
:max_bytes(150000):strip_icc():format(webp)/SDC18_Keynote_OneUI-5be8d33f46e0fb002d108acf.jpg)
How To Fade Audio With Movavi Editor
How To Fade Audio With Movavi Editor
Movavi Video Editor Plus is the best option if you want to use its user-friendly Movavi fade audio feature set with plenty of functionality. There are versions of the app on Mac and Windows. For all intents and purposes, Movavi fade out music functionality is an excellent piece of this video editing software. The Movavi Video Editor Plus package comes with standard advanced features and functionality. You may also store your work and share your Movavi fade out audio exports across devices that have the software installed.
Looking for how to fade out music in Movavi? We’ve got you solutions to it. The ability to quickly and simply check that the beginning and conclusion of any audio is one of the best Movavi fade audio features. Prior to the audio, there must be a distinct period of quiet. Finding the program, like Movavi Audio fade out, that best suits your requirements is essential whether you want to fade-in, fad-out, trim, crop, clip, or combine audio files or segments of a music. Find out the details in the upcoming sections.
Part 1. How to Fade Audio with Movavi Editor
When the song’s ending is not featured in the video, fade-out is used to provide an added level of professionalism. Even if you’ve never altered a video before, using Movavi Video Editor Plus is simple. A step-by-step tutorial that walks you through all the tools you’ll need is shown to you when the software initially launches. Additionally, you may always search the Movavi official website for advice.
Steps to use Movavi Fade Audio:
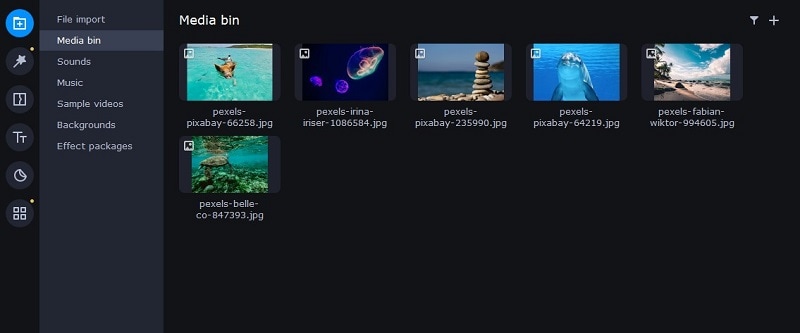
Step1The first step is to import the audio and video files you want to utilize. Drag and drop the files into the software or choose “Add Files” from the Media Bin area to do this. Drag and drop the clip into the timeline after that.
Step2Select the disconnect audio option from the edit menu. Additionally, you can see that the audio and video will no longer be connected by a little connection. Your titles’ location, color, and font may all be changed.
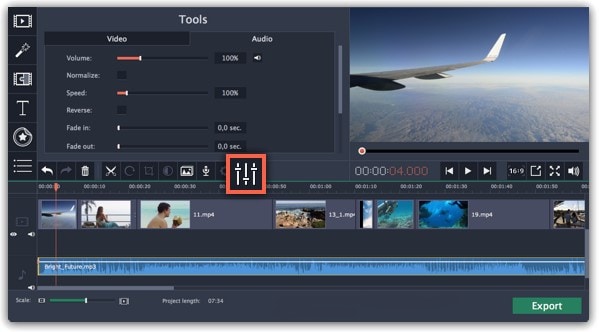
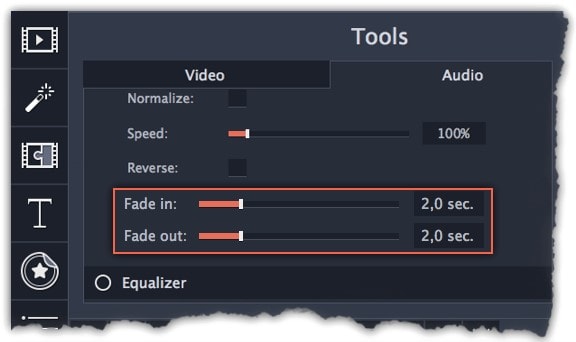
Step3Use the sliders on the Audio tab to set the fade duration by referring to the Audio Properties. Additional options may be used to increase the audio’s loudness, eliminate ambient noise, or even create an echo effect.
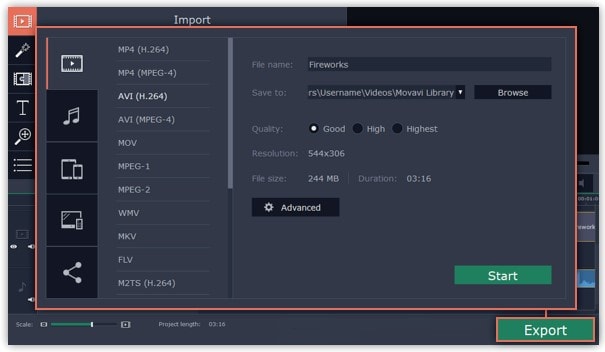
Step4Click on the export option to save this audio as an MP3. Select Audio Export. The MP3 choice is used by default. Select the Save Audio File tab after clicking the Export button. Choose the preferred format and press Start.
Part 2. Movavi Alternative to Fade Audio
Look no further than Filmora by Wondershare if you’re seeking for an effective and user-friendly Movavi audio fade out substitute. This program has all the tools you need to edit, apply special effects, and make titles for videos of a professional caliber. In contrast to Movavi, Filmora gives you the ability to create fade out music without requiring you to install a separate extension. In order to help you understand how to use this function using the Filmora video editing interface, we have enlisted the step-by-step guide for you as well.
Although there are several video editors on the market, Filmora has successfully carved out a position for itself with a variety of intriguing features. The application is appropriate for both new and more experienced users and was designed with novice users in mind. Its user interface (UI), which is rather simple when compared to professional applications. Among all the free video editing programs for beginners, Filmora also offers a far larger selection of effects, customizability, and correction tools, and its screen-splitting capability is much handier than Movavi fade audio feature.
Steps to Fade Out Audio in Filmora:
Step1Install Wondershare Filmora
The straightforward platform to start editing your audio and music files is Filmora, which is available for free. You must first download and install this application on your windows computer in order to utilize it without difficulty. Download the most current edition of this application first. It’s now time to install it on your computer when you’ve completed that. Simply install this program on your computer by following the standard setup instructions if you want to do it fast.
Step2Open Filmora Editor and Import Audio Files
In the step that follows, we’ll show you how to use this platform to fade in and out audio. Filmora may be immediately launched from your desktop or the search bar, then opened as seen below to begin going. By choosing the Video Editor option from the software’s home screen, you may now investigate the basic principles of editing. This will bring up the main interface for Filmora. To import your music and video files, just choose the Import button from the software’s main screen, as seen below:

Step3Load Built-in Audio Editor
You must drag the media files into the program’s timeline after importing them into Filmora. You may modify your media files using every tool in the timeline. To utilize the audio editor in Filmora, just right-click on the specific audio file and choose “Edit Audio” from the list, as seen below.

Step4Use Audio Fade-in/Fade-out
The initial step is to learn how to use Filmora to start fading in and, afterwards, fading out your audio recordings. The best aspect of Filmora is how simple it is to employ these techniques from the timeline. To achieve this, focus on the audio file that you want to change in the timeline; after you’ve picked it, the two icons will show up above the audio file. Drag the first one to the desired duration for the audio fade-in option, as demonstrated:

Step5Edit and Share Video/Sound
In addition to an audio editor, Filmora has a built-in toolset for video editing. You may utilize basic to sophisticated editing techniques inside the program. To choose the basic editor, just click on the video file within the timeline as seen below. There is support for all widely used video and audio formats, including MP3. Click “Export” and choose “File Format” to do this.
By pressing the Format button, choose the required configuration from the list. On a computer, the particular document will be saved to the designated directory.
The Bottom Line
Have you learned how to fade out music in Movavi? If so, then you would also find out that the Movavi fade audio alternative, Filmora , provides a selection of audio editing options in addition to video editing features. The Movavi editor is capable of spicing up your videos and audios, however; Filmora’s workflow is a little more established and well-defined than Movavi’s, which is what propels it to the top of the audio editing field. As a result, Filmora would be the better option if you intend to work as a video editor for a long time.
Free Download For Win 7 or later(64-bit)
Free Download For macOS 10.14 or later
How To Add Motion Blur On CapCut? (IPhone & Android)
Do you know what adds a realistic effect to videos? Professionals add various types of effects to the videos to create artistic perspective flawlessly. Usually, the process of adding effects to the videos happens in the post-production phase, where professionals utilize various software. One of the commonly added effects is the motion blur effect which creates a subtle motion in the video.
In this article, we will address how to do motion blur on CapCut with simple steps. So, continue reading this guide to learn an easy and simple way of creating motion blur in your videos.
Part 1: Why Should You Add Motion Blur to Videos?
The motion blur effect changes the perspective of moving objects in a film or video. If you have created an animated video, you must add a motion blur effect to make the movement of objects or characters natural. Moreover, it gives a realistic touch to your videos by describing a particular movement in the video. That’s why adding a motion blur effect in videos is necessary, as, without this effect, the video would look choppy.
To introduce a motion blur effect, you can find multiple tools and video editors. However, if you want to try professional software, CapCut is a trustworthy option. This tool has a pre-made motion blur effect that you can instantly add within seconds. So, if you have already downloaded CapCut, upgrade to its latest version to try its built-in motion blur effect. Continue reading this article to find out about motion blur CapCut.
Part 2: How to Add Motion Blur to Videos on CapCut?
Are you excited to add a motion blur effect using CapCut? CapCut is a popular video editor, especially for TikTok, through which you can execute professional video editing easily. In this section, we will guide you on how to add motion blur on CapCut using your iPhone and Android.
1. On iPhone
CapCut is available on App Store , through which you can easily download it on your iPhone. To add a motion blur effect to your video on iPhone, check the below steps:
Step1 After adding the desired video clip in CapCut, select it and scroll in the right direction until you can locate the “Motion Blur” option. Now tap on “Motion Blur” and increase its “Blur” and “Blend” strength according to your choice. You can also increase the Blend value accordingly.

Step2 Moreover, you can choose the direction and times of the motion blur effect. Once you are done, tap on the “Tick” icon. After some seconds, the motion blur effect will be applied to your video.

2. On Android
Android users can also take benefit from the CapCut app. Once you have successfully downloaded the CapCut app on your Android phone from Play Store , follow the below instructions:
Step1 Open the CapCut app and tap on the “New Project” option. By doing so, upload the video from your phone on its interface.

Step2 After uploading, select the clip and scroll in the right direction. From there, select the “Motion Blur” option and choose “Blur” strength and “Blend” value. You can also select the “Direction” and “Times” values from the options. Once done, tap on the “Tick” option to add a motion blur effect to your video successfully.

Part 3: The Best Alternative to CapCut to Add Motion Blur On Mobile
If you want alternatives to CapCut for creating a motion blur effect flawlessly, this part of the article can help you. You can find the best 3 apps in this section that are capable of generating a motion blur effect easily.
1. Videoleap
Videoleap is a popular editing app that is available for both iOS and Android users. Using this app, you can add text to your videos by selecting the font, color, opacity, and other elements. Moreover, you can add an audio clip to your video effectively using this app. Furthermore, you can also adjust the brightness, saturation, and other components of the video.
Besides being a powerful video editor, you can also use this tool to add a motion blur to your video. You can use its different filters and effects to create a motion blur effect. This tool offers complete customization freedom so that you can generate your preferred effect easily.

Key Features
- This tool offers over 100 different sound effects that you can add to your video for more engagement.
- You can check your final video in full screen comfortably on this tool.
- This video editor also provides multiple creator video templates through which you can create professional videos.
Pros
- This tool offers small tutorials with every feature to provide you with complete guidance.
- You can execute layer-based editing through this app to add effects, videos, images, and other elements efficiently.
Cons
- This tool does not include a built-in motion effect. Thus, you have to create a motion blur effect on this app through customization.
Tutorial: To see and learn how to use Videoleap effectively, you can see a quick tutorial following this link: https://www.youtube.com/watch?v=e7twWHCVT8U .
2. NSMB – Motion Blur Video
NSMB is a special app that can also work offline to add a motion blur effect to your videos. It has a simple interface that allows you to add a motion blur effect to your video instantly. Once you have uploaded the video on this app, you can easily apply the motion blur effect with a single tap.
Moreover, this app does not distort the quality of your video after adding the motion blur effect. Thus, it’s an efficient app that enables you to add a motion blur to your videos without manual effort.

Download: Android
Key Features
- This app easily supports Android 5.0 OS and above.
- It’s a simple and lightweight app that won’t take up storage space on your phone.
- This app has more than 1M downloads which tell its reliability.
Pros
- This app will add the function of ‘Preview,” through which you will be able to see your final results easily.
- You can adjust the strength of the added motion blur using the slider in this app.
Cons
- This app has limited options and does not offer vast features for video editing.
Tutorial: Do you want to learn how to use this app? Here is a simple and easy video tutorial that you can watch to learn how to use this tool: https://www.youtube.com/shorts/Nm%5FxEMQc6zg .
3. Node Video – Pro Video Editor
Node Video is a complete professional tool as it offers various editing features that can help you. You can discover tons of advanced editing tools on this app, such as keyframe animation, pen tool, motion tracker, puppet pin, etc. It also provides 3D renders that can assist you in mapping your videos to 3D models.
It also offers various types of effects and filters that can transform your video effectively. Moreover, you can also add a motion blur effect from this tool to your video within seconds. It has a built-in motion blur effect that can be added instantly without complications.

Key Features
- Apart from the motion blur effect, this tool contains various sorts of other effects such as gaussian blur, radial blur, cross blur, directional blur, etc.
- The rendering speed of this app is extremely fast to provide you with fast results.
- Its advanced features can automatically separate backgrounds and human faces instantly.
Pros
- Using this tool, you can edit the audio in the video clip by changing properties and effects.
- You can modify the color grading of your video by modifying lift, gamma, and gain elements.
Cons
- To continuously use this app, you have to buy its subscription plans.
Tutorial: In this video tutorial, you can find authentic instructions to use Node Video without any hassle. Thus, visit this video link to check the tutorial: https://www.youtube.com/watch?v=z9lq8XXCmss .
Comparison
Apps like NSMB and Node Video work efficiently as they contain built-in motion blur effects. They work similarly to CapCut, as you can easily add a motion blur effect to your videos automatically. However, these apps provide limited options to choose the area and amount of effect. So, if you want to add customization to your videos proficiently, you can try Videoleap.
Conclusion
Motion blur effect can immensely change the dynamic of your professional videos. If you want to instruct about specific movements in your video, the motion blur effect can enhance it easily. In this article, we have shed light on how to do motion blur on CapCut. For more options, we have also provided three alternatives to CapCut for your additional help.
Tutorial: To see and learn how to use Videoleap effectively, you can see a quick tutorial following this link: https://www.youtube.com/watch?v=e7twWHCVT8U .
2. NSMB – Motion Blur Video
NSMB is a special app that can also work offline to add a motion blur effect to your videos. It has a simple interface that allows you to add a motion blur effect to your video instantly. Once you have uploaded the video on this app, you can easily apply the motion blur effect with a single tap.
Moreover, this app does not distort the quality of your video after adding the motion blur effect. Thus, it’s an efficient app that enables you to add a motion blur to your videos without manual effort.
Download: Android
Key Features
- This app easily supports Android 5.0 OS and above.
- It’s a simple and lightweight app that won’t take up storage space on your phone.
- This app has more than 1M downloads which tell its reliability.
Pros
- This app will add the function of ‘Preview,” through which you will be able to see your final results easily.
- You can adjust the strength of the added motion blur using the slider in this app.
Cons
- This app has limited options and does not offer vast features for video editing.
Tutorial: Do you want to learn how to use this app? Here is a simple and easy video tutorial that you can watch to learn how to use this tool: https://www.youtube.com/shorts/Nm%5FxEMQc6zg .
3. Node Video – Pro Video Editor
Node Video is a complete professional tool as it offers various editing features that can help you. You can discover tons of advanced editing tools on this app, such as keyframe animation, pen tool, motion tracker, puppet pin, etc. It also provides 3D renders that can assist you in mapping your videos to 3D models.
It also offers various types of effects and filters that can transform your video effectively. Moreover, you can also add a motion blur effect from this tool to your video within seconds. It has a built-in motion blur effect that can be added instantly without complications.
Key Features
- Apart from the motion blur effect, this tool contains various sorts of other effects such as gaussian blur, radial blur, cross blur, directional blur, etc.
- The rendering speed of this app is extremely fast to provide you with fast results.
- Its advanced features can automatically separate backgrounds and human faces instantly.
Pros
- Using this tool, you can edit the audio in the video clip by changing properties and effects.
- You can modify the color grading of your video by modifying lift, gamma, and gain elements.
Cons
- To continuously use this app, you have to buy its subscription plans.
Tutorial: In this video tutorial, you can find authentic instructions to use Node Video without any hassle. Thus, visit this video link to check the tutorial: https://www.youtube.com/watch?v=z9lq8XXCmss .
Comparison
Apps like NSMB and Node Video work efficiently as they contain built-in motion blur effects. They work similarly to CapCut, as you can easily add a motion blur effect to your videos automatically. However, these apps provide limited options to choose the area and amount of effect. So, if you want to add customization to your videos proficiently, you can try Videoleap.
Conclusion
Motion blur effect can immensely change the dynamic of your professional videos. If you want to instruct about specific movements in your video, the motion blur effect can enhance it easily. In this article, we have shed light on how to do motion blur on CapCut. For more options, we have also provided three alternatives to CapCut for your additional help.
Top 5 Video Filter Software: Enhance Your Videos
In today’s tech-savvy world, whether you’re a budding content creator or a seasoned pro, creating eye-catching videos is a must.
And what’s the secret sauce to make your videos stand out? You guessed it – video filters! These nifty tools can transform your raw footage into a visual masterpiece.
So, if you’re ready to take your video editing game up a notch, you’re in the right place.
In this article, we’ll dig into the top 5 video filter software of 2024 that are worth your attention.
Before we jump into the juicy details, let’s get down to basics.
Part 1: Introduction
What exactly are video filters, you ask?
Well, video filters are like Instagram filters for your videos but with much more finesse.
They allow you to tweak various aspects of your video’s appearance, such as color, contrast, saturation, and more, to achieve the desired visual style.
The beauty of video filter software lies in its ability to enhance your video’s overall look and feel. Let’s explore the top contenders in the video filter software arena.
Part 2: Top 5 Video Filter Software
01 Filmora

Our first contender in the world of video filter software is Filmora. Designed with a user-friendly interface, Filmora is the ideal choice for those who want to enhance their videos effortlessly. Let’s take a closer look at what makes it stand out.
Advantages:
- Filmora’s intuitive interface makes it a breeze for beginners to get started. You don’t need to be a tech whiz to dive into video editing; Filmora guides you through the process seamlessly.
- Filmora boasts an extensive library of video presets and color grading presets. This treasure trove of pre-made styles allows you to give your videos that extra flair without the need for in-depth editing skills.
- Time is precious, and Filmora respects that. It offers quick rendering speeds, so you can see the results of your editing efforts in no time.
- Filmora’s simplicity is its strength, but it doesn’t mean it lacks creative potential. You can still go into more advanced features when you’re ready to level up your video editing game. This software gracefully balances accessibility and functionality.
Disadvantages:
So, you might be wondering, what about the downsides? Well, Filmora is so user-friendly that it can make you addicted to editing!
You might find yourself spending hours perfecting your videos, which, to be honest, is more of an advantage disguised as a disadvantage. Who wouldn’t want to get lost in the world of video editing, creating stunning content effortlessly?
02 DaVinci Resolve

When it comes to professional video editing and color correction, DaVinci Resolve stands as a true powerhouse in the world of video filter software.
Renowned for its robust feature set and precision, it’s the go-to choice for filmmakers, colorists, and anyone who demands the highest level of control over their video projects.
Advantages:
- DaVinci Resolve is unrivaled in its color correction and grading capabilities. Whether you’re aiming for a cinematic look or a specific color scheme, the software provides an extensive suite of tools to fine-tune every detail. Its color wheels, curves, and advanced grading panels allow you to achieve the exact visual style you envision.
- It provides a lot of cool stuff for editing sound and video, like fancy tools for fixing audio, working with multiple cameras, and working together with others on the same project. This makes it an all-in-one solution for every aspect of video post-production.
- In a world where teamwork is essential, DaVinci Resolve shines with its collaboration features. Many people can work on a project together at the same time, making it easier for teams working on big video projects to edit smoothly.
Disadvantages:
DaVinci Resolve can be resource-intensive, demanding a powerful computer setup for smooth operation. This could be a great advantage for people with really good computers, but it might be a bit tough for folks with older or less powerful ones.
03 HitFilm Express

If you’re an aspiring filmmaker or content creator looking to dive into the world of video editing and visual effects, HitFilm Express is your ticket to boundless creativity.
This versatile software combines video editing and visual effects seamlessly, allowing you to create stunning, professional-quality videos without breaking the bank.
Advantages:
- HitFilm Express excels in merging video editing and visual effects into one unified platform. This means you can effortlessly incorporate jaw-dropping visual effects into your videos without the need for additional software. Whether you’re adding explosions, futuristic CGI, or enchanting motion graphics, HitFilm Express has you covered.
- It offers a free version that provides access to its fundamental video filter features and VFX capabilities. This is a fantastic opportunity for budding content creators to dip their toes into the world of video editing without any financial commitment.
- HitFilm Express comes with an extensive library of tutorials, making it incredibly user-friendly for those who are new to video editing or visual effects. These tutorials guide you through the software’s features and help you create eye-catching effects like a pro.
Disadvantages:
As for potential downsides, the free version of HitFilm Express may have some limitations compared to the paid version.
While it provides access to essential features, you may find certain advanced options restricted.
However, this can be seen as an advantage because it allows you to explore the software without any upfront costs.
04 Adobe Premiere Pro

Adobe Premiere Pro is a name that resonates deeply within the video editing community. It’s renowned for its versatility and rich feature set, making it a go-to choice for professional video editors and content creators alike.
Advantages:
- When it comes to customization, Adobe Premiere Pro truly shines. The software offers an extensive library of plugins and extensions, allowing you to tailor your video filter effects to your precise liking. Whether you’re into color grading, visual effects, or audio enhancement, you’ll find the tools you need within Adobe’s vast ecosystem.
- If you’re already a part of the Adobe Creative family, you’ll appreciate Premiere Pro’s seamless integration with other Adobe software. Easily import and export assets from Adobe Photoshop or Adobe After Effects, enhancing your workflow and saving you time.
- Adobe is committed to keeping Premiere Pro at the forefront of video editing technology. With regular updates, you can expect a constant influx of new features, improvements, and bug fixes. This ensures that your editing experience remains cutting-edge.
Disadvantages:
There are a few considerations to keep in mind. Adobe Premiere Pro operates on a subscription-based model, which means you’ll need to pay a monthly or annual fee to access the software. While this provides you with ongoing updates and support, it might not be the best fit for those on a strict budget.
Adobe Premiere Pro’s extensive feature set can be overwhelming for beginners. If you’re new to video editing, you may find the learning curve a bit steep. However, with dedication and a wealth of online tutorials available, mastering the software is within reach.
05 Final Cut Pro

If you’re a proud owner of a Mac, Final Cut Pro should be on your radar as the ultimate video filter software. This Apple-exclusive gem is tailored to take your video editing experience to the next level, offering seamless integration with the macOS ecosystem.
Advantages:
- A standout feature of Final Cut Pro is how well it works together with other Apple devices and software, making everything run smoothly. Whether you’re working on your Macbook, iPad, or iPhone, Final Cut Pro keeps your workflow smooth and consistent. This synergy allows you to transfer projects effortlessly between devices, making it a go-to choice for Apple enthusiasts.
- Final Cut Pro is a powerhouse when it comes to handling high-resolution videos. Whether you’re working with 4K or 8K footage, this software handles it with grace and precision. Expect smooth playback and rapid rendering, even with the most demanding video projects.
- Mac users will feel right at home with Final Cut Pro’s sleek and user-friendly interface. The software’s design prioritizes ease of use without compromising on functionality. You can focus on your creative vision rather than wrestling with a complex interface.
Disadvantages:
It’s important to mention that Final Cut Pro is quite expensive, which might not be affordable for people on a tight budget.
Final Cut Pro is exclusive to macOS, which means Windows users will have to explore alternative software options. If you’re committed to the Apple ecosystem and prioritize top-notch video editing, Final Cut Pro is a wise investment.
Part 3: Summary
In a world where visual content rules supreme, having the right video filter software can make all the difference.
Your choice depends on your skill level, preferences, and budget. Whether you’re a newbie or a seasoned pro, there’s a video filter software out there that’s perfect for you. Feel free to dive in, experiment, and let your creativity sparkle in your videos!
Part 1: Introduction
What exactly are video filters, you ask?
Well, video filters are like Instagram filters for your videos but with much more finesse.
They allow you to tweak various aspects of your video’s appearance, such as color, contrast, saturation, and more, to achieve the desired visual style.
The beauty of video filter software lies in its ability to enhance your video’s overall look and feel. Let’s explore the top contenders in the video filter software arena.
Part 2: Top 5 Video Filter Software
01 Filmora
Our first contender in the world of video filter software is Filmora. Designed with a user-friendly interface, Filmora is the ideal choice for those who want to enhance their videos effortlessly. Let’s take a closer look at what makes it stand out.
Advantages:
- Filmora’s intuitive interface makes it a breeze for beginners to get started. You don’t need to be a tech whiz to dive into video editing; Filmora guides you through the process seamlessly.
- Filmora boasts an extensive library of video presets and color grading presets. This treasure trove of pre-made styles allows you to give your videos that extra flair without the need for in-depth editing skills.
- Time is precious, and Filmora respects that. It offers quick rendering speeds, so you can see the results of your editing efforts in no time.
- Filmora’s simplicity is its strength, but it doesn’t mean it lacks creative potential. You can still go into more advanced features when you’re ready to level up your video editing game. This software gracefully balances accessibility and functionality.
Disadvantages:
So, you might be wondering, what about the downsides? Well, Filmora is so user-friendly that it can make you addicted to editing!
You might find yourself spending hours perfecting your videos, which, to be honest, is more of an advantage disguised as a disadvantage. Who wouldn’t want to get lost in the world of video editing, creating stunning content effortlessly?
02 DaVinci Resolve
When it comes to professional video editing and color correction, DaVinci Resolve stands as a true powerhouse in the world of video filter software.
Renowned for its robust feature set and precision, it’s the go-to choice for filmmakers, colorists, and anyone who demands the highest level of control over their video projects.
Advantages:
- DaVinci Resolve is unrivaled in its color correction and grading capabilities. Whether you’re aiming for a cinematic look or a specific color scheme, the software provides an extensive suite of tools to fine-tune every detail. Its color wheels, curves, and advanced grading panels allow you to achieve the exact visual style you envision.
- It provides a lot of cool stuff for editing sound and video, like fancy tools for fixing audio, working with multiple cameras, and working together with others on the same project. This makes it an all-in-one solution for every aspect of video post-production.
- In a world where teamwork is essential, DaVinci Resolve shines with its collaboration features. Many people can work on a project together at the same time, making it easier for teams working on big video projects to edit smoothly.
Disadvantages:
DaVinci Resolve can be resource-intensive, demanding a powerful computer setup for smooth operation. This could be a great advantage for people with really good computers, but it might be a bit tough for folks with older or less powerful ones.
03 HitFilm Express
If you’re an aspiring filmmaker or content creator looking to dive into the world of video editing and visual effects, HitFilm Express is your ticket to boundless creativity.
This versatile software combines video editing and visual effects seamlessly, allowing you to create stunning, professional-quality videos without breaking the bank.
Advantages:
- HitFilm Express excels in merging video editing and visual effects into one unified platform. This means you can effortlessly incorporate jaw-dropping visual effects into your videos without the need for additional software. Whether you’re adding explosions, futuristic CGI, or enchanting motion graphics, HitFilm Express has you covered.
- It offers a free version that provides access to its fundamental video filter features and VFX capabilities. This is a fantastic opportunity for budding content creators to dip their toes into the world of video editing without any financial commitment.
- HitFilm Express comes with an extensive library of tutorials, making it incredibly user-friendly for those who are new to video editing or visual effects. These tutorials guide you through the software’s features and help you create eye-catching effects like a pro.
Disadvantages:
As for potential downsides, the free version of HitFilm Express may have some limitations compared to the paid version.
While it provides access to essential features, you may find certain advanced options restricted.
However, this can be seen as an advantage because it allows you to explore the software without any upfront costs.
04 Adobe Premiere Pro
Adobe Premiere Pro is a name that resonates deeply within the video editing community. It’s renowned for its versatility and rich feature set, making it a go-to choice for professional video editors and content creators alike.
Advantages:
- When it comes to customization, Adobe Premiere Pro truly shines. The software offers an extensive library of plugins and extensions, allowing you to tailor your video filter effects to your precise liking. Whether you’re into color grading, visual effects, or audio enhancement, you’ll find the tools you need within Adobe’s vast ecosystem.
- If you’re already a part of the Adobe Creative family, you’ll appreciate Premiere Pro’s seamless integration with other Adobe software. Easily import and export assets from Adobe Photoshop or Adobe After Effects, enhancing your workflow and saving you time.
- Adobe is committed to keeping Premiere Pro at the forefront of video editing technology. With regular updates, you can expect a constant influx of new features, improvements, and bug fixes. This ensures that your editing experience remains cutting-edge.
Disadvantages:
There are a few considerations to keep in mind. Adobe Premiere Pro operates on a subscription-based model, which means you’ll need to pay a monthly or annual fee to access the software. While this provides you with ongoing updates and support, it might not be the best fit for those on a strict budget.
Adobe Premiere Pro’s extensive feature set can be overwhelming for beginners. If you’re new to video editing, you may find the learning curve a bit steep. However, with dedication and a wealth of online tutorials available, mastering the software is within reach.
05 Final Cut Pro
If you’re a proud owner of a Mac, Final Cut Pro should be on your radar as the ultimate video filter software. This Apple-exclusive gem is tailored to take your video editing experience to the next level, offering seamless integration with the macOS ecosystem.
Advantages:
- A standout feature of Final Cut Pro is how well it works together with other Apple devices and software, making everything run smoothly. Whether you’re working on your Macbook, iPad, or iPhone, Final Cut Pro keeps your workflow smooth and consistent. This synergy allows you to transfer projects effortlessly between devices, making it a go-to choice for Apple enthusiasts.
- Final Cut Pro is a powerhouse when it comes to handling high-resolution videos. Whether you’re working with 4K or 8K footage, this software handles it with grace and precision. Expect smooth playback and rapid rendering, even with the most demanding video projects.
- Mac users will feel right at home with Final Cut Pro’s sleek and user-friendly interface. The software’s design prioritizes ease of use without compromising on functionality. You can focus on your creative vision rather than wrestling with a complex interface.
Disadvantages:
It’s important to mention that Final Cut Pro is quite expensive, which might not be affordable for people on a tight budget.
Final Cut Pro is exclusive to macOS, which means Windows users will have to explore alternative software options. If you’re committed to the Apple ecosystem and prioritize top-notch video editing, Final Cut Pro is a wise investment.
Part 3: Summary
In a world where visual content rules supreme, having the right video filter software can make all the difference.
Your choice depends on your skill level, preferences, and budget. Whether you’re a newbie or a seasoned pro, there’s a video filter software out there that’s perfect for you. Feel free to dive in, experiment, and let your creativity sparkle in your videos!
How to Make Discord GIF Avatar in Depth Guide
How to Create Discord GIF Avatar in Depth Guide
An easy yet powerful editor
Numerous effects to choose from
Detailed tutorials provided by the official channel
Discord is no secret, gradually becoming one of the most popular platforms for everyone. And why not when it allows users to communicate via different channels, including video calls, texts, media, voice calls, and files through private channels.
The digital platform is under Discord Inc and became official a while back. It operates under multiple operating systems, including macOS, Android, Linux, iOS, Android, iPadOS, and web browsers. As a result, it is an excellent way for everyone. The platform has risen to fame in the last six months, with many people using it.
As much as the platform is doing great, many things often arise, especially creating Discord GIF Avatar. In other words, how to deliver the best PFP or avatar for your account. Since Discord has recently gained maximum fame, there are fewer details. Fortunately, this article is here to save the day. It includes relevant information about an animated avatar for Discord or GIF discord avatar. Read through the summary below.
In this article
01 [Why Discord Is Becoming Popular Recently?](#Part 1)
02 [Why Discord Emojis?](#Part 2)
03 [How to Create Discord Emoji GIF?](#Part 3)
Part 1 Why is Discord Becoming Popular Recently?
How often do you visit social media? You probably know that the current trending networking platform is Discord if it is frequent. After all, it has risen to fame with millions of users in no time. Plus, the introduction of the GIF Avatar Discord has left many fans amazed with the application. You can also confirm its popularity with the many friends using it.
Discord features multiple good points that explain why most people love it, including the avatar Discord GIF. However, many people still question its popularity and its rise recently. As a result, this section will answer this question using relevant facts.
● It is suitable for gaming communication: Discord is primarily popular among gamers. The platform is new, but it has quickly overtaken its competitors, Skype and TeamSpeak. Why? Many gamers consider it a revolutionized application that solves all their worries making gaming communication bigger and better. Before Discord, gaming communication was difficult and dangerous. After all, you need to share personal Skype details that connect with your phone, making it a not-safe option. When we consider TeamSpeak, you realize that it is limiting with the option available since you only have a voice call. Discord brings out the best network channel; gamers and friends have quickly started using it.
● Most services are free: Discord includes multiple benefits that make communication straightforward and convenient. Luckily, most of the services available are free, meaning that almost everyone can access them. As a result, many people would quickly settle for Discord compared to other platforms since you can get so much at no cost. Currently, they have the Discord Nitro gif avatar, which is affordable and multiplies the fun.
● Create Discord bots are no cost: Discord allows users to create bots for free without including any hosting fee hence an affordable option.
● Constant updates that match the audiences’ needs: Things change in no time for Discord. Why? The developers are active and listen to the community’s opinion of what they want and why they need it. Therefore, it delivers the show that people urgently need leading to popularity rise.
● It rarely includes ads in private chats: A platform can become frustrating, mainly when it features multiple ads every minute. However, Discord is different since it almost has no ads. Therefore, people can freely chat with friends and other gamers.
● Discord is safe: The settings under Discord are safe since they include suitable privacy options and monitoring. Thus, it is a safe option. But many people often raise the question of open chatting in apps and the security issues that come with them. Many people can confirm that Discord is a safe option and if you feel otherwise, ensure that you only add friends you know.
Part 2 Why Discord Emojis?
From the information above, you can tell that Discord’s primary role is communication. And we all know that emojis are the real deal in every conversation since emojis easily communicate our feelings. Currently, most platforms with messaging options include emojis to multiply the fun. The same case happens for Discord emojis. They are there to make communication appealing, interesting, funny and reveal how you feel about a situation.
Importance of Discord emojis
● Emojis help you to communicate the right emotions. Sometimes, it’s impossible to express the right feelings using words, and emojis come to the rescue in such situations. Of course, they are useless for formal communication, but Discord holds a considerable weight for various issues.
● They are fun and exciting. Sometimes you can choose to use an emoji instead of writing some phrase, and this option works for all. Besides, it feels good to see different emojis instead of a long paragraph that tells the same story.
● Emojis make communication easy. We are in the 21st century with multiple revolutionary changes with our communication channels. Young people prefer emojis for different conversations.
● It offers a sense of presence in a conversation. People believed that they could only hold exciting discussions when they were together. Over time, this statement has been proved impossible since we can’t always be there to hold serious talks. We need Discord emojis since they give a sense of physical presence.
● They liven up a serious conversation. Have you ever noticed, people tend to include emojis when having serious talks making them more casual and creating a friendly environment that suits everyone? And this trick often works.
Discord emojis are conversation aids that every communication channel need. Why not, when it gives a sense of friendliness. Try out the Discord emojis and discover the simplest ways to make a conversation lively.
Part 3 How to Create Discord Emoji GIF
There are two popular ways to create an emoji Discord GIF avatar, Discord Nitro animated avatar and Discord GIF avatar without Nitro. The emoji GIF you make depends on the Nitro version you are using.
Creating a Discord account is simple and free, not even considering the hosting cost. However, the developers include the Discord Nitro version, which contains multiple features that make conversations bigger and better. However, the Nitro version is a paid subscription of $4.99 monthly. Creating a discord emoji GIF is quite simple if you are under the later version. After all, it includes the available GIF options that you can choose from depending on your taste. However, if you are under the free option, you won’t have this option.

For standard Discord users, things work differently. They can still add Discord GIF Avatar emojis but via a long process. Check out the details below referencing MiniTool content creator Zoe in an article about making Discord PFP a GIF.
Step 1: Download Application of Choice
We have many websites that offer Discord GIF avatar free. The animated avatars for Discord emojis are readily available for all. Some popular apps are Giphy, Tenor, and Emoji.gg. The latter is a simple platform with multiple animated Discord emojis; you can download those that match your taste.
Step 2: Search for the GIF you need
You can then search for or download a discord avatar gif that suits well as per your need.

Step 3: Click the GIF and open it on a new tab
Next, click the GIF for discord avatar to let it open into the new tab.
Step 4: Save on the GIF and export it to your PC.
In the end, save your selected avatar gif discord.
Another convenient option for non-nitro users is adding animated emojis to a Discord Server using the NQN Discord bot. Note that you need to have a server to include the NQN bot.
Part 1 How to Make a Discord PFP Avatar Online
If you are a Discord user, you understand that the platform is flexible when dealing with servers and profile names but limiting the PFP (your profile picture). Hence, it is necessary to invest in suitable options. If you wish to design something unique, you must create the GIF file or image online using different websites and resources. Besides, the communication platform is yet to introduce editing features. Here is a straightforward way to make GIF Avatar in Discord online referencing Peter Davis’ article, how to make discord PFP online.
Step 1: Search Online
First, you need to identify what face, personality, or character you want to symbolize through your Avatar. For this purpose, you can Google search also, to figure out different characters such as cartoon characters, drawings, illustrations, illusions, etc. Find the right site to download the PFP you need or take the help of multiple emojis and GIFs available under the Wondershare Filmora Video Editor application.
Step 2: Launch Filmora to Upload Character
Next, launch Filmora, upload your character and resize it to a circular shape.
Step 3: Edit your work
Now, go to the editing process using Filmora video editors
Filmora video editor is among the top editing software. The platform is friendly and supports the GIF format. It includes powerful editing skills, and you can easily import your file through drag and drop. After that, customize your PFP avatar GIF discord.

Wondershare Filmora - Best Video Editor for Mac/Windows
5,481,435 people have downloaded it.
Build unique custom animations without breaking a sweat.
Focus on creating epic stories and leave the details to Filmora’s auto features.
Start a creative adventure with drag & drop effects and endless possibilities.
Filmora simplifies advanced features to save you time and effort.
Filmora cuts out repetition so you can move on to your next creative breakthrough.
Edit the background and noise, add filters and the necessary text. Of course, the editor includes features such as rotate, crop, split, trim, merge, and flip settings. After confirming the required changes, export the files to your PC.
Step 4: Add the PFP to your Discord account
Now, open the discord account, upload your customized PFP, and make the difference.
For that, go to your profile in Discord and settle for the user settings. Click on your current PFP, and the edit file conversation will prompt you. Upload the file from your PC.
Follow the above steps to easily make the best Discord GIF avatar using Filmora.
● Ending Thoughts →
● The GIF needs to be at most 8Mbs so that Discord can confirm it.
●Discord Nitro offers many privileges to the users and is available at a monthly fee of $4.99.
●Filmora is among the top editing software you can use.
●Creating a Discord animated avatar is probably the trickiest process in the platform, especially for newbies. However, with the right hacks, the operation is straightforward. This article offers you the most convenient way to create GIF for a Discord avatar.
Discord is no secret, gradually becoming one of the most popular platforms for everyone. And why not when it allows users to communicate via different channels, including video calls, texts, media, voice calls, and files through private channels.
The digital platform is under Discord Inc and became official a while back. It operates under multiple operating systems, including macOS, Android, Linux, iOS, Android, iPadOS, and web browsers. As a result, it is an excellent way for everyone. The platform has risen to fame in the last six months, with many people using it.
As much as the platform is doing great, many things often arise, especially creating Discord GIF Avatar. In other words, how to deliver the best PFP or avatar for your account. Since Discord has recently gained maximum fame, there are fewer details. Fortunately, this article is here to save the day. It includes relevant information about an animated avatar for Discord or GIF discord avatar. Read through the summary below.
In this article
01 [Why Discord Is Becoming Popular Recently?](#Part 1)
02 [Why Discord Emojis?](#Part 2)
03 [How to Create Discord Emoji GIF?](#Part 3)
Part 1 Why is Discord Becoming Popular Recently?
How often do you visit social media? You probably know that the current trending networking platform is Discord if it is frequent. After all, it has risen to fame with millions of users in no time. Plus, the introduction of the GIF Avatar Discord has left many fans amazed with the application. You can also confirm its popularity with the many friends using it.
Discord features multiple good points that explain why most people love it, including the avatar Discord GIF. However, many people still question its popularity and its rise recently. As a result, this section will answer this question using relevant facts.
● It is suitable for gaming communication: Discord is primarily popular among gamers. The platform is new, but it has quickly overtaken its competitors, Skype and TeamSpeak. Why? Many gamers consider it a revolutionized application that solves all their worries making gaming communication bigger and better. Before Discord, gaming communication was difficult and dangerous. After all, you need to share personal Skype details that connect with your phone, making it a not-safe option. When we consider TeamSpeak, you realize that it is limiting with the option available since you only have a voice call. Discord brings out the best network channel; gamers and friends have quickly started using it.
● Most services are free: Discord includes multiple benefits that make communication straightforward and convenient. Luckily, most of the services available are free, meaning that almost everyone can access them. As a result, many people would quickly settle for Discord compared to other platforms since you can get so much at no cost. Currently, they have the Discord Nitro gif avatar, which is affordable and multiplies the fun.
● Create Discord bots are no cost: Discord allows users to create bots for free without including any hosting fee hence an affordable option.
● Constant updates that match the audiences’ needs: Things change in no time for Discord. Why? The developers are active and listen to the community’s opinion of what they want and why they need it. Therefore, it delivers the show that people urgently need leading to popularity rise.
● It rarely includes ads in private chats: A platform can become frustrating, mainly when it features multiple ads every minute. However, Discord is different since it almost has no ads. Therefore, people can freely chat with friends and other gamers.
● Discord is safe: The settings under Discord are safe since they include suitable privacy options and monitoring. Thus, it is a safe option. But many people often raise the question of open chatting in apps and the security issues that come with them. Many people can confirm that Discord is a safe option and if you feel otherwise, ensure that you only add friends you know.
Part 2 Why Discord Emojis?
From the information above, you can tell that Discord’s primary role is communication. And we all know that emojis are the real deal in every conversation since emojis easily communicate our feelings. Currently, most platforms with messaging options include emojis to multiply the fun. The same case happens for Discord emojis. They are there to make communication appealing, interesting, funny and reveal how you feel about a situation.
Importance of Discord emojis
● Emojis help you to communicate the right emotions. Sometimes, it’s impossible to express the right feelings using words, and emojis come to the rescue in such situations. Of course, they are useless for formal communication, but Discord holds a considerable weight for various issues.
● They are fun and exciting. Sometimes you can choose to use an emoji instead of writing some phrase, and this option works for all. Besides, it feels good to see different emojis instead of a long paragraph that tells the same story.
● Emojis make communication easy. We are in the 21st century with multiple revolutionary changes with our communication channels. Young people prefer emojis for different conversations.
● It offers a sense of presence in a conversation. People believed that they could only hold exciting discussions when they were together. Over time, this statement has been proved impossible since we can’t always be there to hold serious talks. We need Discord emojis since they give a sense of physical presence.
● They liven up a serious conversation. Have you ever noticed, people tend to include emojis when having serious talks making them more casual and creating a friendly environment that suits everyone? And this trick often works.
Discord emojis are conversation aids that every communication channel need. Why not, when it gives a sense of friendliness. Try out the Discord emojis and discover the simplest ways to make a conversation lively.
Part 3 How to Create Discord Emoji GIF
There are two popular ways to create an emoji Discord GIF avatar, Discord Nitro animated avatar and Discord GIF avatar without Nitro. The emoji GIF you make depends on the Nitro version you are using.
Creating a Discord account is simple and free, not even considering the hosting cost. However, the developers include the Discord Nitro version, which contains multiple features that make conversations bigger and better. However, the Nitro version is a paid subscription of $4.99 monthly. Creating a discord emoji GIF is quite simple if you are under the later version. After all, it includes the available GIF options that you can choose from depending on your taste. However, if you are under the free option, you won’t have this option.
For standard Discord users, things work differently. They can still add Discord GIF Avatar emojis but via a long process. Check out the details below referencing MiniTool content creator Zoe in an article about making Discord PFP a GIF.
Step 1: Download Application of Choice
We have many websites that offer Discord GIF avatar free. The animated avatars for Discord emojis are readily available for all. Some popular apps are Giphy, Tenor, and Emoji.gg. The latter is a simple platform with multiple animated Discord emojis; you can download those that match your taste.
Step 2: Search for the GIF you need
You can then search for or download a discord avatar gif that suits well as per your need.
Step 3: Click the GIF and open it on a new tab
Next, click the GIF for discord avatar to let it open into the new tab.
Step 4: Save on the GIF and export it to your PC.
In the end, save your selected avatar gif discord.
Another convenient option for non-nitro users is adding animated emojis to a Discord Server using the NQN Discord bot. Note that you need to have a server to include the NQN bot.
Part 1 How to Make a Discord PFP Avatar Online
If you are a Discord user, you understand that the platform is flexible when dealing with servers and profile names but limiting the PFP (your profile picture). Hence, it is necessary to invest in suitable options. If you wish to design something unique, you must create the GIF file or image online using different websites and resources. Besides, the communication platform is yet to introduce editing features. Here is a straightforward way to make GIF Avatar in Discord online referencing Peter Davis’ article, how to make discord PFP online.
Step 1: Search Online
First, you need to identify what face, personality, or character you want to symbolize through your Avatar. For this purpose, you can Google search also, to figure out different characters such as cartoon characters, drawings, illustrations, illusions, etc. Find the right site to download the PFP you need or take the help of multiple emojis and GIFs available under the Wondershare Filmora Video Editor application.
Step 2: Launch Filmora to Upload Character
Next, launch Filmora, upload your character and resize it to a circular shape.
Step 3: Edit your work
Now, go to the editing process using Filmora video editors
Filmora video editor is among the top editing software. The platform is friendly and supports the GIF format. It includes powerful editing skills, and you can easily import your file through drag and drop. After that, customize your PFP avatar GIF discord.
Wondershare Filmora - Best Video Editor for Mac/Windows
5,481,435 people have downloaded it.
Build unique custom animations without breaking a sweat.
Focus on creating epic stories and leave the details to Filmora’s auto features.
Start a creative adventure with drag & drop effects and endless possibilities.
Filmora simplifies advanced features to save you time and effort.
Filmora cuts out repetition so you can move on to your next creative breakthrough.
Edit the background and noise, add filters and the necessary text. Of course, the editor includes features such as rotate, crop, split, trim, merge, and flip settings. After confirming the required changes, export the files to your PC.
Step 4: Add the PFP to your Discord account
Now, open the discord account, upload your customized PFP, and make the difference.
For that, go to your profile in Discord and settle for the user settings. Click on your current PFP, and the edit file conversation will prompt you. Upload the file from your PC.
Follow the above steps to easily make the best Discord GIF avatar using Filmora.
● Ending Thoughts →
● The GIF needs to be at most 8Mbs so that Discord can confirm it.
●Discord Nitro offers many privileges to the users and is available at a monthly fee of $4.99.
●Filmora is among the top editing software you can use.
●Creating a Discord animated avatar is probably the trickiest process in the platform, especially for newbies. However, with the right hacks, the operation is straightforward. This article offers you the most convenient way to create GIF for a Discord avatar.
Also read:
- 2024 Approved If You Wish to Edit FLV Videos without Any Problems, You Should Utilize a Multipurpose Video Editor that Supports the FLV File Format
- 2024 Approved Make A Countdown Video
- In 2024, Best GIF to MOV Converters
- New In 2024, Best CapCut Templates for Slow Motion Video Trend
- New How to Add Custom Subtitles to Netflix
- Updated Find The Best Free Canon LUTs for 2024
- New Fast and Easy Method to Match Color in Photoshop
- Updated How to Create Video Contents That Convert Sales for 2024
- Updated 20 Must-Have Graduation Songs for 2024
- New 2024 Approved Replacing Sky in Your Pictures Using Online and Offline Tools
- Updated How to Windows Online Movie Maker Complete Guide
- Using the Best Templates to Create Slow Motion Videos on CapCut
- New 2024 Approved Easy Ways to Change Aspect Ratio in iMovie?
- 2024 Approved Ultimate Guide on Making A Slideshow Video
- New In 2024, Top 5 Apps To Add Song To Video
- 2024 Approved Adobe Premiere Pro Rec 709 LUTs Finding The Best Options
- New 2024 Approved How to Become a Youtuber?
- Updated 2024 Approved The Right Ways to Slow Down a Video on iPhone
- 6 Tips for Your First Facebook Ads
- In 2024, Are You Eager to Know How to Create an Adjustment Layer in Premiere Pro? This Article Will Highlight the Significance of Adding an Adjustment Layer in Premiere Pro
- 2024 Approved YouTube Lives Are Very Popular Nowadays and People Can Interact with the Anchor at Real Time. If You Want to Comment on a YouTube Live Chat, You Can Follow the Guide Below
- In 2024, Are You Stuck with How to Use Discord GIF Ideally? Check that Out in This Article, as We Will Guide You on All You Need to Know About GIFs for Discord
- New How to Make a Slideshow GIF, In 2024
- 2024 Approved Is Windows Movie Maker Still Available?
- Updated 5 Tips for Faster Editing in Filmora for 2024
- Locked Out of iPhone 11? 5 Ways to get into a Locked iPhone 11 | Dr.fone
- In 2024, The Most Useful Tips for Pokemon Go Ultra League On Motorola Edge 40 | Dr.fone
- How to Recover Deleted Screenshots on iPhone SE (2022)? | Stellar
- How to Flash Dead Vivo Y36i Safely | Dr.fone
- How To Transfer WhatsApp From Apple iPhone 14 Plus to Android/iOS? | Dr.fone
- In 2024, How to Fake Snapchat Location on Lava Agni 2 5G | Dr.fone
- How to sign a .pdf file document with digital signature app
- How To Open Your iPhone 12 Pro Max Without a Home Button | Dr.fone
- Updated 2024 Approved 10 Best Animation Makers for Kids to Have Fun
- In 2024, Full Guide to Fix iToolab AnyGO Not Working On Tecno Spark 10 Pro | Dr.fone
- 6 Solutions to Fix Error 505 in Google Play Store on Samsung Galaxy F34 5G | Dr.fone
- Easily Unlock Your Motorola Edge+ (2023) Device SIM
- Why Your WhatsApp Location is Not Updating and How to Fix On Apple iPhone 14 Plus | Dr.fone
- Can Life360 Track You When Your Motorola G54 5G is off? | Dr.fone
- 5 Ways to Reset Motorola Edge+ (2023) Without Volume Buttons | Dr.fone
- Best Guide for Beginners on 2D Animation Making
- In 2024, Unlock Vivo V27 Phone Password Without Factory Reset Full Guide Here
- In 2024, Full Guide to Unlock Your Realme GT Neo 5
- Title: How To Fade Audio With Movavi Editor
- Author: Chloe
- Created at : 2024-05-20 03:37:28
- Updated at : 2024-05-21 03:37:28
- Link: https://ai-editing-video.techidaily.com/how-to-fade-audio-with-movavi-editor/
- License: This work is licensed under CC BY-NC-SA 4.0.
