
:max_bytes(150000):strip_icc():format(webp)/removerokuchannel-c354faa0f712495384a4d5888017e30c.png)
How To Fix Slow Playback Issues in DaVinci Resolve Finding the Best Solutions for 2024
How To Fix Slow Playback Issues in DaVinci Resolve: Finding the Best Solutions
Davinci Resolve is a well-known video editing software with an intuitive interface. This all-in-all program combines editing, color correction, motion graphics, and visual effects. Video editors don’t need to switch to many apps when DaVinci Resolve can do different tasks. High-quality editing of original camera images can only be done through this tool.
Hollywood films and series use this software to streamline the show. Overall, it’s incredible software, but sometimes DaVinci Resolve slow playback issues arise. To fix this issue, you can read this guide for effective and guaranteed solutions. There, you will also find a trustworthy alternative to avoid DaVinci Resolve slow-down playback.
Slow Motion Video Maker Slow your video’s speed with better control of your keyframes to create unique cinematic effects!
Make A Slow Motion Video Make A Slow Motion Video More Features

Part 1: Finding the Best Resolution for DaVinci Resolve Slow Playback Issue
As Highlighted, DaVinci Resolve is a good video editor for all kinds of use cases. Although it’s a powerful tool, it still shows some errors like choppy and slow playback. Modern problems require modern solutions. Thus, read the given fixes to make DaVinci Resolve faster playback. All the methods are easy and helpful for a smooth playback experience on Windows and macOS.
- Solution 1: Lower Playback Resolution
- Solution 2: Change Timeline Resolution
- Solution 3: Enable Render Cache
- Solution 4: Disable the Live Save Feature
- Solution 5: Use Proxy Media Files
- Solution 6: Disable Color Grades
Solution 1: Lower Playback Resolution
In DaVinci Resolve, full timeline proxy resolution is set by default. To enjoy a smooth playback while editing, you should reduce the playback resolution. Open your project in DaVinci Resolve and press the “Playback” menu from the top. Then, select “Timeline Proxy Resolution” and pick one either “Half” or “Quarter” options. It will reduce the playback resolution and speed up the playback.

Solution 2: Change Timeline Resolution
DaVinci Resolve can work on 4K high-resolution footage that might disrupt the playback. So, cutting down the resolution to speed up your playback is suggested. To do so, click the “Settings” icon from the bottom right side and enter the “Project Settings” window. Expand the “Time Resolution” menu and choose 1920x1080 HD if working on 4K or high resolutions. Now, apply the changes by hitting on “Save.”
Adjust the timeline resolution and right-click on the timeline in the Media Pool. Choose “Timeline” and then “Timeline Settings.” Lastly, check the “Use Project Settings” option and decide a resolution to click on “OK.”

Solution 3: Enable Render Cache
It’s another solution to fix the DaVinci resolve slow playback. Render cache is a file that stores the rendered frames and makes the rendering faster. Start by hitting the “Playback” option and choose “Render Cache.” Then, you’ll see 3 options: None, Smart, and User. You should select “Smart” and let DaVinci Resolve pick one clip to be cached.

Solution 4: Disable the Live Save Feature
Every change you make gets saved with the Live Save option in DaVinci Resolve. If your remote drive is linked, this feature can drag the playback speed down. You can disable it for a DaVinci resolve faster playback.
Look for the “User Preference” menu and click on the top left side button of DaVinci Resolve. Go to the “Preferences” under the user tab. From the “Project Save and load,” check the “Disable Live Save” option. Now, you should remember to manually save your projects after editing.

Solution 5: Use Proxy Media Files
Another solution is to use proxy media during the project editing. Proxy files are small copy files transcoded from a larger, original video file. Get the proxy file to increase the playback and go to your “Media Pool” in DaVinci Resolve. Right-click on the intended file and choose “Generate Proxy Media” from the list.

Solution 6: Disable Color Grades
If you are still failing to resolve the slow playback issue on Davinci Resolve, try this fix. Disable color grades and other effects in the first place. To do so, head to the DaVinci Resolve Edit Page. After getting there, press the “Bypass Color Grades and Fusion Effects” button from the top right side. This way, you can surely solve the DaVinci Resolve slow-down playback error.

Part 2: What Makes a Slow-Motion Video Good?
After resolving the DaVinci Resolve slow playback, let’s continue further editing. Create a slow-motion video to emphasize certain information in the video. It involves technical and creative elements for a good-quality video. You can read this section to understand the points that contribute to a good Slow-motion video.
- Frame Rate: Keep the frame rate higher for a good slow-motion video. In this regard, you can use common frame rates such as 60fps, 120fps, and 140fps. Moreover, you should pick video clips that are originally captured in a high frame rate.
- Shutter Speed: Minimize the motion blur in footage and use a faster shutter speed. It is important when you are shooting fast-moving objects. Adjusting the shutter speed can enhance the look of slow-motion videos.
- Resolution: A good slow motion is only possible when it is captured in high-quality resolution. Better image quality allows more detail in such footage. Moreover, you can optimize the camera settings for the desired resolution.
- Editing and Timing: Thoughtfully chosen clips, timings, and editing can set the stage. Thus, maintain a cohesive flow and pay more attention to the video pacing. Edit all segments in a way that fits seamlessly to contribute a good slow-motion video.
Part 3: Making Slow Playback Issues Go Away with Perfect Alternative: Wondershare Filmora
Sometimes, issues like DaVinci Resolve slow down playback do not go easily. Resolving them requires a lot of effort that might prove frustrating beyond limits. So, it seems better there to switch towards a better option. In this regard, Wondershare Filmora is the most effective solution in video editing. Professionals can rely on Filmora, which offers AI-integrated features for easy video-making.
Users can use its AI Copilot Editing for assistance if they are new to video editing. Moreover, Filmora can generate AI music, images, and scripts. It can ensure your workflow with the quickest editing. Discover more features of this application to unlock your creativity.
Free Download For Win 7 or later(64-bit)
Free Download For macOS 10.14 or later
How to Make a Slow-motion video with Optical Flow
Slow-motion videos with high resolution are not easy to create. Without any playback lagging, this tool can provide you with slow-motion video. Following are those steps that can lead you to easily create such videos:
Step 1Install Filmora and Import Your Project
Launch Filmora’s latest version in your system. Open it and choose the “New Project” option from its main interface. After getting into the editing screen, press the “Ctrl + I” keys to bring the media to Filmora. Drag and drop the file in the timeline section to start editing.

Step 2Explore the Speed Option and Use Optical Flow Feature
In the Timeline, right-click on the video and choose the “Uniform Speed” option. An extended menu will appear on the right side. Now, turn the video into slow motion with the “Speed” slider. Afterward, head down and extend the “AI Frame Interpolation” menu. From the list, select the “Optical Flow” option for slow but high-quality speed.

Step 3Continue Editing or Export as Desired
Now, you can extend your editing and work on “Reverse Speed” and “Ripple Edit.” If you have nothing to edit more, look for the “Export” option from the top-right corner. Click on it and export with customized parameters.

Conclusion
In short, there are several ways to fix DaVinci Resolve’s slow playback error. As explained earlier, you can use any solution for a smooth playback experience. If you don’t want to waste time resolving such issues, switch to Wondershare Filmora. It is a reliable, all-in-all tool for video editors that doesn’t cause any playback lagging. So, start creating slow-motion videos with optical flow.
Make A Slow Motion Video Make A Slow Motion Video More Features
Part 1: Finding the Best Resolution for DaVinci Resolve Slow Playback Issue
As Highlighted, DaVinci Resolve is a good video editor for all kinds of use cases. Although it’s a powerful tool, it still shows some errors like choppy and slow playback. Modern problems require modern solutions. Thus, read the given fixes to make DaVinci Resolve faster playback. All the methods are easy and helpful for a smooth playback experience on Windows and macOS.
- Solution 1: Lower Playback Resolution
- Solution 2: Change Timeline Resolution
- Solution 3: Enable Render Cache
- Solution 4: Disable the Live Save Feature
- Solution 5: Use Proxy Media Files
- Solution 6: Disable Color Grades
Solution 1: Lower Playback Resolution
In DaVinci Resolve, full timeline proxy resolution is set by default. To enjoy a smooth playback while editing, you should reduce the playback resolution. Open your project in DaVinci Resolve and press the “Playback” menu from the top. Then, select “Timeline Proxy Resolution” and pick one either “Half” or “Quarter” options. It will reduce the playback resolution and speed up the playback.
Solution 2: Change Timeline Resolution
DaVinci Resolve can work on 4K high-resolution footage that might disrupt the playback. So, cutting down the resolution to speed up your playback is suggested. To do so, click the “Settings” icon from the bottom right side and enter the “Project Settings” window. Expand the “Time Resolution” menu and choose 1920x1080 HD if working on 4K or high resolutions. Now, apply the changes by hitting on “Save.”
Adjust the timeline resolution and right-click on the timeline in the Media Pool. Choose “Timeline” and then “Timeline Settings.” Lastly, check the “Use Project Settings” option and decide a resolution to click on “OK.”
Solution 3: Enable Render Cache
It’s another solution to fix the DaVinci resolve slow playback. Render cache is a file that stores the rendered frames and makes the rendering faster. Start by hitting the “Playback” option and choose “Render Cache.” Then, you’ll see 3 options: None, Smart, and User. You should select “Smart” and let DaVinci Resolve pick one clip to be cached.
Solution 4: Disable the Live Save Feature
Every change you make gets saved with the Live Save option in DaVinci Resolve. If your remote drive is linked, this feature can drag the playback speed down. You can disable it for a DaVinci resolve faster playback.
Look for the “User Preference” menu and click on the top left side button of DaVinci Resolve. Go to the “Preferences” under the user tab. From the “Project Save and load,” check the “Disable Live Save” option. Now, you should remember to manually save your projects after editing.
Solution 5: Use Proxy Media Files
Another solution is to use proxy media during the project editing. Proxy files are small copy files transcoded from a larger, original video file. Get the proxy file to increase the playback and go to your “Media Pool” in DaVinci Resolve. Right-click on the intended file and choose “Generate Proxy Media” from the list.
Solution 6: Disable Color Grades
If you are still failing to resolve the slow playback issue on Davinci Resolve, try this fix. Disable color grades and other effects in the first place. To do so, head to the DaVinci Resolve Edit Page. After getting there, press the “Bypass Color Grades and Fusion Effects” button from the top right side. This way, you can surely solve the DaVinci Resolve slow-down playback error.
Part 2: What Makes a Slow-Motion Video Good?
After resolving the DaVinci Resolve slow playback, let’s continue further editing. Create a slow-motion video to emphasize certain information in the video. It involves technical and creative elements for a good-quality video. You can read this section to understand the points that contribute to a good Slow-motion video.
- Frame Rate: Keep the frame rate higher for a good slow-motion video. In this regard, you can use common frame rates such as 60fps, 120fps, and 140fps. Moreover, you should pick video clips that are originally captured in a high frame rate.
- Shutter Speed: Minimize the motion blur in footage and use a faster shutter speed. It is important when you are shooting fast-moving objects. Adjusting the shutter speed can enhance the look of slow-motion videos.
- Resolution: A good slow motion is only possible when it is captured in high-quality resolution. Better image quality allows more detail in such footage. Moreover, you can optimize the camera settings for the desired resolution.
- Editing and Timing: Thoughtfully chosen clips, timings, and editing can set the stage. Thus, maintain a cohesive flow and pay more attention to the video pacing. Edit all segments in a way that fits seamlessly to contribute a good slow-motion video.
Part 3: Making Slow Playback Issues Go Away with Perfect Alternative: Wondershare Filmora
Sometimes, issues like DaVinci Resolve slow down playback do not go easily. Resolving them requires a lot of effort that might prove frustrating beyond limits. So, it seems better there to switch towards a better option. In this regard, Wondershare Filmora is the most effective solution in video editing. Professionals can rely on Filmora, which offers AI-integrated features for easy video-making.
Users can use its AI Copilot Editing for assistance if they are new to video editing. Moreover, Filmora can generate AI music, images, and scripts. It can ensure your workflow with the quickest editing. Discover more features of this application to unlock your creativity.
Free Download For Win 7 or later(64-bit)
Free Download For macOS 10.14 or later
How to Make a Slow-motion video with Optical Flow
Slow-motion videos with high resolution are not easy to create. Without any playback lagging, this tool can provide you with slow-motion video. Following are those steps that can lead you to easily create such videos:
Step 1Install Filmora and Import Your Project
Launch Filmora’s latest version in your system. Open it and choose the “New Project” option from its main interface. After getting into the editing screen, press the “Ctrl + I” keys to bring the media to Filmora. Drag and drop the file in the timeline section to start editing.
Step 2Explore the Speed Option and Use Optical Flow Feature
In the Timeline, right-click on the video and choose the “Uniform Speed” option. An extended menu will appear on the right side. Now, turn the video into slow motion with the “Speed” slider. Afterward, head down and extend the “AI Frame Interpolation” menu. From the list, select the “Optical Flow” option for slow but high-quality speed.
Step 3Continue Editing or Export as Desired
Now, you can extend your editing and work on “Reverse Speed” and “Ripple Edit.” If you have nothing to edit more, look for the “Export” option from the top-right corner. Click on it and export with customized parameters.
Conclusion
In short, there are several ways to fix DaVinci Resolve’s slow playback error. As explained earlier, you can use any solution for a smooth playback experience. If you don’t want to waste time resolving such issues, switch to Wondershare Filmora. It is a reliable, all-in-all tool for video editors that doesn’t cause any playback lagging. So, start creating slow-motion videos with optical flow.
Trailer Guide for Creators and Developers
Trailers are a popular means to showcase a product you are about to release to the market. Teasers and trailers are traditionally created for movies, but have eventually evolved to include book trailers, game trailers, and app trailers. In this article, we will explain the key details of a trailer, highlight some examples, and show you how to create an effective trailer.
Part 1. What is a Trailer?
A trailer is a type of video commercial advertisement made to advertise and inform audiences about a specific program or item. To persuade customers to view or use the product, it includes a brief series of previews of the entire material. It also serves as a means of creating anticipation for a show or product that is about to hit the market.

Trailers were originally made for cinema movies. Nowadays, trailers are created for different forms of media like shows, apps, programs, video games, and book videos. A typical traditional trailer lasts between 1 to 3 minutes.
Part 2. What Are the Similarities and Differences Between a Teaser and Trailer?
Teasers and trailers can often be confused with each other. After all, they pretty much have the same objective.
Both are created for the purpose of advertising an upcoming show, product, or service. Teasers and trailers are similarly shown to audiences prior to the release of the thing they are advertising. They are meant to show a small portion of the full experience to create curiosity and excitement towards a targeted market. Both videos are typically short in length - taking up only a maximum of 3 minutes in duration.

The differences between them lie in their content, timeline, and duration. A teaser is much shorter than a trailer - the former runs for only 20-30 seconds while the latter can go between 1-3 minutes in length. This is because teasers are typically made before or during the production process of a movie or feature, whilst trailers are commonly made at the end.
For films, movies, and shows, teasers generally capture only a single part of that media. It focuses on the most intense or impactful scene. Trailers are formed from a series of clips depicting striking scenes derived from the beginning, middle, and end of the show. These scenes are normally arranged in a nonlinear structure, allowing viewers to have a general understanding of the story without revealing the entirety of the plot.
Part 3. Examples of good trailers
An excellent trailer is one who can effectively attract and maintain the audience’s attention. It satisfies its objective of showcasing striking and captivating pieces of the main product and entices viewers to experience its entirety. Here are some examples of trailers who have well fulfilled the criteria of a good trailer.
1. The Suicide Squad
The Suicide Squad is a fresh take featuring DC’s anti-heroes assemble in a single chaotic and unconventional team. James Gunn’s iteration on these characters is brought to life in the trailer with a majestic cast including John Cena, Idris Elba, Margot Robbie, and David Dastmalchian. Several key scenes are shown, highlighting its standout characters in the process while portraying the movie’s setting.
2. Raya and the Last Dragon
The trailer starts out innocently and comes with an adorable and surprising twist. The brief 2-minute trailer is packed with relevant scenes that depict the character’s quest without revealing too much. Many action-packed scenes and emotional interactions are satisfactorily squeezed into the trailer. Excitement builds further with Tamara Bubble’s “I’m That Good” playing in the background on the last minute of the video.
3. Men (2022)
Ingenious combination of sound effects and background music play a distinct role in this 2022 trailer. The female lead’s voice echoing from a tunnel, the haunting piano keys gradually building up the suspense, and the common but cleverly used horror audio effects create a chilling ensemble of haunting scenes in the movie. The sounds gradually rise up as more aggressive and energized scenes flash on the screen, and eventually end back into the sombre intro that leaves the audience with questions.
4. The Farewell
Lulu Wang’s dramatic comedy The Farewell is all about a family hiding the truth of a family member’s terminal illness from the person herself. What makes the trailer special is that it steers away from the sad, melancholic direction and veers toward a feel-good movie vibe. The conflict, struggle, and the beliefs featured in the movie are depicted in the trailer. However, the clever placement of interactions and the uplifting music tug at the audience’s heartstrings and urge them to want to see more.
5. Pokémon Go
Pokémon has become a culture to several generations. Becoming a Pokémon trainer is a secret dream that almost all of us have, even as adults. Niantic’s collaboration with the Pokémon franchise brings people closer to that reality by introducing its AR and location-powered app Pokémon Go. The trailer shows people of all ages living out their trainer dreams in the real world and interacting with Pokémon. The different features of the game are dramatized in a real-life setting, inciting more excitement, and pulling out the nostalgia from its market. The trailer keeps the actual app showcase to a minimum, instead focusing on once again selling that dream to audiences and bringing out the inner child in everyone.
Part 4. How to bring your trailer to the next level?
While it may seem intimidating to create a trailer for your upcoming product, there is no need to worry. It is now easier than ever to create a well-crafted trailer by taking advantage of a program’s tools and templates.
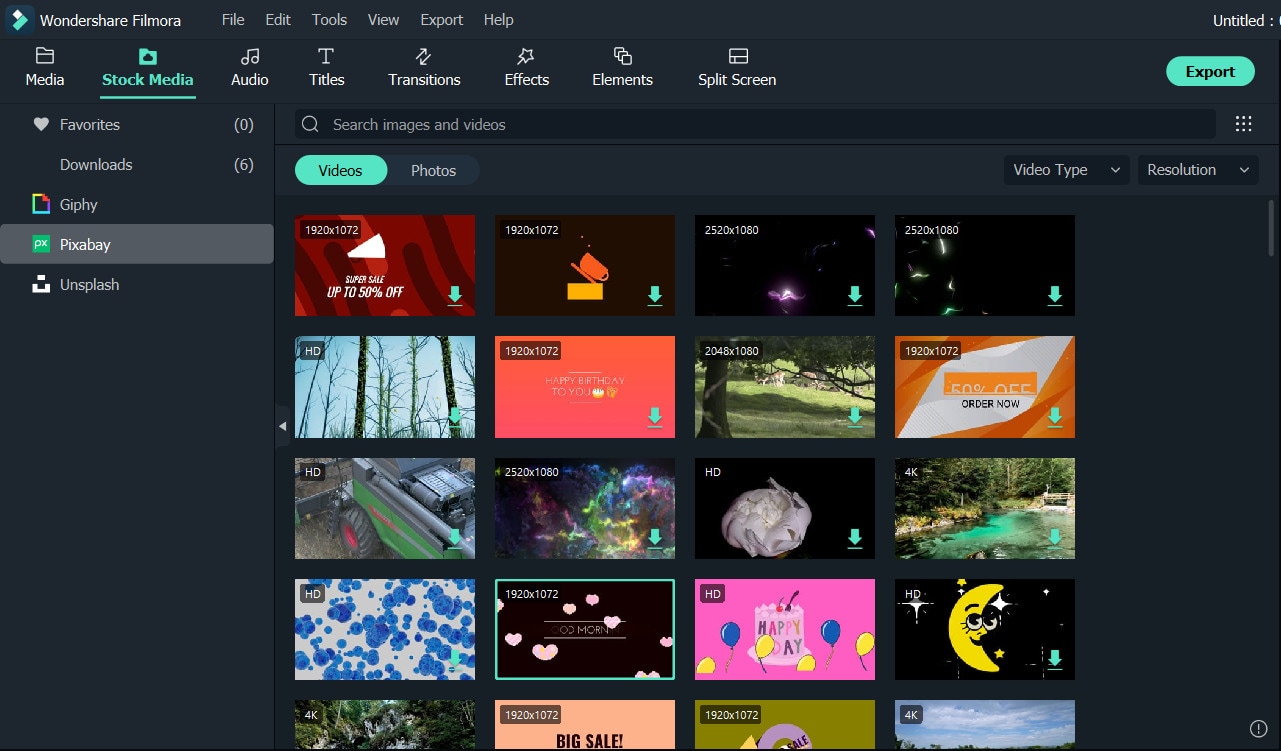
- Stock media
Filmora makes it easy to craft a trailer with only a few clicks. Make use of the program’s media library to gain access to a wealth of resources like stock photos, videos, music, and audio files.
- Keyframing
Keyframing lets you smoothly transition from one scene to another, making it an effective tool for trailers. It is particularly appealing for shows that highlight motion like sports, dancing, and action. Experiment with more than 80 preset templates and create smooth scene transitions with ease.
- Speed Ramping
Speed Ramping is a feature that works perfectly with keyframing. Increase the energy and dynamics in your trailer with 6 preset speed types. You can also customize these templates. There is also no need for concern about the audio - Filmora lets you maintain the audio pitch even when using these features.
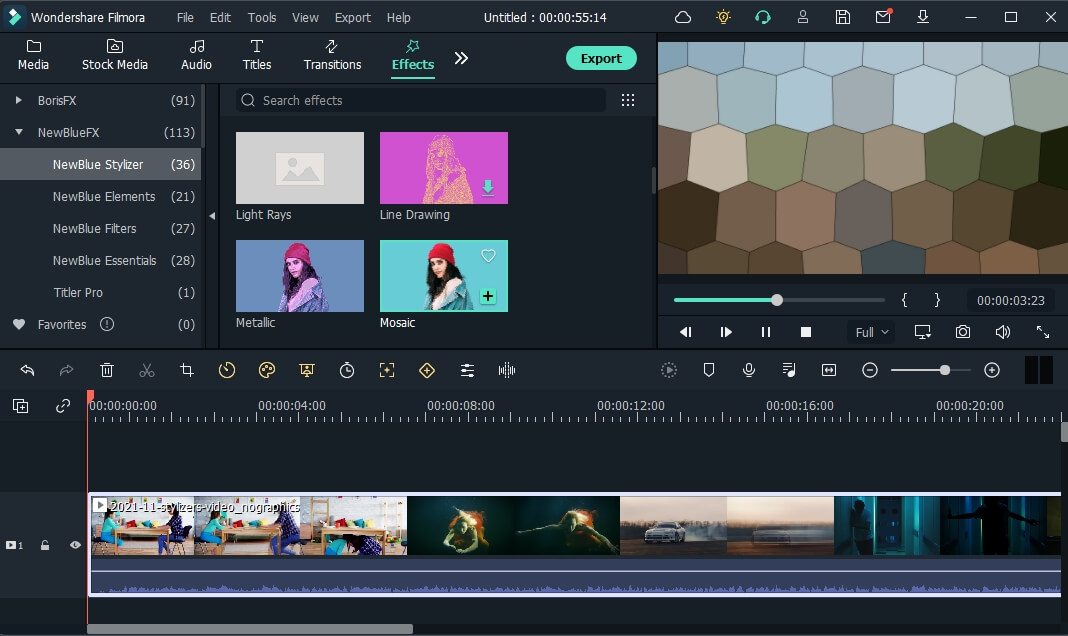
- FX Effects
The program also offers many effects and filters for an extra element in your trailer. The Borix FX is an example of that. Designed in collaboration with the award-winning developer of the same name, Boris FX and its extension Continuum features a wide array of tasteful effects for your convenience. There are over 91 customizable and adjustable presets including types like blurs, stylization, and lights. NewBlue is another option that carries choices of filters, titlers, and stylizers.
Filmora offers different features, tools, and effects to explore that can help make your trailer editing objectives easier and more convenient. Save time and resources by taking advantage of its powerful yet easy-to-use tools.
Free Download For Win 7 or later(64-bit)
Free Download For macOS 10.14 or later
2. Raya and the Last Dragon
The trailer starts out innocently and comes with an adorable and surprising twist. The brief 2-minute trailer is packed with relevant scenes that depict the character’s quest without revealing too much. Many action-packed scenes and emotional interactions are satisfactorily squeezed into the trailer. Excitement builds further with Tamara Bubble’s “I’m That Good” playing in the background on the last minute of the video.
3. Men (2022)
Ingenious combination of sound effects and background music play a distinct role in this 2022 trailer. The female lead’s voice echoing from a tunnel, the haunting piano keys gradually building up the suspense, and the common but cleverly used horror audio effects create a chilling ensemble of haunting scenes in the movie. The sounds gradually rise up as more aggressive and energized scenes flash on the screen, and eventually end back into the sombre intro that leaves the audience with questions.
4. The Farewell
Lulu Wang’s dramatic comedy The Farewell is all about a family hiding the truth of a family member’s terminal illness from the person herself. What makes the trailer special is that it steers away from the sad, melancholic direction and veers toward a feel-good movie vibe. The conflict, struggle, and the beliefs featured in the movie are depicted in the trailer. However, the clever placement of interactions and the uplifting music tug at the audience’s heartstrings and urge them to want to see more.
5. Pokémon Go
Pokémon has become a culture to several generations. Becoming a Pokémon trainer is a secret dream that almost all of us have, even as adults. Niantic’s collaboration with the Pokémon franchise brings people closer to that reality by introducing its AR and location-powered app Pokémon Go. The trailer shows people of all ages living out their trainer dreams in the real world and interacting with Pokémon. The different features of the game are dramatized in a real-life setting, inciting more excitement, and pulling out the nostalgia from its market. The trailer keeps the actual app showcase to a minimum, instead focusing on once again selling that dream to audiences and bringing out the inner child in everyone.
Part 4. How to bring your trailer to the next level?
While it may seem intimidating to create a trailer for your upcoming product, there is no need to worry. It is now easier than ever to create a well-crafted trailer by taking advantage of a program’s tools and templates.
- Stock media
Filmora makes it easy to craft a trailer with only a few clicks. Make use of the program’s media library to gain access to a wealth of resources like stock photos, videos, music, and audio files.
- Keyframing
Keyframing lets you smoothly transition from one scene to another, making it an effective tool for trailers. It is particularly appealing for shows that highlight motion like sports, dancing, and action. Experiment with more than 80 preset templates and create smooth scene transitions with ease.
- Speed Ramping
Speed Ramping is a feature that works perfectly with keyframing. Increase the energy and dynamics in your trailer with 6 preset speed types. You can also customize these templates. There is also no need for concern about the audio - Filmora lets you maintain the audio pitch even when using these features.
- FX Effects
The program also offers many effects and filters for an extra element in your trailer. The Borix FX is an example of that. Designed in collaboration with the award-winning developer of the same name, Boris FX and its extension Continuum features a wide array of tasteful effects for your convenience. There are over 91 customizable and adjustable presets including types like blurs, stylization, and lights. NewBlue is another option that carries choices of filters, titlers, and stylizers.
Filmora offers different features, tools, and effects to explore that can help make your trailer editing objectives easier and more convenient. Save time and resources by taking advantage of its powerful yet easy-to-use tools.
Free Download For Win 7 or later(64-bit)
Free Download For macOS 10.14 or later
Split a Clip in DaVinci Resolve [Step by Step]
The DaVinci resolve is an amazing video editing software that attracts professionals and beginners to work on it. You can also fulfil your wish to edit or split the video clips in it without facing any difficulty.
But, some of them are looking for guidance to work on DaVinci resolve correctly. This article discusses the splitting of the video clips in DaVinci Resolve explicitly. There is also a brief description of its best alternative, Wondershare Filmora. This is also practically relevant and reasonable as well.
How you can split the video clips in DaVinci resolve
DaVinci resolve is a comprehensive program that allows you to deliver different solutions. It can be related to editing the videos, correcting the colours, and producing the videos and audio. Just follow the simple steps below for splitting the videos in the DaVinci resolve:
Part 1 - Splitting of one clip:
Step 1: After installing the DaVinci resolve, launch it in your system.

Step 2: Import and place the media file on the timeline from the library. This is the clip you want to split. Select the blade tool from where you want to split the clip. Use the timeline from the menu and go to Split Clip. Shortcut keys are also available that are Ctrl+\ or Cmd+\ or Cmd+B. Now the split clip is easily visible to you. You can use this clip wherever you want to use it.

Part 2- Splitting of more than one clip on various tracks:
You can also split the number of video and audio clips at the exact timings in DaVinci resolve.
Step 1: When there are piles of clips one after the other, the selection of both of the clips is essential, which have to be split. Keep moving the playhead to the exact area where there is a requirement for the changes.
Step 2: Just keep pressing Command or Control + \ keys, or click on timeline> Split Clip. The selected clips of audio and video get split together now. No more slitting of the clips individually. This option is more appropriate for you when creating and managing different parts of massive projects.

An easier way to split the video clips
Without any doubt, DaVinci resolve is an advanced level software for video editing at the professional level. Moreover, the pricing of DaVinci resolve is $299, and it shows that it is quite expensive for many people. Due to this, you need an economical solution that is Filmora Video Editor .
Most graphic designers and video editors recommend Wondershare Fimora because it is lighter for the systems. All the tools are simplified in using like trimming or splitting the clips. You can convert split video clips into other formats in Wondershare Filmora. Add and apply all the special effects on your videos and export them wherever you want.
For Win 7 or later (64-bit)
For macOS 10.14 or later
Features:
- Splitting or trimming of the video clips
- Removing the noise
- Addition of the transition effects
- Availability of controls for the audio, sound and video
- Separating the audio from the video
Part 1 - Splitting the clips in Wondershare Filmora
If you want to split the clips or trim some parts of the videos, Wondershare Filmora is the right choice. Below are detailed steps for trimming the videos quickly and easily.
Step :1
Drag or drop the files from Media Library or Click on “Import” after selecting the video clips to make the clip visible on the timeline. No need to worry regarding the formats as Wondershare Filmora is highly supportive towards it/

Step:2
Keep hanging the mouse on the corner of the video until and unless the trimming icon appears. So, you can drag ahead or in a backward direction at the endpoints of the video you want to trim.

Step: 3
You don’t want the video parts in the centre of the video clips. First, split the video and delete it. For splitting the video, click on the icon of the scissor.

Step: 4
For deleting the part of the undesired part of the video, click on the dustbin icon. If there is any deletion by mistake, there is no need to worry about it. Click on the undo icon to make the video appear on the timeline again.

Part 2 - Splitting and trimming the clips in Wondershare Filmora:
Apart from the above steps for trimming and splitting the videos in Wondershare Filmora, the position of the video has to be in the place head of the frame that you are willing to trim. Right-click on the clip and select the option of “Trim Start to Playhead or Trim End to Playhead “ for deleting the content of the video ahead or back of it.

In the latest version of the Wondershare Filmora, you can even trim the video without adding it to the timeline. A similar video can easily split multiple times and load only the required one. Go through the following steps to split the clips in a faster way:
- You can easily preview the video first from the library of your media files.
- Select the clip which you want to split or trim by selecting from the beginning till the end
- After dragging, you can view the trim section
- Keep repeating the steps mentioned above for splitting the videos

Although various editing software is available, Wondershare Filmora has to be on the top. It is the best choice to bring your imagination into reality, whether it is transitioning, applying the effects or importing/exporting the videos. All the options are suitable in front and visible on your timeline. Wondershare Filmora supports different operating systems as well. Even no proper training is required, so start using Wondershare Filmora today to get your editing done.
Step 2: Import and place the media file on the timeline from the library. This is the clip you want to split. Select the blade tool from where you want to split the clip. Use the timeline from the menu and go to Split Clip. Shortcut keys are also available that are Ctrl+\ or Cmd+\ or Cmd+B. Now the split clip is easily visible to you. You can use this clip wherever you want to use it.
Part 2- Splitting of more than one clip on various tracks:
You can also split the number of video and audio clips at the exact timings in DaVinci resolve.
Step 1: When there are piles of clips one after the other, the selection of both of the clips is essential, which have to be split. Keep moving the playhead to the exact area where there is a requirement for the changes.
Step 2: Just keep pressing Command or Control + \ keys, or click on timeline> Split Clip. The selected clips of audio and video get split together now. No more slitting of the clips individually. This option is more appropriate for you when creating and managing different parts of massive projects.
An easier way to split the video clips
Without any doubt, DaVinci resolve is an advanced level software for video editing at the professional level. Moreover, the pricing of DaVinci resolve is $299, and it shows that it is quite expensive for many people. Due to this, you need an economical solution that is Filmora Video Editor .
Most graphic designers and video editors recommend Wondershare Fimora because it is lighter for the systems. All the tools are simplified in using like trimming or splitting the clips. You can convert split video clips into other formats in Wondershare Filmora. Add and apply all the special effects on your videos and export them wherever you want.
For Win 7 or later (64-bit)
For macOS 10.14 or later
Features:
- Splitting or trimming of the video clips
- Removing the noise
- Addition of the transition effects
- Availability of controls for the audio, sound and video
- Separating the audio from the video
Part 1 - Splitting the clips in Wondershare Filmora
If you want to split the clips or trim some parts of the videos, Wondershare Filmora is the right choice. Below are detailed steps for trimming the videos quickly and easily.
Step :1
Drag or drop the files from Media Library or Click on “Import” after selecting the video clips to make the clip visible on the timeline. No need to worry regarding the formats as Wondershare Filmora is highly supportive towards it/
Step:2
Keep hanging the mouse on the corner of the video until and unless the trimming icon appears. So, you can drag ahead or in a backward direction at the endpoints of the video you want to trim.
Step: 3
You don’t want the video parts in the centre of the video clips. First, split the video and delete it. For splitting the video, click on the icon of the scissor.
Step: 4
For deleting the part of the undesired part of the video, click on the dustbin icon. If there is any deletion by mistake, there is no need to worry about it. Click on the undo icon to make the video appear on the timeline again.
Part 2 - Splitting and trimming the clips in Wondershare Filmora:
Apart from the above steps for trimming and splitting the videos in Wondershare Filmora, the position of the video has to be in the place head of the frame that you are willing to trim. Right-click on the clip and select the option of “Trim Start to Playhead or Trim End to Playhead “ for deleting the content of the video ahead or back of it.
In the latest version of the Wondershare Filmora, you can even trim the video without adding it to the timeline. A similar video can easily split multiple times and load only the required one. Go through the following steps to split the clips in a faster way:
- You can easily preview the video first from the library of your media files.
- Select the clip which you want to split or trim by selecting from the beginning till the end
- After dragging, you can view the trim section
- Keep repeating the steps mentioned above for splitting the videos
Although various editing software is available, Wondershare Filmora has to be on the top. It is the best choice to bring your imagination into reality, whether it is transitioning, applying the effects or importing/exporting the videos. All the options are suitable in front and visible on your timeline. Wondershare Filmora supports different operating systems as well. Even no proper training is required, so start using Wondershare Filmora today to get your editing done.
How to Convert Videos to Slow Motion?
Slow Motion films are unique, don’t you think? Occasionally, individuals use their phones to shoot slow-motion films if they have an in-built function, and if their phone does not have an in-built feature, they may use slow-motion video creator applications to assist them.
But what happens if you have previously filmed a video at regular speed and now want the movie to be converted to slow motion?
Maybe a video of you from the pool when you’re flipping your hair, but no one remembers to take it in slow motion? Don’t be concerned! Today, we will show you how to turn any video into a slow-motion video on different operating systems.
In this article
01 How to Turn Videos Into Slow Motion on Windows for Free?
02 How to Convert Normal Video to Slow Motion for Free on Mac?
03 How to turn Normal Video to Slow Motion With VLC On Linux Computer?
04 How to Use Wondershare Filmora Video Editor to Turn Normal Videos to Slow Motion?
05 Best Slow Motion Converters to Convert Video to Slow Motion Online Free?
06 How to Convert Normal Video to Smooth Slow Motion In iPhone And Android Phones
Part 1: How to Turn Videos Into Slow Motion on Windows for Free?
If you need to conduct some simple editing and effects on your films, there is no need to invest hundreds of dollars in a video editing software application. For example, you may use the Photos App pre-installed on Windows 10 machines to apply the slow-motion effect to your photographs.
Step 1: Right click the video and choose Open with Photos. If it has been recorded by an iPhone or Android device and stored up to OneDrive, it should appear in the Microsoft Photos app without any further effort. Just click it to preview the video.
Step 2: Go to the Edit & Create option on the right corner on the top, and then select Add slo-mo option.

Step 3: Using the slider, you can determine how slowly you want it to go. Microsoft has built-in support for “Slow“ and “Super-Slow“ performance levels. Drag the slide to the right end will trigger the super slow mode.

Step 4: Specifiy the part that you want to apply slow motion in the playback bar at the bottom, and then save the video that you have just created with slow motion effects on Windows 10 .
The possibility exists that you are using an older version of Windows 10 on your computer if you do not see the option anywhere in the Photos app. You can also follow the steps above to create a slow motion video on Windows 11.
Browse Windows Update from the system menu and click on the appropriate button. When all of the updates have been installed, you will have the most recent version of the Photos app, which includes this functionality.
Part 2: How to Convert Normal Video to Slow Motion for Free on Mac?
Slow-motion videos are among the most enjoyable parts of utilizing your iPhone for videography. Video may be recorded with a frame rate of 120 or 240 fps and then played back at a considerably slower rate than usual.
However, if you don’t record video on your iPhone, making slow motion out of videos shot on other cameras or devices is more challenging. The good news is that iMovie for Mac can do this for you. We’ll show you how in this guide.
Slow-motion films are easy to make using iMovie on your Mac . Just follow the steps listed below.
Step 1: Click on the Import Media option in iMovie once launched on your Mac.
Step 2: Click on the blue Import Selected button once you’ve selected the video file in the file browser to slow it down.
Step 3: You may now open the movie in iMovie. Creating a Project is required at this stage. To do so, click on the Projects option.
Step 4: Once you’ve entered a name for your project, click the blue OK button.
Step 5: By dragging the movie onto your timeline, you may modify the video. Select the video by clicking on it and clicking on the Speed option to change its speed.
Step 6: The speed-editing interface will be shown here. Change Normal to Slow in the Speed drop-down menu.
Step 7: The duration of your movie will be increased by halves the pace at which it was initially recorded. The video may be slowed down even further by moving the speed slider.
Step 8: Go to the Menu Bar and choose File > Share. Select the file you want to share.
Step 9: Click the blue Next button once you’ve selected the properties you want for the file.
Step 10: Select a name for the file, store it, and then click the blue Save button to save it to your computer.
Part 3: How to turn Normal Video to Slow Motion With VLC On Linux Computer?
The video speed may be controlled in two ways using VLC. Using shortcut keys or hotkeys is one method, while menus and buttons are another. Both methods are OK, but the shortcut option is the quickest and most efficient.
Speed up and speed down buttons appear on the upper right of the movie when you press them. Depending on how much you tweak it, the speed is represented as 1.50x or 0.80x. This option is available for those who like to use other shortcut keys.
Step 1: From the VLC menu bar, head over to the Playback for Speed and choose a speed option: slower, slower (fine), normal, faster (fine), and faster.
Step 2: Right-clicking is also possible to access these parameters from the Playback > Speed menu.
Step 3: The video’s speed may be altered by selecting one of those options and then clicking the appropriate button.
If you are running VLC on Windows and Mac, you can check this article to find out the detailed information about how to playback video in slow motion in VLC .
Related: Best Free Video Editor for Linux .
Part 4: How to Use Wondershare Filmora Video Editor to Turn Normal Videos to Slow Motion?
For Win 7 or later (64-bit)
For macOS 10.12 or later
Wondershare Filmora is a video editor we’d like to show to you. Whether using a Windows or a Mac computer, you can rapidly speed up and slow down films with this easy video editor . With a user-friendly interface, Filmora video editor has many professional-grade editing features to help refine videos with ease. From motion tracking to keyframe animations, Filmora video editor offers a plethora of options.
Step 1: Launch Filmora video editor on your Windows or Mac computer (I’m running Windows 10 here). Click the New Project in the Startup window to create a new project in 16:9 aspect ratio by default.

Step 2: Import the video you want to add slow motion effect to the media library, and then drag and drop it to the timeline.

Step 3: To add slow motion effect to part of the video, you need to split the video first and then right click it to choose Speed and Duration. There will be a pop-up window. The motion effects will be sped up or slowed down based on the speed values.

Step 4: When you increase or decrease the video playing speed, the video audio speed changes. If you wish to retain the video audio’s actual playing speed, you may first Detach Audio from the video and then edit the video to achieve a perfect pitch.

Step 5: Select Export after you’ve completed setting the video speed. By selecting Format, you may save the video in any significant format.
Part 5: Best Slow Motion Converters to Convert Video to Slow Motion Online Free?
1. Online Converter
This Online Converter is one of the best on the internet. It is simple to use and supports various video formats such as MP4, AVI, FLV, MOV, 3GP, MKV, WMV, M4V, and others. This tool can also change the video speed by increasing (speeding up) or decreasing (slowing down). The audio in the video file will also become faster or slower due to using this tool.
Step 1: click on the Choose File option from the website to upload the video (max. 200MB).
Step 2: Now select the Speed of the video from the given options. Since we are going to make a video with slow motion effect, choose 0.5x or 0.8x will work perfectly.

Step 3: click on Confirm to convert the video to your preferred slo-mo video.
Part 6: How to Convert Normal Video to Smooth Slow Motion In iPhone And Android Phones
In addition to the essential editing tools of the famous social media platform, TikTok, CapCut is mobile video editing software for both Android and iOS smartphones that were mainly built to complement them. Here is how you can use CapCut to transform a regular video into a slow-mo one:
Step 1: Create A New Project on the CapCut app’s home screen. Browse and add the video you want to search for in slow-motion to the project.
Step 2: When you’re ready to turn off the sound, go ahead and hit the Mute clip audio button first, so there will be no creep sound after applying the slow-motion effect.

Step 3: In case you just want to add a slo-mo effect to part of the video, you need to split the video accordingly. Split the portion of the video that will be slowed down by clicking on the Split button in the menu. And use the Split tool again to end the slow-motion effect to get a segment of the video.
Step 4: Tap the cut section of the video and then you will see the Speed option. Open the Speed menu by selecting it from the drop-down menu.

Step 5: In CapCut, there are two methods to slow down a video, Normal and Curve, respectively. You may just choose the “Normal“ option to make things easy. It is possible to reduce the video’s frame rate by moving the speed slider to the left. You may, for example, make the pace 0.3 times slower. Apply a slow-motion effect by tapping the Check box.

Make a slow motion video at this stage to spice things up. CapCut allows you to add text, create transition effects, and more.
For more information, you can check: How to slo-mo in Capcut .
Conclusion
In this complete guide on “How to Convert Videos to Slow Motion?”, we hope you have learned all the basics. We have covered different apps that can help you do so. As the steps are straigthforward, make sure you abide by all the basics and transform your videos into catchy ones!
02 How to Convert Normal Video to Slow Motion for Free on Mac?
03 How to turn Normal Video to Slow Motion With VLC On Linux Computer?
04 How to Use Wondershare Filmora Video Editor to Turn Normal Videos to Slow Motion?
05 Best Slow Motion Converters to Convert Video to Slow Motion Online Free?
06 How to Convert Normal Video to Smooth Slow Motion In iPhone And Android Phones
Part 1: How to Turn Videos Into Slow Motion on Windows for Free?
If you need to conduct some simple editing and effects on your films, there is no need to invest hundreds of dollars in a video editing software application. For example, you may use the Photos App pre-installed on Windows 10 machines to apply the slow-motion effect to your photographs.
Step 1: Right click the video and choose Open with Photos. If it has been recorded by an iPhone or Android device and stored up to OneDrive, it should appear in the Microsoft Photos app without any further effort. Just click it to preview the video.
Step 2: Go to the Edit & Create option on the right corner on the top, and then select Add slo-mo option.
Step 3: Using the slider, you can determine how slowly you want it to go. Microsoft has built-in support for “Slow“ and “Super-Slow“ performance levels. Drag the slide to the right end will trigger the super slow mode.
Step 4: Specifiy the part that you want to apply slow motion in the playback bar at the bottom, and then save the video that you have just created with slow motion effects on Windows 10 .
The possibility exists that you are using an older version of Windows 10 on your computer if you do not see the option anywhere in the Photos app. You can also follow the steps above to create a slow motion video on Windows 11.
Browse Windows Update from the system menu and click on the appropriate button. When all of the updates have been installed, you will have the most recent version of the Photos app, which includes this functionality.
Part 2: How to Convert Normal Video to Slow Motion for Free on Mac?
Slow-motion videos are among the most enjoyable parts of utilizing your iPhone for videography. Video may be recorded with a frame rate of 120 or 240 fps and then played back at a considerably slower rate than usual.
However, if you don’t record video on your iPhone, making slow motion out of videos shot on other cameras or devices is more challenging. The good news is that iMovie for Mac can do this for you. We’ll show you how in this guide.
Slow-motion films are easy to make using iMovie on your Mac . Just follow the steps listed below.
Step 1: Click on the Import Media option in iMovie once launched on your Mac.
Step 2: Click on the blue Import Selected button once you’ve selected the video file in the file browser to slow it down.
Step 3: You may now open the movie in iMovie. Creating a Project is required at this stage. To do so, click on the Projects option.
Step 4: Once you’ve entered a name for your project, click the blue OK button.
Step 5: By dragging the movie onto your timeline, you may modify the video. Select the video by clicking on it and clicking on the Speed option to change its speed.
Step 6: The speed-editing interface will be shown here. Change Normal to Slow in the Speed drop-down menu.
Step 7: The duration of your movie will be increased by halves the pace at which it was initially recorded. The video may be slowed down even further by moving the speed slider.
Step 8: Go to the Menu Bar and choose File > Share. Select the file you want to share.
Step 9: Click the blue Next button once you’ve selected the properties you want for the file.
Step 10: Select a name for the file, store it, and then click the blue Save button to save it to your computer.
Part 3: How to turn Normal Video to Slow Motion With VLC On Linux Computer?
The video speed may be controlled in two ways using VLC. Using shortcut keys or hotkeys is one method, while menus and buttons are another. Both methods are OK, but the shortcut option is the quickest and most efficient.
Speed up and speed down buttons appear on the upper right of the movie when you press them. Depending on how much you tweak it, the speed is represented as 1.50x or 0.80x. This option is available for those who like to use other shortcut keys.
Step 1: From the VLC menu bar, head over to the Playback for Speed and choose a speed option: slower, slower (fine), normal, faster (fine), and faster.
Step 2: Right-clicking is also possible to access these parameters from the Playback > Speed menu.
Step 3: The video’s speed may be altered by selecting one of those options and then clicking the appropriate button.
If you are running VLC on Windows and Mac, you can check this article to find out the detailed information about how to playback video in slow motion in VLC .
Related: Best Free Video Editor for Linux .
Part 4: How to Use Wondershare Filmora Video Editor to Turn Normal Videos to Slow Motion?
For Win 7 or later (64-bit)
For macOS 10.12 or later
Wondershare Filmora is a video editor we’d like to show to you. Whether using a Windows or a Mac computer, you can rapidly speed up and slow down films with this easy video editor . With a user-friendly interface, Filmora video editor has many professional-grade editing features to help refine videos with ease. From motion tracking to keyframe animations, Filmora video editor offers a plethora of options.
Step 1: Launch Filmora video editor on your Windows or Mac computer (I’m running Windows 10 here). Click the New Project in the Startup window to create a new project in 16:9 aspect ratio by default.
Step 2: Import the video you want to add slow motion effect to the media library, and then drag and drop it to the timeline.
Step 3: To add slow motion effect to part of the video, you need to split the video first and then right click it to choose Speed and Duration. There will be a pop-up window. The motion effects will be sped up or slowed down based on the speed values.
Step 4: When you increase or decrease the video playing speed, the video audio speed changes. If you wish to retain the video audio’s actual playing speed, you may first Detach Audio from the video and then edit the video to achieve a perfect pitch.
Step 5: Select Export after you’ve completed setting the video speed. By selecting Format, you may save the video in any significant format.
Part 5: Best Slow Motion Converters to Convert Video to Slow Motion Online Free?
1. Online Converter
This Online Converter is one of the best on the internet. It is simple to use and supports various video formats such as MP4, AVI, FLV, MOV, 3GP, MKV, WMV, M4V, and others. This tool can also change the video speed by increasing (speeding up) or decreasing (slowing down). The audio in the video file will also become faster or slower due to using this tool.
Step 1: click on the Choose File option from the website to upload the video (max. 200MB).
Step 2: Now select the Speed of the video from the given options. Since we are going to make a video with slow motion effect, choose 0.5x or 0.8x will work perfectly.
Step 3: click on Confirm to convert the video to your preferred slo-mo video.
Part 6: How to Convert Normal Video to Smooth Slow Motion In iPhone And Android Phones
In addition to the essential editing tools of the famous social media platform, TikTok, CapCut is mobile video editing software for both Android and iOS smartphones that were mainly built to complement them. Here is how you can use CapCut to transform a regular video into a slow-mo one:
Step 1: Create A New Project on the CapCut app’s home screen. Browse and add the video you want to search for in slow-motion to the project.
Step 2: When you’re ready to turn off the sound, go ahead and hit the Mute clip audio button first, so there will be no creep sound after applying the slow-motion effect.
Step 3: In case you just want to add a slo-mo effect to part of the video, you need to split the video accordingly. Split the portion of the video that will be slowed down by clicking on the Split button in the menu. And use the Split tool again to end the slow-motion effect to get a segment of the video.
Step 4: Tap the cut section of the video and then you will see the Speed option. Open the Speed menu by selecting it from the drop-down menu.
Step 5: In CapCut, there are two methods to slow down a video, Normal and Curve, respectively. You may just choose the “Normal“ option to make things easy. It is possible to reduce the video’s frame rate by moving the speed slider to the left. You may, for example, make the pace 0.3 times slower. Apply a slow-motion effect by tapping the Check box.
Make a slow motion video at this stage to spice things up. CapCut allows you to add text, create transition effects, and more.
For more information, you can check: How to slo-mo in Capcut .
Conclusion
In this complete guide on “How to Convert Videos to Slow Motion?”, we hope you have learned all the basics. We have covered different apps that can help you do so. As the steps are straigthforward, make sure you abide by all the basics and transform your videos into catchy ones!
Also read:
- Updated | How to Share YouTube Video on Zoom, In 2024
- Updated Top Online Video Background Changers Transform Your Videos with Ease for 2024
- Learn How to Create a Unique Repeated Text Animation in the Filmora Video Editor. Follow the Simple Step-by-Step Instructions for 2024
- New How to Create a Clideo Slideshow Simply
- Updated How to Create Video in Text Intro, In 2024
- In 2024, Would You Like to Know How to Change the Ratio of the Video or Which Is the Correct Aspect Ratio for Uploading to the Online Platform? Then, Go Through the Article to Get Complete Details About the Video Aspect Ratio
- How to Make Animated Text Video on Computer/iPhone/Android/Online for 2024
- Updated In 2024, How to Convert Images Into Video - Kapwing Tutorial
- New How to Make Text Reveal Effect Easily
- New Using the Best Templates to Create Slow Motion Videos on CapCut for 2024
- New 8 Unexpected Ways to Add Emoji to Photo Online
- Ultimate Guide to Making Cinematography for Music Video
- In 2024, Figuring Out Proper Ways to Play a Video in Slow Motion on iPhone
- In 2024, What Is a Transparent Logo and Why Do You Need It
- How to Add Video Transitions in Videos for 2024
- Updated 2024 Approved Kdenlive Review – Is It The Best Video Editor?
- Storyboards Are Amazing Way if You Want to Present Your Story in a Visual Way, Like Explaining Any Process or Giving Any Information. It Is a Graphic Layout to Tell You a Story for 2024
- New 3 In-Camera Transitions Tricks To Make Videos
- Split Audio From Video in Adobe Premiere Pro Step by Step
- New How to Resize FLV Videos Efficiently Windows, Mac,Android, iPhone & Online
- In 2024, How to Rotate AVI in Vertical/Portrait Orientation Windows, Mac,Andro
- Updated In 2024, Best 5 AI Music Video Examples and Makers to Make Them
- Updated Top 5 Free Online Video Filter Editors Improve Your Videos with Filters for 2024
- 2024 Approved Is Augmented Reality Conferencing the Future of Workplace Collaboration?
- New 2024 Approved Thousands Already Know Ezgif and So Can You
- Updated In 2024, Detailed Steps to Rotate Videos in Davinci Resolve
- How To Make A Video Longer
- Updated Best 6 WMV to GIF Converters
- Vintage Film Effect 1920S - How to Make
- New LumaFusion Color Grading Achieving It Through LUTs for 2024
- New In 2024, How to Do Datamoshing Effect in After Effects?
- Updated How to Add the Popular Video Text Effects to Your Video for 2024
- Updated How to Do Perfect Match Paint 100 the Easy Way for 2024
- Add Camera Shake to Video in Adobe After Effects
- Updated In This Article, We Will Discuss What Lens Distortion Is, How It May Be Fixed, and the Factors You Need to Pay Attention to Avoid Lens Distortion when Taking or Recording Videos
- 2024 Approved Splice Video Editor Online - Get Your Videos Splice Easily
- Updated Powerpoint Slideshow Icon, Slide Sorter View Icon, Slideshow Icon Powerpoint, Slide Show View Icon
- Updated Guide To Make a YouTube Intro by Filmora for 2024
- New 2024 Approved Basic Introduction of LumaFusion Color Grading
- Complete guide for recovering pictures files on Itel .
- 5 Hassle-Free Solutions to Fake Location on Find My Friends Of Motorola Moto E13 | Dr.fone
- How to Simulate GPS Movement in AR games On Vivo Y200e 5G? | Dr.fone
- Best Methods for Infinix Smart 7 Wont Turn On | Dr.fone
- How to Remove Apple iPhone 8 Device from iCloud
- How To Transfer Data From Apple iPhone 15 Pro Max To Other iPhone 12 Pro devices? | Dr.fone
- Top 12 Prominent Vivo Y56 5G Fingerprint Not Working Solutions
- 5 Quick Methods to Bypass Asus ROG Phone 7 FRP
- How To Use Special Features - Virtual Location On Oppo K11x? | Dr.fone
- Recover lost data from Samsung Galaxy Z Flip 5
- Oppo A18 Not Connecting to Wi-Fi? 12 Quick Ways to Fix | Dr.fone
- Possible solutions to restore deleted contacts from Motorola Edge 40 Neo.
- Title: How To Fix Slow Playback Issues in DaVinci Resolve Finding the Best Solutions for 2024
- Author: Chloe
- Created at : 2024-05-20 03:38:09
- Updated at : 2024-05-21 03:38:09
- Link: https://ai-editing-video.techidaily.com/how-to-fix-slow-playback-issues-in-davinci-resolve-finding-the-best-solutions-for-2024/
- License: This work is licensed under CC BY-NC-SA 4.0.
