
:max_bytes(150000):strip_icc():format(webp)/TheOscarsStatue-33f6c30d7ffd4694a4dd1d1113de57f5.jpg)
How to Get Zoom on TV Easy Solutions
How to Get Zoom on TV [Easy Solutions]
The modern workforce needs adaptable alternatives to the conventional room-to-room conferencing. The latest integrated online collaboration platform is called Zoom. What’s more, now you can get Zoom on TV. Being one of the most well-known conferencing programs, it offers reliable and efficient hosting of online meetings. In a same vein, you may set up conference rooms, do video seminars, and use instant messaging to receive real-time communications. Moreover, can you get zoom on your tv? Then the answer is Yes! The ideal technique to expand a small conference is to mirror it on TV using Zoom meetings. Additionally, sharing across all platforms and devices is possible. Sharing HD video, audio, and material from your desktop and mobile devices to conference rooms and phone systems is simple, dependable, and safe with Zoom Meetings.
Zoom is one of the top videos calling applications available, however, in terms of functionality, dependability, and stability. Special features include screen sharing for multi-user annotation and local and cloud recording with transcription. With just a single click, you may share any file with supported and encrypted settings for increased security and communicate across all platforms. Zoom has now come to represent meetings for those who do their business remotely. For almost all platforms, including Android, iOS, macOS, Windows, Smart TVs, etc., the Zoom app is officially accessible. For the query how to get zoom on portal tv? you may activate Zoom screen casting whether you’re using a Windows 10 or a Mac laptop with the Chrome browser. This section will be useful to you if you want to benefit from Zoom on a TV. You may thus do so. Continue reading the article to learn more about how to get zoom on tv.
Part 1: Get Zoom on TV with HDMI Cable
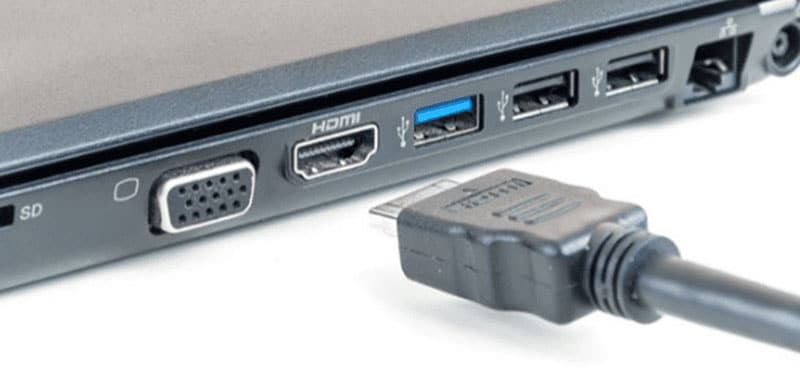
Although Zoom provides companies and bigger organizations with a professional solution like Zoom Rooms, if you’re at home, you don’t need to put anything on your TV to use Zoom. You may start using Zoom right away by simply connecting your Zoom device to your TV. Connect your TV to your laptop’s HDMI port if it has one. Simple as that, however if the laptop doesn’t figure it out on its own you may need to explain what is going on with the second display. Although more reliable, connecting via cable means your source device is linked to the TV and you can’t go for a stroll. It also means you don’t have to worry about the wireless connection fading.
Steps to Get Zoom on TV with HDMI
Step1Connect the HDMI End to the TV and the Other End to Your Device
You may use this in its place if you don’t have an HDMI but do have a USB-C port. To connect to the HDMI cable coming into your TV, you’ll need a dongle, but you’ll need to make sure it’s compatible.
Step2Turn On your TV
Turn on your TV, then switch the video source to the HDMI port you just connected in your device to using the TV remote.
Step3Launch Zoom Meeting
Start or join a meeting by using the Zoom app on your smartphone (available for Android, iOS, Windows, and macOS).
Part 2: Use AirPlay to Connect Zoom to TV
Using AirPlay mirroring, MacOS or iOS devices may share content with Zoom rooms. On MacOS and iOS, Airplay is used to communicate between the Zoom client and the Zoom room. There may be a great potential for your own business requirements if you can figure out how to utilize Airplay to Zoom mirror your screen to your Apple TV. By default, AirPlay sends audio to the Apple TV. Depending on how loud your speakers are set to play and where your input device’s microphone is located, this may cause echoing and ever-louder feedback loops. Without further ado, let’s look at some of the important strategies you may use to maximize live screen streaming on your Apple TV device.
Steps to Use AirPlay to Connect Zoom to TV
Step1Navigate to the Airplay Display in the Apple menu’s top right corner. Choose your Apple TV from the list of AirPlay Display options in the Displays preference pane. The “Show mirroring option in the menu bar when available” checkbox makes it easier to reach the AirPlay menu.

Step2Select Room Management > Zoom Rooms after logging into the Zoom online interface to manage your current Zoom Rooms. Then, modify the account settings and turn on Apple screen mirroring using the location hierarchy system.
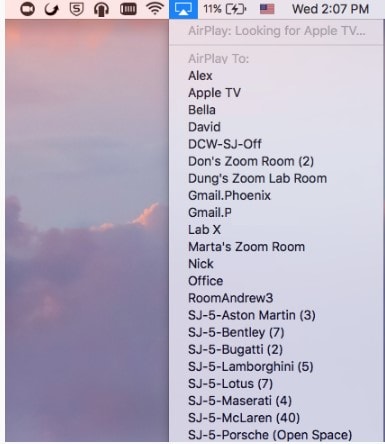
Step3Turn on Apple Screen Mirroring by going to the Meetings tab. If this happens, you may need to activate it from the verification dialog box; otherwise, screen mirroring ought to start immediately on your device and let you see Zoom on your Apple TV. A shared password will be required of you.
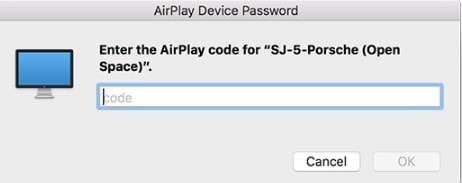
Step4Enter the passcode that is shown on the Zoom room’s screen. You may start using Airplay on your smartphone after enabling Apple screen mirroring.

Step5After that, turn off AirPlay Display by using the option in the preference pane or the system menu bar. To stop sharing, click Disconnect Airplay.
Part 3: Mirror Screen with Chromecast
The Chromecast gadgets from Google are well constructed. They should be able to cast more than just standard streaming services to your TV, logically speaking. Using a Chromecast device is one of the simplest methods to cast a Zoom conference to your TV. They are affordable, and any Google browser and the Google Home app for your Android or iOS smartphone both contain the cast capability. Between a device, such as your phone or computer, and the television, Chromecast offers the perfect connection. Chromecast makes it easy to cast Zoom meetings, particularly conferences with many of participants, since it can virtually reflect everything on your phone, tablet, or computer screen to your TV. For meetings with bigger attendance, it is advantageous to be able to cast Zoom meetings to almost any device, even a smart TV, using Chromecast.
Steps to Mirror Screen with Chromecast
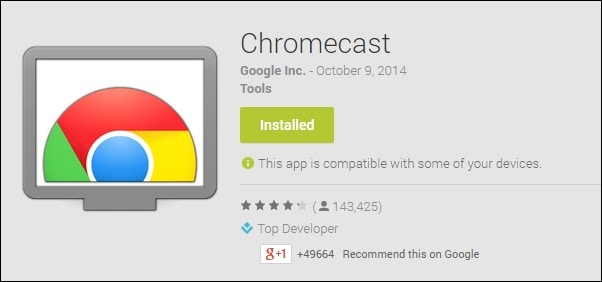
Step1Install the Chromecast
Connect your Google Chromecast to the same internet source as your casting device by plugging it in.
Step2Manage Cast Settings
Locate the casting option on your device and search for recipients. Get the Zoom Cloud Meetings app for iOS or Android. You’ll also need to download the third-party software if you use an iPad or iPhone. After that, sign up for a Zoom account and log in to get started.
Step3Start Mirroring Zoom
The screen of your phone will show up on your TV when you tap your Chromecast. The best view is obtained by turning your phone into landscape after opening Zoom as usual. Once you place a call from here, the video will cast to your TV. Go to the next screen and click Start Broadcasting. You may now start casting to your Chromecast device by opening the Zoom Cloud Meeting app.
You must download the third-party app if you use an iPhone or iPad. The Chromecast Streamer software will let you cast a Zoom meeting on your Chromecast device as Zoom doesn’t provide a casting option.
Conclusion
Zoom’s popularity has skyrocketed as a result of the Pandemic. Zoom has emerged as the preferred video conferencing solution as the bulk of the global workforce shifts to a “work from home” environment. Now that more individuals than ever before work from home, video conferencing has emerged as a vital tool for marketing and corporate communication. Mirroring Zoom meetings to TV has never been this simple. In light of this, we hope that this guide has helped you come up with some of the greatest ideas and approaches for your personal zoom sharing needs. We really hope that this information has been helpful to you if you’ve been interested in learning more about screen sharing your Zoom to TV. Thanks to these methods, you can now mirror any device platform on TV.
The modern workforce needs adaptable alternatives to the conventional room-to-room conferencing. The latest integrated online collaboration platform is called Zoom. What’s more, now you can get Zoom on TV. Being one of the most well-known conferencing programs, it offers reliable and efficient hosting of online meetings. In a same vein, you may set up conference rooms, do video seminars, and use instant messaging to receive real-time communications. Moreover, can you get zoom on your tv? Then the answer is Yes! The ideal technique to expand a small conference is to mirror it on TV using Zoom meetings. Additionally, sharing across all platforms and devices is possible. Sharing HD video, audio, and material from your desktop and mobile devices to conference rooms and phone systems is simple, dependable, and safe with Zoom Meetings.
Zoom is one of the top videos calling applications available, however, in terms of functionality, dependability, and stability. Special features include screen sharing for multi-user annotation and local and cloud recording with transcription. With just a single click, you may share any file with supported and encrypted settings for increased security and communicate across all platforms. Zoom has now come to represent meetings for those who do their business remotely. For almost all platforms, including Android, iOS, macOS, Windows, Smart TVs, etc., the Zoom app is officially accessible. For the query how to get zoom on portal tv? you may activate Zoom screen casting whether you’re using a Windows 10 or a Mac laptop with the Chrome browser. This section will be useful to you if you want to benefit from Zoom on a TV. You may thus do so. Continue reading the article to learn more about how to get zoom on tv.
Part 1: Get Zoom on TV with HDMI Cable
Although Zoom provides companies and bigger organizations with a professional solution like Zoom Rooms, if you’re at home, you don’t need to put anything on your TV to use Zoom. You may start using Zoom right away by simply connecting your Zoom device to your TV. Connect your TV to your laptop’s HDMI port if it has one. Simple as that, however if the laptop doesn’t figure it out on its own you may need to explain what is going on with the second display. Although more reliable, connecting via cable means your source device is linked to the TV and you can’t go for a stroll. It also means you don’t have to worry about the wireless connection fading.
Steps to Get Zoom on TV with HDMI
Step1Connect the HDMI End to the TV and the Other End to Your Device
You may use this in its place if you don’t have an HDMI but do have a USB-C port. To connect to the HDMI cable coming into your TV, you’ll need a dongle, but you’ll need to make sure it’s compatible.
Step2Turn On your TV
Turn on your TV, then switch the video source to the HDMI port you just connected in your device to using the TV remote.
Step3Launch Zoom Meeting
Start or join a meeting by using the Zoom app on your smartphone (available for Android, iOS, Windows, and macOS).
Part 2: Use AirPlay to Connect Zoom to TV
Using AirPlay mirroring, MacOS or iOS devices may share content with Zoom rooms. On MacOS and iOS, Airplay is used to communicate between the Zoom client and the Zoom room. There may be a great potential for your own business requirements if you can figure out how to utilize Airplay to Zoom mirror your screen to your Apple TV. By default, AirPlay sends audio to the Apple TV. Depending on how loud your speakers are set to play and where your input device’s microphone is located, this may cause echoing and ever-louder feedback loops. Without further ado, let’s look at some of the important strategies you may use to maximize live screen streaming on your Apple TV device.
Steps to Use AirPlay to Connect Zoom to TV
Step1Navigate to the Airplay Display in the Apple menu’s top right corner. Choose your Apple TV from the list of AirPlay Display options in the Displays preference pane. The “Show mirroring option in the menu bar when available” checkbox makes it easier to reach the AirPlay menu.
Step2Select Room Management > Zoom Rooms after logging into the Zoom online interface to manage your current Zoom Rooms. Then, modify the account settings and turn on Apple screen mirroring using the location hierarchy system.
Step3Turn on Apple Screen Mirroring by going to the Meetings tab. If this happens, you may need to activate it from the verification dialog box; otherwise, screen mirroring ought to start immediately on your device and let you see Zoom on your Apple TV. A shared password will be required of you.
Step4Enter the passcode that is shown on the Zoom room’s screen. You may start using Airplay on your smartphone after enabling Apple screen mirroring.
Step5After that, turn off AirPlay Display by using the option in the preference pane or the system menu bar. To stop sharing, click Disconnect Airplay.
Part 3: Mirror Screen with Chromecast
The Chromecast gadgets from Google are well constructed. They should be able to cast more than just standard streaming services to your TV, logically speaking. Using a Chromecast device is one of the simplest methods to cast a Zoom conference to your TV. They are affordable, and any Google browser and the Google Home app for your Android or iOS smartphone both contain the cast capability. Between a device, such as your phone or computer, and the television, Chromecast offers the perfect connection. Chromecast makes it easy to cast Zoom meetings, particularly conferences with many of participants, since it can virtually reflect everything on your phone, tablet, or computer screen to your TV. For meetings with bigger attendance, it is advantageous to be able to cast Zoom meetings to almost any device, even a smart TV, using Chromecast.
Steps to Mirror Screen with Chromecast
Step1Install the Chromecast
Connect your Google Chromecast to the same internet source as your casting device by plugging it in.
Step2Manage Cast Settings
Locate the casting option on your device and search for recipients. Get the Zoom Cloud Meetings app for iOS or Android. You’ll also need to download the third-party software if you use an iPad or iPhone. After that, sign up for a Zoom account and log in to get started.
Step3Start Mirroring Zoom
The screen of your phone will show up on your TV when you tap your Chromecast. The best view is obtained by turning your phone into landscape after opening Zoom as usual. Once you place a call from here, the video will cast to your TV. Go to the next screen and click Start Broadcasting. You may now start casting to your Chromecast device by opening the Zoom Cloud Meeting app.
You must download the third-party app if you use an iPhone or iPad. The Chromecast Streamer software will let you cast a Zoom meeting on your Chromecast device as Zoom doesn’t provide a casting option.
Conclusion
Zoom’s popularity has skyrocketed as a result of the Pandemic. Zoom has emerged as the preferred video conferencing solution as the bulk of the global workforce shifts to a “work from home” environment. Now that more individuals than ever before work from home, video conferencing has emerged as a vital tool for marketing and corporate communication. Mirroring Zoom meetings to TV has never been this simple. In light of this, we hope that this guide has helped you come up with some of the greatest ideas and approaches for your personal zoom sharing needs. We really hope that this information has been helpful to you if you’ve been interested in learning more about screen sharing your Zoom to TV. Thanks to these methods, you can now mirror any device platform on TV.
Detailed Tutorial to Rotate a Video in Cyberlink PowerDirector
Video Editing is a craft that is highly dependent on various characteristics of your video. But the way one presents it or goes about filming clips also has a profound effect on the end product. And as you may know, not every aspect of a video production activity always goes without hiccups. But editing can come in clutch as it can easily solve minor problems like skewed footage that was shot at the wrong angle or is upside down (an issue that can happen while using mobile phones).
Thus, with this article, we will be looking at steps to rotate a video in Cyberlink PowerDirector to help you when required. We have also mentioned the steps you will need to follow in Wondershare Filmora.
Note: We documented the steps in this guide with PowerDirector 365 and WonderShare Filmora X.
Steps to Rotate Videos with CyberLink PowerDirector
Put yourself in a situation where you’ve just finished filming a project with your smartphone but end up realizing that the footage isn’t in the right orientation by default. While the error has an easy fix on most smartphones, you can also perform this action with video editing tools.
Also, while this form of rotating might be the most basic implementation of the feature, you can often use the feature to add a dynamic nature to your video with Keyframes.
Definition: Keyframes in Video Editing is a software feature that allows an editor to set start and endpoints (denoted by In and Out Markers), presenting the opportunity to custom clip properties between the two positions. The set changes occur gradually as the playhead continues moving through the clip. Properties that can undergo modification with this method are zoom, rotation, colors, positions, etc.
The process of rotating clips is fairly straightforward; once you have PowerDirector 365 open, follow the steps listed below.
If you do not have CyberLink PowerDirector 365, download the software by visiting Cyberlink’s official website.
Step 1: Create a new video project in Cyberlink PowerDirector 365 and choose Full Mode.

Note: Full Mode in Cyberlink PowerDirector 365 will provide users access to a full-featured video editing tool similar in function to Wondershare Filmora. The other option available is Ad Designer.
Step 2: Now, import media onto the Timeline from the Media Library.
For this guide, we used the pre-existing stock footage in Cyberlink PowerDirector.

Step 3: Now, click on the video file on the Timeline; this will activate the video in the Preview Window. And it will provide you with access to the rotation circle, allowing you to change the orientation of the source file.

EXTRA
Rotation added in the PiP Designer will function as a keyframe-based rotation action. Right-click on the video in the preview window, choose Edit and then Modify to access this menu.

Following this, you can click on the Motion Tab, go into Rotation Settings, and modify the angle with greater precision. In the Preview Window, you will now be able to see the rotating video.

An Easier Way to Crop Video with Wondershare Filmora
Though Cyberlink PowerDirector 365 is a powerful video editing tool, we felt its menus were not as simple to navigate. Accessing the rotate function while available in the forefront, the use of PiP Designer didn’t feel intuitive.
In Wondershare Filmora Video Editor , rotating footage only happens via the Edit Option, and this straightforward approach felt simple. As for those who want to use Keyframes, the integration of this feature right above the Timeline is an appreciated convenience.
This emphasis on quick accessibility is present with almost every function in Filmora, and we believe this to be a significant advantage. The use of modern and unique iconography also increases familiarity, an aspect that will always be welcoming to new and budding creators.
If you do not already have Wondershare Filmora, you can download the software by visiting the official website.
To help you learn how to use the rotate function and show you an example of the easy accessibility in Filmora, here is how you can use the feature to get the output you desire.
For Win 7 or later (64-bit)
For macOS 10.14 or later
Once you have a new project open in Filmora, follow the steps listed below.
Step 1: Import a Media File to edit into your Video Project.

Step 2: Drag the video clip onto the Timeline and then select it with a mouse click to activate further interactions.

Step 3: Choose the Edit Option (marked in Red).
This will bring up the Edit Window in the left-top corner of your screen.

Step 4: Click on the Transform Menu and use the Rotation Slider to edit the orientation.

Having read this stretch of the guide, we believe you may have noticed how Filmora is more user-friendly and accessible due to its menu layout.
BONUS
Click on the Keyframe Button (marked in Green) to access the Keyframe Menu that allows you to set points between which a decided amount of rotation can happen.

The Bottom Line
This marks the end of our guide on how to rotate video in PowerDirector 365 and Wondershare Filmora X. Now, while both software are high-capable tools, we feel the keyframe-based working on rotation in Filmora is a lot more intuitive and easy to use. The ability to only have number-based rotation within the edit menu is also a positive, as rotating with a swivel like in PowerDirector isn’t always the most accurate.
And lastly, the modern iconography-based design of Wondershare Filmora is a factor to keep in mind, as this increases usability manifolds.
Note: Full Mode in Cyberlink PowerDirector 365 will provide users access to a full-featured video editing tool similar in function to Wondershare Filmora. The other option available is Ad Designer.
Step 2: Now, import media onto the Timeline from the Media Library.
For this guide, we used the pre-existing stock footage in Cyberlink PowerDirector.
Step 3: Now, click on the video file on the Timeline; this will activate the video in the Preview Window. And it will provide you with access to the rotation circle, allowing you to change the orientation of the source file.
EXTRA
Rotation added in the PiP Designer will function as a keyframe-based rotation action. Right-click on the video in the preview window, choose Edit and then Modify to access this menu.
Following this, you can click on the Motion Tab, go into Rotation Settings, and modify the angle with greater precision. In the Preview Window, you will now be able to see the rotating video.
An Easier Way to Crop Video with Wondershare Filmora
Though Cyberlink PowerDirector 365 is a powerful video editing tool, we felt its menus were not as simple to navigate. Accessing the rotate function while available in the forefront, the use of PiP Designer didn’t feel intuitive.
In Wondershare Filmora Video Editor , rotating footage only happens via the Edit Option, and this straightforward approach felt simple. As for those who want to use Keyframes, the integration of this feature right above the Timeline is an appreciated convenience.
This emphasis on quick accessibility is present with almost every function in Filmora, and we believe this to be a significant advantage. The use of modern and unique iconography also increases familiarity, an aspect that will always be welcoming to new and budding creators.
If you do not already have Wondershare Filmora, you can download the software by visiting the official website.
To help you learn how to use the rotate function and show you an example of the easy accessibility in Filmora, here is how you can use the feature to get the output you desire.
For Win 7 or later (64-bit)
For macOS 10.14 or later
Once you have a new project open in Filmora, follow the steps listed below.
Step 1: Import a Media File to edit into your Video Project.
Step 2: Drag the video clip onto the Timeline and then select it with a mouse click to activate further interactions.
Step 3: Choose the Edit Option (marked in Red).
This will bring up the Edit Window in the left-top corner of your screen.
Step 4: Click on the Transform Menu and use the Rotation Slider to edit the orientation.
Having read this stretch of the guide, we believe you may have noticed how Filmora is more user-friendly and accessible due to its menu layout.
BONUS
Click on the Keyframe Button (marked in Green) to access the Keyframe Menu that allows you to set points between which a decided amount of rotation can happen.
The Bottom Line
This marks the end of our guide on how to rotate video in PowerDirector 365 and Wondershare Filmora X. Now, while both software are high-capable tools, we feel the keyframe-based working on rotation in Filmora is a lot more intuitive and easy to use. The ability to only have number-based rotation within the edit menu is also a positive, as rotating with a swivel like in PowerDirector isn’t always the most accurate.
And lastly, the modern iconography-based design of Wondershare Filmora is a factor to keep in mind, as this increases usability manifolds.
2 Easy Methods | How To Zoom In On TikTok Videos?
Abundant Video Effects - Wondershare Filmora
Provide abundant video effects - A creative video editor
Powerful color correction and grading
Detailed tutorials are provided by the official channel
TikTok is one of the most common and grossing social media platforms that is utilized by millions of users in the world. Social media platforms, as a whole, have made a significant impact across their users with their impressive features. With the ability to perform multiple functions across your TikTok recording, it makes it a great choice for many users.
This article comes up with the idea of providing users with a guide on how to zoom in on TikTok videos without putting themselves in a mess. We have put up the best methods that can be performed across the easiest of levels.
In this article
Part 1: Zoom In On TikTok After Recording
Part 2: Zoom In TikTok Videos Using Wondershare Filmora
Part 1: Zoom In On TikTok After Recording
The Zoom In feature across any mobile platform has some specific uses and highlights a particular set of characteristics for its users. While using TikTok, you may find the need to highlight a certain section of the video that you’ve recorded to make it visible to users. It may be something that needs to be shown out of curiosity. To understand how to zoom in on TikTok after recording, go through the detailed steps presented as follows:
Step 1: You need to start the process of downloading and installing TikTok on your device. Launch it on your phone and proceed by clicking the “+” icon on the bottom of the screen to record or create a new video across TikTok.

Step 2: Hold the red button of the recording and effectively create a video of your liking. Leave the button once you are done recording the video. As you’ve recorded the video, click on the “Tick” icon to proceed to the edit page of TikTok.

Step 3: Find yourselves on the editing page of TikTok with a list of multiple editing options across the screen. Click on the “Effects” button and find the “Zoom” effect across the available list. To find the effect, let the editor cursor of the video reach the point where you want to add the Zoom in effect. Once it reaches the point of the video, hold the “Zoom” effect button for the specific time that you want to add the effect to your video. You can then conclude editing your video on TikTok and proceed to save it.

Advantages of Zooming Videos After Recording
- This puts you in more control of the video rather than improvising the need to zoom in on a video during recording.
- Zoom into the specific part or portion of the video that you find necessary for covering the purpose. You cannot perform such actions while recording a video since the recording is quite restricted across a device.
- Adding zoom in effect across the video gives it a proper effect that enhances the quality rather than depreciating it.
Disadvantages of Zooming Videos After Recording
- If you put in a zoom in effect on your video, this cannot be reverted back or zoomed out.
- The frame rate of the video is heavily damaged by using such effects across your recorded video. As this is done through the software, there is a guaranteed decrease in the quality output of the video.
Part 2: Zoom In TikTok Videos Using Wondershare Filmora
The default TikTok platform does provide you with the option of zooming in on your videos after recording. This, however, had its disadvantages which have been featured above. As you are aware of these drawbacks, it is necessary for you to go through other options that are proficient and better for users on a similar scale.
Wondershare Filmora has made its name as a video editor in the market. With simple tools like adding zoom in effects across videos, it makes it software accessible for all users. Find out how to zoom in on TikTok using Wondershare Filmora with the steps exclaimed as follows:
Step 1: Download and Install Wondershare Filmora
For starters, you need to download and install the latest version of Wondershare Filmora across your computer. Once installed, launch the platform and click on “New Project” to start working on a project from scratch.

Step 2: Upload Video
As a new canvas opens on your front, you need to click on the “Arrow Head” icon under the “Media” tab to import the video file from TikTok that needs to be zoomed in.

Step 3: Cut Video Part to Slow Zoom
Dissect the specific part of the video that you want to put in the slow zoom feature from Filmora. Take the red indicator across the timeline to the point where you want to start the specific part. Click the split icon on the red line to divide the video. Drag the indicator to the point where you want to end the specific part of the video for the slow zoom feature.

Step 4: Set the Speed of the Clip
Select the split part of the video and find the “Speed” icon on the edit menu at the top of the timeline. Select an appropriate speed that you want to work according to. You can find speeds as low as 0.5x in the ‘Slow’ section and speeds as high as 2x in the ‘Fast’ section.

Step 5: Add Animation Keyframes
To add animation keyframes, right-click on a certain clip of the TikTok video and select the “Add Animation” button from the option of “Animation” in the drop-down menu. Go across the “Customize” section in the “Animation” tab across the menu that opens up and move the indicator where you want to create a keyframe. Click on “Add’ and find a keyframe added to the video. Move the indicator further along the clip to add another animation, as two keyframes create an animation keyframe.

Step 6: Scale Clip Edge
Once you are done adjusting your TikTok video, it is time to scale the clip according to your required settings. Double-click on the video to open a new set of settings on your front. Proceed by opening the menu of “Transform” across the menu. Find the “Scale” option in the provided list and adjust the scale settings as required. Once you are done, click on the “Export” button to conclude the process.

Conclusion
Have you gone through the reasons that provide you the ability to zoom in on a TikTok video with ease? We are hopeful that you’ve learned the process of how to zoom in on TikTok videos with different tools and features. Go through the provided details to know more about the process and make yourselves perfect in executing the process.
TikTok is one of the most common and grossing social media platforms that is utilized by millions of users in the world. Social media platforms, as a whole, have made a significant impact across their users with their impressive features. With the ability to perform multiple functions across your TikTok recording, it makes it a great choice for many users.
This article comes up with the idea of providing users with a guide on how to zoom in on TikTok videos without putting themselves in a mess. We have put up the best methods that can be performed across the easiest of levels.
In this article
Part 1: Zoom In On TikTok After Recording
Part 2: Zoom In TikTok Videos Using Wondershare Filmora
Part 1: Zoom In On TikTok After Recording
The Zoom In feature across any mobile platform has some specific uses and highlights a particular set of characteristics for its users. While using TikTok, you may find the need to highlight a certain section of the video that you’ve recorded to make it visible to users. It may be something that needs to be shown out of curiosity. To understand how to zoom in on TikTok after recording, go through the detailed steps presented as follows:
Step 1: You need to start the process of downloading and installing TikTok on your device. Launch it on your phone and proceed by clicking the “+” icon on the bottom of the screen to record or create a new video across TikTok.
Step 2: Hold the red button of the recording and effectively create a video of your liking. Leave the button once you are done recording the video. As you’ve recorded the video, click on the “Tick” icon to proceed to the edit page of TikTok.
Step 3: Find yourselves on the editing page of TikTok with a list of multiple editing options across the screen. Click on the “Effects” button and find the “Zoom” effect across the available list. To find the effect, let the editor cursor of the video reach the point where you want to add the Zoom in effect. Once it reaches the point of the video, hold the “Zoom” effect button for the specific time that you want to add the effect to your video. You can then conclude editing your video on TikTok and proceed to save it.
Advantages of Zooming Videos After Recording
- This puts you in more control of the video rather than improvising the need to zoom in on a video during recording.
- Zoom into the specific part or portion of the video that you find necessary for covering the purpose. You cannot perform such actions while recording a video since the recording is quite restricted across a device.
- Adding zoom in effect across the video gives it a proper effect that enhances the quality rather than depreciating it.
Disadvantages of Zooming Videos After Recording
- If you put in a zoom in effect on your video, this cannot be reverted back or zoomed out.
- The frame rate of the video is heavily damaged by using such effects across your recorded video. As this is done through the software, there is a guaranteed decrease in the quality output of the video.
Part 2: Zoom In TikTok Videos Using Wondershare Filmora
The default TikTok platform does provide you with the option of zooming in on your videos after recording. This, however, had its disadvantages which have been featured above. As you are aware of these drawbacks, it is necessary for you to go through other options that are proficient and better for users on a similar scale.
Wondershare Filmora has made its name as a video editor in the market. With simple tools like adding zoom in effects across videos, it makes it software accessible for all users. Find out how to zoom in on TikTok using Wondershare Filmora with the steps exclaimed as follows:
Step 1: Download and Install Wondershare Filmora
For starters, you need to download and install the latest version of Wondershare Filmora across your computer. Once installed, launch the platform and click on “New Project” to start working on a project from scratch.
Step 2: Upload Video
As a new canvas opens on your front, you need to click on the “Arrow Head” icon under the “Media” tab to import the video file from TikTok that needs to be zoomed in.
Step 3: Cut Video Part to Slow Zoom
Dissect the specific part of the video that you want to put in the slow zoom feature from Filmora. Take the red indicator across the timeline to the point where you want to start the specific part. Click the split icon on the red line to divide the video. Drag the indicator to the point where you want to end the specific part of the video for the slow zoom feature.
Step 4: Set the Speed of the Clip
Select the split part of the video and find the “Speed” icon on the edit menu at the top of the timeline. Select an appropriate speed that you want to work according to. You can find speeds as low as 0.5x in the ‘Slow’ section and speeds as high as 2x in the ‘Fast’ section.
Step 5: Add Animation Keyframes
To add animation keyframes, right-click on a certain clip of the TikTok video and select the “Add Animation” button from the option of “Animation” in the drop-down menu. Go across the “Customize” section in the “Animation” tab across the menu that opens up and move the indicator where you want to create a keyframe. Click on “Add’ and find a keyframe added to the video. Move the indicator further along the clip to add another animation, as two keyframes create an animation keyframe.
Step 6: Scale Clip Edge
Once you are done adjusting your TikTok video, it is time to scale the clip according to your required settings. Double-click on the video to open a new set of settings on your front. Proceed by opening the menu of “Transform” across the menu. Find the “Scale” option in the provided list and adjust the scale settings as required. Once you are done, click on the “Export” button to conclude the process.
Conclusion
Have you gone through the reasons that provide you the ability to zoom in on a TikTok video with ease? We are hopeful that you’ve learned the process of how to zoom in on TikTok videos with different tools and features. Go through the provided details to know more about the process and make yourselves perfect in executing the process.
How To Make A Video Longer
These days when you head on to social media, you can easily find 4-5 seconds video clips on the internet. However, many social media platforms like YouTube, Instagram, and other videos sharing platforms require you to make your video longer to meet the site’s minimum length requirements. So, for example, although Instagram’s minimum length is 3 seconds, you might want to find ways to engage your audience longer.
This article will describe the best ways to make a video longer. We’ll also offer a bonus tip on how you can edit your video to make it look better and attract more audience. On that note, let’s take a look.
6 Best Methods to Make a Video Longer
There are many methods out there to make your video longer. This section will touch on the six best methods to make a video longer.
Loop the Video

One of the best ways to make your video longer for most social media platforms is to loop the video. When you replay the video several times in a single row, it helps to multiply its length. An example is taking a 2-second video and looping it 4x. This automatically makes it into an 8-second video clip. With looping, you can simply replay the action of the clip rather than altering it in any way.
Many video editing software today allows you to loop your video for free. You have to upload the video and choose how many times you would like to loop it, and the software will get to work.
Slow Down the Video Speed

We would all agree that slow-motion makes everything seem longer automatically. You can utilize the same technique when you want to make a video longer. When you slow down a video clip, every second lasts longer. Using the slow-motion effect on a 3-second video will make the video 6 or even 9 seconds longer.
Add an Intro and Outro

Intro and outro are scenes you add before and after the video; these scenes are popular in YouTube videos. More generally, an intro is like a trailer. It shows the audience what the video is about, and the outro scene is usually used to show more information about the video maker. Adding an intro and outro to your video can add 2-4 seconds to your video clips.
It’s quite easy to add an intro and outro to any video. You can create them separately and then merge them with your video. The intro must be something relevant to the video clip; an example is adding a fast photo slideshow to the beginning of your video or a black frame. Relevant intro and outro scenes will make your video longer and maybe more engaging.
Add Images to the Video
This is another trick that most bloggers use to make their videos longer. It is an old trick in the book and makes your video significantly longer, depending on the number of videos you’re adding. A single picture can add a second or two to your video. You can simply use a video editor to merge the video clip and pictures into one seamless file.
Boomerang Your Video

If you have plans to upload your media to Instagram, then a top feature you can use to make your video longer is the boomerang feature. Instagram introduced the Boomerang feature to play short video clips forward and then repeat their reverse. So by using the Boomerang feature, you don’t only add a memory effect to your video, but you also make your video longer.
Alternatively, you can manually append your video clip to a reversed version; this option allows you to make a boomerang from an existing clip. Apart from Instagram, you can utilize many other editing tools to create a boomerang from an existing video.
Add More Content to Your Video Clip

Another step you can take is to add more materials to your video. This doesn’t necessarily mean you have to get your camera out and start shooting more scenes to add to your video. Instead, you can simply access online media libraries and get amazing materials from there that are relevant to your video clip.
Today, most professional video editors offer you access to royalty-free photos and music material. You can simply browse through their collections and pick materials relevant to your video. For example, you could add a soundtrack and videos or GIFs that make your videos engaging. Adding extra content to your video clip can make it longer by 10 seconds.
Bonus Tips: How to Edit Video Easily on a Computer
Social media platforms offer you basic video editing features that you can use to optimize your video. However, these features are limited in what they can provide you with. If you want to have more control over the editing of your video clip and make it look even more professional, you should try Wondershare Filmora. This video editing tool is powerful and provides you with more editing features to ensure you get the result you want.
Filmora offers users over 300 effects like motion elements, overlays, titles, music sounds, and many more features to make your video more engaging and attractive. Using this app is relatively easy as well, and it offers users the option of changing the file format of their video if the social media platform does not support the original format.
If you would like to edit your video to give it a more engaging and professional look, follow the simple steps below.
Step 1: Import Video to Wondershare Filmora
First, you need to download the app on your device. After that, you can download it from the official website. Luckily, Wondershare Filmora supports Windows and Mac OS. Once you download the file, install and launch the app to get started.
On the menu, click on create a new project to begin. Next, click on the import button, and from the dropdown menu, choose ‘import media file.’ Alternatively, you can simply drag the video directly to the media library of this video editor. In addition, Filmora allows you to preview your video as you add different features to optimize the video.

If your video is shaky, you can use the stabilization feature to make it more stable. Simply right-click on the video in the preview window and select the option. Once you are sure, the video is ok, drag and drop it into the timeline to start editing your video.
Step 2: Cut, Slip, Rotate, or Color-Tune Your Video

You can use many features to shape your video quickly on Wondershare Filmora. For example, you can use the scissors tool to cut or split your video. You can also use the transform tool to rotate and flip your video if you would prefer. In addition, Filmora allows you to add some advanced color tuning to your video with the color feature. This automatically makes your video even more beautiful.
Step 3: Add Filters and Effects to Your Video

Additionally, Wondershare Filmora allows you to choose different transitions, graphics, tiles, texts, sound effects, titles, filters, overlays, and elements for your videos. With this video editing tool, you can get the exact look and sound you’re looking to achieve. In addition, there are different effect tabs above the timeline that directs you to the right feature you would like to include in your video.
You can just drag these effects and drop them on the timeline to apply to your video. Filmora has over 100 in-built filters and royalty-free music you can implement on your video. If you’re not sure which feature you’re looking for. Simply experiment and undo the effect till you find exactly what you’re looking for.
Step 4: Save and Share Edited Video

Once you’re satisfied with your video clip, you can now proceed to save it. You can choose to save the video to your local folder or a storage device you’d prefer. Wondershare Filmora allows you to save in the original format or change the format to your preferred option. Filmora also allows you to change your video’s resolution and bit rate to your preference. Alternatively, you can upload your video to video-sharing platforms like Instagram, Vimeo, YouTube, etc. You can also burn the video into a DVD collection if that’s what you’re looking for.
Final Thoughts
Social media platforms are great for gaining recognition and promoting your brand. However, there are times when you don’t meet the right video length, and you would like to make your video longer. With the six methods explained above, you can make your video as long as you want and also make your video more engaging. Additionally, you can use Wondershare Filmora to make your video more professional-looking. It offers you hundreds of effects and filters you can use to optimize your video.
Meta Description: If your video is short and you need to make it longer, this article gives you six methods to make a video longer and optimize them.
One of the best ways to make your video longer for most social media platforms is to loop the video. When you replay the video several times in a single row, it helps to multiply its length. An example is taking a 2-second video and looping it 4x. This automatically makes it into an 8-second video clip. With looping, you can simply replay the action of the clip rather than altering it in any way.
Many video editing software today allows you to loop your video for free. You have to upload the video and choose how many times you would like to loop it, and the software will get to work.
Slow Down the Video Speed
We would all agree that slow-motion makes everything seem longer automatically. You can utilize the same technique when you want to make a video longer. When you slow down a video clip, every second lasts longer. Using the slow-motion effect on a 3-second video will make the video 6 or even 9 seconds longer.
Add an Intro and Outro
Intro and outro are scenes you add before and after the video; these scenes are popular in YouTube videos. More generally, an intro is like a trailer. It shows the audience what the video is about, and the outro scene is usually used to show more information about the video maker. Adding an intro and outro to your video can add 2-4 seconds to your video clips.
It’s quite easy to add an intro and outro to any video. You can create them separately and then merge them with your video. The intro must be something relevant to the video clip; an example is adding a fast photo slideshow to the beginning of your video or a black frame. Relevant intro and outro scenes will make your video longer and maybe more engaging.
Add Images to the Video
This is another trick that most bloggers use to make their videos longer. It is an old trick in the book and makes your video significantly longer, depending on the number of videos you’re adding. A single picture can add a second or two to your video. You can simply use a video editor to merge the video clip and pictures into one seamless file.
Boomerang Your Video
If you have plans to upload your media to Instagram, then a top feature you can use to make your video longer is the boomerang feature. Instagram introduced the Boomerang feature to play short video clips forward and then repeat their reverse. So by using the Boomerang feature, you don’t only add a memory effect to your video, but you also make your video longer.
Alternatively, you can manually append your video clip to a reversed version; this option allows you to make a boomerang from an existing clip. Apart from Instagram, you can utilize many other editing tools to create a boomerang from an existing video.
Add More Content to Your Video Clip
Another step you can take is to add more materials to your video. This doesn’t necessarily mean you have to get your camera out and start shooting more scenes to add to your video. Instead, you can simply access online media libraries and get amazing materials from there that are relevant to your video clip.
Today, most professional video editors offer you access to royalty-free photos and music material. You can simply browse through their collections and pick materials relevant to your video. For example, you could add a soundtrack and videos or GIFs that make your videos engaging. Adding extra content to your video clip can make it longer by 10 seconds.
Bonus Tips: How to Edit Video Easily on a Computer
Social media platforms offer you basic video editing features that you can use to optimize your video. However, these features are limited in what they can provide you with. If you want to have more control over the editing of your video clip and make it look even more professional, you should try Wondershare Filmora. This video editing tool is powerful and provides you with more editing features to ensure you get the result you want.
Filmora offers users over 300 effects like motion elements, overlays, titles, music sounds, and many more features to make your video more engaging and attractive. Using this app is relatively easy as well, and it offers users the option of changing the file format of their video if the social media platform does not support the original format.
If you would like to edit your video to give it a more engaging and professional look, follow the simple steps below.
Step 1: Import Video to Wondershare Filmora
First, you need to download the app on your device. After that, you can download it from the official website. Luckily, Wondershare Filmora supports Windows and Mac OS. Once you download the file, install and launch the app to get started.
On the menu, click on create a new project to begin. Next, click on the import button, and from the dropdown menu, choose ‘import media file.’ Alternatively, you can simply drag the video directly to the media library of this video editor. In addition, Filmora allows you to preview your video as you add different features to optimize the video.
If your video is shaky, you can use the stabilization feature to make it more stable. Simply right-click on the video in the preview window and select the option. Once you are sure, the video is ok, drag and drop it into the timeline to start editing your video.
Step 2: Cut, Slip, Rotate, or Color-Tune Your Video
You can use many features to shape your video quickly on Wondershare Filmora. For example, you can use the scissors tool to cut or split your video. You can also use the transform tool to rotate and flip your video if you would prefer. In addition, Filmora allows you to add some advanced color tuning to your video with the color feature. This automatically makes your video even more beautiful.
Step 3: Add Filters and Effects to Your Video
Additionally, Wondershare Filmora allows you to choose different transitions, graphics, tiles, texts, sound effects, titles, filters, overlays, and elements for your videos. With this video editing tool, you can get the exact look and sound you’re looking to achieve. In addition, there are different effect tabs above the timeline that directs you to the right feature you would like to include in your video.
You can just drag these effects and drop them on the timeline to apply to your video. Filmora has over 100 in-built filters and royalty-free music you can implement on your video. If you’re not sure which feature you’re looking for. Simply experiment and undo the effect till you find exactly what you’re looking for.
Step 4: Save and Share Edited Video
Once you’re satisfied with your video clip, you can now proceed to save it. You can choose to save the video to your local folder or a storage device you’d prefer. Wondershare Filmora allows you to save in the original format or change the format to your preferred option. Filmora also allows you to change your video’s resolution and bit rate to your preference. Alternatively, you can upload your video to video-sharing platforms like Instagram, Vimeo, YouTube, etc. You can also burn the video into a DVD collection if that’s what you’re looking for.
Final Thoughts
Social media platforms are great for gaining recognition and promoting your brand. However, there are times when you don’t meet the right video length, and you would like to make your video longer. With the six methods explained above, you can make your video as long as you want and also make your video more engaging. Additionally, you can use Wondershare Filmora to make your video more professional-looking. It offers you hundreds of effects and filters you can use to optimize your video.
Meta Description: If your video is short and you need to make it longer, this article gives you six methods to make a video longer and optimize them.
Also read:
- In 2024, Clone Yourself in Videos with Filmora
- Minecraft Pixel Art Is a Trending Subject, and They Simply Consist of In-Game Pixel Artworks, Besides the Minecraft Houses, Farms, or Cities. Lets Explore the Fantastic World of Minecraft Pixel Art for 2024
- New In 2024, Top 10 3D Slideshow Software Review
- 2024 Approved Google Meet Green Screen
- Looking for a Free Video Editor to Edit Videos on Mac? IMovie by Apple Is a Great Choice? But Is It the Best Video Editor or Is There a Better Alternative Available? Check Out Our iMovie Review
- In 2024, 4 Ways to Rotate Videos on Windows PC
- In 2024, Do You Use Premiere Pro and Want to Learn How to Change a Videos Frame Rate Using the Tool? Here Are the Steps that You Need to Follow
- Whatsapp Video converterKeywords Convert Video for Whatsapp 6600; Video Converter for Whatsapp 6600; Reduce Video Size for Whatsapp 1600; Whatsapp Supported Video Formats 720; Convert Video to Whatsapp Format 590 for 2024
- New Perfecting the Art of Slowing Down Video on Instagram
- Updated Top Silence Detection Tools for Better Film Production
- Updated 3D Ray Traced Settings In After Effects A Comprehensive Guide
- In 2024, How to Make a Slideshow with Icecream Slideshow Maker
- New How to Get Motion Blur in Roblox?
- Expolring Top 6 Best Alternatives to Clownfish Voice Changer for 2024
- 2024 Approved LumaFusion Offers Various Look Up Table Presets, or LUTs, Such as FiLMiC deLog and FiLMiC DeFlat, and Several Stylistic LUTs for Use with Neutral Use Video. You Can Also Manually Add the LUTs
- 3 In-Camera Transitions Tricks To Make Videos
- 2024 Approved Difference Between Time Lapse and Hyperlapse
- New GIF to JPG Is as Simple as a Blink of an Eye
- Add Subtitles To Videos With Kapwing Step by Step for 2024
- How to Create a Custom Slide Show in PowerPoint for 2024
- In 2024, How to Create Discord GIF Avatar in Depth Guide
- In 2024, All You Need to Know About Transparent Logos and How You Can Make Them. Top Transparent Logos You Can Take Inspiration From
- In 2024, Splitting the Clips in Adobe After Effects Step by Step
- How to Make a TikTok Loop Video
- New Detailed Guide to Crop Video in Sony Vegas Pro
- Different Ways To Trim Video In Premiere Pro for 2024
- In 2024, Make A Tattoo Disappear Like A Magic
- New Create A Freeze Frame Sequence In Your Videos for 2024
- Updated In 2024, Top 9 Sparkle Effects Photo and Video Editors You Should Know
- How to Hide/Fake Snapchat Location on Your Apple iPhone SE | Dr.fone
- 3 Ways to Erase iPhone 13 Pro When Its Locked Within Seconds | Dr.fone
- How to Change Location On Facebook Dating for your Vivo Y77t | Dr.fone
- In 2024, Unlock Your Device iCloud DNS Bypass Explained and Tested, Plus Easy Alternatives On Apple iPhone 13 Pro Max
- How to Transfer Photos from Infinix Smart 7 HD to New Android? | Dr.fone
- In 2024, Unlock Your iPhone X in Minutes with ICCID Code Everything You Need to Know
- In 2024, How To Activate and Use Life360 Ghost Mode On Motorola Edge 40 Neo | Dr.fone
- In 2024, How to Mirror Your Lava Storm 5G Screen to PC with Chromecast | Dr.fone
- Identify malfunctioning drivers with Windows Device Manager in Windows 11/10/7
- How To Open Your Apple iPhone 11 Pro Max Without a Home Button
- The Easiest Methods to Hard Reset Lava Blaze 2 Pro | Dr.fone
- In 2024, Step-by-Step Tutorial How To Bypass Infinix Note 30i FRP
- How does the stardust trade cost In pokemon go On Oppo A79 5G? | Dr.fone
- Best Pokemons for PVP Matches in Pokemon Go For Apple iPhone 6s | Dr.fone
- A Quick Guide to Vivo Y28 5G FRP Bypass Instantly
- How to Change Location on TikTok to See More Content On your Apple iPhone XR | Dr.fone
- How to Transfer Data from Xiaomi Redmi Note 12 Pro 5G to Samsung Phone | Dr.fone
- In 2024, Dose Life360 Notify Me When Someone Checks My Location On Tecno Spark 20? | Dr.fone
- What is the best Pokemon for pokemon pvp ranking On Honor X50? | Dr.fone
- How to recover deleted photos on 11R
- Title: How to Get Zoom on TV Easy Solutions
- Author: Chloe
- Created at : 2024-05-20 03:37:28
- Updated at : 2024-05-21 03:37:28
- Link: https://ai-editing-video.techidaily.com/how-to-get-zoom-on-tv-easy-solutions/
- License: This work is licensed under CC BY-NC-SA 4.0.
