
:max_bytes(150000):strip_icc():format(webp)/coverjointwitter-6f13b51d1be04d8bb3f5221ef5a057c7.jpg)
How to Make Glitch Effect with Filmora for 2024
How to Make Glitch Effect with Filmora
You don’t need outdated VCRs or any other broken technology to produce glitch effects. Instead, you can use a video editing program for Mac and PCs, such as Filmora , to transform your videos into glitch-effect masterpieces. You can also use the glitch effects to provide striking shot transitions or opening titles. Keep reading this article on how to apply various glitch video effects in Filmora 11:
Part 1: What is a Glitch Effect?
A glitch effect occurs when a section of your video temporarily changes look or “glitches” for a short while. Although transient glitches are typical, they can occasionally linger for a few seconds or more.

You can use a glitch effect to temporarily change the appearance of the image in the video to give the impression that a machine is processing it. Additionally, it gives your finished piece a fantastic, dreamlike aspect.
Part 2: When Should you Apply a Glitch Effect?
A few years back, we had no choice but to watch glitchy movies on rusty VCR devices. Nowadays, retro video effects are very popular in TV movies and even games. You can use these effects in many ways, like making fake vintage footage or emulating a glitching computer.
Filmmakers frequently employ glitching in their videos to give the impression that a character has been affected by a technical abnormality, is having a flashback, or is being watched by someone else via a digital camera system. Something happens when the person or image flashes, often without their knowledge. In addition, you can apply the glitch effect to a composition to evoke a feeling of dramatic irony.
Part 3: Tutorial to Chromatic Aberration Effect
Chromatic aberration refers to how old lenses tend to split colors. This effect is very common in Old media like VHS or LaserDisc.

Here is a complete breakdown of each component of the Retro look and how you can make your glitch effects in Filmora 11:
Step1 Download Wondersshare Filmora 11 on your Pc by visiting filmora.wondershare.com.

Step2 Open Filmora and click on the Effects tab.
Step3 Search Chromatic aberration and drag the effect right onto your clip. It will give you a fantastic pre-made version of the effect.
Part 4: How to Customize Glitch Effect with Filmora
You can add final touches to your video clips by customizing Filmora’s effects to take your glitch effect to the next level. You can mix and match different effects in your video to create your custom glitch effect in Filmora 11.
Free Download For Win 7 or later(64-bit)
Free Download For macOS 10.14 or later
Step1 Once you have your clip on the timeline, select your clip and click on Edit. Now choose Duplicate to create two more copies.

Step2 Put the new copies on the layer above the others and make sure everything is lined up exactly. To create the glitch effect, separate the color channels on your Clips into the primary colors red, green, and blue.

Step3 Double-click on the top clip.

Go to Color and open the White Balance option to make this layer completely red. Next, drag both Temperature and Tint sliders to a hundred.

Step4 Now click the little eye icon on the timeline to hide the top layer and move on to the middle layer.
Step5 Double-click on your middle clip and go to Color, then select White Balance and set your Temperature to -100 and your Tint to 100.

Step6 Finally, hide this layer just like before. Repeat the same steps for the last clip but make this clip the blue layer by leaving the Temperature at zero and setting the Tint to -100.

Step7 Double-click the clip in the top layer, click the Video Tab, and open the Compositing options. Set the Blending Mode of this top layer to Soft Light.

Now click on the clip in your preview window and move the image over by pressing the left Arrow key on your keyboard a few times. Once you’re happy with the top clip, hide that layer by clicking the eye icon.

Step8 To make the middle layer visible, double-click the clip in your mid layer and set the Blending Mode of this layer to Screen.

Now click on your clip in the preview window and press the Right key as many times as you did before. Finally, make all the layers visible by clicking the eye icon.

Vignette
A vignette is a dark border that fades around the frame’s edges in Filmora. You can easily add a vignette effect to your video by using these steps:
Step1 First, click the Effects Tab and type in Vignette.
Step2 Next, drag the Vignette Radius effect to a layer above your previous three layers.
Step3 Now adjust the length to match the other clips.
VHS static effects
A VHS effect is a grainy distortion that resembles an old analog video cassette recording. To apply the VHS static effects:
Step1 Click the Effects tab.
Step2 Search for the VHS static and drag it to a new layer above everything else.
Step3 Extend one of the effects to match the length of your previous clips.
VCR Distortion
VCR Distortion effect will make your video look highly glitched. To apply this effect:
Step1 Click on the Effects tab.
Step2 Search for VCR Distortion, then drag and drop this effect over your previous layer.
Part 5: Tips to Create Awesome Glitch Effects
- One of the best ways to use the VCR Distortion effect is to cut it short and intersperse it around your video in random parts.
- The glitch Distortion effect is very intense, so we recommend cutting this effect very short and dropping it at random parts of your video.
- You can also use these effects as a sneaky way to hide Cuts in your video.
Summary
You can use glitch effects created or inspired by faulty video equipment as a powerful storytelling tool. These effects can help you change the tone of the entire video by adding a specific visual aesthetic and making the narrative simpler to convey and more approachable for the audience.
We recommend using Filmora 11 for adding built-in glitch effects. You can also use this app to create custom glitch effects within a few minutes.
Free Download For macOS 10.14 or later
Step1 Once you have your clip on the timeline, select your clip and click on Edit. Now choose Duplicate to create two more copies.
Step2 Put the new copies on the layer above the others and make sure everything is lined up exactly. To create the glitch effect, separate the color channels on your Clips into the primary colors red, green, and blue.
Step3 Double-click on the top clip.
Go to Color and open the White Balance option to make this layer completely red. Next, drag both Temperature and Tint sliders to a hundred.
Step4 Now click the little eye icon on the timeline to hide the top layer and move on to the middle layer.
Step5 Double-click on your middle clip and go to Color, then select White Balance and set your Temperature to -100 and your Tint to 100.
Step6 Finally, hide this layer just like before. Repeat the same steps for the last clip but make this clip the blue layer by leaving the Temperature at zero and setting the Tint to -100.
Step7 Double-click the clip in the top layer, click the Video Tab, and open the Compositing options. Set the Blending Mode of this top layer to Soft Light.
Now click on the clip in your preview window and move the image over by pressing the left Arrow key on your keyboard a few times. Once you’re happy with the top clip, hide that layer by clicking the eye icon.
Step8 To make the middle layer visible, double-click the clip in your mid layer and set the Blending Mode of this layer to Screen.
Now click on your clip in the preview window and press the Right key as many times as you did before. Finally, make all the layers visible by clicking the eye icon.
Vignette
A vignette is a dark border that fades around the frame’s edges in Filmora. You can easily add a vignette effect to your video by using these steps:
Step1 First, click the Effects Tab and type in Vignette.
Step2 Next, drag the Vignette Radius effect to a layer above your previous three layers.
Step3 Now adjust the length to match the other clips.
VHS static effects
A VHS effect is a grainy distortion that resembles an old analog video cassette recording. To apply the VHS static effects:
Step1 Click the Effects tab.
Step2 Search for the VHS static and drag it to a new layer above everything else.
Step3 Extend one of the effects to match the length of your previous clips.
VCR Distortion
VCR Distortion effect will make your video look highly glitched. To apply this effect:
Step1 Click on the Effects tab.
Step2 Search for VCR Distortion, then drag and drop this effect over your previous layer.
Part 5: Tips to Create Awesome Glitch Effects
- One of the best ways to use the VCR Distortion effect is to cut it short and intersperse it around your video in random parts.
- The glitch Distortion effect is very intense, so we recommend cutting this effect very short and dropping it at random parts of your video.
- You can also use these effects as a sneaky way to hide Cuts in your video.
Summary
You can use glitch effects created or inspired by faulty video equipment as a powerful storytelling tool. These effects can help you change the tone of the entire video by adding a specific visual aesthetic and making the narrative simpler to convey and more approachable for the audience.
We recommend using Filmora 11 for adding built-in glitch effects. You can also use this app to create custom glitch effects within a few minutes.
The Best Cinematic LUTs in The Market
With the development of new editing tools and apps, we all want our content to look different and better from others. Moreover, increasing social media usage has also made people more concerned about their photos and videos. However, besides editing tools, you can add layers of adjustments and apply LUTs, filters, and more to your content.
With different LUTs, such as cinematic LUTs, you can give your digital content a professional look. These LUTs also give a dramatic feel and add depth to your photos and videos.
Part 1: What are Cinematic LUTs Used for?
Cinematic LUTs have several uses, including creating a specific mood or look. They can be used to make the footage look vintage or retro or to create a dark, moody atmosphere or a bright, colorful tone. Furthermore, these cinematic LUTs can match the footage’s colors and tones so they all look the same. They can also be used to contrast and color your photos and images.
It can also make your media files look like they were filmed on a real film camera, giving them a more natural, organic feel. These are useful tools for making videos or images look a certain way. They can improve the color quality and make the story more interesting.
Empower your videos with a new mood using different LUTs. Filmora now offers 100+ top-quality 3D LUTs cover a broad range of scenarios. Transform your videos with Filmora’s powerful 3D LUTs.
Apply LUT on Videos Apply LUT on Videos Learn More


Part 2: Top Cinematic LUT Pack to Consider for Your Media
Many LUTs give a cinematic feel when applied to your digital content. These LUTs add depth and emotion to your images and videos. There are many cinematic LUT packs that you can download and use them.
1. Cinematic LUTs Pack 2023
Many free cinematic LUTs are available to download, but this one differs. The Cinematic LUTs Pack 2023 has various Hollywood-style color grading options available. This pack has different color correction layers that give you a modern cinematic feel. Moreover, you can darken the highlights to enhance the subject in your content.

2. Cinematic LUT
Another LUT that gives your content the cinematic feel you want is this exceptional collection. This LUT fades the colors in your photos and videos to give a rusty look. It gives your media files a West Hollywood-style look to give them a cinematic look. Furthermore, it also enhances certain colors to improve the color grading in your video footage or images.

3. 20 FREE Travel LUTs for Cinematic Looks
It is a great LUT pack if you want multiple options to add cinematic-style LUTs to your digital media content. You get 20 different cinematic LUTs for your travel photos and videos. With the right amount of tan, shadows, highlights, and grains, your videos will look like they are from a movie clip. It improves your travel videos and photos by giving them movie-like color adjustments.

4. Sandstorm
As the name suggests, it gives your media files the golden cinematic shade. It is a LUT, which highlights golden, orange, and brown colors to add a warm tone to your files. This LUT will give your pictures and videos a warm cinematic feel. You can use your photos and videos to apply this adjustment layer to make them look like Hollywood content.

5. Vintage Vibe
Last but not least, Vintage Vibe is a great LUT that adds depth to your photos and videos. It creates an ambiance of an old-style cinematic touch to your digital files. You can improve your story by adding emotion and depth to your content with this LUT. Moreover, you can add this vintage color correction layer to give your content a unique and creative style.

Part 3: 3D LUT Creator: An Effective Cinematic LUTs Software
3D LUT Creator is a powerful tool packed with amazing color correction features for photo and video editing. This tool offers different cinematic LUTs to use and apply to your content. Moreover, users can create their LUTs according to their style and preference. Another impressive feature is its plugin support for different editing software.
Furthermore, the tool also comes with seven color gradients, a color wheel option, and A/B and C/L grids. These options allow you to change and distribute colors to their media files. Additionally, its AI retouching plugin can retouch and beautify your image. With all these features, you can create one of the best cinematic LUTs without hassle.

Part 4: Wondershare Filmora: A Good Platform to Consume Cinematic LUTs
Wondershare Filmora is a great professional editing software. You can easily achieve a cinematic look for your videos with its color grading upgrades and LUT intensity adjustments. Furthermore, the color wheel feature allows you to make professional-looking color grading adjustments. It even offers a cinematic LUTs download option to the users.
Add LUTs on Video For Win 7 or later(64-bit)
Add LUTs on Video For macOS 10.14 or later
Additionally, it has a sharpening tool that sharpens your digital media files. With its new update, you can have many editing options, including over 200 LUTs and other color correction features. Besides this, you have so many different color grading options that you can choose from the LUTs library.

Key Features of Wondershare Filmora To Keep Notice of
- It has a unique feature that lets you denoise any background sounds or voices in your video file. This useful feature removes background noise distortion from a video file.
- Furthermore, silent detection is another unique feature that you can use. It analyzes your video content and removes unnecessary pauses. You can automatically remove awkward pauses and silent moments from your video to make it look professional.
- Additionally, you can access and use its free stock media library. This library has over 10 billion free stock media files you can use in your content.
Conclusion
In conclusion, cinematic LUTs have become essential. With multiple options available in the market, selecting the best cinematic LUT pack can be difficult. However, 3D LUT Creator is a great tool offering plugin options for multiple editing software. In contrast, Wondershare Filmora is an excellent option for creating and consuming cinematic LUTs.
Add LUTs on Video For Win 7 or later(64-bit)
Add LUTs on Video For macOS 10.14 or later
Apply LUT on Videos Apply LUT on Videos Learn More
Part 2: Top Cinematic LUT Pack to Consider for Your Media
Many LUTs give a cinematic feel when applied to your digital content. These LUTs add depth and emotion to your images and videos. There are many cinematic LUT packs that you can download and use them.
1. Cinematic LUTs Pack 2023
Many free cinematic LUTs are available to download, but this one differs. The Cinematic LUTs Pack 2023 has various Hollywood-style color grading options available. This pack has different color correction layers that give you a modern cinematic feel. Moreover, you can darken the highlights to enhance the subject in your content.
2. Cinematic LUT
Another LUT that gives your content the cinematic feel you want is this exceptional collection. This LUT fades the colors in your photos and videos to give a rusty look. It gives your media files a West Hollywood-style look to give them a cinematic look. Furthermore, it also enhances certain colors to improve the color grading in your video footage or images.
3. 20 FREE Travel LUTs for Cinematic Looks
It is a great LUT pack if you want multiple options to add cinematic-style LUTs to your digital media content. You get 20 different cinematic LUTs for your travel photos and videos. With the right amount of tan, shadows, highlights, and grains, your videos will look like they are from a movie clip. It improves your travel videos and photos by giving them movie-like color adjustments.
4. Sandstorm
As the name suggests, it gives your media files the golden cinematic shade. It is a LUT, which highlights golden, orange, and brown colors to add a warm tone to your files. This LUT will give your pictures and videos a warm cinematic feel. You can use your photos and videos to apply this adjustment layer to make them look like Hollywood content.
5. Vintage Vibe
Last but not least, Vintage Vibe is a great LUT that adds depth to your photos and videos. It creates an ambiance of an old-style cinematic touch to your digital files. You can improve your story by adding emotion and depth to your content with this LUT. Moreover, you can add this vintage color correction layer to give your content a unique and creative style.
Part 3: 3D LUT Creator: An Effective Cinematic LUTs Software
3D LUT Creator is a powerful tool packed with amazing color correction features for photo and video editing. This tool offers different cinematic LUTs to use and apply to your content. Moreover, users can create their LUTs according to their style and preference. Another impressive feature is its plugin support for different editing software.
Furthermore, the tool also comes with seven color gradients, a color wheel option, and A/B and C/L grids. These options allow you to change and distribute colors to their media files. Additionally, its AI retouching plugin can retouch and beautify your image. With all these features, you can create one of the best cinematic LUTs without hassle.
Part 4: Wondershare Filmora: A Good Platform to Consume Cinematic LUTs
Wondershare Filmora is a great professional editing software. You can easily achieve a cinematic look for your videos with its color grading upgrades and LUT intensity adjustments. Furthermore, the color wheel feature allows you to make professional-looking color grading adjustments. It even offers a cinematic LUTs download option to the users.
Add LUTs on Video For Win 7 or later(64-bit)
Add LUTs on Video For macOS 10.14 or later
Additionally, it has a sharpening tool that sharpens your digital media files. With its new update, you can have many editing options, including over 200 LUTs and other color correction features. Besides this, you have so many different color grading options that you can choose from the LUTs library.
Key Features of Wondershare Filmora To Keep Notice of
- It has a unique feature that lets you denoise any background sounds or voices in your video file. This useful feature removes background noise distortion from a video file.
- Furthermore, silent detection is another unique feature that you can use. It analyzes your video content and removes unnecessary pauses. You can automatically remove awkward pauses and silent moments from your video to make it look professional.
- Additionally, you can access and use its free stock media library. This library has over 10 billion free stock media files you can use in your content.
Conclusion
In conclusion, cinematic LUTs have become essential. With multiple options available in the market, selecting the best cinematic LUT pack can be difficult. However, 3D LUT Creator is a great tool offering plugin options for multiple editing software. In contrast, Wondershare Filmora is an excellent option for creating and consuming cinematic LUTs.
Add LUTs on Video For Win 7 or later(64-bit)
Add LUTs on Video For macOS 10.14 or later
Ways to Learn Discord Game Bots – Even if You’re Just Starting Out
Ways to Learn Discord Game Bots – Even if You’re Just Starting out
An easy yet powerful editor
Numerous effects to choose from
Detailed tutorials provided by the official channel
Discord is free social communication service used by tens of millions of individuals aged 13 and above to socialize with their communities and friends. People use discord regularly to discuss various topics, from art projects and family vacations to homework and mental health help. It serves as a home for communities of different sizes but has become quite popular as discord bot games due to the rise in the gaming community.
The great majority of servers are private, invite-only locations where friends and communities may communicate and spend time together. More significant, more open groups based on specific themes like popular video games like PUBG and Genshin Impact. Because all discussions are opt-in, users have complete choice over who they connect with and how they use discord.
In this article
01 [What Are Discord Game Bots?](#Part 1)
02 [How Do You Add Bot Games to Discord?](#Part 2)
03 [Top 10 Picks of Discord Gaming Bots](#Part 3)
04 [Discord Game Bots FAQs](#Part 4)
Part 1 What Are Discord Game Bots?
Discord game bots are artificial intelligence (AI)-powered applications that automate processes and add music, games, welcome messages, memes, and other fun stuff to your server. These bots make it simple to interact with your audience, grow your community, and manage your server.
There is a plethora of game bots for discord to pick from, each with its purpose. Some may automatically welcome new users, while others utilize webhooks to interface with other apps—and it may be tough for novice users to figure out which ones will provide the most remarkable results for their requirements.
Part 2 How Do You Add Bot Games to Discord?
Follow the steps below to add game bots for discord successfully:
Step 1: To add a bot to your Discord server, go to the bot’s source page. We’ll be using ProBot for this lesson.
Step 2: Depending on the bot you’re adding, click Add to Discord or Invite Now.
Step 3: To grant the bot access, a pop-up window will appear asking you to check in to your Discord account.
Step 4: After you log in, you’ll see a box asking for account authorization. Locate and choose the Add to Server drop-down menu.
Step 5: This will bring up a list of discord servers where you can add a bot game discord. Continue after selecting your server.
Step 6: Examine the server permissions that the bot asks for. Select and deselect according to your requirements. When you’re ready, click Authorize.
For those who like to share their discord game bots experience through screen recordings and whatnot, a potent and convenient video editing tool to make your sessions look even more incredible is Filmora.
Wondershare Filmora Video Editor is a famous video editing program for those who wish to focus on editing and producing high-quality videos. The program supports 4K video editing. It’s a reasonably priced tool featuring effects for both video and audio. When it comes to designing, adding effects, and modifying movies, it provides users with many possibilities. You can use the tool to add overlays, create animations and objects, add music, and input text. Imagine sharing your experience in 4k!
For Win 7 or later (64-bit)
For macOS 10.12 or later
Part 3 Top 10 Picks of Discord Gaming Bots
01Karuta
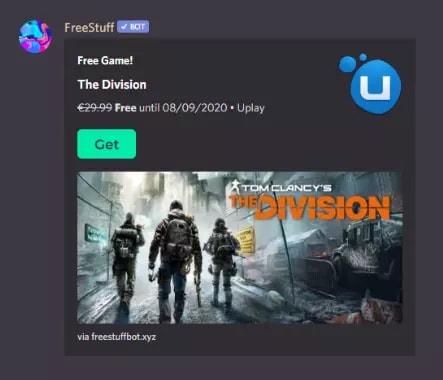
Karuta is a discord game bot where you gather anime characters. In Karuta, though, you collect characters using trading cards. Your cards and other objects may be customized, upgraded, and traded with other players. Better still, you maintain the same cards between servers, allowing you to play Karuta with the same deck on any server where the game discord bot is!
02Dragon Bot Z
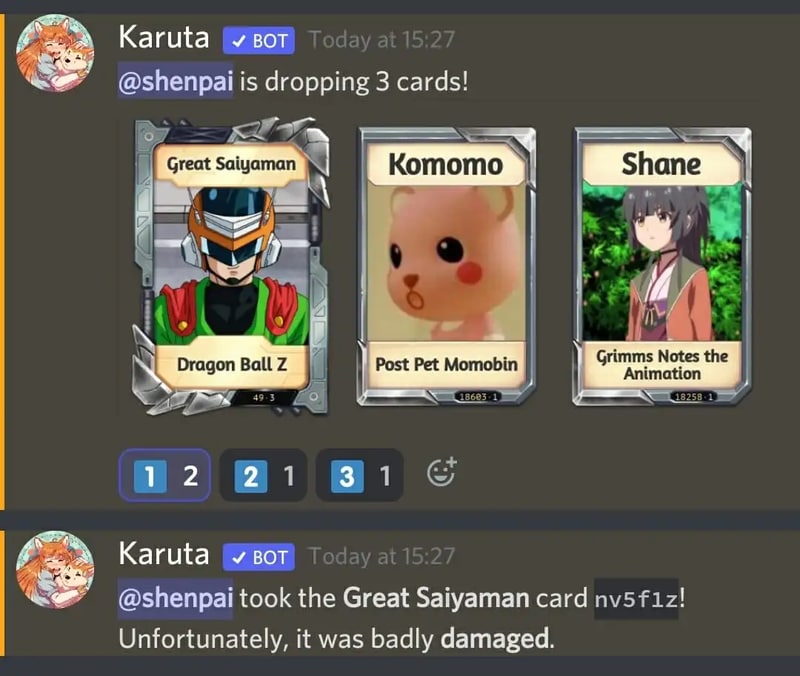
Dragon Bot Z is the discord bot game that adds discord Ball Z, a multiplayer text-based RPG, to your server. Players in Discord Ball Z summon characters from the iconic Dragon Ball Z franchise, train them, fight foes, buy equipment, and trade with other players. This Discord game is ideal for Dragon Ball fans or anybody who likes text-based roleplaying games.
03Mudae
Mudae is a bot discord game with character-collecting. For example, you can claim popular anime and videogame characters as your “waifus” or “husbandos,” develop your harem, and compete for your favorite characters with other users. You can also trade the characters with other members.

04Rock Puppy
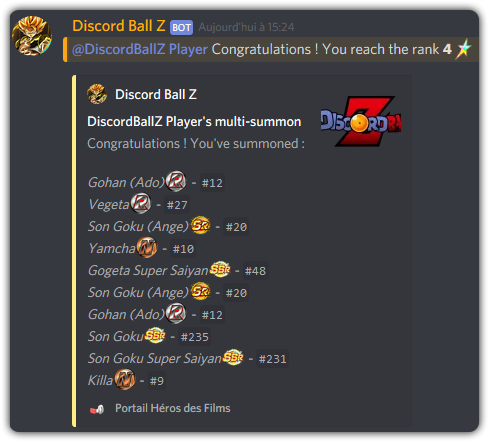
Rock Puppy is a basic yet entertaining game bots discord bot that incorporates several classic games. You can enjoy Discord games like ConnectFour, Truth or Dare, Trivia, Tic-Tac-Toe, Russian Roulette, and Would You Rather with Rock Puppy. You may also use magic 8-ball, dice, or tarot cards, play classic board and party games on your server with Rock Puppy.
05GarticBOT
GarticBot is a bot game in discord that allows you to play the drawing game Gartic. GarticBot begins the Discord game by painting an image on your server. Members then compete against one another to predict the image the quickest. Others can guess your drawings if you submit them. Type the command g.draw, and Gartic will provide you with a URL to submit your artwork. GarticBot creates a fun Pictionary-style game for everyone on your server to play.

06TriviaBot
TriviaBot is the most popular trivia game discord bot. It has over 90,000 questions, and you can even submit your own for inclusion in the bot. Members can form and join teams to compete in competitions. You may also create a public leaderboard to display who performs the best on the server.

07GamesRob
The finest Uno discord game bot is GamesROB. ConnectFour, Trivia, Battleship, 2048, Tic-Tac-Toe, Minesweeper, and Hangman are the other traditional party games added to discord. You may also play “Detective,” a Discord game in which you try to figure out who is the “assassin” on your server, memory games, and Town, Country, River, a game in which you try to come up with as many phrases as possible within a theme.
08Chess Reddit
Chess is a simple game that allows you to play chess on discord. You may play a chess game with other server members directly on the server. Instruct the bot on which pieces to move and where they should go. After each move, the Discord game bot creates a fresh graphic of the board so you can plot your next move. And, because the game hosts on your server, other users may watch and debate it!
09PokeMeow
PokeMeow is by far the most popular Pokemon game discord bot. With this Pokemon bot, you may capture Pokemon on your server, trade, battle with other players, and accomplish tasks for in-game currency and stuff. As you keep building up your Pokedex, the Pokemon bot also allows to compete with other users on the worldwide leaderboard! PokeMeow is the ideal Pokemon Discord bot for fans of the Pokemon series.
10IdleRPG
IdleRPG is a discord game where you may play a text-based roleplaying game. You may make your character complete with ethnicity and social status. Then, you can go on quests and combat beasts, purchase, and exchange mythic objects, join guilds, engage with gods, and even marry other players. Play through your character’s adventure while engaging with and creating stories with other players. IdleRPG is likely to provide your server with hundreds of hours of roleplaying pleasure.
Part 4 Discord Game Bots FAQs
Now, let us go through some FAQs about discord game bots:
Q. Is it possible to play games with discord bots?
A. You could indeed play discord games in-server with bots, challenge other members, and win prizes! A game bot is a terrific method to keep players engaged on your server, especially if it’s a gaming Discord channel.
Q. Do game bots spy on you?
A. No, game discord bots do not have inbuilt spyware.
Q. How many bots should a server have?
A. It’s best not to have more than 20 bots game on discord on a server at any moment. More bots than this may cause users to become confused and the service to seem suspicious.
Q. Are discord bots free?
A. All these discord game bots are free to use. However, some have premium upgrades.
Q. Which bot is the most popular game bot in discord?
A. Worddle
Q. Which bot is the best bot for gaming on discord?
A. Gawesome is an excellent alternative for adding a multifunctional bot to your discord server.
● Ending Thoughts →
● Discord is accessible communication and socializing service for individuals aged 13 and above.
● The platform extends to various servers, each with its users, rules, themes, and channels, but one underutilized feature is the ability to develop and code custom AI-powered bots.
● Game bots for discord are artificial intelligence (AI)-powered applications that automate processes and add games to your discord server.
● These game discord bots make it simple to interact with your audience, grow your community, and manage your server.
● Lastly, to enhance the discord game bots experience and bring your gaming videos to life, use the Filmora software.
Discord is free social communication service used by tens of millions of individuals aged 13 and above to socialize with their communities and friends. People use discord regularly to discuss various topics, from art projects and family vacations to homework and mental health help. It serves as a home for communities of different sizes but has become quite popular as discord bot games due to the rise in the gaming community.
The great majority of servers are private, invite-only locations where friends and communities may communicate and spend time together. More significant, more open groups based on specific themes like popular video games like PUBG and Genshin Impact. Because all discussions are opt-in, users have complete choice over who they connect with and how they use discord.
In this article
01 [What Are Discord Game Bots?](#Part 1)
02 [How Do You Add Bot Games to Discord?](#Part 2)
03 [Top 10 Picks of Discord Gaming Bots](#Part 3)
04 [Discord Game Bots FAQs](#Part 4)
Part 1 What Are Discord Game Bots?
Discord game bots are artificial intelligence (AI)-powered applications that automate processes and add music, games, welcome messages, memes, and other fun stuff to your server. These bots make it simple to interact with your audience, grow your community, and manage your server.
There is a plethora of game bots for discord to pick from, each with its purpose. Some may automatically welcome new users, while others utilize webhooks to interface with other apps—and it may be tough for novice users to figure out which ones will provide the most remarkable results for their requirements.
Part 2 How Do You Add Bot Games to Discord?
Follow the steps below to add game bots for discord successfully:
Step 1: To add a bot to your Discord server, go to the bot’s source page. We’ll be using ProBot for this lesson.
Step 2: Depending on the bot you’re adding, click Add to Discord or Invite Now.
Step 3: To grant the bot access, a pop-up window will appear asking you to check in to your Discord account.
Step 4: After you log in, you’ll see a box asking for account authorization. Locate and choose the Add to Server drop-down menu.
Step 5: This will bring up a list of discord servers where you can add a bot game discord. Continue after selecting your server.
Step 6: Examine the server permissions that the bot asks for. Select and deselect according to your requirements. When you’re ready, click Authorize.
For those who like to share their discord game bots experience through screen recordings and whatnot, a potent and convenient video editing tool to make your sessions look even more incredible is Filmora.
Wondershare Filmora Video Editor is a famous video editing program for those who wish to focus on editing and producing high-quality videos. The program supports 4K video editing. It’s a reasonably priced tool featuring effects for both video and audio. When it comes to designing, adding effects, and modifying movies, it provides users with many possibilities. You can use the tool to add overlays, create animations and objects, add music, and input text. Imagine sharing your experience in 4k!
For Win 7 or later (64-bit)
For macOS 10.12 or later
Part 3 Top 10 Picks of Discord Gaming Bots
01Karuta
Karuta is a discord game bot where you gather anime characters. In Karuta, though, you collect characters using trading cards. Your cards and other objects may be customized, upgraded, and traded with other players. Better still, you maintain the same cards between servers, allowing you to play Karuta with the same deck on any server where the game discord bot is!
02Dragon Bot Z
Dragon Bot Z is the discord bot game that adds discord Ball Z, a multiplayer text-based RPG, to your server. Players in Discord Ball Z summon characters from the iconic Dragon Ball Z franchise, train them, fight foes, buy equipment, and trade with other players. This Discord game is ideal for Dragon Ball fans or anybody who likes text-based roleplaying games.
03Mudae
Mudae is a bot discord game with character-collecting. For example, you can claim popular anime and videogame characters as your “waifus” or “husbandos,” develop your harem, and compete for your favorite characters with other users. You can also trade the characters with other members.
04Rock Puppy
Rock Puppy is a basic yet entertaining game bots discord bot that incorporates several classic games. You can enjoy Discord games like ConnectFour, Truth or Dare, Trivia, Tic-Tac-Toe, Russian Roulette, and Would You Rather with Rock Puppy. You may also use magic 8-ball, dice, or tarot cards, play classic board and party games on your server with Rock Puppy.
05GarticBOT
GarticBot is a bot game in discord that allows you to play the drawing game Gartic. GarticBot begins the Discord game by painting an image on your server. Members then compete against one another to predict the image the quickest. Others can guess your drawings if you submit them. Type the command g.draw, and Gartic will provide you with a URL to submit your artwork. GarticBot creates a fun Pictionary-style game for everyone on your server to play.
06TriviaBot
TriviaBot is the most popular trivia game discord bot. It has over 90,000 questions, and you can even submit your own for inclusion in the bot. Members can form and join teams to compete in competitions. You may also create a public leaderboard to display who performs the best on the server.
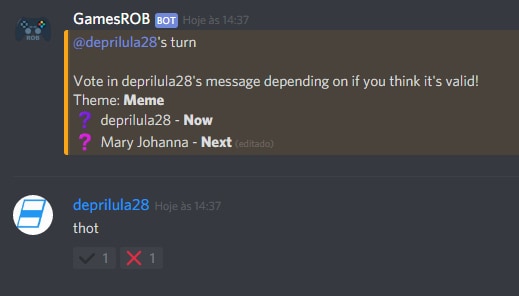
07GamesRob
The finest Uno discord game bot is GamesROB. ConnectFour, Trivia, Battleship, 2048, Tic-Tac-Toe, Minesweeper, and Hangman are the other traditional party games added to discord. You may also play “Detective,” a Discord game in which you try to figure out who is the “assassin” on your server, memory games, and Town, Country, River, a game in which you try to come up with as many phrases as possible within a theme.
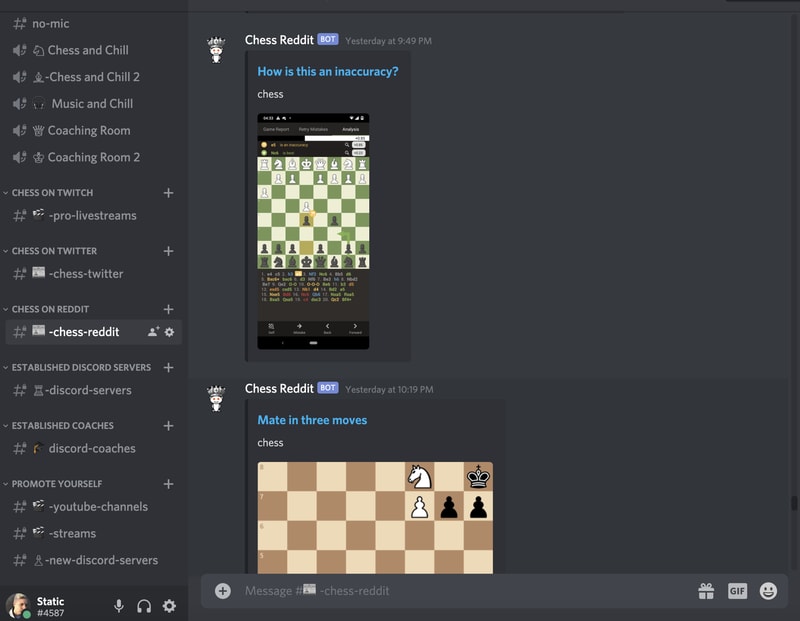
08Chess Reddit
Chess is a simple game that allows you to play chess on discord. You may play a chess game with other server members directly on the server. Instruct the bot on which pieces to move and where they should go. After each move, the Discord game bot creates a fresh graphic of the board so you can plot your next move. And, because the game hosts on your server, other users may watch and debate it!
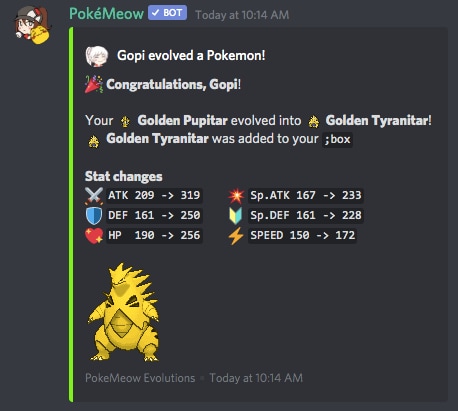
09PokeMeow
PokeMeow is by far the most popular Pokemon game discord bot. With this Pokemon bot, you may capture Pokemon on your server, trade, battle with other players, and accomplish tasks for in-game currency and stuff. As you keep building up your Pokedex, the Pokemon bot also allows to compete with other users on the worldwide leaderboard! PokeMeow is the ideal Pokemon Discord bot for fans of the Pokemon series.
10IdleRPG
IdleRPG is a discord game where you may play a text-based roleplaying game. You may make your character complete with ethnicity and social status. Then, you can go on quests and combat beasts, purchase, and exchange mythic objects, join guilds, engage with gods, and even marry other players. Play through your character’s adventure while engaging with and creating stories with other players. IdleRPG is likely to provide your server with hundreds of hours of roleplaying pleasure.
Part 4 Discord Game Bots FAQs
Now, let us go through some FAQs about discord game bots:
Q. Is it possible to play games with discord bots?
A. You could indeed play discord games in-server with bots, challenge other members, and win prizes! A game bot is a terrific method to keep players engaged on your server, especially if it’s a gaming Discord channel.
Q. Do game bots spy on you?
A. No, game discord bots do not have inbuilt spyware.
Q. How many bots should a server have?
A. It’s best not to have more than 20 bots game on discord on a server at any moment. More bots than this may cause users to become confused and the service to seem suspicious.
Q. Are discord bots free?
A. All these discord game bots are free to use. However, some have premium upgrades.
Q. Which bot is the most popular game bot in discord?
A. Worddle
Q. Which bot is the best bot for gaming on discord?
A. Gawesome is an excellent alternative for adding a multifunctional bot to your discord server.
● Ending Thoughts →
● Discord is accessible communication and socializing service for individuals aged 13 and above.
● The platform extends to various servers, each with its users, rules, themes, and channels, but one underutilized feature is the ability to develop and code custom AI-powered bots.
● Game bots for discord are artificial intelligence (AI)-powered applications that automate processes and add games to your discord server.
● These game discord bots make it simple to interact with your audience, grow your community, and manage your server.
● Lastly, to enhance the discord game bots experience and bring your gaming videos to life, use the Filmora software.
Discord is free social communication service used by tens of millions of individuals aged 13 and above to socialize with their communities and friends. People use discord regularly to discuss various topics, from art projects and family vacations to homework and mental health help. It serves as a home for communities of different sizes but has become quite popular as discord bot games due to the rise in the gaming community.
The great majority of servers are private, invite-only locations where friends and communities may communicate and spend time together. More significant, more open groups based on specific themes like popular video games like PUBG and Genshin Impact. Because all discussions are opt-in, users have complete choice over who they connect with and how they use discord.
In this article
01 [What Are Discord Game Bots?](#Part 1)
02 [How Do You Add Bot Games to Discord?](#Part 2)
03 [Top 10 Picks of Discord Gaming Bots](#Part 3)
04 [Discord Game Bots FAQs](#Part 4)
Part 1 What Are Discord Game Bots?
Discord game bots are artificial intelligence (AI)-powered applications that automate processes and add music, games, welcome messages, memes, and other fun stuff to your server. These bots make it simple to interact with your audience, grow your community, and manage your server.
There is a plethora of game bots for discord to pick from, each with its purpose. Some may automatically welcome new users, while others utilize webhooks to interface with other apps—and it may be tough for novice users to figure out which ones will provide the most remarkable results for their requirements.
Part 2 How Do You Add Bot Games to Discord?
Follow the steps below to add game bots for discord successfully:
Step 1: To add a bot to your Discord server, go to the bot’s source page. We’ll be using ProBot for this lesson.
Step 2: Depending on the bot you’re adding, click Add to Discord or Invite Now.
Step 3: To grant the bot access, a pop-up window will appear asking you to check in to your Discord account.
Step 4: After you log in, you’ll see a box asking for account authorization. Locate and choose the Add to Server drop-down menu.
Step 5: This will bring up a list of discord servers where you can add a bot game discord. Continue after selecting your server.
Step 6: Examine the server permissions that the bot asks for. Select and deselect according to your requirements. When you’re ready, click Authorize.
For those who like to share their discord game bots experience through screen recordings and whatnot, a potent and convenient video editing tool to make your sessions look even more incredible is Filmora.
Wondershare Filmora Video Editor is a famous video editing program for those who wish to focus on editing and producing high-quality videos. The program supports 4K video editing. It’s a reasonably priced tool featuring effects for both video and audio. When it comes to designing, adding effects, and modifying movies, it provides users with many possibilities. You can use the tool to add overlays, create animations and objects, add music, and input text. Imagine sharing your experience in 4k!
For Win 7 or later (64-bit)
For macOS 10.12 or later
Part 3 Top 10 Picks of Discord Gaming Bots
01Karuta
Karuta is a discord game bot where you gather anime characters. In Karuta, though, you collect characters using trading cards. Your cards and other objects may be customized, upgraded, and traded with other players. Better still, you maintain the same cards between servers, allowing you to play Karuta with the same deck on any server where the game discord bot is!
02Dragon Bot Z
Dragon Bot Z is the discord bot game that adds discord Ball Z, a multiplayer text-based RPG, to your server. Players in Discord Ball Z summon characters from the iconic Dragon Ball Z franchise, train them, fight foes, buy equipment, and trade with other players. This Discord game is ideal for Dragon Ball fans or anybody who likes text-based roleplaying games.
03Mudae
Mudae is a bot discord game with character-collecting. For example, you can claim popular anime and videogame characters as your “waifus” or “husbandos,” develop your harem, and compete for your favorite characters with other users. You can also trade the characters with other members.
04Rock Puppy
Rock Puppy is a basic yet entertaining game bots discord bot that incorporates several classic games. You can enjoy Discord games like ConnectFour, Truth or Dare, Trivia, Tic-Tac-Toe, Russian Roulette, and Would You Rather with Rock Puppy. You may also use magic 8-ball, dice, or tarot cards, play classic board and party games on your server with Rock Puppy.
05GarticBOT
GarticBot is a bot game in discord that allows you to play the drawing game Gartic. GarticBot begins the Discord game by painting an image on your server. Members then compete against one another to predict the image the quickest. Others can guess your drawings if you submit them. Type the command g.draw, and Gartic will provide you with a URL to submit your artwork. GarticBot creates a fun Pictionary-style game for everyone on your server to play.
06TriviaBot
TriviaBot is the most popular trivia game discord bot. It has over 90,000 questions, and you can even submit your own for inclusion in the bot. Members can form and join teams to compete in competitions. You may also create a public leaderboard to display who performs the best on the server.
07GamesRob
The finest Uno discord game bot is GamesROB. ConnectFour, Trivia, Battleship, 2048, Tic-Tac-Toe, Minesweeper, and Hangman are the other traditional party games added to discord. You may also play “Detective,” a Discord game in which you try to figure out who is the “assassin” on your server, memory games, and Town, Country, River, a game in which you try to come up with as many phrases as possible within a theme.
08Chess Reddit
Chess is a simple game that allows you to play chess on discord. You may play a chess game with other server members directly on the server. Instruct the bot on which pieces to move and where they should go. After each move, the Discord game bot creates a fresh graphic of the board so you can plot your next move. And, because the game hosts on your server, other users may watch and debate it!
09PokeMeow
PokeMeow is by far the most popular Pokemon game discord bot. With this Pokemon bot, you may capture Pokemon on your server, trade, battle with other players, and accomplish tasks for in-game currency and stuff. As you keep building up your Pokedex, the Pokemon bot also allows to compete with other users on the worldwide leaderboard! PokeMeow is the ideal Pokemon Discord bot for fans of the Pokemon series.
10IdleRPG
IdleRPG is a discord game where you may play a text-based roleplaying game. You may make your character complete with ethnicity and social status. Then, you can go on quests and combat beasts, purchase, and exchange mythic objects, join guilds, engage with gods, and even marry other players. Play through your character’s adventure while engaging with and creating stories with other players. IdleRPG is likely to provide your server with hundreds of hours of roleplaying pleasure.
Part 4 Discord Game Bots FAQs
Now, let us go through some FAQs about discord game bots:
Q. Is it possible to play games with discord bots?
A. You could indeed play discord games in-server with bots, challenge other members, and win prizes! A game bot is a terrific method to keep players engaged on your server, especially if it’s a gaming Discord channel.
Q. Do game bots spy on you?
A. No, game discord bots do not have inbuilt spyware.
Q. How many bots should a server have?
A. It’s best not to have more than 20 bots game on discord on a server at any moment. More bots than this may cause users to become confused and the service to seem suspicious.
Q. Are discord bots free?
A. All these discord game bots are free to use. However, some have premium upgrades.
Q. Which bot is the most popular game bot in discord?
A. Worddle
Q. Which bot is the best bot for gaming on discord?
A. Gawesome is an excellent alternative for adding a multifunctional bot to your discord server.
● Ending Thoughts →
● Discord is accessible communication and socializing service for individuals aged 13 and above.
● The platform extends to various servers, each with its users, rules, themes, and channels, but one underutilized feature is the ability to develop and code custom AI-powered bots.
● Game bots for discord are artificial intelligence (AI)-powered applications that automate processes and add games to your discord server.
● These game discord bots make it simple to interact with your audience, grow your community, and manage your server.
● Lastly, to enhance the discord game bots experience and bring your gaming videos to life, use the Filmora software.
Learn How to Blur a Still or Moving Part of Video
Create High-Quality Video - Wondershare Filmora
An easy and powerful YouTube video editor
Numerous video and audio effects to choose from
Detailed tutorials provided by the official channel
Adding a blur effect to your video is vital, especially if you have added unwanted things that could ruin its quality. It often looks awkward when there’s something wrong in the background of your video. Various video editing programs allow you to blur a moving or still part of your video if you don’t want viewers to see it. With that in mind, we’ll look at how to blur part of a video using Filmora.
In this article
01 How to Blur a Part of a Video Using Filmora
02 How to Blur a Moving Part of a Video Using Filmora
03 How to Blur Part of a Video Using OpenShot
There are several ways you can blur part of a video. Filmora allows you to blur a still and moving part of a video. The software is user-friendly and comes with an aesthetically pleasing interface. You don’t have to be tech-savvy to learn how to blur out part of a video with Filmora. You can also use OpenShot to blur part of a video.
How to Blur a Part of a Video Using Filmora
Both Mac and PC owners can use this video editing software to blur part of a video. Here is how to blur a part of video using Filmora.
- Download and install Wondershare Filmora on your device. If you had already installed Filmora on your computer, double-click the program to launch it.
- Next, you need to drag and drop the video file you wish to blur into the Media Library. Alternatively, you could also navigate to the File tab and click it, then choose Import Media and select the Import Media Files option. Find the video you want to edit and select it. You can now hit the Open button to import the video file to Media Library
- After your video file is on Filmora’s Media Library, drag and drop it into the Timeline; this is where the program allows you to assemble effects and media files for your video project.

- Click on the Effects tab; this will allow you to browse through Filmora’s collection of visual effects. Select Utility on the drop-down menu located on the left side of your screen.

- The program will display a range of effects; select the Mosaic option. You can also type in Mosaic in the search bar to find the effect swiftly.
- Drag the Mosaic effect to above the video clip on your Timeline. Dragging the border of your Mosaic clip allows you to adjust its length.
- A small blurred area will appear in the preview window.

- Lock the main tracks.
- Now, click the Mosaic layer to modify the Mosaic size and area. Move it to the part of the video that you would like to blur.
- Double-clicking on the Mosaic clip will allow you to change the mosaic type and adjust the opacity and blur amount. You can choose from six different Mosaic types. Adjusting the opacity allows you to set the degree to which you can see through the blurred area. The blur amount lets you control the intensity of the blur.

- You can now save your blurred video. Click on the File tab and select ‘Save Project.’ Doing this will save your project to the default file. Choose ‘Save Project As’ to save your video to another destination of your choice.
How to Blur a Moving Part of a Video Using Filmora
You can also blur a moving part of your video with Filmora; this program allows you to add the motion-tracking mosaic to any moving object in your video that you do not want your viewers to see. You can use stickers, mosaic, or anything you download on the internet to hide any unwanted moving object.
With that in mind, here is how to blur a moving part of a video using Filmora:
- Run Filmora on your device.
- Import your video into Filmora’s Media Library.
- Drag your video to the Timeline.

- Now, double-click the video in the Timeline. Doing this will open the editing menu.
- Check the box that’s right next to Motion Tracking; this tool allows you to track movement in a video and then have objects like text, images, videos, or elements follow this movement.

- A tracker box will appear on your preview window; move it over the moving object you would like to track. You can increase or reduce the size of the tracker box. Hit the Start Tracking button to render the effect.

- Wait until the tracking process is complete. The duration of this process will depend on the length of your video. You’ll have to do some trimming if other objects block the moving part you’re tracking from time to time.

- WNow, select the Add Mosaic option.
- Choose the Mosaic type you prefer and adjust the opacity and blur amount to ensure the object is unrecognizable.
- Now, select the moving part of the video you want to blur and click OK.
- The object is now blurred, and the mosaic layer will follow its movement everywhere it goes.
- Playback your video to check the result. Filmora allows you to fine-tune the position and size of the object that’s following the track in your Preview Window without restarting tracking. Additionally, you can switch the follower anytime you want.
- When you have finished blurring the moving part on your video, click File > Save Project or Save Project As to save your video.
For Win 7 or later (64-bit)
For macOS 10.12 or later
How to Blur Part of a Video Using OpenShot
Designed for Windows, Mac, and Linux, OpenShot is a free, open-source, and cross-platform video editor. While there’s no predefined function or filter in this tool to help you blur part of a video, OpenShot has another way of blurring static parts of your video: it uses an image.
OpenShot blur part of video is free, and you’ll use its open-source programs as a base program for the edition of the video and GIMP Image Manipulation software to edit photos. Follow the guide below to learn how to blur out something in a video using OpenShot.
Step 1: Download OpenShot and install it on your device.

Step 2: Take a screenshot from your video, where the part you want to blur is easily visible. You can do this by going to a relevant frame and utilizing Save Current Frame with a camera icon, located on the right side of the video preview window in a standard program configuration.

Step 3: Be sure to save your video screenshot on your computer.
Step 4: Since you have exported a relevant frame from your video as a screenshot, you need to open it in a photo editor that can handle PNG pics and transparency, like the GIMP Image Manipulation program. Use any selection tool to select the area of the picture you want to blur on the video. Depending on your preferences, you can choose the free select tool, the ellipse select tool, or the rectangle select tool.

Step 5: In the blur filters submenu, open the Pixelize tool and adjust the options that suit your preferences. You can use CTRL-Z to cancel the operation, and repeat it until you find the best combination of blurring settings.
Step 6: When you are satisfied with blurring, right-click on the blurred area and select Invert in the Select submenu; this will allow you to select the entire part of the frame that has not been blurred, which is the part you would like to get rid of because you will only have to use the blurred part of your video overlay where necessary.
Step 7: Now, cut the section of the picture you do not want to keep. You can do this by using CTRL-X. The blurred filter for your video is now ready.

Step 8: If after cutting you notice a plain color rather than a checkerboard canvas representing transparency, use CTRL-Z to cancel the cut. Then, use CTRL-I to invert the selection again to get control of the blurred selection again, and copy or cut it using CTRL-X or CTRL-C.
Step 9: Create another image using CTRL-N, and ensure you have navigated to the advanced options and selected transparency as the fill-in color, and paste your selection there.
Step 10: You now have a perfect photo with full transparency, which is represented by a checkerboard canvas, except for the section of the video frames you would like to blur that should be pixelized.
Step 11: Use the Export option under the File menu to export the photo to your PC as a . PNG file. To save a picture with a transparency channel, you need to use the . PNG extension.
Step 12: Now return to OpenShot video editor and import the generated picture with a pixelized portion in the OpenShot video project. Next, add the picture as an overlay track. Make sure it’s above the video track.
Step 13: If the program asks you to import the photo as an image sequence, select the NO option because you need to import a still photo, and not a video sequence.
Step 14: The picture will be displayed before the video, blurring only the portion of the video where you modified the frame. The other parts of the video won’t be touched. You can make adjustments to ensure the picture track is only displayed at required moments. And that’s how to blur part of a video using OpenShot.
Conclusion
● Now that you know how to blur out part of a video, you can have fun and censor anything you want in your clips. Use Filmora to blur moving and still parts on your video.
Adding a blur effect to your video is vital, especially if you have added unwanted things that could ruin its quality. It often looks awkward when there’s something wrong in the background of your video. Various video editing programs allow you to blur a moving or still part of your video if you don’t want viewers to see it. With that in mind, we’ll look at how to blur part of a video using Filmora.
In this article
01 How to Blur a Part of a Video Using Filmora
02 How to Blur a Moving Part of a Video Using Filmora
03 How to Blur Part of a Video Using OpenShot
There are several ways you can blur part of a video. Filmora allows you to blur a still and moving part of a video. The software is user-friendly and comes with an aesthetically pleasing interface. You don’t have to be tech-savvy to learn how to blur out part of a video with Filmora. You can also use OpenShot to blur part of a video.
How to Blur a Part of a Video Using Filmora
Both Mac and PC owners can use this video editing software to blur part of a video. Here is how to blur a part of video using Filmora.
- Download and install Wondershare Filmora on your device. If you had already installed Filmora on your computer, double-click the program to launch it.
- Next, you need to drag and drop the video file you wish to blur into the Media Library. Alternatively, you could also navigate to the File tab and click it, then choose Import Media and select the Import Media Files option. Find the video you want to edit and select it. You can now hit the Open button to import the video file to Media Library
- After your video file is on Filmora’s Media Library, drag and drop it into the Timeline; this is where the program allows you to assemble effects and media files for your video project.
- Click on the Effects tab; this will allow you to browse through Filmora’s collection of visual effects. Select Utility on the drop-down menu located on the left side of your screen.
- The program will display a range of effects; select the Mosaic option. You can also type in Mosaic in the search bar to find the effect swiftly.
- Drag the Mosaic effect to above the video clip on your Timeline. Dragging the border of your Mosaic clip allows you to adjust its length.
- A small blurred area will appear in the preview window.
- Lock the main tracks.
- Now, click the Mosaic layer to modify the Mosaic size and area. Move it to the part of the video that you would like to blur.
- Double-clicking on the Mosaic clip will allow you to change the mosaic type and adjust the opacity and blur amount. You can choose from six different Mosaic types. Adjusting the opacity allows you to set the degree to which you can see through the blurred area. The blur amount lets you control the intensity of the blur.
- You can now save your blurred video. Click on the File tab and select ‘Save Project.’ Doing this will save your project to the default file. Choose ‘Save Project As’ to save your video to another destination of your choice.
How to Blur a Moving Part of a Video Using Filmora
You can also blur a moving part of your video with Filmora; this program allows you to add the motion-tracking mosaic to any moving object in your video that you do not want your viewers to see. You can use stickers, mosaic, or anything you download on the internet to hide any unwanted moving object.
With that in mind, here is how to blur a moving part of a video using Filmora:
- Run Filmora on your device.
- Import your video into Filmora’s Media Library.
- Drag your video to the Timeline.
- Now, double-click the video in the Timeline. Doing this will open the editing menu.
- Check the box that’s right next to Motion Tracking; this tool allows you to track movement in a video and then have objects like text, images, videos, or elements follow this movement.
- A tracker box will appear on your preview window; move it over the moving object you would like to track. You can increase or reduce the size of the tracker box. Hit the Start Tracking button to render the effect.
- Wait until the tracking process is complete. The duration of this process will depend on the length of your video. You’ll have to do some trimming if other objects block the moving part you’re tracking from time to time.
- WNow, select the Add Mosaic option.
- Choose the Mosaic type you prefer and adjust the opacity and blur amount to ensure the object is unrecognizable.
- Now, select the moving part of the video you want to blur and click OK.
- The object is now blurred, and the mosaic layer will follow its movement everywhere it goes.
- Playback your video to check the result. Filmora allows you to fine-tune the position and size of the object that’s following the track in your Preview Window without restarting tracking. Additionally, you can switch the follower anytime you want.
- When you have finished blurring the moving part on your video, click File > Save Project or Save Project As to save your video.
For Win 7 or later (64-bit)
For macOS 10.12 or later
How to Blur Part of a Video Using OpenShot
Designed for Windows, Mac, and Linux, OpenShot is a free, open-source, and cross-platform video editor. While there’s no predefined function or filter in this tool to help you blur part of a video, OpenShot has another way of blurring static parts of your video: it uses an image.
OpenShot blur part of video is free, and you’ll use its open-source programs as a base program for the edition of the video and GIMP Image Manipulation software to edit photos. Follow the guide below to learn how to blur out something in a video using OpenShot.
Step 1: Download OpenShot and install it on your device.
Step 2: Take a screenshot from your video, where the part you want to blur is easily visible. You can do this by going to a relevant frame and utilizing Save Current Frame with a camera icon, located on the right side of the video preview window in a standard program configuration.
Step 3: Be sure to save your video screenshot on your computer.
Step 4: Since you have exported a relevant frame from your video as a screenshot, you need to open it in a photo editor that can handle PNG pics and transparency, like the GIMP Image Manipulation program. Use any selection tool to select the area of the picture you want to blur on the video. Depending on your preferences, you can choose the free select tool, the ellipse select tool, or the rectangle select tool.
Step 5: In the blur filters submenu, open the Pixelize tool and adjust the options that suit your preferences. You can use CTRL-Z to cancel the operation, and repeat it until you find the best combination of blurring settings.
Step 6: When you are satisfied with blurring, right-click on the blurred area and select Invert in the Select submenu; this will allow you to select the entire part of the frame that has not been blurred, which is the part you would like to get rid of because you will only have to use the blurred part of your video overlay where necessary.
Step 7: Now, cut the section of the picture you do not want to keep. You can do this by using CTRL-X. The blurred filter for your video is now ready.
Step 8: If after cutting you notice a plain color rather than a checkerboard canvas representing transparency, use CTRL-Z to cancel the cut. Then, use CTRL-I to invert the selection again to get control of the blurred selection again, and copy or cut it using CTRL-X or CTRL-C.
Step 9: Create another image using CTRL-N, and ensure you have navigated to the advanced options and selected transparency as the fill-in color, and paste your selection there.
Step 10: You now have a perfect photo with full transparency, which is represented by a checkerboard canvas, except for the section of the video frames you would like to blur that should be pixelized.
Step 11: Use the Export option under the File menu to export the photo to your PC as a . PNG file. To save a picture with a transparency channel, you need to use the . PNG extension.
Step 12: Now return to OpenShot video editor and import the generated picture with a pixelized portion in the OpenShot video project. Next, add the picture as an overlay track. Make sure it’s above the video track.
Step 13: If the program asks you to import the photo as an image sequence, select the NO option because you need to import a still photo, and not a video sequence.
Step 14: The picture will be displayed before the video, blurring only the portion of the video where you modified the frame. The other parts of the video won’t be touched. You can make adjustments to ensure the picture track is only displayed at required moments. And that’s how to blur part of a video using OpenShot.
Conclusion
● Now that you know how to blur out part of a video, you can have fun and censor anything you want in your clips. Use Filmora to blur moving and still parts on your video.
Also read:
- New In 2024, Steps to Remove Background Noise From Video Sony Vegas
- New Adobe Premiere Pro Download and Use Guide for 2024
- Try These 10 Music Video Templates To Make Your Work Easy for 2024
- 6 Best Methods to Make a Video Longer
- New 2024 Approved Learn to Use Montage with These Movies
- Updated How to Crop a Video in Windows Media Player for 2024
- Updated 2024 Approved GIF to JPG Is as Simple as a Blink of an Eye
- Time Lapse Video Is Very Interesting and Creative, Which Usually Attracts More Attention. This Article Will Show You How to Make a Time Lapse Video with Adobe After Effects
- New Are You Finding It Difficult to Freeze-Frame in After Effects? Note that Freeze-Frame Takes only a Few Seconds, and, in This Tutorial, We Will Guide You on How to Create and Add Frame Hold in After Effects
- New 2024 Approved Best 5 Solutions on How to Add Emojis to iPhone
- Make A Countdown Video
- Updated 2024 Approved How to Add Customized Transitions to OBS
- 4 Methods to Resize a WebM File for 2024
- How to Create a Smooth Cut Transition Effect for 2024
- 2024 Approved An Introduction to LUTs | Their Overview and Benefits
- Updated How to Make Custom Lower Thirds with Filmora
- New Do You Want to Apply Professional-Looking Color Grading on Your iPhones Photos and Videos? You Can Use Different iPhone LUTs for Your Pictures and Videos
- 2024 Approved How To Make An Interactive Quiz Video? Step-by-Step Guide
- 2024 Approved Best Android Apps For Creating Slow Motion Videos
- New Advancements in Game Recording Software A Comprehensive Overview
- Updated In 2024, How to Rotate a Video in Windows 10
- Updated Level Up Videos By Applying Keyframe with Filmora
- New In 2024, 10 Creative AR Teaching Examples to Tell You What Is AR in Teaching
- New You Can Create a Photo Video Slideshow on YouTube. In Slideshow on YouTube You Can Add Photos and Videos, Effects and Transitions and Make a Quality Slideshow
- In 2024, The Craziest 10 AI Editors Youve Seen
- 2024 Approved How to Choose A Nice GoPro for Vlogging?
- Updated Enhance Your Video Color Accuracy with Video Scopes
- Updated Bored of Extraneous Software Downloads and Program Installations to Edit Your Videos? The Best Video Editing Online Utilities Are Here at Your Rescue
- Updated Follow the Trend of Making Slow-Motion Videos with a Camera Lenta CapCut Template. Learn Everything About CapCut and Find Its Alternatives in This Article
- New In 2024, Best 6 Online MP4 Croppers
- Updated 2 Solutions to Cut Video in VLC on Windows for 2024
- Updated In This Article, You Will Learn How to Make an Engaging and Creative YouTube Intro to Give a Hook and Recap Information to the Audience by Using Wondershare Filmora
- Updated Do You Know Everything Related to Wondershare Filmoras Video Editing Interface? If You Are Unaware of It, Read and Learn About Filmoras Interface
- New Do You Have a Loved Ones Birthday Fast Approaching, and Youre Wondering What to Do? A Birthday Photo Slideshow Is One Good Way to Celebrate the Person and Make Them Feel that They Are Loved
- Updated This Article Will Explore in Detail How You Can Use the Features Available in Wondershare Filmora to Export the Video by Changing the Resolution of the Footage
- 2024 Approved Do You Know Everything Related to Wondershare Filmoras Video Editing Interface? If You Are Unaware of It, Read and Learn About Filmoras Interface
- New In 2024, Add Emoji to Linkedin Post – 5 Tips You Would Like to Know
- In 2024, How to Create Your Own LOL Montage Video
- Updated 12 Top Stop Motion Studios Worth Recommending
- What To Do When Honor 100 Has Black Screen of Death? | Dr.fone
- In 2024, How to Unlock Realme C67 4G Phone Pattern Lock without Factory Reset
- In 2024, Catch or Beat Sleeping Snorlax on Pokemon Go For HTC U23 Pro | Dr.fone
- In 2024, How to Migrate Android Data From Samsung Galaxy M14 4G to New Android Phone? | Dr.fone
- Honor Play 40C Messages Recovery - Recover Deleted Messages from Honor Play 40C
- New Ultimate Guide How to Live Stream on Facebook?
- How to Change/Add Location Filters on Snapchat For your Apple iPhone 14 | Dr.fone
- A Detailed Guide on Faking Your Location in Mozilla Firefox On Motorola Edge 40 | Dr.fone
- In 2024, Apple ID is Greyed Out On Apple iPhone 14 Pro Max How to Bypass?
- In 2024, Why Apple Account Disabled From your iPhone 6 Plus? How to Fix
- In 2024, Top 7 Phone Number Locators To Track OnePlus 11 5G Location | Dr.fone
- How To Bypass the Required Apple Store Verification For Apple iPhone 11 Pro | Dr.fone
- In 2024, How Can We Unlock Our Poco X6 Pro Phone Screen?
- Network Locked SIM Card Inserted On Your Oppo Reno 8T Phone? Unlock It Now
- Unlock android phone if you don't have Tecno Pova 6 Pro 5G fingerprint
- Full Guide to Catch 100 IV Pokémon Using a Map On Vivo Y28 5G | Dr.fone
- New In 2024, What Is an AI Headshot Generator? | Wondershare Virbo Glossary
- How to Reset Nubia Z50S Pro without Losing Data | Dr.fone
- How To Change Xiaomi 14 Pro Lock Screen Clock in Seconds
- How to Transfer Text Messages from Xiaomi Redmi Note 13 Pro 5G to New Phone | Dr.fone
- In 2024, iSpoofer is not working On Oppo A2? Fixed | Dr.fone
- Three Ways to Sim Unlock Vivo Y77t
- How to turn off the screen lock on my Oppo A18
- 4 solution to get rid of pokemon fail to detect location On Oppo Reno 8T 5G | Dr.fone
- 4 Ways to Transfer Music from Oppo A58 4G to iPhone | Dr.fone
- Title: How to Make Glitch Effect with Filmora for 2024
- Author: Chloe
- Created at : 2024-05-20 03:38:11
- Updated at : 2024-05-21 03:38:11
- Link: https://ai-editing-video.techidaily.com/how-to-make-glitch-effect-with-filmora-for-2024/
- License: This work is licensed under CC BY-NC-SA 4.0.
