:max_bytes(150000):strip_icc():format(webp)/internet-archive-logo-5980e6f0845b340011748640.png)
How to Shoot Cinematic Footage From a Smartphone

How to Shoot Cinematic Footage From a Smartphone
Creating cinematic videos is easy if you have expensive equipment like a film set with high-quality cameras. But many of us can’t afford this, so read this article to get an alternative.
You can use smartphones to record cinematic shots if you don’t have expensive lenses. You’ll learn about filming and editing those shots into Wondershare Filmora to get professional results in the below lines.
But before we get into the filming process, having a general idea about the topic can help a lot. So first, let’s understand what cinematic videos are!
Part 1. What Is a Cinematic Video?
The world of cinema has developed and has high recording quality. A cinematic video is a video that is recorded to look more like a movie. These shots excel in all aspects of a video, such as Color, aspect ratio, and lighting techniques.
Most of the cinematic footage required unique cameras, i.e., IMAX cameras for movies. But these cameras are really costly and only suitable for large-scale production.
With the understanding of cinematic videos, you can now use alternative ways to record a cinematic video without an expensive camera. You can also record a cinematic video using only a smartphone with a few requirements.
Scroll below to learn more about what you need to record a cinematic video!
Part 2. Requirements to Record a Cinematic Video
To record a professional video with cinematic effects, you must have the following equipment in your studio:
1. A Gimbal Stabilizer
When you are recording footage from your smartphone, a significant issue that can disturb your video quality is the shaking of your phone. You may have to record while walking, or it could even be a static shot.
If the phone is held in your hands without support, you will end up with shaky footage. This will eventually ruin your video.
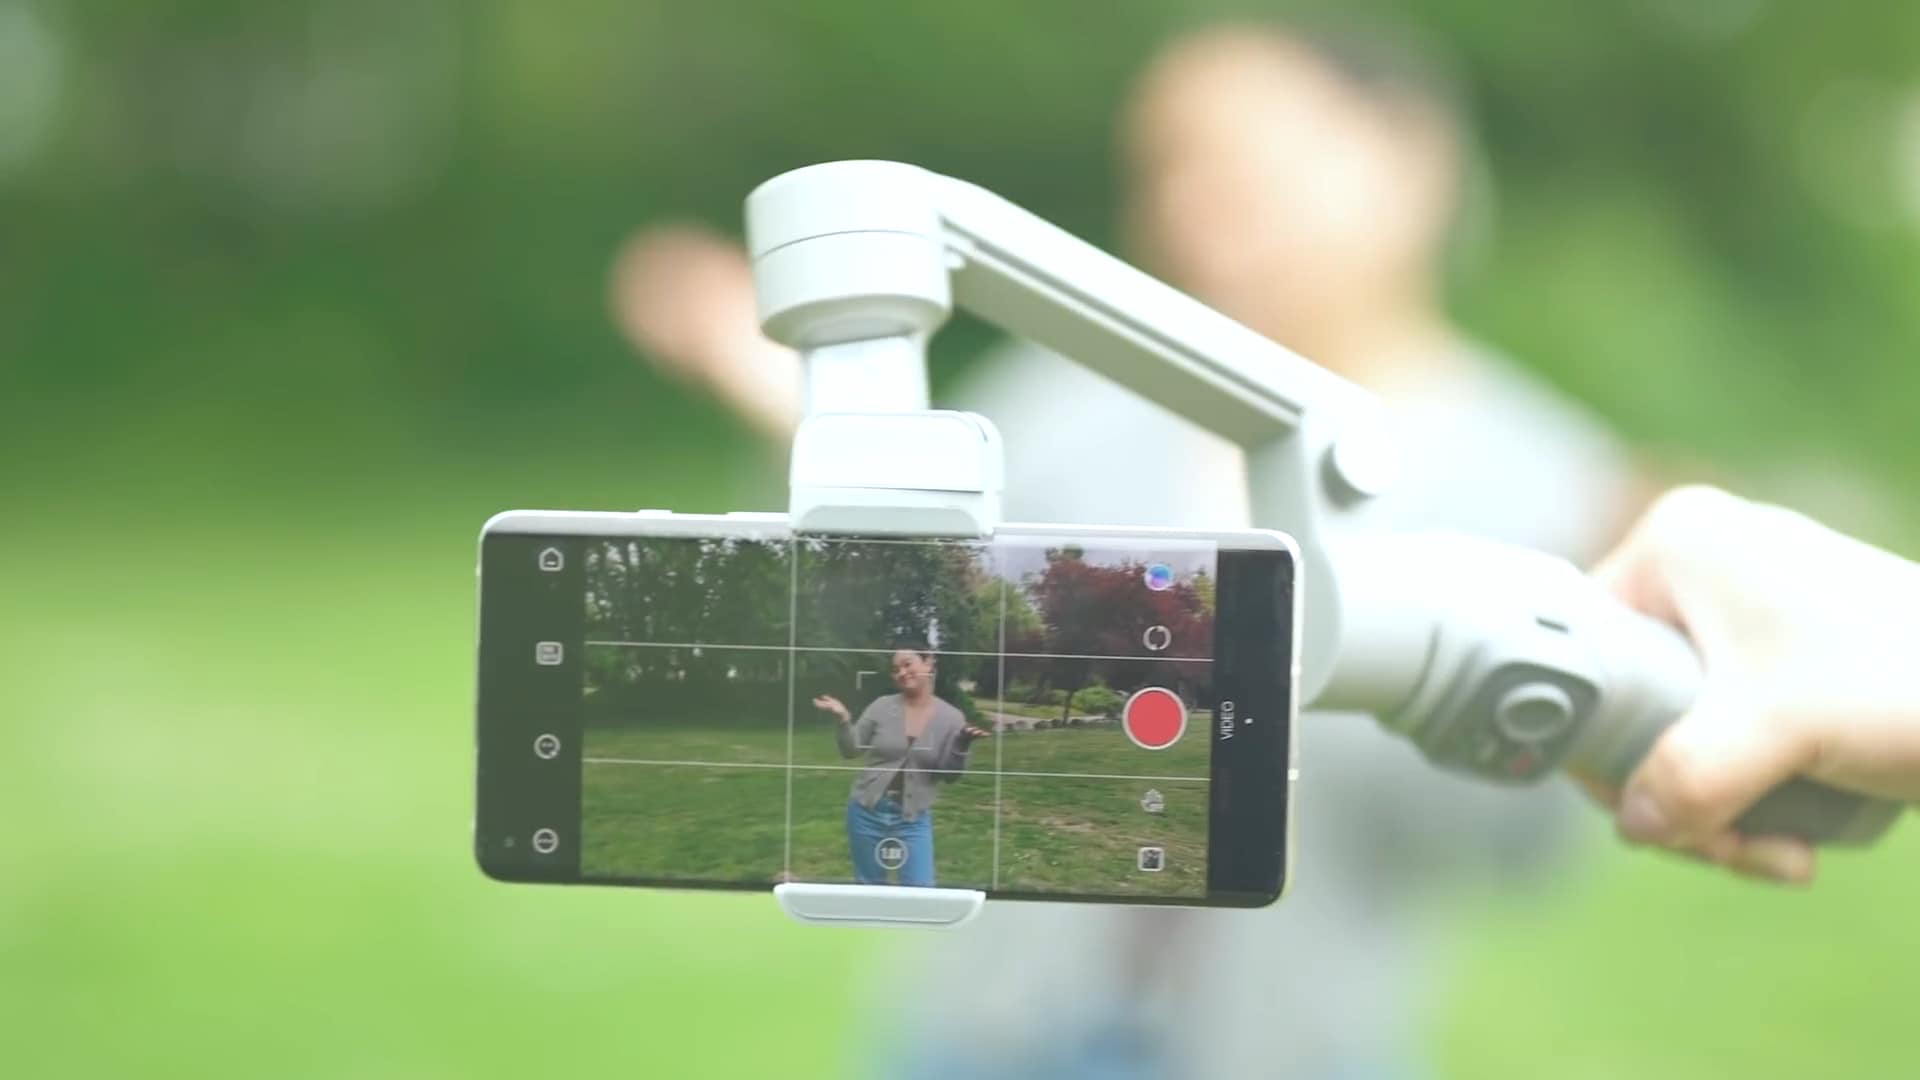
A gimbal stabilizer allows you to stabilize your footage with a handheld stand. Many gimbal stabilizers are available in the market, but for reference, we would be looking at the Q3 Gimbal from Zhiyun.

You can also connect the Gimbal from its app. Scroll below to learn more about the app!
Zhiyun Cami App
Zhiyun Q3 stabilizer also connects with the Zhiyun cami app. This app will allow users to access the filming features more intuitively and comprehensively. You can connect your Gimbal with the app via Bluetooth.

Zhiyun Stabilizer Shooting Modes
There are many modes on different Gimbals, but the Locking and the POV mode are the most useful, which are illustrated as shown below:
- The Locking mode: This mode allows you to lock all three motors of the Gimbal and allows your phone to remain fixed at a certain angle. Due to this, you can shoot your footage from multiple positions while keeping the camera fixed at one angle.
- The POV mode will allow you to unlock all the axes. This mode will also adjust in all three axes when moving around. This feature gives you more freedom of movement.

Extra Features of Zhiyun Q3 Stabilizer
When you are shooting a video using the Gimbal stabilizer, you come across a point where you want extra light. Thus, the Q3 stabilizer comes with a built-in flashlight.
This flashlight will not only light up those small corners of a dark room but also make a huge difference. If you are recording to focus on an object, such as a product, this flashlight will greatly help you.

You can also turn the flashlight towards yourself if you are recording a Vlog or taking a selfie. The light’s temperature is 4300K, giving a relatively warm light on the subject.

2. A Good Smartphone
Most smartphones these days are equipped with cameras with varying powers of recording. Some smartphone cameras focus on Mega Pixels, while others focus on the capture sensor. You need a smartphone camera that balances out all these qualities to record cinematic footage.
The recently released iPhone 14 pro camera is an excellent example of a good quality camera you can use to record cinematic videos.
3. Video Editing Software
There is no better software in the video editing field than the infamous Wondershare Filmora. It allows you to edit high-quality videos with creative features.
Wondershare Filmora allows access to the range of effects and filters you can apply to your videos to give them a more cinematic look. It also allows you to access the vast library of audio to utilize in your videos. Moreover, its engaging UI allows beginners to access to features of Wondershare Filmora easily.

Now that we have learned about the requirements for recording a cinematic video. Let’s look at the different cinematic movements you can use to record from your Smartphone.
Part 3. Top 3 Cinematic Movements to Record From a Smartphone
You may have watched many movies or TV shows, but the general audience usually ignores the effort put into a shot. Only an experienced videographer can detect the difference between a great cinematic shot and a poor one.
Of the great cinematic shots, some are described in this article. These shots can easily record by using a smartphone. The cinematic movements explained below are the best choice. Here we will look at the three camera movements you can record on your smartphone.
- The Reveal Movement.
- The 180° Presentation Movement.
- The Following Movement.
First, let’s take a look at the Reveal movement.
1. The Reveal Movement
This is the most popular movement used in cinematic shooting from your smartphone. With a Gimbal, the Reveal movement is one of the easiest shots to master. But for this, you will need to learn it first.
The Reveal Movement is a shot taken with an object as a perspective. The shot starts from a static object in the foreground. It could be focused at first, but as the camera moves, the focus will be diverted to reveal our target object. This is known as the Reveal Movement.
To shoot the reveal movement, follow the steps mentioned as shown:
- First, ensure your phone is connected properly to the Gimbal.
- Align your Smartphone camera behind the static object.
- Guide the target individual to be ready as you move the camera to reveal them.
- Slowly move the camera, focusing on the static object to change its focus on your main object.

![]()
Note: Make sure to practice and experiment a lot with the steps. Try to be more creative and innovative. With every video you shoot, you gain experience with the errors.
Another thing to remember is that when you are shooting a Reveal movement using the Gimbal, it is best to put it in Locking mode. This mode works the best as it allows the camera to stay fixed in one frame making your footage seem balanced and of quality.

2. The 180° Presentation Movement
The next movement we will be looking at will be the 180° presentation movement. The 180° presentation will move in a half-circle fashion. It will move from one side of the subject to the other side. This will allow you to cover the overall subject’s view.
Apart from that, it will allow you to capture the background with much clarity and detail to maintain a general sense of the ambiance. Making a 180° presentation shot is fairly easy to do so. With its multiple uses, you can use this method in any scenario.
As we will move from one side to the other in a circular manner, we need to fix the frame of our video to move along. Using the POV mode of the Zhiyun Gimbal stabilizer will be the best option in this sense.

Setting the Gimbal in POV mode will allow you to shoot the video from more than one angle while keeping the video balanced. Follow the steps mentioned to shoot a 180° presentation video:
- First, start recording from one side of the subject while keeping the Gimbal in the POV mode.
- Slowly start moving in front of the subject in an arch.
- When you face the subject, do not stop and keep moving to complete the arch.
- When you reach the end of the arch, close the video.

By following the steps mentioned, you can create the 180° presentation movement using a smartphone. Now, move forward to learn about “The Following movement.”
3. The Following Movement
You can use “The following movement” when recording a scene in which the object moves in random directions. Or when there is a high degree of movement of your object in the video, and you want to fix the focus of your footage to that object.
The Following movement is not technically a movement, but a setting that will allow you to record the footage while keeping the object and the video frame focused. In this type of footage, we will use the Zhiyun Cami app to focus on our target object.

To focus on our subject in the video by Cami app, follow the steps mentioned below:
- When recording the video, make sure to put the Gimbal on a tripod stand.
- After that, open the Cami app and draw a square over the object you want to keep in focus.
- Now, the camera will shift its angle to its perspective wherever the object goes.

This is how you will create the following movement.
Part 4. Edit the Clips with Wondershare Filmora
Now that we have recorded our footage, it is time to arrange it and apply the finishing touches. We are going to use Wondershare Filmora for editing the recorded footage.
Free Download For Win 7 or later(64-bit)
Free Download For macOS 10.14 or later
Follow the steps mentioned below to edit on Wondershare Filmora!
Step1 Download Wondershare Filmora
To download Wondershare Filmora, follow the steps outlined below:
- First, download the Wondershare Filmora.
- When the download is finished, click on the setup.
- The Wondershare Filmora installer will begin to load.
- Then you will have installed Wondershare Filmora on your PC or Mac.
If you want to purchase the premium plan’s features, check out the Wondershare Filmora Premium plans.
Step2 Add clips to the timeline
After downloading the Wondershare Filmora app, we must create a workplace. To do so, follow the steps mentioned:
- First of all, click on the import icon in the upper left corner of the home interface of Wondershare Filmora. This will open up your PC library.
- Then Import your footage in the import window.
- Click and drag to drop the footage in the Timeline.

Step3 Trim the Video Clips
After you have added the clips to the timeline, you may have some extra footage you don’t want. Go through the clips you added and trim them according to your wish.
Step4 Add The Effects
After you have trimmed the clips now, you will have to add the finishing touches. To perform this, follow the below instructions:
- Go to the effects icon on the upper bar above the import window.
- Here, you can see the range of effects Wondershare Filmora Provides. Select the one you want for your video.
- You can also search for effects from the search bar.
- Once you have found the effect you want, download it if not been downloaded before.
- Click and drag it to drop below your clips to add the effect.
- Double-click on the effect that you added to adjust its settings.
- Here, you can adjust the opacity to your liking.

Now that we have added the Effects, it is time to add the Overlays!
Step5 Add Overlays
You can also add overlays on your videos to make them pop up even more. You can add Overlays by the following steps:
- In the effects icon on the bar above the import window, you can see the multiple effects of Wondershare Filmora.
- In the left column, you can also see the Filters and Overlays.
- Go to the Overlay
- Select the Overlay that you want.
- Then click and drag it above your video.
- You can also add a border to your video by searching “Border” in the search bar and dragging it below your clips.

Step6 Add Some Music
To finish off your editing, you can also add audio music from the Wondershare Filmora Audio library:
- Before adding the audio music, make sure to lower the volume of your video clips.
- You can do so by dragging below the audio tab on your video clips in the timeline.
- Go to the Audio icon on the bar above the import window.
- Here, you can see the multiple audio available.
- Browse through the library till you find suitable audio.
- Download it and drag it below on the timeline.

Now play the Video from the beginning to see the final looks.

Congratulations! You have now successfully created a cinematic video using Wondershare Filmora.
Conclusion
Using expensive equipment to record a cinematic video can be a reliable step. But it is not in everyone’s budget. You can also use a smartphone to record a cinematic video by the steps mentioned above and give it a professional look by editing on Wondershare Filmora.
Although it might seem strange initially, but the time is close when everyone will create cinematic videos from their smartphones.
Another thing to remember is that when you are shooting a Reveal movement using the Gimbal, it is best to put it in Locking mode. This mode works the best as it allows the camera to stay fixed in one frame making your footage seem balanced and of quality.

2. The 180° Presentation Movement
The next movement we will be looking at will be the 180° presentation movement. The 180° presentation will move in a half-circle fashion. It will move from one side of the subject to the other side. This will allow you to cover the overall subject’s view.
Apart from that, it will allow you to capture the background with much clarity and detail to maintain a general sense of the ambiance. Making a 180° presentation shot is fairly easy to do so. With its multiple uses, you can use this method in any scenario.
As we will move from one side to the other in a circular manner, we need to fix the frame of our video to move along. Using the POV mode of the Zhiyun Gimbal stabilizer will be the best option in this sense.

Setting the Gimbal in POV mode will allow you to shoot the video from more than one angle while keeping the video balanced. Follow the steps mentioned to shoot a 180° presentation video:
- First, start recording from one side of the subject while keeping the Gimbal in the POV mode.
- Slowly start moving in front of the subject in an arch.
- When you face the subject, do not stop and keep moving to complete the arch.
- When you reach the end of the arch, close the video.

By following the steps mentioned, you can create the 180° presentation movement using a smartphone. Now, move forward to learn about “The Following movement.”
3. The Following Movement
You can use “The following movement” when recording a scene in which the object moves in random directions. Or when there is a high degree of movement of your object in the video, and you want to fix the focus of your footage to that object.
The Following movement is not technically a movement, but a setting that will allow you to record the footage while keeping the object and the video frame focused. In this type of footage, we will use the Zhiyun Cami app to focus on our target object.

To focus on our subject in the video by Cami app, follow the steps mentioned below:
- When recording the video, make sure to put the Gimbal on a tripod stand.
- After that, open the Cami app and draw a square over the object you want to keep in focus.
- Now, the camera will shift its angle to its perspective wherever the object goes.

This is how you will create the following movement.
Part 4. Edit the Clips with Wondershare Filmora
Now that we have recorded our footage, it is time to arrange it and apply the finishing touches. We are going to use Wondershare Filmora for editing the recorded footage.
Free Download For Win 7 or later(64-bit)
Free Download For macOS 10.14 or later
Follow the steps mentioned below to edit on Wondershare Filmora!
Step1 Download Wondershare Filmora
To download Wondershare Filmora, follow the steps outlined below:
- First, download the Wondershare Filmora.
- When the download is finished, click on the setup.
- The Wondershare Filmora installer will begin to load.
- Then you will have installed Wondershare Filmora on your PC or Mac.
If you want to purchase the premium plan’s features, check out the Wondershare Filmora Premium plans.
Step2 Add clips to the timeline
After downloading the Wondershare Filmora app, we must create a workplace. To do so, follow the steps mentioned:
- First of all, click on the import icon in the upper left corner of the home interface of Wondershare Filmora. This will open up your PC library.
- Then Import your footage in the import window.
- Click and drag to drop the footage in the Timeline.

Step3 Trim the Video Clips
After you have added the clips to the timeline, you may have some extra footage you don’t want. Go through the clips you added and trim them according to your wish.
Step4 Add The Effects
After you have trimmed the clips now, you will have to add the finishing touches. To perform this, follow the below instructions:
- Go to the effects icon on the upper bar above the import window.
- Here, you can see the range of effects Wondershare Filmora Provides. Select the one you want for your video.
- You can also search for effects from the search bar.
- Once you have found the effect you want, download it if not been downloaded before.
- Click and drag it to drop below your clips to add the effect.
- Double-click on the effect that you added to adjust its settings.
- Here, you can adjust the opacity to your liking.

Now that we have added the Effects, it is time to add the Overlays!
Step5 Add Overlays
You can also add overlays on your videos to make them pop up even more. You can add Overlays by the following steps:
- In the effects icon on the bar above the import window, you can see the multiple effects of Wondershare Filmora.
- In the left column, you can also see the Filters and Overlays.
- Go to the Overlay
- Select the Overlay that you want.
- Then click and drag it above your video.
- You can also add a border to your video by searching “Border” in the search bar and dragging it below your clips.

Step6 Add Some Music
To finish off your editing, you can also add audio music from the Wondershare Filmora Audio library:
- Before adding the audio music, make sure to lower the volume of your video clips.
- You can do so by dragging below the audio tab on your video clips in the timeline.
- Go to the Audio icon on the bar above the import window.
- Here, you can see the multiple audio available.
- Browse through the library till you find suitable audio.
- Download it and drag it below on the timeline.

Now play the Video from the beginning to see the final looks.

Congratulations! You have now successfully created a cinematic video using Wondershare Filmora.
Conclusion
Using expensive equipment to record a cinematic video can be a reliable step. But it is not in everyone’s budget. You can also use a smartphone to record a cinematic video by the steps mentioned above and give it a professional look by editing on Wondershare Filmora.
Although it might seem strange initially, but the time is close when everyone will create cinematic videos from their smartphones.
Want Make a Slide Show Video? Here’s How
Want Make a Slide Show Video Here’s How
An easy yet powerful editor
Numerous effects to choose from
Detailed tutorials provided by the official channel
Dear readers you don’t have to worry a bit, in this article we bring you the best slideshow video maker and easy ways using which you can custom the templates for your presentation in your way.
In this article
01 8 Best Slideshow Video Templates
02 [10 Best Video Slideshow Maker](#Part 2)
03 [5 Easy Steps to Make a Slide Show Video](#Part 3)
04 [How to Custom Templates for Google Slides Presentation](#Part 4)
Part 1 Best Slideshow Video Templates
A slideshow video could be an effective way of presenting your point to your audience. This becomes super easy when you use a good template to create your slide show video. Here are 8 best slideshow video templets which you can give a try
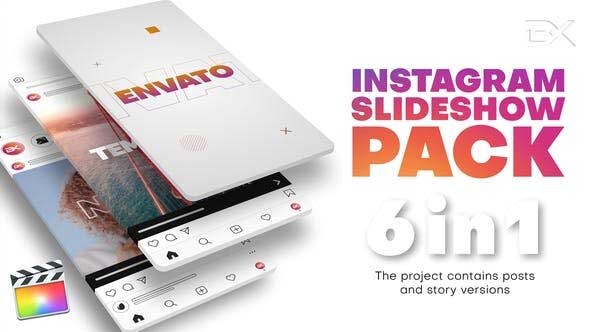
01Instagram Slideshow
This slide show video template is best for creating videos for Instagram and other social media platforms.
02Clean Slideshow Template
This one is suited to create video slide show for family purposes. This template could also be engaged in a clean slideshow presentation for your office.

03Parallax Scrolling Slideshow Template
This is one of the most video templates which you can use for your slide show video. This template has various after-effects which can take your presentations to a different level.
04Modern Tie Slideshow Template
If you are in a business or corporate job then give this slideshow video template a try. With a unique, tiled look and a 3D tile drop-down effect, your videos will impress everyone.
05Minimal Slideshow template
Minimal slide template is best for business presentations or product promotion. Here you can use creative text images and graphics to promote your product.

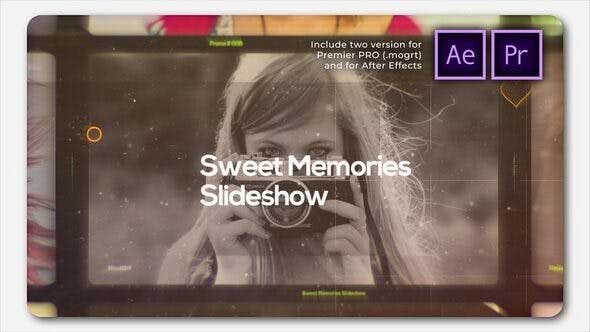
06Sweet Memories Cinematic Slideshow
If you want the best template for presenting your memories, marriages, anniversaries, emotions etc then Sweet Memories Cinematic Slideshow is the one you need.
07Motiongray Slideshow Templates
If you want to turn your adventure images and videos into an impressive slide show video then this is a must try template for you.

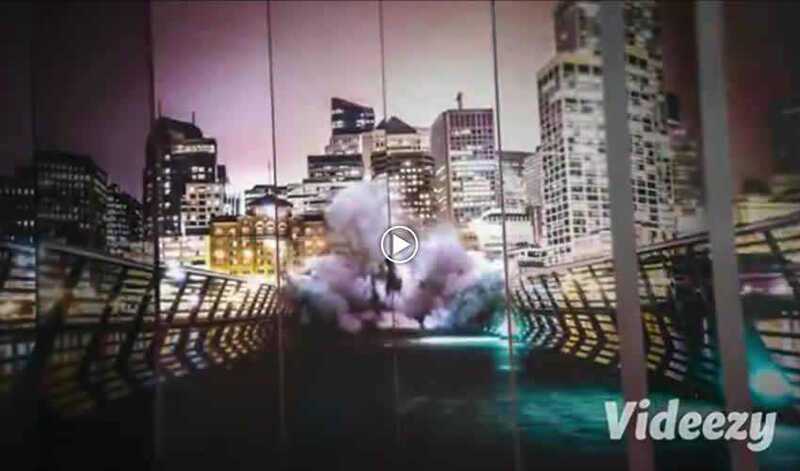
08Stylish Spinning Columns Slideshow Template
This template is best suited for high-end business projects. Here you will have image placeholders paired with a modern spinning column transition effect to make the slideshow video outstanding.
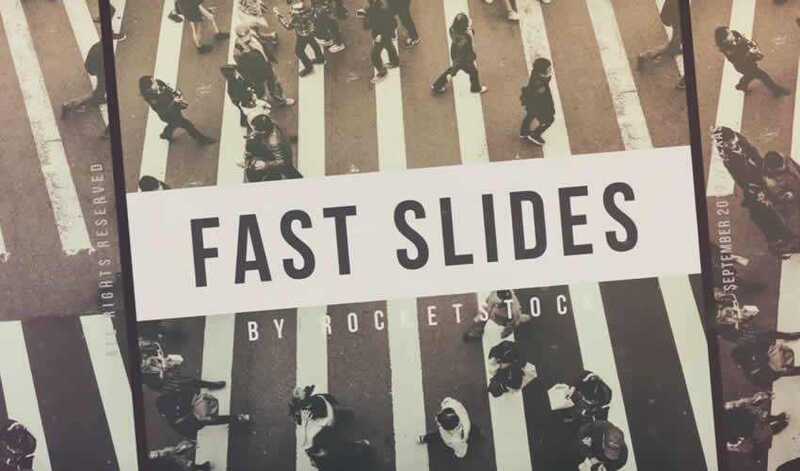
09Fast Slide Slideshow Video Template
If you want to create a high paced slide video show with various concepts explained in it then go for the Fast Slide Slideshow Video Template.
10Creative Slideshow Template
For the ones who want dynamic, fast-paced animation style and bold typography in their slideshow video this is the best-suited one for them.

Part 2 10 Best Video Slideshow Maker
After knowing the best templates for your slideshow video you, may be curious to know about the slideshow video maker. Here, after a lot of research, we have come up with the list of 10 best slideshow video maker which can make your professional life easy. Check the list
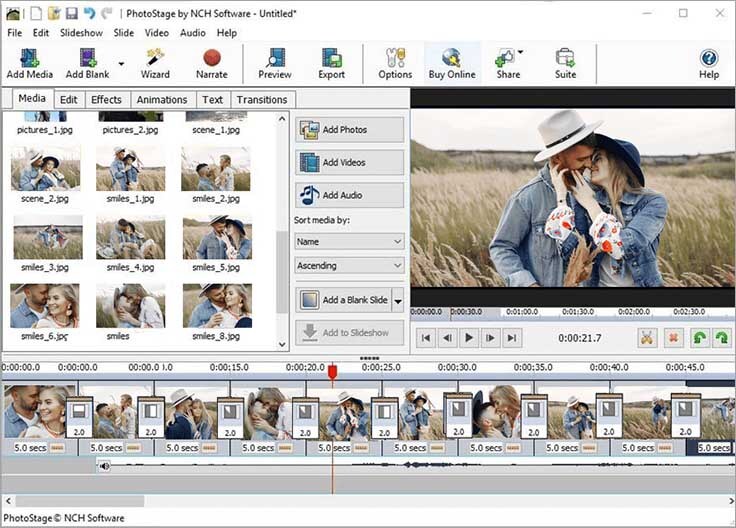
01PhotoStage
PhotoStage by NHC Softwares is one the best online software to create video slide shows online. This tool is specially very helpful in creating personal and commercial presentations.
Key Features - Key features of PhotoStage includes user oriented interface, animations, and music tracks (300 +). It has inbuilt Audio editing tools and a built-in music collection. If you use this software in a paid version then you can unlock its thousands of animation effects and transitions. You can also export your slide show between PC, mobile, Web etc.
Price - PhotoStage PRO $70.
Rating - 4 stars
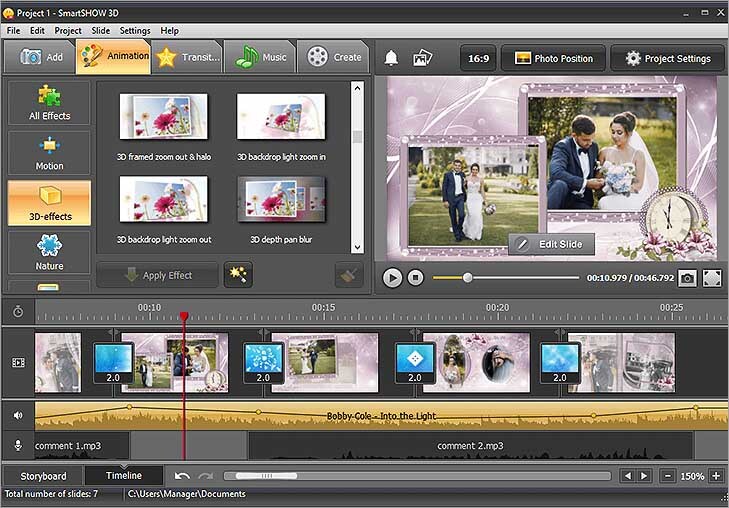
02SmartShow 3D
The next slideshow video maker to feature on our list is SmartShow 3D.
This software is known for its very easy to use interface with power-packed and loaded features.
Key Features - It has more than 200 templates for use of every kind. This software enables you to use 300+ transitions, special effects, 3D collages, and nature effects with animations and graphics. You can add music to your slideshow video from more than 200 music tracks with precise volume adjustment.
Price - Standard version cost $ 39.90 and the Deluxe version costs $ 59.50 (10 days free trial)
Rating - 5 stars
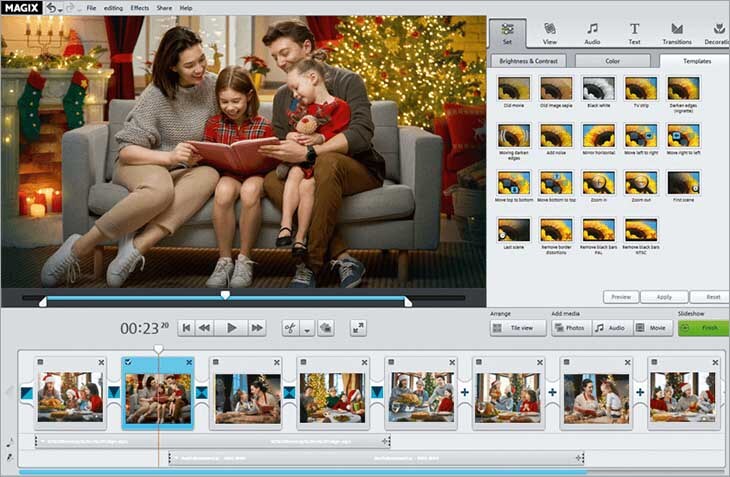
03Magix PhotoStory
If you have a bit of experience in making slideshows then you can take your slideshow making experience to another level using this software. A custom animation module and an integrated photo editing tool of Magix PhotoStory make it stand out in our list.
Key Features - 300+ library of effects coupled with a huge collection of music tracks. 100 + video templates and graphics. This software has Built-in filters for photo enhancement with the picture-in-picture option.
Price - $ 49.99 ( 30 days free trial )
Rating - 4.5 stars
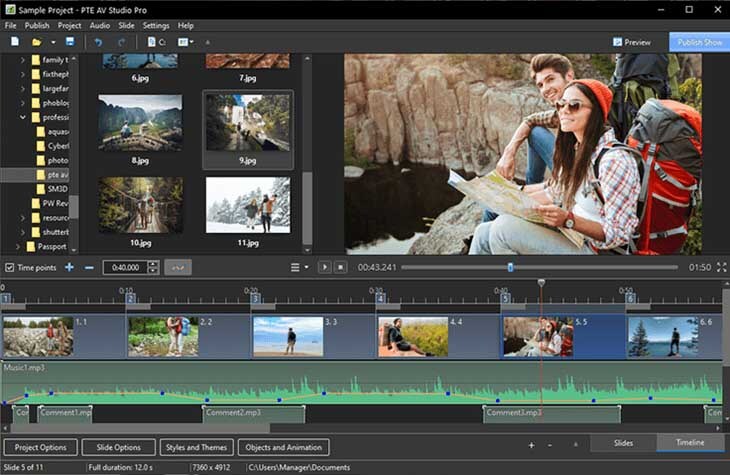
04PTE AV Studio
The best suited online tool to make a slide show video is PTE AV Studio. If you want to create smooth and fluid visual slideshows then try this software once. Here you can combine pictures, videos, and audio files into sleek slideshows and impress your boss and colleagues.
Key Features - PTE AV studio supports 100+ effects and templates. It has the best video, photo, and multitrack sound editing tools among competitors. You can create custom animations and graphics if you want. With a huge collection of masks, filters, and text styles you can create high resolution slideshow videos.
Price - Standard Version costs $ 69 while and Pro version costs $ 139 (30 days free trial)
Rating - 4 stars
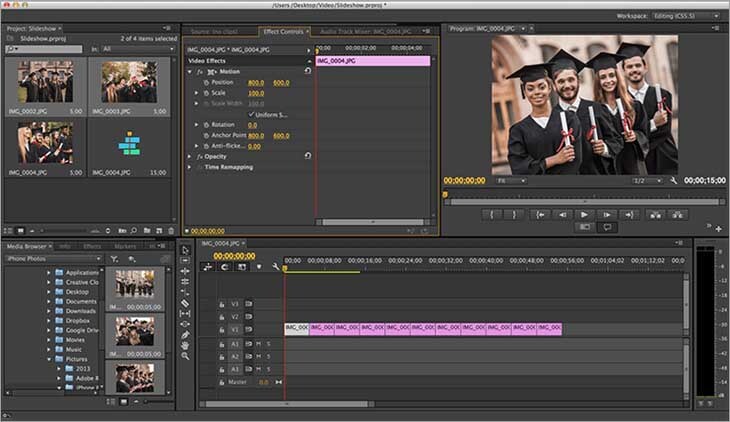
05Adobe Premiere Pro
If you are a regular slideshow user then no doubt you would know about Adobe Premiere Pro. Those who want easy to navigate the software with hundreds of features then try this one. The only draw [back of this software is that it has no inbuilt templates but don’t worry you can download thousands of templates from the internet for free.
Key Features - Animations could be added to slides using keyframes. Efficient video and audio editing and creating tool. Animations and graphics add a cherry to the cake. Advanced photo enhancement and filters to make your photos and slideshows stand out.
Price - $ 239.88 a year (30 days free trial)
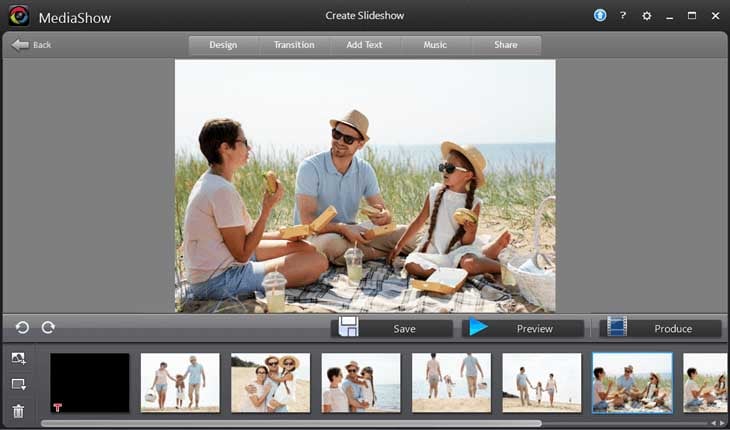
06CyberLink MediaShow
Cyberlink MediaShow is one of the earliest software that came in the field of slideshow video creation. This software enables you to create awesome slideshows, movies, and screensavers. Cyberlink MediaShow has enough features to make eye-catching videos and still it is one of the easiest ones to use. If you aim to create easily simplistic videos then go for this software.
Key Features - Descent collection of transitions with a built-in photo editing module. It is equipped with face recognition and tagging feature. You can integrate social media platforms like Facebook and share to them directly from the software.
Price - $ 49.99 ( 30 days free trial )
Rating - 3.5 stars
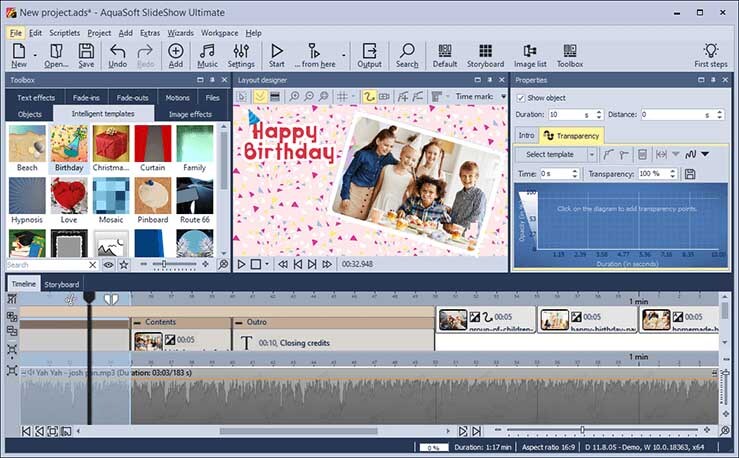
07AquaSoft Slideshow
For users who want to create colourful and dynamic family-themed slide show videos then AquaSoft Slideshow is the software to try. After a review from thousands of users, this software has made a place in our featured list. The user-friendly interface with dozens of eye-catching effects and animated text make it fun to use. It allows you to create colourful, text-filled videos and so on.
Key Features - It is powered packed with more than 200 effects and transitions and hundreds of text options. It supports almost all the formats even the older ones like CDs and DVDs. Smooth and advanced editing tools for a better experience.
Price - Premium costs $ 57.00 while Ultimate costs $ 97.00 ( 30 days free trial version)
Rating - 4 stars
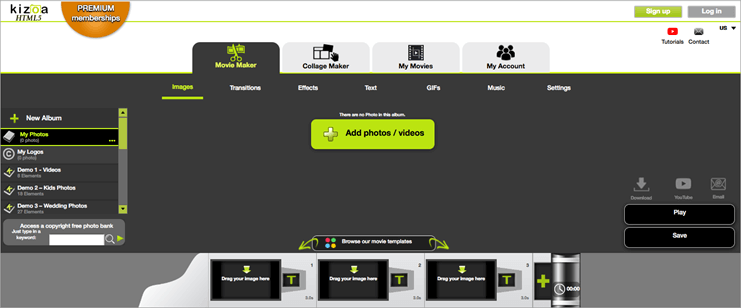
08Kizoa
This software helps you to create slide show videos which can be played on any screen. This is basically an online video creating and editing tool but it provides formats for creating slideshows too. You can use this tool on whatever platform you have like a tablet, TV, smartphone, computer screen etc.
Key Features - Intelligent cropping tool of Kizoa helps you to create and edit world-class finest images for your slideshow video. The created slideshow could be downloaded in various formats like MP4, AVI, MOV, etc. You can directly share the video to online platforms.
Price - Starter $ 29.99, Creator $ 49.99 , Professional $ 99.99, and Business $ 299.99
Rating - 4 stars
Part 3 5 Easy Steps to Make a Slide Show Video
Guys, now you know the best templates and best slideshow video makers but now the question comes “how to make a slideshow video?”. If you are confused and don’t have any clue about making a slideshow video then just get your google slides and follow the steps explained below.
Step 1: Get Free Screen Recorder
Firstly you have to start with launching Free Screen Recorder. You can use any screen recorder of your choice. Create your account on the screen recorder and get started.
Step 2. Record Your Google Slides
Noe on the screen recorder “Drag and drop” the sides of this box that appears on your screen to fit your slides into it. Select a suitable size for your video ( preferably 720 p).
Now on the left corner of the screen, you will see various controls using them you can perform various functions like start and stop recording, recording to webcam, selecting the size of the video, add audio and narration.
After performing all the functions click on “Record” to record your slides into video.
Step 3. Finishing of Recording
If you are satisfied with the video then click on the blue button to stop recording, and select “done” to save your video. However, if you don’t like it you can restart the process anytime.
Step 4. Editing of the Video
Once you have completed the recording of the video you can edit it according to your requirements. You can add or delete overlays, video sounds, narrations, graphics, green screen etc.
Step 5. Publish and Share your Slideshow video
After completing the editing and creating work click on “Publish”. You can save and publish your video directly on a YouTube channel, or Google Drive folder, or save your video as a file. And you can share it on any social media platform.
Part 4 How to Custom Templates for Google Slides Presentation
Just imagine, how easy would it have been if you could create the templates for your slide show videos. This would have made your professional life so easy. If you too are looking for such an online tool which provides you with the feature for creating custom templates for your slideshow video then you should try Wondershare’s Wondershare Filmora Video Editor Video Editor. Don’t get confused with the name it’s a video editor but has awesome features for creating custom slideshow videos. Following are some of the highlighting features of Filmora Video Editor.
Easy to use for beginners.
User-friendly interface and bunches of editing tools.
Library (royalty-free) containing hundreds of audio options.
Hundreds of templates, transitions, and filters to make your video eye-catching.
Here is a brief tutorial to use Wondershare Filmora Video Editor to create custom templates for your slideshow video.
For Win 7 or later (64-bit)
For macOS 10.12 or later
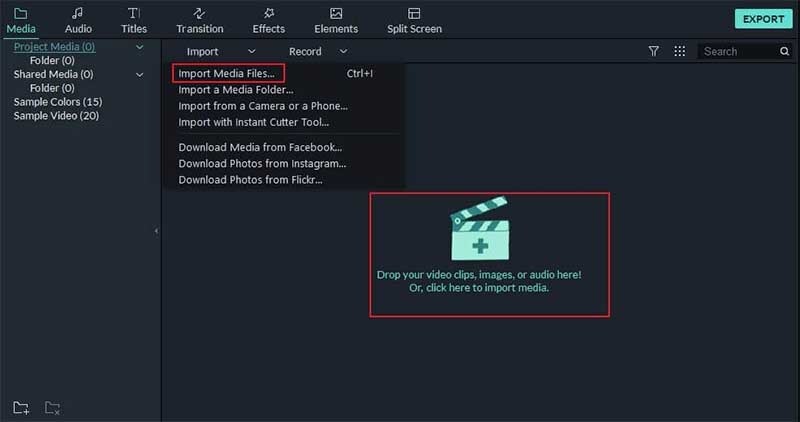
Step 1. Adding Photos and Videos
Open Filmora and click on the “Import menu”. Here select the photos and videos you want to use and click on “OK” to begin the importing.
Step 2. Positioning the Media Files on Timeline
Click on “File menu” > “Preferences option” > “Editing tab” > “Photo Placement drop-down menu”. Here you can perform various functions like zooming of images, setting the duration of images, transitions and effects, crop and fitting.
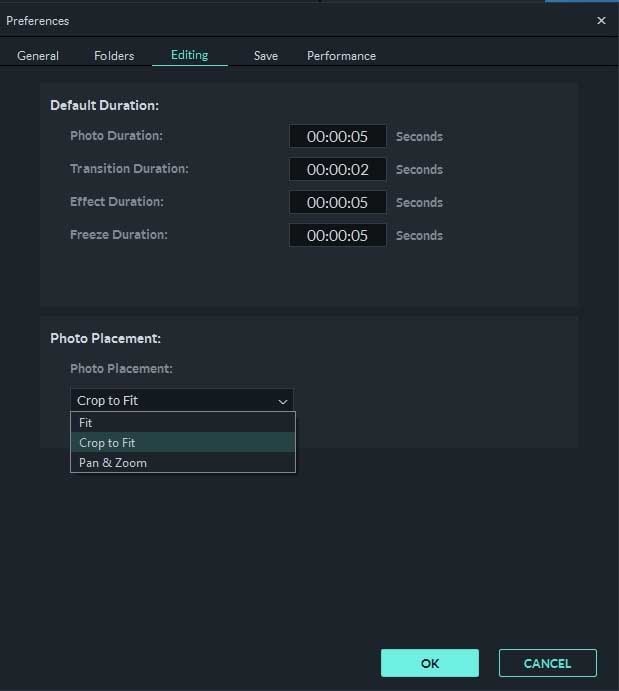
Now if you want to add more images and videos repeat steps 1 and 2.
Step 3. Use the transitions
Use transitions for smooth transitioning from one slide to another. Click on “Transition Setting Window” and set the duration for the transition.
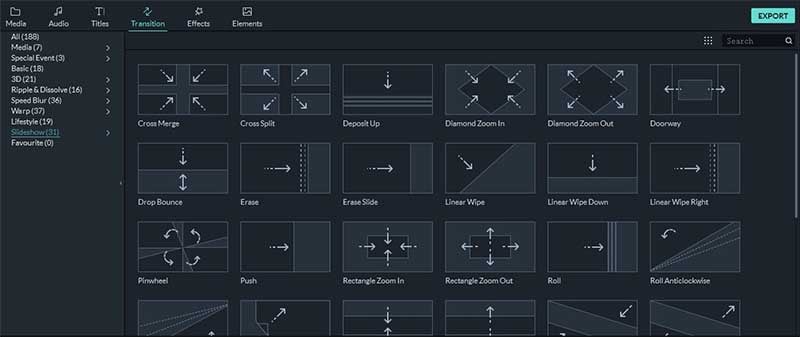
Step 4. Apply Filters and Overlays
Go to “ Effect Tab” and select suitable filters and overlays for your video.
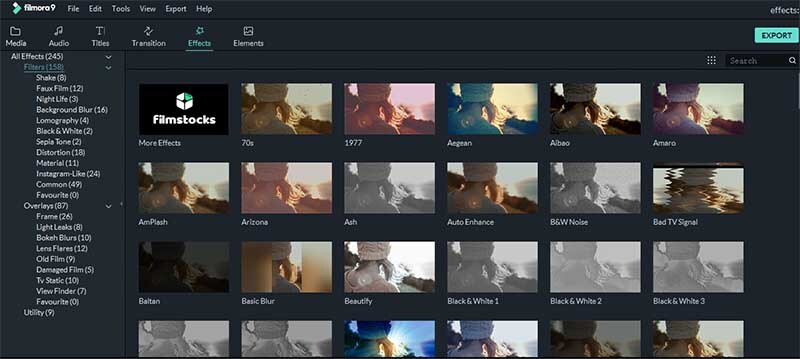
Step 5. Add Motion Graphics Element (Optional Step)
If you wish you can create motion graphics elements for your video. Click on the “ Elements tab” and select the best suited for you.
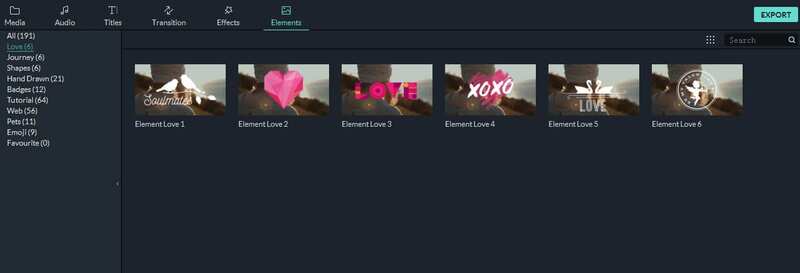
Step 6. Record Voiceover and create a Soundtrack
Go to “Media tab” > “ Record drop-down “ > “ Record Voiceover feature” to record and create soundtracks and voiceovers.
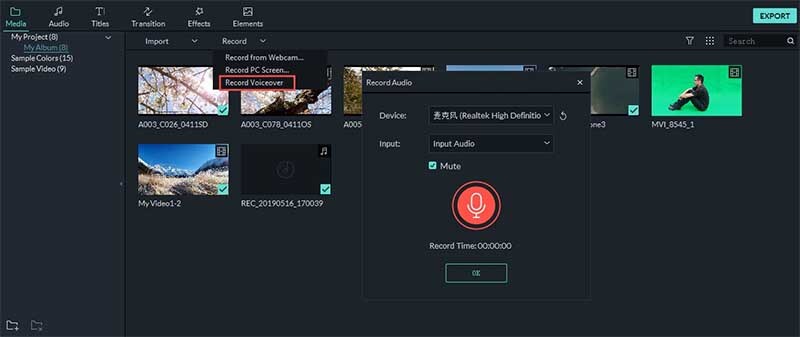
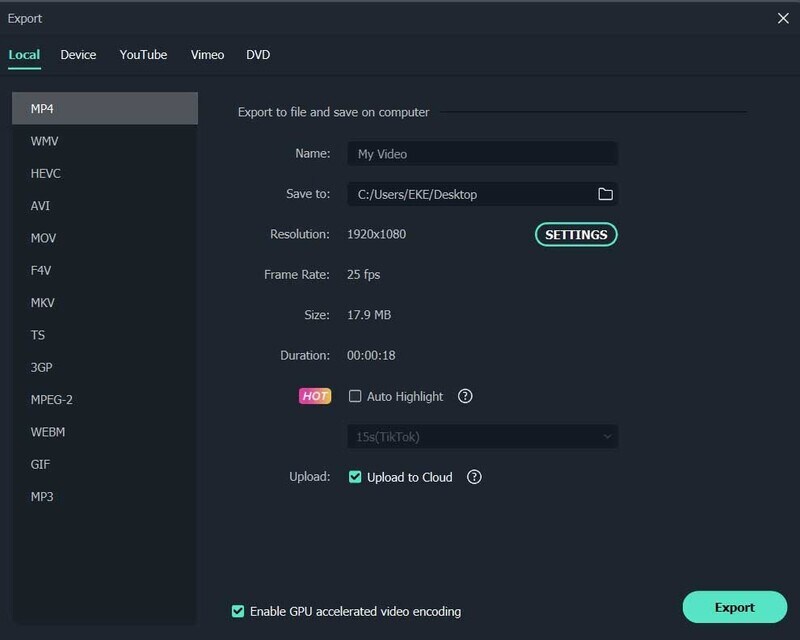
Step 7. Exporting the Slideshow Video
After making all the adjustments in the video click on the “Export” and wait for the Export window to appear on the screen. Now here you can select the output format of the file and the location for exporting your slideshow video.
● Ending Thoughts →
● Dear readers, now it’s time, to sum up this article. We hope our efforts have made things simple for you. We have tried to bring you the best online templates available online.
● You can now read our article and learn about the best slideshow video makers available online. You can use any one of them as per your need.
● If you want to create custom templates for your slideshow video, then we recommend to try Wondershare Filmora Video Editor for easy and effective custom template creation.
Dear readers you don’t have to worry a bit, in this article we bring you the best slideshow video maker and easy ways using which you can custom the templates for your presentation in your way.
In this article
01 8 Best Slideshow Video Templates
02 [10 Best Video Slideshow Maker](#Part 2)
03 [5 Easy Steps to Make a Slide Show Video](#Part 3)
04 [How to Custom Templates for Google Slides Presentation](#Part 4)
Part 1 Best Slideshow Video Templates
A slideshow video could be an effective way of presenting your point to your audience. This becomes super easy when you use a good template to create your slide show video. Here are 8 best slideshow video templets which you can give a try
01Instagram Slideshow
This slide show video template is best for creating videos for Instagram and other social media platforms.

02Clean Slideshow Template
This one is suited to create video slide show for family purposes. This template could also be engaged in a clean slideshow presentation for your office.

03Parallax Scrolling Slideshow Template
This is one of the most video templates which you can use for your slide show video. This template has various after-effects which can take your presentations to a different level.

04Modern Tie Slideshow Template
If you are in a business or corporate job then give this slideshow video template a try. With a unique, tiled look and a 3D tile drop-down effect, your videos will impress everyone.

05Minimal Slideshow template
Minimal slide template is best for business presentations or product promotion. Here you can use creative text images and graphics to promote your product.

06Sweet Memories Cinematic Slideshow
If you want the best template for presenting your memories, marriages, anniversaries, emotions etc then Sweet Memories Cinematic Slideshow is the one you need.

07Motiongray Slideshow Templates
If you want to turn your adventure images and videos into an impressive slide show video then this is a must try template for you.

08Stylish Spinning Columns Slideshow Template
This template is best suited for high-end business projects. Here you will have image placeholders paired with a modern spinning column transition effect to make the slideshow video outstanding.

09Fast Slide Slideshow Video Template
If you want to create a high paced slide video show with various concepts explained in it then go for the Fast Slide Slideshow Video Template.

10Creative Slideshow Template
For the ones who want dynamic, fast-paced animation style and bold typography in their slideshow video this is the best-suited one for them.

Part 2 10 Best Video Slideshow Maker
After knowing the best templates for your slideshow video you, may be curious to know about the slideshow video maker. Here, after a lot of research, we have come up with the list of 10 best slideshow video maker which can make your professional life easy. Check the list
01PhotoStage
PhotoStage by NHC Softwares is one the best online software to create video slide shows online. This tool is specially very helpful in creating personal and commercial presentations.
Key Features - Key features of PhotoStage includes user oriented interface, animations, and music tracks (300 +). It has inbuilt Audio editing tools and a built-in music collection. If you use this software in a paid version then you can unlock its thousands of animation effects and transitions. You can also export your slide show between PC, mobile, Web etc.
Price - PhotoStage PRO $70.
Rating - 4 stars

02SmartShow 3D
The next slideshow video maker to feature on our list is SmartShow 3D.
This software is known for its very easy to use interface with power-packed and loaded features.
Key Features - It has more than 200 templates for use of every kind. This software enables you to use 300+ transitions, special effects, 3D collages, and nature effects with animations and graphics. You can add music to your slideshow video from more than 200 music tracks with precise volume adjustment.
Price - Standard version cost $ 39.90 and the Deluxe version costs $ 59.50 (10 days free trial)
Rating - 5 stars

03Magix PhotoStory
If you have a bit of experience in making slideshows then you can take your slideshow making experience to another level using this software. A custom animation module and an integrated photo editing tool of Magix PhotoStory make it stand out in our list.
Key Features - 300+ library of effects coupled with a huge collection of music tracks. 100 + video templates and graphics. This software has Built-in filters for photo enhancement with the picture-in-picture option.
Price - $ 49.99 ( 30 days free trial )
Rating - 4.5 stars

04PTE AV Studio
The best suited online tool to make a slide show video is PTE AV Studio. If you want to create smooth and fluid visual slideshows then try this software once. Here you can combine pictures, videos, and audio files into sleek slideshows and impress your boss and colleagues.
Key Features - PTE AV studio supports 100+ effects and templates. It has the best video, photo, and multitrack sound editing tools among competitors. You can create custom animations and graphics if you want. With a huge collection of masks, filters, and text styles you can create high resolution slideshow videos.
Price - Standard Version costs $ 69 while and Pro version costs $ 139 (30 days free trial)
Rating - 4 stars

05Adobe Premiere Pro
If you are a regular slideshow user then no doubt you would know about Adobe Premiere Pro. Those who want easy to navigate the software with hundreds of features then try this one. The only draw [back of this software is that it has no inbuilt templates but don’t worry you can download thousands of templates from the internet for free.
Key Features - Animations could be added to slides using keyframes. Efficient video and audio editing and creating tool. Animations and graphics add a cherry to the cake. Advanced photo enhancement and filters to make your photos and slideshows stand out.
Price - $ 239.88 a year (30 days free trial)

06CyberLink MediaShow
Cyberlink MediaShow is one of the earliest software that came in the field of slideshow video creation. This software enables you to create awesome slideshows, movies, and screensavers. Cyberlink MediaShow has enough features to make eye-catching videos and still it is one of the easiest ones to use. If you aim to create easily simplistic videos then go for this software.
Key Features - Descent collection of transitions with a built-in photo editing module. It is equipped with face recognition and tagging feature. You can integrate social media platforms like Facebook and share to them directly from the software.
Price - $ 49.99 ( 30 days free trial )
Rating - 3.5 stars

07AquaSoft Slideshow
For users who want to create colourful and dynamic family-themed slide show videos then AquaSoft Slideshow is the software to try. After a review from thousands of users, this software has made a place in our featured list. The user-friendly interface with dozens of eye-catching effects and animated text make it fun to use. It allows you to create colourful, text-filled videos and so on.
Key Features - It is powered packed with more than 200 effects and transitions and hundreds of text options. It supports almost all the formats even the older ones like CDs and DVDs. Smooth and advanced editing tools for a better experience.
Price - Premium costs $ 57.00 while Ultimate costs $ 97.00 ( 30 days free trial version)
Rating - 4 stars

08Kizoa
This software helps you to create slide show videos which can be played on any screen. This is basically an online video creating and editing tool but it provides formats for creating slideshows too. You can use this tool on whatever platform you have like a tablet, TV, smartphone, computer screen etc.
Key Features - Intelligent cropping tool of Kizoa helps you to create and edit world-class finest images for your slideshow video. The created slideshow could be downloaded in various formats like MP4, AVI, MOV, etc. You can directly share the video to online platforms.
Price - Starter $ 29.99, Creator $ 49.99 , Professional $ 99.99, and Business $ 299.99
Rating - 4 stars

Part 3 5 Easy Steps to Make a Slide Show Video
Guys, now you know the best templates and best slideshow video makers but now the question comes “how to make a slideshow video?”. If you are confused and don’t have any clue about making a slideshow video then just get your google slides and follow the steps explained below.
Step 1: Get Free Screen Recorder
Firstly you have to start with launching Free Screen Recorder. You can use any screen recorder of your choice. Create your account on the screen recorder and get started.
Step 2. Record Your Google Slides
Noe on the screen recorder “Drag and drop” the sides of this box that appears on your screen to fit your slides into it. Select a suitable size for your video ( preferably 720 p).
Now on the left corner of the screen, you will see various controls using them you can perform various functions like start and stop recording, recording to webcam, selecting the size of the video, add audio and narration.
After performing all the functions click on “Record” to record your slides into video.
Step 3. Finishing of Recording
If you are satisfied with the video then click on the blue button to stop recording, and select “done” to save your video. However, if you don’t like it you can restart the process anytime.
Step 4. Editing of the Video
Once you have completed the recording of the video you can edit it according to your requirements. You can add or delete overlays, video sounds, narrations, graphics, green screen etc.
Step 5. Publish and Share your Slideshow video
After completing the editing and creating work click on “Publish”. You can save and publish your video directly on a YouTube channel, or Google Drive folder, or save your video as a file. And you can share it on any social media platform.
Part 4 How to Custom Templates for Google Slides Presentation
Just imagine, how easy would it have been if you could create the templates for your slide show videos. This would have made your professional life so easy. If you too are looking for such an online tool which provides you with the feature for creating custom templates for your slideshow video then you should try Wondershare’s Wondershare Filmora Video Editor Video Editor. Don’t get confused with the name it’s a video editor but has awesome features for creating custom slideshow videos. Following are some of the highlighting features of Filmora Video Editor.
Easy to use for beginners.
User-friendly interface and bunches of editing tools.
Library (royalty-free) containing hundreds of audio options.
Hundreds of templates, transitions, and filters to make your video eye-catching.
Here is a brief tutorial to use Wondershare Filmora Video Editor to create custom templates for your slideshow video.
For Win 7 or later (64-bit)
For macOS 10.12 or later
Step 1. Adding Photos and Videos
Open Filmora and click on the “Import menu”. Here select the photos and videos you want to use and click on “OK” to begin the importing.

Step 2. Positioning the Media Files on Timeline
Click on “File menu” > “Preferences option” > “Editing tab” > “Photo Placement drop-down menu”. Here you can perform various functions like zooming of images, setting the duration of images, transitions and effects, crop and fitting.

Now if you want to add more images and videos repeat steps 1 and 2.
Step 3. Use the transitions
Use transitions for smooth transitioning from one slide to another. Click on “Transition Setting Window” and set the duration for the transition.

Step 4. Apply Filters and Overlays
Go to “ Effect Tab” and select suitable filters and overlays for your video.

Step 5. Add Motion Graphics Element (Optional Step)
If you wish you can create motion graphics elements for your video. Click on the “ Elements tab” and select the best suited for you.

Step 6. Record Voiceover and create a Soundtrack
Go to “Media tab” > “ Record drop-down “ > “ Record Voiceover feature” to record and create soundtracks and voiceovers.

Step 7. Exporting the Slideshow Video
After making all the adjustments in the video click on the “Export” and wait for the Export window to appear on the screen. Now here you can select the output format of the file and the location for exporting your slideshow video.

● Ending Thoughts →
● Dear readers, now it’s time, to sum up this article. We hope our efforts have made things simple for you. We have tried to bring you the best online templates available online.
● You can now read our article and learn about the best slideshow video makers available online. You can use any one of them as per your need.
● If you want to create custom templates for your slideshow video, then we recommend to try Wondershare Filmora Video Editor for easy and effective custom template creation.
Dear readers you don’t have to worry a bit, in this article we bring you the best slideshow video maker and easy ways using which you can custom the templates for your presentation in your way.
In this article
01 8 Best Slideshow Video Templates
02 [10 Best Video Slideshow Maker](#Part 2)
03 [5 Easy Steps to Make a Slide Show Video](#Part 3)
04 [How to Custom Templates for Google Slides Presentation](#Part 4)
Part 1 Best Slideshow Video Templates
A slideshow video could be an effective way of presenting your point to your audience. This becomes super easy when you use a good template to create your slide show video. Here are 8 best slideshow video templets which you can give a try
01Instagram Slideshow
This slide show video template is best for creating videos for Instagram and other social media platforms.

02Clean Slideshow Template
This one is suited to create video slide show for family purposes. This template could also be engaged in a clean slideshow presentation for your office.

03Parallax Scrolling Slideshow Template
This is one of the most video templates which you can use for your slide show video. This template has various after-effects which can take your presentations to a different level.

04Modern Tie Slideshow Template
If you are in a business or corporate job then give this slideshow video template a try. With a unique, tiled look and a 3D tile drop-down effect, your videos will impress everyone.

05Minimal Slideshow template
Minimal slide template is best for business presentations or product promotion. Here you can use creative text images and graphics to promote your product.

06Sweet Memories Cinematic Slideshow
If you want the best template for presenting your memories, marriages, anniversaries, emotions etc then Sweet Memories Cinematic Slideshow is the one you need.

07Motiongray Slideshow Templates
If you want to turn your adventure images and videos into an impressive slide show video then this is a must try template for you.

08Stylish Spinning Columns Slideshow Template
This template is best suited for high-end business projects. Here you will have image placeholders paired with a modern spinning column transition effect to make the slideshow video outstanding.

09Fast Slide Slideshow Video Template
If you want to create a high paced slide video show with various concepts explained in it then go for the Fast Slide Slideshow Video Template.

10Creative Slideshow Template
For the ones who want dynamic, fast-paced animation style and bold typography in their slideshow video this is the best-suited one for them.

Part 2 10 Best Video Slideshow Maker
After knowing the best templates for your slideshow video you, may be curious to know about the slideshow video maker. Here, after a lot of research, we have come up with the list of 10 best slideshow video maker which can make your professional life easy. Check the list
01PhotoStage
PhotoStage by NHC Softwares is one the best online software to create video slide shows online. This tool is specially very helpful in creating personal and commercial presentations.
Key Features - Key features of PhotoStage includes user oriented interface, animations, and music tracks (300 +). It has inbuilt Audio editing tools and a built-in music collection. If you use this software in a paid version then you can unlock its thousands of animation effects and transitions. You can also export your slide show between PC, mobile, Web etc.
Price - PhotoStage PRO $70.
Rating - 4 stars

02SmartShow 3D
The next slideshow video maker to feature on our list is SmartShow 3D.
This software is known for its very easy to use interface with power-packed and loaded features.
Key Features - It has more than 200 templates for use of every kind. This software enables you to use 300+ transitions, special effects, 3D collages, and nature effects with animations and graphics. You can add music to your slideshow video from more than 200 music tracks with precise volume adjustment.
Price - Standard version cost $ 39.90 and the Deluxe version costs $ 59.50 (10 days free trial)
Rating - 5 stars

03Magix PhotoStory
If you have a bit of experience in making slideshows then you can take your slideshow making experience to another level using this software. A custom animation module and an integrated photo editing tool of Magix PhotoStory make it stand out in our list.
Key Features - 300+ library of effects coupled with a huge collection of music tracks. 100 + video templates and graphics. This software has Built-in filters for photo enhancement with the picture-in-picture option.
Price - $ 49.99 ( 30 days free trial )
Rating - 4.5 stars

04PTE AV Studio
The best suited online tool to make a slide show video is PTE AV Studio. If you want to create smooth and fluid visual slideshows then try this software once. Here you can combine pictures, videos, and audio files into sleek slideshows and impress your boss and colleagues.
Key Features - PTE AV studio supports 100+ effects and templates. It has the best video, photo, and multitrack sound editing tools among competitors. You can create custom animations and graphics if you want. With a huge collection of masks, filters, and text styles you can create high resolution slideshow videos.
Price - Standard Version costs $ 69 while and Pro version costs $ 139 (30 days free trial)
Rating - 4 stars

05Adobe Premiere Pro
If you are a regular slideshow user then no doubt you would know about Adobe Premiere Pro. Those who want easy to navigate the software with hundreds of features then try this one. The only draw [back of this software is that it has no inbuilt templates but don’t worry you can download thousands of templates from the internet for free.
Key Features - Animations could be added to slides using keyframes. Efficient video and audio editing and creating tool. Animations and graphics add a cherry to the cake. Advanced photo enhancement and filters to make your photos and slideshows stand out.
Price - $ 239.88 a year (30 days free trial)

06CyberLink MediaShow
Cyberlink MediaShow is one of the earliest software that came in the field of slideshow video creation. This software enables you to create awesome slideshows, movies, and screensavers. Cyberlink MediaShow has enough features to make eye-catching videos and still it is one of the easiest ones to use. If you aim to create easily simplistic videos then go for this software.
Key Features - Descent collection of transitions with a built-in photo editing module. It is equipped with face recognition and tagging feature. You can integrate social media platforms like Facebook and share to them directly from the software.
Price - $ 49.99 ( 30 days free trial )
Rating - 3.5 stars

07AquaSoft Slideshow
For users who want to create colourful and dynamic family-themed slide show videos then AquaSoft Slideshow is the software to try. After a review from thousands of users, this software has made a place in our featured list. The user-friendly interface with dozens of eye-catching effects and animated text make it fun to use. It allows you to create colourful, text-filled videos and so on.
Key Features - It is powered packed with more than 200 effects and transitions and hundreds of text options. It supports almost all the formats even the older ones like CDs and DVDs. Smooth and advanced editing tools for a better experience.
Price - Premium costs $ 57.00 while Ultimate costs $ 97.00 ( 30 days free trial version)
Rating - 4 stars

08Kizoa
This software helps you to create slide show videos which can be played on any screen. This is basically an online video creating and editing tool but it provides formats for creating slideshows too. You can use this tool on whatever platform you have like a tablet, TV, smartphone, computer screen etc.
Key Features - Intelligent cropping tool of Kizoa helps you to create and edit world-class finest images for your slideshow video. The created slideshow could be downloaded in various formats like MP4, AVI, MOV, etc. You can directly share the video to online platforms.
Price - Starter $ 29.99, Creator $ 49.99 , Professional $ 99.99, and Business $ 299.99
Rating - 4 stars

Part 3 5 Easy Steps to Make a Slide Show Video
Guys, now you know the best templates and best slideshow video makers but now the question comes “how to make a slideshow video?”. If you are confused and don’t have any clue about making a slideshow video then just get your google slides and follow the steps explained below.
Step 1: Get Free Screen Recorder
Firstly you have to start with launching Free Screen Recorder. You can use any screen recorder of your choice. Create your account on the screen recorder and get started.
Step 2. Record Your Google Slides
Noe on the screen recorder “Drag and drop” the sides of this box that appears on your screen to fit your slides into it. Select a suitable size for your video ( preferably 720 p).
Now on the left corner of the screen, you will see various controls using them you can perform various functions like start and stop recording, recording to webcam, selecting the size of the video, add audio and narration.
After performing all the functions click on “Record” to record your slides into video.
Step 3. Finishing of Recording
If you are satisfied with the video then click on the blue button to stop recording, and select “done” to save your video. However, if you don’t like it you can restart the process anytime.
Step 4. Editing of the Video
Once you have completed the recording of the video you can edit it according to your requirements. You can add or delete overlays, video sounds, narrations, graphics, green screen etc.
Step 5. Publish and Share your Slideshow video
After completing the editing and creating work click on “Publish”. You can save and publish your video directly on a YouTube channel, or Google Drive folder, or save your video as a file. And you can share it on any social media platform.
Part 4 How to Custom Templates for Google Slides Presentation
Just imagine, how easy would it have been if you could create the templates for your slide show videos. This would have made your professional life so easy. If you too are looking for such an online tool which provides you with the feature for creating custom templates for your slideshow video then you should try Wondershare’s Wondershare Filmora Video Editor Video Editor. Don’t get confused with the name it’s a video editor but has awesome features for creating custom slideshow videos. Following are some of the highlighting features of Filmora Video Editor.
Easy to use for beginners.
User-friendly interface and bunches of editing tools.
Library (royalty-free) containing hundreds of audio options.
Hundreds of templates, transitions, and filters to make your video eye-catching.
Here is a brief tutorial to use Wondershare Filmora Video Editor to create custom templates for your slideshow video.
For Win 7 or later (64-bit)
For macOS 10.12 or later
Step 1. Adding Photos and Videos
Open Filmora and click on the “Import menu”. Here select the photos and videos you want to use and click on “OK” to begin the importing.

Step 2. Positioning the Media Files on Timeline
Click on “File menu” > “Preferences option” > “Editing tab” > “Photo Placement drop-down menu”. Here you can perform various functions like zooming of images, setting the duration of images, transitions and effects, crop and fitting.

Now if you want to add more images and videos repeat steps 1 and 2.
Step 3. Use the transitions
Use transitions for smooth transitioning from one slide to another. Click on “Transition Setting Window” and set the duration for the transition.

Step 4. Apply Filters and Overlays
Go to “ Effect Tab” and select suitable filters and overlays for your video.

Step 5. Add Motion Graphics Element (Optional Step)
If you wish you can create motion graphics elements for your video. Click on the “ Elements tab” and select the best suited for you.

Step 6. Record Voiceover and create a Soundtrack
Go to “Media tab” > “ Record drop-down “ > “ Record Voiceover feature” to record and create soundtracks and voiceovers.

Step 7. Exporting the Slideshow Video
After making all the adjustments in the video click on the “Export” and wait for the Export window to appear on the screen. Now here you can select the output format of the file and the location for exporting your slideshow video.

● Ending Thoughts →
● Dear readers, now it’s time, to sum up this article. We hope our efforts have made things simple for you. We have tried to bring you the best online templates available online.
● You can now read our article and learn about the best slideshow video makers available online. You can use any one of them as per your need.
● If you want to create custom templates for your slideshow video, then we recommend to try Wondershare Filmora Video Editor for easy and effective custom template creation.
Dear readers you don’t have to worry a bit, in this article we bring you the best slideshow video maker and easy ways using which you can custom the templates for your presentation in your way.
In this article
01 8 Best Slideshow Video Templates
02 [10 Best Video Slideshow Maker](#Part 2)
03 [5 Easy Steps to Make a Slide Show Video](#Part 3)
04 [How to Custom Templates for Google Slides Presentation](#Part 4)
Part 1 Best Slideshow Video Templates
A slideshow video could be an effective way of presenting your point to your audience. This becomes super easy when you use a good template to create your slide show video. Here are 8 best slideshow video templets which you can give a try
01Instagram Slideshow
This slide show video template is best for creating videos for Instagram and other social media platforms.

02Clean Slideshow Template
This one is suited to create video slide show for family purposes. This template could also be engaged in a clean slideshow presentation for your office.

03Parallax Scrolling Slideshow Template
This is one of the most video templates which you can use for your slide show video. This template has various after-effects which can take your presentations to a different level.

04Modern Tie Slideshow Template
If you are in a business or corporate job then give this slideshow video template a try. With a unique, tiled look and a 3D tile drop-down effect, your videos will impress everyone.

05Minimal Slideshow template
Minimal slide template is best for business presentations or product promotion. Here you can use creative text images and graphics to promote your product.

06Sweet Memories Cinematic Slideshow
If you want the best template for presenting your memories, marriages, anniversaries, emotions etc then Sweet Memories Cinematic Slideshow is the one you need.

07Motiongray Slideshow Templates
If you want to turn your adventure images and videos into an impressive slide show video then this is a must try template for you.

08Stylish Spinning Columns Slideshow Template
This template is best suited for high-end business projects. Here you will have image placeholders paired with a modern spinning column transition effect to make the slideshow video outstanding.

09Fast Slide Slideshow Video Template
If you want to create a high paced slide video show with various concepts explained in it then go for the Fast Slide Slideshow Video Template.

10Creative Slideshow Template
For the ones who want dynamic, fast-paced animation style and bold typography in their slideshow video this is the best-suited one for them.

Part 2 10 Best Video Slideshow Maker
After knowing the best templates for your slideshow video you, may be curious to know about the slideshow video maker. Here, after a lot of research, we have come up with the list of 10 best slideshow video maker which can make your professional life easy. Check the list
01PhotoStage
PhotoStage by NHC Softwares is one the best online software to create video slide shows online. This tool is specially very helpful in creating personal and commercial presentations.
Key Features - Key features of PhotoStage includes user oriented interface, animations, and music tracks (300 +). It has inbuilt Audio editing tools and a built-in music collection. If you use this software in a paid version then you can unlock its thousands of animation effects and transitions. You can also export your slide show between PC, mobile, Web etc.
Price - PhotoStage PRO $70.
Rating - 4 stars

02SmartShow 3D
The next slideshow video maker to feature on our list is SmartShow 3D.
This software is known for its very easy to use interface with power-packed and loaded features.
Key Features - It has more than 200 templates for use of every kind. This software enables you to use 300+ transitions, special effects, 3D collages, and nature effects with animations and graphics. You can add music to your slideshow video from more than 200 music tracks with precise volume adjustment.
Price - Standard version cost $ 39.90 and the Deluxe version costs $ 59.50 (10 days free trial)
Rating - 5 stars

03Magix PhotoStory
If you have a bit of experience in making slideshows then you can take your slideshow making experience to another level using this software. A custom animation module and an integrated photo editing tool of Magix PhotoStory make it stand out in our list.
Key Features - 300+ library of effects coupled with a huge collection of music tracks. 100 + video templates and graphics. This software has Built-in filters for photo enhancement with the picture-in-picture option.
Price - $ 49.99 ( 30 days free trial )
Rating - 4.5 stars

04PTE AV Studio
The best suited online tool to make a slide show video is PTE AV Studio. If you want to create smooth and fluid visual slideshows then try this software once. Here you can combine pictures, videos, and audio files into sleek slideshows and impress your boss and colleagues.
Key Features - PTE AV studio supports 100+ effects and templates. It has the best video, photo, and multitrack sound editing tools among competitors. You can create custom animations and graphics if you want. With a huge collection of masks, filters, and text styles you can create high resolution slideshow videos.
Price - Standard Version costs $ 69 while and Pro version costs $ 139 (30 days free trial)
Rating - 4 stars

05Adobe Premiere Pro
If you are a regular slideshow user then no doubt you would know about Adobe Premiere Pro. Those who want easy to navigate the software with hundreds of features then try this one. The only draw [back of this software is that it has no inbuilt templates but don’t worry you can download thousands of templates from the internet for free.
Key Features - Animations could be added to slides using keyframes. Efficient video and audio editing and creating tool. Animations and graphics add a cherry to the cake. Advanced photo enhancement and filters to make your photos and slideshows stand out.
Price - $ 239.88 a year (30 days free trial)

06CyberLink MediaShow
Cyberlink MediaShow is one of the earliest software that came in the field of slideshow video creation. This software enables you to create awesome slideshows, movies, and screensavers. Cyberlink MediaShow has enough features to make eye-catching videos and still it is one of the easiest ones to use. If you aim to create easily simplistic videos then go for this software.
Key Features - Descent collection of transitions with a built-in photo editing module. It is equipped with face recognition and tagging feature. You can integrate social media platforms like Facebook and share to them directly from the software.
Price - $ 49.99 ( 30 days free trial )
Rating - 3.5 stars

07AquaSoft Slideshow
For users who want to create colourful and dynamic family-themed slide show videos then AquaSoft Slideshow is the software to try. After a review from thousands of users, this software has made a place in our featured list. The user-friendly interface with dozens of eye-catching effects and animated text make it fun to use. It allows you to create colourful, text-filled videos and so on.
Key Features - It is powered packed with more than 200 effects and transitions and hundreds of text options. It supports almost all the formats even the older ones like CDs and DVDs. Smooth and advanced editing tools for a better experience.
Price - Premium costs $ 57.00 while Ultimate costs $ 97.00 ( 30 days free trial version)
Rating - 4 stars

08Kizoa
This software helps you to create slide show videos which can be played on any screen. This is basically an online video creating and editing tool but it provides formats for creating slideshows too. You can use this tool on whatever platform you have like a tablet, TV, smartphone, computer screen etc.
Key Features - Intelligent cropping tool of Kizoa helps you to create and edit world-class finest images for your slideshow video. The created slideshow could be downloaded in various formats like MP4, AVI, MOV, etc. You can directly share the video to online platforms.
Price - Starter $ 29.99, Creator $ 49.99 , Professional $ 99.99, and Business $ 299.99
Rating - 4 stars

Part 3 5 Easy Steps to Make a Slide Show Video
Guys, now you know the best templates and best slideshow video makers but now the question comes “how to make a slideshow video?”. If you are confused and don’t have any clue about making a slideshow video then just get your google slides and follow the steps explained below.
Step 1: Get Free Screen Recorder
Firstly you have to start with launching Free Screen Recorder. You can use any screen recorder of your choice. Create your account on the screen recorder and get started.
Step 2. Record Your Google Slides
Noe on the screen recorder “Drag and drop” the sides of this box that appears on your screen to fit your slides into it. Select a suitable size for your video ( preferably 720 p).
Now on the left corner of the screen, you will see various controls using them you can perform various functions like start and stop recording, recording to webcam, selecting the size of the video, add audio and narration.
After performing all the functions click on “Record” to record your slides into video.
Step 3. Finishing of Recording
If you are satisfied with the video then click on the blue button to stop recording, and select “done” to save your video. However, if you don’t like it you can restart the process anytime.
Step 4. Editing of the Video
Once you have completed the recording of the video you can edit it according to your requirements. You can add or delete overlays, video sounds, narrations, graphics, green screen etc.
Step 5. Publish and Share your Slideshow video
After completing the editing and creating work click on “Publish”. You can save and publish your video directly on a YouTube channel, or Google Drive folder, or save your video as a file. And you can share it on any social media platform.
Part 4 How to Custom Templates for Google Slides Presentation
Just imagine, how easy would it have been if you could create the templates for your slide show videos. This would have made your professional life so easy. If you too are looking for such an online tool which provides you with the feature for creating custom templates for your slideshow video then you should try Wondershare’s Wondershare Filmora Video Editor Video Editor. Don’t get confused with the name it’s a video editor but has awesome features for creating custom slideshow videos. Following are some of the highlighting features of Filmora Video Editor.
Easy to use for beginners.
User-friendly interface and bunches of editing tools.
Library (royalty-free) containing hundreds of audio options.
Hundreds of templates, transitions, and filters to make your video eye-catching.
Here is a brief tutorial to use Wondershare Filmora Video Editor to create custom templates for your slideshow video.
For Win 7 or later (64-bit)
For macOS 10.12 or later
Step 1. Adding Photos and Videos
Open Filmora and click on the “Import menu”. Here select the photos and videos you want to use and click on “OK” to begin the importing.

Step 2. Positioning the Media Files on Timeline
Click on “File menu” > “Preferences option” > “Editing tab” > “Photo Placement drop-down menu”. Here you can perform various functions like zooming of images, setting the duration of images, transitions and effects, crop and fitting.

Now if you want to add more images and videos repeat steps 1 and 2.
Step 3. Use the transitions
Use transitions for smooth transitioning from one slide to another. Click on “Transition Setting Window” and set the duration for the transition.

Step 4. Apply Filters and Overlays
Go to “ Effect Tab” and select suitable filters and overlays for your video.

Step 5. Add Motion Graphics Element (Optional Step)
If you wish you can create motion graphics elements for your video. Click on the “ Elements tab” and select the best suited for you.

Step 6. Record Voiceover and create a Soundtrack
Go to “Media tab” > “ Record drop-down “ > “ Record Voiceover feature” to record and create soundtracks and voiceovers.

Step 7. Exporting the Slideshow Video
After making all the adjustments in the video click on the “Export” and wait for the Export window to appear on the screen. Now here you can select the output format of the file and the location for exporting your slideshow video.

● Ending Thoughts →
● Dear readers, now it’s time, to sum up this article. We hope our efforts have made things simple for you. We have tried to bring you the best online templates available online.
● You can now read our article and learn about the best slideshow video makers available online. You can use any one of them as per your need.
● If you want to create custom templates for your slideshow video, then we recommend to try Wondershare Filmora Video Editor for easy and effective custom template creation.
Minecraft Pixel Art: A Complete Guide for Die-Hard Fans
Versatile Video Editor - Wondershare Filmora
An easy yet powerful editor
Numerous effects to choose from
Detailed tutorials provided by the official channel
Minecraft pixel art is a trending subject, and they simply consist of in-game pixel artworks, besides the Minecraft houses, farms or cities.
In this article
01 What is Pixel Art Minecraft?
02 5 Most Popular Minecraft Pixel Art for Minecraft Die-Hard Fans
03 Best Tools to Make Minecraft Pixel Art
04 How to Make Pixel Art Minecraft In-game?
05 Tips for Creating a Wonderful Minecraft Pixel Art
Part 1: What is Pixel Art Minecraft?
This art can range from drawings to 3D models and even statues. Anything the players would like is just up to their imagination.
Like any Minecraft thing you do in-game, you just stack piles of blocks over blocks to do it, except what the player is doing is creating pixelated art, in general in large proportions. In terms of in-game, pixel art really doesn’t do much, but it is to be appreciated like any art.
Many players state that Minecraft pixel art is rewarding and realistic in terms of the game.
Part 2: 5 Most Popular Minecraft Pixel Art for Minecraft Die-Hard Fans
1. The Sandshrew
In this Minecraft pixel art, we see a mural of a Sandshrew; a pokemon depicted sitting down and with a palette color ranging from yellow to light brown and dark brown.
![]()
2. The Obama
In this Minecraft Pixel art, we can see the former president of the USA, Barack Obama portrait, in reference to a famous picture of him in real life. The color palette ranges from white to blue and red.
![]()
3. The Goomba
In this pixel art Minecraft, we have Goomba, a character from Super Mario. The colors are very simple and range from black to white and brown.
![]()
4. Spongebob
In this Minecraft pixel art, we have depicted SpongeBob Square pants in the game. Its color goes from yellow to green, blue, white and black to be faithful to the original cartoon.
![]()
5. The Joker
In this Minecraft pixel art, we have Joker from the Batman universe. A famous villain in that universe. Its color pattern ranges from several tones of green, red, purple, white, and blue.
![]()
Part 3: Best Tools to Make Minecraft Pixel Art
There are a few apps that you can use to create Minecraft pixel art, for example:
1. Scriptolab.com
In this small web application, you are able to transform your image or any photo of your choice into Minecraft pixel art and blocks.
It’s very easy to use. All you have to do is go to the website and pic your image. Resize the image or picture to the desired size to correspond to the number of blocks in the game.
It also has an easy-to-contact platform to communicate with the website owner that can guide you through the steps if you are ever in doubt.
2. Filmora
This is an application that you can download onto your PC or Mac for free. It is a powerful tool that does more than pixel art, but we will use it for such.
With Filmora, you can use a range of tools to create your Minecraft pixel art, like posterize effect to add a different gradient to the pixel art. The tool CC Black Load can help you perfect the square pixels to make it look more defined. You also have tools such as tint and grid to give a retro look to your art. Or even an animation effect for your wallpapers.
Also, in Filmora, you can add many effects to your pixel art like the 8-bit style or 16-bit style. You can also share your creations and export them and send them to your friends.
![]()
Wondershare Filmora
Get started easily with Filmora’s powerful performance, intuitive interface, and countless effects!
Try It Free Try It Free Try It Free Learn More >

3. Pixel Art Builder
In this mobile app, you can create Minecraft pixel art from the palm of your hand.
You can draw on grids rather than in real pixels to help you be more precise with your art. It has a very easy-to-use interface, and it is completely free.
Many of its key features are, for example, exporting images, dynamic size adjustment of the ability to save in several different formats. Its tools range from the regular pencil to eraser, paint bucket, line and circle drawer, move/zoom function, color wheel, and eyedropper.
Part 4: How to Make Pixel Art Minecraft In-game?
It is very easy to create pixel art Minecraft in-game. Of course, each artist’s ability differs, and so does art as well, but to start out, you do not need much. You need, though, careful planning and knowing the exact scale of your art.
You can break the creation of pixel art in Minecraft into four different steps:
1. Choose an image that you like
It is important that you reference the original work and can easily access it, as you might need to peek often while building your own art. The best thing to do is when you are starting to copy an image and work on it, rather than start it from scratch, as it takes an enormous amount of time and you need to be an expert to do it.
2. Break the image down into single-color sections
This is the part where “careful planning” comes in. You need to be looking at your original piece constantly to know if you are going in the right direction. Also, take all the colors and try to group them. Deconstructing the original image into colored shapes is a process that will help you outline the shape and color of the original design.
3. Obtain the necessary resources
You can start this step by opening Minecraft and start collecting blocks that you think will be useful for your pixel art. It does not matter if you play in Survival, Hardcore, or Adventure mode. The process is the same. It is ideal, though, that you work on creative mode when making pixel art, as the game gives you unlimited resources. You are also able to fly in this mode, making it easier to pick up blocks, and there is no risk of your art being destroyed.
4. Start building
Now you can start building your masterpiece. Start with the foundation and build from there; although you can virtually start anywhere, these blocks can float, unlike art or buildings outside the game. The time the process takes depends on the amount of work that needs to be done and the piece’s complexity.
Part 5: Tips for Creating a Wonderful Minecraft Pixel Art
There are many ways to draw Minecraft pixel art, but here are some tips to help you out.
- Have a clear idea of what kind of art you want to do. And start with something pre-made if you are only starting out. It is extremely hard to start something from scratch.
- Plan the pixel art you are going to do. Gather around all the block materials and colors that you’ll need to make your pixel art.
- Use creative mode. Because with the creative mode, you are not limited to the number of blocks you can find, and also, no one can come and destroy your art.
- If it is easier, you can first draft your pixel art on another app to help you map out your own project.
Conclusion
Minecraft pixel art is a growing trend in the video games world. It can range from easy and accessible to beginners to extremely complicated pieces of art. Players are becoming more engaged with this type of art in-game, and the future only predicts a bigger expansion. There are several tools that you can use to start out in your pixel art, as well as many tutorials.
Minecraft pixel art is a trending subject, and they simply consist of in-game pixel artworks, besides the Minecraft houses, farms or cities.
In this article
01 What is Pixel Art Minecraft?
02 5 Most Popular Minecraft Pixel Art for Minecraft Die-Hard Fans
03 Best Tools to Make Minecraft Pixel Art
04 How to Make Pixel Art Minecraft In-game?
05 Tips for Creating a Wonderful Minecraft Pixel Art
Part 1: What is Pixel Art Minecraft?
This art can range from drawings to 3D models and even statues. Anything the players would like is just up to their imagination.
Like any Minecraft thing you do in-game, you just stack piles of blocks over blocks to do it, except what the player is doing is creating pixelated art, in general in large proportions. In terms of in-game, pixel art really doesn’t do much, but it is to be appreciated like any art.
Many players state that Minecraft pixel art is rewarding and realistic in terms of the game.
Part 2: 5 Most Popular Minecraft Pixel Art for Minecraft Die-Hard Fans
1. The Sandshrew
In this Minecraft pixel art, we see a mural of a Sandshrew; a pokemon depicted sitting down and with a palette color ranging from yellow to light brown and dark brown.
![]()
2. The Obama
In this Minecraft Pixel art, we can see the former president of the USA, Barack Obama portrait, in reference to a famous picture of him in real life. The color palette ranges from white to blue and red.
![]()
3. The Goomba
In this pixel art Minecraft, we have Goomba, a character from Super Mario. The colors are very simple and range from black to white and brown.
![]()
4. Spongebob
In this Minecraft pixel art, we have depicted SpongeBob Square pants in the game. Its color goes from yellow to green, blue, white and black to be faithful to the original cartoon.
![]()
5. The Joker
In this Minecraft pixel art, we have Joker from the Batman universe. A famous villain in that universe. Its color pattern ranges from several tones of green, red, purple, white, and blue.
![]()
Part 3: Best Tools to Make Minecraft Pixel Art
There are a few apps that you can use to create Minecraft pixel art, for example:
1. Scriptolab.com
In this small web application, you are able to transform your image or any photo of your choice into Minecraft pixel art and blocks.
It’s very easy to use. All you have to do is go to the website and pic your image. Resize the image or picture to the desired size to correspond to the number of blocks in the game.
It also has an easy-to-contact platform to communicate with the website owner that can guide you through the steps if you are ever in doubt.
2. Filmora
This is an application that you can download onto your PC or Mac for free. It is a powerful tool that does more than pixel art, but we will use it for such.
With Filmora, you can use a range of tools to create your Minecraft pixel art, like posterize effect to add a different gradient to the pixel art. The tool CC Black Load can help you perfect the square pixels to make it look more defined. You also have tools such as tint and grid to give a retro look to your art. Or even an animation effect for your wallpapers.
Also, in Filmora, you can add many effects to your pixel art like the 8-bit style or 16-bit style. You can also share your creations and export them and send them to your friends.
![]()
Wondershare Filmora
Get started easily with Filmora’s powerful performance, intuitive interface, and countless effects!
Try It Free Try It Free Try It Free Learn More >

3. Pixel Art Builder
In this mobile app, you can create Minecraft pixel art from the palm of your hand.
You can draw on grids rather than in real pixels to help you be more precise with your art. It has a very easy-to-use interface, and it is completely free.
Many of its key features are, for example, exporting images, dynamic size adjustment of the ability to save in several different formats. Its tools range from the regular pencil to eraser, paint bucket, line and circle drawer, move/zoom function, color wheel, and eyedropper.
Part 4: How to Make Pixel Art Minecraft In-game?
It is very easy to create pixel art Minecraft in-game. Of course, each artist’s ability differs, and so does art as well, but to start out, you do not need much. You need, though, careful planning and knowing the exact scale of your art.
You can break the creation of pixel art in Minecraft into four different steps:
1. Choose an image that you like
It is important that you reference the original work and can easily access it, as you might need to peek often while building your own art. The best thing to do is when you are starting to copy an image and work on it, rather than start it from scratch, as it takes an enormous amount of time and you need to be an expert to do it.
2. Break the image down into single-color sections
This is the part where “careful planning” comes in. You need to be looking at your original piece constantly to know if you are going in the right direction. Also, take all the colors and try to group them. Deconstructing the original image into colored shapes is a process that will help you outline the shape and color of the original design.
3. Obtain the necessary resources
You can start this step by opening Minecraft and start collecting blocks that you think will be useful for your pixel art. It does not matter if you play in Survival, Hardcore, or Adventure mode. The process is the same. It is ideal, though, that you work on creative mode when making pixel art, as the game gives you unlimited resources. You are also able to fly in this mode, making it easier to pick up blocks, and there is no risk of your art being destroyed.
4. Start building
Now you can start building your masterpiece. Start with the foundation and build from there; although you can virtually start anywhere, these blocks can float, unlike art or buildings outside the game. The time the process takes depends on the amount of work that needs to be done and the piece’s complexity.
Part 5: Tips for Creating a Wonderful Minecraft Pixel Art
There are many ways to draw Minecraft pixel art, but here are some tips to help you out.
- Have a clear idea of what kind of art you want to do. And start with something pre-made if you are only starting out. It is extremely hard to start something from scratch.
- Plan the pixel art you are going to do. Gather around all the block materials and colors that you’ll need to make your pixel art.
- Use creative mode. Because with the creative mode, you are not limited to the number of blocks you can find, and also, no one can come and destroy your art.
- If it is easier, you can first draft your pixel art on another app to help you map out your own project.
Conclusion
Minecraft pixel art is a growing trend in the video games world. It can range from easy and accessible to beginners to extremely complicated pieces of art. Players are becoming more engaged with this type of art in-game, and the future only predicts a bigger expansion. There are several tools that you can use to start out in your pixel art, as well as many tutorials.
Minecraft pixel art is a trending subject, and they simply consist of in-game pixel artworks, besides the Minecraft houses, farms or cities.
In this article
01 What is Pixel Art Minecraft?
02 5 Most Popular Minecraft Pixel Art for Minecraft Die-Hard Fans
03 Best Tools to Make Minecraft Pixel Art
04 How to Make Pixel Art Minecraft In-game?
05 Tips for Creating a Wonderful Minecraft Pixel Art
Part 1: What is Pixel Art Minecraft?
This art can range from drawings to 3D models and even statues. Anything the players would like is just up to their imagination.
Like any Minecraft thing you do in-game, you just stack piles of blocks over blocks to do it, except what the player is doing is creating pixelated art, in general in large proportions. In terms of in-game, pixel art really doesn’t do much, but it is to be appreciated like any art.
Many players state that Minecraft pixel art is rewarding and realistic in terms of the game.
Part 2: 5 Most Popular Minecraft Pixel Art for Minecraft Die-Hard Fans
1. The Sandshrew
In this Minecraft pixel art, we see a mural of a Sandshrew; a pokemon depicted sitting down and with a palette color ranging from yellow to light brown and dark brown.
![]()
2. The Obama
In this Minecraft Pixel art, we can see the former president of the USA, Barack Obama portrait, in reference to a famous picture of him in real life. The color palette ranges from white to blue and red.
![]()
3. The Goomba
In this pixel art Minecraft, we have Goomba, a character from Super Mario. The colors are very simple and range from black to white and brown.
![]()
4. Spongebob
In this Minecraft pixel art, we have depicted SpongeBob Square pants in the game. Its color goes from yellow to green, blue, white and black to be faithful to the original cartoon.
![]()
5. The Joker
In this Minecraft pixel art, we have Joker from the Batman universe. A famous villain in that universe. Its color pattern ranges from several tones of green, red, purple, white, and blue.
![]()
Part 3: Best Tools to Make Minecraft Pixel Art
There are a few apps that you can use to create Minecraft pixel art, for example:
1. Scriptolab.com
In this small web application, you are able to transform your image or any photo of your choice into Minecraft pixel art and blocks.
It’s very easy to use. All you have to do is go to the website and pic your image. Resize the image or picture to the desired size to correspond to the number of blocks in the game.
It also has an easy-to-contact platform to communicate with the website owner that can guide you through the steps if you are ever in doubt.
2. Filmora
This is an application that you can download onto your PC or Mac for free. It is a powerful tool that does more than pixel art, but we will use it for such.
With Filmora, you can use a range of tools to create your Minecraft pixel art, like posterize effect to add a different gradient to the pixel art. The tool CC Black Load can help you perfect the square pixels to make it look more defined. You also have tools such as tint and grid to give a retro look to your art. Or even an animation effect for your wallpapers.
Also, in Filmora, you can add many effects to your pixel art like the 8-bit style or 16-bit style. You can also share your creations and export them and send them to your friends.
![]()
Wondershare Filmora
Get started easily with Filmora’s powerful performance, intuitive interface, and countless effects!
Try It Free Try It Free Try It Free Learn More >

3. Pixel Art Builder
In this mobile app, you can create Minecraft pixel art from the palm of your hand.
You can draw on grids rather than in real pixels to help you be more precise with your art. It has a very easy-to-use interface, and it is completely free.
Many of its key features are, for example, exporting images, dynamic size adjustment of the ability to save in several different formats. Its tools range from the regular pencil to eraser, paint bucket, line and circle drawer, move/zoom function, color wheel, and eyedropper.
Part 4: How to Make Pixel Art Minecraft In-game?
It is very easy to create pixel art Minecraft in-game. Of course, each artist’s ability differs, and so does art as well, but to start out, you do not need much. You need, though, careful planning and knowing the exact scale of your art.
You can break the creation of pixel art in Minecraft into four different steps:
1. Choose an image that you like
It is important that you reference the original work and can easily access it, as you might need to peek often while building your own art. The best thing to do is when you are starting to copy an image and work on it, rather than start it from scratch, as it takes an enormous amount of time and you need to be an expert to do it.
2. Break the image down into single-color sections
This is the part where “careful planning” comes in. You need to be looking at your original piece constantly to know if you are going in the right direction. Also, take all the colors and try to group them. Deconstructing the original image into colored shapes is a process that will help you outline the shape and color of the original design.
3. Obtain the necessary resources
You can start this step by opening Minecraft and start collecting blocks that you think will be useful for your pixel art. It does not matter if you play in Survival, Hardcore, or Adventure mode. The process is the same. It is ideal, though, that you work on creative mode when making pixel art, as the game gives you unlimited resources. You are also able to fly in this mode, making it easier to pick up blocks, and there is no risk of your art being destroyed.
4. Start building
Now you can start building your masterpiece. Start with the foundation and build from there; although you can virtually start anywhere, these blocks can float, unlike art or buildings outside the game. The time the process takes depends on the amount of work that needs to be done and the piece’s complexity.
Part 5: Tips for Creating a Wonderful Minecraft Pixel Art
There are many ways to draw Minecraft pixel art, but here are some tips to help you out.
- Have a clear idea of what kind of art you want to do. And start with something pre-made if you are only starting out. It is extremely hard to start something from scratch.
- Plan the pixel art you are going to do. Gather around all the block materials and colors that you’ll need to make your pixel art.
- Use creative mode. Because with the creative mode, you are not limited to the number of blocks you can find, and also, no one can come and destroy your art.
- If it is easier, you can first draft your pixel art on another app to help you map out your own project.
Conclusion
Minecraft pixel art is a growing trend in the video games world. It can range from easy and accessible to beginners to extremely complicated pieces of art. Players are becoming more engaged with this type of art in-game, and the future only predicts a bigger expansion. There are several tools that you can use to start out in your pixel art, as well as many tutorials.
Minecraft pixel art is a trending subject, and they simply consist of in-game pixel artworks, besides the Minecraft houses, farms or cities.
In this article
01 What is Pixel Art Minecraft?
02 5 Most Popular Minecraft Pixel Art for Minecraft Die-Hard Fans
03 Best Tools to Make Minecraft Pixel Art
04 How to Make Pixel Art Minecraft In-game?
05 Tips for Creating a Wonderful Minecraft Pixel Art
Part 1: What is Pixel Art Minecraft?
This art can range from drawings to 3D models and even statues. Anything the players would like is just up to their imagination.
Like any Minecraft thing you do in-game, you just stack piles of blocks over blocks to do it, except what the player is doing is creating pixelated art, in general in large proportions. In terms of in-game, pixel art really doesn’t do much, but it is to be appreciated like any art.
Many players state that Minecraft pixel art is rewarding and realistic in terms of the game.
Part 2: 5 Most Popular Minecraft Pixel Art for Minecraft Die-Hard Fans
1. The Sandshrew
In this Minecraft pixel art, we see a mural of a Sandshrew; a pokemon depicted sitting down and with a palette color ranging from yellow to light brown and dark brown.
![]()
2. The Obama
In this Minecraft Pixel art, we can see the former president of the USA, Barack Obama portrait, in reference to a famous picture of him in real life. The color palette ranges from white to blue and red.
![]()
3. The Goomba
In this pixel art Minecraft, we have Goomba, a character from Super Mario. The colors are very simple and range from black to white and brown.
![]()
4. Spongebob
In this Minecraft pixel art, we have depicted SpongeBob Square pants in the game. Its color goes from yellow to green, blue, white and black to be faithful to the original cartoon.
![]()
5. The Joker
In this Minecraft pixel art, we have Joker from the Batman universe. A famous villain in that universe. Its color pattern ranges from several tones of green, red, purple, white, and blue.
![]()
Part 3: Best Tools to Make Minecraft Pixel Art
There are a few apps that you can use to create Minecraft pixel art, for example:
1. Scriptolab.com
In this small web application, you are able to transform your image or any photo of your choice into Minecraft pixel art and blocks.
It’s very easy to use. All you have to do is go to the website and pic your image. Resize the image or picture to the desired size to correspond to the number of blocks in the game.
It also has an easy-to-contact platform to communicate with the website owner that can guide you through the steps if you are ever in doubt.
2. Filmora
This is an application that you can download onto your PC or Mac for free. It is a powerful tool that does more than pixel art, but we will use it for such.
With Filmora, you can use a range of tools to create your Minecraft pixel art, like posterize effect to add a different gradient to the pixel art. The tool CC Black Load can help you perfect the square pixels to make it look more defined. You also have tools such as tint and grid to give a retro look to your art. Or even an animation effect for your wallpapers.
Also, in Filmora, you can add many effects to your pixel art like the 8-bit style or 16-bit style. You can also share your creations and export them and send them to your friends.
![]()
Wondershare Filmora
Get started easily with Filmora’s powerful performance, intuitive interface, and countless effects!
Try It Free Try It Free Try It Free Learn More >

3. Pixel Art Builder
In this mobile app, you can create Minecraft pixel art from the palm of your hand.
You can draw on grids rather than in real pixels to help you be more precise with your art. It has a very easy-to-use interface, and it is completely free.
Many of its key features are, for example, exporting images, dynamic size adjustment of the ability to save in several different formats. Its tools range from the regular pencil to eraser, paint bucket, line and circle drawer, move/zoom function, color wheel, and eyedropper.
Part 4: How to Make Pixel Art Minecraft In-game?
It is very easy to create pixel art Minecraft in-game. Of course, each artist’s ability differs, and so does art as well, but to start out, you do not need much. You need, though, careful planning and knowing the exact scale of your art.
You can break the creation of pixel art in Minecraft into four different steps:
1. Choose an image that you like
It is important that you reference the original work and can easily access it, as you might need to peek often while building your own art. The best thing to do is when you are starting to copy an image and work on it, rather than start it from scratch, as it takes an enormous amount of time and you need to be an expert to do it.
2. Break the image down into single-color sections
This is the part where “careful planning” comes in. You need to be looking at your original piece constantly to know if you are going in the right direction. Also, take all the colors and try to group them. Deconstructing the original image into colored shapes is a process that will help you outline the shape and color of the original design.
3. Obtain the necessary resources
You can start this step by opening Minecraft and start collecting blocks that you think will be useful for your pixel art. It does not matter if you play in Survival, Hardcore, or Adventure mode. The process is the same. It is ideal, though, that you work on creative mode when making pixel art, as the game gives you unlimited resources. You are also able to fly in this mode, making it easier to pick up blocks, and there is no risk of your art being destroyed.
4. Start building
Now you can start building your masterpiece. Start with the foundation and build from there; although you can virtually start anywhere, these blocks can float, unlike art or buildings outside the game. The time the process takes depends on the amount of work that needs to be done and the piece’s complexity.
Part 5: Tips for Creating a Wonderful Minecraft Pixel Art
There are many ways to draw Minecraft pixel art, but here are some tips to help you out.
- Have a clear idea of what kind of art you want to do. And start with something pre-made if you are only starting out. It is extremely hard to start something from scratch.
- Plan the pixel art you are going to do. Gather around all the block materials and colors that you’ll need to make your pixel art.
- Use creative mode. Because with the creative mode, you are not limited to the number of blocks you can find, and also, no one can come and destroy your art.
- If it is easier, you can first draft your pixel art on another app to help you map out your own project.
Conclusion
Minecraft pixel art is a growing trend in the video games world. It can range from easy and accessible to beginners to extremely complicated pieces of art. Players are becoming more engaged with this type of art in-game, and the future only predicts a bigger expansion. There are several tools that you can use to start out in your pixel art, as well as many tutorials.
Guide: Create The Perfect VHS Effect Look in Premiere Pro
Adobe Premiere Pro is an excellent tool for video editing. It is a tool that can edit, create effects and filters, and do much more. In addition to this, you can even add different effects, such as VHS. The VHS effect in recent years has become significantly important due to its usage. This effect creates an old and jittery look to your video.
VHS effect has characteristics of old video tapes with lines and scales. It also adds distortion, noise, and color shifting to your videos. There are many filters and overlays that you can apply to get the VHS look. However, if you are using a PC tool, such as Premiere Pro, then you have to learn how to apply it. You can easily create a VHS effect Premiere look once you learn to add the effect to your video.
Part 1: What Are The Benefits of Using VHS Effects in Video?
Using VHS effects in your videos can bring several benefits. You can easily use multiple VHS effects in Premiere Pro. However, firstly, explore why incorporating VHS effects can be advantageous:
- Nostalgic Appeal: VHS effects can take your audience back to the era of VHS tapes. It creates a feeling of nostalgia and familiarity. Such effects also take you back to the 90s era by creating a similar look.
- Authenticity: Applying such effects mimics the characteristics of old tapes by adding imperfections. These effects also add color bleeding, distortion, and noise to your videos. It creates a sense of authenticity, looking like the video was recorded on genuine VHS tapes.
- Creative Style: These effects offer a unique style in terms of the video’s appeal. It further enhances the storytelling and allows for artistic expression. They can set a particular mood, add decay, and contribute to specific genres like retro.
- Enhancing Period Settings: If your video is set in a specific time period, then these effects can help. By using VHS effects, you can make the video more authentic. Additionally, this reinforces the historical context of the narrative.
- Attention-Grabbing: In a world of crisp and high-definition visuals, uniqueness matters. Intentionally using VHS effects for your video, you can make your video stand out. The distinct and unconventional look captures viewers’ attention.
- Cost-Effective Solution: You can use such effects to cut down your cost. Instead of investing in expensive props, VHS effects offer a more cost-effective solution. Digital software and plugins can apply these effects, eliminating the need for physical equipment.
Add VHS Effect to Video
Simply add video effects on Video with Filmora Video Effect Editor ! Experience the magic of cool yet outstanding video effects, where your videos come to life in beautiful visuals.
Apply VHS Effect Apply VHS Effect Learn More >

Part 2: How To Add VHS Effect in Premiere Pro: An Overview
Do you know how you can add the VHS effect in Premiere Pro? Don’t worry because this guideline will provide you with the required information. These simple steps will let you add your favorite VHS look to your video using Premiere Pro.
Step 1: Import your video into Adobe Premiere Pro. Open the “Lumetri Color” panel by clicking “Color” in the main toolbar. Further, choose “Lumetri Scopes” to access the graph window. Then, adjust the basic settings in the “Lumetri Color” panel. Continue to decrease the value of “Whites,” increase the “Contrast,” and set the “Blacks” to 10 on the graph.
Step 2: Navigate to the “Creative” tab in the “Lumetri Color” panel. Increase the “Faded Film” and decrease the “Sharpness,” “Saturation,” and “Vibrance” to your liking. Use the color wheels in the “Color Wheels & Match” section to give the right tone. Further, proceed to increase the “Vignette” value from the same tab.
Step 3: Enable editing mode by selecting “Editing” in the main bar. Choose “Edit” from the lower section and search for the “Channel Blur” effect. Apply the effect by dragging and dropping it onto your video clip. Place the effect above previous adjustments and effects.
Step 4: In the “Channel Blur” effect tab, enable “Repeat Edge Pixel” and increase “Red Blurriness” to 30. Repeat the same step but this time increase “Blue Blurriness” to 30 and “Red Blurriness” to 15 and change “Blur Dimensions” to “Vertical.”
Step 5: Continue to add the “Unsharp Mask” and “Color Emboss” effects from the “Effect” tab. Proceed and change “Amount” and “Radius” for “Unsharp Mask” to 85 and 20, respectively. Slightly increase the “Relief” values for the “Color Emboss” effect.
Proceed to apply the “Noise” effect from the “Noise & Grain” section and further adjust the “Amount of Noise” to your preference. Induce the “Wave Warp” effect and set the parameters of “Wave Height” to 2 and “Wave Width” to 1000. Change “Direction” to 0 and “Pinning” to “Horizontal Edges.”
Step 6: You can crop your video to a 4:3 aspect ratio to give your video more authenticity. To do this, create two “Color Matte” layers using the “New Item” icon. Name and place them over the video clip. Apply the “Crop” effect to both layers. Set the “Left” option to 86 for the first layer and the “Right” option to 86 for the second layer. Set the “Edge Feather” to 30 for both layers.
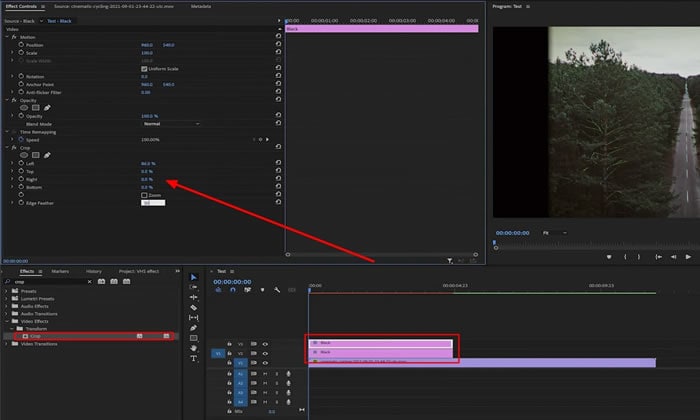
Make sure to save your VHS effect as a preset for future use by right-clicking and selecting “Save Preset.” Finally, export your VHS effect Premiere Pro video to your desired format.
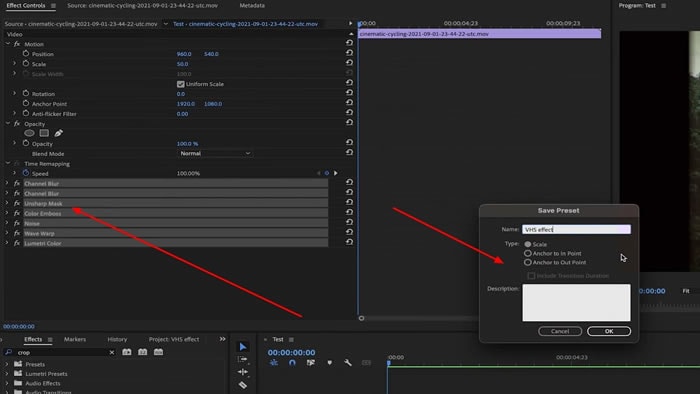
Part 3: Using Wondershare Filmora to Add The Perfect VHS Effect in No Time
Wondershare has provided us with so many tools and applications for different purposes. It has provided an amazing video editing tool called Filmora. Wondershare Filmora Video Editor provides easy editing options for the user. You can create highly professional videos with impressive results using Filmora. This tool offers multiple overlays, video effects , and filters to use.
Add VHS Effect For Win 7 or later(64-bit)
Add VHS Effect For macOS 10.14 or later
If you want to add VHS effect Vegas Pro overlays using Filmora, you can. In order to apply such effects to your videos, you need to follow the guide. There are 4 simple steps to add the perfect VHS look to your video in no time.
Step 1xxx
To apply a similar VHS overlay Premiere effect to your video, first access Wondershare Filmora on your computer. Then, click on the “New Project” tab in the main interface, which will take you to a new window.
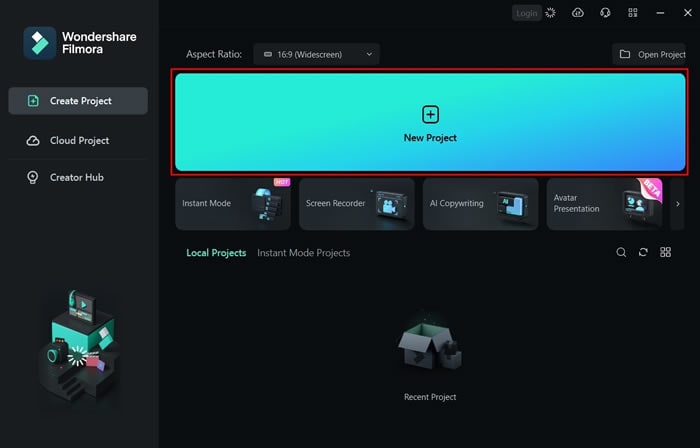
Step 2Import and Arrange Your Video
Next, import your video by either dragging and dropping it into the software or using the import media option. Once imported, drag and drop your video into the timeline area to begin working with it.
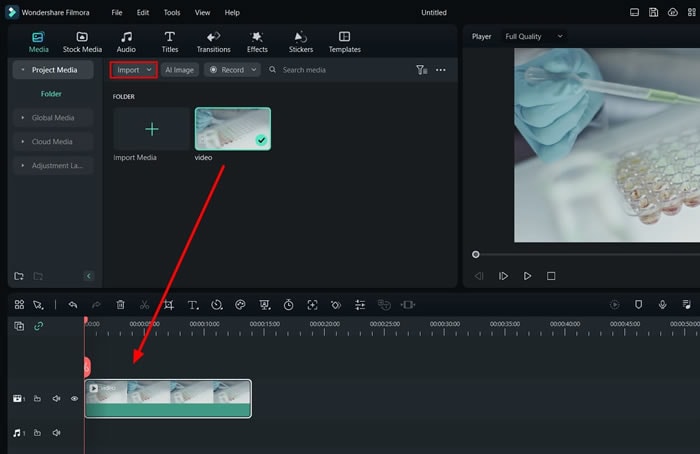
Step 3Apply VHS Effects
Access the “Effects” option from the top bar of the software. Search for “VHS” in the Effects panel to explore the various VHS effects available. Choose the desired effect that fits your style, then drag and drop your video on top of the timeline.
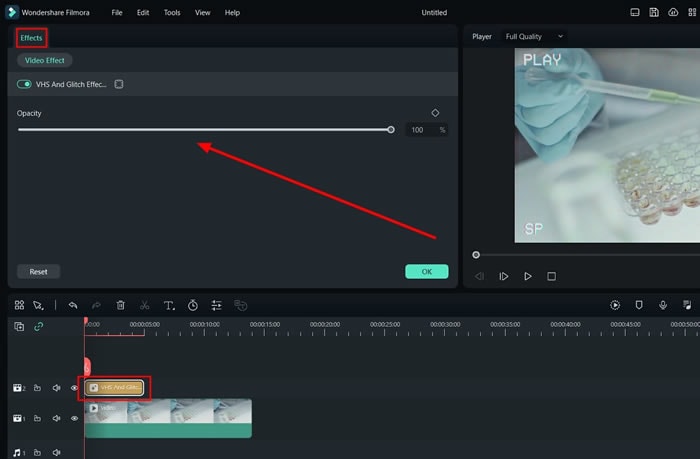
Step 4Adjust Opacity and Export
To refine the intensity of the VHS effect, go to the “Effects” tab located on the right side of the screen. From there, you can adjust the effect’s opacity by changing its transparency. Then, click “Export” at the top left of the screen to save your video with the applied VHS effects.
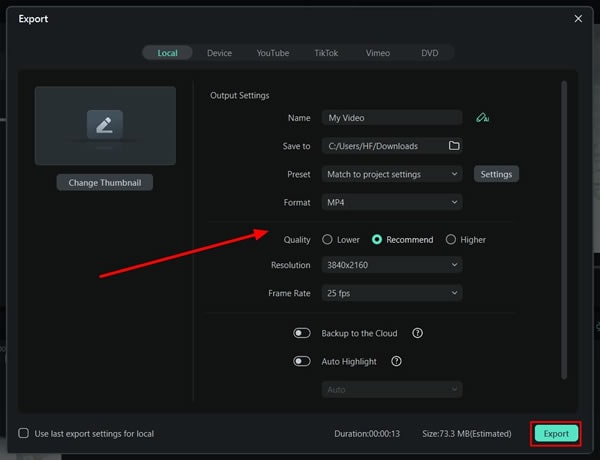
Conclusion
To conclude, there are many different overlays, effects, and filters that you can use. However, VHS effects are some of the most popular ones. People use different VHS filters in Premiere Pro to give their content a distinctive look. You can add these effects using different online and offline tools. One of the most popular tools is Wondershare Filmora which helps you add the VHS look to your video.
Apply VHS Effect Apply VHS Effect Learn More >

Part 2: How To Add VHS Effect in Premiere Pro: An Overview
Do you know how you can add the VHS effect in Premiere Pro? Don’t worry because this guideline will provide you with the required information. These simple steps will let you add your favorite VHS look to your video using Premiere Pro.
Step 1: Import your video into Adobe Premiere Pro. Open the “Lumetri Color” panel by clicking “Color” in the main toolbar. Further, choose “Lumetri Scopes” to access the graph window. Then, adjust the basic settings in the “Lumetri Color” panel. Continue to decrease the value of “Whites,” increase the “Contrast,” and set the “Blacks” to 10 on the graph.

Step 2: Navigate to the “Creative” tab in the “Lumetri Color” panel. Increase the “Faded Film” and decrease the “Sharpness,” “Saturation,” and “Vibrance” to your liking. Use the color wheels in the “Color Wheels & Match” section to give the right tone. Further, proceed to increase the “Vignette” value from the same tab.

Step 3: Enable editing mode by selecting “Editing” in the main bar. Choose “Edit” from the lower section and search for the “Channel Blur” effect. Apply the effect by dragging and dropping it onto your video clip. Place the effect above previous adjustments and effects.

Step 4: In the “Channel Blur” effect tab, enable “Repeat Edge Pixel” and increase “Red Blurriness” to 30. Repeat the same step but this time increase “Blue Blurriness” to 30 and “Red Blurriness” to 15 and change “Blur Dimensions” to “Vertical.”

Step 5: Continue to add the “Unsharp Mask” and “Color Emboss” effects from the “Effect” tab. Proceed and change “Amount” and “Radius” for “Unsharp Mask” to 85 and 20, respectively. Slightly increase the “Relief” values for the “Color Emboss” effect.

Proceed to apply the “Noise” effect from the “Noise & Grain” section and further adjust the “Amount of Noise” to your preference. Induce the “Wave Warp” effect and set the parameters of “Wave Height” to 2 and “Wave Width” to 1000. Change “Direction” to 0 and “Pinning” to “Horizontal Edges.”

Step 6: You can crop your video to a 4:3 aspect ratio to give your video more authenticity. To do this, create two “Color Matte” layers using the “New Item” icon. Name and place them over the video clip. Apply the “Crop” effect to both layers. Set the “Left” option to 86 for the first layer and the “Right” option to 86 for the second layer. Set the “Edge Feather” to 30 for both layers.

Make sure to save your VHS effect as a preset for future use by right-clicking and selecting “Save Preset.” Finally, export your VHS effect Premiere Pro video to your desired format.

Part 3: Using Wondershare Filmora to Add The Perfect VHS Effect in No Time
Wondershare has provided us with so many tools and applications for different purposes. It has provided an amazing video editing tool called Filmora. Wondershare Filmora Video Editor provides easy editing options for the user. You can create highly professional videos with impressive results using Filmora. This tool offers multiple overlays, video effects , and filters to use.
Add VHS Effect For Win 7 or later(64-bit)
Add VHS Effect For macOS 10.14 or later
If you want to add VHS effect Vegas Pro overlays using Filmora, you can. In order to apply such effects to your videos, you need to follow the guide. There are 4 simple steps to add the perfect VHS look to your video in no time.
Step 1xxx
To apply a similar VHS overlay Premiere effect to your video, first access Wondershare Filmora on your computer. Then, click on the “New Project” tab in the main interface, which will take you to a new window.

Step 2Import and Arrange Your Video
Next, import your video by either dragging and dropping it into the software or using the import media option. Once imported, drag and drop your video into the timeline area to begin working with it.

Step 3Apply VHS Effects
Access the “Effects” option from the top bar of the software. Search for “VHS” in the Effects panel to explore the various VHS effects available. Choose the desired effect that fits your style, then drag and drop your video on top of the timeline.

Step 4Adjust Opacity and Export
To refine the intensity of the VHS effect, go to the “Effects” tab located on the right side of the screen. From there, you can adjust the effect’s opacity by changing its transparency. Then, click “Export” at the top left of the screen to save your video with the applied VHS effects.

Conclusion
To conclude, there are many different overlays, effects, and filters that you can use. However, VHS effects are some of the most popular ones. People use different VHS filters in Premiere Pro to give their content a distinctive look. You can add these effects using different online and offline tools. One of the most popular tools is Wondershare Filmora which helps you add the VHS look to your video.
Also read:
- New How to Remove Audio From Videos with FFmpeg?
- How to Put Emoji on Mac That Take Less Than 10 Mins
- In 2024, Do You Still Waste Time Making Transparent Background in Paint
- New 15 Camera Shake Preset for Adobe Premiere Pro
- Unlock Your Video Editing Potential With Wondershare Filmora for 2024
- In 2024, Do You Want to Make Your Photos and Videos Look Different From Others? There Are Many Lightroom LUTs Free, and They Make Your Media Content Stand Out From Others
- Online Video Makers
- New 12 Impressive AI Video Ideas for Creating Engaging Video Content for 2024
- Updated How to Create Datamoshing Effect to Your Footage in After Effects, In 2024
- 2 Solutions to Cut Video in VLC on Windows for 2024
- Looking for the Best Alternatives of iPad Compatible Slideshow Applications to Design High End Graphic Presentations? Rest Assured, You Have Landed at the Correct Spot
- New In 2024, Find Out The Best Dark Moody LUTs During Editing
- Updated 2 Effective Ways to Easily Convert VTT to SRT for 2024
- In This Article, We Talk About How to Add Old Film Overlays and Other Effects to Turn the Videos or Photos More Vintage and with an Older Aspect. We Take a Look at Filmora in This Guide and Give Tips on How to Create Great Retro Videos
- In 2024, Create Risograph Effect In Photoshop A Beginners Guide
- Updated Top 8 Video Grabbers for Chrome
- New How to Make Eye Zoom Transition Effect with Filmora
- In 2024, Learn How to Add Dynamic Shake Effects to Your Videos Using Alight Motion. Our Step-by-Step Guide Makes It Easy to Create Cinematic Footage
- New In 2024, Discover the Process of Slowing Down Time-Lapse Videos on Your iPhone
- Updated Hitfilm Express - A Guide to Download, Install, Key Features for 2024
- 2024 Approved Top iOS Solutions Finding Premium Slow Motion Apps For Video Creation
- 2024 Approved Looking for a Full Guide on Removing the Background From PNG Images? Do You Want to Transform JPG to PNG Transparent? If so, Take some Time to Read This Article
- Updated In 2024, How to Make Text Reveal Effect Easily
- How to Choose A Nice GoPro for Vlogging?
- Updated An Introduction to LUTs | Their Overview and Benefits for 2024
- New 2 Easy Methods | How To Zoom In On TikTok Videos, In 2024
- Updated In 2024, A Complete Guide to the Best Brand Story Videos |2023|
- New 2024 Approved FLV Editor for Windows 11/10/8.1/8/7 Easily Edit FLV Videos on PC
- 2024 Approved How to Add a Custom Transition to OBS
- New How to Convert Images Into Video - Kapwing Tutorial for 2024
- Updated 2024 Approved 4 Ways to Merge MP4 and MP3
- In 2024, Turn Your Blog Content Into Audio Podcasts to Reach a Wider Audience and Increase Reader Participation
- New Wondering About How to Easily Create a Slideshow on Your iPhone? Well, Take Note of some of the Finest Apps to Turn Your Vision Into Reality
- 2024 Approved Wondering How to Create a Stunning Intro Video with KineMaster? Here Are the Simple Steps to Use KineMaster to Design Your Intro Video in Simple Steps
- Updated Sometimes It May Happen to You that You Are Watching a Video that Has Very Low Graphics or, in Other Words, Low Visual Quality. You Might Wish to Change, Instead Improve the Video Quality. Here, AI Upscaling Video Comes to Use
- In 2024, In This Article, You Will Learn About the Top 5 Editors for Windows, Top 5 Editors for iPhone/Android, and Top 5 Editors for Animated GIF Editing
- New Most-Used 3 Ways to Compress Video for Instagram Story, Feed, and IGTV
- How to Make a Movie with Windows Movie Maker?
- Updated Add Zoom Blur Effect In Photoshop Step by Step for 2024
- 2024 Approved This Article Introduces How Sheila Become a Youtuber and How She Started Video Editing
- New Are You Looking for the Best Way to Add Subtitles to Your Video? The Top SRT File Creators Can Help You Do That
- Updated In 2024, Guide To Creating The Perfect VHS Effect Look in Premiere Pro
- New This Is the Method Employed During Every Evening Weather Broadcast The Newscaster Is Standing in Front of a Blank Screen, but the Viewers at Home See a Weather Map
- In 2024, While Fiddling with Solutions to Complement the Ordinary Text Messages with Graphic Elements, People Also Ask About Ways to Add Emoji to Photo Online. Stay Here to Get the Best Answers
- Updated Do You Want to Know How to Add a VHS Effect Premiere Look? You Can Easily Apply the VHS Effect to Your Videos Using Adobe Premiere Pro
- Update your hardware drivers with Device Manager on Windows 11/10/7
- 10 Best Fake GPS Location Spoofers for Nokia C32 | Dr.fone
- In 2024, Easy Guide How To Bypass HTC FRP Android 10/11/12/13
- In 2024, Apple ID Unlock From iPhone 7 Plus? How to Fix it?
- How can I get more stardust in pokemon go On OnePlus Ace 2? | Dr.fone
- Cellular Network Not Available for Voice Calls On Lava Blaze 2 Pro | Dr.fone
- In 2024, Delete Gmail Account With/Without Password On Vivo V27e
- In 2024, How to Use Pokémon Emerald Master Ball Cheat On Tecno Spark 10 5G | Dr.fone
- How to Track Apple iPhone 14 Location by Number | Dr.fone
- In 2024, About Oppo Find X6 FRP Bypass
- How to Update Apple iPhone SE without Losing Data? | Dr.fone
- In 2024, AddROM Bypass An Android Tool to Unlock FRP Lock Screen For your Motorola Moto G73 5G
- How to identify malfunctioning hardware drivers with Windows Device Manager on Windows 11 & 10
- Complete Guide to Hard Reset Your Samsung Galaxy F15 5G | Dr.fone
- How to Downgrade Apple iPhone 14 Pro Max without Losing Data? | Dr.fone
- Full Guide to Bypass Vivo Y200 FRP
- In 2024, How to Change Lenovo ThinkPhone Location on Skout | Dr.fone
- Hassle-Free Ways to Remove FRP Lock on Xiaomi Redmi Note 12 Pro 4Gwith/without a PC
- Complete Guide on Unlocking iPhone 11 Pro with a Broken Screen?
- Top 5 Tracking Apps to Track Xiaomi Redmi Note 12 5G without Them Knowing | Dr.fone
- In 2024, Top 4 SIM Location Trackers To Easily Find Your Lost Infinix Smart 8 Pro Device
- In 2024, How to Cast Motorola G24 Power Screen to PC Using WiFi | Dr.fone
- How to Use Pokémon Emerald Master Ball Cheat On Vivo Y100 5G | Dr.fone
- In 2024, Will Pokémon Go Ban the Account if You Use PGSharp On Poco X5 Pro | Dr.fone
- Title: How to Shoot Cinematic Footage From a Smartphone
- Author: Chloe
- Created at : 2024-05-20 03:37:22
- Updated at : 2024-05-21 03:37:22
- Link: https://ai-editing-video.techidaily.com/how-to-shoot-cinematic-footage-from-a-smartphone/
- License: This work is licensed under CC BY-NC-SA 4.0.


