:max_bytes(150000):strip_icc():format(webp)/GettyImages-944229088-5bd1f61e46e0fb0026fdf2f0.jpg)
How to Use 3D Camera Tracking Effects in After Effects

How to Use 3D Camera Tracking Effects in After Effects
Adobe After Effects is an ever-growing product, with new features introduced almost every year. One of these features is the 3D Camera Tracking, which allows you to take your motion graphic effects to the next level.
Camera Tracking is extracting the camera movement from a recorded video sequence. This process allows filmmakers to add computer-generated elements to a live action shot, track objects throughout a shot for compositing, and estimate camera movements for virtual reality applications.
In this article, we will explore what Camera Tracking is and Motion Tracking in After Effect. We’ll also show you how to use 3D Camera Tracking in After Effects on a Windows PC.
Part 1. What Is Camera Tracking
Camera Tracking is a process that determines the movement of a video clip. This information can be used to add certain effects to the video, such as objects that seem to follow the camera or text that appears to be stationary in the frame.
Camera Tracking is a relatively simple process, but it can be time-consuming. However, the results are often worth the effort, as it can add a whole new level of realism to your footage clips.
For example, you have taken a video clip of a zoo and want to add an object to it while making sure it gives a realistic look. This is where the Camera Tracking feature can help you make a smooth transition and add the element as if it was there.
Part 2. Why Use Camera Tracking?
Now that you know what Camera Tracking is, let’s have a look at some benefits of using it:
- Add a 3D object or element to a 2D video clip.
- Embed objects, texts, etc., to a video.
- Stabilize a shaky camera/video clip.
- Create special effects.
- Apply color grading.
- Replace a TV or PC screen with some information.
Thus, if you need some basic compositions or advanced ones, the Camera Tracking feature will help you track your videos, embed anything you want, or create special effects to make your clip different.
Part 3. Motion Tracking In After Effects
The Motion Tracking capability is Adobe After Effects’ feature that allows you to track the movement of the camera/an object in a video clip and use the data to add effects to objects.
Motion tracking can be used for various effects, like creating realistic text animations or adding special effects to objects in a video.
There are four main types of Motion Tracking in After Effects, each with its own advantages and disadvantages:
Single Point Tracking
Single Point tracking tracks a single position in a video clip. You can use it for composing a video clip with a single point of focus, and it is suitable for following the movement of an object with right-left or up-down motion.
Advantage: Single Point Tracking is perfect for tracking a single position or motion of a single object.
Disadvantage: No scale or rotation properties and needs a clear contrast point for effective results.
Two Point Tracking
Two Point Tracking is a feature that allows you to track two points in a footage clip and can be used for scale, motion, and rotation tracking.
Advantage: Two Point Tracking can track scale and rotation along with the motion.
Disadvantage: It doesn’t give effective results with a shaky video clip.
Four Point Tracking
The Four Point Tracking feature lets you track four different points (corners) in your footage and apply the tracking data to a layer in your composition.
The four points can be placed at the screen’s corners in your shot, and new footage is applied to cover the screen.
Advantage: Directly pins the data to each corner of the image.
Disadvantage: Cannot be used to create a 3D object.
3D Camera Tracking
With 3D camera tracking, you can track the movement of a camera in a video and place 3D elements in the scene that match the camera’s movement. This is a great way to add realism to your graphics and make them look like they’re part of the scene.
Advantage: 3D Camera Tracking can help you add shapes, texts, or 3D objects to 2D footage.
Disadvantage: A bit tricky and needs an expert grip on the tool to use effectively.
Part 4. How To Use 3D Camera Tracking In After Effects Of Windows
Here’s a simple and quick rundown of how to use 3D camera tracking in After Effects:
Step1Import Your Video Footage
Launch Adobe After Effects, create a new composition, and import your footage. Once your clip is uploaded, click the Window Menu. Scroll down and choose “Tracker.”
![]()
Here you will see four tracking options:
- Track Camera
- Warp Stabilizer
- Track Motion
- Stabilize Motion
![]()
Click “Track Camera” to add the 3D Camera Tracker effect to your selected layer. After Effects will start analyzing the layer, show the percentage, and count the total frames of clips tracked.
![]()
Note: The dots that appear on your video clips cannot be rendered out, as they are strictly referential.
Step2Establish The Tracking Points
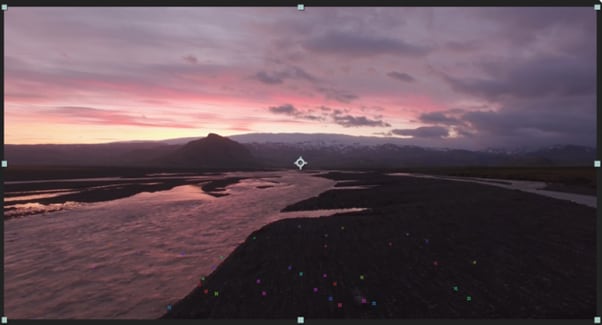
You have to select the tracking points and a plane to which it must be tracked. To do this, hover over the tracking point references in the After Effect compositions window. Between the three tracking points, a triangle will form, and a red “target” will appear to help you better visualize the plane.
Now, you have to find a tracking point that lays the red “target” parallel to your selected plane. Next, select the triangle that lines up best for your surface. Move the arrow away to disable the picker and stop the red “target.”
![]()
Step3Add The Text To Your Video Clip
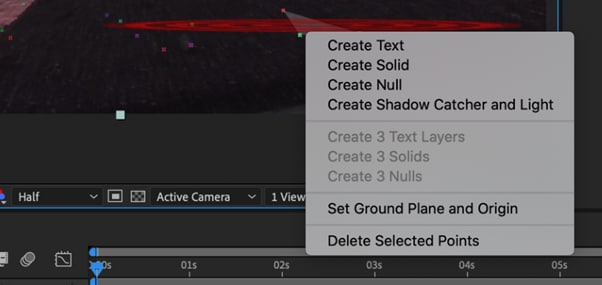
Once you define the plane, it’s time to add text to your video clip. To do this, right-click on the triangle you have set previously, and a window will appear, allowing you to create new layers.
Click “Create Text” to place the text on your tracked video clip. A new text layer will be added using the tracking data.
Step4Align Text On Tracked Footage
Now you have to align your text. In the timeline, locate the tracked text layer and click the arrow to the left to unveil all the editable properties for the layer.
Click the “Transform” option to use the transform options and use the layer lines to adjust the X, Y, and Scale values afterward.
![]()
Note: You can select your layer and press the S, P, R, or T keys to adjust the scale, position, rotation, and opacity, respectively.
Your text will now be added to your video footage. The method is similar to adding solid or null to your clips. However, the exact steps might differ a little.
Video - Learn 3D Camera Tracking In After Effects
Conclusion
In this article, we’ve discussed what Camera Tracking is and why to use it. We also provided information regarding Motion Tracking, its four types, and their advantages and disadvantages.
Furthermore, we walked you through the step-by-step process of using 3D Camera Tracking in Adobe After Effects for Windows.
We hope this guide helps you to add text to your video footage without much effort, and you now have complete knowledge of the Camera Tracking feature.
Free Download For Win 7 or later(64-bit)
Free Download For macOS 10.14 or later

Step2Establish The Tracking Points
You have to select the tracking points and a plane to which it must be tracked. To do this, hover over the tracking point references in the After Effect compositions window. Between the three tracking points, a triangle will form, and a red “target” will appear to help you better visualize the plane.
Now, you have to find a tracking point that lays the red “target” parallel to your selected plane. Next, select the triangle that lines up best for your surface. Move the arrow away to disable the picker and stop the red “target.”
![]()
Step3Add The Text To Your Video Clip
Once you define the plane, it’s time to add text to your video clip. To do this, right-click on the triangle you have set previously, and a window will appear, allowing you to create new layers.
Click “Create Text” to place the text on your tracked video clip. A new text layer will be added using the tracking data.

Step4Align Text On Tracked Footage
Now you have to align your text. In the timeline, locate the tracked text layer and click the arrow to the left to unveil all the editable properties for the layer.
Click the “Transform” option to use the transform options and use the layer lines to adjust the X, Y, and Scale values afterward.
![]()
Note: You can select your layer and press the S, P, R, or T keys to adjust the scale, position, rotation, and opacity, respectively.
Your text will now be added to your video footage. The method is similar to adding solid or null to your clips. However, the exact steps might differ a little.
Video - Learn 3D Camera Tracking In After Effects
Conclusion
In this article, we’ve discussed what Camera Tracking is and why to use it. We also provided information regarding Motion Tracking, its four types, and their advantages and disadvantages.
Furthermore, we walked you through the step-by-step process of using 3D Camera Tracking in Adobe After Effects for Windows.
We hope this guide helps you to add text to your video footage without much effort, and you now have complete knowledge of the Camera Tracking feature.
Free Download For Win 7 or later(64-bit)
Free Download For macOS 10.14 or later
3 Best Effects to Appear on Camera
We all want to improve our video editing skills and give them more of a wow factor. A fantastic method of achieving this is using different effects and tricks on Filmora .
Appearance effects are optical illusions used to replicate imagined occurrences in a narrative or made-up universe. These effects can be effective narrative devices. As a result, they are widely employed in the theater, film, television, and video game industries. Here is what you need to do to add appearance effects to your videos:
Part 1: Why are Appearance Effects Important?
A good branding and advertising strategy must include video. You can raise the caliber of clients who utilize your product by improving the image you provide.
How can video help you build your brand? How well do you look? Although there is no quick fix to seem nice on-screen instantly, you can employ several appearance effects to enhance the general flow of your videos. Appearance effects are significant because they add a slight twist to your videos. They can help you stand out, add some humor and draw attention from your audience. These simple tricks could add extra fun and Spark to your videos.
Part 2: How to Make Cloth Appearance
Let’s start with the first one. Before you start, make sure you put the camera on a tripod or a steady surface, so it doesn’t move while filming.
Step1 For the first shot, you must throw a jacket on a stool. Make sure it lands on the stool or wherever your talent is going to sit.

Step2 Make a shot of your talent appearing from where the jacket landed. You can add some acting skills to make this shot more realistic.

Step3 Download Filmora to edit your footage. You can get started by going to their official website.

Step4 Now split the first clip on the frame where your jacket lands on the stool. Place it on the first track.

Step5 Trim the second shot until the talents start acting and place it on the second track to match the first clip.

Part 3: How to Make an Explosion Appearance
Step1 This effect is the easiest. You need to film the empty plate with just a background. Then let the talent enter the frame and jump into the place.

Step2 Now import the clip into Filmora and place it onto the first video track.
Step3 Freeze the frame of the empty plate with just the background and extend it as necessary. Place the clip onto the second video track and trim it until the action of the talent jump starts.

Step4 Delete the rest on the left. The trick is to use some explosion or smoke effect to hide the transition.
Step5 Use the green screen sample in the default menu here. Add some smoke effects available in film stock. Place it on the third video track and move it to hide the transition.

Part 4: How to Make Roof Appearance
The last trick here is combining the techniques from the two previous effects.
Step1 First, record the empty plate with just a background. Let the talent jump in the frame and set up a green screen for the talent to jump in front of it. It will look like they’re falling from the ceiling.

Step2 Now import the clip into Filmora again. Follow the steps from the second example so we have the subject appearing on the screen like this.

Step3 Add the green screenshot onto the third video track.

Step4 Double-click on it, activate the setting window and then key out the background using the chroma key feature.

Step5 Move the clip until it covers only the first frame of the appearing clip. Now keyframe the following subject from the outer frame to the final position.

Step6 Now search for some smoke effects and put it upside down. So it looks like the ceiling is broken when the subject falls. Then add some camera shake to the fall.

Step7 Drag the camera shake effect back to the top track and shorten it to an ideal length. You can also add some sound effects if you want to this video.

Part 5: Tips to Look Good in Your Next Video
1. Be Clear About the Topic
Intellectuals frequently complain that everyone has attention deficit disorder due to the Internet. According to studies, we only have an attention span of 8 seconds today. You need a punchy, concise message to keep viewers watching your video.
2. Don’t Forget to Smile
Individuals who smile frequently are perceived to be more confident and successful. Therefore, showing your audience that you are confident in your company and services is the best method to gain their trust.
3. Look into the Camera
Direct eye contact with the camera lens is essential. Although it may seem enticing, your sole audience is the person directly in front of you when you’re speaking.
Be mindful of the camera’s confined area. Bring it up to eye level and keep your gaze there rather than elsewhere.
Summary
There are several fantastic camera effects that you can experiment with in your videos. While some are well-known, others are less well-known and often used. We have mentioned the three fun ways to appear on camera above. We suggest using video editing software like Filmora to use these effects more effectively. You can use these appearance effects to create an atmosphere, make your story more understandable, or spice up the video.
Free Download For Win 7 or later(64-bit)
Free Download For macOS 10.14 or later
Free Download For macOS 10.14 or later
7 Tips to Create Teaching Videos
For many teachers, online classes begin with a live recording of their lectures or lessons. Sending the recorded lectures to the students allows them to pause the video and rewatch it multiple times.
Recording lectures before class can assist lecturers in filling gaps that may arise due to your absence. You don’t have to worry about missing lessons if you’re going on vacation or to be sick for an extended time.

You can keep the class continuing even if you are absent by using pre-recorded lectures and sending the file to the class, so they know the lesson. With the help of an online lecture software or tool available on the internet, you can download it free.
These are the steps in creating an instructional video in your classes:
Know Your Target Audience
Before you record the video to present in your classes, you need to know your target audience. We all know that some teachers handle grade school, and some handle high school level. We need to discover what kind of knowledge or skills your students hope to gain in your class learning the topic you presented. Try to use your book, or maybe add some research and then use that information to help you discuss with your students.

Things you need to remember before you proceed to the next step:
- Who is your audience? We, educators, already know our audience. It depends on the school and what level we are going to handle. It’s either grade school level or high school level.
- What is your topic/s? There are a lot of topics and subjects in the field of teaching but try to pick only one topic or subject to present to your class. For example, Computer Subject because I’m a computer teacher. I will be using this subject or topic about computers to create my instructional video for the class.
- What is the learning objective or learning outcome of your video? The learning objective of your video is the outcome that captures precisely what knowledge, skills, and attitudes the students should be able to exhibit following the instructions.
- How will your video benefit your audience? The students will learn and understand the lesson you are discussing, helping them gain knowledge of that subject to answer all the assignments, quizzes, or maybe an activity you will give them.
Write a Script
Once you know your audience and have the topic you need, it’s time to write a script. Think about your plan for presenting your video in your classes.

- Here are a few more writing script tips to help you in your classes:
Go to the mirror and practice. This tip may help some teachers instead of calling their loved ones and getting feedback about the script they write.
- Explain what you’re doing and why you’re doing it. You are not only presenting the topic and explaining it but also showing the class what the topic is all about, which will be suitable for your students. Present some examples, pictures, or videos for them to know better what your discussion is all about.
- Knowing your script 100% is important. Make sure that you already know your script before you record. If you forget something or make a mistake, go back to the beginning and repeat it correctly. Remember as a teacher that we are not allowed to make mistakes in the eyes of the students. So, double-check everything before you record it and show it to the class.
Record the Narration
After writing your script, let’s try to record the narration. You don’t need any application software where you can record the narration. Simply using your mobile phone and having a good background is enough.

Using a microphone to record the narration is necessary. Getting those headphones with one connected microphone is good. Some of that has noise cancellation, providing a much better sound quality while recording and ensuring that your videos don’t contain background noise. Then, find a quiet place to record. Explain to your family members that no one will ever talk loud or shout while you are recording the narration.
Once you are ready to hit that record button, speak clearly. Nobody is perfect, so it’s ok if you make a mistake. You don’t need to start over, just pause and start again. You can remove the error or mistake by editing your finished product. Make sure your narration will be the same on the screen while recording your video.
Record and Edit your Video
The first thing you need to do in recording your video is to clean up your computer screen and close all the unnecessary applications. You need to turn off also the notifications that will pop up on your computer before you start recording. You can also add your recorded narration to your video.
Here are a few simple tips for editing your video:
- Add some interactive elements like motions to highlight key points of your video.
- Adding music to your video is optional but may elevate a decent video to the next level. Pick something cheery. You want your audience to feel good while learning.
The Video Duration
I’d say it’s one of the first things students look at before they click the ‘play’ button of the video. It will benefit both teacher and the students if the video is brief and direct to the point. Some students are more likely to want a short video, or maybe let’s focus on the time between 20 - 30 minutes video, where they can watch and learn on any platform, anytime. After that, you can add time by adding other pieces of information and giving activities and assignments.
Be Yourself
Be yourself, and don’t be afraid to make mistakes sometimes. Make sure that your personality shines throughout the video. Try to research how some teachers or maybe some speakers speak naturally and have a conversational manner with an enthusiastic tone.
When you are recording yourself talking, look right at the camera so students can feel eye contact with you, even if it is online. Sometimes we forget the words we need to say to the class, so try to prepare a note next to your webcam. The messages you prepare will help you don’t look away from the camera all the time. Don’t pretend to the class that you’re reading something, just talk naturally as you would in real classrooms.
Sharing your Video
Instead of sharing your recorded video with your students, you can also share it directly to online video platforms like YouTube, Facebook, and Vimeo or save the video as a local file to upload on a social media platform. They can go there and watch the video. You can also upload your file to the school learning management system like Google Classroom. Please take note of this; before sending the recorded video to your students, share it with first to a few people to get some video feedback about what you created. This might help you ensure that your message is clear and that your video accomplishes your goals for your students.
There’s a chance that your recorded video doesn’t meet your requirements or you are not satisfied with that for the first time. Don’t worry; try it again, even if you recorded it once or several times. You need to trust yourself by doing it because we are teachers; we are doing our best for the students to learn something from us.
Free Download For Win 7 or later(64-bit)
Free Download For macOS 10.14 or later
Free Download For macOS 10.14 or later
[Top 10] Transparent Image Online Tools That Give You an Advantage
[Top 10] Transparent Image Online Tools That Give You an Advantage
An easy yet powerful editor
Numerous effects to choose from
Detailed tutorials provided by the official channel
If you are a photoholic person and you love to share your images on social media then at some point in time you might have felt the need of removing the background of the image and add something cool to the background. This process of removing the background of the image is called making your image transparent. Professional photo artists make the most use of this feature to create the best of photos. Creating transparent images and changing their background could be used in many ways like designing the logo of the brands, professional photography, or simply fun purpose.
If you have not made use of transparent images yet and you want to learn to create transparent images online and edit transparent images online then this article is for you.
In this article
01 [Best 10 Transparent Image Editors You Deserve to Own](#Part 1)
02 [Can You Find Assets of Transparent Image in the Video Editor?](#Part 2)
Part 1 Best 10 Transparent Image Editors You Deserve to Own
You might be afraid that editing a picture online and making it a transparent image would need technical knowledge in photo editing. Then you are wrong. Making transparent images online and then editing them is very easy. We, here in this article, have come up with the 10 best online transparent image makers using which you can create transparent images in a very fun way, and then you can use them for whatever purpose you want. And don’t worry, we have provided the steps on how to use online transparent image makers to make your work easy.
01Removebg
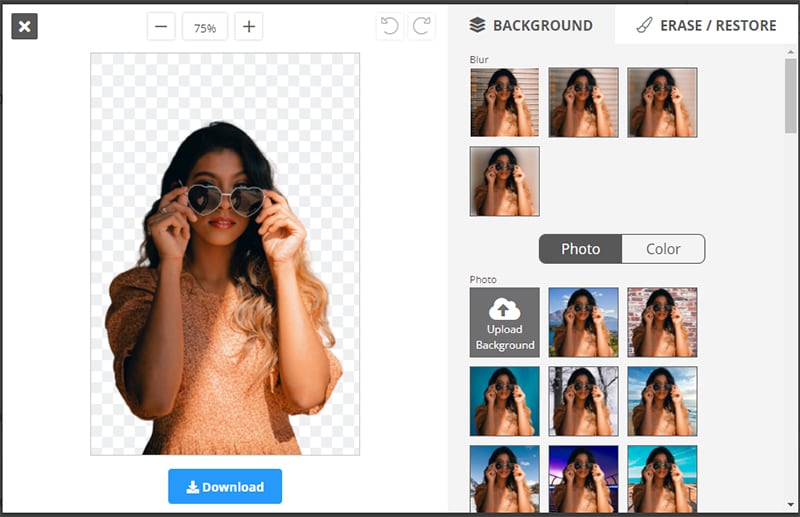
If you are looking for a free online transparent image maker then Removbg should be the first one you give a try. This online tool is powered by Al technology which enables you to remove the background of your image precisely. Removebg has “Erase” and “Restore” tools which provides for manual adjustment of the details so you can give your image a realistic touch. Apart from these features, the other highlights of this online tool are solid color backgrounds, well-designed templates, and custom templates. Using this online free tool you can also upload your image in batches. Images created by you will have a professional finishing.
02FocoClipping
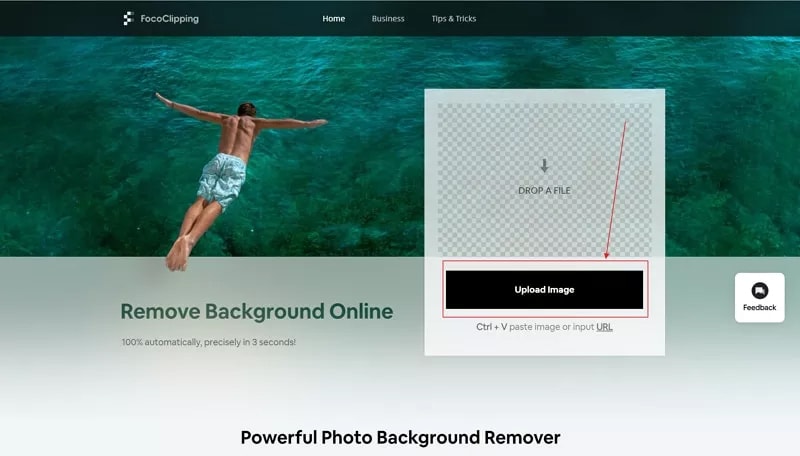
The next great online transparent image maker on our list is FocoClipping. While most of the image makers and editors have a free version and paid version but all the features in the FocoClipping are free. This image editor enables you to remove background from your photos and make them transparent with only a single click. FocoClipping also uses AI tech to remove the background of your image precisely. The other features of this tool include no limit of download and upload, an easy-to-use interface, casting shadows into images, and many more.
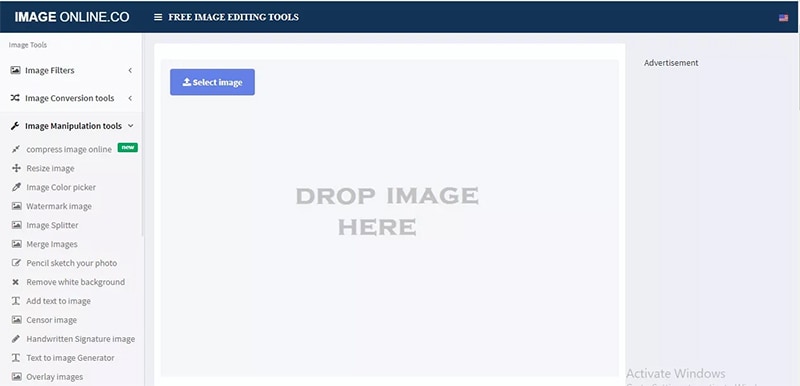
03Image online.co
Image online.co is a trusted name in the field of transparent image makers online. This amazing website is also completely free to use. This website is powered packed by a bundle of image editing tools. To make your transparent image all you need to do is to select the background using the mouse and you are done. No technical photo editing knowledge is required to use this tool. Apart from this Image online.co offers you features like resizing the image, image color picker, merging the images, pencil sketching the photo, adding text to the image, adding a logo to the photo, etc.
04AirMore
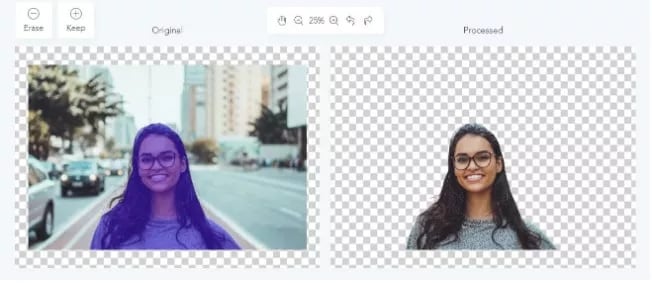
If you are the one who needs a simple and easy-to-use tool without much sophistication to make a transparent image, then AirMore could be a good choice for you. All you need is a single click on the background to remove it. This tool provides the “Keep” and “Remove” options so in case you don’t like your editing then you can reverse the whole process. The best thing about using AirMore is that you will not have to compromise with the quality of your image and you can add any cool background to your image like a pro.
05PhotoWorks
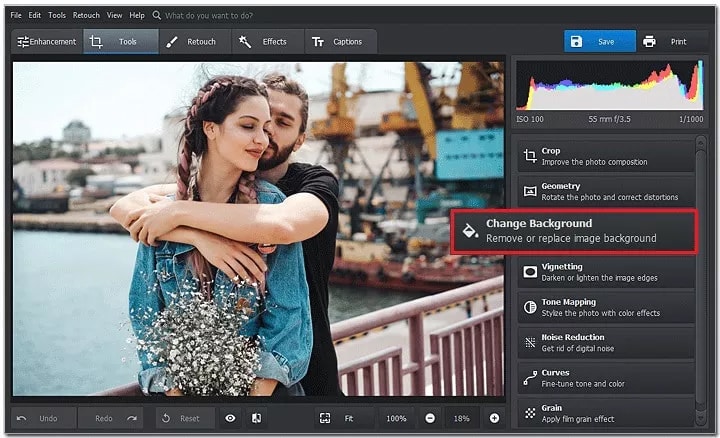
If you find photoshop software on your pc too complicated to use then try PhotoWorks. This easy-to-use tool can help you in making transparent images online in a few seconds. PhotoWorks has a very user-friendly interface packed with many manual settings which users can adjust according to their needs. The biggest highlight of this tool is once you access it online you need no further internet connection to edit your images. It is a wonderful transparent background generator with effective results.
06Publisher
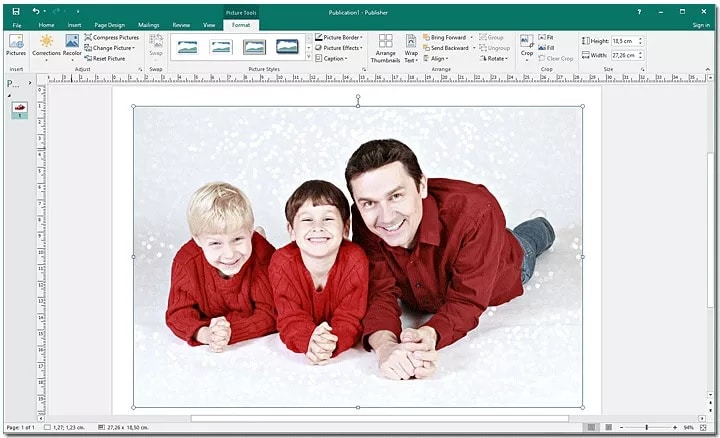
This tool comes is created by Microsoft and comes in your laptops and computers with the Microsoft office package. Publisher provides features using which you can generate transparent images in a very quick and easy manner. Other features of this tool include making designs, calendars, posters, greeting cards, and many more. However, this tool is only compatible with computers only and not smartphones. The results generated by Publisher are accurate to a high level and the interface of this software is very user-friendly.
07Online PNG Tools
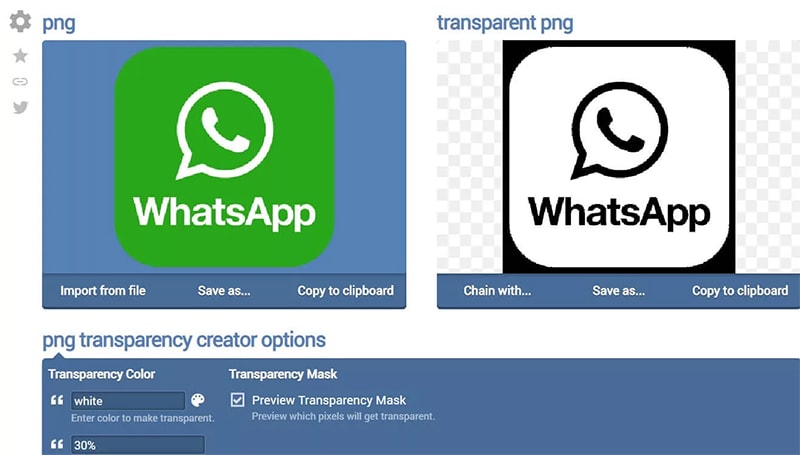
Another website on our list is Online PNG Tools. This website offers you all the means to create a hassle-free transparent image online in a few seconds and that too at no cost. The algorithm of this website is powered by artificial intelligence which lets you make transparent images without any trouble. All you need to do is open the site and upload your image and click on the background you want to make transparent. The most attractive feature offered by this website is that it does not ask you to download anything. You will get very quick results while using Online PNG Tools.
08Photoshop
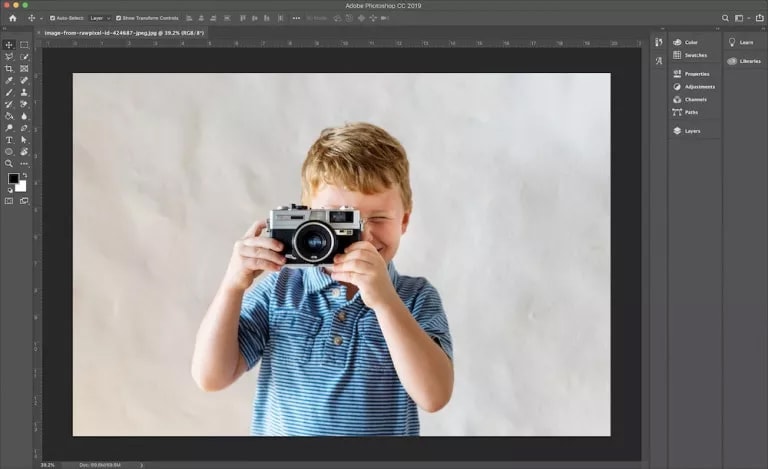
After reading the name Photoshop on our list, many readers might be surprised. Many people find Photoshop a bit tough to use but that is not true. This is one of the best online transparent image makers which you can use to remove the background from your images. Photoshop is a one-stop solution for the entire photo editing-related works. Here you can use features like resizing the image, image color picker, merging the images, pencil sketching the photo, adding text to the image, adding a logo to the photo, etc. Photoshop is the most reliable transparent image maker.
09LunaPic
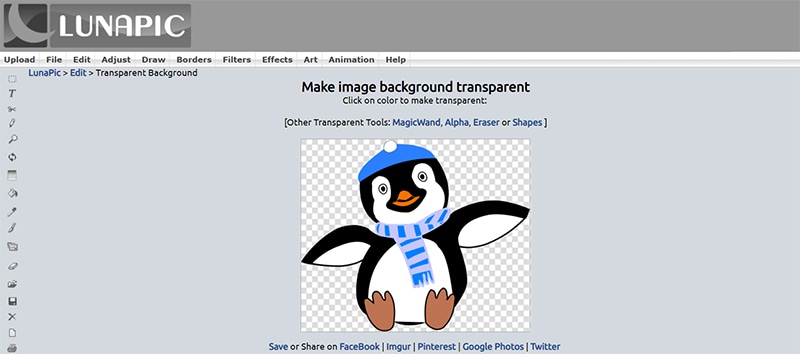
Next on our list of online transparent image makers is LunaPic. This online platform is completely free to use and you don’t even need to sign in to use it. The best feature is can upload your image from your computer, social media, the Cloud, or any other website you want. LunaPic is power-packed with numerous tools for editing the images which will make your online transparent image-making experience a good one. It provides various Borders, Filters, Effects, etc using which you can be master in image editing. Also, you can share your photos directly to social media from the LunaPic.
10Fotor
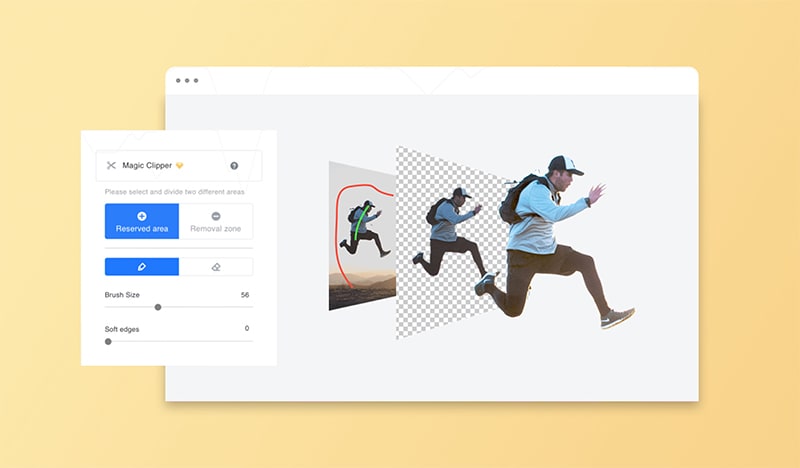
No discussion of online transparent image maker is complete without Fotor. If you consider yourself a complete beginner, in photo editing, you should try Fotor. Creating transparent images through this tool is very easy. Along with this, you can make use of various Effects, Beauty, Frames, Stickers, etc to make the image picture-perfect. This tool’s photo background remover lets you clear the background in just a few steps. Be it about beautifying life by sharing moments or the purpose is simply the business advertisement, when you have Fotor in hand, the background removal experience is incredible and the process gets easy with its easy interface.
So, now you know the best online transparent image maker. But if you are not a professional and worried about using these online tools then we are here. Here we will guide you on making a transparent picture online, and we have usedFocoClipping for explaining, but you can use any of the above-mentioned tools and the steps are almost similar for all.
Step 1: Go to the browser of your computer and type “FocoClipping” in your search box. Click on the FocoClipping link on your screen.
Step 2: Now select the image you want to make transparent and click on “Upload”. FocoClipping user interface is auto-adjusted to remove the background from your image. As soon as you open the image in FocoClipping the background of your image will be removed.
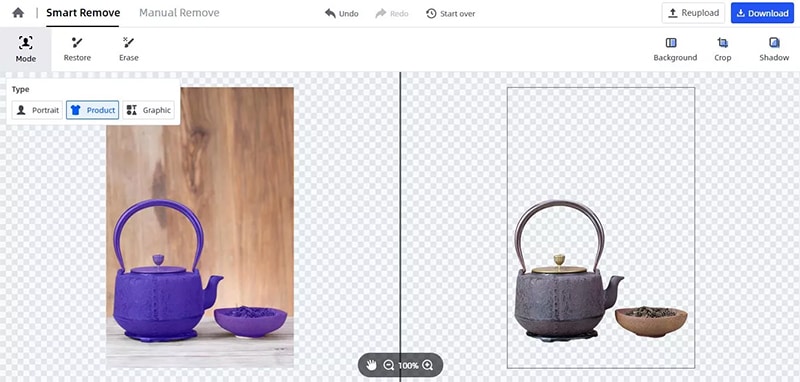
Step 3: Now if you want to experiment more with your image then you a new background, crop, or resize the transparent image. On the right corner of your screen, you will see options “Background, Crop, and Shadow” select them according to your requirements.
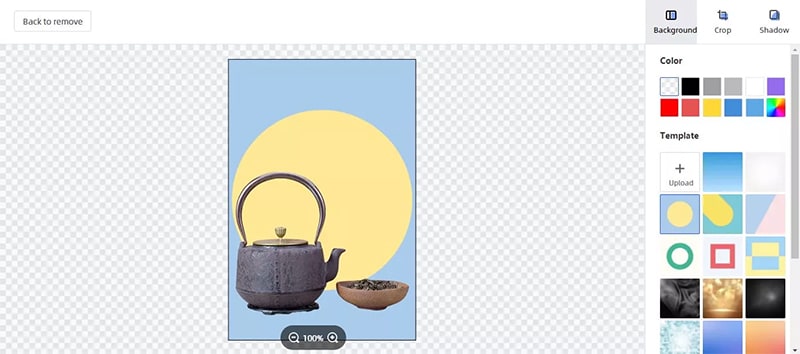
Step 4: If you feel like restoring any part or whole of the real image then select the “Recover” option. Drag the recover brush over the parts you want to recover. You can make use of the “Erase” tool to delete any stuff.
Step 5: After the completion of the whole editing process click on the “Download” button”. FocoClipping will download your image without any sign-in process. The tool will ask you to choose between PNG and JPG format to save your edited image, go for your preferred format. Hit the “Download” option again and your edited image will get saved to your preferred location on your pc.
Part 2 Can You Find Assets of Transparent Image in the Video Editor?
Till now we were keeping our discussion limited to online photo editors that can create transparent images, but what is a video editing platform that provides all such features? If you find all the assets of the transparent image in a video editor then your life is going to be very easy.
Here we are talking about Wondershare Filmora Video Editor . This online video editing platform enables its users to find all the assets of transparent images. All the online video content creators find this feature of Filmora very handy in making their videos awesome and cool.
For Win 7 or later (64-bit)
For macOS 10.12 or later
Apart from this Filmora is power-packed with a big list of features some of these features are mentioned below.
● Editing features like split screen, motion tracker, screen recorder, keyframing, Auto Beat Sync, etc.
● Various kinds of effects like green screen, mask and blend, AI portraits, video effects, etc.
● Audio editing features like audio ducking and silence detection.
● Color match and color combination.
Using Filmora you can create transparent images online and along with it, this platform offers a whole bunch of editing features. If you are new to photo editing then you don’t have to worry, the UI of Filmora has been designed in such a way that anyone without any technical expertise can edit their images and videos like a pro.
● Ending Thoughts →
● So dear readers, with this article we have tried to bring you the best online transparent image maker.
● All the 10 image editors mentioned in his article are top class and you can use them to create and edit all kinds of images including transparent images.
● With the tutorial provided in the article, you can learn to create transparent images. All you need to do is to follow the steps explained in the article and you will master the art of creating transparent images online.
● If you are looking for a video editing platform through which you can access all the assets of transparent images then try Filmora.
● This platform enables you to create and video including transparent images in a very quick and easy manner.
If you are a photoholic person and you love to share your images on social media then at some point in time you might have felt the need of removing the background of the image and add something cool to the background. This process of removing the background of the image is called making your image transparent. Professional photo artists make the most use of this feature to create the best of photos. Creating transparent images and changing their background could be used in many ways like designing the logo of the brands, professional photography, or simply fun purpose.
If you have not made use of transparent images yet and you want to learn to create transparent images online and edit transparent images online then this article is for you.
In this article
01 [Best 10 Transparent Image Editors You Deserve to Own](#Part 1)
02 [Can You Find Assets of Transparent Image in the Video Editor?](#Part 2)
Part 1 Best 10 Transparent Image Editors You Deserve to Own
You might be afraid that editing a picture online and making it a transparent image would need technical knowledge in photo editing. Then you are wrong. Making transparent images online and then editing them is very easy. We, here in this article, have come up with the 10 best online transparent image makers using which you can create transparent images in a very fun way, and then you can use them for whatever purpose you want. And don’t worry, we have provided the steps on how to use online transparent image makers to make your work easy.
01Removebg
If you are looking for a free online transparent image maker then Removbg should be the first one you give a try. This online tool is powered by Al technology which enables you to remove the background of your image precisely. Removebg has “Erase” and “Restore” tools which provides for manual adjustment of the details so you can give your image a realistic touch. Apart from these features, the other highlights of this online tool are solid color backgrounds, well-designed templates, and custom templates. Using this online free tool you can also upload your image in batches. Images created by you will have a professional finishing.

02FocoClipping
The next great online transparent image maker on our list is FocoClipping. While most of the image makers and editors have a free version and paid version but all the features in the FocoClipping are free. This image editor enables you to remove background from your photos and make them transparent with only a single click. FocoClipping also uses AI tech to remove the background of your image precisely. The other features of this tool include no limit of download and upload, an easy-to-use interface, casting shadows into images, and many more.

03Image online.co
Image online.co is a trusted name in the field of transparent image makers online. This amazing website is also completely free to use. This website is powered packed by a bundle of image editing tools. To make your transparent image all you need to do is to select the background using the mouse and you are done. No technical photo editing knowledge is required to use this tool. Apart from this Image online.co offers you features like resizing the image, image color picker, merging the images, pencil sketching the photo, adding text to the image, adding a logo to the photo, etc.

04AirMore
If you are the one who needs a simple and easy-to-use tool without much sophistication to make a transparent image, then AirMore could be a good choice for you. All you need is a single click on the background to remove it. This tool provides the “Keep” and “Remove” options so in case you don’t like your editing then you can reverse the whole process. The best thing about using AirMore is that you will not have to compromise with the quality of your image and you can add any cool background to your image like a pro.

05PhotoWorks
If you find photoshop software on your pc too complicated to use then try PhotoWorks. This easy-to-use tool can help you in making transparent images online in a few seconds. PhotoWorks has a very user-friendly interface packed with many manual settings which users can adjust according to their needs. The biggest highlight of this tool is once you access it online you need no further internet connection to edit your images. It is a wonderful transparent background generator with effective results.

06Publisher
This tool comes is created by Microsoft and comes in your laptops and computers with the Microsoft office package. Publisher provides features using which you can generate transparent images in a very quick and easy manner. Other features of this tool include making designs, calendars, posters, greeting cards, and many more. However, this tool is only compatible with computers only and not smartphones. The results generated by Publisher are accurate to a high level and the interface of this software is very user-friendly.

07Online PNG Tools
Another website on our list is Online PNG Tools. This website offers you all the means to create a hassle-free transparent image online in a few seconds and that too at no cost. The algorithm of this website is powered by artificial intelligence which lets you make transparent images without any trouble. All you need to do is open the site and upload your image and click on the background you want to make transparent. The most attractive feature offered by this website is that it does not ask you to download anything. You will get very quick results while using Online PNG Tools.

08Photoshop
After reading the name Photoshop on our list, many readers might be surprised. Many people find Photoshop a bit tough to use but that is not true. This is one of the best online transparent image makers which you can use to remove the background from your images. Photoshop is a one-stop solution for the entire photo editing-related works. Here you can use features like resizing the image, image color picker, merging the images, pencil sketching the photo, adding text to the image, adding a logo to the photo, etc. Photoshop is the most reliable transparent image maker.

09LunaPic
Next on our list of online transparent image makers is LunaPic. This online platform is completely free to use and you don’t even need to sign in to use it. The best feature is can upload your image from your computer, social media, the Cloud, or any other website you want. LunaPic is power-packed with numerous tools for editing the images which will make your online transparent image-making experience a good one. It provides various Borders, Filters, Effects, etc using which you can be master in image editing. Also, you can share your photos directly to social media from the LunaPic.

10Fotor
No discussion of online transparent image maker is complete without Fotor. If you consider yourself a complete beginner, in photo editing, you should try Fotor. Creating transparent images through this tool is very easy. Along with this, you can make use of various Effects, Beauty, Frames, Stickers, etc to make the image picture-perfect. This tool’s photo background remover lets you clear the background in just a few steps. Be it about beautifying life by sharing moments or the purpose is simply the business advertisement, when you have Fotor in hand, the background removal experience is incredible and the process gets easy with its easy interface.

So, now you know the best online transparent image maker. But if you are not a professional and worried about using these online tools then we are here. Here we will guide you on making a transparent picture online, and we have usedFocoClipping for explaining, but you can use any of the above-mentioned tools and the steps are almost similar for all.
Step 1: Go to the browser of your computer and type “FocoClipping” in your search box. Click on the FocoClipping link on your screen.
Step 2: Now select the image you want to make transparent and click on “Upload”. FocoClipping user interface is auto-adjusted to remove the background from your image. As soon as you open the image in FocoClipping the background of your image will be removed.

Step 3: Now if you want to experiment more with your image then you a new background, crop, or resize the transparent image. On the right corner of your screen, you will see options “Background, Crop, and Shadow” select them according to your requirements.

Step 4: If you feel like restoring any part or whole of the real image then select the “Recover” option. Drag the recover brush over the parts you want to recover. You can make use of the “Erase” tool to delete any stuff.
Step 5: After the completion of the whole editing process click on the “Download” button”. FocoClipping will download your image without any sign-in process. The tool will ask you to choose between PNG and JPG format to save your edited image, go for your preferred format. Hit the “Download” option again and your edited image will get saved to your preferred location on your pc.
Part 2 Can You Find Assets of Transparent Image in the Video Editor?
Till now we were keeping our discussion limited to online photo editors that can create transparent images, but what is a video editing platform that provides all such features? If you find all the assets of the transparent image in a video editor then your life is going to be very easy.
Here we are talking about Wondershare Filmora Video Editor . This online video editing platform enables its users to find all the assets of transparent images. All the online video content creators find this feature of Filmora very handy in making their videos awesome and cool.
For Win 7 or later (64-bit)
For macOS 10.12 or later
Apart from this Filmora is power-packed with a big list of features some of these features are mentioned below.
● Editing features like split screen, motion tracker, screen recorder, keyframing, Auto Beat Sync, etc.
● Various kinds of effects like green screen, mask and blend, AI portraits, video effects, etc.
● Audio editing features like audio ducking and silence detection.
● Color match and color combination.
Using Filmora you can create transparent images online and along with it, this platform offers a whole bunch of editing features. If you are new to photo editing then you don’t have to worry, the UI of Filmora has been designed in such a way that anyone without any technical expertise can edit their images and videos like a pro.
● Ending Thoughts →
● So dear readers, with this article we have tried to bring you the best online transparent image maker.
● All the 10 image editors mentioned in his article are top class and you can use them to create and edit all kinds of images including transparent images.
● With the tutorial provided in the article, you can learn to create transparent images. All you need to do is to follow the steps explained in the article and you will master the art of creating transparent images online.
● If you are looking for a video editing platform through which you can access all the assets of transparent images then try Filmora.
● This platform enables you to create and video including transparent images in a very quick and easy manner.
If you are a photoholic person and you love to share your images on social media then at some point in time you might have felt the need of removing the background of the image and add something cool to the background. This process of removing the background of the image is called making your image transparent. Professional photo artists make the most use of this feature to create the best of photos. Creating transparent images and changing their background could be used in many ways like designing the logo of the brands, professional photography, or simply fun purpose.
If you have not made use of transparent images yet and you want to learn to create transparent images online and edit transparent images online then this article is for you.
In this article
01 [Best 10 Transparent Image Editors You Deserve to Own](#Part 1)
02 [Can You Find Assets of Transparent Image in the Video Editor?](#Part 2)
Part 1 Best 10 Transparent Image Editors You Deserve to Own
You might be afraid that editing a picture online and making it a transparent image would need technical knowledge in photo editing. Then you are wrong. Making transparent images online and then editing them is very easy. We, here in this article, have come up with the 10 best online transparent image makers using which you can create transparent images in a very fun way, and then you can use them for whatever purpose you want. And don’t worry, we have provided the steps on how to use online transparent image makers to make your work easy.
01Removebg
If you are looking for a free online transparent image maker then Removbg should be the first one you give a try. This online tool is powered by Al technology which enables you to remove the background of your image precisely. Removebg has “Erase” and “Restore” tools which provides for manual adjustment of the details so you can give your image a realistic touch. Apart from these features, the other highlights of this online tool are solid color backgrounds, well-designed templates, and custom templates. Using this online free tool you can also upload your image in batches. Images created by you will have a professional finishing.

02FocoClipping
The next great online transparent image maker on our list is FocoClipping. While most of the image makers and editors have a free version and paid version but all the features in the FocoClipping are free. This image editor enables you to remove background from your photos and make them transparent with only a single click. FocoClipping also uses AI tech to remove the background of your image precisely. The other features of this tool include no limit of download and upload, an easy-to-use interface, casting shadows into images, and many more.

03Image online.co
Image online.co is a trusted name in the field of transparent image makers online. This amazing website is also completely free to use. This website is powered packed by a bundle of image editing tools. To make your transparent image all you need to do is to select the background using the mouse and you are done. No technical photo editing knowledge is required to use this tool. Apart from this Image online.co offers you features like resizing the image, image color picker, merging the images, pencil sketching the photo, adding text to the image, adding a logo to the photo, etc.

04AirMore
If you are the one who needs a simple and easy-to-use tool without much sophistication to make a transparent image, then AirMore could be a good choice for you. All you need is a single click on the background to remove it. This tool provides the “Keep” and “Remove” options so in case you don’t like your editing then you can reverse the whole process. The best thing about using AirMore is that you will not have to compromise with the quality of your image and you can add any cool background to your image like a pro.

05PhotoWorks
If you find photoshop software on your pc too complicated to use then try PhotoWorks. This easy-to-use tool can help you in making transparent images online in a few seconds. PhotoWorks has a very user-friendly interface packed with many manual settings which users can adjust according to their needs. The biggest highlight of this tool is once you access it online you need no further internet connection to edit your images. It is a wonderful transparent background generator with effective results.

06Publisher
This tool comes is created by Microsoft and comes in your laptops and computers with the Microsoft office package. Publisher provides features using which you can generate transparent images in a very quick and easy manner. Other features of this tool include making designs, calendars, posters, greeting cards, and many more. However, this tool is only compatible with computers only and not smartphones. The results generated by Publisher are accurate to a high level and the interface of this software is very user-friendly.

07Online PNG Tools
Another website on our list is Online PNG Tools. This website offers you all the means to create a hassle-free transparent image online in a few seconds and that too at no cost. The algorithm of this website is powered by artificial intelligence which lets you make transparent images without any trouble. All you need to do is open the site and upload your image and click on the background you want to make transparent. The most attractive feature offered by this website is that it does not ask you to download anything. You will get very quick results while using Online PNG Tools.

08Photoshop
After reading the name Photoshop on our list, many readers might be surprised. Many people find Photoshop a bit tough to use but that is not true. This is one of the best online transparent image makers which you can use to remove the background from your images. Photoshop is a one-stop solution for the entire photo editing-related works. Here you can use features like resizing the image, image color picker, merging the images, pencil sketching the photo, adding text to the image, adding a logo to the photo, etc. Photoshop is the most reliable transparent image maker.

09LunaPic
Next on our list of online transparent image makers is LunaPic. This online platform is completely free to use and you don’t even need to sign in to use it. The best feature is can upload your image from your computer, social media, the Cloud, or any other website you want. LunaPic is power-packed with numerous tools for editing the images which will make your online transparent image-making experience a good one. It provides various Borders, Filters, Effects, etc using which you can be master in image editing. Also, you can share your photos directly to social media from the LunaPic.

10Fotor
No discussion of online transparent image maker is complete without Fotor. If you consider yourself a complete beginner, in photo editing, you should try Fotor. Creating transparent images through this tool is very easy. Along with this, you can make use of various Effects, Beauty, Frames, Stickers, etc to make the image picture-perfect. This tool’s photo background remover lets you clear the background in just a few steps. Be it about beautifying life by sharing moments or the purpose is simply the business advertisement, when you have Fotor in hand, the background removal experience is incredible and the process gets easy with its easy interface.

So, now you know the best online transparent image maker. But if you are not a professional and worried about using these online tools then we are here. Here we will guide you on making a transparent picture online, and we have usedFocoClipping for explaining, but you can use any of the above-mentioned tools and the steps are almost similar for all.
Step 1: Go to the browser of your computer and type “FocoClipping” in your search box. Click on the FocoClipping link on your screen.
Step 2: Now select the image you want to make transparent and click on “Upload”. FocoClipping user interface is auto-adjusted to remove the background from your image. As soon as you open the image in FocoClipping the background of your image will be removed.

Step 3: Now if you want to experiment more with your image then you a new background, crop, or resize the transparent image. On the right corner of your screen, you will see options “Background, Crop, and Shadow” select them according to your requirements.

Step 4: If you feel like restoring any part or whole of the real image then select the “Recover” option. Drag the recover brush over the parts you want to recover. You can make use of the “Erase” tool to delete any stuff.
Step 5: After the completion of the whole editing process click on the “Download” button”. FocoClipping will download your image without any sign-in process. The tool will ask you to choose between PNG and JPG format to save your edited image, go for your preferred format. Hit the “Download” option again and your edited image will get saved to your preferred location on your pc.
Part 2 Can You Find Assets of Transparent Image in the Video Editor?
Till now we were keeping our discussion limited to online photo editors that can create transparent images, but what is a video editing platform that provides all such features? If you find all the assets of the transparent image in a video editor then your life is going to be very easy.
Here we are talking about Wondershare Filmora Video Editor . This online video editing platform enables its users to find all the assets of transparent images. All the online video content creators find this feature of Filmora very handy in making their videos awesome and cool.
For Win 7 or later (64-bit)
For macOS 10.12 or later
Apart from this Filmora is power-packed with a big list of features some of these features are mentioned below.
● Editing features like split screen, motion tracker, screen recorder, keyframing, Auto Beat Sync, etc.
● Various kinds of effects like green screen, mask and blend, AI portraits, video effects, etc.
● Audio editing features like audio ducking and silence detection.
● Color match and color combination.
Using Filmora you can create transparent images online and along with it, this platform offers a whole bunch of editing features. If you are new to photo editing then you don’t have to worry, the UI of Filmora has been designed in such a way that anyone without any technical expertise can edit their images and videos like a pro.
● Ending Thoughts →
● So dear readers, with this article we have tried to bring you the best online transparent image maker.
● All the 10 image editors mentioned in his article are top class and you can use them to create and edit all kinds of images including transparent images.
● With the tutorial provided in the article, you can learn to create transparent images. All you need to do is to follow the steps explained in the article and you will master the art of creating transparent images online.
● If you are looking for a video editing platform through which you can access all the assets of transparent images then try Filmora.
● This platform enables you to create and video including transparent images in a very quick and easy manner.
If you are a photoholic person and you love to share your images on social media then at some point in time you might have felt the need of removing the background of the image and add something cool to the background. This process of removing the background of the image is called making your image transparent. Professional photo artists make the most use of this feature to create the best of photos. Creating transparent images and changing their background could be used in many ways like designing the logo of the brands, professional photography, or simply fun purpose.
If you have not made use of transparent images yet and you want to learn to create transparent images online and edit transparent images online then this article is for you.
In this article
01 [Best 10 Transparent Image Editors You Deserve to Own](#Part 1)
02 [Can You Find Assets of Transparent Image in the Video Editor?](#Part 2)
Part 1 Best 10 Transparent Image Editors You Deserve to Own
You might be afraid that editing a picture online and making it a transparent image would need technical knowledge in photo editing. Then you are wrong. Making transparent images online and then editing them is very easy. We, here in this article, have come up with the 10 best online transparent image makers using which you can create transparent images in a very fun way, and then you can use them for whatever purpose you want. And don’t worry, we have provided the steps on how to use online transparent image makers to make your work easy.
01Removebg
If you are looking for a free online transparent image maker then Removbg should be the first one you give a try. This online tool is powered by Al technology which enables you to remove the background of your image precisely. Removebg has “Erase” and “Restore” tools which provides for manual adjustment of the details so you can give your image a realistic touch. Apart from these features, the other highlights of this online tool are solid color backgrounds, well-designed templates, and custom templates. Using this online free tool you can also upload your image in batches. Images created by you will have a professional finishing.

02FocoClipping
The next great online transparent image maker on our list is FocoClipping. While most of the image makers and editors have a free version and paid version but all the features in the FocoClipping are free. This image editor enables you to remove background from your photos and make them transparent with only a single click. FocoClipping also uses AI tech to remove the background of your image precisely. The other features of this tool include no limit of download and upload, an easy-to-use interface, casting shadows into images, and many more.

03Image online.co
Image online.co is a trusted name in the field of transparent image makers online. This amazing website is also completely free to use. This website is powered packed by a bundle of image editing tools. To make your transparent image all you need to do is to select the background using the mouse and you are done. No technical photo editing knowledge is required to use this tool. Apart from this Image online.co offers you features like resizing the image, image color picker, merging the images, pencil sketching the photo, adding text to the image, adding a logo to the photo, etc.

04AirMore
If you are the one who needs a simple and easy-to-use tool without much sophistication to make a transparent image, then AirMore could be a good choice for you. All you need is a single click on the background to remove it. This tool provides the “Keep” and “Remove” options so in case you don’t like your editing then you can reverse the whole process. The best thing about using AirMore is that you will not have to compromise with the quality of your image and you can add any cool background to your image like a pro.

05PhotoWorks
If you find photoshop software on your pc too complicated to use then try PhotoWorks. This easy-to-use tool can help you in making transparent images online in a few seconds. PhotoWorks has a very user-friendly interface packed with many manual settings which users can adjust according to their needs. The biggest highlight of this tool is once you access it online you need no further internet connection to edit your images. It is a wonderful transparent background generator with effective results.

06Publisher
This tool comes is created by Microsoft and comes in your laptops and computers with the Microsoft office package. Publisher provides features using which you can generate transparent images in a very quick and easy manner. Other features of this tool include making designs, calendars, posters, greeting cards, and many more. However, this tool is only compatible with computers only and not smartphones. The results generated by Publisher are accurate to a high level and the interface of this software is very user-friendly.

07Online PNG Tools
Another website on our list is Online PNG Tools. This website offers you all the means to create a hassle-free transparent image online in a few seconds and that too at no cost. The algorithm of this website is powered by artificial intelligence which lets you make transparent images without any trouble. All you need to do is open the site and upload your image and click on the background you want to make transparent. The most attractive feature offered by this website is that it does not ask you to download anything. You will get very quick results while using Online PNG Tools.

08Photoshop
After reading the name Photoshop on our list, many readers might be surprised. Many people find Photoshop a bit tough to use but that is not true. This is one of the best online transparent image makers which you can use to remove the background from your images. Photoshop is a one-stop solution for the entire photo editing-related works. Here you can use features like resizing the image, image color picker, merging the images, pencil sketching the photo, adding text to the image, adding a logo to the photo, etc. Photoshop is the most reliable transparent image maker.

09LunaPic
Next on our list of online transparent image makers is LunaPic. This online platform is completely free to use and you don’t even need to sign in to use it. The best feature is can upload your image from your computer, social media, the Cloud, or any other website you want. LunaPic is power-packed with numerous tools for editing the images which will make your online transparent image-making experience a good one. It provides various Borders, Filters, Effects, etc using which you can be master in image editing. Also, you can share your photos directly to social media from the LunaPic.

10Fotor
No discussion of online transparent image maker is complete without Fotor. If you consider yourself a complete beginner, in photo editing, you should try Fotor. Creating transparent images through this tool is very easy. Along with this, you can make use of various Effects, Beauty, Frames, Stickers, etc to make the image picture-perfect. This tool’s photo background remover lets you clear the background in just a few steps. Be it about beautifying life by sharing moments or the purpose is simply the business advertisement, when you have Fotor in hand, the background removal experience is incredible and the process gets easy with its easy interface.

So, now you know the best online transparent image maker. But if you are not a professional and worried about using these online tools then we are here. Here we will guide you on making a transparent picture online, and we have usedFocoClipping for explaining, but you can use any of the above-mentioned tools and the steps are almost similar for all.
Step 1: Go to the browser of your computer and type “FocoClipping” in your search box. Click on the FocoClipping link on your screen.
Step 2: Now select the image you want to make transparent and click on “Upload”. FocoClipping user interface is auto-adjusted to remove the background from your image. As soon as you open the image in FocoClipping the background of your image will be removed.

Step 3: Now if you want to experiment more with your image then you a new background, crop, or resize the transparent image. On the right corner of your screen, you will see options “Background, Crop, and Shadow” select them according to your requirements.

Step 4: If you feel like restoring any part or whole of the real image then select the “Recover” option. Drag the recover brush over the parts you want to recover. You can make use of the “Erase” tool to delete any stuff.
Step 5: After the completion of the whole editing process click on the “Download” button”. FocoClipping will download your image without any sign-in process. The tool will ask you to choose between PNG and JPG format to save your edited image, go for your preferred format. Hit the “Download” option again and your edited image will get saved to your preferred location on your pc.
Part 2 Can You Find Assets of Transparent Image in the Video Editor?
Till now we were keeping our discussion limited to online photo editors that can create transparent images, but what is a video editing platform that provides all such features? If you find all the assets of the transparent image in a video editor then your life is going to be very easy.
Here we are talking about Wondershare Filmora Video Editor . This online video editing platform enables its users to find all the assets of transparent images. All the online video content creators find this feature of Filmora very handy in making their videos awesome and cool.
For Win 7 or later (64-bit)
For macOS 10.12 or later
Apart from this Filmora is power-packed with a big list of features some of these features are mentioned below.
● Editing features like split screen, motion tracker, screen recorder, keyframing, Auto Beat Sync, etc.
● Various kinds of effects like green screen, mask and blend, AI portraits, video effects, etc.
● Audio editing features like audio ducking and silence detection.
● Color match and color combination.
Using Filmora you can create transparent images online and along with it, this platform offers a whole bunch of editing features. If you are new to photo editing then you don’t have to worry, the UI of Filmora has been designed in such a way that anyone without any technical expertise can edit their images and videos like a pro.
● Ending Thoughts →
● So dear readers, with this article we have tried to bring you the best online transparent image maker.
● All the 10 image editors mentioned in his article are top class and you can use them to create and edit all kinds of images including transparent images.
● With the tutorial provided in the article, you can learn to create transparent images. All you need to do is to follow the steps explained in the article and you will master the art of creating transparent images online.
● If you are looking for a video editing platform through which you can access all the assets of transparent images then try Filmora.
● This platform enables you to create and video including transparent images in a very quick and easy manner.
Also read:
- New 9 Best Sparkle Effects Photo and Video Editors You Should Know for 2024
- How to Create a DIY Green Screen Video Effect for 2024
- Kdenlive Review – Is It The Best Video Editor?
- In 2024, How to Shoot Cinematic Footage with Phone
- In 2024, 5 Tools to Create a Time-Lapse Video Online
- Learn Topaz Video Enhance AI Review and Achieve Powerful Video Conversion for 2024
- 2024 Approved Looking for the Best Alternatives of iPad Compatible Slideshow Applications to Design High End Graphic Presentations? Rest Assured, You Have Landed at the Correct Spot
- In 2024, Splitting Video Into Frames with the FFmpeg Step by Step
- Guide to Making Cinematography for Music Video for 2024
- Updated 2024 Approved How to Create a Bokeh Effect
- Updated 2024 Approved How to Create the Night-to-Day Effect Video
- 2024 Approved Free
- New Browse the List of the Best 8 Scanners or Converters for Converting the Slides to Digital Images. Also, Know the Other Important Information of Slides to Digital Conversion
- Guide to Synchronizing Your Audio And Videos Properly for 2024
- New Top 8 Video Editor with Useful Masking for 2024
- Best Cloud Storage Service for Videos for 2024
- Updated 2024 Approved How to Create a DIY Green Screen Video Effect?
- New In 2024, Doable Ways to Create Transparent Background in Procreate
- New How to Put a Filter on a Video in iMovie
- 2024 Approved How to Convert a GIF to a Video for Instagram
- In 2024, How to Use 3D Camera Tracking Effects in After Effects
- Discover a Quick Guide to Add Personalized Video Filters in VN App. Learn How to Use Built-In Filters and Import External Ones for Creative Video Editing
- How to Simulate GPS Movement in AR games On Vivo Y100i Power 5G? | Dr.fone
- In 2024, The Magnificent Art of Pokemon Go Streaming On Motorola Moto G24? | Dr.fone
- How to Change Your Nokia G42 5G Location on life360 Without Anyone Knowing? | Dr.fone
- Ultimate Guide, How to Transfer Music From Apple iPhone 14 Pro to iPhone | Dr.fone
- How To Convert Video Voice to Text Online for Free for 2024
- Top 10 Best Spy Watches For your Apple iPhone 15 Pro | Dr.fone
- Top 5 Car Locator Apps for Lava Blaze 2 | Dr.fone
- Updated In 2024, 10 Cartoon Character Makers to Create Animated Characters
- In 2024, Most Asked Questions about Pokemon Go Battle League Rewards On Apple iPhone SE (2022) | Dr.fone
- In 2024, How to Bypass FRP on Infinix Hot 40i?
- How To Transfer Data From Apple iPhone SE (2020) To Android/iOS? | Dr.fone
- Forgot Your Apple ID Password and Email On iPhone 7? Heres the Best Fixes
- Easily Unlock Your Xiaomi Redmi Note 12T Pro Device SIM
- In 2024, Simple and Effective Ways to Change Your Country on YouTube App Of your Samsung Galaxy M54 5G | Dr.fone
- 2024 Approved 9 Best French Video Translators Online and Download Options
- In 2024, Fixing Foneazy MockGo Not Working On Apple iPhone 6 Plus | Dr.fone
- Best Android Data Recovery - Retrieve Lost Pictures from Infinix Note 30 5G.
- In 2024, A Working Guide For Pachirisu Pokemon Go Map On Xiaomi Redmi A2+ | Dr.fone
- The Magnificent Art of Pokemon Go Streaming On Apple iPhone 6s? | Dr.fone
- Title: How to Use 3D Camera Tracking Effects in After Effects
- Author: Chloe
- Created at : 2024-05-20 03:37:29
- Updated at : 2024-05-21 03:37:29
- Link: https://ai-editing-video.techidaily.com/how-to-use-3d-camera-tracking-effects-in-after-effects/
- License: This work is licensed under CC BY-NC-SA 4.0.

