
:max_bytes(150000):strip_icc():format(webp)/GettyImages-504331578-cheering-football-on-tv-5a231ffdaad52b00372ae2a6.jpg)
How to Use Blender Green Screen for 2024
How to Use Blender Green Screen
Blender is an open-source cross-platform 3D graphics program, but this doesn’t mean it’s a low-rent option. Just like commercial packages like Lightwave 3D, it is also a very capable compositing package. Unlike Lightwave, it is a modern node-based compositor like Nuke or Fusion. It’s not what the software is designed for, but it does a bangup job of green screen compositing, as you will soon see.
Blender green screen uses technique of the chroma key a color is isolated (in our case the green of thegreen screen), or a particular luminance, it is removed and the area that was occupied by it becomes transparent, thus becoming part of the alpha channel. The transparent parts will thus show the video or the image below, which will thus define the environment in which the subject of the first movie will act.
How to Use Green Screen in Blender
So we need to pull these two elements into Blender and pull a key on the green bits to make the background show through in as naturalistic a way as possible. Blender is a node-based compositor which means the control mechanism is nodes or little LEGO blocks of love which you place on the screen and link with little strings which form your signal path.

Locate the drop-down (it goes up, actually, but you know what we mean) at the bottom of the view, and select “Movie Clip Editor.”
Click the “Open” button and choose and load your green screen footage. (You can also load sequences of images for uncompressed keys in this step if you have the space, and the footage is the right size.)
Once the clip is loaded, go back to the drop-down and select Node Editor.
The screen will be blank, but just go to the bottom of the view and click the middle button marked “Node Tree Type” to Display, and then check the Use Nodes and Backdrop buttons.
Select the “Render Layers” node, and because we won’t need it you can delete it (on the Mac this is the Forward Delete key). Then move the Compositing node out of the way because we won’t need it yet.
**Note: to zoom in and out of the nodes, use the centre scroll wheel of the mouse if you have it. To zoom in and out of the images you are working on, use the V and Alt-V keys.
**Compositing Nodes
Click the Add menu in the bar at the bottom of the view and select “Input -> Movie Clip.” Select the green screen clip you added in the Movie Clip Editor. This is the input. We have to push this through a keyer to remove the green and make those areas transparent.
**Important: in this program flow goes from left to right, so node inputs are on the left of a node, and outputs are on the right of a node.
Now select “Add -> Matte -> Keying” to add a keying node. Also “Add -> Output -> Viewer” to make the output from the key visible. Click on the little yellow dot next to Image output on the Input node, and drag it to Image input on the Keying node. Then drag the little dot next to Image output on the keying node, and drag it to the image input on the viewer node.
You now have to select the key colour, the colour which the keyer is changing to transparent. Click the Key Colour button on the Keying node, and this displays a colour selector. Click the eyedropper, and click on the image in the background somewhere on the green screen.
If you look carefully, you will see that there are some areas which still have a bit of colour and are not fully transparent. You can check this more accurately by dragging the string from the Matte output on the Keying node and linking to the input on the viewer. This is the key you have made. As you can see, the dark bits are supposed to be totally black, and there are still greys showing through. (This is because the source material wasn’t perfect.)
There are many different ways to fix this depending on the shot, but if it’s a reasonably well-shot green screen, all you will need to do is the following.
Adjust the Black Clip slider to expand the amount of greens which turn to black. Then adjust the White Clip to push the whites to prevent them from becoming transparent.
Once you have pure white and pure black, reconnect the image output of the keying node to the image input on the viewer, and you’ll see you have a decent key.
You can adjust the amount of fringing and spill (reflections from the green screen on the model), but generally the keyer does a good job of guessing that for you with a decently-shot green screen.
**Adding the background
After this, adding the background is more of the same with a slight twist. “Add -> Input -> Movie Clip,” navigate to your background clip and load it.
To blend the two layers, you have to make a mix of the two clips so that the background shows through the now transparent bits of the foreground.
“Add -> Colour -> Mix node”. Take the output from the background clip, and feed it to the top image input of the mix node. Take the output from the keying node, and feed it into the lower image input on the mix node.
Click the Alpha channel button next to the drop-down on the mix node.
And finally we have our key. The background is way too sharp and makes the green screen footage look really soft and crappy, so we need to soften the background. There is a really nice Bokeh Blur filter in blender for just this purpose to make the background look out of focus and add lots of gorgeous Bokeh blobs.
“Add -> Filter -> Bokeh Blur” and put it between the background clip and the mix. In Blender, if you add a node and place it over a string between two nodes, the string goes yellow, and dropping it will automatically insert the new node into the signal path connecting inputs and outputs.
Finally add an image to the Bokeh Blur for the shape you want the bokeh to be; we opted for a donut-shaped iris pattern.
To render out your video, connect the output of the Mix node to the input of the compositing node we left lying about earlier. It’s okay for this output to be connected to the input node of the viewer, too, as this means we see progress while rendering.
Make sure you are set up to render the right amount of frames at 30fps in the render panel on the far right. 30fps for 5 seconds (the duration of our clip) is 150 frames. Insert 150 where it says End Fr.
Select a place and a filename to output to in the Output panel further down the right-hand side. Then to render, select the info menu bar from the top-left drop-down, and finally choose “Render Menu -> Render Animation,” and the render will begin.
Wondershare Filmora
If you’re just starting out with video editing, or just want a simple program that works, Wondershare Filmora might be what you’re looking for. It has the essential tools, and anyone can learn to use it easily.
Wondershare Filmora is the one of best video editing software with cool features that compares to other competing video editing Softwares. Many video editing programs claim to offer professional results; Filmora is one of a few consumer-level tools that actually delivers.
For Win 7 or later (64-bit)
For macOS 10.12 or later
Installation Steps
- Click the icon in the center of the Media Library to add files directly.
- Go File > Import Media > Import Media Files.
- Drag and drop to the Media Library directly.
While importing a media file, Wondershar Filmora may ask you if you wish to create a proxy file to accelerate the editing process. Select “Yes” to have a fast video editing experience.

You can also import video clips using your Touch Bar controls if your computer has Touch Bar.
Related FAQs
How do I get rid of the green screen in blender?
This is achieved by Compositing Nodes: Click the Add menu in the bar at the bottom of the view and select “Input -> Movie Clip.” Select the green screen clip you added in the Movie Clip Editor. This is the input. We have to push this through a keyer to remove the green and make those areas transparent.
How do I get rid of objects in green screen?
This can be done by following these prompts: Select “Add -> Matte -> Keying” to add a keying node. Also “Add -> Output -> Viewer” to make the output from the key visible. Click on the little yellow dot next to Image output on the Input node, and drag it to Image input on the Keying node. Then drag the little dot next to Image output on the keying node, and drag it to the image input on the viewer node.
Conclusion
Obviously, to get the best green screen composites you have to shoot good “plates.” “Plates” are the main bits of the shot that you bolt together in movie visual effects. You have the foreground plate and the green screen bit with an actor filmed in front of a green screen. Then you have the background plate which is the bit you want to show through the green bits of the foreground, making the whole thing look as though the background and foreground were filmed at the same time.
For macOS 10.12 or later
Installation Steps
- Click the icon in the center of the Media Library to add files directly.
- Go File > Import Media > Import Media Files.
- Drag and drop to the Media Library directly.
While importing a media file, Wondershar Filmora may ask you if you wish to create a proxy file to accelerate the editing process. Select “Yes” to have a fast video editing experience.
You can also import video clips using your Touch Bar controls if your computer has Touch Bar.
Related FAQs
How do I get rid of the green screen in blender?
This is achieved by Compositing Nodes: Click the Add menu in the bar at the bottom of the view and select “Input -> Movie Clip.” Select the green screen clip you added in the Movie Clip Editor. This is the input. We have to push this through a keyer to remove the green and make those areas transparent.
How do I get rid of objects in green screen?
This can be done by following these prompts: Select “Add -> Matte -> Keying” to add a keying node. Also “Add -> Output -> Viewer” to make the output from the key visible. Click on the little yellow dot next to Image output on the Input node, and drag it to Image input on the Keying node. Then drag the little dot next to Image output on the keying node, and drag it to the image input on the viewer node.
Conclusion
Obviously, to get the best green screen composites you have to shoot good “plates.” “Plates” are the main bits of the shot that you bolt together in movie visual effects. You have the foreground plate and the green screen bit with an actor filmed in front of a green screen. Then you have the background plate which is the bit you want to show through the green bits of the foreground, making the whole thing look as though the background and foreground were filmed at the same time.
Powerpoint Supported Video Format and Advanced User Tips
It doesn’t matter if you are a student or a working person; you must have made a PowerPoint presentation in your life. It can be a business presentation, educational presentation, or any work-related presentation if you are an employee. The types of presentation may vary, but the way to make a presentation is almost the same.
We are here to share a few tips and tricks to make your presentations unique like, you can add videos, voice-overs, and much more things. Remember one thing; there are certain video formats that PowerPoint supports. The video formats for PowerPoint presentations are discussed below, read ahead, and you’ll know more about them.
In this article
01 Overview of PowerPoint Supported Video Format
02 How to Insert or Embed Video in PowerPoint?
03 How to Turn Your Presentation into A Video with PowerPoint?
04 How to Match Color and Remove Image Background in PowerPoint?
Part 1. Overview of PowerPoint Supported Video Format
The supported video formats for PowerPoint are different for both Windows and macOS. All the supported formats for both types of the operating system are discussed below individually:

Windows
ASF: Advanced System Format (ASF) is a proprietary video and audio container format. It is an extensible file format design.
AVI: AVI is an Audio Video Interleave file. It is a multimedia container format made by Microsoft. It allows synchronous audio with video playback.
MP4, M4V, MOV: MPEG-4 file format is also known as MP4 or M4V. It is a common video file format. In comparison, MOV is developed by Apple Inc. It is the same as MP4 but is made for Apple devices.
MPEG, MPG: It is a famous file format for movies that are distributed over the internet. They use specific compression that makes downloading and steaming easy and fast.
WMV: WMV was introduced by Microsoft, and it stands for Windows Media Video. It is a compressed file container. The format is based on ASF.
macOS
AVI, VFW: AVI stands for Audio Video Interleave, and VFW stands for Video for Windows. Both are multimedia container files. AVI is encoded into VFW.
MP4, MPEG-4: MP4 is a digital video file format. MPEG-4 uses compression, but it is less common than the MP4 extension. MPEG encodes audio tracks.
M4V: It is a video container format developed by Apple Inc. It is similar to MP4. MV4 is used to encode video files in iTunes.
MPG, MPEG, MPE, M75, M15: MPG, MPEG, MPE, M75, and M15 are all the different types of formats developed by the Moving Pictures Expert Group.
M2V: It contains only video data and no other files. It is encoded by using MPEG-2 compression. It is mostly used by DVD authorized applications.
TS: It is a Video Transport Stream file and is used to store MPEG-2 compressed video data. It is used by digital broadcasting systems.
MOV, QT: QT and MOV both were developed by Apple Inc. Both the formats can hold multiple types of multimedia formats (audio, video, and subtitles).
DIF: DIF stands for Data Interchange Format. It is a text-based file format and is used for tabular and spreadsheet data. It is also used to transfer data between spreadsheets.
Part 2. How to Insert or Embed Video in PowerPoint?
PowerPoint is the simplest way to make a presentation. You might impress your boss with a good presentation. Do you ever consider adding videos from your computer across your slides? Have you ever embedded a video in PowerPoint? Allow us to help you out with this. The process to insert or embed a video in PowerPoint is not difficult; you can do this in a few simple steps.
How to Insert a Video in PowerPoint
The video format for PowerPoint differs for different versions. The steps to insert a video in PowerPoint do not deviate much. You can follow the following instructions and insert the video:
Step 1: First, you need to select the slide in which the video is supposed to be inserted. Select the video from the device you are using by heading to the ‘Insert’ tab. There, look for the ‘Video’ option and click on it to select the ‘This Device’ option.

Step 2: After you have located and selected the video, click on ‘Insert.’ Adjust the video settings from the ‘Format’ and ‘Playback’ toolbar according to your needs. You can resize the video, add effects, play full screen, etc.

Step 3: After all the settings are done, you need to preview the slideshow to check if the video is playing according to your desire or not.

How to Embed a Video in PowerPoint
If you are looking to add an online video across PowerPoint, the platform allows you to either embed its code or use its URL for adding it within your slides. To follow this, look into the steps featured below.
Step 1: Access the online video across your browser that you wish to embed in your PowerPoint slides. You can either copy its embed code or simply copy its URL. However, this video can only be from YouTube, SlideShare, Vimeo, Stream, or Flipgrid, as allowed by PowerPoint.

Step 2: Once copied, open your slides, and navigate to the “Insert” panel. Select “Video” from the available options and proceed to click on “Online Videos.”

Step 3: A new window opens up. Paste the copied code or URL across the provided space and tap “Insert” to add the online video across your slides. You can enhance the video across the “Video Format” and “Playback” sections.

Part 3. How to Turn Your Presentation into A Video with PowerPoint?
Inserting videos in PowerPoint presentations is normal; now, it’s time to discover something new. Have you ever thought of making a PowerPoint presentation a video itself? It is interesting! Your superior authority might get impressed and give you a promotion; who knows.
How to save your presentation as a video in PowerPoint? It can be done in a few simple steps. These steps are concisely discussed in the section below; follow to help yourself.
Step 1: You need to save the presentation that you made at first. After saving the original file, you need to click on ‘Export’ from the main menu.

Step 2: From the ‘Export’ menu, click on the ‘Create Video’ option. Select the video quality as per your needs. You can use pre-recorded narrations with the timings. In case no recorded narrations exist, you can record your own.

Step 3: The recorded narration will play over your video. If you don’t want narrations, you can simply skip these settings and move on.

Step 4: Next step is to select how much time a single slide will be shown. Keep in mind the longest slide; select an appropriate time so that all the material in the slides can be read easily.

Step 5: Now, moving towards the final step, click on ‘Create Video.’ This will generate and save the new PowerPoint video on your respective device.

Part 4. How to Match Color and Remove Image Background in PowerPoint?
There are two different things that you can do to make your presentation better. These are distinctive concerning video format for PowerPoint. Removal of background in PowerPoint is discussed, followed by Color Matching.
Remove Image Background
A simple way to remove background in PowerPoint is discussed in the following steps, read them for further assistance:
Step 1: Start by opening the PowerPoint software. Afterward, move to the ‘Insert’ tab and hit the ‘Pictures’ option to insert the image you plan to work with. As you click the photo, the ‘Picture Format’ tab will appear on the taskbar. Select the ‘Remove Background’ option on the left-most side below the taskbar.

Step 2: When you click ‘Remove Background,’ it will give options. Select the ‘Mark Areas to Keep’ option and draw the section that you want to save. You can also select the option ‘Mark Areas to Remove.’ It depends on the type of photo on which the task is being performed.

Step 3: Once all the necessary editing is done, click on the option ‘Keep Changes.’ You can save the image separately by clicking on ‘Save as Picture.’

Match Color in PowerPoint
Eyedropper helps you to match colors in your presentation. This takes a few clicks, and you have done color matching.
Step 1: For this, you need to open PowerPoint and select the image that you want to match the color of its background with the rest of the slide. Navigate to the “Design” panel and select the “Format Background” option.

Step 2: Click on ‘Drawing tool’ from the ribbon. Select the option of ‘Solid Fill’ from the menu bar at the top of the screen. Now, from ‘Solid Fill,’ move the mouse towards the ‘Eyedropper’ option. Tap on the background color that you wish to match within the background.

Step 3: Select the area that you want to change the background to its desired color. Access the option of “Solid Fill” after selecting the appropriate section of the document and select the color from the preview window present in the recent colors.

Closing Words
After reading the above article, you will be able to make incredible PowerPoint presentations. As videos add great information to your presentation so hence, we discussed in detail various video formats for PowerPoint. Now let’s share something new.
Do you know anything about Wondershare Filmora ? The software is a video editor with tons of great features and functionalities. You can create stunning videos with Filmora and its wide list of features. The video editor lets you trim, join, cut, split, and do much more than this. You get so many different effects, transitions, and elements with Filmora.
For Win 7 or later (64-bit)
For macOS 10.12 or later
02 How to Insert or Embed Video in PowerPoint?
03 How to Turn Your Presentation into A Video with PowerPoint?
04 How to Match Color and Remove Image Background in PowerPoint?
Part 1. Overview of PowerPoint Supported Video Format
The supported video formats for PowerPoint are different for both Windows and macOS. All the supported formats for both types of the operating system are discussed below individually:
Windows
ASF: Advanced System Format (ASF) is a proprietary video and audio container format. It is an extensible file format design.
AVI: AVI is an Audio Video Interleave file. It is a multimedia container format made by Microsoft. It allows synchronous audio with video playback.
MP4, M4V, MOV: MPEG-4 file format is also known as MP4 or M4V. It is a common video file format. In comparison, MOV is developed by Apple Inc. It is the same as MP4 but is made for Apple devices.
MPEG, MPG: It is a famous file format for movies that are distributed over the internet. They use specific compression that makes downloading and steaming easy and fast.
WMV: WMV was introduced by Microsoft, and it stands for Windows Media Video. It is a compressed file container. The format is based on ASF.
macOS
AVI, VFW: AVI stands for Audio Video Interleave, and VFW stands for Video for Windows. Both are multimedia container files. AVI is encoded into VFW.
MP4, MPEG-4: MP4 is a digital video file format. MPEG-4 uses compression, but it is less common than the MP4 extension. MPEG encodes audio tracks.
M4V: It is a video container format developed by Apple Inc. It is similar to MP4. MV4 is used to encode video files in iTunes.
MPG, MPEG, MPE, M75, M15: MPG, MPEG, MPE, M75, and M15 are all the different types of formats developed by the Moving Pictures Expert Group.
M2V: It contains only video data and no other files. It is encoded by using MPEG-2 compression. It is mostly used by DVD authorized applications.
TS: It is a Video Transport Stream file and is used to store MPEG-2 compressed video data. It is used by digital broadcasting systems.
MOV, QT: QT and MOV both were developed by Apple Inc. Both the formats can hold multiple types of multimedia formats (audio, video, and subtitles).
DIF: DIF stands for Data Interchange Format. It is a text-based file format and is used for tabular and spreadsheet data. It is also used to transfer data between spreadsheets.
Part 2. How to Insert or Embed Video in PowerPoint?
PowerPoint is the simplest way to make a presentation. You might impress your boss with a good presentation. Do you ever consider adding videos from your computer across your slides? Have you ever embedded a video in PowerPoint? Allow us to help you out with this. The process to insert or embed a video in PowerPoint is not difficult; you can do this in a few simple steps.
How to Insert a Video in PowerPoint
The video format for PowerPoint differs for different versions. The steps to insert a video in PowerPoint do not deviate much. You can follow the following instructions and insert the video:
Step 1: First, you need to select the slide in which the video is supposed to be inserted. Select the video from the device you are using by heading to the ‘Insert’ tab. There, look for the ‘Video’ option and click on it to select the ‘This Device’ option.
Step 2: After you have located and selected the video, click on ‘Insert.’ Adjust the video settings from the ‘Format’ and ‘Playback’ toolbar according to your needs. You can resize the video, add effects, play full screen, etc.
Step 3: After all the settings are done, you need to preview the slideshow to check if the video is playing according to your desire or not.
How to Embed a Video in PowerPoint
If you are looking to add an online video across PowerPoint, the platform allows you to either embed its code or use its URL for adding it within your slides. To follow this, look into the steps featured below.
Step 1: Access the online video across your browser that you wish to embed in your PowerPoint slides. You can either copy its embed code or simply copy its URL. However, this video can only be from YouTube, SlideShare, Vimeo, Stream, or Flipgrid, as allowed by PowerPoint.
Step 2: Once copied, open your slides, and navigate to the “Insert” panel. Select “Video” from the available options and proceed to click on “Online Videos.”
Step 3: A new window opens up. Paste the copied code or URL across the provided space and tap “Insert” to add the online video across your slides. You can enhance the video across the “Video Format” and “Playback” sections.
Part 3. How to Turn Your Presentation into A Video with PowerPoint?
Inserting videos in PowerPoint presentations is normal; now, it’s time to discover something new. Have you ever thought of making a PowerPoint presentation a video itself? It is interesting! Your superior authority might get impressed and give you a promotion; who knows.
How to save your presentation as a video in PowerPoint? It can be done in a few simple steps. These steps are concisely discussed in the section below; follow to help yourself.
Step 1: You need to save the presentation that you made at first. After saving the original file, you need to click on ‘Export’ from the main menu.
Step 2: From the ‘Export’ menu, click on the ‘Create Video’ option. Select the video quality as per your needs. You can use pre-recorded narrations with the timings. In case no recorded narrations exist, you can record your own.
Step 3: The recorded narration will play over your video. If you don’t want narrations, you can simply skip these settings and move on.
Step 4: Next step is to select how much time a single slide will be shown. Keep in mind the longest slide; select an appropriate time so that all the material in the slides can be read easily.
Step 5: Now, moving towards the final step, click on ‘Create Video.’ This will generate and save the new PowerPoint video on your respective device.
Part 4. How to Match Color and Remove Image Background in PowerPoint?
There are two different things that you can do to make your presentation better. These are distinctive concerning video format for PowerPoint. Removal of background in PowerPoint is discussed, followed by Color Matching.
Remove Image Background
A simple way to remove background in PowerPoint is discussed in the following steps, read them for further assistance:
Step 1: Start by opening the PowerPoint software. Afterward, move to the ‘Insert’ tab and hit the ‘Pictures’ option to insert the image you plan to work with. As you click the photo, the ‘Picture Format’ tab will appear on the taskbar. Select the ‘Remove Background’ option on the left-most side below the taskbar.
Step 2: When you click ‘Remove Background,’ it will give options. Select the ‘Mark Areas to Keep’ option and draw the section that you want to save. You can also select the option ‘Mark Areas to Remove.’ It depends on the type of photo on which the task is being performed.
Step 3: Once all the necessary editing is done, click on the option ‘Keep Changes.’ You can save the image separately by clicking on ‘Save as Picture.’
Match Color in PowerPoint
Eyedropper helps you to match colors in your presentation. This takes a few clicks, and you have done color matching.
Step 1: For this, you need to open PowerPoint and select the image that you want to match the color of its background with the rest of the slide. Navigate to the “Design” panel and select the “Format Background” option.
Step 2: Click on ‘Drawing tool’ from the ribbon. Select the option of ‘Solid Fill’ from the menu bar at the top of the screen. Now, from ‘Solid Fill,’ move the mouse towards the ‘Eyedropper’ option. Tap on the background color that you wish to match within the background.
Step 3: Select the area that you want to change the background to its desired color. Access the option of “Solid Fill” after selecting the appropriate section of the document and select the color from the preview window present in the recent colors.
Closing Words
After reading the above article, you will be able to make incredible PowerPoint presentations. As videos add great information to your presentation so hence, we discussed in detail various video formats for PowerPoint. Now let’s share something new.
Do you know anything about Wondershare Filmora ? The software is a video editor with tons of great features and functionalities. You can create stunning videos with Filmora and its wide list of features. The video editor lets you trim, join, cut, split, and do much more than this. You get so many different effects, transitions, and elements with Filmora.
For Win 7 or later (64-bit)
For macOS 10.12 or later
Tips to Make Cinematic Color Grading
New modern color grading software allows you to do point-and-click color grading right in your browser. Color changes are as easy and intuitive as painting or sketching.
You can choose from many different look presets and movie emulations based on Hollywood movies plus real-time previews of your favorite LUTs with this software.
Part 1. What is Cinematic Color Grading?
The cinematic look is all the rage these days and aims to mimic images captured on real film rather than digitally created. To achieve this effect, film directors use various means from lighting to cinematic color gradation. The latter is a powerful tool for bringing a cool or warm tone to a video and providing smooth color transitions to fall on an image that doesn’t look too real but feels emotional.
This kind of post-production processing, which produces beautiful results when used by color magicians, requires a deep understanding of colors and their effect on our psyche and even physiology. It’s not enough to watch a color grading video and use a LUT to get where you want. You should at the very least have an understanding of:
- Color wheel
- Color quality
- Color harmony and discord
- Warm and cool colors
- Color context
Part 2. Tips to make cinematic color grading
Here are three helpful tips to create cinematic-looking images in DaVinci Resolve.
In my 10-year career as a colorist, I’ve worked on every type of content imaginable: short, long, commercial, educational, episodic—you name it. And while each of these formats requires its approach, the one constant that spans them all is the client’s desire for a cinematic look.
Virtually all of us aspire to more cinematic color, but we often come up short—in part because the term itself has become too broad to effectively target. To focus on the goal, I like to think of “cinematic” as “an image whose key visual properties are consistent with those of printed film.”
The print film was the primary medium through which we consumed cinematic images for the first century of filmmaking and is therefore at the very heart of cinematic aesthetics. In this video, I’ll show you my top three secrets to achieving this aesthetic quickly and consistently in Davinci Resolve.
Tips1: Create Color Density
The first secret to film color is to create color density. Another key aesthetic property of film images is that colors can be either highly saturated or highly luminescent but cannot be both.
We can mimic this visual characteristic by identifying strongly saturated colors in our image and using the Hue vs. Lum to reduce their brightness. This simple technique is especially effective on pure primary colors (red, green, and blue).
Tips2: Separation Beats Saturation
The second secret to film color is prioritizing separation over saturation. When you feel like an image lacks overall color or pop, it’s all too easy to reach for the saturation knob, but that’s not a very cinematic solution.
Instead, try using split toning—pushing cool colors into shadows and warm colors into highlights—to increase tonal separation and add depth to an image. This characteristic is present in virtually every film print and is deeply evocative when applied correctly.
Tips3: Strong Contrast is Your Friend
The third secret of film colors is a strong contrast. This is not always easy, as a higher contrast look inherently requires more precision with exposure placement. Too often we pump up some contrast, end up with an image that looks blown out or too crisp, and then immediately back away from editing.
However, if you stick with high contrast long enough to improve your exposure, you’ll get a very different result and be well on your way to a more cinematic image.
Part 3. How to add color cinematic grading by using Filmora?
New modern color grading software allows you to do point-and-click color grading right in your browser. Color changes are as easy and intuitive as painting or sketching.
You can choose from many different look presets and movie emulations based on Hollywood movies plus real-time previews of your favorite LUTs with this software.
Wondershare Filmora is an option if you want to easily change the colors of your projects. You may just double-click the media after dragging it onto the editing timeline to change the contrast, saturation, brightness, and hue.
Despite its speed, it also allows you to merge, edit audio, divide, rotate, and apply as many cool video effects as you like.
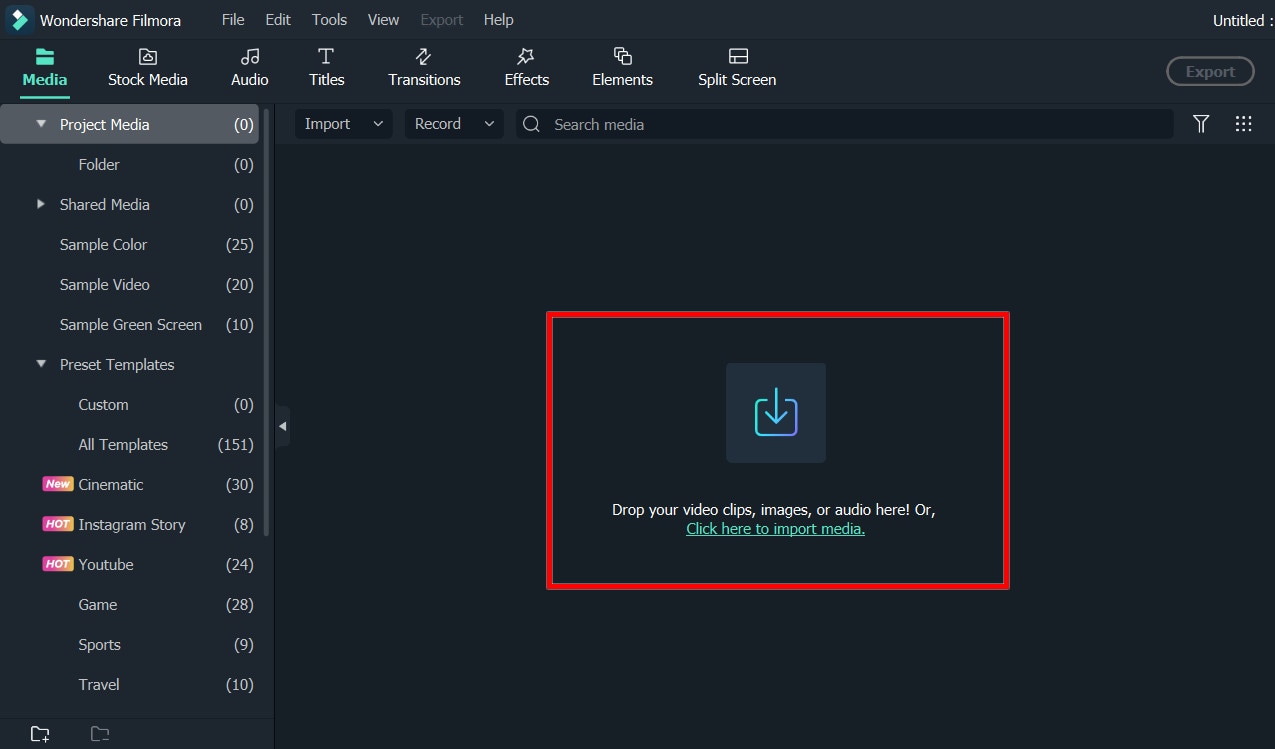
Step1Add the media
After installing Wondershare Filmora, click the New Project and Import button to easily find and load your videos.
Step2Correct the color [Basic and Advanced]
In the timeline, double-click the video editing window. Select the “Color” panel and make adjustments.
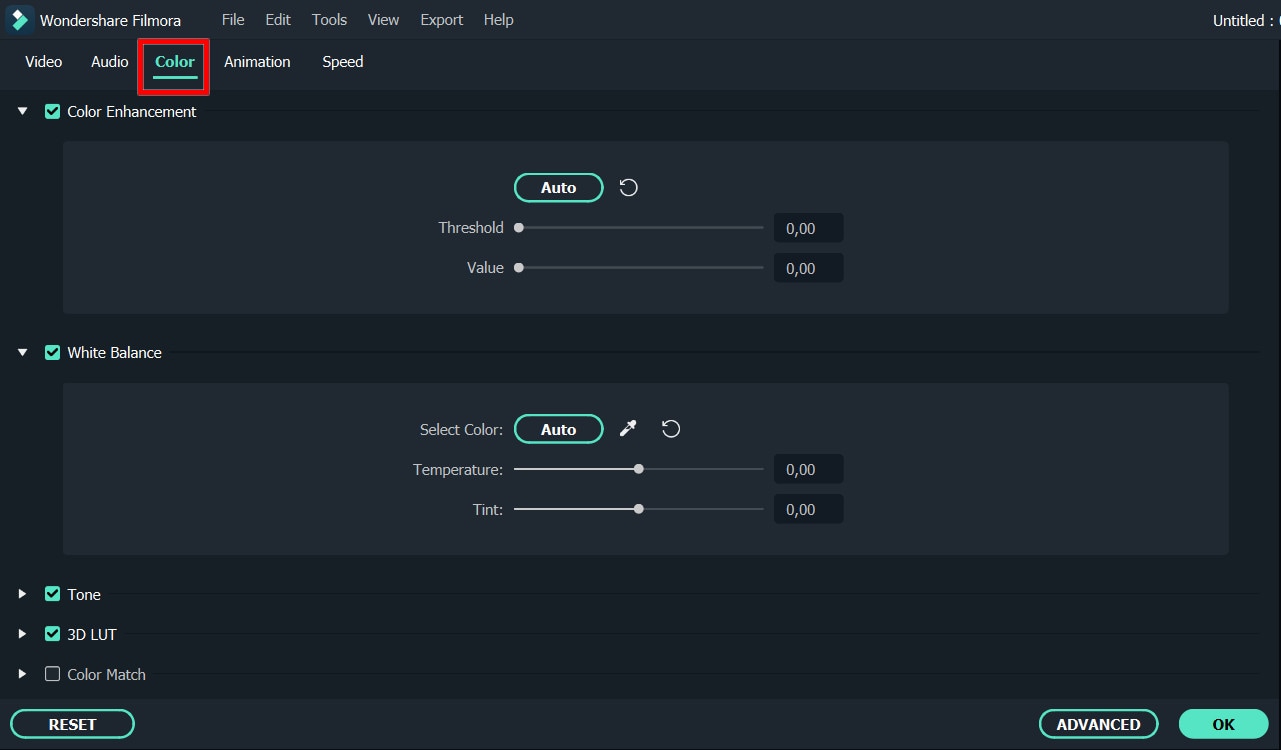
- Contrast: By adjusting this setting, you can control the brightness and color in different parts of the image.
- Saturation: This setting highlights the gray part of the video to a shade. You can adjust it to make the colors of the entire video image appear more saturated or more subdued.
- Brightness: You can change this setting to adjust the overall darkness and lightness of your project.
- Hue: Hue is generally the lightness of a color. Let’s say that when red is saturated with white, it creates a shade of pink.
- 3D LUT: 3D lookup tables provide your media with Hollywood movie color sets like the 007 series, Batman, Harry Porter, etc.
Hover over the indicator to adjust the color correction settings. Then left click on it and move the slider. The corresponding value stabilizes after releasing the mouse button.
With Filmora, you also have access to advanced color correction. Click the Advanced Color Tuning icon to enter the appropriate window where you can fine-tune the color or use preset templates.
The Preferences tab has a variety of templates, including Movie, Normal, 3D LUT, and Vignette. In the Edit tab, you can adjust color temperature, white balance, hue, 3D LUT, color, HSL, light, vignette, etc.
Step3Preview and save the new video
When you are satisfied with your creation, click “Export”. Then click the Settings button and save the new videos in different formats in the Format tab. You can also export the video directly to Vimeo or YouTube or burn it to DVD for better preservation.
Filmora’s color correction tools will make your videos look natural, more attractive, more vibrant, consistent, and professional.
Color Correction Presets
Color correction presets help your video achieve an enhanced cinematic look. Adjust gives you control over fine-tuning the colors in your shots. You can make various adjustments such as color temperature and exposure.
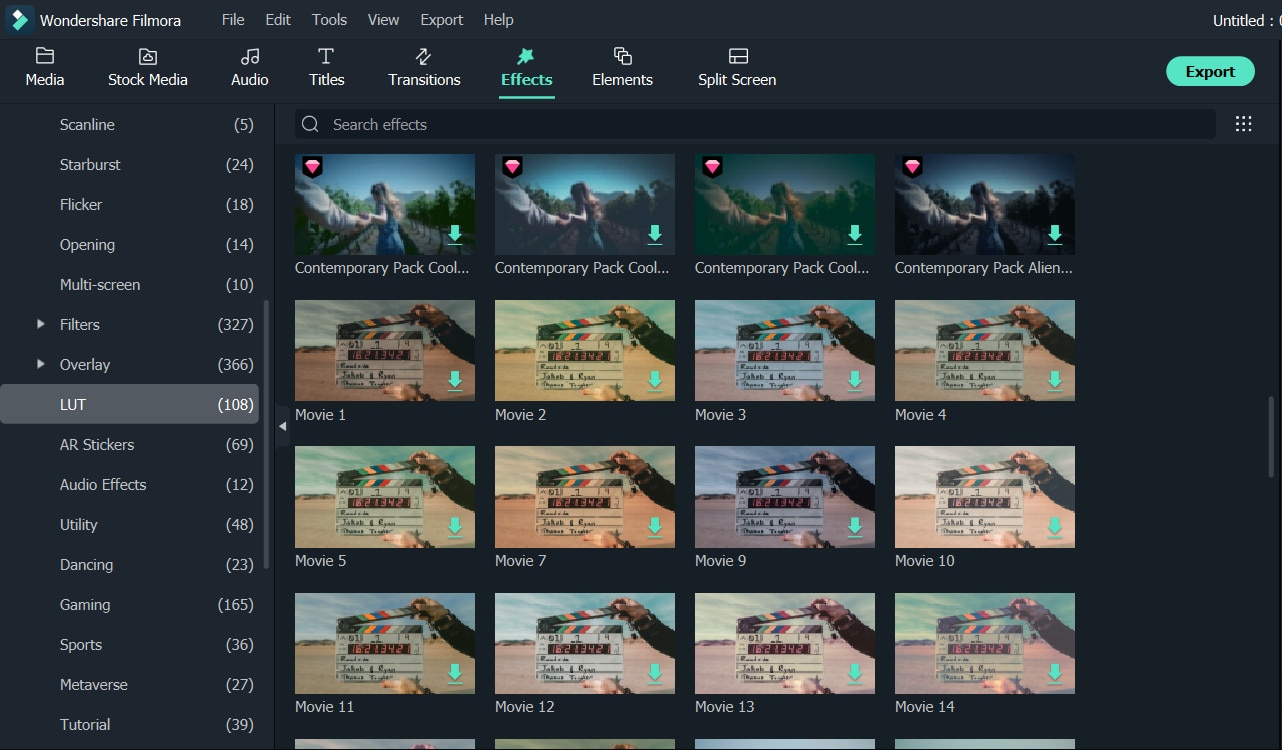
In the “Effects > LUT” tab, you’ll see an extensive selection of preset color settings. These include Vignettes, Movie Looks Like Old Movies, and Cinematic 3D LUT effects such as Harry Potter, Game of Thrones, House of Cards, and Mission Impossible.
Filmora’s Color Correction Advanced Tool also categorizes your presets. Click on All Presents to see six categories: Favorites, Custom, 3D Lut, Common, Film, and Vignette.
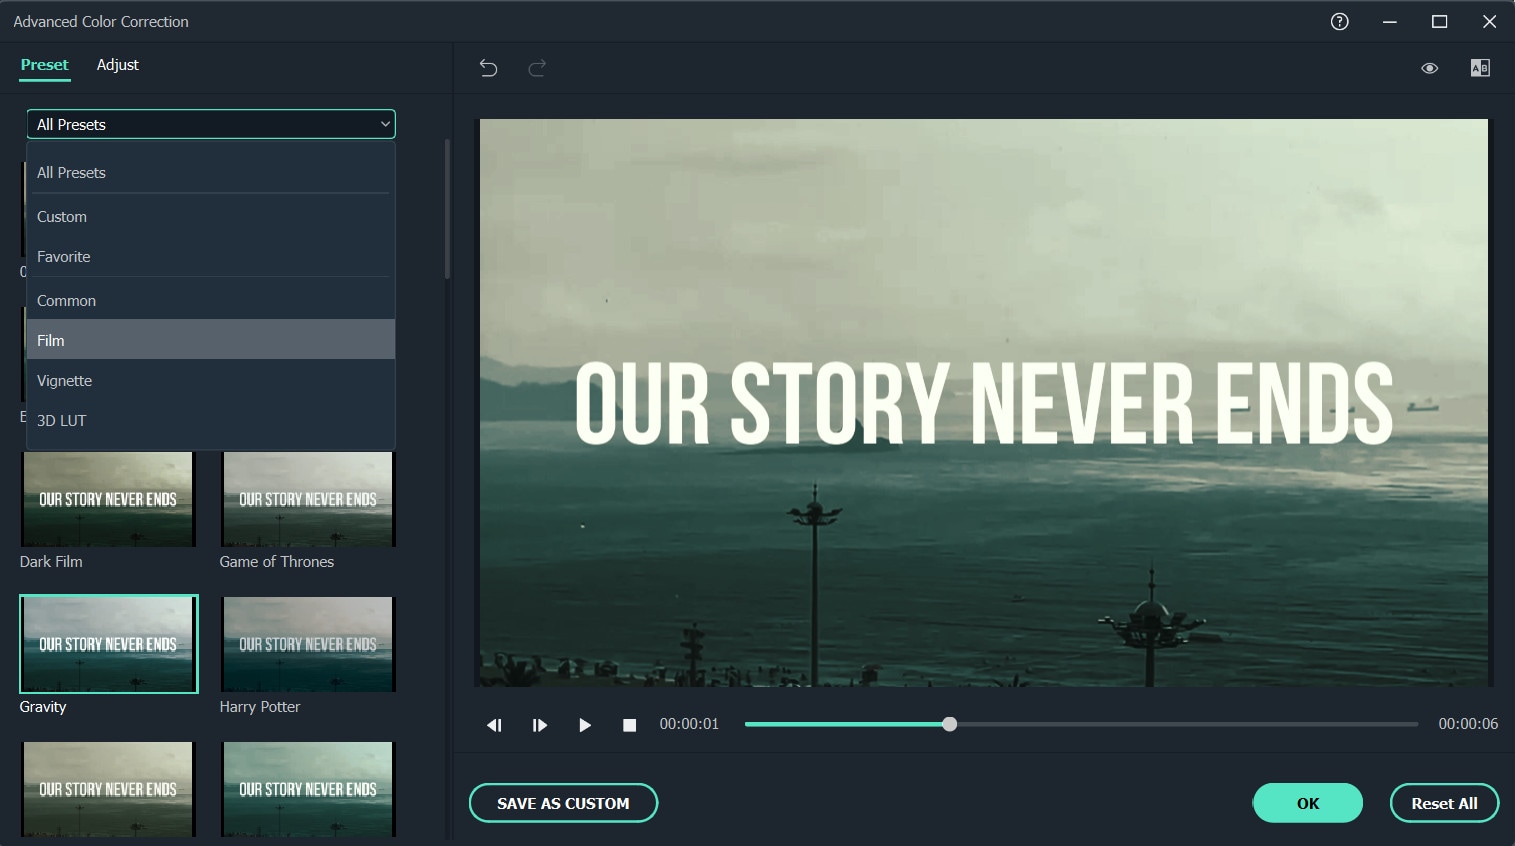
Double-click a preset to apply it to your video. You can see how it looks in the Advanced Color Correction preview window. If you are satisfied with the results, click OK.
Conclusion
Above are the steps to give your video a cinematic look using Wondershare Filmora, hope this helps if you are wondering how to do it. As we can see above, using Filmora video editor will make you more creative in making videos with a suitable emotional tone.
Free Download For Win 7 or later(64-bit)
Free Download For macOS 10.14 or later
[100% Workable] How to Mask Track with Adobe Premiere Pro
Mask tracking Premiere Pro is a technique that lets you apply effects to a precise frame area. In video editing, mask tracking is crucial because it lets you apply effects to areas of your footage rather than the full frame. This can assist you in producing videos that look more professional by emphasizing crucial details, obscuring delicate content, and using imaginative effects.
This article guides Premiere Pro mask tracking using the right tools and effects. Give it a read if you are interested in tracking mask Premiere.
AI Smart Masking Spice up your video content with the endless possibilities of AI masking functions!
Free Download Free Download Learn More

Part 1. What Do You Know About Mask Tracking in Videos?
Automatic tracking and following a certain object or area during a video clip is known as mask tracking. Usually, the “mask” depicts a designated zone of interest, such as a person’s face, an item, or any other area. Mask tracking is achieved using various methods and algorithms, including computer vision techniques such as optical flow, feature tracking, or machine learning.
The objective of the effect is to track the targeted item consistently over all video frames. Mask tracking Premiere Pro is a common special effect in video editing. It can add visual components, apply filters, or change the color and lighting inside the tracked region.
Part 2. How To Perform Mask Tracking with Adobe Premiere Pro
One of the most widely used industry standard programs for video editing is Adobe Premiere Pro . With the help of this tool, users can alter various aspects of photographs and films. It can tweak effects in nearly every frame according to user preferences using Premiere mask tracking. You will undoubtedly get remarkable outcomes from it in a short amount of time.
The tool is a video editing expert, so many professional video editors rely on it. It offers a huge range of editing features that get together to create an impactful and eye-catching video.
Marked Key Features of Adobe Premiere Pro
- Video Editing: You can combine audio and apply effects and transitions to your video content. The platform also helps you work with color or add animated titles to your videos.
- Text-Based Editing: Text-based editing creates a transcript and automatically highlights text to add clips to your timeline. It can edit and rearrange clips like a text document.
- Color Correction: With the help of AI, you can automatically balance your colors or modify the frame using expert color wheels and curve controls. It also assists in viewing your work using integrated video scopes.
- Audio Editing: With Adobe Premiere Pro, you can explore audio tracks, license them, and utilize AI to adapt them to your clips automatically.
Step-by-Step Guide to Perform Mask Tracking with Premiere Pro
Adobe Premiere mask tracking is one of the many remarkable features of the app. If you want to employ mask tracking in your videos using Adobe Premiere, look at the steps below:
Step 1: To start off with the process, import the video onto the timeline that needs to be edited. Navigate to the top of the screen and select “Effect Controls” to proceed further. Select any specific shape present below the “Opacity” option on the left to add a mask to your clip.

Step 2: Set the shape according to the person or object you will track by masking. Now, under the “Mask” option, you will see the “Mask Feather” option. Click on “Mask Feather” and adjust it so it won’t look too harsh on the edges.

Step 4: Go to the beginning of the video you are editing, return to the editing section, and look for the “Mask Path” option. Now hit the “Track Selected Masked Forward” button and wait for the system to complete the Premiere Pro tracking mask process and save the video.

Part 3. Making Masking Easy with Wondershare Filmora: Reviewing the Details
Adobe Premiere Pro is an incredible tool, without a doubt. However, many users say that it needs to be simpler to use. You cannot generate a good video even after watching tutorials because it’s hard for an amateur to use Adobe Premiere Pro. Because of this, many users look for alternative options to add a premiere tracking mask and make other changes to their videos.
This part is all about the amazing alternative that you’re looking for. Wondershare Filmora is a video editing tool that provides professional quality content editing. The tool is so easy to use that you can start immediately with basic instructions. Its smart editing features, combined with a fast and intelligent system, make it a great choice for everyone.
Free Download For Win 7 or later(64-bit)
Free Download For macOS 10.14 or later
Key Features of Wondershare Filmora
- Compound Clip: This feature will arrange all your clips, combine them, and edit them as a single clip. This strong and intuitive feature improves and edits your video.

- AI Text-to-Video: You can convert text into engaging visual narratives and instantly turn text inputs into interesting videos. The feature makes ideas into stunning videos with ease.

- Speed Ramping: This feature produces distinctive cinematic effects by managing your keyframes and altering the speed of your film.

- AI Thumbnail Creator: The tool uses AI to create attractive, engaging thumbnails that get the viewers’ attention. You can use different presets to beautify your thumbnail.

Step-by-Step Guide on How to Perform AI Masking on Filmora
Wondershare Filmora Premiere Pro mask tracking is way easier and provides the same high-end results. Follow the steps below to do mask tracking using Filmora’s unique functions and procedures:
Step 1Add Video Content to Timeline in Filmora
Launch Wondershare Filmora on your computer and proceed by creating a “New Project.” As a new window opens, import your required video clips to the timeline. Double-click and proceed to their respective video settings.

Step 2Use AI Masking Feature on Video
On double-clicking the video, proceed to the “Video” tab from the top and continue into the “Mask” section. Select the “AI Mask” option in the provided list to open further settings. Select any appropriate mode of AI Mask from the bottom options and set the respective parameters accordingly. You can either select “Smart Brush” or go for “Smart Character” or “Smart Subject.”

Step 3Save Final Video
On clicking “OK,” all changes are applied to the video. Continue to the “Export” button to save your edited video clip on your computer.

Free Download For Win 7 or later(64-bit)
Free Download For macOS 10.14 or later
Conclusion
Mask tracking is handy for adding effects to a moving object in your video. By tracking the movement, you can ensure the effect persists even as the object moves around the frame. Many professionals use it in their videos to edit and enhance a specific area in their clip. Check out this article if you also seek an app for Premiere mask tracking.
Free Download Free Download Learn More
Part 1. What Do You Know About Mask Tracking in Videos?
Automatic tracking and following a certain object or area during a video clip is known as mask tracking. Usually, the “mask” depicts a designated zone of interest, such as a person’s face, an item, or any other area. Mask tracking is achieved using various methods and algorithms, including computer vision techniques such as optical flow, feature tracking, or machine learning.
The objective of the effect is to track the targeted item consistently over all video frames. Mask tracking Premiere Pro is a common special effect in video editing. It can add visual components, apply filters, or change the color and lighting inside the tracked region.
Part 2. How To Perform Mask Tracking with Adobe Premiere Pro
One of the most widely used industry standard programs for video editing is Adobe Premiere Pro . With the help of this tool, users can alter various aspects of photographs and films. It can tweak effects in nearly every frame according to user preferences using Premiere mask tracking. You will undoubtedly get remarkable outcomes from it in a short amount of time.
The tool is a video editing expert, so many professional video editors rely on it. It offers a huge range of editing features that get together to create an impactful and eye-catching video.
Marked Key Features of Adobe Premiere Pro
- Video Editing: You can combine audio and apply effects and transitions to your video content. The platform also helps you work with color or add animated titles to your videos.
- Text-Based Editing: Text-based editing creates a transcript and automatically highlights text to add clips to your timeline. It can edit and rearrange clips like a text document.
- Color Correction: With the help of AI, you can automatically balance your colors or modify the frame using expert color wheels and curve controls. It also assists in viewing your work using integrated video scopes.
- Audio Editing: With Adobe Premiere Pro, you can explore audio tracks, license them, and utilize AI to adapt them to your clips automatically.
Step-by-Step Guide to Perform Mask Tracking with Premiere Pro
Adobe Premiere mask tracking is one of the many remarkable features of the app. If you want to employ mask tracking in your videos using Adobe Premiere, look at the steps below:
Step 1: To start off with the process, import the video onto the timeline that needs to be edited. Navigate to the top of the screen and select “Effect Controls” to proceed further. Select any specific shape present below the “Opacity” option on the left to add a mask to your clip.
Step 2: Set the shape according to the person or object you will track by masking. Now, under the “Mask” option, you will see the “Mask Feather” option. Click on “Mask Feather” and adjust it so it won’t look too harsh on the edges.
Step 4: Go to the beginning of the video you are editing, return to the editing section, and look for the “Mask Path” option. Now hit the “Track Selected Masked Forward” button and wait for the system to complete the Premiere Pro tracking mask process and save the video.
Part 3. Making Masking Easy with Wondershare Filmora: Reviewing the Details
Adobe Premiere Pro is an incredible tool, without a doubt. However, many users say that it needs to be simpler to use. You cannot generate a good video even after watching tutorials because it’s hard for an amateur to use Adobe Premiere Pro. Because of this, many users look for alternative options to add a premiere tracking mask and make other changes to their videos.
This part is all about the amazing alternative that you’re looking for. Wondershare Filmora is a video editing tool that provides professional quality content editing. The tool is so easy to use that you can start immediately with basic instructions. Its smart editing features, combined with a fast and intelligent system, make it a great choice for everyone.
Free Download For Win 7 or later(64-bit)
Free Download For macOS 10.14 or later
Key Features of Wondershare Filmora
- Compound Clip: This feature will arrange all your clips, combine them, and edit them as a single clip. This strong and intuitive feature improves and edits your video.
- AI Text-to-Video: You can convert text into engaging visual narratives and instantly turn text inputs into interesting videos. The feature makes ideas into stunning videos with ease.
- Speed Ramping: This feature produces distinctive cinematic effects by managing your keyframes and altering the speed of your film.
- AI Thumbnail Creator: The tool uses AI to create attractive, engaging thumbnails that get the viewers’ attention. You can use different presets to beautify your thumbnail.
Step-by-Step Guide on How to Perform AI Masking on Filmora
Wondershare Filmora Premiere Pro mask tracking is way easier and provides the same high-end results. Follow the steps below to do mask tracking using Filmora’s unique functions and procedures:
Step 1Add Video Content to Timeline in Filmora
Launch Wondershare Filmora on your computer and proceed by creating a “New Project.” As a new window opens, import your required video clips to the timeline. Double-click and proceed to their respective video settings.
Step 2Use AI Masking Feature on Video
On double-clicking the video, proceed to the “Video” tab from the top and continue into the “Mask” section. Select the “AI Mask” option in the provided list to open further settings. Select any appropriate mode of AI Mask from the bottom options and set the respective parameters accordingly. You can either select “Smart Brush” or go for “Smart Character” or “Smart Subject.”
Step 3Save Final Video
On clicking “OK,” all changes are applied to the video. Continue to the “Export” button to save your edited video clip on your computer.
Free Download For Win 7 or later(64-bit)
Free Download For macOS 10.14 or later
Conclusion
Mask tracking is handy for adding effects to a moving object in your video. By tracking the movement, you can ensure the effect persists even as the object moves around the frame. Many professionals use it in their videos to edit and enhance a specific area in their clip. Check out this article if you also seek an app for Premiere mask tracking.
Also read:
- Updated ReVisionFX ReelSmart Motion Blur Plugin For Premiere Pro
- Updated Top 11 Best Video Editing Apps for iPhone
- New 10 Apps to Make Videos with Pictures and Music
- How to Add Miniature Effect in Video with Filmora
- Updated How to Create The Best Video Collages for 2024
- In 2024, In This Article, We Will Be Discussing How to Crop a Video on Android, but Since Most Android Devices Dont Have This Option, You Will Need to Do It Externally, by Downloading and Using Different Apps
- Updated In 2024, 10+ Best Unlimited FCPX Slideshow Templates
- Want to Learn How to Create the Random Letter Reveal Intro? Read Through the Stages of Preparing This Effect via Filmora in This Guide for 2024
- AVI Video Format How to Open, Play, Edit AVI File?
- Updated 2024 Approved Add a Miniature Effect on Your Video for Filmy Looks. To Add This Effect, Read the Complete Guide and Make Your Video Cinematic by Wondershare Filmora
- Are You Looking to Finish Your YouTube Video in Style? The Following Are the Best End Screen Makers to Choose From
- New 22 Free Video Editing Software to Save Your Money and Time for 2024
- New 2024 Approved Best GIF to AVI Converters (Online + Software Solutions)
- Updated In 2024, 15 Amazing GIF Splitter Examples You Need to Bookmark
- Updated Wondering How to Make a Perfect Love Video to Express Your Love for Your Special One and Share with the World? Here Are the Best Love Video Makers with Music
- In 2024, All About GIF Keyboard That You May Want to Know
- 6 Tips for Your First Facebook Ads for 2024
- Detailed Guide to Crop Videos in Sony Vegas Pro
- New A Review of 3D LUT Mobile App - A Composite Application for Editing Media
- 2024 Approved How to Add a Slideshow in PowerPoint
- New Mask Tracking with Adobe Premiere Pro A Detailed Guide
- New A Guide to Use Distortion Effect in Premeiere Pro
- New In 2024, How Did AI Video Games Act More Human Than Human?
- Updated Best 10 Tools to Convert a GIF Into a PDF
- Blender - A Video Editor for All Professor
- Updated How To Polish Your Music Video Edits Using Filmora for 2024
- New In 2024, Get Creative with These 10 Video Editing App With Templates
- Updated Google Meet Green Screen Is the Latest Addition to the Virtual Meeting App. It Is a Crucial Feature as It Allows Users to Maintain a Semblance of Privacy Through Virtual Backgrounds
- 3 Ways to Create Motion Text Effects for Your Video
- Detailed Tutorial to Crop Video in KineMaster
- Updated How to Make Coin Magic With Filmora
- Updated In 2024, How to Crop Videos in Windows Media Player
- New Top 8 Sites to Download Glitch Transition for Premiere Pro
- Updated Learning The Details Of How To Replace Sky in Lightroom for 2024
- New How to Create Cinematic Style Videos? Easy Guide for Beginners
- New Reviewing Efectum App and The Best Alternatives for Smartphone Users for 2024
- Are You Looking to Vlog Across Your Next Stop at the Café? Get Aware of the Significant Elements that Make up the Café Vlog for 2024
- Updated Art of Time Manipulation A Guide to After Effects Slow Motion Mastery
- New Do You Want to Learn About the iPhone LUT? Have You Used Them on Your iOS Device? Use This Article to Get Valuable Insights on the Same
- How To Change Vivo Y100 5G Lock Screen Clock in Seconds
- Updated A Roster of 15 Best Disney Channel Cartoons
- How to Retrieve deleted photos on Y100A
- How to bypass Xperia 1 V’s lock screen pattern, PIN or password
- How Do I Stop Someone From Tracking My Oppo Reno 10 Pro+ 5G? | Dr.fone
- Top 15 Augmented Reality Games Like Pokémon GO To Play On Samsung Galaxy Z Fold 5 | Dr.fone
- How to retrieve lost files from Poco X6?
- Motorola Data Retrieval tool – restore lost data from Motorola Moto G14
- Can I use iTools gpx file to catch the rare Pokemon On Samsung Galaxy M14 4G | Dr.fone
- Top 3 Ways to Create Gif Images with Great 3D Gif Maker for 2024
- In 2024, Can I Bypass a Forgotten Phone Password Of Xiaomi Redmi Note 12 Pro+ 5G?
- What Legendaries Are In Pokemon Platinum On Apple iPhone 11? | Dr.fone
- In 2024, How to Use Pokémon Emerald Master Ball Cheat On Samsung Galaxy M54 5G | Dr.fone
- Pokemon Go No GPS Signal? Heres Every Possible Solution On Vivo V29 Pro | Dr.fone
- How to Factory Reset Oppo A56s 5G in 5 Easy Ways | Dr.fone
- How to Unlock a Network Locked Nokia Phone?
- Life360 Learn How Everything Works On Vivo V27 | Dr.fone
- How to Check Distance and Radius on Google Maps For your Vivo X Fold 2 | Dr.fone
- In 2024, How to Bypass Activation Lock from Apple iPhone 15 Pro or iPad?
- In 2024, How PGSharp Save You from Ban While Spoofing Pokemon Go On Vivo V27 Pro? | Dr.fone
- New 2024 Approved 15 Horror Animes That Will Trigger a Heart Attack
- List of Pokémon Go Joysticks On OnePlus Open | Dr.fone
- In 2024, How to Mirror Your Honor 90 Lite Screen to PC with Chromecast | Dr.fone
- Complete guide for recovering messages files on Nova Y71
- How to Reset Honor X50 Without the Home Button | Dr.fone
- What Does Enter PUK Code Mean And Why Did The Sim Get PUK Blocked On Vivo Y02T Device
- In 2024, Top 4 Ways to Trace Motorola Moto G24 Location | Dr.fone
- Title: How to Use Blender Green Screen for 2024
- Author: Chloe
- Created at : 2024-05-20 03:38:12
- Updated at : 2024-05-21 03:38:12
- Link: https://ai-editing-video.techidaily.com/how-to-use-blender-green-screen-for-2024/
- License: This work is licensed under CC BY-NC-SA 4.0.
