
:max_bytes(150000):strip_icc():format(webp)/GettyImages-1088144728-3a9f1bd54e994bfaa4cabea82414202e.jpg)
How to Use Kahoot! On Zoom for 2024
How to Use Kahoot! On Zoom
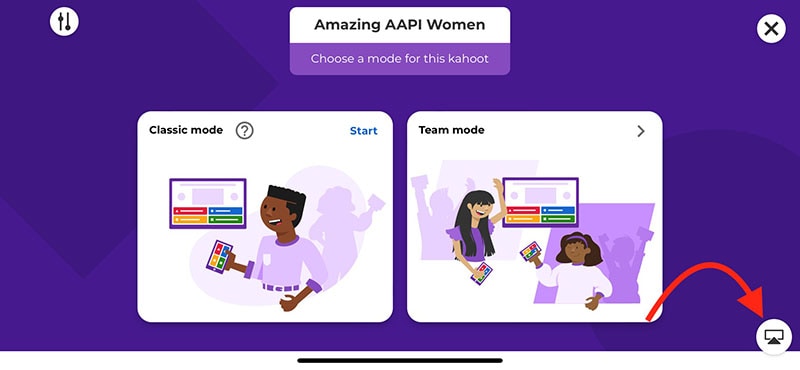
In the educational game Kahoot! participants respond to multiple-choice questions based on trivia. Each participant uses their own controller to answer questions in the online game. There are several question kinds to pick from, allowing for complete customization of the test. Each player needs their own controller for Kahoot! The game questions will be shown in the Zoom/Google Meet window, but the answers must be entered using the controller. With the Kahoot!! app for Zoom, presenters may use play and friendly rivalry to increase participant engagement. Users may organize knowledge- and feedback-gathering pulse checks with staff members, encourage original thought with word clouds, and empower participants’ voices with surveys, open-ended questions, and other tools. Utilizing the brainstorm tool, organizations may crowdsource ideas and advance teamwork.
Engagement has emerged as a crucial component of successful learning, collaboration, and connection as the globe has increased the use of video communications in social and professional situations. Users may access, host, and play Kahoot!! games and educational information with other meeting participants using the Kahoot!! app for Zoom without ever leaving the Zoom Meeting or requiring a second device. Corporate executives may motivate their staff via speeches, meetings, and online activities. Meeting hosts will have immediate access to data and statistics from their Kahoot!! experience, allowing them to respond in real time to audience engagement with the material. Additionally, hosts may email the Kahoot!! games to all participants so they can practice and improve their scores, which will increase participant engagement and learning retention. Hosts can also distribute the Kahoot!! games as self-paced challenges with individuals who couldn’t attend in person.
Part 1: Key Features of Kahoot
What more is there to discuss, Kahoot!? Every pupil adores it. Many instructors and educators use it all around the world to make learning simple, enjoyable, and interesting. Everyone may use it since it is free and extremely simple to use. These are some of its attributes:
- Quizzes may be made in a matter of minutes.
- Develop games based on the abilities of the kids. Playing at home or in the Zoom is simple for them.
- Various templates are offered. You can choose one of them with confidence.
- Kahoot! has the ability to be organized into many folders according to topics or subjects.
- Additionally, multiple choice questions may be included by quiz makers.
- Teachers using Kahoot! may combine different questions into one format, such as quizzes, polls, riddles, and slides.
- Use Apple Schoolwork, Google Zooms, and Microsoft Teams to share student-centered tasks.
Part 2: How to Host a Kahoot! Session within a Zoom Meeting
With the Zoom app, Kahoot! may be viewed, hosted, and used. It’s amazing that Kahoot!!, one of the most well-known brands in quiz-based learning, still provides a free-to-use platform, making it very accessible to both instructors and students. It’s also a useful resource for a hybrid class that combines online and classroom instruction. Most devices will be able to use the cloud-based service using a web browser. This implies that students using computers, tablets, and cellphones in class or at home may access this. Participants in Zoom Meetings may play games and learn without having to leave the Zoom meeting or bring a second device.
Step1Sign up for Zoom ahead of time and get ready. On the other hand, launch the Kahoot! test in your web browser, then be ready to share your screen in Zoom.
Step2As the participants come, allow them in and check to see whether you and they can both hear each other. To access the Kahoot! quiz, make sure they have a device or another browser tab open.
Step3Open the Kahoot! test and share it using Zoom’s “Share Screen” feature. While your screen is shared, continue to host the Kahoot! as normal. To view participants next to your shared screen, we advise selecting Side-by-Side Mode.
Part 3: How to Participate in Kahoot! Sessions within a Zoom Meeting
With more than 40 million ready-made games available on Kahoot!!, getting started is fast and simple. When time and resources are limited, hybrid or distant learning is ideal. After linking the Kahoot! to your Zoom account, you may utilize it. Use this app and start a meeting. Go to Apps on the toolbar and choose the program you wish to use. Select Who is Hosting to locate their host or to join a Kahoot! session being hosted by a friend or another player. Players may post a question to a shared screen on the Kahoot! platform. Kahoot!! just needs an account to be made in order to use it since it is free. Most devices may be used by students to access Kahoot!! from wherever there is an internet connection. This is how:
Step1Take the time to check that Zoom, Skype, Cisco Webex, or Google Hangout are operating and that your camera, microphone, and speaker are all operational.
Step2In the right-side panel, add the Kahoot!! app to your list of apps and click Join.
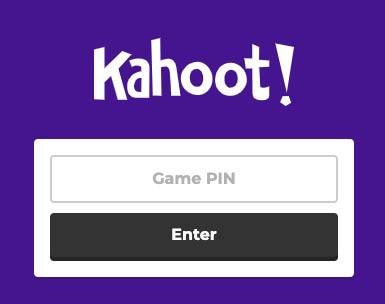
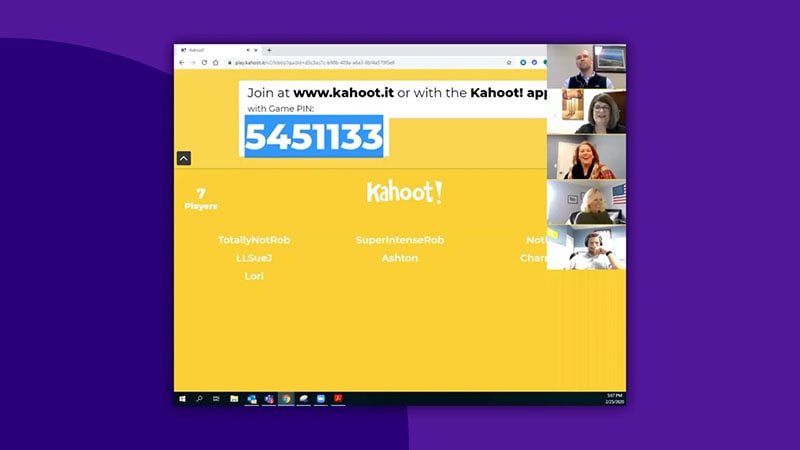
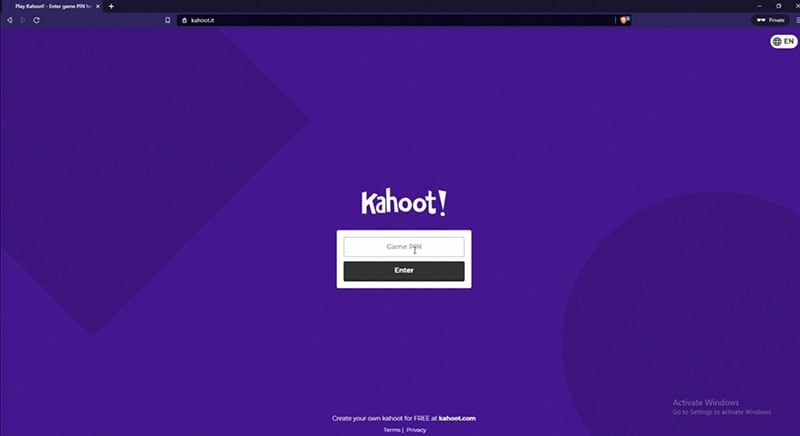
Step3The lobby will reveal your game PIN when you click the Play button, allowing the computer to show you a Kahoot! You may enter the game PIN and press Enter to join the Kahoot! session once the host shows their screen with you. To participate in a Kahoot! session, you don’t need a Kahoot! account.
Part 4: How to Record Zoom Meetings
Zoom is a conference tool that enables real-time, high-quality, low-latency communication. Filmora is an excellent video recorder for that reason, enabling users to capture on-screen activity such Zoom audio tracks and video conversations. Wondershare One of the most versatile and portable Zoom voice recorders is the Filmora. Even novices may easily utilize it due to its user-friendly UI. All you have to do is click the record button after choosing the proper audio source in the settings. The all-in-one video editing program Filmora allows you to record your screen with audio, a facecam, and a green screen effect. You can record the entire screen or just a portion of it, and you can perform a number of quick edits on your video using tools like trimming, cropping, changing the audio track’s volume, and so on.
How to Use Filmora to Record Zoom Lectures
Having said that, Filmora is a great Zoom recorder that can capture games, audio, and video conversations. This video recorder may be used to make video clip lessons in addition to recording movies, video games, and webcam footage. In addition to Zoom, it can also capture internet streaming audio. Here is information on how to record Zoom meetings using this software:
Step1Download and Install Filmora on your PC
To use this program for a number of tasks, including screen recording and recording editing, you must first download and install it on your computer. To achieve this, download the recording program by clicking the link below. Launch the program as soon as the download is finished to start the installation process, and then adhere to the on-screen directions to install and make this software available for usage.
Step2Choose the Record’s Ideal Position in the Zoom
Use it on your PC at this point. As soon as you start the program, a window interface with two choices for screen recording, editing already recorded videos, and generating videos will display. Choose the Recording option from the menu. When you click the record button, the program will direct you to the recording interface, where you can easily adjust the settings for your camera and audio. To add the microphone or Zoom sound in that particular field, use the necessary buttons as described below:
Step3Press the Record Button
It goes without saying that you must test your recording tools to ensure they are functional and capturing the highest quality audio. But once you’re ready, click the record button, which will allow you 3-5 seconds before starting to record the personalized screen of your PC as seen below:
Step4Export and Save Your Zoom Recording
You may now save the Zoom video for sharing on social media after making and modifying it. The following file types may be used to save the document: MP4, WMV, AVI, MOV, GIF, and MP3. The finest feature of Wondershare Filmora is the direct export and sharing of Zoom video recordings to YouTube; the only need is that you must be signed in to your YouTube account inside the application:
Because the MOV format is only available for online movies, you may also export your Zoom recordings to MP4 if you want to publish them to your YouTube channel. You are free to choose the format that best suits your needs. You may choose the encoder from a drop-down menu in the export options.
Conclusion
With the aid of several interesting tools and programs made accessible in this virtual environment, learning has now become enjoyable. Of them is Kahoot! In Zoom. It is an application that acts as a learning tool by providing fun games, tests, and a variety of other chances. In only a few minutes, quizzes may be made and distributed. Games and quizzes may be planned using this platform quite easily. The Kahoot! with Zoom will make it simpler than ever for corporate leaders to engage and encourage their team members with Kahoot!! engaging game-based learning experiences at a time when many organizations are staying virtual or planning for a hybrid model. Head towards recording Kahoot with Filmora to experience a smooth Kahoot! usage on Zoom. Plus, you can also share the gameplay afterwards.
In the educational game Kahoot! participants respond to multiple-choice questions based on trivia. Each participant uses their own controller to answer questions in the online game. There are several question kinds to pick from, allowing for complete customization of the test. Each player needs their own controller for Kahoot! The game questions will be shown in the Zoom/Google Meet window, but the answers must be entered using the controller. With the Kahoot!! app for Zoom, presenters may use play and friendly rivalry to increase participant engagement. Users may organize knowledge- and feedback-gathering pulse checks with staff members, encourage original thought with word clouds, and empower participants’ voices with surveys, open-ended questions, and other tools. Utilizing the brainstorm tool, organizations may crowdsource ideas and advance teamwork.
Engagement has emerged as a crucial component of successful learning, collaboration, and connection as the globe has increased the use of video communications in social and professional situations. Users may access, host, and play Kahoot!! games and educational information with other meeting participants using the Kahoot!! app for Zoom without ever leaving the Zoom Meeting or requiring a second device. Corporate executives may motivate their staff via speeches, meetings, and online activities. Meeting hosts will have immediate access to data and statistics from their Kahoot!! experience, allowing them to respond in real time to audience engagement with the material. Additionally, hosts may email the Kahoot!! games to all participants so they can practice and improve their scores, which will increase participant engagement and learning retention. Hosts can also distribute the Kahoot!! games as self-paced challenges with individuals who couldn’t attend in person.
Part 1: Key Features of Kahoot
What more is there to discuss, Kahoot!? Every pupil adores it. Many instructors and educators use it all around the world to make learning simple, enjoyable, and interesting. Everyone may use it since it is free and extremely simple to use. These are some of its attributes:
- Quizzes may be made in a matter of minutes.
- Develop games based on the abilities of the kids. Playing at home or in the Zoom is simple for them.
- Various templates are offered. You can choose one of them with confidence.
- Kahoot! has the ability to be organized into many folders according to topics or subjects.
- Additionally, multiple choice questions may be included by quiz makers.
- Teachers using Kahoot! may combine different questions into one format, such as quizzes, polls, riddles, and slides.
- Use Apple Schoolwork, Google Zooms, and Microsoft Teams to share student-centered tasks.
Part 2: How to Host a Kahoot! Session within a Zoom Meeting
With the Zoom app, Kahoot! may be viewed, hosted, and used. It’s amazing that Kahoot!!, one of the most well-known brands in quiz-based learning, still provides a free-to-use platform, making it very accessible to both instructors and students. It’s also a useful resource for a hybrid class that combines online and classroom instruction. Most devices will be able to use the cloud-based service using a web browser. This implies that students using computers, tablets, and cellphones in class or at home may access this. Participants in Zoom Meetings may play games and learn without having to leave the Zoom meeting or bring a second device.
Step1Sign up for Zoom ahead of time and get ready. On the other hand, launch the Kahoot! test in your web browser, then be ready to share your screen in Zoom.
Step2As the participants come, allow them in and check to see whether you and they can both hear each other. To access the Kahoot! quiz, make sure they have a device or another browser tab open.
Step3Open the Kahoot! test and share it using Zoom’s “Share Screen” feature. While your screen is shared, continue to host the Kahoot! as normal. To view participants next to your shared screen, we advise selecting Side-by-Side Mode.
Part 3: How to Participate in Kahoot! Sessions within a Zoom Meeting
With more than 40 million ready-made games available on Kahoot!!, getting started is fast and simple. When time and resources are limited, hybrid or distant learning is ideal. After linking the Kahoot! to your Zoom account, you may utilize it. Use this app and start a meeting. Go to Apps on the toolbar and choose the program you wish to use. Select Who is Hosting to locate their host or to join a Kahoot! session being hosted by a friend or another player. Players may post a question to a shared screen on the Kahoot! platform. Kahoot!! just needs an account to be made in order to use it since it is free. Most devices may be used by students to access Kahoot!! from wherever there is an internet connection. This is how:
Step1Take the time to check that Zoom, Skype, Cisco Webex, or Google Hangout are operating and that your camera, microphone, and speaker are all operational.
Step2In the right-side panel, add the Kahoot!! app to your list of apps and click Join.
Step3The lobby will reveal your game PIN when you click the Play button, allowing the computer to show you a Kahoot! You may enter the game PIN and press Enter to join the Kahoot! session once the host shows their screen with you. To participate in a Kahoot! session, you don’t need a Kahoot! account.
Part 4: How to Record Zoom Meetings
Zoom is a conference tool that enables real-time, high-quality, low-latency communication. Filmora is an excellent video recorder for that reason, enabling users to capture on-screen activity such Zoom audio tracks and video conversations. Wondershare One of the most versatile and portable Zoom voice recorders is the Filmora. Even novices may easily utilize it due to its user-friendly UI. All you have to do is click the record button after choosing the proper audio source in the settings. The all-in-one video editing program Filmora allows you to record your screen with audio, a facecam, and a green screen effect. You can record the entire screen or just a portion of it, and you can perform a number of quick edits on your video using tools like trimming, cropping, changing the audio track’s volume, and so on.
How to Use Filmora to Record Zoom Lectures
Having said that, Filmora is a great Zoom recorder that can capture games, audio, and video conversations. This video recorder may be used to make video clip lessons in addition to recording movies, video games, and webcam footage. In addition to Zoom, it can also capture internet streaming audio. Here is information on how to record Zoom meetings using this software:
Step1Download and Install Filmora on your PC
To use this program for a number of tasks, including screen recording and recording editing, you must first download and install it on your computer. To achieve this, download the recording program by clicking the link below. Launch the program as soon as the download is finished to start the installation process, and then adhere to the on-screen directions to install and make this software available for usage.
Step2Choose the Record’s Ideal Position in the Zoom
Use it on your PC at this point. As soon as you start the program, a window interface with two choices for screen recording, editing already recorded videos, and generating videos will display. Choose the Recording option from the menu. When you click the record button, the program will direct you to the recording interface, where you can easily adjust the settings for your camera and audio. To add the microphone or Zoom sound in that particular field, use the necessary buttons as described below:
Step3Press the Record Button
It goes without saying that you must test your recording tools to ensure they are functional and capturing the highest quality audio. But once you’re ready, click the record button, which will allow you 3-5 seconds before starting to record the personalized screen of your PC as seen below:
Step4Export and Save Your Zoom Recording
You may now save the Zoom video for sharing on social media after making and modifying it. The following file types may be used to save the document: MP4, WMV, AVI, MOV, GIF, and MP3. The finest feature of Wondershare Filmora is the direct export and sharing of Zoom video recordings to YouTube; the only need is that you must be signed in to your YouTube account inside the application:
Because the MOV format is only available for online movies, you may also export your Zoom recordings to MP4 if you want to publish them to your YouTube channel. You are free to choose the format that best suits your needs. You may choose the encoder from a drop-down menu in the export options.
Conclusion
With the aid of several interesting tools and programs made accessible in this virtual environment, learning has now become enjoyable. Of them is Kahoot! In Zoom. It is an application that acts as a learning tool by providing fun games, tests, and a variety of other chances. In only a few minutes, quizzes may be made and distributed. Games and quizzes may be planned using this platform quite easily. The Kahoot! with Zoom will make it simpler than ever for corporate leaders to engage and encourage their team members with Kahoot!! engaging game-based learning experiences at a time when many organizations are staying virtual or planning for a hybrid model. Head towards recording Kahoot with Filmora to experience a smooth Kahoot! usage on Zoom. Plus, you can also share the gameplay afterwards.
Does Your Video Shake so Much? Shaking Movement on Your Camera Is Often Inevitable, Especially if You Don’t Use a Camera Stabilizer or a Camera with No Built-In Image Stabilization. As a Result, It Can Make Your Video Look Distracting and Difficult to Watch
Does your video shake so much? Shaking movement on your camera is often inevitable, especially if you don’t use a camera stabilizer or a camera with no built-in image stabilization. As a result, it can make your video look distracting and difficult to watch.
But you don’t need to worry. You can use a stabilization tool in Filmora . A stabilization tool is a feature that can help to correct for camera shake and other types of movement. If you are a handheld shooter, you will find this tool extremely helpful.
Part 1: When do you need to stabilize your video?
Now, let’s talk about when you should stabilize your video. If you’re shooting something that is moving, like people or animals, you will definitely want to stabilize your video. This will help ensure that the video is smooth and steady.
Another time you may want to stabilize your video is if you’re shooting in a low-light situation. It will help to ensure that your video is not too shaky.
Finally, if you’re shooting a video that’s going to be displayed on a large screen, you may want to stabilize your video. Stabilizing your video will help ensure the output is crisp and clear.
Part 2: How to stabilize your video with Filmora
Filmora has a stabilization feature that can help to smooth your video and make it look more professional. If you haven’t installed Filmora yet, you can download it for free.
Free Download For Win 7 or later(64-bit)
Free Download For macOS 10.14 or later
So, should you have a wobble movement in your video, follow these steps to make it smoother in no time:
Step1 Launch Filmora 11 and create a new project.
Step2 Import your video to Filmora.

Step3 After you import your video to Filmora, the Stabilization must have been off. So, switch the Stabilization toggle on, then a loading bar will start going up to analyze the clip.

Step4 Once it finishes analyzing, the smooth level will default to 10. See the preview whether you like how it turns out.
Before

After

Please note that the center point of your image will always be the most stable. The more shaky a clip is, the more it will crop into that image.
If you are unsatisfied with the default setting, increasing the Smoothness Level will result in more cropping to the image. On the contrary, if you put the Smoothness Level down to zero, you are no longer cropping into the image, but the result won’t be as smooth.

Should the cropping bother you, such as it crops the subject’s hair out of the frame, you can adjust it with Edge Processing.
If you change it to None, you will see the black bars that simulate how it stabilizes the clip. Try to hit play on the preview screen, and then you can see more clearly how the tool keeps the center of the frame to make it stable and less shaky.

As Reflect is the default, the Extend uses artificial intelligence to extend the pixels, as you are often aware in Photoshop.

Besides the three, there is also the Tile option. Each of them would give a different result. You can try and use the one that works best for you.
Summary
When you’re shooting a video, you must have wanted it to be as smooth and stable as possible. By stabilizing your video, you can help ensure it’s smooth and easy to watch.
Filmora offers a Stabilization feature that allows you to easily improve your video’s quality. Simply select the video clip you want to stabilize and click the stabilization button. Filmora will do the rest, giving you a smooth and stable video.
Free Download For macOS 10.14 or later
So, should you have a wobble movement in your video, follow these steps to make it smoother in no time:
Step1 Launch Filmora 11 and create a new project.
Step2 Import your video to Filmora.
Step3 After you import your video to Filmora, the Stabilization must have been off. So, switch the Stabilization toggle on, then a loading bar will start going up to analyze the clip.
Step4 Once it finishes analyzing, the smooth level will default to 10. See the preview whether you like how it turns out.
Before
After
Please note that the center point of your image will always be the most stable. The more shaky a clip is, the more it will crop into that image.
If you are unsatisfied with the default setting, increasing the Smoothness Level will result in more cropping to the image. On the contrary, if you put the Smoothness Level down to zero, you are no longer cropping into the image, but the result won’t be as smooth.
Should the cropping bother you, such as it crops the subject’s hair out of the frame, you can adjust it with Edge Processing.
If you change it to None, you will see the black bars that simulate how it stabilizes the clip. Try to hit play on the preview screen, and then you can see more clearly how the tool keeps the center of the frame to make it stable and less shaky.
As Reflect is the default, the Extend uses artificial intelligence to extend the pixels, as you are often aware in Photoshop.
Besides the three, there is also the Tile option. Each of them would give a different result. You can try and use the one that works best for you.
Summary
When you’re shooting a video, you must have wanted it to be as smooth and stable as possible. By stabilizing your video, you can help ensure it’s smooth and easy to watch.
Filmora offers a Stabilization feature that allows you to easily improve your video’s quality. Simply select the video clip you want to stabilize and click the stabilization button. Filmora will do the rest, giving you a smooth and stable video.
How to Make Text Reveal Effect for Your Video
Have you ever seen the text reveal led by a subject when moving across the frame? It’s one of the most common text-revealing effects in video editing. This technique is often used to add titles or credits to a scene for cinematic vibes and creative effects.
While it may look complicated, it’s actually quite easy to create with a video editing program like Filmora. Filmora’s masking feature allows users to create impressive and eye-catching text reveals in their videos. For those looking for a tutorial on how to make text reveal, here’s a step-by-step guide to help you out.
How to add text reveal effect using Filmora’s masking tool
Free Download For Win 7 or later(64-bit)
Free Download For macOS 10.14 or later
First, make sure the video clips you are using are clear, with the subject moving across the frame. It will help the text to stand out and be more easily seen. Now, follow the step-by-step guides below:
Step 1 Add video tracks
You will need three video tracks in order to create this effect, so click the (+) icon above the timeline > Add Video Track and add two more video tracks.

Step 2 Import the clip to the timeline
Drag and drop your clip onto the first and third video tracks of the timeline. Then, align them with each other.

Step 3 Make a cut at the beginning of the text
Find the spot where you want the text reveals to start, then click the scissor icon to make a cut on the clip from the first video track.

Step 4 Add and adjust the text
Go to Title > Plain Text > select which text styles suit you best. Then, drag the title to the second video track.

Double-click on the title clip and type out your text. Then, adjust the text position and align it to the cut you have made.

Step 5 Use the masking tool
Go to Effects > Utility > Image Mask, then drag and drop it onto the latter half of the top video clip.

Make more cuts on the top latter clip, frame by frame, starting from the first cut you have made.

Double-click on each of the smaller clips and find the mask settings.

Since the subject in this tutorial is moving from side to side, we are going to match the mask’s y-axis setting, which is also the revealed text portion, with the subject’s movement. Starting from the first clip, adjust the y-axis number to a smaller/bigger number.

There we go! The final look should look like this:

Summary
That is how we can create the text reveal effect using Wondershare Filmora. Using Filmora’s masking tool, it’s easy to create a text reveal the effect that can add flair and interest to your videos. Just follow the simple steps, and you’ll be able to get the desired result with a few clicks of your mouse. Give it a try, and share your thoughts with us.
Free Download For macOS 10.14 or later
First, make sure the video clips you are using are clear, with the subject moving across the frame. It will help the text to stand out and be more easily seen. Now, follow the step-by-step guides below:
Step 1 Add video tracks
You will need three video tracks in order to create this effect, so click the (+) icon above the timeline > Add Video Track and add two more video tracks.
Step 2 Import the clip to the timeline
Drag and drop your clip onto the first and third video tracks of the timeline. Then, align them with each other.
Step 3 Make a cut at the beginning of the text
Find the spot where you want the text reveals to start, then click the scissor icon to make a cut on the clip from the first video track.
Step 4 Add and adjust the text
Go to Title > Plain Text > select which text styles suit you best. Then, drag the title to the second video track.
Double-click on the title clip and type out your text. Then, adjust the text position and align it to the cut you have made.
Step 5 Use the masking tool
Go to Effects > Utility > Image Mask, then drag and drop it onto the latter half of the top video clip.
Make more cuts on the top latter clip, frame by frame, starting from the first cut you have made.
Double-click on each of the smaller clips and find the mask settings.
Since the subject in this tutorial is moving from side to side, we are going to match the mask’s y-axis setting, which is also the revealed text portion, with the subject’s movement. Starting from the first clip, adjust the y-axis number to a smaller/bigger number.
There we go! The final look should look like this:
Summary
That is how we can create the text reveal effect using Wondershare Filmora. Using Filmora’s masking tool, it’s easy to create a text reveal the effect that can add flair and interest to your videos. Just follow the simple steps, and you’ll be able to get the desired result with a few clicks of your mouse. Give it a try, and share your thoughts with us.
Learn About some of the Best Photo Collage with Music Tools
8 Free Photo Collage with Music Video Maker
An easy yet powerful editor
Numerous effects to choose from
Detailed tutorials provided by the official channel
It is definitely possible Usually, people use video collage makers for this reason. But you can also create an actual photo collage with music as well (no need to use actual video clips if you don’t want to.)
In the end, it all depends on the collage maker you’re using to be completely honest. In this case, the collage maker in question would have to have video editing functionalities advanced enough to allow you to create a video consisting of a picture collage with music Learn more about the different tools that you can check out below as we break down some of the best of the best available
01 Wondershare Filmora Video Editor
The first of the video makers that we’re going to be introducing is called Filmora. This is a professional editor that’s equipped with just about everything you need for creating high-quality video content. That includes the things that you will need in order to create a music photo collage
For your reference, that means that you can use it to create a video showing off a picture collage with music. Usually by making use of the templates provided by the software and uploading your own images (although, in the newest version of Filmora, Filmora V11, there is a ‘Stock Media’ option that includes an endless supply of photographs, videos, music, etc. for adding to your content.)

For Win 7 or later (64-bit)
For macOS 10.12 or later
02 Canva
Canva is really more of a photo editor than anything else. But it has a timeline function that you can use for more advanced things. Which, in this case, would be creating a picture collage with music
Note, just like with Filmora, Canva is not an entirely FREE program. But it is free to try. And, just like Filmora, it comes with a stock media library that you can use as a resource for your projects (i.e., images, clip arts, etc.) Canva also comes with a Pro version that you can unlock if you want some of its more advanced features (highly recommended if you’re looking to create content for work or entrepreneurial reasons and not just for posting on social media. Especially since it will allow you to collaborate with others.)

03 Express It
You can say that “Express It” is Adobe’s version of Canva. It is available as an online tool and as a photo collage with music app that you can use for your smartphone or tablet.
Much like with Canva, this program has a built-in stock media library that you can use for your projects. It’s also primarily FREE to use, although you’ll need to pay in order to unlock some of its more advanced resources. It comes with the usual layouts for creating quick templates, but it’s most prized for its ‘free-style’ mode, which will allow you to create a collage that looks exactly how you want it to look.

04 Smilebox
Smilebox is an automatic video collage maker that is capable of turning photographs into a video collage without much input from you It’s the tool to use if all you’re looking for is a quick solution. By that, we of course mean the solution of the ‘upload-and-then-download’ variety
It is also an online tool, so Sign-Up is required. But once you’re signed up, the only thing you really have to do is provide the images that you want to use for your music photo collage

05 Fotojet
Next is ‘Fotojet’, which is an online collage maker that is incredibly popular for those that are looking for an easy solution. It works pretty much how you expect a collage maker to work. You choose from a list of ‘collage layouts’, choose the images that you want to place in the layout that you’ve chosen, pick out your music, maybe decorate the pic collage a bit (for example, you can add text, clipart stickers, etc.) and then you’re done
Much like some of the programs on this list, Fotojet isn’t an entirely free music photo collage tool. However, a FREE trial is available if you want to try it out for a quick project or two.

06 Vimeo
Video is a professional online photo editing tool that’s incredibly popular with entrepreneurs. It actually works very similarly with all the other tools that we’ve introduced so far. That means that it comes with templates that you can use in order to create projects, it also comes with a ‘resources’ library that you can take advantage of in order to fill up said projects
As for creating a photo collage with music by using this tool. You will need to sign up to start creating, but it’s FREE to try — with some elements locked under the premium version.

07 Kapwing
KapWing is exactly what it looks like, it’s an online photo editor The best part about it is that it comes with quick collage layouts that you can use and the usual resources library. The layouts in question are customizable, allowing you to control what your music photo collages look like in the end. You also have the choice of creating said collage with photos, videos, GIFs, and music

08 VEED.IO
Similar to KapWing, VEED.IO offers a video collage maker that comes with customizable layouts that you can use to easily create a pic collage with music. The program is of course also free to try (though certain elements are locked in the FREE version).

● Key Takeaways from This Episode →
● Collages are a fun way to preserve memories of a fun event with friends and families Traditionally, of course, photo collages were created with printed still images.
● Now, however, not only can you create a moving collage (with images, videos, GIFs, etc.) but you can even add music to it
● These types of music photo collages are really fun to share with friends and family online. And, these days, there are even digital picture frames that will allow you to display them in your home (and yes, some of these picture frames do come with speakers for playing music)
It is definitely possible Usually, people use video collage makers for this reason. But you can also create an actual photo collage with music as well (no need to use actual video clips if you don’t want to.)
In the end, it all depends on the collage maker you’re using to be completely honest. In this case, the collage maker in question would have to have video editing functionalities advanced enough to allow you to create a video consisting of a picture collage with music Learn more about the different tools that you can check out below as we break down some of the best of the best available
01 Wondershare Filmora Video Editor
The first of the video makers that we’re going to be introducing is called Filmora. This is a professional editor that’s equipped with just about everything you need for creating high-quality video content. That includes the things that you will need in order to create a music photo collage
For your reference, that means that you can use it to create a video showing off a picture collage with music. Usually by making use of the templates provided by the software and uploading your own images (although, in the newest version of Filmora, Filmora V11, there is a ‘Stock Media’ option that includes an endless supply of photographs, videos, music, etc. for adding to your content.)
For Win 7 or later (64-bit)
For macOS 10.12 or later
02 Canva
Canva is really more of a photo editor than anything else. But it has a timeline function that you can use for more advanced things. Which, in this case, would be creating a picture collage with music
Note, just like with Filmora, Canva is not an entirely FREE program. But it is free to try. And, just like Filmora, it comes with a stock media library that you can use as a resource for your projects (i.e., images, clip arts, etc.) Canva also comes with a Pro version that you can unlock if you want some of its more advanced features (highly recommended if you’re looking to create content for work or entrepreneurial reasons and not just for posting on social media. Especially since it will allow you to collaborate with others.)
03 Express It
You can say that “Express It” is Adobe’s version of Canva. It is available as an online tool and as a photo collage with music app that you can use for your smartphone or tablet.
Much like with Canva, this program has a built-in stock media library that you can use for your projects. It’s also primarily FREE to use, although you’ll need to pay in order to unlock some of its more advanced resources. It comes with the usual layouts for creating quick templates, but it’s most prized for its ‘free-style’ mode, which will allow you to create a collage that looks exactly how you want it to look.
04 Smilebox
Smilebox is an automatic video collage maker that is capable of turning photographs into a video collage without much input from you It’s the tool to use if all you’re looking for is a quick solution. By that, we of course mean the solution of the ‘upload-and-then-download’ variety
It is also an online tool, so Sign-Up is required. But once you’re signed up, the only thing you really have to do is provide the images that you want to use for your music photo collage
05 Fotojet
Next is ‘Fotojet’, which is an online collage maker that is incredibly popular for those that are looking for an easy solution. It works pretty much how you expect a collage maker to work. You choose from a list of ‘collage layouts’, choose the images that you want to place in the layout that you’ve chosen, pick out your music, maybe decorate the pic collage a bit (for example, you can add text, clipart stickers, etc.) and then you’re done
Much like some of the programs on this list, Fotojet isn’t an entirely free music photo collage tool. However, a FREE trial is available if you want to try it out for a quick project or two.
06 Vimeo
Video is a professional online photo editing tool that’s incredibly popular with entrepreneurs. It actually works very similarly with all the other tools that we’ve introduced so far. That means that it comes with templates that you can use in order to create projects, it also comes with a ‘resources’ library that you can take advantage of in order to fill up said projects
As for creating a photo collage with music by using this tool. You will need to sign up to start creating, but it’s FREE to try — with some elements locked under the premium version.
07 Kapwing
KapWing is exactly what it looks like, it’s an online photo editor The best part about it is that it comes with quick collage layouts that you can use and the usual resources library. The layouts in question are customizable, allowing you to control what your music photo collages look like in the end. You also have the choice of creating said collage with photos, videos, GIFs, and music
08 VEED.IO
Similar to KapWing, VEED.IO offers a video collage maker that comes with customizable layouts that you can use to easily create a pic collage with music. The program is of course also free to try (though certain elements are locked in the FREE version).
● Key Takeaways from This Episode →
● Collages are a fun way to preserve memories of a fun event with friends and families Traditionally, of course, photo collages were created with printed still images.
● Now, however, not only can you create a moving collage (with images, videos, GIFs, etc.) but you can even add music to it
● These types of music photo collages are really fun to share with friends and family online. And, these days, there are even digital picture frames that will allow you to display them in your home (and yes, some of these picture frames do come with speakers for playing music)
Also read:
- Use This Color Match Paint Technique to Find the Exact Shade of Any Hue You Have in Mind for Your Paint Project. Match the Paint to Your Desired Color Even without Knowing the Paint Name or Brand with Automotive Paint Matching for 2024
- Updated 2024 Approved 5 Ways to Make a Fake Facetime Call Video
- Updated 10+ Top Unlimited FCPX Slideshow Templates for 2024
- Updated 2024 Approved How to Create The Best Video Collages ?
- New Filmora Is a Great Video Editor that Many Users Are Making Intro Video with It. This Article Will Guide You How to Create an Intro Video with Filmora
- New In 2024, IMovie Review – Is It The Best Video Editor for Mac Users
- Updated Best 10 Video Quiz Makers 2024 Add Quiz To Videos Easily
- Updated 2024 Approved How to Create Discord Emoji GIF
- Step by Step to Crop Videos with CyberLink PowerDirector
- Updated Are You Working on Editing a Video and Youd Like to Add Text to It? Learn the Various Ways that You Can Add Text to a Video
- Beginners Guide to Green Screen Keying for 2024
- Updated In 2024, Best Audio Waveform Generator
- Updated 10 Catchy Pixel Art Wallpapers and How to Custom Your Own with Ease
- New Keyframes Interval Everything You Need To Know for 2024
- In 2024, Are You Eager to Discover the Top-Rated and Reliable LUTs that Can Be Used in Shotcut? This Article Will Help You a Lot with This Matter
- In 2024, Top 10 Best Slideshow Makers with Music
- The Top Tools for Converting Slides to Digital - 2024 Review
- Updated 2024 Approved How to Loop Videos with iMovie
- In 2024, Your Recorded Video Footage Has some Visible Grains Making Your Video Noisy and Thus Hampering the Overall Viewing Experience. No Worries, as There AI Video Denoiser and Other Software Available to Correct the Issue
- New In 2024, Practical Way to Resize Video in Handbrake
- In 2024, 15 Amazing GIF Splitter Examples You Need to Bookmark
- In 2024, Split Audio From a Video in Adobe Premiere Pro Step by Step
- In 2024, Video Course and Online Learning Are Very Popular Nowadays. Here We Are Going to Recommend some of the Best Video Websites for Teachers to Use
- New How To Cut Videos For Instagram On Mac
- New How to Make Text Reveal Effect Easily
- The Easiest Way to Make Time-Lapse Videos. Yes, You Can Make a Time-Lapse Video with Your Phone. It Powers a Very Simple and Easy Way to Make Time-Lapse Videos for 2024
- One of the Latest Tools for Editing Video and Images Is AI Composite Video App Which Is Popular Among Users. Learn All About This Tool and Its Functioning for 2024
- Transform Your Videos Into 90S VHS Nostalgia for Free! Learn Where to Get Overlays and Use Filmoras Built-In Presets. Dive Into the Retro Realm Now for 2024
- New 2024 Approved Quick Answer What Is a GIF File?
- New In 2024, Blender - A Video Editor for Every Professional
- In 2024, The Most Complete Guide to Make Fortnite Montage
- New 2024 Approved Create the Stranger Things Upside Down Effect Video
- Best 8 Educational Video Websites for Teachers
- Updated In 2024, How to Create Liquid Water Reveal Intro?
- New Is Augmented Reality Conferencing the Future of Workplace Collaboratio
- Updated How to Crop a Video in Davinci Resolve Step by Step
- In 2024, The Necessity of the Creation of Video Content for Social Media Has Urged Many Editing Software to Come Out on the Market. We Have Reviewed some, Free of Them in This Article for You
- New 3GP Video Format What Is 3GP Format And How To Play It, In 2024
- 2024 Approved How to Correct Lens Distortion With Filmora
- Updated 2024 Approved How to Add Green Screen Effects In Phhotoshop
- Best Applications That Can Help Apply The Best VHS Camera Effect
- 2024 Approved What Is Animated GIF
- Updated Best 7 Color Match Paint Apps for 2024
- Are You Also a Fan of the Slow Mo Guys? Well! Who Isnt? Learn How You Can Create Compelling Slow-Mo Videos Like the Slow Mo Guys Here
- In 2024, 15 Best Free MP4 Video Rotators Windows,Mac, Android, iPhone & Online
- New In 2024, Create Risograph Effect In Photoshop A Beginners Guide
- Practical Way to Resize Video in Handbrake
- In 2024, 5 Ways to Move Contacts From Motorola G24 Power to iPhone (13/14/15) | Dr.fone
- How to Translate Audio/Video Content From Spanish to English and Vice Versa?
- 9 Quick Fixes to Unfortunately TouchWiz has stopped Of Google Pixel Fold | Dr.fone
- 7 Solutions to Fix Chrome Crashes or Wont Open on Lava Agni 2 5G | Dr.fone
- In 2024, 4 Ways to Unlock iPhone 12 to Use USB Accessories Without Passcode
- Use Device Manager to reinstall your hardware drivers on Windows 11
- Updated In 2024, Top 10 AI Subtitle Translators for Content Creators That Anyone Can Use
- 8 Safe and Effective Methods to Unlock Your Apple iPhone 14 Plus Without a Passcode
- In 2024, How to Watch Hulu Outside US On Apple iPhone 8 Plus | Dr.fone
- In 2024, Top 10 Password Cracking Tools For Oppo A79 5G
- In 2024, iPhone 15 Pro Asking for Passcode after iOS 17/14 Update, What to Do?
- How to Fix It Vivo V27e Wont Turn On | Dr.fone
- In 2024, 15 Best Strongest Pokémon To Use in Pokémon GO PvP Leagues For Motorola Moto G04 | Dr.fone
- Title: How to Use Kahoot! On Zoom for 2024
- Author: Chloe
- Created at : 2024-04-24 07:08:12
- Updated at : 2024-04-25 07:08:12
- Link: https://ai-editing-video.techidaily.com/how-to-use-kahoot-on-zoom-for-2024/
- License: This work is licensed under CC BY-NC-SA 4.0.
