
:max_bytes(150000):strip_icc():format(webp)/is-audible-worth-it-00616437e29b4d108264ba36057bbdde.jpg)
How to Windows Online Movie Maker Complete Guide
How to Windows Online Movie Maker [Complete Guide]
The likelihood is that video will soon play a significant role in your content marketing approach, if it hasn’t already – and for that using windows online movie maker is inevitable. You are an emerging brand, a sole proprietor, or even a podcaster. Knowing the importance of video marketing to content producers and agencies is second nature if you’re an astute digital marketer It may be costly and challenging to utilize video editing software. Fortunately, there are free online video editors available.
Before very recently, video editing needed highly specialized skills and was done manually using different tools. Windows Movie Maker used to be a standard component of every Windows user’s toolbox and was a highly recommended video editing product for novices. With the windows movie maker online, the application was well-liked for its ease of use and entertaining special effects, but most significantly - it was free. It came pre-installed on all Windows machines. You may do that with the help of our handy list of the top three online video creators.
Part 1. How to Make a Video Online [Use Movie Maker Windows Online]
Using the help of Movie Maker, you may create videos online with your browser. It enables you to create professional-caliber videos without having to purchase video editing tools at professional-caliber costs. For every genre and need, this web program includes stock video, animated text, audio tracks, and on-screen effects. Your own video clips are uploaded. Then, use the simple drag-and-drop online video editor in Movie Maker to edit footage and add special effects and music to make your movie shine.
Making fantastic compilation films from your already-existing photographs and videos doesn’t need you to be a skilled editor. Even for amateur video makers, the platform’s UI is simple to use and straightforward to navigate. The customizing choices in Movie Maker are many. You have the option of uploading your own fonts and logos. You may also watermark your films and alter the text’s color. Additionally, there are a ton of very unique components like stickers, vector shapes, and masks that may enhance the visual appeal of your video productions and widen your creative boundaries.
Steps to Make Video with Movie Maker Online
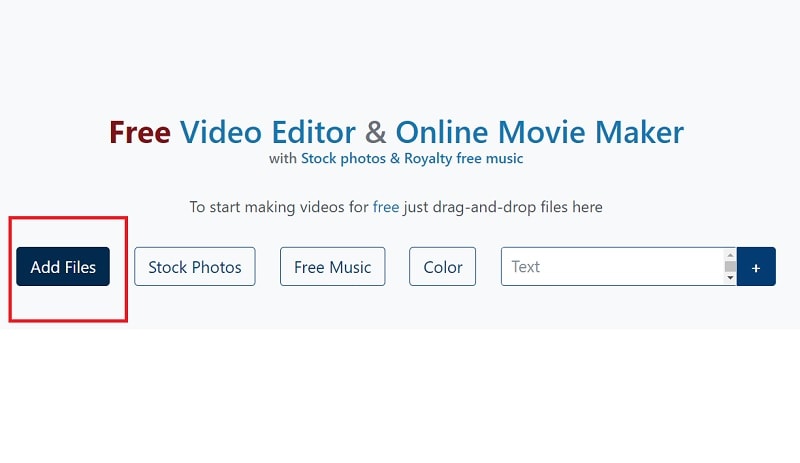
Step1 Go to Movie Maker Online
Using Movie Maker Online, you can quickly and easily make incredibly interesting compilation films using your already-posted photographs and videos. You’ll immediately be sent to the editor, where you can begin organizing your films. Here’s the official link to the toolkit:
Step2 Upload Files to Web
Your photographs, videos, and text may all be uploaded. If you like the default music, you may skip the step to change it; otherwise, you can choose another song from our library or upload your own MP3 file. Files from a variety of sources and devices may be added. Click the Import Media button to start importing your own media. Click Open after locating the video you wish to modify.
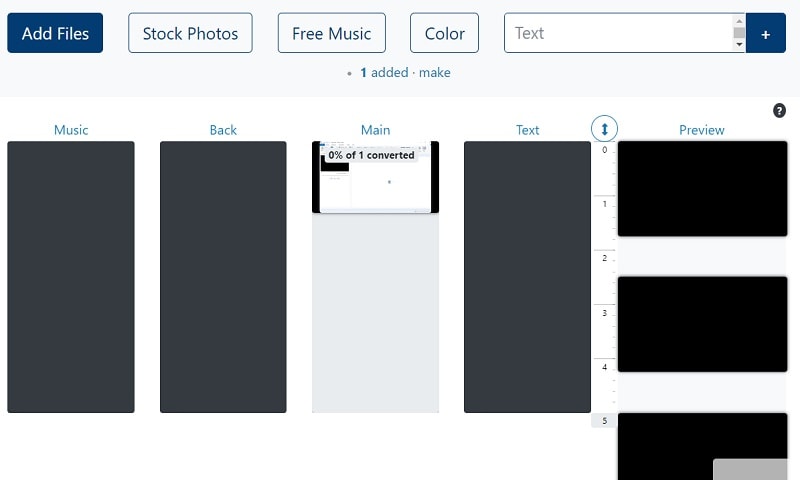
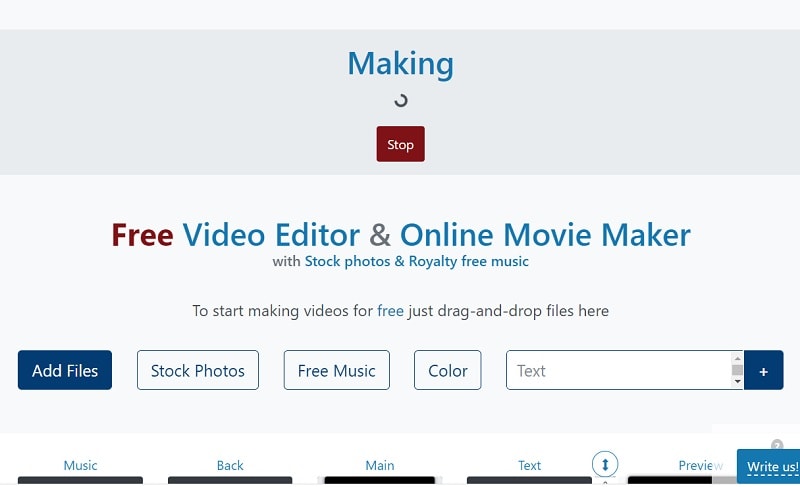
Step3 Create an online video
Add your music to your video compilation after all of your clips have been placed on the timeline. To accomplish that, choose a song depending on the genre or mood you want by clicking on the Music option on the left menu panel. To listen to the music track, click the little icon to the left of it. Text, colors, pictures, and video may all be customized to your heart’s delight. Add effects, drag, cut, etc. Press the Make Video button.
Step4 Save and Share with Others
Sharing your films on Facebook, Instagram, YouTube, and other platforms is made effortless. You may also send your loved ones the URLs to your videos. When you are happy with the changes, click the Save & Share option in the upper right corner, choose the quality you want to download your movie in, and then click the Export button. Download the updated video, then post it.
Part 2. Other Windows Online Movie Makers to Use [Top 3]
1. Kizoa
Link: Kizoa
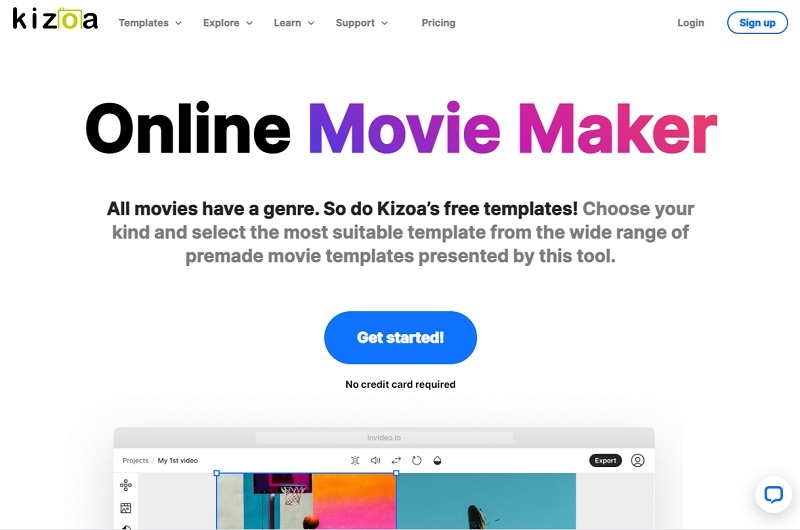
Customizing the appearance of your film is one of the finest ways to make it seem like it is your own. With the Kizoa tool, you may trim, apply a crossfade effect, choose the required resolution, and format for an output video in addition to merging files. Utilize Kizoa’s online video creator to produce eye-catching videos that will hold your audience’s attention. Create any kind of video, from personal family video slideshows to expert films to advertise your company. With the drag-and-drop movie production tool from Kizoa, you can create your very own video in a matter of minutes.
Use a video template as your starting point if you need inspiration. Key framing, animated overlays, noise reduction, transitions, and titles are just a few of the features it provides to help you produce excellent footage. For rapid video editing, there is a video production wizard. Windows Movie Maker’s auto movie themes pale in comparison to those provided by this program. Its extensive collection of stock footage and audio tracks helps you to concentrate on the crucial elements without having to drastically decrease the length of your film or the number of scenes.
2. FlexClip
Link: FlexClip
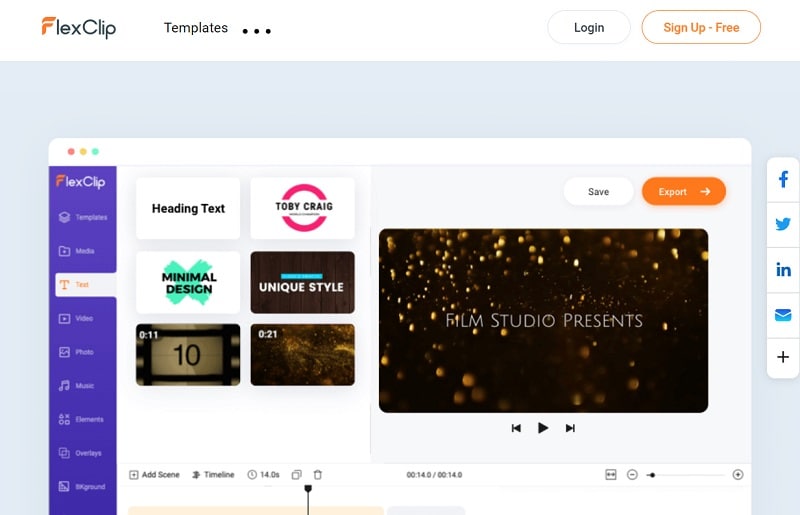
With the aid of the online video effects tool FlexClip, you may quickly and easily make entertaining short films. It has a ton of video editing features that you may use without logging in or creating an account, like merging, compressing, compiling, adding text, creating memes, etc. For those that are muted, you may use FlexClip to add animated text that blends in with the style of your film. Additionally, you may add your logo so that everyone is aware of who created the masterpiece they just saw.
An online video editor called FlexClip is mainly focused on producing high-quality marketing, advertising, and promotional films for companies. Recording a single video that will function on all social networking and video-sharing websites is almost impossible. Instagram, YouTube, and Facebook Marketing are among the partners of FlexClip that have received expert approval. It is used by marketers and enthusiasts to quickly create looping movies and stop motion animation. But as it only provides very basic functionality, it may not be the greatest choice for more intricate, demanding editing.
3. Veed.Io
Link: Veed.Io
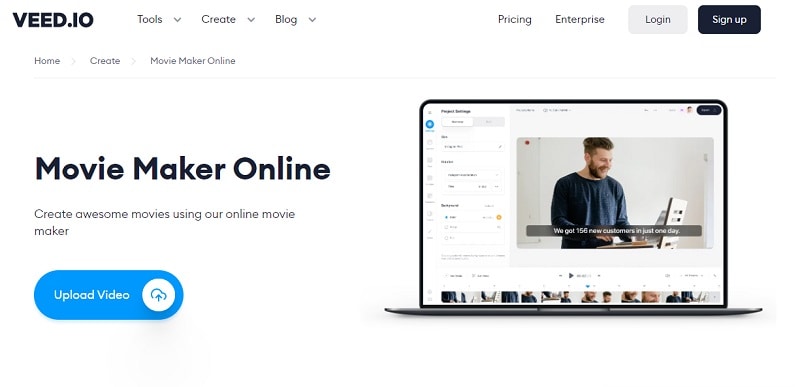
With only a few mouse clicks, users of the browser-based video editing program VEED may create professional-caliber movies. The greatest movie-making tools, including filters, effects, and stickers, are available on VEED. There are no intricate timelines, layers, or intricacy since it is a simple program that runs in your web browser. Simple drag-and-drop functionality is all you need to convey your tales. You may modify your video using its features. Using the video track below, you may combine, divide, or cut your files. Visit our website to see all of our filters, stickers, add-ons, and other tools.
Any device, whether an iPhone or Android phone, a MacBook, a Windows or Linux computer, may use VEED’s online video editor. You have access to all the resources you need to make amazing videos using VEED’s online video editor. Our user-friendly interface is very simple to use and is contemporary and intuitive. The native video sizes on each of the publishing sites, including Facebook, YouTube, and Vimeo, may all be altered using Veed. Finally, click “Export” in the editor’s upper-right corner, and your video will render quickly. Share some!
Conclusion
Use this editing list to produce more compelling video mashups for YouTube and other social media platforms in order to expand your audience, cultivate real connections with them, and eventually increase conversion rates. Because they combine the complex capabilities of the expensive, professional video suites with the user-friendliness and cost that appeal to novices, these online makers are a popular among editors of all skill levels. Make an investment in one of these video editing tools and own it.
Free Download For Win 7 or later(64-bit)
Free Download For macOS 10.14 or later
Part 1. How to Make a Video Online [Use Movie Maker Windows Online]
Using the help of Movie Maker, you may create videos online with your browser. It enables you to create professional-caliber videos without having to purchase video editing tools at professional-caliber costs. For every genre and need, this web program includes stock video, animated text, audio tracks, and on-screen effects. Your own video clips are uploaded. Then, use the simple drag-and-drop online video editor in Movie Maker to edit footage and add special effects and music to make your movie shine.
Making fantastic compilation films from your already-existing photographs and videos doesn’t need you to be a skilled editor. Even for amateur video makers, the platform’s UI is simple to use and straightforward to navigate. The customizing choices in Movie Maker are many. You have the option of uploading your own fonts and logos. You may also watermark your films and alter the text’s color. Additionally, there are a ton of very unique components like stickers, vector shapes, and masks that may enhance the visual appeal of your video productions and widen your creative boundaries.
Steps to Make Video with Movie Maker Online
Step1 Go to Movie Maker Online
Using Movie Maker Online, you can quickly and easily make incredibly interesting compilation films using your already-posted photographs and videos. You’ll immediately be sent to the editor, where you can begin organizing your films. Here’s the official link to the toolkit:
Step2 Upload Files to Web
Your photographs, videos, and text may all be uploaded. If you like the default music, you may skip the step to change it; otherwise, you can choose another song from our library or upload your own MP3 file. Files from a variety of sources and devices may be added. Click the Import Media button to start importing your own media. Click Open after locating the video you wish to modify.
Step3 Create an online video
Add your music to your video compilation after all of your clips have been placed on the timeline. To accomplish that, choose a song depending on the genre or mood you want by clicking on the Music option on the left menu panel. To listen to the music track, click the little icon to the left of it. Text, colors, pictures, and video may all be customized to your heart’s delight. Add effects, drag, cut, etc. Press the Make Video button.
Step4 Save and Share with Others
Sharing your films on Facebook, Instagram, YouTube, and other platforms is made effortless. You may also send your loved ones the URLs to your videos. When you are happy with the changes, click the Save & Share option in the upper right corner, choose the quality you want to download your movie in, and then click the Export button. Download the updated video, then post it.
Part 2. Other Windows Online Movie Makers to Use [Top 3]
1. Kizoa
Link: Kizoa
Customizing the appearance of your film is one of the finest ways to make it seem like it is your own. With the Kizoa tool, you may trim, apply a crossfade effect, choose the required resolution, and format for an output video in addition to merging files. Utilize Kizoa’s online video creator to produce eye-catching videos that will hold your audience’s attention. Create any kind of video, from personal family video slideshows to expert films to advertise your company. With the drag-and-drop movie production tool from Kizoa, you can create your very own video in a matter of minutes.
Use a video template as your starting point if you need inspiration. Key framing, animated overlays, noise reduction, transitions, and titles are just a few of the features it provides to help you produce excellent footage. For rapid video editing, there is a video production wizard. Windows Movie Maker’s auto movie themes pale in comparison to those provided by this program. Its extensive collection of stock footage and audio tracks helps you to concentrate on the crucial elements without having to drastically decrease the length of your film or the number of scenes.
2. FlexClip
Link: FlexClip
With the aid of the online video effects tool FlexClip, you may quickly and easily make entertaining short films. It has a ton of video editing features that you may use without logging in or creating an account, like merging, compressing, compiling, adding text, creating memes, etc. For those that are muted, you may use FlexClip to add animated text that blends in with the style of your film. Additionally, you may add your logo so that everyone is aware of who created the masterpiece they just saw.
An online video editor called FlexClip is mainly focused on producing high-quality marketing, advertising, and promotional films for companies. Recording a single video that will function on all social networking and video-sharing websites is almost impossible. Instagram, YouTube, and Facebook Marketing are among the partners of FlexClip that have received expert approval. It is used by marketers and enthusiasts to quickly create looping movies and stop motion animation. But as it only provides very basic functionality, it may not be the greatest choice for more intricate, demanding editing.
3. Veed.Io
Link: Veed.Io
With only a few mouse clicks, users of the browser-based video editing program VEED may create professional-caliber movies. The greatest movie-making tools, including filters, effects, and stickers, are available on VEED. There are no intricate timelines, layers, or intricacy since it is a simple program that runs in your web browser. Simple drag-and-drop functionality is all you need to convey your tales. You may modify your video using its features. Using the video track below, you may combine, divide, or cut your files. Visit our website to see all of our filters, stickers, add-ons, and other tools.
Any device, whether an iPhone or Android phone, a MacBook, a Windows or Linux computer, may use VEED’s online video editor. You have access to all the resources you need to make amazing videos using VEED’s online video editor. Our user-friendly interface is very simple to use and is contemporary and intuitive. The native video sizes on each of the publishing sites, including Facebook, YouTube, and Vimeo, may all be altered using Veed. Finally, click “Export” in the editor’s upper-right corner, and your video will render quickly. Share some!
Conclusion
Use this editing list to produce more compelling video mashups for YouTube and other social media platforms in order to expand your audience, cultivate real connections with them, and eventually increase conversion rates. Because they combine the complex capabilities of the expensive, professional video suites with the user-friendliness and cost that appeal to novices, these online makers are a popular among editors of all skill levels. Make an investment in one of these video editing tools and own it.
Free Download For Win 7 or later(64-bit)
Free Download For macOS 10.14 or later
Mastering DaVinci Resolve Scopes: A Comprehensive Guide
How do you set up DaVinci scopes? The internal color scopes in Resolve are flexible and customizable but can be confusing. The built-in DaVinci Resolve scope used to be limited only a few possibilities. However, the new 9-scope view offers a wider range of choice, making them a powerful tool for video editing. In this article, we will explore how to set up DaVinci scopes to achieve better color results.
Color Correction Editor An easy-to-use video editor helps you make color correction and color grading experience for videos!
Free Download Use Vectorscope in Filmora Try Color Correction

Part 1. Unlocking Color Precision: Exploring the Improved Scopes in DaVinci Resolve
The Blackmagic Design continues to improve the Resolve to make it better with every iteration. The new features improve colorist workflow in less powerful ways. The major improvements include a major facelift to the scope, allowing professions to do more with DaVinci resolve. Let’s have a look at some of these changes:
1. CIE 1931 Color Space
The inclusion of the CIE chromaticity diagram is perhaps the biggest change to DaVinci scopes. It displays the gamut of the project as set in the Color Management preferences. This makes it a useful alternate way of looking at the trace of an image to judge when the values are out of legal range. It also functions as an educational tool for learning about the range of color spaces.

2. Low Pass Filter
The wavefront and parade scopes now have a low pass filter, which reduces noise in the trace. This visually sharpens the display of the scopes, allowing easier detection of elements in the frame.

The image above shows the major improvements. The second set of waveforms has more defined lines. These have the low-pass filter activated, which makes the scopes easier to read.
3. High, Mid, and Low Views in Vectorscope
The vectorscope has been added to the ability to toggle the mid-tones, shadows, and highlights of the image independently. You can set the ranges with greater visualization control.

As seen in the picture above, the vectorscope controls allow you to select the low, mid, or high range of the image. You can also set the low and high ranges as desired.
4. Histograms Over Curves
Another great DaVinci scope is the histogram, which now appears outside of the scope panel. The new improvements have embedded the histogram inside the Curves tab on the bottom Palette. Click on the three dots in the Custom Curves tab. The pulldown menu that appears includes the Input or Output of the histogram. With these settings, you can find the element in the frame that helps you make adjustments quickly.

5. Scope Quality
The GPU-accelerated scopes engine allows the scopes to respond quickly. Users have the option to set the quality to high, medium, or low and the scopes will respond to a range of hardware systems. Depending on whether you are working on a stationary short or looking to see how the scopes react in real-time, you will be able to toggle the modes quickly and easily.

6. YRGB View in Histogram and Parade
The histogram and parade now come with the ability to view luminance together with the red, green, and blue channels. Users also have the option for YCbCr mode in the Parade.

7. Extents
These are weak elements in the signore, which are of lesser importance compared to the stronger elements. However, Danvici now allows them to be revealed for a full illustration of the information that lies in the image. Consequently, extents can be used to determine whether the data is being clipped beyond legal limits.

Part 2. Mastering Scopes in DaVinci Resolve: A Brief Guide
DaVinci scopes help you to analyze images as a basis for color correction. When used properly, scopes help in fixing white balance issues and checking saturation. They also allow you to get the correct exposure and check details like skin tone. To use scopes in DaVinci Resolve, go to the color page in the bottom right corner. You can also click on the small graph icon to view the scope. Here is how to use them:
1. Waveform
The Waveform represents the brightness or luminance of your image. In this video scope, the brightest parts are at the top while the darkest are at the bottom. The pixels are represented from left to right.

The Waveform scope on DaVinci Resolve is helpful when you are checking for clipping. This simply means finding out whether the image is too bright or too dark. The waveform also ensures that the image is properly exposed. The colorize feature of the waveform shows the colors of the image while the extent shows the darkest or lightest parts of the image.
2. Parade (RGB)
The RGB Parade comprises 3 waveforms that represent the luminance of red, green, and blue channels. The approach for reading the parade video scope is similar to that of the waveform. However, you now look at the balance between the colors correct the white balance, and check for a color cast.

The Parade works almost in a similar manner as the waveform. It displays the red, green, and blue channels of the image as separate waveforms. This way, you can easily identify and correct color casts while ensuring the colors in the image are balanced. The video scope provides useful information to decide which parts of the image need to be corrected or tweaked further.
3. Vectorscope
Vectorscope in DaVinci Resolve shows hue and saturation on a circular graph. Hues (the colors) are indicated outside of the color wheel for easier color correction. Saturation is indicated by how far the graph extends from the center.

By displaying the hue and saturation of the image as a vector, this video scope helps check skin tones. The scope specifically checks whether skin tones are shifted toward colors such as yellow, magenta, or green. It allows you to make sure that the colors in your subject skin tones are not too saturated or desaturated.
4. Histogram
Histogram is a video scope in DaVinci Resolve that displays the brightness or luminance of an image from left to right for the RGB channel. The video scope is based on the number of pixels that the colors red, blue, and green have in an image.

Using the histogram video scope on DaVinci Resolve allows you to check for overexposure or underexposure in your image. You can also ensure that the image has a good overall brightness range. The scope provides a graphical representation of tonal distribution in each channel. This way, you can evaluate the tone in detail for more accurate brightness and contrast adjustments.
Part 3: Edit Like a Pro: Mastering Video Scopes in Filmora
When working on video projects, Wondershare Filmora is a great editing software. It comes with unique features to color-correct your videos on the go as you edit it. From AI-powered features to royalty-free music, there is so much more you can do with Filmora.
Free Download For Win 7 or later(64-bit)
Free Download For macOS 10.14 or later
How to Use Video Scopes on Filmora
Using video scopes on Filmora is easy. The software offers four video scope options, allowing you to color-correct and grade your visual images properly. They include parade RGB, waveform, vectorscope, and histogram. When editing videos on Filmora, the video scopes can be accessed by clicking on the video scopes icon. The icon is found on the top right corner of the media player.

Filmora has made it easy for users to manage video scopes, and color-correct videos quickly. Users can change the layout options of the video scopes to match the editing needs of their project. You can also expand the button to show the name of the scope. As you manage the scopes, you can start with the Parade to make the necessary adjustments. Then move on to waveform, vectorscope, and histogram.

The uses of the video scope on Filmora are as follows:
- Parade – Cahnge the color channel from RBG to YRGB or YCbCr
- Vectorscope – Identify skin tone
- Waveform – Adjust color channels in a different way
- Histogram – Display the multiple color adjustments in a graphical way
Conclusion
Scopes are indeed valuable to video editors and colorists. While viewing images on a monitor can be subjective, scopes allow you to analyze and define them objectively. This gives you the power to color grade and correct to ensure that viewers look at the image with a clear representation. When working on or editing your videos, we recommend Wondershare Filmora. The video editing software comes with a wide range of features and video scopes that allow you to do everything on the same platform.
Free Download Use Vectorscope in Filmora Try Color Correction
Part 1. Unlocking Color Precision: Exploring the Improved Scopes in DaVinci Resolve
The Blackmagic Design continues to improve the Resolve to make it better with every iteration. The new features improve colorist workflow in less powerful ways. The major improvements include a major facelift to the scope, allowing professions to do more with DaVinci resolve. Let’s have a look at some of these changes:
1. CIE 1931 Color Space
The inclusion of the CIE chromaticity diagram is perhaps the biggest change to DaVinci scopes. It displays the gamut of the project as set in the Color Management preferences. This makes it a useful alternate way of looking at the trace of an image to judge when the values are out of legal range. It also functions as an educational tool for learning about the range of color spaces.
2. Low Pass Filter
The wavefront and parade scopes now have a low pass filter, which reduces noise in the trace. This visually sharpens the display of the scopes, allowing easier detection of elements in the frame.
The image above shows the major improvements. The second set of waveforms has more defined lines. These have the low-pass filter activated, which makes the scopes easier to read.
3. High, Mid, and Low Views in Vectorscope
The vectorscope has been added to the ability to toggle the mid-tones, shadows, and highlights of the image independently. You can set the ranges with greater visualization control.
As seen in the picture above, the vectorscope controls allow you to select the low, mid, or high range of the image. You can also set the low and high ranges as desired.
4. Histograms Over Curves
Another great DaVinci scope is the histogram, which now appears outside of the scope panel. The new improvements have embedded the histogram inside the Curves tab on the bottom Palette. Click on the three dots in the Custom Curves tab. The pulldown menu that appears includes the Input or Output of the histogram. With these settings, you can find the element in the frame that helps you make adjustments quickly.
5. Scope Quality
The GPU-accelerated scopes engine allows the scopes to respond quickly. Users have the option to set the quality to high, medium, or low and the scopes will respond to a range of hardware systems. Depending on whether you are working on a stationary short or looking to see how the scopes react in real-time, you will be able to toggle the modes quickly and easily.
6. YRGB View in Histogram and Parade
The histogram and parade now come with the ability to view luminance together with the red, green, and blue channels. Users also have the option for YCbCr mode in the Parade.
7. Extents
These are weak elements in the signore, which are of lesser importance compared to the stronger elements. However, Danvici now allows them to be revealed for a full illustration of the information that lies in the image. Consequently, extents can be used to determine whether the data is being clipped beyond legal limits.
Part 2. Mastering Scopes in DaVinci Resolve: A Brief Guide
DaVinci scopes help you to analyze images as a basis for color correction. When used properly, scopes help in fixing white balance issues and checking saturation. They also allow you to get the correct exposure and check details like skin tone. To use scopes in DaVinci Resolve, go to the color page in the bottom right corner. You can also click on the small graph icon to view the scope. Here is how to use them:
1. Waveform
The Waveform represents the brightness or luminance of your image. In this video scope, the brightest parts are at the top while the darkest are at the bottom. The pixels are represented from left to right.
The Waveform scope on DaVinci Resolve is helpful when you are checking for clipping. This simply means finding out whether the image is too bright or too dark. The waveform also ensures that the image is properly exposed. The colorize feature of the waveform shows the colors of the image while the extent shows the darkest or lightest parts of the image.
2. Parade (RGB)
The RGB Parade comprises 3 waveforms that represent the luminance of red, green, and blue channels. The approach for reading the parade video scope is similar to that of the waveform. However, you now look at the balance between the colors correct the white balance, and check for a color cast.
The Parade works almost in a similar manner as the waveform. It displays the red, green, and blue channels of the image as separate waveforms. This way, you can easily identify and correct color casts while ensuring the colors in the image are balanced. The video scope provides useful information to decide which parts of the image need to be corrected or tweaked further.
3. Vectorscope
Vectorscope in DaVinci Resolve shows hue and saturation on a circular graph. Hues (the colors) are indicated outside of the color wheel for easier color correction. Saturation is indicated by how far the graph extends from the center.
By displaying the hue and saturation of the image as a vector, this video scope helps check skin tones. The scope specifically checks whether skin tones are shifted toward colors such as yellow, magenta, or green. It allows you to make sure that the colors in your subject skin tones are not too saturated or desaturated.
4. Histogram
Histogram is a video scope in DaVinci Resolve that displays the brightness or luminance of an image from left to right for the RGB channel. The video scope is based on the number of pixels that the colors red, blue, and green have in an image.
Using the histogram video scope on DaVinci Resolve allows you to check for overexposure or underexposure in your image. You can also ensure that the image has a good overall brightness range. The scope provides a graphical representation of tonal distribution in each channel. This way, you can evaluate the tone in detail for more accurate brightness and contrast adjustments.
Part 3: Edit Like a Pro: Mastering Video Scopes in Filmora
When working on video projects, Wondershare Filmora is a great editing software. It comes with unique features to color-correct your videos on the go as you edit it. From AI-powered features to royalty-free music, there is so much more you can do with Filmora.
Free Download For Win 7 or later(64-bit)
Free Download For macOS 10.14 or later
How to Use Video Scopes on Filmora
Using video scopes on Filmora is easy. The software offers four video scope options, allowing you to color-correct and grade your visual images properly. They include parade RGB, waveform, vectorscope, and histogram. When editing videos on Filmora, the video scopes can be accessed by clicking on the video scopes icon. The icon is found on the top right corner of the media player.
Filmora has made it easy for users to manage video scopes, and color-correct videos quickly. Users can change the layout options of the video scopes to match the editing needs of their project. You can also expand the button to show the name of the scope. As you manage the scopes, you can start with the Parade to make the necessary adjustments. Then move on to waveform, vectorscope, and histogram.
The uses of the video scope on Filmora are as follows:
- Parade – Cahnge the color channel from RBG to YRGB or YCbCr
- Vectorscope – Identify skin tone
- Waveform – Adjust color channels in a different way
- Histogram – Display the multiple color adjustments in a graphical way
Conclusion
Scopes are indeed valuable to video editors and colorists. While viewing images on a monitor can be subjective, scopes allow you to analyze and define them objectively. This gives you the power to color grade and correct to ensure that viewers look at the image with a clear representation. When working on or editing your videos, we recommend Wondershare Filmora. The video editing software comes with a wide range of features and video scopes that allow you to do everything on the same platform.
How Can Filmora Create an Audio Visualizer Project for a Song? All Steps, From Launching the App to Editing the Text, Are Detailed Here
While editing videos, the ability to edit the audio in the background is one of the key ingredients of successful video making. For this purpose, the Audio Visualizer as a resource on Wondershare Filmora is a high-quality option. With this feature, users can typically add audio effects to their video soundtrack with AI technology, aligning the sound properly with the video.
It is possible to choose out of 25 different effects for audio visualization on this software for customized audio effects. You can also drag visual-based effects to the file, which the software mechanism will automatically configure with the sound cohesively.
While this is useful as a functionality, users naturally have concerns about how to handle the Audio Visualization effect to work on video projects and podcasts. Let’s learn the main steps for this process in this post, explained stage by stage in detail.
Launch the App
The first step is downloading and installing the software into your device. For this, go to the official website of Wondershare Filmora 11 and click on the Free Download button at the top of the screen. Depending on your device’s operating system, i.e., macOS or Windows, the relevant software installer will download automatically into your device.
Free Download For Win 7 or later(64-bit)
Free Download For macOS 10.14 or later

You must click on the installed APK file and double-click the Agree button for the process to continue. After you carry out the instructions that appear, the software will begin installing into your device. Wait for the software to install completely, and then the main homepage will open automatically on your screen.

Make sure that the software is in the 11.3.0 or higher version. Because the feature for audio visualization will not work on any of the older software versions. So, if you have the Filmora9 software, upgrade it to the Wondershare Filmora 11.

Add the music file
Next, you should click on the “Create New Project” button from the homepage. Then, tap on the “Click here to import media” section when it opens and add the file to the software window from your internal storage.
You can also click on the My Media tab and choose Project Media. Go to All Templates and download the audio track you will make changes to. Then, drag the audio file you have imported down to the editor timeline. Add a stock image from your Stock Media section.

You can also add another pre-made background cover image that you created beforehand from the device, if available. Drag that to the editor timeline as well above the song clip you moved there and tap on the slider. Pull the slider to fit the full size of the audio length for the background alignment. Right-click on the file, and the editing window will open for basic video editing. Make changes like adjusting the Scale, Position, Opacity, etc. Press OK.

Add the Audio Visualizer Effects
Next, you should go to the Effects tab. When this window opens, you should tap on the Filmstock tab beside the Default one for advanced features like Audio Visualizer. Click on it next.
When you tap on it, you see a list of different visualizer effects in a collection. Please choose one of them that you prefer and download it.

After that, you must drag the visualizer effect selected from the collection to the editing timeline above the background image you added previously. Again, use the slider on the clip to drag it forward and fit the size of both the music clip and the image.
Edit the Audio Visualiser
The next step of the process that you must focus on is editing the audio visualizer properly for the song and its background cover. For this, you must double-click on the audio visualizer effect you dropped in the timeline- this will open the editing window for the clip.
Here, make some changes to the quality of the audio visualizer as you prefer. Adjustment options available here include position, scale, Opacity, and Intensity. Drag the sliders for them to adjust the visualizer effect as needed. Change the color of the visualizer as well from here, and then use the slider on the visualizer effect on the timeline to see the effect change. Press the OK button after you are done.

Add the Portrait Image
Go to the My Media tab next to get the Portrait image into the project. If you previously imported the image to Filmora, drag it to the timeline. Or, you can add it later by clicking on the Import Media button and adding the Portrait photo from your device.
When it is available on the media window, hold, drag, and then drop it above the visualizer. Like in the case of the previous parts, use the slider end of this image in the timeline to drag it and fit the size of the other clips.

Next, the editing window for that will open. Make changes to the size and placement of the portrait photo, with elements like scale, position, rotation, opacity, etc. Move the photo in the preview window to the section where you want the image to appear. Then, tap the OK button under the window.

Add the overlapping visualizer effect
After adding the portrait, you can add another audio visualizer effect to the project. For this, again, tap on the Effects tab and choose the Filmstock option. Select Audio Visualizer and click on the circular visualizer effect from the list. Repeat the dragging and dropping step for this effect as well.
On the timeline, you have to adjust the visualizer effect over the portrait photo to match the length of the previous clips. Then, please tap on the portrait photo in the timeline again and adjust its appearance, like reducing the image size to fit the second visualizer effect size.

After fitting the image within the visualizer, click on the Mask tab in the same editor window. Choose the circular shape preset and scroll down to find the adjustment parameters like position, scaling, horizontal/vertical lining, etc. Keep making the changes per your needs, like fitting the image to the same size as the circular visualizer.
Move it to place the image inside the visualizer. After you are done, press the OK button.
Add a Title
An attractive title is the next element you should add to the project. You have to click on the Titles tab from the top toolbar. Choose the titles option from the drop-down list and move it to the timeline below. As you did with the previous elements you added to the timeline, move the slider onward and fit it with the previous one’s length.
Next, you should click on the Title in the timeline you added for the Title editing window to open. Here, you have to tap on the Advanced button.

In the next window that opens, tap on the Customize tab and add the song name in the title area. Make other font-related changes as you see fit, like the font size, font style, indentation, color, etc. Tap on the add text icon in this window to get another text field in which you can add the artist’s name. Make sure to reduce the size of it to lower than that of the main song title text.

Following that, you can tap on the shape icon to add a shape to the project by adding the name of the streaming service provider, like Apple Music or Spotify. Choose the Rectangle option, for example, and move it to the side of the screen. Click on the shape editing option and adjust the border size of it to three.
If you want to create a rounded-off edge look to the rectangle shape, tap on the small yellow icon that you will see at its edge. Move it slightly to adjust. Then, type the information into the shape text field, like “Listen on Spotify,” and make font and shape size adjustments. After you have completed this step, press the OK button below.
Check and Export
After making the changes, you will return to the main editor timeline. Press the play button under the preview window to see how the final project looks, and tap on the Export button to download it offline. Make changes to the exporting file after clicking on the Local tab and choosing the file format you will download it as. Then, press Export again.

Conclusion
Indeed, Filmora is a high-quality editing software for video editors with effects and sound clips to optimize the project. Advanced functions like the Audio Visualizer system are available for high-quality project optimization since it instantly handles most of the heavy editing load.
You should follow the sequence mentioned accurately to make the right effects at the end. Plus, more editing features are available, so creating an interesting video project or podcast that attracts audiences is easy. So go ahead and give it a try first.
Free Download For macOS 10.14 or later
You must click on the installed APK file and double-click the Agree button for the process to continue. After you carry out the instructions that appear, the software will begin installing into your device. Wait for the software to install completely, and then the main homepage will open automatically on your screen.
Make sure that the software is in the 11.3.0 or higher version. Because the feature for audio visualization will not work on any of the older software versions. So, if you have the Filmora9 software, upgrade it to the Wondershare Filmora 11.
Add the music file
Next, you should click on the “Create New Project” button from the homepage. Then, tap on the “Click here to import media” section when it opens and add the file to the software window from your internal storage.
You can also click on the My Media tab and choose Project Media. Go to All Templates and download the audio track you will make changes to. Then, drag the audio file you have imported down to the editor timeline. Add a stock image from your Stock Media section.
You can also add another pre-made background cover image that you created beforehand from the device, if available. Drag that to the editor timeline as well above the song clip you moved there and tap on the slider. Pull the slider to fit the full size of the audio length for the background alignment. Right-click on the file, and the editing window will open for basic video editing. Make changes like adjusting the Scale, Position, Opacity, etc. Press OK.
Add the Audio Visualizer Effects
Next, you should go to the Effects tab. When this window opens, you should tap on the Filmstock tab beside the Default one for advanced features like Audio Visualizer. Click on it next.
When you tap on it, you see a list of different visualizer effects in a collection. Please choose one of them that you prefer and download it.
After that, you must drag the visualizer effect selected from the collection to the editing timeline above the background image you added previously. Again, use the slider on the clip to drag it forward and fit the size of both the music clip and the image.
Edit the Audio Visualiser
The next step of the process that you must focus on is editing the audio visualizer properly for the song and its background cover. For this, you must double-click on the audio visualizer effect you dropped in the timeline- this will open the editing window for the clip.
Here, make some changes to the quality of the audio visualizer as you prefer. Adjustment options available here include position, scale, Opacity, and Intensity. Drag the sliders for them to adjust the visualizer effect as needed. Change the color of the visualizer as well from here, and then use the slider on the visualizer effect on the timeline to see the effect change. Press the OK button after you are done.
Add the Portrait Image
Go to the My Media tab next to get the Portrait image into the project. If you previously imported the image to Filmora, drag it to the timeline. Or, you can add it later by clicking on the Import Media button and adding the Portrait photo from your device.
When it is available on the media window, hold, drag, and then drop it above the visualizer. Like in the case of the previous parts, use the slider end of this image in the timeline to drag it and fit the size of the other clips.
Next, the editing window for that will open. Make changes to the size and placement of the portrait photo, with elements like scale, position, rotation, opacity, etc. Move the photo in the preview window to the section where you want the image to appear. Then, tap the OK button under the window.
Add the overlapping visualizer effect
After adding the portrait, you can add another audio visualizer effect to the project. For this, again, tap on the Effects tab and choose the Filmstock option. Select Audio Visualizer and click on the circular visualizer effect from the list. Repeat the dragging and dropping step for this effect as well.
On the timeline, you have to adjust the visualizer effect over the portrait photo to match the length of the previous clips. Then, please tap on the portrait photo in the timeline again and adjust its appearance, like reducing the image size to fit the second visualizer effect size.
After fitting the image within the visualizer, click on the Mask tab in the same editor window. Choose the circular shape preset and scroll down to find the adjustment parameters like position, scaling, horizontal/vertical lining, etc. Keep making the changes per your needs, like fitting the image to the same size as the circular visualizer.
Move it to place the image inside the visualizer. After you are done, press the OK button.
Add a Title
An attractive title is the next element you should add to the project. You have to click on the Titles tab from the top toolbar. Choose the titles option from the drop-down list and move it to the timeline below. As you did with the previous elements you added to the timeline, move the slider onward and fit it with the previous one’s length.
Next, you should click on the Title in the timeline you added for the Title editing window to open. Here, you have to tap on the Advanced button.
In the next window that opens, tap on the Customize tab and add the song name in the title area. Make other font-related changes as you see fit, like the font size, font style, indentation, color, etc. Tap on the add text icon in this window to get another text field in which you can add the artist’s name. Make sure to reduce the size of it to lower than that of the main song title text.
Following that, you can tap on the shape icon to add a shape to the project by adding the name of the streaming service provider, like Apple Music or Spotify. Choose the Rectangle option, for example, and move it to the side of the screen. Click on the shape editing option and adjust the border size of it to three.
If you want to create a rounded-off edge look to the rectangle shape, tap on the small yellow icon that you will see at its edge. Move it slightly to adjust. Then, type the information into the shape text field, like “Listen on Spotify,” and make font and shape size adjustments. After you have completed this step, press the OK button below.
Check and Export
After making the changes, you will return to the main editor timeline. Press the play button under the preview window to see how the final project looks, and tap on the Export button to download it offline. Make changes to the exporting file after clicking on the Local tab and choosing the file format you will download it as. Then, press Export again.
Conclusion
Indeed, Filmora is a high-quality editing software for video editors with effects and sound clips to optimize the project. Advanced functions like the Audio Visualizer system are available for high-quality project optimization since it instantly handles most of the heavy editing load.
You should follow the sequence mentioned accurately to make the right effects at the end. Plus, more editing features are available, so creating an interesting video project or podcast that attracts audiences is easy. So go ahead and give it a try first.
Some Facts About GIF Background You Didn’t Know
Some Facts About GIF Background You Didn’t Know
An easy yet powerful editor
Numerous effects to choose from
Detailed tutorials provided by the official channel
Once you start using GIFs in your everyday conversations, there’s no going back. GIFs make the conversation more immersive and enjoyable and add a sense of emotion that is not possible with ordinary text. You probably loved some gifs more than others, or there were moments when you wanted to turn them into gifs and wished you could use them as a gif background on your device or presentation but couldn’t figure out how to do it. But, now you don’t have to bury your wish any longer. During this article, you will learn everything there is to know about all the different ways you can use gifs as your background and many more. In addition, you will learn how to use them as your background and how to create them.
In this article
01 [How to Use a GIF as Your Desktop Background on Windows](#Part 1)
02 [How to Make GIF Background on Windows/Mac/Android/iPhone](#Part 2)
03 [How to Make GIF Powerpoint Background](#Part 3)
04 [How to Make GIF Without Background - Free & Efficiently?](#Part 4)
Part 1 How to Use a GIF as Your Desktop Background on Windows?
Although Windows doesn’t have native support to keep animated gif backgrounds, you can use third-party services to keep gifs as background images.
Using Plastuer or BioniX wallpaper changer as a 3rd party software is the best way to use animated gifs for your desktop.
As a starting point, we’ll cover plastuer, which uses WebGL and chromium-browser to make gifs as your background.

The software includes selecting different screens where you want the wallpaper to appear, making it possible to apply it to different screens at once.
To select the gif you want:
● You can paste the URL of the gif you want to use.
● You can also use the “create playlist” field to add multiple gifs as your background.
● You can select a file from your device using the “select file” option.
● Or you can choose from hundreds of gifs present in the plastuer library.
● You can disable the wallpaper whenever you wish by clicking on the “disable wallpaper” option.

How to use the bioniX wallpaper changer?
BioniX comes with several options that one may need to apply to their Windows device’s background, and animated gif backgrounds are one of them.

You will need to download the software and once it is installed, launch it on your PC to apply cool gif backgrounds. To choose files from the device itself, you will have to use the shortcut command “CTRL+F”, or you can also choose to insert the URL of the gif you want to use as your background.
Once your image gets uploaded into the software, double click on it to set it as your windows wallpaper. You can also choose a launch of gifs, create a playlist, and select the timer to change wallpaper regularly.
Part 2 How to Make GIF Background on Windows/Mac/Android/iPhone?
So, how can you create moving background gifs on your different devices like Windows/Mac/Android/iPhone?
In case you thought that was hard, you were entirely mistaken. Now, you can easily create or customize cool background gifs for your computer, tablet, phone, or other devices that you own. The best part is that you don’t need any technical skills to use different tools.
You can create gifs with the help of many tools such as Giphy and share them with your family, friends, and coworkers.
01Giphy
Giphy is a one-stop destination for all of your gifs needs. You can create or choose from thousands of gifs present in their library. Furthermore, one can make personalized gifs with all the tools they provide and add custom stickers, texts or different filters. There is also a live wallpaper section present in giphy, from where you can download hundreds of cool gif backgrounds and make your old machine look fabulous again.

02Pinterest
It’s no secret that Pinterest has a lot of great images, but did you know you can also find gif backgrounds here in various genres that you like and then download them?
It’s straightforward to use, and you can also find anime gif backgrounds on Pinterest if you are an anime fan.

03Tenor
This site offers online gif backgrounds. One may choose from a wide selection of wallpapers and backgrounds available on this site. Online Library is filled up with all sorts of aesthetic gif backgrounds and other types of background that people like.
A few more tools fit the need, but most of them are not reliable, and the tools mentioned above are currently the best ones available for you to use.

Part 3 How to Make a GIF Powerpoint Background?
If you make PowerPoint presentations, you can use various tools to modify your presentation. But did you know that you can also include an aesthetic gif background as part of your presentation?
The steps to creating a gif PowerPoint background are very simple, and below you will find all the steps you need to follow:
● You’ll need to choose the PPTx file that you want to use the GIF background on to get started. Then you can choose the specific slide.
● Navigate to the “design” tab, then to the “background” section. You will see a “background styles” option where you will have to select “format background” to complete the process.
● Select “fill” in the left-hand side panel of the appeared window. Now, select “picture or texture fill” and choose the “file” button, which will lead to another window.
● In the “look in” menu, find the folder or file where the required gif is present. Go on to select the “ok” option. You can either select “close” to apply the gif to a particular slide or “apply to all” to use the gif background in the whole presentation.
Part 4 How to Make GIF Without Background - Free & Efficiently?
One may also look for transparent gif maker websites that will help them make gifs without background and use them on different devices they own.
Here are a few websites that are best for this job; they won’t only help you make transparent gifs but also edit various features like delay time, animation speed etc.
01Using EzGif
Using EzGif is probably one of the best options available in the market at the moment. You can go to their website and create a transparent gif background of high resolution.
Doing that is easy; you need to upload PNG type images that don’t have a background or combine transparent background to form a gif. You can choose up to 2000 images with a maximum file size of 100 MB for all images combined.
To create a gif, go on their site, then to the “gif maker” section to upload the images, and click on “make a gif” to make a transparent gif from the selected images. Once the gif is created, you can use it as a moving gif background and share it with friends or family.
02Use animizer.net to create a gif without background
It is effortless to use software to create transparent gifs by uploading multiple transparent PNG images and combining them to form a gif.
You can use unlimited images for your gif and animated gif background. It also lets you adjust various settings for your transparent gifs like loops, animation speed and much more.
03Use filmora for making gifs without background easily
Wondershare Filmora Video Editor is an all in one tool that will help you create all sorts of gifs, including transparent gifs. You can take advantage of their easy to use tools that are fir for people who have no technical skills at all.
You can easily upload the images and remove their background in the software itself and later use it in the gif you are willing to create.

Wondershare Filmora - Best Video Editor for Mac/Windows
5,481,435 people have downloaded it.
Build unique custom animations without breaking a sweat.
Focus on creating epic stories and leave the details to Filmora’s auto features.
Start a creative adventure with drag & drop effects and endless possibilities.
Filmora simplifies advanced features to save you time and effort.
Filmora cuts out repetition so you can move on to your next creative breakthrough.
This is probably one of the best options if you are looking for an all in one tool for all your needs.
● Ending Thoughts →
● The techniques that we have talked about in this guide may help you discover things about gif backgrounds you have not known before.
● They are incredible and can help you utilize gifs in ways you hadn’t even considered.
● Create a moving gif background and apply it to any device easily.
● Of course, a simple background won’t provide the same type of effect as a moving gif. With this guide, you’ll learn about every tool that you may use and how to apply or create a cool gif background on your own.
Once you start using GIFs in your everyday conversations, there’s no going back. GIFs make the conversation more immersive and enjoyable and add a sense of emotion that is not possible with ordinary text. You probably loved some gifs more than others, or there were moments when you wanted to turn them into gifs and wished you could use them as a gif background on your device or presentation but couldn’t figure out how to do it. But, now you don’t have to bury your wish any longer. During this article, you will learn everything there is to know about all the different ways you can use gifs as your background and many more. In addition, you will learn how to use them as your background and how to create them.
In this article
01 [How to Use a GIF as Your Desktop Background on Windows](#Part 1)
02 [How to Make GIF Background on Windows/Mac/Android/iPhone](#Part 2)
03 [How to Make GIF Powerpoint Background](#Part 3)
04 [How to Make GIF Without Background - Free & Efficiently?](#Part 4)
Part 1 How to Use a GIF as Your Desktop Background on Windows?
Although Windows doesn’t have native support to keep animated gif backgrounds, you can use third-party services to keep gifs as background images.
Using Plastuer or BioniX wallpaper changer as a 3rd party software is the best way to use animated gifs for your desktop.
As a starting point, we’ll cover plastuer, which uses WebGL and chromium-browser to make gifs as your background.
The software includes selecting different screens where you want the wallpaper to appear, making it possible to apply it to different screens at once.
To select the gif you want:
● You can paste the URL of the gif you want to use.
● You can also use the “create playlist” field to add multiple gifs as your background.
● You can select a file from your device using the “select file” option.
● Or you can choose from hundreds of gifs present in the plastuer library.
● You can disable the wallpaper whenever you wish by clicking on the “disable wallpaper” option.
How to use the bioniX wallpaper changer?
BioniX comes with several options that one may need to apply to their Windows device’s background, and animated gif backgrounds are one of them.
You will need to download the software and once it is installed, launch it on your PC to apply cool gif backgrounds. To choose files from the device itself, you will have to use the shortcut command “CTRL+F”, or you can also choose to insert the URL of the gif you want to use as your background.
Once your image gets uploaded into the software, double click on it to set it as your windows wallpaper. You can also choose a launch of gifs, create a playlist, and select the timer to change wallpaper regularly.
Part 2 How to Make GIF Background on Windows/Mac/Android/iPhone?
So, how can you create moving background gifs on your different devices like Windows/Mac/Android/iPhone?
In case you thought that was hard, you were entirely mistaken. Now, you can easily create or customize cool background gifs for your computer, tablet, phone, or other devices that you own. The best part is that you don’t need any technical skills to use different tools.
You can create gifs with the help of many tools such as Giphy and share them with your family, friends, and coworkers.
01Giphy
Giphy is a one-stop destination for all of your gifs needs. You can create or choose from thousands of gifs present in their library. Furthermore, one can make personalized gifs with all the tools they provide and add custom stickers, texts or different filters. There is also a live wallpaper section present in giphy, from where you can download hundreds of cool gif backgrounds and make your old machine look fabulous again.
02Pinterest
It’s no secret that Pinterest has a lot of great images, but did you know you can also find gif backgrounds here in various genres that you like and then download them?
It’s straightforward to use, and you can also find anime gif backgrounds on Pinterest if you are an anime fan.
03Tenor
This site offers online gif backgrounds. One may choose from a wide selection of wallpapers and backgrounds available on this site. Online Library is filled up with all sorts of aesthetic gif backgrounds and other types of background that people like.
A few more tools fit the need, but most of them are not reliable, and the tools mentioned above are currently the best ones available for you to use.
Part 3 How to Make a GIF Powerpoint Background?
If you make PowerPoint presentations, you can use various tools to modify your presentation. But did you know that you can also include an aesthetic gif background as part of your presentation?
The steps to creating a gif PowerPoint background are very simple, and below you will find all the steps you need to follow:
● You’ll need to choose the PPTx file that you want to use the GIF background on to get started. Then you can choose the specific slide.
● Navigate to the “design” tab, then to the “background” section. You will see a “background styles” option where you will have to select “format background” to complete the process.
● Select “fill” in the left-hand side panel of the appeared window. Now, select “picture or texture fill” and choose the “file” button, which will lead to another window.
● In the “look in” menu, find the folder or file where the required gif is present. Go on to select the “ok” option. You can either select “close” to apply the gif to a particular slide or “apply to all” to use the gif background in the whole presentation.
Part 4 How to Make GIF Without Background - Free & Efficiently?
One may also look for transparent gif maker websites that will help them make gifs without background and use them on different devices they own.
Here are a few websites that are best for this job; they won’t only help you make transparent gifs but also edit various features like delay time, animation speed etc.
01Using EzGif
Using EzGif is probably one of the best options available in the market at the moment. You can go to their website and create a transparent gif background of high resolution.
Doing that is easy; you need to upload PNG type images that don’t have a background or combine transparent background to form a gif. You can choose up to 2000 images with a maximum file size of 100 MB for all images combined.
To create a gif, go on their site, then to the “gif maker” section to upload the images, and click on “make a gif” to make a transparent gif from the selected images. Once the gif is created, you can use it as a moving gif background and share it with friends or family.
02Use animizer.net to create a gif without background
It is effortless to use software to create transparent gifs by uploading multiple transparent PNG images and combining them to form a gif.
You can use unlimited images for your gif and animated gif background. It also lets you adjust various settings for your transparent gifs like loops, animation speed and much more.
03Use filmora for making gifs without background easily
Wondershare Filmora Video Editor is an all in one tool that will help you create all sorts of gifs, including transparent gifs. You can take advantage of their easy to use tools that are fir for people who have no technical skills at all.
You can easily upload the images and remove their background in the software itself and later use it in the gif you are willing to create.
Wondershare Filmora - Best Video Editor for Mac/Windows
5,481,435 people have downloaded it.
Build unique custom animations without breaking a sweat.
Focus on creating epic stories and leave the details to Filmora’s auto features.
Start a creative adventure with drag & drop effects and endless possibilities.
Filmora simplifies advanced features to save you time and effort.
Filmora cuts out repetition so you can move on to your next creative breakthrough.
This is probably one of the best options if you are looking for an all in one tool for all your needs.
● Ending Thoughts →
● The techniques that we have talked about in this guide may help you discover things about gif backgrounds you have not known before.
● They are incredible and can help you utilize gifs in ways you hadn’t even considered.
● Create a moving gif background and apply it to any device easily.
● Of course, a simple background won’t provide the same type of effect as a moving gif. With this guide, you’ll learn about every tool that you may use and how to apply or create a cool gif background on your own.
Also read:
- How to Create Vintage Film Effect 1990S for 2024
- Guide Adopting Lumetri Color Presets in Effective Color Grading for 2024
- New 2024 Approved 2 Easy Methods | How To Zoom In On TikTok Videos?
- Updated 2024 Approved Create a Kickass COD Warzone Thumbnail for Free
- Updated Want to Immediately Know All About Discord GIF for 2024
- 2024 Approved Do You Want to Remove Unnecessary Sound From Your Video? We Are Providing You the List of the Best Software to Remove Audio From Video for Mac and Apple
- New Are You Tired of Long Video Edits? Do You Speed up the Video in Canva without a Hassle? Well, Stick with Us as We Guide You Through the Process Step by Step
- Updated How to Easily Convert SRT to VTT
- Zoom In and Out on Snapchat
- New Before & After Editing Trick | Wondershare Filmora Tutorial for 2024
- Updated 12 Top Marketing Slideshow Templates
- Updated How to Make Coin Magic With Filmora
- Updated In 2024, Detailed Guide to Crop Videos in Sony Vegas Pro
- Updated In 2024, How to Add Text Effects in Adobe Premiere Pro?
- New In 2024, Best Voice Changers for WhatsApp Free Included
- In 2024, The Benefits Of Using Video For Social Media Marketing
- New 2024 Approved How to Add Photos to Tik Tok Video
- In 2024, Complete Guide to Converting GIF to SVG With Ease
- Updated Create Stunning Videos Like a Pro with Filmora. Learn About Its Benefits and some Amazing Video and Audio Editing Features Such as Split Screens, Keyframing, Etc
- Here We Are Going to Show You the Best Effects to Appear on Camera Made with Filmora
- In 2024, Level Up Videos By Applying Keyframe Like A Pro
- New 2024 Approved Separate Audio From Video in DaVinci Resolve Step by Step
- Through Speed Ramping, Create a Smooth Transition in Slow-Motion Videos. Follow This Guide and Learn About Premiere Pro Slow Motion and a Better Alternative for 2024
- Updated How to Add Expression in After Effects
- New In 2024, Explore the List of the Top Six Online Video Speed Controllers for Chrome, Safari, and Firefox
- New In 2024, Add Emoji to Linkedin Post – 5 Tips You Need to Know
- In 2024, How to Put a Filter on a Video in iMovie
- How to Create Loop Videos with Filmora for 2024
- New Best 20 Slideshow Makers for Win/Mac/Online Review
- New 2024 Approved The Ultimate Guide to GIF for Discord Profile
- Updated In 2024, How to Become a Youtuber
- Updated How to Create the Stranger Things Upside Down Effect
- In 2024, How to Change Aspect Ratio of Video?
- New Split Audio From a Video in Adobe Premiere Pro Step by Step
- Updated Top 10 Old Film Overlays to Make Your Videos Look Vintage for 2024
- In 2024, You May Want to Change the Speed of Certain Portions of Your Video. This Article Enlightens You on How to Splice and Speed up the Video in Simple Ways
- New VN Editor A Prominent Option for Adding Luts for Video Editing for 2024
- In 2024, Methods on How to Speed Up Video on Splice
- Want to Create an Impressive Video Collage but Clueless About the Best Tools? No Worries as We Are Here and Will Help You to Learn About the Best Video Collage Maker PC Tools for 2024
- In 2024, Mastering Lock Screen Settings How to Enable and Disable on Samsung Galaxy F34 5G
- In 2024, Pokémon Go Cooldown Chart On Honor X50 GT | Dr.fone
- Will iSpoofer update On Oppo Find X7 | Dr.fone
- In 2024, 3 Ways to Track Realme GT Neo 5 without Them Knowing | Dr.fone
- In 2024, Full Guide to Fix iToolab AnyGO Not Working On Vivo T2 5G | Dr.fone
- Easy steps to recover deleted pictures from Google Pixel 7a.
- Complete Tutorial to Use GPS Joystick to Fake GPS Location On Motorola Edge 40 | Dr.fone
- Simple ways to get lost files back from Samsung Galaxy S24
- Can Life360 Track You When Your Xiaomi 14 Ultra is off? | Dr.fone
- How To Get Out of Recovery on Apple iPhone 14 Plus? | Dr.fone
- Play Store Stuck on Downloading Of Tecno Spark 20? 7 Ways to Resolve | Dr.fone
- In 2024, How and Where to Find a Shiny Stone Pokémon For Honor Magic 6? | Dr.fone
- In 2024, Overview of the Best Infinix Smart 8 HD Screen Mirroring App | Dr.fone
- In 2024, How To Change Your Apple ID Password On your iPhone 15 | Dr.fone
- Will Pokémon Go Ban the Account if You Use PGSharp On OnePlus 11R | Dr.fone
- How to Remove the Activation Lock On your iPad and iPhone 15 without Apple Account
- List of Pokémon Go Joysticks On Samsung Galaxy Z Fold 5 | Dr.fone
- 4 Solutions to Fix Unfortunately Your App Has Stopped Error on Vivo Y77t | Dr.fone
- In 2024, The Most Useful Tips for Pokemon Go Ultra League On Apple iPhone XR | Dr.fone
- Title: How to Windows Online Movie Maker Complete Guide
- Author: Chloe
- Created at : 2024-05-20 03:37:29
- Updated at : 2024-05-21 03:37:29
- Link: https://ai-editing-video.techidaily.com/how-to-windows-online-movie-maker-complete-guide/
- License: This work is licensed under CC BY-NC-SA 4.0.
