
:max_bytes(150000):strip_icc():format(webp)/GettyImages-971165690-1e0af1d9299f4fdba1225c2d20c739f2.jpg)
If You Wish to Edit FLV Videos without Any Problems, You Should Utilize a Multipurpose Video Editor that Supports the FLV File Format
If You Wish to Edit FLV Videos without Any Problems, You Should Utilize a Multipurpose Video Editor that Supports the FLV File Format
FLV is a common container format for transferring digital video and audio information over the Internet. A.flv file is a flash video that may be seen on your computer with Adobe Flash Player, Adobe Air, or some third-party Adobe Flash plugins.
FLV has become the standard video format for web-based streaming video service providers such as Hulu and VEVO due to its superior functionality and tiny size. It’s also the default format for Quicktime on Mac systems.
If you wish to edit FLV videos without any problems, you should utilize a multipurpose video editor that supports the FLV file format.
Best FLV Editor to Edit FlV Video on Windows and Mac - Filmroa Video Editor
Filmora Video Editor is a professional FLV video editing application. This software allows you to edit 4K video files, share completed films directly on social media platforms, and add subtitles and audio files.
You may mix multiple films and enhance your footage with numerous transitions and other effects using this FLV video editing software. Furthermore, the free Filmora application is ideal for adding audio files or video clips from the wide library and uploading your soundtrack.
For Win 7 or later (64-bit)
For macOS 10.14 or later
Therefore, you can use the following steps to edit FLV video on Windows and Mac:
Step 1: Import file:

Step 2: Edit the FLV file:
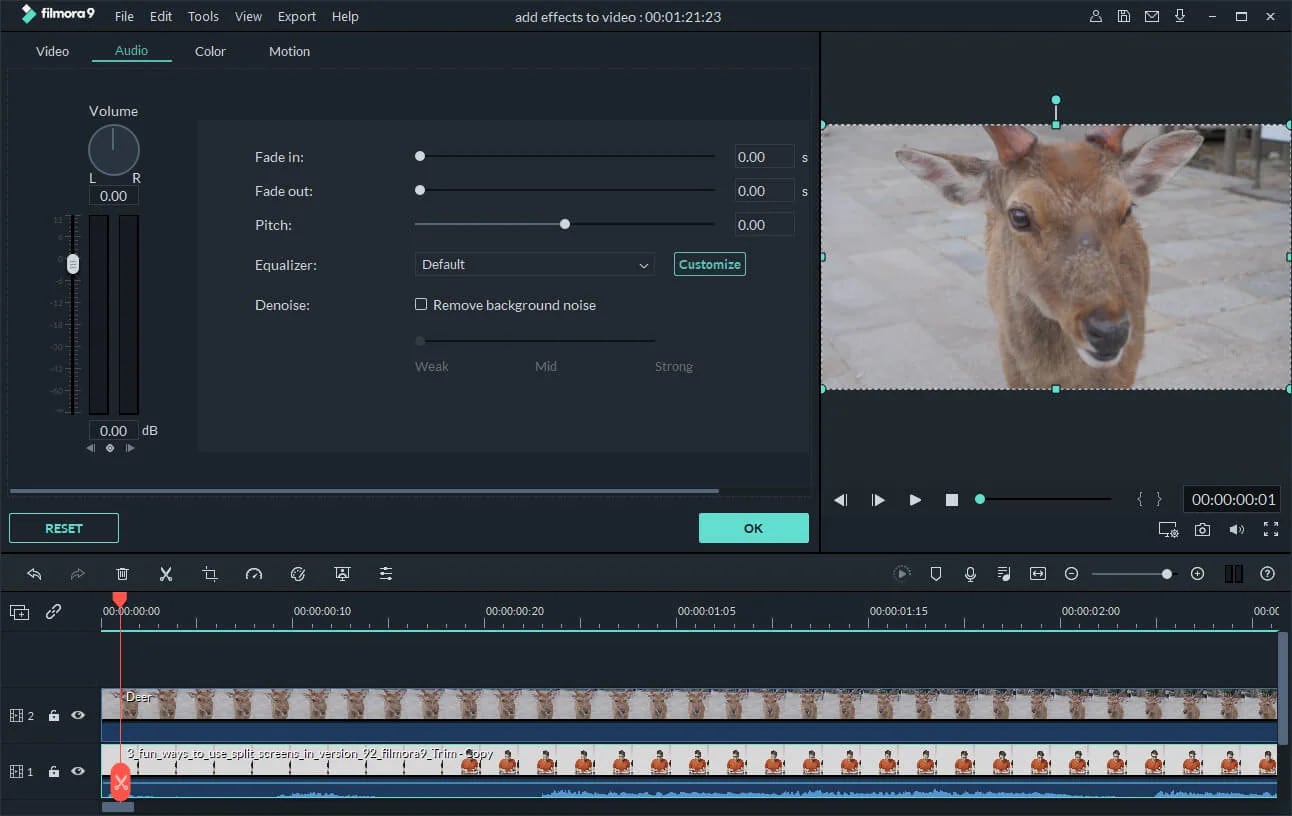
Acquire the perfect tool in your palm for anything you want to do, such as clipping, cropping, rotating, and more.
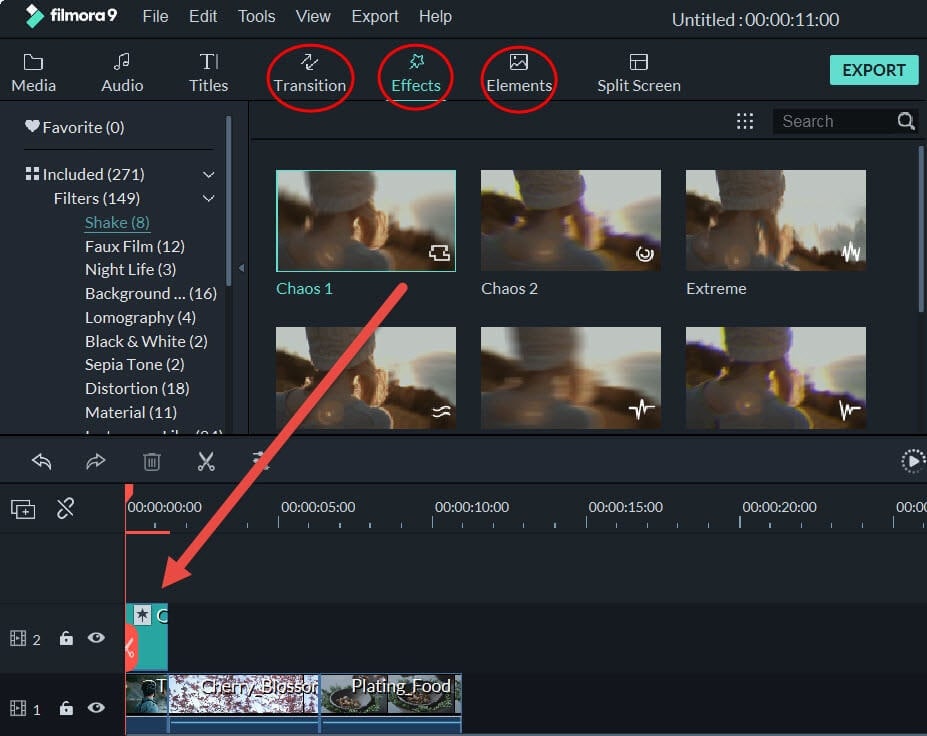
Furthermore, all editing capabilities in the toolbar allow drag-and-drop, making it even easier to touch up your films quickly. Consider the following scenario:
- Drag and drop a transition into the video/photo, or right-click it and select “Apply to All.”
- Please drag & drop a title template to the position where you want it to appear, then adjust it.
- To use the effects, select one from the 50+ available video effects, select it, and apply it to your photos/videos instantaneously.
Step 3: Save or Export the file:

When you’re done, export your modified MP4 files to Windows/Mac and quickly share them on YouTube, with the option of sending a message to Facebook and Twitter. When you click Create in the program window’s middle right corner, you’ll be taken to the Output window below.
Alternative Way to Edit FlV Video on Windows
1. VSDC
VSDC is a free video editor along with a lot of advanced features. Cut, combine, trim, crop, and other editing capabilities are available to help you polish your FLV films.
Although it may not look logical, learning the editing capabilities hidden within modular boxes is simple. One noteworthy aspect of VSDC is its ability to produce good visual effects using many trendy video effects, transitions, and filters.
Furthermore, strong chroma keys, color correction, object modification, and other editing tools can be utilized to edit FLV videos. It not only creates excellent FLV videos, but it also supports a wide range of media conversion, allowing you to convert FLV files to various formats and export them without a watermark.
Therefore, follow the below mentioned steps to edit FLV video using VSDC:
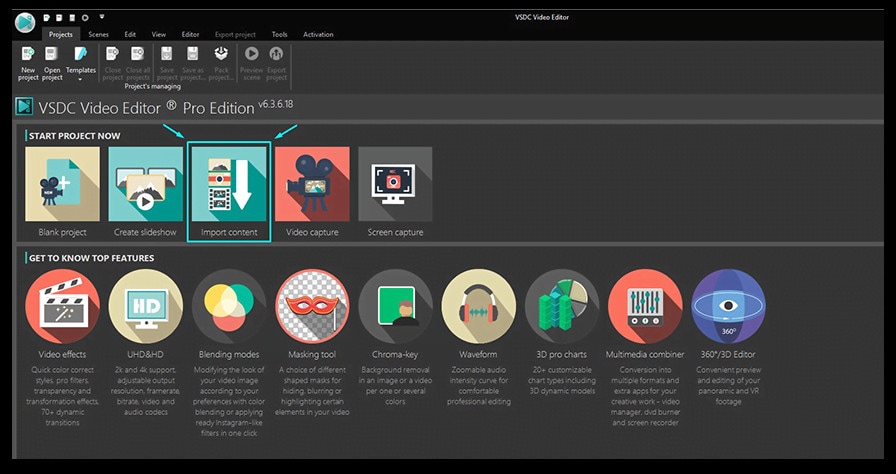
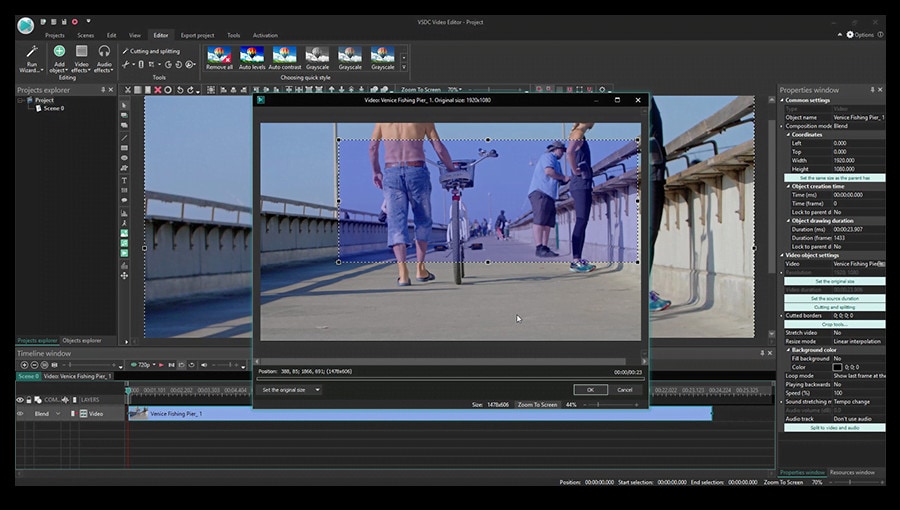
Step 1: Install the software on the Windows. Open the application and import the video.
Step 2: Use cutting and splitting tools to edit the video.
The first icon is a picture of a pair of scissors, which is a cutting tool. It’s very useful when you need to cut the beginning or end of a film. Place the cursor exactly where you want to cut, then select “Trim start” or “Trim finish” from the dropdown cutting menu (the small triangle next to the scissors icon).
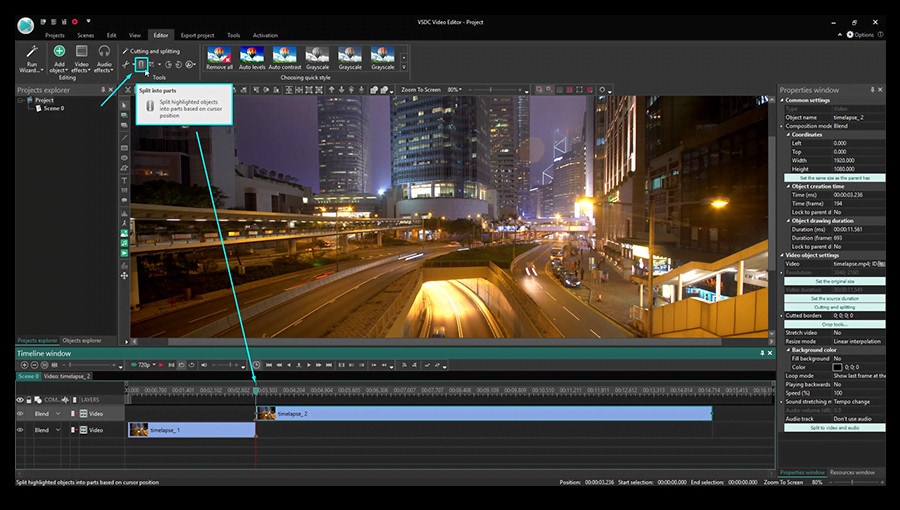
Cropping is also simple. If you have too much additional space around the scene object recorded, just choose the file you want to trim and select the cropping icon from the “Cutting and Splitting” option. A new window will appear, allowing you to select the region of the scene that should stay.
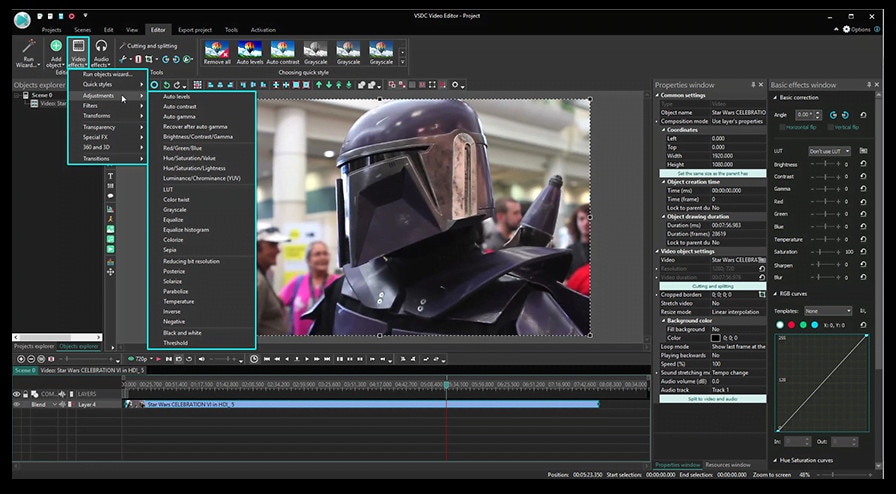
Step 3: Apply effects and transitions.
To use one, first select the video file you wish to edit, then go to the Video effects tab and select the effect you want to use. On the timeline, a new tab will appear, containing all of the effects done to the selected object. You can alter the effect’s duration and position in time by dragging it with the mouse there. The properties pane on the right-hand side can be used to change other parameters.
Transitions follow the same rule. Place your cursor where you want the transition to begin, then choose a transition from the Video effects dropdown menu and manually adjust the duration.
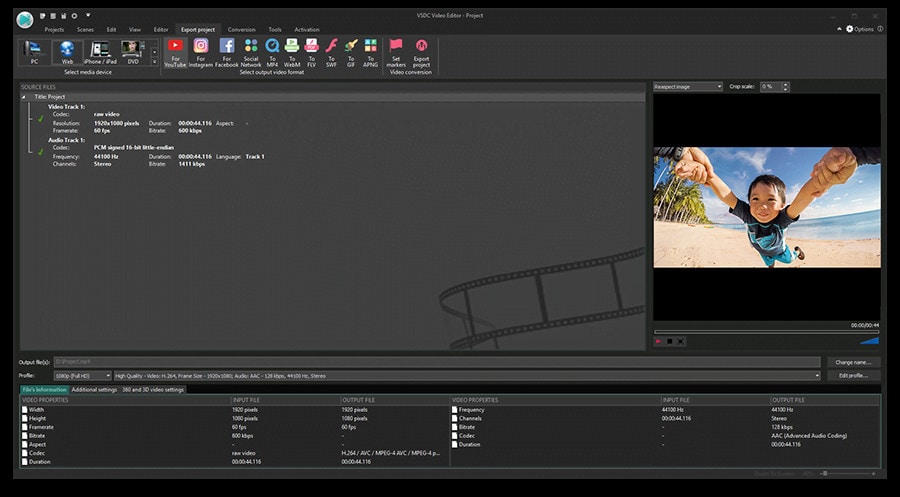
Step 4: Save changes and export video.
Make sure your movie appears exactly how you want it to before exporting it. If the video appears choppy, use the red preview button and lower the preview quality. When the PC’s resources are insufficient to process the video in real time, lagging can occur. Keep in mind that it has no bearing on the outcome. When you’re finished, navigate to the Export project tab and select an export format.
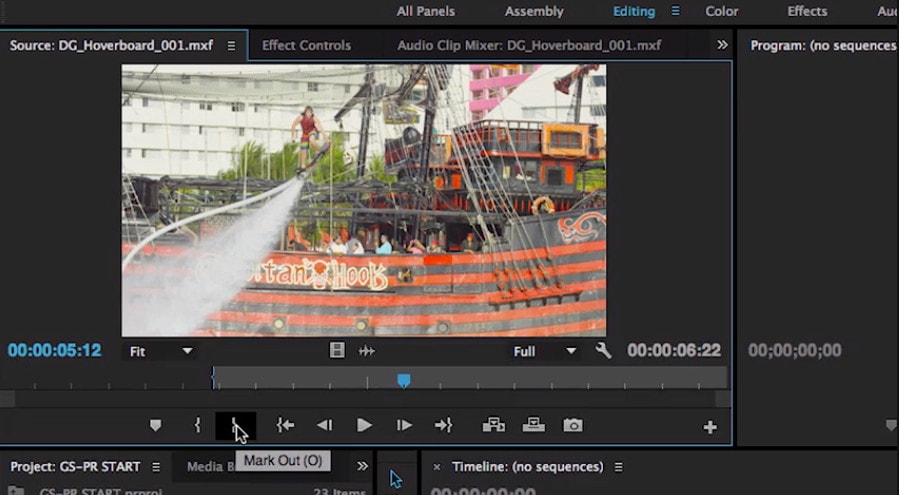
2. Adobe Premiere Pro:
Professional video editors use Premiere Pro to make everything from YouTube videos to Hollywood films like Mank, a 2021 Oscar candidate. It’s also widely utilized in the workflows of designers, animators, and VFX artists, and we can see why after lengthy testing.
We found the software’s UI to be simple to use, and it increased our productivity by separating things into various workspaces, such as editing, effects, and audio. When we tested it on both Mac and PC, we discovered that each workspace helps handle a specific activity while minimizing distraction.
Edit the FLV video with Adobe Premiere Pro using the following steps:
Step 1: Import the video and create initial sequence.
Step 2: In the Timeline, trim and rearrange clips, add audio, and transitions.
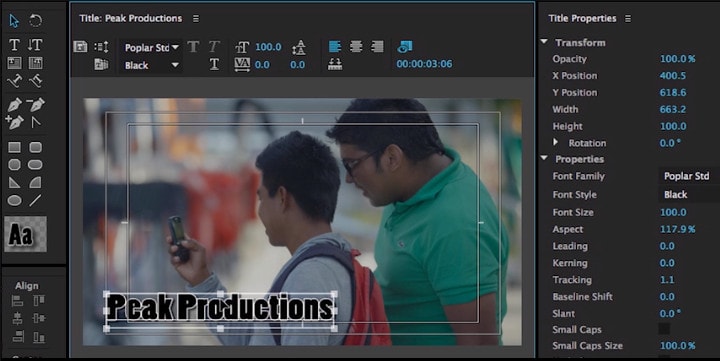
Step 3: Add title and graphics.
In Premiere Pro, you may make onscreen titles, as well as stylize and animate your images.
Step 4: Export your video.

Alternative Way to Edit FlV Video on Mac
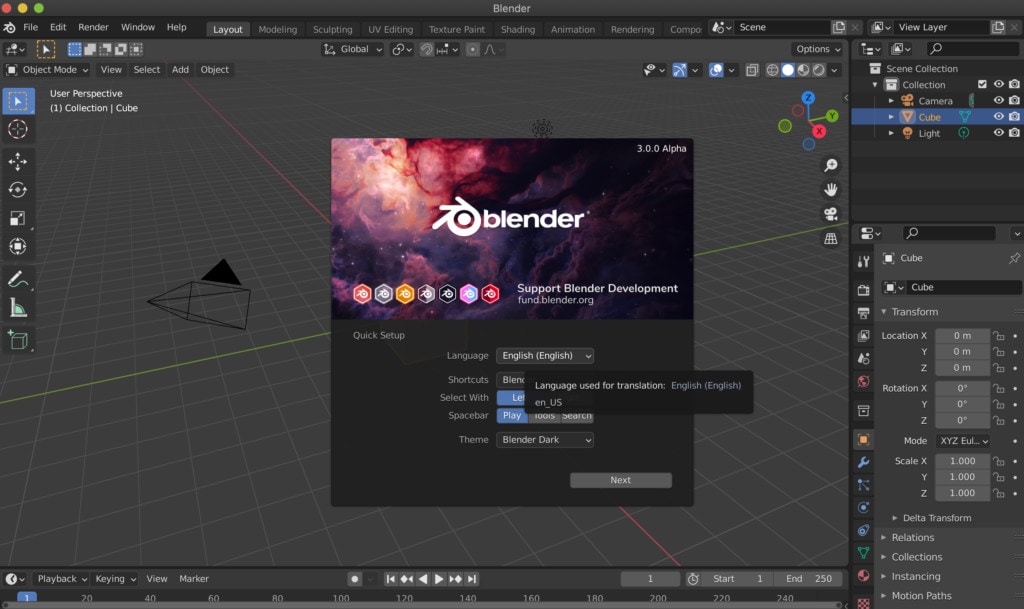
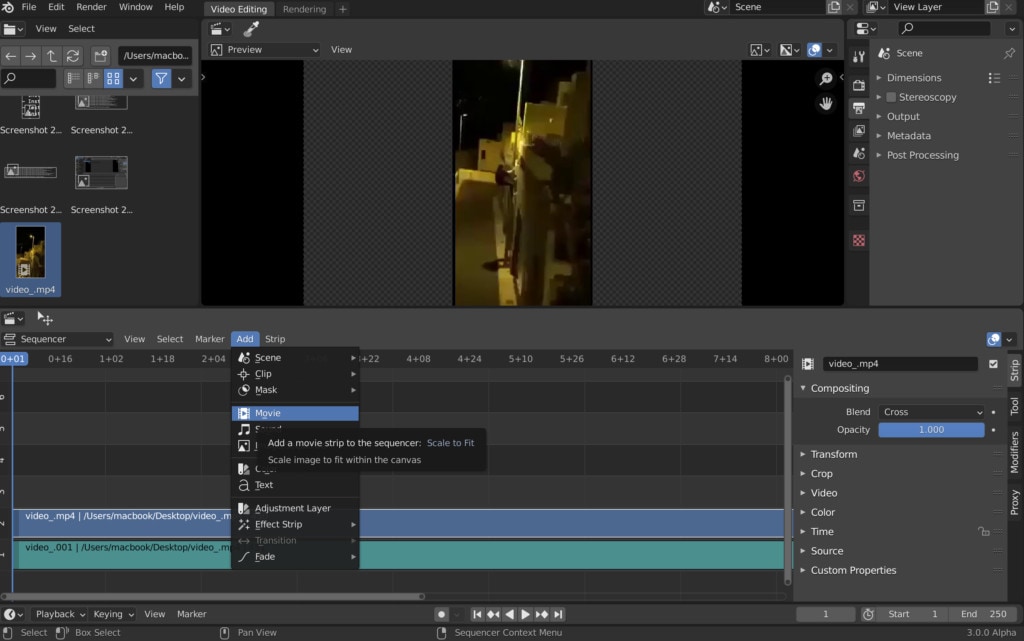
1. Blender:
Under the GNU General Public License, Blender is a free, open-source 3D content production program that runs on all major operating systems. Blender is one of the greatest video editors for both Windows and Mac, with advanced features such as modifier-based modeling tools, powerful character animation capabilities, a node-based material, etc.
Because it is developed for professionals, it is tough to use as a beginner. However, it is unrestricted in its use and distribution. In addition, color options are changeable and versatile in the UI.
In contrast, this free video editor is perfect for semi-pros or those who want to enhance their video editing skills. However, you’ll need a lot of time and effort to learn it.
Step 1: Open the application.
Step 2: Then, go into File->New->Video Editing to open the video editor.
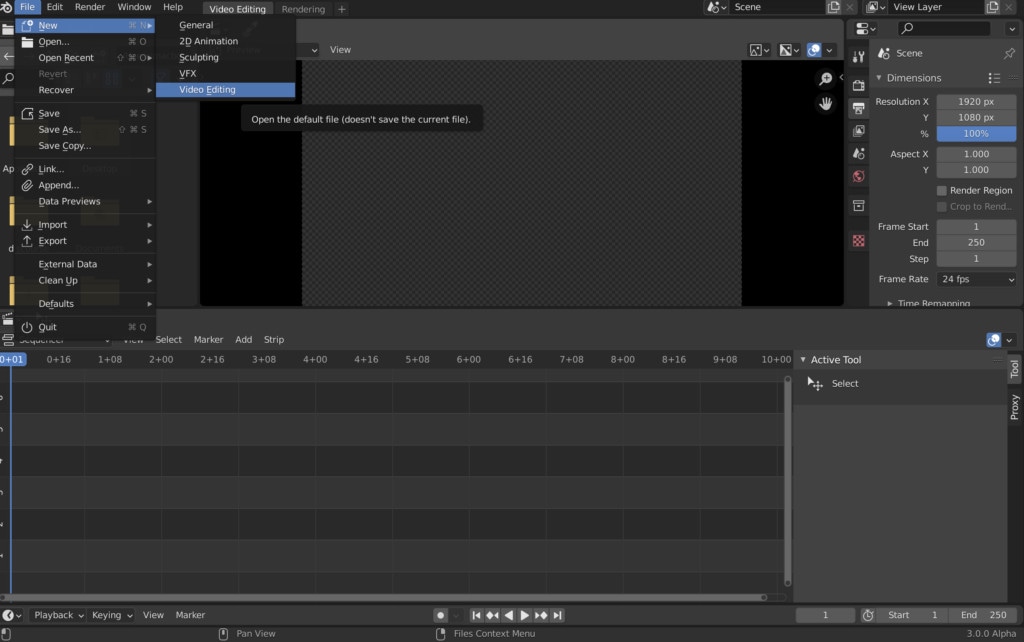
Step 3: Import the video and start editing using the editing tools.
Step 4: Save and export the video.

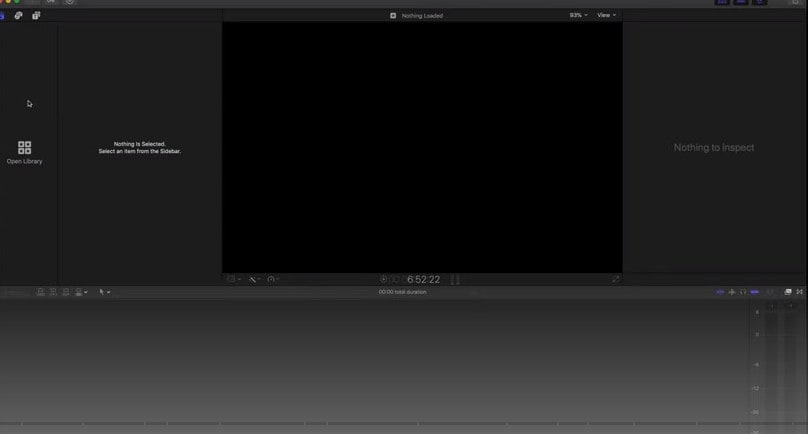
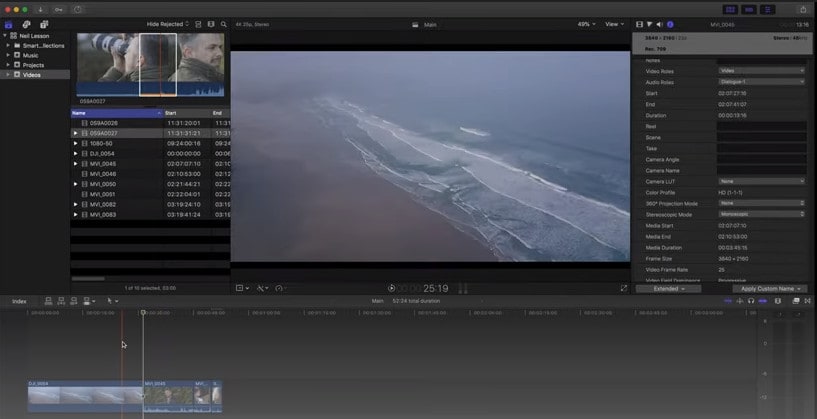
2. Final Cut Pro:
When it comes to video editing software, Apple’s Final Cut Pro is one of the industry standards. As a result, it’s widely utilized in the television and film industries - at least among Mac users. However, one of the truly convincing reasons to choose it over Premiere Pro is because it is subscription-free: you only pay once.
The software’s Magnetic Timeline, grouping tools, a vast selection of effects, solid organizational capabilities, and simple ways to add and edit audio make it a favorite among professional video editors. 360° video, HDR, and powerful color correcting tools are among the other capabilities. It’s a strong software with a lot of features.
Follow the steps to edit FLV video using Final Cut Pro:
Step 1: Create Project.
To make a movie in Final Cut Pro, you must first establish a project, which keeps track of your editing selections and the media you utilize.
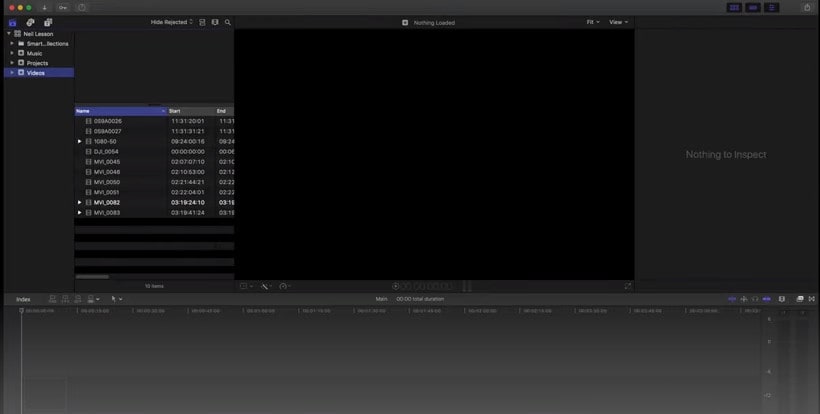
Step 2: Select and add clips to the timeline:
The second stage in making a movie with Final Cut Pro is to add and arrange clips in your project. In the timeline, you can move and reorder clips.
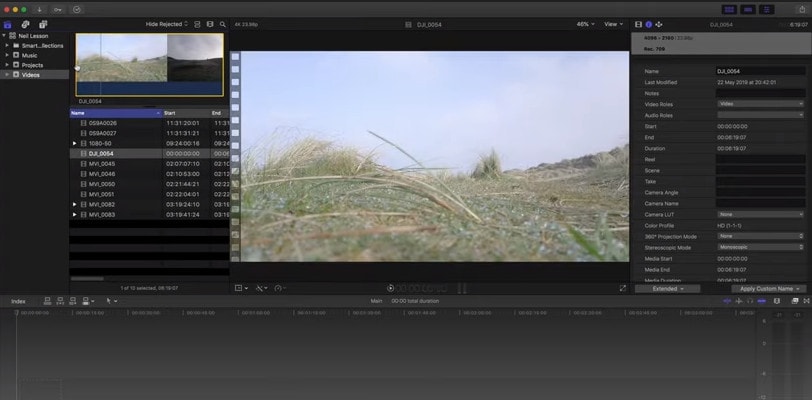
Step 3: Cut and trim video:
Final Cut Pro has a number of features for altering the start and stop points of clips in the timeline, as well as regulating the pacing of shots from one to the next.
Step 4: Edit the video by adding effects and transitions:
Final Cut Pro includes a number of advanced editing features that make it simple to create a professional film. Visual enhancements and colour correction are among the finishing touches.

Step 5: Save and export video:
2 Ways to Edit FlV Video on Android:
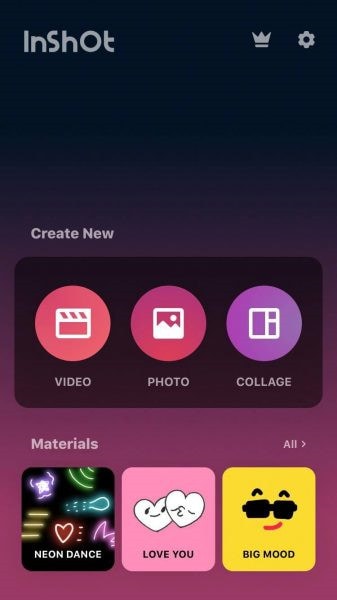
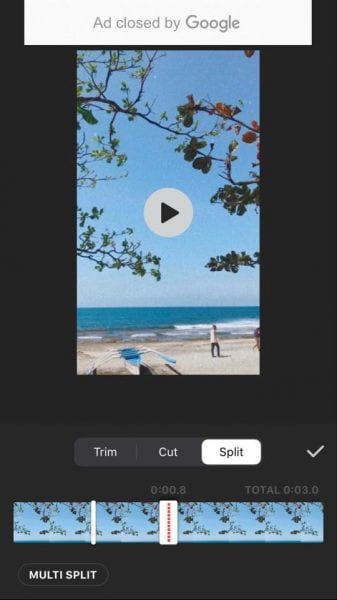
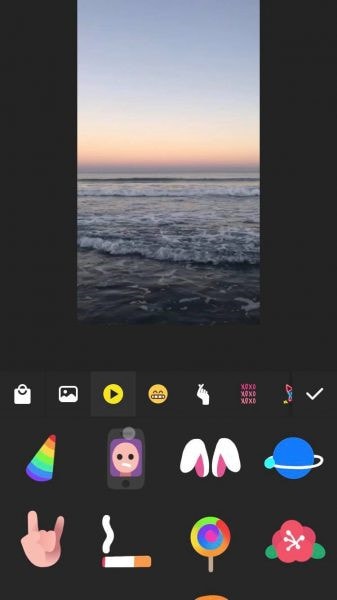
1. Inshot:
For Android users, Inshot is a fantastic image and video editor. This Android video editor allows you to add popular stickers and emoticons to your films, making them more fashionable and unique.
The program supports HD video output, allowing you more control over your footage. Moreover, the additional sound and video can be synchronized with the available video chronology.
You can quickly blend more than two movies into one with rich effects and sound with this Android editor app. In addition, you can generate a watermark using unique text provided in the app, and subtitles support allow you to produce one with a variety of fonts.
Following are the steps that you can follow to edit FLV video using Inshot:
Step 1: Open the app and import the video.
Tap “Video” to open your phone’s gallery folder and begin editing a video in the InShot app. Select a video to work with. Adjust the canvass after your video has been loaded into the InShot App. For your other social media accounts, there are aspect ratios and sizes that work well with the video. It also has the option of being in portrait or landscape mode.
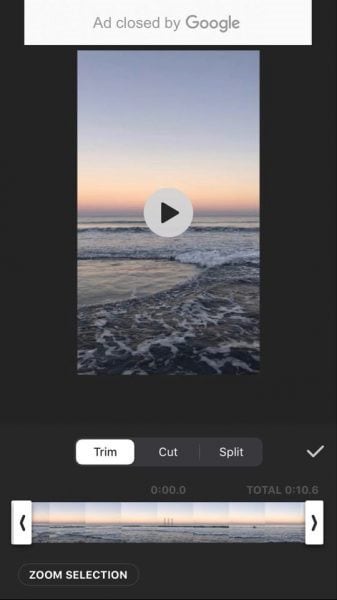
Step 2: Trim and split videos.
Step 3: Merge videos (optional):
By combining clips, you can combine them into a single film or project. Simply choose the videos you want to import from the drop-down menu. By tapping the “+” button on the lower left of the screen, you can insert and merge more videos. Your project will then be updated using the selected video.
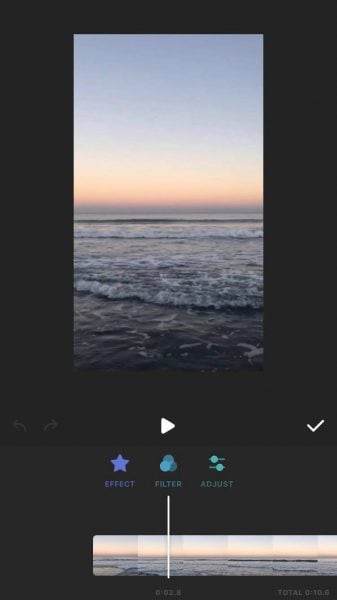
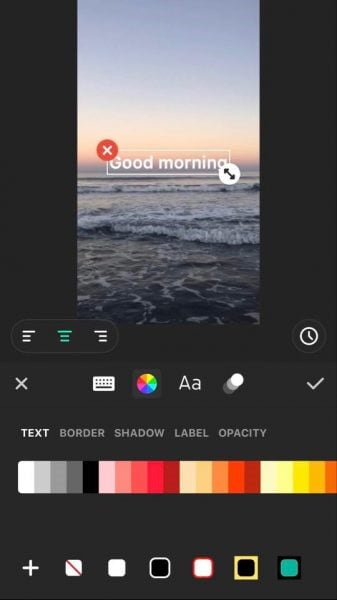
Step 4: Apply filters, add music, text and stickers.
Step 5: Once you are done with the editing process, save the file.
2. Videoshow:
VideoShow has a lot of video editing options. It is a simple and practical video editing program and movie scene maker for art directors and beginners. Using this video cutter, you may reverse, blur, duplicate, edit, merge and split collage clips or films.
You can also use VideoShow to adjust the audio or add subtitles to any video. It also allows you to use different filters on any video on your device. Over 50 intricate themes are included in the program, allowing you to create gorgeous music videos, slide shows, and vlogs in no time.
The annual subscription package is for $135.19, or you can also make a one-time purchase for $225.78.
However, to edit the video, you can use the following steps:
Step 1: Download and install the videoshow application and open it. Upload the video that you want to edit.
Step 2: Edit the video by applying filters or cutting and trimming the part of the video that you want to remove.
Step 3: Save changes and export the video to your preferred location.
2 Ways to Edit FlV Video on iPhone:
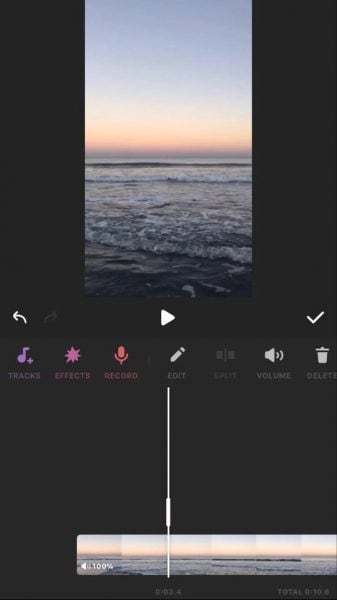
1. LumaFusion:
No other software program on the iPhone comes close to the feature set that LumaFusion offers for video editing. It is the only premium app on this list, and it is well worth every penny.
But, of course, YouTubers aren’t the only ones who use the program; mobile journalists and professional video producers who don’t want to lug along their bulky camera equipment and editing apparatus also use it.
LumaFusion deals with up to six video and audio tracks for photographs, movies, audio, titles, and graphics, and six audio tracks for narration, music, and sound effects. You also receive a magnetic timeline; importing clips is a breeze once they’ve been imported.
There are many transitions and effects to choose from, all of which can be layered. Finally, it includes much royalty-free music, sound effects, and other assets. So if you need a professional video editing tool for your iPhone, LumaFusion ($29.99) is the way to go.
Follow these steps to edit FLV video using LumaFusion:
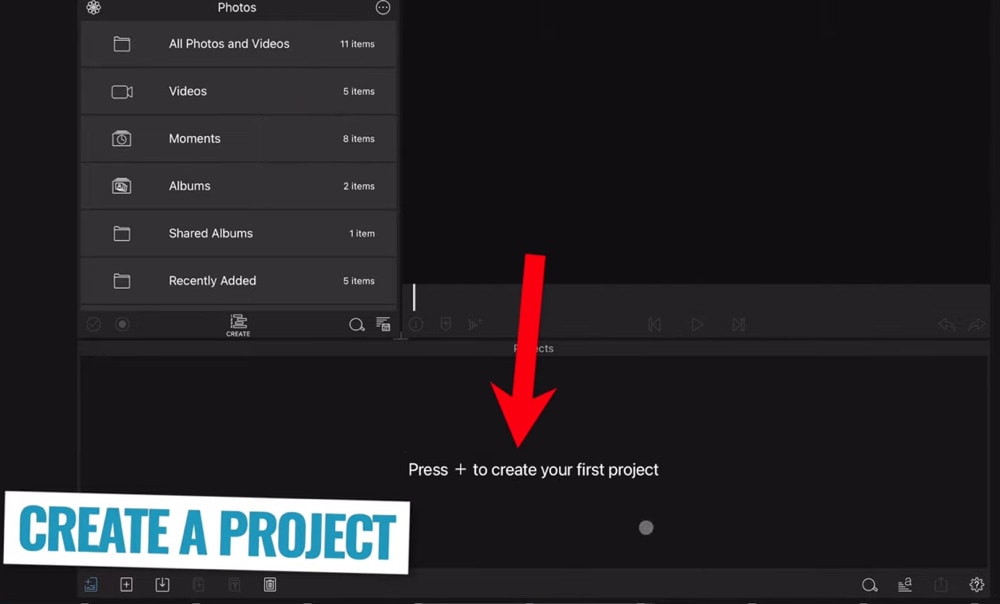
Step 1: To create your first project, press + at the bottom of the screen. You can create a new project by tapping that area or by tapping the Plus button.
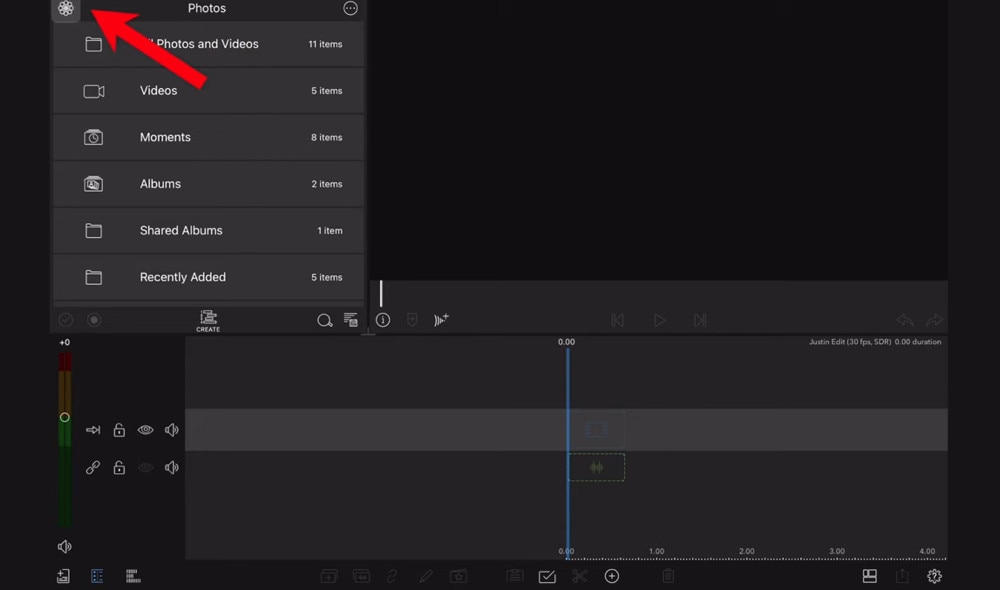
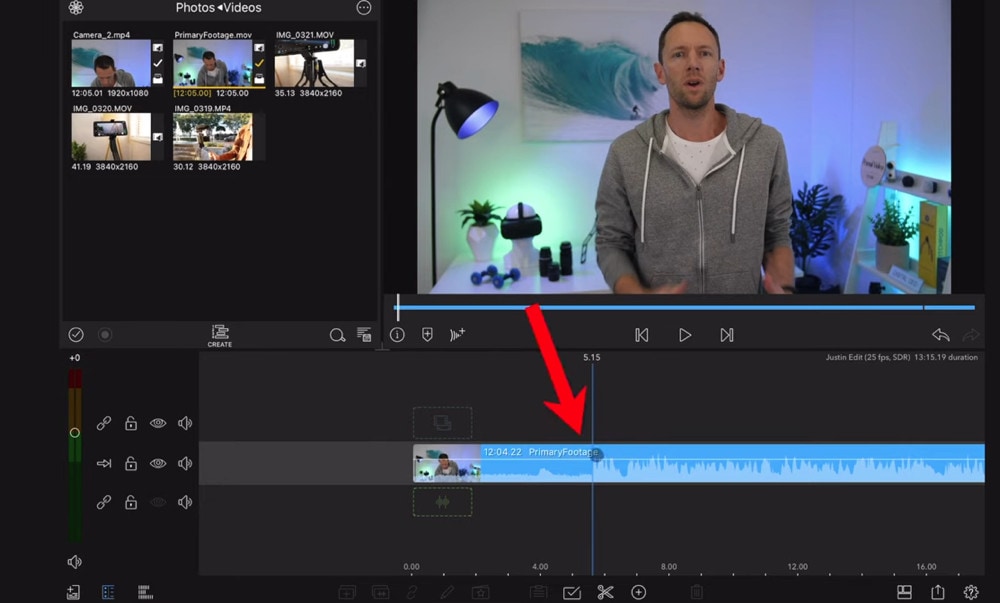
Step 2: Import video:
The Import section is located in the top left corner of the screen. This defaults to the Photos tab when you initially launch a new project. All of the photographs and videos can be seen here.
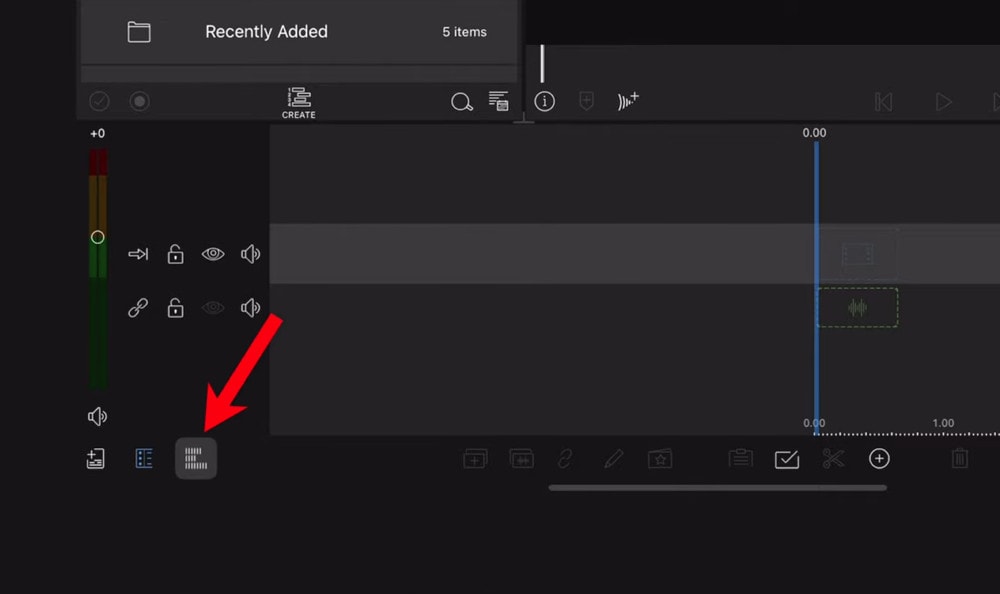
Step 3: Check layout and adjust volume levels
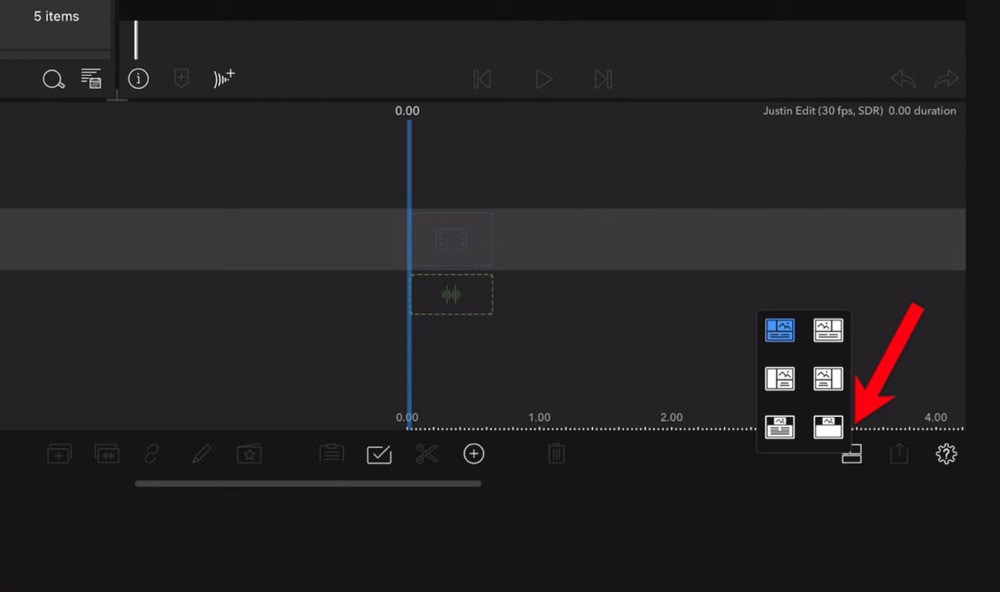
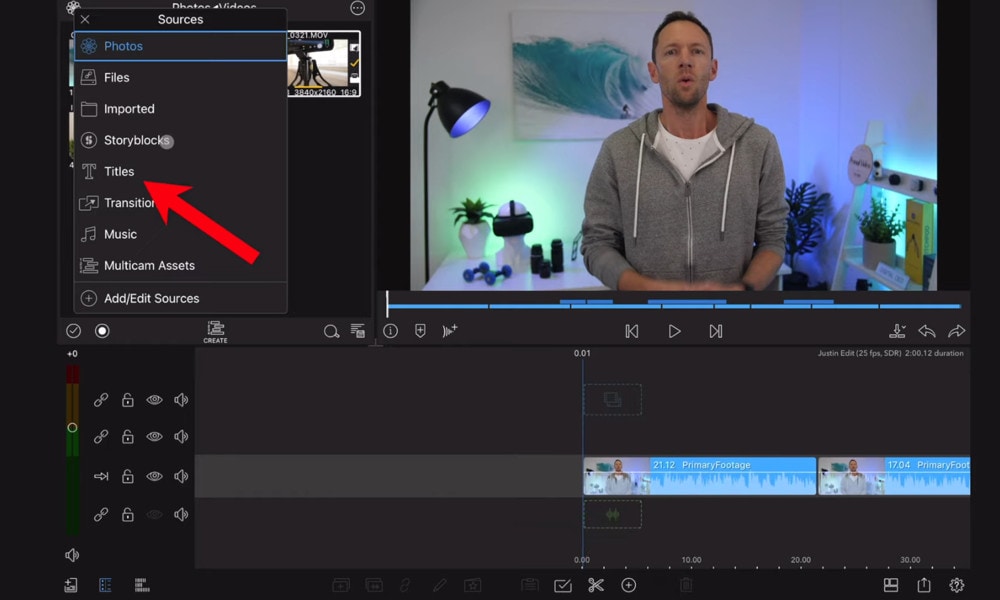
Step 4: Edit the video and add titles.
Step 5: Export the video.
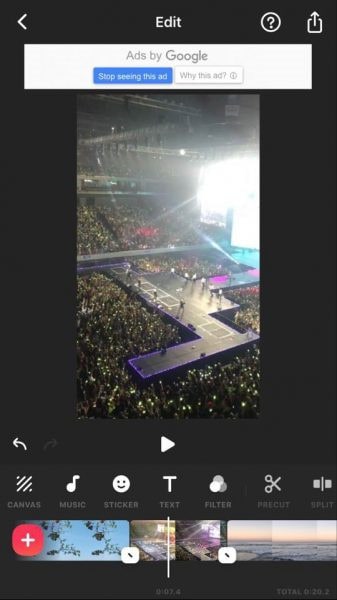
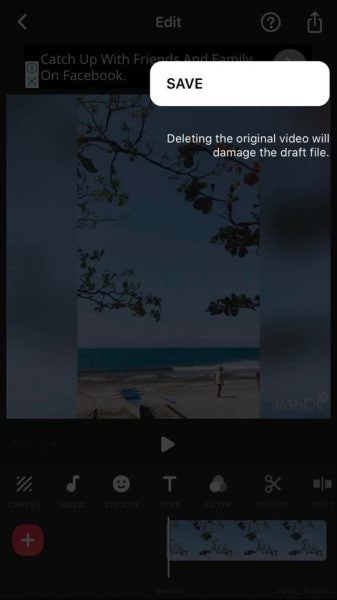
2. Filmora Go:
Without a doubt, Filmora is one of the greatest free video editors for iPhone that does not contain any watermarks. In addition, it’s compatible with both iPhones and Android devices and has a simple user interface.
Filmora is the greatest iPhone video editor for beginners, with themed filters and effects that add flair to your videos without any work.
Filmora has many unique features, including themes for your videos and ‘Materials,’ which are visual effects created by the program. Unfortunately, materials are only available with Filmora Pro, so keep that in mind.
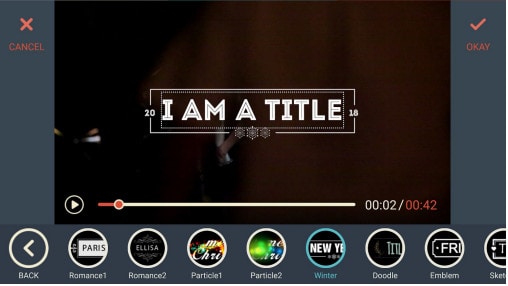
Aside from that, you’ll find all of the typical features here. You can also add titles to videos, utilize stickers and effects, and add music to the background of your movie. You may also add another clip in picture-in-picture mode, which is beneficial.
Below are the following steps to edit FLV video:
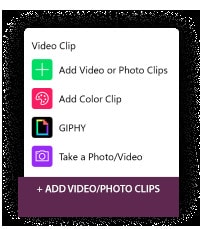
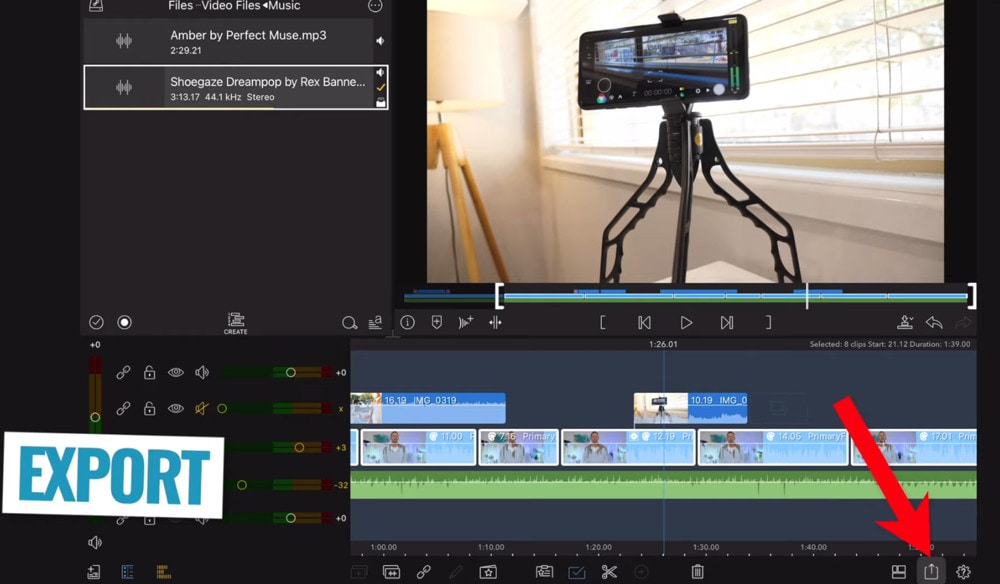
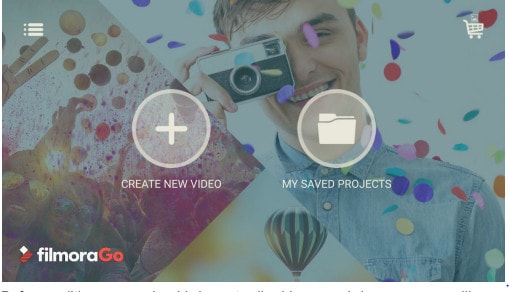
Step 1: Open the application and select ‘Create new video’. Now, import the video by choosing the video icon.
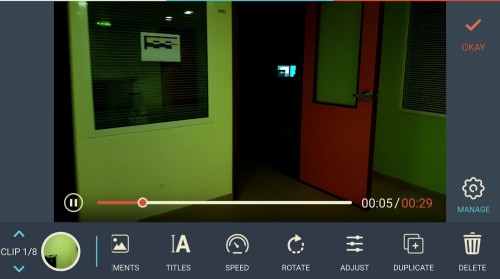
Step 2: Edit the video. Within the edit tool, you can trim and split the video. You can also improve the video quality by adding titles, transitions, and music, and voiceovers.


Step 3: After editing the video, select ‘SAVE’ and export the video or download it.
2 Ways to Edit FlV Video Online:
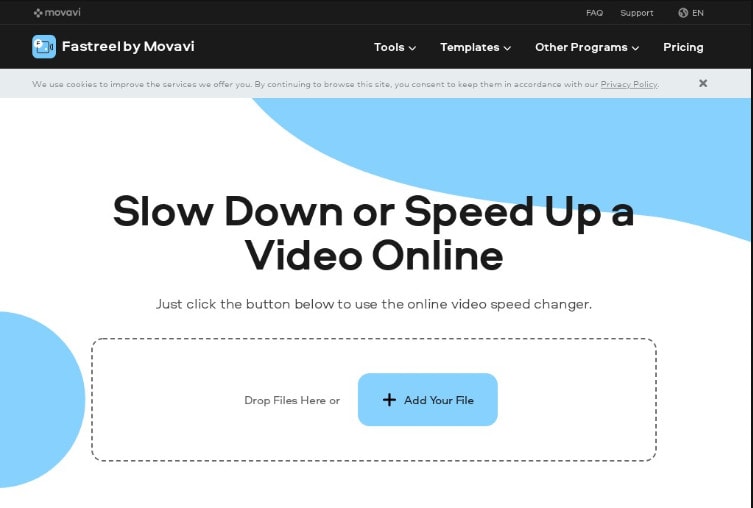
1. Fastreel:
If you’re seeking the finest free online video editor, Fastreel is a terrific tool to start with. This online video editing software provides a wide range of editing options. It can merge, edit, crop, and compress videos to make sharing easier.
It also includes many pre-made templates that you can change to create titles and transitions and other editing features like reverse, looping, and rotating. It’s also quite simple to use, and you can have polished videos in minutes.
There are also numerous pricing options to suit different customers, ranging from a completely free plan with watermarks to paid subscriptions with no limitations.
Use the following steps to edit FLV video:
Step 1: Open Fastreel web and import the video.
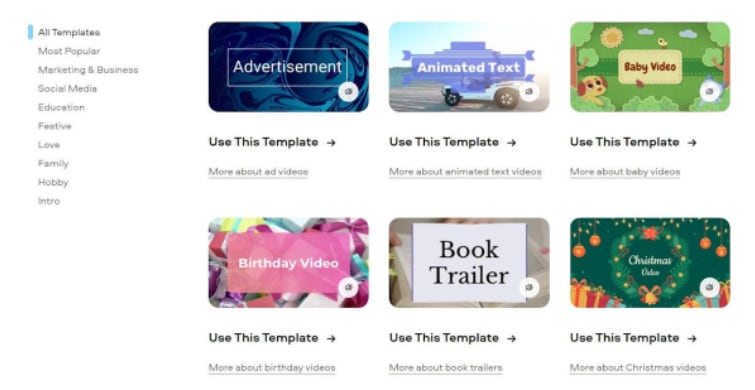
Step 2: Use templates to make it look attractive.
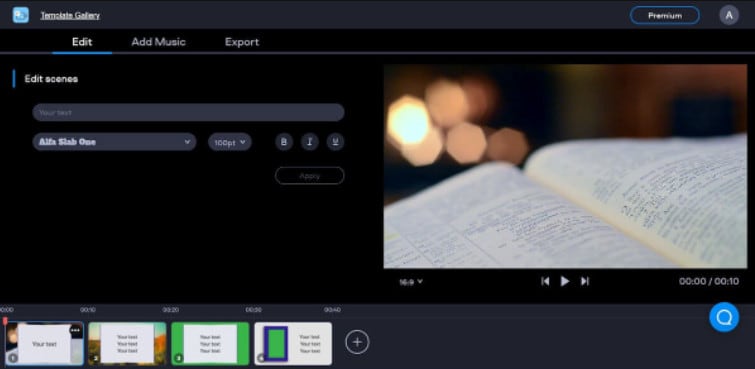
Step 3: Edit the video using the template.
Templates are unfinished videos with all of the effects already applied, such as backdrops, transitions, animated stickers, and titles. There are blank spots for your photos or videos, and you can arrange them in any sequence you like. You can also add music from the Fastreel library or upload your own track after entering your text.
Step 4: Once you are done with edits, save the video and export it.
2. WeVideo:
When you’re seeking the greatest video producer online, another wonderful choice to explore is WeVideo.
Google, Dropbox, Rover, and Roche are just a few of the huge names that trust our online editor. Its fast, versatile editing engine and vast stock content collection for adding stock movies, photos, and audio tracks to your productions are ideal for business users.
WeVideo also stands out since it provides unlimited cloud storage for all of your videos, which you can download and watch on any device. The only drawback is that all of this comes at a price, with WeVideo offering a variety of payment plans ranging from $4.99 to $36.99 a month.
Follow the steps to edit videos using WeVideo:
Step 1: Open WeVideo and import the video file.
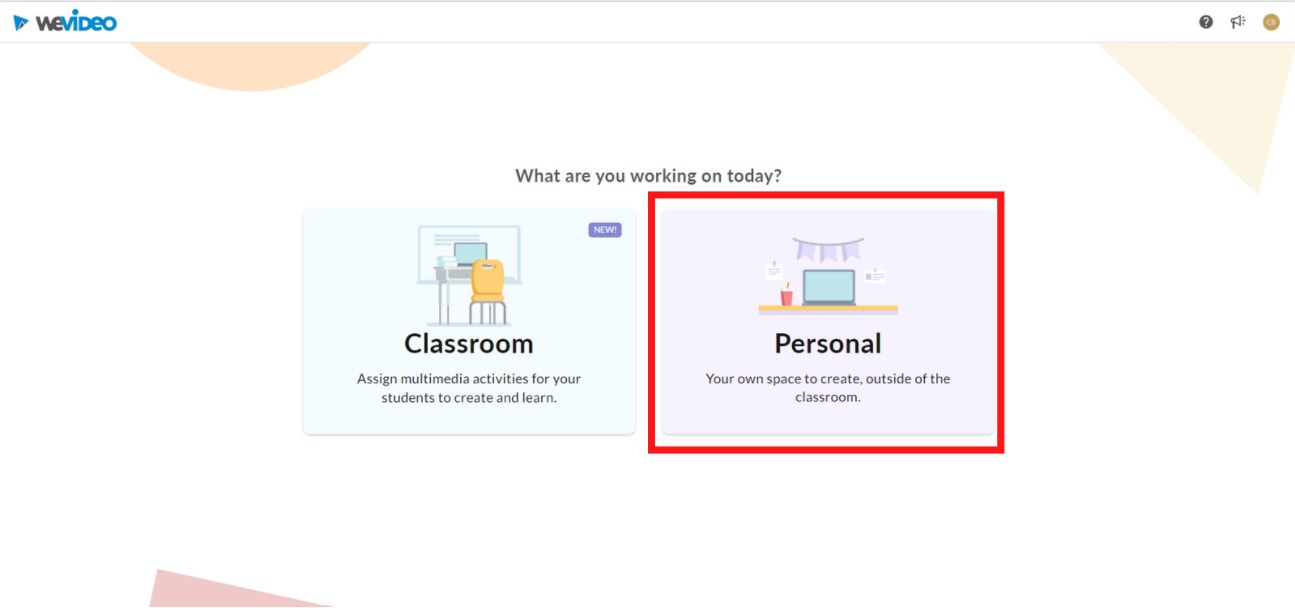
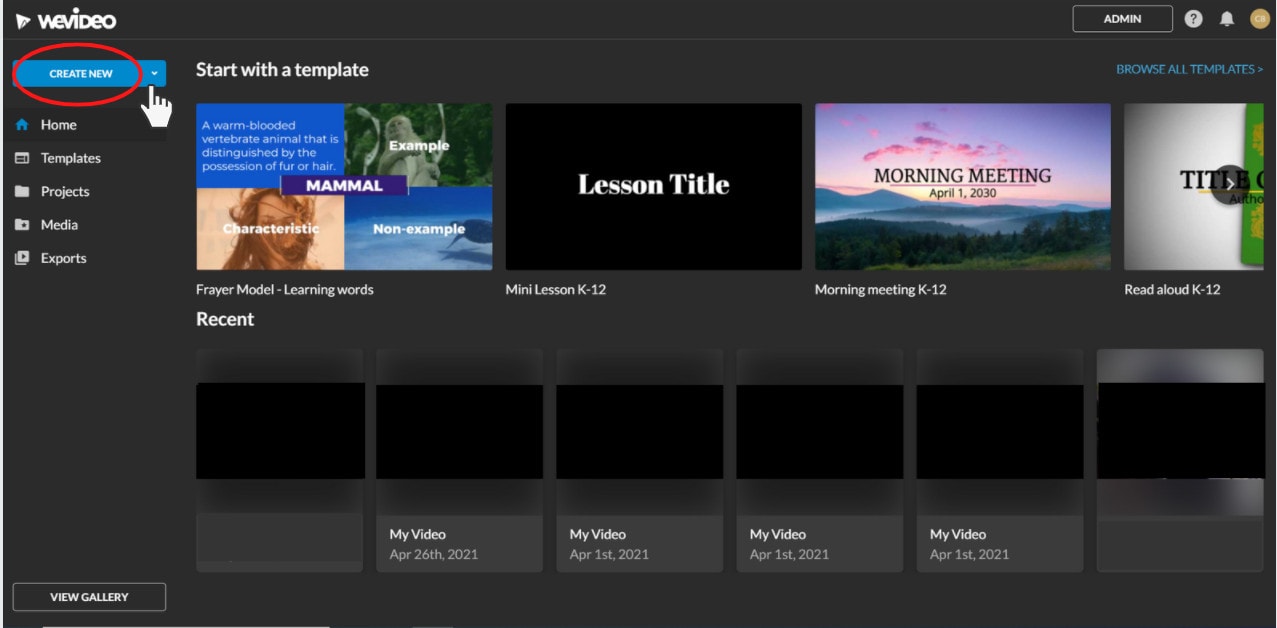
Step 2: Click on create new video in the left-hand corner of the screen.
Step 3: Edit the video.
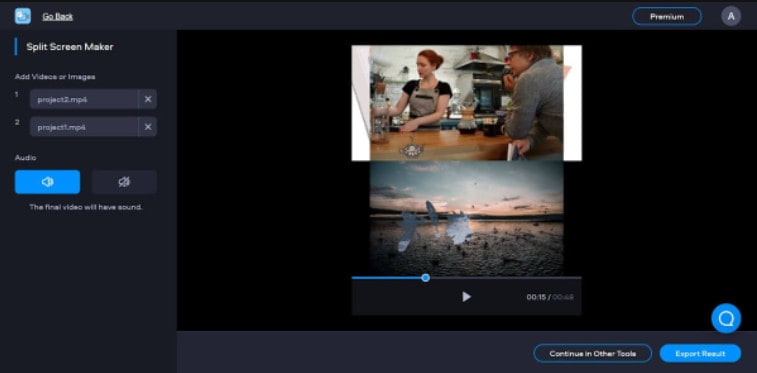
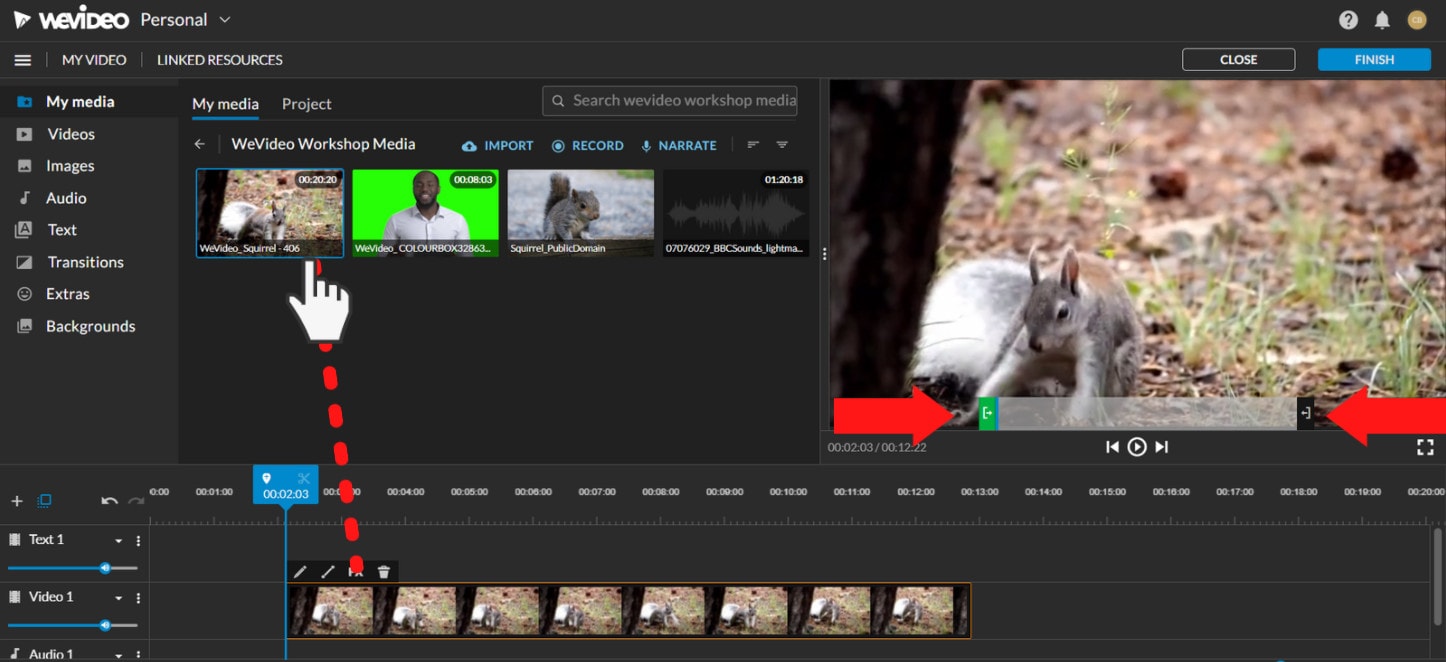
The video clip you imported will appear in the viewing window to the right once you click on it. By moving the arrows and either end, you can edit out the beginning or end of your footage.
- Drag the clip into your timeline from your media pool.
- Place the clip on your timeline by dragging and dropping it.
- Click the scissor symbol after moving the blue marker to the spot where you want to cut your clip.
- Once the material has been chopped, you can erase bits of it by selecting it with your mouse and then pressing delete on your keyboard or rearrange the clips in the timeline by dragging and dropping them to other positions.
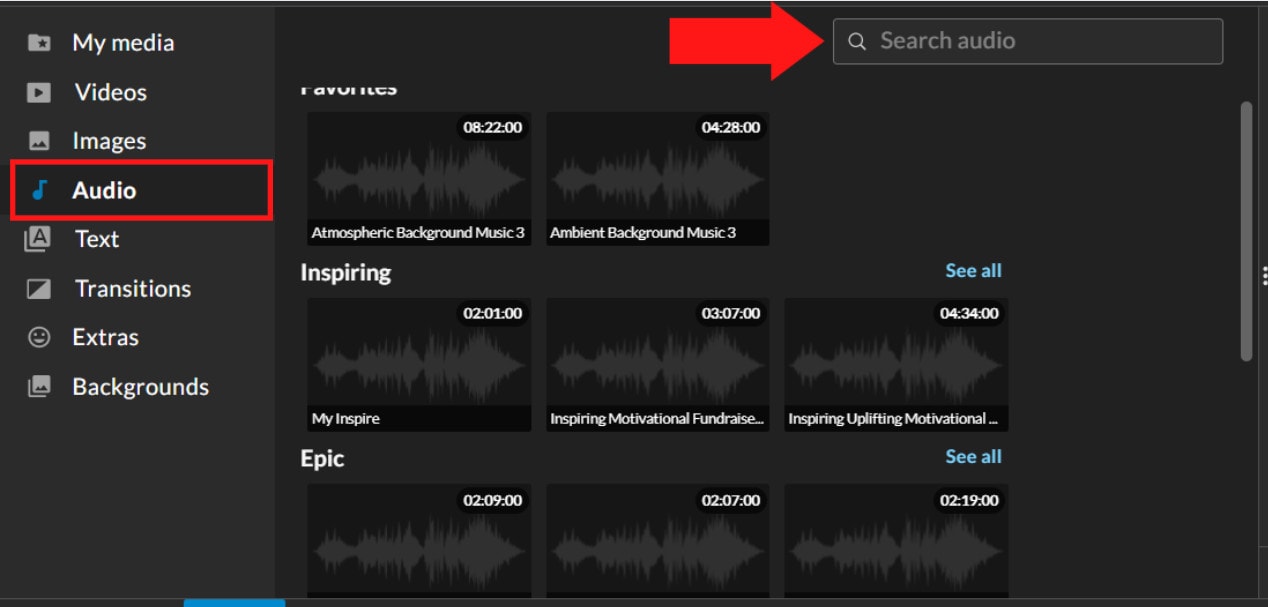
Step 4: Add effects, transitions, and music to the video.
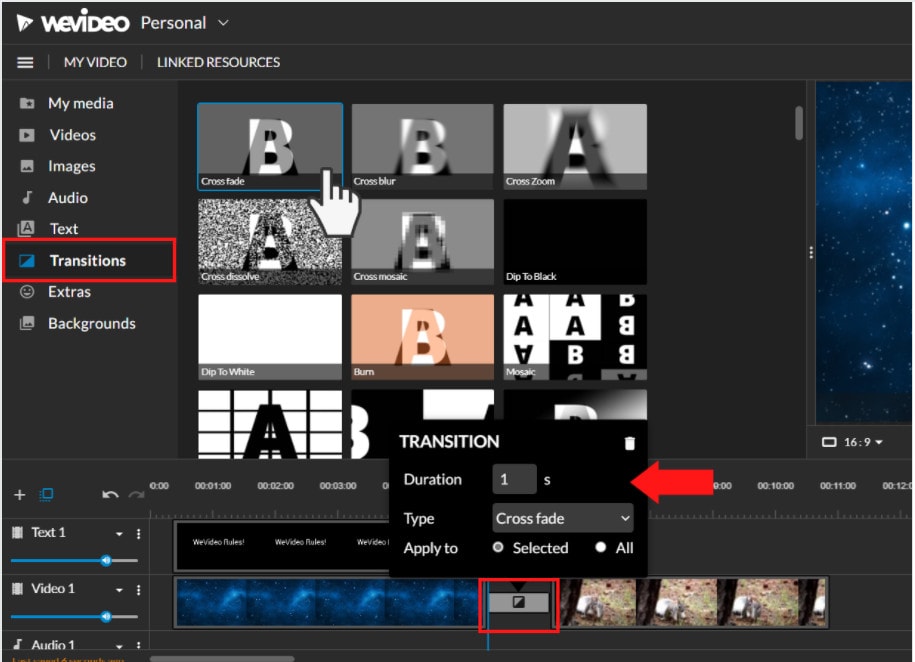
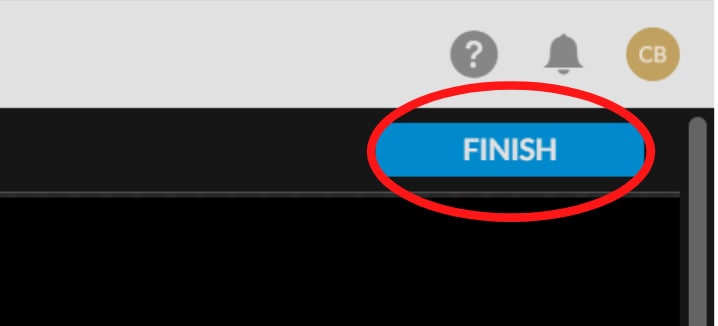
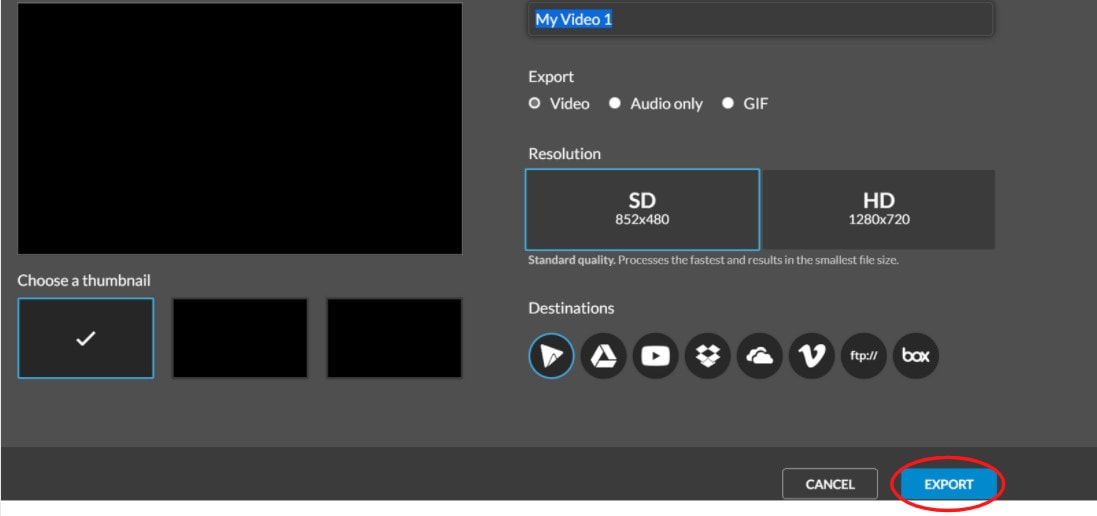
Step 5: Save and export the video by clicking on the Finish tab.
FAQs about editing FLV video
- How to open FLV files?
Any FLV player is required to view FLV files. Various players are available, including VLC, FLV Player, Sothink FLV Player for Mac, Tonec Free FLV Player, Any FLV Player, and others.
- Is Filmora compatible with Mac?
Filmora requires macOS Sierra (version 10.12) or later and the Big Sur (version 11) and Apple M1 chips. Touch Bar compatibility for MacBook Pro users and custom shortcuts to speed up editing.
- What is the best online FLV editor?
There are numerous free online editors to choose from. Fastreel, WeVideo, and FlexClip Video Maker are a few of the most popular.
- Is FLV better than MP4?
Because FLV and MP4 are the two most popular video file formats, it’s crucial to know which one is preferable. Adobe’s proprietary format is FLV. Both formats employ video and audio codecs and have equal performance levels. In their unprocessed state, MP4 files are more adaptable. You can, however, use an FLV file at the same time if you have the correct player.
- How do I choose a video editor?
When comparing video editing software, there are six crucial elements to consider.
- Budget and cost
- Ease of use/learning curve
- Multi-GPGPU acceleration and video format support
- Tools for advanced editing
- Music, special effects, and other goodies
- Customer service is second to none.
For macOS 10.14 or later
Therefore, you can use the following steps to edit FLV video on Windows and Mac:
Step 1: Import file:
Step 2: Edit the FLV file:
Acquire the perfect tool in your palm for anything you want to do, such as clipping, cropping, rotating, and more.
Furthermore, all editing capabilities in the toolbar allow drag-and-drop, making it even easier to touch up your films quickly. Consider the following scenario:
- Drag and drop a transition into the video/photo, or right-click it and select “Apply to All.”
- Please drag & drop a title template to the position where you want it to appear, then adjust it.
- To use the effects, select one from the 50+ available video effects, select it, and apply it to your photos/videos instantaneously.
Step 3: Save or Export the file:
When you’re done, export your modified MP4 files to Windows/Mac and quickly share them on YouTube, with the option of sending a message to Facebook and Twitter. When you click Create in the program window’s middle right corner, you’ll be taken to the Output window below.
Alternative Way to Edit FlV Video on Windows
1. VSDC
VSDC is a free video editor along with a lot of advanced features. Cut, combine, trim, crop, and other editing capabilities are available to help you polish your FLV films.
Although it may not look logical, learning the editing capabilities hidden within modular boxes is simple. One noteworthy aspect of VSDC is its ability to produce good visual effects using many trendy video effects, transitions, and filters.
Furthermore, strong chroma keys, color correction, object modification, and other editing tools can be utilized to edit FLV videos. It not only creates excellent FLV videos, but it also supports a wide range of media conversion, allowing you to convert FLV files to various formats and export them without a watermark.
Therefore, follow the below mentioned steps to edit FLV video using VSDC:
Step 1: Install the software on the Windows. Open the application and import the video.
Step 2: Use cutting and splitting tools to edit the video.
The first icon is a picture of a pair of scissors, which is a cutting tool. It’s very useful when you need to cut the beginning or end of a film. Place the cursor exactly where you want to cut, then select “Trim start” or “Trim finish” from the dropdown cutting menu (the small triangle next to the scissors icon).
Cropping is also simple. If you have too much additional space around the scene object recorded, just choose the file you want to trim and select the cropping icon from the “Cutting and Splitting” option. A new window will appear, allowing you to select the region of the scene that should stay.
Step 3: Apply effects and transitions.
To use one, first select the video file you wish to edit, then go to the Video effects tab and select the effect you want to use. On the timeline, a new tab will appear, containing all of the effects done to the selected object. You can alter the effect’s duration and position in time by dragging it with the mouse there. The properties pane on the right-hand side can be used to change other parameters.
Transitions follow the same rule. Place your cursor where you want the transition to begin, then choose a transition from the Video effects dropdown menu and manually adjust the duration.
Step 4: Save changes and export video.
Make sure your movie appears exactly how you want it to before exporting it. If the video appears choppy, use the red preview button and lower the preview quality. When the PC’s resources are insufficient to process the video in real time, lagging can occur. Keep in mind that it has no bearing on the outcome. When you’re finished, navigate to the Export project tab and select an export format.
2. Adobe Premiere Pro:
Professional video editors use Premiere Pro to make everything from YouTube videos to Hollywood films like Mank, a 2021 Oscar candidate. It’s also widely utilized in the workflows of designers, animators, and VFX artists, and we can see why after lengthy testing.
We found the software’s UI to be simple to use, and it increased our productivity by separating things into various workspaces, such as editing, effects, and audio. When we tested it on both Mac and PC, we discovered that each workspace helps handle a specific activity while minimizing distraction.
Edit the FLV video with Adobe Premiere Pro using the following steps:
Step 1: Import the video and create initial sequence.
Step 2: In the Timeline, trim and rearrange clips, add audio, and transitions.
Step 3: Add title and graphics.
In Premiere Pro, you may make onscreen titles, as well as stylize and animate your images.
Step 4: Export your video.
Alternative Way to Edit FlV Video on Mac
1. Blender:
Under the GNU General Public License, Blender is a free, open-source 3D content production program that runs on all major operating systems. Blender is one of the greatest video editors for both Windows and Mac, with advanced features such as modifier-based modeling tools, powerful character animation capabilities, a node-based material, etc.
Because it is developed for professionals, it is tough to use as a beginner. However, it is unrestricted in its use and distribution. In addition, color options are changeable and versatile in the UI.
In contrast, this free video editor is perfect for semi-pros or those who want to enhance their video editing skills. However, you’ll need a lot of time and effort to learn it.
Step 1: Open the application.
Step 2: Then, go into File->New->Video Editing to open the video editor.
Step 3: Import the video and start editing using the editing tools.
Step 4: Save and export the video.
2. Final Cut Pro:
When it comes to video editing software, Apple’s Final Cut Pro is one of the industry standards. As a result, it’s widely utilized in the television and film industries - at least among Mac users. However, one of the truly convincing reasons to choose it over Premiere Pro is because it is subscription-free: you only pay once.
The software’s Magnetic Timeline, grouping tools, a vast selection of effects, solid organizational capabilities, and simple ways to add and edit audio make it a favorite among professional video editors. 360° video, HDR, and powerful color correcting tools are among the other capabilities. It’s a strong software with a lot of features.
Follow the steps to edit FLV video using Final Cut Pro:
Step 1: Create Project.
To make a movie in Final Cut Pro, you must first establish a project, which keeps track of your editing selections and the media you utilize.
Step 2: Select and add clips to the timeline:
The second stage in making a movie with Final Cut Pro is to add and arrange clips in your project. In the timeline, you can move and reorder clips.
Step 3: Cut and trim video:
Final Cut Pro has a number of features for altering the start and stop points of clips in the timeline, as well as regulating the pacing of shots from one to the next.
Step 4: Edit the video by adding effects and transitions:
Final Cut Pro includes a number of advanced editing features that make it simple to create a professional film. Visual enhancements and colour correction are among the finishing touches.
Step 5: Save and export video:
2 Ways to Edit FlV Video on Android:
1. Inshot:
For Android users, Inshot is a fantastic image and video editor. This Android video editor allows you to add popular stickers and emoticons to your films, making them more fashionable and unique.
The program supports HD video output, allowing you more control over your footage. Moreover, the additional sound and video can be synchronized with the available video chronology.
You can quickly blend more than two movies into one with rich effects and sound with this Android editor app. In addition, you can generate a watermark using unique text provided in the app, and subtitles support allow you to produce one with a variety of fonts.
Following are the steps that you can follow to edit FLV video using Inshot:
Step 1: Open the app and import the video.
Tap “Video” to open your phone’s gallery folder and begin editing a video in the InShot app. Select a video to work with. Adjust the canvass after your video has been loaded into the InShot App. For your other social media accounts, there are aspect ratios and sizes that work well with the video. It also has the option of being in portrait or landscape mode.
Step 2: Trim and split videos.
Step 3: Merge videos (optional):
By combining clips, you can combine them into a single film or project. Simply choose the videos you want to import from the drop-down menu. By tapping the “+” button on the lower left of the screen, you can insert and merge more videos. Your project will then be updated using the selected video.
Step 4: Apply filters, add music, text and stickers.
Step 5: Once you are done with the editing process, save the file.
2. Videoshow:
VideoShow has a lot of video editing options. It is a simple and practical video editing program and movie scene maker for art directors and beginners. Using this video cutter, you may reverse, blur, duplicate, edit, merge and split collage clips or films.
You can also use VideoShow to adjust the audio or add subtitles to any video. It also allows you to use different filters on any video on your device. Over 50 intricate themes are included in the program, allowing you to create gorgeous music videos, slide shows, and vlogs in no time.
The annual subscription package is for $135.19, or you can also make a one-time purchase for $225.78.
However, to edit the video, you can use the following steps:
Step 1: Download and install the videoshow application and open it. Upload the video that you want to edit.
Step 2: Edit the video by applying filters or cutting and trimming the part of the video that you want to remove.
Step 3: Save changes and export the video to your preferred location.
2 Ways to Edit FlV Video on iPhone:
1. LumaFusion:
No other software program on the iPhone comes close to the feature set that LumaFusion offers for video editing. It is the only premium app on this list, and it is well worth every penny.
But, of course, YouTubers aren’t the only ones who use the program; mobile journalists and professional video producers who don’t want to lug along their bulky camera equipment and editing apparatus also use it.
LumaFusion deals with up to six video and audio tracks for photographs, movies, audio, titles, and graphics, and six audio tracks for narration, music, and sound effects. You also receive a magnetic timeline; importing clips is a breeze once they’ve been imported.
There are many transitions and effects to choose from, all of which can be layered. Finally, it includes much royalty-free music, sound effects, and other assets. So if you need a professional video editing tool for your iPhone, LumaFusion ($29.99) is the way to go.
Follow these steps to edit FLV video using LumaFusion:
Step 1: To create your first project, press + at the bottom of the screen. You can create a new project by tapping that area or by tapping the Plus button.
Step 2: Import video:
The Import section is located in the top left corner of the screen. This defaults to the Photos tab when you initially launch a new project. All of the photographs and videos can be seen here.
Step 3: Check layout and adjust volume levels
Step 4: Edit the video and add titles.
Step 5: Export the video.
2. Filmora Go:
Without a doubt, Filmora is one of the greatest free video editors for iPhone that does not contain any watermarks. In addition, it’s compatible with both iPhones and Android devices and has a simple user interface.
Filmora is the greatest iPhone video editor for beginners, with themed filters and effects that add flair to your videos without any work.
Filmora has many unique features, including themes for your videos and ‘Materials,’ which are visual effects created by the program. Unfortunately, materials are only available with Filmora Pro, so keep that in mind.
Aside from that, you’ll find all of the typical features here. You can also add titles to videos, utilize stickers and effects, and add music to the background of your movie. You may also add another clip in picture-in-picture mode, which is beneficial.
Below are the following steps to edit FLV video:
Step 1: Open the application and select ‘Create new video’. Now, import the video by choosing the video icon.
Step 2: Edit the video. Within the edit tool, you can trim and split the video. You can also improve the video quality by adding titles, transitions, and music, and voiceovers.
Step 3: After editing the video, select ‘SAVE’ and export the video or download it.
2 Ways to Edit FlV Video Online:
1. Fastreel:
If you’re seeking the finest free online video editor, Fastreel is a terrific tool to start with. This online video editing software provides a wide range of editing options. It can merge, edit, crop, and compress videos to make sharing easier.
It also includes many pre-made templates that you can change to create titles and transitions and other editing features like reverse, looping, and rotating. It’s also quite simple to use, and you can have polished videos in minutes.
There are also numerous pricing options to suit different customers, ranging from a completely free plan with watermarks to paid subscriptions with no limitations.
Use the following steps to edit FLV video:
Step 1: Open Fastreel web and import the video.
Step 2: Use templates to make it look attractive.
Step 3: Edit the video using the template.
Templates are unfinished videos with all of the effects already applied, such as backdrops, transitions, animated stickers, and titles. There are blank spots for your photos or videos, and you can arrange them in any sequence you like. You can also add music from the Fastreel library or upload your own track after entering your text.
Step 4: Once you are done with edits, save the video and export it.
2. WeVideo:
When you’re seeking the greatest video producer online, another wonderful choice to explore is WeVideo.
Google, Dropbox, Rover, and Roche are just a few of the huge names that trust our online editor. Its fast, versatile editing engine and vast stock content collection for adding stock movies, photos, and audio tracks to your productions are ideal for business users.
WeVideo also stands out since it provides unlimited cloud storage for all of your videos, which you can download and watch on any device. The only drawback is that all of this comes at a price, with WeVideo offering a variety of payment plans ranging from $4.99 to $36.99 a month.
Follow the steps to edit videos using WeVideo:
Step 1: Open WeVideo and import the video file.
Step 2: Click on create new video in the left-hand corner of the screen.
Step 3: Edit the video.
The video clip you imported will appear in the viewing window to the right once you click on it. By moving the arrows and either end, you can edit out the beginning or end of your footage.
- Drag the clip into your timeline from your media pool.
- Place the clip on your timeline by dragging and dropping it.
- Click the scissor symbol after moving the blue marker to the spot where you want to cut your clip.
- Once the material has been chopped, you can erase bits of it by selecting it with your mouse and then pressing delete on your keyboard or rearrange the clips in the timeline by dragging and dropping them to other positions.
Step 4: Add effects, transitions, and music to the video.
Step 5: Save and export the video by clicking on the Finish tab.
FAQs about editing FLV video
- How to open FLV files?
Any FLV player is required to view FLV files. Various players are available, including VLC, FLV Player, Sothink FLV Player for Mac, Tonec Free FLV Player, Any FLV Player, and others.
- Is Filmora compatible with Mac?
Filmora requires macOS Sierra (version 10.12) or later and the Big Sur (version 11) and Apple M1 chips. Touch Bar compatibility for MacBook Pro users and custom shortcuts to speed up editing.
- What is the best online FLV editor?
There are numerous free online editors to choose from. Fastreel, WeVideo, and FlexClip Video Maker are a few of the most popular.
- Is FLV better than MP4?
Because FLV and MP4 are the two most popular video file formats, it’s crucial to know which one is preferable. Adobe’s proprietary format is FLV. Both formats employ video and audio codecs and have equal performance levels. In their unprocessed state, MP4 files are more adaptable. You can, however, use an FLV file at the same time if you have the correct player.
- How do I choose a video editor?
When comparing video editing software, there are six crucial elements to consider.
- Budget and cost
- Ease of use/learning curve
- Multi-GPGPU acceleration and video format support
- Tools for advanced editing
- Music, special effects, and other goodies
- Customer service is second to none.
Easy Guide to Overlay Videos in Premiere Pro
In order to make it simple to combine the shot’s components into a sequence, video overlays are pieces of film that are often recorded in a dark studio. Using image overlays on a video production is fairly frequent. However, adding pictures to every video you export might be tiresome and time-consuming if you have several films to send. For instance, an overlay video in Premiere Pro might be preferred by you rather than a manual addition of the overlay media.
There is a quick and easy method to know how to overlay a video on a video in Premiere Pro and we’ve got it covered. However, depending on the kind of element, there may be some color blending that affects the components themselves. Overlays may be filmed on either a green screen or a blue screen. Snow components photographed against a green screen may have a green hue shift, necessitating further color grading before the footage might be used.
Part 1. How to Overlay Video in Premiere Pro
Videos sometimes need a splash of color to elevate them. With the built-in color effects in Adobe Premiere Pro, you can apply overlays to any video, whether you want to add a little drama to a clip or a splash of color to a social media post. We’ll demonstrate how to overlay videos in this article. To liven up your intros, make your outros stand out, and spruce up your summer social media posts, add a gradient video overlay effect. Adobe Premiere Pro and gorgeous video clips are all you need.
Steps to Overlay Video in Premiere Pro
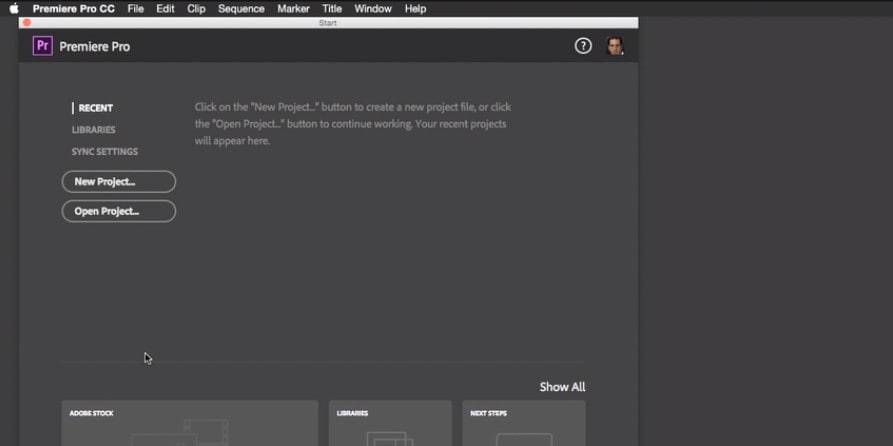
Step1Activate Premiere Pro
To build a new sequence, start a new project in Premiere, import your footage, then drag your clip onto the timeline. The clip’s parameters will be reflected in the sequence.

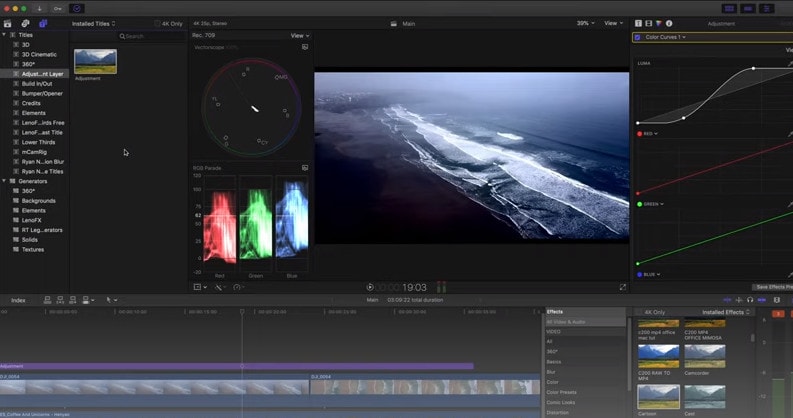
Step2Select Overlay Effect
Secondly, choose the Effects workspace (located near the top of your window). This will guarantee that the tools we need are accessible. Alternately, you may go to Window > Workspaces > Effects.

Step3Create a layer of adjustments
Go to File > New > Adjustment Layer to begin. Make sure your Project panel is chosen if the option is not accessible. Your clip and sequence will show up in your Project panel with the adjustment layer. Add the timeline with the adjustment layer selected.

Step4Create the Video Overlay
Transitions, generators, audio effects, and video effects are all included under the Effects panel. We’ll begin by selecting the 4-Color Gradient from the “Generate” folder, which contains generators for patterns and gradients, to produce the video overlay effect. Right-click on the adjustment layer in the timeline and drag the appropriate effect there.

Step5Change the Effect Control
In the Effect Controls panel, you may manage and adjust effects. You may change the default effect settings for each element in your timeline, such as size and opacity, under the Effect Controls panel along with any additional effects you’ve added. To access an item’s effect controls, click on it in the timeline.

By selecting the ‘Show all properties’ next to the adjustment layer in your timeline, you can get a before-and-after comparison. Increase the value by selecting “blend with original.” To change the effect’s strength, move this up and down.
Step6Save the Project
Try switching the linear mode to radial. You can make a color transition for circles by doing this. You will be able to highlight various things with color after this transition. The circle’s starting point may be animated to follow a certain item in the scene.

To the right of the Presets drop-down menu, choose the Auto Save button. Check the Save Effects Settings box when the Choose a Name dialog box appears. Future exports made with this preset will automatically take into account any Image Overlay settings you’ve configured.
Part 2. Premiere Pro Easy Alternative to Overlay Video [Filmora ]
Any professional video editor may be interested in it since it offers the strength, complexity, and adaptability they need. Users need to be well-versed in a variety of editing techniques in order to use the tools properly. Therefore, it’s not really the best option for a novice or someone who hasn’t mastered video editing. We advise using Filmora as a substitute because of this. It is user-friendly for all users and is crammed with numerous theme effects shops to spruce up your video effects, such as transitions, filters, overlays, titles, etc.
Filmora is a powerful and creative video editing program that is really simple to use. With a wide variety of sophisticated video editing tools, Filmora boasts a highly user-friendly interface. Both novice and experienced video editors may utilize the many creative features that Filmora offers. Filmora is the best option if you’re looking for a video editing program that’s not only inexpensive but also offers a variety of features and functions. The program not only has a fantastic user interface, but it also offers strong capabilities that let video editors create precisely the films they desire.
Free Download For Win 7 or later(64-bit)
Free Download For macOS 10.14 or later
Steps to Use Filmora to Overlay Videos:
Step1Launch Filmora
Run the software and switch to Video editor mode. Next, add the image or movie to the media library. Now drag and drop the primary video into the video track or click the “Import Media” button to add it.

Step2Import Media to Overlay
Find the image or video in the media library that you want to overlay over the backdrop video and right-click on it. The image or video overlay may be resized and positioned here as desired.

Step3Spice up with Effects
There are several choices available for adding extra effects to the video. By selecting the effect tab, you may look for more effects as well. The decision to switch to a green screen or include other components into the film is entirely up to you.

Step4Customize Effects and Save
Inside the Effects window, press Ok and once you have applied the required effects to see the modifications appear on the screen. You may also add element movements to make the video seem more entertaining. Once the editing and effect adding are complete, you may export the video on the go.
Conclusion
An image or animation that you contribute to your movies as a video overlay will display below the video and cover the video. Overlay editing is the kind of editing that is most often utilized. It just covers over whatever is in the timeline at the location where you wish to add that clip. If necessary, you may also review the comprehensive instructions for adding images or movies as an overlay to a video, which helps in improving the video quality. With Filmora , video overlays allow for the sharing of additional information without interfering with the viewing of the video.
Free Download For macOS 10.14 or later
Steps to Use Filmora to Overlay Videos:
Step1Launch Filmora
Run the software and switch to Video editor mode. Next, add the image or movie to the media library. Now drag and drop the primary video into the video track or click the “Import Media” button to add it.
Step2Import Media to Overlay
Find the image or video in the media library that you want to overlay over the backdrop video and right-click on it. The image or video overlay may be resized and positioned here as desired.
Step3Spice up with Effects
There are several choices available for adding extra effects to the video. By selecting the effect tab, you may look for more effects as well. The decision to switch to a green screen or include other components into the film is entirely up to you.
Step4Customize Effects and Save
Inside the Effects window, press Ok and once you have applied the required effects to see the modifications appear on the screen. You may also add element movements to make the video seem more entertaining. Once the editing and effect adding are complete, you may export the video on the go.
Conclusion
An image or animation that you contribute to your movies as a video overlay will display below the video and cover the video. Overlay editing is the kind of editing that is most often utilized. It just covers over whatever is in the timeline at the location where you wish to add that clip. If necessary, you may also review the comprehensive instructions for adding images or movies as an overlay to a video, which helps in improving the video quality. With Filmora , video overlays allow for the sharing of additional information without interfering with the viewing of the video.
How to Do Perfect Match Paint 100% the Easy Way
How to Do Perfect Match Paint 100% the Easy Way
An easy yet powerful editor
Numerous effects to choose from
Detailed tutorials provided by the official channel
You always have to be highly precise and appropriate when choosing the color for your wall. If you are not accurate enough, you might not choose the right shade, which would never look good on your walls. But, to help you match the paint colors perfectly, we have discussed three methods.
And lastly, we have also introduced a video editing tool Perfect Match Paint that will help you match the color in your videos as well. So, you can have the perfect desired color on your walls and also in your videos!
In this article
01 [How to Match Paint Color Without a Sample](#Part 1)
02 [Need to Color Match in Video? There’s an App for That…](#Part 2)
Part 1 How to Match Paint Color Without a Sample
We will be discussing three methods in which you will get the perfect answer to the question of how can I match my paint color perfectly. So, let us jump right into the first method without further delay.
01Method 1 Perfect Match Paint without a sample
The following steps will help you attain Perfect Match Paint without the necessity of a sample.
Step Clean the print area
The first and the most essential step is to make the area where you will be painting clean and tidy. As time passes, fingerprints, marks, dust, and many other things accumulate and make the area dirty. And if you do not clean the same, then the paint you do on it becomes much darker, dull, and gives a shabby outlook.
Use a damp sponge, and if possible, it is better to use soap on the sponge. And most importantly, you will have to let the area dry out completely before you put it on to test the paint. Moreover, the new paint adheres much better than before when you clean the area.

Step Scraping off
The next step requires you to use a utility knife. And with that utility knife, you will have to scrap an inch or 2.5 cm of your wall paint. It is because, when you have a sample, you can easily bring that to the store for paint matching near me. Use a plastic bag to secure the sample price. It will prevent the paint of the sample to smudge or getting any marks or destruction.
And after you find paint colors that match the ones you need, try to dab a little of that paint on the sample. As a result, you will precisely know how perfectly the new shade of paint matches with the new one. It ensures optimum precision and can be the best way to match paint.

Step Bring the object if possible
The best way to maintain absolute precision in the match is by bringing an object to the store. You can also opt for a car paint match near me. If you bring the object with the color for matching, it ensures perfect matching and 10precision. Nowadays, the technology is highly advanced and will help you obtain the best paint match.
02Method 2 Using a sample
Since we have discussed the steps for matching paint without the sample, you must know how to match color with the help of samples. So, here are the steps for doing so.
Step 1: Click a Picture of the original hue
This step is necessary for better precision and matching the color as perfectly as possible. Clock a picture of the original color sample. The color in the photo might not be absolutely precise. But it can help to a large extent to match the color as perfectly as possible. You can easily take the sample to any renowned color matching store, like, dupli color paint match and have the perfect color matching done.
And it is better to not one picture or from just one angel. It will be best to take numerous snaps and that too, from different angles, sides and lighting conditions. It will help you get the original color shades in different angles, shades and lights, and it increases the possibility of matching the color as impeccably as possible.
Step 2: Bring home more than one sample
You will see numerous samples of paints that you feel will match the color you brought from your home as a sample of the original color. You might not be sure which sample perfectly matches the original sample color at that exact moment. However, if you find a sample that seems t match perfectly, you must not make your decision right at that moment. Because in the store, the lighting, angles, and many other factors play a hugely influential role in enhancing the shades of the sample colors.
So, the color you see in the store often does not remain the same in natural light settings; it might get a bit darker or lighter. So, it is always better to bring home those samples that you feel match the original shade of the sample you brought. This increases the possibility of being the most precise and impeccable in matching the colors.

Step 3: stick the sample and compare.
This is the final step for matching the colors of paint with the help of a sample. After bringing home the samples that you found similar to the original sample, tape them to the wall. Take a sample at a time and use a tap to place them on the wall. You can also tape all the samples side by side, leaving enough gap between them.
It helps better compare and matches the sample’s colors and the wall. A common thing that occurs is that in the daytime, you find one color matching perfectly, whereas, in the nighttime, some other sample color is matching perfectly. In such an instance, it is best to ask the store if they can give you the shade by mixing both the colors: the color that perfectly matched with the sample in the daytime and the color that perfectly matched with the sample in the time.

Step 4: Paint the samples on the wall
It is an optional step, and you can opt for this step if you are not getting a hundred per cent confidence in choosing the correct color. Try to paint the colors of the samples that you are finding similar to the wall. Since the wall already has the original color, when you paint the sample colors on it, the sample colors clearly distinguish which samples match more impeccably with the actual color.

03Method 3 with the help of apps
Since the technology has advanced in the most progressive way possible, you can easily match the paint colors through an application. So now, we will be listing down the steps that will help you match the paints with the help of mobile applications. The steps are given as follows.
Step 1 Install the application
You will find numerous mobile applications meant for matching paint colors. Opt for the ones you find the best and most efficient. Download it and install it on your phone. If you have used a renowned brand for painting, you can use their application. For example, you can use Asian paints color matching if you have used their brand of paints before.

Step 2 Scan the shade
Now, even the original paint shade. There are factors such as lighting, angel and shadow that you must remover to consider while you scan the color of the original sample.

Step 3 Paint the sample
To be most precise and sure, paint the sample of the paint you have chosen. It will be a way of double-checking your division and ensuring a perfect paint match.

Step 4 Use a color scanner
It is another optional step, but there will be absolutely no doubt in the precision of paint matching if you use it. You can either borrow or buy a paint scanner. If you are not planning to paint again soon, it is best to borrow the paint scanner.

Part 2 Need to Color Match in Video? There’s an App for That
Right now, we talked about mobile apps that can help you match paint colors for your walls. Well, you can ever match colors in the videos that you capture! Yes, that is possible in the highest quality and most effortlessly. And color match paint from photos can be likely through the best video editing tool- Wondershare Filmora Video Editor . More precisely, it has numerous features; one among them is the “Color Match: a feature which makes this possible.
The “Color Match” feature of Filmora allows you to extract a clip from the video where you want to match the colors and then carries out the process most effortlessly. You can apply any color you wish to within a few minutes.
For Win 7 or later (64-bit)
For macOS 10.12 or later
You can use this incredible tool on any device, and it will work equally proficiently and help you create fantastic videos!
● Key Takeaways from This Episode →
● How to match paint colors without samples
● Two more methods of matching paint colors
● We introduced Filmora and its feature of “Color Match” that can help you match the colors of your videos most profoundly.
You always have to be highly precise and appropriate when choosing the color for your wall. If you are not accurate enough, you might not choose the right shade, which would never look good on your walls. But, to help you match the paint colors perfectly, we have discussed three methods.
And lastly, we have also introduced a video editing tool Perfect Match Paint that will help you match the color in your videos as well. So, you can have the perfect desired color on your walls and also in your videos!
In this article
01 [How to Match Paint Color Without a Sample](#Part 1)
02 [Need to Color Match in Video? There’s an App for That…](#Part 2)
Part 1 How to Match Paint Color Without a Sample
We will be discussing three methods in which you will get the perfect answer to the question of how can I match my paint color perfectly. So, let us jump right into the first method without further delay.
01Method 1 Perfect Match Paint without a sample
The following steps will help you attain Perfect Match Paint without the necessity of a sample.
Step Clean the print area
The first and the most essential step is to make the area where you will be painting clean and tidy. As time passes, fingerprints, marks, dust, and many other things accumulate and make the area dirty. And if you do not clean the same, then the paint you do on it becomes much darker, dull, and gives a shabby outlook.
Use a damp sponge, and if possible, it is better to use soap on the sponge. And most importantly, you will have to let the area dry out completely before you put it on to test the paint. Moreover, the new paint adheres much better than before when you clean the area.
Step Scraping off
The next step requires you to use a utility knife. And with that utility knife, you will have to scrap an inch or 2.5 cm of your wall paint. It is because, when you have a sample, you can easily bring that to the store for paint matching near me. Use a plastic bag to secure the sample price. It will prevent the paint of the sample to smudge or getting any marks or destruction.
And after you find paint colors that match the ones you need, try to dab a little of that paint on the sample. As a result, you will precisely know how perfectly the new shade of paint matches with the new one. It ensures optimum precision and can be the best way to match paint.
Step Bring the object if possible
The best way to maintain absolute precision in the match is by bringing an object to the store. You can also opt for a car paint match near me. If you bring the object with the color for matching, it ensures perfect matching and 10precision. Nowadays, the technology is highly advanced and will help you obtain the best paint match.
02Method 2 Using a sample
Since we have discussed the steps for matching paint without the sample, you must know how to match color with the help of samples. So, here are the steps for doing so.
Step 1: Click a Picture of the original hue
This step is necessary for better precision and matching the color as perfectly as possible. Clock a picture of the original color sample. The color in the photo might not be absolutely precise. But it can help to a large extent to match the color as perfectly as possible. You can easily take the sample to any renowned color matching store, like, dupli color paint match and have the perfect color matching done.
And it is better to not one picture or from just one angel. It will be best to take numerous snaps and that too, from different angles, sides and lighting conditions. It will help you get the original color shades in different angles, shades and lights, and it increases the possibility of matching the color as impeccably as possible.
Step 2: Bring home more than one sample
You will see numerous samples of paints that you feel will match the color you brought from your home as a sample of the original color. You might not be sure which sample perfectly matches the original sample color at that exact moment. However, if you find a sample that seems t match perfectly, you must not make your decision right at that moment. Because in the store, the lighting, angles, and many other factors play a hugely influential role in enhancing the shades of the sample colors.
So, the color you see in the store often does not remain the same in natural light settings; it might get a bit darker or lighter. So, it is always better to bring home those samples that you feel match the original shade of the sample you brought. This increases the possibility of being the most precise and impeccable in matching the colors.
Step 3: stick the sample and compare.
This is the final step for matching the colors of paint with the help of a sample. After bringing home the samples that you found similar to the original sample, tape them to the wall. Take a sample at a time and use a tap to place them on the wall. You can also tape all the samples side by side, leaving enough gap between them.
It helps better compare and matches the sample’s colors and the wall. A common thing that occurs is that in the daytime, you find one color matching perfectly, whereas, in the nighttime, some other sample color is matching perfectly. In such an instance, it is best to ask the store if they can give you the shade by mixing both the colors: the color that perfectly matched with the sample in the daytime and the color that perfectly matched with the sample in the time.
Step 4: Paint the samples on the wall
It is an optional step, and you can opt for this step if you are not getting a hundred per cent confidence in choosing the correct color. Try to paint the colors of the samples that you are finding similar to the wall. Since the wall already has the original color, when you paint the sample colors on it, the sample colors clearly distinguish which samples match more impeccably with the actual color.
03Method 3 with the help of apps
Since the technology has advanced in the most progressive way possible, you can easily match the paint colors through an application. So now, we will be listing down the steps that will help you match the paints with the help of mobile applications. The steps are given as follows.
Step 1 Install the application
You will find numerous mobile applications meant for matching paint colors. Opt for the ones you find the best and most efficient. Download it and install it on your phone. If you have used a renowned brand for painting, you can use their application. For example, you can use Asian paints color matching if you have used their brand of paints before.
Step 2 Scan the shade
Now, even the original paint shade. There are factors such as lighting, angel and shadow that you must remover to consider while you scan the color of the original sample.
Step 3 Paint the sample
To be most precise and sure, paint the sample of the paint you have chosen. It will be a way of double-checking your division and ensuring a perfect paint match.
Step 4 Use a color scanner
It is another optional step, but there will be absolutely no doubt in the precision of paint matching if you use it. You can either borrow or buy a paint scanner. If you are not planning to paint again soon, it is best to borrow the paint scanner.
Part 2 Need to Color Match in Video? There’s an App for That
Right now, we talked about mobile apps that can help you match paint colors for your walls. Well, you can ever match colors in the videos that you capture! Yes, that is possible in the highest quality and most effortlessly. And color match paint from photos can be likely through the best video editing tool- Wondershare Filmora Video Editor . More precisely, it has numerous features; one among them is the “Color Match: a feature which makes this possible.
The “Color Match” feature of Filmora allows you to extract a clip from the video where you want to match the colors and then carries out the process most effortlessly. You can apply any color you wish to within a few minutes.
For Win 7 or later (64-bit)
For macOS 10.12 or later
You can use this incredible tool on any device, and it will work equally proficiently and help you create fantastic videos!
● Key Takeaways from This Episode →
● How to match paint colors without samples
● Two more methods of matching paint colors
● We introduced Filmora and its feature of “Color Match” that can help you match the colors of your videos most profoundly.
Best 8 AR Apps for Android and iOS | Help You See the World of AR
Top 8 AR Apps for Android and Ios Help You See the World of AR
An easy yet powerful editor
Numerous effects to choose from
Detailed tutorials provided by the official channel
Suppose you want to buy a pair of eyeglasses and don’t know which pair would suit your look. Now you might wish to look at how your face would look on different frames. Here you can use AR and see which pair of glasses would fit you using AR. AR can be used to share and receive various kinds of tacit knowledge. Augmented Reality is often synonymously used for “Computed-mediated reality” and “Mixed- Reality.”
Despite such an exceptional concept, many users raised questions about the privacy issues of this app. AR technology constantly needs to record the real environment, which involves real human beings. Recording their movement breaches their privacy which can cause legal trouble for the user. If the videos are recorded with consent, they will not harm anyone.
In this article
01 [What Is Augmented Reality?](#Part 1)
02 [The 4 Best Augmented Reality Apps for iPhone](#Part 2)
03 [The 4 Best Augmented Reality Apps for Android](#Part 3)
Part 1 What Is Augmented Reality?
Augmented Reality is a technology that uses the real-world environment where virtual objects reside. This process involves an experience where the real or physical world interweaves with virtually created objects. It interweaves so perfectly that the artificial seems a part of the natural. This is an artificial experience, and it adds to the real environment. AR gained popularity in the fields of entertainment and video games.
You might think that AR (Augmented Reality) is the same as VR (Virtual Reality). They are not the same. When someone looks through a VR, everything, including the object’s environment, is virtual or an illusion. When AR is used, the object is virtual, but the environment is real. Suppose you want to buy an item of furniture and you do not know whether it would match your home décor; here, you can use AR to see whether the furniture would fit your décor or not.
Part 2 The 4 Best Augmented Reality Apps for iPhone
Have you ever wondered how it would be to purchase furniture sitting in your bedroom? How would it be like to not worry about which color would fit the home décor o which position would be the best for the product? You can experience these exciting features using this Augmented Reality or AR powered apps. These four apps will give you the best iPhone ar video experience.
01Amikasa
Amikasa is basically a home furnishing AR app. It is exclusive to iOS users only. You can use this app to view products from different brands and websites. This app will improve your shopping experience without going to different stores to get the right product for your room. You can just walk around your house and find the best-fitted product for your house using AR models of the products. Since there are no boundaries to websites and brands, it gives you more opportunity to choose your product wisely. The most interesting part about this app is that you can make your purchases without exiting from this app.

02Wanna Kicks
Wanna Kicks is a fashion-based AR app. To be precise, this app focuses on footwear. This app is also exclusive to iOS users only. You can look into different brands and websites and choose the best footwear for yourself. You can virtually look at how a pair of shoes would look on you when you wear them. You do not browse around to find the most suitable footwear and do it sitting on your bed. These interesting features of this app have gained people’s attention from various countries. This app can push your apple ar video experience to a different level.

03Augment
Augment is a home furnishing goods-based AR app. The app needs to be purchased at $10/month for corporate uses. This app mainly targets e-commerce store owners to make their selling process smooth by creating AR pictures of their products. The seller creates 3D images or models of products that the customers can use to find the best fit for their house. The images created by this app are uploaded for common people’s Augmented Reality experience through mobile apps, websites, or some other source. It comes to great use when the products are sold in the field like event sales, pop-up shops, e-commerce markets, etc.

04Roar
Roar is another AR technology-based app that needs to be purchased at $49 by the creators or hosts. This app aims at business owners. Business owners can use this app in many ways possible, like creating an online store using AR technology using which the consumers can scan the product packages from their homes, using AR technology in advertisements, and many other ways possible.
This app can be used by car sellers to show 3D models or AR images of different cars. Roar is a very popular app used by educators to make educational videos more game-like and make the process of learning fun by including animations and models for teaching.

Part 3 The 4 Best Augmented Reality Apps for Android
Augmented Reality or AR is a very interesting technology, and anybody would want to have this feature in their phone. So here are some apps mentioned below which will help you get ar video app android experience. These four apps top the list of best AR videos for android.
01Google Lens
Google Lens is an image-recognizing application based on AR technology developed by Google, which can be used for free. This app top the list of best Augmented Reality apps. This app can be used to identify objects, texts, images, landmarks, and so much more. Instead of typing your query, you can just scan the product you want to know about.
If you want to buy a product you searched for, the app will provide you with websites selling that particular product. The object needs to be placed in front of the mobile’s camera, and the app uses its Augmented Reality technology to recognize the object and gives appropriate results. You can access Google Lenses by downloading the app or the Google Photos app itself.

02Snapchat
Snapchat is a very popular app, especially among the youngsters. Snapchat is a free app with very minimum system requirements and thus can be accessed by anyone. It has some cool features like fun image effects and exciting texting features. This app offers quirky face filters where the Augmented Reality technology comes to use.
You can transform into anything like a cat, dog, or even another person using this app’s appropriate filter. You can also send funny videos of yourself using those quirky filters through this app. This app gives you a fun and silly experience with taking pictures of yourself or taking a selfie, as popularly known.

03IKEA Place
IKEA Place is a free home décor-based Augmented Reality app. This app is a bridge between Swedish furniture retailers and shoppers. The shoppers or the consumers get the opportunity to place or put out the furniture in their house and decide whether it is suitable for the room or the house. The app considers the whole area and shows the product concerning the space of the area of the room where the product is to be kept. This “drag-and-drop” function helps the users select colors according to the place where they want to keep the product. These features make the shoppers’ experience smooth and hustle-free. This app is one of the best apps for ar video app android users.

04Houzz
Houzz is a home furnishing goods or furniture selling app that uses Augmented Reality for advertising its goods. This app can be used to do interior planning to decide on designs, positions, or layouts of the products. You can view products of different brands and buy the products without exiting the app because of its e-commerce functionality.
This app has an interesting feature: the “View in My Room,” an Augmented Reality powered feature. You can decide the product’s position by virtually placing it in your room. You might not get the most accurate result, but you can get a slight idea of the product and how it would look in your house.
For Win 7 or later (64-bit)
For macOS 10.12 or later
● Ending Thoughts →
● I hope now you know what Augmented Reality is and in which fields it is used.
● It has gained popularity in the marketing industry because it gives a multi-dimensional opportunity to buy and sell products.
● Most importantly, you know how Augmented Reality is different from Virtual Reality.
● This article also highlights the best apple ar video apps and ar video apps android. The apps mentioned in this article are very easy to use. These apps can give you a smooth AR using experience and take it to a different level.
Suppose you want to buy a pair of eyeglasses and don’t know which pair would suit your look. Now you might wish to look at how your face would look on different frames. Here you can use AR and see which pair of glasses would fit you using AR. AR can be used to share and receive various kinds of tacit knowledge. Augmented Reality is often synonymously used for “Computed-mediated reality” and “Mixed- Reality.”
Despite such an exceptional concept, many users raised questions about the privacy issues of this app. AR technology constantly needs to record the real environment, which involves real human beings. Recording their movement breaches their privacy which can cause legal trouble for the user. If the videos are recorded with consent, they will not harm anyone.
In this article
01 [What Is Augmented Reality?](#Part 1)
02 [The 4 Best Augmented Reality Apps for iPhone](#Part 2)
03 [The 4 Best Augmented Reality Apps for Android](#Part 3)
Part 1 What Is Augmented Reality?
Augmented Reality is a technology that uses the real-world environment where virtual objects reside. This process involves an experience where the real or physical world interweaves with virtually created objects. It interweaves so perfectly that the artificial seems a part of the natural. This is an artificial experience, and it adds to the real environment. AR gained popularity in the fields of entertainment and video games.
You might think that AR (Augmented Reality) is the same as VR (Virtual Reality). They are not the same. When someone looks through a VR, everything, including the object’s environment, is virtual or an illusion. When AR is used, the object is virtual, but the environment is real. Suppose you want to buy an item of furniture and you do not know whether it would match your home décor; here, you can use AR to see whether the furniture would fit your décor or not.
Part 2 The 4 Best Augmented Reality Apps for iPhone
Have you ever wondered how it would be to purchase furniture sitting in your bedroom? How would it be like to not worry about which color would fit the home décor o which position would be the best for the product? You can experience these exciting features using this Augmented Reality or AR powered apps. These four apps will give you the best iPhone ar video experience.
01Amikasa
Amikasa is basically a home furnishing AR app. It is exclusive to iOS users only. You can use this app to view products from different brands and websites. This app will improve your shopping experience without going to different stores to get the right product for your room. You can just walk around your house and find the best-fitted product for your house using AR models of the products. Since there are no boundaries to websites and brands, it gives you more opportunity to choose your product wisely. The most interesting part about this app is that you can make your purchases without exiting from this app.
02Wanna Kicks
Wanna Kicks is a fashion-based AR app. To be precise, this app focuses on footwear. This app is also exclusive to iOS users only. You can look into different brands and websites and choose the best footwear for yourself. You can virtually look at how a pair of shoes would look on you when you wear them. You do not browse around to find the most suitable footwear and do it sitting on your bed. These interesting features of this app have gained people’s attention from various countries. This app can push your apple ar video experience to a different level.
03Augment
Augment is a home furnishing goods-based AR app. The app needs to be purchased at $10/month for corporate uses. This app mainly targets e-commerce store owners to make their selling process smooth by creating AR pictures of their products. The seller creates 3D images or models of products that the customers can use to find the best fit for their house. The images created by this app are uploaded for common people’s Augmented Reality experience through mobile apps, websites, or some other source. It comes to great use when the products are sold in the field like event sales, pop-up shops, e-commerce markets, etc.
04Roar
Roar is another AR technology-based app that needs to be purchased at $49 by the creators or hosts. This app aims at business owners. Business owners can use this app in many ways possible, like creating an online store using AR technology using which the consumers can scan the product packages from their homes, using AR technology in advertisements, and many other ways possible.
This app can be used by car sellers to show 3D models or AR images of different cars. Roar is a very popular app used by educators to make educational videos more game-like and make the process of learning fun by including animations and models for teaching.
Part 3 The 4 Best Augmented Reality Apps for Android
Augmented Reality or AR is a very interesting technology, and anybody would want to have this feature in their phone. So here are some apps mentioned below which will help you get ar video app android experience. These four apps top the list of best AR videos for android.
01Google Lens
Google Lens is an image-recognizing application based on AR technology developed by Google, which can be used for free. This app top the list of best Augmented Reality apps. This app can be used to identify objects, texts, images, landmarks, and so much more. Instead of typing your query, you can just scan the product you want to know about.
If you want to buy a product you searched for, the app will provide you with websites selling that particular product. The object needs to be placed in front of the mobile’s camera, and the app uses its Augmented Reality technology to recognize the object and gives appropriate results. You can access Google Lenses by downloading the app or the Google Photos app itself.
02Snapchat
Snapchat is a very popular app, especially among the youngsters. Snapchat is a free app with very minimum system requirements and thus can be accessed by anyone. It has some cool features like fun image effects and exciting texting features. This app offers quirky face filters where the Augmented Reality technology comes to use.
You can transform into anything like a cat, dog, or even another person using this app’s appropriate filter. You can also send funny videos of yourself using those quirky filters through this app. This app gives you a fun and silly experience with taking pictures of yourself or taking a selfie, as popularly known.
03IKEA Place
IKEA Place is a free home décor-based Augmented Reality app. This app is a bridge between Swedish furniture retailers and shoppers. The shoppers or the consumers get the opportunity to place or put out the furniture in their house and decide whether it is suitable for the room or the house. The app considers the whole area and shows the product concerning the space of the area of the room where the product is to be kept. This “drag-and-drop” function helps the users select colors according to the place where they want to keep the product. These features make the shoppers’ experience smooth and hustle-free. This app is one of the best apps for ar video app android users.
04Houzz
Houzz is a home furnishing goods or furniture selling app that uses Augmented Reality for advertising its goods. This app can be used to do interior planning to decide on designs, positions, or layouts of the products. You can view products of different brands and buy the products without exiting the app because of its e-commerce functionality.
This app has an interesting feature: the “View in My Room,” an Augmented Reality powered feature. You can decide the product’s position by virtually placing it in your room. You might not get the most accurate result, but you can get a slight idea of the product and how it would look in your house.
For Win 7 or later (64-bit)
For macOS 10.12 or later
● Ending Thoughts →
● I hope now you know what Augmented Reality is and in which fields it is used.
● It has gained popularity in the marketing industry because it gives a multi-dimensional opportunity to buy and sell products.
● Most importantly, you know how Augmented Reality is different from Virtual Reality.
● This article also highlights the best apple ar video apps and ar video apps android. The apps mentioned in this article are very easy to use. These apps can give you a smooth AR using experience and take it to a different level.
Also read:
- How to Use LUTs in Premiere Pro
- New 2024 Approved How to Merge Audio and Video Using FFmpeg
- 2024 Approved How to Concatenate Videos Using FFmpeg
- Updated How Can You Make a Slideshow Look Aesthetic? Follow the Given Discussion to Learn About Creating an Aesthetic Slideshow All by Yourself
- In 2024, Looking for the Best Quiz-Making Tools? Read Our Full Review to Find Out the 10 Best Video Quiz Makers Available
- New Are You in Search for a Step-by-Step Guide to How to Add Effects in TikTok? Here It Is. To Add some Flavor to Your TikTok Videos. Use These How to Add Effect to TikTok Recommendations
- AVI Video Format Is Known and Famous for Its Features. Many of You Must Have Heard About It but Do You Know some Details About AVI? Lets Increase Your Knowledge and Talk About It
- Updated 20 Best Text To Speech Software Windows, Mac, Android, iPhone & O
- Updated Best 8 Online GIF to APNG Converters for 2024
- How to Create Emoji on Mac That Take Less Than 10 Mins for 2024
- Updated How to Use LUTs Perfectly in Final Cut Pro
- New 2024 Approved How to Add a Slideshow in PowerPoint
- 2024 Approved Complete How-To Tutorials of Kapwing Collage Maker
- Updated In 2024, Best 8 Animated Video Makers
- Updated 6 Ways to Mimic Professional Filming Gears
- Updated Create Promotional Video for 2024
- New 2024 Approved Featuring The Use of Camera Shake in Creating the Best Videos
- New How To Create The Best AI Thumbnail Using The Right Tools for 2024
- 2024 Approved How to Do Datamoshing Effect in After Effects?
- Add Green Screen Video on TikTok
- New Liquid Water Text Reveal Intro Offers an Impressive Opening to Any Video Content. Go Through the Detailed Steps to Create Liquid Water Reveal Intro in Wondershare Filmora
- Updated 2024 Approved A Guide to Speed up a Video on Splice
- In 2024, Easy Way to Combine Several Xvid Files Into One Windows, Mac,Android
- 2024 Approved How To Achieve LumaFusion Color Grading Through LUTs
- New In 2024, VSCO Slow Motion
- Overview of Best LUTs for Vlog for 2024
- In 2024, Do You Want Your Photo and Video Edits to Look Like Peter McKinnons? Color-Grade Your Media Files with Peter McKinnon LUTs to Make Your Content Stand Out
- Are You Also Facing a Problem with the Snapchat Camera Zoomed In? Find Out the Easiest Methods to Fix This Error without Installing a Third-Party Tool for 2024
- New Motion Blur Photo With GIMP Step-By-Step Guide
- New 2024 Approved 2 Methods to Cut Video in VLC on Windows
- New 2024 Approved 3 Ways to Create Motion Text Effects for Your Video
- Updated To Know How to Add Effects in Premiere Pro, You Need to Follow This Guide as It Has All You Need to Know to Add Effects in Premiere Pro. Learn More Here
- New 2024 Approved Best Video Editing Courses Online with Certificate
- How to Share YouTube Video on Zoom?
- How to Add Subtitles in Canva for 2024
- In 2024, Top 8 Memoji Makers to Make a Memoji on PC, Android & iPhone
- Updated In 2024, How to Add a Lower Third to Your Video
- New Easy Steps to Slow Down a Video on iPhone and Android
- 2024 Approved To Get Cinematographs of a Music Video, You Need to Understand the Basics of Camera Movement. As Well Framing and Lighting of the Setup Are Illustrated in This Article
- Updated Best 20 Slideshow Makers for Win/Mac/Online Review
- New How to Be a YouTube Vlogger
- In 2024, Apple iPhone 15 Plus Backup Password Never Set But Still Asking? Heres the Fix
- In 2024, What You Want To Know About Two-Factor Authentication for iCloud On your iPhone 12 Pro Max
- 3 Ways to Export Contacts from Apple iPhone 14 Pro Max to Excel CSV & vCard Easily | Dr.fone
- In 2024, How to Fake Snapchat Location on Samsung Galaxy S23 FE | Dr.fone
- In 2024, Ultimate guide to get the meltan box pokemon go For Sony Xperia 1 V | Dr.fone
- In 2024, How to Unlock Apple iPhone 15 Without Passcode?
- In 2024, For People Wanting to Mock GPS on Itel S23+ Devices | Dr.fone
- 11 Best Location Changers for Honor X8b | Dr.fone
- Is your Asus ROG Phone 7 Ultimate working too slow? Heres how you can hard reset it | Dr.fone
- In 2024, How To Change Your Apple ID Password On your Apple iPhone 11 Pro
- In 2024, How to Transfer Contacts from Realme C67 5G to Other Android Devices Using Bluetooth? | Dr.fone
- Mastering Lock Screen Settings How to Enable and Disable on Vivo X Flip
- Title: If You Wish to Edit FLV Videos without Any Problems, You Should Utilize a Multipurpose Video Editor that Supports the FLV File Format
- Author: Chloe
- Created at : 2024-04-24 07:07:56
- Updated at : 2024-04-25 07:07:56
- Link: https://ai-editing-video.techidaily.com/if-you-wish-to-edit-flv-videos-without-any-problems-you-should-utilize-a-multipurpose-video-editor-that-supports-the-flv-file-format/
- License: This work is licensed under CC BY-NC-SA 4.0.
