:max_bytes(150000):strip_icc():format(webp)/GettyImages-screen-mirroring-842272124-5a7897e104d1cf0037763c0a.jpg)
In 2024, 11 Best Video Editing Apps for iPhone

Top 11 Best Video Editing Apps for iPhone
Videography is an art, whether done professionally or just for fun. It includes many phases from pre-production to post-production and video editing is one of its important aspects. It is a gamechanger, as most of the mistakes done during production can be fixed in editing.
Video editing is done on large scale for film industries which require expensive and powerful computers but we won’t about them now. As video editing doesn’t only depend on powerful softwares and expensive computers, Skills play a vital role in video editing. A skilled artist on a mobile phone can create better content than a beginner with an expensive PC.
Therefore, here we will talk about small-scale editing which can be done on mobile phones and especially iPhones. Considering iPhones as they are one of the most common devices used by vloggers and small filmmakers. As a mobile video editor, you can edit your clips anywhere you want. Therefore editing videos on a go is quite important. So we have selected some top iPhone video editors for you which are as following:
- Filmora Go
- Free iPhone Video Editors
- Adobe Premiere Rush
- CapCut
- iMovie
- GoPro-Quik
- VN Video Editor
- Paid iPhone Video Editors
- Kinemaster
- Power Director
- LumaFusion
- InShot
- VivaCut
Filmora Go:
It is available on IOS and Android both.
Apart from having a professional video editor for PC, Wondershare has also introduced a video editor for mobile phones. Filmora Go is an amazing video editor, with many cool features such as chroma key, mask, keyframing, blending, e.t.c. It is fast and easy to use with built-in effects, transitions, and presets to speed up the editing process. It is a paid video editor but you can try it for free, free trial includes most of the features but it leaves a watermark on export.
~Features:
- Has speed curves for smooth speed ramping.
- Supports multiple images and video layers.
- Have many presets and filters for fast pace editing.
- Have cool features like chroma key, masking, keyframing, e.t.c.
- Supports “Pixabay’s” stock library.
~Cons:
- Its UI doesn’t support editing in landscape orientation.
- It doesn’t support 4k video resolution.
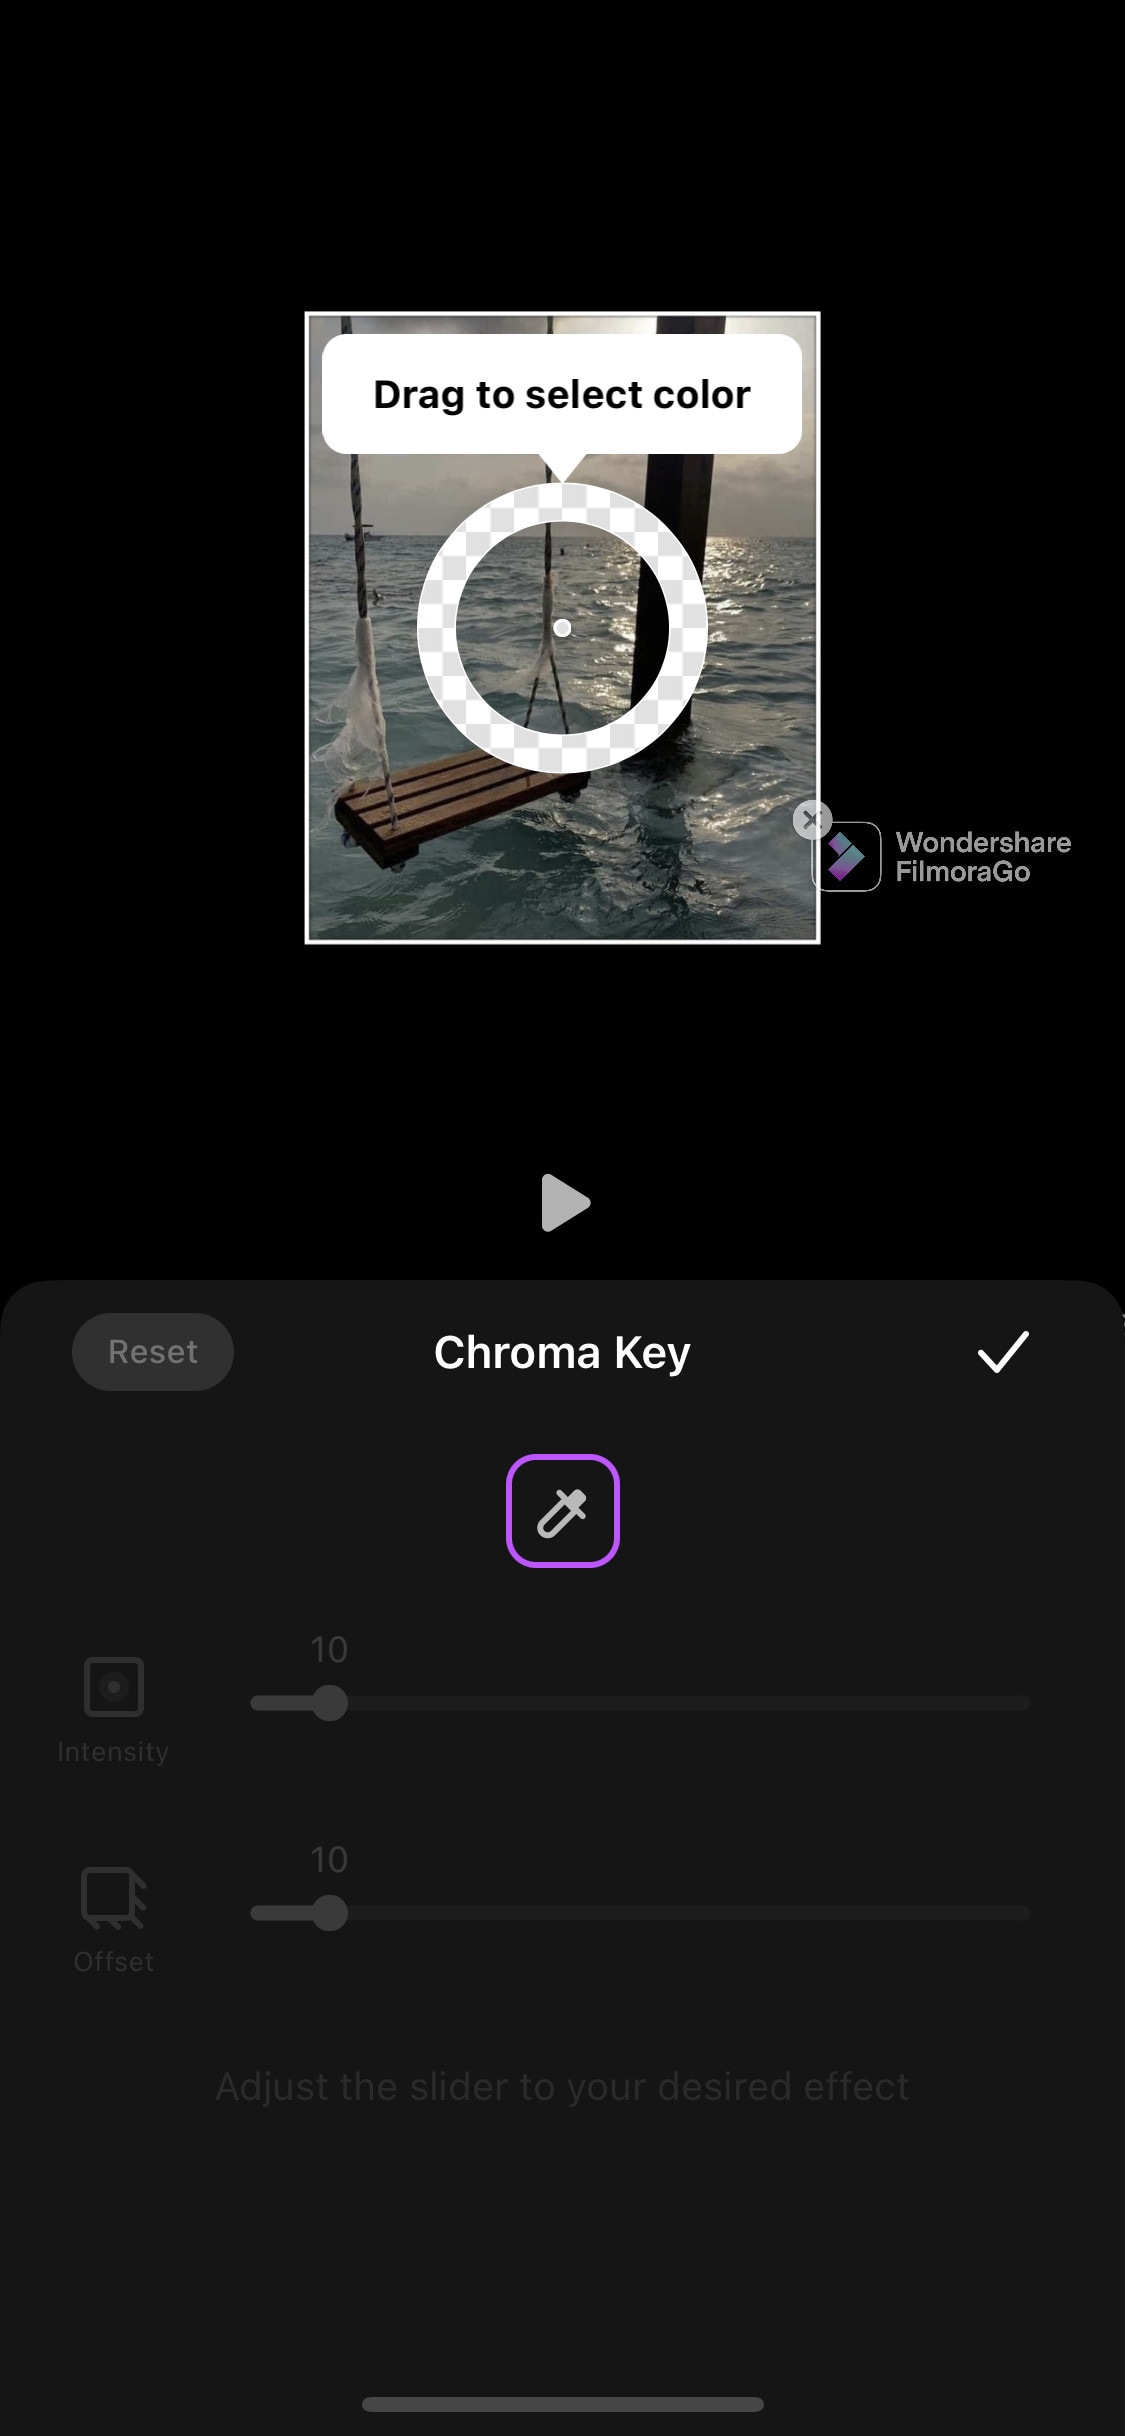
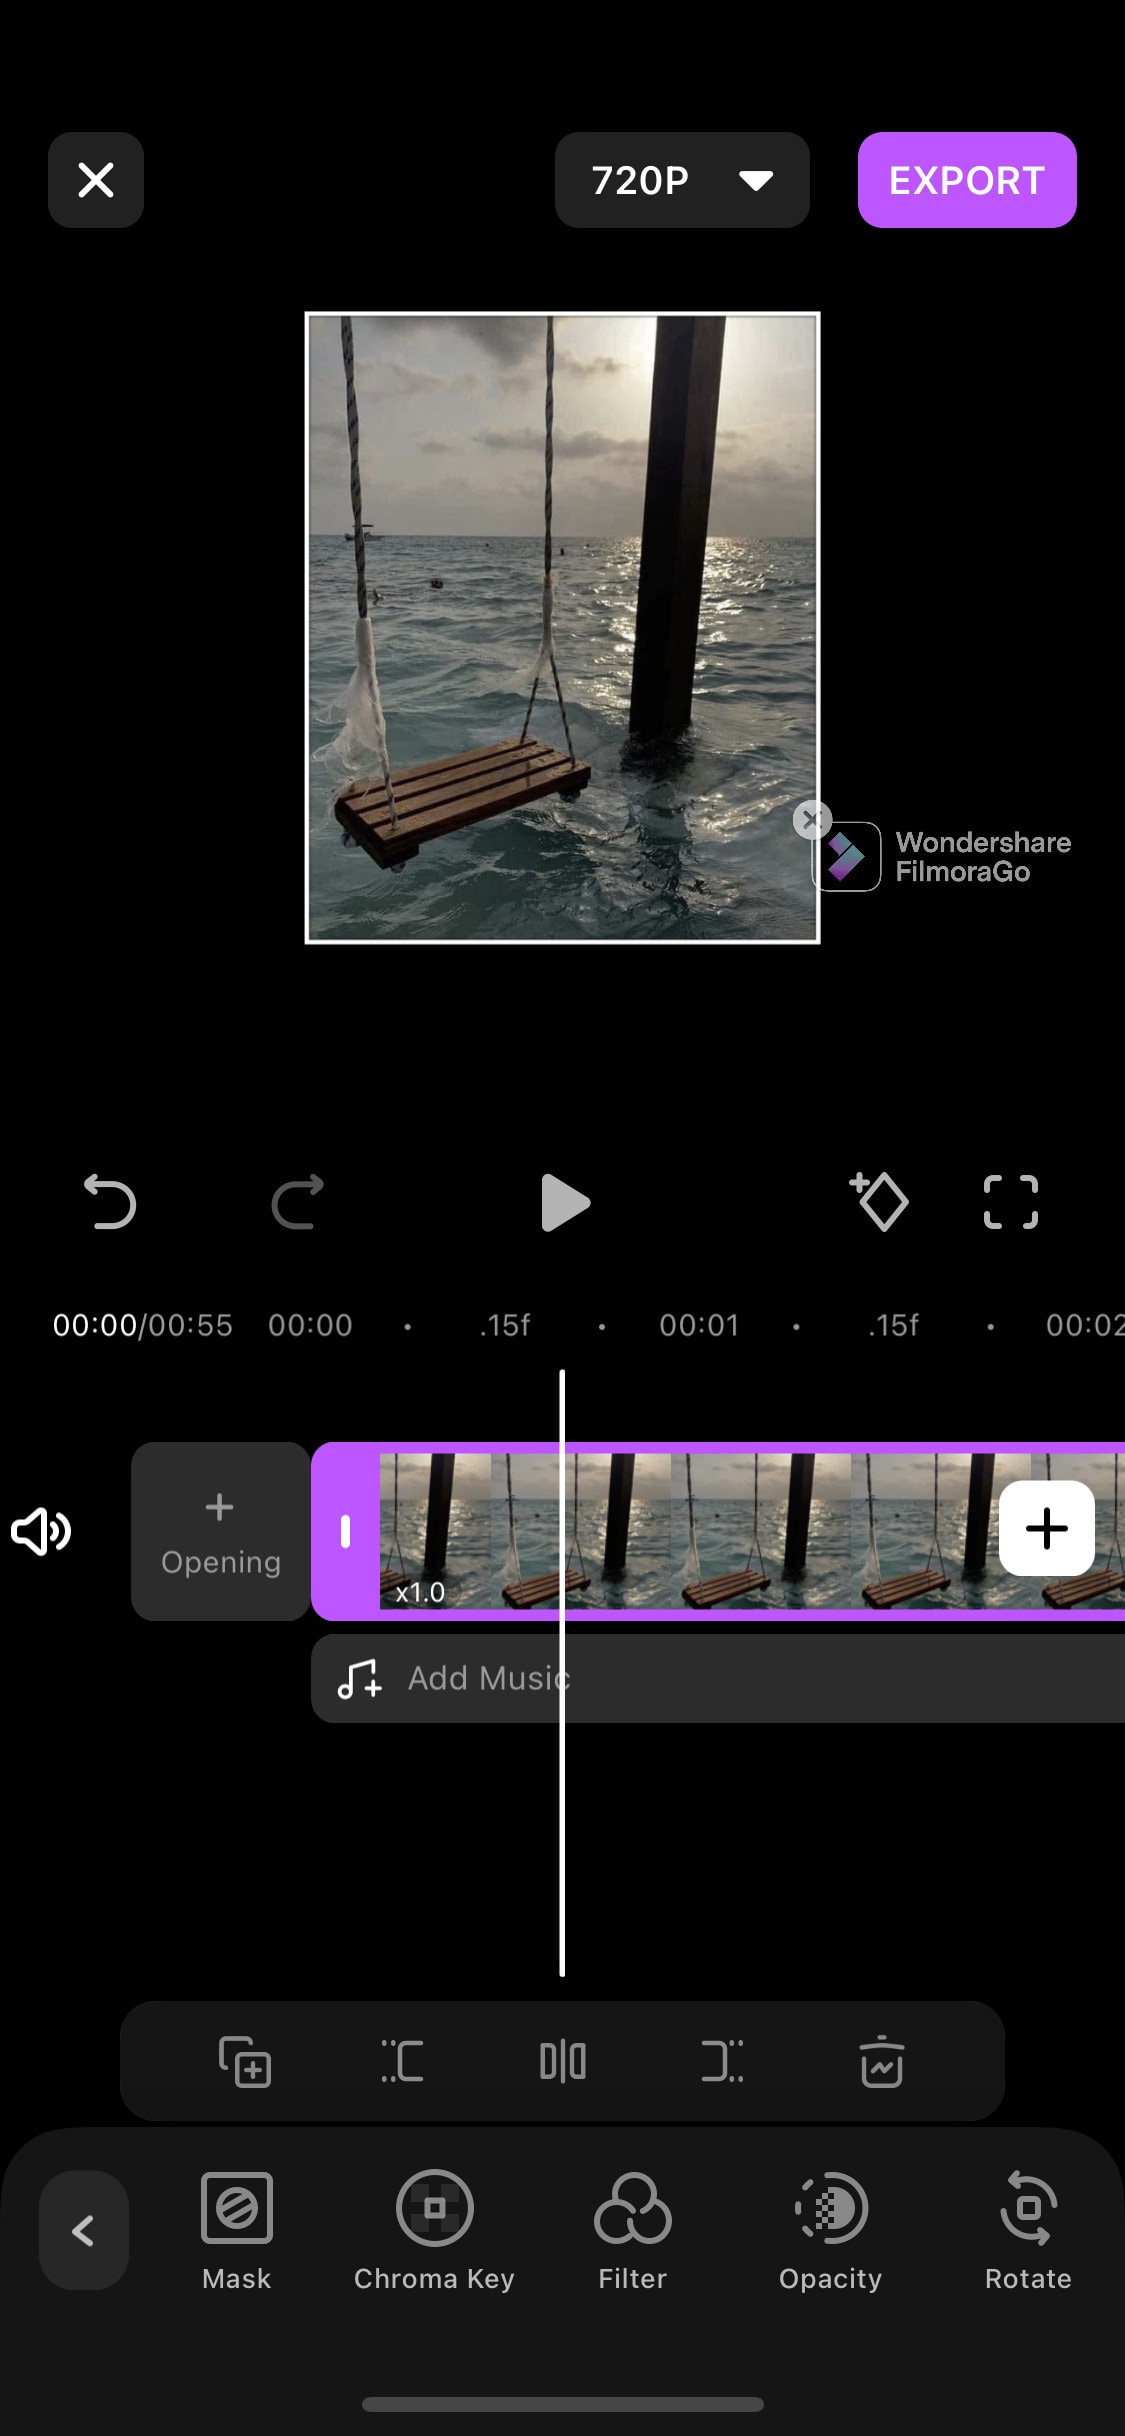
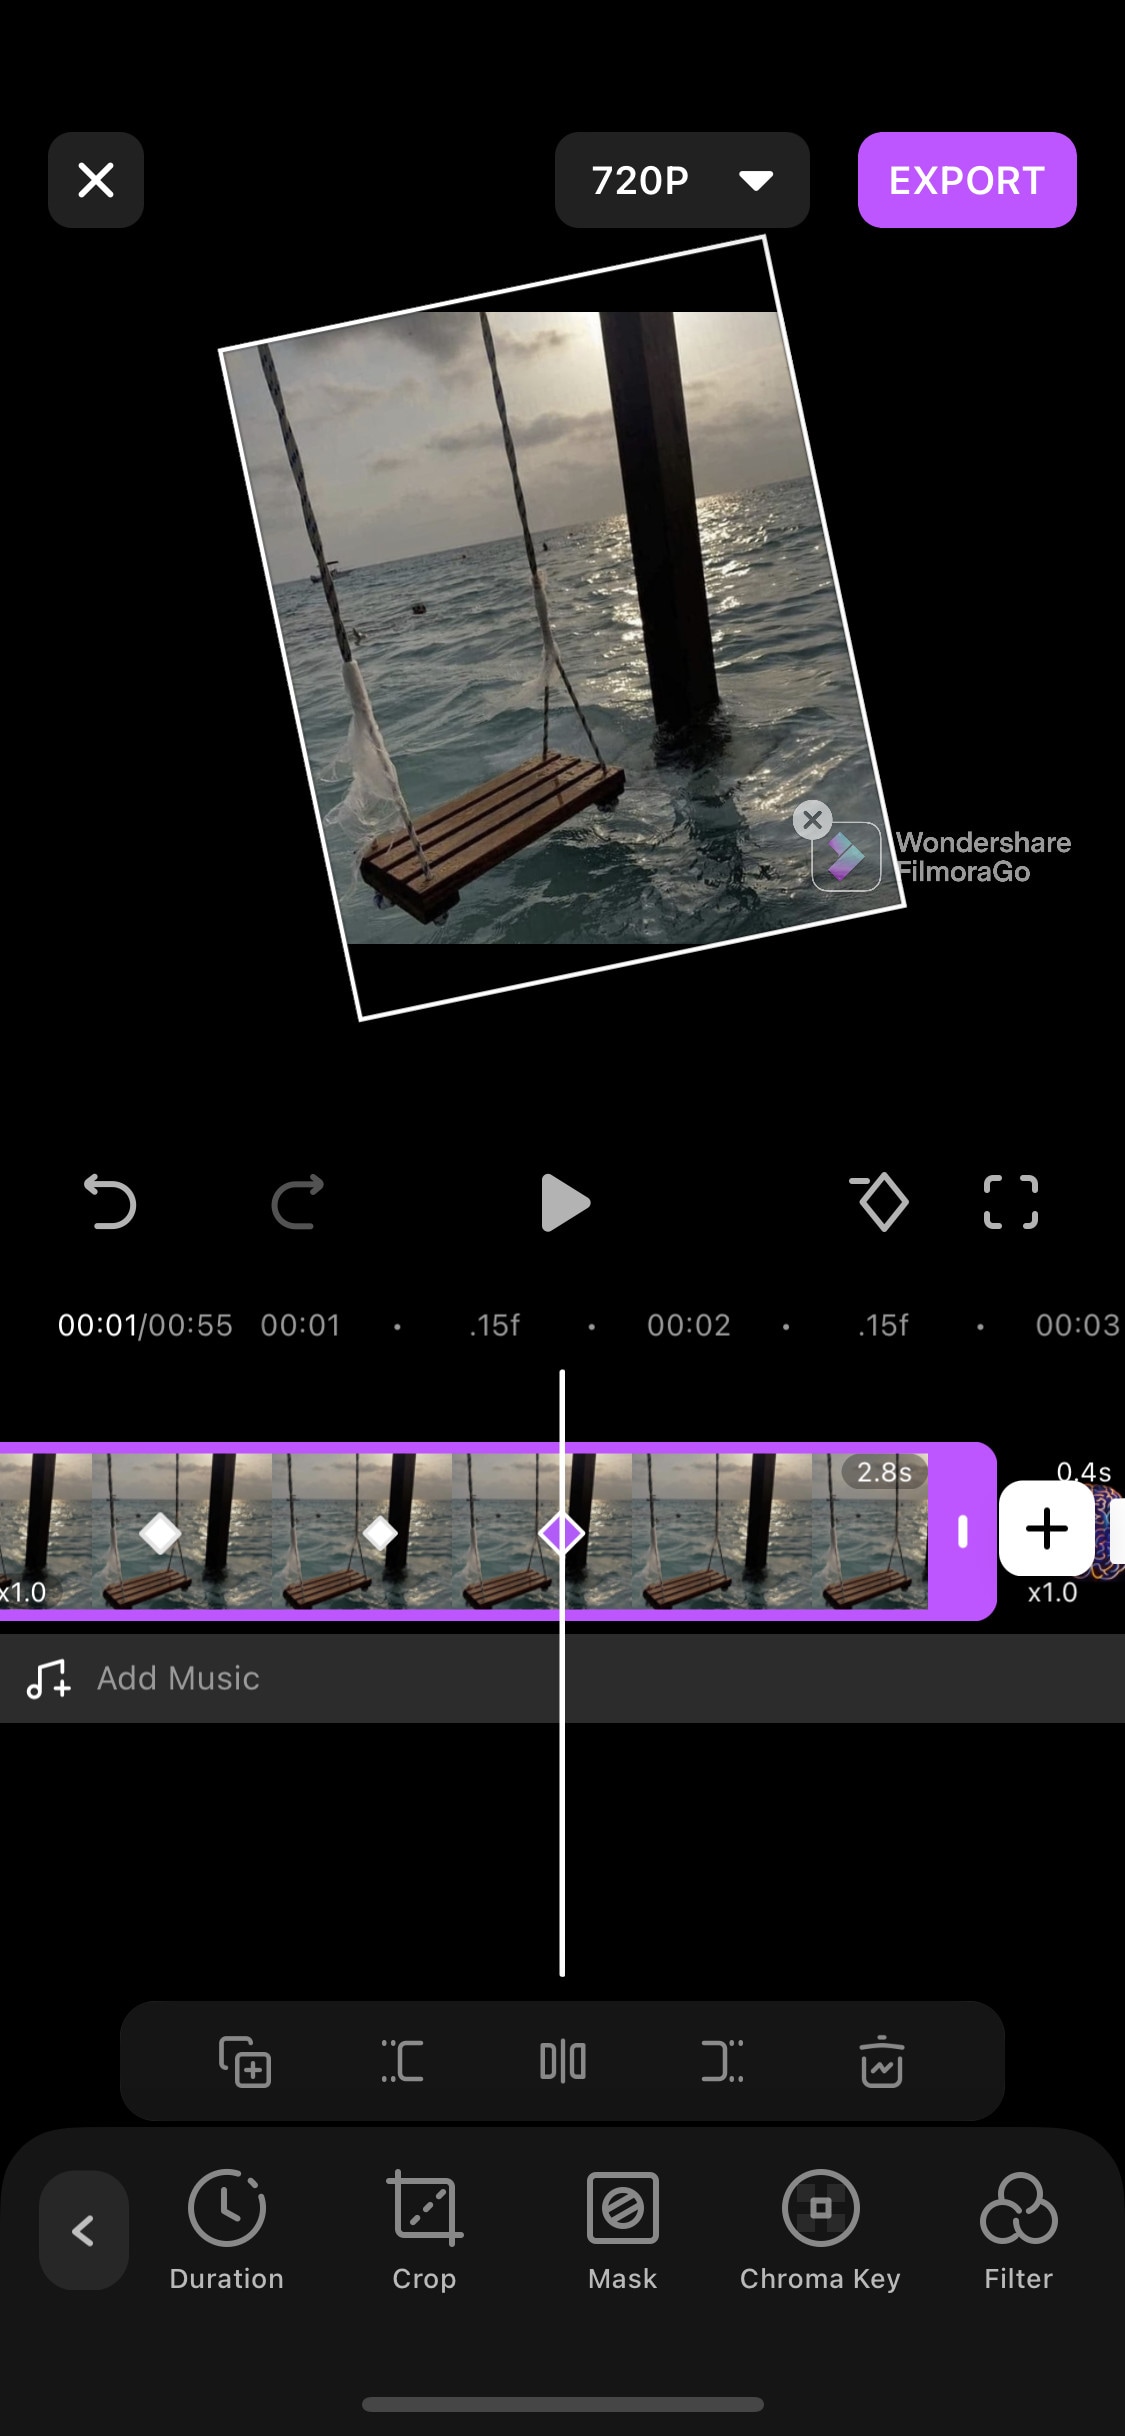
~Steps:
Import: Open Filmora Go, Click “New project” to start a new project, or Choose the previous one from the “Draft” portion. Select videos or images to import to your timeline. Hold and drag the clip to change its arrangement.
Edit: You can add text, effects, stickers, layers, e.t.c. by clicking their icon, present on the bar at the bottom.
Click the “PiP” icon to add image or video layers, you also can add multiple layers.
Select a clip to edit it. Different editing tools appear on the bottom bar. Here you can change its opacity, its speed, or add animations.
Effects: Click the “Effects” icon to open the effects menu. Select an effect to apply to your clip.
Click the white box between two clips to add transitions.
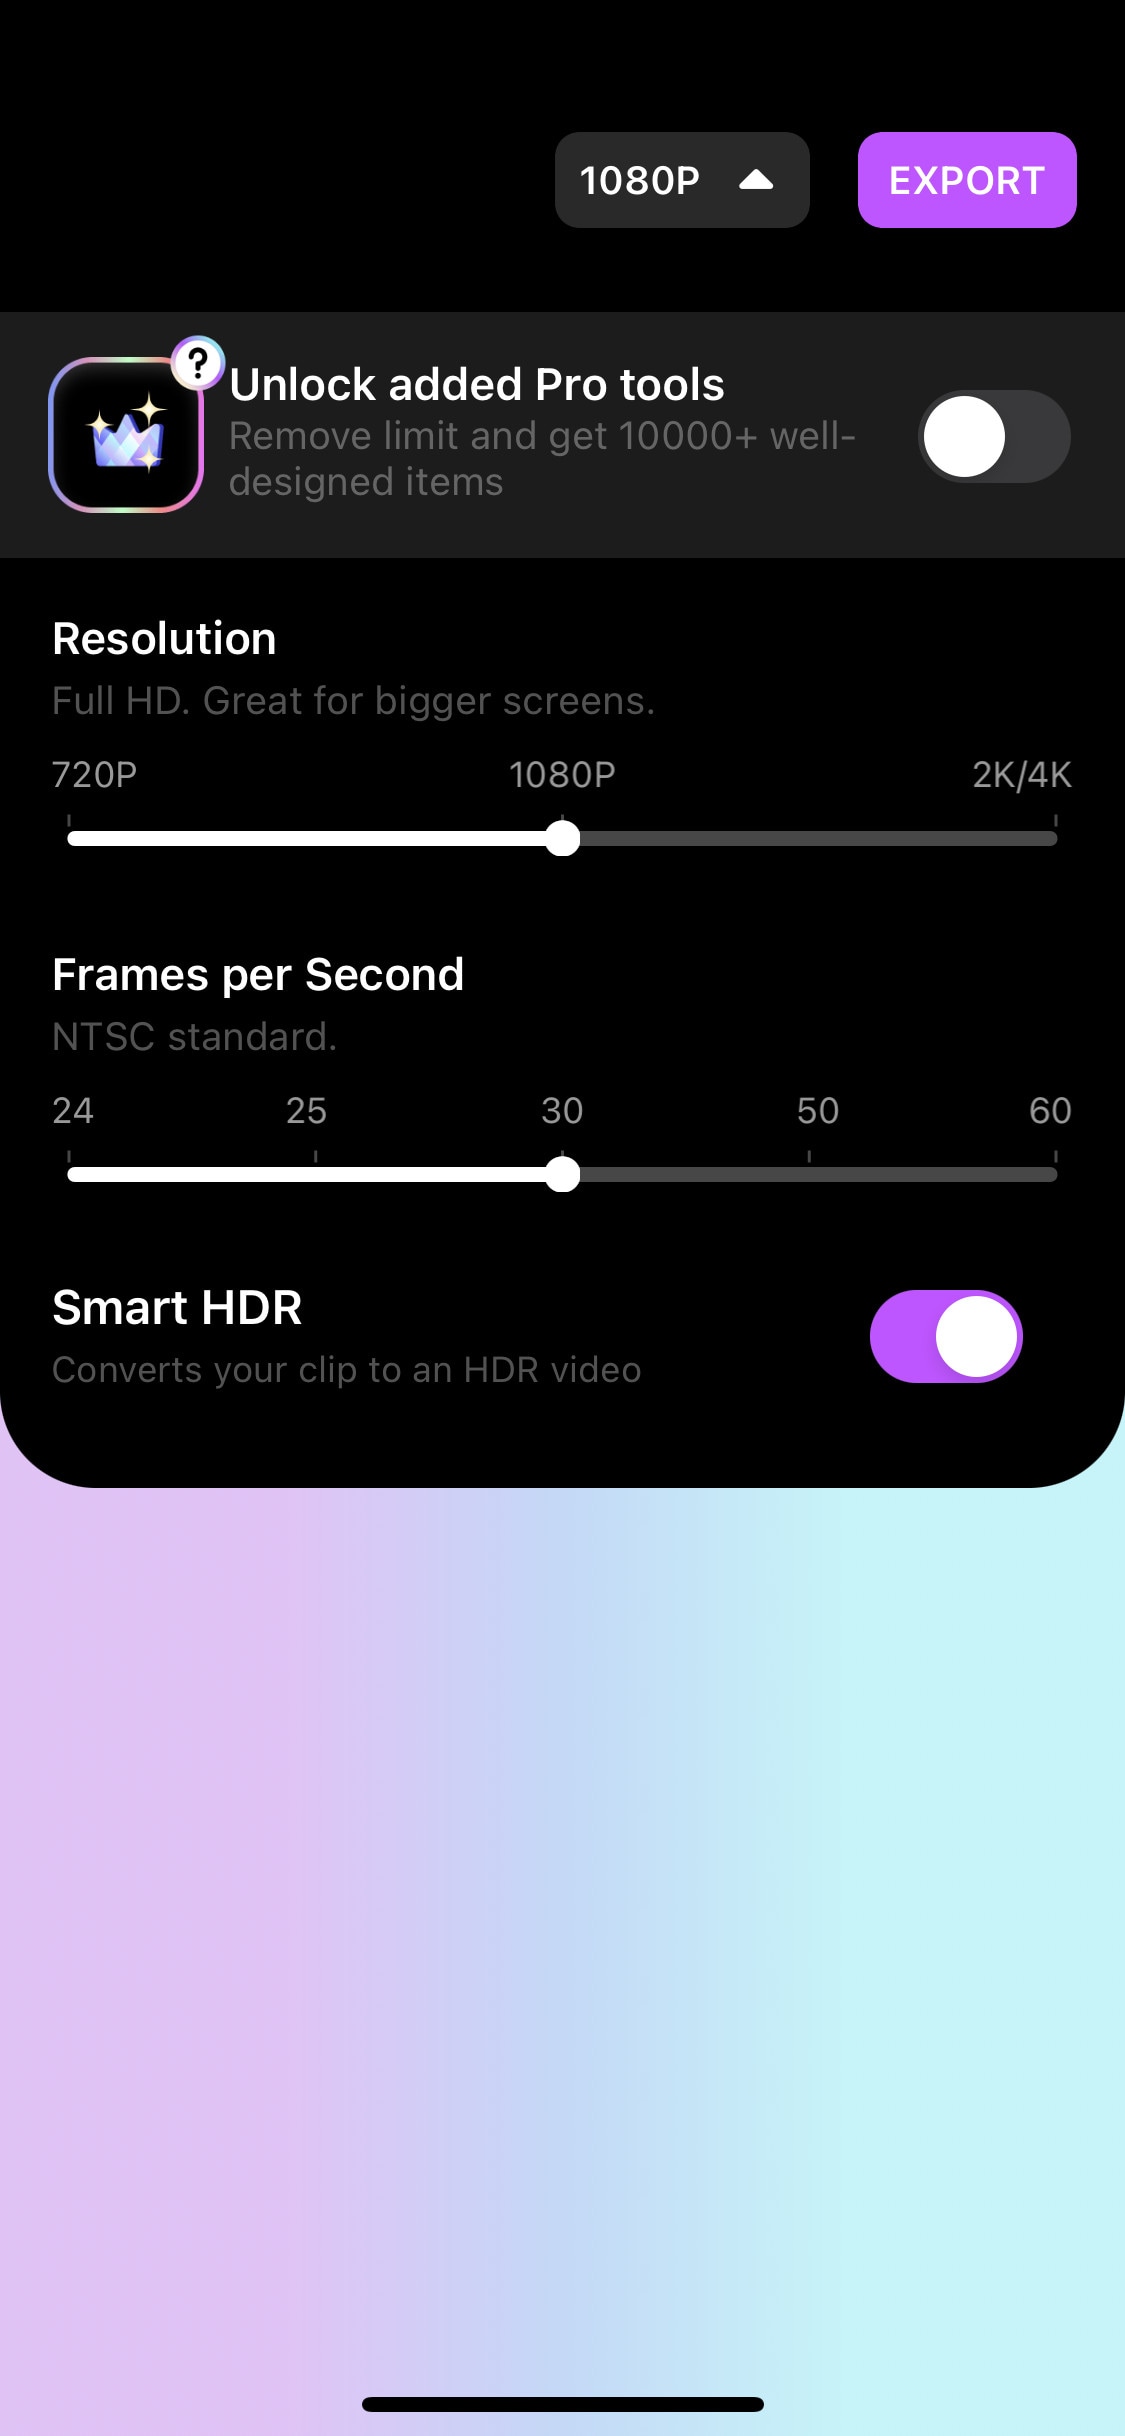
Export: Click the “Export” button to export your file. Select your desired resolution and frame rate to export your clip.
Some Free iPhone Video Editors:
If you do video editing rarely or do just basic video editing then it is useless to purchase paid video editors. Even if you are a content creator but tight on budget or new to this field, you can use free video editing softwares and save your cash for other pieces of equipment.
So, here we have mentioned some free video editors for you. Some of these are quite powerful and can do advanced editing while others are simple but easy to use.
Adobe Premiere Rush:
It is available on IOS and Android both.
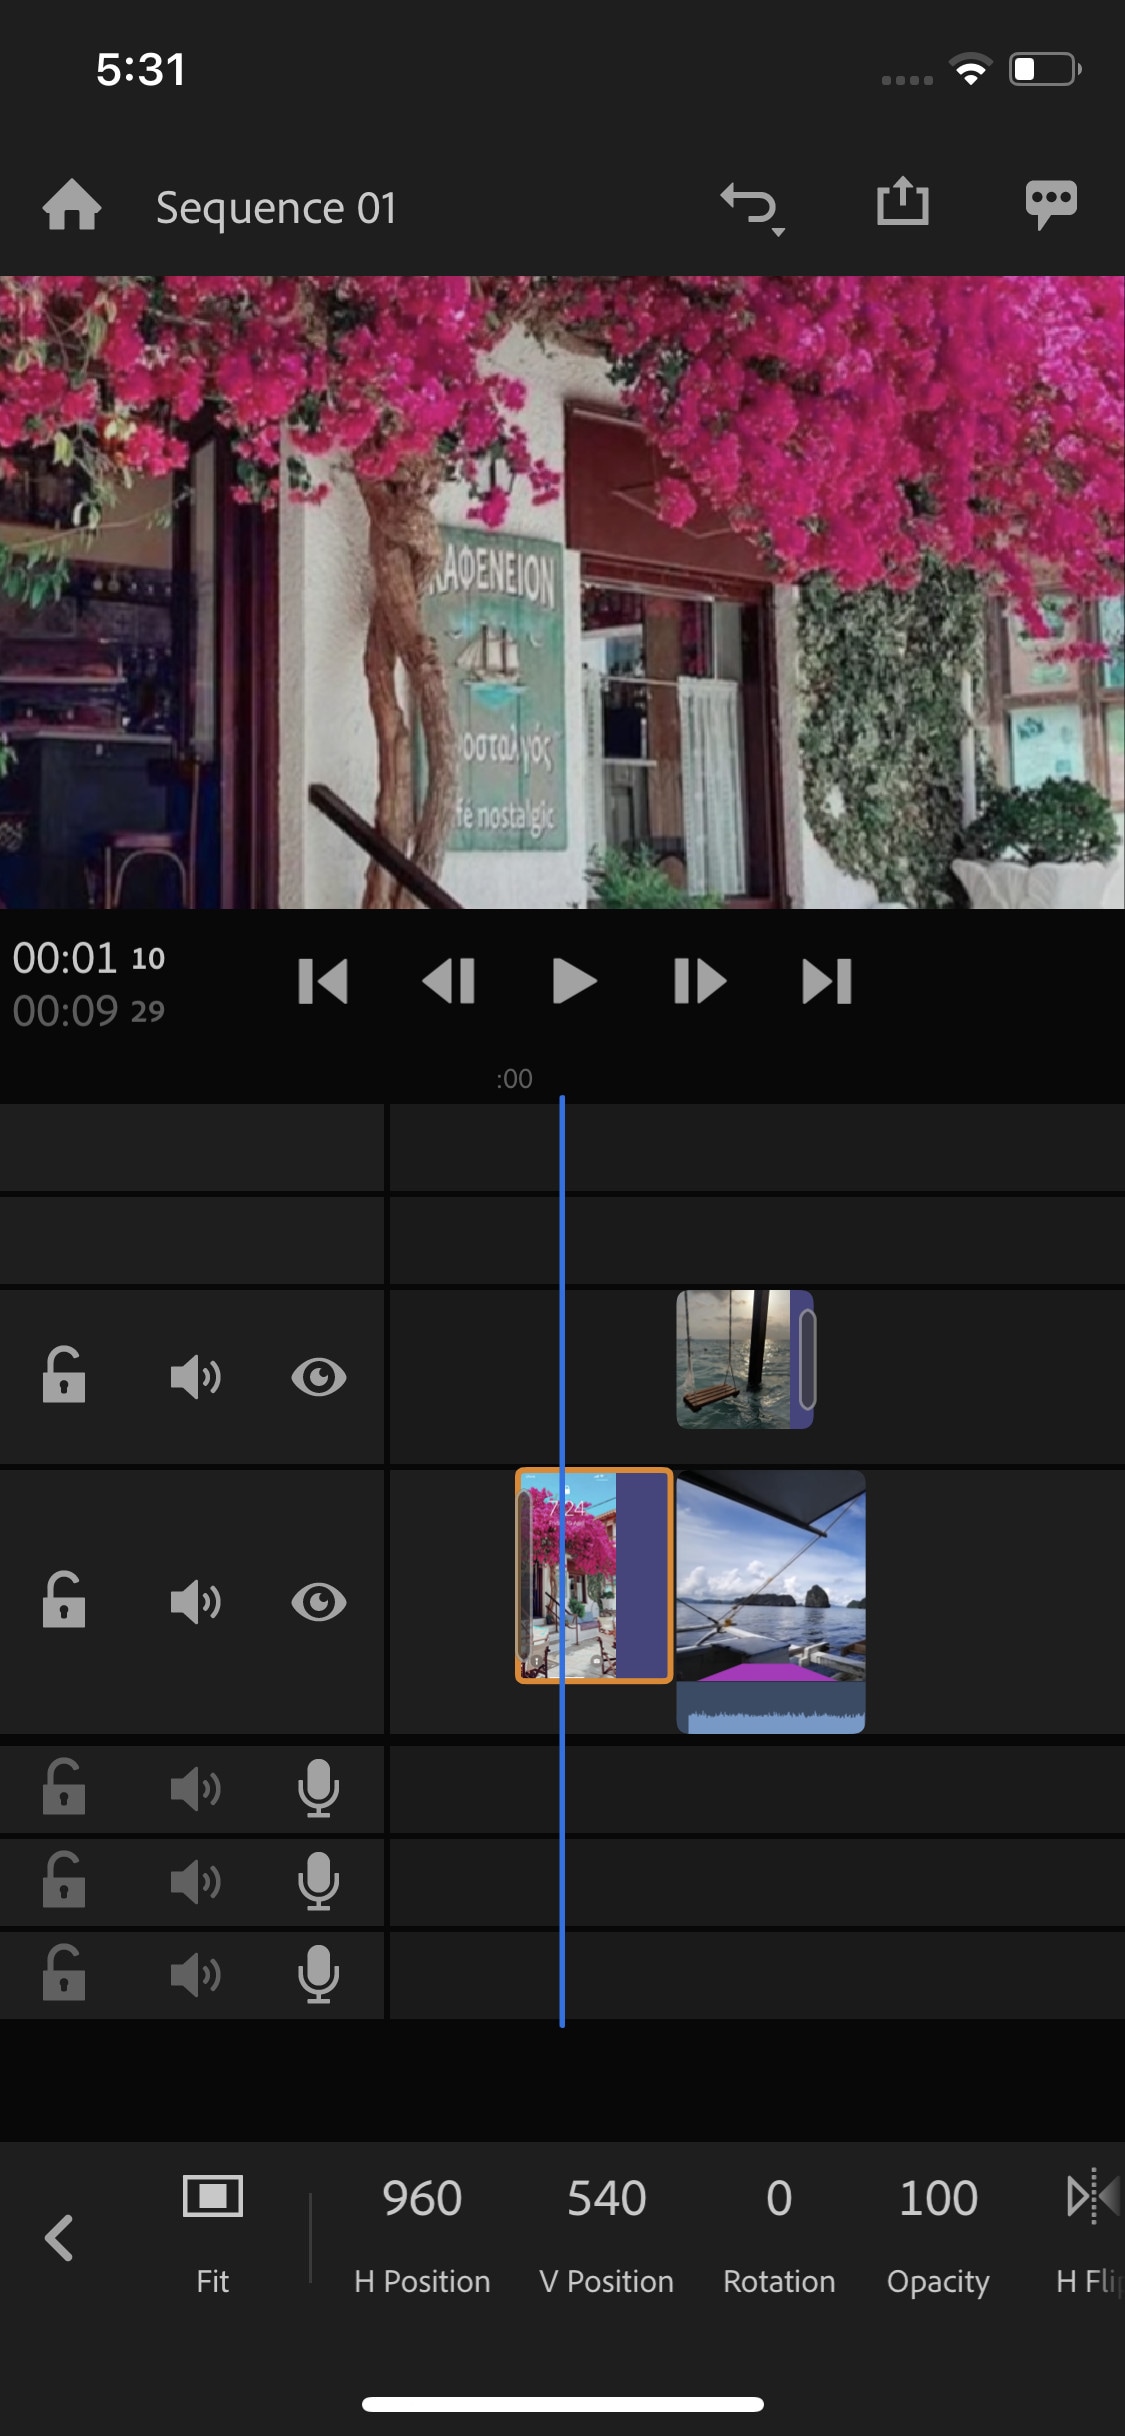
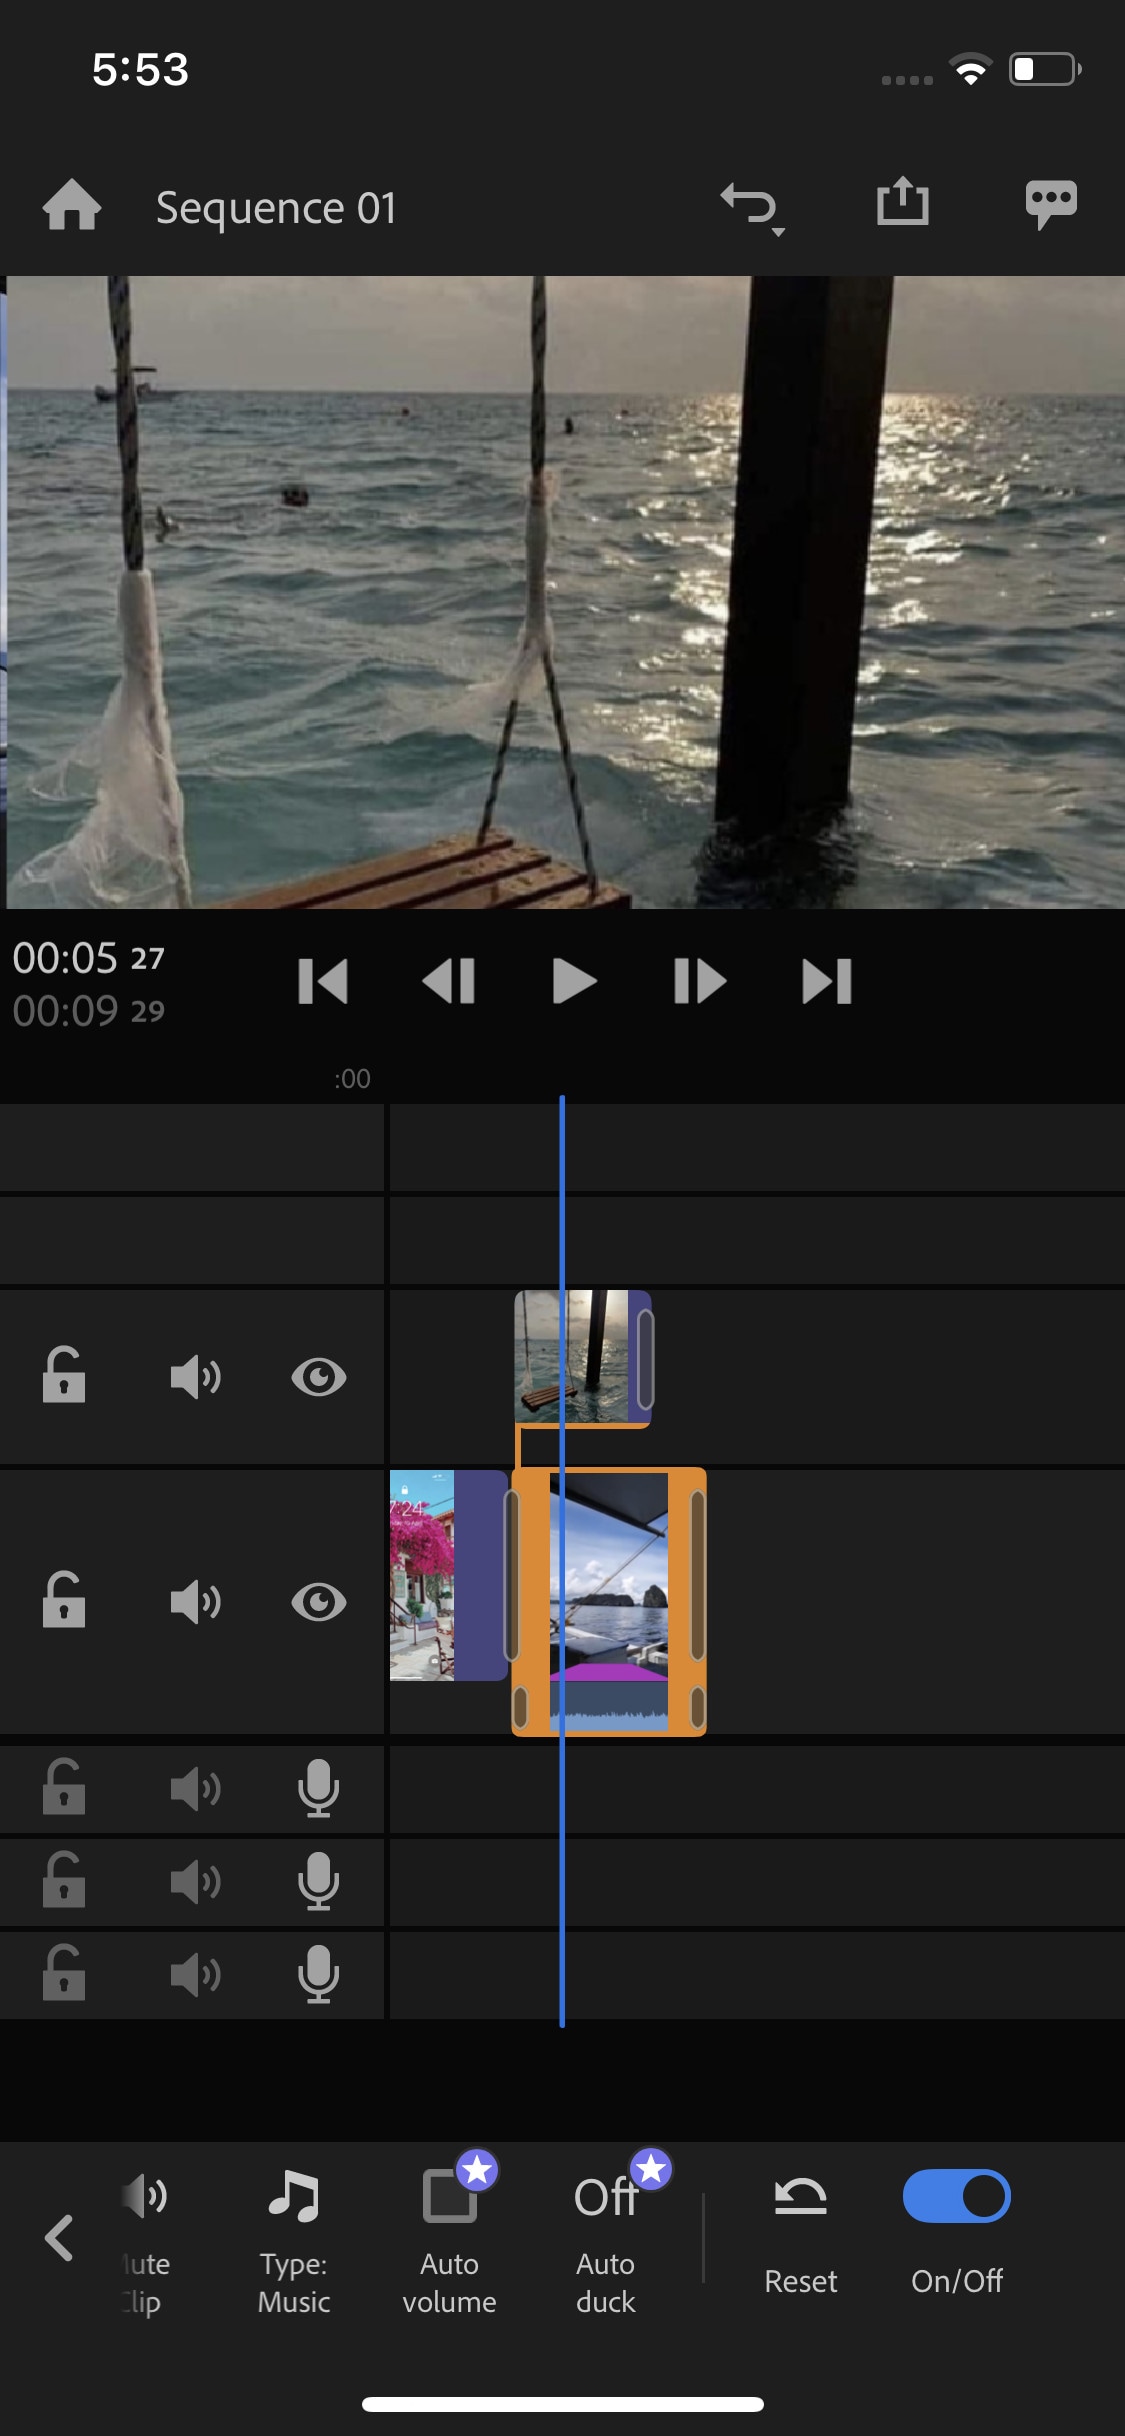
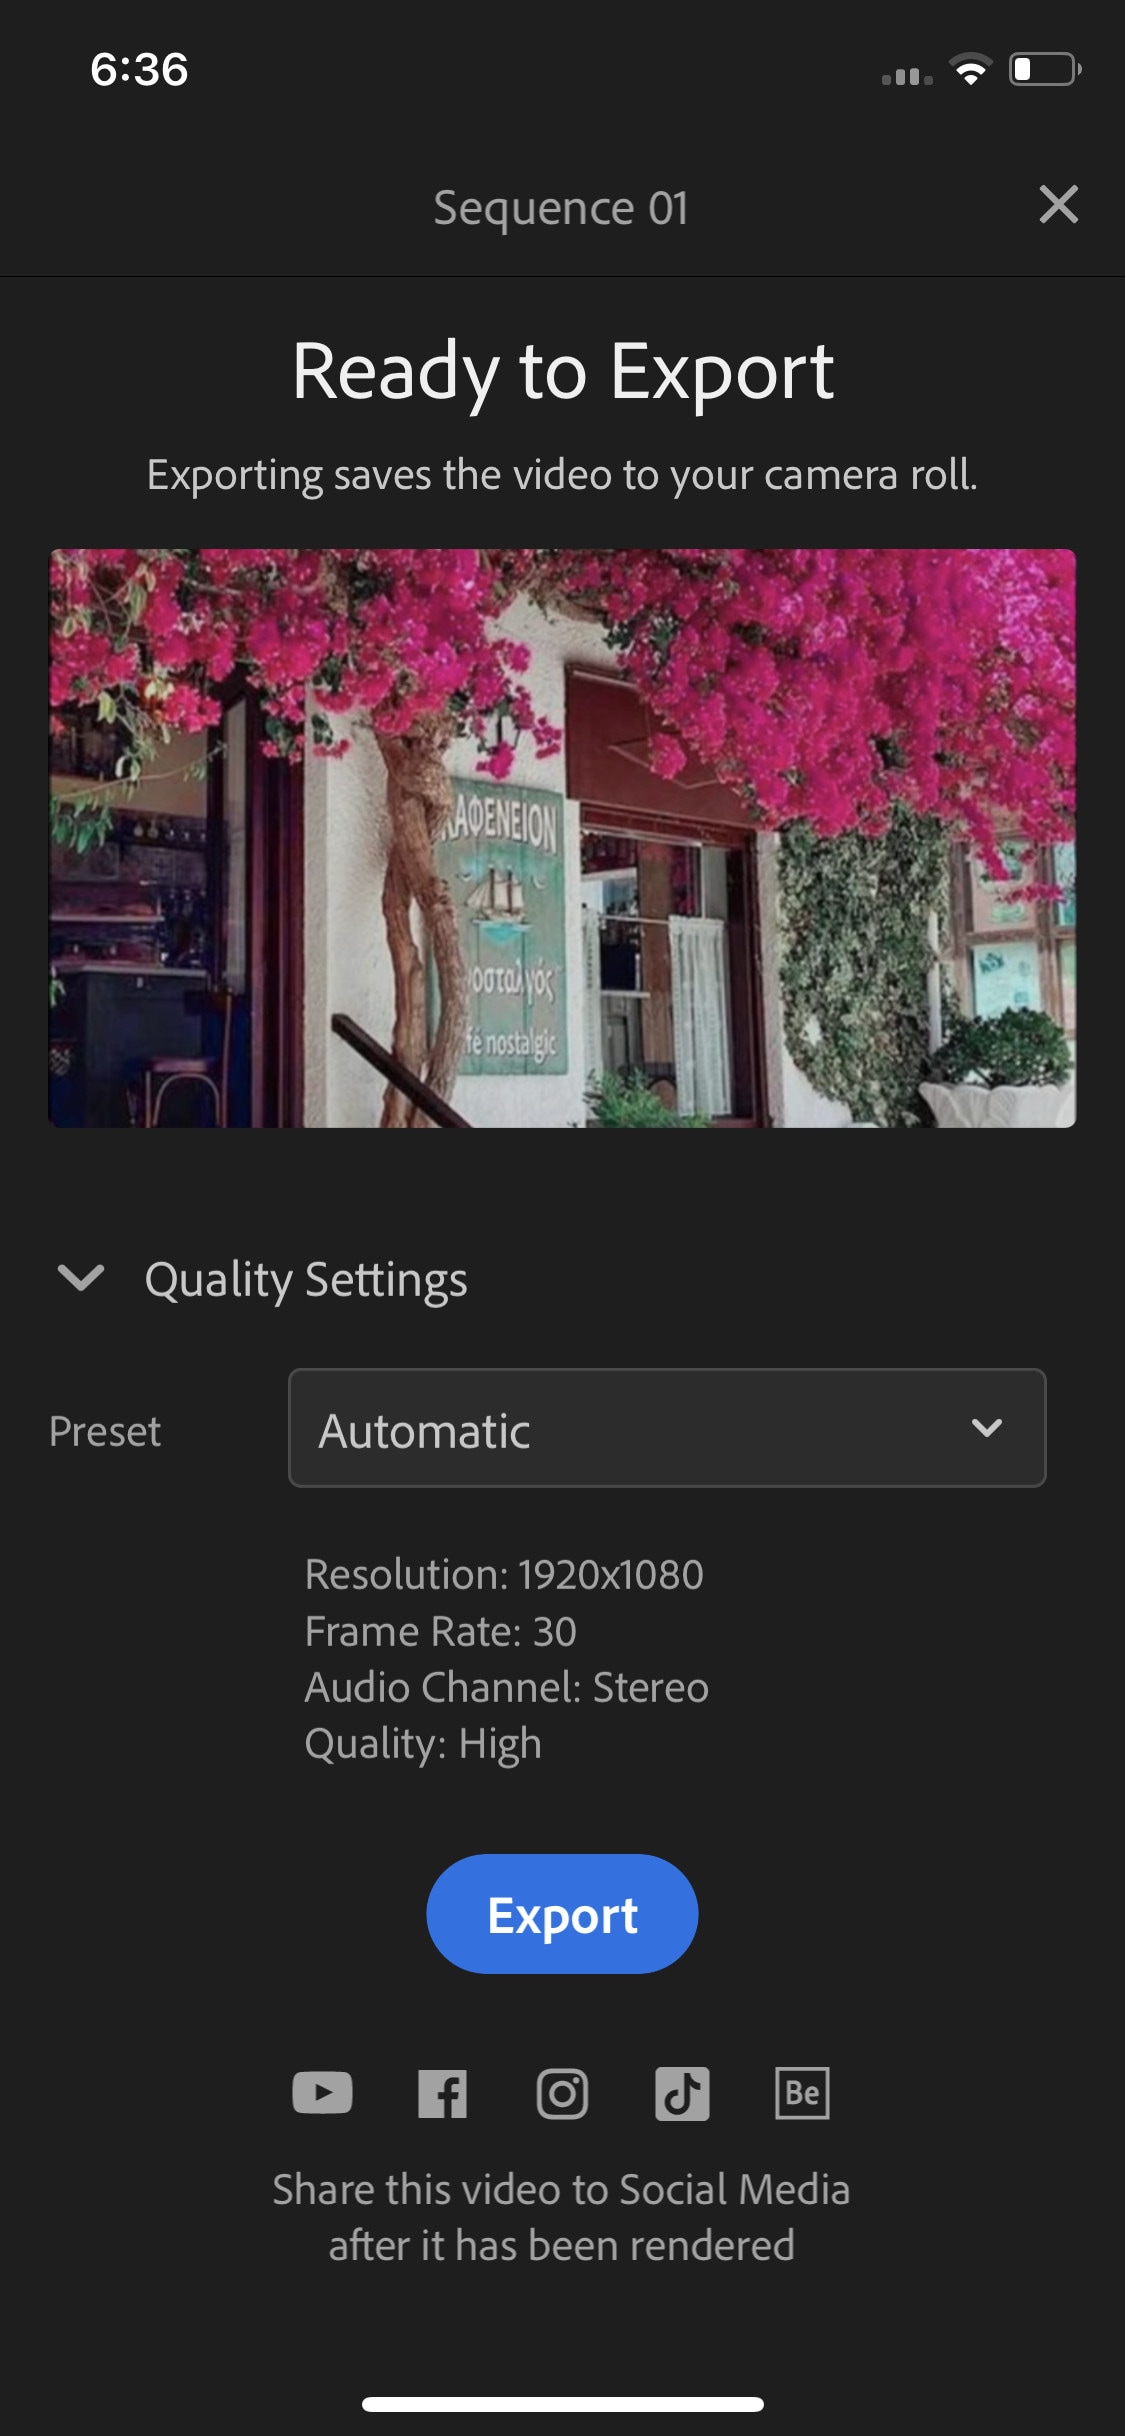
Whether you are a beginner or a content creator using mobile phones or PCs for editing, you may have heard of Adobe softwares. It is a computer software company which makes powerful softwares for different purposes. Like premiere pro, they have designed a compact version for phones named “Premiere Rush”. It is a free video editor that has all the tools needed for video editing, from video effects to color grading and audio editing. Its UI is a bit similar to PC video editors. It is a free video editor with no watermarks. Although it takes some time to understand it. But once mastered, you can do editing quickly.
~Features:
- It is a free video editor with no watermark.
- It supports up to 4K resolution at 60fps.
- You can extract audio and can do voiceover directly from the software.
- It has hundreds of filters, overlays, and title designs.
- It has basic color grading tools.
- It also has a motion tracking feature. (in Paid version)
- It supports multiple audio, video, and text layers.
~Cons:
- It only runs on high-end devices. ( It is not supported in most mid-range phones)
- Not suitable for beginners. Its UI is quite hard to understand.
- Doesn’t have common features like the chroma key, masking, e.t.c.
~Price:
Its Premium version is available for 9.99/month. It includes some premium features. Or you can purchase the “All Apps Bundle” at $54.99/month for the annual plan.
CapCut:
It is available on IOS and Android both.
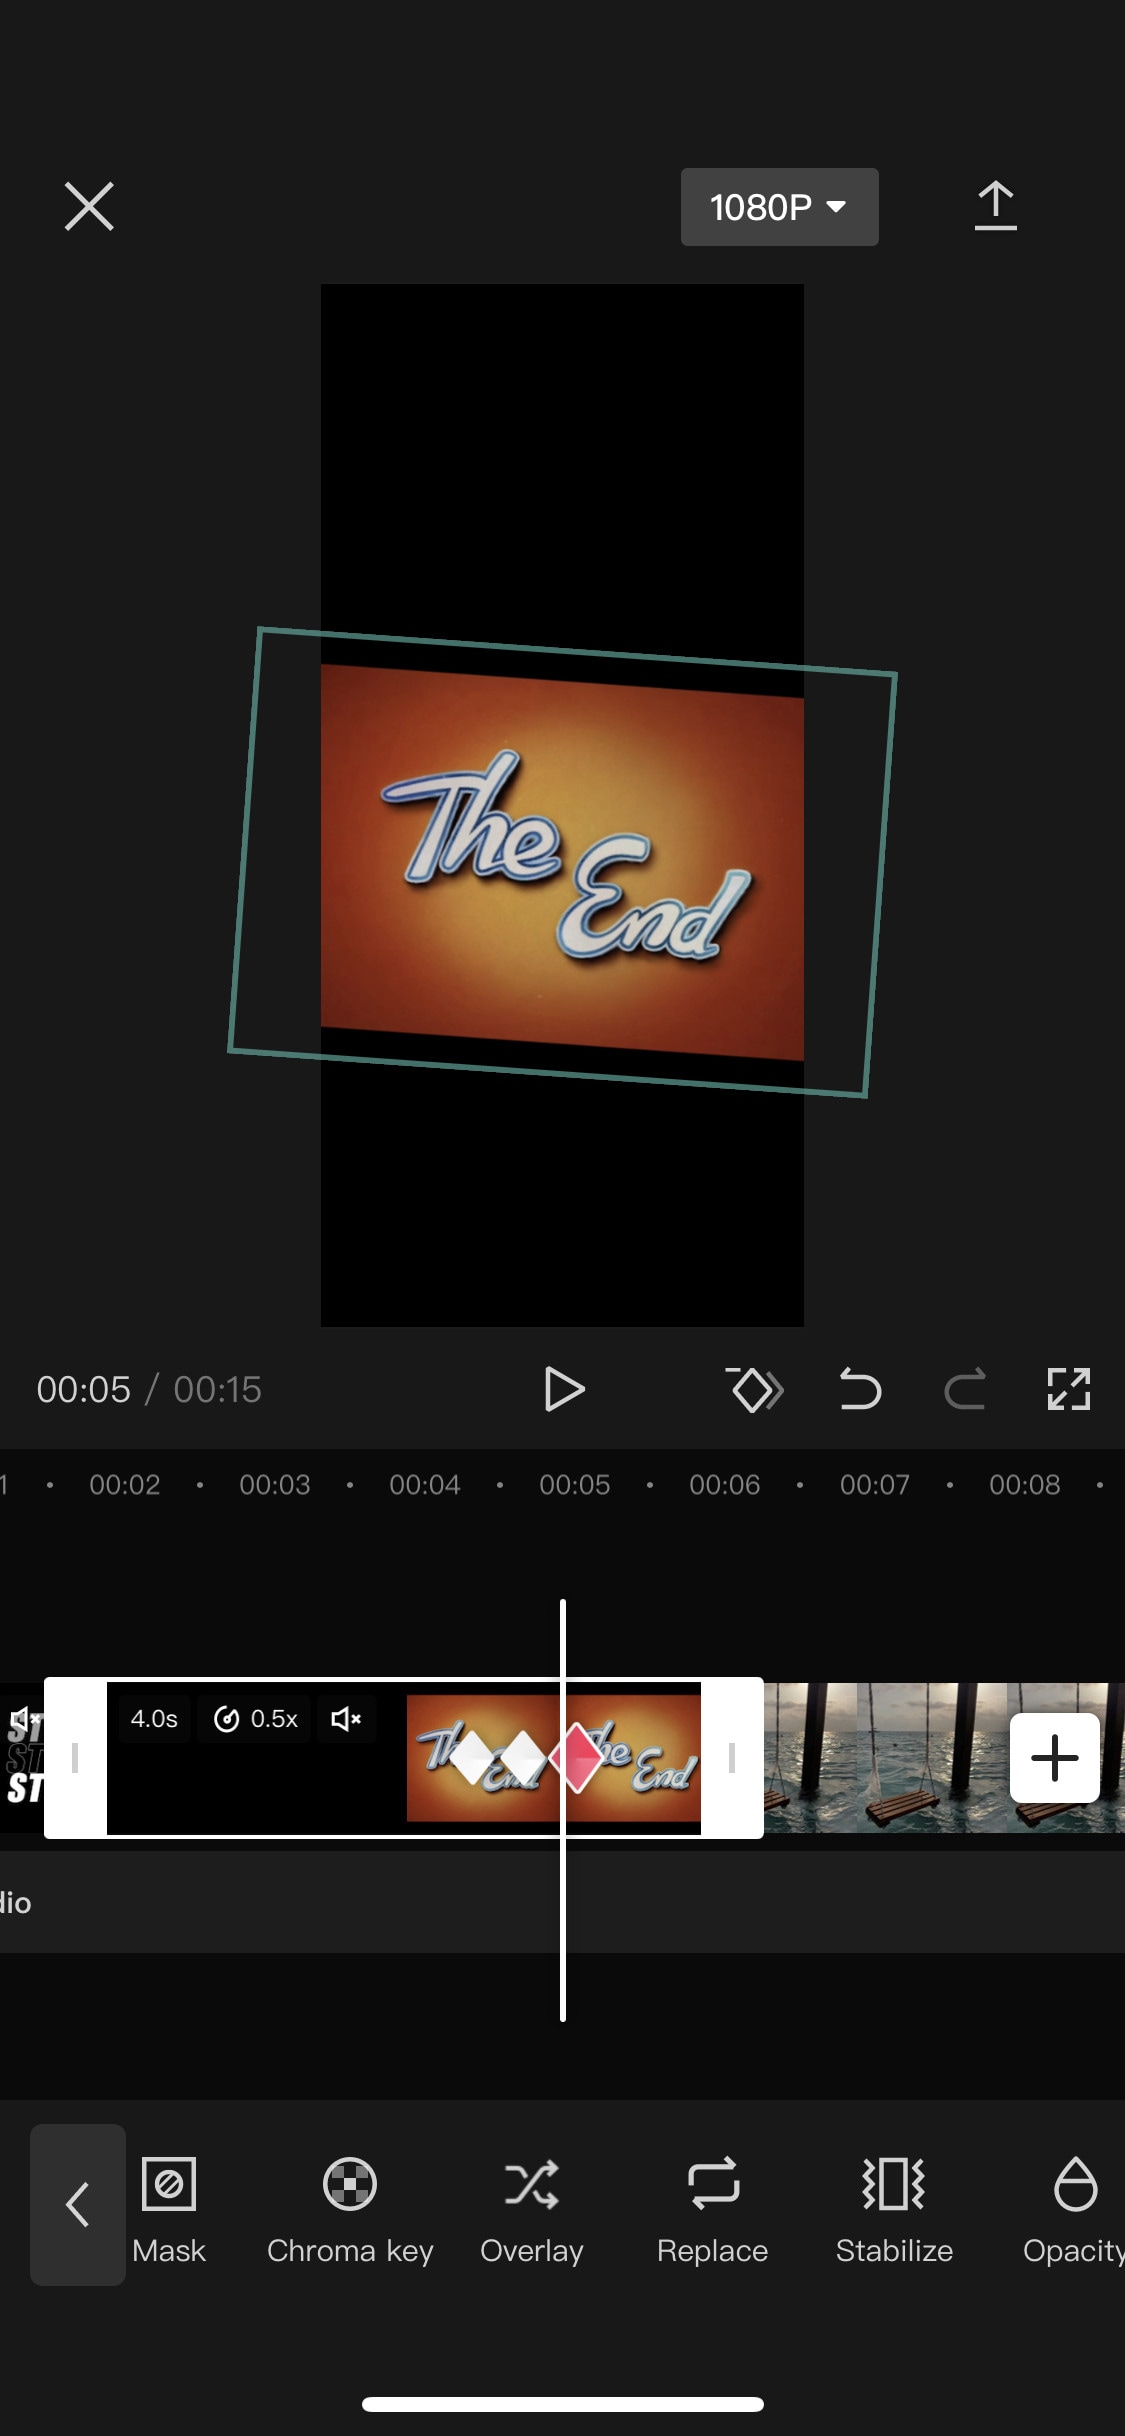
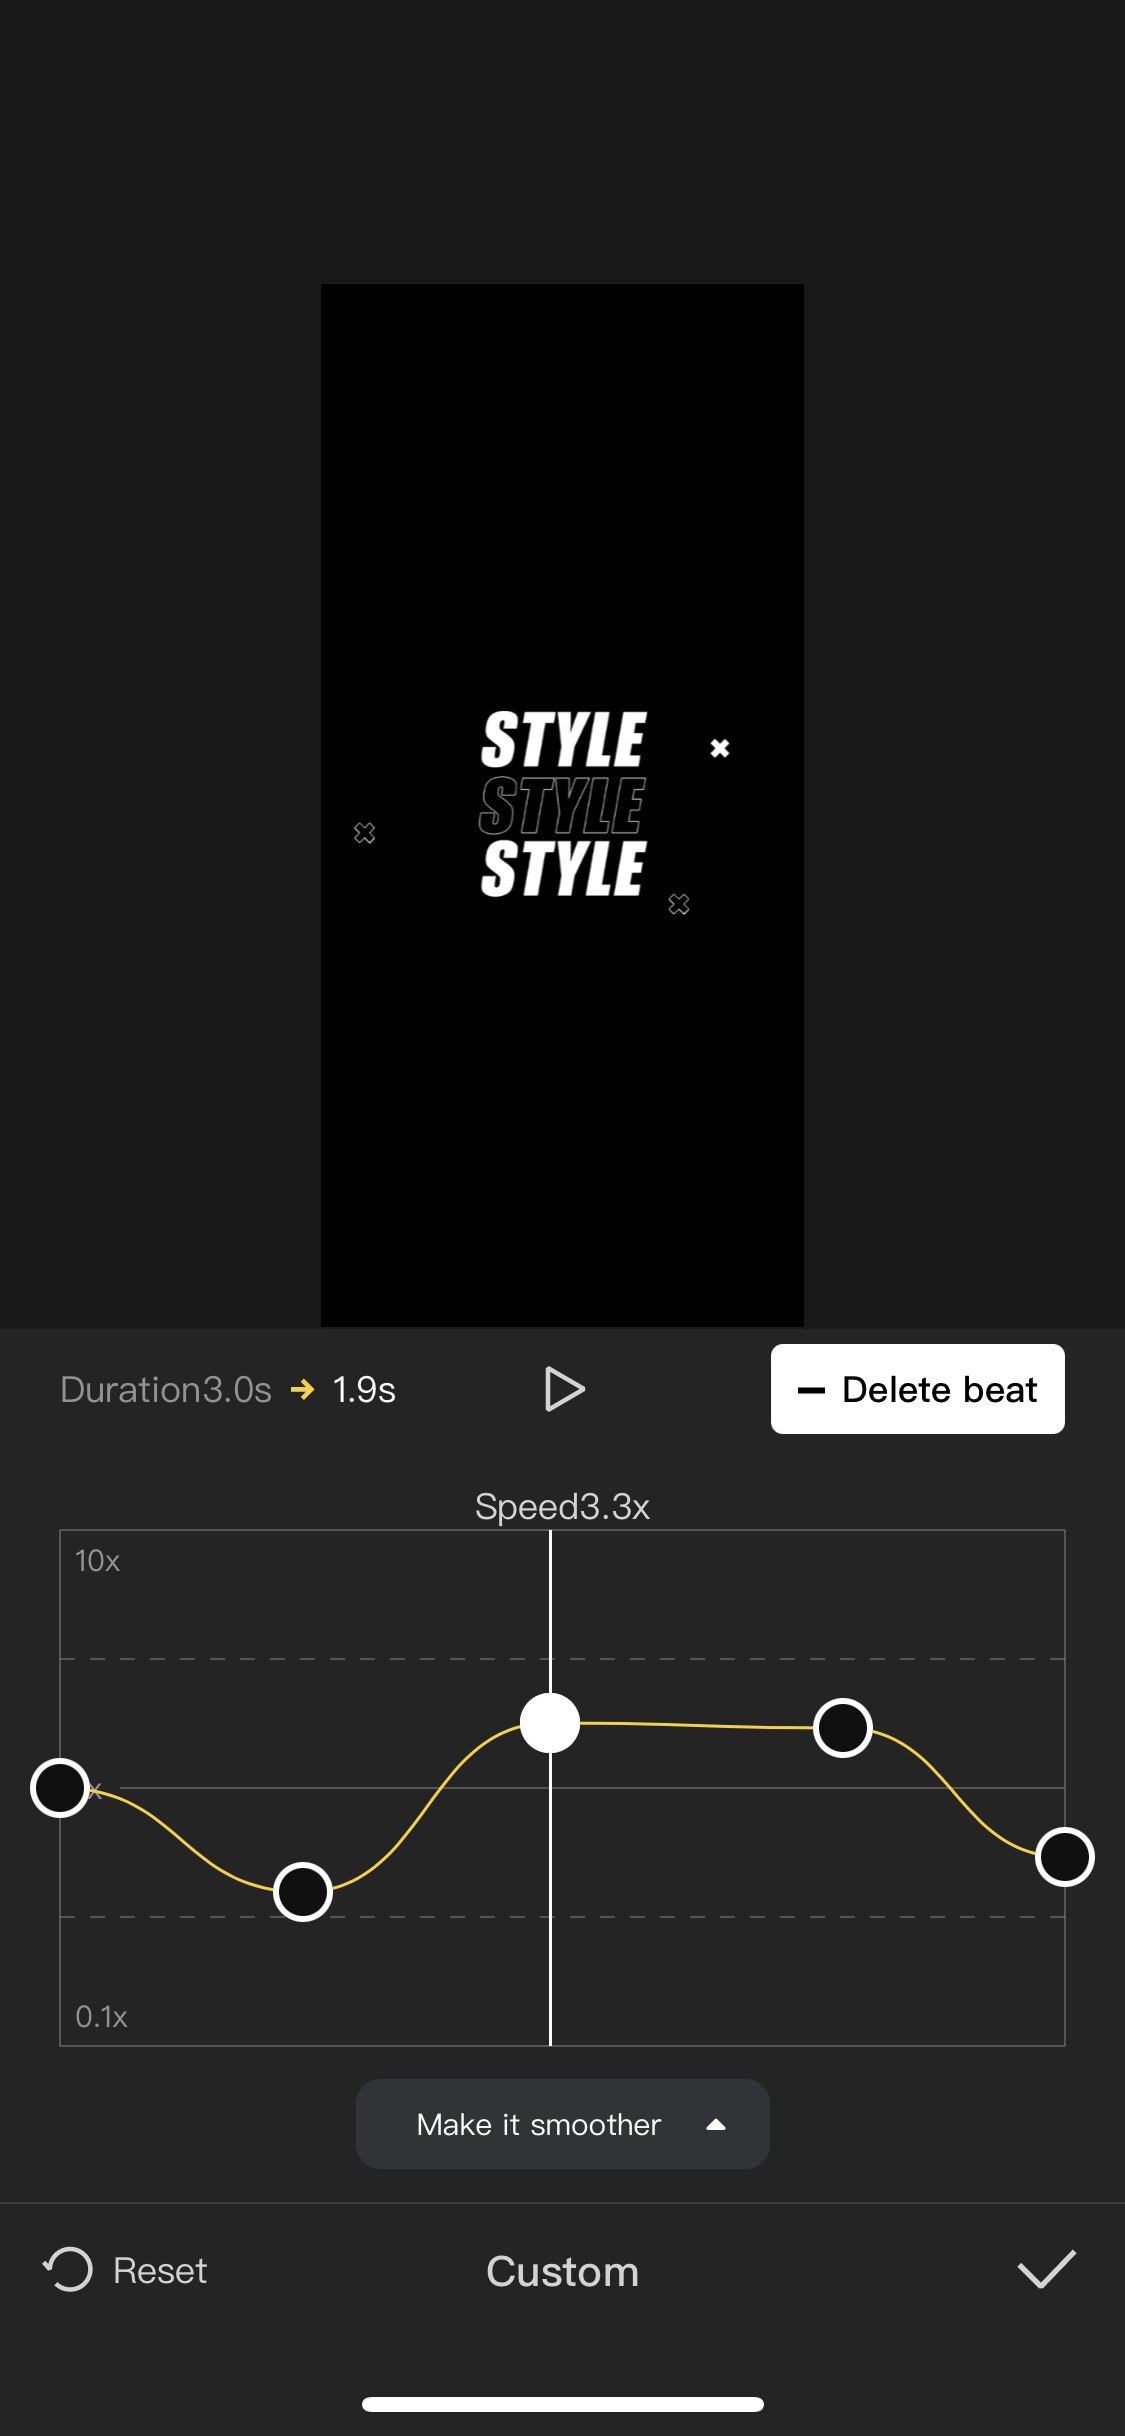
If you are looking for a free but good video editor to help you edit videos on the go, then you should get your hands on CapCut. It is a free mobile video editing software with many interesting features like keyframing, chroma-key, masking e.t.c. It also supports video and image layers. It has one of the best speed ramping features among other mobile video editors. It provides curves to smoothly speed ramp your clips. It can edit landscape, portrait, and even square video formats. It has many amazing effects and filters, it also has some stock clips.
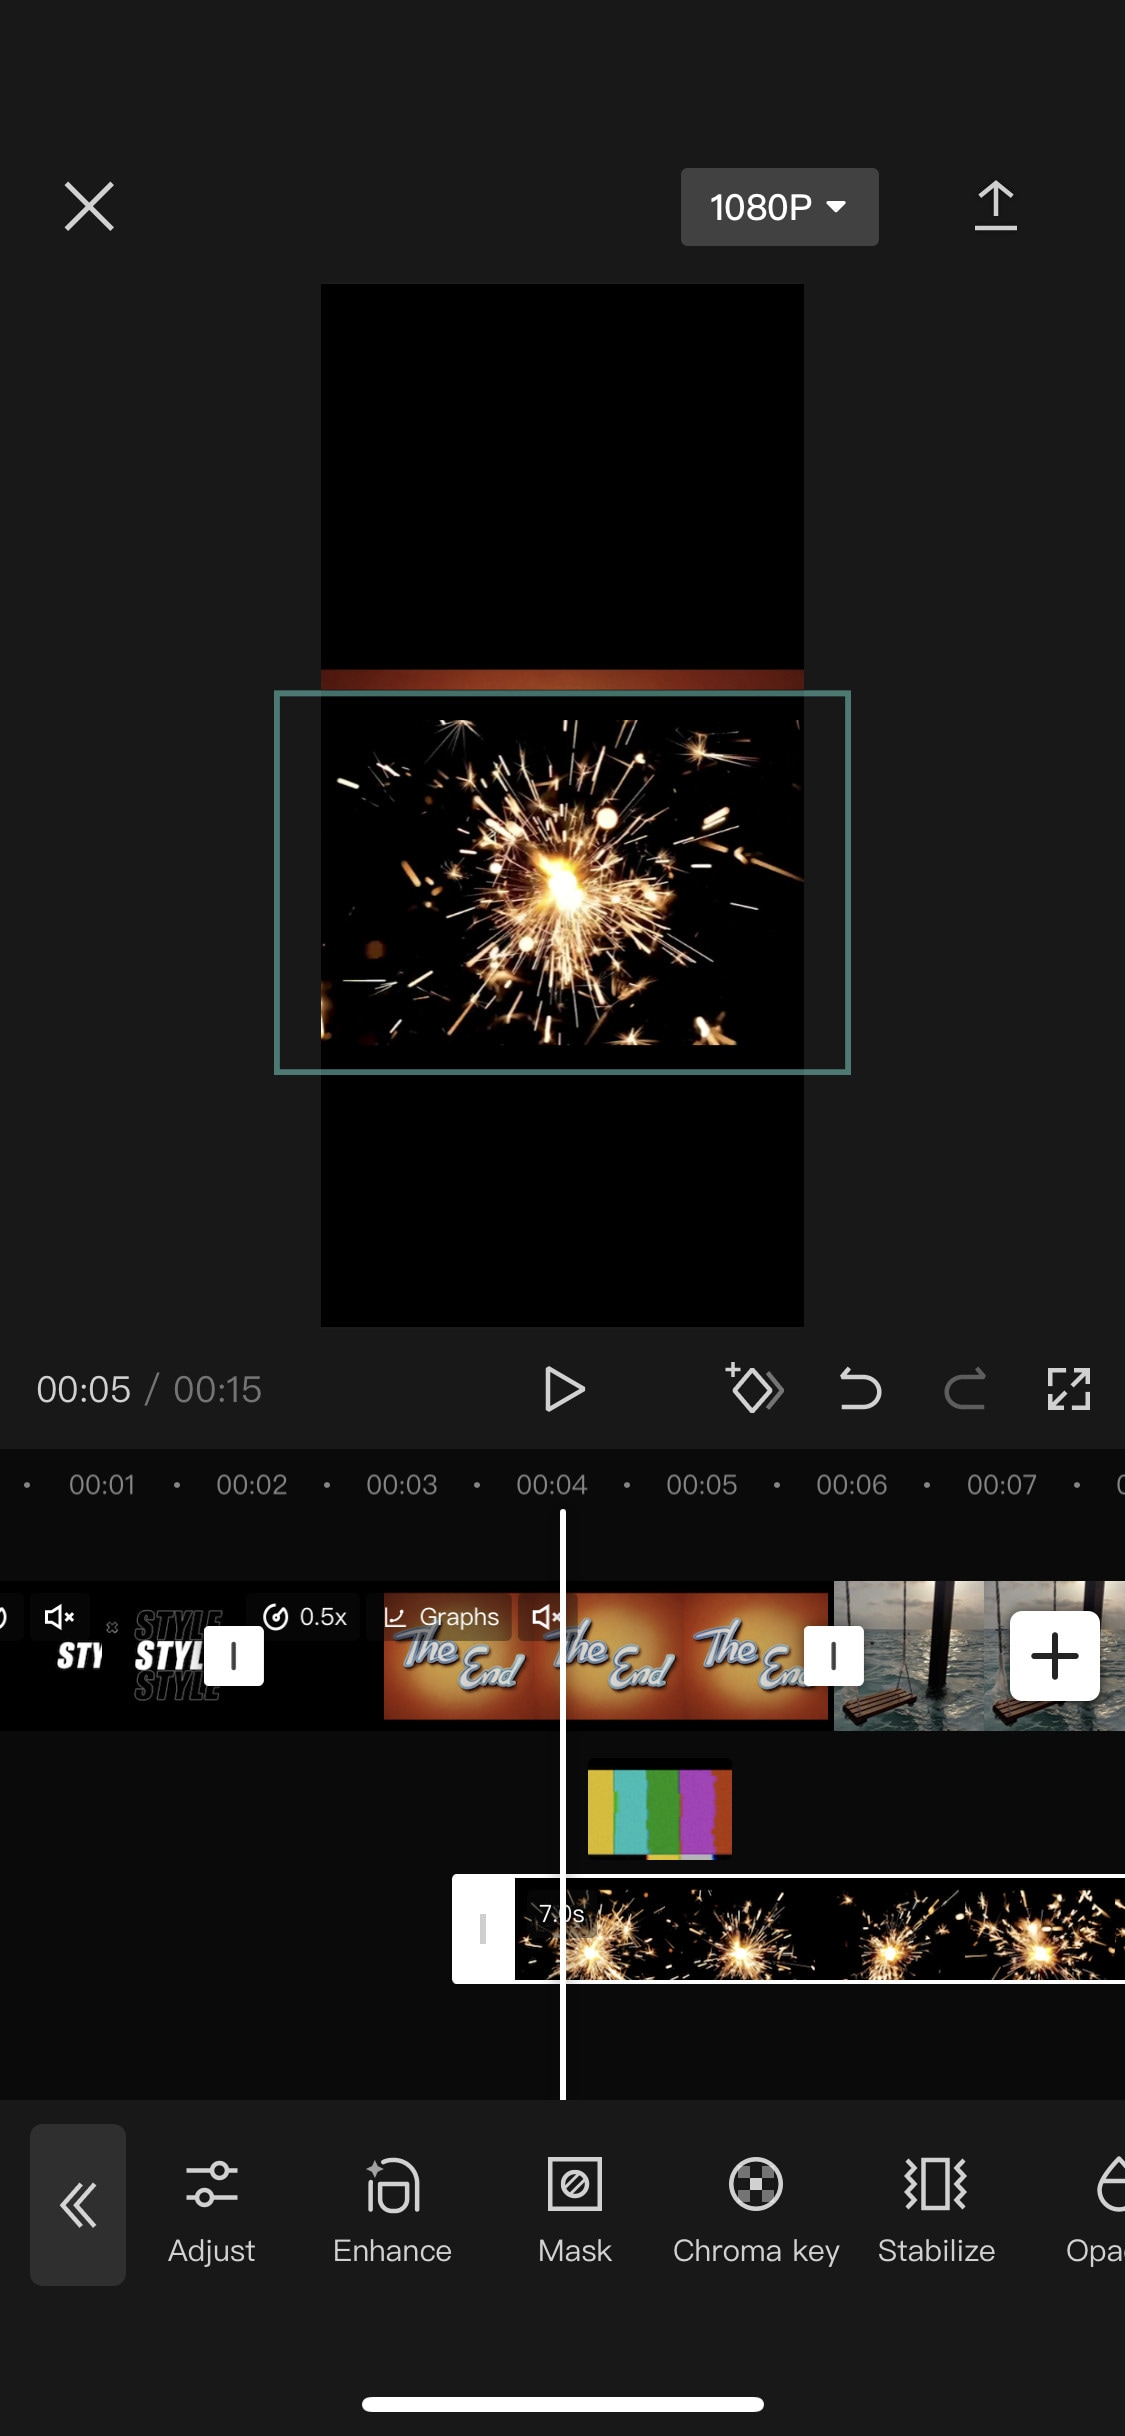
~Features:
- It is completely free and has no watermarks.
- It supports up to 4K video resolution.
- Has curves for speed ramping.
- Has keyframes for animation.
- It has hundreds of effects, overlays, and titles.
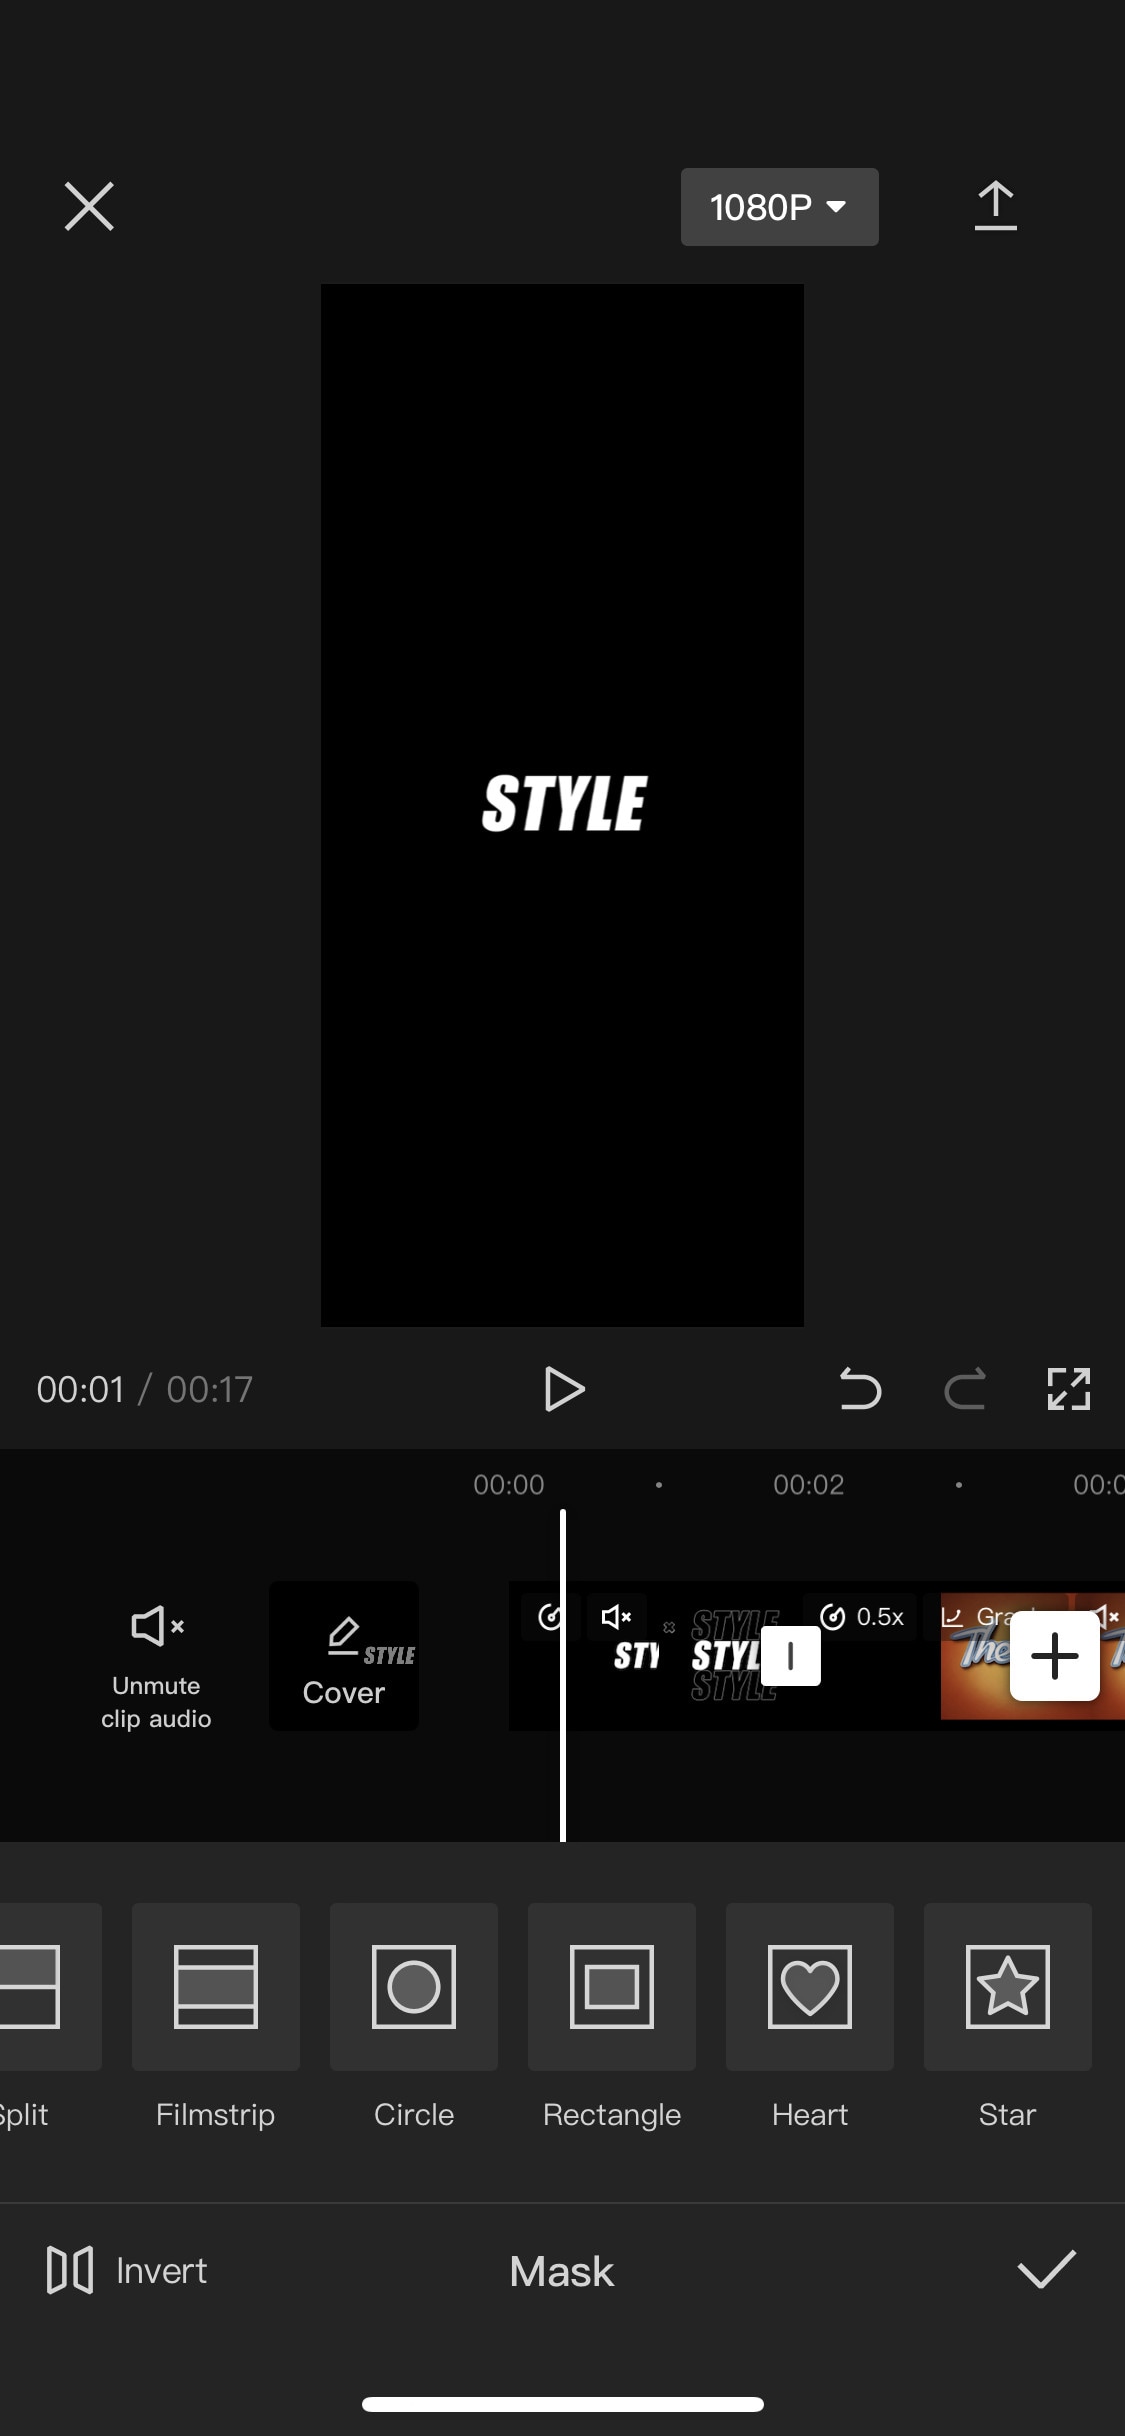
~Cons:
- Its UI doesn’t support editing in landscape orientation.
- Lacks some common editing tools.
iMovie:
It is available on IOS and Mac.
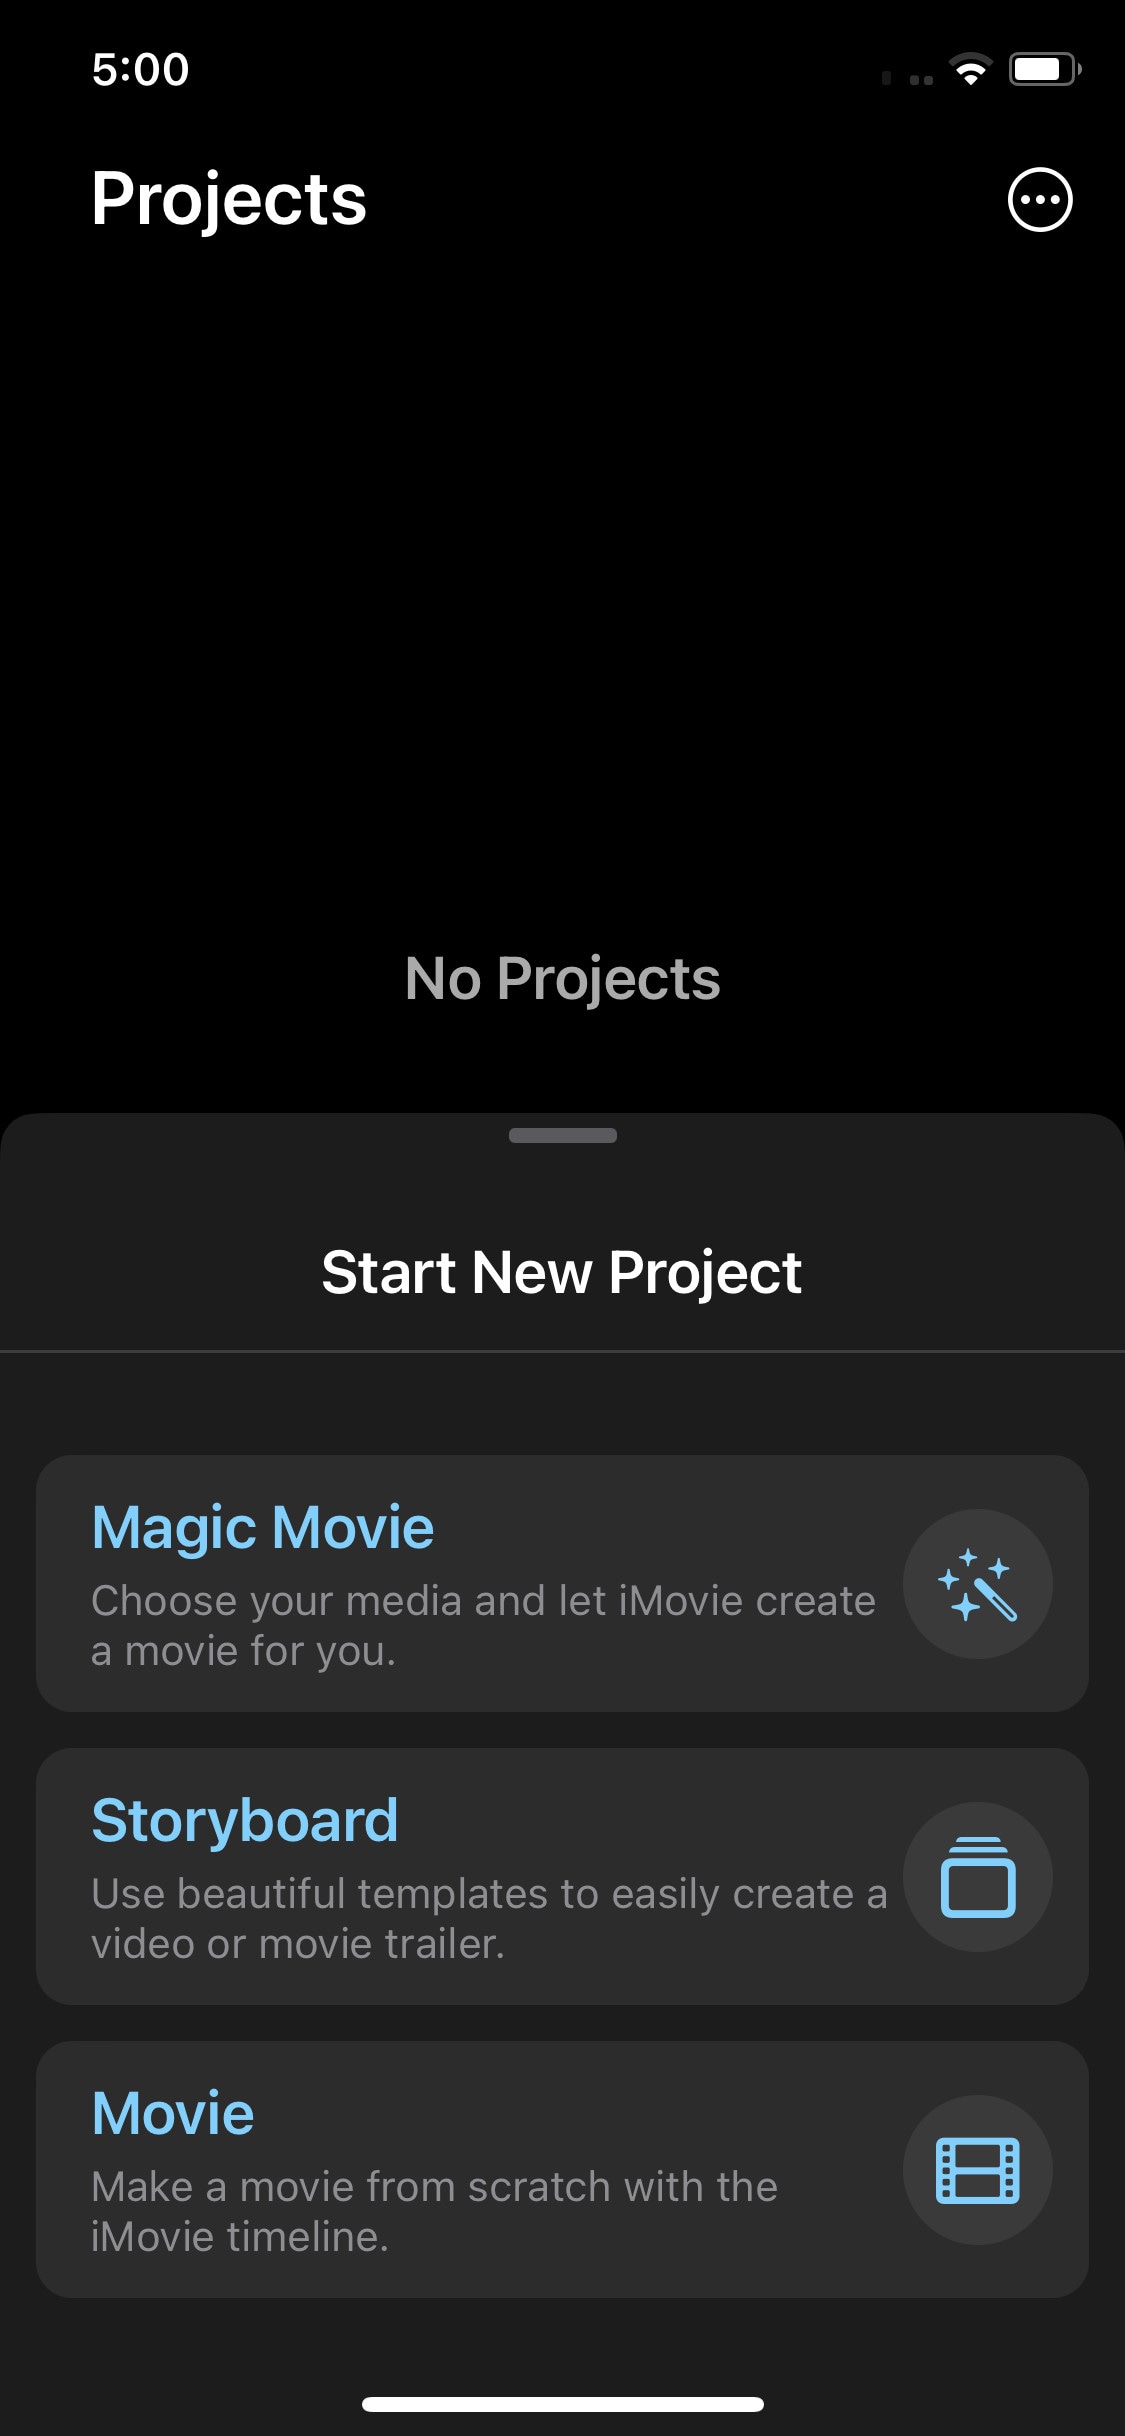
iMovie is a free video editing software designed by apple for their flagship products. It is simple and easy to use. It has all the basic editing tools to enhance your video like crop, trim, transitions, effects, e.t.c. It also has a speed ramping feature which let you change the speed at different points of a clip. It’s AI mode “Magic Movie” lets you select clips and a style and software will make the final product for you.
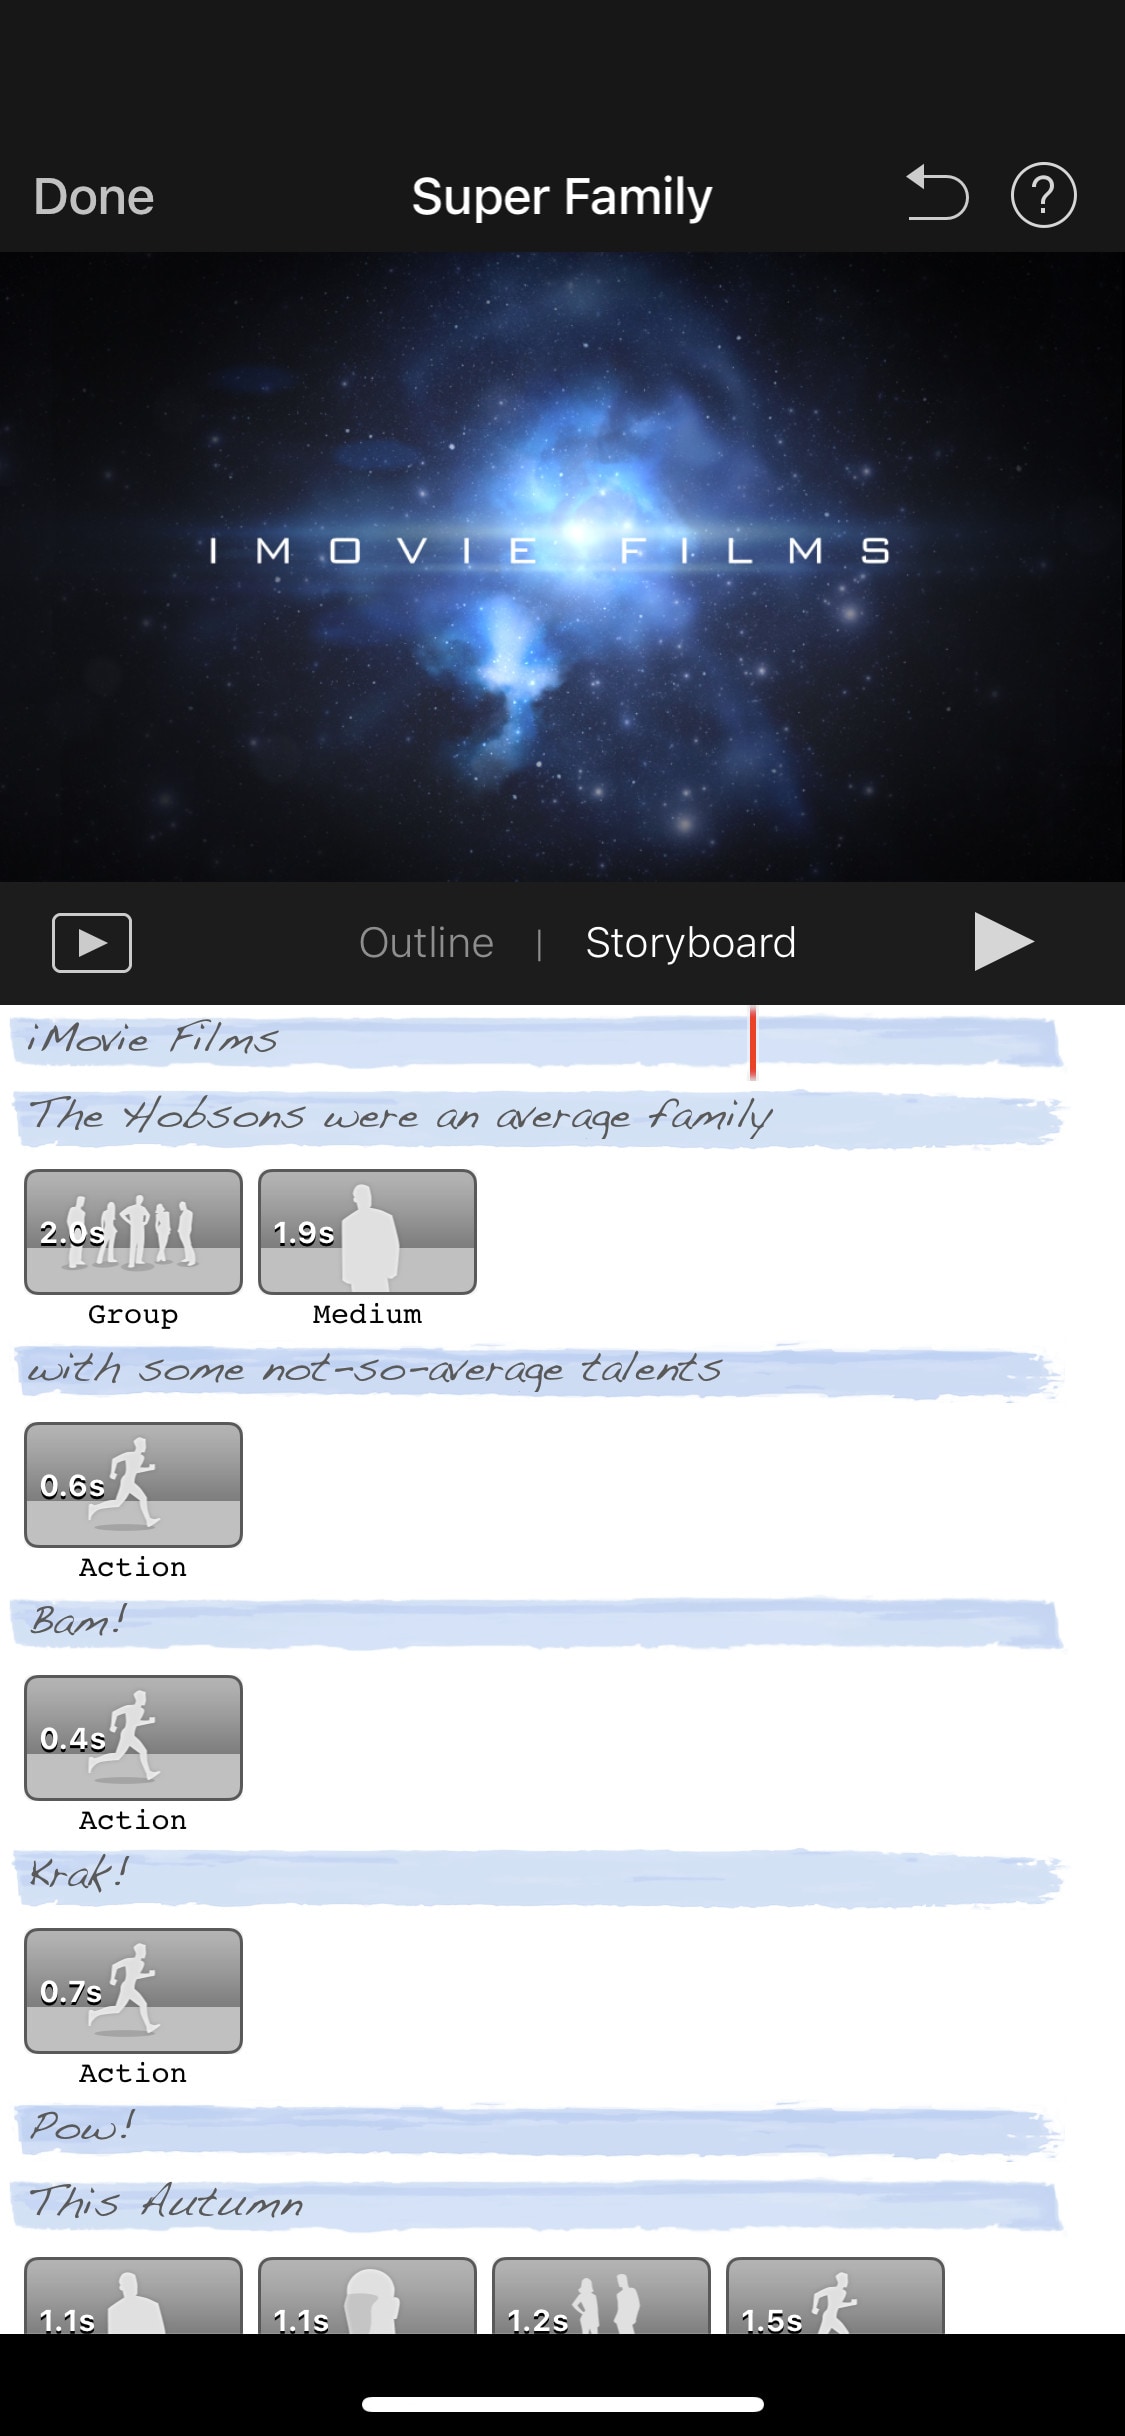
Its “Storyboards” mode is a creative way of learning production and post-production skills. It lets you choose a theme from many famous Genres available, then it will guide you through the production process like capturing footage, arranging your shots, and creating cinematic titles to enhance your story.
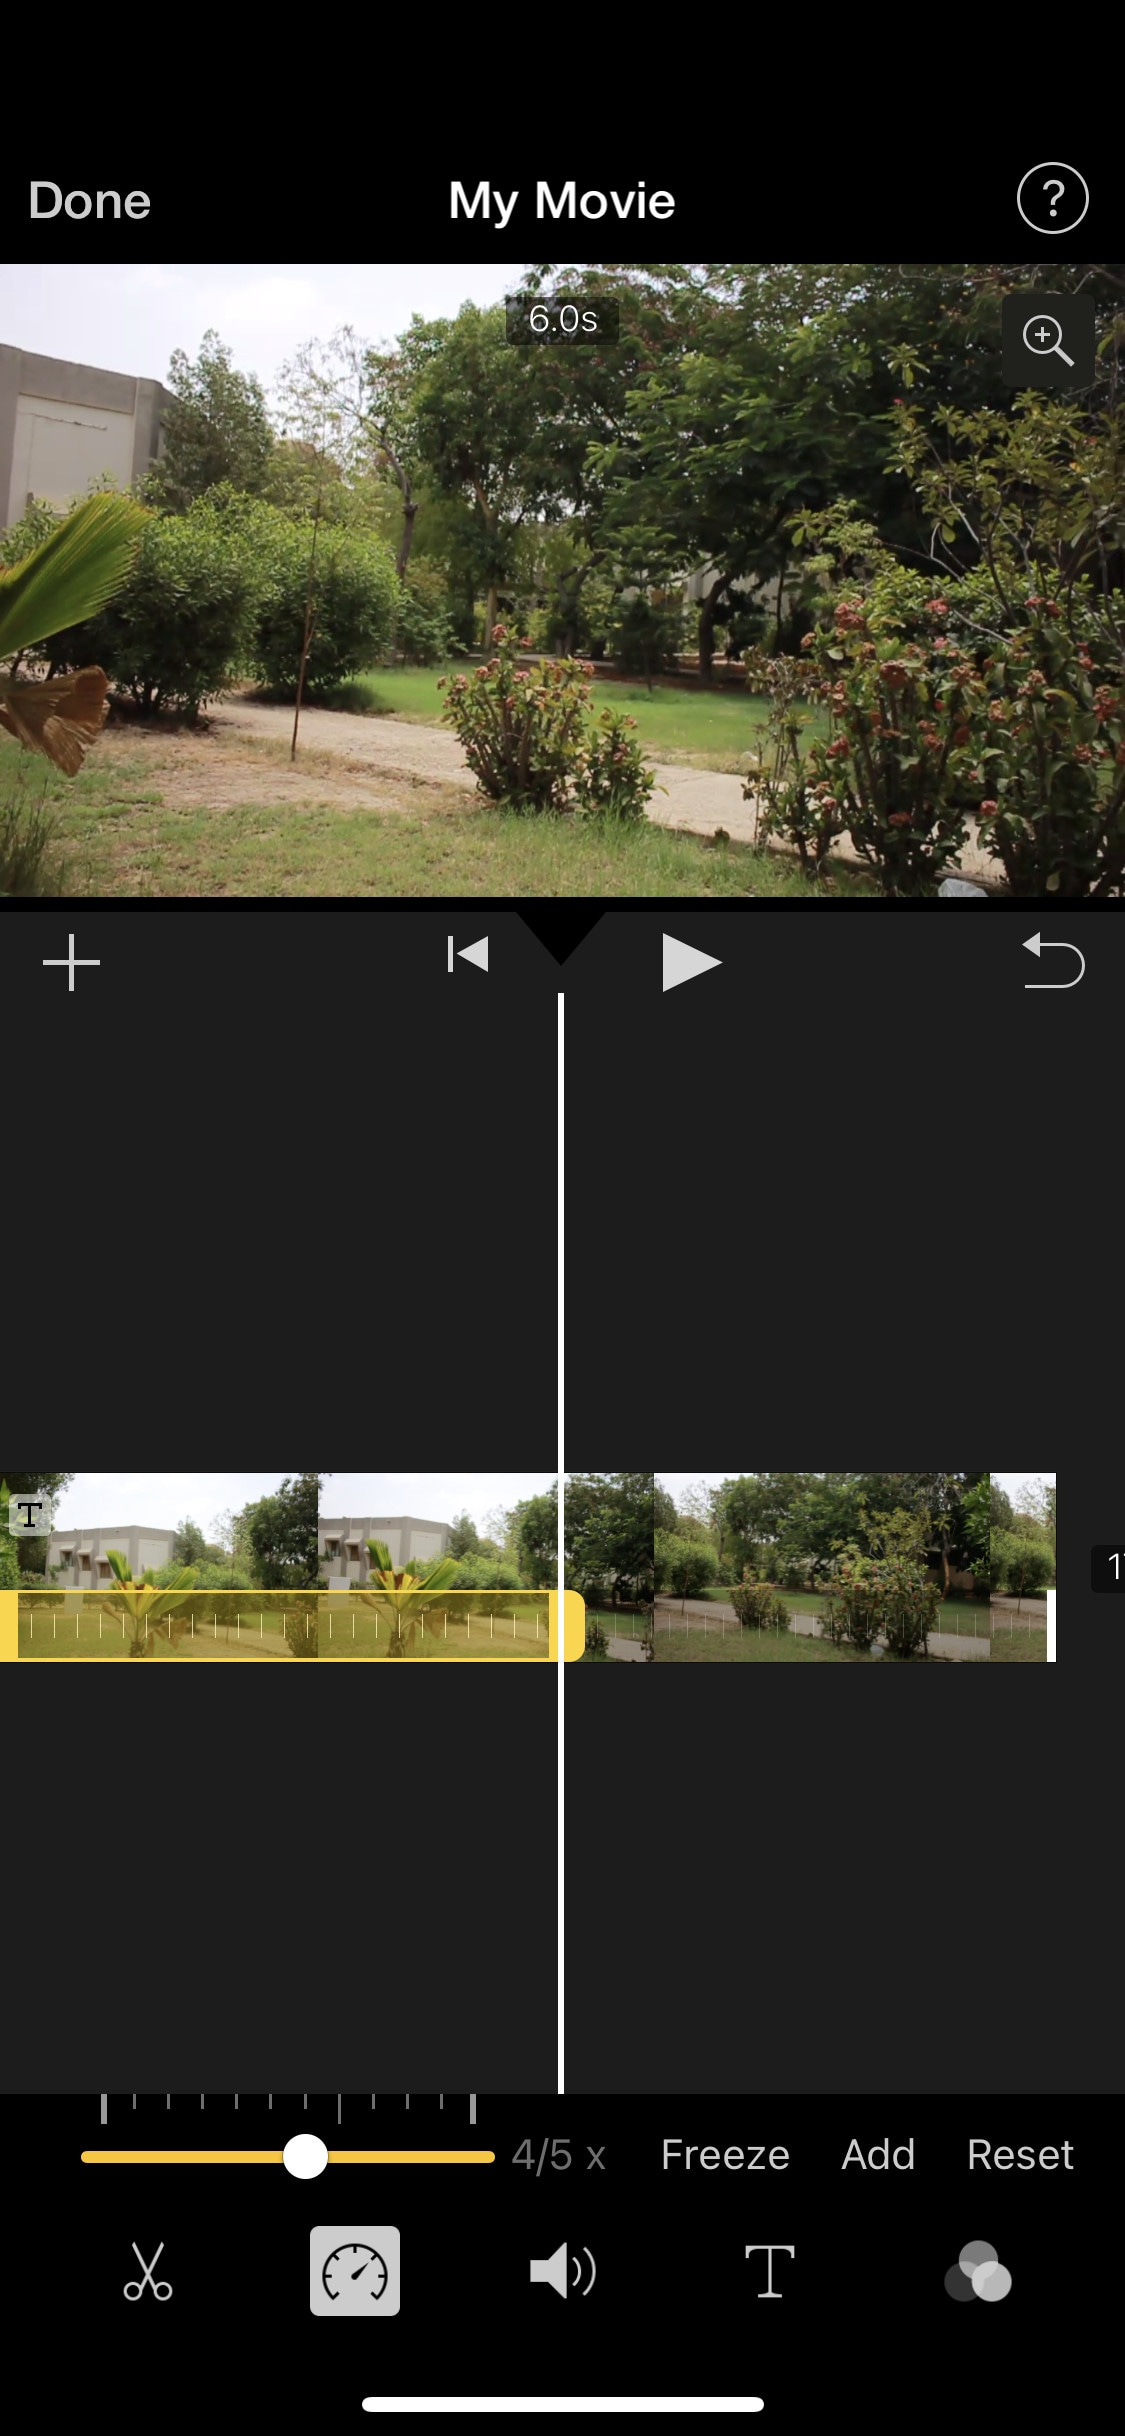
~Features:
- It is free and easy to use.
- Let you do speed ramping.
- Supports Raw files.
- It’s AI mode creates videos for you on its own.
- The “Storyboarding” feature helps you through the production process.
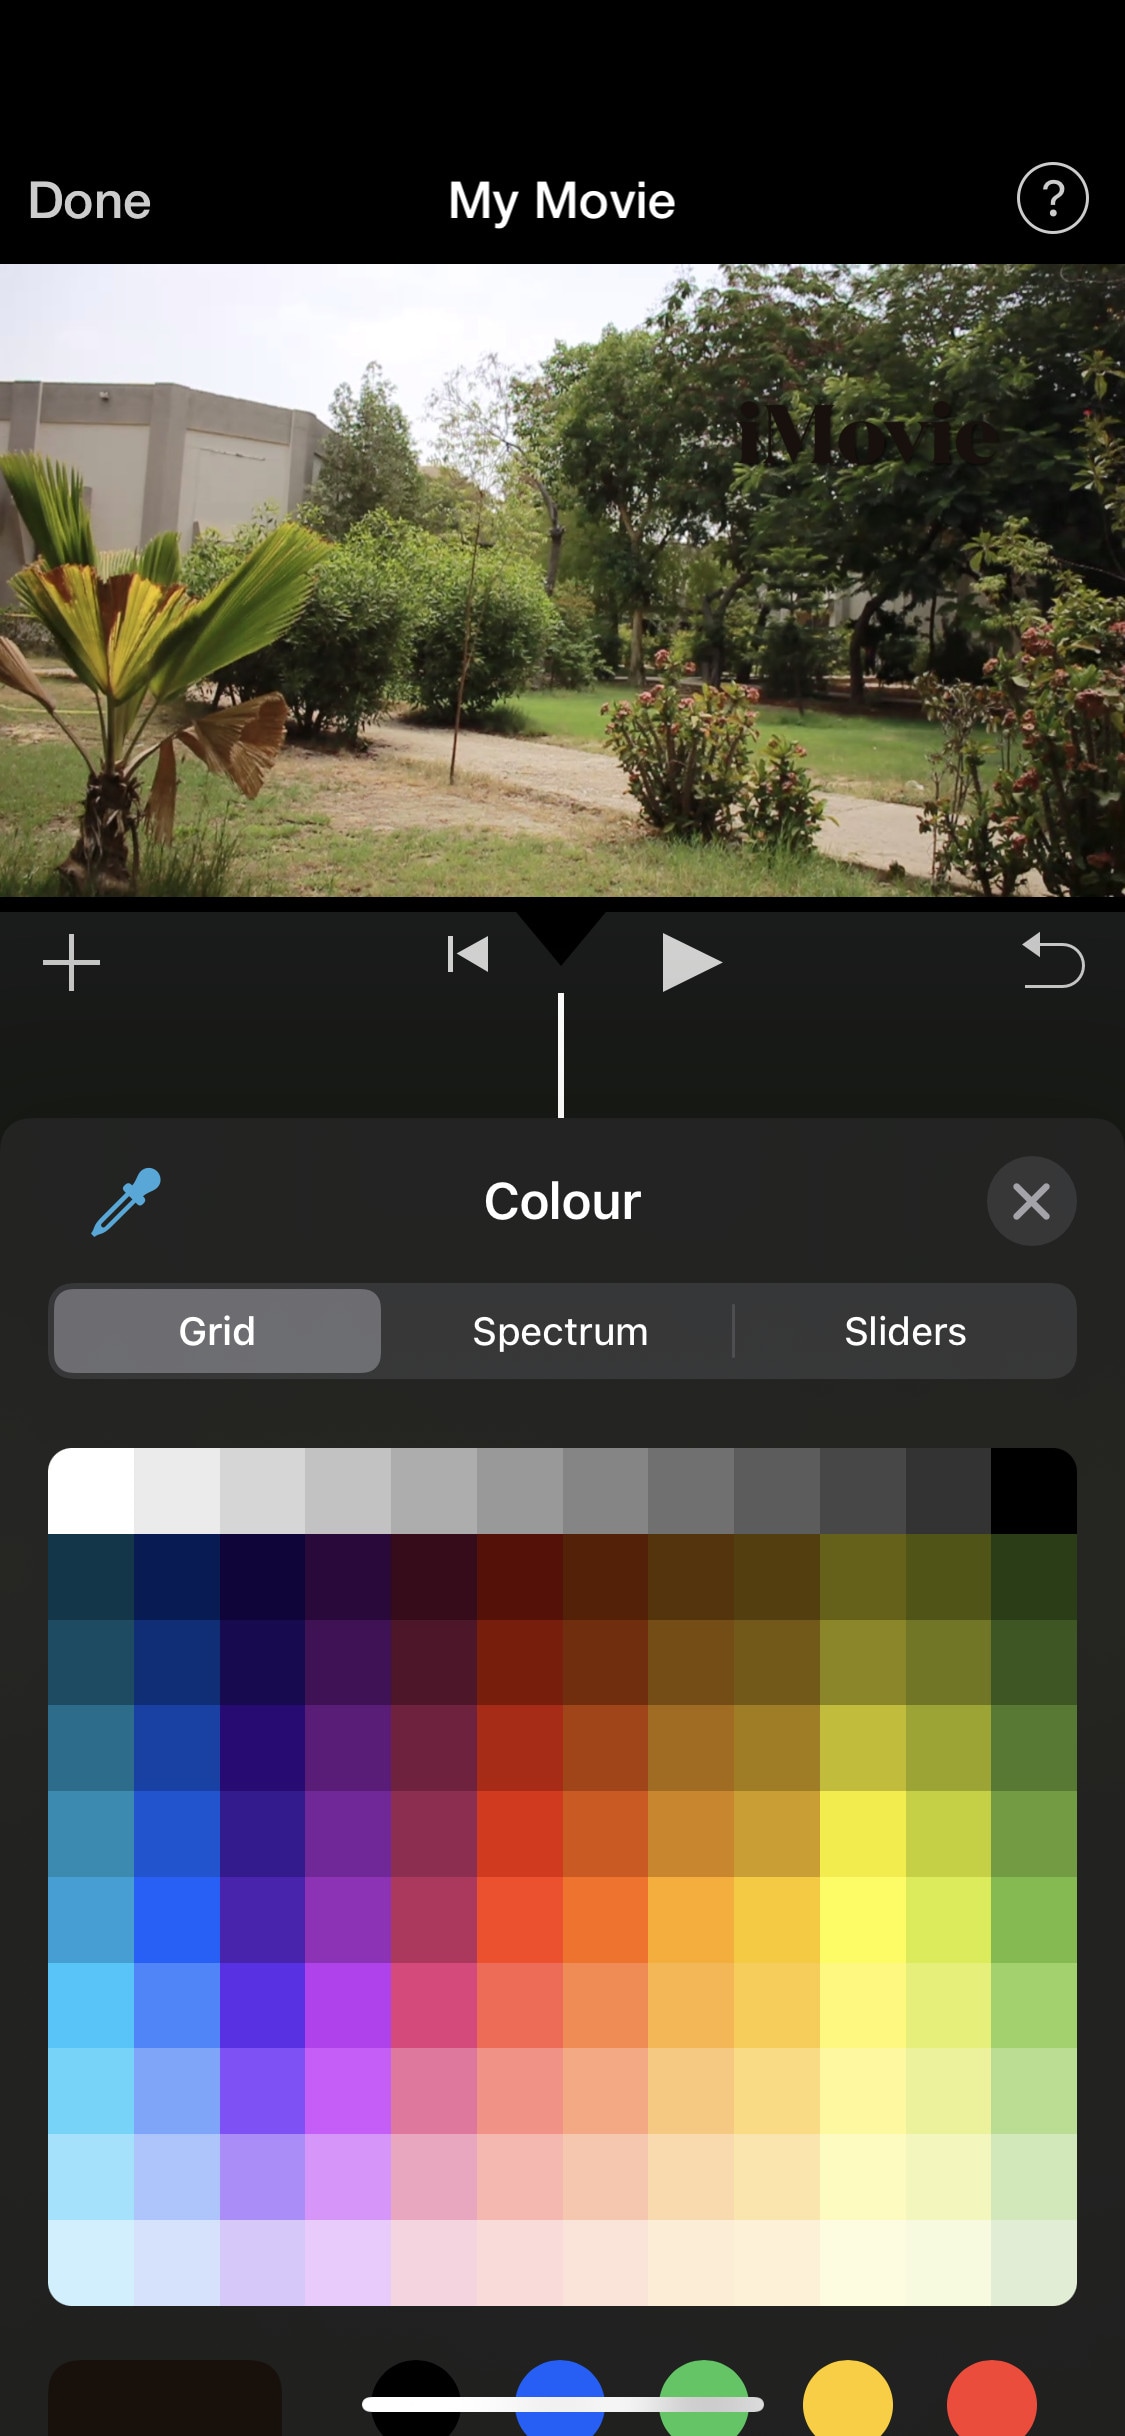
~Cons:
- It only works on ios and Mac.
- Not suitable for professional projects.
GoPro - Quik:
It is available on IOS and Android and windows also.
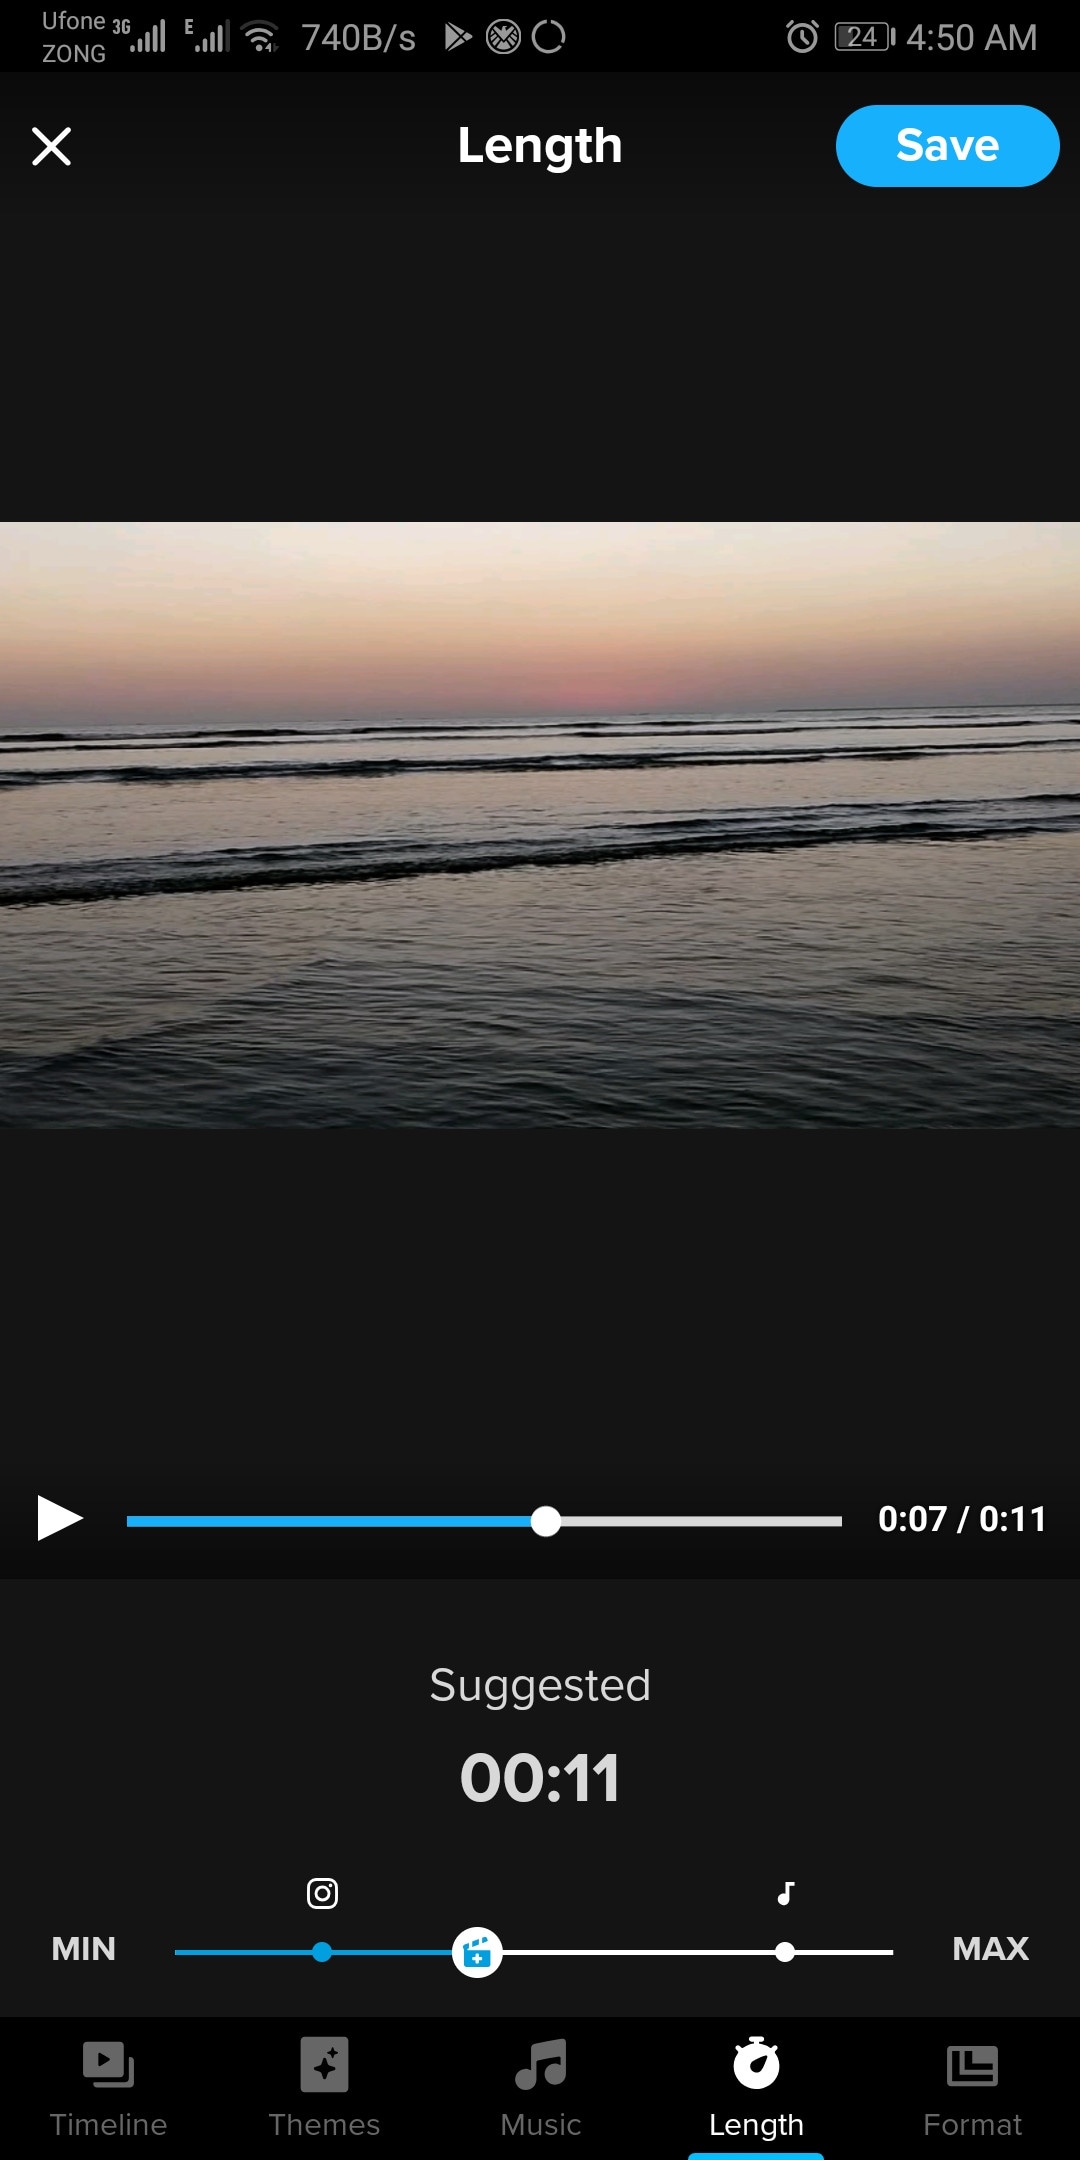
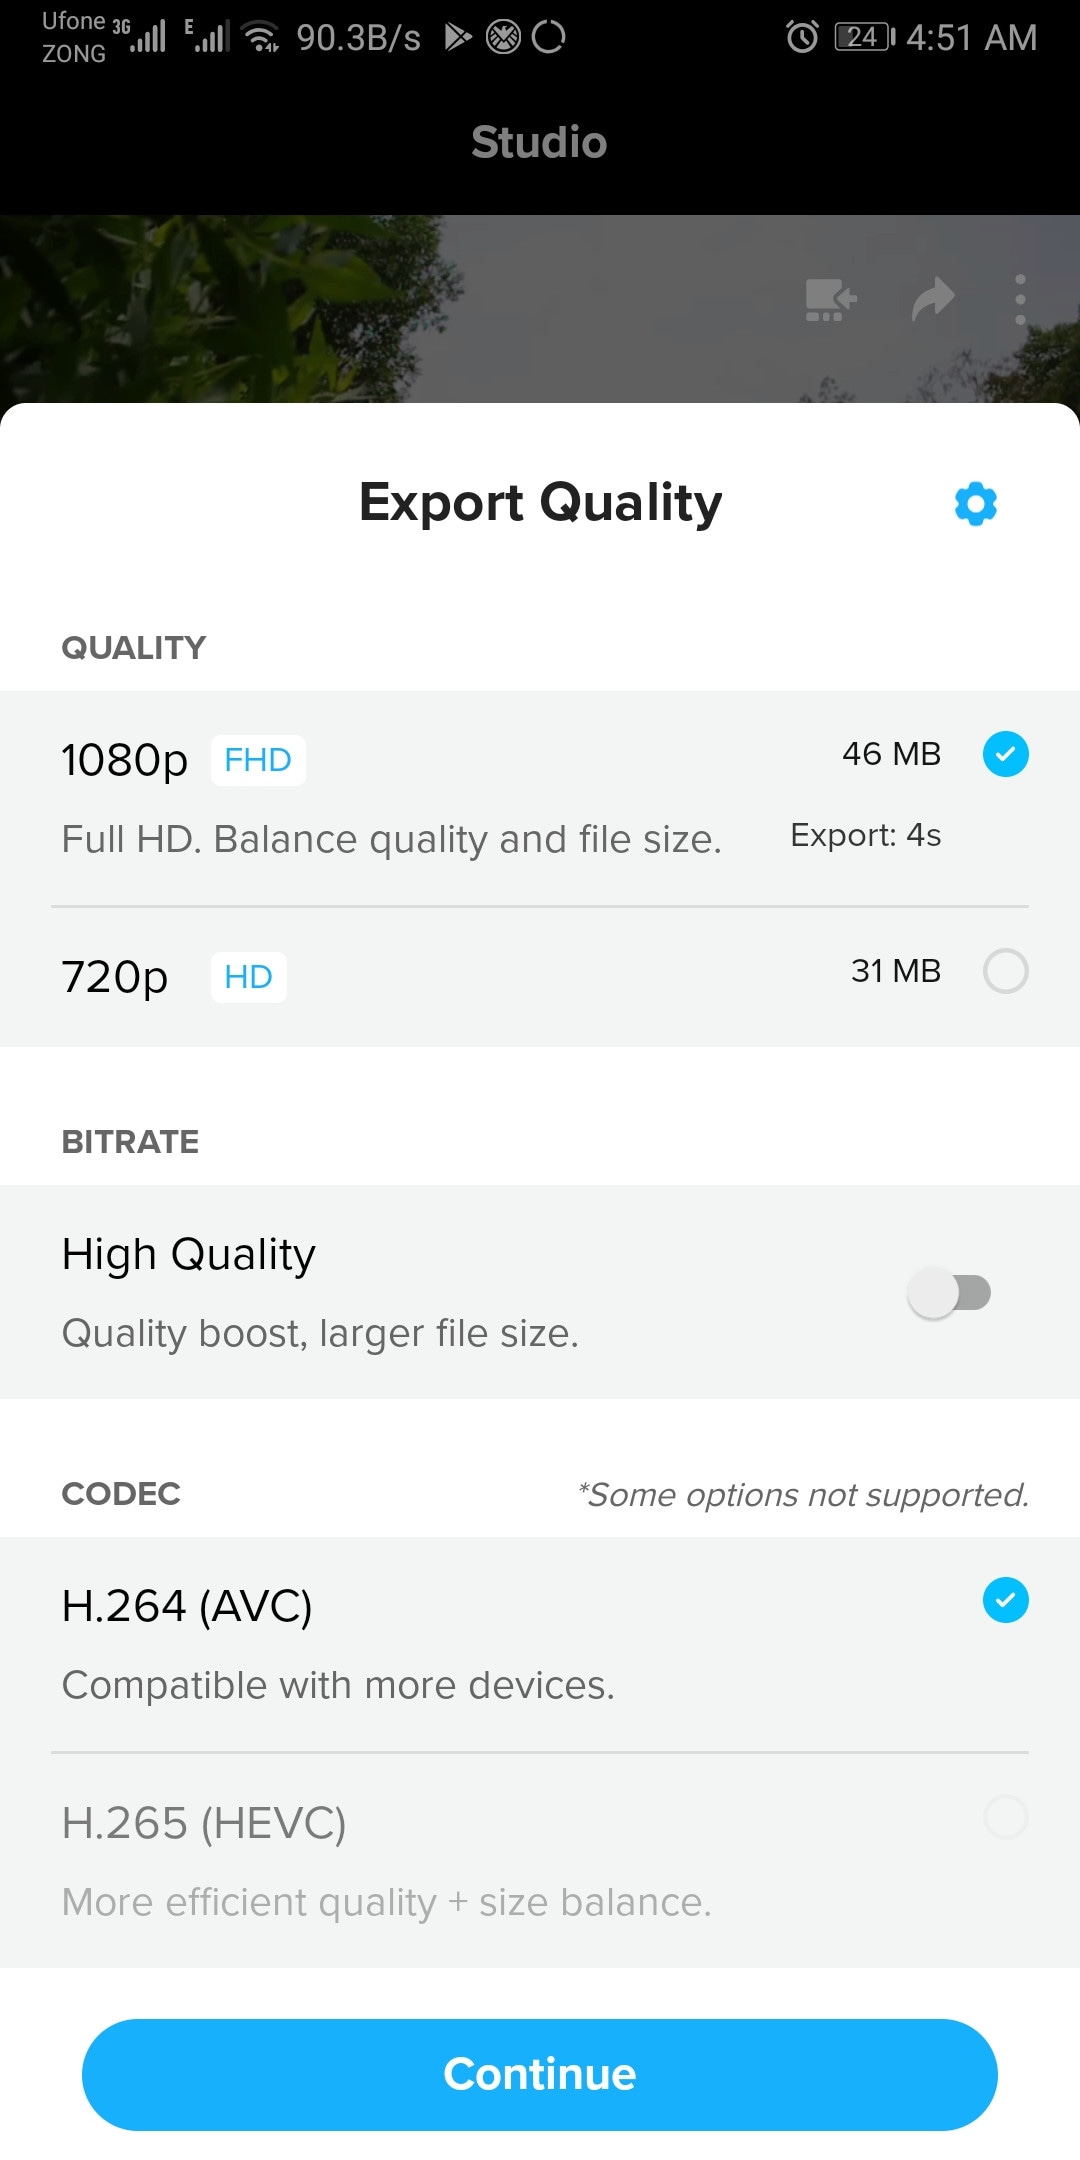
It is a free and easy-to-use software designed by GoPro. It can edit clips of your GoPro or any other device. It is a quick and easy way to enhance your clips before posting them on any social platform. It can do basic edits like trim, rotate, color correction, e.t.c. It can also make amazing speed ramps by changing the speed of different parts of the clip (available in the premium version only). It doesn’t produce any watermarks. Although its premium version unlocks more features like speed ramping, more themes, and unlimited backup space.
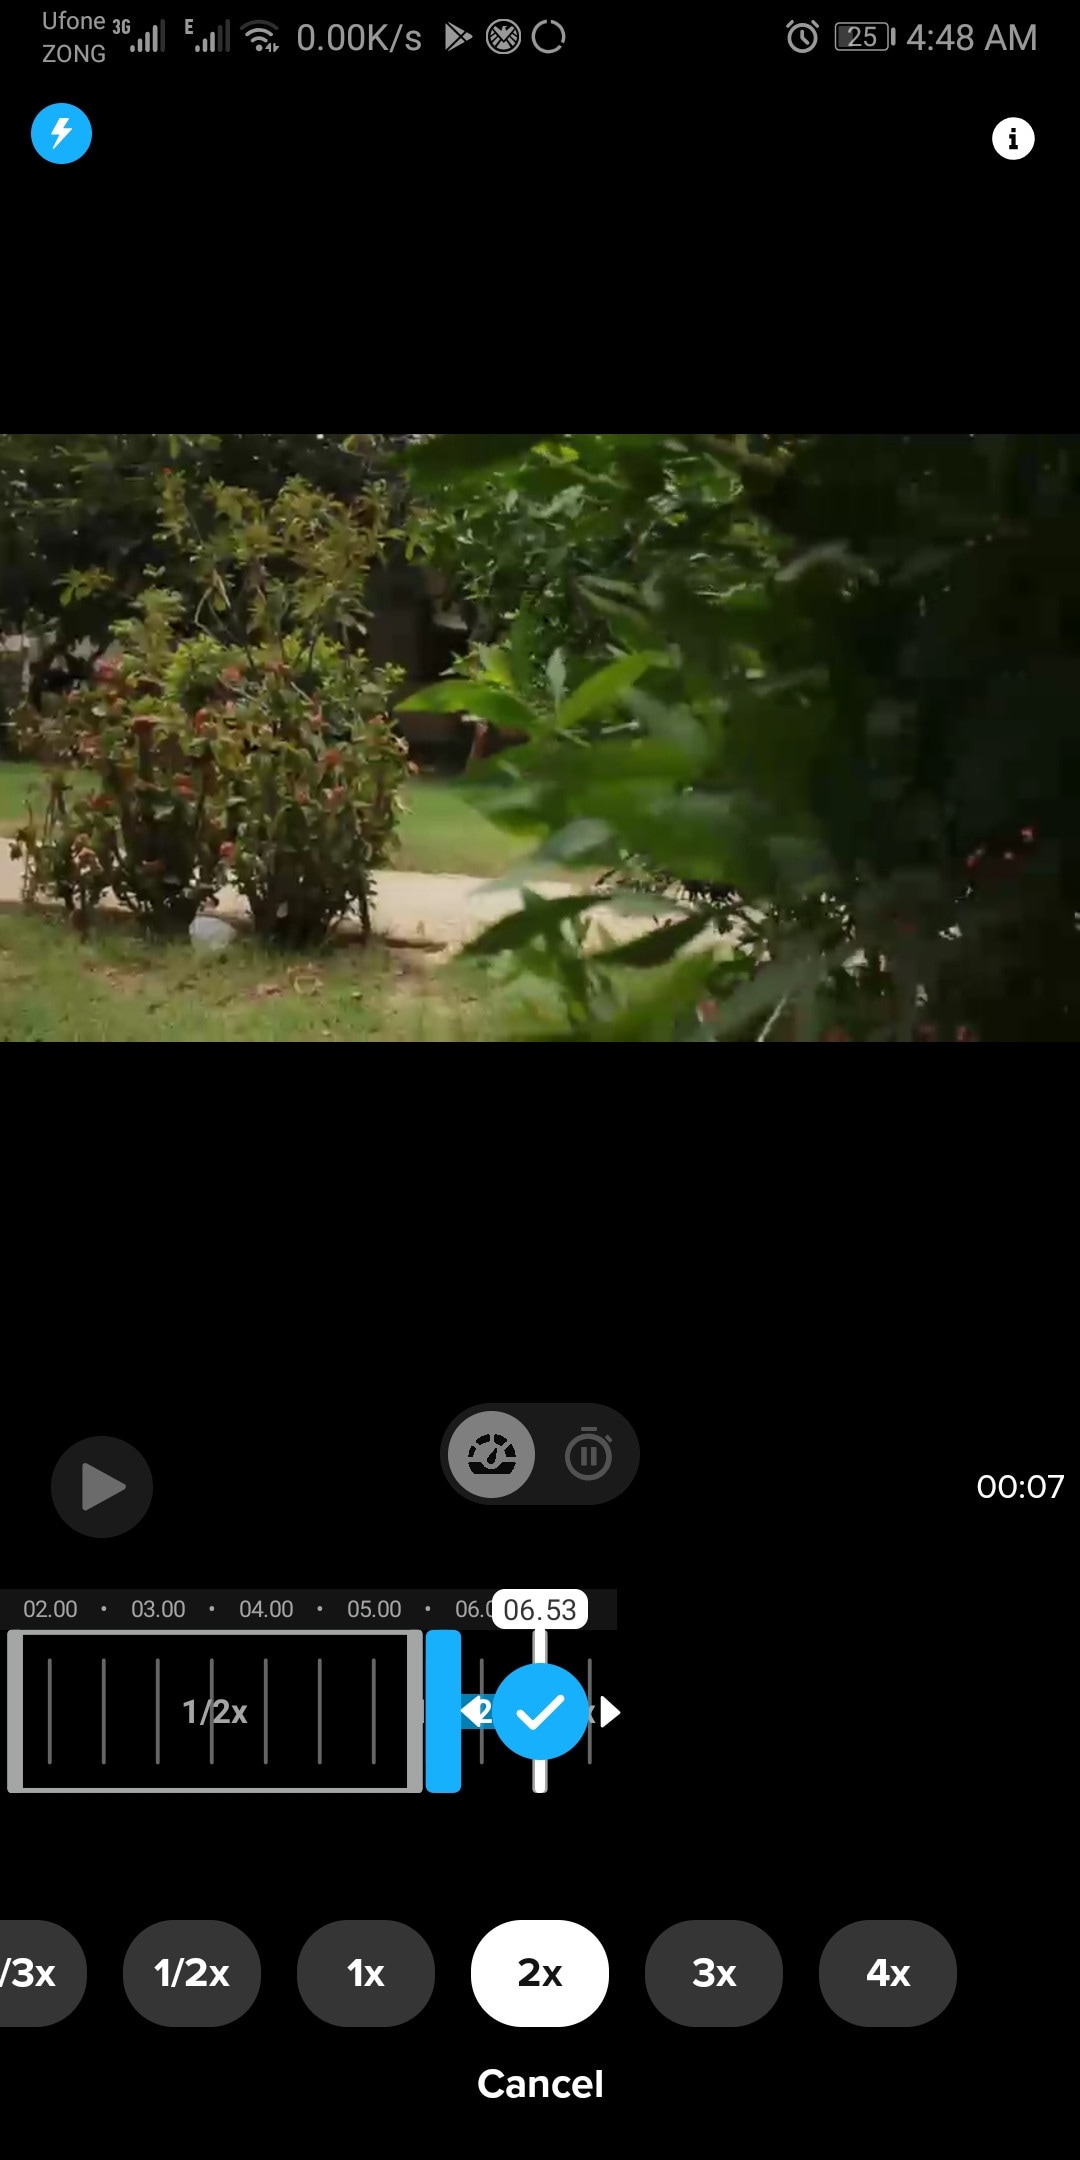
~Features:
- Its free version doesn’t leave a watermark.
- It is simple and easy to use.
- Can do basic color correction.
- Have pre-made themes for faster editing.
- Change the speed at different parts of the video to create smooth speed ramps. (Available in the premium version.)
- Has a free version with limited tools for basic editing.
~Cons:
- It lacks advanced tools therefore not suitable for large projects.
- Its free version has many limitations.
~Price: Its subscription is available at $1.99/month or at discount for an annual subscription having $9.99/year.
VN Video editor:
It is available on IOS and Android, Windows, and Mac.
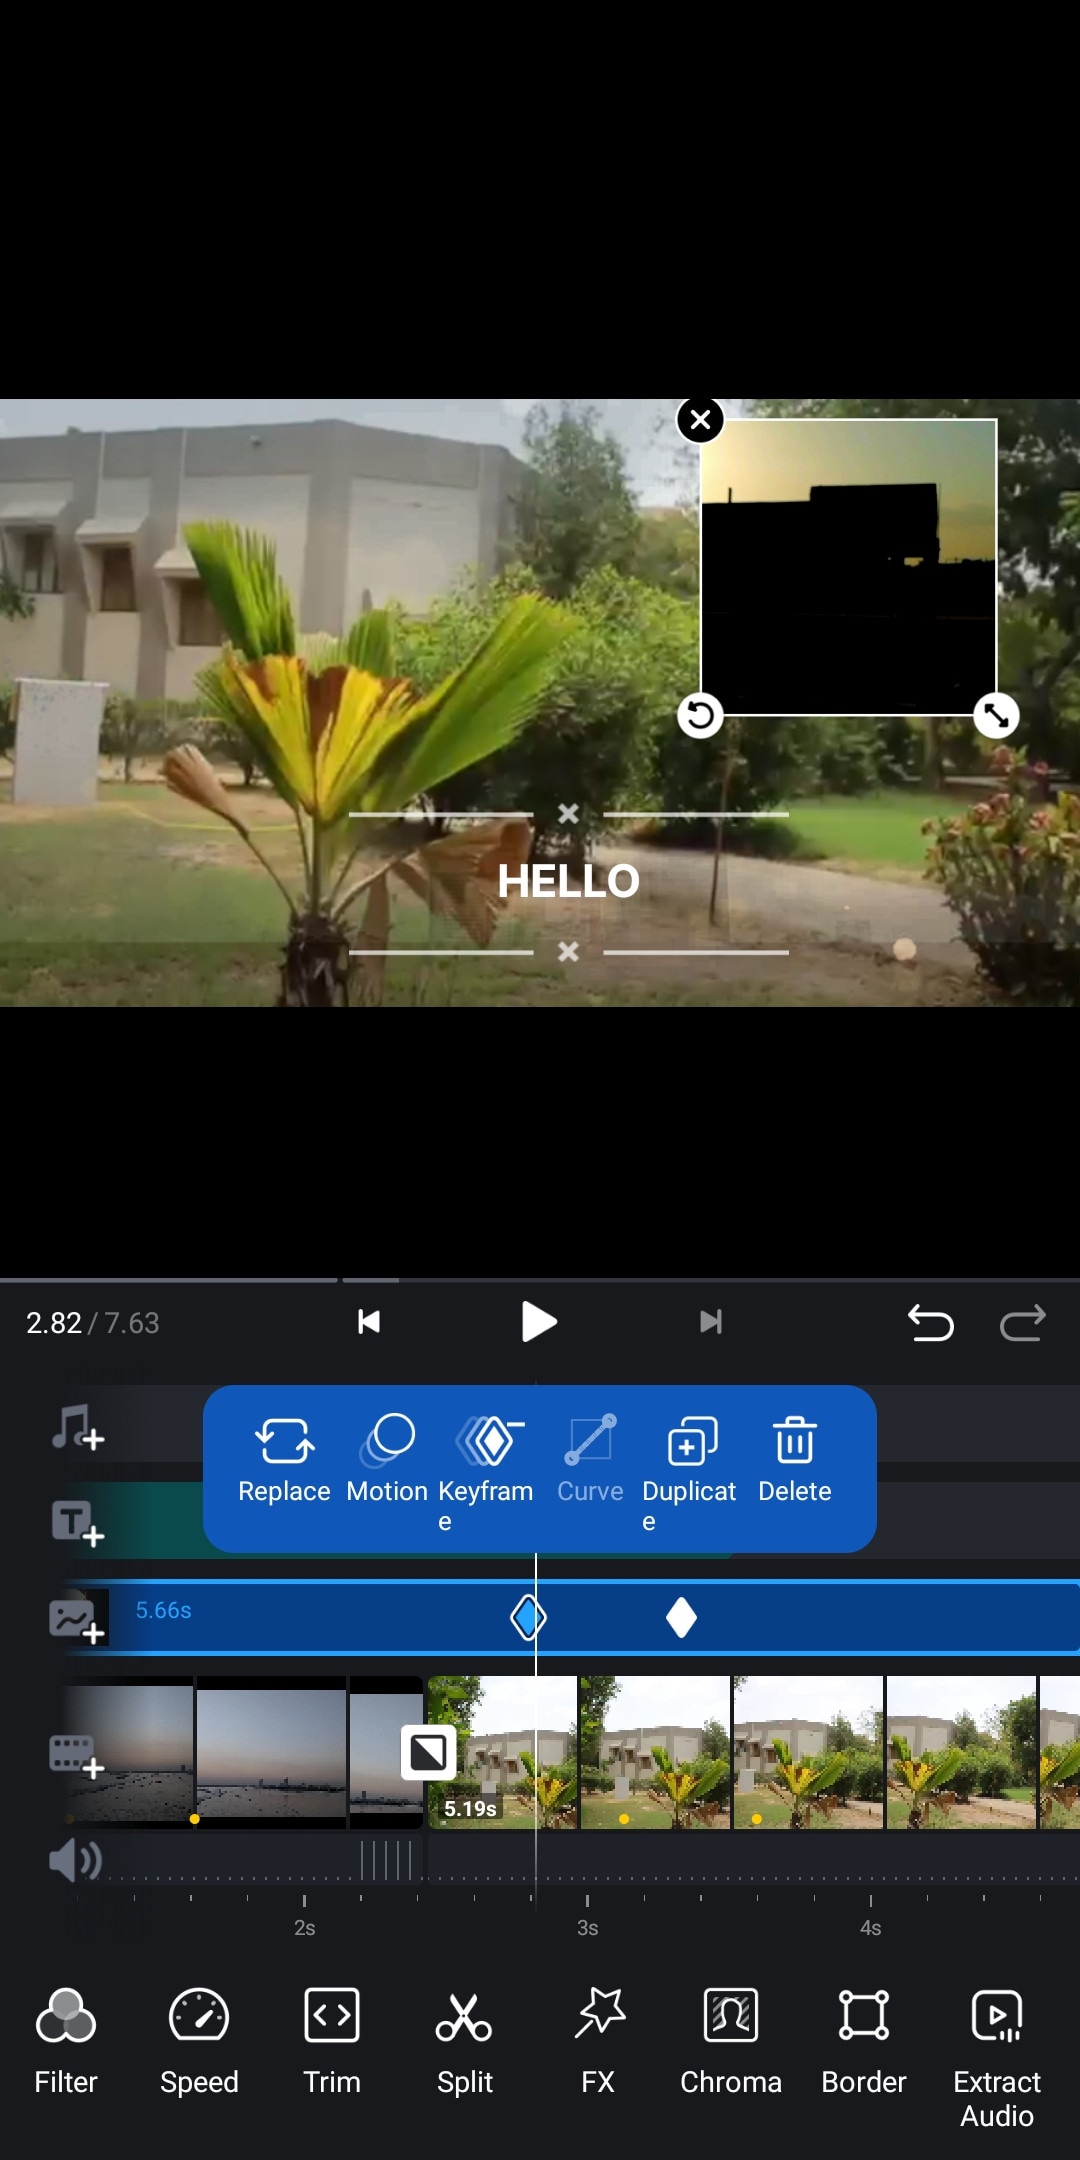
If you are looking for a video editor, which let you do fast but quality edits, then “VN video editor” is the right choice for you. It is free and easy-to-use software with many useful features like transitions, effects, speed ramps, PiP, chroma-key, keyframing, e.t.c. It supports different aspect ratios for all your social platforms.
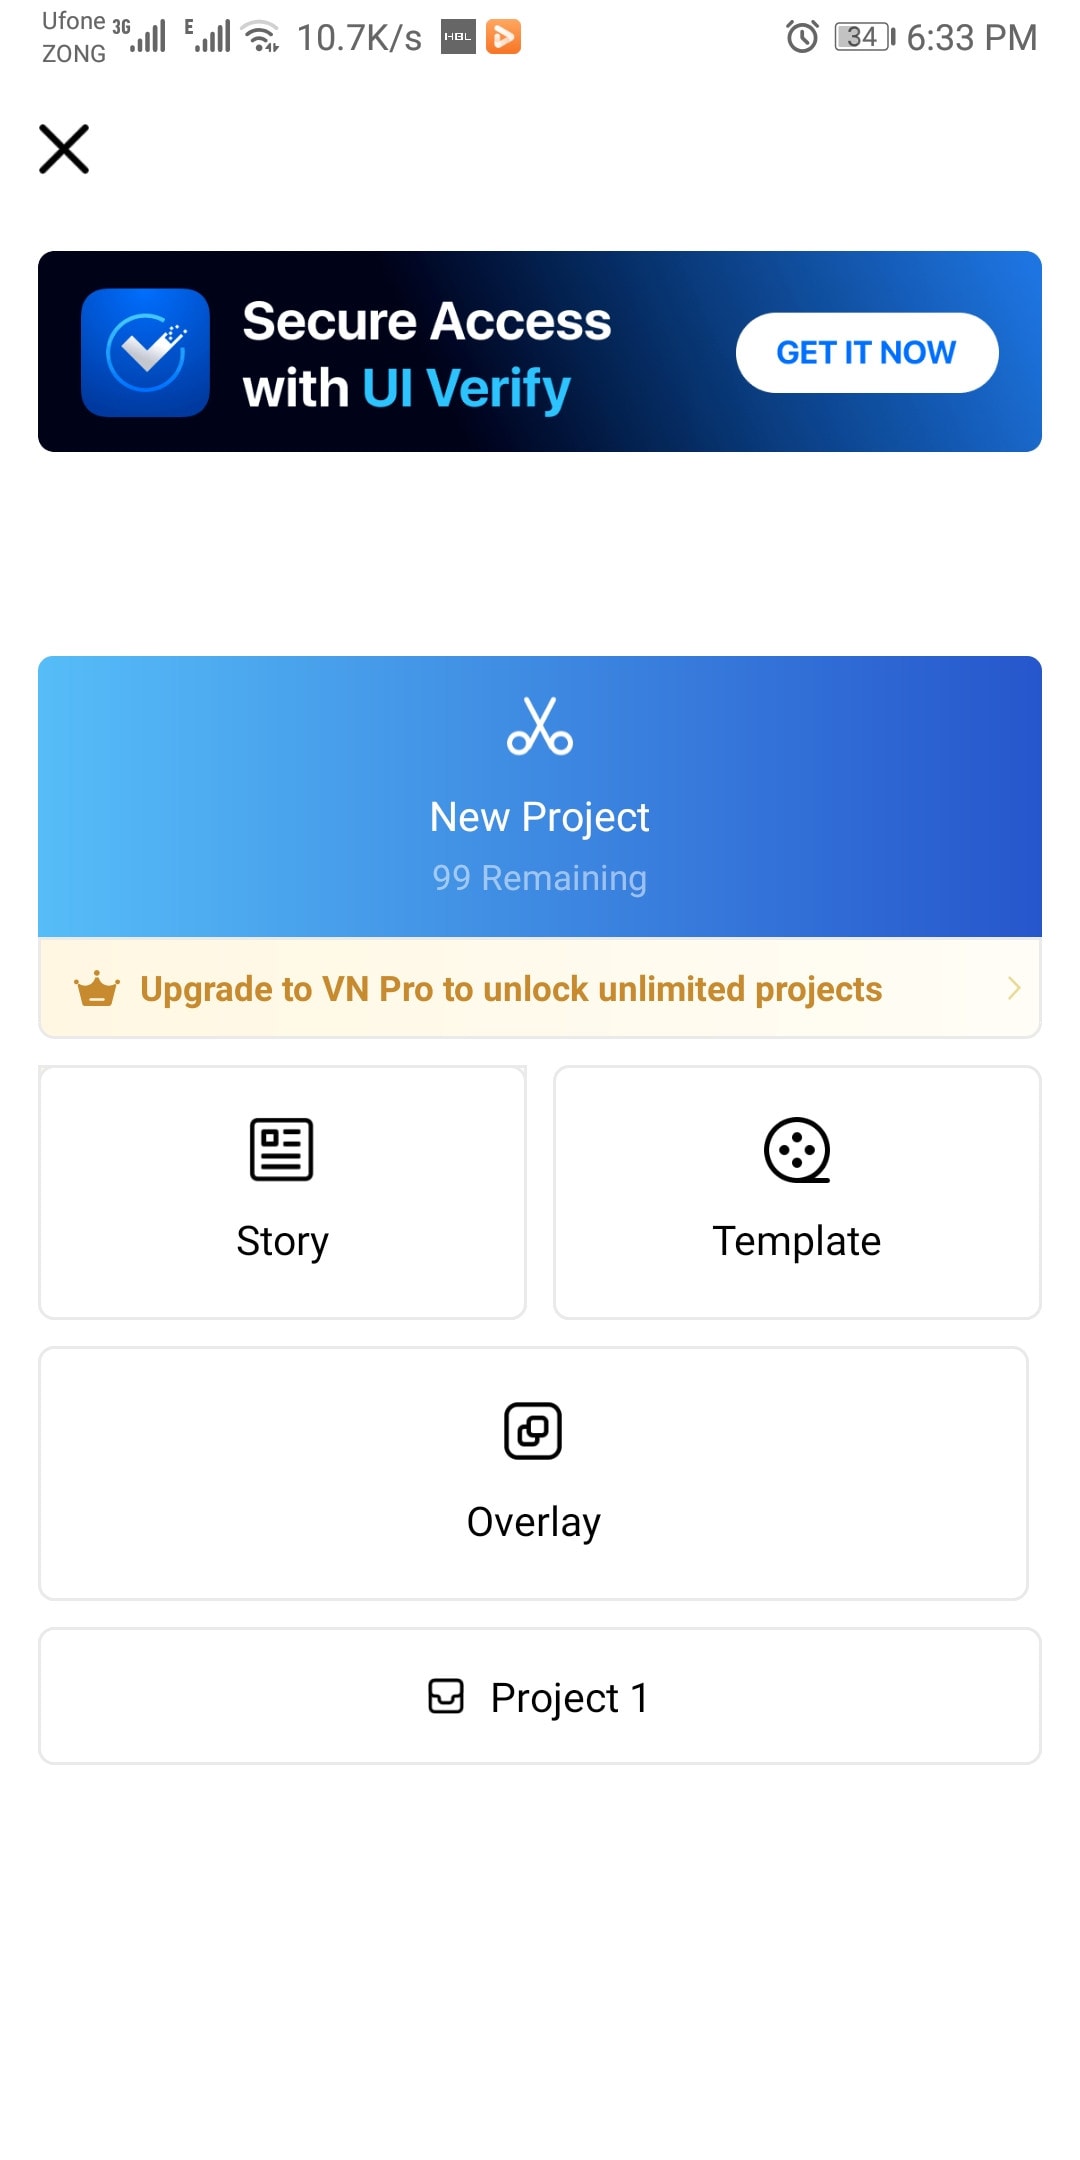
It also has pre-made templates to speed up your editing process. Its Story mode let you manage your production and post-production work easily. It also has overlay mode, which can make awesome slide shows for you.
~Features:
- It is free software with no watermark.
- It supports up to 4K resolution at 60fps.
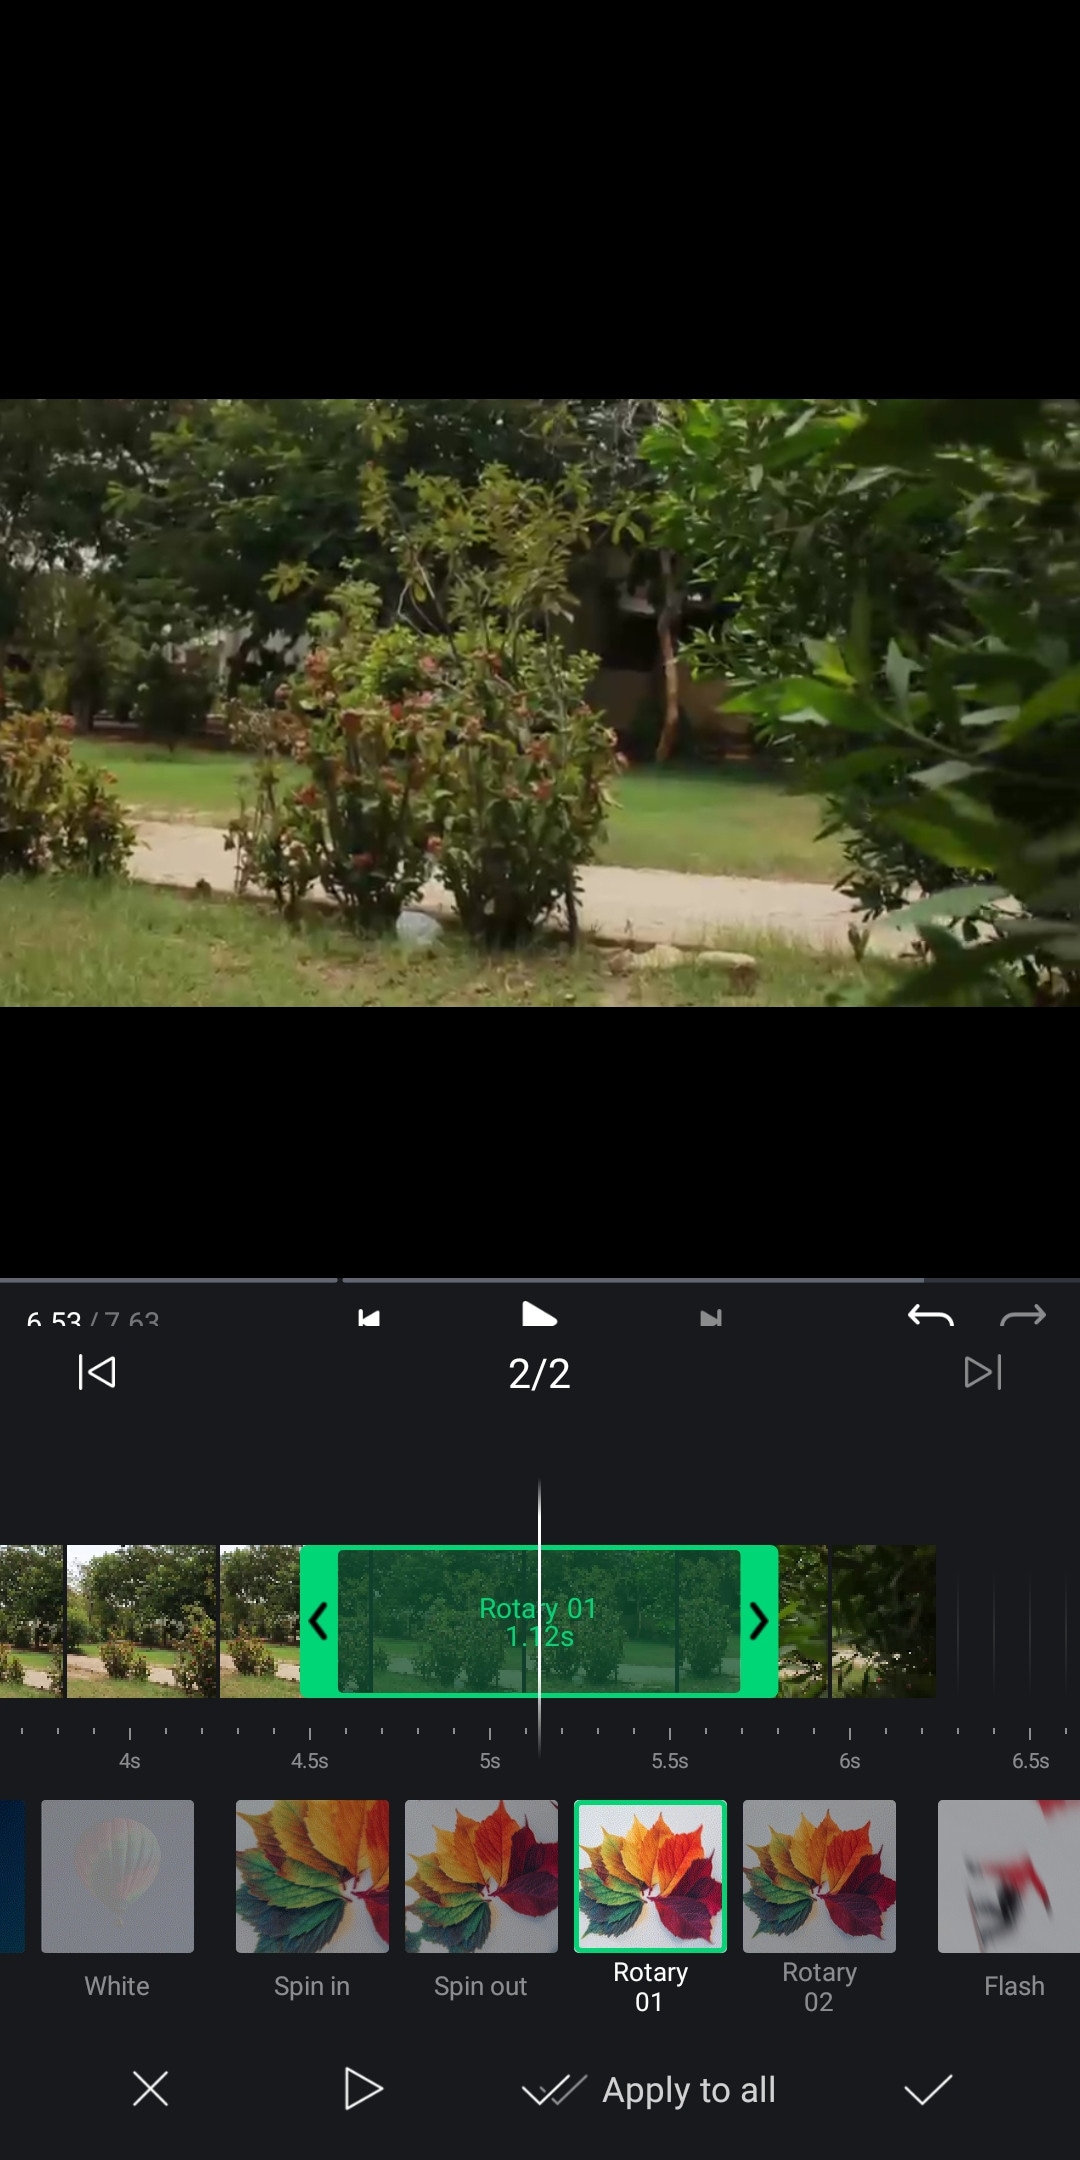
- Supports multi-layer editing.
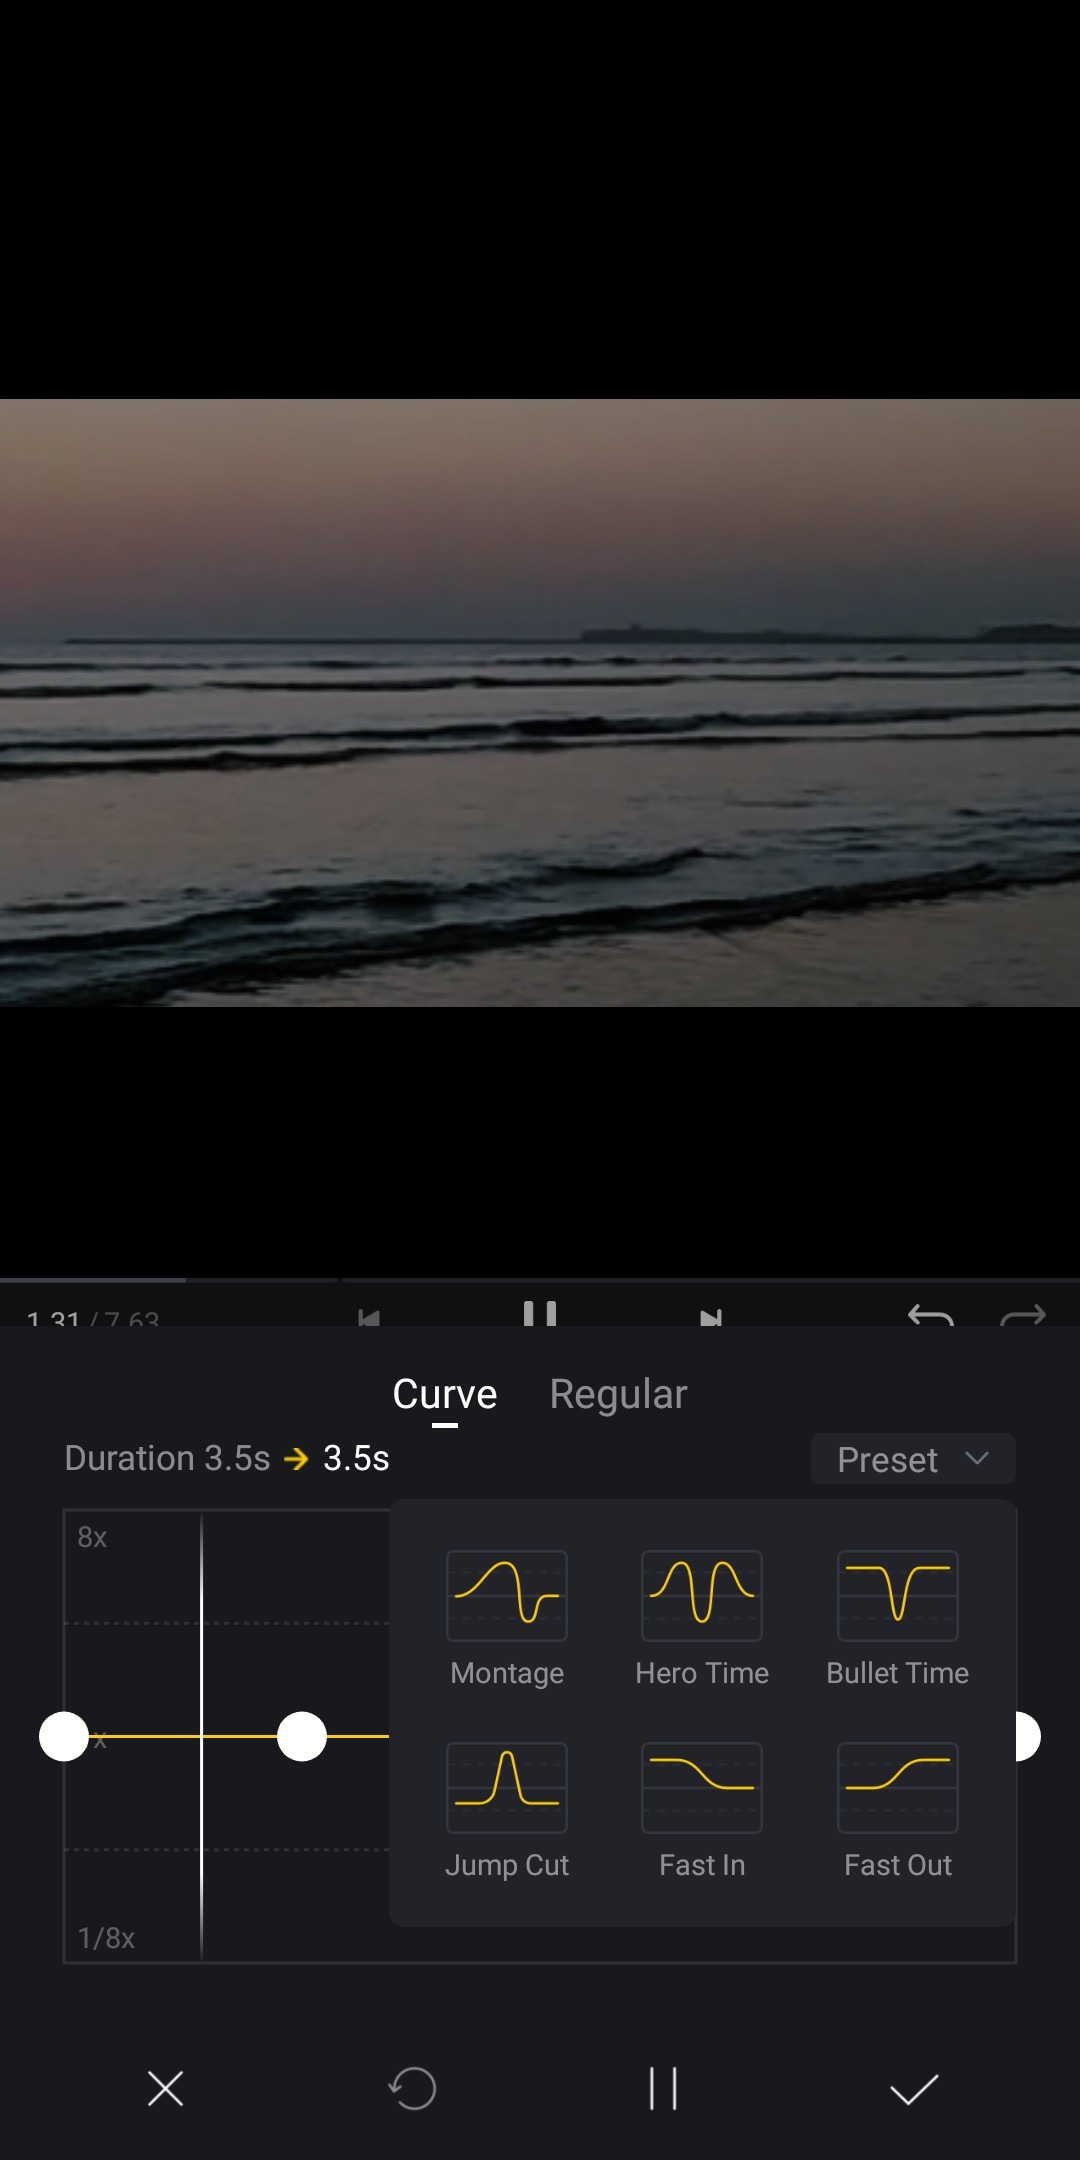
- Have keyframing curves to create smooth animations.
- Have speed curves for smooth speed ramping.
- Its Story mode let you manage your production work easily.
- Can extract audio from a video file.
~Cons:
- Its UI doesn’t support editing landscape orientation.
- Its free version has limitations of creating max 100 projects.
~Price:
Its Premium version is available for $3.9/month or $20.9/year.
Some Paid iPhone Video Editors:
If you want to move forward and get your hands on these paid softwares to try new features then you should buy these paid softwares. As most of these softwares are quite affordable but they pack the punch. And some of them can give you more in return than your investment. Then what are you waiting for? go and try them yourself.
Kinemaster:
It is available on IOS and Android both.
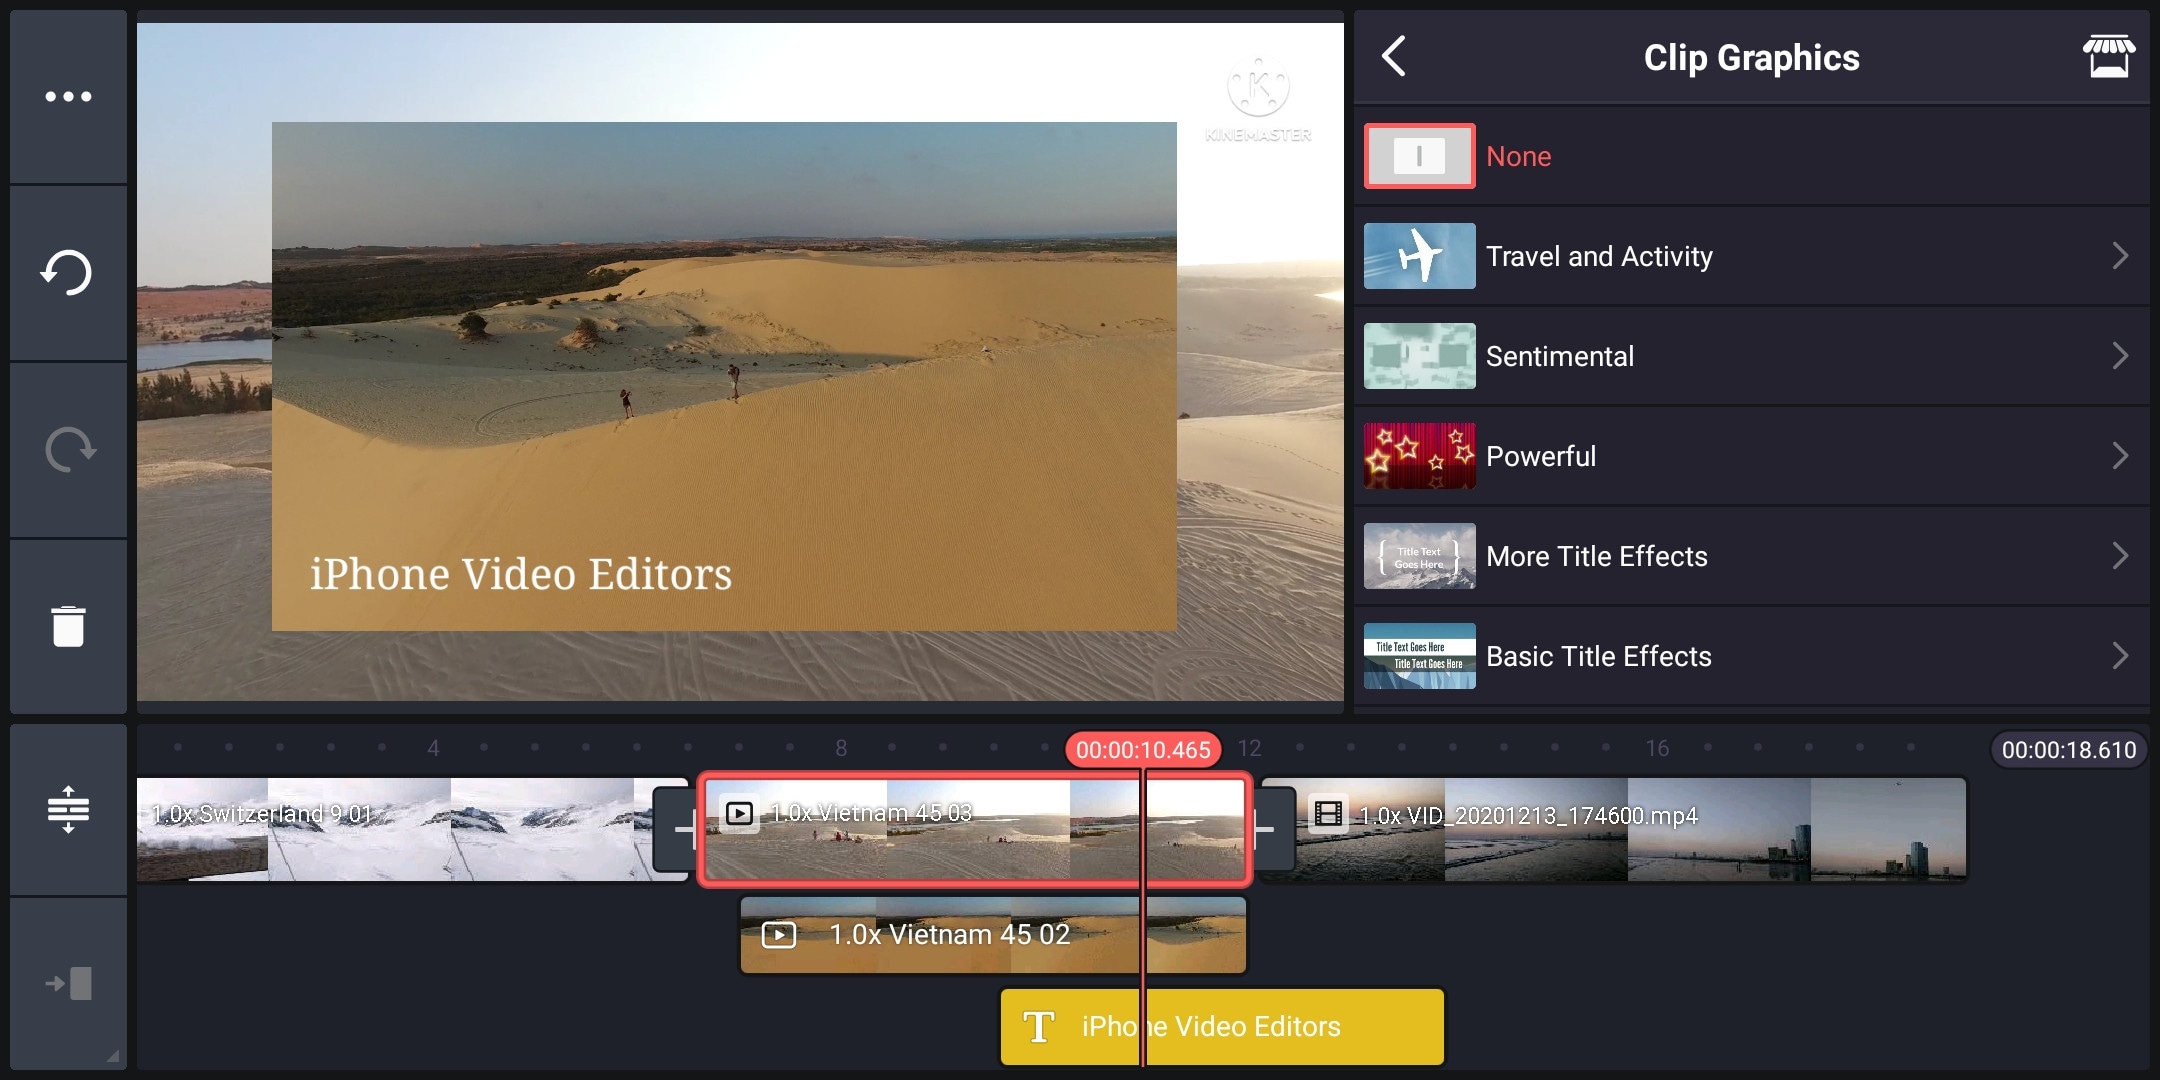
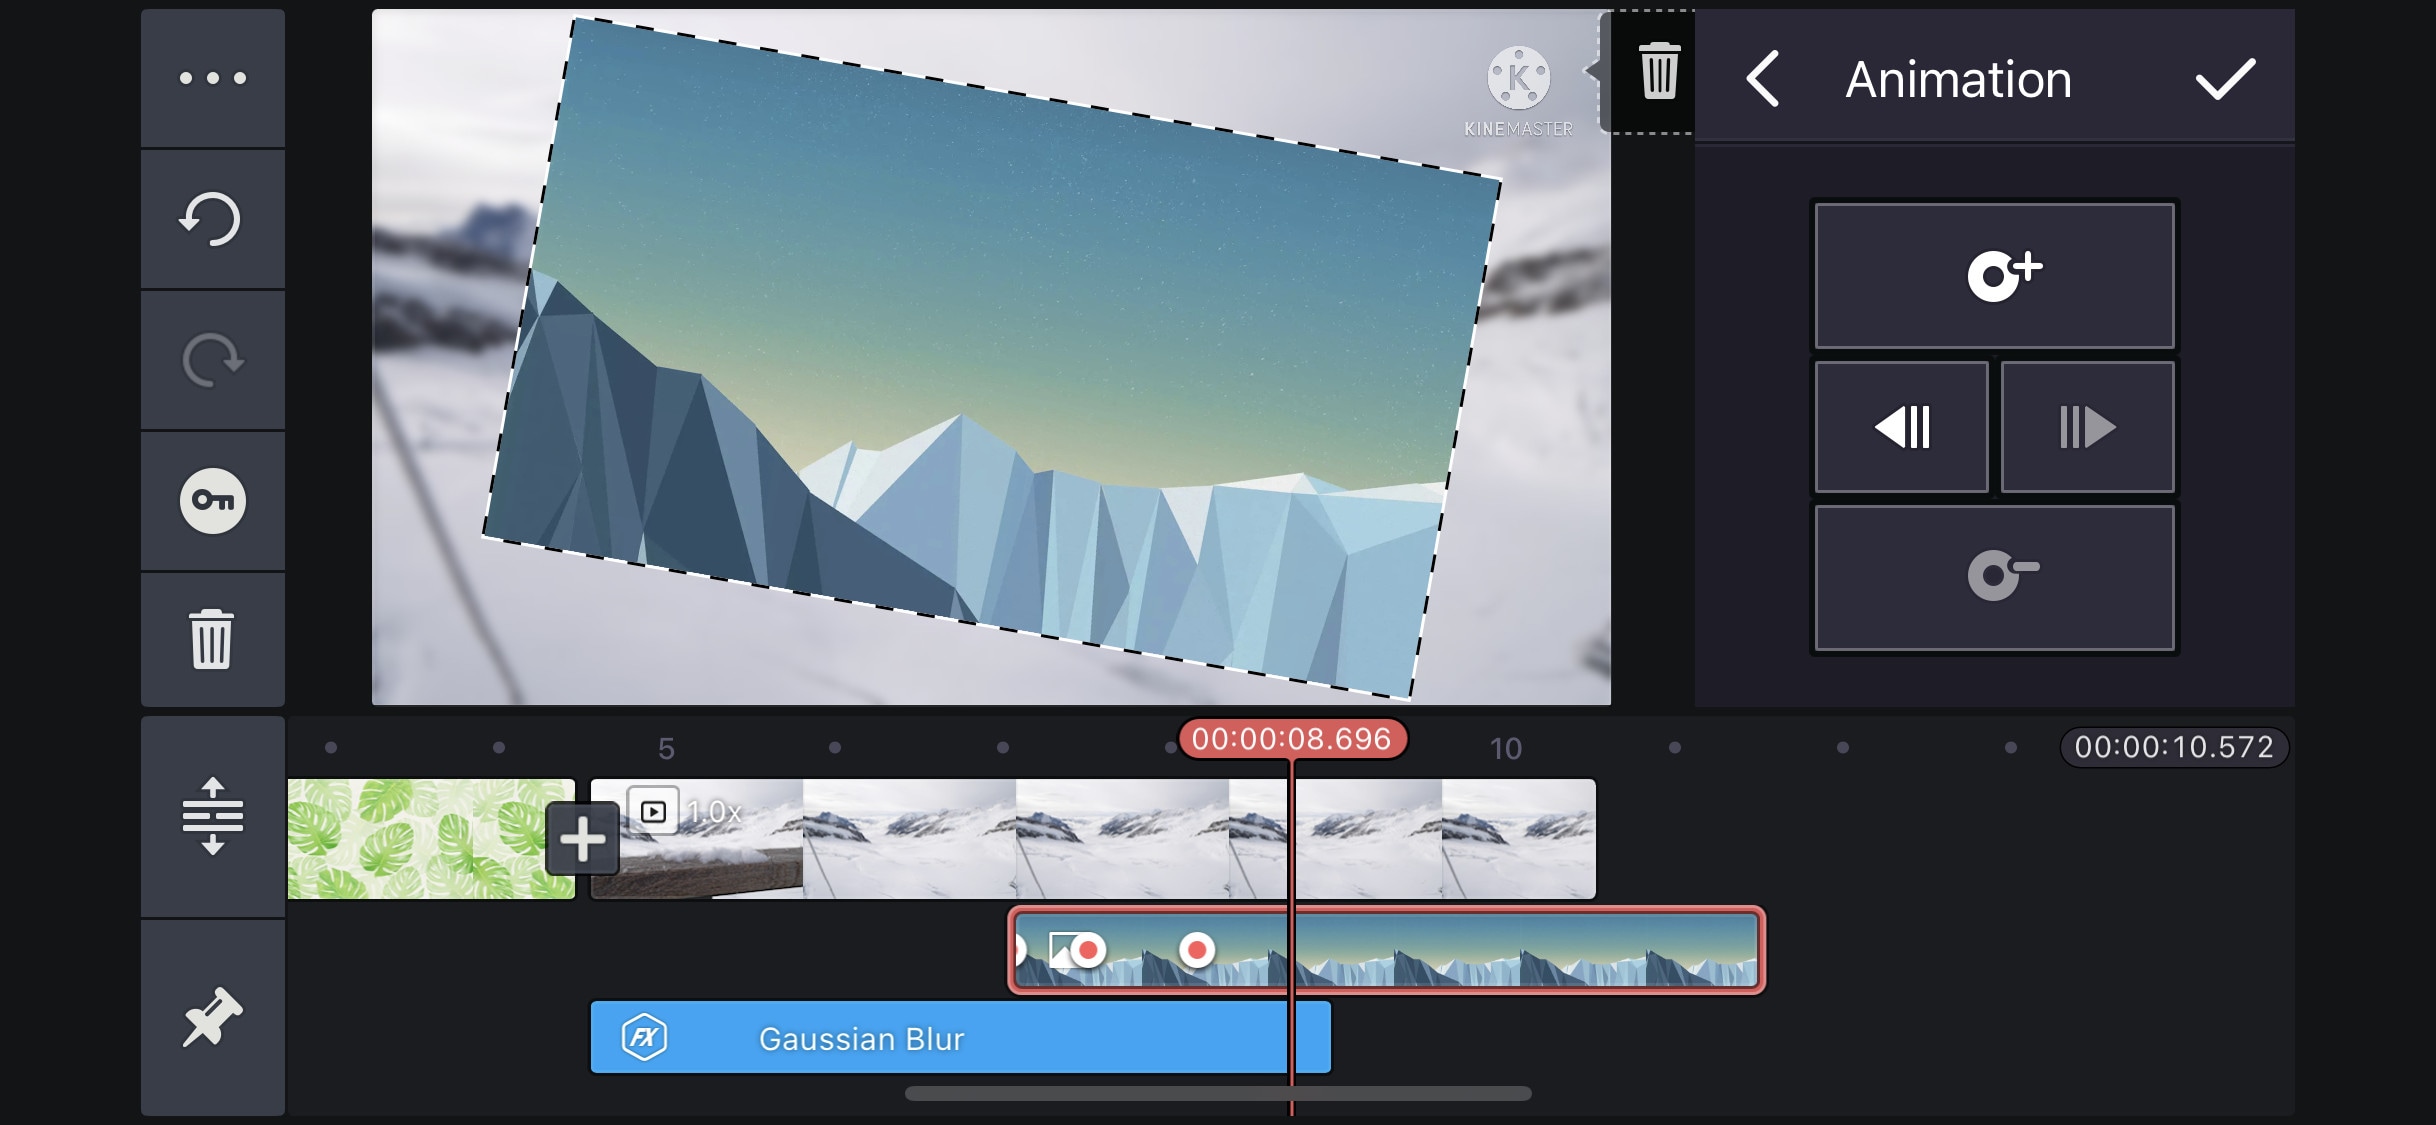
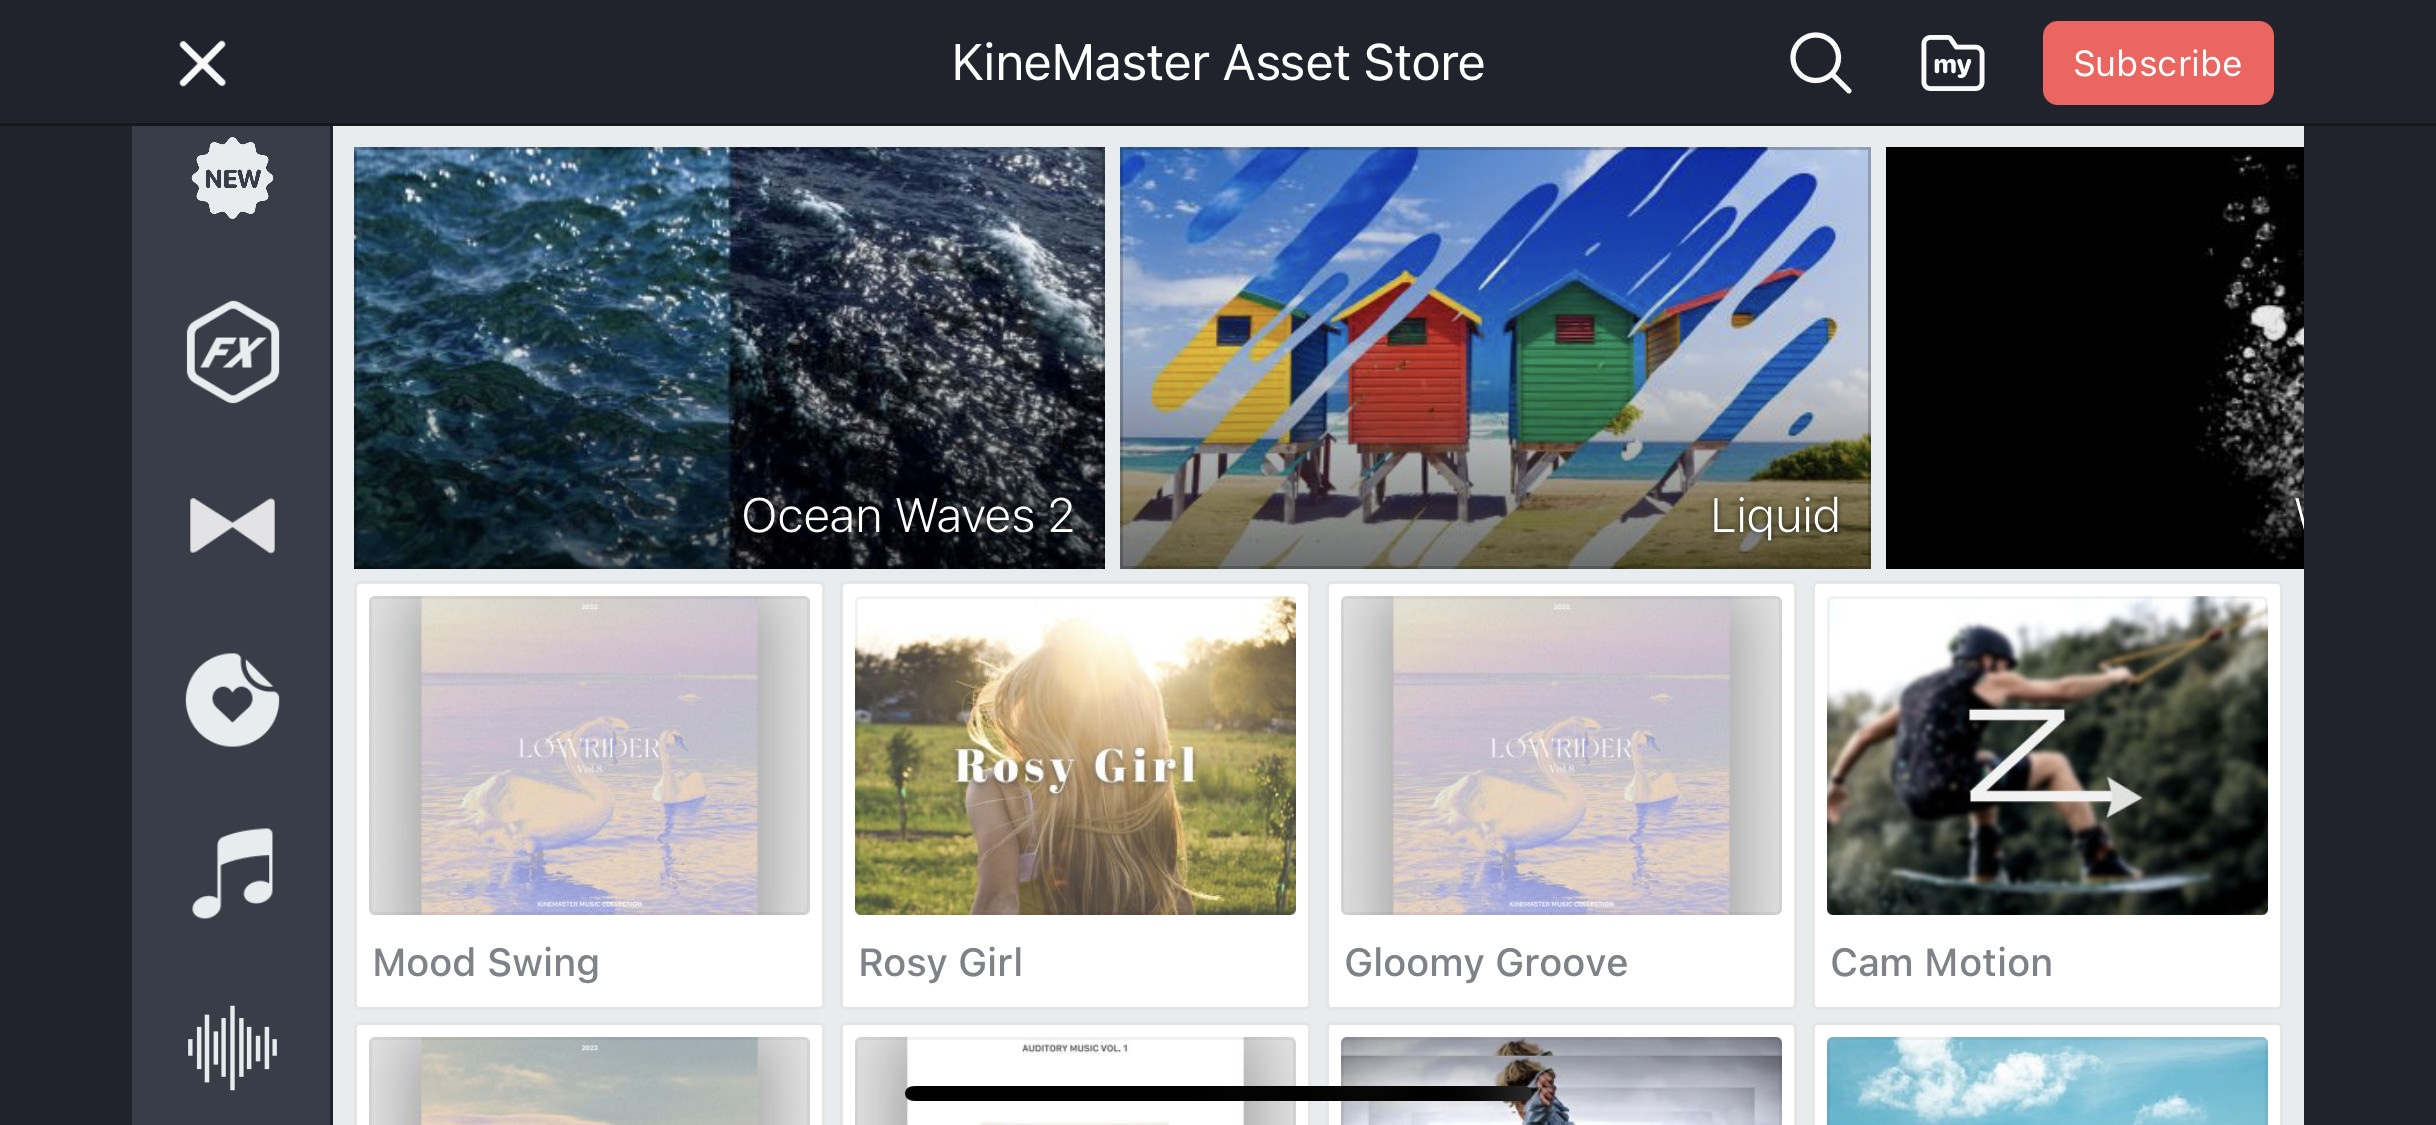
If you want to do more than just trimming and cropping to your videos then you should try Kinemaster. For editors, who want to do some advanced-level video editing on their phone, then you must have Kinemaster on your phone. It is a paid software, which is packed with many useful features. It has many video and audio effects. It also has an amazing audio editor. It also has many title designs and basic color correction tools. It has hundreds of effects and transitions + more can be downloaded from its asset store. Its UI is suitable for beginners and content creators both. It is a paid software, but all its features are completely free to use, but the free version leaves a watermark on export.
~Features:
- It supports up to 4K resolution at 60fps. (depending on mobile configuration)
- Have amazing features like chroma key, keyframing, blend e.t.c
- Has built-in audio and video recorder.
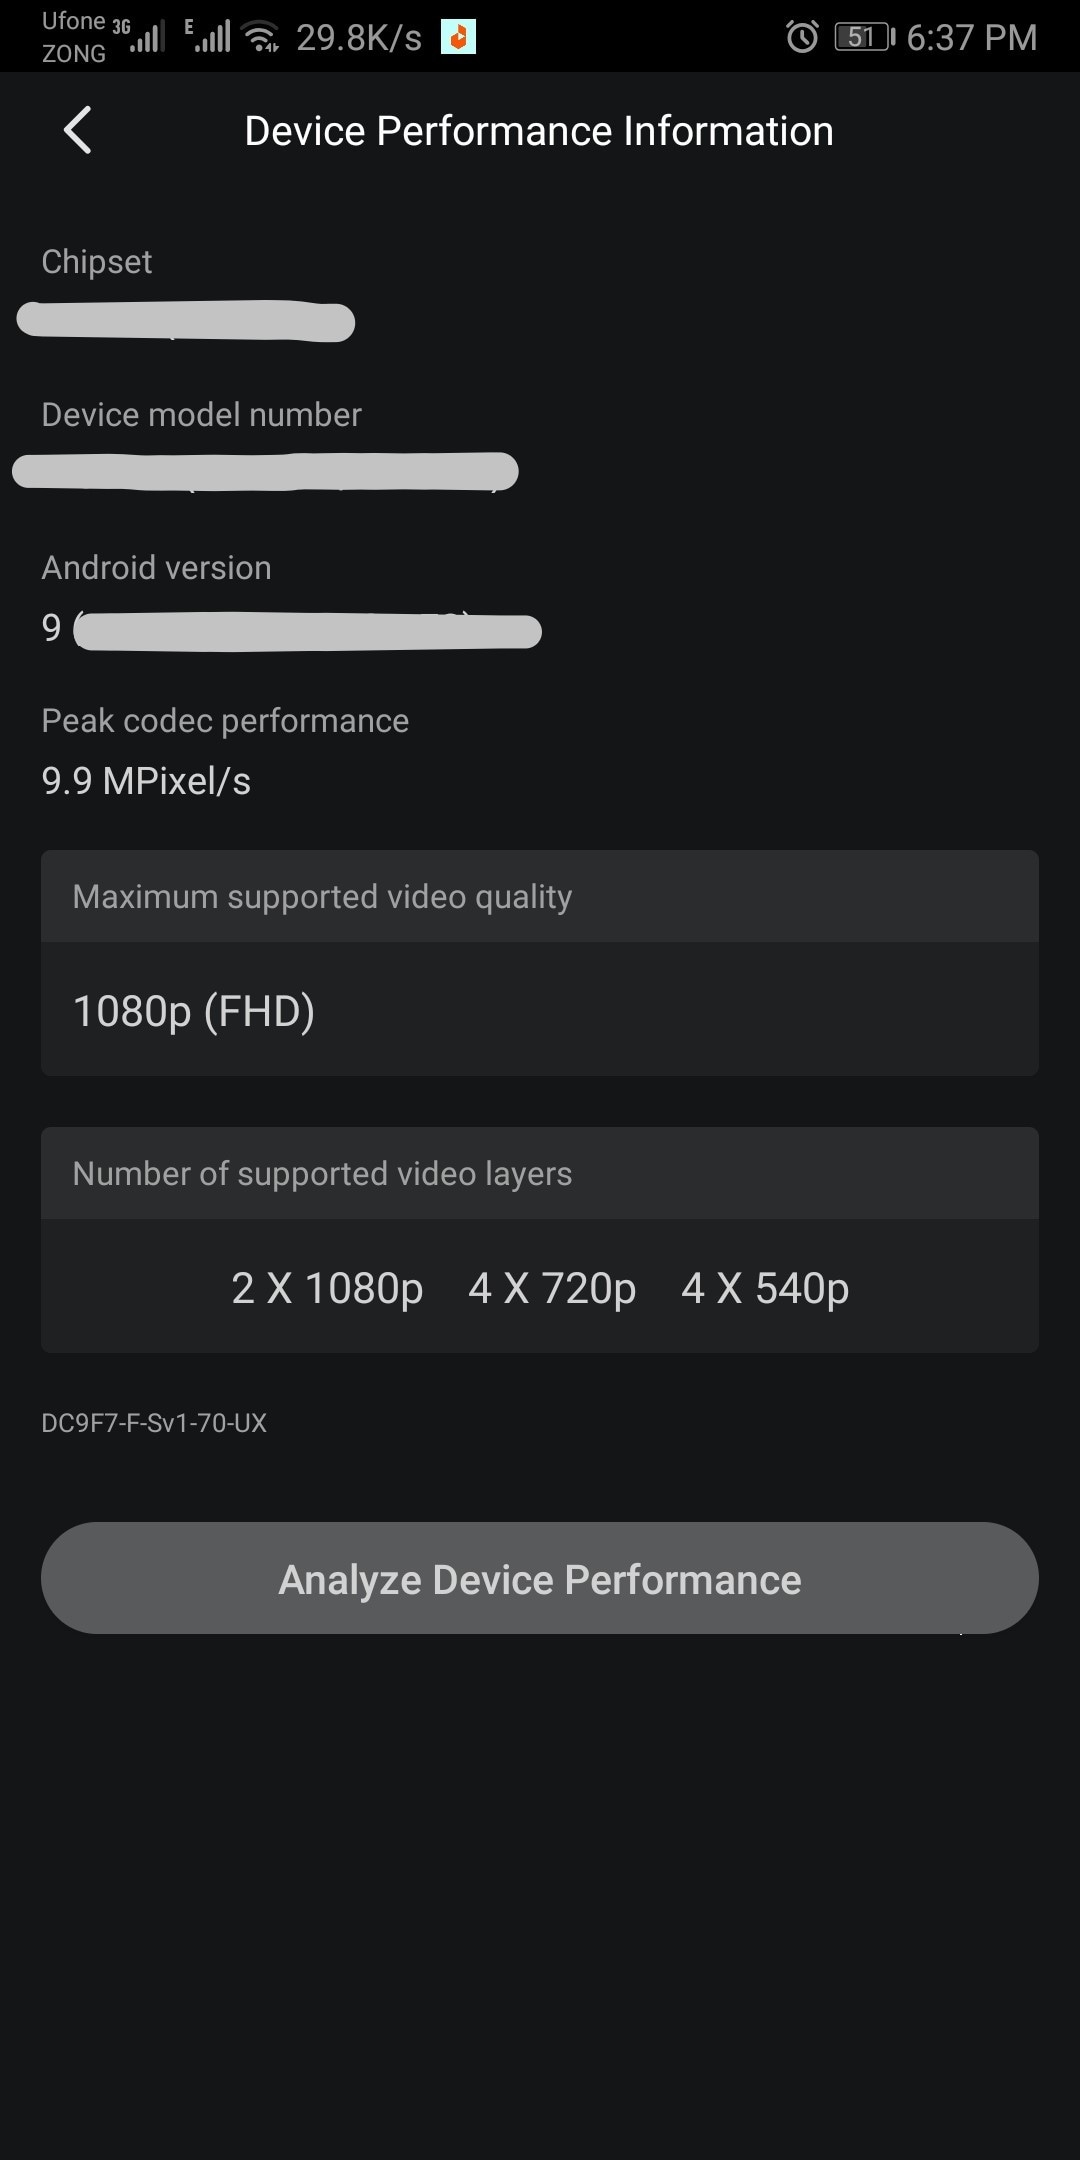
- Supports multiple texts and video layers with different resolutions depending on the capability of the mobile phone.
- Has UI like a PC video editor and supports landscape orientation for editing.
- Have an asset store with 100s of free effects, transitions, and stock material.
~Cons:
- Can’t export 4K videos on most devices.
- Can’t apply keyframes and chroma key to the main video. (can be done on layers only)
~Price:
Its Premium version is available for $4.9/month or $39.9/year. It also includes all the premium assets.
Power Director:
It is available on IOS and Android both.
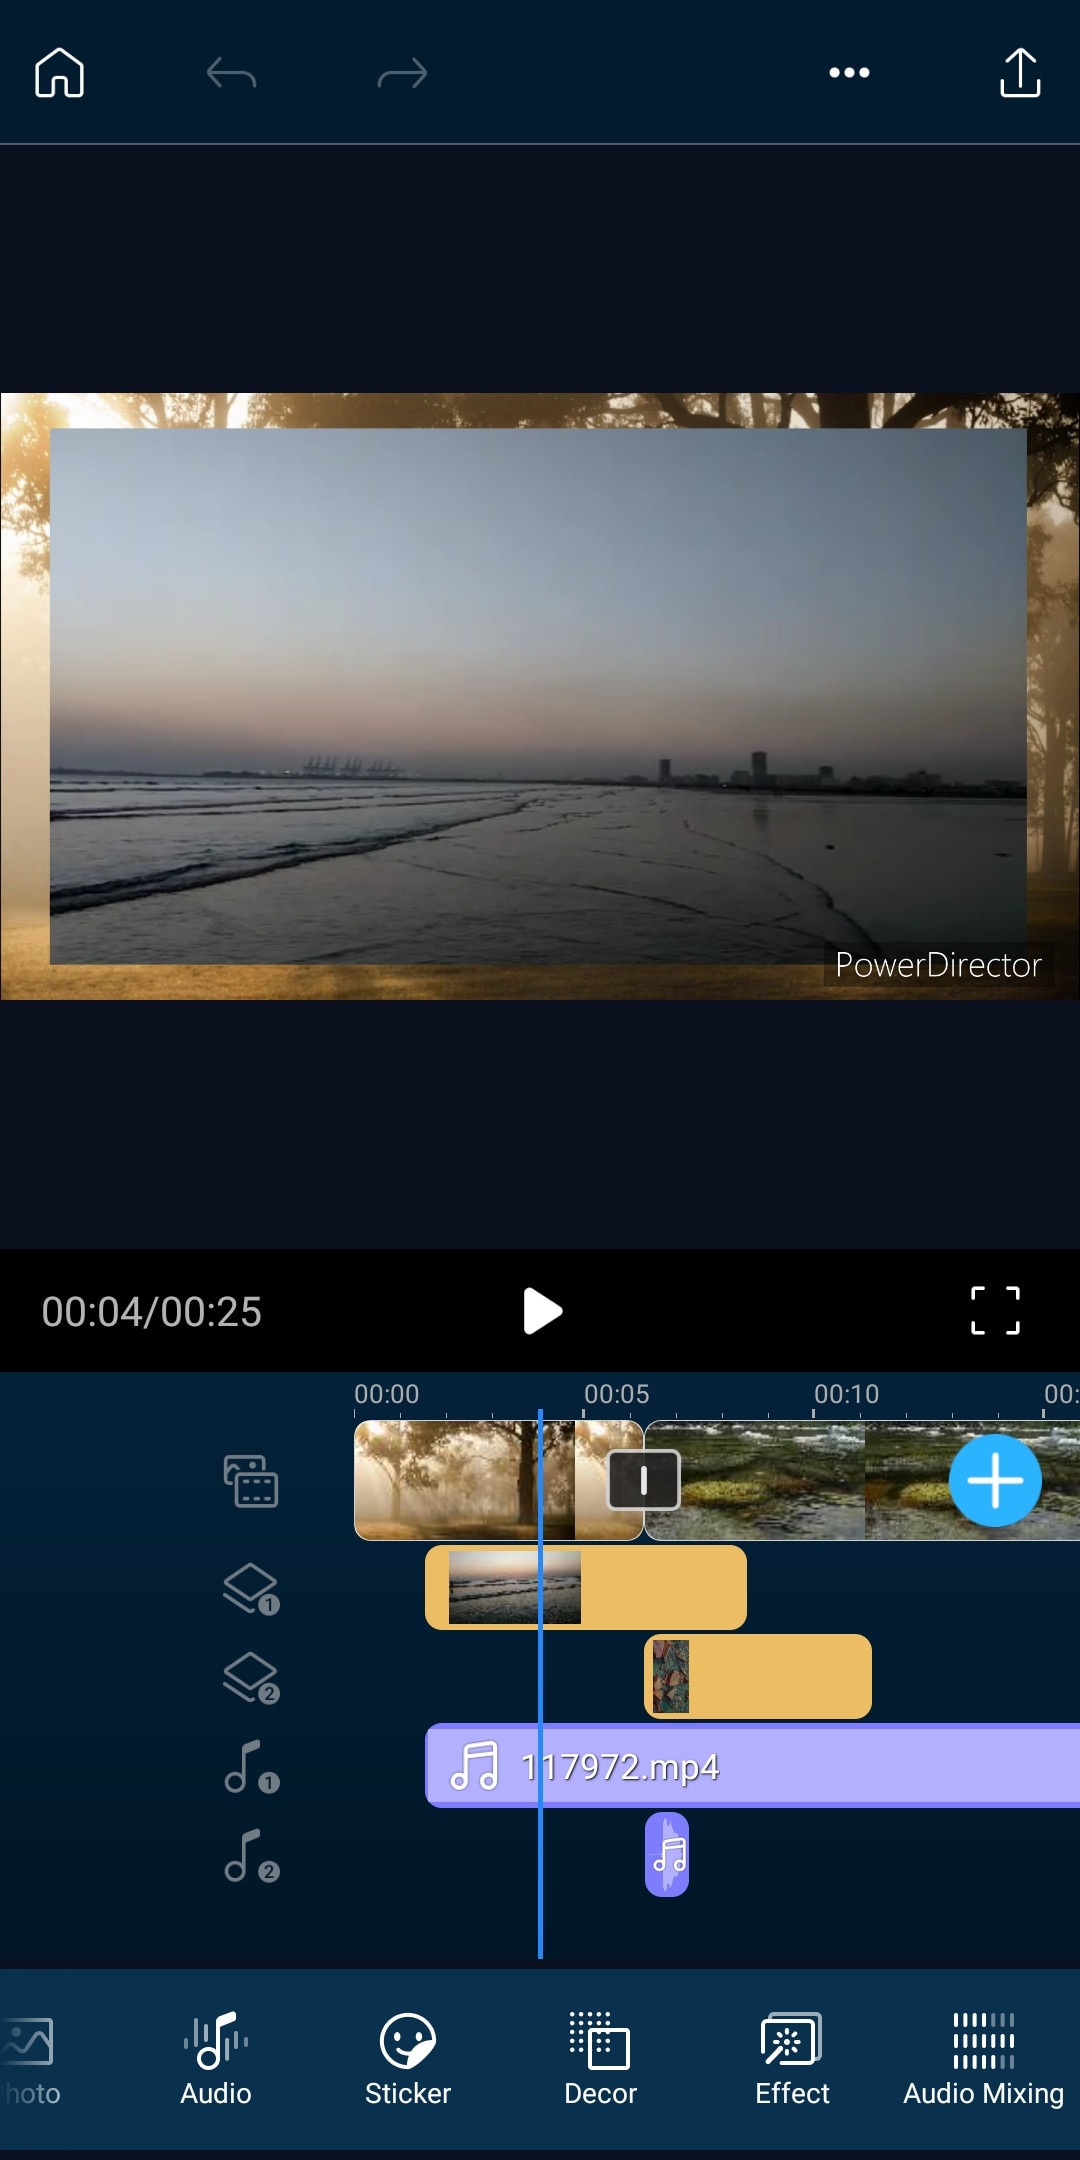
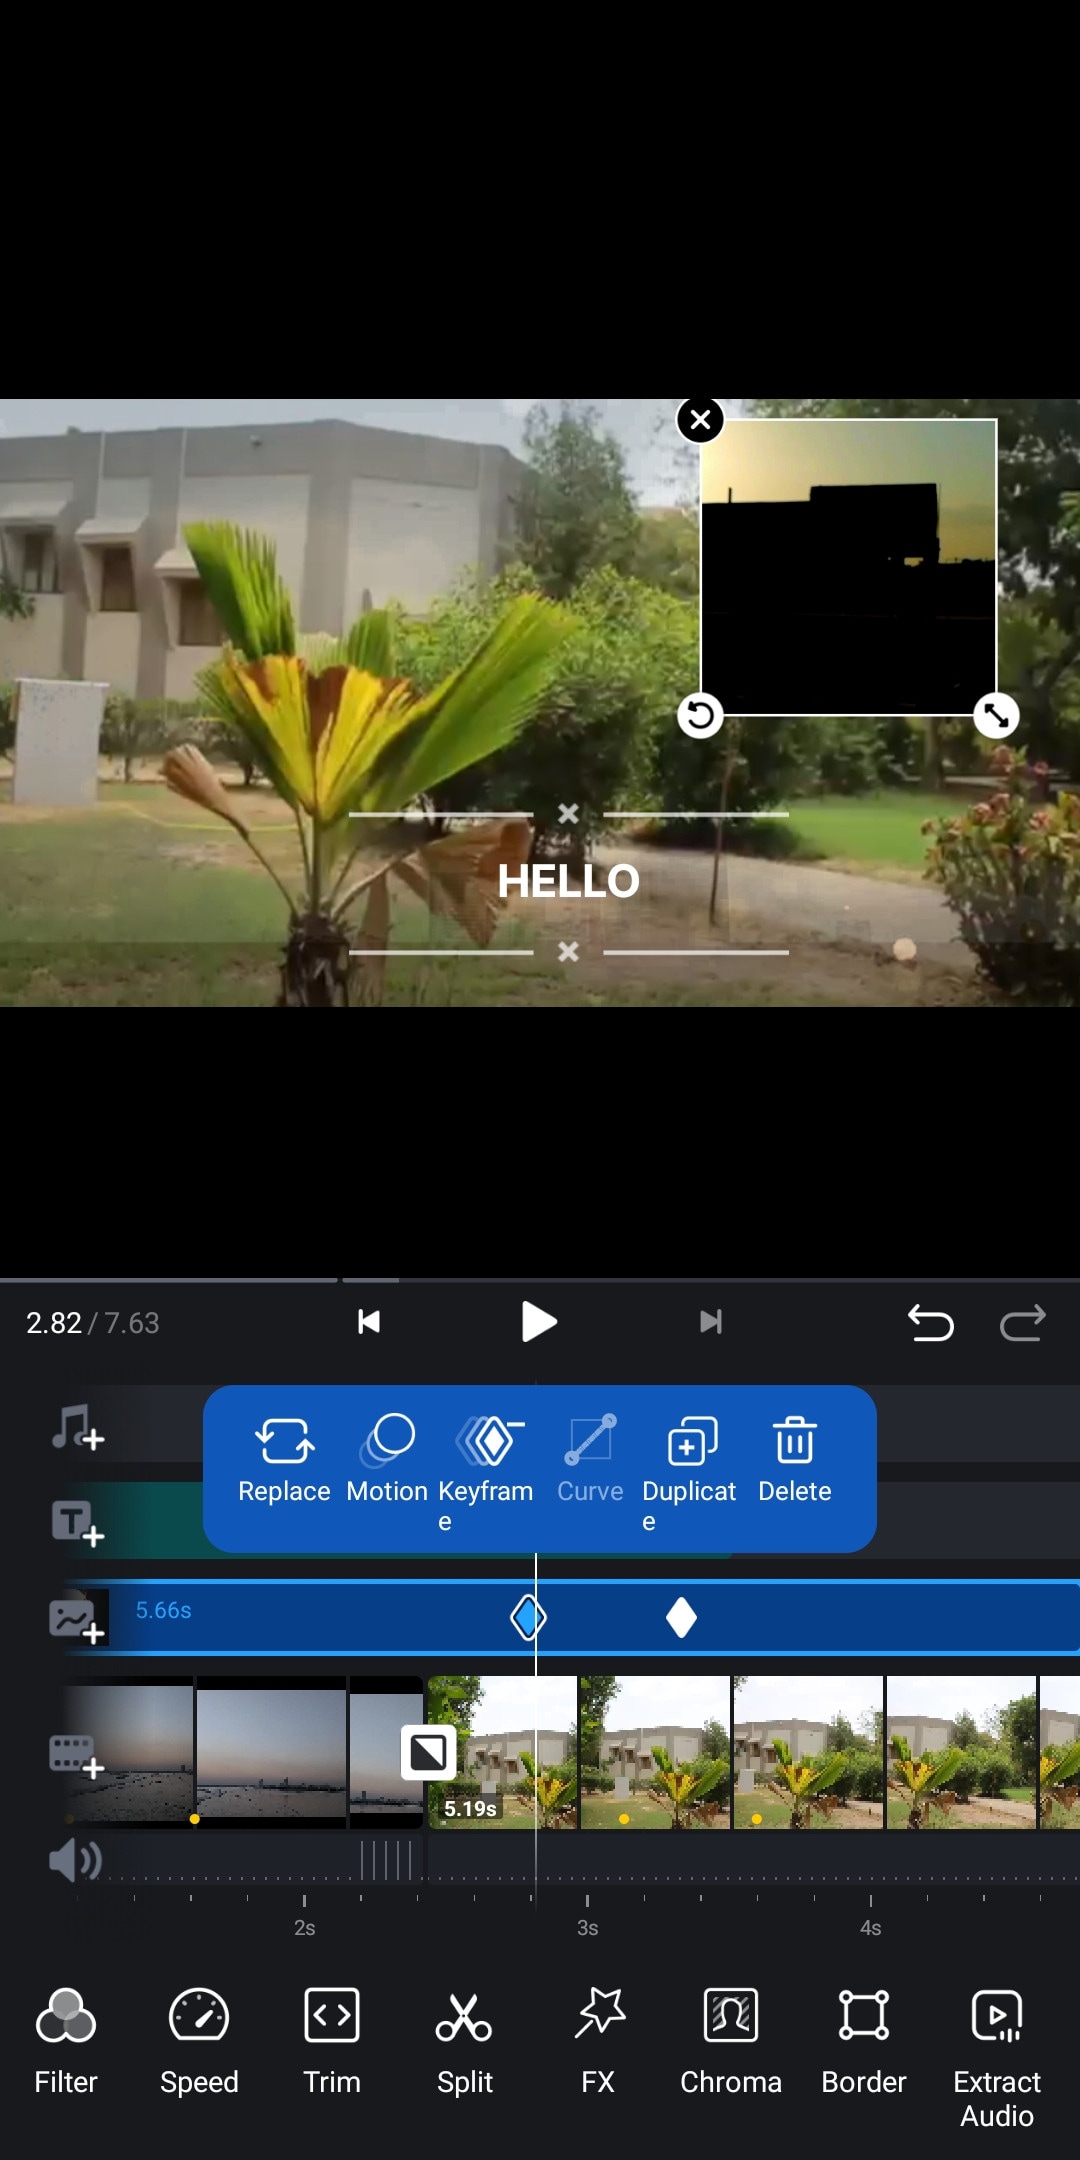
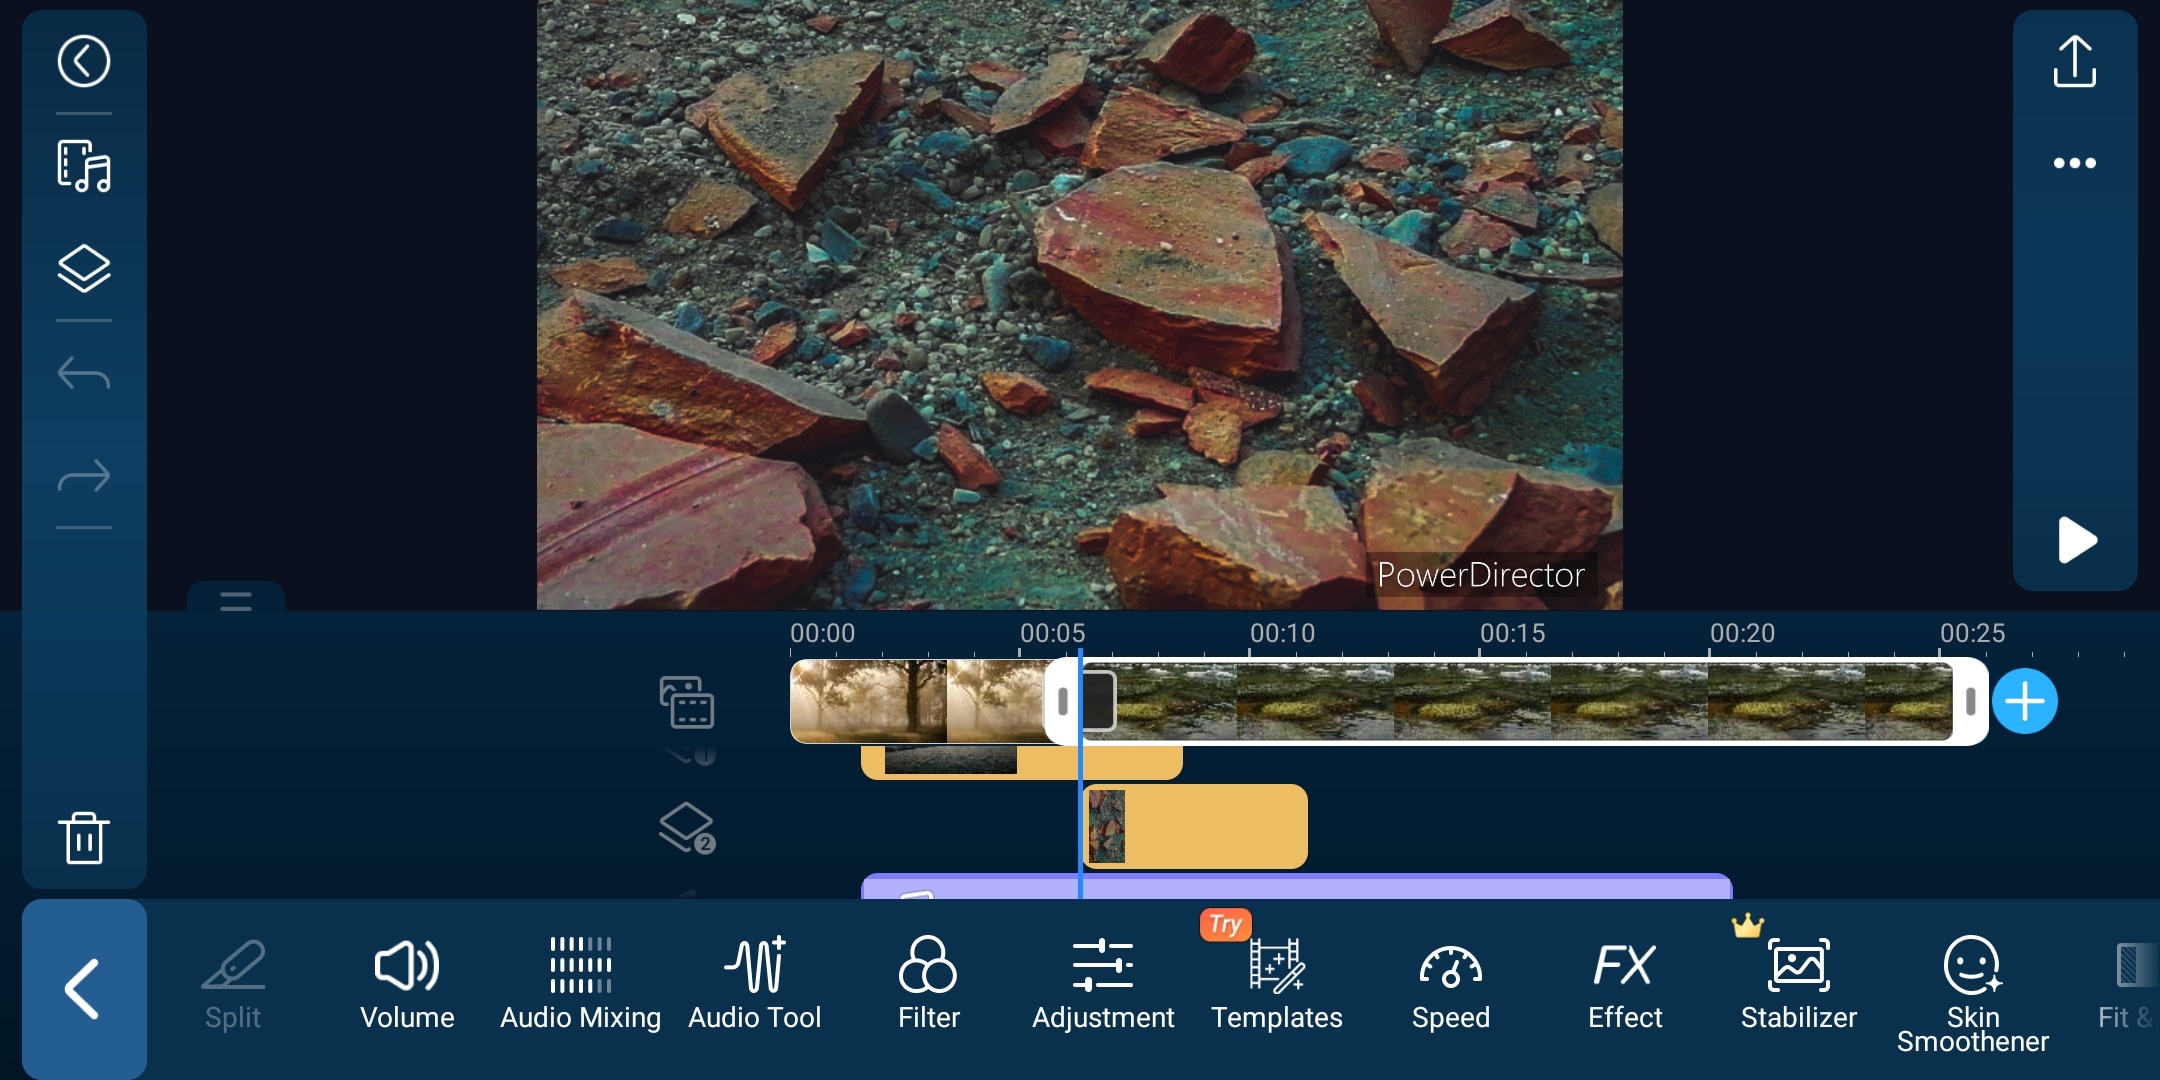
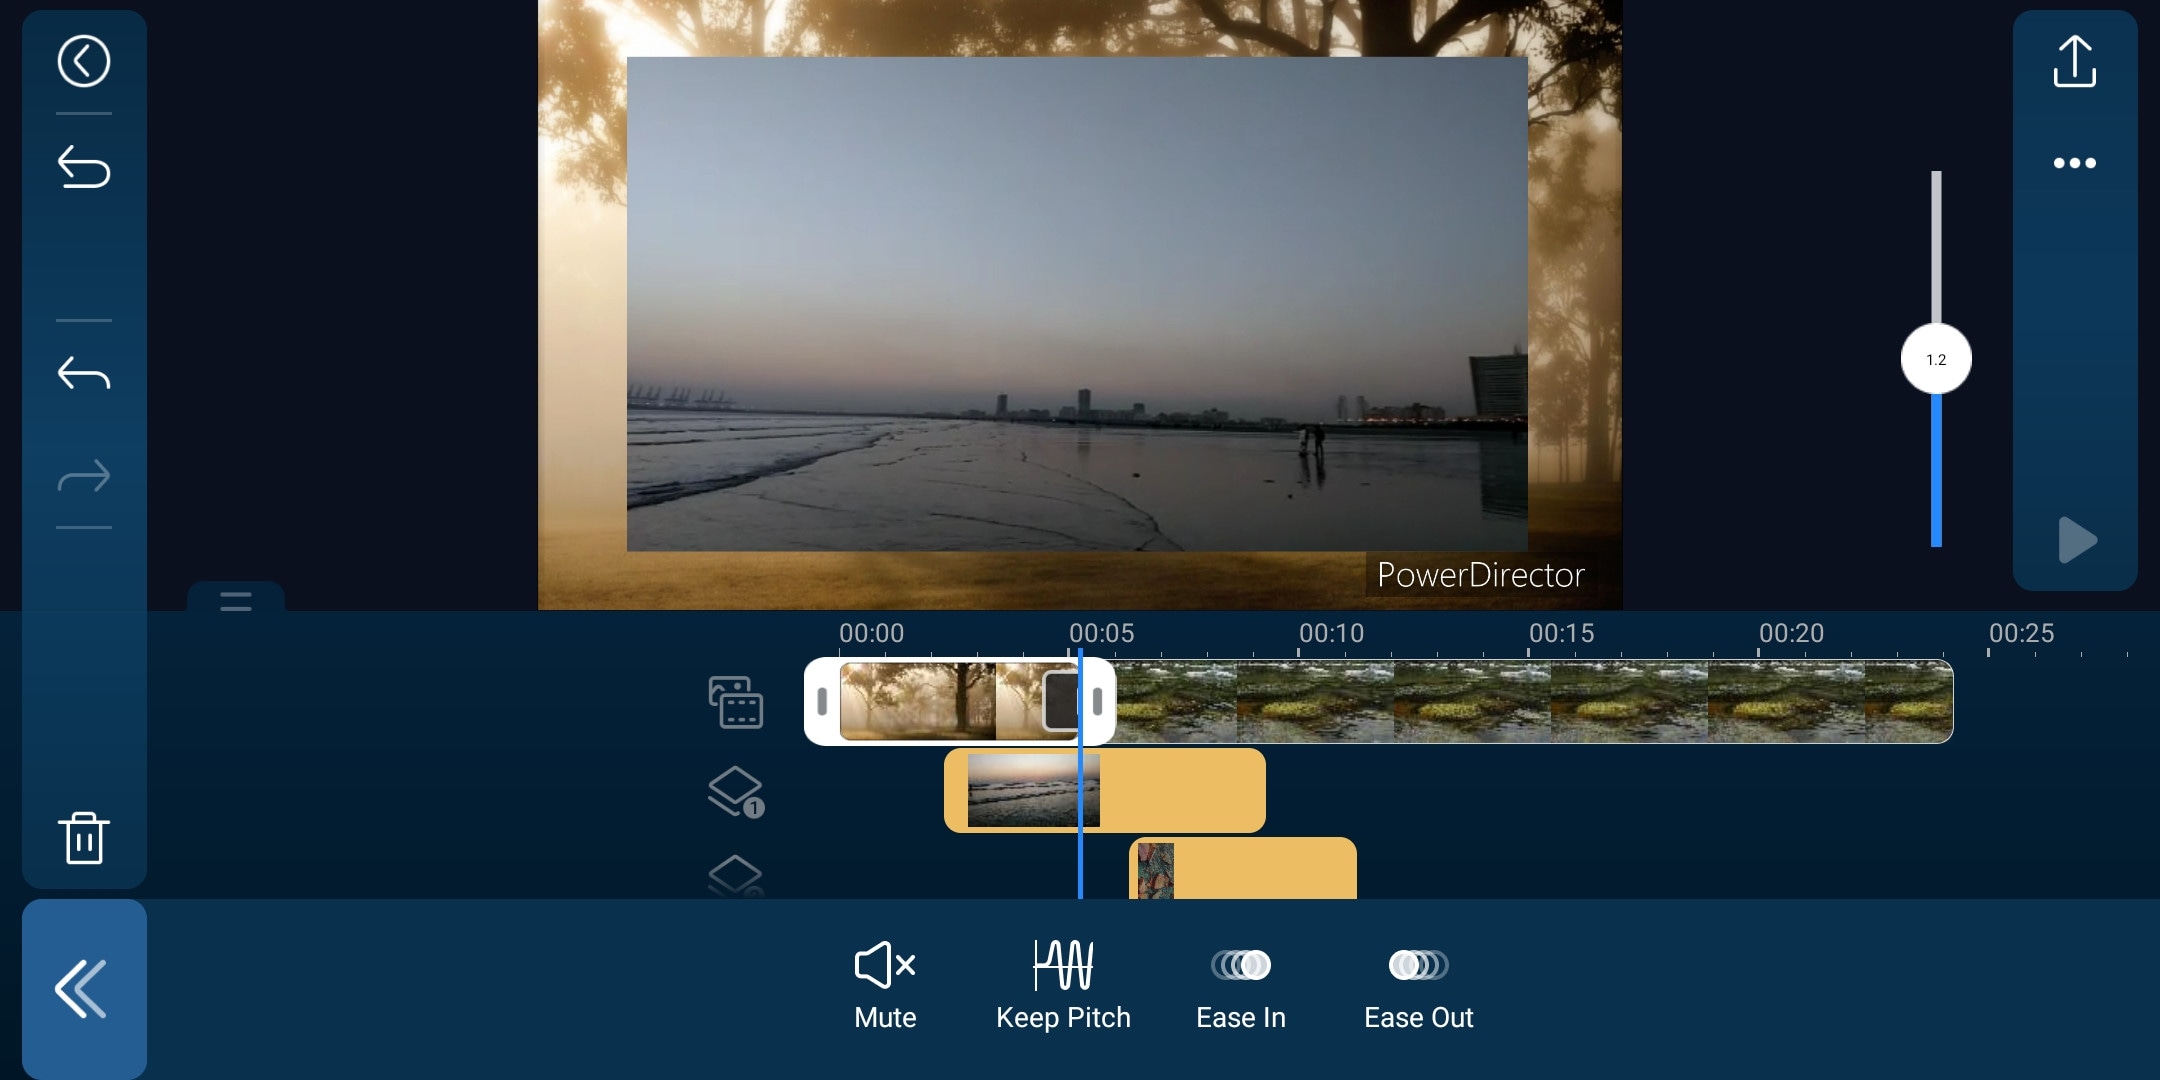
It is a paid but quite advanced video editor available for androids and IOS both. Like its PC version mobile version is also packed with many great features. It is compact and easy to use. It supports multiple video and audio layers. Have many cool filters and transitions. Can also do basic color corrections. To complete post-production work it also has audio editing tools and effects. It also has hundreds of title designs. Its UI is easy to use and supports both portrait and landscape orientation for editing. Most of its features can be used for free with a watermark on export. To remove the watermark you need to purchase the premium version.
~Features:
- It supports up to 4K resolution at 60fps. (compatible on most devices)
- Supports both Portrait and Landscape orientation for editing.
- Supports Key framing and video stabilization also.
- Supports multiple audio and video layers.
- Can edit videos in different aspect ratios.
- Have a vast stock library.
~Cons:
- Can’t export 4K videos on many devices.
- Can apply keyframing and chroma key to layers only.
- Software lags sometimes.
~Price:
Its Premium version is available for $4.9/month or $29.9/year.
LumaFusion:
It is available on IOS and Mac (with an m1 processor).
If you are a content creator and want to do professional-level video editing on your phone then you should get your hands on “LumaFusion”. It is of the most powerful and advanced video editors designed for a mobile phone. But it only works on iPhones and iPads. It is a multi-track video editor with many useful features like the Chroma key, keyframing, color grading, and color LUTs. Have powerful color grading tools and an audio editor. It also has a lock and load stabilizer. You have to purchase the software before using it. It doesn’t have any free version to try.
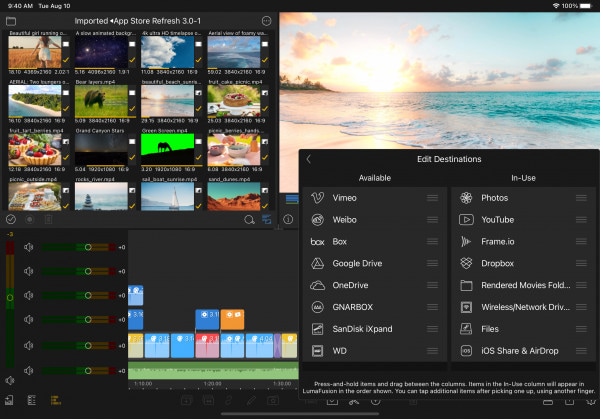
Credits: Pic by Luma touch website.
~Features:
- It supports up to 4K video resolution at a max of 240 fps.
- Can also edit and export 360 videos.
- Have powerful color correction tools. You can also import your own color LUTs.
- Supports Keyframing on almost all the editing tools within the software.
- You can add some third-party audio plugins.
- Supports up to 6 audio and video layers.
- Have “Storyblock” stock library. (Many of its contents are free to use)
- Supports external monitor for display.
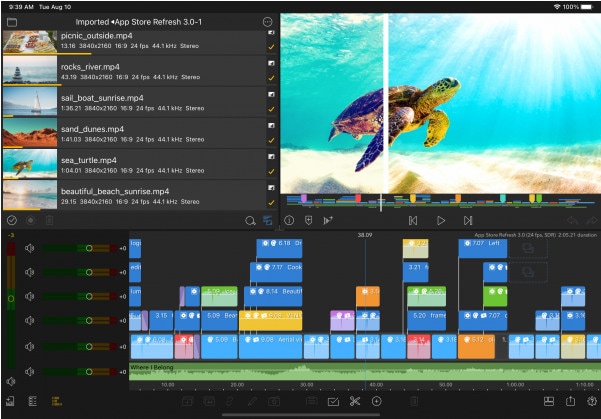
Credits: Pic by Luma touch website.
~Cons:
- Not available for Android devices.
- Being an advanced software, it doesn’t have masking and speed ramping features.
- Doesn’t have a free version to try on.
~Price:
It is available for purchase at $29.99.
InShot:
It is available on IOS and Android both.
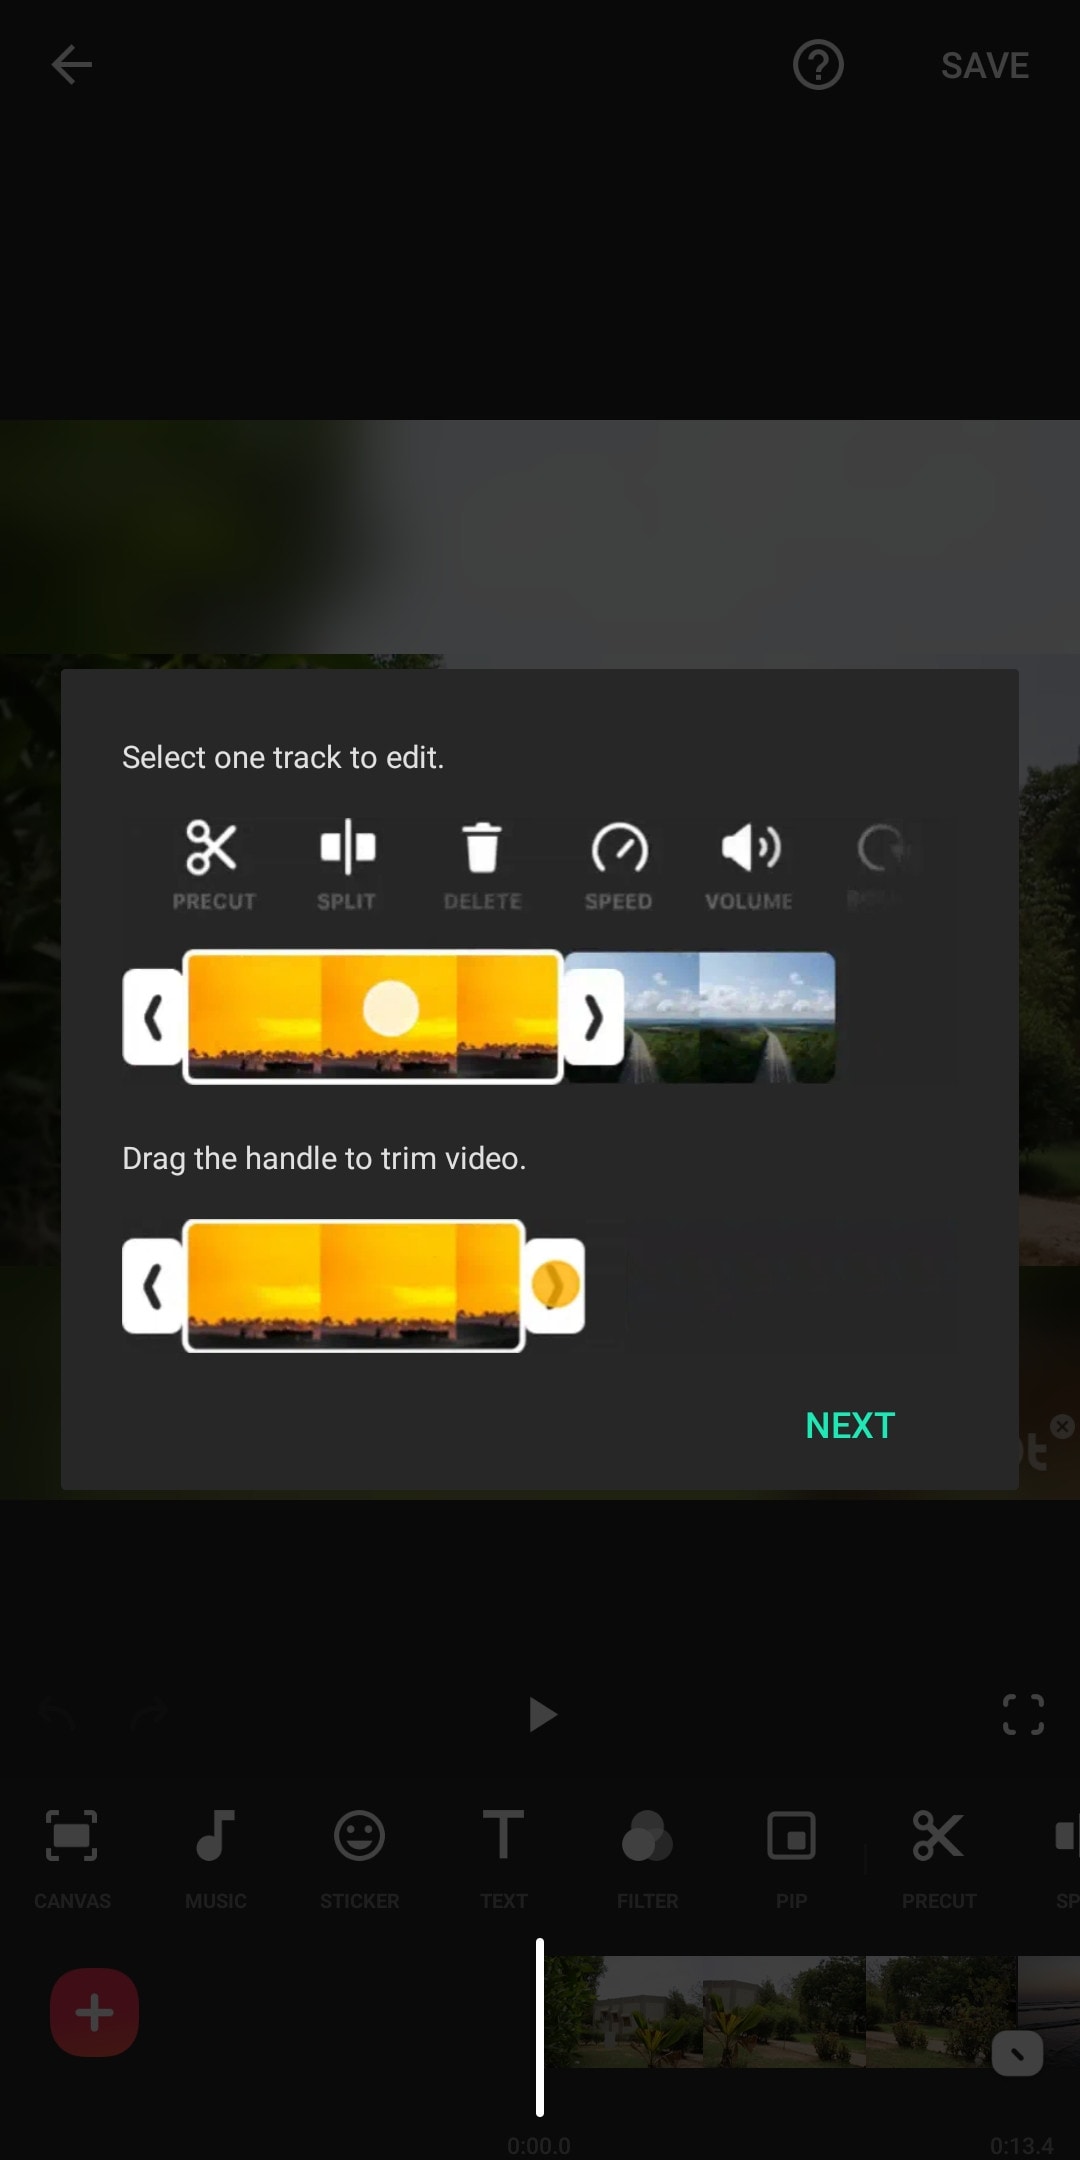
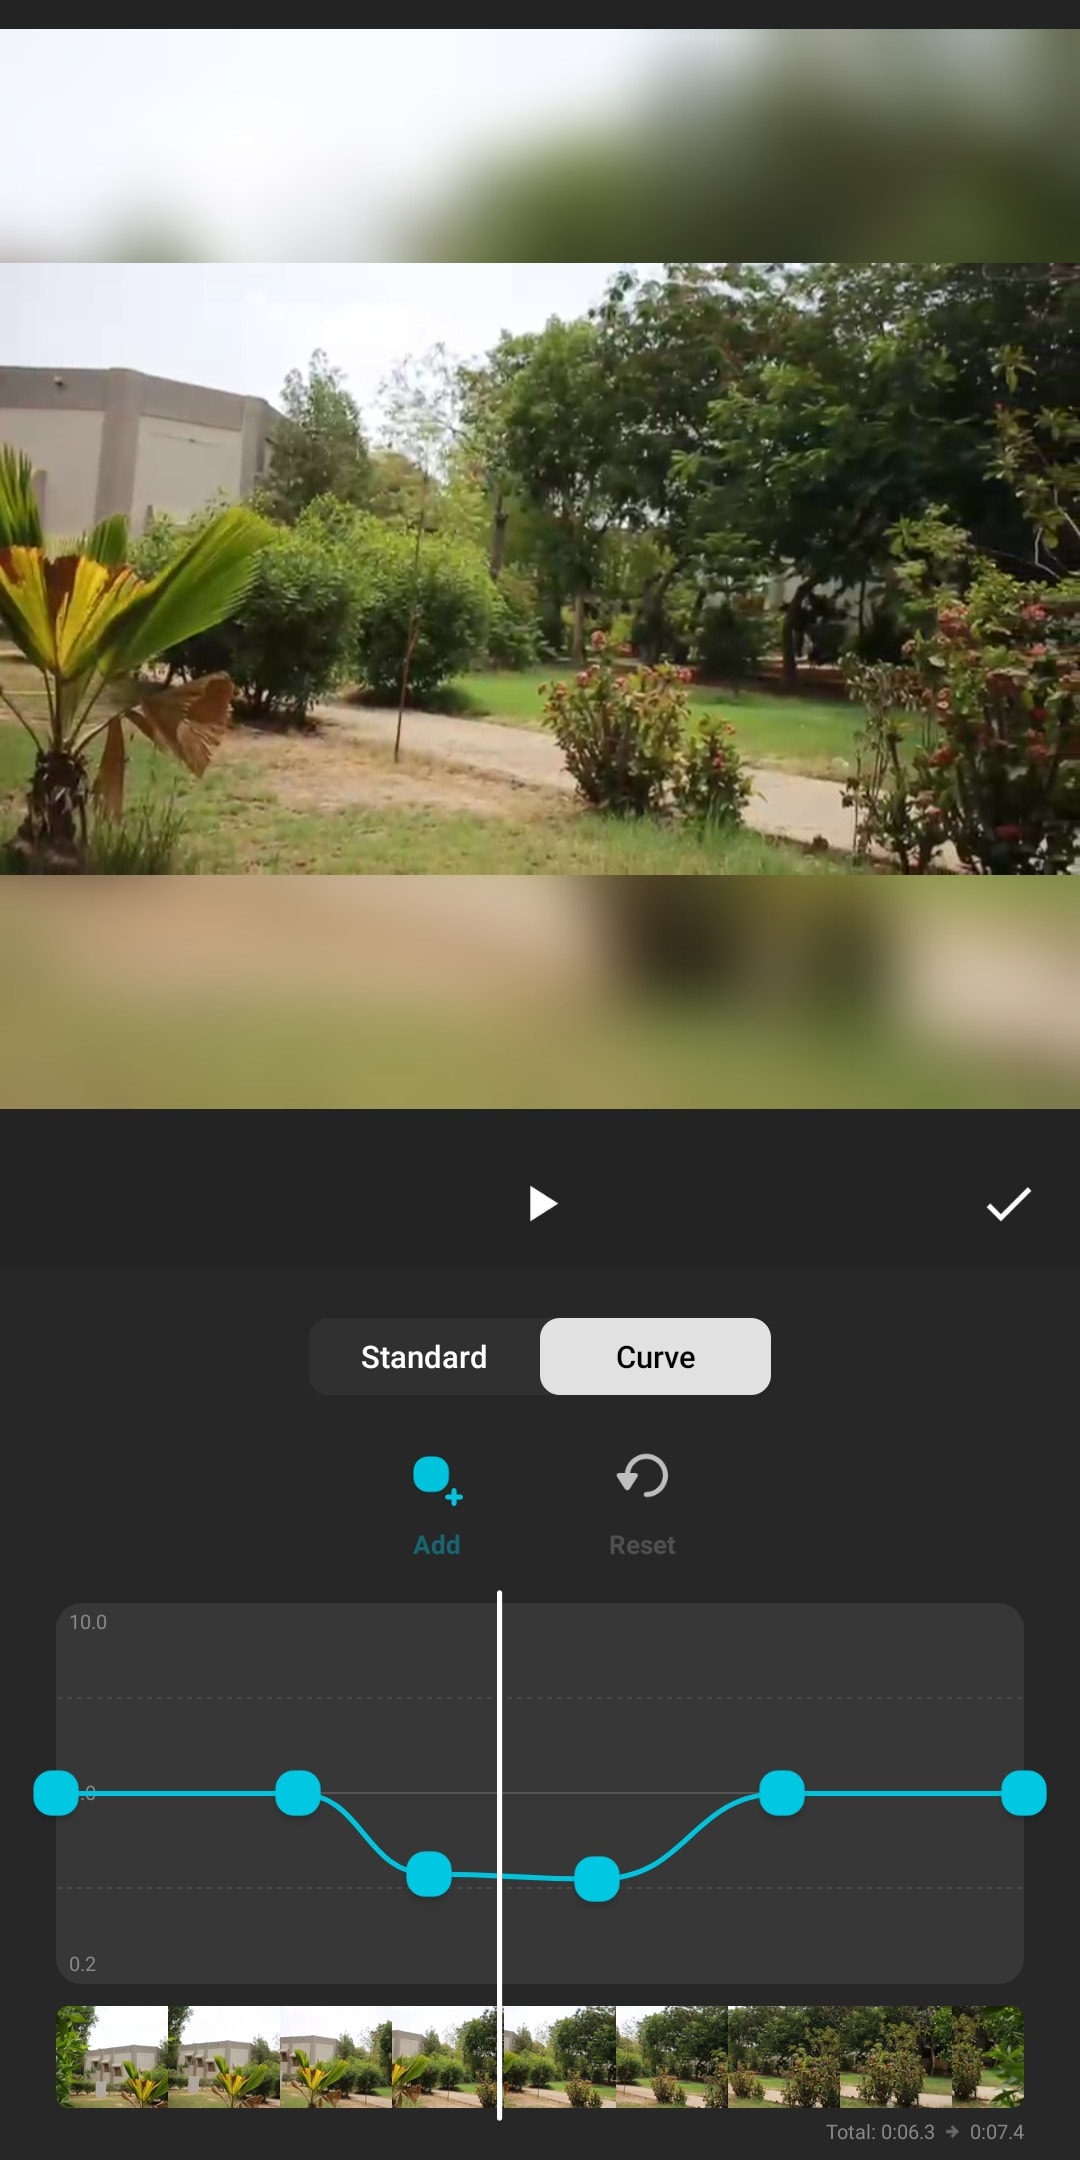
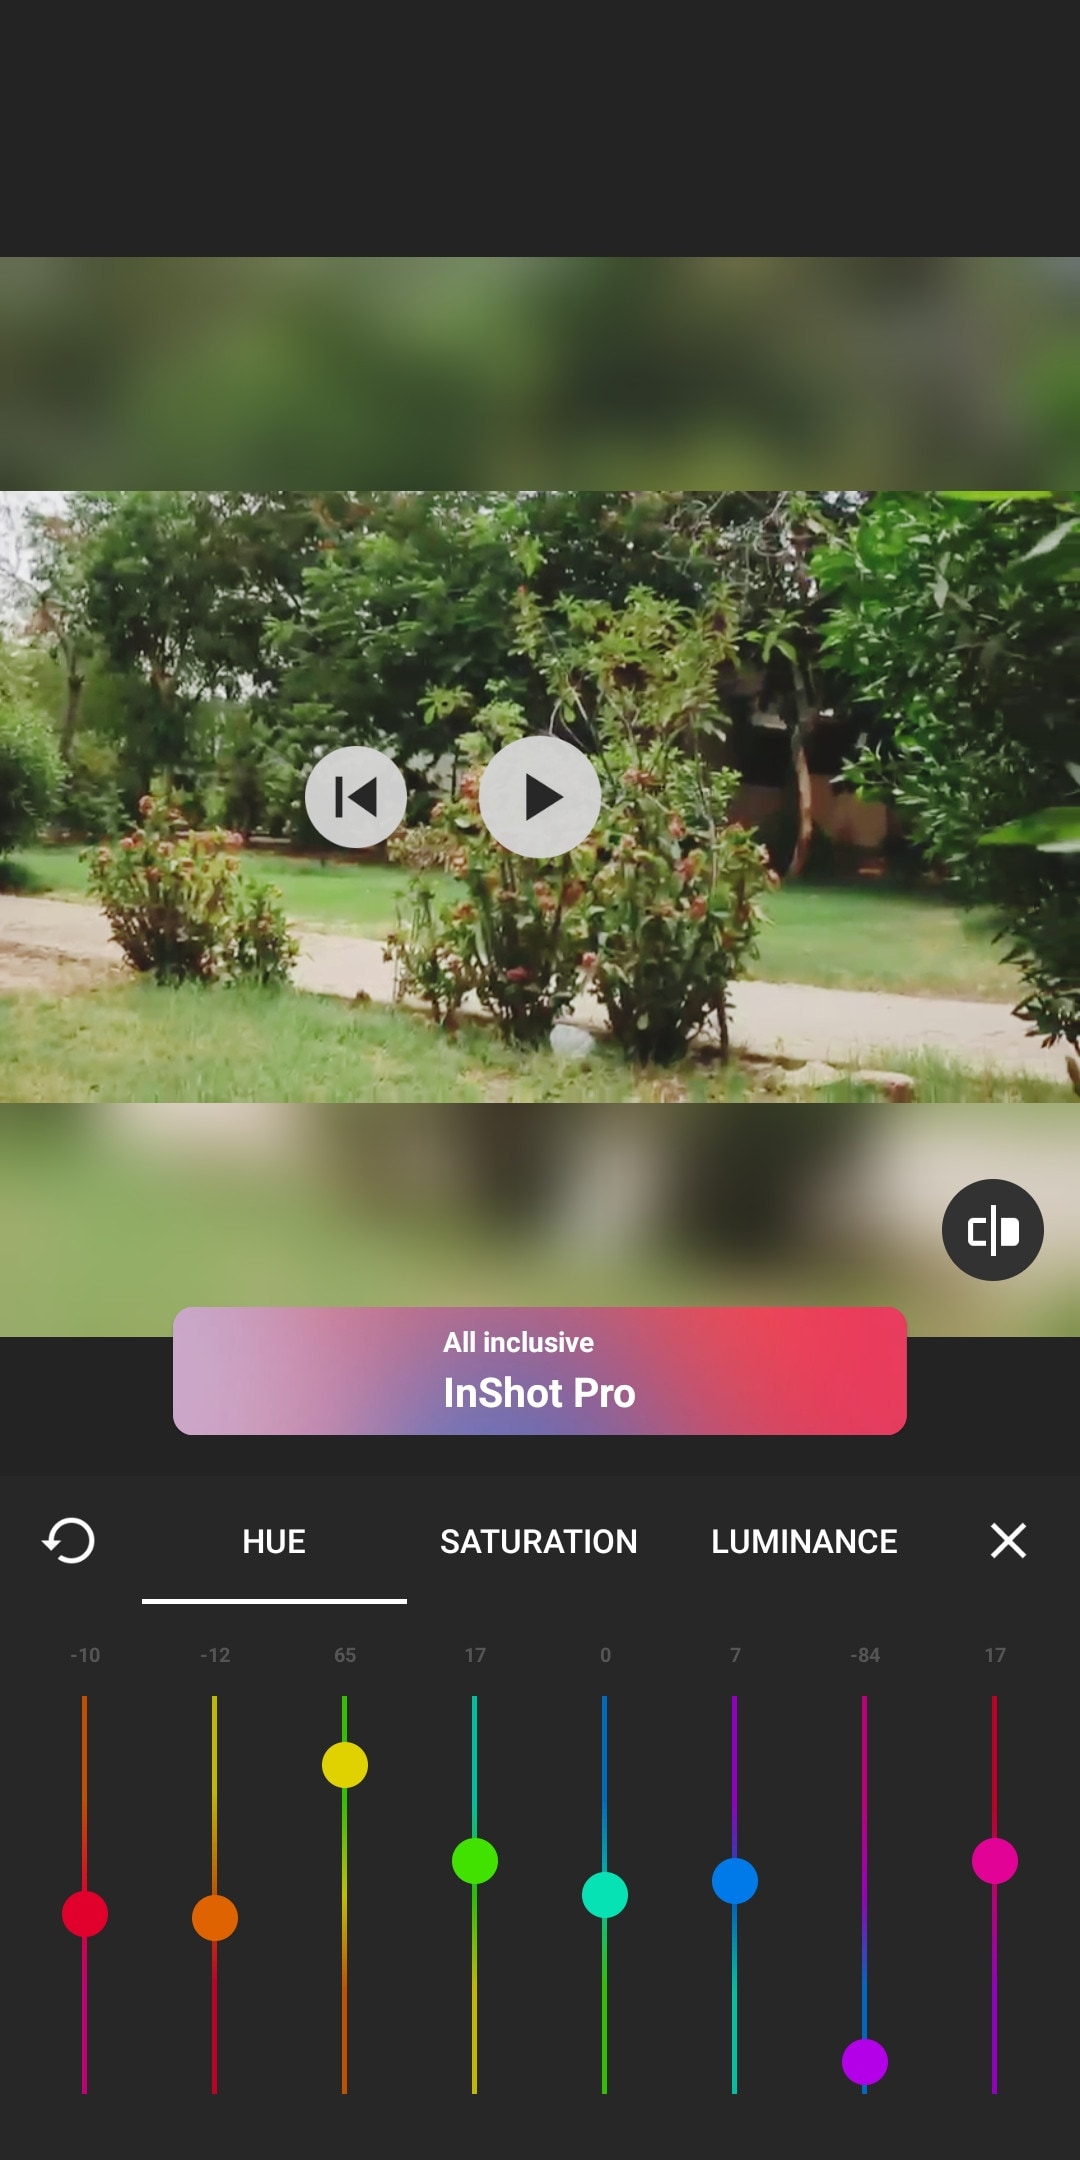
If you are new to video editing and want to do simple editing tasks then this software can be the right choice for you. It is simple and easy to use. Apart from just trimming and arranging your clips, it also has some cool features like speed ramping, chroma-key, mask e.t.c. It also has an HSL color grading tool. You can add multiple layers as PiP. It is a paid software but you can try it for free with the watermark on export.
~Features:
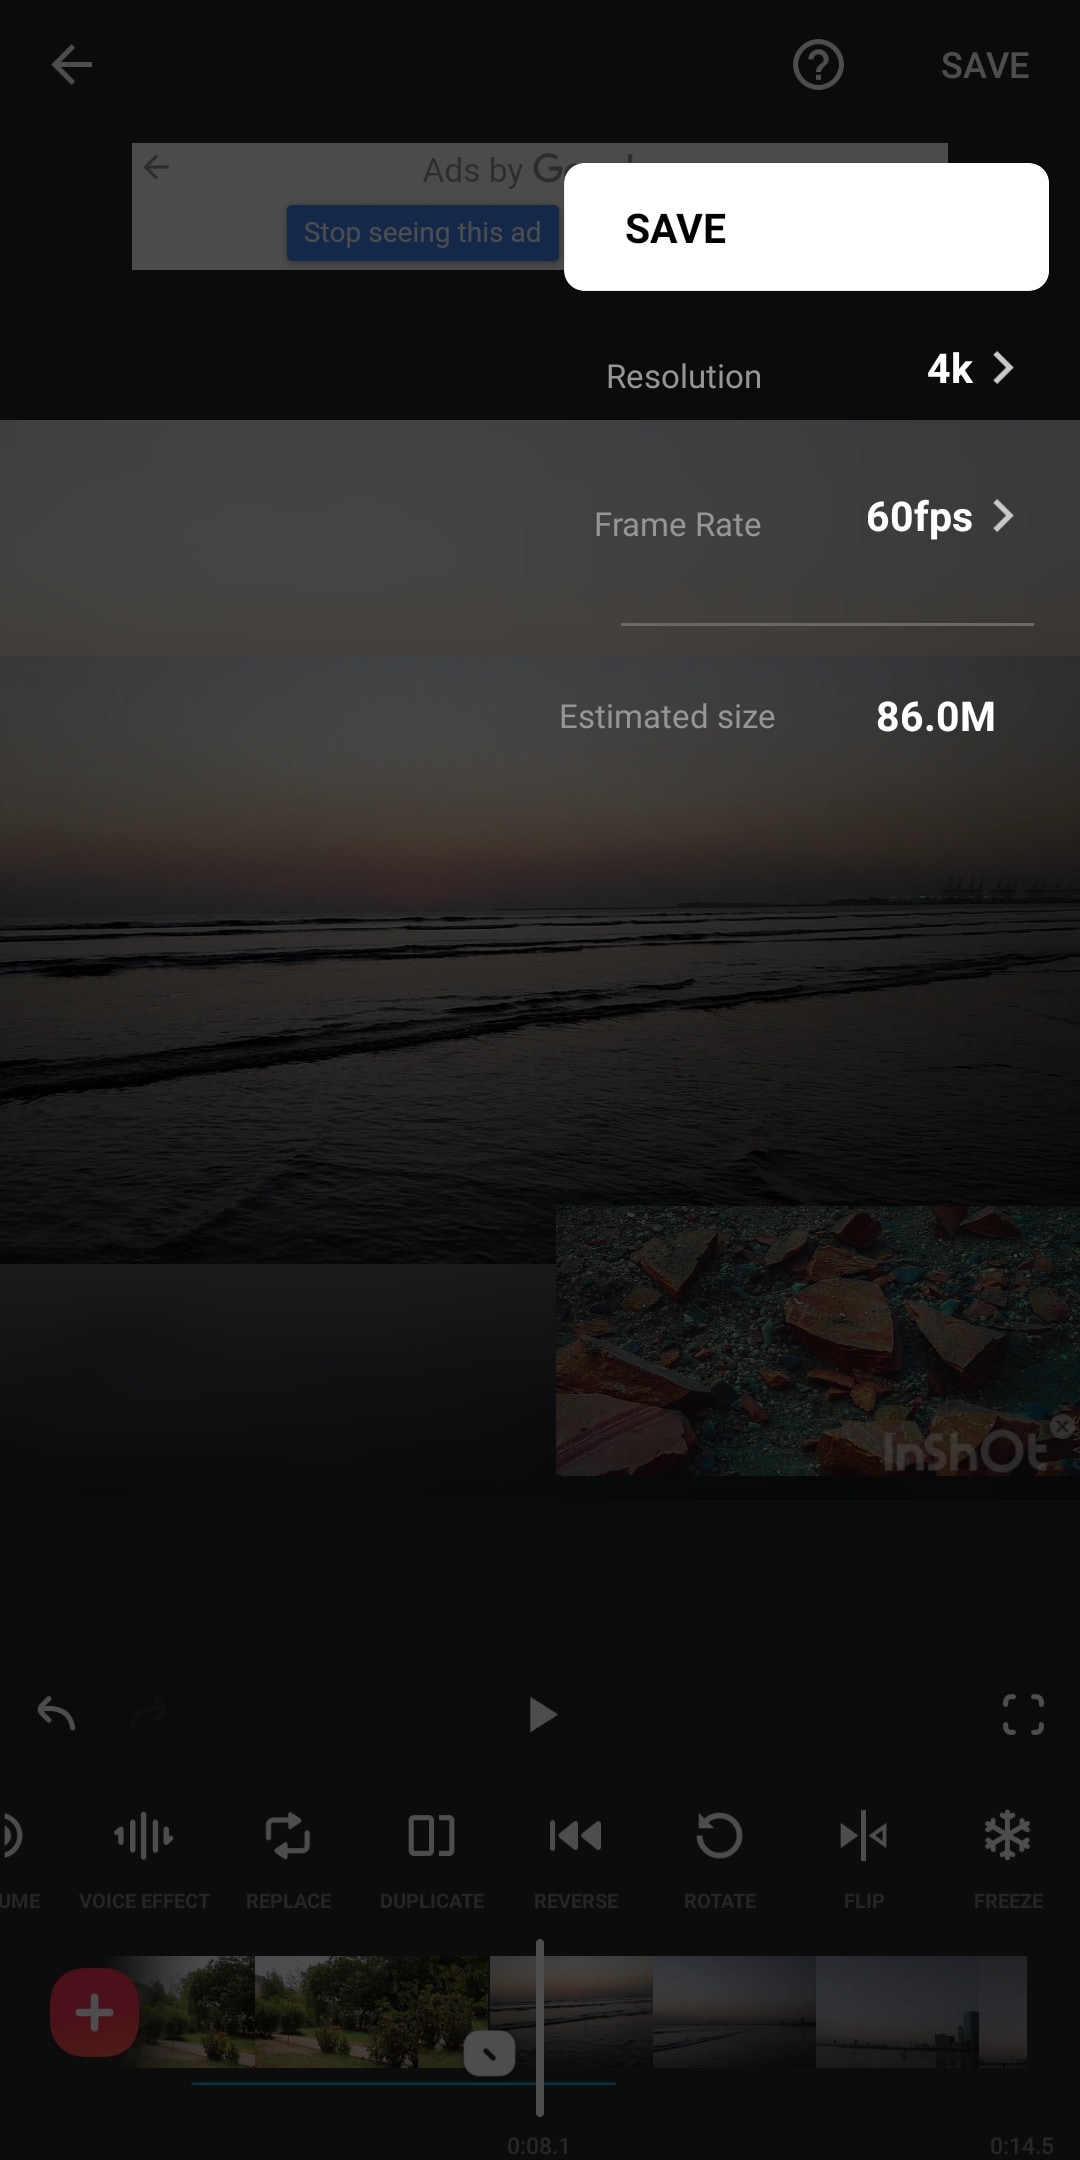
- It supports up to 4K resolution at 60fps.
- Its UI is beginner-friendly.
- Have some advanced color correction and grading tools.
- Supports multiple images and video layers as PiP.
- Have features like a mask, chroma key, and blend for layers.
- Can edit videos in different aspect ratios.
- Have speed curves for smooth speed ramping.
~Cons:
- Doesn’t have advanced tools.
- Its UI doesn’t support editing landscape orientation.
~Price:
It has 3 diff purchase plans. you can get its subscription for $3.9/month or $14.99/year. or you can purchase the software for lifetime at $34.99.
VivaCut:
It is available on IOS and Android both.
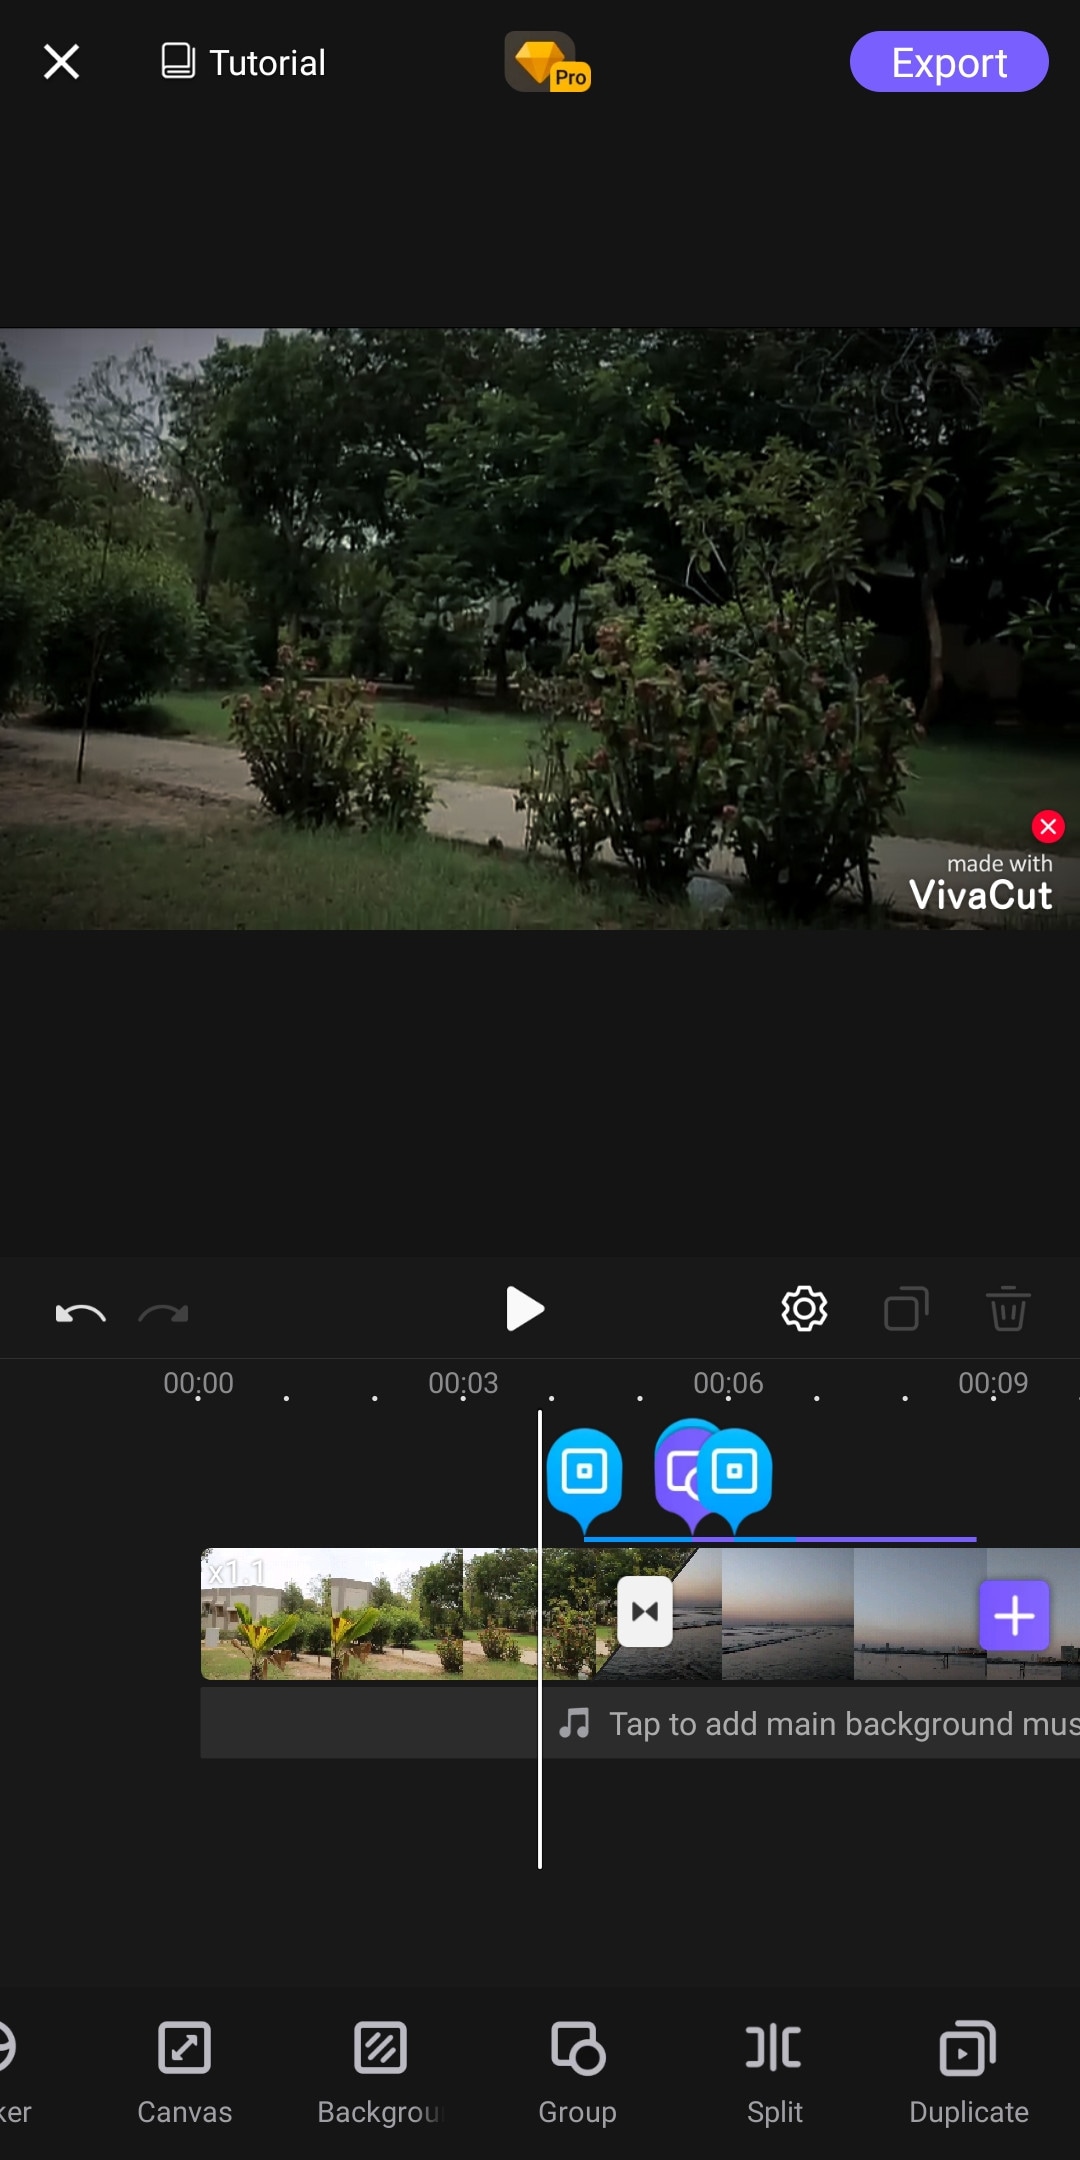
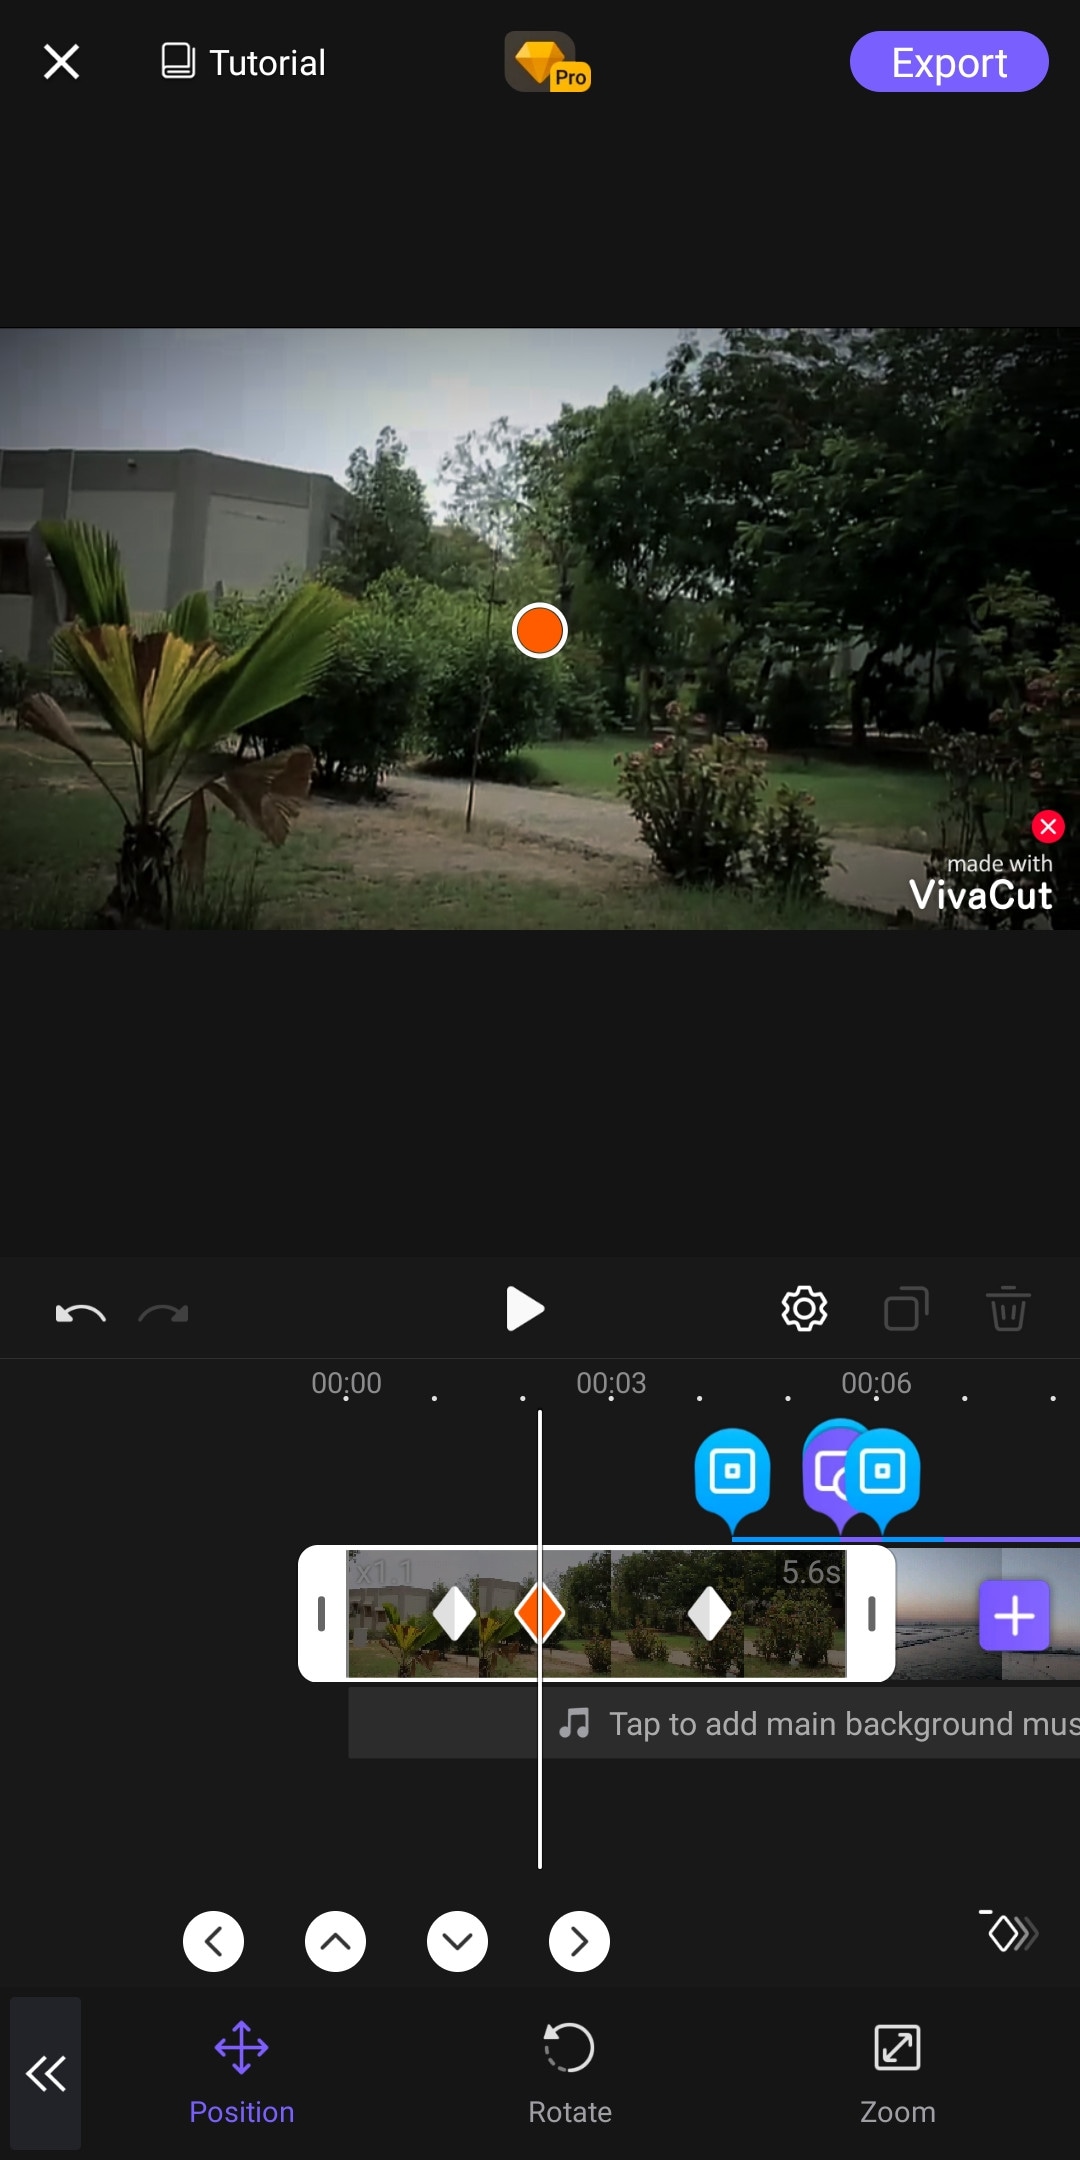
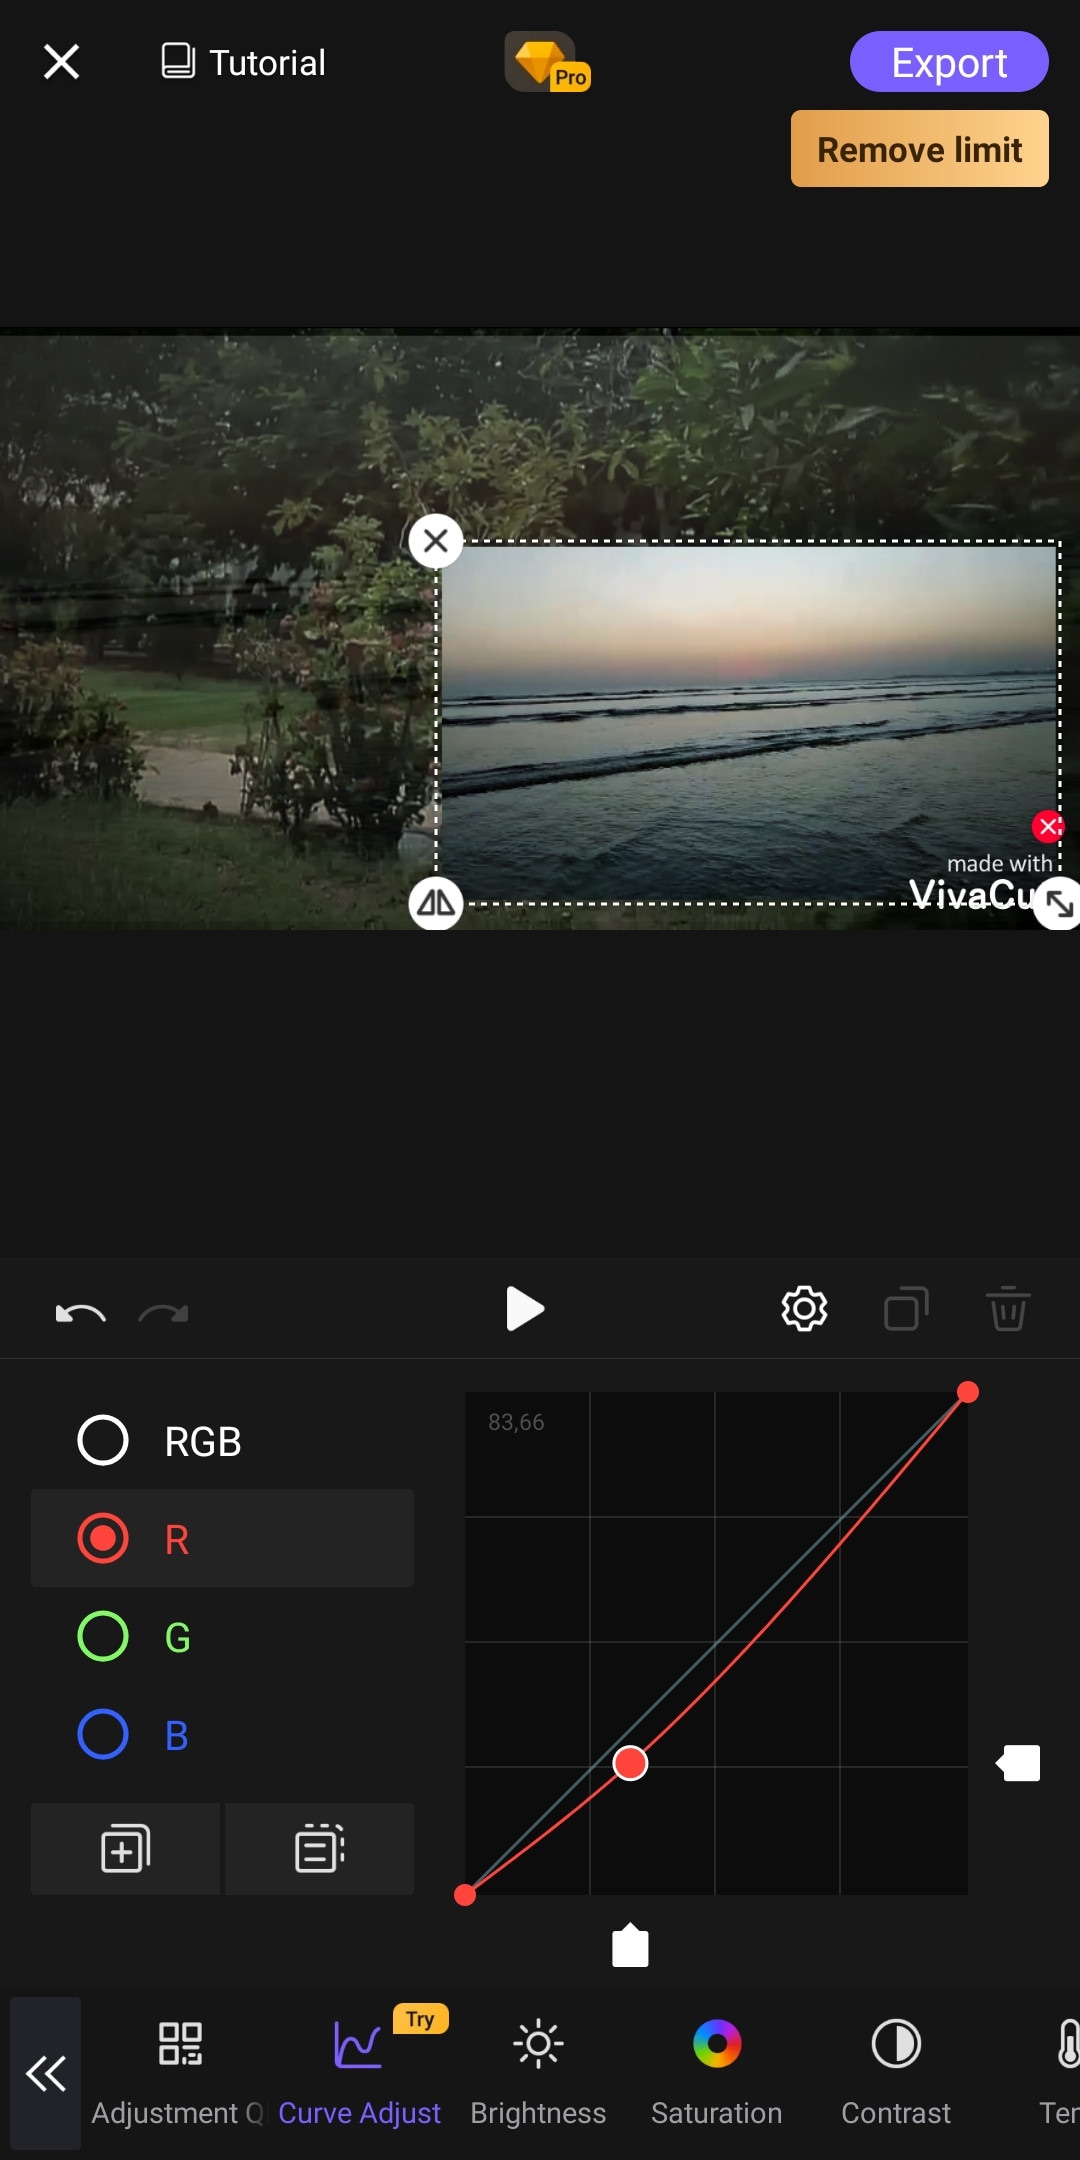
Almost every mobile video editor wished for doing PC-like video editing on their phone, but that was not possible due to software limitations and device compatibility. But now you can create PC-like videos on your phone through “VivaCut”. It is a paid software that is packed with many advanced features. Like 3D transform, overlay, Effects, Masking, e.t.c. It has one of the best color correction and grading tools among other mobile video editors. It has advanced keyframing and curve paths that can make splendid animations. It also supports multi-layer video editing. It also has a Grouping tool that let you combine several clips and texts into a single clip for easy editing. It also lets you import your presets. It is a paid software but you can try it for free with the watermark on export.
~Features:
- It supports multi-layer editing.
- Supports keyframing curves and 3D transform.
- Have advanced color correction and grading tools.
- Can Group multiple clips for easy editing.
- Let you import your presets.
- Can edit videos in different aspect ratios.
- Have an “FX plugin” library with many special effects that can be customized also.

~Cons:
- It doesn’t support 4K resolution.
- Its UI doesn’t support editing landscape orientation.
- It lags and crashes sometimes.
~Price:
Its premium version is available at $4.99/month or $19.99/year.
Which Should I Choose Free or Paid Video Editing Apps for iPhone:
If you do video editing once in a while or you don’t do more than just trimming and cropping then you shouldn’t purchase a paid video editing software. Because there are free video editors that can get your job done and even more than that. But if you are a content creator who doesn’t want to do editing on PCs or laptops, then you can get these paid video editors for your iPhone. These softwares are quite affordable and worthy of your investment. Some are cheaper than others. You can purchase the one, which meets your budget or fulfills your needs.
And if you are a beginner but want to move forward in this field then you should try free versions of these paid softwares. Select the one, which you are comfortable working on and once you are satisfied with the software then you can purchase its premium version.
- Free iPhone Video Editors
- Adobe Premiere Rush
- CapCut
- iMovie
- GoPro-Quik
- VN Video Editor
- Paid iPhone Video Editors
- Kinemaster
- Power Director
- LumaFusion
- InShot
- VivaCut
Filmora Go:
It is available on IOS and Android both.
Apart from having a professional video editor for PC, Wondershare has also introduced a video editor for mobile phones. Filmora Go is an amazing video editor, with many cool features such as chroma key, mask, keyframing, blending, e.t.c. It is fast and easy to use with built-in effects, transitions, and presets to speed up the editing process. It is a paid video editor but you can try it for free, free trial includes most of the features but it leaves a watermark on export.
~Features:
- Has speed curves for smooth speed ramping.
- Supports multiple images and video layers.
- Have many presets and filters for fast pace editing.
- Have cool features like chroma key, masking, keyframing, e.t.c.
- Supports “Pixabay’s” stock library.
~Cons:
- Its UI doesn’t support editing in landscape orientation.
- It doesn’t support 4k video resolution.


~Steps:
Import: Open Filmora Go, Click “New project” to start a new project, or Choose the previous one from the “Draft” portion. Select videos or images to import to your timeline. Hold and drag the clip to change its arrangement.
Edit: You can add text, effects, stickers, layers, e.t.c. by clicking their icon, present on the bar at the bottom.
Click the “PiP” icon to add image or video layers, you also can add multiple layers.
Select a clip to edit it. Different editing tools appear on the bottom bar. Here you can change its opacity, its speed, or add animations.
Effects: Click the “Effects” icon to open the effects menu. Select an effect to apply to your clip.
Click the white box between two clips to add transitions.
Export: Click the “Export” button to export your file. Select your desired resolution and frame rate to export your clip.


Some Free iPhone Video Editors:
If you do video editing rarely or do just basic video editing then it is useless to purchase paid video editors. Even if you are a content creator but tight on budget or new to this field, you can use free video editing softwares and save your cash for other pieces of equipment.
So, here we have mentioned some free video editors for you. Some of these are quite powerful and can do advanced editing while others are simple but easy to use.
Adobe Premiere Rush:
It is available on IOS and Android both.
Whether you are a beginner or a content creator using mobile phones or PCs for editing, you may have heard of Adobe softwares. It is a computer software company which makes powerful softwares for different purposes. Like premiere pro, they have designed a compact version for phones named “Premiere Rush”. It is a free video editor that has all the tools needed for video editing, from video effects to color grading and audio editing. Its UI is a bit similar to PC video editors. It is a free video editor with no watermarks. Although it takes some time to understand it. But once mastered, you can do editing quickly.
~Features:
- It is a free video editor with no watermark.
- It supports up to 4K resolution at 60fps.
- You can extract audio and can do voiceover directly from the software.
- It has hundreds of filters, overlays, and title designs.
- It has basic color grading tools.
- It also has a motion tracking feature. (in Paid version)
- It supports multiple audio, video, and text layers.


~Cons:
- It only runs on high-end devices. ( It is not supported in most mid-range phones)
- Not suitable for beginners. Its UI is quite hard to understand.
- Doesn’t have common features like the chroma key, masking, e.t.c.

~Price:
Its Premium version is available for 9.99/month. It includes some premium features. Or you can purchase the “All Apps Bundle” at $54.99/month for the annual plan.
CapCut:
It is available on IOS and Android both.
If you are looking for a free but good video editor to help you edit videos on the go, then you should get your hands on CapCut. It is a free mobile video editing software with many interesting features like keyframing, chroma-key, masking e.t.c. It also supports video and image layers. It has one of the best speed ramping features among other mobile video editors. It provides curves to smoothly speed ramp your clips. It can edit landscape, portrait, and even square video formats. It has many amazing effects and filters, it also has some stock clips.


~Features:
- It is completely free and has no watermarks.
- It supports up to 4K video resolution.
- Has curves for speed ramping.
- Has keyframes for animation.
- It has hundreds of effects, overlays, and titles.


~Cons:
- Its UI doesn’t support editing in landscape orientation.
- Lacks some common editing tools.
iMovie:
It is available on IOS and Mac.
iMovie is a free video editing software designed by apple for their flagship products. It is simple and easy to use. It has all the basic editing tools to enhance your video like crop, trim, transitions, effects, e.t.c. It also has a speed ramping feature which let you change the speed at different points of a clip. It’s AI mode “Magic Movie” lets you select clips and a style and software will make the final product for you.
Its “Storyboards” mode is a creative way of learning production and post-production skills. It lets you choose a theme from many famous Genres available, then it will guide you through the production process like capturing footage, arranging your shots, and creating cinematic titles to enhance your story.


~Features:
- It is free and easy to use.
- Let you do speed ramping.
- Supports Raw files.
- It’s AI mode creates videos for you on its own.
- The “Storyboarding” feature helps you through the production process.


~Cons:
- It only works on ios and Mac.
- Not suitable for professional projects.
GoPro - Quik:
It is available on IOS and Android and windows also.
It is a free and easy-to-use software designed by GoPro. It can edit clips of your GoPro or any other device. It is a quick and easy way to enhance your clips before posting them on any social platform. It can do basic edits like trim, rotate, color correction, e.t.c. It can also make amazing speed ramps by changing the speed of different parts of the clip (available in the premium version only). It doesn’t produce any watermarks. Although its premium version unlocks more features like speed ramping, more themes, and unlimited backup space.


~Features:
- Its free version doesn’t leave a watermark.
- It is simple and easy to use.
- Can do basic color correction.
- Have pre-made themes for faster editing.
- Change the speed at different parts of the video to create smooth speed ramps. (Available in the premium version.)
- Has a free version with limited tools for basic editing.

~Cons:
- It lacks advanced tools therefore not suitable for large projects.
- Its free version has many limitations.
~Price: Its subscription is available at $1.99/month or at discount for an annual subscription having $9.99/year.
VN Video editor:
It is available on IOS and Android, Windows, and Mac.
If you are looking for a video editor, which let you do fast but quality edits, then “VN video editor” is the right choice for you. It is free and easy-to-use software with many useful features like transitions, effects, speed ramps, PiP, chroma-key, keyframing, e.t.c. It supports different aspect ratios for all your social platforms.
It also has pre-made templates to speed up your editing process. Its Story mode let you manage your production and post-production work easily. It also has overlay mode, which can make awesome slide shows for you.


~Features:
- It is free software with no watermark.
- It supports up to 4K resolution at 60fps.
- Supports multi-layer editing.
- Have keyframing curves to create smooth animations.
- Have speed curves for smooth speed ramping.
- Its Story mode let you manage your production work easily.
- Can extract audio from a video file.


~Cons:
- Its UI doesn’t support editing landscape orientation.
- Its free version has limitations of creating max 100 projects.
~Price:
Its Premium version is available for $3.9/month or $20.9/year.
Some Paid iPhone Video Editors:
If you want to move forward and get your hands on these paid softwares to try new features then you should buy these paid softwares. As most of these softwares are quite affordable but they pack the punch. And some of them can give you more in return than your investment. Then what are you waiting for? go and try them yourself.
Kinemaster:
It is available on IOS and Android both.
If you want to do more than just trimming and cropping to your videos then you should try Kinemaster. For editors, who want to do some advanced-level video editing on their phone, then you must have Kinemaster on your phone. It is a paid software, which is packed with many useful features. It has many video and audio effects. It also has an amazing audio editor. It also has many title designs and basic color correction tools. It has hundreds of effects and transitions + more can be downloaded from its asset store. Its UI is suitable for beginners and content creators both. It is a paid software, but all its features are completely free to use, but the free version leaves a watermark on export.


~Features:
- It supports up to 4K resolution at 60fps. (depending on mobile configuration)
- Have amazing features like chroma key, keyframing, blend e.t.c
- Has built-in audio and video recorder.
- Supports multiple texts and video layers with different resolutions depending on the capability of the mobile phone.
- Has UI like a PC video editor and supports landscape orientation for editing.
- Have an asset store with 100s of free effects, transitions, and stock material.


~Cons:
- Can’t export 4K videos on most devices.
- Can’t apply keyframes and chroma key to the main video. (can be done on layers only)
~Price:
Its Premium version is available for $4.9/month or $39.9/year. It also includes all the premium assets.
Power Director:
It is available on IOS and Android both.
It is a paid but quite advanced video editor available for androids and IOS both. Like its PC version mobile version is also packed with many great features. It is compact and easy to use. It supports multiple video and audio layers. Have many cool filters and transitions. Can also do basic color corrections. To complete post-production work it also has audio editing tools and effects. It also has hundreds of title designs. Its UI is easy to use and supports both portrait and landscape orientation for editing. Most of its features can be used for free with a watermark on export. To remove the watermark you need to purchase the premium version.


~Features:
- It supports up to 4K resolution at 60fps. (compatible on most devices)
- Supports both Portrait and Landscape orientation for editing.
- Supports Key framing and video stabilization also.
- Supports multiple audio and video layers.
- Can edit videos in different aspect ratios.
- Have a vast stock library.


~Cons:
- Can’t export 4K videos on many devices.
- Can apply keyframing and chroma key to layers only.
- Software lags sometimes.
~Price:
Its Premium version is available for $4.9/month or $29.9/year.
LumaFusion:
It is available on IOS and Mac (with an m1 processor).
If you are a content creator and want to do professional-level video editing on your phone then you should get your hands on “LumaFusion”. It is of the most powerful and advanced video editors designed for a mobile phone. But it only works on iPhones and iPads. It is a multi-track video editor with many useful features like the Chroma key, keyframing, color grading, and color LUTs. Have powerful color grading tools and an audio editor. It also has a lock and load stabilizer. You have to purchase the software before using it. It doesn’t have any free version to try.

Credits: Pic by Luma touch website.
~Features:
- It supports up to 4K video resolution at a max of 240 fps.
- Can also edit and export 360 videos.
- Have powerful color correction tools. You can also import your own color LUTs.
- Supports Keyframing on almost all the editing tools within the software.
- You can add some third-party audio plugins.
- Supports up to 6 audio and video layers.
- Have “Storyblock” stock library. (Many of its contents are free to use)
- Supports external monitor for display.

Credits: Pic by Luma touch website.
~Cons:
- Not available for Android devices.
- Being an advanced software, it doesn’t have masking and speed ramping features.
- Doesn’t have a free version to try on.
~Price:
It is available for purchase at $29.99.
InShot:
It is available on IOS and Android both.
If you are new to video editing and want to do simple editing tasks then this software can be the right choice for you. It is simple and easy to use. Apart from just trimming and arranging your clips, it also has some cool features like speed ramping, chroma-key, mask e.t.c. It also has an HSL color grading tool. You can add multiple layers as PiP. It is a paid software but you can try it for free with the watermark on export.


~Features:
- It supports up to 4K resolution at 60fps.
- Its UI is beginner-friendly.
- Have some advanced color correction and grading tools.
- Supports multiple images and video layers as PiP.
- Have features like a mask, chroma key, and blend for layers.
- Can edit videos in different aspect ratios.
- Have speed curves for smooth speed ramping.


~Cons:
- Doesn’t have advanced tools.
- Its UI doesn’t support editing landscape orientation.
~Price:
It has 3 diff purchase plans. you can get its subscription for $3.9/month or $14.99/year. or you can purchase the software for lifetime at $34.99.
VivaCut:
It is available on IOS and Android both.
Almost every mobile video editor wished for doing PC-like video editing on their phone, but that was not possible due to software limitations and device compatibility. But now you can create PC-like videos on your phone through “VivaCut”. It is a paid software that is packed with many advanced features. Like 3D transform, overlay, Effects, Masking, e.t.c. It has one of the best color correction and grading tools among other mobile video editors. It has advanced keyframing and curve paths that can make splendid animations. It also supports multi-layer video editing. It also has a Grouping tool that let you combine several clips and texts into a single clip for easy editing. It also lets you import your presets. It is a paid software but you can try it for free with the watermark on export.


~Features:
- It supports multi-layer editing.
- Supports keyframing curves and 3D transform.
- Have advanced color correction and grading tools.
- Can Group multiple clips for easy editing.
- Let you import your presets.
- Can edit videos in different aspect ratios.
- Have an “FX plugin” library with many special effects that can be customized also.


~Cons:
- It doesn’t support 4K resolution.
- Its UI doesn’t support editing landscape orientation.
- It lags and crashes sometimes.
~Price:
Its premium version is available at $4.99/month or $19.99/year.
Which Should I Choose Free or Paid Video Editing Apps for iPhone:
If you do video editing once in a while or you don’t do more than just trimming and cropping then you shouldn’t purchase a paid video editing software. Because there are free video editors that can get your job done and even more than that. But if you are a content creator who doesn’t want to do editing on PCs or laptops, then you can get these paid video editors for your iPhone. These softwares are quite affordable and worthy of your investment. Some are cheaper than others. You can purchase the one, which meets your budget or fulfills your needs.
And if you are a beginner but want to move forward in this field then you should try free versions of these paid softwares. Select the one, which you are comfortable working on and once you are satisfied with the software then you can purchase its premium version.
- Free iPhone Video Editors
- Adobe Premiere Rush
- CapCut
- iMovie
- GoPro-Quik
- VN Video Editor
- Paid iPhone Video Editors
- Kinemaster
- Power Director
- LumaFusion
- InShot
- VivaCut
Filmora Go:
It is available on IOS and Android both.
Apart from having a professional video editor for PC, Wondershare has also introduced a video editor for mobile phones. Filmora Go is an amazing video editor, with many cool features such as chroma key, mask, keyframing, blending, e.t.c. It is fast and easy to use with built-in effects, transitions, and presets to speed up the editing process. It is a paid video editor but you can try it for free, free trial includes most of the features but it leaves a watermark on export.
~Features:
- Has speed curves for smooth speed ramping.
- Supports multiple images and video layers.
- Have many presets and filters for fast pace editing.
- Have cool features like chroma key, masking, keyframing, e.t.c.
- Supports “Pixabay’s” stock library.
~Cons:
- Its UI doesn’t support editing in landscape orientation.
- It doesn’t support 4k video resolution.


~Steps:
Import: Open Filmora Go, Click “New project” to start a new project, or Choose the previous one from the “Draft” portion. Select videos or images to import to your timeline. Hold and drag the clip to change its arrangement.
Edit: You can add text, effects, stickers, layers, e.t.c. by clicking their icon, present on the bar at the bottom.
Click the “PiP” icon to add image or video layers, you also can add multiple layers.
Select a clip to edit it. Different editing tools appear on the bottom bar. Here you can change its opacity, its speed, or add animations.
Effects: Click the “Effects” icon to open the effects menu. Select an effect to apply to your clip.
Click the white box between two clips to add transitions.
Export: Click the “Export” button to export your file. Select your desired resolution and frame rate to export your clip.


Some Free iPhone Video Editors:
If you do video editing rarely or do just basic video editing then it is useless to purchase paid video editors. Even if you are a content creator but tight on budget or new to this field, you can use free video editing softwares and save your cash for other pieces of equipment.
So, here we have mentioned some free video editors for you. Some of these are quite powerful and can do advanced editing while others are simple but easy to use.
Adobe Premiere Rush:
It is available on IOS and Android both.
Whether you are a beginner or a content creator using mobile phones or PCs for editing, you may have heard of Adobe softwares. It is a computer software company which makes powerful softwares for different purposes. Like premiere pro, they have designed a compact version for phones named “Premiere Rush”. It is a free video editor that has all the tools needed for video editing, from video effects to color grading and audio editing. Its UI is a bit similar to PC video editors. It is a free video editor with no watermarks. Although it takes some time to understand it. But once mastered, you can do editing quickly.
~Features:
- It is a free video editor with no watermark.
- It supports up to 4K resolution at 60fps.
- You can extract audio and can do voiceover directly from the software.
- It has hundreds of filters, overlays, and title designs.
- It has basic color grading tools.
- It also has a motion tracking feature. (in Paid version)
- It supports multiple audio, video, and text layers.


~Cons:
- It only runs on high-end devices. ( It is not supported in most mid-range phones)
- Not suitable for beginners. Its UI is quite hard to understand.
- Doesn’t have common features like the chroma key, masking, e.t.c.

~Price:
Its Premium version is available for 9.99/month. It includes some premium features. Or you can purchase the “All Apps Bundle” at $54.99/month for the annual plan.
CapCut:
It is available on IOS and Android both.
If you are looking for a free but good video editor to help you edit videos on the go, then you should get your hands on CapCut. It is a free mobile video editing software with many interesting features like keyframing, chroma-key, masking e.t.c. It also supports video and image layers. It has one of the best speed ramping features among other mobile video editors. It provides curves to smoothly speed ramp your clips. It can edit landscape, portrait, and even square video formats. It has many amazing effects and filters, it also has some stock clips.


~Features:
- It is completely free and has no watermarks.
- It supports up to 4K video resolution.
- Has curves for speed ramping.
- Has keyframes for animation.
- It has hundreds of effects, overlays, and titles.


~Cons:
- Its UI doesn’t support editing in landscape orientation.
- Lacks some common editing tools.
iMovie:
It is available on IOS and Mac.
iMovie is a free video editing software designed by apple for their flagship products. It is simple and easy to use. It has all the basic editing tools to enhance your video like crop, trim, transitions, effects, e.t.c. It also has a speed ramping feature which let you change the speed at different points of a clip. It’s AI mode “Magic Movie” lets you select clips and a style and software will make the final product for you.
Its “Storyboards” mode is a creative way of learning production and post-production skills. It lets you choose a theme from many famous Genres available, then it will guide you through the production process like capturing footage, arranging your shots, and creating cinematic titles to enhance your story.


~Features:
- It is free and easy to use.
- Let you do speed ramping.
- Supports Raw files.
- It’s AI mode creates videos for you on its own.
- The “Storyboarding” feature helps you through the production process.


~Cons:
- It only works on ios and Mac.
- Not suitable for professional projects.
GoPro - Quik:
It is available on IOS and Android and windows also.
It is a free and easy-to-use software designed by GoPro. It can edit clips of your GoPro or any other device. It is a quick and easy way to enhance your clips before posting them on any social platform. It can do basic edits like trim, rotate, color correction, e.t.c. It can also make amazing speed ramps by changing the speed of different parts of the clip (available in the premium version only). It doesn’t produce any watermarks. Although its premium version unlocks more features like speed ramping, more themes, and unlimited backup space.


~Features:
- Its free version doesn’t leave a watermark.
- It is simple and easy to use.
- Can do basic color correction.
- Have pre-made themes for faster editing.
- Change the speed at different parts of the video to create smooth speed ramps. (Available in the premium version.)
- Has a free version with limited tools for basic editing.

~Cons:
- It lacks advanced tools therefore not suitable for large projects.
- Its free version has many limitations.
~Price: Its subscription is available at $1.99/month or at discount for an annual subscription having $9.99/year.
VN Video editor:
It is available on IOS and Android, Windows, and Mac.
If you are looking for a video editor, which let you do fast but quality edits, then “VN video editor” is the right choice for you. It is free and easy-to-use software with many useful features like transitions, effects, speed ramps, PiP, chroma-key, keyframing, e.t.c. It supports different aspect ratios for all your social platforms.
It also has pre-made templates to speed up your editing process. Its Story mode let you manage your production and post-production work easily. It also has overlay mode, which can make awesome slide shows for you.


~Features:
- It is free software with no watermark.
- It supports up to 4K resolution at 60fps.
- Supports multi-layer editing.
- Have keyframing curves to create smooth animations.
- Have speed curves for smooth speed ramping.
- Its Story mode let you manage your production work easily.
- Can extract audio from a video file.


~Cons:
- Its UI doesn’t support editing landscape orientation.
- Its free version has limitations of creating max 100 projects.
~Price:
Its Premium version is available for $3.9/month or $20.9/year.
Some Paid iPhone Video Editors:
If you want to move forward and get your hands on these paid softwares to try new features then you should buy these paid softwares. As most of these softwares are quite affordable but they pack the punch. And some of them can give you more in return than your investment. Then what are you waiting for? go and try them yourself.
Kinemaster:
It is available on IOS and Android both.
If you want to do more than just trimming and cropping to your videos then you should try Kinemaster. For editors, who want to do some advanced-level video editing on their phone, then you must have Kinemaster on your phone. It is a paid software, which is packed with many useful features. It has many video and audio effects. It also has an amazing audio editor. It also has many title designs and basic color correction tools. It has hundreds of effects and transitions + more can be downloaded from its asset store. Its UI is suitable for beginners and content creators both. It is a paid software, but all its features are completely free to use, but the free version leaves a watermark on export.


~Features:
- It supports up to 4K resolution at 60fps. (depending on mobile configuration)
- Have amazing features like chroma key, keyframing, blend e.t.c
- Has built-in audio and video recorder.
- Supports multiple texts and video layers with different resolutions depending on the capability of the mobile phone.
- Has UI like a PC video editor and supports landscape orientation for editing.
- Have an asset store with 100s of free effects, transitions, and stock material.


~Cons:
- Can’t export 4K videos on most devices.
- Can’t apply keyframes and chroma key to the main video. (can be done on layers only)
~Price:
Its Premium version is available for $4.9/month or $39.9/year. It also includes all the premium assets.
Power Director:
It is available on IOS and Android both.
It is a paid but quite advanced video editor available for androids and IOS both. Like its PC version mobile version is also packed with many great features. It is compact and easy to use. It supports multiple video and audio layers. Have many cool filters and transitions. Can also do basic color corrections. To complete post-production work it also has audio editing tools and effects. It also has hundreds of title designs. Its UI is easy to use and supports both portrait and landscape orientation for editing. Most of its features can be used for free with a watermark on export. To remove the watermark you need to purchase the premium version.


~Features:
- It supports up to 4K resolution at 60fps. (compatible on most devices)
- Supports both Portrait and Landscape orientation for editing.
- Supports Key framing and video stabilization also.
- Supports multiple audio and video layers.
- Can edit videos in different aspect ratios.
- Have a vast stock library.


~Cons:
- Can’t export 4K videos on many devices.
- Can apply keyframing and chroma key to layers only.
- Software lags sometimes.
~Price:
Its Premium version is available for $4.9/month or $29.9/year.
LumaFusion:
It is available on IOS and Mac (with an m1 processor).
If you are a content creator and want to do professional-level video editing on your phone then you should get your hands on “LumaFusion”. It is of the most powerful and advanced video editors designed for a mobile phone. But it only works on iPhones and iPads. It is a multi-track video editor with many useful features like the Chroma key, keyframing, color grading, and color LUTs. Have powerful color grading tools and an audio editor. It also has a lock and load stabilizer. You have to purchase the software before using it. It doesn’t have any free version to try.

Credits: Pic by Luma touch website.
~Features:
- It supports up to 4K video resolution at a max of 240 fps.
- Can also edit and export 360 videos.
- Have powerful color correction tools. You can also import your own color LUTs.
- Supports Keyframing on almost all the editing tools within the software.
- You can add some third-party audio plugins.
- Supports up to 6 audio and video layers.
- Have “Storyblock” stock library. (Many of its contents are free to use)
- Supports external monitor for display.

Credits: Pic by Luma touch website.
~Cons:
- Not available for Android devices.
- Being an advanced software, it doesn’t have masking and speed ramping features.
- Doesn’t have a free version to try on.
~Price:
It is available for purchase at $29.99.
InShot:
It is available on IOS and Android both.
If you are new to video editing and want to do simple editing tasks then this software can be the right choice for you. It is simple and easy to use. Apart from just trimming and arranging your clips, it also has some cool features like speed ramping, chroma-key, mask e.t.c. It also has an HSL color grading tool. You can add multiple layers as PiP. It is a paid software but you can try it for free with the watermark on export.


~Features:
- It supports up to 4K resolution at 60fps.
- Its UI is beginner-friendly.
- Have some advanced color correction and grading tools.
- Supports multiple images and video layers as PiP.
- Have features like a mask, chroma key, and blend for layers.
- Can edit videos in different aspect ratios.
- Have speed curves for smooth speed ramping.


~Cons:
- Doesn’t have advanced tools.
- Its UI doesn’t support editing landscape orientation.
~Price:
It has 3 diff purchase plans. you can get its subscription for $3.9/month or $14.99/year. or you can purchase the software for lifetime at $34.99.
VivaCut:
It is available on IOS and Android both.
Almost every mobile video editor wished for doing PC-like video editing on their phone, but that was not possible due to software limitations and device compatibility. But now you can create PC-like videos on your phone through “VivaCut”. It is a paid software that is packed with many advanced features. Like 3D transform, overlay, Effects, Masking, e.t.c. It has one of the best color correction and grading tools among other mobile video editors. It has advanced keyframing and curve paths that can make splendid animations. It also supports multi-layer video editing. It also has a Grouping tool that let you combine several clips and texts into a single clip for easy editing. It also lets you import your presets. It is a paid software but you can try it for free with the watermark on export.


~Features:
- It supports multi-layer editing.
- Supports keyframing curves and 3D transform.
- Have advanced color correction and grading tools.
- Can Group multiple clips for easy editing.
- Let you import your presets.
- Can edit videos in different aspect ratios.
- Have an “FX plugin” library with many special effects that can be customized also.


~Cons:
- It doesn’t support 4K resolution.
- Its UI doesn’t support editing landscape orientation.
- It lags and crashes sometimes.
~Price:
Its premium version is available at $4.99/month or $19.99/year.
Which Should I Choose Free or Paid Video Editing Apps for iPhone:
If you do video editing once in a while or you don’t do more than just trimming and cropping then you shouldn’t purchase a paid video editing software. Because there are free video editors that can get your job done and even more than that. But if you are a content creator who doesn’t want to do editing on PCs or laptops, then you can get these paid video editors for your iPhone. These softwares are quite affordable and worthy of your investment. Some are cheaper than others. You can purchase the one, which meets your budget or fulfills your needs.
And if you are a beginner but want to move forward in this field then you should try free versions of these paid softwares. Select the one, which you are comfortable working on and once you are satisfied with the software then you can purchase its premium version.
- Free iPhone Video Editors
- Adobe Premiere Rush
- CapCut
- iMovie
- GoPro-Quik
- VN Video Editor
- Paid iPhone Video Editors
- Kinemaster
- Power Director
- LumaFusion
- InShot
- VivaCut
Filmora Go:
It is available on IOS and Android both.
Apart from having a professional video editor for PC, Wondershare has also introduced a video editor for mobile phones. Filmora Go is an amazing video editor, with many cool features such as chroma key, mask, keyframing, blending, e.t.c. It is fast and easy to use with built-in effects, transitions, and presets to speed up the editing process. It is a paid video editor but you can try it for free, free trial includes most of the features but it leaves a watermark on export.
~Features:
- Has speed curves for smooth speed ramping.
- Supports multiple images and video layers.
- Have many presets and filters for fast pace editing.
- Have cool features like chroma key, masking, keyframing, e.t.c.
- Supports “Pixabay’s” stock library.
~Cons:
- Its UI doesn’t support editing in landscape orientation.
- It doesn’t support 4k video resolution.


~Steps:
Import: Open Filmora Go, Click “New project” to start a new project, or Choose the previous one from the “Draft” portion. Select videos or images to import to your timeline. Hold and drag the clip to change its arrangement.
Edit: You can add text, effects, stickers, layers, e.t.c. by clicking their icon, present on the bar at the bottom.
Click the “PiP” icon to add image or video layers, you also can add multiple layers.
Select a clip to edit it. Different editing tools appear on the bottom bar. Here you can change its opacity, its speed, or add animations.
Effects: Click the “Effects” icon to open the effects menu. Select an effect to apply to your clip.
Click the white box between two clips to add transitions.
Export: Click the “Export” button to export your file. Select your desired resolution and frame rate to export your clip.


Some Free iPhone Video Editors:
If you do video editing rarely or do just basic video editing then it is useless to purchase paid video editors. Even if you are a content creator but tight on budget or new to this field, you can use free video editing softwares and save your cash for other pieces of equipment.
So, here we have mentioned some free video editors for you. Some of these are quite powerful and can do advanced editing while others are simple but easy to use.
Adobe Premiere Rush:
It is available on IOS and Android both.
Whether you are a beginner or a content creator using mobile phones or PCs for editing, you may have heard of Adobe softwares. It is a computer software company which makes powerful softwares for different purposes. Like premiere pro, they have designed a compact version for phones named “Premiere Rush”. It is a free video editor that has all the tools needed for video editing, from video effects to color grading and audio editing. Its UI is a bit similar to PC video editors. It is a free video editor with no watermarks. Although it takes some time to understand it. But once mastered, you can do editing quickly.
~Features:
- It is a free video editor with no watermark.
- It supports up to 4K resolution at 60fps.
- You can extract audio and can do voiceover directly from the software.
- It has hundreds of filters, overlays, and title designs.
- It has basic color grading tools.
- It also has a motion tracking feature. (in Paid version)
- It supports multiple audio, video, and text layers.


~Cons:
- It only runs on high-end devices. ( It is not supported in most mid-range phones)
- Not suitable for beginners. Its UI is quite hard to understand.
- Doesn’t have common features like the chroma key, masking, e.t.c.

~Price:
Its Premium version is available for 9.99/month. It includes some premium features. Or you can purchase the “All Apps Bundle” at $54.99/month for the annual plan.
CapCut:
It is available on IOS and Android both.
If you are looking for a free but good video editor to help you edit videos on the go, then you should get your hands on CapCut. It is a free mobile video editing software with many interesting features like keyframing, chroma-key, masking e.t.c. It also supports video and image layers. It has one of the best speed ramping features among other mobile video editors. It provides curves to smoothly speed ramp your clips. It can edit landscape, portrait, and even square video formats. It has many amazing effects and filters, it also has some stock clips.


~Features:
- It is completely free and has no watermarks.
- It supports up to 4K video resolution.
- Has curves for speed ramping.
- Has keyframes for animation.
- It has hundreds of effects, overlays, and titles.


~Cons:
- Its UI doesn’t support editing in landscape orientation.
- Lacks some common editing tools.
iMovie:
It is available on IOS and Mac.
iMovie is a free video editing software designed by apple for their flagship products. It is simple and easy to use. It has all the basic editing tools to enhance your video like crop, trim, transitions, effects, e.t.c. It also has a speed ramping feature which let you change the speed at different points of a clip. It’s AI mode “Magic Movie” lets you select clips and a style and software will make the final product for you.
Its “Storyboards” mode is a creative way of learning production and post-production skills. It lets you choose a theme from many famous Genres available, then it will guide you through the production process like capturing footage, arranging your shots, and creating cinematic titles to enhance your story.


~Features:
- It is free and easy to use.
- Let you do speed ramping.
- Supports Raw files.
- It’s AI mode creates videos for you on its own.
- The “Storyboarding” feature helps you through the production process.


~Cons:
- It only works on ios and Mac.
- Not suitable for professional projects.
GoPro - Quik:
It is available on IOS and Android and windows also.
It is a free and easy-to-use software designed by GoPro. It can edit clips of your GoPro or any other device. It is a quick and easy way to enhance your clips before posting them on any social platform. It can do basic edits like trim, rotate, color correction, e.t.c. It can also make amazing speed ramps by changing the speed of different parts of the clip (available in the premium version only). It doesn’t produce any watermarks. Although its premium version unlocks more features like speed ramping, more themes, and unlimited backup space.


~Features:
- Its free version doesn’t leave a watermark.
- It is simple and easy to use.
- Can do basic color correction.
- Have pre-made themes for faster editing.
- Change the speed at different parts of the video to create smooth speed ramps. (Available in the premium version.)
- Has a free version with limited tools for basic editing.

~Cons:
- It lacks advanced tools therefore not suitable for large projects.
- Its free version has many limitations.
~Price: Its subscription is available at $1.99/month or at discount for an annual subscription having $9.99/year.
VN Video editor:
It is available on IOS and Android, Windows, and Mac.
If you are looking for a video editor, which let you do fast but quality edits, then “VN video editor” is the right choice for you. It is free and easy-to-use software with many useful features like transitions, effects, speed ramps, PiP, chroma-key, keyframing, e.t.c. It supports different aspect ratios for all your social platforms.
It also has pre-made templates to speed up your editing process. Its Story mode let you manage your production and post-production work easily. It also has overlay mode, which can make awesome slide shows for you.


~Features:
- It is free software with no watermark.
- It supports up to 4K resolution at 60fps.
- Supports multi-layer editing.
- Have keyframing curves to create smooth animations.
- Have speed curves for smooth speed ramping.
- Its Story mode let you manage your production work easily.
- Can extract audio from a video file.


~Cons:
- Its UI doesn’t support editing landscape orientation.
- Its free version has limitations of creating max 100 projects.
~Price:
Its Premium version is available for $3.9/month or $20.9/year.
Some Paid iPhone Video Editors:
If you want to move forward and get your hands on these paid softwares to try new features then you should buy these paid softwares. As most of these softwares are quite affordable but they pack the punch. And some of them can give you more in return than your investment. Then what are you waiting for? go and try them yourself.
Kinemaster:
It is available on IOS and Android both.
If you want to do more than just trimming and cropping to your videos then you should try Kinemaster. For editors, who want to do some advanced-level video editing on their phone, then you must have Kinemaster on your phone. It is a paid software, which is packed with many useful features. It has many video and audio effects. It also has an amazing audio editor. It also has many title designs and basic color correction tools. It has hundreds of effects and transitions + more can be downloaded from its asset store. Its UI is suitable for beginners and content creators both. It is a paid software, but all its features are completely free to use, but the free version leaves a watermark on export.


~Features:
- It supports up to 4K resolution at 60fps. (depending on mobile configuration)
- Have amazing features like chroma key, keyframing, blend e.t.c
- Has built-in audio and video recorder.
- Supports multiple texts and video layers with different resolutions depending on the capability of the mobile phone.
- Has UI like a PC video editor and supports landscape orientation for editing.
- Have an asset store with 100s of free effects, transitions, and stock material.


~Cons:
- Can’t export 4K videos on most devices.
- Can’t apply keyframes and chroma key to the main video. (can be done on layers only)
~Price:
Its Premium version is available for $4.9/month or $39.9/year. It also includes all the premium assets.
Power Director:
It is available on IOS and Android both.
It is a paid but quite advanced video editor available for androids and IOS both. Like its PC version mobile version is also packed with many great features. It is compact and easy to use. It supports multiple video and audio layers. Have many cool filters and transitions. Can also do basic color corrections. To complete post-production work it also has audio editing tools and effects. It also has hundreds of title designs. Its UI is easy to use and supports both portrait and landscape orientation for editing. Most of its features can be used for free with a watermark on export. To remove the watermark you need to purchase the premium version.


~Features:
- It supports up to 4K resolution at 60fps. (compatible on most devices)
- Supports both Portrait and Landscape orientation for editing.
- Supports Key framing and video stabilization also.
- Supports multiple audio and video layers.
- Can edit videos in different aspect ratios.
- Have a vast stock library.


~Cons:
- Can’t export 4K videos on many devices.
- Can apply keyframing and chroma key to layers only.
- Software lags sometimes.
~Price:
Its Premium version is available for $4.9/month or $29.9/year.
LumaFusion:
It is available on IOS and Mac (with an m1 processor).
If you are a content creator and want to do professional-level video editing on your phone then you should get your hands on “LumaFusion”. It is of the most powerful and advanced video editors designed for a mobile phone. But it only works on iPhones and iPads. It is a multi-track video editor with many useful features like the Chroma key, keyframing, color grading, and color LUTs. Have powerful color grading tools and an audio editor. It also has a lock and load stabilizer. You have to purchase the software before using it. It doesn’t have any free version to try.

Credits: Pic by Luma touch website.
~Features:
- It supports up to 4K video resolution at a max of 240 fps.
- Can also edit and export 360 videos.
- Have powerful color correction tools. You can also import your own color LUTs.
- Supports Keyframing on almost all the editing tools within the software.
- You can add some third-party audio plugins.
- Supports up to 6 audio and video layers.
- Have “Storyblock” stock library. (Many of its contents are free to use)
- Supports external monitor for display.

Credits: Pic by Luma touch website.
~Cons:
- Not available for Android devices.
- Being an advanced software, it doesn’t have masking and speed ramping features.
- Doesn’t have a free version to try on.
~Price:
It is available for purchase at $29.99.
InShot:
It is available on IOS and Android both.
If you are new to video editing and want to do simple editing tasks then this software can be the right choice for you. It is simple and easy to use. Apart from just trimming and arranging your clips, it also has some cool features like speed ramping, chroma-key, mask e.t.c. It also has an HSL color grading tool. You can add multiple layers as PiP. It is a paid software but you can try it for free with the watermark on export.


~Features:
- It supports up to 4K resolution at 60fps.
- Its UI is beginner-friendly.
- Have some advanced color correction and grading tools.
- Supports multiple images and video layers as PiP.
- Have features like a mask, chroma key, and blend for layers.
- Can edit videos in different aspect ratios.
- Have speed curves for smooth speed ramping.


~Cons:
- Doesn’t have advanced tools.
- Its UI doesn’t support editing landscape orientation.
~Price:
It has 3 diff purchase plans. you can get its subscription for $3.9/month or $14.99/year. or you can purchase the software for lifetime at $34.99.
VivaCut:
It is available on IOS and Android both.
Almost every mobile video editor wished for doing PC-like video editing on their phone, but that was not possible due to software limitations and device compatibility. But now you can create PC-like videos on your phone through “VivaCut”. It is a paid software that is packed with many advanced features. Like 3D transform, overlay, Effects, Masking, e.t.c. It has one of the best color correction and grading tools among other mobile video editors. It has advanced keyframing and curve paths that can make splendid animations. It also supports multi-layer video editing. It also has a Grouping tool that let you combine several clips and texts into a single clip for easy editing. It also lets you import your presets. It is a paid software but you can try it for free with the watermark on export.


~Features:
- It supports multi-layer editing.
- Supports keyframing curves and 3D transform.
- Have advanced color correction and grading tools.
- Can Group multiple clips for easy editing.
- Let you import your presets.
- Can edit videos in different aspect ratios.
- Have an “FX plugin” library with many special effects that can be customized also.


~Cons:
- It doesn’t support 4K resolution.
- Its UI doesn’t support editing landscape orientation.
- It lags and crashes sometimes.
~Price:
Its premium version is available at $4.99/month or $19.99/year.
Which Should I Choose Free or Paid Video Editing Apps for iPhone:
If you do video editing once in a while or you don’t do more than just trimming and cropping then you shouldn’t purchase a paid video editing software. Because there are free video editors that can get your job done and even more than that. But if you are a content creator who doesn’t want to do editing on PCs or laptops, then you can get these paid video editors for your iPhone. These softwares are quite affordable and worthy of your investment. Some are cheaper than others. You can purchase the one, which meets your budget or fulfills your needs.
And if you are a beginner but want to move forward in this field then you should try free versions of these paid softwares. Select the one, which you are comfortable working on and once you are satisfied with the software then you can purchase its premium version.
Split a Video in the Lightworks [Step by Step]
Lightworks is among the best programs for editing the videos available for the Windows and Mac operating systems with no watermark. Through the accessible version of Lightworks, it is easy to export the videos into the MP4 format along with the resolution of 720p. There are different tools available in Lightworks so you can make videos for your YouTube channels, Vimeo, film making projects and different social media platforms.
Lightworks has become famous because it has been used for editing the popular movies of Hollywood. Along with the videos, it is straightforward to enhance the images by blending the colours. This article has a detailed description of how you can split the videos in Lightworks including the the discussion of splitting the Wondershare Filmora as an alternative. It is also a suitable choice.
How can you split the video clips in Lightworks?
Lightworks is software based on the cloud that consists of particular functionalities. It only includes editing and trimming, cutting, and splitting your video clips according to your requirements. Following are the easy-to-follow steps for splitting the clips in Lightworks:
Part1 - Splitting of one clip:
Step 1: The first step is importing the video into the timeline. It is simply through dragging the file on which you have to work.
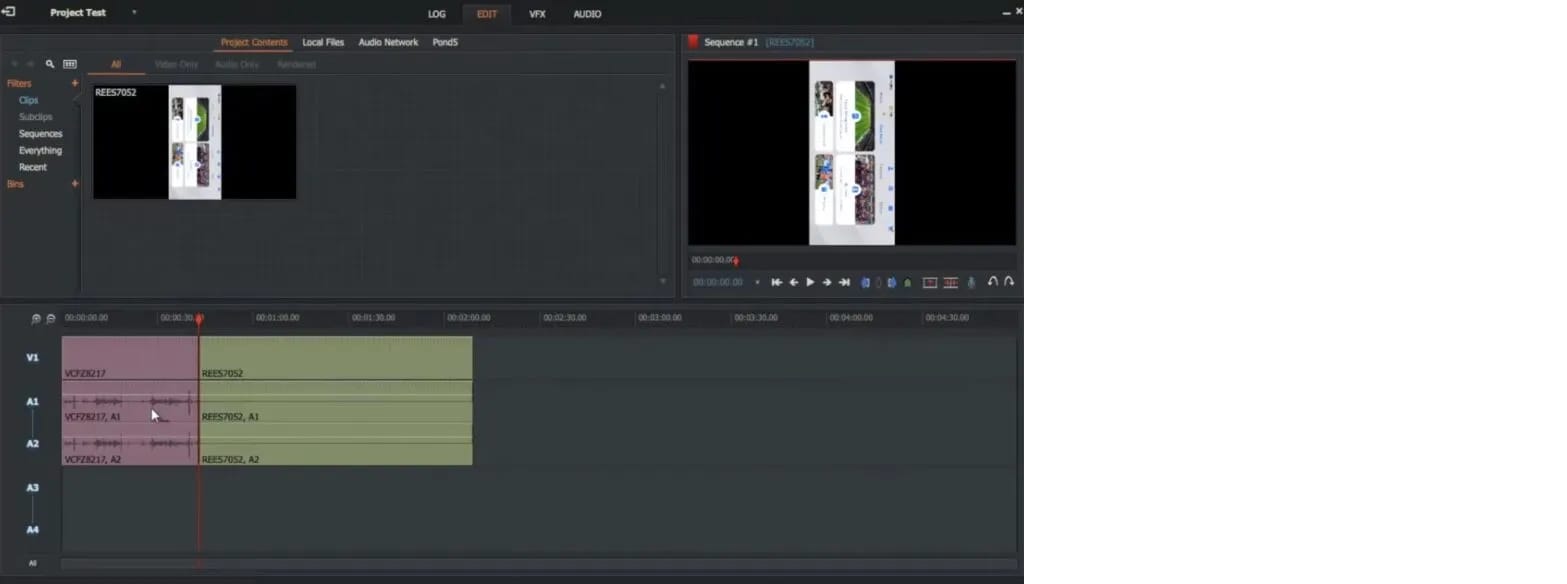
Step 2: When the uploading is complete, you can cut and split the clips depending on your needs. Now, keep moving the play head in the specific direction from where you have to cut the clips—Press “C” on your keyboard.

Step 3: After getting the split clip, you can delete the remaining part that is not in use. For this, selecting the particular part is necessary and selecting the option of “Delete”. Even, you can press the “delete” key on your keyboard.

Step 4: When your video is ready, simply export the video by clicking right on the option of “All”. On the left lower side of the timeline, it is now clicked on “Export”.


Part 2- trimming of the clips in Lightworks
To trim the video clips in Lightworks, you require to hover the mouse towards the last of the video clip. Keep moving until and unless that part of the clip gets highlighted. After this step, start dragging till the previous where you want it.


An easier way to split the video clip
Even though Lightworks is a wonderful software for editing videos and images, its interface is easy to handle. But it is not supportive of different formats and 4K videos. For a few features, you might need the paid version of Lightworks. The most acquired solution to resolve this issue is Filmora Video Editor . It is freely available, and use all the tools according to your needs. That’s why it is gaining popularity, and users are increasing day by day. The latest versions of the Wondershare Filmora are available to enhance user experiences. You can export the outcome with ease from the tools.
For Win 7 or later (64-bit)
For macOS 10.14 or later
Features:
- Availability of drag and drag feature
- Can preview the functionalities you apply
- Easy to customize the images and videos
- Involvement of the animation
- Huge library available for the effects of visual and audio
- Splitting and merging the clips
Wondershare Filmora always offers to split the clips from the creative techniques. This tool is extremely useful, particularly when creating commentaries, tutorials, or interviews. The exact footage has to be on the timeline. All the options are on the main panel. Add anything you like, such as animation, text, images, or other media, to make an outstanding outcome. These are very easy to understand, so go through the following steps for splitting the video clips. Two ways are trimming and splitting the clips in Wondershare Filmora.
First method: splitting on the timeline
Step 1. Selection of the clip in the timeline that you want to split. Your play head should be precisely at this particular place from where you need the splitting.

Step 2. When your play head is on the correct point of the timeline, right-click on the clip for opening the menu. Select the option of “Split” or click on the scissor icon in red colour.
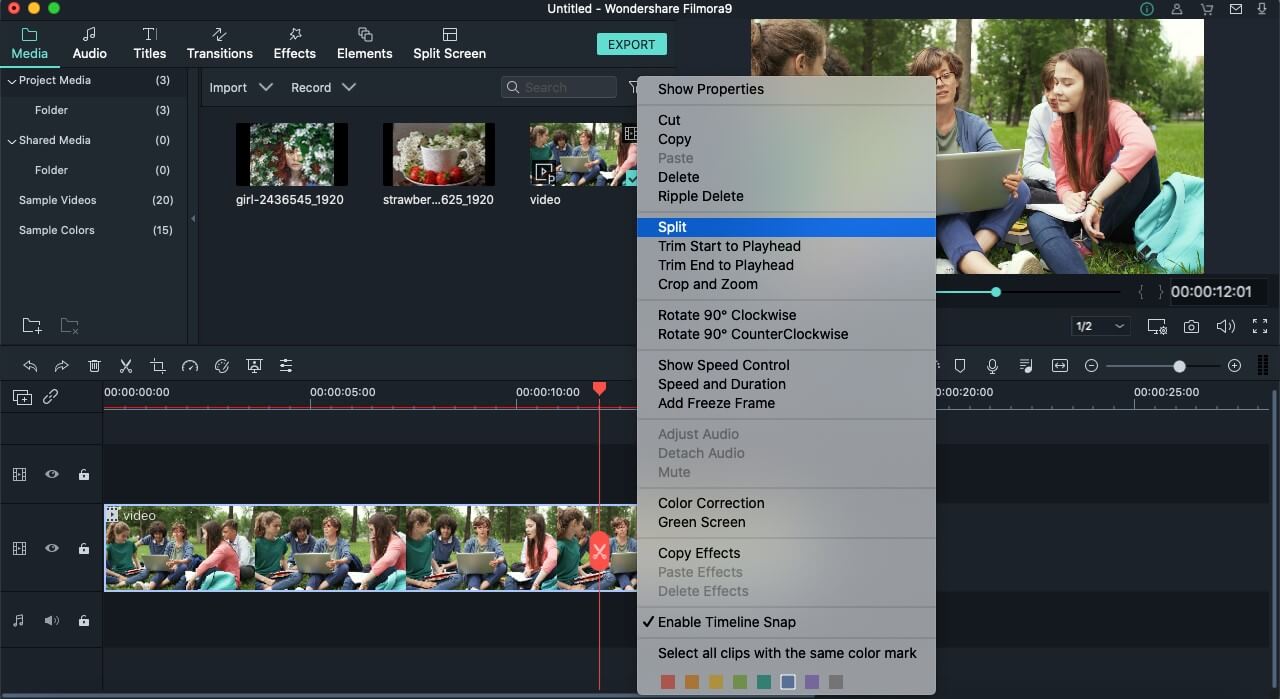
There is also a possibility of hiding the red icon of the scissor present. You can do it by tapping on the options of Wondershare Filmora. Then go to Preferencesàediting. Now uncheck the button of Split.
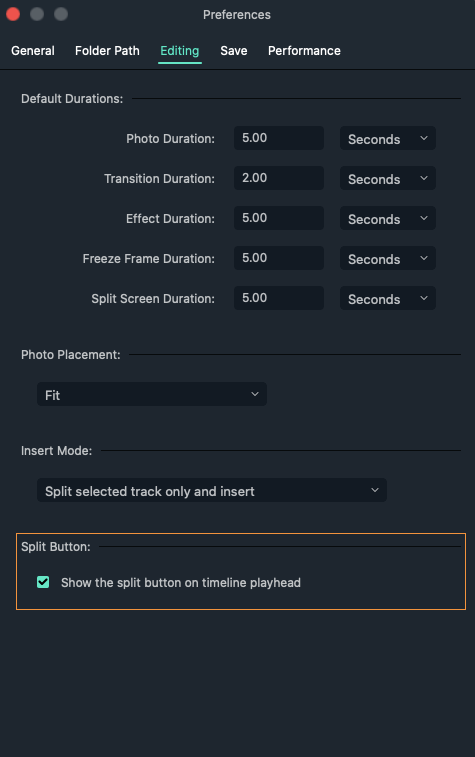
Second method: detection of the scene
If there are different shots in your clips or separation in the scenes, you can use the tool of “scene detection” in the Wondershare Filmora.
Step 1. Select your video clip from the media library that you want to split. After right-clicking on it, select the option of “Scene detection” from the menu.
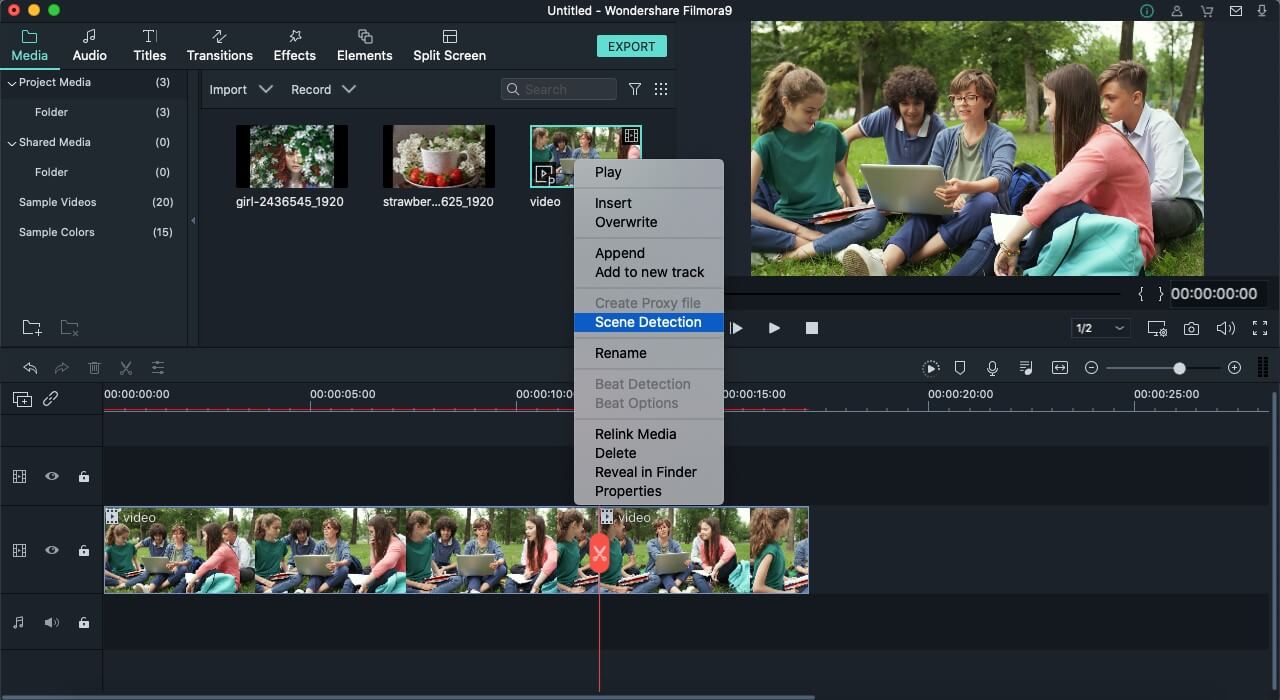
Step 2. The new window of the scene detection appears and then click on “Detect”. Depending on the transitions of the video clips, it is divided into different parts.
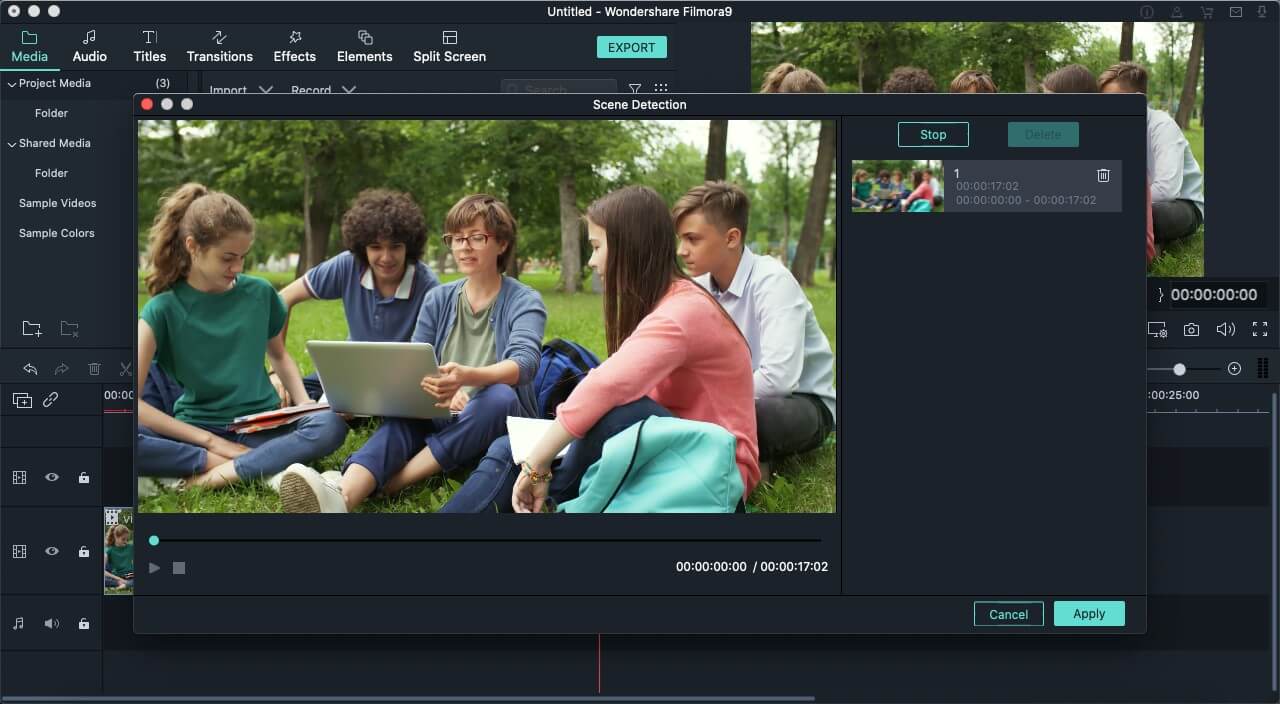
There are hundreds of editing software present in the marketplace, but Wondershare Filmora’s success rate is the highest. It is just because of its simplicity and advanced tools that fulfil the users’ needs. The whole interface is hassle-free and clean no matter which operating system you use. It is also helpful in saving your time in terms of applying the settings of colour correction on more than one clip at all at once.
Exploration of the transition effects with the filters allows motion elements in your images and videos. Even you can split the screens to present your videos in a different style. Must discover the Wondershare Filmora whether you are using it casually or professionally. Keep going with the flow and go through the available guidelines. You will definitely consider Wondershare Filmora the best software for your managing and editing tasks.
Step 2: When the uploading is complete, you can cut and split the clips depending on your needs. Now, keep moving the play head in the specific direction from where you have to cut the clips—Press “C” on your keyboard.

Step 3: After getting the split clip, you can delete the remaining part that is not in use. For this, selecting the particular part is necessary and selecting the option of “Delete”. Even, you can press the “delete” key on your keyboard.

Step 4: When your video is ready, simply export the video by clicking right on the option of “All”. On the left lower side of the timeline, it is now clicked on “Export”.


Part 2- trimming of the clips in Lightworks
To trim the video clips in Lightworks, you require to hover the mouse towards the last of the video clip. Keep moving until and unless that part of the clip gets highlighted. After this step, start dragging till the previous where you want it.


An easier way to split the video clip
Even though Lightworks is a wonderful software for editing videos and images, its interface is easy to handle. But it is not supportive of different formats and 4K videos. For a few features, you might need the paid version of Lightworks. The most acquired solution to resolve this issue is Filmora Video Editor . It is freely available, and use all the tools according to your needs. That’s why it is gaining popularity, and users are increasing day by day. The latest versions of the Wondershare Filmora are available to enhance user experiences. You can export the outcome with ease from the tools.
For Win 7 or later (64-bit)
For macOS 10.14 or later
Features:
- Availability of drag and drag feature
- Can preview the functionalities you apply
- Easy to customize the images and videos
- Involvement of the animation
- Huge library available for the effects of visual and audio
- Splitting and merging the clips
Wondershare Filmora always offers to split the clips from the creative techniques. This tool is extremely useful, particularly when creating commentaries, tutorials, or interviews. The exact footage has to be on the timeline. All the options are on the main panel. Add anything you like, such as animation, text, images, or other media, to make an outstanding outcome. These are very easy to understand, so go through the following steps for splitting the video clips. Two ways are trimming and splitting the clips in Wondershare Filmora.
First method: splitting on the timeline
Step 1. Selection of the clip in the timeline that you want to split. Your play head should be precisely at this particular place from where you need the splitting.

Step 2. When your play head is on the correct point of the timeline, right-click on the clip for opening the menu. Select the option of “Split” or click on the scissor icon in red colour.

There is also a possibility of hiding the red icon of the scissor present. You can do it by tapping on the options of Wondershare Filmora. Then go to Preferencesàediting. Now uncheck the button of Split.

Second method: detection of the scene
If there are different shots in your clips or separation in the scenes, you can use the tool of “scene detection” in the Wondershare Filmora.
Step 1. Select your video clip from the media library that you want to split. After right-clicking on it, select the option of “Scene detection” from the menu.

Step 2. The new window of the scene detection appears and then click on “Detect”. Depending on the transitions of the video clips, it is divided into different parts.

There are hundreds of editing software present in the marketplace, but Wondershare Filmora’s success rate is the highest. It is just because of its simplicity and advanced tools that fulfil the users’ needs. The whole interface is hassle-free and clean no matter which operating system you use. It is also helpful in saving your time in terms of applying the settings of colour correction on more than one clip at all at once.
Exploration of the transition effects with the filters allows motion elements in your images and videos. Even you can split the screens to present your videos in a different style. Must discover the Wondershare Filmora whether you are using it casually or professionally. Keep going with the flow and go through the available guidelines. You will definitely consider Wondershare Filmora the best software for your managing and editing tasks.
Step 2: When the uploading is complete, you can cut and split the clips depending on your needs. Now, keep moving the play head in the specific direction from where you have to cut the clips—Press “C” on your keyboard.

Step 3: After getting the split clip, you can delete the remaining part that is not in use. For this, selecting the particular part is necessary and selecting the option of “Delete”. Even, you can press the “delete” key on your keyboard.

Step 4: When your video is ready, simply export the video by clicking right on the option of “All”. On the left lower side of the timeline, it is now clicked on “Export”.


Part 2- trimming of the clips in Lightworks
To trim the video clips in Lightworks, you require to hover the mouse towards the last of the video clip. Keep moving until and unless that part of the clip gets highlighted. After this step, start dragging till the previous where you want it.


An easier way to split the video clip
Even though Lightworks is a wonderful software for editing videos and images, its interface is easy to handle. But it is not supportive of different formats and 4K videos. For a few features, you might need the paid version of Lightworks. The most acquired solution to resolve this issue is Filmora Video Editor . It is freely available, and use all the tools according to your needs. That’s why it is gaining popularity, and users are increasing day by day. The latest versions of the Wondershare Filmora are available to enhance user experiences. You can export the outcome with ease from the tools.
For Win 7 or later (64-bit)
For macOS 10.14 or later
Features:
- Availability of drag and drag feature
- Can preview the functionalities you apply
- Easy to customize the images and videos
- Involvement of the animation
- Huge library available for the effects of visual and audio
- Splitting and merging the clips
Wondershare Filmora always offers to split the clips from the creative techniques. This tool is extremely useful, particularly when creating commentaries, tutorials, or interviews. The exact footage has to be on the timeline. All the options are on the main panel. Add anything you like, such as animation, text, images, or other media, to make an outstanding outcome. These are very easy to understand, so go through the following steps for splitting the video clips. Two ways are trimming and splitting the clips in Wondershare Filmora.
First method: splitting on the timeline
Step 1. Selection of the clip in the timeline that you want to split. Your play head should be precisely at this particular place from where you need the splitting.

Step 2. When your play head is on the correct point of the timeline, right-click on the clip for opening the menu. Select the option of “Split” or click on the scissor icon in red colour.

There is also a possibility of hiding the red icon of the scissor present. You can do it by tapping on the options of Wondershare Filmora. Then go to Preferencesàediting. Now uncheck the button of Split.

Second method: detection of the scene
If there are different shots in your clips or separation in the scenes, you can use the tool of “scene detection” in the Wondershare Filmora.
Step 1. Select your video clip from the media library that you want to split. After right-clicking on it, select the option of “Scene detection” from the menu.

Step 2. The new window of the scene detection appears and then click on “Detect”. Depending on the transitions of the video clips, it is divided into different parts.

There are hundreds of editing software present in the marketplace, but Wondershare Filmora’s success rate is the highest. It is just because of its simplicity and advanced tools that fulfil the users’ needs. The whole interface is hassle-free and clean no matter which operating system you use. It is also helpful in saving your time in terms of applying the settings of colour correction on more than one clip at all at once.
Exploration of the transition effects with the filters allows motion elements in your images and videos. Even you can split the screens to present your videos in a different style. Must discover the Wondershare Filmora whether you are using it casually or professionally. Keep going with the flow and go through the available guidelines. You will definitely consider Wondershare Filmora the best software for your managing and editing tasks.
Step 2: When the uploading is complete, you can cut and split the clips depending on your needs. Now, keep moving the play head in the specific direction from where you have to cut the clips—Press “C” on your keyboard.

Step 3: After getting the split clip, you can delete the remaining part that is not in use. For this, selecting the particular part is necessary and selecting the option of “Delete”. Even, you can press the “delete” key on your keyboard.

Step 4: When your video is ready, simply export the video by clicking right on the option of “All”. On the left lower side of the timeline, it is now clicked on “Export”.


Part 2- trimming of the clips in Lightworks
To trim the video clips in Lightworks, you require to hover the mouse towards the last of the video clip. Keep moving until and unless that part of the clip gets highlighted. After this step, start dragging till the previous where you want it.


An easier way to split the video clip
Even though Lightworks is a wonderful software for editing videos and images, its interface is easy to handle. But it is not supportive of different formats and 4K videos. For a few features, you might need the paid version of Lightworks. The most acquired solution to resolve this issue is Filmora Video Editor . It is freely available, and use all the tools according to your needs. That’s why it is gaining popularity, and users are increasing day by day. The latest versions of the Wondershare Filmora are available to enhance user experiences. You can export the outcome with ease from the tools.
For Win 7 or later (64-bit)
For macOS 10.14 or later
Features:
- Availability of drag and drag feature
- Can preview the functionalities you apply
- Easy to customize the images and videos
- Involvement of the animation
- Huge library available for the effects of visual and audio
- Splitting and merging the clips
Wondershare Filmora always offers to split the clips from the creative techniques. This tool is extremely useful, particularly when creating commentaries, tutorials, or interviews. The exact footage has to be on the timeline. All the options are on the main panel. Add anything you like, such as animation, text, images, or other media, to make an outstanding outcome. These are very easy to understand, so go through the following steps for splitting the video clips. Two ways are trimming and splitting the clips in Wondershare Filmora.
First method: splitting on the timeline
Step 1. Selection of the clip in the timeline that you want to split. Your play head should be precisely at this particular place from where you need the splitting.

Step 2. When your play head is on the correct point of the timeline, right-click on the clip for opening the menu. Select the option of “Split” or click on the scissor icon in red colour.

There is also a possibility of hiding the red icon of the scissor present. You can do it by tapping on the options of Wondershare Filmora. Then go to Preferencesàediting. Now uncheck the button of Split.

Second method: detection of the scene
If there are different shots in your clips or separation in the scenes, you can use the tool of “scene detection” in the Wondershare Filmora.
Step 1. Select your video clip from the media library that you want to split. After right-clicking on it, select the option of “Scene detection” from the menu.

Step 2. The new window of the scene detection appears and then click on “Detect”. Depending on the transitions of the video clips, it is divided into different parts.

There are hundreds of editing software present in the marketplace, but Wondershare Filmora’s success rate is the highest. It is just because of its simplicity and advanced tools that fulfil the users’ needs. The whole interface is hassle-free and clean no matter which operating system you use. It is also helpful in saving your time in terms of applying the settings of colour correction on more than one clip at all at once.
Exploration of the transition effects with the filters allows motion elements in your images and videos. Even you can split the screens to present your videos in a different style. Must discover the Wondershare Filmora whether you are using it casually or professionally. Keep going with the flow and go through the available guidelines. You will definitely consider Wondershare Filmora the best software for your managing and editing tasks.
Top-Rated Android Apps For Slowing Down Motion
Creating slow-motion videos has been a trend followed by millions across social platforms. For designing the perfect video as a slow-motion video, people seek a good option. Android slow motion video apps are one remedy to this requirement. Google Play Store offers a diversity of applications for making video slow motion Android.
This article is all about figuring out the top Android applications that can feature the best slow motion. For that, go through the content provided to find out the most suitable slow motion video in Android.
Slow Motion Video Maker Slow your video’s speed with better control of your keyframes to create unique cinematic effects!
Make A Slow Motion Video Make A Slow Motion Video More Features

Part 1. Top 10 Android Apps For Slowing Down Motion in Video
When searching for a slow motion video app for Android, there are many options to go by. Provided next is a composite list of mobile apps that serve the purpose of slow-motion video creation:
- Slow Motion Video – Fast&Slow Mo
- Slow Motion Video Maker
- Video Editor & Maker – InShot
- Video Maker & Editor - Vidma
- VivaVideo - Video Editor&Maker
- VivaVideo - Video Editor&Maker
- VivaVideo - Video Editor&Maker
- VivaVideo - Video Editor&Maker
- VivaVideo - Video Editor&Maker
- VivaVideo - Video Editor&Maker
1. Slow Motion Video – Fast&Slow Mo
This Android slow-motion video converter offers an intuitive user interface and simple functions. Users can craft slow motion via drag and adjust the action of the slider in a downward direction. The video’s playback speed is customizable, ranging from 0.25x to 4.0x. Additionally, the software empowers users to apply slow motion to specific video segments to enhance precision.
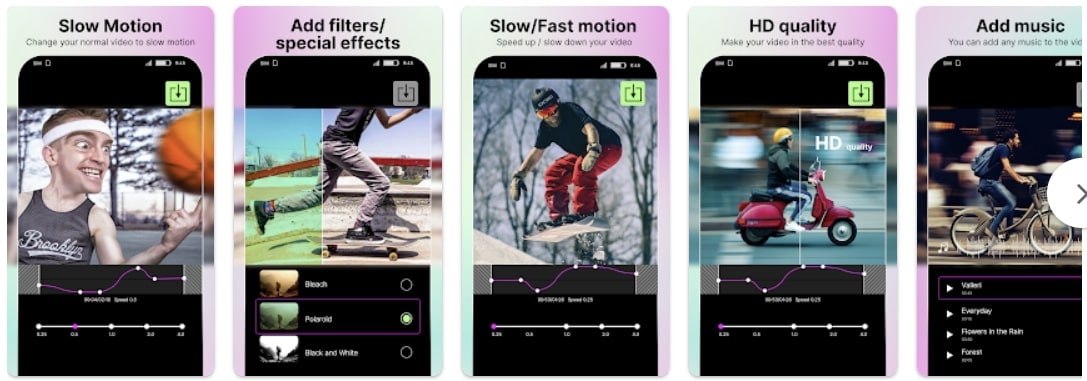
Key Features
- The application offers pre-installed filters and special effects to elevate visual aesthetics.
- It preserves video quality and transforms video resolution to high definition (HD).
- Incorporate high-quality music into your videos with its built-in music collection.
2. Slow Motion Video Maker
This slow-mo video Android editor offers advanced functionalities to craft perfect videos. With its timeline editing interface, it simplifies the application of slow-motion effects to specific scenes. The application showcases three distinct slow-motion speed options: 0.5x, 0.3x, and 0.25x, ensuring perfection.
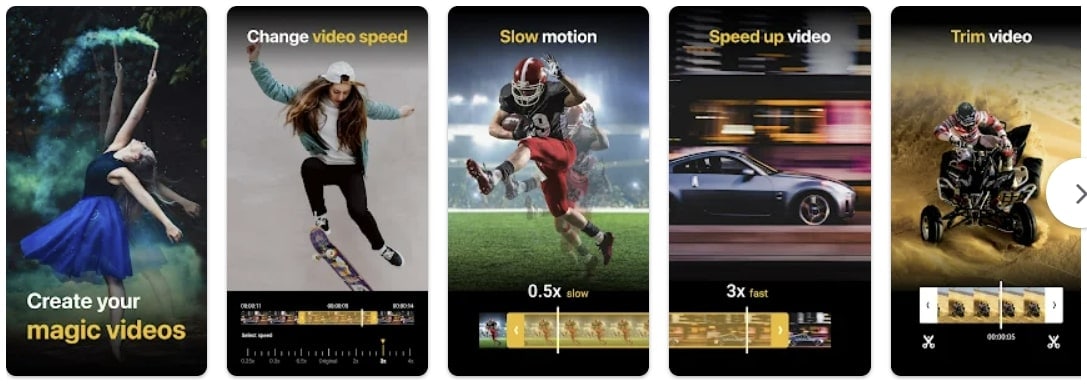
Key Features
- Accelerate your videos up to 4x with its high-speed options and get high-quality results.
- The video trimming feature and timeline editing enable accurate segmentation of a video.
- It is equipped with pre-existing music tracks to create the perfect slow-motion video on Android.
3. Video Editor & Maker - InShot
Embark upon the journey to create video slow motion Android with this multifunctional app. It extends a straightforward approach to slow video speed through slider manipulation. Timeline editing and selective playhead options empower users to adjust the speed of specific segments. This exceeds the conventional approach of a slo-mo creation, unlocking creative possibilities.
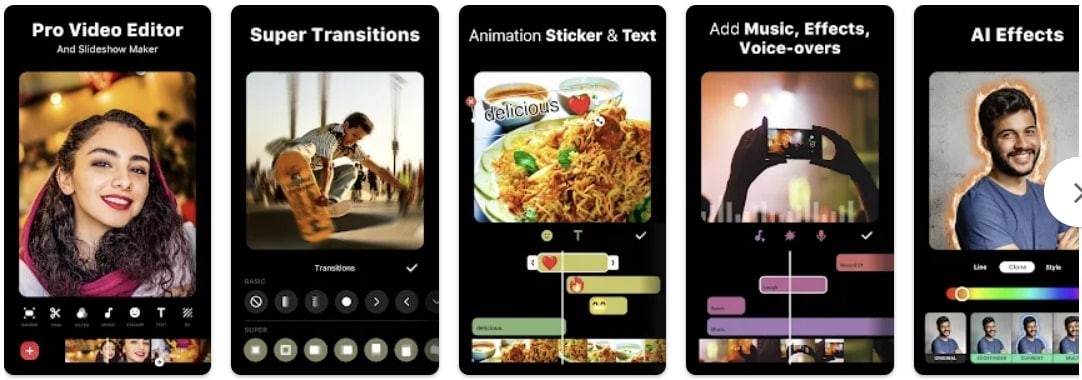
Key Features
- Elevate the artistic expression of videos by integrating a wide range of animations and text.
- Enhance your reels with a collection of transition effects like Fade in, Fade out, basics, and more.
- This editor has AI capabilities and background removal options with a heightened level of accuracy.
4. Video Maker & Editor - Vidma
This slow-mo app for Android facilitates individuals seeking a video editor capable of producing convincing results. It acts as a Velocity Edit Maker, offering diverse playback speed and positioning controls. The interface resembles a velocity graph, providing a visual representation of speed adjustments.
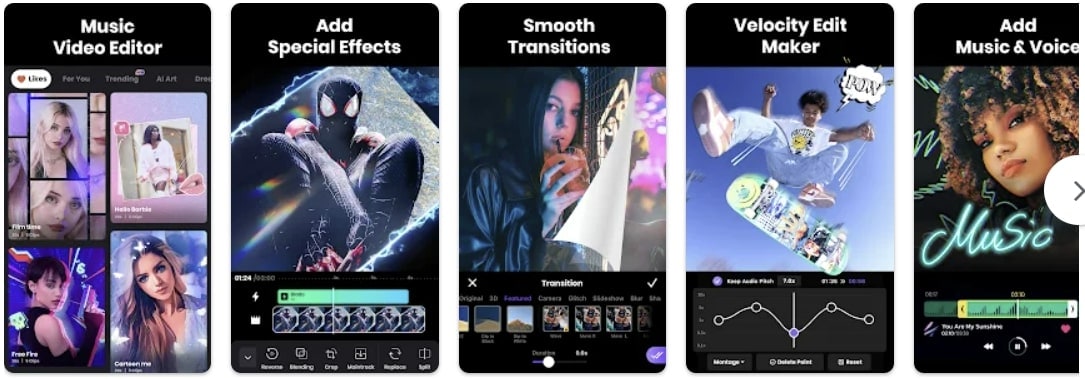
Key Features
- Introduces an automated “Keep Audio Pitch” option, ensuring high-quality audio.
- Enhance the creative factor in your images and videos with its built-in text and stickers.
- Comes with a variety of visual filters with an intensity control option.
5. VivaVideo - Video Editor&Maker
If you are seeking the best Slomo app for Android, this editor provides diverse speed-setting presets for creating slow-motion and fast-motion effects. Among presets such as Montage, Hero, Bullet, and others, it offers a Custom preset option to help you adjust everything accordingly. With its ability to apply speed settings at specific periods, your slow motions are bound to be perfect.
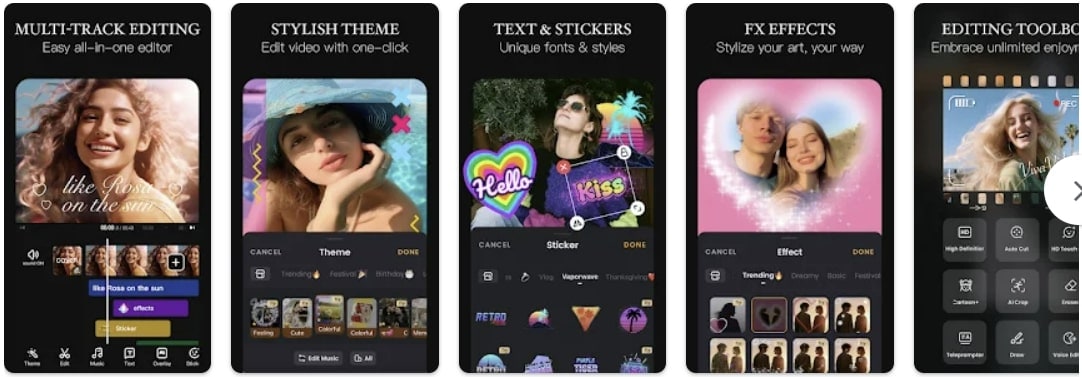
Key Features
- The non-uniform timeline editor allows you to incorporate multiple assets at once.
- A range of texts, animations, themes, effects, and music tracks are in its Stock Library.
- This video maker also incorporates a Voice Editor to uphold the audio track’s quality.
6. Smart Video Crop - Video Cut
Although this video maker is specified for resizing videos, it also offers speed change options. To make a video slow motion on Android, you can change both playback speed and framerate. Once you have edited your video, you can make changes to the export options. In addition, the application updates its mechanism and shows compatibility with Android 4.4 and higher versions.

Key Features
- The application shows multi-format video support, i.e., MP4, 3GP, and AVI.
- Proposes multiple video crop options like 1:1, 4:3, 16:9, and 3:2.
- You can select to crop the whole video or apply the crop to a specific part of it.
7. Video Editor - Video.Guru
What would be better than a slow-motion video app for Android that can change speed and enhance video? To access this functionality, users need to switch to its PRO version. The speed change options that it offers are from 0.2x to 100x, with 0.2x being the slowest. In addition, the tool doesn’t decline video quality but enhances it to 4K.
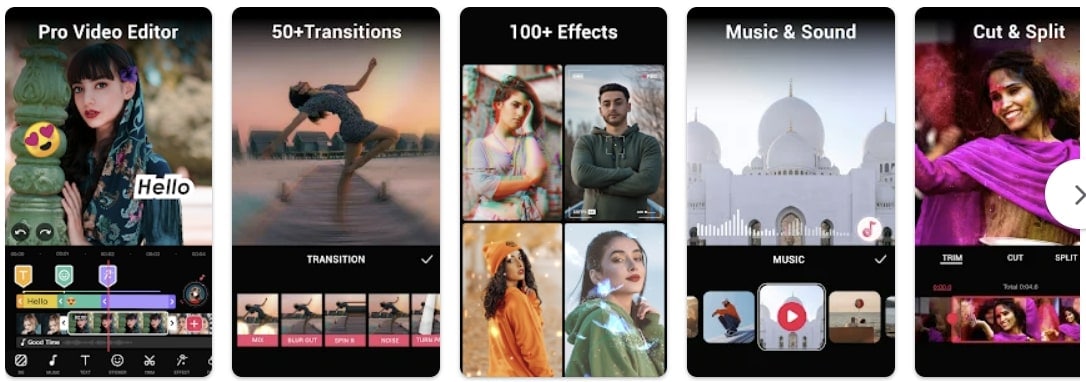
Key Features
- If you are a YouTuber, then this editor affects and filters for Vloggers and offers to remove Watermark.
- You can crop a video into available ratios while keeping its HD quality.
- Can add 30+ video transition effects and incorporate music to enhance their quality.
8. Slow Motion - Slow Mo, Fast Mo
Make video slow motion Android effortlessly with this application, which is specified for speed change. It offers 10 playback speed options for creating slow motions with precision. The playback speed ranges from 0.95x to 0.1x. Once you have created a slow motion with it, you can easily preview it to observe if any changes are needed.
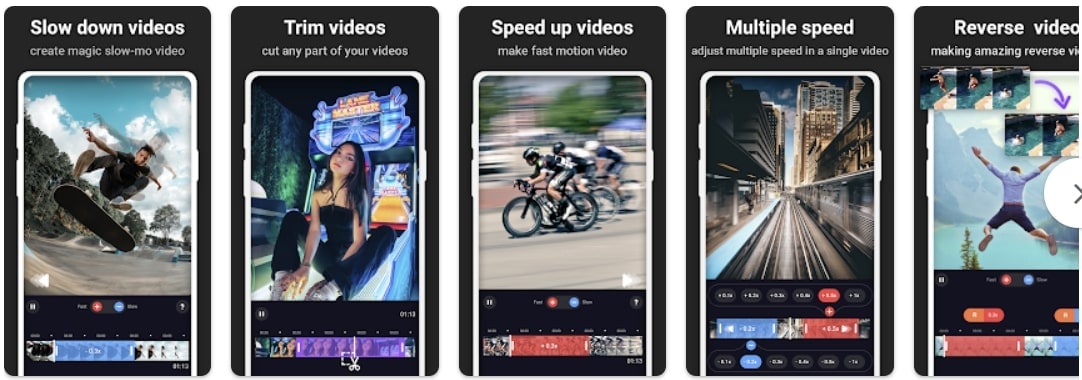
Key Features
- Along with precise slo-mo options, it also offers extensive fast motion option speed ranges.
- You can mix and match both fast and slow-motion effects in a video at once.
- It also offers a watermark removal option to avoid any visual weakening.
9. Slow Motion Video FX-camera
Not only video frame rates but also slow down your speech with this slow-motion app for Android. You can add dramatic or funny effects to your voices using the application. It offers to slow down video speed up to 0.25x. It uses the standard slider approach to manipulate the playback speed of your videos. You can apply the slow-mo effect to the overall video or to some specific parts of it.
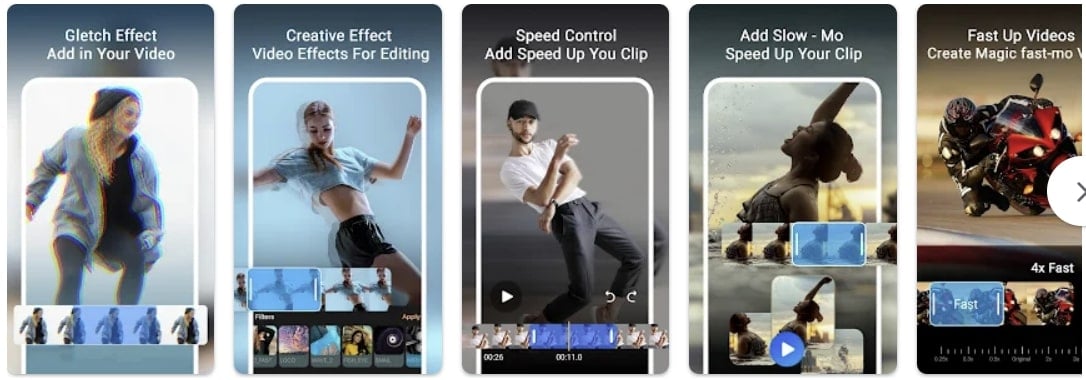
Key Features
- An intuitive user interface with a velocity graph to observe the changes in speed and duration.
- Transform your low-quality videos to HD quality with this slow-motion app for Android.
- Use the application’s built-in music library to incorporate music tracks.
10. Slow Motion
Decrease your video speed up to 1/4th of its original speed with this Android slow-motion video editor. The speed options are customizable, and you can apply them to multiple video scenes. As the name indicates, the tool is specifically fashioned for slow-motion effects; hence, it offers an accessible user interface.

Key Features
- Export your videos in landscape or portrait mode; the choice is yours.
- In any mode, the application retains video quality and exports it in full resolution.
- It is excellent to slow down YouTube videos as there is no watermark addition.
Bonus Part: Wondershare Filmora: A Perfect Desktop Solution To Slow Down Video
Making slow motion videos in Android is like keeping creativity in your hand anywhere. This facility is good for basic effects but not for professional and advanced slow-motion effects. That’s where you need to shift to a more equipped alternative, which is Wondershare Filmora . Using Filmora means turning imagination into the real picture.
It is a video editing platform with artificial intelligence integration. You can create slow-motion videos with automation in Filmora. The interactive interface of Filmora caters to all users’ needs in simple steps. Freelancers, content creators, and educationists use this platform for diverse needs.
Free Download For Win 7 or later(64-bit)
Free Download For macOS 10.14 or later
How to Make Video Slow Motion Android in Filmora
As you are familiar with Filmora, let’s make a slow-motion video. It is quite easy if compared with Android slow-motion video making. Without further delay, delve into the given step-by-step guide:
Step 1Import Your Project After Successful Launch
Unleash your creativity in Filmora after downloading it. In this regard, you must go to Wondershare Filmora’s official site. Open the main interface of Filmora and tap “New Project” to enter the editing window. To start working, import a file in the media panel and drag it into the timeline section.
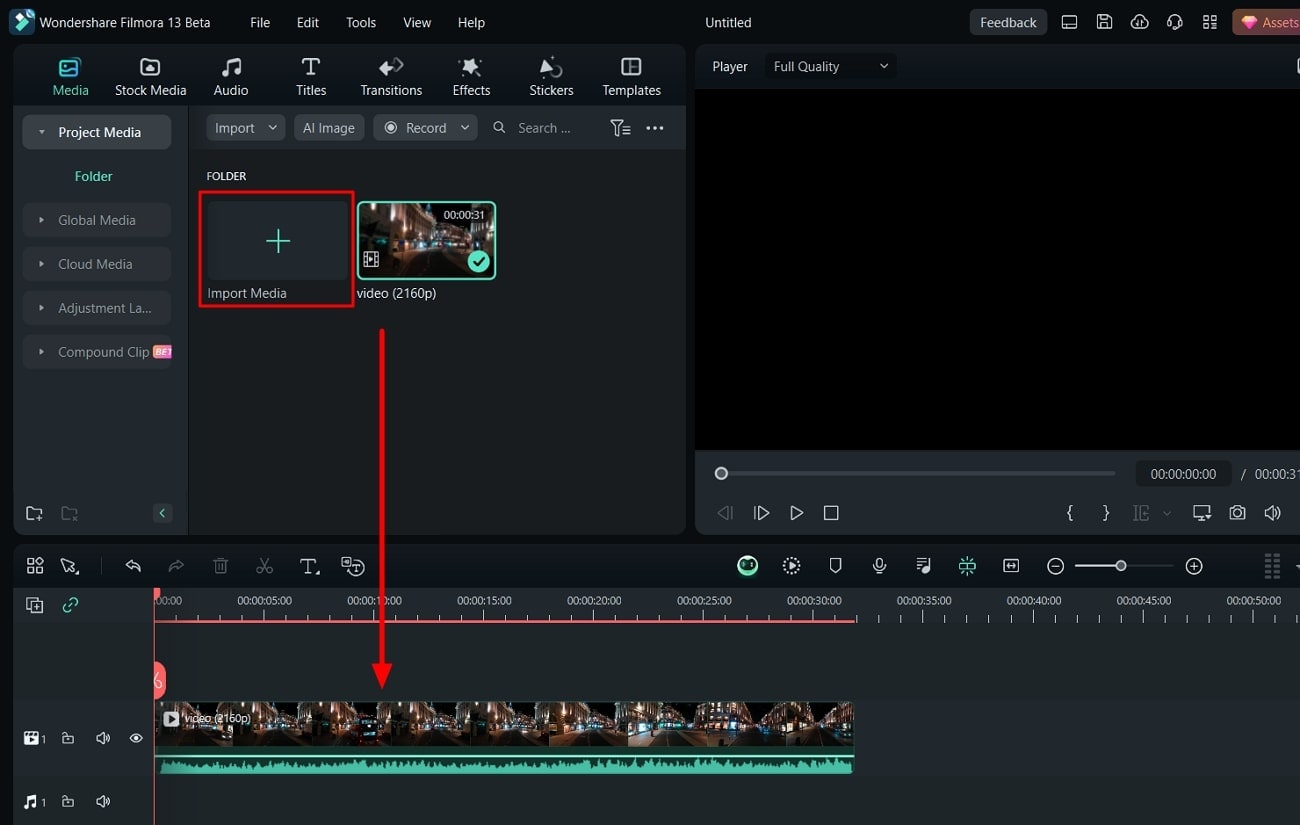
Step 2Slow Down the Video with Uniform Speed
After successful importing, right-click on your video and an extended list. Choose the “Uniform Speed” option from the list and find an editing panel towards your right. You will see the slider under the speed option. Hold on to the circle and drag it to the left if you want to slow down the videos. Move downward and toggle the “Ripple Edit” and “Maintain Pitch” for good results.
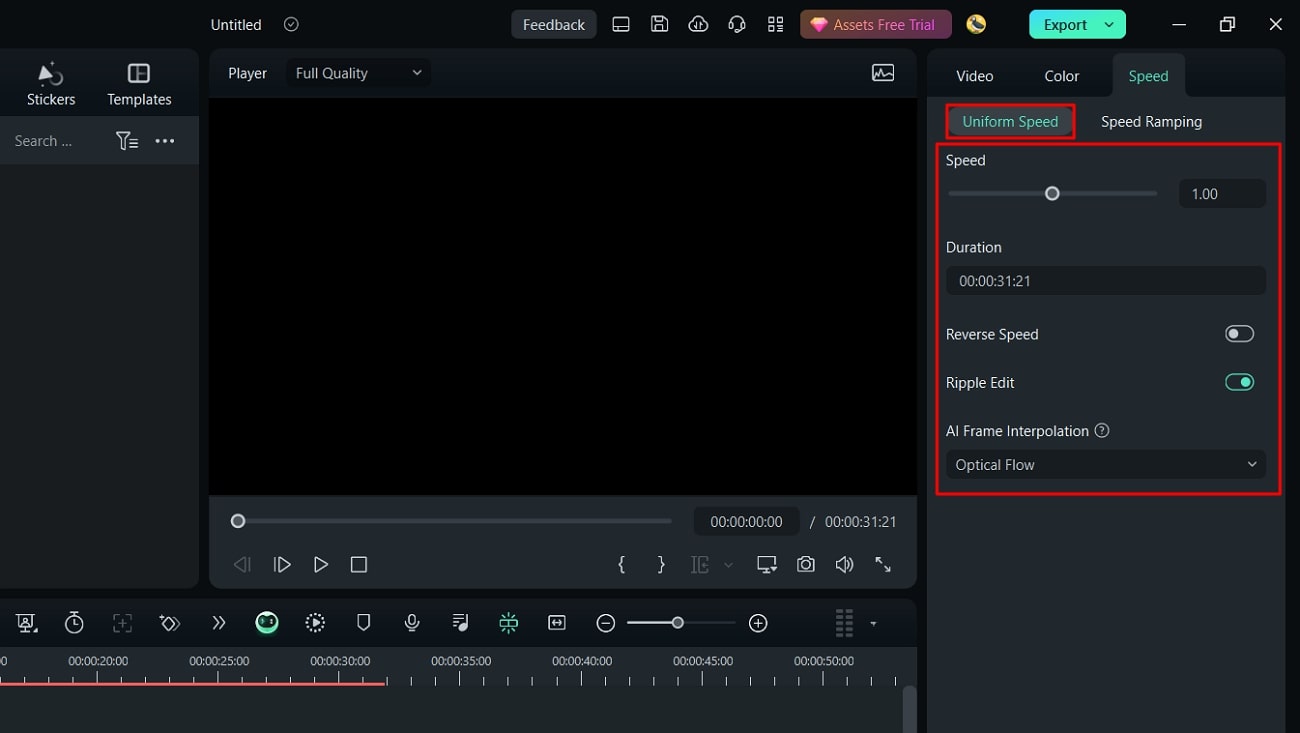
Step 3Enhance Video with Optical Flow
Towards the end, you will find the “AI Frame Interpolation.” Click on its downward symbol and select the “Optical Flow” option from the list. It will automatically boost your video quality. You can choose the “Reverse Speed” option if your video is required.
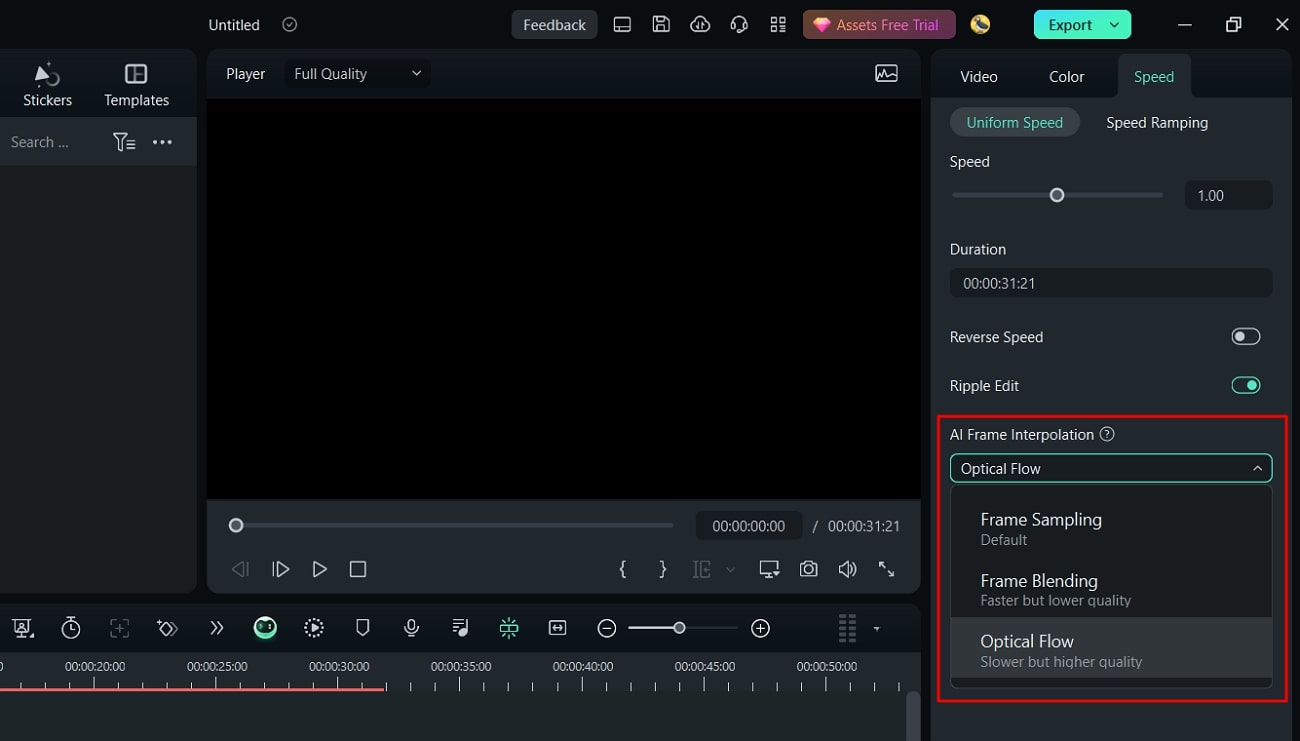
Step 4End Editing and Move to Export
Now, it’s up to you if you want to continue editing with Filmora or want to export the media. To end editing, you can hit the “Export” button from the top right.
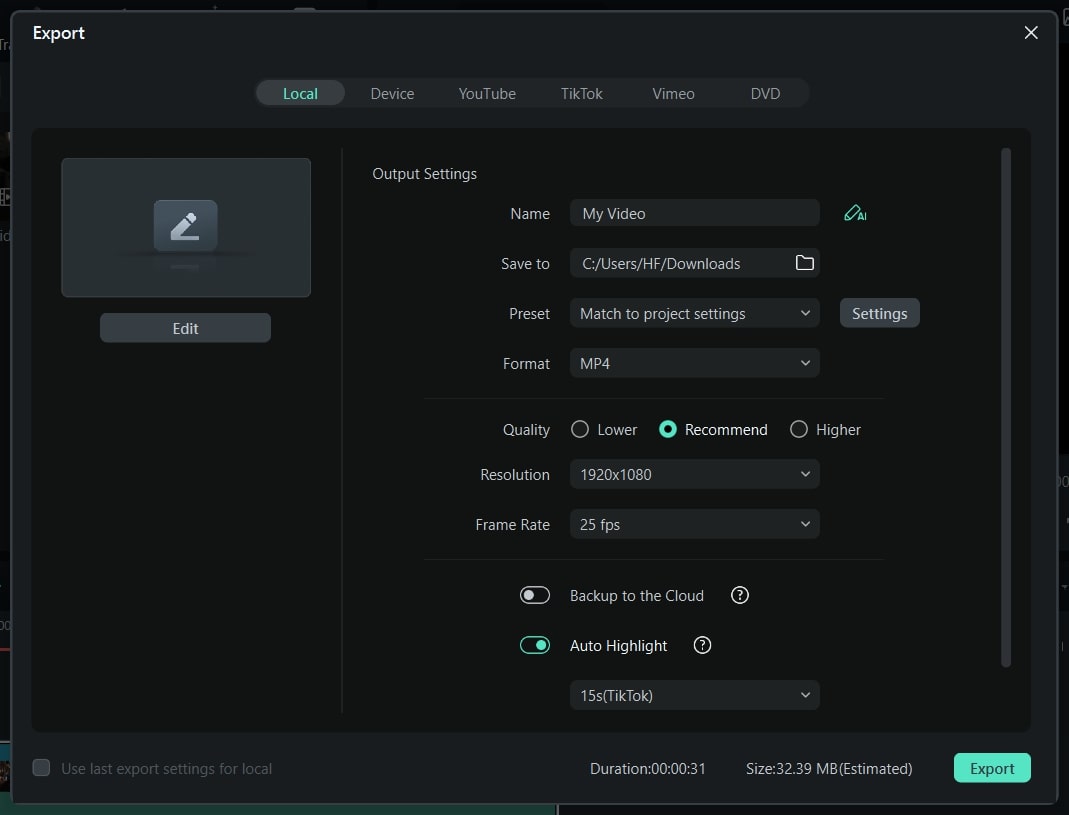
Remarkable Key Functionalities of Filmora
If you want to understand the amazing features of Filmora better, this section is for you. Keep reading and find some integral functionalities of Filmora. This platform offers more than just creating slow-motion video Android:
1. AI Smart Cutout
Artificial intelligence in Filmora can amazingly assist you in making flawless videos. Unlike other tools, Filmora allows you to remove unwanted objects, people, and icons from videos. Besides, users can refine their cutout frame by frame using its’ advanced editing options. You can preview the modified media in four ways, such as Transparency grid and Alpha Mode.
2. AI Audio Stretch
This AI-based feature is new to the market and saves hours of rippling and cutting audio. It aims to match the length of your audio with videos. From Vlog videos to blockbuster audio effects, you can use this feature almost everywhere. This option allows you to re-time your audio tracks after detecting vocals in the music.
3. Speech-to-Text
Video captions make the content accessible to international viewers. That’s where Filmora proves vital in removing language barriers. It supports over 26 languages and adds subtitles to your videos with one click. This built-in feature in Filmora recognizes speech swiftly to guarantee accuracy. You can also export your SRT file of subtitles to make any edits.
4. AI Portrait
Beautify faces in your videos to set a new trend on social media with Filmora. To do so, an AI Portrait feature can automatically detect faces to apply changes. You can choose a sticker effect from more than 70 AI portrait AR stickers. Besides, it can remove video backgrounds by retaining the human beings there.
Conclusion
With all marked details, this article concludes with a note that there are always different calibers of tools that we can work with. While discovering the best Android application in the market, you got to know many slow motion videos on Android. Along with that, we also discussed DemoCreator as a comprehensive solution to the entire use of mobile apps.
Make A Slow Motion Video Make A Slow Motion Video More Features

Part 1. Top 10 Android Apps For Slowing Down Motion in Video
When searching for a slow motion video app for Android, there are many options to go by. Provided next is a composite list of mobile apps that serve the purpose of slow-motion video creation:
- Slow Motion Video – Fast&Slow Mo
- Slow Motion Video Maker
- Video Editor & Maker – InShot
- Video Maker & Editor - Vidma
- VivaVideo - Video Editor&Maker
- VivaVideo - Video Editor&Maker
- VivaVideo - Video Editor&Maker
- VivaVideo - Video Editor&Maker
- VivaVideo - Video Editor&Maker
- VivaVideo - Video Editor&Maker
1. Slow Motion Video – Fast&Slow Mo
This Android slow-motion video converter offers an intuitive user interface and simple functions. Users can craft slow motion via drag and adjust the action of the slider in a downward direction. The video’s playback speed is customizable, ranging from 0.25x to 4.0x. Additionally, the software empowers users to apply slow motion to specific video segments to enhance precision.

Key Features
- The application offers pre-installed filters and special effects to elevate visual aesthetics.
- It preserves video quality and transforms video resolution to high definition (HD).
- Incorporate high-quality music into your videos with its built-in music collection.
2. Slow Motion Video Maker
This slow-mo video Android editor offers advanced functionalities to craft perfect videos. With its timeline editing interface, it simplifies the application of slow-motion effects to specific scenes. The application showcases three distinct slow-motion speed options: 0.5x, 0.3x, and 0.25x, ensuring perfection.

Key Features
- Accelerate your videos up to 4x with its high-speed options and get high-quality results.
- The video trimming feature and timeline editing enable accurate segmentation of a video.
- It is equipped with pre-existing music tracks to create the perfect slow-motion video on Android.
3. Video Editor & Maker - InShot
Embark upon the journey to create video slow motion Android with this multifunctional app. It extends a straightforward approach to slow video speed through slider manipulation. Timeline editing and selective playhead options empower users to adjust the speed of specific segments. This exceeds the conventional approach of a slo-mo creation, unlocking creative possibilities.

Key Features
- Elevate the artistic expression of videos by integrating a wide range of animations and text.
- Enhance your reels with a collection of transition effects like Fade in, Fade out, basics, and more.
- This editor has AI capabilities and background removal options with a heightened level of accuracy.
4. Video Maker & Editor - Vidma
This slow-mo app for Android facilitates individuals seeking a video editor capable of producing convincing results. It acts as a Velocity Edit Maker, offering diverse playback speed and positioning controls. The interface resembles a velocity graph, providing a visual representation of speed adjustments.

Key Features
- Introduces an automated “Keep Audio Pitch” option, ensuring high-quality audio.
- Enhance the creative factor in your images and videos with its built-in text and stickers.
- Comes with a variety of visual filters with an intensity control option.
5. VivaVideo - Video Editor&Maker
If you are seeking the best Slomo app for Android, this editor provides diverse speed-setting presets for creating slow-motion and fast-motion effects. Among presets such as Montage, Hero, Bullet, and others, it offers a Custom preset option to help you adjust everything accordingly. With its ability to apply speed settings at specific periods, your slow motions are bound to be perfect.

Key Features
- The non-uniform timeline editor allows you to incorporate multiple assets at once.
- A range of texts, animations, themes, effects, and music tracks are in its Stock Library.
- This video maker also incorporates a Voice Editor to uphold the audio track’s quality.
6. Smart Video Crop - Video Cut
Although this video maker is specified for resizing videos, it also offers speed change options. To make a video slow motion on Android, you can change both playback speed and framerate. Once you have edited your video, you can make changes to the export options. In addition, the application updates its mechanism and shows compatibility with Android 4.4 and higher versions.

Key Features
- The application shows multi-format video support, i.e., MP4, 3GP, and AVI.
- Proposes multiple video crop options like 1:1, 4:3, 16:9, and 3:2.
- You can select to crop the whole video or apply the crop to a specific part of it.
7. Video Editor - Video.Guru
What would be better than a slow-motion video app for Android that can change speed and enhance video? To access this functionality, users need to switch to its PRO version. The speed change options that it offers are from 0.2x to 100x, with 0.2x being the slowest. In addition, the tool doesn’t decline video quality but enhances it to 4K.

Key Features
- If you are a YouTuber, then this editor affects and filters for Vloggers and offers to remove Watermark.
- You can crop a video into available ratios while keeping its HD quality.
- Can add 30+ video transition effects and incorporate music to enhance their quality.
8. Slow Motion - Slow Mo, Fast Mo
Make video slow motion Android effortlessly with this application, which is specified for speed change. It offers 10 playback speed options for creating slow motions with precision. The playback speed ranges from 0.95x to 0.1x. Once you have created a slow motion with it, you can easily preview it to observe if any changes are needed.

Key Features
- Along with precise slo-mo options, it also offers extensive fast motion option speed ranges.
- You can mix and match both fast and slow-motion effects in a video at once.
- It also offers a watermark removal option to avoid any visual weakening.
9. Slow Motion Video FX-camera
Not only video frame rates but also slow down your speech with this slow-motion app for Android. You can add dramatic or funny effects to your voices using the application. It offers to slow down video speed up to 0.25x. It uses the standard slider approach to manipulate the playback speed of your videos. You can apply the slow-mo effect to the overall video or to some specific parts of it.

Key Features
- An intuitive user interface with a velocity graph to observe the changes in speed and duration.
- Transform your low-quality videos to HD quality with this slow-motion app for Android.
- Use the application’s built-in music library to incorporate music tracks.
10. Slow Motion
Decrease your video speed up to 1/4th of its original speed with this Android slow-motion video editor. The speed options are customizable, and you can apply them to multiple video scenes. As the name indicates, the tool is specifically fashioned for slow-motion effects; hence, it offers an accessible user interface.

Key Features
- Export your videos in landscape or portrait mode; the choice is yours.
- In any mode, the application retains video quality and exports it in full resolution.
- It is excellent to slow down YouTube videos as there is no watermark addition.
Bonus Part: Wondershare Filmora: A Perfect Desktop Solution To Slow Down Video
Making slow motion videos in Android is like keeping creativity in your hand anywhere. This facility is good for basic effects but not for professional and advanced slow-motion effects. That’s where you need to shift to a more equipped alternative, which is Wondershare Filmora . Using Filmora means turning imagination into the real picture.
It is a video editing platform with artificial intelligence integration. You can create slow-motion videos with automation in Filmora. The interactive interface of Filmora caters to all users’ needs in simple steps. Freelancers, content creators, and educationists use this platform for diverse needs.
Free Download For Win 7 or later(64-bit)
Free Download For macOS 10.14 or later
How to Make Video Slow Motion Android in Filmora
As you are familiar with Filmora, let’s make a slow-motion video. It is quite easy if compared with Android slow-motion video making. Without further delay, delve into the given step-by-step guide:
Step 1Import Your Project After Successful Launch
Unleash your creativity in Filmora after downloading it. In this regard, you must go to Wondershare Filmora’s official site. Open the main interface of Filmora and tap “New Project” to enter the editing window. To start working, import a file in the media panel and drag it into the timeline section.

Step 2Slow Down the Video with Uniform Speed
After successful importing, right-click on your video and an extended list. Choose the “Uniform Speed” option from the list and find an editing panel towards your right. You will see the slider under the speed option. Hold on to the circle and drag it to the left if you want to slow down the videos. Move downward and toggle the “Ripple Edit” and “Maintain Pitch” for good results.

Step 3Enhance Video with Optical Flow
Towards the end, you will find the “AI Frame Interpolation.” Click on its downward symbol and select the “Optical Flow” option from the list. It will automatically boost your video quality. You can choose the “Reverse Speed” option if your video is required.

Step 4End Editing and Move to Export
Now, it’s up to you if you want to continue editing with Filmora or want to export the media. To end editing, you can hit the “Export” button from the top right.

Remarkable Key Functionalities of Filmora
If you want to understand the amazing features of Filmora better, this section is for you. Keep reading and find some integral functionalities of Filmora. This platform offers more than just creating slow-motion video Android:
1. AI Smart Cutout
Artificial intelligence in Filmora can amazingly assist you in making flawless videos. Unlike other tools, Filmora allows you to remove unwanted objects, people, and icons from videos. Besides, users can refine their cutout frame by frame using its’ advanced editing options. You can preview the modified media in four ways, such as Transparency grid and Alpha Mode.
2. AI Audio Stretch
This AI-based feature is new to the market and saves hours of rippling and cutting audio. It aims to match the length of your audio with videos. From Vlog videos to blockbuster audio effects, you can use this feature almost everywhere. This option allows you to re-time your audio tracks after detecting vocals in the music.
3. Speech-to-Text
Video captions make the content accessible to international viewers. That’s where Filmora proves vital in removing language barriers. It supports over 26 languages and adds subtitles to your videos with one click. This built-in feature in Filmora recognizes speech swiftly to guarantee accuracy. You can also export your SRT file of subtitles to make any edits.
4. AI Portrait
Beautify faces in your videos to set a new trend on social media with Filmora. To do so, an AI Portrait feature can automatically detect faces to apply changes. You can choose a sticker effect from more than 70 AI portrait AR stickers. Besides, it can remove video backgrounds by retaining the human beings there.
Conclusion
With all marked details, this article concludes with a note that there are always different calibers of tools that we can work with. While discovering the best Android application in the market, you got to know many slow motion videos on Android. Along with that, we also discussed DemoCreator as a comprehensive solution to the entire use of mobile apps.
How To Use Virtual Green Screen to Shoot Video
We have seen video creators on YouTube using green screen effects to beautify their background to make the video look professional and eye-catching. The same is applicable for gamers who live stream their gameplay on Twitch. Instead of physically hanging green screens in the background, some video creators opt for virtual green screens. Yes, it is possible to shoot videos with a virtual green background, and you do not have to buy screen greens and deal with the problem of hanging them in the background.
The concept of using virtual greenscreen is rather new, but it is getting popular among amateur video creators who do not want to invest in purchasing green screens initially. When you use a virtual background to shoot your video, the actual physical background is replaced completely with a virtual green background. Thereafter, you have to replace this virtual background with anything by using a video editor. In this article, we will illustrate how to use a virtual green screen to shoot video.
1. Free Virtual Green Screen
In order to shoot a video with green virtual background, you cannot shoot your video with your regular camera app. Otherwise, your physical background will get recorded, and replacing that through video editor is going to be time-consuming. Therefore, there are specific apps available through which you have to shoot your video so that your physical background gets completely replaced by virtual greenscreen in real-time.
Snap Camera from Snapchat is a free app through which you can shoot your video to get a virtual green background. The app comes with a Green Screen filter that makes this virtual background effect possible. However, you will need a camera recording app that can record your video with green screen effects from Snap Camera. We will be using OBS Studio for recording the video which is also available for free. Snap Camera is compatible with Windows 10 and Mac 10.11+, and hence, you can use it to shoot video from your computer webcam. Here are the steps to follow –
Step 1: Download and install Snap Camera app on your computer.
Step 2: Set up your webcam perfectly so that its angle is direct to your face.
Step 3: Open Snap Camera app and you will see yourself on the app through your webcam. Select the appropriate Lens(filter) and you have to select Green Screen Snap Filter.

Step 4: You should see a green virtual background by now. Now, you have to launch OBS Studio (webcam recording software).
Step 5: Go to Sources and click on “+” icon and select Video Capture Device option.

Step 6: While configuration the new device, select Snap Camera as Device. This will enable green screen virtual backgrounds and you can start recording. After recording is done, save the file on your hard drive.

Now that you have recorded the video with green virtual background without green screen, it is time to edit the virtual greenscreen out with the video editor.
2. Best Way To Apply Green Screen Effect To Your Recorded Video
The best video editor to add green effect to your recorded video with virtual green screen is Wondershare Filmora. There are loads of video editors available with green screen feature but Filmora has the simplest steps to add green screen effects. That is why you do not have to be an expert video editor to add green screen effects to your video.
Apart from green screen effects, you can enhance the video quality by adjusting different parameters and adding other video effects to make the video interesting. Here are the steps to follow to add green screen effects to the recorded video with green virtual background.
For Win 7 or later (64-bit)
For macOS 10.12 or later
Step 1: Download and install Wondershare Filmora. Launch the video editor and select Create New Project option to get started.
Step 2: Import the recorded video with virtual green screen and drag it onto the Timeline.
Step 3: Get the stunning photo or video effect with which you want to replace the virtual background without green screen in the recorded video. Put it directly on the Timeline.
Please note that your recorded green screen video is above the replacement video on the Timeline.

Step 4: Double-click on the recorded video and you will see a panel on the upper-left side. From that panel, turn on Chroma Key option. We have already stated that green screen effect is technically referred to as Chroma Key.
Now you will the superimposed version of the replacement video effect on the green screen background of your recorded video.

Step 5: You can adjust several parameters available to fine tune the green screen effect. When you are done, click on Ok button.
Conclusion
You can now have virtual background without green screen purchase on your video. All you need is a proper application to replace your physical background with a virtual green screen and record the entire video. We have recommended free Snap Camera app and OBS Studio for this job. Then you need to edit the green screen virtual backgrounds with a video editor for which we have recommended Wondershare Filmora.
For macOS 10.12 or later
Step 1: Download and install Wondershare Filmora. Launch the video editor and select Create New Project option to get started.
Step 2: Import the recorded video with virtual green screen and drag it onto the Timeline.
Step 3: Get the stunning photo or video effect with which you want to replace the virtual background without green screen in the recorded video. Put it directly on the Timeline.
Please note that your recorded green screen video is above the replacement video on the Timeline.

Step 4: Double-click on the recorded video and you will see a panel on the upper-left side. From that panel, turn on Chroma Key option. We have already stated that green screen effect is technically referred to as Chroma Key.
Now you will the superimposed version of the replacement video effect on the green screen background of your recorded video.

Step 5: You can adjust several parameters available to fine tune the green screen effect. When you are done, click on Ok button.
Conclusion
You can now have virtual background without green screen purchase on your video. All you need is a proper application to replace your physical background with a virtual green screen and record the entire video. We have recommended free Snap Camera app and OBS Studio for this job. Then you need to edit the green screen virtual backgrounds with a video editor for which we have recommended Wondershare Filmora.
For macOS 10.12 or later
Step 1: Download and install Wondershare Filmora. Launch the video editor and select Create New Project option to get started.
Step 2: Import the recorded video with virtual green screen and drag it onto the Timeline.
Step 3: Get the stunning photo or video effect with which you want to replace the virtual background without green screen in the recorded video. Put it directly on the Timeline.
Please note that your recorded green screen video is above the replacement video on the Timeline.

Step 4: Double-click on the recorded video and you will see a panel on the upper-left side. From that panel, turn on Chroma Key option. We have already stated that green screen effect is technically referred to as Chroma Key.
Now you will the superimposed version of the replacement video effect on the green screen background of your recorded video.

Step 5: You can adjust several parameters available to fine tune the green screen effect. When you are done, click on Ok button.
Conclusion
You can now have virtual background without green screen purchase on your video. All you need is a proper application to replace your physical background with a virtual green screen and record the entire video. We have recommended free Snap Camera app and OBS Studio for this job. Then you need to edit the green screen virtual backgrounds with a video editor for which we have recommended Wondershare Filmora.
For macOS 10.12 or later
Step 1: Download and install Wondershare Filmora. Launch the video editor and select Create New Project option to get started.
Step 2: Import the recorded video with virtual green screen and drag it onto the Timeline.
Step 3: Get the stunning photo or video effect with which you want to replace the virtual background without green screen in the recorded video. Put it directly on the Timeline.
Please note that your recorded green screen video is above the replacement video on the Timeline.

Step 4: Double-click on the recorded video and you will see a panel on the upper-left side. From that panel, turn on Chroma Key option. We have already stated that green screen effect is technically referred to as Chroma Key.
Now you will the superimposed version of the replacement video effect on the green screen background of your recorded video.

Step 5: You can adjust several parameters available to fine tune the green screen effect. When you are done, click on Ok button.
Conclusion
You can now have virtual background without green screen purchase on your video. All you need is a proper application to replace your physical background with a virtual green screen and record the entire video. We have recommended free Snap Camera app and OBS Studio for this job. Then you need to edit the green screen virtual backgrounds with a video editor for which we have recommended Wondershare Filmora.
Also read:
- Updated 2024 Approved Adobe Premiere Pro Download and Use Guide In Depth
- In 2024, Why Your Transparent GIF Is Hard to Remove and How to Do With It
- New Detailed Tutorial to Rotate a Video in Cyberlink PowerDirector for 2024
- Updated In 2024, Guide to Making Cinematography for Music Video
- In 2024, How to Get VHS Filter and Glitch Filter to Your Images or Videos?
- New In 2024, Add Text Animation to A Video Online
- In 2024, Let Us Talk About the Famous Photoshop and Most Commonly Used Glitch Effect. The Article Understudy Will Discuss in Detail About Photo Glitch Effect
- New How To Change Text In Premiere Pro
- Updated Discover How You Can Use Vectorscope to Adjust Luminance, Color Grading, and More in Your Video Editing Projects
- New Are You Looking for a Voice Changer to Make Your Gaming Experience More Fun? Here Is a List of the Top 6 Best Alternatives of Clownfish Voice Changers to Use
- Want to Learn How to Trim Videos in Premiere Pro. Read on; Our Guide Will Help You Trim Videos with This Timeline-Based Video Editing Software Application to Make Them Engaging to Viewers for 2024
- 2024 Approved This Article Aim to Teach You How to Make a Night to Day Effect Video with Filmora. Follow the Steps to Figure It Out
- 3 In-Camera Transitions Tricks To Make Videos
- New In 2024, How to Slow Down Time-Lapse Videos on iPhone
- New Ideas That Help You Out in Converting AVI to GIF
- Updated VN Editor A Prominent Option for Adding Luts for Video Editing for 2024
- Updated Adobe After Effects Review
- How to Put a Background on A Green Screen
- 2024 Approved Unlocking the Power of DaVinci Resolve Scopes Enhance Your Color Grad
- New In 2024, How to Create a Makeup Video
- Top 20 Slideshow Makers for Win/Mac/Online Review for 2024
- Updated Detailed Tutorial to Merge Videos in VLC Media Player for 2024
- Having GoPro Accessories Is Easy, but Editing on GoPro Quik Is Challenging. Read This Guide and, Stepwise, Learn to Use GoPro Slow-Motion for Perfect Shots
- 11 Ways to Fix it When My Realme Narzo N55 Wont Charge | Dr.fone
- In 2024, How to Bypass FRP from Samsung?
- Quick Fixes to Repair Microsoft Excel 2013 Content related error | Stellar
- How to Exit Android Factory Mode On Nokia C22? | Dr.fone
- How To Get Out of Recovery or DFU Mode on Apple iPhone SE (2020)? | Dr.fone
- Complete Guide to Hard Reset Your Xiaomi Civi 3 | Dr.fone
- A Detailed Guide on Faking Your Location in Mozilla Firefox On OnePlus Nord 3 5G | Dr.fone
- In 2024, Does Life360 Notify When You Log Out On Nubia Z50S Pro? | Dr.fone
- Fix App Not Available in Your Country Play Store Problem on Vivo V30 Lite 5G | Dr.fone
- Top 6 Apps/Services to Trace Any Apple iPhone XS Location By Mobile Number | Dr.fone
- How to use Pokemon Go Joystick on OnePlus Ace 3? | Dr.fone
- How to Remove a Previously Synced Google Account from Your Infinix
- Hacks to do pokemon go trainer battles For Samsung Galaxy F14 5G | Dr.fone
- In 2024, Top 12 Prominent Poco F5 5G Fingerprint Not Working Solutions
- In 2024, Complete Tutorial to Use VPNa to Fake GPS Location On Apple iPhone SE (2020) | Dr.fone
- How to Unlock Itel P40+ Phone Pattern Lock without Factory Reset
- Easy steps to recover deleted messages from Motorola Moto G73 5G
- In 2024, The Best iSpoofer Alternative to Try On OnePlus Nord 3 5G | Dr.fone
- In 2024, The Complete Guide to Xiaomi Redmi Note 12 5G FRP Bypass Everything You Need to Know
- In 2024, How to Change your Vivo S17 Pro Location on Twitter | Dr.fone
- Title: In 2024, 11 Best Video Editing Apps for iPhone
- Author: Chloe
- Created at : 2024-05-20 03:37:39
- Updated at : 2024-05-21 03:37:39
- Link: https://ai-editing-video.techidaily.com/in-2024-11-best-video-editing-apps-for-iphone/
- License: This work is licensed under CC BY-NC-SA 4.0.

