
:max_bytes(150000):strip_icc():format(webp)/ArtificialIntelligence-Chatbot-6921166a1d9e447eb0251f52694d919a.jpg)
In 2024, 15 Best Free MP4 Video Rotators Windows,Mac, Android, iPhone & Online
15 Best Free MP4 Video Rotators [Windows,Mac, Android, iPhone & Online
Have you ever encountered a problem where you saved a video in the wrong orientation? So you ask yourself what’s the best tool to rotate. There are tools that help to flip videos recorded so that you don’t get frustrated while you watch them later on your pc or phone. So why don’t you take a look at the best video rotators that are available for Android, iOs, Windows, Mac, and online tools?
Best MP4 Video Rotators to Rotate MP4 Video on Windows and Mac - Filmroa Video Editor
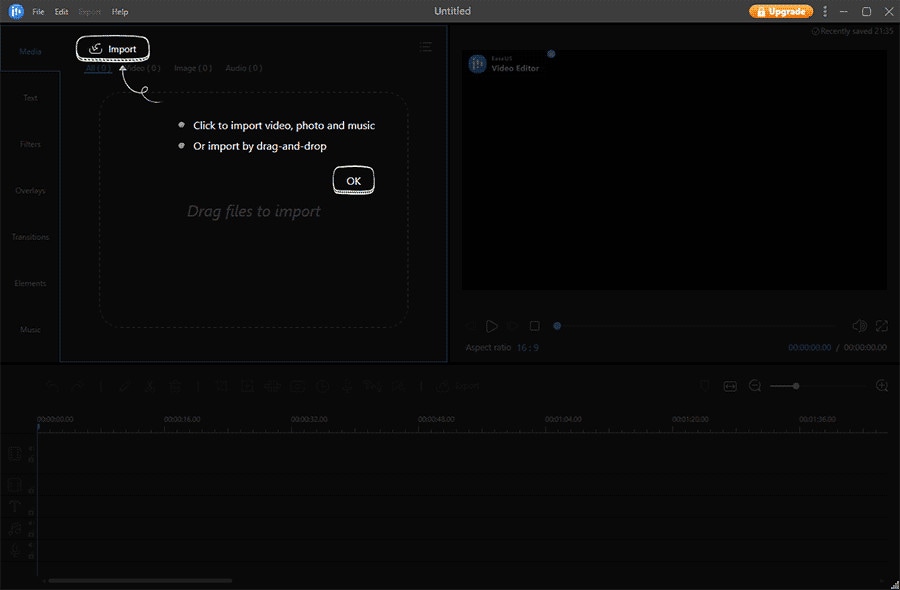
Filmora Video Editor allows you to rotate your video to any angle. You can also zoom in and crop out the parts of the video that you don’t want to see. It also includes predefined aspect ratios such as 16:9, 9:16, 4:5, 1:1, and others to help you quickly discover the ideal aspect ratio for YouTube, Instagram, and other sites. Let’s look at how to modify the orientation of a video in Filmora.
For Win 7 or later (64-bit)
For macOS 10.14 or later
How to change the video orientation in Filmora
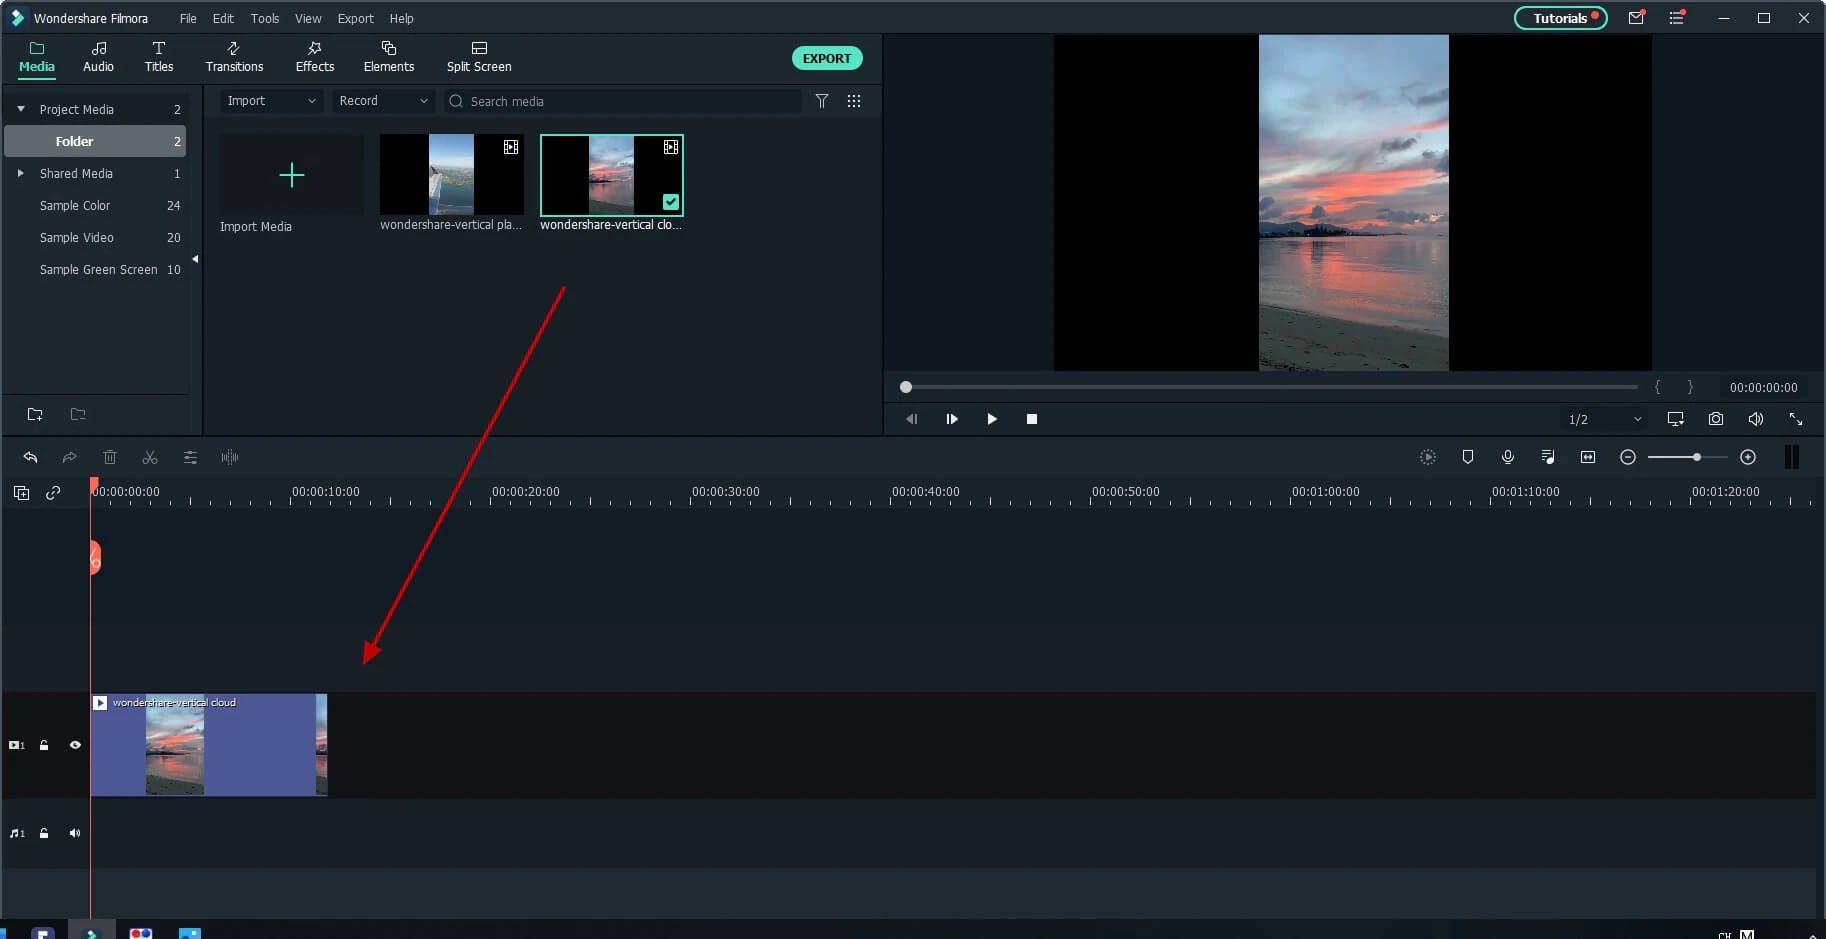
Step 1:Import the video file into Filmora, and then drag it to the timeline.
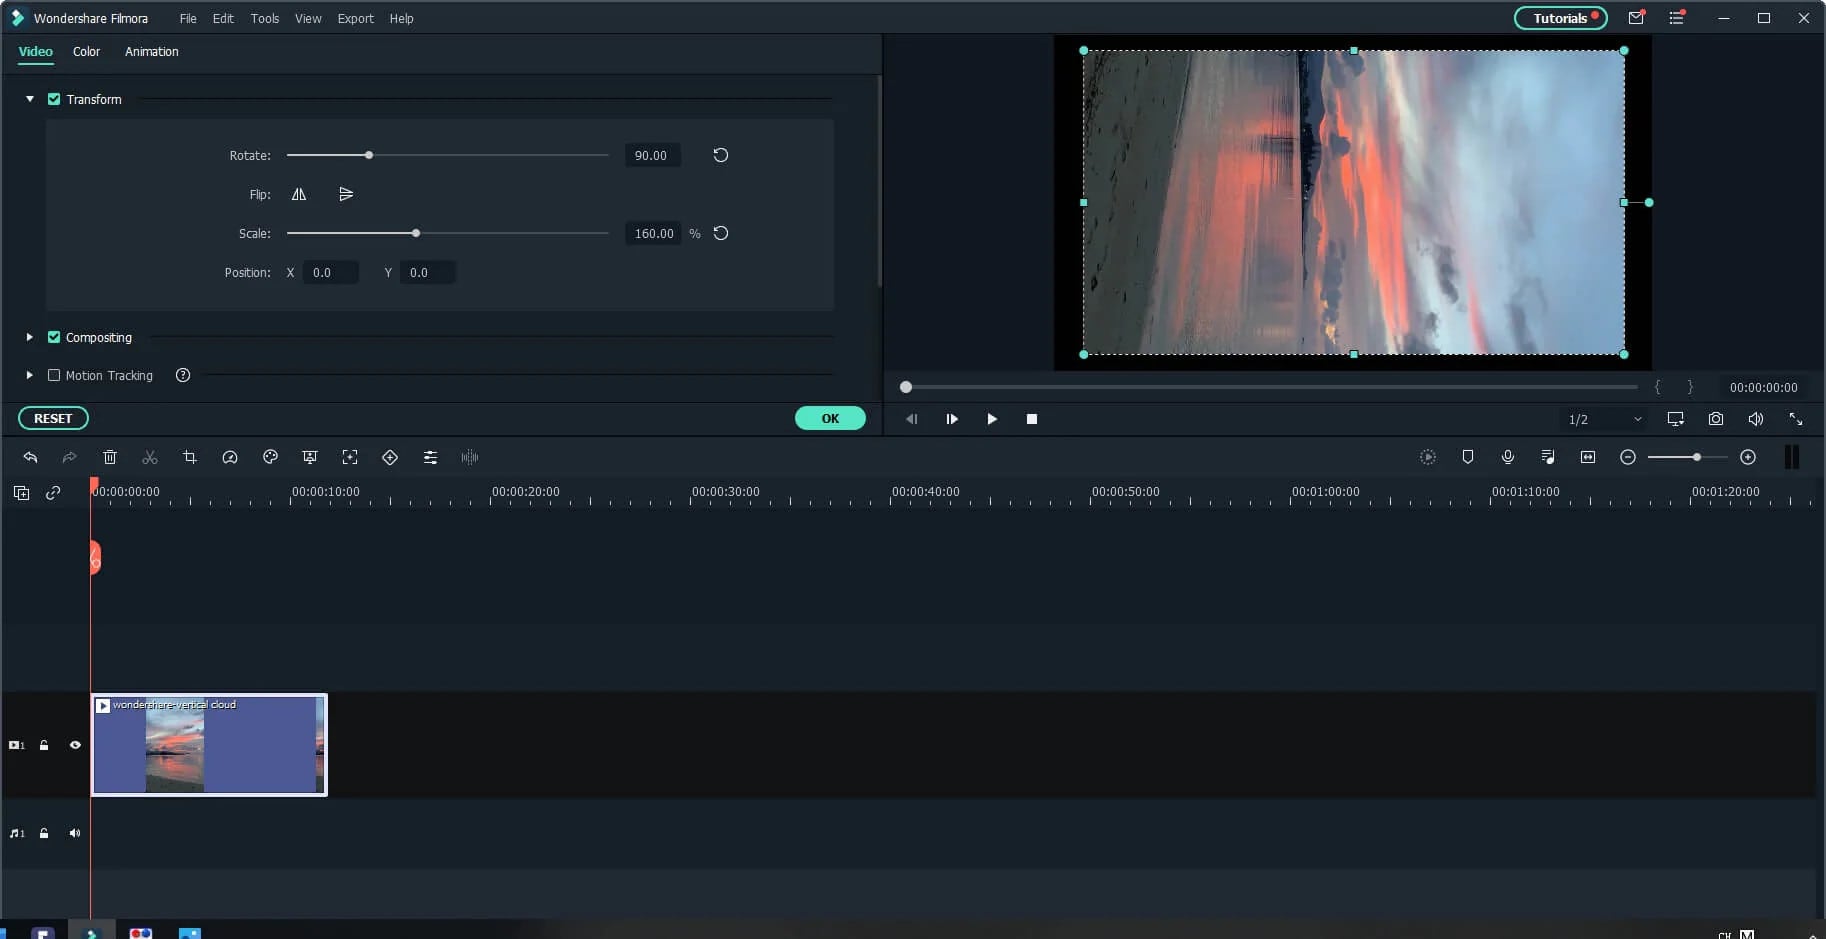
Step 2: To enter the video editing panel, double-click the video clip in the timeline. Locate the “Rotate” option under the “Transform” menu. You can drag the slider or enter a specific number to adjust the rotation value. You can rotate up to 360 degrees. When you enter “90” in the box, the video clip will be rotated 90 degrees.
By dragging the “Scale” slider, you can make the full image screen, or you can directly adjust its position, size, shape, etc., in the Viewer panel.
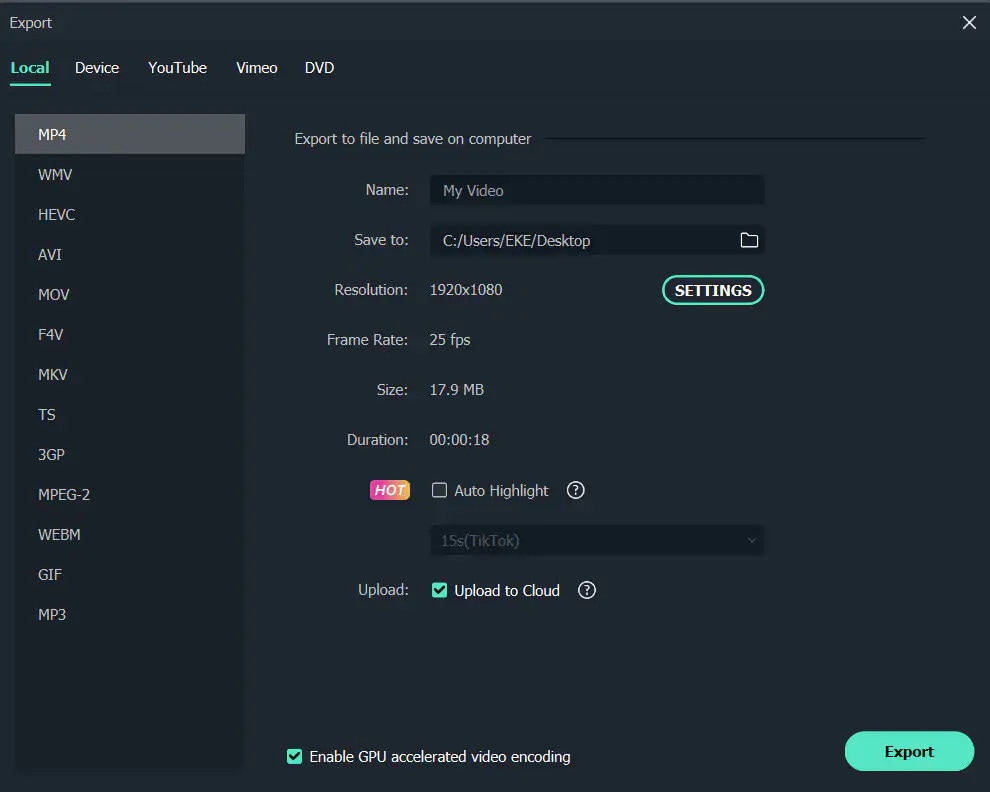
Step 3: After you are satisfied, click the export button. You can change the format here, or you can upload the file to YouTube.
Top 3 Free MP4 Video Rotators on Windows
Looking for the best free video rotator?
If you are looking for a free video rotator for windows, then this article has got you covered. A list of the top 3 free video rotators for windows has been listed.
- VSDC Free Video Editor

It is a highly functional video editing suite with easy controls. It provides anyone who is a beginner to easily access and edit the video easily.
It helps you rotate the videos in increments of 90 degrees, be it clockwise or anticlockwise )
VSDC is a free video editor with non-linear editing capabilities. Users may swiftly convert video and audio files from one format to another with VSDC. A built-in disk burning tool for DVDs is also included in the software. This free program, designed for educational purposes, can be used by businesses or individuals.
VSDC Free Video Editor features
- Built-In DVD Burning Tool
- Colour Blending And Filters
- Specific Multimedia Devices Creation
- Desktop Video Capture
- Export To Social Networking Sites
- Masking
- Non-Linear Video Editing
- Subpixel Accuracy
- Supports Popular Formats
- Video File Converter
Pros
- It’s completely free.
- There is no watermark.
- There are numerous free video editing programs available.
- Support a wide range of file formats
Cons
There isn’t a macOS version available.
Take a severe learning curve into consideration.
There are numerous premium-only features.
The timeline isn’t the same as most NLE editing software.
- Windows Movie Maker
The most well-known video rotator and editor are probably Windows Movie Maker. Most of us who grew up with Microsoft’s various operating systems have had access to it because it comes as a free download with most Microsoft products. It can handle a wide range of files and is generally simple to use. Adding features like sound, music, special effects, or even speeding up the video is simple, and you’ll love the variety of skins available.
For beginners, Windows Video Maker is ideal. It is available for free on Windows PCs and includes basic capabilities and workflow aspects found in professional video editing systems. Its user-friendly interface resembles a simplified version of a video editor timeline and is simple enough for even inexperienced editors to understand.
Features of Windows Movie Maker
- Customization Tool’s title
- Auto Movie Options
- Credit Customization Tool
- Special Effects Options
- Overlays for Transitions
Pros:
- Various video editing functions;
- A variety of output possibilities
Cons:
- Many different versions of the same product;
- No longer included in the Windows operating system.
3.EaseUS Video Editor
EaseUS Video Editor is one of the few most popular video rotators we have today. Its video editing provides tools that can change the video orientation by 90 degrees anticlockwise and clockwise, which can flip vertically and horizontally.
In terms of videos, adding great filters, sound, music, subtitles and other elements to have a great video output can be achieved using the EaseUS. Moreover, it accepts video formats and can convert files to MP4 and other great features.
Features of EaseUS Video Editor
- Can easily trim, cut, split, merge, rotate, and mix video clips.
- Ability to apply stylish video effects
- Can add or remove the watermark and reduce background or wind noise from a video.
Pros:
- User-friendly interface, perfect for beginners
- Easily trim, cut, split, merge, rotate, mix video clips
- A full range of free visual and audio effects
- Change of contrast, exposure, brightness, and other video aspects
- Use the voiceover function to add your comments to the video
Cons:
- The software has no version for macOS
Top 3 Free MP4 Video Rotators on Mac
- iMovie
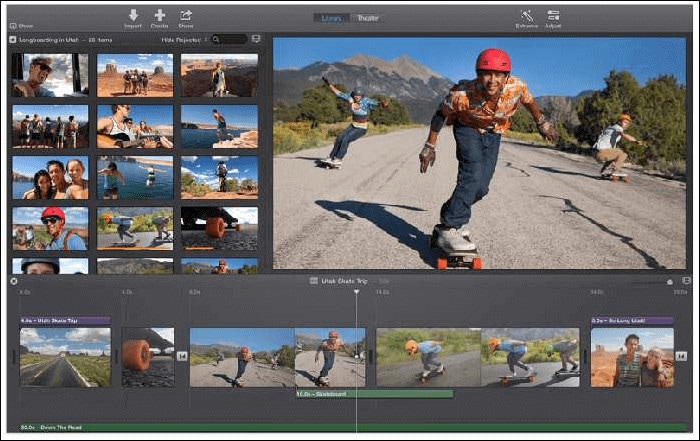
The iMovie for Mac users is an exceptional video rotator. You can turn any video or movie you may have into an amazing masterpiece with more features due to the special after-effects it has. Simple application to use and navigate easily, although when importing video takes a while at certain times.
Features of the iMovie include
- Full range of options to modify
- Ability to enhance colour settings
- Easily crop and edit video clips ease
- Ability to change the speed of clips.
Pros:
- Nice interface;
- The function is to create fun Movie Trailers.
Cons:
- Supports only a few video formats;
- Pre-processing and import trans-coding can be time-consuming.
- Movavi Video Editor
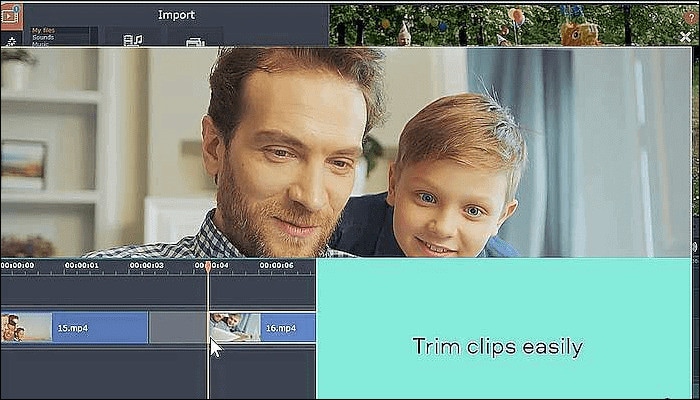
Movavi has a free version that is easy to use, especially for beginners. It allows you to add titles, filters, transitions, and special effects to your videos and photographs to make attractive movies. You can use the animation to smoothly move things around the screen in your film. On the multi-track timeline, you can add as many tracks as you wish. From the expanded built-in collection, you can get more example video clips, stickers, and audio tracks.
Features of Movavi Video Editor
- You can upload files and photographs in almost any format.
- To make videos automatically, use the Montage Wizard.
- Transition Wizard allows you to quickly put together slideshows.
- Enhance image quality by cutting, cropping, and rotating videos on the timeline.
- Apply artistic filters, and make transitions between portions as smooth as possible.
- Create animated headlines, stickers, callouts, and video overlays:
Pros:
- It’s appropriate for newcomers and casual users alike.
- A number of video formats are supported, including.mov (QuickTime)
- Chroma Key and Slow Motion are examples of special effects.
Cons
- Only the premium version supports the advanced features.
- It uses the basic colour grading tool
- QuickTime Player
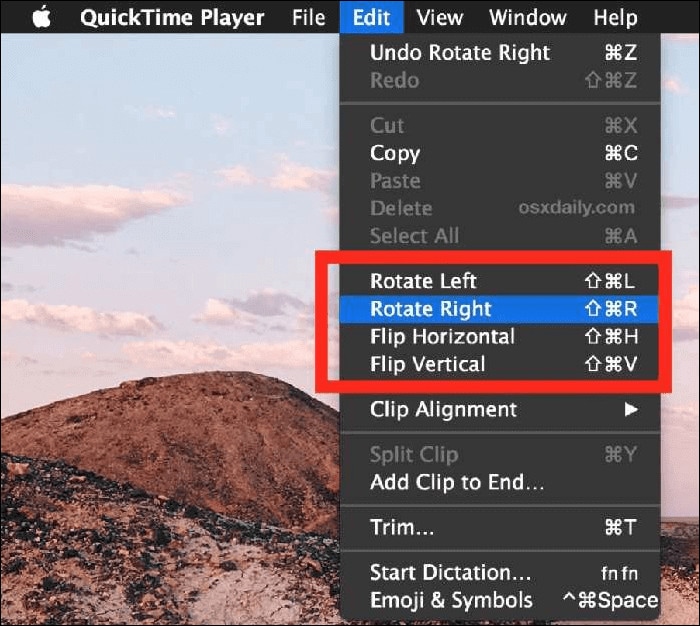
The key advantage of Apple’s QuickTime is that it comes pre-installed on your Mac’s macOS operating system. It’s powerful enough to rotate your clip, yet it’s simple enough for beginners to do. iTunes files can be played and edited with QuickTime. After rotation, it exports a new video file, leaving the old clip on the Mac. The output video will be compressed slightly, resulting in a smaller rotational video file than the original.
Features of QuickTime Player
- Anything can be recorded, including video, audio, and the screen.
- Cropping, audio detachment, combining, and rotation are all simple video editing techniques.
- From 4K to 480p video compression
- Quickly share your video: directly upload videos to YouTube
Pros:
- With macOS, it comes pre-installed.
- Work with iTunes files Streaming video player with no configuration
Cons:
- Only QuickTime Pro 7 unlocks the editing feature.
- There will be no more Windows versions.
- It isn’t compatible with standard subtitle files.
Top 3 Free MP4 Video Rotators on Android
When we use a smartphone to capture a video or download one from a website, we occasionally discover that the video has been inverted. As a result, we’ll require a video rotator app to correct the problem. On the market, there are many different sorts of tools for various platforms. However, you may have discovered that separating the wheat from the chaff can be difficult at times. To save you time, I’ve compiled a list of 3 video rotator applications for Android
- VivaVideo
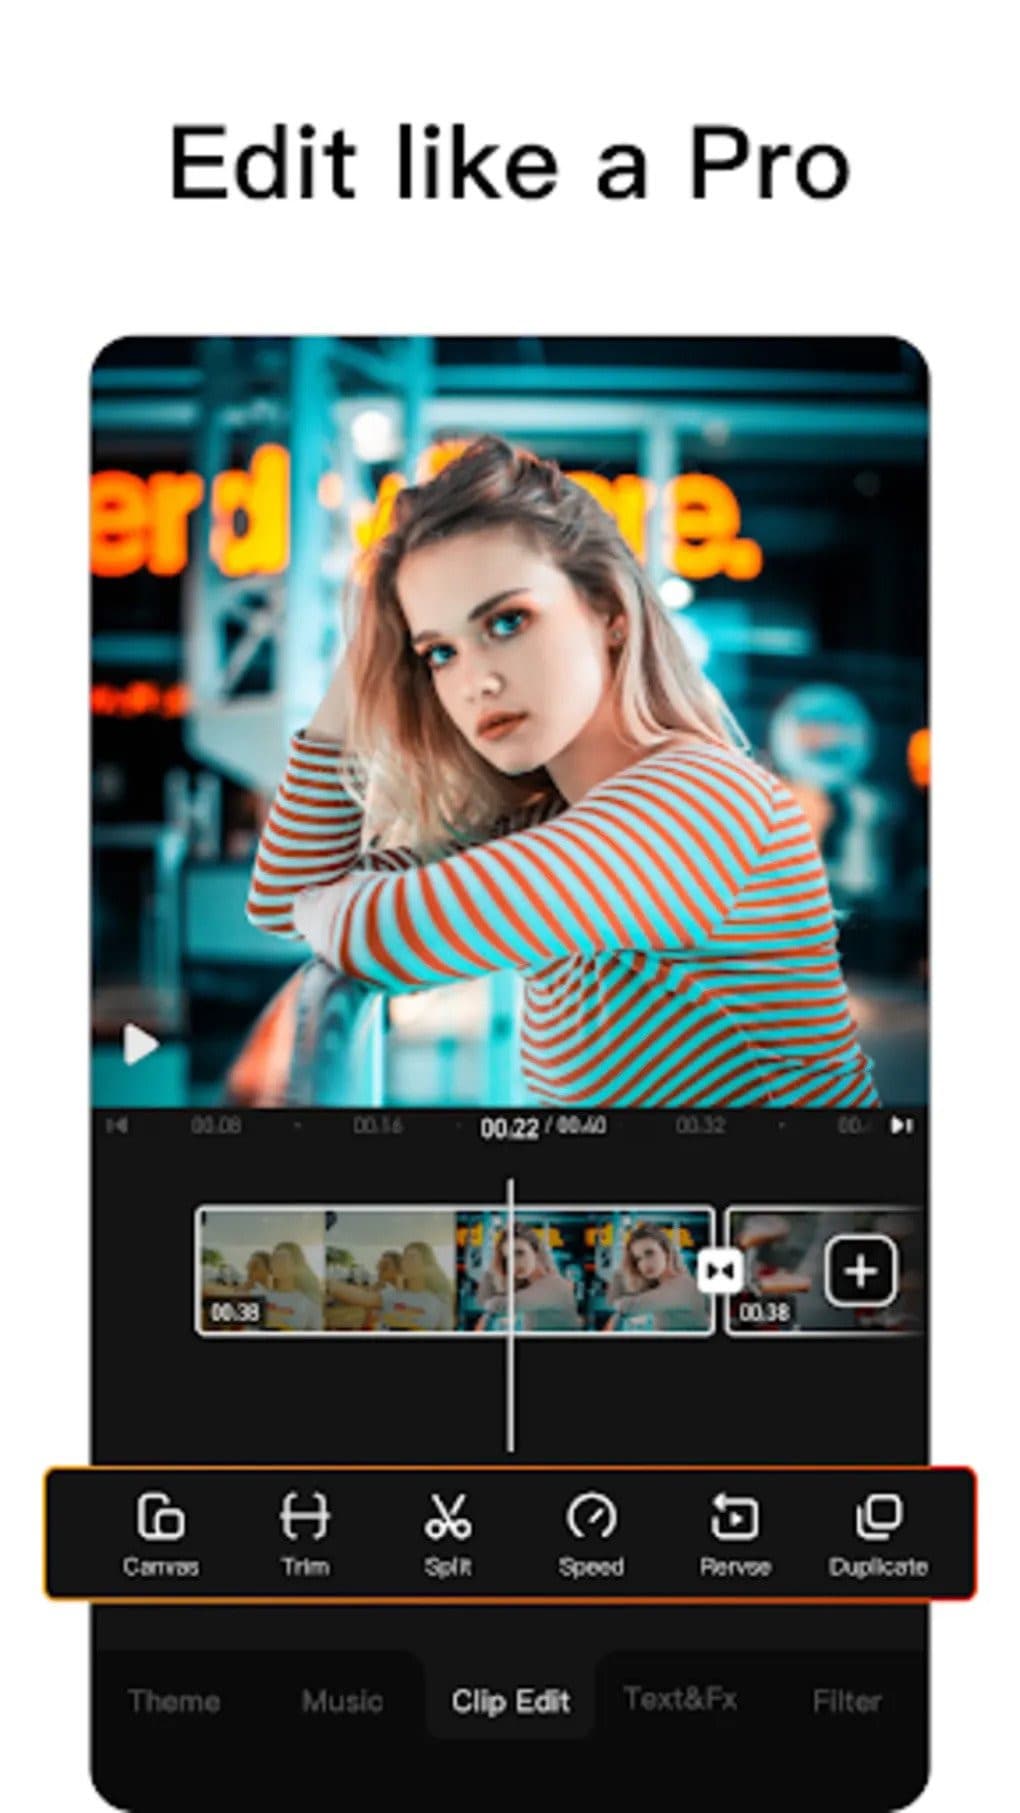
VivaVideo is one of the top movie producers and free video rotators for Android devices as a media editor. This application allows you to alter the orientation of your videos. Aside from rotating videos, this software also includes cropping, combining, cutting, and other editing features. “The best video editor software is VivaVideo - Video Maker App,” an Android expert previously said. This program is a video producer as well as an editor.
Features of VivaVideo
- It allows you to add music to videos.
- Combine videos clips into one video
- Can apply video effects.
- After you’ve finished editing your videos, you may save and share them on YouTube and TikTok! To rotate video, use this program!
Pros
- It has an In-app camera with live effects previews for capturing videos.
- More than 60 effects to choose from with additional downloadable effects.
- Enhance the videos using themes.
- Ability to Merge videos and create montages with storyboarding features
- Edit frames within a video
Cons
- There is no negative review to say about this app
2.Google Photos
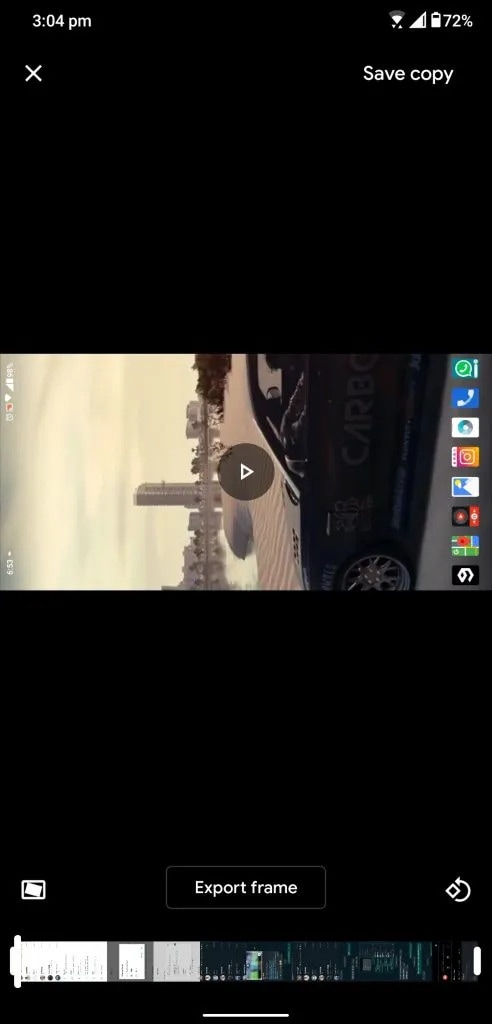
This app may already be installed on your smartphone, but you are unaware of its full potential. This program includes a built-in picture and video editor in addition to backing up your photos. This program includes three essential video editing tools that are extremely basic and easy to use.
The first is to stabilize the video; if your video is unsteady, you can use this option in Google Photos to stabilize it. You may also use the timeline below the video to cut the video. If you mistakenly captured the video in the wrong orientation, there is a tool to rotate it.
Features of Google Photos
- You can modify photographs and videos in Google Photos.
- On Google Photos, make a collage or a movie.
- Recover photos or videos that were recently erased.
- Clear off some space on Google Photos…
- Place photos in the Archive.
Pros
Google Images automatically backs up all of your device’s photos and videos.
Despite its many advantages, the reason I choose Google Photos is that it helps me save space on my smartphone.
The original quality of images stored in Google Photos is really high. Photos and videos are saved in the same resolution as when they were taken.
Over time, Google has improved the Google Photos interface, and it now incorporates AI to provide consumers with even better performance.
Cons
There aren’t many effects, and there aren’t any other editing tools.
The lack of a password-protection option in Google Photos is annoying. Some photos are private, and you may not wish to share them with others.
Users of Google Photos will no longer have limitless storage.
3Adobe Rush
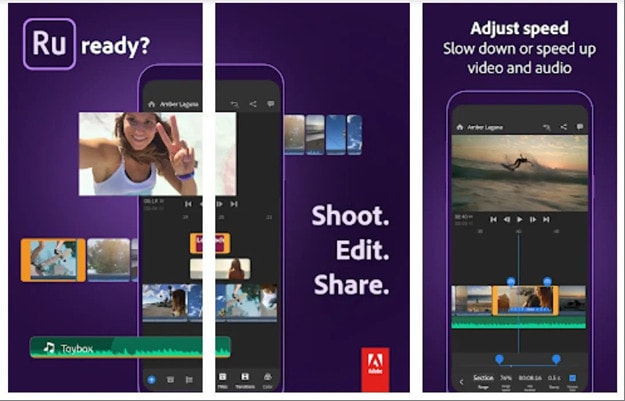
Adobe Rush is a new video editor that Adobe released via a partnership with Samsung’s latest flagship smartphone. This app is a simple yet powerful tool for editing videos on the go, on your smartphone.
This app comes with some powerful tools which you find on some high-end video editing apps. You get a timeline interface to edit your videos perfectly, and you get some music recommendations right into the app.
Features Of Adobe Rush
- In the timeline, you can make changes to your video.
- Audio can be added and refined.
- Change the colour, size, and position of the video.
- Make a title.
- Add transitions, pan and zoom effects, and reframe your clips automatically.
- Change the clip’s attributes.
- Change your video’s aspect ratio.
- Create the illusion of a picture-in-picture effect.
Pros
- It has a user-friendly UI that is responsive and snappy.
- It’s easy to use and provides helpful advice for newcomers.
- It enables Adobe users to quickly and easily produce stunning videos that are customized to their preferences.
- When compared to its competitors, exporting files is a breeze.
- Unlike most of its competitors, it comes with good colour and title tools.
- YouTube, Facebook, Vimeo, Snapchat, Instagram, and Twitter are just a few of the social media channels where the finished files can be simply shared.
- It synchronizes projects between desktop and mobile devices, making them more accessible.
Cons
- When compared to its competitors, it is a little costly.
- It renders projects slowly and only supports three transitions.
- The app does not have storyboard templates and cannot specify the exact structure for output files.
- It only comes with a few video and audio editing capabilities.
- Many standard video effects are missing.
Top 3 Free MP4 Video Rotators on iPhone
1.Splice

Trimming, cropping, effects, titles, speed adjustments, animation, transitions, and music are all available in this well-known video editor, which has a cultish following of dedicated Splicers.
Splice’s music library is one of its strongest assets. It offers a large selection of free music and sound effects to layer over your video, as well as the ability to sync your movie to the beat of your soundtrack.
Features of Splice
Clips should be cropped and trimmed to focus on the highlights.
With an Audio Library and iTunes Integration, you may add music to your videos.
To smooth transitions between clips and images, use transitions.
Enhance videos with effects.
Pros:
- Developed by GoPro, award-winning, highly regarded.
Cons:
- Only available on iOS devices.
2. Clips

It’s easy to miss pre-loaded apps like Apple’s Clips, but this video editing tool has lots of impressive features to enjoy, thanks to the weight of the tech giant’s greatest brains behind it. Take, for example, their live tiles setting. You can use this to generate animated captions and titles that appear as you speak.
To liven things up, you may add animated emojis and backgrounds, and music tracks dynamically sync to the length of your video.
Features of Clips
- Ability to generate animated captions
- Full access to Animated emojis and backgrounds
- Ability to have your music sync to your videos
Pros:
- Simple to use, unique features, and Apple’s support.
Cons:
- It’s only for iOS devices (obviously! ), and it has trouble with a big number of clips.
3. Quik

You may apply transitions and effects to up to 200 photographs and video clips from your photo library or GoPro Plus with this free software. You may not only crop, zoom, and rotate photos and video clips, but you can also customize them with 26 different themes, fonts, effects, and artwork.
You may make HD 1080p or 720p films for social sharing in cinema, square, or portrait formats, and you can store your draft creations for up to seven days.
Features of Quik
- Everything that is available for free.
- There are no limits to the number of mural events.
- Editing is unrestricted.
- There are now a total of 25 more photo and video filters.
Pros:
- Tons of features, including access to 100+ free songs,
- Flashbacks and QuikStories, which make videos based on your most recent footage,
- syncs footage to the beat of your soundtrack, and AI editing help.
Cons:
- Limited control and no trimming option; customers have claimed that it is occasionally glitchy.
Top 3 Free MP4 Video Rotators Online
1.Online Video Cutter
This web tool comes in helpful when you need to rapidly edit a small video file. It is not necessary to install it; you may use it right from your browser. The clip can only be rotated 90, 180, or 270 degrees. It’ll come in handy, especially if you’ve closed the video in portrait mode and want to watch it on a big screen. The service’s provider says that the files will be automatically erased from the servers a few hours after you accomplish your task, resulting in a high level of security.
Features of Online Video cutter.
- It Supports Any Video Format. …
- Completely Online for you to access
- Additional Settings to make more edits to videos
- Easy to use, User-friendly interface.
Pros:
It has a very simple user interface.
You do not need to pay for a license to utilize it.
Almost every video format is supported.
Cons:
Only suitable for little clips
Performing simply the most basic functions, such as rotating and cropping
2.EzGif
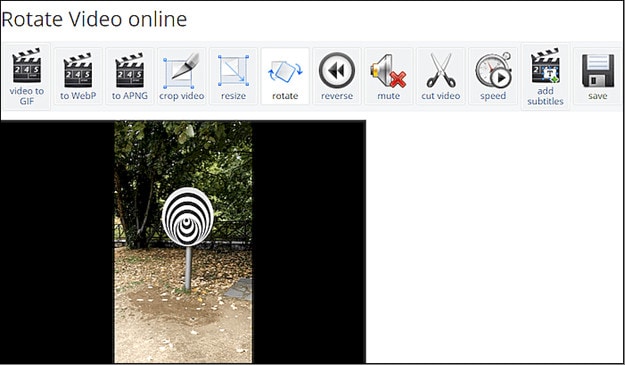
This unique internet tool not only creates animated GIFs but can also rotate video. You simply choose the clip from your local folder. However, the file’s maximum size is limited to 100MB. A basic tool for rotating the video through 90, 180, and 270 degrees. You can also vertically and horizontally flip the video before exporting it in a different format and encoding.
Features of EzGif
- A simple user interface to find your way around the website.
- Ability to do resizing and rotating of videos and images.
- Capable of video conversions and editing
Pros:
- Many video formats are supported, including MP4, WebM, AVI, MPEG, FLV, MOV, and 3GP.
- The rotation procedure is quick and simple to utilize.
- After rotating, provide a preview function.
Cons:
- The maximum file size is 100 megabytes.
- There are no filters or transitions, and only basic editing functions are available.
3.Videorotate
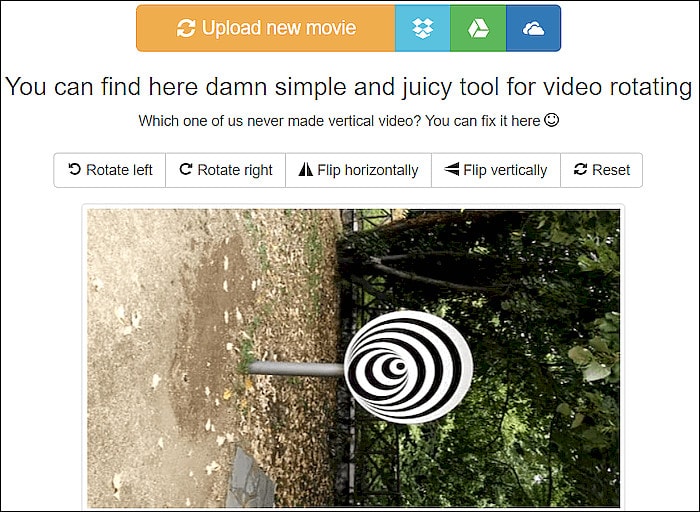
- This is a free online video rotator that is simple and quick to use. You can upload your video from a local folder or import a recorded clip from major cloud services like Dropbox, Google Drive, and One Drive, just like the other online services (there are buttons for each of them). You can flip the clip or rotate it left and right. Other video capabilities available on the site include cropping, stabilizing, and slicing.
Features of Videorotate
- Ability to crop, stabilize and slice videos.
Pros:
- Simple and straightforward to use
- Clips from your Dropbox, Google Drive, and OneDrive accounts can be uploaded.
- A specific “Reset” button is available.
Cons:
- For basic operations, a service for newcomers is available.
- Only a few video file formats are supported.
FAQs about Video Rotator
- What is the best way to rotate a video?
Use an easy-to-use video editing program. It’s easy to rotate a video, even if you’ve never edited one before. You can also use some media players.
- How do I rotate a video permanently?
In this guide, we will show you exactly how to rotate video in Windows with EaseUS Video Editor and save it permanently.
3.How can I rotate a video for free on the internet?
It’s simple to rotate a video online, and there are various services that offer free online video rotators.
- Videorotate
- Ezgif
- Video cutter on the internet
- How do I mirror a video on the internet?
The websites that support video rotation also offer the ability to “flip” the video vertically and horizontally. You’ll have “mirroring” frames in this manner as if you’re filming your pals in the mirror.
For macOS 10.14 or later
How to change the video orientation in Filmora
Step 1:Import the video file into Filmora, and then drag it to the timeline.
Step 2: To enter the video editing panel, double-click the video clip in the timeline. Locate the “Rotate” option under the “Transform” menu. You can drag the slider or enter a specific number to adjust the rotation value. You can rotate up to 360 degrees. When you enter “90” in the box, the video clip will be rotated 90 degrees.
By dragging the “Scale” slider, you can make the full image screen, or you can directly adjust its position, size, shape, etc., in the Viewer panel.
Step 3: After you are satisfied, click the export button. You can change the format here, or you can upload the file to YouTube.
Top 3 Free MP4 Video Rotators on Windows
Looking for the best free video rotator?
If you are looking for a free video rotator for windows, then this article has got you covered. A list of the top 3 free video rotators for windows has been listed.
- VSDC Free Video Editor
It is a highly functional video editing suite with easy controls. It provides anyone who is a beginner to easily access and edit the video easily.
It helps you rotate the videos in increments of 90 degrees, be it clockwise or anticlockwise )
VSDC is a free video editor with non-linear editing capabilities. Users may swiftly convert video and audio files from one format to another with VSDC. A built-in disk burning tool for DVDs is also included in the software. This free program, designed for educational purposes, can be used by businesses or individuals.
VSDC Free Video Editor features
- Built-In DVD Burning Tool
- Colour Blending And Filters
- Specific Multimedia Devices Creation
- Desktop Video Capture
- Export To Social Networking Sites
- Masking
- Non-Linear Video Editing
- Subpixel Accuracy
- Supports Popular Formats
- Video File Converter
Pros
- It’s completely free.
- There is no watermark.
- There are numerous free video editing programs available.
- Support a wide range of file formats
Cons
There isn’t a macOS version available.
Take a severe learning curve into consideration.
There are numerous premium-only features.
The timeline isn’t the same as most NLE editing software.
- Windows Movie Maker
The most well-known video rotator and editor are probably Windows Movie Maker. Most of us who grew up with Microsoft’s various operating systems have had access to it because it comes as a free download with most Microsoft products. It can handle a wide range of files and is generally simple to use. Adding features like sound, music, special effects, or even speeding up the video is simple, and you’ll love the variety of skins available.
For beginners, Windows Video Maker is ideal. It is available for free on Windows PCs and includes basic capabilities and workflow aspects found in professional video editing systems. Its user-friendly interface resembles a simplified version of a video editor timeline and is simple enough for even inexperienced editors to understand.
Features of Windows Movie Maker
- Customization Tool’s title
- Auto Movie Options
- Credit Customization Tool
- Special Effects Options
- Overlays for Transitions
Pros:
- Various video editing functions;
- A variety of output possibilities
Cons:
- Many different versions of the same product;
- No longer included in the Windows operating system.
3.EaseUS Video Editor
EaseUS Video Editor is one of the few most popular video rotators we have today. Its video editing provides tools that can change the video orientation by 90 degrees anticlockwise and clockwise, which can flip vertically and horizontally.
In terms of videos, adding great filters, sound, music, subtitles and other elements to have a great video output can be achieved using the EaseUS. Moreover, it accepts video formats and can convert files to MP4 and other great features.
Features of EaseUS Video Editor
- Can easily trim, cut, split, merge, rotate, and mix video clips.
- Ability to apply stylish video effects
- Can add or remove the watermark and reduce background or wind noise from a video.
Pros:
- User-friendly interface, perfect for beginners
- Easily trim, cut, split, merge, rotate, mix video clips
- A full range of free visual and audio effects
- Change of contrast, exposure, brightness, and other video aspects
- Use the voiceover function to add your comments to the video
Cons:
- The software has no version for macOS
Top 3 Free MP4 Video Rotators on Mac
- iMovie
The iMovie for Mac users is an exceptional video rotator. You can turn any video or movie you may have into an amazing masterpiece with more features due to the special after-effects it has. Simple application to use and navigate easily, although when importing video takes a while at certain times.
Features of the iMovie include
- Full range of options to modify
- Ability to enhance colour settings
- Easily crop and edit video clips ease
- Ability to change the speed of clips.
Pros:
- Nice interface;
- The function is to create fun Movie Trailers.
Cons:
- Supports only a few video formats;
- Pre-processing and import trans-coding can be time-consuming.
- Movavi Video Editor
Movavi has a free version that is easy to use, especially for beginners. It allows you to add titles, filters, transitions, and special effects to your videos and photographs to make attractive movies. You can use the animation to smoothly move things around the screen in your film. On the multi-track timeline, you can add as many tracks as you wish. From the expanded built-in collection, you can get more example video clips, stickers, and audio tracks.
Features of Movavi Video Editor
- You can upload files and photographs in almost any format.
- To make videos automatically, use the Montage Wizard.
- Transition Wizard allows you to quickly put together slideshows.
- Enhance image quality by cutting, cropping, and rotating videos on the timeline.
- Apply artistic filters, and make transitions between portions as smooth as possible.
- Create animated headlines, stickers, callouts, and video overlays:
Pros:
- It’s appropriate for newcomers and casual users alike.
- A number of video formats are supported, including.mov (QuickTime)
- Chroma Key and Slow Motion are examples of special effects.
Cons
- Only the premium version supports the advanced features.
- It uses the basic colour grading tool
- QuickTime Player
The key advantage of Apple’s QuickTime is that it comes pre-installed on your Mac’s macOS operating system. It’s powerful enough to rotate your clip, yet it’s simple enough for beginners to do. iTunes files can be played and edited with QuickTime. After rotation, it exports a new video file, leaving the old clip on the Mac. The output video will be compressed slightly, resulting in a smaller rotational video file than the original.
Features of QuickTime Player
- Anything can be recorded, including video, audio, and the screen.
- Cropping, audio detachment, combining, and rotation are all simple video editing techniques.
- From 4K to 480p video compression
- Quickly share your video: directly upload videos to YouTube
Pros:
- With macOS, it comes pre-installed.
- Work with iTunes files Streaming video player with no configuration
Cons:
- Only QuickTime Pro 7 unlocks the editing feature.
- There will be no more Windows versions.
- It isn’t compatible with standard subtitle files.
Top 3 Free MP4 Video Rotators on Android
When we use a smartphone to capture a video or download one from a website, we occasionally discover that the video has been inverted. As a result, we’ll require a video rotator app to correct the problem. On the market, there are many different sorts of tools for various platforms. However, you may have discovered that separating the wheat from the chaff can be difficult at times. To save you time, I’ve compiled a list of 3 video rotator applications for Android
- VivaVideo
VivaVideo is one of the top movie producers and free video rotators for Android devices as a media editor. This application allows you to alter the orientation of your videos. Aside from rotating videos, this software also includes cropping, combining, cutting, and other editing features. “The best video editor software is VivaVideo - Video Maker App,” an Android expert previously said. This program is a video producer as well as an editor.
Features of VivaVideo
- It allows you to add music to videos.
- Combine videos clips into one video
- Can apply video effects.
- After you’ve finished editing your videos, you may save and share them on YouTube and TikTok! To rotate video, use this program!
Pros
- It has an In-app camera with live effects previews for capturing videos.
- More than 60 effects to choose from with additional downloadable effects.
- Enhance the videos using themes.
- Ability to Merge videos and create montages with storyboarding features
- Edit frames within a video
Cons
- There is no negative review to say about this app
2.Google Photos
This app may already be installed on your smartphone, but you are unaware of its full potential. This program includes a built-in picture and video editor in addition to backing up your photos. This program includes three essential video editing tools that are extremely basic and easy to use.
The first is to stabilize the video; if your video is unsteady, you can use this option in Google Photos to stabilize it. You may also use the timeline below the video to cut the video. If you mistakenly captured the video in the wrong orientation, there is a tool to rotate it.
Features of Google Photos
- You can modify photographs and videos in Google Photos.
- On Google Photos, make a collage or a movie.
- Recover photos or videos that were recently erased.
- Clear off some space on Google Photos…
- Place photos in the Archive.
Pros
Google Images automatically backs up all of your device’s photos and videos.
Despite its many advantages, the reason I choose Google Photos is that it helps me save space on my smartphone.
The original quality of images stored in Google Photos is really high. Photos and videos are saved in the same resolution as when they were taken.
Over time, Google has improved the Google Photos interface, and it now incorporates AI to provide consumers with even better performance.
Cons
There aren’t many effects, and there aren’t any other editing tools.
The lack of a password-protection option in Google Photos is annoying. Some photos are private, and you may not wish to share them with others.
Users of Google Photos will no longer have limitless storage.
3Adobe Rush
Adobe Rush is a new video editor that Adobe released via a partnership with Samsung’s latest flagship smartphone. This app is a simple yet powerful tool for editing videos on the go, on your smartphone.
This app comes with some powerful tools which you find on some high-end video editing apps. You get a timeline interface to edit your videos perfectly, and you get some music recommendations right into the app.
Features Of Adobe Rush
- In the timeline, you can make changes to your video.
- Audio can be added and refined.
- Change the colour, size, and position of the video.
- Make a title.
- Add transitions, pan and zoom effects, and reframe your clips automatically.
- Change the clip’s attributes.
- Change your video’s aspect ratio.
- Create the illusion of a picture-in-picture effect.
Pros
- It has a user-friendly UI that is responsive and snappy.
- It’s easy to use and provides helpful advice for newcomers.
- It enables Adobe users to quickly and easily produce stunning videos that are customized to their preferences.
- When compared to its competitors, exporting files is a breeze.
- Unlike most of its competitors, it comes with good colour and title tools.
- YouTube, Facebook, Vimeo, Snapchat, Instagram, and Twitter are just a few of the social media channels where the finished files can be simply shared.
- It synchronizes projects between desktop and mobile devices, making them more accessible.
Cons
- When compared to its competitors, it is a little costly.
- It renders projects slowly and only supports three transitions.
- The app does not have storyboard templates and cannot specify the exact structure for output files.
- It only comes with a few video and audio editing capabilities.
- Many standard video effects are missing.
Top 3 Free MP4 Video Rotators on iPhone
1.Splice
Trimming, cropping, effects, titles, speed adjustments, animation, transitions, and music are all available in this well-known video editor, which has a cultish following of dedicated Splicers.
Splice’s music library is one of its strongest assets. It offers a large selection of free music and sound effects to layer over your video, as well as the ability to sync your movie to the beat of your soundtrack.
Features of Splice
Clips should be cropped and trimmed to focus on the highlights.
With an Audio Library and iTunes Integration, you may add music to your videos.
To smooth transitions between clips and images, use transitions.
Enhance videos with effects.
Pros:
- Developed by GoPro, award-winning, highly regarded.
Cons:
- Only available on iOS devices.
2. Clips
It’s easy to miss pre-loaded apps like Apple’s Clips, but this video editing tool has lots of impressive features to enjoy, thanks to the weight of the tech giant’s greatest brains behind it. Take, for example, their live tiles setting. You can use this to generate animated captions and titles that appear as you speak.
To liven things up, you may add animated emojis and backgrounds, and music tracks dynamically sync to the length of your video.
Features of Clips
- Ability to generate animated captions
- Full access to Animated emojis and backgrounds
- Ability to have your music sync to your videos
Pros:
- Simple to use, unique features, and Apple’s support.
Cons:
- It’s only for iOS devices (obviously! ), and it has trouble with a big number of clips.
3. Quik
You may apply transitions and effects to up to 200 photographs and video clips from your photo library or GoPro Plus with this free software. You may not only crop, zoom, and rotate photos and video clips, but you can also customize them with 26 different themes, fonts, effects, and artwork.
You may make HD 1080p or 720p films for social sharing in cinema, square, or portrait formats, and you can store your draft creations for up to seven days.
Features of Quik
- Everything that is available for free.
- There are no limits to the number of mural events.
- Editing is unrestricted.
- There are now a total of 25 more photo and video filters.
Pros:
- Tons of features, including access to 100+ free songs,
- Flashbacks and QuikStories, which make videos based on your most recent footage,
- syncs footage to the beat of your soundtrack, and AI editing help.
Cons:
- Limited control and no trimming option; customers have claimed that it is occasionally glitchy.
Top 3 Free MP4 Video Rotators Online
1.Online Video Cutter
This web tool comes in helpful when you need to rapidly edit a small video file. It is not necessary to install it; you may use it right from your browser. The clip can only be rotated 90, 180, or 270 degrees. It’ll come in handy, especially if you’ve closed the video in portrait mode and want to watch it on a big screen. The service’s provider says that the files will be automatically erased from the servers a few hours after you accomplish your task, resulting in a high level of security.
Features of Online Video cutter.
- It Supports Any Video Format. …
- Completely Online for you to access
- Additional Settings to make more edits to videos
- Easy to use, User-friendly interface.
Pros:
It has a very simple user interface.
You do not need to pay for a license to utilize it.
Almost every video format is supported.
Cons:
Only suitable for little clips
Performing simply the most basic functions, such as rotating and cropping
2.EzGif
This unique internet tool not only creates animated GIFs but can also rotate video. You simply choose the clip from your local folder. However, the file’s maximum size is limited to 100MB. A basic tool for rotating the video through 90, 180, and 270 degrees. You can also vertically and horizontally flip the video before exporting it in a different format and encoding.
Features of EzGif
- A simple user interface to find your way around the website.
- Ability to do resizing and rotating of videos and images.
- Capable of video conversions and editing
Pros:
- Many video formats are supported, including MP4, WebM, AVI, MPEG, FLV, MOV, and 3GP.
- The rotation procedure is quick and simple to utilize.
- After rotating, provide a preview function.
Cons:
- The maximum file size is 100 megabytes.
- There are no filters or transitions, and only basic editing functions are available.
3.Videorotate
- This is a free online video rotator that is simple and quick to use. You can upload your video from a local folder or import a recorded clip from major cloud services like Dropbox, Google Drive, and One Drive, just like the other online services (there are buttons for each of them). You can flip the clip or rotate it left and right. Other video capabilities available on the site include cropping, stabilizing, and slicing.
Features of Videorotate
- Ability to crop, stabilize and slice videos.
Pros:
- Simple and straightforward to use
- Clips from your Dropbox, Google Drive, and OneDrive accounts can be uploaded.
- A specific “Reset” button is available.
Cons:
- For basic operations, a service for newcomers is available.
- Only a few video file formats are supported.
FAQs about Video Rotator
- What is the best way to rotate a video?
Use an easy-to-use video editing program. It’s easy to rotate a video, even if you’ve never edited one before. You can also use some media players.
- How do I rotate a video permanently?
In this guide, we will show you exactly how to rotate video in Windows with EaseUS Video Editor and save it permanently.
3.How can I rotate a video for free on the internet?
It’s simple to rotate a video online, and there are various services that offer free online video rotators.
- Videorotate
- Ezgif
- Video cutter on the internet
- How do I mirror a video on the internet?
The websites that support video rotation also offer the ability to “flip” the video vertically and horizontally. You’ll have “mirroring” frames in this manner as if you’re filming your pals in the mirror.
3GP Video Format: What Is 3GP Format And How To Play It?
Everyone uses the internet nowadays as it is a necessary part of our lives. We exchange multimedia files and texts messages on various apps. The files that we share on the internet have a specific extension for the files. It is essential to know about the different available and widely used formats so that you can use and access the file easily.
The article below will focus on and share great details about the 3GP file format. The multimedia format is popularly used for its great benefits, such as audio and video transfer. Do you want to know more about the 3GP format? Let’s get started!
In this article
02 Advantages and Disadvantages About Video Format?
03 How Can You Open and Play 3GP Video Format?
04 How Edit 3GP Video More Creatively?
Part 1. What Is 3GP Video Format?
The multimedia files that we share on the internet have the extension as ‘.3GP’. It is an audio and video container made under the proprietorship of the 3rd Generation Partnership Project. The 3GP format stores and transmits the data that is shared between 3G-enabled devices. All 3G devices, along with some 2G and 4G devices, support 3GP file format video recording and playback.

3GP format needs less broadband demand which makes the phone run fluently. Along with taking less space as compared to other formats, it saves multimedia content efficiently. 3GP file format was designed to match the high speed of data transition between 3G networks.
Part 2. Advantages and Disadvantages About Video Format?
The 3GP format was designed to work at a high level on 3G devices. The above section of this article sheds light on what the 3GP file format is. Now that you have adequate knowledge of the format, let’s proceed and talk about the pros and cons of the file format.
Advantages of 3GP Format
- The biggest plus point of using the 3GP format is its size. The format is small in size but can store disk space. The small size of the format uses tiny amounts of data.
- The format is great because it creates an environment for business connections and improves communication. You can share text messages, videos, and multimedia files with your team members.
- 3GP file format is widely used because it has low bandwidth and also it has decreased mobile storage requirements.
- 3GP files are transferred and shared very efficiently. Hence, sharing video files has become a lot easier with this format.
- 3GP files are fast for both streaming and downloading, even if you have a weak or problematic internet connection.
Disadvantages of 3GP Format
- The quality of the audio file is damaged while compressing the file to reduce its size, as compared to the original file.
- Not every program supports 3GP file format; hence users face compatibility issues.
- Compared to the original video, the 3GP video files, after compressing, lose their quality, and the resolution is also compromised.
Part 3. How Can You Open and Play 3GP Video Format?
Do you know there are various file formats and different platforms support different formats? If we specifically talk about the 3GP format, it is supported by VLC Media Player, QuickTime Player, and 5KPlayer. Let’s discuss them:
VLC Media Player
VLC Media Player is a free open-source platform that can play 3GP file format. It is developed by the VideoLAN project. VLC Media Player is a cross-platform media player software and media streamer available for Windows, Mac, Linux, and Unix.
Mobile users can use it irrespective of the device type; Android, iPhone, iPad, and iPod users can use it. VLC can be used to play 3GP format along with any format that you may encounter.

QuickTime Player
QuickTime Player was made under Apple Inc. proprietorship. It is an extendible multimedia framework and can only be used on macOS devices because the Windows-supported version was ceased after 2016. It can handle picture and digital video formats, including a 3GP file format. Although, the MOV file extension represents the QuickTime Player. QuickTime Player is pre-installed on all Mac devices.

5KPlayer
5KPlayer is developed under the proprietorship of DearMob. It is a music and video player. 5KPlayer has built-in support for AirPlay. You can stream audio and video via AirPlay without any loss in the quality of the media file. It supports different formats for multimedia, including a 3GP file format. 5KPlayer provides you the facility to download videos from 300+ sites, including YouTube, Vimeo, and Dailymotion.

3.1. Steps to Open and Play 3GP Format on VLC Media Player
Now that you know about the different platforms that support the 3GP format let us share the steps on how you can open and play 3GP video files on VLC Media Player.
Step 1: After you have installed VLC Media Player on your device, launch it. Head to the ‘Media’ tab from the main screen by accessing the top menu. Or else, simply open VLC Media Player to drag and drop the media file there.

Step 2: Select the ‘Open File’ option from the Media section and locate the 3GP video file on your device. Add the file to VLC and enjoy watching it.

Part 4. How Edit 3GP Video More Creatively?
What else could be better for editing your videos than Wondershare Filmora ? Whenever you want a good video editor, you will find Filmora on top of the list. The video editor comes with an extensive range of features that you cannot even count. Moreover, it offers endless editing capabilities.
For editing unique and stunning 3GP format videos, try Filmora. It comes with both Basic and also Advanced editing features. Do you want to know more about it? Let us tell you. Filmora offers basic and standard editing tools like cut, trim, split, and join.
If we look at the advanced features, they include Green Screen, Scene Detection, Power Tool, Video Snapshot, and whatnot. Moreover, you also get various AI editing features like Auto Highlight, Auto Reframe, Auto Normalization, and much more than this.
What else does Filmora provide to its users? Let’s share a step-by-step guideline about how to edit 3GP file format videos on Filmora along with its other features.
Step 1: Import 3GP Video File
Start by launching Filmora Video Editor on your device and head to the ‘File’ tab from the top menu bar. There, hover on the ‘Import Media’ option; this will open a sub-menu with an option of ‘Import Media Files’; click on it.

For Win 7 or later (64-bit)
For macOS 10.12 or later
Step 2: Drag to Timeline
You can locate the video file from the device and import it to the software. After a successful import, the media file will appear on the screen, drag and drop it to the ‘Timeline’ to start the editing.

Step 3: Add Audio Effects
Start by adding audio effects to your video and making it more captivating. For this, head to the ‘Audio’ tab and select the most suitable sound from the provided options like Travel Vlog, Folk, Young & Bright, etc.

Step 4: Use Interesting Elements
What kind of elements do you like? With Filmora, you get Countdown, Laser Eye, Subscription, Share, and a lot other cooler options are available under the ‘Elements’ section.

Step 5: Add Attractive Titles
Are you looking for title templates? Have you looked at the ‘Titles’ section in Filmora? You will get beautiful templates according to the latest trends and occasions.

Step 6: Export 3GP File
Once you are done, export the 3GP format file. For this, click on the ‘Export’ button, select the output file format and proceed to save the file.

Bottom Line
We hope that the above article has shared sufficient information with you regarding the 3GP file format. We discussed its pros and cons, ways to open it, and also edit it. As we are concluding, let’s talk a little more about Wondershare Filmora. The video editor is an excellent choice for editing and creating mind-blowing videos.
You get various Basic and also Advanced features that can enhance your video. With Filmora, you can efficiently work with features like Silence Detection, Keyframing, Advanced Color Tuning, and much more. If you wish to create fantastic videos, use Wondershare Filmora.
For Win 7 or later (64-bit)
For macOS 10.12 or later
02 Advantages and Disadvantages About Video Format?
03 How Can You Open and Play 3GP Video Format?
04 How Edit 3GP Video More Creatively?
Part 1. What Is 3GP Video Format?
The multimedia files that we share on the internet have the extension as ‘.3GP’. It is an audio and video container made under the proprietorship of the 3rd Generation Partnership Project. The 3GP format stores and transmits the data that is shared between 3G-enabled devices. All 3G devices, along with some 2G and 4G devices, support 3GP file format video recording and playback.
3GP format needs less broadband demand which makes the phone run fluently. Along with taking less space as compared to other formats, it saves multimedia content efficiently. 3GP file format was designed to match the high speed of data transition between 3G networks.
Part 2. Advantages and Disadvantages About Video Format?
The 3GP format was designed to work at a high level on 3G devices. The above section of this article sheds light on what the 3GP file format is. Now that you have adequate knowledge of the format, let’s proceed and talk about the pros and cons of the file format.
Advantages of 3GP Format
- The biggest plus point of using the 3GP format is its size. The format is small in size but can store disk space. The small size of the format uses tiny amounts of data.
- The format is great because it creates an environment for business connections and improves communication. You can share text messages, videos, and multimedia files with your team members.
- 3GP file format is widely used because it has low bandwidth and also it has decreased mobile storage requirements.
- 3GP files are transferred and shared very efficiently. Hence, sharing video files has become a lot easier with this format.
- 3GP files are fast for both streaming and downloading, even if you have a weak or problematic internet connection.
Disadvantages of 3GP Format
- The quality of the audio file is damaged while compressing the file to reduce its size, as compared to the original file.
- Not every program supports 3GP file format; hence users face compatibility issues.
- Compared to the original video, the 3GP video files, after compressing, lose their quality, and the resolution is also compromised.
Part 3. How Can You Open and Play 3GP Video Format?
Do you know there are various file formats and different platforms support different formats? If we specifically talk about the 3GP format, it is supported by VLC Media Player, QuickTime Player, and 5KPlayer. Let’s discuss them:
VLC Media Player
VLC Media Player is a free open-source platform that can play 3GP file format. It is developed by the VideoLAN project. VLC Media Player is a cross-platform media player software and media streamer available for Windows, Mac, Linux, and Unix.
Mobile users can use it irrespective of the device type; Android, iPhone, iPad, and iPod users can use it. VLC can be used to play 3GP format along with any format that you may encounter.
QuickTime Player
QuickTime Player was made under Apple Inc. proprietorship. It is an extendible multimedia framework and can only be used on macOS devices because the Windows-supported version was ceased after 2016. It can handle picture and digital video formats, including a 3GP file format. Although, the MOV file extension represents the QuickTime Player. QuickTime Player is pre-installed on all Mac devices.
5KPlayer
5KPlayer is developed under the proprietorship of DearMob. It is a music and video player. 5KPlayer has built-in support for AirPlay. You can stream audio and video via AirPlay without any loss in the quality of the media file. It supports different formats for multimedia, including a 3GP file format. 5KPlayer provides you the facility to download videos from 300+ sites, including YouTube, Vimeo, and Dailymotion.
3.1. Steps to Open and Play 3GP Format on VLC Media Player
Now that you know about the different platforms that support the 3GP format let us share the steps on how you can open and play 3GP video files on VLC Media Player.
Step 1: After you have installed VLC Media Player on your device, launch it. Head to the ‘Media’ tab from the main screen by accessing the top menu. Or else, simply open VLC Media Player to drag and drop the media file there.
Step 2: Select the ‘Open File’ option from the Media section and locate the 3GP video file on your device. Add the file to VLC and enjoy watching it.
Part 4. How Edit 3GP Video More Creatively?
What else could be better for editing your videos than Wondershare Filmora ? Whenever you want a good video editor, you will find Filmora on top of the list. The video editor comes with an extensive range of features that you cannot even count. Moreover, it offers endless editing capabilities.
For editing unique and stunning 3GP format videos, try Filmora. It comes with both Basic and also Advanced editing features. Do you want to know more about it? Let us tell you. Filmora offers basic and standard editing tools like cut, trim, split, and join.
If we look at the advanced features, they include Green Screen, Scene Detection, Power Tool, Video Snapshot, and whatnot. Moreover, you also get various AI editing features like Auto Highlight, Auto Reframe, Auto Normalization, and much more than this.
What else does Filmora provide to its users? Let’s share a step-by-step guideline about how to edit 3GP file format videos on Filmora along with its other features.
Step 1: Import 3GP Video File
Start by launching Filmora Video Editor on your device and head to the ‘File’ tab from the top menu bar. There, hover on the ‘Import Media’ option; this will open a sub-menu with an option of ‘Import Media Files’; click on it.
For Win 7 or later (64-bit)
For macOS 10.12 or later
Step 2: Drag to Timeline
You can locate the video file from the device and import it to the software. After a successful import, the media file will appear on the screen, drag and drop it to the ‘Timeline’ to start the editing.
Step 3: Add Audio Effects
Start by adding audio effects to your video and making it more captivating. For this, head to the ‘Audio’ tab and select the most suitable sound from the provided options like Travel Vlog, Folk, Young & Bright, etc.
Step 4: Use Interesting Elements
What kind of elements do you like? With Filmora, you get Countdown, Laser Eye, Subscription, Share, and a lot other cooler options are available under the ‘Elements’ section.
Step 5: Add Attractive Titles
Are you looking for title templates? Have you looked at the ‘Titles’ section in Filmora? You will get beautiful templates according to the latest trends and occasions.
Step 6: Export 3GP File
Once you are done, export the 3GP format file. For this, click on the ‘Export’ button, select the output file format and proceed to save the file.
Bottom Line
We hope that the above article has shared sufficient information with you regarding the 3GP file format. We discussed its pros and cons, ways to open it, and also edit it. As we are concluding, let’s talk a little more about Wondershare Filmora. The video editor is an excellent choice for editing and creating mind-blowing videos.
You get various Basic and also Advanced features that can enhance your video. With Filmora, you can efficiently work with features like Silence Detection, Keyframing, Advanced Color Tuning, and much more. If you wish to create fantastic videos, use Wondershare Filmora.
For Win 7 or later (64-bit)
For macOS 10.12 or later
How to Set Up Twitch Green Screen
Green screens are a fun way for creators to bring their personality to their stream, allowing them to dynamically alter their stream background and make their content appear even more engaging and polished. With Twitch green screen background, you can easily configure Chroma key settings and detect your green screen with a single click.
The twitch green screen attaches directly to the back of your chair. You don’t have to worry about stands, or spacing behind your chair. Just attach it and go. This portable green screen can fit on the back of your chair a feature that makes it easy to assemble and use for start-up twitchers.
How to set up a Green Screen with Twitch Studio
**Set Up Your Camera
First things first, make sure that your camera is being detected on Twitch Studio. If you do not already have a layer with your webcam on your scene, click Edit Scene and add a webcam layer by clicking the + icon on the left next to Layers.
Once your webcam layer has been created, make sure that the desired device is selected, plugged in, and that you have not turned off every webcam (Camera icon on the bottom left of Twitch Studio).
**Set Up Your Green Screen
Once your green screen is set up in your background, select your webcam layers to display your webcam settings.
We recommend using the Auto-Detect Color feature as it will automatically detect the best color code for you and will be a great base to work from. If you prefer, you can manually pick the color code by either providing the color code in the Color to Remove field or clicking on the colored square to display a color spectrum that you can select from.
The Chroma Key section is located at the bottom of the webcam settings, and you will be able to toggle the chroma key on and off by clicking the eye icon.
To adjust the chroma key settings, you can click on Edit Chroma Key. You will be able to change the color code and change similarity, edge transparency and color correction for the perfect fit.
Other free ways to set up green screen for Twitch streams
OBS
OBS Studio is a free and open-source app for screen-casting and live streaming. Written in C/C++ and built with Qt, OBS Studio provides real-time capture, scene composition, recording, encoding, and broadcasting via the Real Time Messaging Protocol(RTMP).It can stream Videos to any RTMP supporting destination including YouTube, Twitch, Instagram and Facebook.
OBS Green Screen Set-up Steps
- Make sure you have the following equipment prepared: a solid green background, webcam or video camera, lighting, and OBS Studio.
- Download the latest stable version of OBS Studio from the official website and install the software. Open OBS and let the Auto-Configuration Wizard optimize the software’s settings based on your hardware.
- Now you can add a video source.
- Right-click on the video source you’ve created and select Filter.
- Click the +button under the Effects Filters section and select Chroma Key.
- Type in a name for this effect layer.
- After you add a chroma key, OBS will automatically create and adjust the baseline settings for the filter. You can experiment with the sliders and settle when you are satisfied with the result.
- Make sure you aren’t wearing any green or reflective material. You can double-checkthe performance on the preview screen.
- If things are working smoothly, you are all set to start streamingwith the green screen on.
Pro tip:
You can follow the instructions above and live stream to multiple platforms at once with Restream. Multistreaming to platforms like YouTube, Facebook, Twitter, Twitch, and LinkedIn allows you to drastically increase the audience reach and grow your followers.
XBOX
It is a video gaming brand created and owned by Microsoft. The brand consists of five video game consoles, as well as applications(games), streaming services, an online service by the name of Xbox network, and the development arm by the name of Xbox Game Studios. The brand was first introduced in the United States in November 2001, with the launch of the original Xbox console.
Steps on Using Xbox Green Screen
Make your Xbox console reflect your personal style by changing its look and feel. Choose a favourite colour, update your background with game art or a customised image, or select a different theme.
Choose your color
The color you choose will appear in tiles and accents on your Xbox. It also follows you to any console you sign in to.
- Press the Xboxbutton on your controller to open the guide, and then select Profile & system > Settings > General > Personalisation > My color & theme > My color.
- Select a color, and then select OK.
**Choose your background
Your background appears where you’d expect it to—in the background of Home. It can be a solid color or an image, such as game art, achievement art, a screenshot, or a customized image. Achievement art follows you to any Xbox, but screenshots and customized images stay on the console that they’re set to.
To choose your background, press the Xbox button on your controller to open the guide, and then select Profile & system > Settings > General > Personalization > My background.
From here, choose from the following options:
**Solid color and game art
Select a background color, and then select OK. To then add game art, choose the game most recently played and the game art will appear as the background.
**Achievement art
- Select Achievement art> Gaming.
- Select a game from your list of games with achievements.
- Select the achievement with the background art you want.
- Select Set as background.
**Custom image
Note Customized images must be smaller than 3 MB, and the best size for backgrounds is 1920 x 1080.
- Copy a JPG or PNG file that you want to use to a USB device, and then plug it into your Xbox.
- On your Xbox, select Customized image. A dialogue box appears that shows the contents of your console and attached USB device.
- Select the USB device, and then choose your image.
**Screenshot
- Select Screenshot, then choose the one you want.
- Select More actions> Set as background.
**Dynamic background
Note Dynamic backgrounds are only available on Xbox Series X|S.
- Select Dynamic background.
- Select the background art you want.
- Select Apply.
Note Some dynamic backgrounds are only available through promotions with special edition hardware (like the 20th Anniversary Special Edition controller). To see one of these special dynamic backgrounds in your list of options, make sure your special edition hardware is turned on and in use with your console when you set your background.
**Remove customized background
If you want to remove your background, select Remove customized background.
**Choose your theme
Themes can be set to dark or light and can also be scheduled. To set a theme:
- Press the Xboxbutton on your controller to open the guide, and then select Profile & system > Settings > General > Personalization.
- Select My color & theme.
- Under System theme, select Darkor Light. Select Scheduled to activate your theme according to specific times, or to start at sunrise and sunset.
Themes stay on the console they’re set to.
Solid Color
Achievement Art
Custom Image
Remove Custom Background
Filmora
Wondershare Filmora is the one of best video editing software with cool features that compares to other competing video editing Softwares. Many video editing programs claim to offer professional results; Filmora is one of a few consumer-level tools that actually delivers.
For Win 7 or later (64-bit)
For macOS 10.12 or later
Key Features
4k editing support
GIF support
Noise removal
Color tuning
Advanced tech editor
Audio mixer
Video stabilization
Scene detection
Conclusion
You probably already have an idea of how to use a green screen, at least in principle. You film something or someone in front of a colored background — the green screen — then you replace everything that’s in the color of the screen with other footage, images, charts, presentations, or whatever visuals you want. However, Chroma keying a live stream works almost the same way. The main difference is that you have to replace the green screen as you’re filming, rather than during editing.
How to Create an URL for Your Video?
A well-personalized video is an effective way to get your way around the viewers easily. Besides, you can also easily impress them with your products or services by uniquely pressing them.

Now, imagine if you have an easier way to share your videos with audiences on different platforms! Well, this way you will save a lot of time. For this, you need to upload the video to the link, and then you can share the URL link on various platforms. Keep reading to understand the entire process.
Part 1: Method1: Upload videos to a video hosting platform
The method to upload the video to the link will vary based on the video-sharing platform you are using. Let’s understand this with an example. If you are using YouTube, then you need to follow the below-given steps to upload and generate a link for your video.
- First of all, you need to log into your YouTube channel or account.
- Now, you need to click on the video icon. You can find it on the right-hand side of the screen.
- Then, click on the Upload a Video option.
- Click on the Select Files option and choose the video that you want to upload. You can also drag and drop the video to upload it.
- Once done, click on Publish option to complete the process.
Now, to complete your YouTube video upload share, you need to find the link to your video. For this, you need to click on the pause button and then right-click on the video. Now choose the Copy video URL. Now, you can share that video on other platforms just by pasting the video link.
How To Make Video Private and Public?
- Sign in to your YouTube account.
- Choose the Videos option.
- Now choose the video that you want to update.
- Then you need to click on the down arrow located under Visibility and select Private or Public based on your preference and then click on the Save option.

Different Video Hosting Platforms that You can Use
1. Vimeo
One of the best alternatives to YouTube is Vimeo. This platform allows the user to create, manage and enjoy an easy video upload share process. This platform has more than 250 million active users. It offers different subscription plans, and for unlimited upload limits, webinars, live streaming and more, you can go for its premium package. Some of the impressive features of this platform are:
- Custom CTAs- Calls to Actions
- Support video hosting in 8K quality.
- Easy access to different video editing templates
- CRM- Customer Relationship Management integrations
- Supports content analytics
- video upload share option for social media
2. Streamable

Speaking about Streamable, this is a video editing as well as sharing tool that will allow you to stream videos in 4K quality, and you can even embed the videos. You will have the freedom to upload your videos in different formats and can also resize them in vertical, landscape and square formats. Some unique features of Streamable are:
- Content management tool
- Brand overlay
- Easy-to-customize templates
- Content Library
- Audio capture
- Faster data export and import and more
3. Uscreen
This is an excellent all-in-one platform that helps video creators to sell, manage and market their content while expanding their business. Besides, the platform also helps the users to create mobile and TV apps and offers tools to market the videos. Some features for Uscreen to consider are:
- Different membership options.
- Support offline viewing of content, including videos.
- A professional video player
- You will enjoy full ownership of your audience’s data
- Supports different retention and marketing tools.
- Supports more than 150 hours of video storage and more.
4. Dailymotion

This platform is also called “the home for videos that matter”. Dailymotion is used by many well-known clients such as MLB, CNN and more to host video content. If you are a creator, you can easily upload your videos on this platform for free. Creators can utilize different features available on the platform, such as:
- Easily embeddable and shareable videos
- Easy video sharing using your video link on social media platforms
- You can upload videos of up to 4K quality.
- Password-protected videos
Part 2: Upload your videos to a cloud disk and share to others
As per some studies, more than 85 percent of businesses utilize videos for marketing strategy. Video content is entertaining, easy to understand and can offer better ROI as you can reuse it. However, with the huge volume of these files, it has become more challenging to find a good storage option.

This is where cloud storage comes to play. There are different cloud disk or storage platforms where you can upload video to link and share your videos with others. For example, Google storage or Google Drive. So, let’s know the process of uploading a video to Google Drive.
- First, visit your Google Drive Account and then click on the new option.
- Now, you need to click on File Upload and then select the video that you want to upload.
- You can now see the selected video uploading in the screen’s lower left corner. It will take some time.
- Once done, Google Drive will begin processing the video.
- Once your video is available on Google Drive, you can move it to different folders or change the name.
Now, let’s talk about how to generate a link to your video and share that link with others.
- Open your Google Drive account.
- Choose the video that you want to share and right-click on it.
- Now, you need to click on the Get Link option.
- Then, choose the Anyone with the Link option from the viewer option.
- Now, click on the Copy Link option, and you can now share that link with anyone you want.
There are different reasons that make cloud storage options a perfect choice for video creators or other users. For example:
- You don’t have to worry about data loss.
- Cloud storage is highly scalable.
- There will be no space or storage limit
- The users can enjoy real-time video content updates
- One can access and share videos using any device.
However, some of the cloud storage platforms are not free to use. You will get up to 10GB to 20GB for free. For more storage limits, you will have to buy a subscription plan. For example, if you are using Dropbox, then you will have to pay around USD 20 per month to get up to 3TB of storage.
Besides, there are some content restrictions that you will have to consider. You are not allowed to upload videos that support malicious attacks, hate speech, graphic violence, predatory behavior or videos that promote any dangerous behavior. Besides, the platforms support certain types of video formats, such as OGG, WebM files, WMV, MTS, AVI, and WMV. FLV, 3GPP, MPEG 4, MOV and other file formats.
If you are looking for some free cloud storage platforms, then you can give Google Drive, Dropbox, Box, NeXT cloud, pCloud, Amazon Cloud Drive and OneDrive a try.
Part 3: How to Make Videos That Go Viral?
To make your videos go viral, you will have to make stunning videos by adding some unique special effects. And for this, you can use the Filmora tool. This is a creative video editing tool for a video creator. The platform offers some great features to vloggers, gamers and others. For example, it supports 4K editing, noise removal, advanced text editor, GIF support, video stabilization, equalizer and more. Now, let’s talk about how to use this platform to make or edit a video.
- Open Filmora and choose the desired aspect ratio. Now, click on the New Project option and import the video.
- Then you need to choose the frame rate and resolution for the video.
- Once done, you can go on and transition music between your video clips, or you can use different visual effects.
- Once you are done with editing, you can then explore the videos and then share the videos on different platforms directly from Filmora.
Free Download For Win 7 or later(64-bit)
Free Download For macOS 10.14 or later
FAQs
Why Create a Video Link?
The first reason to consider here is when upload video to link, you can easily share the videos in various formats. Besides, you can share it without worrying about the video size. The video can be shared on multiple platforms and social media channels. It is a faster way to share your video content.
How To Locate the URL of Your Video?
To locate your video URL, you can open the video online. The link that you will see in the browser’s address bar will be the URL of your video. You can then copy the URL and paste it or share it on other platforms. It also applies to YouTube and other video-sharing platforms.
How Do I Get My YouTube Channel’s URL?
You need to sign in to your YouTube Studio. Then from the left Menu, choose Customization and then choose the Basic info. Under the Channel URL option, you can see the URL of your YouTube channel. Now you can copy the Channel URL and share it with others.
Also read:
- Easy Way to Apply Green Screen to YouTube Videos
- New Want to Make a Slide Show Video? Heres How
- New 2024 Approved How to Combine Several Xvid Files Into One Windows, Mac,Android, iPhone & Online
- 2024 Approved Do You Have Images in GIF Format, and Do You Find Converting Them to AVI Pretty Tricky? Please Stay on This Article as Well Guide You with Tools Thatll Help You Convert Your GIF to AVI Quickly and with Ease
- New Do You Know There Are Websites to Download Free Glitch Transition Effects for Premiere Pro? You Can Easily Download Them and Make Awesome Videos
- New How to Loop Videos with iMovie for 2024
- Motion Blur Photo With GIMP Step-By-Step Guide for 2024
- How to Use 3D Camera Tracking Effects in After Effects for 2024
- New Discover the Best Video Filter Software . Elevate Your Video Editing with Top Contenders Like Filmora, DaVinci Resolve, HitFilm Express, and More
- New Cropping Video in VLC Step by Step
- 2024 Approved To Closely Observe the Content on Screen, We Often Zoom in to Catch the Details. This Article Will Provide You with a Brief Note on How to Zoom in on YouTube Videos Quickly on Your Devices
- In 2024, How to Make a Transparent Background in Paint. How 3D Paint Transparent Background Can Be Made. How to Save an Image with Transparent Background?
- In 2024, If You Do Not Know How to Blur Faces in a Video on iPhone, You Are in the Right Place. We Have Provided You with All the Details You Need to Learn How to Blur Part of Your Video on Your iOS Device
- New In 2024, A Full Guide to Funcall Voice Changer and Its Alternatives
- In 2024, Premiere Pro Best Slow Motion Effects To Use
- 2024 Approved How to Make Falling Text Effect in Filmora?
- Updated In 2024, Achieving GoPro Slow Motion with Quality An In-Depth Overview
- Boost the Pace of Your Instagram Reels Videos with These Simple Tricks
- Updated Videos Look Better when Edited Professionally. If Youre Looking to Edit Recorded Video with a Pro-Level Editing Then Weve Got You Covered. Learn About Editing Recorded Videos with the Best Toolkit Here
- New Learn Color Correction in After Effects with These Videos
- How to Make a Slideshow on iPhone for 2024
- 2024 Approved Guide to Make Timelapse Video with iMovie
- New In 2024, Discover the Process of Slowing Down Time-Lapse Videos on Your iPhone
- Updated 2024 Approved 3GP Video Format What Is 3GP Format And How To Open It?
- New Repeated Text Animation Tutorial in Filmora
- New In 2024, Achieving GoPro Slow Motion with Quality An In-Depth Overview
- 2024 Approved Easy Steps to Make Glitch Effect with Filmora
- Updated Video Course and Online Learning Are Very Popular Nowadays. Here We Are Going to Recommend some of the Best Video Websites for Teachers to Use
- New 15 Best Free Cinematic LUTs for Your Film for 2024
- Best Love Video Maker with Music for 2024
- Updated In 2024, Creating Video Testimonials
- New In 2024, What Is TS Format and How To Play TS Files?
- Updated To Determine or Change the Video Aspect Ratio Online. Use a Ratio Calculator to Calculate Pixel Dimensions and Aspect Ratios of Images or Videos
- A Guide to Color Grade Your Picture in LightRoom
- Updated Hitfilm Express - A Guide to Download, Install, Key Features for 2024
- 2024 Approved Learn Topaz Video Enhance AI Review
- Updated How to Use LUTs in Lumafusion & Free LUTs Resource
- How to Livestream Zoom on Facebook for 2024
- New Best Slow Motion Camera Apps for Best Content Creation for 2024
- 2024 Approved How to Livestream Zoom on Facebook?
- Maximize Your User Engagement With Instagram Live Shopping Expert Tips for 2024
- 3 Facts You Need to Know about Screen Mirroring Lenovo ThinkPhone | Dr.fone
- 5 Ways to Reset Infinix Hot 40 Pro Without Volume Buttons | Dr.fone
- Quickly Remove Google FRP Lock on Blaze 2 Pro
- In 2024, How To Activate and Use Life360 Ghost Mode On Apple iPhone XR | Dr.fone
- New Best 4 Elon Musk Voice Generators to Make You Sound Like the Billionaire
- What is Fake GPS Location Pro and Is It Good On Nokia C12? | Dr.fone
- iCloud Unlocker Download Unlock iCloud Lock for your iPhone 7
- Best Fixes For Meizu 21 Hard Reset | Dr.fone
- 3 Ways to Track Lava Yuva 2 Pro without Them Knowing | Dr.fone
- Nokia C210 Messages Recovery - Recover Deleted Messages from Nokia C210
- The Magnificent Art of Pokemon Go Streaming On Samsung Galaxy M34? | Dr.fone
- How To Restore a Bricked Infinix Smart 8 Pro Back to Operation | Dr.fone
- Ultimate Guide from Oppo Find X6 FRP Bypass
- How do i sign a .wbk file free
- How To Pause Life360 Location Sharing For Realme 11X 5G | Dr.fone
- In 2024, How can I get more stardust in pokemon go On Samsung Galaxy A14 4G? | Dr.fone
- Hard Reset Xiaomi Redmi 13C 5G in 3 Efficient Ways | Dr.fone
- New What Is AI Marketing for 2024
- How to Spy on Text Messages from Computer & Asus ROG Phone 7 | Dr.fone
- How to Unlock Disabled iPhone 6 Plus/iPad Without Computer | Dr.fone
- In 2024, Ultimate Guide to Catch the Regional-Located Pokemon For Samsung Galaxy A15 5G | Dr.fone
- Title: In 2024, 15 Best Free MP4 Video Rotators Windows,Mac, Android, iPhone & Online
- Author: Chloe
- Created at : 2024-05-20 03:37:40
- Updated at : 2024-05-21 03:37:40
- Link: https://ai-editing-video.techidaily.com/in-2024-15-best-free-mp4-video-rotators-windowsmac-android-iphone-and-online/
- License: This work is licensed under CC BY-NC-SA 4.0.
