
:max_bytes(150000):strip_icc():format(webp)/how-to-view-instagram-without-an-account-5271416-505eeceaf0e142ed8674d2ce2244a8be.jpg)
In 2024, 6 Best Text to Speech Generators for YouTube Videos Windows, Mac, Android, iPhone & Online
6 Best Text to Speech Generators for YouTube Videos [Windows, Mac, Android, iPhone & Online]
Best Text To Speech Converter and Video Editor
Filmora’s Text to Speech (TTS) function allows you to convert your text files to voiceover and bring more elements to enrich your video.
Free Download Free Download Free Download Learn More >

Speech has a significant impact on the success rate of the entire YouTube adventure, whether storytelling or a standard sales pitch. It helps to have a decent voice and speaking abilities. However, not everyone gets both simultaneously; many individuals employ voice artists to provide voice-overs.
Some freelancers charge $5-$100 for a 5-minute voice-over. However, not everyone can afford an expensive voice artist, especially for longer films or just starting. Here are other options that I discovered as the most acceptable free text to voice generators for YouTube videos.
Let’s take a deeper look at the most excellent free text to speech software for YouTube videos.
Getting Started
Text to speech is a speech synthesis software that speaks aloud digital and textual content. The software offers a wide range of applications and is utilized by everyone from professionals and students to toddlers and adults.
Viewers are emotionally attached to documents such as PDFs, books, novels, and e-learning courses when they hear narration with a human voice. Text-to-speech systems are ideal for multitasking by busy professionals.
It’s no surprise that there are numerous text-to-speech options available. Audiobooks are also becoming more popular for the same reasons.
We’ll go over the best text-to-speech tools available in this guide. We’ve gathered a detailed list of the most exemplary free and commercial text-to-speech applications to help you choose the best option for your needs:
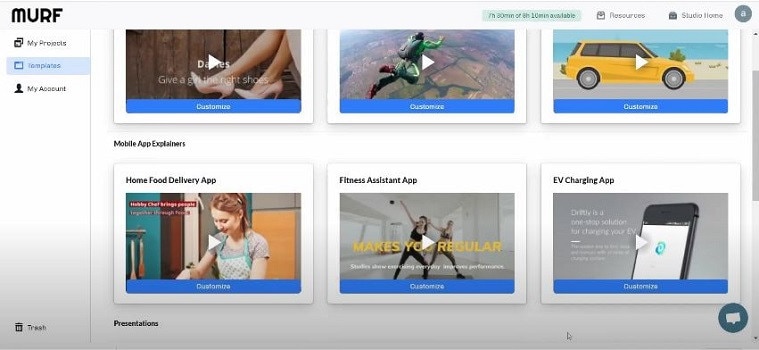
#1: Murf
It is available on Windows, Mac, Android, iPhone, and Online
Murf is a text-based voice-over maker. You can either compose your script or submit a voice clip to convert it into hyper-realistic AI voices. Murf delivers expert voice-over artists with experienced voices. You can check multiple parameters in the voices. You can use Murf to signify a brand, a product, a company, a presentation, and many more.
Features:
- Murf allows you to create voice-overs from the text. It also allows you to transform your speech into editable text, which you can subsequently edit or convert into AI voice.
- Murf Studio provides the ability to synchronize your speech with visuals.
- Murf provides over 100 authentic voices in 19 languages.
- It also gives options for inserting pauses, altering narration tempo, and emphasizing certain points.
- It also includes features such as script checking with grammar assistance, free background music, video and music cutting, and more.
- Murf offers comprehensive communication and collaboration tools, access control, a pronunciation library, and a service level agreement (SLA) for enterprises wishing to develop voice-overs in bulk.
Price
| Free | Basic | Pro | Enterprise |
|---|---|---|---|
| $0 / Month | $13 / Month | $26 / Month | $166 / Month |
| Try all 120+ voices 10 mins of voice generation 10 mins of transcription Share link for audio/video output No downloads Single User No credit card required | Unlimited Downloads 24 hours of voice generation/year Access to 60 voices (10 languages) Commercial Usage rights Chat and Email support Single User | Unlimited Downloads 96 hours of voice generation/year 48 hours of transcription/year Access 120+ voices (20 languages) Commercial Usage rights Recorded voice editing Voice changer Up to 3 users Priority Support | 5+ Users Unlimited Voice Generation Time Unlimited Transcription time Custom Voices Single-sign on (SSO) Collaboration and Access Control Dedicated Account Representative Centralized invoicing Service Agreement Deletion recovery Unlimited Storage |
Cons
- You may experience frequent technical glitches.
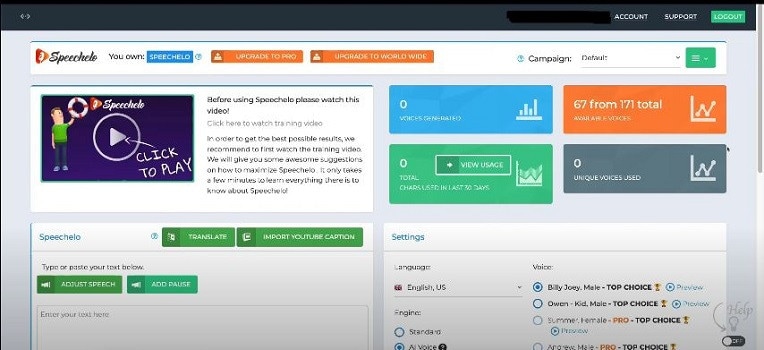
#2: Speechelo
It is available on Windows, Mac, Android, iPhone, and Online
Speechelo gives a realistic voice tone and expressions. This gets people more interested in voice-overs. You can use Speechelo to create sales videos, training films, and instructive videos, among other things. It includes attributes such as breathing and pauses, vocal tones, changing speed and pitch, and compatibility for 23 languages.
Features
- The text-to-speech engine in Speechelo can add intonation to the voice.
- It contains over 30 voices that sound natural.
- It has both male and female voices.
- It works with various video editing tools, including Camatasia, Adobe, Premier, and iMovie.
- Ordinary tone, cheerful tone, and serious tone are the three tones you may use to read your text.
Price
| Premium |
|---|
| $47 (Discount price) |
| One-time payment With 60-day money-back guarantee |
Cons
- The output of Speechelo will be 48kbps. If you’re familiar with sound production, you’ll see that this is a very low output.
- It might produce inaccurate output if you input long voice-overs.
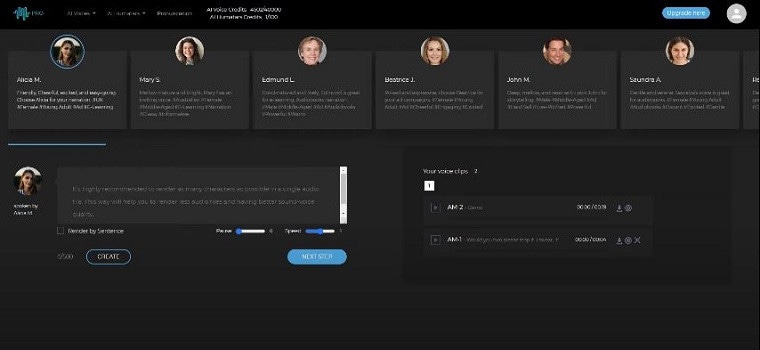
#3: Synthesys
It is available on Windows, Mac, Android, iPhone, and Online
Synthesys helps to convert text into a natural-sounding voice. With Synthesis, you can choose from various tones, accents, male and female voices, languages, and reading speeds. Moreover, It simply takes three steps to create a natural-sounding artificial speech that you may use for a variety of commercial applications.
- To begin, select the gender, style, accent, and tone you want the created voice to have.
- You can paste or type the content you want to turn into speech into Synthesys’ AI voice-producing platform.
- Lastly, click ‘create’ to start creating your artificial speech in minutes. You may adjust the reading speed and pause length from here.
Features
- Cloud-based software.
- Expert and natural-sounding voices are available in an extensive collection.
- There are over 35 female voices and 30 male voices.
- You can create and sell unlimited voices.
- Extremely user-friendly interface.
Price
| Audio Synthesys | Human Studio Synthesys | Audio and Human Studio Synthesys |
|---|---|---|
| $29 / Month | #39 / Month | $59 / Month |
| Unlimited voice-overs downloads Access to 30 Real Human Voices Access to 66 Languages & 254 General Voices Fully Web-Based | Unlimited Videos Access to 73 Humatars (Extra Outfits included) Access to 66 Languages & 254 General Voices Upload Your Own Voice Full Video Customization Fully Web-Based | Unlimited Videos & Voice Overs Access to both Software All features included 20% OFF |
Cons
- It has character limitations when making a voice-over.
- It does not have a free trial version.
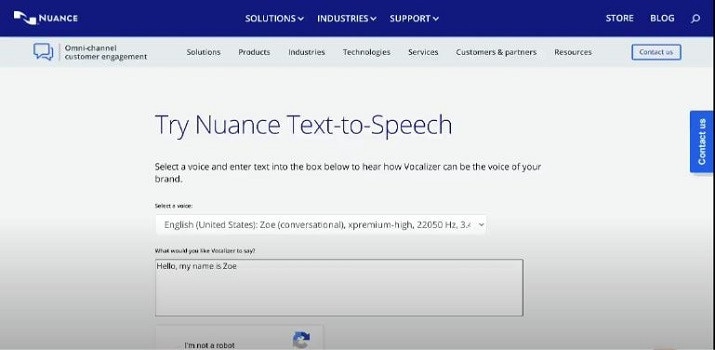
#4: Nuance Dragon
It is available in Windows only
Nuance Dragon is an artificial intelligence-powered voice recognition system. It offers both residential and commercial solutions. It spans across various data centers and delivers cloud services.
Its hosting platform is Microsoft Azure, which is HITRUST CSF-approved. All of their solutions follow industry-standard guidelines. Nuance Dragon protects data in transit and at rest with 256-bit encryption.
Features
- Nuance Dragon complies with HIPAA regulations, which are critical for public sector security and confidentiality.
- It applies to a wide range of professions.
- It offers complete protection.
Price
| Home | Professional |
|---|---|
| $200 | $500 |
| It has 99% recognition accuracy Immediate access to your dictation. One-time payment. | It has 99% recognition accuracy Share documents Sync custom words and commands Immediate access to your dictation. One-time payment. |
Cons
- It works only on Windows, and it is not available on Mac.
- It does not have a free trial version.
- It does not include Premium Consulting or Integration Services.
#5: Notevibes
It is available on Windows, Mac, Android, iPhone, and Online
Notevibes is a tremendous text-to-speech tool that comes in both a free and a commercial edition with many features. It offers customers over five hundred translation characters while also allowing them to modify the pronunciation.
As a result, users have access to all of their resources to learn a new language and significantly increase their reading skills. Furthermore, Notevibes features 177 distinct voices speaking in 18 different languages.
Users appreciate the natural-sounding voices that assist them in pronouncing words correctly. Users from many walks of life can profit from the tool because it has many functions.
Features
- Realistic voice generator
- Aloud Speaking
- Make an MP3 of your audio speech.
- 47 Individual Voices
- Characters: 200 – 1,000,000
Price
| Personal Pack | Commercial Pack | Corporate Pack |
|---|---|---|
| $9 / Month ($107 per year) | $90 / Month ($1080 per year) | $4,000 / Year |
| For personal use only: private listening, personal e-learning 1,200,000 characters pack per year 201 Premium Voices available 18 Languages (EN, ES, DE, FR, VT, RU, PT, IT, NL, TR, JP, KO, HI and etc) MP3 Download 1 Account License | For Commercial use: YouTube, broadcasts, TV, IVR voiceover and other businesses 12,000,000 characters pack per year Advanced voice editor new 201 Premium Voices available 18 Languages (EN, ES, DE, FR, VT, RU, PT, IT, NL, TR, JP, KO, HI and etc.) SSML tags support MP3, Wav Download Audio files history You 100% own intellectual property for all files | For Corporate Users All in Commercial and 50,000,000 characters pack per year Master account for management Team License (up to 10 users) Priority email support |
Cons
- It does not have a preview. You have to generate the voice-over to listen.
- You can’t combine a single audio file out of many audio files.
- The Voiceover & Editor Page is unique in that it has two sections: one for creating the voice-over and another for obtaining audio files. Switching between them will take some time. If you’re working on a large project, moving between bot sites will be a hassle.
- No project-based organization
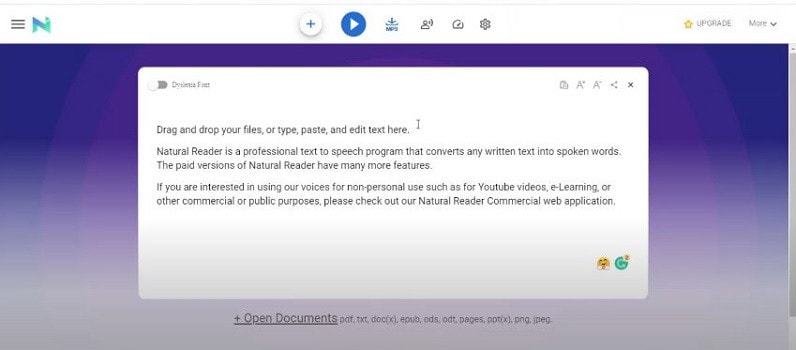
#6: Natural Reader
It is available on Windows, Mac, Android, iPhone, and Online
Natural Reader is among the few free text-to-speech programs with several exciting features. It’s pretty easy to use, and you can get started right away by loading texts into its library.
Furthermore, the tool allows users to manage several files in various formats. Lastly, the built-in OCR will enable you to submit images or text scans and have them read aloud.
Features
- Built-in OCR
- Choice of interfaces
- Built-in browser
- Dyslexic-friendly font
Price
| Free | Personal | Professional | Ultimate |
|---|---|---|---|
| $0 (Free to use) | $99.50 (One-time payment) | $129.50 (One-time payment) | $199.50 (One-time payment) |
| Unlimited use with Free Voices Miniboard to read text in other applications Pronunciation Editor Works with PDF, Docx, TXT and ePub | 2 natural voices included All features of Free Version included Convert to MP3 | 4 natural voices included All features of Personal Version included | 6 natural voices included All features of Professional Version included 5000 images/year for OCR to read from images & scanned PDFs |
Cons
- There is no way to skip or jump around any text on the page.
- You will need internet access in the free software to access the voices.
- The paid version is very expensive in comparison to others.
- Long-term use is complex.
Pro Tip:
If you just use text-to-speech software sometimes, it’s best to utilize one of the many free options available. On the other hand, paid versions are great if you want extensive functionality and don’t mind limitations on usage.
You should check for text-to-speech software with natural voices enabled in commercial applications. A top-rated system should include real-time speech capabilities and a user-friendly UI.
Text to Speech Services’ Advantages
TTS systems can help content owners such as corporations, YouTubers, institutions, media houses, mobile app developers, e-learning solution providers, and others in comparable fields in the following ways:
- Global Reach: TTS voices that sound human, are clear, and can be customized can let you communicate with people worldwide. You can even incorporate translations in multiple languages to read the text in their own language.
- Improve User Experience: Allowing speech in pre-sales and after-sales can reduce human agent burden, provide individualized services, lower operating expenses, and speed up productivity.
- Saves Money and Time: Companies can quickly and easily implement TTS systems with little maintenance.
- Improves Productivity: E-learning experts and HR departments can create learning modules for staff training using TTS. This will allow employees to learn the information while working anywhere and at any time.
Text to speech solutions can also help online students, researchers, teachers, device users, app users, website visitors, machine users, and others in the following ways:
- People with Reading Difficulties: A considerable portion of the global population suffers from learning or reading disabilities, including language-based learning disabilities. TTS solutions in your documents might assist them in better understanding the document. It can also aid persons with vision problems and literacy issues.
- Multitasking: Listening to something allows you to execute multiple physical duties at once, such as cooking, cleaning, exercising, etc. It’s a welcome break for busy professionals who can’t find time to read the stacks of books that have accumulated on their desks for years. They can just put on their headphones and listen to them while doing other things.
- Great for Kids: Instead of being glued to their computers or phones all day, your children can listen to audio files, including their books and other study materials. It will safeguard their priceless sight. It will also increase word recognition, cognitive skills, make finding and correcting problems in their writing easier.
- Journey Mate: People can listen to information while traveling by using speech to text. You may always listen to the noises and enjoy them while riding without having to strain your eyes, regardless of how rocky the road is.
Frequently Asked Questions
What is Text to Speech Software?
TTS (text-to-speech) is an assistive technology that reads text aloud. TTS systems provide computer-generated sound, and we may vary the reading speed by increasing the speed or slowing things down.
Is Text-To-Speech Technology Handy?
According to studies, text-to-speech technology helps viewers concentrate on the content rather than the process of reading, resulting in a greater understanding of the topic and more engagement.
While some argue that audiobooks, or scripts read by paid voice actors, are superior to computer-generated voices, there is compelling proof that text to speech can be a handy tool for YouTube content creators.
Is The Voice Quality Consistent Across All Text to Speech Programs?
Voice quality ultimately depends on the service. However, some use human voices, while premium solutions employ the voices of well-known narrators like David Attenborough and Morgan Freeman.
You can even mimic the sound of youngsters speaking. Many gadgets, particularly online web page scanners and even audiobooks emphasize the text they are scanning.
What Are the Benefits of Using Text to Speech Software?
You can use this type of technology in a variety of ways. Some programs read text from a digital document or an interactive online page for users. Some programs can even convert handwritten text into speech using modern technology such as Optical Character Recognition (OCR).
Text-to-speech software is compatible with various devices and applies to all kinds of individual digital devices, including laptops, PCs, tablets, and smartphones.
What Is the Process of Converting Speech in Text to Speech Software?
The majority of text-to-speech software works in the same way. Users can either upload or input the content to convert to audio. Then they choose from the different voices to evaluate which sound is best for the voice-over.
Many TTS solutions rely on OCR technology in some form. OCR allows us to obtain text from documents and photos by recognizing written and digital text. If you click an image of a street sign, the program will read the words printed on it.
Is it possible to use Text to Speech on YouTube?
Absolutely, you can get them in YouTube videos, but to prevent advertising strikes, make sure you post videos with authentic human voices somewhere between.
What Text-To-Speech Software Does YouTube Content Creators Use?
To incorporate voice-overs on their sales pitches and informative videos, most YouTubers pay for text-to-speech software like Synthesys and Speechelo.
Is It Possible to Monetize YouTube Videos Using Text to Speech?
It varies on the text to speech engine you’re using; some TTS engines support YouTube monetization while others don’t.
Speech has a significant impact on the success rate of the entire YouTube adventure, whether storytelling or a standard sales pitch. It helps to have a decent voice and speaking abilities. However, not everyone gets both simultaneously; many individuals employ voice artists to provide voice-overs.
Some freelancers charge $5-$100 for a 5-minute voice-over. However, not everyone can afford an expensive voice artist, especially for longer films or just starting. Here are other options that I discovered as the most acceptable free text to voice generators for YouTube videos.
Let’s take a deeper look at the most excellent free text to speech software for YouTube videos.
Getting Started
Text to speech is a speech synthesis software that speaks aloud digital and textual content. The software offers a wide range of applications and is utilized by everyone from professionals and students to toddlers and adults.
Viewers are emotionally attached to documents such as PDFs, books, novels, and e-learning courses when they hear narration with a human voice. Text-to-speech systems are ideal for multitasking by busy professionals.
It’s no surprise that there are numerous text-to-speech options available. Audiobooks are also becoming more popular for the same reasons.
We’ll go over the best text-to-speech tools available in this guide. We’ve gathered a detailed list of the most exemplary free and commercial text-to-speech applications to help you choose the best option for your needs:
#1: Murf
It is available on Windows, Mac, Android, iPhone, and Online
Murf is a text-based voice-over maker. You can either compose your script or submit a voice clip to convert it into hyper-realistic AI voices. Murf delivers expert voice-over artists with experienced voices. You can check multiple parameters in the voices. You can use Murf to signify a brand, a product, a company, a presentation, and many more.
Features:
- Murf allows you to create voice-overs from the text. It also allows you to transform your speech into editable text, which you can subsequently edit or convert into AI voice.
- Murf Studio provides the ability to synchronize your speech with visuals.
- Murf provides over 100 authentic voices in 19 languages.
- It also gives options for inserting pauses, altering narration tempo, and emphasizing certain points.
- It also includes features such as script checking with grammar assistance, free background music, video and music cutting, and more.
- Murf offers comprehensive communication and collaboration tools, access control, a pronunciation library, and a service level agreement (SLA) for enterprises wishing to develop voice-overs in bulk.
Price
| Free | Basic | Pro | Enterprise |
|---|---|---|---|
| $0 / Month | $13 / Month | $26 / Month | $166 / Month |
| Try all 120+ voices 10 mins of voice generation 10 mins of transcription Share link for audio/video output No downloads Single User No credit card required | Unlimited Downloads 24 hours of voice generation/year Access to 60 voices (10 languages) Commercial Usage rights Chat and Email support Single User | Unlimited Downloads 96 hours of voice generation/year 48 hours of transcription/year Access 120+ voices (20 languages) Commercial Usage rights Recorded voice editing Voice changer Up to 3 users Priority Support | 5+ Users Unlimited Voice Generation Time Unlimited Transcription time Custom Voices Single-sign on (SSO) Collaboration and Access Control Dedicated Account Representative Centralized invoicing Service Agreement Deletion recovery Unlimited Storage |
Cons
- You may experience frequent technical glitches.
#2: Speechelo
It is available on Windows, Mac, Android, iPhone, and Online
Speechelo gives a realistic voice tone and expressions. This gets people more interested in voice-overs. You can use Speechelo to create sales videos, training films, and instructive videos, among other things. It includes attributes such as breathing and pauses, vocal tones, changing speed and pitch, and compatibility for 23 languages.
Features
- The text-to-speech engine in Speechelo can add intonation to the voice.
- It contains over 30 voices that sound natural.
- It has both male and female voices.
- It works with various video editing tools, including Camatasia, Adobe, Premier, and iMovie.
- Ordinary tone, cheerful tone, and serious tone are the three tones you may use to read your text.
Price
| Premium |
|---|
| $47 (Discount price) |
| One-time payment With 60-day money-back guarantee |
Cons
- The output of Speechelo will be 48kbps. If you’re familiar with sound production, you’ll see that this is a very low output.
- It might produce inaccurate output if you input long voice-overs.
#3: Synthesys
It is available on Windows, Mac, Android, iPhone, and Online
Synthesys helps to convert text into a natural-sounding voice. With Synthesis, you can choose from various tones, accents, male and female voices, languages, and reading speeds. Moreover, It simply takes three steps to create a natural-sounding artificial speech that you may use for a variety of commercial applications.
- To begin, select the gender, style, accent, and tone you want the created voice to have.
- You can paste or type the content you want to turn into speech into Synthesys’ AI voice-producing platform.
- Lastly, click ‘create’ to start creating your artificial speech in minutes. You may adjust the reading speed and pause length from here.
Features
- Cloud-based software.
- Expert and natural-sounding voices are available in an extensive collection.
- There are over 35 female voices and 30 male voices.
- You can create and sell unlimited voices.
- Extremely user-friendly interface.
Price
| Audio Synthesys | Human Studio Synthesys | Audio and Human Studio Synthesys |
|---|---|---|
| $29 / Month | #39 / Month | $59 / Month |
| Unlimited voice-overs downloads Access to 30 Real Human Voices Access to 66 Languages & 254 General Voices Fully Web-Based | Unlimited Videos Access to 73 Humatars (Extra Outfits included) Access to 66 Languages & 254 General Voices Upload Your Own Voice Full Video Customization Fully Web-Based | Unlimited Videos & Voice Overs Access to both Software All features included 20% OFF |
Cons
- It has character limitations when making a voice-over.
- It does not have a free trial version.
#4: Nuance Dragon
It is available in Windows only
Nuance Dragon is an artificial intelligence-powered voice recognition system. It offers both residential and commercial solutions. It spans across various data centers and delivers cloud services.
Its hosting platform is Microsoft Azure, which is HITRUST CSF-approved. All of their solutions follow industry-standard guidelines. Nuance Dragon protects data in transit and at rest with 256-bit encryption.
Features
- Nuance Dragon complies with HIPAA regulations, which are critical for public sector security and confidentiality.
- It applies to a wide range of professions.
- It offers complete protection.
Price
| Home | Professional |
|---|---|
| $200 | $500 |
| It has 99% recognition accuracy Immediate access to your dictation. One-time payment. | It has 99% recognition accuracy Share documents Sync custom words and commands Immediate access to your dictation. One-time payment. |
Cons
- It works only on Windows, and it is not available on Mac.
- It does not have a free trial version.
- It does not include Premium Consulting or Integration Services.
#5: Notevibes
It is available on Windows, Mac, Android, iPhone, and Online
Notevibes is a tremendous text-to-speech tool that comes in both a free and a commercial edition with many features. It offers customers over five hundred translation characters while also allowing them to modify the pronunciation.
As a result, users have access to all of their resources to learn a new language and significantly increase their reading skills. Furthermore, Notevibes features 177 distinct voices speaking in 18 different languages.
Users appreciate the natural-sounding voices that assist them in pronouncing words correctly. Users from many walks of life can profit from the tool because it has many functions.
Features
- Realistic voice generator
- Aloud Speaking
- Make an MP3 of your audio speech.
- 47 Individual Voices
- Characters: 200 – 1,000,000
Price
| Personal Pack | Commercial Pack | Corporate Pack |
|---|---|---|
| $9 / Month ($107 per year) | $90 / Month ($1080 per year) | $4,000 / Year |
| For personal use only: private listening, personal e-learning 1,200,000 characters pack per year 201 Premium Voices available 18 Languages (EN, ES, DE, FR, VT, RU, PT, IT, NL, TR, JP, KO, HI and etc) MP3 Download 1 Account License | For Commercial use: YouTube, broadcasts, TV, IVR voiceover and other businesses 12,000,000 characters pack per year Advanced voice editor new 201 Premium Voices available 18 Languages (EN, ES, DE, FR, VT, RU, PT, IT, NL, TR, JP, KO, HI and etc.) SSML tags support MP3, Wav Download Audio files history You 100% own intellectual property for all files | For Corporate Users All in Commercial and 50,000,000 characters pack per year Master account for management Team License (up to 10 users) Priority email support |
Cons
- It does not have a preview. You have to generate the voice-over to listen.
- You can’t combine a single audio file out of many audio files.
- The Voiceover & Editor Page is unique in that it has two sections: one for creating the voice-over and another for obtaining audio files. Switching between them will take some time. If you’re working on a large project, moving between bot sites will be a hassle.
- No project-based organization
#6: Natural Reader
It is available on Windows, Mac, Android, iPhone, and Online
Natural Reader is among the few free text-to-speech programs with several exciting features. It’s pretty easy to use, and you can get started right away by loading texts into its library.
Furthermore, the tool allows users to manage several files in various formats. Lastly, the built-in OCR will enable you to submit images or text scans and have them read aloud.
Features
- Built-in OCR
- Choice of interfaces
- Built-in browser
- Dyslexic-friendly font
Price
| Free | Personal | Professional | Ultimate |
|---|---|---|---|
| $0 (Free to use) | $99.50 (One-time payment) | $129.50 (One-time payment) | $199.50 (One-time payment) |
| Unlimited use with Free Voices Miniboard to read text in other applications Pronunciation Editor Works with PDF, Docx, TXT and ePub | 2 natural voices included All features of Free Version included Convert to MP3 | 4 natural voices included All features of Personal Version included | 6 natural voices included All features of Professional Version included 5000 images/year for OCR to read from images & scanned PDFs |
Cons
- There is no way to skip or jump around any text on the page.
- You will need internet access in the free software to access the voices.
- The paid version is very expensive in comparison to others.
- Long-term use is complex.
Pro Tip:
If you just use text-to-speech software sometimes, it’s best to utilize one of the many free options available. On the other hand, paid versions are great if you want extensive functionality and don’t mind limitations on usage.
You should check for text-to-speech software with natural voices enabled in commercial applications. A top-rated system should include real-time speech capabilities and a user-friendly UI.
Text to Speech Services’ Advantages
TTS systems can help content owners such as corporations, YouTubers, institutions, media houses, mobile app developers, e-learning solution providers, and others in comparable fields in the following ways:
- Global Reach: TTS voices that sound human, are clear, and can be customized can let you communicate with people worldwide. You can even incorporate translations in multiple languages to read the text in their own language.
- Improve User Experience: Allowing speech in pre-sales and after-sales can reduce human agent burden, provide individualized services, lower operating expenses, and speed up productivity.
- Saves Money and Time: Companies can quickly and easily implement TTS systems with little maintenance.
- Improves Productivity: E-learning experts and HR departments can create learning modules for staff training using TTS. This will allow employees to learn the information while working anywhere and at any time.
Text to speech solutions can also help online students, researchers, teachers, device users, app users, website visitors, machine users, and others in the following ways:
- People with Reading Difficulties: A considerable portion of the global population suffers from learning or reading disabilities, including language-based learning disabilities. TTS solutions in your documents might assist them in better understanding the document. It can also aid persons with vision problems and literacy issues.
- Multitasking: Listening to something allows you to execute multiple physical duties at once, such as cooking, cleaning, exercising, etc. It’s a welcome break for busy professionals who can’t find time to read the stacks of books that have accumulated on their desks for years. They can just put on their headphones and listen to them while doing other things.
- Great for Kids: Instead of being glued to their computers or phones all day, your children can listen to audio files, including their books and other study materials. It will safeguard their priceless sight. It will also increase word recognition, cognitive skills, make finding and correcting problems in their writing easier.
- Journey Mate: People can listen to information while traveling by using speech to text. You may always listen to the noises and enjoy them while riding without having to strain your eyes, regardless of how rocky the road is.
Frequently Asked Questions
What is Text to Speech Software?
TTS (text-to-speech) is an assistive technology that reads text aloud. TTS systems provide computer-generated sound, and we may vary the reading speed by increasing the speed or slowing things down.
Is Text-To-Speech Technology Handy?
According to studies, text-to-speech technology helps viewers concentrate on the content rather than the process of reading, resulting in a greater understanding of the topic and more engagement.
While some argue that audiobooks, or scripts read by paid voice actors, are superior to computer-generated voices, there is compelling proof that text to speech can be a handy tool for YouTube content creators.
Is The Voice Quality Consistent Across All Text to Speech Programs?
Voice quality ultimately depends on the service. However, some use human voices, while premium solutions employ the voices of well-known narrators like David Attenborough and Morgan Freeman.
You can even mimic the sound of youngsters speaking. Many gadgets, particularly online web page scanners and even audiobooks emphasize the text they are scanning.
What Are the Benefits of Using Text to Speech Software?
You can use this type of technology in a variety of ways. Some programs read text from a digital document or an interactive online page for users. Some programs can even convert handwritten text into speech using modern technology such as Optical Character Recognition (OCR).
Text-to-speech software is compatible with various devices and applies to all kinds of individual digital devices, including laptops, PCs, tablets, and smartphones.
What Is the Process of Converting Speech in Text to Speech Software?
The majority of text-to-speech software works in the same way. Users can either upload or input the content to convert to audio. Then they choose from the different voices to evaluate which sound is best for the voice-over.
Many TTS solutions rely on OCR technology in some form. OCR allows us to obtain text from documents and photos by recognizing written and digital text. If you click an image of a street sign, the program will read the words printed on it.
Is it possible to use Text to Speech on YouTube?
Absolutely, you can get them in YouTube videos, but to prevent advertising strikes, make sure you post videos with authentic human voices somewhere between.
What Text-To-Speech Software Does YouTube Content Creators Use?
To incorporate voice-overs on their sales pitches and informative videos, most YouTubers pay for text-to-speech software like Synthesys and Speechelo.
Is It Possible to Monetize YouTube Videos Using Text to Speech?
It varies on the text to speech engine you’re using; some TTS engines support YouTube monetization while others don’t.
How to Create Simple Slideshow Word
How to Create Simple Slideshow Word
An easy yet powerful editor
Numerous effects to choose from
Detailed tutorials provided by the official channel
Working with the MS Office Suite may often present forward a need to create a slideshow in Word. Stay here to learn about the easiest ways of making slideshow in MS Word.
In this article
01 [Easy Steps to Create Simple Slideshow Word](#Part 1)
02 [Top 5 Microsoft Word Slideshow Maker Alternatives](#Part 2)
03 [FAQs of Creating Simple Slideshow Word](#Part 3)
Part 1 Easy Steps to Create Simple Slideshow Word
Slideshow presentations easily land among the commonest forms of information delivery in the corporate sector and business world. Be it a product promotion, or the upcoming inline company strategy, slideshow presentations address it all in the simplest and the most expressive manner.
When the talk is about creating these graphic snippets in the MS Office Suite, the latter’s PowerPoint application is affordably the first tool that comes into the picture. However, you may well be surprised to know that the MS Word application is no less in addressing the aforesaid concern.
Creating slideshow presentations in Microsoft Word comes handy when there is a need to quickly supplement product documentations with expressive and precise graphical explanations. Adding to the credibility, such presentations are easily converted to PDFs for addressing inline export concerns.
Discussing about the same, let us dive into the stepwise process of working towards making slideshow presentations in the Microsoft Word application in what follows next:
User’s Guide to Create an MS Word Slideshow Presentation
Step 1: Launch the Application
To begin creating a Microsoft Word slideshow, start with navigating to the MS Office package in your preferred device and launching the MS Word application.
Step 2: Select the Outline View
Navigate to and hit the ‘View’ tab at the topmost ribbon to select the ‘Outline’ presentation view.

Step 3: Insert Images and Tables
Within the slide navigation pane that appears at the left in the ‘Outline’ view, select the first slide and begin entering your desired text. If you wish to supplement the text with graphic elements, MS Word allows including pictures, tables, clip arts, equations, and many more objects within the slides.
For instance, you can insert an image or graph in a slide by heading to the ‘Insert’ tab in the ribbon at the top and clicking on the ‘Insert Picture from File’ icon. Following this, you will need to browse for the desired image within your device’s gallery and open the same in the presentation you are working at.
Likewise, if you desire to complement the slideshow title with an apt table, click on the ‘Table’ icon within the ‘Insert’ tab. MS Word offers a range of preset table dimensions along with granting you the liberty to include a customized table dimension of your own.

Step 4: Some More Decoration Ahead!
When creating a professional slideshow presentation to promote your brand and address a series of likewise concerns, the customary inclusion of tables and images does not seem enough. Rest assured, MS Word is here to help you create an elaborative slideshow with its explanatory charts and decorative clip arts. You will easily find all these elements within the ‘Insert’ tab at the top of the working screen.
To add charts and clip arts in your slideshow, head to and hit the ‘Insert’ tab, followed by selecting the ‘Chart’ and ‘Clip Art’ options respectively, from the dropdown menu that appears next.

Step 5: Craft the Successive Presentation Slides
When you are done with creating the title slide of your presentation, proceed with crafting the rest of the presentation in a similar manner. While images and the other elements discussed above are a luxury to any version of the MS Word tool you prefer, adding video elements becomes a limitation for the 2007 and 2010 versions of the application.

If you are working in MS Word versions of 2013 and above, select the ‘Online Video’ option within the ‘Insert’ tab’s dropdown menu. You will henceforth be presented with the ‘Insert Video’ dialog box, where you can choose the most suitable insertion option from the 3 choices available.

Step 6: Exporting the Presentation to PowerPoint
When you are done with everything, navigate to the ‘File’ tab in the topmost ribbon and select ‘Options’ from the drop down menu that follows. The ‘Options’ window pops up, wherein you are required to click on the ‘Quick Access Toolbar’.
Making the aforesaid selection will open the ‘Choose Commands From’ menu, where you will have to select the ‘All Commands’ option. In the list of options that appears next, click on the ‘Send to Microsoft PowerPoint’. Lastly, tap ‘OK’ to confirm your choice. The slideshow presentation that you have just created will now be sent to MS PowerPoint.
Part 2 Top 5 Microsoft Word Slideshow Maker Alternatives
While creating slideshow presentations in the MS Word application is quite handy, you may often land across a need to design presentation pieces with advanced customizations that involve an extra bit of detailing. Speaking in the light of high end professional concerns, the MS Word tool may sometimes fall short of meeting the precise and diverse slideshow creation needs.
In such a case, you can conveniently rely on the hoard of online and software based programs available in the IT market as well as across the web. Moving in the line of addressing the most sophisticated slideshow design concerns, let us look through some of the most feasible alternatives to create professionally sound graphic presentations in the following section:
01Icecream Slideshow Maker
The Icecream slideshow maker easily lands among the most reliable and modernized software alternatives to design slideshow presentations with utmost ease. Talking of program interface and user accessibility, the program conveniently earns appreciable scores. Moving ahead, the latter’s elegant workspace transforms the monotonous slideshow design process into a fun activity that you will love to indulge in.
Throwing light on the app’s creation utilities, you are allowed to supplement your presentations with all the latest audio-visual effects and customizations. You can add images, videos and music to the presentations, while choosing to save them either on your device or export to online storage accounts, like, Dropbox, YouTube and Google Drive, or burn to DVDs. You can either use the software for free or prefer a paid subscription to avail the premium features.

02PhotoStage Slideshow Software
This one is an all-purpose slideshow creator program designed for addressing every creation need ranging from personal, fun-filled entertainment movies to high end professional and business oriented presentations. Talking of customization flexibilities, the software allows you to explore your graphic creativity on the widest canvas with a range of preset templates, audio tracks, transitions, videos, photos and a variety of additional media integrations.
What adds to the usage credibility of this slideshow creator program is the latter’s in-built image editor, which effectively dedicates itself towards adding life to your otherwise customary still captures. You can further, drop all your output quality concerns when working with the aforesaid program as the software has the most expanded range of output features. The software however, comes with a bit outdated interface and is limited to a 30-day free usage.

03Slideshow Maker
The 4K slideshow maker is an affordable freeware utility to create image centered presentations. All you need to do is, upload your selected images in the software’s editing timeline and begin a customization spree with the diversity of available effects, features and tools. To mention a few, you can work with selecting the perfect video quality and aspect ratio for the presentation, or make manual adjustments to transition flow and slide screen timings.
When it comes to adding background audio, you can either select a matching music piece from the software’s preset audio library, or pick one from the media gallery of your device in the WAV, MP3, M4A, OGG and other audio formats. The program caters to generate high quality slideshow output in the FLV, M4V, MP4 and AVI file formats. The software however, works to create slideshows exclusively from JPG images and has a series of features that are seldom used.

04Proshow Gold
Another entry into the list of alternatives to MS Word slideshow maker is the aforesaid software that comes with a free user access. The program allows you to design high end professional presentations with the longest list of customization features and tools. Working with the program, you can include the most cohesive media integrations within your presentations to create a stunning slideshow.
You can choose between adding the images, music and videos either from your device or import them from social media platforms. The software additionally, permits you to work with the most elusive and integrated slideshow themes and a never ending series of royalty-free music. The program further houses an extensive range of automated utilities that are equally appreciated by beginners and experienced users, however for a limited period free trial.

05Kizoa
Last sin the list is the Kizoa slideshow maker program that is highly appreciated for its user cohesive working interface. The software attempts to guide you at every step of the slideshow creation process with on screen pop-ups that contain tips and tricks for a hassle free working experience with the program. Working with the program, you are allowed to use the vast library of categorized premade templates for creating manual masterpieces of slideshow presentations.
Talking of customization features, you can choose to add images to the presentation, both from your device gallery, or through a Facebook import. The program library has a decent set of 48 transition and 58 image effects to amplify the appearance of the added photos. You can work to modify the image size to a screen fit to ward off blank spaces at the sides.
The slides can further be supplemented with premade music, GIFs and customizable text annotations. The software however, demands an account creation to address slideshow export needs to different media sharing platforms, like, Facebook, YouTube, DVD burning, etc.

Part 3 FAQs of Creating Simple Slideshow Word
01What is the 10/20/30 rule of slideshow presentations?
The 10/20/30 rule sets counted limitations on slideshow elements to generate high quality presentation outputs. The rule states that the perfect slideshow presentation consists of a maximum of 10 slides, has a run time of approximately 20 minutes and has minimum font size of 30 points.
02What is the 6 x 6 bullet rule of slideshow presentations?
The 6 x 6 bullet point rule states that you should include a maximum of 6 bullet points within each slide, along with limiting the bullet description to 6 words at the most. Abiding by this rule, your presentations slides will never look cluttered, while you can convey the desired information in a precise manner.
03Why should the presentation slides have a limited amount of text?
Creating a crowded slideshow with a bundled text annotations are a downside to audience interests. Add only essential contents in text, while warding off unnecessary words, lest you may lose the uninterrupted attention of your viewers towards the presentation.
04What is the perfect screen time of each slide within a presentation?
Keeping a slide screen time between 2 to 3 minutes is a smart strategy to captivate viewer attention. To get an appreciable response from the audience, you should aim at coming directly at the point, instead of beating about the bush. In an otherwise case of longer lengths, you may end up distracting your audience.
05What is the affordable word limit of each slide within a presentation?
To ensure a decent and professional look of your slideshow, restrict the latter’s text content to a maximum of 30 words within 6 to 8 lines. Add precise bullet points and avoid including lengthy paragraphs to create an engaging impact on the audience, instead of forcing them to read the presentation content as if it were a news article.
06Creating Microsoft Word Presentations in Wondershare Filmora
Wondershare Filmora Video Editor is a professional standard graphic editor package that caters to the most diverse slideshow creation needs with utmost ease. Regardless of the platform you choose to work with for creating a slideshow presentation, the aforesaid program is ready to supplement your artwork with the best and most advanced editing effects and features. When the talk is about creating and editing slideshows in the MS Office Suite, the software easily claims the title of being the best image slider for Wordpress.
For Win 7 or later (64-bit)
For macOS 10.12 or later
Elaborating a bit on the feature rich library of the software program, you get to access a plethora of audio-visual effects and tools, preset presentation themes and templates, background music tracks, transitions and text styles, etc., that combine together to deliver a jaw dropping presentation output. The software greets you with the most interactive, responsive and clean interface to work with and is available absolutely free of cost.
● Ending Thoughts →
● Creating a slideshow presentation in Microsoft Word is quite easy and involves just a few simple steps to design elementary presentation snippets.
● Browsing through the software market, you will come across a diversity of slideshow creation tools and applications that are feasible alternatives to the MS Word tool.
● When aiming to pick the best slideshow creator program from the hoard of available choices, you can stay with Wondershare Filmora without having to think twice.
Working with the MS Office Suite may often present forward a need to create a slideshow in Word. Stay here to learn about the easiest ways of making slideshow in MS Word.
In this article
01 [Easy Steps to Create Simple Slideshow Word](#Part 1)
02 [Top 5 Microsoft Word Slideshow Maker Alternatives](#Part 2)
03 [FAQs of Creating Simple Slideshow Word](#Part 3)
Part 1 Easy Steps to Create Simple Slideshow Word
Slideshow presentations easily land among the commonest forms of information delivery in the corporate sector and business world. Be it a product promotion, or the upcoming inline company strategy, slideshow presentations address it all in the simplest and the most expressive manner.
When the talk is about creating these graphic snippets in the MS Office Suite, the latter’s PowerPoint application is affordably the first tool that comes into the picture. However, you may well be surprised to know that the MS Word application is no less in addressing the aforesaid concern.
Creating slideshow presentations in Microsoft Word comes handy when there is a need to quickly supplement product documentations with expressive and precise graphical explanations. Adding to the credibility, such presentations are easily converted to PDFs for addressing inline export concerns.
Discussing about the same, let us dive into the stepwise process of working towards making slideshow presentations in the Microsoft Word application in what follows next:
User’s Guide to Create an MS Word Slideshow Presentation
Step 1: Launch the Application
To begin creating a Microsoft Word slideshow, start with navigating to the MS Office package in your preferred device and launching the MS Word application.
Step 2: Select the Outline View
Navigate to and hit the ‘View’ tab at the topmost ribbon to select the ‘Outline’ presentation view.
Step 3: Insert Images and Tables
Within the slide navigation pane that appears at the left in the ‘Outline’ view, select the first slide and begin entering your desired text. If you wish to supplement the text with graphic elements, MS Word allows including pictures, tables, clip arts, equations, and many more objects within the slides.
For instance, you can insert an image or graph in a slide by heading to the ‘Insert’ tab in the ribbon at the top and clicking on the ‘Insert Picture from File’ icon. Following this, you will need to browse for the desired image within your device’s gallery and open the same in the presentation you are working at.
Likewise, if you desire to complement the slideshow title with an apt table, click on the ‘Table’ icon within the ‘Insert’ tab. MS Word offers a range of preset table dimensions along with granting you the liberty to include a customized table dimension of your own.
Step 4: Some More Decoration Ahead!
When creating a professional slideshow presentation to promote your brand and address a series of likewise concerns, the customary inclusion of tables and images does not seem enough. Rest assured, MS Word is here to help you create an elaborative slideshow with its explanatory charts and decorative clip arts. You will easily find all these elements within the ‘Insert’ tab at the top of the working screen.
To add charts and clip arts in your slideshow, head to and hit the ‘Insert’ tab, followed by selecting the ‘Chart’ and ‘Clip Art’ options respectively, from the dropdown menu that appears next.
Step 5: Craft the Successive Presentation Slides
When you are done with creating the title slide of your presentation, proceed with crafting the rest of the presentation in a similar manner. While images and the other elements discussed above are a luxury to any version of the MS Word tool you prefer, adding video elements becomes a limitation for the 2007 and 2010 versions of the application.
If you are working in MS Word versions of 2013 and above, select the ‘Online Video’ option within the ‘Insert’ tab’s dropdown menu. You will henceforth be presented with the ‘Insert Video’ dialog box, where you can choose the most suitable insertion option from the 3 choices available.
Step 6: Exporting the Presentation to PowerPoint
When you are done with everything, navigate to the ‘File’ tab in the topmost ribbon and select ‘Options’ from the drop down menu that follows. The ‘Options’ window pops up, wherein you are required to click on the ‘Quick Access Toolbar’.
Making the aforesaid selection will open the ‘Choose Commands From’ menu, where you will have to select the ‘All Commands’ option. In the list of options that appears next, click on the ‘Send to Microsoft PowerPoint’. Lastly, tap ‘OK’ to confirm your choice. The slideshow presentation that you have just created will now be sent to MS PowerPoint.
Part 2 Top 5 Microsoft Word Slideshow Maker Alternatives
While creating slideshow presentations in the MS Word application is quite handy, you may often land across a need to design presentation pieces with advanced customizations that involve an extra bit of detailing. Speaking in the light of high end professional concerns, the MS Word tool may sometimes fall short of meeting the precise and diverse slideshow creation needs.
In such a case, you can conveniently rely on the hoard of online and software based programs available in the IT market as well as across the web. Moving in the line of addressing the most sophisticated slideshow design concerns, let us look through some of the most feasible alternatives to create professionally sound graphic presentations in the following section:
01Icecream Slideshow Maker
The Icecream slideshow maker easily lands among the most reliable and modernized software alternatives to design slideshow presentations with utmost ease. Talking of program interface and user accessibility, the program conveniently earns appreciable scores. Moving ahead, the latter’s elegant workspace transforms the monotonous slideshow design process into a fun activity that you will love to indulge in.
Throwing light on the app’s creation utilities, you are allowed to supplement your presentations with all the latest audio-visual effects and customizations. You can add images, videos and music to the presentations, while choosing to save them either on your device or export to online storage accounts, like, Dropbox, YouTube and Google Drive, or burn to DVDs. You can either use the software for free or prefer a paid subscription to avail the premium features.
02PhotoStage Slideshow Software
This one is an all-purpose slideshow creator program designed for addressing every creation need ranging from personal, fun-filled entertainment movies to high end professional and business oriented presentations. Talking of customization flexibilities, the software allows you to explore your graphic creativity on the widest canvas with a range of preset templates, audio tracks, transitions, videos, photos and a variety of additional media integrations.
What adds to the usage credibility of this slideshow creator program is the latter’s in-built image editor, which effectively dedicates itself towards adding life to your otherwise customary still captures. You can further, drop all your output quality concerns when working with the aforesaid program as the software has the most expanded range of output features. The software however, comes with a bit outdated interface and is limited to a 30-day free usage.
03Slideshow Maker
The 4K slideshow maker is an affordable freeware utility to create image centered presentations. All you need to do is, upload your selected images in the software’s editing timeline and begin a customization spree with the diversity of available effects, features and tools. To mention a few, you can work with selecting the perfect video quality and aspect ratio for the presentation, or make manual adjustments to transition flow and slide screen timings.
When it comes to adding background audio, you can either select a matching music piece from the software’s preset audio library, or pick one from the media gallery of your device in the WAV, MP3, M4A, OGG and other audio formats. The program caters to generate high quality slideshow output in the FLV, M4V, MP4 and AVI file formats. The software however, works to create slideshows exclusively from JPG images and has a series of features that are seldom used.
04Proshow Gold
Another entry into the list of alternatives to MS Word slideshow maker is the aforesaid software that comes with a free user access. The program allows you to design high end professional presentations with the longest list of customization features and tools. Working with the program, you can include the most cohesive media integrations within your presentations to create a stunning slideshow.
You can choose between adding the images, music and videos either from your device or import them from social media platforms. The software additionally, permits you to work with the most elusive and integrated slideshow themes and a never ending series of royalty-free music. The program further houses an extensive range of automated utilities that are equally appreciated by beginners and experienced users, however for a limited period free trial.
05Kizoa
Last sin the list is the Kizoa slideshow maker program that is highly appreciated for its user cohesive working interface. The software attempts to guide you at every step of the slideshow creation process with on screen pop-ups that contain tips and tricks for a hassle free working experience with the program. Working with the program, you are allowed to use the vast library of categorized premade templates for creating manual masterpieces of slideshow presentations.
Talking of customization features, you can choose to add images to the presentation, both from your device gallery, or through a Facebook import. The program library has a decent set of 48 transition and 58 image effects to amplify the appearance of the added photos. You can work to modify the image size to a screen fit to ward off blank spaces at the sides.
The slides can further be supplemented with premade music, GIFs and customizable text annotations. The software however, demands an account creation to address slideshow export needs to different media sharing platforms, like, Facebook, YouTube, DVD burning, etc.
Part 3 FAQs of Creating Simple Slideshow Word
01What is the 10/20/30 rule of slideshow presentations?
The 10/20/30 rule sets counted limitations on slideshow elements to generate high quality presentation outputs. The rule states that the perfect slideshow presentation consists of a maximum of 10 slides, has a run time of approximately 20 minutes and has minimum font size of 30 points.
02What is the 6 x 6 bullet rule of slideshow presentations?
The 6 x 6 bullet point rule states that you should include a maximum of 6 bullet points within each slide, along with limiting the bullet description to 6 words at the most. Abiding by this rule, your presentations slides will never look cluttered, while you can convey the desired information in a precise manner.
03Why should the presentation slides have a limited amount of text?
Creating a crowded slideshow with a bundled text annotations are a downside to audience interests. Add only essential contents in text, while warding off unnecessary words, lest you may lose the uninterrupted attention of your viewers towards the presentation.
04What is the perfect screen time of each slide within a presentation?
Keeping a slide screen time between 2 to 3 minutes is a smart strategy to captivate viewer attention. To get an appreciable response from the audience, you should aim at coming directly at the point, instead of beating about the bush. In an otherwise case of longer lengths, you may end up distracting your audience.
05What is the affordable word limit of each slide within a presentation?
To ensure a decent and professional look of your slideshow, restrict the latter’s text content to a maximum of 30 words within 6 to 8 lines. Add precise bullet points and avoid including lengthy paragraphs to create an engaging impact on the audience, instead of forcing them to read the presentation content as if it were a news article.
06Creating Microsoft Word Presentations in Wondershare Filmora
Wondershare Filmora Video Editor is a professional standard graphic editor package that caters to the most diverse slideshow creation needs with utmost ease. Regardless of the platform you choose to work with for creating a slideshow presentation, the aforesaid program is ready to supplement your artwork with the best and most advanced editing effects and features. When the talk is about creating and editing slideshows in the MS Office Suite, the software easily claims the title of being the best image slider for Wordpress.
For Win 7 or later (64-bit)
For macOS 10.12 or later
Elaborating a bit on the feature rich library of the software program, you get to access a plethora of audio-visual effects and tools, preset presentation themes and templates, background music tracks, transitions and text styles, etc., that combine together to deliver a jaw dropping presentation output. The software greets you with the most interactive, responsive and clean interface to work with and is available absolutely free of cost.
● Ending Thoughts →
● Creating a slideshow presentation in Microsoft Word is quite easy and involves just a few simple steps to design elementary presentation snippets.
● Browsing through the software market, you will come across a diversity of slideshow creation tools and applications that are feasible alternatives to the MS Word tool.
● When aiming to pick the best slideshow creator program from the hoard of available choices, you can stay with Wondershare Filmora without having to think twice.
Looking for the Best Websites for 3D Text PNG? We’ve Covered You with Our Top 8 Picks for Your Upcoming Work
3D text is an essential aspect of graphic design that adds depth and dimension to the text to make it more visually appealing and easier to read. However, finding suitable three-dimensional fonts in PNG format can take time and effort.
We’ll look at this article’s top 8 websites for 3D text PNG to make things easier. We’ll also provide a brief overview of each website so you can decide which is right for you. Keep reading to find the perfect source for your needs!
There are all kinds of great resources out there that offer free 3D fonts. However, the problem is that not all websites are created equal. Some don’t provide an excellent selection, while others only offer high-quality images. That’s why we’ve done the work and compiled a list of the top eight websites containing 3D texts with PNG resources.
1. LovePik
LovePik is an excellent online platform with a massive selection of 3D fonts with transparent backgrounds. In addition, the website offers a separate category for PNG files, and most assets are free to experiment to your heart’s content.
Besides that, LovePik comes with three personal premium plans with pricing starting from $19.9 per month with unlimited downloads.

Pros
- Unlimited collection of assets
- Over 10MB/s download speed
- Clear copyright license
- Easy to navigate and use
- Multiple formats are available
Cons
- Only 1 per day download in the free version.
- The assets are only for personal use, even in the premium plan
2. Adobe Stock
AdobeStock is a creative resource with an easy-to-use interface with over 9k high-quality 3D fonts in PNG file format. The website is integrated with Creative Cloud and provides a 30-day free trial period.
The premium version will cost you about $49.99 per month with the monthly plan and $29.99/per month with an annual plan.

Pros
- Advanced AI search
- Easy licensing process
- Integrated with creative cloud
- Extensive Library of assets
- 30-day free trial
Cons
- You can only download ten assets in the free-trail
- Licensing is limited to some regions
3. PikBest
With its user-friendly UI and multiple search categories, PikBest makes it easy to find suitable 3D fonts in PNG format to add visual interest to your design. The library has over 170,000 3d text assets available for both personal and commercial use.
Besides its advanced search result, PikBest allows you to sort your result based on Popular, Top Download, and Brand New.

Pros
- Inexpensive premium version, starting at $19.9 per month
- Personal and commercial licenses
- Huge selection of high-quality assets
- Multiple file formats
- Intuitive UI
Cons
- Only 1 per day download in the free version.
- You cannot use the assets for commercial use in the free plan.
4. IconScout
IconScout is another online library providing over 5.5 million assets in many file formats. With its easy-to-navigate interface and multiple filters, you’re sure to find a suitable one in PNG format for your project.
It’s important to note that the website only offers paid subscriptions and only 1 selected asset for free per day.

Pros
- Detailed filters for search results
- Million of high-definition assets
- Multiple platforms integration by using its plugin
- User-friendly
- The Library is updated daily
Cons
- Only 1 selected free asset per day.
5. FreePik
With the FreePik website, you can access over 1.6k 3D fonts available in PNG format for the free and premium versions. To get the text style, visit the platform, search for the resource, and click Download.
The assets available on FreePik are fully scalable and editable. Moreover, you can even access the built-in icon editor with the premium version.

Pros
- The assets are updated daily
- No attribution is required in the premium version
- The affordable premium plan, starting at only 9 EUR /month
- Fully editable assets
- Massive selection of assets
Cons
- You are only allowed 100 downloads per day in the premium version.
6. Pngtree
Whether you’re a graphic designer, web developer, or just someone who loves playing around with 3D fonts, Pngtree is worth checking out. The website offers a separate category for PNG files and has over 9,910 3D fonts for you to use.
Pngtree comes with four premium plans with unlimited downloads and other features. In comparison, the free version is limited to 1 download per day and has no support for commercial usage.

Pros
- Over 10MB/s download speed
- Free and premium assets
- Has a background remover tool
- Multiple file formats, including PNG, AI, PSD, and EPS
Cons
- Attribution is required in the free plan.
7. Vecteezy
Vecteezy is a leading provider of royalty-free vectors, clipart graphics, icons, stock photos, stock videos, 3D fonts in PNG format, backgrounds, patterns, banners, and designs. Their assets are from professional illustrators and artists from all over the world.
The free version of Vecteezy comes with certain limitations. However, you can get full access with the premium version at just $14/per month.

Pros
- Affordable pricing plans
- Advanced filters
- Easy-to-use
- No need for registration/sign up
- The simple and quick licensing process
Cons
- Attribution is required in the free version
8. InkPx
InkPx Word Art is a simple yet powerful tool for generating different word art styles, including 3D, for your designs in a few seconds. The website supports JPG and PNG file formats when exporting your template.
Moreover, its editor lets you change the presets’ text, font style, line height, line spacing, size, alignment, and background.

Pros
- Available for free
- Personal and commercial usage is allowed
- Fully editable text styles
- Vast collection of font styles is available
- Easy-to-use interface
Cons
- Only JPG and PNG file formats are available.
How to Create 3D Text Effects in Video
If you want to avoid spending time on the internet to find the 3D text effects for your video, you can create them using Wondershare Filmora .
Wondershare Filmora is a unique video editing software with easy-to-use functionality and various features. The software also provides title editing capabilities and numerous text styles, so you can easily add titles, subtitles, and captions to your videos.
You can watch the video below to learn more about the fantastic features of Filmora, including the 3D text animation.
The following step-by-step method will show you how you can create 3D text in a video using Filmora:
Step 1: In the first step, you can download Filmora from the official website, or from the download buttons below.’
Free Download For Win 7 or later(64-bit)
Free Download For macOS 10.14 or later
Step 2: Now, open the Downloads folder and double-click the downloaded installation file. Follow the on-screen instructions to install the software.
Once the software is installed, click its icon to launch it, and click the “New Project” option on the program’s main screen.
Step 3: Next, you must import your video footage to edit and create a 3D text effect. To do this, drag and drop the file directly into the Project Media folder. Alternatively, click “File” and select “Import Media Files” from the drop-down menu.
Step 4: Now, drag and drop the file in the timeline and click the “Titles” tab in the top panel. And you will see “3D Titles” option on the left side of the window.

Once you find the perfect text style for your video, click the “Download” icon at the top right of the template. Next, drag and drop the effect in the timeline and adjust it where you want it to display in the video.
Step 5: Afterward, double-click the template, type your text, and hit Enter to save it. Now, configure the text style and color. Next, right-click or double click the effect in the timeline, and head to advanced setting. Select a suitable animation effect to apply to the text.

Step 6: Finally, in the video player above the timeline, click the “Play” icon to preview the 3D text effect on your video.
Once done, click “Export” and set the video resolution. Click “Export” again to save the final video on your system.
The Bottom Line
In this article, we’ve recommended and provided an overview of the top 8 websites for 3D text PNG. We’ve also explored their features and limitations to help you select a suitable resource for your upcoming project.
Ultimately, we’ve provided a step-by-step guide on creating 3D text effects in a video using Wondershare Filmora software. Hopefully, you’ve found this article helpful and can now choose a practical resource that meets your requirements.
2. Adobe Stock
AdobeStock is a creative resource with an easy-to-use interface with over 9k high-quality 3D fonts in PNG file format. The website is integrated with Creative Cloud and provides a 30-day free trial period.
The premium version will cost you about $49.99 per month with the monthly plan and $29.99/per month with an annual plan.
Pros
- Advanced AI search
- Easy licensing process
- Integrated with creative cloud
- Extensive Library of assets
- 30-day free trial
Cons
- You can only download ten assets in the free-trail
- Licensing is limited to some regions
3. PikBest
With its user-friendly UI and multiple search categories, PikBest makes it easy to find suitable 3D fonts in PNG format to add visual interest to your design. The library has over 170,000 3d text assets available for both personal and commercial use.
Besides its advanced search result, PikBest allows you to sort your result based on Popular, Top Download, and Brand New.
Pros
- Inexpensive premium version, starting at $19.9 per month
- Personal and commercial licenses
- Huge selection of high-quality assets
- Multiple file formats
- Intuitive UI
Cons
- Only 1 per day download in the free version.
- You cannot use the assets for commercial use in the free plan.
4. IconScout
IconScout is another online library providing over 5.5 million assets in many file formats. With its easy-to-navigate interface and multiple filters, you’re sure to find a suitable one in PNG format for your project.
It’s important to note that the website only offers paid subscriptions and only 1 selected asset for free per day.
Pros
- Detailed filters for search results
- Million of high-definition assets
- Multiple platforms integration by using its plugin
- User-friendly
- The Library is updated daily
Cons
- Only 1 selected free asset per day.
5. FreePik
With the FreePik website, you can access over 1.6k 3D fonts available in PNG format for the free and premium versions. To get the text style, visit the platform, search for the resource, and click Download.
The assets available on FreePik are fully scalable and editable. Moreover, you can even access the built-in icon editor with the premium version.
Pros
- The assets are updated daily
- No attribution is required in the premium version
- The affordable premium plan, starting at only 9 EUR /month
- Fully editable assets
- Massive selection of assets
Cons
- You are only allowed 100 downloads per day in the premium version.
6. Pngtree
Whether you’re a graphic designer, web developer, or just someone who loves playing around with 3D fonts, Pngtree is worth checking out. The website offers a separate category for PNG files and has over 9,910 3D fonts for you to use.
Pngtree comes with four premium plans with unlimited downloads and other features. In comparison, the free version is limited to 1 download per day and has no support for commercial usage.
Pros
- Over 10MB/s download speed
- Free and premium assets
- Has a background remover tool
- Multiple file formats, including PNG, AI, PSD, and EPS
Cons
- Attribution is required in the free plan.
7. Vecteezy
Vecteezy is a leading provider of royalty-free vectors, clipart graphics, icons, stock photos, stock videos, 3D fonts in PNG format, backgrounds, patterns, banners, and designs. Their assets are from professional illustrators and artists from all over the world.
The free version of Vecteezy comes with certain limitations. However, you can get full access with the premium version at just $14/per month.
Pros
- Affordable pricing plans
- Advanced filters
- Easy-to-use
- No need for registration/sign up
- The simple and quick licensing process
Cons
- Attribution is required in the free version
8. InkPx
InkPx Word Art is a simple yet powerful tool for generating different word art styles, including 3D, for your designs in a few seconds. The website supports JPG and PNG file formats when exporting your template.
Moreover, its editor lets you change the presets’ text, font style, line height, line spacing, size, alignment, and background.
Pros
- Available for free
- Personal and commercial usage is allowed
- Fully editable text styles
- Vast collection of font styles is available
- Easy-to-use interface
Cons
- Only JPG and PNG file formats are available.
How to Create 3D Text Effects in Video
If you want to avoid spending time on the internet to find the 3D text effects for your video, you can create them using Wondershare Filmora .
Wondershare Filmora is a unique video editing software with easy-to-use functionality and various features. The software also provides title editing capabilities and numerous text styles, so you can easily add titles, subtitles, and captions to your videos.
You can watch the video below to learn more about the fantastic features of Filmora, including the 3D text animation.
The following step-by-step method will show you how you can create 3D text in a video using Filmora:
Step 1: In the first step, you can download Filmora from the official website, or from the download buttons below.’
Free Download For Win 7 or later(64-bit)
Free Download For macOS 10.14 or later
Step 2: Now, open the Downloads folder and double-click the downloaded installation file. Follow the on-screen instructions to install the software.
Once the software is installed, click its icon to launch it, and click the “New Project” option on the program’s main screen.
Step 3: Next, you must import your video footage to edit and create a 3D text effect. To do this, drag and drop the file directly into the Project Media folder. Alternatively, click “File” and select “Import Media Files” from the drop-down menu.
Step 4: Now, drag and drop the file in the timeline and click the “Titles” tab in the top panel. And you will see “3D Titles” option on the left side of the window.
Once you find the perfect text style for your video, click the “Download” icon at the top right of the template. Next, drag and drop the effect in the timeline and adjust it where you want it to display in the video.
Step 5: Afterward, double-click the template, type your text, and hit Enter to save it. Now, configure the text style and color. Next, right-click or double click the effect in the timeline, and head to advanced setting. Select a suitable animation effect to apply to the text.
Step 6: Finally, in the video player above the timeline, click the “Play” icon to preview the 3D text effect on your video.
Once done, click “Export” and set the video resolution. Click “Export” again to save the final video on your system.
The Bottom Line
In this article, we’ve recommended and provided an overview of the top 8 websites for 3D text PNG. We’ve also explored their features and limitations to help you select a suitable resource for your upcoming project.
Ultimately, we’ve provided a step-by-step guide on creating 3D text effects in a video using Wondershare Filmora software. Hopefully, you’ve found this article helpful and can now choose a practical resource that meets your requirements.
Step By Step Guide on Using Media Player Classic To Rotate A Video
The Internet and social media have become a staple in our daily lives. Internet users post thousands of videos every day that you can watch online or download and rewatch in your free time. Suppose you encounter a video that is upside down or shot at an angle that makes it difficult for you to enjoy it fully.
It would be nice to find a way to rotate the video to portrait mode so you can watch it without any distractions. Fortunately, this article will discuss using Media Player Classic to rotate any video. We also discuss an excellent alternative to the aforementioned media player.

What Is Media Player Classic?
In a nutshell, Media Player Classic is an open-source media player suitable for 32-bit and 64-bit Microsoft Windows. If you have used the original interface, you might notice that it resembles Windows Media Player 6.4. The only key difference is that the former is more feature-rich and provides more options. In addition, Media Player Classic is very compact and lightweight.

A programmer named “Gabest’’ created and designed this platform as a closed-source application. Things changed, and he later relicensed the media player as free under the terms of the GLP-2.0 license. He released the final version, MPC 6.4.9.0, on 20th March 2006.
Unfortunately, development stalled in 2006, much to the disappointment of many users who had grown to love it. Gabest made a public statement in 2007 saying that Media Player Classic was not dead, just that he couldn’t work on it anymore.
How To Rotate Video in Media Player Classic?
Media Player Classic allows you to rotate your video around three axes, X, Y, and Z. Once you are done, you can fix a video that was initially upside down or in landscape mode for a better viewing experience. Another perk of using Media Player Classic to rotate a video is that you can use shortcuts to make your work easier.
Before we teach you how to rotate video in windows Media Player Classic, there are a few things you should know. Unfortunately, this platform doesn’t allow you to rotate a video in its graphical user interface. You can’t also use it to edit a video. Suppose you want to add text or overwrite the original video clip. Media Player Classic can only allow you to playback a video or rotate it.
Here is a simple guide on how to rotate videos in Media Player Classic.
Step1 Launch Media Player Classic and click on the “View” tab. Select “Options” or click “O” to display the “Options” window.

Step2 Navigate to the left pane to the Player Group and click on “Keys.” If the Player Group is not expanded by the time, you launch the platform, double-click it and wait a few seconds. You can then navigate to the “PnS Rotate” command on the Keys list.

Step3 Go to the “PnS Rotate+” command and double-click the “Key” field. You can then click on any key to rotate your video around the x-axis. Once you are satisfied with the results, click “…” to apply the changes you have made.

Step4 You can now assign shortcuts to “PnS Rotate” commands. For instance, you could assign PnS Rotate Y for rotation along the Y axis and PnS Z for rotation along the Z axis. After each axis has a shortcut, select “Apply” then “OK” to save your changes and close the Options window respectively.

Step5 Select “Output” on the Options window and navigate to the DirectShow Video section to confirm whether the Media Classic Player supports rotation for the rendered video. Ascertain the Rotation feature has a green check mark, which indicates that the platform promotes rotation for the video. If the video has a red X, select “Apply” and click “OK.”

Step6 Use the shortcuts you assigned to the keys in Step 4 to rotate your video as you see fit. Since the rotation occurs gradually, you might need to press the keys numerous times or press and hold to see a visible change.
For instance, you can rotate your video from landscape to portrait by clicking “Alt-Num 1” and “Alt-Num 3,” respectively. To revert your video to its original state, press “Alt-Num 5.”
Need an alternative to Media Player Classic? Try Wondershare Filmora To Rotate a Video
Free Download For Win 7 or later(64-bit)
Free Download For macOS 10.14 or later
You might need a better alternative to Media Classic Player to help rotate your videos. As we mentioned, Media Classic Player doesn’t allow you to change the video. The scope of this platform only extends to playing and rotating videos along three axes. In our opinion, Wondershare Filmora is an excellent alternative.

This feature-rich platform is your one-stop solution for any creator who wants to make a mark with their videos. You can download it free on your desktop, laptop, or smartphone and use it anytime. The cloud storage allows you to snap a photo and upload it for editing at a later time.
In addition, the platform has a co-creation space where you can share your work with other users and compare notes. Here is a list of other nifty features we guarantee you will enjoy.
- Motion tracking
- Auto beat sync
- Split screen
- Title Editing
- Preset templates
- AI Portrait
- Mask and blend
- Text to speech
- Silence detection
- Audio visualizer
How To Rotate a Video 90 Degrees With Wondershare Filmora?
Now that you have seen how different this platform is from Media Classic Player, you might be curious about how effectively it rotates your videos. Perhaps our detailed guide will help you decide whether you want to give Wondershare Filmora a shot.
Stick around to learn how to rotate a video 90 degrees with Wondershare Filmora.
Step1 Import the video you want to rotate to Wondershare Filmora and drag and drop it to the timeline as shown below.

Step2 Click on the monitor icon and select “Change Project Aspect Ratio” in the drop-down menu.

Step3 In the “Project Settings” window, you can change your video’s Aspect Ratio, Resolution, Frame Rate, and Color space.

Step4 Once you are happy with your changes, click “OK” and close the window.

Step5 Double-click the video track and navigate to the Rotate option in the window. Hover your mouse over the dot in the Rotate tab until you get to 90 degrees. You could also adjust the rotation of the video by clicking on the pivot in the media player till the video is at 90 degrees.

Step6 Click “Export” to save a copy of the rotated video to your device.

Which Is Better To Rotate a Video? Media Player Classic or Wondershare Filmora?
Having seen both sides of the coin, you might wonder which option is better to help you rotate a video. In this section of the article, we pit Wondershare Filmora against Media Player Classic to help you determine which option will work best for you.
Take a look at the table below.
| Media Player Classic | Wondershare Filmora | |
|---|---|---|
| Operating System | Microsoft Windows | Windows & Mac |
| Ratings from G2 | N/A | 4.4/5 stars |
| Pricing | Free | Annual Plan – US$49.99/yearCross Platform Plan - US$59.99/YearPerpetual Plan - US$79.99 |
| Features | ● Enhanced video rendering● Removal of tearing● Supports SVCD, VCD, and DVD playback● AVI subtitles● Customizable toolbar | ● AI Portrait● Mask and blend● Text to speech● Silence detection● Audio visualizer● Motion tracking● Auto beat sync● Split screen● Title Editing● Preset templates |
As you have seen, Media player Classic doesn’t have the Rotate feature per se. However, you can assign shortcuts to the keys to rotate a video along three axes as you see fit. You can also use a combination of keys like Alt and Num to change how your video sits so you can enjoy it as you like.
On the other hand, Wondershare Filmora has a more comprehensive Rotate feature that allows you to drag your pointer along a bar till the video sits at the correct number of degrees.
This platform also provides additional features, like allowing you to scale the video to fit the screen and adjusting project settings like the resolution and frame rate. If you don’t want to use the sliding bar, you can use your pointer to manually adjust the rotation by clicking on the pivot with your pointer.
In a nutshell, Windows Media Player is the ideal choice if you want to rotate your video and leave it at that. However, if you are looking for more advanced features, you are better off choosing Wondershare Filmora. The latter option also makes your videos look more polished like they were edited by a professional.
Conclusion
Videos might be trickier to edit than photos, especially when you want to rotate them. Fortunately, developers have been working tirelessly to ensure you have many tools at your disposal to edit your videos from any device at any time.
If you don’t fancy editing videos on your laptop, you could download the software to your smartphone and rotate videos on the move. Technology is truly a blessing that has come to make our work easier. Hopefully, after reading this article, you can effortlessly rotate any video you encounter.
Free Download For macOS 10.14 or later
You might need a better alternative to Media Classic Player to help rotate your videos. As we mentioned, Media Classic Player doesn’t allow you to change the video. The scope of this platform only extends to playing and rotating videos along three axes. In our opinion, Wondershare Filmora is an excellent alternative.
This feature-rich platform is your one-stop solution for any creator who wants to make a mark with their videos. You can download it free on your desktop, laptop, or smartphone and use it anytime. The cloud storage allows you to snap a photo and upload it for editing at a later time.
In addition, the platform has a co-creation space where you can share your work with other users and compare notes. Here is a list of other nifty features we guarantee you will enjoy.
- Motion tracking
- Auto beat sync
- Split screen
- Title Editing
- Preset templates
- AI Portrait
- Mask and blend
- Text to speech
- Silence detection
- Audio visualizer
How To Rotate a Video 90 Degrees With Wondershare Filmora?
Now that you have seen how different this platform is from Media Classic Player, you might be curious about how effectively it rotates your videos. Perhaps our detailed guide will help you decide whether you want to give Wondershare Filmora a shot.
Stick around to learn how to rotate a video 90 degrees with Wondershare Filmora.
Step1 Import the video you want to rotate to Wondershare Filmora and drag and drop it to the timeline as shown below.
Step2 Click on the monitor icon and select “Change Project Aspect Ratio” in the drop-down menu.
Step3 In the “Project Settings” window, you can change your video’s Aspect Ratio, Resolution, Frame Rate, and Color space.
Step4 Once you are happy with your changes, click “OK” and close the window.
Step5 Double-click the video track and navigate to the Rotate option in the window. Hover your mouse over the dot in the Rotate tab until you get to 90 degrees. You could also adjust the rotation of the video by clicking on the pivot in the media player till the video is at 90 degrees.
Step6 Click “Export” to save a copy of the rotated video to your device.
Which Is Better To Rotate a Video? Media Player Classic or Wondershare Filmora?
Having seen both sides of the coin, you might wonder which option is better to help you rotate a video. In this section of the article, we pit Wondershare Filmora against Media Player Classic to help you determine which option will work best for you.
Take a look at the table below.
| Media Player Classic | Wondershare Filmora | |
|---|---|---|
| Operating System | Microsoft Windows | Windows & Mac |
| Ratings from G2 | N/A | 4.4/5 stars |
| Pricing | Free | Annual Plan – US$49.99/yearCross Platform Plan - US$59.99/YearPerpetual Plan - US$79.99 |
| Features | ● Enhanced video rendering● Removal of tearing● Supports SVCD, VCD, and DVD playback● AVI subtitles● Customizable toolbar | ● AI Portrait● Mask and blend● Text to speech● Silence detection● Audio visualizer● Motion tracking● Auto beat sync● Split screen● Title Editing● Preset templates |
As you have seen, Media player Classic doesn’t have the Rotate feature per se. However, you can assign shortcuts to the keys to rotate a video along three axes as you see fit. You can also use a combination of keys like Alt and Num to change how your video sits so you can enjoy it as you like.
On the other hand, Wondershare Filmora has a more comprehensive Rotate feature that allows you to drag your pointer along a bar till the video sits at the correct number of degrees.
This platform also provides additional features, like allowing you to scale the video to fit the screen and adjusting project settings like the resolution and frame rate. If you don’t want to use the sliding bar, you can use your pointer to manually adjust the rotation by clicking on the pivot with your pointer.
In a nutshell, Windows Media Player is the ideal choice if you want to rotate your video and leave it at that. However, if you are looking for more advanced features, you are better off choosing Wondershare Filmora. The latter option also makes your videos look more polished like they were edited by a professional.
Conclusion
Videos might be trickier to edit than photos, especially when you want to rotate them. Fortunately, developers have been working tirelessly to ensure you have many tools at your disposal to edit your videos from any device at any time.
If you don’t fancy editing videos on your laptop, you could download the software to your smartphone and rotate videos on the move. Technology is truly a blessing that has come to make our work easier. Hopefully, after reading this article, you can effortlessly rotate any video you encounter.
Also read:
- New Top 5 Online Video Converter for Instagram 2024
- Are You Also a Fan of the Slow Mo Guys? Well! Who Isnt? Learn How You Can Create Compelling Slow-Mo Videos Like the Slow Mo Guys Here
- Updated How to Edit Facebook Video Ads for E-Commerce Business for 2024
- 2024 Approved Best Frame Rate for 4K Video
- 2024 Approved Best Video Format Converter for PC and Online
- Updated How to Brighten a Video in Windows 10 Easily for 2024
- Best 15 Subtitle Apps 2023 Windows, Mac, iPhone, Android & Online
- New Have a Desire to Uplift Your Editing Creativity with Trying Hands at Working with Storyboards? Keep Reading to Have a Comprehensive Understating of the Workflow Through Stepwise User Guides
- New How to Add Camera Shake to Video in Adobe After Effects for 2024
- New 7 Best GoPro Video Editors for Mac
- 4 Methods to Merge MP4 and MP3 for 2024
- 2024 Approved How To Make A Political Video
- Kdenlive Is a Free, Open-Source Video Editing Software Application. Kdenlive Is a Powerful Video Editor that Can Be Used to Create Professional-Quality Videos
- New In 2024, Full Guide to Funcall Voice Changer and Its Alternatives
- Updated Doable Ways to Make Transparent Background in Procreate for 2024
- Why Your WhatsApp Live Location is Not Updating and How to Fix on your Honor X8b | Dr.fone
- In 2024, 9 Best Free Android Monitoring Apps to Monitor Phone Remotely For your Itel P55+ | Dr.fone
- How to Factory Reset Poco M6 Pro 4G If I Forgot Security Code or Password? | Dr.fone
- Which Pokémon can Evolve with a Moon Stone For Meizu 21 Pro? | Dr.fone
- In 2024, Latest Guide How To Bypass Vivo Y78 5G FRP Without Computer
- Updated 2024 Approved 5 Smart Tips About YouTube Shorts to Grow Your Business
- Unlock Apple iPhone XS Max Without Passcode Easily | Dr.fone
- A Guide Xiaomi Redmi K70 Wireless and Wired Screen Mirroring | Dr.fone
- New Best Tool to Translate YouTube Video to Arabic for 2024
- Change Location on Yik Yak For your Honor 90 GT to Enjoy More Fun | Dr.fone
- In 2024, How To Activate and Use Life360 Ghost Mode On Nokia C210 | Dr.fone
- How to Fix Life360 Shows Wrong Location On Oppo A59 5G? | Dr.fone
- In 2024, How to Remove iPhone 14 Pro Device from iCloud
- In 2024, Edit and Send Fake Location on Telegram For your Honor X7b in 3 Ways | Dr.fone
- Looking For A Location Changer On Realme GT 5? Look No Further | Dr.fone
- Title: In 2024, 6 Best Text to Speech Generators for YouTube Videos Windows, Mac, Android, iPhone & Online
- Author: Chloe
- Created at : 2024-05-20 03:37:43
- Updated at : 2024-05-21 03:37:43
- Link: https://ai-editing-video.techidaily.com/in-2024-6-best-text-to-speech-generators-for-youtube-videos-windows-mac-android-iphone-and-online/
- License: This work is licensed under CC BY-NC-SA 4.0.
