
:max_bytes(150000):strip_icc():format(webp)/espnplus-6d79c347f2df42d7a38cdb0ba9a2472b.jpg)
In 2024, A Comprehensive Guide on Converting Slo-Mo Videos to Normal Speed Videos On iPhone
A Comprehensive Guide on Converting Slo-Mo Videos to Normal Speed Videos On iPhone
Thanks to the eccentric and offbeat elements, slow-motion videos have become the super-fun, state-of-the-art trend. Whether you’re in the bar trying to click the aesthetic, cinematic video or capture cool, unique, and enticing birthday moments, you can always rely on the slow-mo feature.

But do you ever feel like converting the slow-motion video in your iOS device to a normal video? Perhaps you thought the slow-mo video would be more attractive, but it’s not, or maybe you want to determine how to remove slow-motion from a video iPhone.
No matter the reason, there are numerous ways to remove slow motion from iPhone video. In this article, you’ll learn the various methods to convert slow-motion video into a regular video on your iPhone or iPad. Also, learn the steps involved in achieving it.
So, let’s start.
How To Convert Slow Motion Video to Normal on iPhone and iPad
Due to the slow-motion and Time-lapse modes that are built into the iPhone, people may quickly record slo-mo and time-lapse clips using their iOS smartphone cameras.
Access the iPhone camera, select Slo-mo, press the Record icon once to begin filming, and then press it once more to stop. This will create a slo-mo video.
Do you ever wish to get your video’s slow motion removed? How to convert slow-motion video to normal on an iPhone? Well, here’s your answer.
Method 1. Using the Photos App
The Photos app is an in-built app for iPhone and iPad that features editing capabilities like rotation, resizing, and auto-enhancement, in addition to helping you manage videos and images.

You may quickly and effortlessly turn a slow-mo video into a regular-speed one with the Photos app’s tucked-away slow-motion converter feature. Additionally, there won’t be any quality loss in your video.
And here are the steps on how to remove slow-mo from iPhone video using the Photos app on an iPad or iPhone to turn it to normal speed.
Step1: Take your iPad or iPhone, navigate to the Photos app, open it, and then go to the bottom to hit the Albums tab.
Step2: Choose the Slo-mo option, and subsequently select the video you wish to turn into a regular speed video. Go to the top right corner of the screen and hit the Edit button.

Step3: If you look under the timeline, you’ll find vertical lines. Here, the area with apart spaces signifies slow motion.

Step4: To learn how to remove slow mo from iPhone video is to learn how to turn it into regular speed. To do so, select the slow-motion bar and drag it towards the other one to position the lines at a close distance.
Step5: When finished, hit the Done button and save this video. However, if you think this change was unnecessary or incorrect, you can discard it by clicking on Edit → Revert → Revert To Original.

Editing Tip
- The Photos app on iPhone doesn’t allow you to convert any video shot at 24fps or 30fps to slow motion.
- You cannot reduce or decrease the overall size of the video after conversion.
Pros & Cons
Pros
- It is a built-in app on every iOS device.
- Saves the hassle of downloading any third-party app.
- No charges are applicable for using this app.
- Excellent slow-mo video convertor.
Cons
- Limited speed adjustment for the conversion of slow-mo videos into regular videos.
Method 2: Using Other Converter Apps
You may think that converting slow-mo video to a regular speed video on your iPad or iPhone is convenient, but there’s a drawback too. The method mentioned above can only help you with minimalistic speed changes, which may not give you the desired result.
However, other converter apps also help you change slow-mo video to regular iPhone video. These apps work seamlessly on your PC or Mac to turn your slow-mo videos on the iPhone or Mac to normal-speed video using customized and high-resolution settings.
Overview of The Apps
| Particulars | iMovie | Slow-Fast Motion Video Editor |
|---|---|---|
| Type (versatile or specialized) | Versatile | Specialized |
| Supported OS | iOS, Mac | iOS, Mac |
| Average Rating | 3.9/5 | 4.7/5 |
| Price | Free | Free |
| Best for | Video editing with cinematic effects | Slo-mo video conversion |
1) iMovie

iMovie is an excellent option if you’re looking for an application to modify a video with additional tools and convert the slow-mo to a regular pace. Among the top video converters for the iPhone is iMovie.
It offers a wide range of tools and capabilities that allow you to change the video transition, audio, and speed, add music, animated text, video overlay effects, normal video effects, and more. Additionally, it aids users in producing stunning films and commercials in a Cinematic manner.
iMovie could convert slow-mo footage to normal speed, in case you didn’t know. Did you ever attempt to change slow mot to regular speed in iMovie? With the use of iMovie, how can slow-motion video be made normally on an iPhone?
Here are the instructions.
Step1: Open the iMovie app, click on the ‘Create Project’ option, → tap on ‘Movie → Media → Video.

Step2: Tap on the slow-mo option, select the slow-motion video you want to convert and hit the ‘Create Movie’ option.

Step3: Get to know the editing options by clicking on the timeline. Then, click on the clock (speed) icon. At the beginning of the lines, you’ll find a turtle. It demonstrates slow motion. Plus, the number right behind the rabbit at the end signifies the speed.

Step4: To turn this slow-motion video into a regular speed video, drag and slide the speed control slider until the number turns 1x.
Step5: To save the changes, tap on the Done option. Subsequently, edit the video as per your preference.
2) Slow-Fast Motion Video Editor

This slow-mo video converter app helps you slow down or speed up any slow-motion video without any watermark and charges. This free app supports both landscape or portrait operation, unlimited video length, and corrected audio pitch.
The application is convenient to use and seamless to speed up or slow down any parts or clips of your videos. Without charging a penny, this app meets the users’ expectations. If you’re wondering how to use this converter app, here’s a step-by-step guide:
Method 3. Using Third-Party Online Tools
The smartphone sector’s most cutting-edge functionalities can be found on iPhones. Users may capture slow-motion videos, for instance. However, you may consider accelerating the slo-mo movie to regular video speed once it has been recorded.
Using your smartphone, how would you go about doing that? Well, we have seen that using the built-in Photos app and converter apps like iMovie can help, but can they really provide the level of customization and outcomes you need?
When things get professional and the expectations are too high, it’s best to use third-party online tools. So, here are a few practical choices:
Overview of the Online Tools
| Particulars | KAPWING | Clideo | EZGIF |
|---|---|---|---|
| Supported File Format | .AVI, .FLV, 3GP, and other edge file types. | MP4, MOV, WMV, AVI, WEBM, FLV, MKV, MPG, MPEG, MTS. | MNG files |
| Watermark | Not Available | Only in Free version | Not Available |
| Available Speed Option | As fast as 4x for an accelerated video | 0.25 times to 2 times | 0.25 times to 2 times |
| Time Consuming | No | Moderate | No |
1) KAPWING

Kapwing is a tool for group film editing that enables people to collaborate to produce original videos. For individuals to create the ideal video, Kapwing offers a collection of pre-built themes, stock footage, and materials.
Kapwing acts as a digital office solution that enables individuals to organize all of their resources in one location and work together on projects utilizing sharing features. Amid its vast range of features, its slow-mo converter is the most famous and widely used one.
- Rating: 4.1/5
- Price: Plan starts at $20 per month
Step-By-Step Guide To Convert Slow-Mo on Iphone Using Kapwing App
Step1: First, download and install the Kapwing app from the App Store.
Step2: Upload the slow-mo video that you want to speed up.
![]()
Note: Kapwing also lets you speed up any slow-mo video present on TikTok, Twitter, or YouTube.

Step3: Perform the video clip speed adjustment by utilizing the Kapwing sidebar. You can accelerate the video clip speed up to four times the original speed. If not, you can play in every level in between.

Step4: Finally, click on the Export option, and the final video clip with all speed adjustments will be generated within a few seconds.

2) Clideo

Among the finest free tools for rapid photo or video editing is Clideo. You can start upgrading your material by uploading files in a wide range of formats to their site.
Limitless customization is possible with the paid version for just $9 a month. The capabilities, though, aren’t as varied as those offered by rivals, and there aren’t any mobile apps for people who want to generate material while on the go.
- Ratings: 4.3/5
- Price: Starts at $9 per month
Step-By-Step Guide To Convert Slow-Mo on Iphone Using Clideo App:
Step1: From your computer (Mac) or mobile device (iPhone), upload a video. You can also add from a Dropbox or Google Drive account.

Step2: Select to speed up the video after it has been recorded. Then, if required, muffle its sound and alter the file type.


Step3: The video can be seen directly in your browser. Click “Download” after you are finished and delighted with your creation.

3) EZGIF

EZGIF is a free online editing tool that enables individuals to change the playback speed of any video. Not only does it effectively convert your slow-mo video on an iOS device to a normal speed video, but it also comes with many other features (later on that). The website has a simple, outdated interface, but except for that, it’s a fine app for beginners.
Step-By-Step Guide To Convert Slow-Mo on Iphone Using Clideo App:
Step1: Upload the video clip and choose a speed multiplier to start using this program.

Step2: A number less than one will slow down playback; a number greater than one will quicken it.
Step3: Thus, input 0.5 to run the program at 1/2 its normal speed, and so forth.

Step4: You can preserve the audio track’s original tempo, vary the speed along with the video, or silence the audio entirely.
Convert Your Slo-Mo Videos Into Regular Ones In a Few Simple Steps With Filmora
Filmora is a leading online video editing software that has become the preferred choice of all professionals and amateurs. From everyday needs to something formal, it helps you edit videos for every occasion.
You can change pace swiftly or consistently in Filmora and vary the pace of the audio or video recordings. Use the Speed Ramping tool in Filmora. If you want to remove slow-mo or add it, you can use Filmora’s speed ramping feature anytime.
Free Download For Win 7 or later(64-bit)
Free Download For macOS 10.14 or later
We will share some details on how to use this feature here, but for a comprehensive, detailed guide, read to the end.
Step-By-Step Guide to Speed Changing
Step1Launch the Video
Activate Wondershare Filmora on your computer. To increase the speed and runtime of the movie, explore the desired video and enter it into the software. You can drag and drop the movie onto the interface as well.
Step2Speed Adjustment

Press the left mouse button as soon as the video shows on the screen. And click the speed tab in the toolbar. There is then a contextual menu displayed. To double the rate, select 2x from the “Fast” menu. The participant may use any fundamental that has more than one.
Step3Save & Export
When finished, select “Save Project” from the list of available options in the “File” panel. Press “Save” after renaming the project.
Using Filmora’s “Export” feature, selecting “Export,” and then modifying the file name is the alternative way to export the video. A device, a system, or even YouTube can receive the exported video. Next, click “Export.”
Bonus Tips. 2 More Methods to Normalize Your Video Speed
Filmora offers you 2 more advanced methods to increase or decrease the speed of the video, one is uniform speed and the other, is speed ramping . Want to learn more about changing speed in Filmora, watch this video tutorial to get a quick start on using them.
Conclusion
That’s basically it! So that’s how you turn any slow-motion video into a regular one.
This article covers all major techniques to convert videos to slow motion on iOS and Mac. You can pick one of them to convert video to slow motion or to slow down slow motion.
So, are you now prepared to convert slow-motion videos on your iPad or iPhone device to ordinary speed? Try the Filmora video editor if you’re looking for something really professional.
It makes it much easier to convert slow-motion videos from your smartphone or tablet to regular speed. It has powerful video editing features and is more comfortable to use. So, get started today!
Method 2: Using Other Converter Apps
You may think that converting slow-mo video to a regular speed video on your iPad or iPhone is convenient, but there’s a drawback too. The method mentioned above can only help you with minimalistic speed changes, which may not give you the desired result.
However, other converter apps also help you change slow-mo video to regular iPhone video. These apps work seamlessly on your PC or Mac to turn your slow-mo videos on the iPhone or Mac to normal-speed video using customized and high-resolution settings.
Overview of The Apps
| Particulars | iMovie | Slow-Fast Motion Video Editor |
|---|---|---|
| Type (versatile or specialized) | Versatile | Specialized |
| Supported OS | iOS, Mac | iOS, Mac |
| Average Rating | 3.9/5 | 4.7/5 |
| Price | Free | Free |
| Best for | Video editing with cinematic effects | Slo-mo video conversion |
1) iMovie
iMovie is an excellent option if you’re looking for an application to modify a video with additional tools and convert the slow-mo to a regular pace. Among the top video converters for the iPhone is iMovie.
It offers a wide range of tools and capabilities that allow you to change the video transition, audio, and speed, add music, animated text, video overlay effects, normal video effects, and more. Additionally, it aids users in producing stunning films and commercials in a Cinematic manner.
iMovie could convert slow-mo footage to normal speed, in case you didn’t know. Did you ever attempt to change slow mot to regular speed in iMovie? With the use of iMovie, how can slow-motion video be made normally on an iPhone?
Here are the instructions.
Step1: Open the iMovie app, click on the ‘Create Project’ option, → tap on ‘Movie → Media → Video.
Step2: Tap on the slow-mo option, select the slow-motion video you want to convert and hit the ‘Create Movie’ option.
Step3: Get to know the editing options by clicking on the timeline. Then, click on the clock (speed) icon. At the beginning of the lines, you’ll find a turtle. It demonstrates slow motion. Plus, the number right behind the rabbit at the end signifies the speed.
Step4: To turn this slow-motion video into a regular speed video, drag and slide the speed control slider until the number turns 1x.
Step5: To save the changes, tap on the Done option. Subsequently, edit the video as per your preference.
2) Slow-Fast Motion Video Editor
This slow-mo video converter app helps you slow down or speed up any slow-motion video without any watermark and charges. This free app supports both landscape or portrait operation, unlimited video length, and corrected audio pitch.
The application is convenient to use and seamless to speed up or slow down any parts or clips of your videos. Without charging a penny, this app meets the users’ expectations. If you’re wondering how to use this converter app, here’s a step-by-step guide:
Method 3. Using Third-Party Online Tools
The smartphone sector’s most cutting-edge functionalities can be found on iPhones. Users may capture slow-motion videos, for instance. However, you may consider accelerating the slo-mo movie to regular video speed once it has been recorded.
Using your smartphone, how would you go about doing that? Well, we have seen that using the built-in Photos app and converter apps like iMovie can help, but can they really provide the level of customization and outcomes you need?
When things get professional and the expectations are too high, it’s best to use third-party online tools. So, here are a few practical choices:
Overview of the Online Tools
| Particulars | KAPWING | Clideo | EZGIF |
|---|---|---|---|
| Supported File Format | .AVI, .FLV, 3GP, and other edge file types. | MP4, MOV, WMV, AVI, WEBM, FLV, MKV, MPG, MPEG, MTS. | MNG files |
| Watermark | Not Available | Only in Free version | Not Available |
| Available Speed Option | As fast as 4x for an accelerated video | 0.25 times to 2 times | 0.25 times to 2 times |
| Time Consuming | No | Moderate | No |
1) KAPWING
Kapwing is a tool for group film editing that enables people to collaborate to produce original videos. For individuals to create the ideal video, Kapwing offers a collection of pre-built themes, stock footage, and materials.
Kapwing acts as a digital office solution that enables individuals to organize all of their resources in one location and work together on projects utilizing sharing features. Amid its vast range of features, its slow-mo converter is the most famous and widely used one.
- Rating: 4.1/5
- Price: Plan starts at $20 per month
Step-By-Step Guide To Convert Slow-Mo on Iphone Using Kapwing App
Step1: First, download and install the Kapwing app from the App Store.
Step2: Upload the slow-mo video that you want to speed up.
![]()
Note: Kapwing also lets you speed up any slow-mo video present on TikTok, Twitter, or YouTube.
Step3: Perform the video clip speed adjustment by utilizing the Kapwing sidebar. You can accelerate the video clip speed up to four times the original speed. If not, you can play in every level in between.
Step4: Finally, click on the Export option, and the final video clip with all speed adjustments will be generated within a few seconds.
2) Clideo
Among the finest free tools for rapid photo or video editing is Clideo. You can start upgrading your material by uploading files in a wide range of formats to their site.
Limitless customization is possible with the paid version for just $9 a month. The capabilities, though, aren’t as varied as those offered by rivals, and there aren’t any mobile apps for people who want to generate material while on the go.
- Ratings: 4.3/5
- Price: Starts at $9 per month
Step-By-Step Guide To Convert Slow-Mo on Iphone Using Clideo App:
Step1: From your computer (Mac) or mobile device (iPhone), upload a video. You can also add from a Dropbox or Google Drive account.
Step2: Select to speed up the video after it has been recorded. Then, if required, muffle its sound and alter the file type.
Step3: The video can be seen directly in your browser. Click “Download” after you are finished and delighted with your creation.
3) EZGIF
EZGIF is a free online editing tool that enables individuals to change the playback speed of any video. Not only does it effectively convert your slow-mo video on an iOS device to a normal speed video, but it also comes with many other features (later on that). The website has a simple, outdated interface, but except for that, it’s a fine app for beginners.
Step-By-Step Guide To Convert Slow-Mo on Iphone Using Clideo App:
Step1: Upload the video clip and choose a speed multiplier to start using this program.
Step2: A number less than one will slow down playback; a number greater than one will quicken it.
Step3: Thus, input 0.5 to run the program at 1/2 its normal speed, and so forth.
Step4: You can preserve the audio track’s original tempo, vary the speed along with the video, or silence the audio entirely.
Convert Your Slo-Mo Videos Into Regular Ones In a Few Simple Steps With Filmora
Filmora is a leading online video editing software that has become the preferred choice of all professionals and amateurs. From everyday needs to something formal, it helps you edit videos for every occasion.
You can change pace swiftly or consistently in Filmora and vary the pace of the audio or video recordings. Use the Speed Ramping tool in Filmora. If you want to remove slow-mo or add it, you can use Filmora’s speed ramping feature anytime.
Free Download For Win 7 or later(64-bit)
Free Download For macOS 10.14 or later
We will share some details on how to use this feature here, but for a comprehensive, detailed guide, read to the end.
Step-By-Step Guide to Speed Changing
Step1Launch the Video
Activate Wondershare Filmora on your computer. To increase the speed and runtime of the movie, explore the desired video and enter it into the software. You can drag and drop the movie onto the interface as well.
Step2Speed Adjustment
Press the left mouse button as soon as the video shows on the screen. And click the speed tab in the toolbar. There is then a contextual menu displayed. To double the rate, select 2x from the “Fast” menu. The participant may use any fundamental that has more than one.
Step3Save & Export
When finished, select “Save Project” from the list of available options in the “File” panel. Press “Save” after renaming the project.
Using Filmora’s “Export” feature, selecting “Export,” and then modifying the file name is the alternative way to export the video. A device, a system, or even YouTube can receive the exported video. Next, click “Export.”
Bonus Tips. 2 More Methods to Normalize Your Video Speed
Filmora offers you 2 more advanced methods to increase or decrease the speed of the video, one is uniform speed and the other, is speed ramping . Want to learn more about changing speed in Filmora, watch this video tutorial to get a quick start on using them.
Conclusion
That’s basically it! So that’s how you turn any slow-motion video into a regular one.
This article covers all major techniques to convert videos to slow motion on iOS and Mac. You can pick one of them to convert video to slow motion or to slow down slow motion.
So, are you now prepared to convert slow-motion videos on your iPad or iPhone device to ordinary speed? Try the Filmora video editor if you’re looking for something really professional.
It makes it much easier to convert slow-motion videos from your smartphone or tablet to regular speed. It has powerful video editing features and is more comfortable to use. So, get started today!
WMV File Format Has Many Benefits over the Video Industry. If You Are Excited to Know More About the Format and Its Pros and Cons, Then Let’s Start the Discussion
WMV is the default file format for Windows Media Player. It was developed as an alternative to the RealVideo codec for web streaming purposes. WMV can be streamed on the internet and played by various media players. YouTube allows the users to upload WMV file format content.
Now that you know this about WMV format, there are some more details to share, so let’s start. The article understudy will discuss everything in detail; buckle up!
In this article
02 Advantage and Disadvantage of WMV Video Format
03 Best MMV Video Editor - Wondershare Filmora
04 How to Edit WMV Video File?
05 WMV VS. MP4: What’s the Difference?
Part 1. What Is WMV File?
WMV file format is from a sequence of video codecs, and it was developed by Microsoft. The full abbreviation of WMV is ‘Windows Media Video.’ WMV is a compressed file container that was made for the Windows Media Framework. It is mainly used for the video content that is to be sold either online or through HD DVDs and Blu-ray Discs.

WMV format files support the encryption for the use with Digital Rights Management (DRM) systems, protecting the content from copywriting and any unlawful production. The WMV file may contain animation, high-definition videos, TV episodes, or video clips.
WMV compresses large files for better data transmission over a network while maintaining quality standards. It is specifically designed to run on all Windows devices. After standardization by the Society of Motion Pictures and Television Engineering (SMPTE), WMV is now considered to be an open standard format.
Part 2. Advantage and Disadvantage of WMV Video Format
Like everything, the WMV file format has its benefits and drawbacks, but not everyone knows much about them. The following section of this article will talk about the benefits and drawbacks; let’s get started!
Advantages of WMV Format
- WMV format is excellent for web videos as it acquires little disc memory space and thus takes less time in loading.
- The files are compressed and have reduced size; hence it is easy to transfer WMV file format via emails etc.
- The format is widely used on Windows and is suitable for storing short animations as well as compressed videos.
- Do you know anything about the compression ratio? Well, if we compare WMV to MPEG-4, WMV format has a 2x compression ratio.
- The format also works on the Web through Google Drive. Also, the quality of the video is maintained with Windows video format.
Disadvantages of WMV Format
- Although the small size is better but not, every application works with the tiny file size as offered by WMV format.
- If you are a Mac user and wish to play WMV files on your Mac, you need plugins like Flip4Mac.
Part 3. Best MMV Video Editor -Wondershare Filmora
Wondershare Filmora has always been on the top of the list whenever we talk about video editing. The software is used worldwide by professionals and also newbies. This is because Filmora provides an endless range of features that can create captivating videos. Let’s share a few features:
- Stabilize Video: Your video might be shaky, or maybe single footage can be shaky. Do you know a way to fix this? Try Stabilize Video feature from Filmora. This feature helps you to smooth all the shaky scenes in your video.
- Motion Tracking: In the editing world, Motion Tracking is the most fun type of feature. With this feature, you can move objects like text, audio, video, elements, etc., by tracking the movements in your video.
- Auto Highlight: Do you know a feature that will save your time and effort? It’s Auto Highlight. The feature spontaneously extracts the highlight from the clip and saves your video trimming time.
For Win 7 or later (64-bit)
For macOS 10.12 or later
Part 4. How to Edit WMV Video File?
For editing, Wondershare Filmora is an ideal software to use. Now that you know about Filmora and its stunning features, do you have any knowledge about how to use it? Well, don’t worry. We are here to guide you about how you can edit WMV file format videos in Filmora. Just follow the simple steps shared below:
Step 1: Get the Media File
Start by launching the software on your respective device. Once Filmora opens, you can import the media file by drag and drop. Or else, tap on the ‘File’ tab and move to the ‘Import Media’ option. From the submenu, select the ‘Import Media Files’ option to add the WMV format file.

Step 2: Head to Editor Timeline
You should know that editing is only possible when your file is on the timeline. For that, after a successful file import, simply drag and drop the media file to the timeline and let the fun begins.

Step 3: Add Video Effects
Once the file is in the timeline, start editing. You can add various video effects to your WMV video file from this section. You can get effects like Canvas, Cool Film, Four Seasons, etc., and can also add overlays, filters, etc.

Step 4: Use Title Template
Filmora offers you so many different and cool title templates. You only have to select the best template from the options. You can go for School Pack, Channel Subscribe, Romantic Pack, etc. Moreover, add Lower Thirds, Subtitles, Openers, and a lot more.

Step 5: Export the WMV File
After all the editing is complete, get the WMV format file exported to your device. For that, hit the ‘Export’ button and from the ‘Locals’ section, select your preferred output file format.

Part 5. WMV VS. MP4: What’s the Difference?
MP4 is far more popular than the WMV file format. The world is shifting on the internet; MP4 is widely used and loved online. On the other hand, WMV is popular with Windows users, along with DVD and Blu-ray collectors.
If we talk about the supported software for MP4 and WMV, MP4 has bigger support. WMV is supported by fewer video players and online video editing tools. On the contrary, MP4 is supported by all the video players available for both Windows and Mac users; along with that, every online tool also supports MP4 format for video editing.
Now the world demands quality. In terms of quality, MP4 has better quality than WMV. WMV has lost the battle of quality provision against WMV. MP4 is a larger file than WMV in terms of file size. It is less compressed than WMV format, but the compression gives WMV an advantage over MP4.
Having a compressed file format produces files of smaller size, which can be easily stored. Easy storage of video files makes WMV a better option in places where the quality of the video can be compromised.
Bottom Line
After reading this article, we hope that you have increased your knowledge regarding the WMV file format. We talked about the pros and cons of the WMV format. Moreover, we also shared ways to edit a WMV video with the best video editor, Wondershare Filmora.
Let’s tell you more about the video editing software. Wondershare Filmora is not just a Video Editor; it’s also an Audio Editor with various diverse features like Audio Denoise, Silence Detection, etc. The software is easy to use with a drag and drop facility. You can create and edit stunning videos with the multi-track editor.
For Win 7 or later (64-bit)
For macOS 10.12 or later
02 Advantage and Disadvantage of WMV Video Format
03 Best MMV Video Editor - Wondershare Filmora
04 How to Edit WMV Video File?
05 WMV VS. MP4: What’s the Difference?
Part 1. What Is WMV File?
WMV file format is from a sequence of video codecs, and it was developed by Microsoft. The full abbreviation of WMV is ‘Windows Media Video.’ WMV is a compressed file container that was made for the Windows Media Framework. It is mainly used for the video content that is to be sold either online or through HD DVDs and Blu-ray Discs.
WMV format files support the encryption for the use with Digital Rights Management (DRM) systems, protecting the content from copywriting and any unlawful production. The WMV file may contain animation, high-definition videos, TV episodes, or video clips.
WMV compresses large files for better data transmission over a network while maintaining quality standards. It is specifically designed to run on all Windows devices. After standardization by the Society of Motion Pictures and Television Engineering (SMPTE), WMV is now considered to be an open standard format.
Part 2. Advantage and Disadvantage of WMV Video Format
Like everything, the WMV file format has its benefits and drawbacks, but not everyone knows much about them. The following section of this article will talk about the benefits and drawbacks; let’s get started!
Advantages of WMV Format
- WMV format is excellent for web videos as it acquires little disc memory space and thus takes less time in loading.
- The files are compressed and have reduced size; hence it is easy to transfer WMV file format via emails etc.
- The format is widely used on Windows and is suitable for storing short animations as well as compressed videos.
- Do you know anything about the compression ratio? Well, if we compare WMV to MPEG-4, WMV format has a 2x compression ratio.
- The format also works on the Web through Google Drive. Also, the quality of the video is maintained with Windows video format.
Disadvantages of WMV Format
- Although the small size is better but not, every application works with the tiny file size as offered by WMV format.
- If you are a Mac user and wish to play WMV files on your Mac, you need plugins like Flip4Mac.
Part 3. Best MMV Video Editor -Wondershare Filmora
Wondershare Filmora has always been on the top of the list whenever we talk about video editing. The software is used worldwide by professionals and also newbies. This is because Filmora provides an endless range of features that can create captivating videos. Let’s share a few features:
- Stabilize Video: Your video might be shaky, or maybe single footage can be shaky. Do you know a way to fix this? Try Stabilize Video feature from Filmora. This feature helps you to smooth all the shaky scenes in your video.
- Motion Tracking: In the editing world, Motion Tracking is the most fun type of feature. With this feature, you can move objects like text, audio, video, elements, etc., by tracking the movements in your video.
- Auto Highlight: Do you know a feature that will save your time and effort? It’s Auto Highlight. The feature spontaneously extracts the highlight from the clip and saves your video trimming time.
For Win 7 or later (64-bit)
For macOS 10.12 or later
Part 4. How to Edit WMV Video File?
For editing, Wondershare Filmora is an ideal software to use. Now that you know about Filmora and its stunning features, do you have any knowledge about how to use it? Well, don’t worry. We are here to guide you about how you can edit WMV file format videos in Filmora. Just follow the simple steps shared below:
Step 1: Get the Media File
Start by launching the software on your respective device. Once Filmora opens, you can import the media file by drag and drop. Or else, tap on the ‘File’ tab and move to the ‘Import Media’ option. From the submenu, select the ‘Import Media Files’ option to add the WMV format file.
Step 2: Head to Editor Timeline
You should know that editing is only possible when your file is on the timeline. For that, after a successful file import, simply drag and drop the media file to the timeline and let the fun begins.
Step 3: Add Video Effects
Once the file is in the timeline, start editing. You can add various video effects to your WMV video file from this section. You can get effects like Canvas, Cool Film, Four Seasons, etc., and can also add overlays, filters, etc.
Step 4: Use Title Template
Filmora offers you so many different and cool title templates. You only have to select the best template from the options. You can go for School Pack, Channel Subscribe, Romantic Pack, etc. Moreover, add Lower Thirds, Subtitles, Openers, and a lot more.
Step 5: Export the WMV File
After all the editing is complete, get the WMV format file exported to your device. For that, hit the ‘Export’ button and from the ‘Locals’ section, select your preferred output file format.
Part 5. WMV VS. MP4: What’s the Difference?
MP4 is far more popular than the WMV file format. The world is shifting on the internet; MP4 is widely used and loved online. On the other hand, WMV is popular with Windows users, along with DVD and Blu-ray collectors.
If we talk about the supported software for MP4 and WMV, MP4 has bigger support. WMV is supported by fewer video players and online video editing tools. On the contrary, MP4 is supported by all the video players available for both Windows and Mac users; along with that, every online tool also supports MP4 format for video editing.
Now the world demands quality. In terms of quality, MP4 has better quality than WMV. WMV has lost the battle of quality provision against WMV. MP4 is a larger file than WMV in terms of file size. It is less compressed than WMV format, but the compression gives WMV an advantage over MP4.
Having a compressed file format produces files of smaller size, which can be easily stored. Easy storage of video files makes WMV a better option in places where the quality of the video can be compromised.
Bottom Line
After reading this article, we hope that you have increased your knowledge regarding the WMV file format. We talked about the pros and cons of the WMV format. Moreover, we also shared ways to edit a WMV video with the best video editor, Wondershare Filmora.
Let’s tell you more about the video editing software. Wondershare Filmora is not just a Video Editor; it’s also an Audio Editor with various diverse features like Audio Denoise, Silence Detection, etc. The software is easy to use with a drag and drop facility. You can create and edit stunning videos with the multi-track editor.
For Win 7 or later (64-bit)
For macOS 10.12 or later
How to Perfectly Use Canva Color Match?
How to Perfectly Use Canva Color Match?
An easy yet powerful editor
Numerous effects to choose from
Detailed tutorials provided by the official channel
Color combination is the essential thing that you need to keep in mind designing. It helps create eye-catchy designs and can create a positive impact on the target audience.

This is the greatest secret of creating attractive and wonderful designs. Reading further will help you to understand the Canva color match in detail. So, without any further dues, let’s get started!
In this article
01 [What is the Canva Color Picker?](#Part 1)
02 [Why Use the Color Match Tool?](#Part 2)
03 [How to Use Color Match in Canva to Match Your Brand](#Part 3)
04 [Alternative to Canva Color Match](#Part 4)
Part 1 What is the Canva Color Picker?
Canva is one of the simplest and easiest ways of creating great and eye-catchy graphic designs. Color combinations help us to make these designs more attractive. But earlier, there were some limitations in Canva regarding the color picker tool; designers had to use browser extensions like ColorZilla to match the color combinations perfectly. They faced many problems while selecting the perfect color of their choice while designing their pins, social media content, logos, online invitations, etc. They had to find the perfect color code of their choice from an external source and paste it into the Canva, which was simply very time-consuming.
The most-awaited color picker tool was introduced in Canva at the end of November 202This new design tool makes the design very convenient while using Canva for graphic designing. With this tool, you don’t need to spend hours searching for the right color that matches the background. Color picker helps you to find a perfect color match according to the image, logo, or anything else uploaded on Canva.

But before using this new color match tool, you must ensure that:
● You are using the updated version of the Canva desktop app.
● You have the latest version of the browsers like Chrome, Mozilla, Internet Explorer, etc.
Part 2 Why Use the Color Match Tool?

This color match tool is the most-demanded feature that has been updated on Canva. It helps choose the perfect color match very efficiently without wasting time and effort. It works like an eyedropper tool available in graphic designing software like Photoshop. It is elementary and valuable to use, and it saves a lot of time in creating attractive and wonderful designs.
It helps determine the different colors available in a particular image uploaded on the Canva app. You can easily choose the appropriate color by placing the tool in the place that has your desired color. It is a compassionate tool, so you should be very careful while choosing the color of your choice. You can press the ‘Esc’ button to exit the command without choosing any color.
This color match tool magically helps select the desired color in seconds without using any external color picker browser extension. This tool is readily available on the color pallet in the updated version of the Canva desktop app.
Part 3 How to Use Color Match in Canva to Match Your Brand
The color match tool is now inbuilt in the Canva desktop app, which is very easy and convenient. You need to download the Canva desktop app to use this feature from the official website of Canva.

The designers need to follow the simple steps given below to use the color match tool (eyedropper tool) in the updated version of the Canva desktop app:
● First of all, open the Canva desktop app.
● After this, open any design or image of your choice that you want to edit. This color match tool can work on any type of image, regardless of the shape and size.
● Now, select the particular part of the image whose color you want to change.
● After this, click on the color block available at the top corner to open the color customization options.
● A color pallet will open.
● On the top of the color pallet, you will see a ‘+’ (add new color) button, this button has a colorful square outline.
● After this, a color chart will appear under that button. You will see the color code written over there and an eyedropper tool will be available next to that color code (hex code).
● Click on this eyedropper tool and select the color of your choice either from the image or any other color available in Canva.
● After selecting the color tap on the particular part of the image whose color you want to change.
This is how you can change the color using the new color picker tool available in Canva and enjoy editing your images using the new Canva desktop app.
Part 4 Alternative to Canva Color Match
As we all know, Canva is the most accessible online graphic designing platform used for image editing and video editing. But there are certain limitations of using it, so here we have listed some of the other graphic designing tools for both image and video editing that can be used as an alternative to the Canva app:
● Visme: It is a drag and drops editing and graphic designing tool. Using; this tool is effortless to use, and you can easily create attractive presentations, infographics, social media graphics, logos, etc. This tool can be used by anyone like students (to create their school activities), educators (to create easy to learn infographics), business people (to create attractive presentations), graphic designers (to create different content), etc.
It contains a lot of features like:
● Data Visualization Tools
● Variety of Professionally Designed Easy to Use Templates
● Infographic Maker
● A Large Number of Editing Tools
● Animation Feature with Hover Effects
● Analytics Feature
● Adobe Spark: It is an online tool launched by Adobe. Although it can’t compete with professional software like Photoshop and Illustrator, it can be treated as the best alternative for Canva. It is used to create social media posts, logos, and graphic designs easily and efficiently. The only limitation it has is that non-designers and newcomers can’t use it without any knowledge of graphic design.
● PicMonkey: PicMonkey is another great alternative to Canva, just like Visme. It has many features that help both professional and non-professional designers create attractive and wonderful designs very easily and efficiently. It has many exciting features like photo re-toucher, pattern & effects tools, etc., just like Photoshop, but it is relatively easier to use and can be used by anyone who wants to create beautiful and creative graphic designs.
● ****Wondershare Filmora Video Editor **: Filmora is a video editing software and can be used as an alternative to Canva if you create and edit the videos to medium & advanced levels. It is used to create and edit short videos for social media and ad campaigns very quickly, with many features available in professional software like Adobe Premiere Pro. It is easy-to-use with an intuitive user interface that is very helpful for non-professional and less experienced video editors.
For Win 7 or later (64-bit)
For macOS 10.12 or later
● Key Takeaways from This Episode →
● It can be concluded that Canva is a fantastic graphic designing tool for all the non-professionals and newcomers in the field of design. It helps people create attractive and creative designs with less effort and less time consumption.
● No doubt, everything has its pros and cons. Similarly, Canva also has certain limitations compared to the other professional graphic designing tools like Photoshop, Illustrator, etc.
● But still, it is continuously updating and removing those limitations. For example- the new color match tool is introduced to this platform for easy and convenient graphic designing.
● This color match tool (eyedropper tool) was demanded by the designers who use Canva for their graphics and creating attractive social media posts, infographics, video editing, etc.
Color combination is the essential thing that you need to keep in mind designing. It helps create eye-catchy designs and can create a positive impact on the target audience.
This is the greatest secret of creating attractive and wonderful designs. Reading further will help you to understand the Canva color match in detail. So, without any further dues, let’s get started!
In this article
01 [What is the Canva Color Picker?](#Part 1)
02 [Why Use the Color Match Tool?](#Part 2)
03 [How to Use Color Match in Canva to Match Your Brand](#Part 3)
04 [Alternative to Canva Color Match](#Part 4)
Part 1 What is the Canva Color Picker?
Canva is one of the simplest and easiest ways of creating great and eye-catchy graphic designs. Color combinations help us to make these designs more attractive. But earlier, there were some limitations in Canva regarding the color picker tool; designers had to use browser extensions like ColorZilla to match the color combinations perfectly. They faced many problems while selecting the perfect color of their choice while designing their pins, social media content, logos, online invitations, etc. They had to find the perfect color code of their choice from an external source and paste it into the Canva, which was simply very time-consuming.
The most-awaited color picker tool was introduced in Canva at the end of November 202This new design tool makes the design very convenient while using Canva for graphic designing. With this tool, you don’t need to spend hours searching for the right color that matches the background. Color picker helps you to find a perfect color match according to the image, logo, or anything else uploaded on Canva.
But before using this new color match tool, you must ensure that:
● You are using the updated version of the Canva desktop app.
● You have the latest version of the browsers like Chrome, Mozilla, Internet Explorer, etc.
Part 2 Why Use the Color Match Tool?
This color match tool is the most-demanded feature that has been updated on Canva. It helps choose the perfect color match very efficiently without wasting time and effort. It works like an eyedropper tool available in graphic designing software like Photoshop. It is elementary and valuable to use, and it saves a lot of time in creating attractive and wonderful designs.
It helps determine the different colors available in a particular image uploaded on the Canva app. You can easily choose the appropriate color by placing the tool in the place that has your desired color. It is a compassionate tool, so you should be very careful while choosing the color of your choice. You can press the ‘Esc’ button to exit the command without choosing any color.
This color match tool magically helps select the desired color in seconds without using any external color picker browser extension. This tool is readily available on the color pallet in the updated version of the Canva desktop app.
Part 3 How to Use Color Match in Canva to Match Your Brand
The color match tool is now inbuilt in the Canva desktop app, which is very easy and convenient. You need to download the Canva desktop app to use this feature from the official website of Canva.
The designers need to follow the simple steps given below to use the color match tool (eyedropper tool) in the updated version of the Canva desktop app:
● First of all, open the Canva desktop app.
● After this, open any design or image of your choice that you want to edit. This color match tool can work on any type of image, regardless of the shape and size.
● Now, select the particular part of the image whose color you want to change.
● After this, click on the color block available at the top corner to open the color customization options.
● A color pallet will open.
● On the top of the color pallet, you will see a ‘+’ (add new color) button, this button has a colorful square outline.
● After this, a color chart will appear under that button. You will see the color code written over there and an eyedropper tool will be available next to that color code (hex code).
● Click on this eyedropper tool and select the color of your choice either from the image or any other color available in Canva.
● After selecting the color tap on the particular part of the image whose color you want to change.
This is how you can change the color using the new color picker tool available in Canva and enjoy editing your images using the new Canva desktop app.
Part 4 Alternative to Canva Color Match
As we all know, Canva is the most accessible online graphic designing platform used for image editing and video editing. But there are certain limitations of using it, so here we have listed some of the other graphic designing tools for both image and video editing that can be used as an alternative to the Canva app:
● Visme: It is a drag and drops editing and graphic designing tool. Using; this tool is effortless to use, and you can easily create attractive presentations, infographics, social media graphics, logos, etc. This tool can be used by anyone like students (to create their school activities), educators (to create easy to learn infographics), business people (to create attractive presentations), graphic designers (to create different content), etc.
It contains a lot of features like:
● Data Visualization Tools
● Variety of Professionally Designed Easy to Use Templates
● Infographic Maker
● A Large Number of Editing Tools
● Animation Feature with Hover Effects
● Analytics Feature
● Adobe Spark: It is an online tool launched by Adobe. Although it can’t compete with professional software like Photoshop and Illustrator, it can be treated as the best alternative for Canva. It is used to create social media posts, logos, and graphic designs easily and efficiently. The only limitation it has is that non-designers and newcomers can’t use it without any knowledge of graphic design.
● PicMonkey: PicMonkey is another great alternative to Canva, just like Visme. It has many features that help both professional and non-professional designers create attractive and wonderful designs very easily and efficiently. It has many exciting features like photo re-toucher, pattern & effects tools, etc., just like Photoshop, but it is relatively easier to use and can be used by anyone who wants to create beautiful and creative graphic designs.
● ****Wondershare Filmora Video Editor **: Filmora is a video editing software and can be used as an alternative to Canva if you create and edit the videos to medium & advanced levels. It is used to create and edit short videos for social media and ad campaigns very quickly, with many features available in professional software like Adobe Premiere Pro. It is easy-to-use with an intuitive user interface that is very helpful for non-professional and less experienced video editors.
For Win 7 or later (64-bit)
For macOS 10.12 or later
● Key Takeaways from This Episode →
● It can be concluded that Canva is a fantastic graphic designing tool for all the non-professionals and newcomers in the field of design. It helps people create attractive and creative designs with less effort and less time consumption.
● No doubt, everything has its pros and cons. Similarly, Canva also has certain limitations compared to the other professional graphic designing tools like Photoshop, Illustrator, etc.
● But still, it is continuously updating and removing those limitations. For example- the new color match tool is introduced to this platform for easy and convenient graphic designing.
● This color match tool (eyedropper tool) was demanded by the designers who use Canva for their graphics and creating attractive social media posts, infographics, video editing, etc.
Top Animated Title Makers
You know that your video needs a title, but rather than just type in some bland text to introduce the video, you can create an animated title page that is far more attractive. Animated titles make a video more attractive and when done correctly, they can even guarantee that your target audience will stick around long enough to watch the entire video. They can also be very useful for introducing the content of the video.
But to make an effective animated title, you need a tool that is designed to do just that. In this article, we look at some of the top animated title makers that you can use to create the perfect animated title for your video.
Part 1. Animated Title Maker Online
If you don’t want to install software on your computer to create the animated title, the following are the top online tools to choose from;
Animaker
Link: https://www.animaker.com/text-animation-maker
Rating: 4.5/5
Animaker is an online tool that is specifically designed to help you create text animations that you can then add to your video project. Available online on all browsers, Animaker has a simple user interface that makes it easy to create text animations in a matter of minutes. It is so easy to use that even the average beginner can create stunning text animations.
If you don’t want to create the animations from scratch, Animaker has numerous pre-designed templates for you to choose from that you can then just edit to fit your design. It also has a lot of customizable infographics that you can repurpose.

Animatron Studio
Link: https://www.animatron.com/studio
Rating: 4.5/5
The Animatron Studio is a one-stop solution for generating all types of animated texts. You can use it to create the perfect animated title for your video, but its numerous features also mean that it is one of the best ways to create attention-grabbing animated banner ads that can be posted on various ad sites,
It has a wealth of resources that you can use to create the title including more than 500,000 royalty-free images, videos, and audio to include in your project. If you don’t want to build the animated content from the ground up, you can select from the 200 pre-animated sets that Animatron Studio provides.
Kapwing Title Maker
Link: https://www.kapwing.com/animated-text-video-maker
Rating: 4.5/5
If your goal is to do more than just create an animated title for your video, Kapwing is a good solution. It is a complete online video editor that can also be used to create animated titles. As such, you can expect Kapwing to have more advanced features that allow you to customize the animated title in various ways.
For instance, it has a huge selection of animations that you can apply to the text. But you also get the option to upload your own animations, colors, and fonts. But please note that the free version of Kapwing will add a watermark to the video.

Biteable Animated Text Maker
Link: https://biteable.com/animated/text/
Rating: 4.5/5
Biteable is one of the most popular solutions that you can use to create all kinds of animated texts. It is simple enough to use that it is useful to both professionals and amateur video creators. It has numerous useful features including custom scenes, foundations, backgrounds, and characters all of which can work together to create the perfect animated title.
One of the main benefits of choosing Biteable is that you can share the videos you edit directly on social media without having to download the video.

Flexclip Video Maker
Link: https://www.flexclip.com/editor/
Rating: 4.5/5
Flexclip is another very easy-to-use and easily accessible solution to create animated texts for videos. Rather than create the texts from scratch, Flexclip allows you to create stunning animated texts just by selecting several parameters.
There are also a lot of pre-made designer text templates that are fully customizable. All you have to do is select one of the templates, and change the text, font, and any images to make it unique to you and your video.

Part 2. Animated Title Maker for Computer
Online tools can be useful, especially since they are more easily accessible. But if you want additional features and more ways to customize your animated title, the following desktop solutions may be more applicable to you;
Filmora
Rating: 4.5/5
Wondershare Filmora is a complete suite of video editing tools that can also come in handy when creating animated titles for videos. It is a very simple video editor with a simple user interface, making it an ideal solution even for beginner users. Adding a title to your video is easy and you get to choose from more than 200 different animations that you can apply to bring the text to life.
Filmora is also very useful because it comes with advanced editing features for the professional editor. You can use it to edit all aspects of the video including the clips and even any audio that may be on the project.

Adobe Animate
Rating: 4.5/5
Adobe Animate is a great option to create various animations for your video project, including animated texts. Used by animators to create 2D animated content, Adobe Animate has a lot of features designed to facilitate this kind of animation and is, therefore, one of the go-to solutions for designers looking to create illustrations like logos and infographics.
But like other Adobe programs, Adobe Animate is not very easy to use and the beginner may find that it takes quite a long time to figure out how it works. But once you figure it out, the 800+ web fonts can make it very easy for you to customize your animated title in various ways.

Express Animate
Rating: 4.5/5
Express Animate is a completely free program that you can download on your computer. It is a complete video editor which means that you can use it to animate text and characters, but it is also a great way to edit other aspects of the video including the audio tracks and adding digital effects.
With a simple user interface, Express Animate allows users to create 2D animations that can be used to create unique videos. It is also a good way to create GIFs and memes.
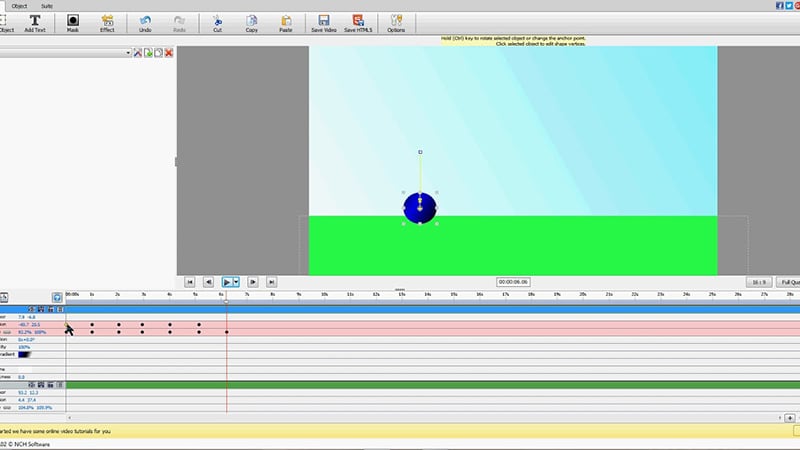
Movavi Video Editor
Rating: 4.5/5
Movavi Video Editor is another complete suite of editing tools that can also come in handy when you want to create an animated title for your video. Designed for both professionals and beginners, this video has all the advanced features you will need to edit all aspects of your video, including a built-in audio editor.
When it comes to animation, Movavi has a lot of effects and transitions as well as pre-made title templates to choose from. Once you have selected the title, you can easily customize the font and color to fit into your project.

Windows Movie Maker
Rating: 4.5/5
For PC users Windows Movie Maker is a simple to use and free way to edit videos. Included with the Windows OS, you likely don’t need to install any software to use and even though it is a free solution, Windows Movie Maker does have the necessary features to create and add animated titles to any video.
It comes with numerous effects, transitions, and templates to choose from when animating text. And it can also be used to edit videos in other ways including trimming and merging clips.

Part 3. Animated Title Maker Apps
If you are editing your videos on your mobile device, the following are the top animated title-making apps to choose from;
Tomo
Rating: 4.5/5
Link: https://m.apkpure.com/tomo-animate-text-in-video/com.entzeners.app.tomo
Tomo is one of the best apps that you can use to animate text in a video. It has robust features that allow you to easily add text to the video and then animate the text using various transitions and effects. Once the edits are complete, Tomo allows you to share the completed video directly on social media apps like Instagram and Twitter.
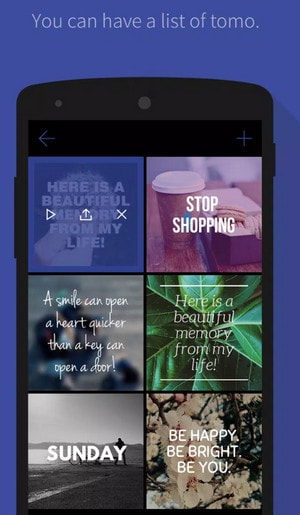
Adobe Spark
Rating: 4.5/5
Link:https://apps.apple.com/us/app/adobe-spark-post-design-maker/id1051937863
Available for both Android and iOS devices, Adobe Spark is a video editing tool that has numerous tools to add and edit texts on videos. You can use the professionally designed templates that you have access to when using Adobe Spark to create stunning animation titles. And since it easily integrates with other apps on the device, sharing the videos is very easy.
Quik
Rating: 4.5/5
Link: https://play.google.com/store/apps/details?id=com.gopro.smarty&hl=en&gl=US
Quik is an app that is dedicated to text animations and therefore one of the best solutions when you want to add and edit texts on videos. It is available for both iOS and Android and although the free version of the app is slightly limited, its basic editing features are still better than what you find on other more expensive solutions.
Hyper-type Animated Text Videos
Rating: 4.5/5
Link: https://itunes.apple.com/us/app/hype-type-animated-text-videos
This app gives you two options when it comes to animating the text on your video; auto-motion and typography. It focuses on just adding and editing text on a video and as such may not have any of the other video editing features you will find on some of the other apps. But if your goal is to create an interactive animated video title, Hyper-type Animated Text Videos is a great solution.
Vimeo
Rating: 4.5/5
Link: https://play.google.com/store/apps/details?id=com.vimeo.android.videoapp&hl=en&gl=US
Also available for both iOS and Android devices, Vimeo can also be a handy solution for the creation and editing of animated titles for videos. It has a lot of features to edit not just the text in videos, but also all other elements including audio. You even get a wide selection of royalty-free music that you can add to the video and motion stickers to make your title stand out even more. But the free version of Vimeo will add a watermark to the video.

Free Download For Win 7 or later(64-bit)
Free Download For macOS 10.14 or later
Also read:
- New 2024 Approved 10 Best Voice Over Generators Windows, Mac, Android, iPhone, and Online
- New Learn How to Perform Velocity Edits on Your PC
- New 3 Best Effects to Appear on Camera Made with Filmora
- New How to Uue Adobe Lightroom Color Grading
- New In 2024, How to Loop Video in Canva
- New 2024 Approved How to Add Motion Blur in After Effects
- Adjust Background to Black for Your Product Review Video for 2024
- New With Looping Videos, People Stay on Your Site Longer, Boosting Engagement. With Video Being Watched on Mobile over 3X More than Any Other Content, Its an Essential Part of Mobile Advertising
- Updated 12 Top Picks of Video Enhancer Software
- Online Video Makers to Use for 2024
- New Top 11 Best Video Editing Apps for iPhone for 2024
- New In 2024, How To Brighten Video In Premiere Pro | Step By Step Guide
- Updated How to Create the Stranger Things Upside Down Effect for 2024
- New Create Slow Motion Videos Using Final Cut Pro with Ease for 2024
- 2024 Approved Best Animated Text Generator
- New In 2024, Something That You Should Know About MP4 Video Format
- Updated Discover the Top Slow Motion Camera App to Use
- New How to Make a Movie with Windows Movie Maker?
- New Common Platforms for Live Streaming | Virbo AI Live Stream for 2024
- In 2024, Edit and Send Fake Location on Telegram For your Apple iPhone 6 Plus in 3 Ways | Dr.fone
- In 2024, How To Transfer From Apple iPhone SE (2020) to Samsung Simplified Guide | Dr.fone
- In 2024, Top 5 Tracking Apps to Track Apple iPhone 12 mini without Them Knowing | Dr.fone
- Guide to Promoting Music Videos on YouTube for 2024
- Best 10 Mock Location Apps Worth Trying On Vivo Y100i Power 5G | Dr.fone
- How to Recover Deleted Photos, Videos & Music Files from iPhone 11 | Stellar
- The Easiest Methods to Hard Reset Nokia G310 | Dr.fone
- How to Fix the Soft Bricked Tecno Pop 7 Pro? | Dr.fone
- In 2024, How to Fake GPS on Android without Mock Location For your Honor Magic 5 | Dr.fone
- Ultimate Guide to Catch the Regional-Located Pokemon For Samsung Galaxy A15 5G | Dr.fone
- Forgot iPhone 6 Plus Password? – Here are the Best Solutions | Stellar
- In 2024, 11 Best Location Changers for Itel S23+ | Dr.fone
- In 2024, How I Transferred Messages from Tecno Spark 10 5G to iPhone 12/XS (Max) in Seconds | Dr.fone
- Updated 10 Cartoon Photo Converters for 2024
- In 2024, How to Use Life360 on Windows PC For Realme C51? | Dr.fone
- How to Track Oppo A78 Location by Number | Dr.fone
- Hassle-Free Ways to Remove FRP Lock on Infinix Note 30with/without a PC
- Title: In 2024, A Comprehensive Guide on Converting Slo-Mo Videos to Normal Speed Videos On iPhone
- Author: Chloe
- Created at : 2024-05-20 03:37:45
- Updated at : 2024-05-21 03:37:45
- Link: https://ai-editing-video.techidaily.com/in-2024-a-comprehensive-guide-on-converting-slo-mo-videos-to-normal-speed-videos-on-iphone/
- License: This work is licensed under CC BY-NC-SA 4.0.
