
:max_bytes(150000):strip_icc():format(webp)/how-to-change-your-tiktok-username-and-profile-picture-048cd3c3b4854846ab46f920e862332f.jpg)
In 2024, Are You Looking for Dark LUTs Premiere Pro Free? This Article Discusses the Dark Moody LUTs with Top Recommendations for Beginning Visual Editing
Are You Looking for Dark LUTs Premiere Pro Free? This Article Discusses the Dark Moody LUTs with Top Recommendations for Beginning Visual Editing
Look-up tables (LUTs) are visual editing tools used as color presets. By using LUTs, you can enhance color grading within photos and videos. This way, your visual content looks more aesthetic, engaging, and appealing. Meanwhile, within LUTs, there are several color presets to use. The most popular one is dark moody LUT. In this article, you’ll find useful information on dark moody LUTs with the best recommendations.
Part 1: What Do Dark Moody LUTs Represent?
Like another color preset, dark moody LUTs provide special and unique color grading. So, you’ll experience darkened shadows, desaturated tones, blue tints, green hues, and others. The dark preset filters offer moody looks with pitch-dark effects to your visual content. Hence, these types of LUTs add a foreboding atmosphere.
Dark and moody LUTs are used in horror films or thriller cinematography. After all, they provide dedicated dark contrast with gloomy looks to the visual content. Hence, a special dark horror effect is blended, which adds mystery, tension, and fear. For adding dark moody LUTs, several tools are available for enhancing colors.
Empower your videos with a new mood using different LUTs. Filmora now offers 100+ top-quality 3D LUTs cover a broad range of scenarios. Transform your videos with Filmora’s powerful 3D LUTs.
Apply LUT on Videos Apply LUT on Videos Learn More


Part 2: Best Dark Moody LUTs You Can Find
LUTs are perfect for enhancing color gradients with minimal effort. This means you don’t need to spend long hours on video editing. With dark moody LUTs, there is an option to make your video more cinematic. Let’s find some of the best dark moody LUTs to make things easier:
1. Dark Moody LUTS Fashion
Elevate your photos and videos with these cinematic dark moody LUTs filters. There are 4 LUT presets that could be utilized to blend dark contrast. Hence, you can provide muted looks to your visual content with a mystery tone. The LUTs are ideal for fashion use because of dark shadows. For social media content, these LUTs are ideal.

2. Dark and Moody Cinematic 3D LUTs
Videography and photography are incomplete without color enhancement through editing. Saving time, these dark and moody cinematic 3D LUTs pack is a perfect solution. If you want desaturated contrast with muted colors, there are 8 different LUTs to assist. Apply all the LUT preset filters easily without hassles. With 4 separate files, the LUTs will suit almost every editing tool.

3. Dark Moody Lightroom Presets
Improvise your closest visual media with dark moody Lightroom presets. You will get 20 different dark LUTs Premiere Pro free in this pack. All available LUT filter presets are unique, with different dark contrasts and tones. Thus, you can add a moody touch with desaturated color gradients. This way, your photos, and videos will enlighten with a murk appearance.

4. Film Noir LUTs and Presets Pack
Adding film-like dark cinematic looks is possible with this LUTs preset pack. The availability of 50 preset filters allows adding dark moods to your visual media. The content becomes visually appealing with crushed black hues and darker and gloomy textures. The filters are instantly applied and can be edited with desired intensity and contrast.

5. Dark & Moody Aesthetic Filters
This dark and moody LUTs filter pack has everything to beautify your photos and videos. With 5 different filter presets, transform color gradients with cool hues and less vibrant colors. This will provide dark aesthetic looks to your visual content with desaturated tone. This exceptional grading with moody filters allows upscaling colors for social media content.

6. MOODY NORDIC LUTS
The Nordic region is known for its attractive landscapes with dark weather. Adding such LUTs to your videos enhances color hues with gloomy and dark gradients. This will provide cinematic looks to your videos in an engaging way. The available LUTs are in 5 color presets, and each one is unique. Thus, your travel videos can become more pleasing using Nordic effects.

Part 3: Wondershare Filmora: A Great Platform For Using Dark Moody LUTs
For video upgradation, editing is essential to overcome underlying visual hindrances. Meanwhile, a good video editor is necessary for this purpose. Meet Wondershare Filmora that is a creative video editing platform for content creators. Using this tool, you can use 100+ LUTs, including dark moody LUTs. You can also utilize elements, stickers, transitions, and other effects.
Add LUTs on Video For Win 7 or later(64-bit)
Add LUTs on Video For macOS 10.14 or later
Filmora is the industry-leading tool for enhancing video quality with suitable color gradients. The filters are fully creative with adjustable contrast and saturation. Meanwhile, Filmora has added 100+ LUTs in its new updates. This means there are more than 200 LUTs in Filmora. When it comes to usability, Filmora offers best-in-class tools with amazing functionalities.

Key Features Of Wondershare Filmora
Filmora is an easy-to-use platform that delivers video editing with optimized solutions. Let’s find more of its features that make it an exceptional tool:
- Audio Support: With Filmora, users can add songs, voiceovers, and music to their videos. This can make their videos more enchanting. Meanwhile, there is also an option to merge, split, crop, or customize audio speed. Using an audio visualizer is also a possibility by adjusting audio bass, treble, and frequencies.
- Color Grading: There is a color wheel by which you can set desired color palette. This way, you can transform your video into desired color contrast with necessary gradients. The color intensity could also be adjusted from 0 – 100% range. With available LUT preset filters, different color effects could be applied.
- Split Screen: The availability of a split screen function allows for playing different videos at one time. Thus, combining or comparing different videos will be easier to process. This will save you time and simplify your video editing procedure.
- Text-to-Speech: Filmora’s text-to-speech allows you to create voiceovers from text files. This will enrich your video and give useful content with more elements. The transcription process is quick and fast with more accuracy. This feature is available in up to 16 types of languages.
Conclusion
Using LUTs, you can enhance and optimize the color grading of your video. Meanwhile, if your video is horror or suspense relevant, use dark LUTs Premiere Pro free. This adds dark shades to your video with desaturated contrasts and crushed black hues. So, if you want the best dark moody LUTs free download, Filmora is the right solution. This tool provides unique and special LUTs in different categories.
Add LUTs on Video For Win 7 or later(64-bit)
Add LUTs on Video For macOS 10.14 or later
Apply LUT on Videos Apply LUT on Videos Learn More
Part 2: Best Dark Moody LUTs You Can Find
LUTs are perfect for enhancing color gradients with minimal effort. This means you don’t need to spend long hours on video editing. With dark moody LUTs, there is an option to make your video more cinematic. Let’s find some of the best dark moody LUTs to make things easier:
1. Dark Moody LUTS Fashion
Elevate your photos and videos with these cinematic dark moody LUTs filters. There are 4 LUT presets that could be utilized to blend dark contrast. Hence, you can provide muted looks to your visual content with a mystery tone. The LUTs are ideal for fashion use because of dark shadows. For social media content, these LUTs are ideal.
2. Dark and Moody Cinematic 3D LUTs
Videography and photography are incomplete without color enhancement through editing. Saving time, these dark and moody cinematic 3D LUTs pack is a perfect solution. If you want desaturated contrast with muted colors, there are 8 different LUTs to assist. Apply all the LUT preset filters easily without hassles. With 4 separate files, the LUTs will suit almost every editing tool.
3. Dark Moody Lightroom Presets
Improvise your closest visual media with dark moody Lightroom presets. You will get 20 different dark LUTs Premiere Pro free in this pack. All available LUT filter presets are unique, with different dark contrasts and tones. Thus, you can add a moody touch with desaturated color gradients. This way, your photos, and videos will enlighten with a murk appearance.
4. Film Noir LUTs and Presets Pack
Adding film-like dark cinematic looks is possible with this LUTs preset pack. The availability of 50 preset filters allows adding dark moods to your visual media. The content becomes visually appealing with crushed black hues and darker and gloomy textures. The filters are instantly applied and can be edited with desired intensity and contrast.
5. Dark & Moody Aesthetic Filters
This dark and moody LUTs filter pack has everything to beautify your photos and videos. With 5 different filter presets, transform color gradients with cool hues and less vibrant colors. This will provide dark aesthetic looks to your visual content with desaturated tone. This exceptional grading with moody filters allows upscaling colors for social media content.
6. MOODY NORDIC LUTS
The Nordic region is known for its attractive landscapes with dark weather. Adding such LUTs to your videos enhances color hues with gloomy and dark gradients. This will provide cinematic looks to your videos in an engaging way. The available LUTs are in 5 color presets, and each one is unique. Thus, your travel videos can become more pleasing using Nordic effects.
Part 3: Wondershare Filmora: A Great Platform For Using Dark Moody LUTs
For video upgradation, editing is essential to overcome underlying visual hindrances. Meanwhile, a good video editor is necessary for this purpose. Meet Wondershare Filmora that is a creative video editing platform for content creators. Using this tool, you can use 100+ LUTs, including dark moody LUTs. You can also utilize elements, stickers, transitions, and other effects.
Add LUTs on Video For Win 7 or later(64-bit)
Add LUTs on Video For macOS 10.14 or later
Filmora is the industry-leading tool for enhancing video quality with suitable color gradients. The filters are fully creative with adjustable contrast and saturation. Meanwhile, Filmora has added 100+ LUTs in its new updates. This means there are more than 200 LUTs in Filmora. When it comes to usability, Filmora offers best-in-class tools with amazing functionalities.
Key Features Of Wondershare Filmora
Filmora is an easy-to-use platform that delivers video editing with optimized solutions. Let’s find more of its features that make it an exceptional tool:
- Audio Support: With Filmora, users can add songs, voiceovers, and music to their videos. This can make their videos more enchanting. Meanwhile, there is also an option to merge, split, crop, or customize audio speed. Using an audio visualizer is also a possibility by adjusting audio bass, treble, and frequencies.
- Color Grading: There is a color wheel by which you can set desired color palette. This way, you can transform your video into desired color contrast with necessary gradients. The color intensity could also be adjusted from 0 – 100% range. With available LUT preset filters, different color effects could be applied.
- Split Screen: The availability of a split screen function allows for playing different videos at one time. Thus, combining or comparing different videos will be easier to process. This will save you time and simplify your video editing procedure.
- Text-to-Speech: Filmora’s text-to-speech allows you to create voiceovers from text files. This will enrich your video and give useful content with more elements. The transcription process is quick and fast with more accuracy. This feature is available in up to 16 types of languages.
Conclusion
Using LUTs, you can enhance and optimize the color grading of your video. Meanwhile, if your video is horror or suspense relevant, use dark LUTs Premiere Pro free. This adds dark shades to your video with desaturated contrasts and crushed black hues. So, if you want the best dark moody LUTs free download, Filmora is the right solution. This tool provides unique and special LUTs in different categories.
Add LUTs on Video For Win 7 or later(64-bit)
Add LUTs on Video For macOS 10.14 or later
The Ultimate Guide for the 10 Leading Slow-Motion Cameras
Camera technology is evolving at an increased pace with improved features. Each brand competes in the media industry to release cameras with diverse functionalities. When you keep updated on the latest models, you will get to know different varieties and options. It will also help you stay current with evolving technology for slow-motion videos. Choosing the best slow-motion camera involves considering specific needs like filmmaking or creating slow-motion videos.
In this article, we’ll mention the top 10 best slow mo cameras for filming slow-motion videos. The slow-motion camera is specifically built to capture the moments in perfect frame rates. Furthermore, this article will highlight an innovative way to slow down videos without any camera.
Slow Motion Video Maker Slow your video’s speed with better control of your keyframes to create unique cinematic effects!
Make A Slow Motion Video Make A Slow Motion Video More Features
Part 1: How Do Slow-Motion Cameras Help in Recording Perfect Slow-Mo Videos?
Slow-motion cameras record videos at much faster speeds than regular cameras. This feature helps create slow-motion videos by slowing down the recorded action when played at normal speed. These slow-motion cameras are popular in filmmaking, sports analysis, science, and content creation. That’s because they capture detailed moments and highlight fast-moving things.
- Higher Frame Rate: Regular videos usually record 24, 30, or 60 frames per second (fps). But slow-motion cameras can capture hundreds or thousands of frames per second. More frames mean more details and smoother slow-motion videos when played back.
- Smooth Playback: Slow-motion videos look smooth and purposeful when played at regular speeds. More frames are recorded initially to achieve this effect. Ultimately, it will preserve all details when the video is played in slow motion.
- High-Resolution Sensors: Lots of slow-motion cameras have high-quality sensors. These sensors ensure that even with more frames captured, the picture stays sharp and detailed in slow-motion videos. This helps capture fine details without losing clarity.
- Creative Control: Slow-motion cameras let filmmakers and videographers control how fast or slow some parts of a scene look. This helps tell stories better, focus on details, and make videos more interesting and attractive to watch.
- Reduced Motion Blur: More frames per second make pictures clearer and sharper. This feature works especially for fast-moving things. This is important when you need to see tiny details or when the lighting isn’t great.
- Temporal Resolution: Slow-motion cameras can record lots of details in quick movements. They’re handy in sports, science, and creative videos where catching fast and detailed actions matter a lot.
Part 2: Finding The Top Slow-Motion Cameras to Use in 2024
If you want a good slow-motion camera, start by checking out the ones with higher frame rates. Also, think about what you’ll be recording and where you’ll share your videos. Buying a new camera can be confusing and perplexing. We hope you’ll find the best slow-motion camera in the list below. We have arranged the top slow-motion cameras to use in 2024 below:
- PowerShot G7 X Mark III Black
- Sony ZV-1 Camera
- GoPro HERO11 Black
- GoPro HERO10 Black
- Panasonic Lumix GH6
- Sony α7R IV
- Fujifilm X-S20
- Canon EOS-1D X Mark III DSLR Camera
- Nikon D6 FX-Format Digital SLR Camera
- Canon DSLR Camera [EOS 90D]
1. PowerShot G7 X Mark III Black
The PowerShot G7 X Mark III Black is a small but powerful camera for taking high-quality slow-motion videos. It has a 20.1 Megapixel camera and a DIGIC 8 Image Processor, which means it shows exceptional clarity even in different lighting. The 4.2x Optical Zoom Kens with Optical Image Stabilizer helps get close-up shots without making them blurry. For videos, it can record in 4K (at 30 frames per second) and Full HD (at 120 frames per second) for super smooth slow-motion shots.

2. Sony ZV-1 Camera
The Sony ZV-1 Camera is made specifically for content creators and vloggers. Although it has a compact design, it is packed with powerful features. This slow-motion video camera has a 1-inch sensor and digital and optical image stabilization. This means your pictures and videos will be clear and steady even if things are moving fast.
The camera’s results are sharp and colorful thanks to its 20.1 MP resolution and BIONZ X Image Processor. Also, it has a Fast Hybrid AF System that quickly focuses accurately, perfect for both photos and videos.

3. GoPro HERO11 Black
The GoPro HERO11 Black is an awesome slow-motion camera perfect for all kinds of adventures. It takes clear videos up to 5.3K resolution and sharp 27MP photos. The camera has great stabilization, so your videos always look smooth. You can change how wide your shots are and switch lenses digitally while keeping things clear.
GoPro HERO11 Black has cool effects for nighttime shots, making them look artistic. The camera is tough, waterproof up to 33 feet, and has a long-lasting battery that works well even in cold weather.

4. GoPro HERO10 Black
The GoPro HERO10 Black has a faster processor for smoother use and better touch controls. It can record super clear videos at higher speeds: 5.3K at 60fps and 4K at 120fps. You can also shoot camera slow-motion videos at 240fps in 2.7K resolution. The camera’s sensor is better, too, making photos sharper and allowing you to grab 15.8MP pictures from videos. It keeps footage perfectly steady with its excellent stabilization.

5. Panasonic LUMIX GH6
The LUMIX GH6 is an inspiring innovation in the LUMIX camera series, packed with amazing upgrades. It records high-quality videos internally in ProRes 422 HQ and ProRes 422, making them look great and easier to work with on computers later. This slow-mo video camera is faster due to a new engine, making pictures look better with less noise and better colors.
It’s great for professional video making, offering top-notch recording options. It also has image stabilization, a flexible rear monitor, and slots for different memory cards.

6. Sony α7R IV
The Sony A7R IV is a top-notch mirrorless camera appreciated by videography experts. It takes super clear pictures with its 20MP full-frame sensor. Also, it has a feature that prevents shaky photos and helps videos stay steady. You can control how long the shutter stays open, which helps in different lighting.
This slow-motion video camera lets you choose different ways to measure light for better pictures. Small and adaptable, it is high-tech and has great performance in digital photography.

7. Fujifilm X-S20
The Fujifilm X-S20 is a versatile camera that is equipped with advanced features and is easy to carry. This slow-motion camera has a 26.1MP sensor for really clear pictures. The screen is a vary-angle touchscreen of 3.0 inches and 1.84m-dot. You can connect it to Wi-Fi and Bluetooth to share and control the camera from a distance.
It’s perfect for videos, too, recording in high-quality up to 6.2K resolution. The camera is small and compact at 127.7 x 85.1 x 65.4mm and weighs only 491g.

8. Canon EOS-1D X Mark III DSLR Camera
The Canon EOS-1D X Mark III is a top choice for professionals in photography and videography. It has a powerful 20.1 Megapixel Full-frame CMOS sensor that ensures high-quality images. The DIGIC X Image Processor handles low-light situations exceptionally well. Adding on, it offers a wide ISO range for great performance.
Its advanced autofocus system with deep learning technology tracks subjects accurately. This slow-mo camera supports impressive 4K UHD 2160p video recording.

9. Nikon D6 FX-Format Digital SLR Camera
The Nikon D6 FX-Format Digital SLR Camera Body is made for professionals who promise top-notch performance. It has a powerful 20.8 Megapixel Full-frame CMOS sensor for high-quality photos. Also, it can work as a webcam with a maximum resolution of 16 MP and performs well in different situations.
Using digital image stabilization, the slow-motion video camera helps prevent blur. Moreover, it has a quick shutter speed of 1/8000 seconds for precise control over exposure.

10. Canon DSLR Camera [EOS 90D]
The Canon 90D Body is a slow-mo camera for both filmmakers and videographers. It has a 32.5-megapixel CMOS APS-C sensor for clear and detailed images. Furthermore, it supports recording videos in 4K UHD 30P and Full HD 120P, which helps in delivering excellent video quality. With a 45-Point All Cross-type AF System, the 90D provides precise autofocus across the entire frame.

Part 3: What To Do If You Do Not Have a Camera? Use Filmora for Slow-Mo Video Making
Sometimes, getting an affordable slow-motion camera for shooting videos can be tricky. But don’t worry! You can still create slow-motion videos without having a specific camera. Wondershare Filmora is an excellent solution to make fantastic slow-motion videos, even if you don’t own a special slow-motion camera.
You can adjust the speed of your videos easily to make certain moments slower, making your clips look cool. Filmora isn’t just about changing the speed of your videos. It’s a powerful editing software that lets you do lots of things to make your videos better.
Free Download For Win 7 or later(64-bit)
Free Download For macOS 10.14 or later
Steps Required to Slow Down Video Professionally with Speed Ramping
Filmora Speed Ramping feature allows you to control your clip’s speed. It gives the flexibility to either slow down the entire video or specific segments. Here’s a guide on executing slow-motion in the Filmora video editing interface.
Step 1Set Up Project and Import Footage
Start by launching Wondershare Filmora and creating a new project. Then, import your video by clicking the “+” icon. After that, select “Match to Media” to ensure your project settings align with your clip’s resolution.

Step 2Apply Slow-Motion Effect to Slow Down Video
In the next step, add the imported video to the timeline and access the “Speed” icon. Choose a preset, such as 0.5x from the “Slow” menu, to apply a slow-motion effect to the entire clip. Alternatively, right-click on the video, go to “Speed,” followed by “Uniform Speed,” and adjust the slider leftwards for slow motion.

Step 3Customize Speed for Specific Segments
To create slow-motion effects for specific parts or frames within your video, navigate to the “Speed Ramping” window. Then, choose “Customize” and modify the speed by dragging the points along the line.

Step 4Add Freeze Frame at Required Position
For freezing a frame, position the play head at the desired spot. Select “Add Freeze Frame,” then set the freeze duration in the “Freeze Time Field” and adjust its placement as required. Save changes by clicking “OK.”

Top Features Offered by Filmora
Wondershare Filmora offers its users a variety of advanced features to perform an edit conveniently. It enhances creativity and productivity with the help of AI-equipped in it. Described below are some of these features to know about Filmora:
1. AI Smart Masking
AI Smart Masking simplifies the process of adding high-quality transitions and effects. By contrast, it can be complex with manual editing. By activating this feature, it automatically handles the masking task. Once AI masking is enabled and the desired area is specified, it swiftly completes the process. This allows you to apply transitions and effects to the unmasked area afterward.
2. AI Copywriting
Filmora AI Copywriting is a new tool that incorporates ChatGPT API. It uses AI to create scripts, providing tons of ideas for creators to improve their video storytelling. This tool seamlessly integrates AI-generated text and narration into the editing process. With Filmora AI Copywriting, creators can quickly develop catchy YouTube titles and descriptions.
3. Audio Visualizer
Filmora Audio Visualizer is an innovative tool for music videos on how you experience sound and visuals together. It works by matching the visuals to the sound in your video. The Audio Visualizer analyzes the audio and syncs with the music’s beats and rhythm. This creates an amazing display that makes watching and listening more enjoyable.

4. Speech-To-Text
The Filmora Speech-To-Text (STT) feature is a huge help for video editors who want to work more efficiently. With just one click, this tool changes spoken words in videos into written text. It saves a lot of time by avoiding the manual work of typing subtitles. This feature not only saves time but also ensures that subtitles match what’s being said in the video accurately.
Conclusion
In summary, slow-motion videography is an amazing way to tell stories visually. Mixing technology and your ideas helps create videos that capture people’s attention. For that reason, we have provided 10 slow-motion video cameras to help you capture slow-motion videos. Additionally, we also highlighted the perfect solution if you don’t have a camera: Wondershare Filmora. You can easily generate a slow-motion video using our simple guide with this tool.
Make A Slow Motion Video Make A Slow Motion Video More Features
Part 1: How Do Slow-Motion Cameras Help in Recording Perfect Slow-Mo Videos?
Slow-motion cameras record videos at much faster speeds than regular cameras. This feature helps create slow-motion videos by slowing down the recorded action when played at normal speed. These slow-motion cameras are popular in filmmaking, sports analysis, science, and content creation. That’s because they capture detailed moments and highlight fast-moving things.
- Higher Frame Rate: Regular videos usually record 24, 30, or 60 frames per second (fps). But slow-motion cameras can capture hundreds or thousands of frames per second. More frames mean more details and smoother slow-motion videos when played back.
- Smooth Playback: Slow-motion videos look smooth and purposeful when played at regular speeds. More frames are recorded initially to achieve this effect. Ultimately, it will preserve all details when the video is played in slow motion.
- High-Resolution Sensors: Lots of slow-motion cameras have high-quality sensors. These sensors ensure that even with more frames captured, the picture stays sharp and detailed in slow-motion videos. This helps capture fine details without losing clarity.
- Creative Control: Slow-motion cameras let filmmakers and videographers control how fast or slow some parts of a scene look. This helps tell stories better, focus on details, and make videos more interesting and attractive to watch.
- Reduced Motion Blur: More frames per second make pictures clearer and sharper. This feature works especially for fast-moving things. This is important when you need to see tiny details or when the lighting isn’t great.
- Temporal Resolution: Slow-motion cameras can record lots of details in quick movements. They’re handy in sports, science, and creative videos where catching fast and detailed actions matter a lot.
Part 2: Finding The Top Slow-Motion Cameras to Use in 2024
If you want a good slow-motion camera, start by checking out the ones with higher frame rates. Also, think about what you’ll be recording and where you’ll share your videos. Buying a new camera can be confusing and perplexing. We hope you’ll find the best slow-motion camera in the list below. We have arranged the top slow-motion cameras to use in 2024 below:
- PowerShot G7 X Mark III Black
- Sony ZV-1 Camera
- GoPro HERO11 Black
- GoPro HERO10 Black
- Panasonic Lumix GH6
- Sony α7R IV
- Fujifilm X-S20
- Canon EOS-1D X Mark III DSLR Camera
- Nikon D6 FX-Format Digital SLR Camera
- Canon DSLR Camera [EOS 90D]
1. PowerShot G7 X Mark III Black
The PowerShot G7 X Mark III Black is a small but powerful camera for taking high-quality slow-motion videos. It has a 20.1 Megapixel camera and a DIGIC 8 Image Processor, which means it shows exceptional clarity even in different lighting. The 4.2x Optical Zoom Kens with Optical Image Stabilizer helps get close-up shots without making them blurry. For videos, it can record in 4K (at 30 frames per second) and Full HD (at 120 frames per second) for super smooth slow-motion shots.
2. Sony ZV-1 Camera
The Sony ZV-1 Camera is made specifically for content creators and vloggers. Although it has a compact design, it is packed with powerful features. This slow-motion video camera has a 1-inch sensor and digital and optical image stabilization. This means your pictures and videos will be clear and steady even if things are moving fast.
The camera’s results are sharp and colorful thanks to its 20.1 MP resolution and BIONZ X Image Processor. Also, it has a Fast Hybrid AF System that quickly focuses accurately, perfect for both photos and videos.
3. GoPro HERO11 Black
The GoPro HERO11 Black is an awesome slow-motion camera perfect for all kinds of adventures. It takes clear videos up to 5.3K resolution and sharp 27MP photos. The camera has great stabilization, so your videos always look smooth. You can change how wide your shots are and switch lenses digitally while keeping things clear.
GoPro HERO11 Black has cool effects for nighttime shots, making them look artistic. The camera is tough, waterproof up to 33 feet, and has a long-lasting battery that works well even in cold weather.
4. GoPro HERO10 Black
The GoPro HERO10 Black has a faster processor for smoother use and better touch controls. It can record super clear videos at higher speeds: 5.3K at 60fps and 4K at 120fps. You can also shoot camera slow-motion videos at 240fps in 2.7K resolution. The camera’s sensor is better, too, making photos sharper and allowing you to grab 15.8MP pictures from videos. It keeps footage perfectly steady with its excellent stabilization.
5. Panasonic LUMIX GH6
The LUMIX GH6 is an inspiring innovation in the LUMIX camera series, packed with amazing upgrades. It records high-quality videos internally in ProRes 422 HQ and ProRes 422, making them look great and easier to work with on computers later. This slow-mo video camera is faster due to a new engine, making pictures look better with less noise and better colors.
It’s great for professional video making, offering top-notch recording options. It also has image stabilization, a flexible rear monitor, and slots for different memory cards.
6. Sony α7R IV
The Sony A7R IV is a top-notch mirrorless camera appreciated by videography experts. It takes super clear pictures with its 20MP full-frame sensor. Also, it has a feature that prevents shaky photos and helps videos stay steady. You can control how long the shutter stays open, which helps in different lighting.
This slow-motion video camera lets you choose different ways to measure light for better pictures. Small and adaptable, it is high-tech and has great performance in digital photography.
7. Fujifilm X-S20
The Fujifilm X-S20 is a versatile camera that is equipped with advanced features and is easy to carry. This slow-motion camera has a 26.1MP sensor for really clear pictures. The screen is a vary-angle touchscreen of 3.0 inches and 1.84m-dot. You can connect it to Wi-Fi and Bluetooth to share and control the camera from a distance.
It’s perfect for videos, too, recording in high-quality up to 6.2K resolution. The camera is small and compact at 127.7 x 85.1 x 65.4mm and weighs only 491g.
8. Canon EOS-1D X Mark III DSLR Camera
The Canon EOS-1D X Mark III is a top choice for professionals in photography and videography. It has a powerful 20.1 Megapixel Full-frame CMOS sensor that ensures high-quality images. The DIGIC X Image Processor handles low-light situations exceptionally well. Adding on, it offers a wide ISO range for great performance.
Its advanced autofocus system with deep learning technology tracks subjects accurately. This slow-mo camera supports impressive 4K UHD 2160p video recording.
9. Nikon D6 FX-Format Digital SLR Camera
The Nikon D6 FX-Format Digital SLR Camera Body is made for professionals who promise top-notch performance. It has a powerful 20.8 Megapixel Full-frame CMOS sensor for high-quality photos. Also, it can work as a webcam with a maximum resolution of 16 MP and performs well in different situations.
Using digital image stabilization, the slow-motion video camera helps prevent blur. Moreover, it has a quick shutter speed of 1/8000 seconds for precise control over exposure.
10. Canon DSLR Camera [EOS 90D]
The Canon 90D Body is a slow-mo camera for both filmmakers and videographers. It has a 32.5-megapixel CMOS APS-C sensor for clear and detailed images. Furthermore, it supports recording videos in 4K UHD 30P and Full HD 120P, which helps in delivering excellent video quality. With a 45-Point All Cross-type AF System, the 90D provides precise autofocus across the entire frame.
Part 3: What To Do If You Do Not Have a Camera? Use Filmora for Slow-Mo Video Making
Sometimes, getting an affordable slow-motion camera for shooting videos can be tricky. But don’t worry! You can still create slow-motion videos without having a specific camera. Wondershare Filmora is an excellent solution to make fantastic slow-motion videos, even if you don’t own a special slow-motion camera.
You can adjust the speed of your videos easily to make certain moments slower, making your clips look cool. Filmora isn’t just about changing the speed of your videos. It’s a powerful editing software that lets you do lots of things to make your videos better.
Free Download For Win 7 or later(64-bit)
Free Download For macOS 10.14 or later
Steps Required to Slow Down Video Professionally with Speed Ramping
Filmora Speed Ramping feature allows you to control your clip’s speed. It gives the flexibility to either slow down the entire video or specific segments. Here’s a guide on executing slow-motion in the Filmora video editing interface.
Step 1Set Up Project and Import Footage
Start by launching Wondershare Filmora and creating a new project. Then, import your video by clicking the “+” icon. After that, select “Match to Media” to ensure your project settings align with your clip’s resolution.
Step 2Apply Slow-Motion Effect to Slow Down Video
In the next step, add the imported video to the timeline and access the “Speed” icon. Choose a preset, such as 0.5x from the “Slow” menu, to apply a slow-motion effect to the entire clip. Alternatively, right-click on the video, go to “Speed,” followed by “Uniform Speed,” and adjust the slider leftwards for slow motion.
Step 3Customize Speed for Specific Segments
To create slow-motion effects for specific parts or frames within your video, navigate to the “Speed Ramping” window. Then, choose “Customize” and modify the speed by dragging the points along the line.
Step 4Add Freeze Frame at Required Position
For freezing a frame, position the play head at the desired spot. Select “Add Freeze Frame,” then set the freeze duration in the “Freeze Time Field” and adjust its placement as required. Save changes by clicking “OK.”
Top Features Offered by Filmora
Wondershare Filmora offers its users a variety of advanced features to perform an edit conveniently. It enhances creativity and productivity with the help of AI-equipped in it. Described below are some of these features to know about Filmora:
1. AI Smart Masking
AI Smart Masking simplifies the process of adding high-quality transitions and effects. By contrast, it can be complex with manual editing. By activating this feature, it automatically handles the masking task. Once AI masking is enabled and the desired area is specified, it swiftly completes the process. This allows you to apply transitions and effects to the unmasked area afterward.
2. AI Copywriting
Filmora AI Copywriting is a new tool that incorporates ChatGPT API. It uses AI to create scripts, providing tons of ideas for creators to improve their video storytelling. This tool seamlessly integrates AI-generated text and narration into the editing process. With Filmora AI Copywriting, creators can quickly develop catchy YouTube titles and descriptions.
3. Audio Visualizer
Filmora Audio Visualizer is an innovative tool for music videos on how you experience sound and visuals together. It works by matching the visuals to the sound in your video. The Audio Visualizer analyzes the audio and syncs with the music’s beats and rhythm. This creates an amazing display that makes watching and listening more enjoyable.
4. Speech-To-Text
The Filmora Speech-To-Text (STT) feature is a huge help for video editors who want to work more efficiently. With just one click, this tool changes spoken words in videos into written text. It saves a lot of time by avoiding the manual work of typing subtitles. This feature not only saves time but also ensures that subtitles match what’s being said in the video accurately.
Conclusion
In summary, slow-motion videography is an amazing way to tell stories visually. Mixing technology and your ideas helps create videos that capture people’s attention. For that reason, we have provided 10 slow-motion video cameras to help you capture slow-motion videos. Additionally, we also highlighted the perfect solution if you don’t have a camera: Wondershare Filmora. You can easily generate a slow-motion video using our simple guide with this tool.
8 Tips to Apply Cinematic Color Grading to Your Videos
Create High-Quality Video - Wondershare Filmora
An easy and powerful YouTube video editor
Numerous video and audio effects to choose from
Detailed tutorials are provided by the official channel
After a successful video shoot, video editing tends to wrap up the video production process. However, a video cannot be enlivened by using simple video editing tools, i.e., cut, crop, and trim, but rather tools such as cinematic color grading. Usually, directors want their video to evoke their intended ambiance and appear more realistic – This can only be achieved through cinematic color grading.
Color grading is the alteration and enhancement of color in a video, motion picture, or still image. Color grading is an essential tool for videographers since it enables them to enhance the mood or tone. Stick to this article and learn about the eight tips to apply cinematic color grading to your video.
In this article
02 8 Tips to Apply Cinematic Color Grading to Your Video
Don’t Make These Mistakes
Even though to err is human, there are some mistakes that colorists and video editors need to avoid at all costs. It is not only because they will make them look amateurish but also undermines the message and impact of the video.
Some people assume color grading is as simple as adding filters to their Instagram photos which they are absolutely wrong. Color grading is a long and frustrating process, and it only requires “persons with a thick skin.”
Some mistakes are not only committed by amateurs alone but also professional colorists who are in a rush to complete their projects on due time. Usually, these mistakes degrade the quality output. Some of the mistakes that one needs not make include:
1. Using a Poorly Calibrated Monitor
Almost every videographer and colorist’s goal is to design footages that distinctively display their primary colors and decipher the intended message. And this can only be achieved using a properly calibrated monitor.
Before working on a project, you ought to crosscheck your monitor calibration. Most people assume that the calibration is accurate since they possess a new, out-of-the-box monitor. It is utterly wrong since retailer shops usually adjust the monitor settings to overblown saturation and contrast to attract customers.
Furthermore, if you opt to edit your videos without adjusting your monitor calibration, you will have a poor footage.
2. Poor Prepping of the Video Footage
One major mistake that videographers often make is not prepping their video correctly. A poorly prepped footage is one that has a bad color space conversion. Usually, the outcome result of poorly prepped footage is an imbalanced image.
Prepping footage is not as easy as an apple pie. Besides, most videographers tend to follow a shortcut by starting messing with the gains and individual nodes, forgetting that a shortcut is often a wrong cut.
The best way of prepping a video is to start by making separate nodes and labeling them differently.
3. Imbalancing the Shadow
Have you ever seen video footage with partially opaque shadows? And when you look keenly, you see tinted greens and reds. Usually, this is a result of an imbalanced shadow.
This mistake is not only carried out by beginner videographers but also professionals who are always in a hurry to complete a project. When you look at your scope, you see the shadows are lifted or down in other scenarios – This is also a result of shadow imbalance.
4. Overusing LUTs
A mistake that beginner editors often make is overusing LUTs. Footages with overly used LUTs often appear to be dull. A thing that videographers need to observe when using LUTs is consistency.
When using LUTs, you need to ensure that your project has similar saturation, colors, and contrast throughout your video project. Moreover, it would be best to choose your LUTs based on the film color palette and your story.
5. Having Limited break
Having enough break enables one’s eyes to recalibrate. As a colorist, your eyes are often considered the main asset. Sitting for long periods in your workstation and staring for long hours at your monitor may cause one to add more saturation and contrast, thus making the video dull. Therefore the best remedy is to take a break from your monitor.
Besides, coming from a break enables one to have another different perspective about the color grading of the project.
8 Tips to Apply Cinematic Color Grading to Your Video
When it comes to creating cinematic looks in video footage, the camera type is usually non-essential. What matters is that you capture quality videos with the right angles then leave the rest to color grading.
For a video clip to look more cinematic, a couple of elements are put together. Here, we will look at those elements and create stunning videos.
1. Use Lumetri Color to adjust brightness, contrast, and saturation
The Lumeri color is an essential color grading functionality in most premiere software, including Wondershare Filmora, Adobe After Effects, and Davinci Resolve 17. With this functionality tool, you can carry out a wide range of customizable settings such as hue, saturation, contrasts, brightness, and tone.
The lumetri panel contains a histogram, vectorscope, parade scope, and waveform monitor. In your lumetri panel, you can measure the brightness and tonal values using a histogram, the light intensity with a waveform monitor, saturation and hue using vectorscope, and color channel using parade scope.
Adjusting the brightness, contrast, hue, saturation, and tone to moderate levels will give your video clip that cinematic look.

2. Use Cosmo functionality to adjust skin tones
Due to the light effect, shots taken during the day will have inconsistent color matches, especially skin tone. In the post-production process, one needs to make uniformity in skin tone and the clip. To rectify this, you need to involve a professional color grading functionality, Cosmo.
With cosmo, you can adjust the skin color, squeeze the skin, and soften the skin. Generally, Cosmo makes people in video clips look their best.

3. Use Highlights and Shadows adjustment
A clip will look more cinematic when the shadows and highlights are brought out as separate entities. The shadows become more vivid when adjusted to either teal, purple or blue. You can go a mile and adjust the highlights to become crystal clear by making the footage become yellow, red, or orange.
When carrying out color grading, you need to know the various video demands, such as the horror clips demand more of the dark shadow.

4. Use Vectorscope to get the accurate adjustment
Naked eyes cannot effectively see all the errors in a video project, which is the essence of having a vectorscope. A vectorscope provides all the quantitative information about a video image – This lessens work for video editors.
Vectorscope provides extensive details, such as how intense a given color is – This will help you make necessary adjustments to your footage.

5. Use the black and white functionality to change the opacity
Even though you can change your footage to black and white using the hue and saturation functionality, the black and white tool gives you more control.
This functionality feature can make your footage blend with the soft light part. Besides, it is best to first lower the contrast of your image or video to black and white to be able to highlight the unclear parts.

6. Use levels to unveil the whites, blacks, and mids of an image
Levels is a functionality feature that displays the blacks, whites, and mids of footage. With this functionality, you can make the highlight parts lighter and the shadows appear darker, which is essential in making cinematic videos.
In the levels histogram, the left slider defines the darkest part, the right defines the brightest part, and the top defines distributions.
In software such as Adobe After Effects, you can set this functionality to automatic or customize it based on your preference.

7. Use Vibrance to control other levels of saturation
The saturation of video footage or a clip can be regulated using vibrance functionality. With vibrance, you can alter the saturation levels of your clip while simultaneously minimizing clippings for the colors to approach complete saturation.
When you want to use this functionality in After Effects, you drag and drop it right on top of your footage – The exact part you want to apply it.

8. Use a Vignette to fade edges
To increase the point of focus, you need to fade your edges. In color grading, you can only fade your edges with a vignette.
This functionality allows you to center images or certain video parts and make the edges unclear. Your emphasis will be more on the central region.

Bottom line
● Color grading is not a piece of cake. Besides, you should not use it as an excuse for making simple mistakes such as the ones highlighted above. You need to pay close attention when color grading your films, and you will have your video project mapping out its intended meaning.
● Moreover, you need not be a pro to carry out cinematic color grading. You need to follow the above eight tips altogether to apply color grading to your video. You will create stunning video files that leave your viewers’ eyes gorged out.
After a successful video shoot, video editing tends to wrap up the video production process. However, a video cannot be enlivened by using simple video editing tools, i.e., cut, crop, and trim, but rather tools such as cinematic color grading. Usually, directors want their video to evoke their intended ambiance and appear more realistic – This can only be achieved through cinematic color grading.
Color grading is the alteration and enhancement of color in a video, motion picture, or still image. Color grading is an essential tool for videographers since it enables them to enhance the mood or tone. Stick to this article and learn about the eight tips to apply cinematic color grading to your video.
In this article
02 8 Tips to Apply Cinematic Color Grading to Your Video
Don’t Make These Mistakes
Even though to err is human, there are some mistakes that colorists and video editors need to avoid at all costs. It is not only because they will make them look amateurish but also undermines the message and impact of the video.
Some people assume color grading is as simple as adding filters to their Instagram photos which they are absolutely wrong. Color grading is a long and frustrating process, and it only requires “persons with a thick skin.”
Some mistakes are not only committed by amateurs alone but also professional colorists who are in a rush to complete their projects on due time. Usually, these mistakes degrade the quality output. Some of the mistakes that one needs not make include:
1. Using a Poorly Calibrated Monitor
Almost every videographer and colorist’s goal is to design footages that distinctively display their primary colors and decipher the intended message. And this can only be achieved using a properly calibrated monitor.
Before working on a project, you ought to crosscheck your monitor calibration. Most people assume that the calibration is accurate since they possess a new, out-of-the-box monitor. It is utterly wrong since retailer shops usually adjust the monitor settings to overblown saturation and contrast to attract customers.
Furthermore, if you opt to edit your videos without adjusting your monitor calibration, you will have a poor footage.
2. Poor Prepping of the Video Footage
One major mistake that videographers often make is not prepping their video correctly. A poorly prepped footage is one that has a bad color space conversion. Usually, the outcome result of poorly prepped footage is an imbalanced image.
Prepping footage is not as easy as an apple pie. Besides, most videographers tend to follow a shortcut by starting messing with the gains and individual nodes, forgetting that a shortcut is often a wrong cut.
The best way of prepping a video is to start by making separate nodes and labeling them differently.
3. Imbalancing the Shadow
Have you ever seen video footage with partially opaque shadows? And when you look keenly, you see tinted greens and reds. Usually, this is a result of an imbalanced shadow.
This mistake is not only carried out by beginner videographers but also professionals who are always in a hurry to complete a project. When you look at your scope, you see the shadows are lifted or down in other scenarios – This is also a result of shadow imbalance.
4. Overusing LUTs
A mistake that beginner editors often make is overusing LUTs. Footages with overly used LUTs often appear to be dull. A thing that videographers need to observe when using LUTs is consistency.
When using LUTs, you need to ensure that your project has similar saturation, colors, and contrast throughout your video project. Moreover, it would be best to choose your LUTs based on the film color palette and your story.
5. Having Limited break
Having enough break enables one’s eyes to recalibrate. As a colorist, your eyes are often considered the main asset. Sitting for long periods in your workstation and staring for long hours at your monitor may cause one to add more saturation and contrast, thus making the video dull. Therefore the best remedy is to take a break from your monitor.
Besides, coming from a break enables one to have another different perspective about the color grading of the project.
8 Tips to Apply Cinematic Color Grading to Your Video
When it comes to creating cinematic looks in video footage, the camera type is usually non-essential. What matters is that you capture quality videos with the right angles then leave the rest to color grading.
For a video clip to look more cinematic, a couple of elements are put together. Here, we will look at those elements and create stunning videos.
1. Use Lumetri Color to adjust brightness, contrast, and saturation
The Lumeri color is an essential color grading functionality in most premiere software, including Wondershare Filmora, Adobe After Effects, and Davinci Resolve 17. With this functionality tool, you can carry out a wide range of customizable settings such as hue, saturation, contrasts, brightness, and tone.
The lumetri panel contains a histogram, vectorscope, parade scope, and waveform monitor. In your lumetri panel, you can measure the brightness and tonal values using a histogram, the light intensity with a waveform monitor, saturation and hue using vectorscope, and color channel using parade scope.
Adjusting the brightness, contrast, hue, saturation, and tone to moderate levels will give your video clip that cinematic look.
2. Use Cosmo functionality to adjust skin tones
Due to the light effect, shots taken during the day will have inconsistent color matches, especially skin tone. In the post-production process, one needs to make uniformity in skin tone and the clip. To rectify this, you need to involve a professional color grading functionality, Cosmo.
With cosmo, you can adjust the skin color, squeeze the skin, and soften the skin. Generally, Cosmo makes people in video clips look their best.
3. Use Highlights and Shadows adjustment
A clip will look more cinematic when the shadows and highlights are brought out as separate entities. The shadows become more vivid when adjusted to either teal, purple or blue. You can go a mile and adjust the highlights to become crystal clear by making the footage become yellow, red, or orange.
When carrying out color grading, you need to know the various video demands, such as the horror clips demand more of the dark shadow.
4. Use Vectorscope to get the accurate adjustment
Naked eyes cannot effectively see all the errors in a video project, which is the essence of having a vectorscope. A vectorscope provides all the quantitative information about a video image – This lessens work for video editors.
Vectorscope provides extensive details, such as how intense a given color is – This will help you make necessary adjustments to your footage.
5. Use the black and white functionality to change the opacity
Even though you can change your footage to black and white using the hue and saturation functionality, the black and white tool gives you more control.
This functionality feature can make your footage blend with the soft light part. Besides, it is best to first lower the contrast of your image or video to black and white to be able to highlight the unclear parts.
6. Use levels to unveil the whites, blacks, and mids of an image
Levels is a functionality feature that displays the blacks, whites, and mids of footage. With this functionality, you can make the highlight parts lighter and the shadows appear darker, which is essential in making cinematic videos.
In the levels histogram, the left slider defines the darkest part, the right defines the brightest part, and the top defines distributions.
In software such as Adobe After Effects, you can set this functionality to automatic or customize it based on your preference.
7. Use Vibrance to control other levels of saturation
The saturation of video footage or a clip can be regulated using vibrance functionality. With vibrance, you can alter the saturation levels of your clip while simultaneously minimizing clippings for the colors to approach complete saturation.
When you want to use this functionality in After Effects, you drag and drop it right on top of your footage – The exact part you want to apply it.
8. Use a Vignette to fade edges
To increase the point of focus, you need to fade your edges. In color grading, you can only fade your edges with a vignette.
This functionality allows you to center images or certain video parts and make the edges unclear. Your emphasis will be more on the central region.
Bottom line
● Color grading is not a piece of cake. Besides, you should not use it as an excuse for making simple mistakes such as the ones highlighted above. You need to pay close attention when color grading your films, and you will have your video project mapping out its intended meaning.
● Moreover, you need not be a pro to carry out cinematic color grading. You need to follow the above eight tips altogether to apply color grading to your video. You will create stunning video files that leave your viewers’ eyes gorged out.
How to Get Zoom on TV [Easy Solutions]
The modern workforce needs adaptable alternatives to the conventional room-to-room conferencing. The latest integrated online collaboration platform is called Zoom. What’s more, now you can get Zoom on TV. Being one of the most well-known conferencing programs, it offers reliable and efficient hosting of online meetings. In a same vein, you may set up conference rooms, do video seminars, and use instant messaging to receive real-time communications. Moreover, can you get zoom on your tv? Then the answer is Yes! The ideal technique to expand a small conference is to mirror it on TV using Zoom meetings. Additionally, sharing across all platforms and devices is possible. Sharing HD video, audio, and material from your desktop and mobile devices to conference rooms and phone systems is simple, dependable, and safe with Zoom Meetings.
Zoom is one of the top videos calling applications available, however, in terms of functionality, dependability, and stability. Special features include screen sharing for multi-user annotation and local and cloud recording with transcription. With just a single click, you may share any file with supported and encrypted settings for increased security and communicate across all platforms. Zoom has now come to represent meetings for those who do their business remotely. For almost all platforms, including Android, iOS, macOS, Windows, Smart TVs, etc., the Zoom app is officially accessible. For the query how to get zoom on portal tv? you may activate Zoom screen casting whether you’re using a Windows 10 or a Mac laptop with the Chrome browser. This section will be useful to you if you want to benefit from Zoom on a TV. You may thus do so. Continue reading the article to learn more about how to get zoom on tv.
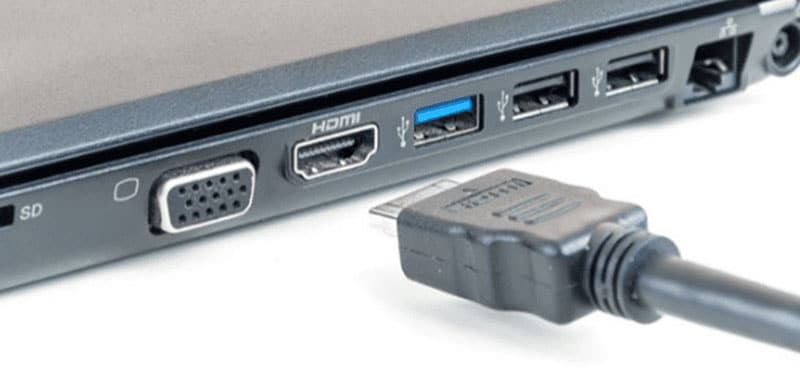
Part 1: Get Zoom on TV with HDMI Cable
Although Zoom provides companies and bigger organizations with a professional solution like Zoom Rooms, if you’re at home, you don’t need to put anything on your TV to use Zoom. You may start using Zoom right away by simply connecting your Zoom device to your TV. Connect your TV to your laptop’s HDMI port if it has one. Simple as that, however if the laptop doesn’t figure it out on its own you may need to explain what is going on with the second display. Although more reliable, connecting via cable means your source device is linked to the TV and you can’t go for a stroll. It also means you don’t have to worry about the wireless connection fading.
Steps to Get Zoom on TV with HDMI
Step1Connect the HDMI End to the TV and the Other End to Your Device
You may use this in its place if you don’t have an HDMI but do have a USB-C port. To connect to the HDMI cable coming into your TV, you’ll need a dongle, but you’ll need to make sure it’s compatible.
Step2Turn On your TV
Turn on your TV, then switch the video source to the HDMI port you just connected in your device to using the TV remote.
Step3Launch Zoom Meeting
Start or join a meeting by using the Zoom app on your smartphone (available for Android, iOS, Windows, and macOS).
Part 2: Use AirPlay to Connect Zoom to TV
Using AirPlay mirroring, MacOS or iOS devices may share content with Zoom rooms. On MacOS and iOS, Airplay is used to communicate between the Zoom client and the Zoom room. There may be a great potential for your own business requirements if you can figure out how to utilize Airplay to Zoom mirror your screen to your Apple TV. By default, AirPlay sends audio to the Apple TV. Depending on how loud your speakers are set to play and where your input device’s microphone is located, this may cause echoing and ever-louder feedback loops. Without further ado, let’s look at some of the important strategies you may use to maximize live screen streaming on your Apple TV device.
Steps to Use AirPlay to Connect Zoom to TV
Step1Navigate to the Airplay Display in the Apple menu’s top right corner. Choose your Apple TV from the list of AirPlay Display options in the Displays preference pane. The “Show mirroring option in the menu bar when available” checkbox makes it easier to reach the AirPlay menu.

Step2Select Room Management > Zoom Rooms after logging into the Zoom online interface to manage your current Zoom Rooms. Then, modify the account settings and turn on Apple screen mirroring using the location hierarchy system.
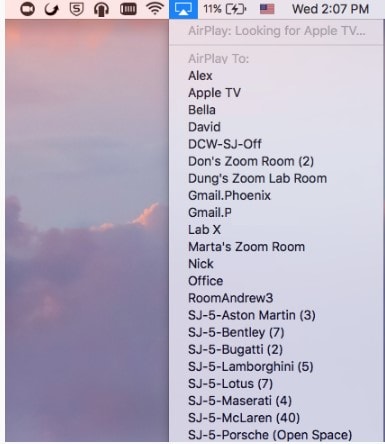
Step3Turn on Apple Screen Mirroring by going to the Meetings tab. If this happens, you may need to activate it from the verification dialog box; otherwise, screen mirroring ought to start immediately on your device and let you see Zoom on your Apple TV. A shared password will be required of you.
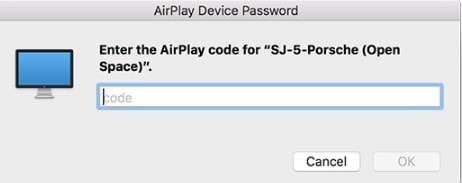
Step4Enter the passcode that is shown on the Zoom room’s screen. You may start using Airplay on your smartphone after enabling Apple screen mirroring.

Step5After that, turn off AirPlay Display by using the option in the preference pane or the system menu bar. To stop sharing, click Disconnect Airplay.
Part 3: Mirror Screen with Chromecast
The Chromecast gadgets from Google are well constructed. They should be able to cast more than just standard streaming services to your TV, logically speaking. Using a Chromecast device is one of the simplest methods to cast a Zoom conference to your TV. They are affordable, and any Google browser and the Google Home app for your Android or iOS smartphone both contain the cast capability. Between a device, such as your phone or computer, and the television, Chromecast offers the perfect connection. Chromecast makes it easy to cast Zoom meetings, particularly conferences with many of participants, since it can virtually reflect everything on your phone, tablet, or computer screen to your TV. For meetings with bigger attendance, it is advantageous to be able to cast Zoom meetings to almost any device, even a smart TV, using Chromecast.
Steps to Mirror Screen with Chromecast
Step1Install the Chromecast
Connect your Google Chromecast to the same internet source as your casting device by plugging it in.
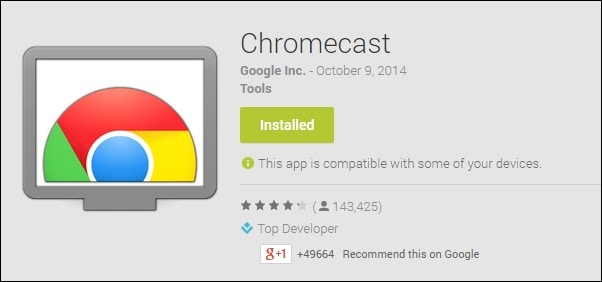
Step2Manage Cast Settings
Locate the casting option on your device and search for recipients. Get the Zoom Cloud Meetings app for iOS or Android. You’ll also need to download the third-party software if you use an iPad or iPhone. After that, sign up for a Zoom account and log in to get started.
Step3Start Mirroring Zoom
The screen of your phone will show up on your TV when you tap your Chromecast. The best view is obtained by turning your phone into landscape after opening Zoom as usual. Once you place a call from here, the video will cast to your TV. Go to the next screen and click Start Broadcasting. You may now start casting to your Chromecast device by opening the Zoom Cloud Meeting app.

You must download the third-party app if you use an iPhone or iPad. The Chromecast Streamer software will let you cast a Zoom meeting on your Chromecast device as Zoom doesn’t provide a casting option.
Conclusion
Zoom’s popularity has skyrocketed as a result of the Pandemic. Zoom has emerged as the preferred video conferencing solution as the bulk of the global workforce shifts to a “work from home” environment. Now that more individuals than ever before work from home, video conferencing has emerged as a vital tool for marketing and corporate communication. Mirroring Zoom meetings to TV has never been this simple. In light of this, we hope that this guide has helped you come up with some of the greatest ideas and approaches for your personal zoom sharing needs. We really hope that this information has been helpful to you if you’ve been interested in learning more about screen sharing your Zoom to TV. Thanks to these methods, you can now mirror any device platform on TV.
The modern workforce needs adaptable alternatives to the conventional room-to-room conferencing. The latest integrated online collaboration platform is called Zoom. What’s more, now you can get Zoom on TV. Being one of the most well-known conferencing programs, it offers reliable and efficient hosting of online meetings. In a same vein, you may set up conference rooms, do video seminars, and use instant messaging to receive real-time communications. Moreover, can you get zoom on your tv? Then the answer is Yes! The ideal technique to expand a small conference is to mirror it on TV using Zoom meetings. Additionally, sharing across all platforms and devices is possible. Sharing HD video, audio, and material from your desktop and mobile devices to conference rooms and phone systems is simple, dependable, and safe with Zoom Meetings.
Zoom is one of the top videos calling applications available, however, in terms of functionality, dependability, and stability. Special features include screen sharing for multi-user annotation and local and cloud recording with transcription. With just a single click, you may share any file with supported and encrypted settings for increased security and communicate across all platforms. Zoom has now come to represent meetings for those who do their business remotely. For almost all platforms, including Android, iOS, macOS, Windows, Smart TVs, etc., the Zoom app is officially accessible. For the query how to get zoom on portal tv? you may activate Zoom screen casting whether you’re using a Windows 10 or a Mac laptop with the Chrome browser. This section will be useful to you if you want to benefit from Zoom on a TV. You may thus do so. Continue reading the article to learn more about how to get zoom on tv.
Part 1: Get Zoom on TV with HDMI Cable
Although Zoom provides companies and bigger organizations with a professional solution like Zoom Rooms, if you’re at home, you don’t need to put anything on your TV to use Zoom. You may start using Zoom right away by simply connecting your Zoom device to your TV. Connect your TV to your laptop’s HDMI port if it has one. Simple as that, however if the laptop doesn’t figure it out on its own you may need to explain what is going on with the second display. Although more reliable, connecting via cable means your source device is linked to the TV and you can’t go for a stroll. It also means you don’t have to worry about the wireless connection fading.
Steps to Get Zoom on TV with HDMI
Step1Connect the HDMI End to the TV and the Other End to Your Device
You may use this in its place if you don’t have an HDMI but do have a USB-C port. To connect to the HDMI cable coming into your TV, you’ll need a dongle, but you’ll need to make sure it’s compatible.
Step2Turn On your TV
Turn on your TV, then switch the video source to the HDMI port you just connected in your device to using the TV remote.
Step3Launch Zoom Meeting
Start or join a meeting by using the Zoom app on your smartphone (available for Android, iOS, Windows, and macOS).
Part 2: Use AirPlay to Connect Zoom to TV
Using AirPlay mirroring, MacOS or iOS devices may share content with Zoom rooms. On MacOS and iOS, Airplay is used to communicate between the Zoom client and the Zoom room. There may be a great potential for your own business requirements if you can figure out how to utilize Airplay to Zoom mirror your screen to your Apple TV. By default, AirPlay sends audio to the Apple TV. Depending on how loud your speakers are set to play and where your input device’s microphone is located, this may cause echoing and ever-louder feedback loops. Without further ado, let’s look at some of the important strategies you may use to maximize live screen streaming on your Apple TV device.
Steps to Use AirPlay to Connect Zoom to TV
Step1Navigate to the Airplay Display in the Apple menu’s top right corner. Choose your Apple TV from the list of AirPlay Display options in the Displays preference pane. The “Show mirroring option in the menu bar when available” checkbox makes it easier to reach the AirPlay menu.
Step2Select Room Management > Zoom Rooms after logging into the Zoom online interface to manage your current Zoom Rooms. Then, modify the account settings and turn on Apple screen mirroring using the location hierarchy system.
Step3Turn on Apple Screen Mirroring by going to the Meetings tab. If this happens, you may need to activate it from the verification dialog box; otherwise, screen mirroring ought to start immediately on your device and let you see Zoom on your Apple TV. A shared password will be required of you.
Step4Enter the passcode that is shown on the Zoom room’s screen. You may start using Airplay on your smartphone after enabling Apple screen mirroring.
Step5After that, turn off AirPlay Display by using the option in the preference pane or the system menu bar. To stop sharing, click Disconnect Airplay.
Part 3: Mirror Screen with Chromecast
The Chromecast gadgets from Google are well constructed. They should be able to cast more than just standard streaming services to your TV, logically speaking. Using a Chromecast device is one of the simplest methods to cast a Zoom conference to your TV. They are affordable, and any Google browser and the Google Home app for your Android or iOS smartphone both contain the cast capability. Between a device, such as your phone or computer, and the television, Chromecast offers the perfect connection. Chromecast makes it easy to cast Zoom meetings, particularly conferences with many of participants, since it can virtually reflect everything on your phone, tablet, or computer screen to your TV. For meetings with bigger attendance, it is advantageous to be able to cast Zoom meetings to almost any device, even a smart TV, using Chromecast.
Steps to Mirror Screen with Chromecast
Step1Install the Chromecast
Connect your Google Chromecast to the same internet source as your casting device by plugging it in.
Step2Manage Cast Settings
Locate the casting option on your device and search for recipients. Get the Zoom Cloud Meetings app for iOS or Android. You’ll also need to download the third-party software if you use an iPad or iPhone. After that, sign up for a Zoom account and log in to get started.
Step3Start Mirroring Zoom
The screen of your phone will show up on your TV when you tap your Chromecast. The best view is obtained by turning your phone into landscape after opening Zoom as usual. Once you place a call from here, the video will cast to your TV. Go to the next screen and click Start Broadcasting. You may now start casting to your Chromecast device by opening the Zoom Cloud Meeting app.
You must download the third-party app if you use an iPhone or iPad. The Chromecast Streamer software will let you cast a Zoom meeting on your Chromecast device as Zoom doesn’t provide a casting option.
Conclusion
Zoom’s popularity has skyrocketed as a result of the Pandemic. Zoom has emerged as the preferred video conferencing solution as the bulk of the global workforce shifts to a “work from home” environment. Now that more individuals than ever before work from home, video conferencing has emerged as a vital tool for marketing and corporate communication. Mirroring Zoom meetings to TV has never been this simple. In light of this, we hope that this guide has helped you come up with some of the greatest ideas and approaches for your personal zoom sharing needs. We really hope that this information has been helpful to you if you’ve been interested in learning more about screen sharing your Zoom to TV. Thanks to these methods, you can now mirror any device platform on TV.
Also read:
- New 15 Best Video Editing Courses Online with Certificate Free $ Paid
- Customize PowerPoint Slideshow Icon in Simple Ways
- Updated 2024 Approved Online Video Makers
- Updated 2024 Approved How to Create and Use Adjustment Layers in After Effects
- New In 2024, Complete Guide to Change Video Resolution in Filmora
- Ways to Make Sure Your Recording Slideshow in Powerpoint Is Not Wrong
- 2024 Approved How to Apply Gaussian Blur Effect to Videos In Premiere Pro?
- New 2024 Approved Add Flesh to Your Video Content Before Posting Them for Your Audience to See Using Meme Texts. Use the Tutorial Guide Shared in This Post
- Updated 2024 Approved How to Add Video Effects with Movavi Slideshow Maker
- How to Speed Up Video with Canva Online Tool?
- Do You Want to Know About the Photo Video Maker with Song? Are You Ready to Discover It in Detail? This Article Will Give You Valuable Insights on This Topic for 2024
- New Top 4 Free 3D Intro Maker to Use
- New Best 7 Color Match Paint Apps for 2024
- How to Create a Bokeh Effect for 2024
- Updated Experience Time Differently with The Top Slow-Motion Applications
- Change Video Speed with FFmpeg
- Vlogs and Travel Content Are Incomplete without a Fast-Motion Effect. Learn Step-by-Step How to Make Fast Motion Video on an iPhone in This Article for 2024
- New How To Make A Video Longer
- Updated In 2024, How to Create Photoshop GIF The 100 Easy Way
- Want to Speed up Your Video to Create Short-Duration Instagram Reels? Here Is How You Can Change the Speed of Pre-Recorded and Live Videos on Instagram Reels
- New 2024 Approved How to Add Text Effects in Adobe Premiere Pro?
- Have You Ever Played Roblox Games? Read This Article to Find Out How to Get Motion Blur in Roblox Using Simple and Efficient Ways for 2024
- Complete How-To Tutorials of Kapwing Collage Maker for 2024
- 2024 Approved The Best Peter McKinnon LUTs Recommendation
- How To Use Voicemod On Discord Desktop+Mobile
- Updated 2024 Approved Reviewing Efectum App and The Best Alternatives for Smartphone Users
- Updated How To Change Sky Background With Adobe Photoshop Best Ways for 2024
- Updated In 2024, How to Perfectly Use Canva Color Match?
- New 2024 Approved Best Green Screen Software for Beginner on Mac
- Updated Finest Approach to Slow Down a Video CapCut All-in-One Video Editor for 2024
- Track Mattes The Ultimate Guide For After Effects for 2024
- In 2024, Easy Ways to Edit Recorded Video
- In 2024, Premiere Pro Best Slow Motion Effects To Use
- New 2024 Approved How To Create A Green Screen Video In After Effects
- New 2024 Approved 7 Best Green Screen Software for Beginners on Mac
- New In 2024, Create Risograph Effect In Photoshop A Beginners Guide
- In 2024, How to Resize FLV Videos EfficientlyWindows, Mac, Android, iPhone & Online
- How to Reset Gmail Password on Realme Devices
- In 2024, The Ultimate Guide How to Bypass Swipe Screen to Unlock on Vivo V29 Device
- Best Free Apple iPhone 6s Plus IMEI Checker
- Top 6 Apps/Services to Trace Any Motorola Moto G14 Location By Mobile Number | Dr.fone
- How to Reset a Vivo S17 Pro Phone That Is Locked | Dr.fone
- In 2024, How To Change Your Apple ID Password On your iPhone 15 Pro | Dr.fone
- Authentication Error Occurred on Infinix Hot 40? Here Are 10 Proven Fixes | Dr.fone
- Will the iPogo Get You Banned and How to Solve It On Lava Blaze 2 5G | Dr.fone
- Your Complete Guide To Reset Honor 100 | Dr.fone
- How to Remove Activation Lock On the iPhone 15 Without Previous Owner?
- Possible solutions to restore deleted videos from Vivo V27e
- In 2024, How to Transfer Apps from Oppo Reno 10 Pro 5G to Another | Dr.fone
- In 2024, How to Unlock Samsung Galaxy Z Fold 5 Phone without Any Data Loss
- How to Share Location in Messenger On Infinix Note 30 5G? | Dr.fone
- In 2024, The Best Android Unlock Software For Vivo V30 Pro Device Top 5 Picks to Remove Android Locks
- How Can OnePlus Nord 3 5GMirror Share to PC? | Dr.fone
- Recover your music after Motorola has been deleted
- Updated Update 6 Best Voice Changers You Cant Miss
- How to fix Microsoft Excel 2007 has stopped working error? | Stellar
- How to Unlock Oppo A59 5G Phone with Broken Screen
- In 2024, About Nokia C110 FRP Bypass
- Remove Tecno Pova 5 Pro unlock screen
- How to Change Netflix Location to Get More Country Version On Infinix Note 30 Pro | Dr.fone
- 8 Ultimate Fixes for Google Play Your Realme GT Neo 5 SE Isnt Compatible | Dr.fone
- How to recover old call logs from your Y78t?
- How To Repair iPhone SE System Issues? | Dr.fone
- In 2024, List of Pokémon Go Joysticks On Samsung Galaxy A34 5G | Dr.fone
- In 2024, How to Unlock Apple ID Activation Lock On iPhone XS Max?
- In 2024, How To Check if Your Nokia G22 Is Unlocked
- How To Transfer Data From iPhone 7 Plus To Android? | Dr.fone
- iSpoofer is not working On Realme GT Neo 5 SE? Fixed | Dr.fone
- Bypassing Google Account With vnROM Bypass For Vivo S17
- In 2024, 2 Ways to Transfer Text Messages from OnePlus Nord CE 3 Lite 5G to iPhone 15/14/13/12/11/X/8/ | Dr.fone
- 3 Methods to Mirror Poco X5 Pro to Roku | Dr.fone
- How To Bypass Xiaomi 13 Ultra FRP In 3 Different Ways
- In 2024, Ultimate Guide from Vivo V29 FRP Bypass
- Can I Bypass a Forgotten Phone Password Of Tecno Spark 10C?
- Title: In 2024, Are You Looking for Dark LUTs Premiere Pro Free? This Article Discusses the Dark Moody LUTs with Top Recommendations for Beginning Visual Editing
- Author: Chloe
- Created at : 2024-04-24 07:08:17
- Updated at : 2024-04-25 07:08:17
- Link: https://ai-editing-video.techidaily.com/in-2024-are-you-looking-for-dark-luts-premiere-pro-free-this-article-discusses-the-dark-moody-luts-with-top-recommendations-for-beginning-visual-editing/
- License: This work is licensed under CC BY-NC-SA 4.0.
