

In 2024, Best 8 Augmented Reality Video Games
Best 8 Augmented Reality Video Games
Top 8 Augmented Reality Video Games
An easy yet powerful editor
Numerous effects to choose from
Detailed tutorials provided by the official channel
Augmented reality video games are the latest sensation in the gamer fraternity. Be here to know everything about the top 8 AR video games of all times!
In this article
01 [What Is AR in Gaming? Is AR the Future of Gaming?](#Part 1)
02 [What Is the Most Popular AR Game Now?](#Part 2)
03 [8 Best Augmented Reality Games (For iOS & Android)](#Part 3)
Part 1 What Is AR in Gaming? Is AR the Future of Gaming?
Before taking a dive into the most appealing augmented reality gaming alternatives, it would be better to have a generalized understanding of the concept behind the AR utility. Sticking to digital terms, augmented reality refers to an enhanced presentation of your real world environment with the use of suitable digital equipments. The most basic example in this regard is using your smartphone camera to view the nearby environment in a considerably upgraded graphic setting through an AR application.
When thinking to experiment with the diversity of graphic elements in augmented reality, you can explore the digital overlays by trying hands at one or more of the following enhancements:
● Changing the color perspectives of the screen backgrounds, along with applying suitable filters to produce the effect of high quality chromatic scaling in the graphic elements.
● Superimposition of 3D graphic models, images and other elements conveying snippets of digital information.
● Add labels to screen elements for precise recognition and convenient location, when using the augmented reality concept for gaming purposes.
● Integrate the AR concept to with social media platforms, like using SnapChat and Instagram’s image filters to modify the player’s appearance within the game surroundings.
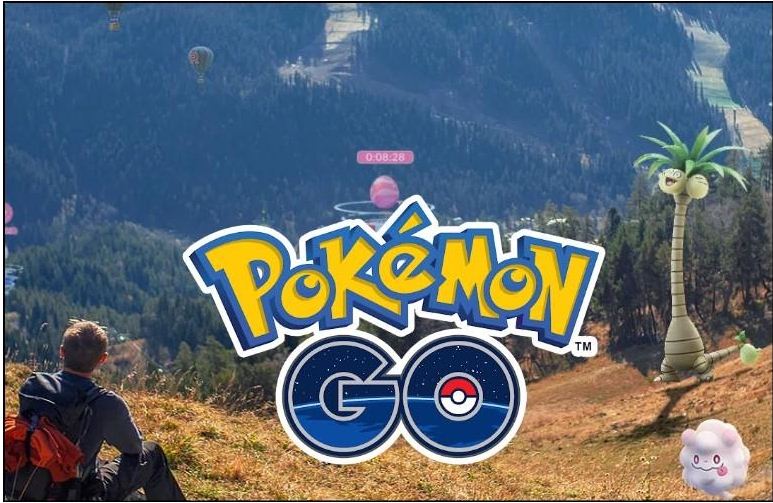
Moving ahead to the specific discussion on augmented reality video games, the concept was introduced in 2016, with Pokemon GO being the inaugural AR experiment. Since then, the gaming fraternity is dedicated towards providing a real-time perception of different gaming environments with high quality graphic imagery, matchless storytelling and an exquisite range of gaming hardware.
About the latest trends in the domain, you will land across a diversity of immersive augmented reality games introduced by some of the most pronounced game developing companies. These games are a complete entertainment package, where you gave the surety of getting a maximized real-time gameplay experience with enhanced capacities of headsets and motion controls.
Most of the aforesaid games use a GPS tracking system to create a more responsive and realistic gaming environment, allowing the player to undertake a flawless transition amid the real world and its technological replica.
● Augmented Reality: The Future of Console Gaming
Talking about the modern day console gaming prospects, a lot needs to be owed to the revolutions encountered in the gaming technology in the past decade. While the integration of augmented reality into conventional video gaming has come up with upgraded concepts of real-time gaming that has definitely given a boost to the present time gaming aspects.
Augmented reality is being regarded as a potential candidate in the domain of computer based gaming platforms, considering the fact that the latter has brought about an integration of real-world elements into gaming alternatives with minimal prerequisites. As of now, AR based games are all set to provide you with the most immersive gaming experience you have ever had.
As far as the future if console gaming in the light of augmented reality is concerned, it would be a rather quick judgment to define the latter’s prospects within any constraints. With the technology being a relatively newer entrant to the world of gaming, the realm of feature-based enhancement is wide open.
All said and done, the bottom line of the discussion is that the future would have a huge storehouse of immersive gaming alternatives, with the most realistic AR approaches, which would further be supplemented by the day to day technological advancements in the IT and communication industry. The introduction of high tech 5G devices will further let players embrace the real world through their console, thus ensuring a perfect synchronization of virtual gaming technology with the real-time environment.
Part 2 What Is the Most Popular AR Game Now?
Since its advent in 2016, augmented reality gaming has mastered the art of ruling the hearts of gamers around the world. Right from graphical enhancement to real-time modulation, and top quality futures to convenient gameplay, AR gaming has everything to keep you glued to your consoles and smartphones for hours that refuse to end!
AR video games are the talk of the trend, and boast of presenting an enormous variety of gaming choices in front of dedicated players. While it is quite obvious to have a tough time choosing your best AR game, you can begin your gaming streak with Pokemon GO, the first and the most popular entry into the series, till you make a new choice.
Diving into the game specifications, Pokemon GO is a location centered, augmented reality game, which is conveniently compatible to any of your smartphones. The game marked the entry of the augmented reality concept into the realm of video game development with its release in July 2016 as a new member of the Pokemon franchise. Talking of the game’s popularity, the latter became successful in becoming an absolute favorite among global gamers and is known to have generated the maximum revenue at the time of its release, taking the credit of being recognized as the first mainstream console game based on augmented reality.
As reviewed by the players, Pokemon GO is loaded with excellent features of storyline flow, game controls and interface mechanics, sociability and of course, the undeniably appealing legacy of the Pokemon brand. Other attractions of the game with special reference to augmented reality include, a free access revenue model and adequate information safety.
Part 2 Best Augmented Reality Games (For iOS & Android)
Having discussed enough about the advent and credibility of augmented reality based console gaming, you might easily feel motivated to try hands at the popular and appealing integration of technology and entertainment. Adhering to the concern, let us browse through the most interactive choices of augmented reality infused games that you would love to relish on your iOS and Android devices:
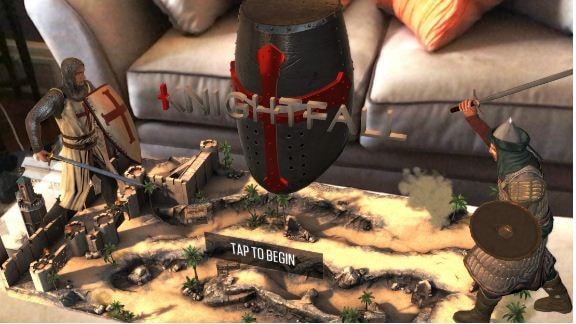
01Knightfall AR
Set in the fictional region of The Knights Templar, this one is a combat oriented AR video game that tasks you with the responsibility of defending the land of Acre against a rival army invasion, while protecting the Holy Grail, which is the most valuable relic of Christianity. When playing the game, you will be grouped into teams of Knights and Warriors to proceed with the quest.
This AR game promises you of an everlasting real-time action gaming experience, where you can fire bullets to kill enemies, collect gold and reconstruct your defense system. You need to win battles, while unlocking features and challenges to proceed through the gameplay. You are also allowed to choose a character in the game’s Photo mode for entertainment purposes.
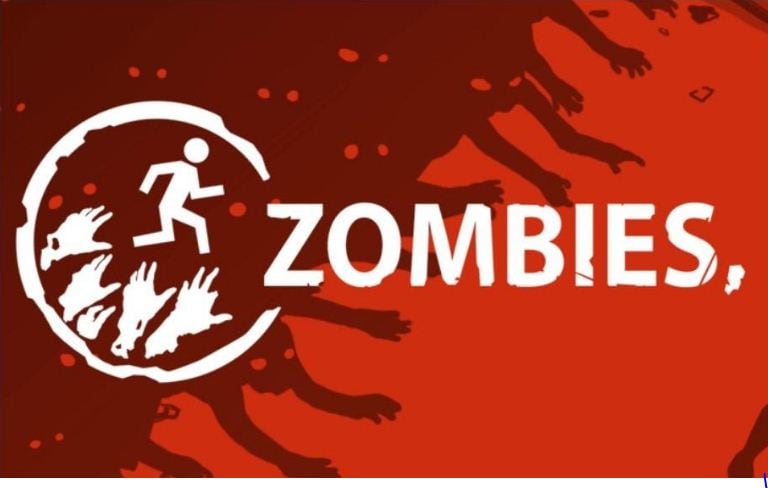
02Zombie, Run
If you have a soft corner for your morning jog routine, get ready dive into the most thrilling sporty adventure with the aforesaid augmented reality gaming application. The gameplay put you amid a world of attacking zombies, where you are required to run and simultaneously collect specified game items to escape the fatal attacks of the nasty creatures.
You are entitled to enjoy an amplified experience of your regular morning jogs with the game’s motivating narration and complementing background music that boosts your gaming as well as exercising willpower.
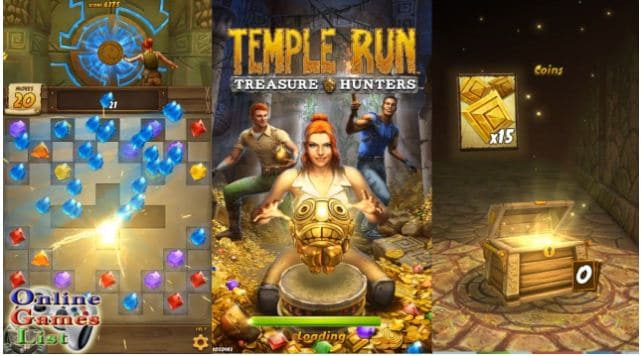
03Temple Treasure Hunt
This one is the perfect game for you if the idea of treasure hunting and mystery solving turns you on. Using the concept of geo-location to inculcate the augmented reality characteristic, Temple Treasure Hunt is a simple yet exciting game with a diversity of legends to hear, mysteries to solve and adventures to experience.
As a player of the game, you are allowed to make a choice between assuming the role of either a treasure protector or a hunter. While the former requires you to create challenging treasure tests that would make it difficult for the hunters to locate the same, the latter, on the other hand demands you to hunt the protected treasure to win the game. Regardless of the role you pick, you are required to follow a route map to proceed through the game.
04Jurassic World Alive
The aforesaid game is a treat for those who have always been the secret admirers of the gigantic creatures of the prehistoric period. The thrilling gameplay of Jurassic World Alive lets you have an encounter with the freely wandering prehistoric beings within the modern day civilizations. Packed with well designed graphics, the game is all set to give its players an exciting and unforgettable augmented reality experience.
Landing into the game, you are given the liberty to explore the diversity of elements in the realms of the Jurassic World, while completing the game’s task if collecting DNA samples of the giant mammoths, Pteranodons and dinosaurs. If that is not enough, you are free to create a customized raptor of your own, and share the same while competing with similar counterparts in real-time.

05Harry Potter: Wizards Unite
Who amongst us is not a die-hard fan of the magically fantasizing Harry Potter series! Thanks to augmented reality, the love of the same can now be relished in real-time. Talking of the aforesaid Wizards Unite edition, this one is a fantasy adventure game that requires the players to relieve Harry Potter’s magical universe from the drastic doom that has struck upon the land with an aim of ultimate destruction.
When playing the game, you are supposed to slip into the role of a Wizard and proceed through the game by overcoming challenges and combating enemies. With the integration of realistic graphics, players get to experience wizard magic in true sense.

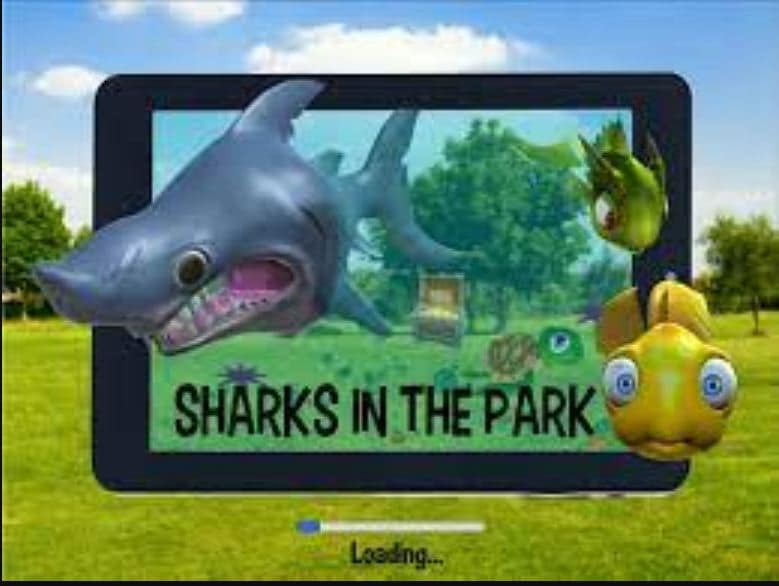
06Sharks in the Park
This one is a fun centered augmented reality game, set within an oceanic ecosystem. When traversing through the exquisite regions of the aquatic world, you will come across a hoard of newly found water species, which you need to interact with, in real-time for addressing the different aspects of the game quest.
The game accesses the GPS functionality of your smartphone to help you to walk through the ocean while you are on your expedition of discovering the different forms of aquatic life under the sea. The game further utilizes smartphone sensors for a synchronized movement tracking of the players, which means that your movements in real-time will be exactly replicated in the digital environment.
07Beer Pong AR
This game is conveniently regarded as the digital prototype of board games in the future and showcases the fusion of augmented reality into the already entertaining world of console gaming. The gameplay begins with the players getting a choice to select a preferred set of surroundings for installing the beer. This is followed by throwing ping pong balls from the most suitable angle.
Talking of the games another attraction is the perfect sync between the real and digital worlds and the non-messy post game experience. If you are keen on enjoying augmented reality gaming on an Android phone, Beer Pong AR is possibly the best alternative you can rely on.

08Dark: Subject One
If you are more comfortable in the adventure and mystery centered gameplay genres, consider trying hands at this game in the environment of augmented reality. The gameplay unfolds a horror storyline, where the player being the hero of the game, adheres to the task of searching for his disappeared friend. As the game progresses, the player is directed to a parallel universe, where he is welcomed by terrifying encounters.
Beating through the eerie landscapes and overcoming scary hurdles, the player lands across clues and hints to unravel the mystery of the case. The top class augmented reality elements promise you of an escalated horrid feel all through the gameplay.
09Experiencing Augmented Reality With Filmora
When looking for suitable alternatives to edit augmented reality video games, you can rely on the Wondershare Filmora Video Editor software without a second thought. Right from welcoming you with the most user-cohesive working interface to presenting a diverse library of top class video editing effects, this application has visibly everything that an editor of augmented reality video game will ever need.
For Win 7 or later (64-bit)
For macOS 10.12 or later
The software program even furnishes you with an additional in-built screen recorder program that allows you to record and edit video games with the most stunning audio-visual editing effects and filters within the app’s editing library.
● Ending Thoughts →
● The advent of augmented reality has put console gaming on a different level with the integration of real-time features.
● When looking for the best alternatives for landing into AR gaming, there are a variety of Android and iOS compatible games to choose from.
● To address the need of editing an AR video game, you can conveniently seek the help of Wondershare Filmora for the best quality editing output.
Augmented reality video games are the latest sensation in the gamer fraternity. Be here to know everything about the top 8 AR video games of all times!
In this article
01 [What Is AR in Gaming? Is AR the Future of Gaming?](#Part 1)
02 [What Is the Most Popular AR Game Now?](#Part 2)
03 [8 Best Augmented Reality Games (For iOS & Android)](#Part 3)
Part 1 What Is AR in Gaming? Is AR the Future of Gaming?
Before taking a dive into the most appealing augmented reality gaming alternatives, it would be better to have a generalized understanding of the concept behind the AR utility. Sticking to digital terms, augmented reality refers to an enhanced presentation of your real world environment with the use of suitable digital equipments. The most basic example in this regard is using your smartphone camera to view the nearby environment in a considerably upgraded graphic setting through an AR application.
When thinking to experiment with the diversity of graphic elements in augmented reality, you can explore the digital overlays by trying hands at one or more of the following enhancements:
● Changing the color perspectives of the screen backgrounds, along with applying suitable filters to produce the effect of high quality chromatic scaling in the graphic elements.
● Superimposition of 3D graphic models, images and other elements conveying snippets of digital information.
● Add labels to screen elements for precise recognition and convenient location, when using the augmented reality concept for gaming purposes.
● Integrate the AR concept to with social media platforms, like using SnapChat and Instagram’s image filters to modify the player’s appearance within the game surroundings.
Moving ahead to the specific discussion on augmented reality video games, the concept was introduced in 2016, with Pokemon GO being the inaugural AR experiment. Since then, the gaming fraternity is dedicated towards providing a real-time perception of different gaming environments with high quality graphic imagery, matchless storytelling and an exquisite range of gaming hardware.
About the latest trends in the domain, you will land across a diversity of immersive augmented reality games introduced by some of the most pronounced game developing companies. These games are a complete entertainment package, where you gave the surety of getting a maximized real-time gameplay experience with enhanced capacities of headsets and motion controls.
Most of the aforesaid games use a GPS tracking system to create a more responsive and realistic gaming environment, allowing the player to undertake a flawless transition amid the real world and its technological replica.
● Augmented Reality: The Future of Console Gaming
Talking about the modern day console gaming prospects, a lot needs to be owed to the revolutions encountered in the gaming technology in the past decade. While the integration of augmented reality into conventional video gaming has come up with upgraded concepts of real-time gaming that has definitely given a boost to the present time gaming aspects.
Augmented reality is being regarded as a potential candidate in the domain of computer based gaming platforms, considering the fact that the latter has brought about an integration of real-world elements into gaming alternatives with minimal prerequisites. As of now, AR based games are all set to provide you with the most immersive gaming experience you have ever had.
As far as the future if console gaming in the light of augmented reality is concerned, it would be a rather quick judgment to define the latter’s prospects within any constraints. With the technology being a relatively newer entrant to the world of gaming, the realm of feature-based enhancement is wide open.
All said and done, the bottom line of the discussion is that the future would have a huge storehouse of immersive gaming alternatives, with the most realistic AR approaches, which would further be supplemented by the day to day technological advancements in the IT and communication industry. The introduction of high tech 5G devices will further let players embrace the real world through their console, thus ensuring a perfect synchronization of virtual gaming technology with the real-time environment.
Part 2 What Is the Most Popular AR Game Now?
Since its advent in 2016, augmented reality gaming has mastered the art of ruling the hearts of gamers around the world. Right from graphical enhancement to real-time modulation, and top quality futures to convenient gameplay, AR gaming has everything to keep you glued to your consoles and smartphones for hours that refuse to end!
AR video games are the talk of the trend, and boast of presenting an enormous variety of gaming choices in front of dedicated players. While it is quite obvious to have a tough time choosing your best AR game, you can begin your gaming streak with Pokemon GO, the first and the most popular entry into the series, till you make a new choice.
Diving into the game specifications, Pokemon GO is a location centered, augmented reality game, which is conveniently compatible to any of your smartphones. The game marked the entry of the augmented reality concept into the realm of video game development with its release in July 2016 as a new member of the Pokemon franchise. Talking of the game’s popularity, the latter became successful in becoming an absolute favorite among global gamers and is known to have generated the maximum revenue at the time of its release, taking the credit of being recognized as the first mainstream console game based on augmented reality.
As reviewed by the players, Pokemon GO is loaded with excellent features of storyline flow, game controls and interface mechanics, sociability and of course, the undeniably appealing legacy of the Pokemon brand. Other attractions of the game with special reference to augmented reality include, a free access revenue model and adequate information safety.
Part 2 Best Augmented Reality Games (For iOS & Android)
Having discussed enough about the advent and credibility of augmented reality based console gaming, you might easily feel motivated to try hands at the popular and appealing integration of technology and entertainment. Adhering to the concern, let us browse through the most interactive choices of augmented reality infused games that you would love to relish on your iOS and Android devices:
01Knightfall AR
Set in the fictional region of The Knights Templar, this one is a combat oriented AR video game that tasks you with the responsibility of defending the land of Acre against a rival army invasion, while protecting the Holy Grail, which is the most valuable relic of Christianity. When playing the game, you will be grouped into teams of Knights and Warriors to proceed with the quest.
This AR game promises you of an everlasting real-time action gaming experience, where you can fire bullets to kill enemies, collect gold and reconstruct your defense system. You need to win battles, while unlocking features and challenges to proceed through the gameplay. You are also allowed to choose a character in the game’s Photo mode for entertainment purposes.
02Zombie, Run
If you have a soft corner for your morning jog routine, get ready dive into the most thrilling sporty adventure with the aforesaid augmented reality gaming application. The gameplay put you amid a world of attacking zombies, where you are required to run and simultaneously collect specified game items to escape the fatal attacks of the nasty creatures.
You are entitled to enjoy an amplified experience of your regular morning jogs with the game’s motivating narration and complementing background music that boosts your gaming as well as exercising willpower.
03Temple Treasure Hunt
This one is the perfect game for you if the idea of treasure hunting and mystery solving turns you on. Using the concept of geo-location to inculcate the augmented reality characteristic, Temple Treasure Hunt is a simple yet exciting game with a diversity of legends to hear, mysteries to solve and adventures to experience.
As a player of the game, you are allowed to make a choice between assuming the role of either a treasure protector or a hunter. While the former requires you to create challenging treasure tests that would make it difficult for the hunters to locate the same, the latter, on the other hand demands you to hunt the protected treasure to win the game. Regardless of the role you pick, you are required to follow a route map to proceed through the game.
04Jurassic World Alive
The aforesaid game is a treat for those who have always been the secret admirers of the gigantic creatures of the prehistoric period. The thrilling gameplay of Jurassic World Alive lets you have an encounter with the freely wandering prehistoric beings within the modern day civilizations. Packed with well designed graphics, the game is all set to give its players an exciting and unforgettable augmented reality experience.
Landing into the game, you are given the liberty to explore the diversity of elements in the realms of the Jurassic World, while completing the game’s task if collecting DNA samples of the giant mammoths, Pteranodons and dinosaurs. If that is not enough, you are free to create a customized raptor of your own, and share the same while competing with similar counterparts in real-time.
05Harry Potter: Wizards Unite
Who amongst us is not a die-hard fan of the magically fantasizing Harry Potter series! Thanks to augmented reality, the love of the same can now be relished in real-time. Talking of the aforesaid Wizards Unite edition, this one is a fantasy adventure game that requires the players to relieve Harry Potter’s magical universe from the drastic doom that has struck upon the land with an aim of ultimate destruction.
When playing the game, you are supposed to slip into the role of a Wizard and proceed through the game by overcoming challenges and combating enemies. With the integration of realistic graphics, players get to experience wizard magic in true sense.
06Sharks in the Park
This one is a fun centered augmented reality game, set within an oceanic ecosystem. When traversing through the exquisite regions of the aquatic world, you will come across a hoard of newly found water species, which you need to interact with, in real-time for addressing the different aspects of the game quest.
The game accesses the GPS functionality of your smartphone to help you to walk through the ocean while you are on your expedition of discovering the different forms of aquatic life under the sea. The game further utilizes smartphone sensors for a synchronized movement tracking of the players, which means that your movements in real-time will be exactly replicated in the digital environment.
07Beer Pong AR
This game is conveniently regarded as the digital prototype of board games in the future and showcases the fusion of augmented reality into the already entertaining world of console gaming. The gameplay begins with the players getting a choice to select a preferred set of surroundings for installing the beer. This is followed by throwing ping pong balls from the most suitable angle.
Talking of the games another attraction is the perfect sync between the real and digital worlds and the non-messy post game experience. If you are keen on enjoying augmented reality gaming on an Android phone, Beer Pong AR is possibly the best alternative you can rely on.
08Dark: Subject One
If you are more comfortable in the adventure and mystery centered gameplay genres, consider trying hands at this game in the environment of augmented reality. The gameplay unfolds a horror storyline, where the player being the hero of the game, adheres to the task of searching for his disappeared friend. As the game progresses, the player is directed to a parallel universe, where he is welcomed by terrifying encounters.
Beating through the eerie landscapes and overcoming scary hurdles, the player lands across clues and hints to unravel the mystery of the case. The top class augmented reality elements promise you of an escalated horrid feel all through the gameplay.
09Experiencing Augmented Reality With Filmora
When looking for suitable alternatives to edit augmented reality video games, you can rely on the Wondershare Filmora Video Editor software without a second thought. Right from welcoming you with the most user-cohesive working interface to presenting a diverse library of top class video editing effects, this application has visibly everything that an editor of augmented reality video game will ever need.
For Win 7 or later (64-bit)
For macOS 10.12 or later
The software program even furnishes you with an additional in-built screen recorder program that allows you to record and edit video games with the most stunning audio-visual editing effects and filters within the app’s editing library.
● Ending Thoughts →
● The advent of augmented reality has put console gaming on a different level with the integration of real-time features.
● When looking for the best alternatives for landing into AR gaming, there are a variety of Android and iOS compatible games to choose from.
● To address the need of editing an AR video game, you can conveniently seek the help of Wondershare Filmora for the best quality editing output.
Best Ideas on Using Green Screen with Filmora
Green screener chroma key is commonly used in film, tv shows, and social media videos nowadays. This article will show you how to light film and edit a green screen. Additionally, you can have some fun ideas with a chroma key. Therefore, keep reading this article to know all the information.
Part 1: Cool Ideas to Use Green Screen
1. The Magic Box

2. Liquid Transformation

3. Key Out a Body Part

4. T-shirt TV Screen

Part 2: Setting Up The Green Screen
Filming with the green screen is getting easier and easier. Anyone can do it, but before you get started, we will share some do’s and don’ts to help you get the best results.
In fact, there are many ways to set up a green screen, but the most cost-efficient way is with a green screen fabric. If you are using a green fabric as a DIY green screen, make sure you steam or iron it out, whether taping it to a wall or hanging it off the rack. Keep in mind the green screen should not leave any wrinkles.
It is because wrinkles will make lighting the green screen a nightmare, and uneven lighting will leave you with shadows and disappointing results. It would help if you also pulled the green screen tight to get a seamless background. The better you do with the setup, the easier it will be the key it out later
Part 3: Lighting a Green Screen
It doesn’t matter how nice your green screen is. You won’t get good results if you don’t light it properly. When you light a green screen, be aware of these things.
- Make sure there are at least six feet of space between you and your green screen; therefore, you’re not casting a shadow that cannot be keyed out later.
- Remember, any shadow on the green screen is bad. The lighting on the screen should be flat, even, and one-dimensional meaning. Please don’t place the screen leaning at an angle since they’ll make it harder to light evenly.
- Do light yourself and your background separately. It will ensure your subject wouldn’t bleed into the green, which will create a halo around them.
- After you key out the green screen and lighting, your subjects should emulate the lighting from your final footage. For example, if you know sunlight is coming from the left light, your subject is from the left direction as well.
Part 4. Keying out your green screen
Once your footage is good, go into Filmora and import it into your timeline, then double-click it to find the chroma key menu. However, don’t stop there. Clicking the chroma key button is not enough to guarantee perfectly keyed footage, so play around with the offset tolerance edge thickness and edge feather. Lastly, adjust it to make sure your edit looks as good as possible.
Free Download For Win 7 or later(64-bit)
Free Download For macOS 10.14 or later

Summary
Aside from a video background, there are many things you can use chrome key effects on. For example, you can make liquid transformation, you can make a magic box, etc. In the meantime, it doesn’t matter how good your green screen, it won’t have a good results if are not light it properly. You can use Filmora to keying out your green screen. It just take a few clicks to be able keying out your green screen by following the tutorial above.
Free Download For macOS 10.14 or later
Summary
Aside from a video background, there are many things you can use chrome key effects on. For example, you can make liquid transformation, you can make a magic box, etc. In the meantime, it doesn’t matter how good your green screen, it won’t have a good results if are not light it properly. You can use Filmora to keying out your green screen. It just take a few clicks to be able keying out your green screen by following the tutorial above.
FLV Editor for Windows 11/10/8.1/8/7: Easily Edit FLV Videos on PC
If you are a streamer or a content creator then you undoubtedly may have come across files having .flv format. FLV stands for “Flash Video”. It is a container file format like .mp4 and .mov. But it isn’t used quite frequently nowadays. They are mainly used for streaming videos. Because it provides compressed video while maintaining the quality and takes less space. It supports codec which is compatible with most of the devices but you may need a flash player to play these files. If you have recently started working with .flv files or need more info about it then read till the end. We have gathered all the necessary information for you in this article.
Being a content creator, you can’t just record videos and publish them directly. Sometimes it requires finishing touches or an entirely new look, for this purpose you need a good editor. And if you are working with .flv files then selecting a good editing software that supports .flv files is important. So, here we have mentioned a list of FLV video editors. You can select one depending on your needs and budget.
Best FLV Editor to Edit FlV Video on Windows and Mac:
- Wondershare – Filmora:
It is available for both Windows and Mac.
Filmora Video Editor is the most common and versatile editing software in this list that almost every content creator may have used or heard about. It has a lot of professional features used by content creators. It is one of the best video editors for .flv format, if u work with .flv files then you must get your hands on filmora.
Its UI is quite similar to premiere pro which makes it quite easy for people who are looking for premiere pro alternatives. It has hundreds of classy transitions/effects and dozens of unique and useful features but many of them are available on paid version only.
The free version also packs a punch but it is almost useless for most users as it leaves a watermark on the final product. It is good for learning video editing and once you master enough to move forward then you can purchase the pro version or you can start directly on the paid version.
For Win 7 or later (64-bit)
For macOS 10.14 or later
Features:
- Support a wide range of formats including .flv.
- Have advanced color grading options.
- Have standard Motion Tracking feature.
- Masking and Chroma key.
- Keyframing and Smooth animation. (Paid version)
- Speed ramping and Auto Synchronization. (Paid Version)
- Support industry-standard plugins (like Boris fx).
- Have a vast stock library.
Cons:
- Leaves a watermark on export. (free version)
- Have playback issues while using 4k videos.
- Lacks some standard editing features.
*Almost every software has some pros and cons. Remember these are inspected from my point of view. And it can differ from your experience.
Steps:
Import: Open filmora, a popup will appear, Select desired aspect ratio then click “New Project” to start editing or click “Open Project” to continue your old project.
On the center of the screen, you will see the import window, click it to import .flv file or any other video you want to edit.

Edit: Drag the clips on the timeline to start editing. Drag the clips from the corner to trim them. Click the top left icon of the timeline (not the whole screen) to add layers. In the toolbar above the timeline, you will find a bunch of tools, like split, crop, speed ramping, animation e.t.c. Click the red scissors icon on the pointer to split the clip at the desired timestamp.

Effects: Click the “edit” icon, then you will see a bunch of icons appear on the top left corner of the screen, These are as follow.
Select the “Video” icon to transform the clip or to do motion tracking, stabilization, chroma-key, Masking, e.t.c. To do Motion tracking, on the playback screen, lock the box on the item you want to track then click “Start Tracking”.
Select the “Audio” icon to apply effects and enhance your audio.
Select the “Color” icon to do fine-tuning and color grading, Select the “3D LUT” option to import a new customized lut. You can find a number of cool luts online.
Select the “Animation” icon to add preset animations or make custom animations by using keyframes.
Select the “Speed” icon to adjust the speed of the clip or to do speed ramping.
Click the “OK” button below to go back to previous tabs.
From there you can add Audio, Titles, Transitions, Effects, Elements, and Stock Media. Simply drag and drop the effects and transition on the clip to apply it. And to use titles and stock media, click and drag them on the timeline to use them.
Export: Click the blue “Export” button. Then choose Desired format and Resolution to export your final product.
More Free FLV Editor for Windows to Edit FLV Videos:
If you are looking for a .flv video editor to perform some editing tasks without spending any money then read till the end because here we have mentioned some free FLV editors for you.
- VSDC video editors :
It is available only on Windows.
Despite being free software, it is packed with lots of features. It is a good choice for non-professionals and it can even run on low-end PCs. It supports a wide range of video/audio formats including .flv file. It has dozens of cool effects and tools that can give your videos a new look. It is a non-linear program that makes using layers much easier means you can add layers at any specific time frame and can add layers into layers for complex editing. It also supports 360 and 3D video which can easily be converted into 2D. It has a number of video and audio effects. It is an old yet powerful software which can even run in 19s Pc. Its features are mentioned below.
Features:
- Free Software with no watermark.
- Can support 4K footages on the latest versions.
- Can import/export a wide range of formats.
- Have built-in video and screen capture feature.
- Has a Non-linear interface that supports multi-layer editing.
- Have professional features like chroma key and masking.
- Can convert layers into a sprite (Grouped Sequence) for handling multiple layers easily.
Cons:
- Being a free software it has some limitations too.
- It’s hard to learn for beginners.
- It still lacks features for a professional creator.
- Doesn’t support Hardware acceleration.
Steps:
Import: Open VSDC video editor, from the “Start Project Now” tab click “Blank Project” to start a new project or click “Import Content” to browse video or image files. Then select “Project settings”.

Edit: You can add more files by clicking the “Add Object” button on the top left corner. Then drag the file from Object explorer to anywhere on the timeline even on layers. On top of the “Editor Tab”, you can find the necessary tools to split, crop, and rotate the video. Click “Spacebar” to play/pause the timeline.

Effects: Click a video on the timeline then select the Effect buttons on top of the “Editor” tab to apply effects to your clip. Then Click the effect on “Object Explorer” to open its properties menu. On the left side of the player, you will find buttons to add text, shapes, e.t.c to the project. On the right side of the screen, you will find the “Basic effects window” where you can do color correction and grading.
Select Multiple Clips then right-click the mouse button and then the “Convert to sprite” button to make a grouped clip (clips within a clip).
Export: Click the “Export Project” button on the top of the screen. Then choose “Media device”, “output video format” and select output destination and quality setup then click “Export Project” to export the video. If you are using the free version of the software, a popup will appear saying “export without premium features”, just click Continue. Now your file is ready to be viewed.

- Shotcut:
It is available on Windows, Mac, and Linux.
It is a free and open-source video editor which is simple and easy to use, which makes it ideal for beginners. It doesn’t have any pro version. It is an ideal software to deal with .flv files as it supports a large number of import/export formats. However, it takes some time to understand its UI. After that, it is quite easy to use. It has cool effects and transitions. It has a clean and simple timeline which is not versatile for professionals although it has some complex options to customize your timeline. It has some refined color grading options. Being a free software it has some 360 effects and 3D text which makes it comparatively good as compared to some other free softwares. It can support 4K videos also but lags or crashes sometimes when using 4K clips. All the effects and tools are combined in one tab “Filter” which is a plus point for some users. It also has some good quality audio effects. Some of its features are mentioned below.
Features:
- It is completely free software with no watermark.
- It has one of the largest file format compatibility.
- It can support 4K video resolution.
- It has 3 wheel grading tool and some other color filters.
- It has standard animation and keyframing features.
- It has some effects to support 360 videos.
Cons:
- It isn’t suitable for professionals as it lacks some useful features.
- Have issues with playback of 4K videos and sometimes crashes.
- Doesn’t have a separate text column and lacks some basic text and title effects.
- Its UI is different from other common video editors and is a bit hard to understand.
Steps:
Import: Click the “Open file” icon on the top left corner of the window to import files.

Edit: Drag and drop clips on an empty timeline panel to add tracks. Right-click on the left side of the timeline to add a video or an audio track. To trim from ends, drag the clip from corners to trim. Click the Scissors icon on the top timeline to split the clip in between.
Click the “Properties” tab above the timeline panel to change the aspect ratio and playback speed of the clip.

Effects: Click the “Filters” tab above the timeline panel to open the filter menu, Click “+” above it to add filters. Double click a filter to add it to the selected clip, then click the filter to change its properties.
Click the “Keyframes” icon on top of the window to open the Keyframes window. Then click the “Timeline” icon to go back to the previous window.
Export: Click the “Export” button on the top of the screen. Select a preset or click the “Advanced” button to change export settings then click “Export File”.

- OpenShot:
It is available on Windows, Mac, and Linux.
OpenShot is another choice for you if you are looking for a free FLV editor. It is simple and easy to use. Its User Interface is clean and beginner-friendly. It has hundreds of transitions and effects. It has an animated titles option also, which is powered by Blender.
Features:
- Is simple and easy to use.
- Its UI is Beginner friendly.
- Can support 4K videos.
- Support a wide range of formats.
- Have smooth keyframe animation.
- Is free and has no watermark.
Cons:
- Video Playback is a bit laggy.
- Animated titles are only supported when you have Blender (3d software) installed on your PC.
- Doesn’t have enough tools for professionals.
Steps:
Import: Start “OpenShot” then drag and drop files in the project files tab from your file system (or press CTRL + F). Drag and drop files to add them to the timeline.
Edit: To trim from ends, drag the clip from corners to trim. There are some basic tools above the tracks in the timeline window. Click “+” to add a new track. Click the scissors icon to split the clip at the desired length. Click the magnet icon to on snapping mode. Click the green marker icon to add markers at desired points during editing.

Effects: Above the timeline window you will see a bar containing 4 buttons: Project Files, Transitions, Effects, and Emojis. Drag these elements to add them to the timeline. Effects appear as a small icon on the clip. Right-click the icon then select “Remove Effect” to remove it.

Right-click the clip to access more features like keyframe animation, playback speed, e.t.c.
Export: Click the red dot button on the top of the screen to export your video (or press CTRL + E). Select the desired Profile, Format, Quality, and Destination folder then click “Export Video” to export your file.

More Paid FLV Editor for Windows to Edit FLV Videos:
If you are looking for a good flv editor and you are ready to spend some cash on it then we have selected some paid softwares worthy of your investment.
- Power director 365 (import only):
It is available on both, Windows and Mac.
If you are looking for software to do more than just trimming and cropping the video then Cyberlink Power Director can be the right choice for you. It is packed with dozens of features that professional content creators look for. It has some professional-level plugins also. It is suitable for both beginners and advanced users.
It allows users to import .flv file and edit it like usual but you can’t export it in the same format as it exports videos in few formats only. FLV file is then converted into any of the other supported formats.
Pricing:
Its annual subscription is 69$ which is available at 30% off at 48.99$/year. This offer is valid till 4th May 2022.
Features:
- Can support 4K videos and can import a wide range of file formats.
- Have Auto Chapter and Subtitle settings.
- Multi-cam editing.
- Have hundreds of transitions, effects, and access to thousands of stock footage.
- Can Group clips for easy editing.
- Can import presets and color LUTS.
Cons:
- It lags sometimes, this issue can be resolved to an extent if you have a powerful PC.
- Some features are complicated to use.
- Export settings have fewer file formats as compared to the import file range.
Steps:
Import: Open Power Director then select the aspect ratio and click “Full Mode” to start the program. Import media files to the media room. Click the “Import Media” icon below the files tab to add more clips.

Edit: Drag and drop files to add them to the timeline. Drop files above or below to add them in layers. Click the icon on the top left corner of the timeline to add a new layer. You can find basic editing tools above the timeline.

Effects: All the effects and overlay elements are situated at the top left corner of the screen in a vertical bar. Here you will find the Project library, titles, effects, transitions, overlays, e.t.c. Simply just drag and drop on the timeline to use them. Here you can also do audio mixing and add subtitles and chapters.
Double click a clip or an overlay element to open the designer window. Here you can customize the clips and overlays to enhance your project.

Export: Click the “Produce” button on top of the screen then select the desired mode and file format and add a destination then click “Start”.
- AVS video editor:
If you are looking for a good .flv video editor and are ready to spend some bucks then the AVS video editor is a good choice for you. It is a low-budget software that is simple and easy to use and has some great features. It was my first video editor which I used about 5-6 years ago when I started making videos. It is simple and easy to use. It has some fine features that can fulfill your basic video editing tasks. Has a unique animation trajectory feature, where you can create paths for overlays.
Pricing:
It has two different plans, the first is an annual one which is at 69$ per year and the second one is a lifetime offer for 199$. In a lifetime plan, you can own the software forever. Right now, the software is at a 70% discount(till 30th April 2022) which decreases the price of the annual subscription to 39$ and the purchase price is 59$ this offer makes the software valuable enough to invest in.
Features:
- Its UI is beginner-friendly and easy to learn.
- Can Support 4K videos.
- Has cool features like video stabilization and a chroma key.
- Has 300+ effects, transitions, and overlays.
- Has a storyboard-type editing style also, which is a great feature for some users.
- Has keyframing and animation trajectory option for overlays.
Cons:
- Lacks some commonly used features.
- It is a decade-old software and needs some new updates to compete with other editing softwares.
- It isn’t suitable for professionals as you can’t do many customizations.
- It has only one layer for every element like text, effects, overlays, e.t.c.
- If hard disk crashes you have to purchase the license again.
Steps:
Import: Click “Import Media Files” to import clips or click “Open Existing Project” to load previously saved projects. Drag and drop files to add them to the timeline.
Edit: To trim from ends, drag the clip from corners to trim. On top of the timeline, you will find a few basic tools like change speed, apply transitions, do color correction, or do video stabilization.

Effects: Click the “Transition” button above the timeline to apply transitions. Drag and drop transitions between two clips to apply it. Right-click on the transition to change its duration.
Click the “Video Effects” button on top of the timeline, then drag and drop the desired effect on the effects layer and trim it according to your need.
Similarly from the “Text” tab Drag and drop the desired text to the text layer in the timeline. Then select “Edit text” to change the text.

Export: Click the “Produce” button on top of the timeline to open the export window. Select the desired file format and quality then click “next” and then click the “Create” button to export your file.

Veed.io: (Online):
If you want to edit FLV videos quickly and don’t want to install any software then Veed.io can be a good choice for you. It is an online FLV video editor that can run on any browser and is compatible with Windows, Mac, Linux, and even mobile phones. It is a quick and simple method to fulfill your basic video editing needs. It has some amazing and uniques features as compared to other basic video editors. It is a great platform to edit videos anywhere. You can start editing video on your PC and can continue it on your phone if you have to leave your workplace. But these features come at a price as its basic plan has the majority of the features but it leaves a watermark on the final video.
Pricing:
It has 3 different plans depending on your needs. The first one is the “Free Plan” which is almost useless for most users as it creates a watermark. The second one is the “Basic Plan” at 18$/month. While third is the “Pro Plan” at 30$/month which has some more features than the basic plan. You can purchase an annual plan to save up to 33%.

Features:
- It is an online platform that makes it easily accessible from any device.
- It is multi user friendly and is a good choice for team projects.
- It has a simple and clean interface which is ideal for beginners.
- It has an Auto subtitle generator + subtitle translator and editor.
- It has audio to text and video to text features that aren’t found in many other editors.
- It is compatible with many video and audio formats.
Cons:
- It is quite slow as compared to other video editing software.
- Downloading 4K videos is only available in Pro Plan.
- It is an online platform, so its data can be breached or leaked, so avoid editing your personal videos on this platform. It can rarely happen but precaution is better than cure.
Steps:
Import: Click choose FLV File on the home screen then a popup will appear, click “Browse” to upload a file or use a template.

Edit: To trim from ends, drag the clip from corners to trim. Click the “Split” button above the timeline to split the clip in between.

Effects: All the effects tabs like Text, Elements, Transitions lie on the left side of the screen (on windows). Click an element and it will be added to the timeline, then adjust the settings according to your will.
Export: Click the “Export” button on the top right side of the screen. Select a preset or change export settings then click “Export Video”. Soon you will get your final product.
Which Should I choose Free or Paid FLV Editor :
Are you confused to choose the FLV editor for you? Then look for the one that suits your other needs. Like if you want an editor only to crop or trim videos then save your money and go for a free video editor. But if you want some extra features to enhance your workflow or have some cash then go for paid software. For professionals, Power Director 365 or Filmora pro can be a good choice to invest your money in.
~ Some FAQs about FLV Videos:
why is .flv format used?
FLV is basically used to publish or distribute videos on the Internet. Many social platforms and web pages (such as youtube, Hulu, e.t.c.) use .flv files as it provide high-quality synchronized audio and video in compact file size. It was mostly used for embedded videos on these platforms. It is compatible with most browsers and devices even with older phones and computers.
How to play .FLV files?
To play .flv files a flash player is required. Which is pre-installed in almost most of the computers and browsers, if that’s not the case. Then you need a good video player which supports .flv format. Therefore VLC media prayer is a good choice. It is quite easy to use and has some useful features like Speed, Adding subtitles, Audio sync, e.t.c.
Is .flv file easy to edit?
FLV is just a format, It can be edited like any other format. Steps may differ from software to software. But don’t worry as I have mentioned the steps of some popular FLV video editors above.
Can the .flv file be converted?
If you don’t want to stick with the .flv format for long enough and want to switch over to a more convenient format then you can try these converters.
VLC Media Player: Yes, apart from being a video player it can convert video formats. It’s quite easy to use.
Simply Open VLC Media Player >> Click Media tab >> Click “Convert/Save” >> On pop up menu Select “Add” to add file (can add multiple files also) >> Click “Convert/Save” >> Add Destination folder and File Format (to convert in) then click “Start”.
Hand Brake: It is another popular video converter that can convert a .flv file into almost any file format.
Open HandBrake-“Drop a file” screen will appear >> Select the specific file you one to convert >> Select Destination filder >> Click “Start encoding”.
Flv vs Mp4 which is better?
FLV format was quite popular back in 2010 as it provides high-quality compressed video for the internet. It takes less space which makes it easy to download and transfer quickly. Nowadays MP4 format is used more as it is versatile and is compatible with almost all devices like Mobile, PC, TV, e.t.c. FLV uses H.263 codec while MP4 uses codec which provides better quality after compression. Still .flv file is a better choice for streaming platforms as one of the most common software used for streaming is OBS studio and it produces .flv files.
It is available for both Windows and Mac.
Filmora Video Editor is the most common and versatile editing software in this list that almost every content creator may have used or heard about. It has a lot of professional features used by content creators. It is one of the best video editors for .flv format, if u work with .flv files then you must get your hands on filmora.
Its UI is quite similar to premiere pro which makes it quite easy for people who are looking for premiere pro alternatives. It has hundreds of classy transitions/effects and dozens of unique and useful features but many of them are available on paid version only.
The free version also packs a punch but it is almost useless for most users as it leaves a watermark on the final product. It is good for learning video editing and once you master enough to move forward then you can purchase the pro version or you can start directly on the paid version.
For Win 7 or later (64-bit)
For macOS 10.14 or later
Features:
- Support a wide range of formats including .flv.
- Have advanced color grading options.
- Have standard Motion Tracking feature.
- Masking and Chroma key.
- Keyframing and Smooth animation. (Paid version)
- Speed ramping and Auto Synchronization. (Paid Version)
- Support industry-standard plugins (like Boris fx).
- Have a vast stock library.
Cons:
- Leaves a watermark on export. (free version)
- Have playback issues while using 4k videos.
- Lacks some standard editing features.
*Almost every software has some pros and cons. Remember these are inspected from my point of view. And it can differ from your experience.
Steps:
Import: Open filmora, a popup will appear, Select desired aspect ratio then click “New Project” to start editing or click “Open Project” to continue your old project.
On the center of the screen, you will see the import window, click it to import .flv file or any other video you want to edit.
Edit: Drag the clips on the timeline to start editing. Drag the clips from the corner to trim them. Click the top left icon of the timeline (not the whole screen) to add layers. In the toolbar above the timeline, you will find a bunch of tools, like split, crop, speed ramping, animation e.t.c. Click the red scissors icon on the pointer to split the clip at the desired timestamp.
Effects: Click the “edit” icon, then you will see a bunch of icons appear on the top left corner of the screen, These are as follow.
Select the “Video” icon to transform the clip or to do motion tracking, stabilization, chroma-key, Masking, e.t.c. To do Motion tracking, on the playback screen, lock the box on the item you want to track then click “Start Tracking”.
Select the “Audio” icon to apply effects and enhance your audio.
Select the “Color” icon to do fine-tuning and color grading, Select the “3D LUT” option to import a new customized lut. You can find a number of cool luts online.
Select the “Animation” icon to add preset animations or make custom animations by using keyframes.
Select the “Speed” icon to adjust the speed of the clip or to do speed ramping.
Click the “OK” button below to go back to previous tabs.
From there you can add Audio, Titles, Transitions, Effects, Elements, and Stock Media. Simply drag and drop the effects and transition on the clip to apply it. And to use titles and stock media, click and drag them on the timeline to use them.
Export: Click the blue “Export” button. Then choose Desired format and Resolution to export your final product.
More Free FLV Editor for Windows to Edit FLV Videos:
If you are looking for a .flv video editor to perform some editing tasks without spending any money then read till the end because here we have mentioned some free FLV editors for you.
- VSDC video editors :
It is available only on Windows.
Despite being free software, it is packed with lots of features. It is a good choice for non-professionals and it can even run on low-end PCs. It supports a wide range of video/audio formats including .flv file. It has dozens of cool effects and tools that can give your videos a new look. It is a non-linear program that makes using layers much easier means you can add layers at any specific time frame and can add layers into layers for complex editing. It also supports 360 and 3D video which can easily be converted into 2D. It has a number of video and audio effects. It is an old yet powerful software which can even run in 19s Pc. Its features are mentioned below.
Features:
- Free Software with no watermark.
- Can support 4K footages on the latest versions.
- Can import/export a wide range of formats.
- Have built-in video and screen capture feature.
- Has a Non-linear interface that supports multi-layer editing.
- Have professional features like chroma key and masking.
- Can convert layers into a sprite (Grouped Sequence) for handling multiple layers easily.
Cons:
- Being a free software it has some limitations too.
- It’s hard to learn for beginners.
- It still lacks features for a professional creator.
- Doesn’t support Hardware acceleration.
Steps:
Import: Open VSDC video editor, from the “Start Project Now” tab click “Blank Project” to start a new project or click “Import Content” to browse video or image files. Then select “Project settings”.
Edit: You can add more files by clicking the “Add Object” button on the top left corner. Then drag the file from Object explorer to anywhere on the timeline even on layers. On top of the “Editor Tab”, you can find the necessary tools to split, crop, and rotate the video. Click “Spacebar” to play/pause the timeline.
Effects: Click a video on the timeline then select the Effect buttons on top of the “Editor” tab to apply effects to your clip. Then Click the effect on “Object Explorer” to open its properties menu. On the left side of the player, you will find buttons to add text, shapes, e.t.c to the project. On the right side of the screen, you will find the “Basic effects window” where you can do color correction and grading.
Select Multiple Clips then right-click the mouse button and then the “Convert to sprite” button to make a grouped clip (clips within a clip).
Export: Click the “Export Project” button on the top of the screen. Then choose “Media device”, “output video format” and select output destination and quality setup then click “Export Project” to export the video. If you are using the free version of the software, a popup will appear saying “export without premium features”, just click Continue. Now your file is ready to be viewed.
- Shotcut:
It is available on Windows, Mac, and Linux.
It is a free and open-source video editor which is simple and easy to use, which makes it ideal for beginners. It doesn’t have any pro version. It is an ideal software to deal with .flv files as it supports a large number of import/export formats. However, it takes some time to understand its UI. After that, it is quite easy to use. It has cool effects and transitions. It has a clean and simple timeline which is not versatile for professionals although it has some complex options to customize your timeline. It has some refined color grading options. Being a free software it has some 360 effects and 3D text which makes it comparatively good as compared to some other free softwares. It can support 4K videos also but lags or crashes sometimes when using 4K clips. All the effects and tools are combined in one tab “Filter” which is a plus point for some users. It also has some good quality audio effects. Some of its features are mentioned below.
Features:
- It is completely free software with no watermark.
- It has one of the largest file format compatibility.
- It can support 4K video resolution.
- It has 3 wheel grading tool and some other color filters.
- It has standard animation and keyframing features.
- It has some effects to support 360 videos.
Cons:
- It isn’t suitable for professionals as it lacks some useful features.
- Have issues with playback of 4K videos and sometimes crashes.
- Doesn’t have a separate text column and lacks some basic text and title effects.
- Its UI is different from other common video editors and is a bit hard to understand.
Steps:
Import: Click the “Open file” icon on the top left corner of the window to import files.
Edit: Drag and drop clips on an empty timeline panel to add tracks. Right-click on the left side of the timeline to add a video or an audio track. To trim from ends, drag the clip from corners to trim. Click the Scissors icon on the top timeline to split the clip in between.
Click the “Properties” tab above the timeline panel to change the aspect ratio and playback speed of the clip.
Effects: Click the “Filters” tab above the timeline panel to open the filter menu, Click “+” above it to add filters. Double click a filter to add it to the selected clip, then click the filter to change its properties.
Click the “Keyframes” icon on top of the window to open the Keyframes window. Then click the “Timeline” icon to go back to the previous window.
Export: Click the “Export” button on the top of the screen. Select a preset or click the “Advanced” button to change export settings then click “Export File”.
- OpenShot:
It is available on Windows, Mac, and Linux.
OpenShot is another choice for you if you are looking for a free FLV editor. It is simple and easy to use. Its User Interface is clean and beginner-friendly. It has hundreds of transitions and effects. It has an animated titles option also, which is powered by Blender.
Features:
- Is simple and easy to use.
- Its UI is Beginner friendly.
- Can support 4K videos.
- Support a wide range of formats.
- Have smooth keyframe animation.
- Is free and has no watermark.
Cons:
- Video Playback is a bit laggy.
- Animated titles are only supported when you have Blender (3d software) installed on your PC.
- Doesn’t have enough tools for professionals.
Steps:
Import: Start “OpenShot” then drag and drop files in the project files tab from your file system (or press CTRL + F). Drag and drop files to add them to the timeline.
Edit: To trim from ends, drag the clip from corners to trim. There are some basic tools above the tracks in the timeline window. Click “+” to add a new track. Click the scissors icon to split the clip at the desired length. Click the magnet icon to on snapping mode. Click the green marker icon to add markers at desired points during editing.
Effects: Above the timeline window you will see a bar containing 4 buttons: Project Files, Transitions, Effects, and Emojis. Drag these elements to add them to the timeline. Effects appear as a small icon on the clip. Right-click the icon then select “Remove Effect” to remove it.
Right-click the clip to access more features like keyframe animation, playback speed, e.t.c.
Export: Click the red dot button on the top of the screen to export your video (or press CTRL + E). Select the desired Profile, Format, Quality, and Destination folder then click “Export Video” to export your file.
More Paid FLV Editor for Windows to Edit FLV Videos:
If you are looking for a good flv editor and you are ready to spend some cash on it then we have selected some paid softwares worthy of your investment.
- Power director 365 (import only):
It is available on both, Windows and Mac.
If you are looking for software to do more than just trimming and cropping the video then Cyberlink Power Director can be the right choice for you. It is packed with dozens of features that professional content creators look for. It has some professional-level plugins also. It is suitable for both beginners and advanced users.
It allows users to import .flv file and edit it like usual but you can’t export it in the same format as it exports videos in few formats only. FLV file is then converted into any of the other supported formats.
Pricing:
Its annual subscription is 69$ which is available at 30% off at 48.99$/year. This offer is valid till 4th May 2022.
Features:
- Can support 4K videos and can import a wide range of file formats.
- Have Auto Chapter and Subtitle settings.
- Multi-cam editing.
- Have hundreds of transitions, effects, and access to thousands of stock footage.
- Can Group clips for easy editing.
- Can import presets and color LUTS.
Cons:
- It lags sometimes, this issue can be resolved to an extent if you have a powerful PC.
- Some features are complicated to use.
- Export settings have fewer file formats as compared to the import file range.
Steps:
Import: Open Power Director then select the aspect ratio and click “Full Mode” to start the program. Import media files to the media room. Click the “Import Media” icon below the files tab to add more clips.
Edit: Drag and drop files to add them to the timeline. Drop files above or below to add them in layers. Click the icon on the top left corner of the timeline to add a new layer. You can find basic editing tools above the timeline.
Effects: All the effects and overlay elements are situated at the top left corner of the screen in a vertical bar. Here you will find the Project library, titles, effects, transitions, overlays, e.t.c. Simply just drag and drop on the timeline to use them. Here you can also do audio mixing and add subtitles and chapters.
Double click a clip or an overlay element to open the designer window. Here you can customize the clips and overlays to enhance your project.
Export: Click the “Produce” button on top of the screen then select the desired mode and file format and add a destination then click “Start”.
- AVS video editor:
If you are looking for a good .flv video editor and are ready to spend some bucks then the AVS video editor is a good choice for you. It is a low-budget software that is simple and easy to use and has some great features. It was my first video editor which I used about 5-6 years ago when I started making videos. It is simple and easy to use. It has some fine features that can fulfill your basic video editing tasks. Has a unique animation trajectory feature, where you can create paths for overlays.
Pricing:
It has two different plans, the first is an annual one which is at 69$ per year and the second one is a lifetime offer for 199$. In a lifetime plan, you can own the software forever. Right now, the software is at a 70% discount(till 30th April 2022) which decreases the price of the annual subscription to 39$ and the purchase price is 59$ this offer makes the software valuable enough to invest in.
Features:
- Its UI is beginner-friendly and easy to learn.
- Can Support 4K videos.
- Has cool features like video stabilization and a chroma key.
- Has 300+ effects, transitions, and overlays.
- Has a storyboard-type editing style also, which is a great feature for some users.
- Has keyframing and animation trajectory option for overlays.
Cons:
- Lacks some commonly used features.
- It is a decade-old software and needs some new updates to compete with other editing softwares.
- It isn’t suitable for professionals as you can’t do many customizations.
- It has only one layer for every element like text, effects, overlays, e.t.c.
- If hard disk crashes you have to purchase the license again.
Steps:
Import: Click “Import Media Files” to import clips or click “Open Existing Project” to load previously saved projects. Drag and drop files to add them to the timeline.
Edit: To trim from ends, drag the clip from corners to trim. On top of the timeline, you will find a few basic tools like change speed, apply transitions, do color correction, or do video stabilization.
Effects: Click the “Transition” button above the timeline to apply transitions. Drag and drop transitions between two clips to apply it. Right-click on the transition to change its duration.
Click the “Video Effects” button on top of the timeline, then drag and drop the desired effect on the effects layer and trim it according to your need.
Similarly from the “Text” tab Drag and drop the desired text to the text layer in the timeline. Then select “Edit text” to change the text.
Export: Click the “Produce” button on top of the timeline to open the export window. Select the desired file format and quality then click “next” and then click the “Create” button to export your file.
Veed.io: (Online):
If you want to edit FLV videos quickly and don’t want to install any software then Veed.io can be a good choice for you. It is an online FLV video editor that can run on any browser and is compatible with Windows, Mac, Linux, and even mobile phones. It is a quick and simple method to fulfill your basic video editing needs. It has some amazing and uniques features as compared to other basic video editors. It is a great platform to edit videos anywhere. You can start editing video on your PC and can continue it on your phone if you have to leave your workplace. But these features come at a price as its basic plan has the majority of the features but it leaves a watermark on the final video.
Pricing:
It has 3 different plans depending on your needs. The first one is the “Free Plan” which is almost useless for most users as it creates a watermark. The second one is the “Basic Plan” at 18$/month. While third is the “Pro Plan” at 30$/month which has some more features than the basic plan. You can purchase an annual plan to save up to 33%.
Features:
- It is an online platform that makes it easily accessible from any device.
- It is multi user friendly and is a good choice for team projects.
- It has a simple and clean interface which is ideal for beginners.
- It has an Auto subtitle generator + subtitle translator and editor.
- It has audio to text and video to text features that aren’t found in many other editors.
- It is compatible with many video and audio formats.
Cons:
- It is quite slow as compared to other video editing software.
- Downloading 4K videos is only available in Pro Plan.
- It is an online platform, so its data can be breached or leaked, so avoid editing your personal videos on this platform. It can rarely happen but precaution is better than cure.
Steps:
Import: Click choose FLV File on the home screen then a popup will appear, click “Browse” to upload a file or use a template.
Edit: To trim from ends, drag the clip from corners to trim. Click the “Split” button above the timeline to split the clip in between.
Effects: All the effects tabs like Text, Elements, Transitions lie on the left side of the screen (on windows). Click an element and it will be added to the timeline, then adjust the settings according to your will.
Export: Click the “Export” button on the top right side of the screen. Select a preset or change export settings then click “Export Video”. Soon you will get your final product.
Which Should I choose Free or Paid FLV Editor :
Are you confused to choose the FLV editor for you? Then look for the one that suits your other needs. Like if you want an editor only to crop or trim videos then save your money and go for a free video editor. But if you want some extra features to enhance your workflow or have some cash then go for paid software. For professionals, Power Director 365 or Filmora pro can be a good choice to invest your money in.
~ Some FAQs about FLV Videos:
why is .flv format used?
FLV is basically used to publish or distribute videos on the Internet. Many social platforms and web pages (such as youtube, Hulu, e.t.c.) use .flv files as it provide high-quality synchronized audio and video in compact file size. It was mostly used for embedded videos on these platforms. It is compatible with most browsers and devices even with older phones and computers.
How to play .FLV files?
To play .flv files a flash player is required. Which is pre-installed in almost most of the computers and browsers, if that’s not the case. Then you need a good video player which supports .flv format. Therefore VLC media prayer is a good choice. It is quite easy to use and has some useful features like Speed, Adding subtitles, Audio sync, e.t.c.
Is .flv file easy to edit?
FLV is just a format, It can be edited like any other format. Steps may differ from software to software. But don’t worry as I have mentioned the steps of some popular FLV video editors above.
Can the .flv file be converted?
If you don’t want to stick with the .flv format for long enough and want to switch over to a more convenient format then you can try these converters.
VLC Media Player: Yes, apart from being a video player it can convert video formats. It’s quite easy to use.
Simply Open VLC Media Player >> Click Media tab >> Click “Convert/Save” >> On pop up menu Select “Add” to add file (can add multiple files also) >> Click “Convert/Save” >> Add Destination folder and File Format (to convert in) then click “Start”.
Hand Brake: It is another popular video converter that can convert a .flv file into almost any file format.
Open HandBrake-“Drop a file” screen will appear >> Select the specific file you one to convert >> Select Destination filder >> Click “Start encoding”.
Flv vs Mp4 which is better?
FLV format was quite popular back in 2010 as it provides high-quality compressed video for the internet. It takes less space which makes it easy to download and transfer quickly. Nowadays MP4 format is used more as it is versatile and is compatible with almost all devices like Mobile, PC, TV, e.t.c. FLV uses H.263 codec while MP4 uses codec which provides better quality after compression. Still .flv file is a better choice for streaming platforms as one of the most common software used for streaming is OBS studio and it produces .flv files.
YouTube Lives Are Very Popular Nowadays and People Can Interact with the Anchor at Real Time. If You Want to Comment on a YouTube Live Chat, You Can Follow the Guide Below
YouTube continues to grow in popularity. On this platform, users of YouTube can view and upload videos as well as debate them live. Live chat on YouTube is described in this article.
Let’s start off!

1. What is YouTube live chat?
Every day, more than 30 million individuals use YouTube to upload and watch entertaining videos. Many individuals are interested in having a conversation with the video’s producer or later on discussing these films with others. You can now have live video chats on YouTube using the Google+ Hangouts On Air service because Google’s YouTube has opened up its live streaming service to all users in good standing.
The live chat box appears to the right of the video player as soon as the live stream starts. Both the video and the live chat’s material will be archived once the live stream stops. People can rewatch the video with live chat if necessary.
On YouTube, there are two different live chat views:
- Best chat: The messages that may hurt you are filtered out in this display.
- Live chat: No messages are filtered in this display.
Additionally, the live chat will not be available if the channel or live stream is intended for children.
2. How to comment on YouTube live chat?
YouTube users would like to comment on the live chat when the stream starts. Here are the steps for posting a comment in the YouTube Live Chat
Step1Create a YouTube account and sign in using your username and email. You cannot post any messages at tall if you are not signed into your YouTube account.
Step2Join the live stream. Click the live stream that you want to watch after selecting it.
Step3Click where it says, “Live Chat” and start typing anything you want to publish in the chat box. Next, select the
send button.
Additionally, a number of YouTube viewers frequently lament their inability to comment on livestreams or the fact that their messages keep disappearing. Because certain comments are flagged as spam and filtered, this is the cause. There is no other option but to post constructive criticism. If the streamer is one you enjoy or if you don’t want to miss the author’s next live stream. Then choose “HIDE Chat” if you don’t want to see any comments at all. The procedures below can be used if you simply want to have a private conversation or reply to someone.
Conclusion
You now know what YouTube live chat is and how to participate in it thanks to this post. I hope it will be beneficial to you.
Free Download For Win 7 or later(64-bit)
Free Download For macOS 10.14 or later
Free Download For macOS 10.14 or later
Also read:
- New Ways to Make Sure Your Recording Slideshow in Powerpoint Is Not Wrong
- In 2024, Learn How to Use 3D Camera Tracking in Adobe After Effects and Take Your Skills to the Next Level
- 2024 Approved Fast and Easy Method to Match Color in Photoshop
- In 2024, How to Use Deep Fried Meme Maker
- Updated Good Ways to Make Sure Your Video Editing Course Is Worthing to Watch
- 2024 Approved Create Slide Masking Effect Intro
- Updated In 2024, Everything That You Need to Know About Video Montages- Ideas, Techniques, and Software
- Updated How to Create Cooking Video Intro and Outro for YouTube Channel, In 2024
- New Top 10 Anime Movies of All Time
- New In 2024, | Best 8 Online GIF to APNG Converters
- New 2024 Approved Easy Way to Combine Several Xvid Files Into One Windows, Mac,Android
- New Free
- How to Spruce Up Your Telegram Profile
- Are You in Search for a Step-by-Step Guide to How to Add Effects in TikTok? Here It Is. To Add some Flavor to Your TikTok Videos. Use These How to Add Effect to TikTok Recommendations
- In 2024, Top 18 Video Editors for PC and Mac
- How to Create A Freeze Frame Sequence in Video
- 2024 Approved Based on Preferences, You Can Adjust the Speed of YouTube Videos. Learn How to Produce a YouTube Slow-Motion Video in This Article
- In 2024, Best 8 AI Video Denoise Software
- Updated How to Make a Slideshow GIF?
- 2024 Approved Easy Way to Add Transitions to Videos
- An Easy-to-Understand Guide on How to Loop a Video on Canva. This Article Is Sure to Help You if This Is Your First Time Attempting a Loop Video
- New Simple Step by Step Tutorial on Creating a Lightroom Collage
- New 2024 Approved Best Youtube Video Meme Maker
- Updated Step by Step to Rotate Video Using KMPlayer
- 2024 Approved While Fiddling with Solutions to Complement the Ordinary Text Messages with Graphic Elements, People Also Ask About Ways to Add Emoji to Photo Online. Stay Here to Get the Best Answers
- In 2024, How To Change Text In Premiere Pro
- Updated MAGIX Vegas Pro Review A Professional Video Editing Software
- Updated 2024 Approved How To Mirror a Video Clip in Premiere Pro
- In 2024, Master Premiere Pro Custom Sequence Presets
- Funny Content Ideas for YouTube Videos and Funny Music Background for 2024
- Updated Best Phantom Slow-Mo Camera For Recording Slow Motion Videos
- Updated Looking for a Way to Learn How to Merge Videos in HandBrake? Theres a Better Solution Waiting for You Inside
- Hassle-Free Ways to Remove FRP Lock from Google Pixel Fold Phones with/without a PC
- In 2024, Tips and Tricks for Apple ID Locked Issue From Apple iPhone 14 Pro Max
- In 2024, Catch or Beat Sleeping Snorlax on Pokemon Go For Xiaomi Redmi Note 12T Pro | Dr.fone
- Home Button Not Working on Infinix Hot 30i? Here Are Real Fixes | Dr.fone
- How to Unlock Samsung Galaxy XCover 7 Phone Pattern Lock without Factory Reset
- In 2024, How to Remove Forgotten PIN Of Your Realme C53
- How do I reset my Vivo Y55s 5G (2023) Phone without technical knowledge? | Dr.fone
- How to Remove Apple ID from iPhone SE (2022) without Password?
- Can I Bypass a Forgotten Phone Password Of Nokia 105 Classic?
- Here are Some of the Best Pokemon Discord Servers to Join On Oppo A78 | Dr.fone
- In 2024, How to Change/Add Location Filters on Snapchat For your Realme GT 5 Pro | Dr.fone
- Data Recovery – recover lost data from Find X6
- Mastering Android Device Manager The Ultimate Guide to Unlocking Your Vivo S18e Device
- How to Detect and Remove Spyware on OnePlus Nord CE 3 Lite 5G? | Dr.fone
- How To Restore Missing Photos Files from Motorola Moto G84 5G.
- Why Your Oppo A2 Screen Might be Unresponsive and How to Fix It | Dr.fone
- In 2024, The Best iSpoofer Alternative to Try On Vivo Y28 5G | Dr.fone
- Title: In 2024, Best 8 Augmented Reality Video Games
- Author: Chloe
- Created at : 2024-06-18 14:30:49
- Updated at : 2024-06-19 14:30:49
- Link: https://ai-editing-video.techidaily.com/in-2024-best-8-augmented-reality-video-games/
- License: This work is licensed under CC BY-NC-SA 4.0.
