

In 2024, Best Tools To Create Blend Image Collage
Best Tools To Create Blend Image Collage
Best Tools To Create Blend Image Collage
An easy yet powerful editor
Numerous effects to choose from
Detailed tutorials provided by the official channel
While creating a photo collage, the blending of images needs to be perfect so that the final outcome is impressive. Though creating a collage may sound as simple as placing one image next to the other, it requires thoughtful placing and positioning of the images along with additional editing to create a visually impressive frame. To help you with this task, a good collage maker can be used.
Though there are several tools making tall claims, not all deliver what they promise. So, to make your tool selection task a little easier, we have shortlisted the best ones in the following parts.
In this article
01 [Top blended collage maker tool](#Part 1)
02 [Best tool for stock media and video editing- Wondershare Filmora](#Part 2)
Part 1 Top blended collage maker tool
A roundup of the top 5 tools to create blended photo collage is given below.
01PicMonkey
This is a free collage-making tool by Shutterstock that can let you blend images to create wonderful freestyle as well as grid-based collages. If needed, you can even add videos to the collage.
Key features
● Create freestyle grid-based blend collage using images and videos.
● Wide range of layouts to choose from.
● Offer flexible resizing of the cells for proper blending of the images.
● Support drag-and-drop.
● This photo blend collage maker allows adding graphics, text, effects, and other elements.
● Comes with a free stock of photos and videos.

02Photo Collage Maker
This is an integrated mask tool that supports blending your images to create an impressive collage.
Key features
● Simple and intuitive interface.
● Allows creating blend collage in a few simple steps.
● More than 100 templates in different themes and designs are available.
● Enhance the collage by adding masks, clip-arts, captions, and other effects.
● Created collage can be saved in all key image formats like JPEG, PNG, GIF, and TIFF.

03Blend Collage Free
Developed by KDN Soft this is a free Android-based blend collage apk for blending images perfectly and creating an interesting collage.
Key features
● Allows to blend images and create a collage in HD quality.
● Collage can be shared over Instagram, Facebook, and other sites.
● Simple interface that makes the process easy and quick.
● Add images from your device, capture them using the camera or even use the stock collection at the app.
● Decent editing options supported.

04Photo Blend
With a 3.6 rating, this is a decent blend collage app for iOS devices to blend images and create a collage.
Key features
● Blend and add images to create an impressive collage.
● Create a double-exposure effect by blending images.
● A wide range of filters is available to enhance the collage.
● Created collage can be shared with dear ones.

05Blend Collage Photo Editor
To create an impressive collage with a blending effect, this is a good tool to consider.
Key features
● Free to use tool for creating blend collage.
● Comes with more than 50 customized shapes to crop the images.
● Support multiple filters to be used on images.
● Allows cropping the images free-hand as well.
● Save the created collage on the system or share it over Twitter, Facebook, and other sites.

Part 2 Best tool for stock media and video editing- Wondershare Filmora
A lot of blend-collage makers also allow adding videos, and in such situations, the need for a good video editing tool may also arise to edit the video before adding. One such excellent tool that we recommend here is Wondershare Filmora. This is a Windows and Mac-based software that supports all basic as well as advanced video editing features. Files in almost all formats can be quickly processed using the tool.
Additionally, if you are not able to find your choice of image or video, Wondershare Filmora is a great place to checkout as it has a huge collection of media files in an array of categories and themes. You are surely going to get something of your choice and requirement.
There are several other useful features of the software like split-screen-video making, advanced editing, audio editing, and more. Check out more in detail about the software at this this link

● Key Takeaways from This Episode →
● Blend collage allows you to blend your images for creating a smooth and interesting-looking collage.
● Several online tools, desktop programs, and apps are available to create a photo blend collage.
● To get a collection of media files and edit your video professionally, Wondershare Filmora works as the best software.
While creating a photo collage, the blending of images needs to be perfect so that the final outcome is impressive. Though creating a collage may sound as simple as placing one image next to the other, it requires thoughtful placing and positioning of the images along with additional editing to create a visually impressive frame. To help you with this task, a good collage maker can be used.
Though there are several tools making tall claims, not all deliver what they promise. So, to make your tool selection task a little easier, we have shortlisted the best ones in the following parts.
In this article
01 [Top blended collage maker tool](#Part 1)
02 [Best tool for stock media and video editing- Wondershare Filmora](#Part 2)
Part 1 Top blended collage maker tool
A roundup of the top 5 tools to create blended photo collage is given below.
01PicMonkey
This is a free collage-making tool by Shutterstock that can let you blend images to create wonderful freestyle as well as grid-based collages. If needed, you can even add videos to the collage.
Key features
● Create freestyle grid-based blend collage using images and videos.
● Wide range of layouts to choose from.
● Offer flexible resizing of the cells for proper blending of the images.
● Support drag-and-drop.
● This photo blend collage maker allows adding graphics, text, effects, and other elements.
● Comes with a free stock of photos and videos.
02Photo Collage Maker
This is an integrated mask tool that supports blending your images to create an impressive collage.
Key features
● Simple and intuitive interface.
● Allows creating blend collage in a few simple steps.
● More than 100 templates in different themes and designs are available.
● Enhance the collage by adding masks, clip-arts, captions, and other effects.
● Created collage can be saved in all key image formats like JPEG, PNG, GIF, and TIFF.
03Blend Collage Free
Developed by KDN Soft this is a free Android-based blend collage apk for blending images perfectly and creating an interesting collage.
Key features
● Allows to blend images and create a collage in HD quality.
● Collage can be shared over Instagram, Facebook, and other sites.
● Simple interface that makes the process easy and quick.
● Add images from your device, capture them using the camera or even use the stock collection at the app.
● Decent editing options supported.
04Photo Blend
With a 3.6 rating, this is a decent blend collage app for iOS devices to blend images and create a collage.
Key features
● Blend and add images to create an impressive collage.
● Create a double-exposure effect by blending images.
● A wide range of filters is available to enhance the collage.
● Created collage can be shared with dear ones.
05Blend Collage Photo Editor
To create an impressive collage with a blending effect, this is a good tool to consider.
Key features
● Free to use tool for creating blend collage.
● Comes with more than 50 customized shapes to crop the images.
● Support multiple filters to be used on images.
● Allows cropping the images free-hand as well.
● Save the created collage on the system or share it over Twitter, Facebook, and other sites.
Part 2 Best tool for stock media and video editing- Wondershare Filmora
A lot of blend-collage makers also allow adding videos, and in such situations, the need for a good video editing tool may also arise to edit the video before adding. One such excellent tool that we recommend here is Wondershare Filmora. This is a Windows and Mac-based software that supports all basic as well as advanced video editing features. Files in almost all formats can be quickly processed using the tool.
Additionally, if you are not able to find your choice of image or video, Wondershare Filmora is a great place to checkout as it has a huge collection of media files in an array of categories and themes. You are surely going to get something of your choice and requirement.
There are several other useful features of the software like split-screen-video making, advanced editing, audio editing, and more. Check out more in detail about the software at this this link
● Key Takeaways from This Episode →
● Blend collage allows you to blend your images for creating a smooth and interesting-looking collage.
● Several online tools, desktop programs, and apps are available to create a photo blend collage.
● To get a collection of media files and edit your video professionally, Wondershare Filmora works as the best software.
Best Ways to Slow Down Motion in CapCut
Since the slow-motion trend captured everyone’s attention, it never went out of fashion. Keeping this in view, many content creators followed the trend and created slo-mos. In filmmaking, slow motion assisted in emphasizing high-action scenes and details. Many tools and software like Adobe After Effects or Adobe Premiere Pro can do this.
Smartphone video editors were introduced to enhance the application of slow motion. One of these editors is CapCut , a multifunctional video editor capable of slo-mo creation. This article will focus on how to do slow-mo in CapCut. With tools brief review, you can find the detailed guide on the CapCut slow-mo effect . Along with learning how to do some in CapCut, we’ll look into its alternative.
Slow Motion Video Maker Slow your video’s speed with better control of your keyframes to create unique cinematic effects  Make A Slow Motion Video More Features

Part 1: CapCut Video Editor: An Exceptional Mobile App for Video Editing
CapCut is an editing application that caters to the needs of both Android and iPhone users. Whether you are working as a seasoned editor or a team member, it assists all. It harbors numerous video editing tools like the CapCut slow-motion effect. Moreover, users can also access keyframe editor, effects and filters, stock videos, and more.

The tool offers a sleek user interface with cutting-edge AI technology for automated editing. The interface looks artistic and organized for accessible editing. Along with video editing, users can perform audio, text, and image editing. You can access its Resource collection on its site, which is full of tips and tutorials. To give you a broader vision of CapCut slow-mo effect, here are some of its features:
- Video Filters and Effects: CapCut has a free collection of effects and filters to enhance your footage. The video effects and filters add uniqueness and hide any irregularities in videos. The collection keeps updating, and you can use Business, Ads, and other categories.
- Stock Videos: Use CapCut’s free stock media instead of roaming through the internet. If you must show your abilities as an editor, then try its royalty-free videos. These videos are editable, and you can apply multiple pre-installed animations and stickers to them.
- Keyframe Animation: Although CapCut offers a range of stock animations, you can create one. With its keyframe functioning, users can create custom animations. It offers custom settings like scale, position, opacity, and more adjustments.
- Background Remover: If you want to erase messy backgrounds and replace them, CapCut can assist. Its background remover eliminates video backgrounds with accuracy. Moreover, you can replace them with solid or gradient colors, images, and videos.
- Video Upscaler: This tool is available online and enhances video resolution up to 4K. The tool is compatible with diverse video contexts and gives professional outcomes. The tool is backed by AI, and hence, you just need to upload the video for upscaling.
Part 2: How to Create a Slow Mo on CapCut? A Guide
There are two seamless methods of creating slow-mo on CapCut via “Normal” and “Curve” options. The normal method involves slowing down videos via basic playback speed alteration. However, the Curve method involves multiple speed templates for this. If you do not find an expected speed template, you can utilize the “Custom” option. Following is the procedural guide to the CapCut slow-mo effect:
Step 1
After downloading and launching CapCut on your device, access its main menu. From the main menu, click the “New Project” option and upload a video.

Step 2
Once you have added the video, navigate towards the toolbar at the bottom. From there, locate and select the “Edit” option.

Step 3
From the appearing options, select the “Speed” option for the CapCut slow-mo effect.

Step 4
In the speed display, adjust the position of the slider to add the slo-mo effect. Further, go to the “Normal” section to start speed manipulation.

Step 5
Drag the playback speed slider toward the left side of the screen. This will add a slow-mo effect and will increase the video’s duration. In this section, you can also expand the “Make it smoother” option to enhance the quality. Moreover, you can also enable the “Pitch” option to maintain audio quality. Afterward, click the “ü” icon at the bottom right corner to finalize the slo-mo effect.

Part 3: CapCut Slow Mo Alternative: Wondershare Filmora for Smartphone Users
After seeing how to slow down videos on CapCut, you must think that it is so easy. However, there is an alternative editor that offers a minimal interface with similar qualities. Wondershare Filmora is a professional slow-motion creator catered to your needs. Whether you are skilled or just beginning your journey, it can assist you.
Using this CapCut slow-motion video has its benefits, as it offers multiple speed change options. You can change video speed using Normal playback speed or speed “Curve” alteration. In this section, we’ll teach you how to create a slow motion in Filmora. We are going to use the Curve technique to manipulate speed professionally.
Step-by-Step Guide to Slow Down Video in Filmora App
You can find multiple speed templates here to craft a cinematic-level slow motion. By utilizing the Custom speed setting options, this effect is possible. To fashion professional-grade and artistic slow motion in Filmora, follow these steps:
Step 1Import Videos After Creating a New Project
Download the Filmora app from the Play Store or App Store and launch it. Then, click the “New Project” tab and import a video from the device gallery.

Step 2Access the Speed Curve Option
After importing the video, navigate towards the timeline panel and select the video. From the options appearing in the bar at the bottom, select “Speed.” In the speed section, select the “Curve” section to access speed settings.

Step 3Adjust the Speed Curve Settings
From the appearing options, click the “Customize” option and start editing. To create the slo-mo effect, drag the slider in the downward direction. If you notice, the slider points are distant from each other. It is to edit videos and slow down videos at different durations. Once you are done editing in this CapCut slow-mo effect alternative, hit “Export.”

Bonus Part: Edit Your Slow Mo Video on Desktop with Filmora Desktop
No doubt Wondershare Filmora offers precise editing features compared to other apps. However, skilled and professional editors just prefer the desktop version to bring precision. In addition, there is an optical flow option and an extensive timeline panel. Both these features ensure professional outcomes and a smooth slow-motion effect.
Wondershare Filmora is a powerful alternative to CapCut slow-motion download. The software has a range of video editing features that open unlimited editing opportunities. With its various effects and filters, you can seize the audience’s attention. In addition, the software is compatible with Linux and macOS devices for diversity.
Free Download For Win 7 or later(64-bit)
Free Download For macOS 10.14 or later
Step-by-Step Guide to Create Slow Motion in Filmora for Desktop
In this method, we’ll use Filmora’s Uniform Speed functionality to generate a slow-motion video. This feature uses a simple speed slider to enhance or decelerate video speed. Find the guide to Filmora’s Uniform Speed feature attached below:
Step 1Access the Speed Tab to Start Editing
After opening a project in Filmora, select the video in the timeline and access the settings panel. From there, go to the “Speed” > “Uniform Speed” option and change the slider’s position. By dragging it towards the left side, you can add a slow-motion effect.

Step 2Add Optical Flow Effect
To add a layer of smoothness to your slow-motion video, access “AI Frame Interpolation.” You can find this option at the bottom of the Uniform Speed tab. Expand this option and select the “Optical Flow” option.

Step 3Activate Rendering and Export Video
To analyze the outcome of activating optical flow, navigate towards the timeline panel. From the given options, click on the “Render Preview” icon and wait for its completion. Once the rendering is complete, click the “Export” button after the preview.

Video Editing Features of Filmora
CapCut and Wondershare Filmora both possess AI powers to ensure seamless video creation. However, Filmora offers more video editing features, and all of them offer customization. The interface is just perfect for every professional or non-professional. With its accessible interface, you must try the following video editing tools:
1. Screen Recorder
For the seamless generation of tutorials and ‘How to” videos, this editor offers a screen recorder. The recorder is embedded with custom settings to cater to each user’s requirements. You can accommodate screen resolution, microphone settings, and cam settings with it.
2. Keyframing
Transform your illustrations into reality using Filmora’s keyframe editing feature. You can add keyframes at different points in the timeline to adjust the movements. There are custom settings like position, scale, opacity, color, and more for each keyframe.
3. Split Screen
Make your videos happening and captivating simultaneously with Filmora’s split screen option. This allows you to add distinct videos and auto-adjust them at different split screens. You can also enable manual visual, audio, and AI editing for each split video.
4. Assets Backup & Sync
Why worry about finishing a project at once when you can edit it later with Filmora? With its cloud backup option, you can start editing a video where you left off. In addition, the tool also offers synchronization across devices. This means you can access your videos, downloaded assets, and other storage data with a simple login.
5. AI Text-Based Editing
As discussed earlier, the AI algorithms allow you to edit with full efficiency. This feature of Filmora enhances productivity via text-to-speech function. It creates captions out of a video and allows you to seamlessly cut videos by removing text.
Conclusion
In conclusion, this article considered how to do slow-mo in CapCut. In addition, we saw how you can create a slow-motion video on a smartphone using CapCut. During times that demand the creation of sophisticated slow-motion content, we suggest Filmora. This editing software offers a myriad of editing tools and techniques, facilitating the creation and adjustment of slow motion.
Make A Slow Motion Video Make A Slow Motion Video More Features
Part 1: CapCut Video Editor: An Exceptional Mobile App for Video Editing
CapCut is an editing application that caters to the needs of both Android and iPhone users. Whether you are working as a seasoned editor or a team member, it assists all. It harbors numerous video editing tools like the CapCut slow-motion effect. Moreover, users can also access keyframe editor, effects and filters, stock videos, and more.
The tool offers a sleek user interface with cutting-edge AI technology for automated editing. The interface looks artistic and organized for accessible editing. Along with video editing, users can perform audio, text, and image editing. You can access its Resource collection on its site, which is full of tips and tutorials. To give you a broader vision of CapCut slow-mo effect, here are some of its features:
- Video Filters and Effects: CapCut has a free collection of effects and filters to enhance your footage. The video effects and filters add uniqueness and hide any irregularities in videos. The collection keeps updating, and you can use Business, Ads, and other categories.
- Stock Videos: Use CapCut’s free stock media instead of roaming through the internet. If you must show your abilities as an editor, then try its royalty-free videos. These videos are editable, and you can apply multiple pre-installed animations and stickers to them.
- Keyframe Animation: Although CapCut offers a range of stock animations, you can create one. With its keyframe functioning, users can create custom animations. It offers custom settings like scale, position, opacity, and more adjustments.
- Background Remover: If you want to erase messy backgrounds and replace them, CapCut can assist. Its background remover eliminates video backgrounds with accuracy. Moreover, you can replace them with solid or gradient colors, images, and videos.
- Video Upscaler: This tool is available online and enhances video resolution up to 4K. The tool is compatible with diverse video contexts and gives professional outcomes. The tool is backed by AI, and hence, you just need to upload the video for upscaling.
Part 2: How to Create a Slow Mo on CapCut? A Guide
There are two seamless methods of creating slow-mo on CapCut via “Normal” and “Curve” options. The normal method involves slowing down videos via basic playback speed alteration. However, the Curve method involves multiple speed templates for this. If you do not find an expected speed template, you can utilize the “Custom” option. Following is the procedural guide to the CapCut slow-mo effect:
Step 1
After downloading and launching CapCut on your device, access its main menu. From the main menu, click the “New Project” option and upload a video.
Step 2
Once you have added the video, navigate towards the toolbar at the bottom. From there, locate and select the “Edit” option.
Step 3
From the appearing options, select the “Speed” option for the CapCut slow-mo effect.
Step 4
In the speed display, adjust the position of the slider to add the slo-mo effect. Further, go to the “Normal” section to start speed manipulation.
Step 5
Drag the playback speed slider toward the left side of the screen. This will add a slow-mo effect and will increase the video’s duration. In this section, you can also expand the “Make it smoother” option to enhance the quality. Moreover, you can also enable the “Pitch” option to maintain audio quality. Afterward, click the “ü” icon at the bottom right corner to finalize the slo-mo effect.
Part 3: CapCut Slow Mo Alternative: Wondershare Filmora for Smartphone Users
After seeing how to slow down videos on CapCut, you must think that it is so easy. However, there is an alternative editor that offers a minimal interface with similar qualities. Wondershare Filmora is a professional slow-motion creator catered to your needs. Whether you are skilled or just beginning your journey, it can assist you.
Using this CapCut slow-motion video has its benefits, as it offers multiple speed change options. You can change video speed using Normal playback speed or speed “Curve” alteration. In this section, we’ll teach you how to create a slow motion in Filmora. We are going to use the Curve technique to manipulate speed professionally.
Step-by-Step Guide to Slow Down Video in Filmora App
You can find multiple speed templates here to craft a cinematic-level slow motion. By utilizing the Custom speed setting options, this effect is possible. To fashion professional-grade and artistic slow motion in Filmora, follow these steps:
Step 1Import Videos After Creating a New Project
Download the Filmora app from the Play Store or App Store and launch it. Then, click the “New Project” tab and import a video from the device gallery.
Step 2Access the Speed Curve Option
After importing the video, navigate towards the timeline panel and select the video. From the options appearing in the bar at the bottom, select “Speed.” In the speed section, select the “Curve” section to access speed settings.
Step 3Adjust the Speed Curve Settings
From the appearing options, click the “Customize” option and start editing. To create the slo-mo effect, drag the slider in the downward direction. If you notice, the slider points are distant from each other. It is to edit videos and slow down videos at different durations. Once you are done editing in this CapCut slow-mo effect alternative, hit “Export.”
Bonus Part: Edit Your Slow Mo Video on Desktop with Filmora Desktop
No doubt Wondershare Filmora offers precise editing features compared to other apps. However, skilled and professional editors just prefer the desktop version to bring precision. In addition, there is an optical flow option and an extensive timeline panel. Both these features ensure professional outcomes and a smooth slow-motion effect.
Wondershare Filmora is a powerful alternative to CapCut slow-motion download. The software has a range of video editing features that open unlimited editing opportunities. With its various effects and filters, you can seize the audience’s attention. In addition, the software is compatible with Linux and macOS devices for diversity.
Free Download For Win 7 or later(64-bit)
Free Download For macOS 10.14 or later
Step-by-Step Guide to Create Slow Motion in Filmora for Desktop
In this method, we’ll use Filmora’s Uniform Speed functionality to generate a slow-motion video. This feature uses a simple speed slider to enhance or decelerate video speed. Find the guide to Filmora’s Uniform Speed feature attached below:
Step 1Access the Speed Tab to Start Editing
After opening a project in Filmora, select the video in the timeline and access the settings panel. From there, go to the “Speed” > “Uniform Speed” option and change the slider’s position. By dragging it towards the left side, you can add a slow-motion effect.
Step 2Add Optical Flow Effect
To add a layer of smoothness to your slow-motion video, access “AI Frame Interpolation.” You can find this option at the bottom of the Uniform Speed tab. Expand this option and select the “Optical Flow” option.
Step 3Activate Rendering and Export Video
To analyze the outcome of activating optical flow, navigate towards the timeline panel. From the given options, click on the “Render Preview” icon and wait for its completion. Once the rendering is complete, click the “Export” button after the preview.
Video Editing Features of Filmora
CapCut and Wondershare Filmora both possess AI powers to ensure seamless video creation. However, Filmora offers more video editing features, and all of them offer customization. The interface is just perfect for every professional or non-professional. With its accessible interface, you must try the following video editing tools:
1. Screen Recorder
For the seamless generation of tutorials and ‘How to” videos, this editor offers a screen recorder. The recorder is embedded with custom settings to cater to each user’s requirements. You can accommodate screen resolution, microphone settings, and cam settings with it.
2. Keyframing
Transform your illustrations into reality using Filmora’s keyframe editing feature. You can add keyframes at different points in the timeline to adjust the movements. There are custom settings like position, scale, opacity, color, and more for each keyframe.
3. Split Screen
Make your videos happening and captivating simultaneously with Filmora’s split screen option. This allows you to add distinct videos and auto-adjust them at different split screens. You can also enable manual visual, audio, and AI editing for each split video.
4. Assets Backup & Sync
Why worry about finishing a project at once when you can edit it later with Filmora? With its cloud backup option, you can start editing a video where you left off. In addition, the tool also offers synchronization across devices. This means you can access your videos, downloaded assets, and other storage data with a simple login.
5. AI Text-Based Editing
As discussed earlier, the AI algorithms allow you to edit with full efficiency. This feature of Filmora enhances productivity via text-to-speech function. It creates captions out of a video and allows you to seamlessly cut videos by removing text.
Conclusion
In conclusion, this article considered how to do slow-mo in CapCut. In addition, we saw how you can create a slow-motion video on a smartphone using CapCut. During times that demand the creation of sophisticated slow-motion content, we suggest Filmora. This editing software offers a myriad of editing tools and techniques, facilitating the creation and adjustment of slow motion.
3 Ways to Create Motion Text Effects for Your Video
When you think about text effects, you generally refer to the amazing static text styles that will make any text look stunning. But when you talk about any text or title in a video, static text effects do not draw a scratch in the minds of the beholders. You have to get your text in motion and that is where text animations come into the scene.
Motion text effects refer to the text being in motion so that it can go well with any video in the background as well as look visually appealing. Creating text motion graphics is easy these days if you have the right video editor. There are amazing motion text animation templates available that you can apply to the texts and titles in your video and amaze your viewers. We will illustrate the simple steps to create motion text graphics in popular video editors.
Part 1. Create Motion Text Effect with Filmora
Wondershare Filmora is undoubtedly the easiest video editor to create amazing motion text effects thanks to its intuitive user interface. There are different categories of motion text effects available to suit your requirements perfectly as per your video projects. Filmora has the latest collection of text effects that you can use in your video and outshine your competitors.
Apart from text animations, you get different elements to enhance your text effects. You can have animated backgrounds and you can customize the animation in your text minutely to get the desired result. Filmora is available for both Windows and Mac users and you can try out its free trial before purchasing the license. Here are the steps to create Alight Motion text effect using Filmora.
Free Download For Win 7 or later(64-bit)
Free Download For macOS 10.14 or later
Step1 Download and install Wondershare Filmora on your computer. Click on New Project on the welcome screen. You can drag and drop your video clip for the background on Project Media folder.

Step2 Drop the video clip onto timeline. If you do not have any background video, you can select background from Stock Media> pexels/Pixabay> Video and drop animated background onto the timeline.

Step3 Go to Titles and search for “animation” and you will get all the motion text effect and animation templates. Select any one of them and drop onto the timeline above the background layer.

Step4 Double-click on the text layer to type in your desired text. Reposition the text layer on the timeline and on the video from Viewer.

Part 2. Use Premiere Pro to Make Motion Text
Adobe Premiere Pro is one of the most preferred video editors among professionals. Even though Premiere Pro does not come with a vast set of motion text effects, you can download them online and import them to use for the texts in your video. Here are the steps to create text motion graphics on Premiere Pro.
Step1 Go to Graphics> Essential Graphics and select a motion text effect template as per your preference. Drag and drop it into your timeline above your video or background clip.

Step2 Double-click on the text to edit the words and type in your text. Go to Essential Graphics panel to customize the text effect parameters as per your requirements.

Step3 If you want to edit the animation, select the text layer and go to Effects Control panel. Open up Keyframe box by dragging it to the right. Adjust the keyframe as per your animation requirements.

Bring the keyframes closer or spread them apart to speed up or slow down. Tweak parameters like? Velocity Controls under different text properties to edit the animation effectively.
Part 3. How to Make Motion Text in After Effects
After Effects is the most popular video editor when it comes to motion text effects. This is because there are different categories of motion text animation templates and presets available like Filmora. Even though the user interface is slightly complicated like Premiere Pro, most professionals use the tool for video editing and adding text effects. Here are the steps to add motion text effect Alight Motion like using After Effects.
Step1 From Tool panel, click on Type tool and click on Composition panel to type in your text. From Characters and Paragraph section, adjust the text styles and textures.

Step2 Go to Effects and Presets panel, go through and search for the desired motion text effect preset. Drag and drop the selected preset on the text layer directly.

Step3 From Current Time Indicator, slide the keyframes to adjust the animation. Click on the text layer to expand it and adjust different parameters to get the desired text animation.

Part 4. Best Motion Effects Ideas to Try
There are several text motions effects available that make your text look stunning and grab the attention of the viewers instantly. If you are confused which text motion effects you should try out, there are some of the best text motion effects you can try out on After Effects and Filmora.
Data Stream – You get the motion effect on After Effects where the characters come on the screen in a scrambled fashion. Thereafter, the characters organize them to form meaning words and sentences. Then the words disperse in a scrambled fashion before the next words and sentences follow the same pattern.
Abstract Motion Intro – You can get the motion effect on Filmora where there are multiple animations are put together in one effect. There are 3d effect, slide in motion as well as zoom in effect to display the desired texts and titles colourfully.
Random Spike Tumble – This is another motion effect on After Effects where the characters appear on the screen with spike in size along with blur effect and flipping animation. Finally, they settle on the screen and the meaning word or sentence appears perfectly. The effect helps to hold the attention of the viewers throughout.
Comic and Life Effect – You get this motion effect on Filmora where the large texts are shown and they have a comical typography. The words keep on zooming in and out to add to the comical factor.
Corporate Title Effect – This comes as a pack on After Effects whereby you get amazing text motion effects that you mostly see in professional videos. Starting from oblique stripe and emerge effect to slide in and out with modern touches and objects, you get stunning text motion to enhance your video content.?
The Bottom Line
If there are texts and titles in your video, you have to use motion text effect to make your video content interesting. We have illustrated the simple steps to create and edit motion text effects. We recommend Wondershare Filmora as the best video editor for creating motion text effects as the user interface is intuitive and there are unlimited motion text effects to choose from.
Free Download For macOS 10.14 or later
Step1 Download and install Wondershare Filmora on your computer. Click on New Project on the welcome screen. You can drag and drop your video clip for the background on Project Media folder.
Step2 Drop the video clip onto timeline. If you do not have any background video, you can select background from Stock Media> pexels/Pixabay> Video and drop animated background onto the timeline.
Step3 Go to Titles and search for “animation” and you will get all the motion text effect and animation templates. Select any one of them and drop onto the timeline above the background layer.
Step4 Double-click on the text layer to type in your desired text. Reposition the text layer on the timeline and on the video from Viewer.
Part 2. Use Premiere Pro to Make Motion Text
Adobe Premiere Pro is one of the most preferred video editors among professionals. Even though Premiere Pro does not come with a vast set of motion text effects, you can download them online and import them to use for the texts in your video. Here are the steps to create text motion graphics on Premiere Pro.
Step1 Go to Graphics> Essential Graphics and select a motion text effect template as per your preference. Drag and drop it into your timeline above your video or background clip.
Step2 Double-click on the text to edit the words and type in your text. Go to Essential Graphics panel to customize the text effect parameters as per your requirements.
Step3 If you want to edit the animation, select the text layer and go to Effects Control panel. Open up Keyframe box by dragging it to the right. Adjust the keyframe as per your animation requirements.
Bring the keyframes closer or spread them apart to speed up or slow down. Tweak parameters like? Velocity Controls under different text properties to edit the animation effectively.
Part 3. How to Make Motion Text in After Effects
After Effects is the most popular video editor when it comes to motion text effects. This is because there are different categories of motion text animation templates and presets available like Filmora. Even though the user interface is slightly complicated like Premiere Pro, most professionals use the tool for video editing and adding text effects. Here are the steps to add motion text effect Alight Motion like using After Effects.
Step1 From Tool panel, click on Type tool and click on Composition panel to type in your text. From Characters and Paragraph section, adjust the text styles and textures.
Step2 Go to Effects and Presets panel, go through and search for the desired motion text effect preset. Drag and drop the selected preset on the text layer directly.
Step3 From Current Time Indicator, slide the keyframes to adjust the animation. Click on the text layer to expand it and adjust different parameters to get the desired text animation.
Part 4. Best Motion Effects Ideas to Try
There are several text motions effects available that make your text look stunning and grab the attention of the viewers instantly. If you are confused which text motion effects you should try out, there are some of the best text motion effects you can try out on After Effects and Filmora.
Data Stream – You get the motion effect on After Effects where the characters come on the screen in a scrambled fashion. Thereafter, the characters organize them to form meaning words and sentences. Then the words disperse in a scrambled fashion before the next words and sentences follow the same pattern.
Abstract Motion Intro – You can get the motion effect on Filmora where there are multiple animations are put together in one effect. There are 3d effect, slide in motion as well as zoom in effect to display the desired texts and titles colourfully.
Random Spike Tumble – This is another motion effect on After Effects where the characters appear on the screen with spike in size along with blur effect and flipping animation. Finally, they settle on the screen and the meaning word or sentence appears perfectly. The effect helps to hold the attention of the viewers throughout.
Comic and Life Effect – You get this motion effect on Filmora where the large texts are shown and they have a comical typography. The words keep on zooming in and out to add to the comical factor.
Corporate Title Effect – This comes as a pack on After Effects whereby you get amazing text motion effects that you mostly see in professional videos. Starting from oblique stripe and emerge effect to slide in and out with modern touches and objects, you get stunning text motion to enhance your video content.?
The Bottom Line
If there are texts and titles in your video, you have to use motion text effect to make your video content interesting. We have illustrated the simple steps to create and edit motion text effects. We recommend Wondershare Filmora as the best video editor for creating motion text effects as the user interface is intuitive and there are unlimited motion text effects to choose from.
Best 31 Video Trimmers for Computer, Phone and Online
In the world of videography, editing a video is equally important as shooting a video. No matter how perfectly you shoot a video, there are some parts that you need to trim out so that the video could be presented perfectly to your target audience. If you are getting started in the videography world, this article is for you to learn how to trim videos with the best video trimmer.
First, we will touch upon different ways of making a video. Thereafter, you will move on to how to trim a video that you have either recorded with recording software or shot with your digital camera. We will begin by providing you the list of the best video trimmers for Windows, Mac and mobile users. The video trimmers are segregated for beginner and advanced users, and hence, you can choose as per your preference and requirements.
We will also touch on how to edit your video and share the edited video among your target audiences. Therefore, take your time to go through our list of the top 32 best video trimmers of 2022. Starting from free and premium video trimmers to video trimmers for beginners and advanced users, you will definitely find the best video trimmer that is tailor-made to satisfy your requirements.
Contents
01 [How to Make a Video before Trimming](#Part 1)
02 [Video Trimmer for PC and Mac](#Part 2)
03 [Video Trimmers for Mobile](#Part 3)
04 [Online Video Trimmers](#Part 4)
05 [Editing Tips to Improve Your Videos](#Part 5)
06 [How to Share Your Videos](#Part 6)
07 [Related FAQs about Video Trimming](#Part 7)
Part 1 How to Make a Video before Trimming
Before coming to the trimming of a video section in detail, let us begin with how to make a video. You have two options when it comes to making a video. You can either record a video with recording software or you can shoot a video with your camera. Let us discuss both options in detail now.
-Record a video
You can record a video with recording software when you are capturing video from your webcam or from your computer screen. There are two options you have when it comes to choose a recording software.
- Premium Recorder - A premium recorder is a professional video recording software that you have to purchase to avail all the features and functionalities. Choose the best video recorder.
- Free Recorder - If you are not willing to spend any money on a recording software, there are plenty of free recording applications available. We recommend OBS Studio as the best free video recorder.
-Shoot a video
The second option is shooting a video with your external digital camera. You can also use your phone camera to shoot a video. For example, making vlogs, comedy skits, travel videos, or short films needs a digital camera. If you are using your phone camera, you can cut and crop the video after shooting using the video trimmer apps or online video trimmers. If you are shooting external with an external camera, you can transfer the video to your mobile or computer and use a preferred video trimmer for editing.
Part 2 Video Trimmer for PC and Mac
When it comes to editing and trimming a video, using a computer is the best option. This is because you have a wider screen to pay attention to the details of the video and trim out the unnecessary parts easily. Besides, editing a video requires CPU resources which are best served by a computer. We have divided the video trimmers for computers into two categories for user convenience. You can easily find video trimmers for Windows PC as well as for Mac.
# For Beginner Users
This category is perfect for those who do not have any experience in video editing and they are looking for a basic video trimmer to get the job done. Besides, if you need to trim videos once in a while, these are perfect for you. You can trim video free with the following video trimmers.
1. Windows Photos
Best for: Windows users with no editing skills
G2 rating: 4.0/5
Price: Free 
If you are a Windows PC user and you are looking for a basic video trimming application, Windows Photos is right there for you. The application comes pre-installed on Windows PC and hence, there is no need to install any external application. Even though Windows Photos is primarily used for viewing photos, there is a dedicated video editor available where you can trim your recorded video easily. Apart from trimming videos, you can do some basic editing like adding title cards and text, video effects, background music, and filters. Here are the pros and cons of Windows Photos.
Pros:-
- Comes pre-installed in Windows.
- Super easy user interface to operate.
- Quick trimming and cutting out videos.
- Different motion transitions and effects present.
- Add titles, texts, and audio to video.
- AVarious filters and 3D effects available.
Cons:-
- Not suitable for trimming large videos.
- Lack of different file formats for saving the videos.
2. QuickTime Player
Best for: Mac users with basic trimming needs
G2 rating: 4.2/5
Price: Free 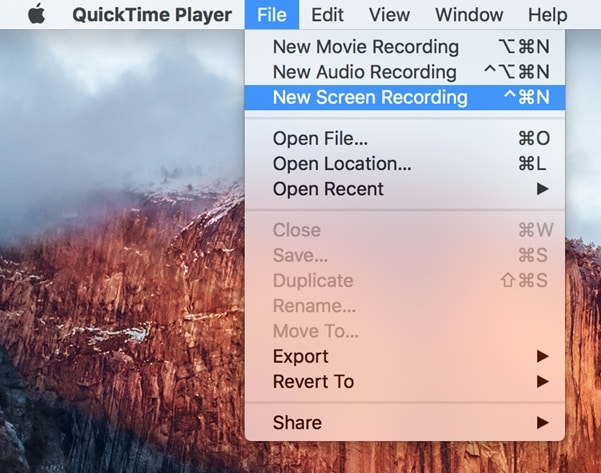
If you are a Mac user and you are looking for a free video editor for trimming your video, QuickTime Player is the best application for you. Just like Windows Photos for Windows users, QuickTime Player comes pre-installed for Mac users. In fact, it is the default media player for Mac users. Apart from playing media files, you can use QuickTime Player for video recording as well as editing the recorded video. This includes trimming videos and replaying on the application to reach the level of perfection easily. Here are the pros and cons of QuickTime Player you should be aware of.
Pros:-
- The user interface is super easy to operate.
- Trim, flip, split, and merge videos quickly.
- Option to record video with audio flawlessly.
- Instant preview of the edited video on QuickTime.
- QuickTime is compatible with iPhone and iPad.
- Advanced streaming options available in Pro version.
- Supports playing different video file formats.
Cons:-
- Some of the settings are complicated.
- It can crash while editing large video files.
3. iMovie
Best for: Playing and editing videos
G2 rating: 4.3/5
Price: Free 
If you are a Mac user and you are looking for a dedicated video editor, iMovie is a great choice. iMovie also comes pre-install on Mac and it is compatible with iPhone and iPad as well. The application is available completely free for mac users and hence, many prefer it over QuickTime Player for editing videos. You can quickly trim your videos as well as rotate and crop your videos as per your requirements. You can enhance your video with effects and filters available. Here are the pros and cons of iMovie you should be aware of.
Pros:-
- Intuitive user interface for easy operation.
- Quick edits to make a raw video presentable.
- Supports 4K video editing without crashing.
- Add different graphical elements for engaging videos.
- Different types of effects and filters for video enhancement.
- Easy sharing options across devices and online platforms.
- Work on multiple video projects simultaneously.
Cons:-
- Editing MP4 video is complicated.
- Lacks advanced editing features.
4. Media Cope
Best for: Multiple video using needs
G2 rating: 4.0/5
Price: Free 
Media Cope is a freeware video trimmer for Windows users only. It is a basic video editor with standard editing options. The software is best suited for those who have older Windows versions such as Windows 7. The lightweight application can act as an audio and video player. You can easily trim your video and extract import parts as well. You can also join audio and video files and convert them into desired file formats. Here are the pros and cons of Media Cope.
Pros:-
- Can play audio and video files of different formats.
- Instantly trim and cut video and audio files.
- Can join audio and video clips and save in desired file format.
- Can convert audio and video files as per requirements.
- Transform photos into slideshow instantly.
- Resize photos and take screenshots from videos.
- Modify different video parameters and export the file.
Cons:-
- Lack of various standard video editing options.
- Looks outdated for modern Windows OS.
5. OpenShot
Best for: Open source software lovers
G2 rating: 4.4/5
Price: Free 
If you are looking for a video editor that is compatible with all desktop operating system, OpenShot is the best choice for you. It is a completely free, open-source video editor for Windows, Mac and even Linux users. In this list of video editors for beginners, this is the best in terms of features and functionalities. You can trim and slice video, add animations, insert different layers and video effects to enhance the video content. The user interface is rather intuitive in spite of having all the different options you look for in a video editor. Here are the pros and cons of OpenShot video editor.
Pros:-
- Simple but powerful user interface.
- Trim video instantly without different options.
- Add 3D titles, 3D animations, and slow motion effects.
- Loads of video and audio effects present to apply.
- Add different layers of videos, audio tracks, and images.
- Advanced option for keyframing and time mapping.
- Multi-lingual support and frequent updates for new features.
Cons:-
- Unstable performance for large video files.
- The hardware acceleration is not very powerful.
# For Advanced Users
If you are a regular video creator and you want your videos to stand out, this category is for you. You can edit and trim your videos exactly the way you want. Besides, you can transform your raw videos into professional-quality videos with the following video editors.
1. Filmora
Best for: Rich videos effects and templates
G2 rating: 4.4/5
Price: $49.99 
Wondershare Filmora is an outstanding video editor where you can trim your video and audio files like a professional. Since you are an advanced user, you will need more than just trimming to make your raw video look stunning. Filmora offers you all the tools and features you will ever need to take your video to the next level.
Compared to other popular premium video editors, Filmora does not need heavy CPU resource and it has an intuitive user interface. That is why video creators especially YouTubers and Vloggers prefer it for editing their videos regularly. The software is available for both Windows and Mac users. Here are the pros and cons of Filmora that you should be aware of.
For Win 7 or later (64-bit)
For macOS 10.12 or later
Pros:-
- Record screen and webcam video with audio sources.
- Basic tools for trimming, splitting, and joining video files.
- Customize different video settings and parameters.
- Add video and audio effects and graphical elements.
- Wide range of stock library of media files and animations.
- Add multiple layers and work with multiple channels while editing.
- Export the recorded or edited video file in different file formats.
Cons:-
- Saving the edited video takes time due to processing part.
2. Adobe Premiere Pro
Best for: Professional video trim, edit and after effects
G2 rating: 4.5/5
Price: $20.99/month 
Adobe Premiere Pro is the most powerful video editor and that is why even professional video editors use it for editing movies. There is hardly any video file format that Premiere does not support. You can edit multiple videos at the same time and switch between scenes and clips. Trimming video and audio files is swift with intuitive controls. There is also option for non-linear video editing for advanced users.
Since it is extremely popular in the videography world, there are many organizational tools available for editing large video projects and integrated workflow. The software supports VR video, 3D video, and multicam video editing. The software is available for Windows as well as Mac users. Here are the pros and cons of Adobe Premiere Pro.
Pros:-
- Customizable layouts for reorganizing user interface.
- Quick trimming and playback option without rendering.
- Supports a wide range of file formats for import and export.
- All the different tools for professional video and audio editing.
- Can work on and render multiple video files easily.
- Cross-app functionality with amazing stabilization features.
Cons:-
- The learning curve is rather steep and takes a lot of time.
- The software is only suitable for high-end computers.
3. Final Cut Pro
Best for: Advanced organizing tools of any professional video editing
G2 rating: 4.4/5
Price: $299 
Final Cut Pro is equally popular in the videography world as Adobe Premiere Pro. Final Cut Pro is primarily for Mac users as it is developed by Apple. This is the most powerful video editor for Mac users as it is packed with loads of features for professional video editing. Trimming videos is as easy as it gets, along with other standard editing options.
The software supports editing multicam videos, VR videos, 3D videos as well as 360 degree videos. There are endless presets and effects available that you can apply on your video while editing. You can easily edit 4K videos without performance lag. In fact, Final Cut Pro shines where other video editors fail to perform with high resolution and large video files. Here are the pros and cons of Final Cut Pro.
Pros:-
- Trimming, cutting, splitting and joining videos are easy.
- Seamless video editing with standard and advanced tools.
- Different motion graphics templates available.
- Supports external plug-ins and VR headset playback.
- Proper video files and assets organizing and audio editing options.
- Relatively quick rendering of large video files.
Cons:-
- May take time to get used to all the available options.
- Relatively expensive in comparison to peers.
4. Movavi Video Editor
Best for: People who love more brilliant effects in videos
G2 rating: 4.8/5
Price: $74.95 
Movavi Video Editor is a premium software for trimming and editing videos. It is available for both Windows and Mac users. There is a free version available but it puts a watermark on the output video. Apart from trimming and splitting videos, you can add various video effects starting from adding titles and transitions to stickers and elements. Besides, you can opt for greenscreen effect and edit videos in vertical mode. Here are the pros and cons of Movavi Video Editor you should be aware of.
Pros:-
- Integrated video capturing options from different sources.
- Instant trimming, splitting, and joining of videos.
- Loads of titles, filters and transitions present.
- Add video PiP layers as well as voiceover.
- Vertical video editing mode present.
- Video stabilization mode and Chroma key.
- Keyframing, slow motion and motion tracking.
Cons:-
- The rendering is not very fast.
- Lack of color tuning options.
5. Bandicut
Best for: Trim, join and split video with fast speed
G2 rating: 4.0/5
Price: $44.96 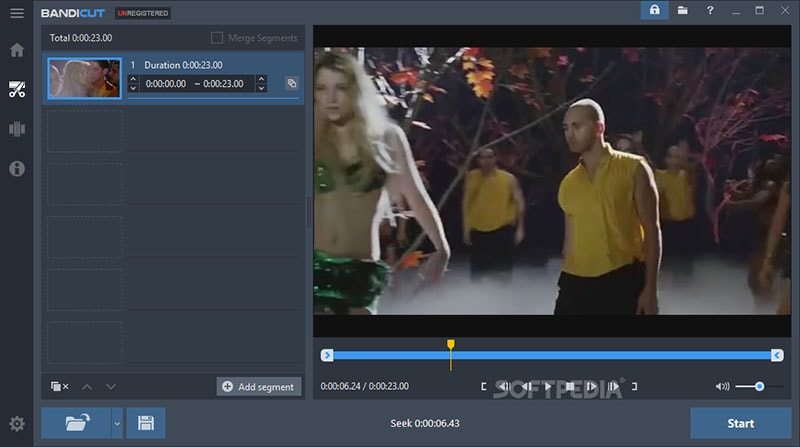
Bandicut from Bandicam is a dedicated video trimmer for Windows users. It is a premium application with a one-time purchase fee. The software ensures lossless video trimming, and you can trim video instantly thanks to its intuitive user interface. It is a versatile application that you can use to extract audio from a video as well as joining multiple video files. Splitting a large video file into multiple files is super easy. However, it is not a full-fledged video editor like Filmora or Premiere. Therefore, if your objective is specifically to trim, split, and join videos, this is the one for you. Here are the pros and cons of Bandicut.
Pros:-
- Trim and split videos instantly
- Super intuitive user interface.
- Cut segments from videos.
- Join multiple videos quickly.
- Supports different file formats.
- No loss of video quality during editing.
- Hardware acceleration for high performance.
Cons:-
- Very limited editing features.
6. VSDC
Best for: Movie level video cut with light professional skills
G2 rating: 4.0/5
Price: $19.99 
VSDC is a free video editor with all the basic editing tools available. VSDC Pro is a premium video editor where advanced features are available. For trimming a video, VSDC free video editor can get the job done. Even though it is completely free, some features are comparable to many premium video editors. For example, you get access to a large set of filters, effects, and transitions that you can apply to your videos. Even when you have a low-end PC, you can do basic video editing works comfortably. Here are all the pros and cons of VSDC free video editor you should know.
Pros:-
- Instant trimming and basic editing of videos.
- Wide range of effects and filters as well as Chroma key.
- Color correction option and non-linear editing available.
- Supports editing 360 degree videos and split-screen videos.
- Supports different video and audio file formats.
- Lightweight and suitable for low-end computers.
Cons:-
- Lacks standard audio editing options.
- Lacks hotkeys and useful keyboard shortcuts.
7. Camtasia
Best for: Tutorial video recording and editing
G2 rating: 4.6/5
Price: $224.99 
Camtasia by TechSmith is a premium video editor for Windows and Mac users. Even though it is more popular as a video editor, you can trim your videos easily on the software. You can record anything on your screen as well as external webcam. You can edit recorded video as well as import external video files for quick editing. The software offers easy share instant through which you can share on popular video streaming platforms. There are various templates and themes available to create and edit videos of different categories. Here are the pros and cons of Camtasia.
Pros:-
- Quick trimming, splitting, joining video options.
- Different templates and packages for versatile video creation.
- Various transitions, annotations, and presets present.
- PowerPoint integration, screen and web cam capture.
- Different cursor and audio effects with royalty-free assets.
- Import different media files and upload directly on video streaming platforms.
Cons:-
- Reports of crashes when working with large files.
- No keyframe and motion tracking.
- Very few customization options.
Part 3 Video Trimmers for Mobile
In today’s world, the cameras of smartphones are extremely powerful, and there are many who shoot videos with phone cameras instead of a dedicated digital camera. For example, there are many popular vloggers who shoot their videos with phone cameras, and video creators make short videos with phone cameras. When you shoot a video on your phone, you must be looking for a video trimmer app for your phone so that you can trim the recorded video instantly and share across social media and video streaming platforms. Here is the list of the best video trimmers for mobile.
# For Beginner Users
1. VidTrim Pro
Best for: Android video trimming, merging, frame grabbing
Rating: 4.1/5
Download Link: https://play.google.com/store/apps/details?id=com.goseet.VidTrimPro&hl=en\_US&gl=US
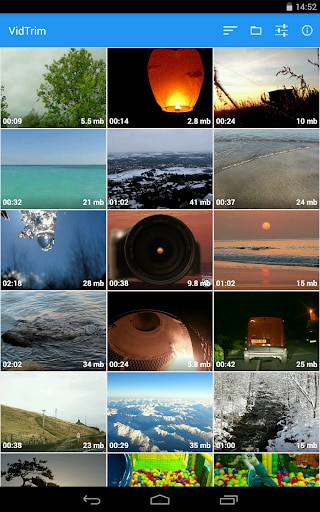
VidTrim is a dedicated video trimmer available for Android users. The free version adds a watermark to the output video, and hence, you have to opt for VidTrim Pro to avoid all limitations. Apart from trimming videos, you can merge videos and convert videos into audio files. You can also add effects and music tracks to your videos. The user interface is as simple as it gets. Here are the pros and cons of VidTrim Pro app.
Pros:-
- Trim videos as well as merge video clips.
- Convert supported video files into Mp3 audio files.
- Rotate videos as well as save screenshots from videos.
- Add cool video effects, sound effects, and soundtracks.
- Multi-lingual support and video file format converter.
Cons:-
- Limited video editing features for a paid video editor app.
- The user interface is simple but outdated.
2. KineMaster
Best for: Video content downloadable
Rating: 4.2/5
Download Link: https://play.google.com/store/apps/details?id=com.nexstreaming.app.kinemasterfree&hl=en\_US&gl=US

You must have seen many videos online with the watermark “Made with Kinemaster”. This is because KineMaster is very popular among amateur video creators. KineMaster is available for Android as well as iOS users. You can instantly trim and crop videos. Besides, you can add special effects, animations and stickers as well as tweak different video settings for enhancements. KineMaster is available free of cost but it attaches a watermark to the output video at one corner. You can subscribe to KineMaster Premium to remove watermark and unlock more features. Here are the pros and cons of KineMaster.
Pros:-
- Trim, cut, slice, and crop videos instantly.
- Add music, sound effects as well as voiceover.
- Provides amazing visual effects and animations.
- Adjust color filters, modes and video speed.
- Supports keyframing and motion tracking.
- Save 4K videos and share instantly online.
Cons:-
- KineMaster chroma key feature has bugs.
- Can crash or freeze handling large video files.
3. Quik
Best for: Producing cinematic auto-edits.
Rating: 4.3/5
Download Link: https://play.google.com/store/apps/details?id=com.gopro.smarty&hl=en\_US&gl=US
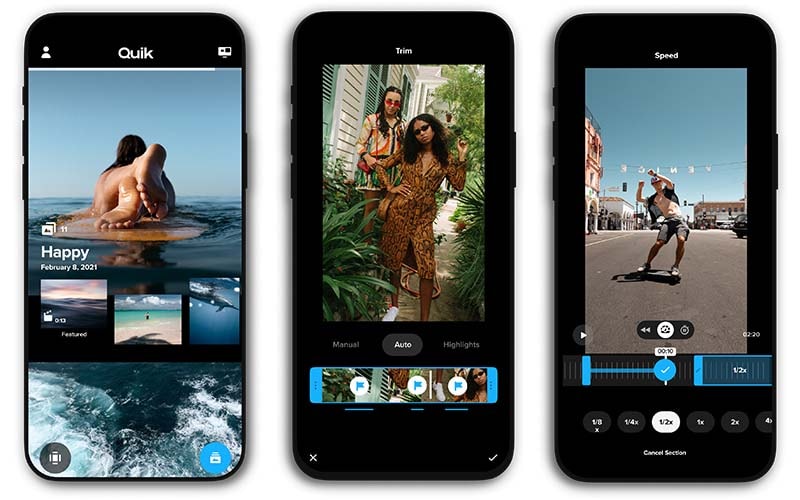
Quick from GoPro is fast becoming a popular video editor app. GoPro is the most popular action camera brand and naturally, its video editing app has garnered enough attention. The app is available for Android and iOS users. The app has a mixed bag of options for editing videos quickly. You can trim your videos, add filters and adjust video speed. Besides, its AI can locate the best shots in a video and enhance them with special effects. Here are the pros and cons of Quick app.
Pros:-
- Trim, crop, adjust speed, remove audio from videos.
- Different preset templates available with effects and filters.
- Add music, titles, effects, and transitions.
- Easy sharing of videos and photos.
- Powerful AI to highlight the best shots in a video.
- Adjust video orientation, save in 1080p resolution.
Cons:-
- Not suitable for large video files.
- No font adjustment options.
4. iMovie
Best for: Create Hollywood-style trailers and beautiful movies
Rating: 4.0/5
Download Link: https://apps.apple.com/us/app/imovie/id377298193
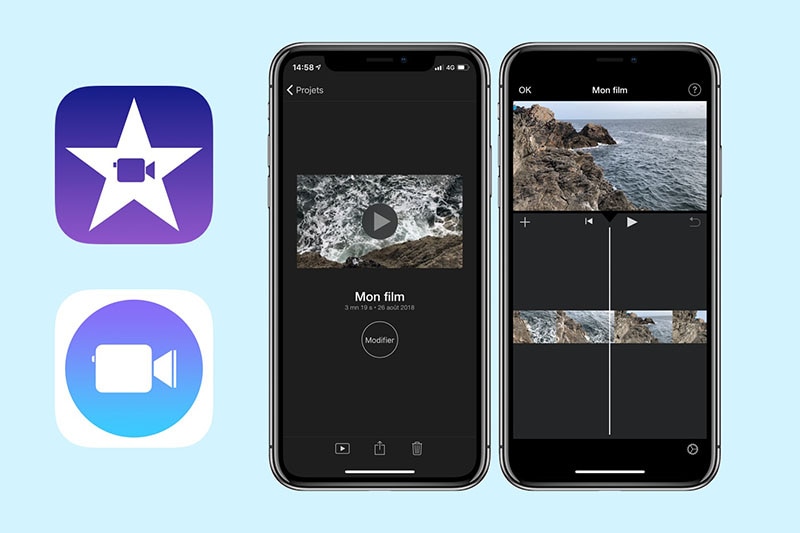
iMovie app by Apple is exclusively available for iOS users. iMovie is also available as a software which we have already discussed. In terms of features, iMovie app is very similar to iMovie software. You can instantly make basic editing works. Apart from editing, the app is ideal for creating different types of videos with ready-made templates. There are loads of graphical effects, animated titles, and video filters available to apply. Here are the pros and cons of iMovie app for you.
Pros:-
- Record, trim, split, join and crop videos on the go.
- Choose from different themes and templates to create videos.
- Animated titles, video filters, graphical effects available.
- Chroma key, PiP mode as well as split screen effect possible.
- Add sound effects, music, and depth of field effect.
- Optimized output for social media and video streaming platforms.
- Supports 4K video editing and easy share across Apple devices.
Cons:-
- Limited resources and customization options.
- The app size is large and uses high CPU resources.
# For Advanced Users
1. LumaFusion
Best for: Professional video trimming for iOS devices
Rating: 4.8/5
Download Link: https://apps.apple.com/us/app/lumafusion/id1062022008

LumaFusion is a top-rated video editor for iPad and iPhone. The app is as good as a premium video editor for desktop users. Therefore, professional video creators who use iPhone or iPad for video editing prefer LumaFusion all the time. You can trim, cut, crop, split, and merge videos intuitively from its timeline. Most importantly, you can edit multiple video and audio files together like a professional. Here are the pros and cons of LumaFusion.
Pros:-
- Trim and export video in different file formats.
- Work with multiple video and audio files.
- Preset transitions, instant preview, markers for timeline.
- Add Chroma and Luma key effects as well as stunning visual effects.
- Adjust speed, audio, use keyframes, correct colors.
- Work with titles, fonts, borders, and share conveniently.
- Wide range of media files available in the library.
Cons:-
- Does not support motion tracking.
- Can be difficult to edit large files.
2. Adobe Premiere Rush
Best for: Shoot, edit, and share online videos anywhere.
Rating: 3.0/5
Download Link: https://play.google.com/store/apps/details?id=com.adobe.premiererush.videoeditor&hl=en\_US&gl=US
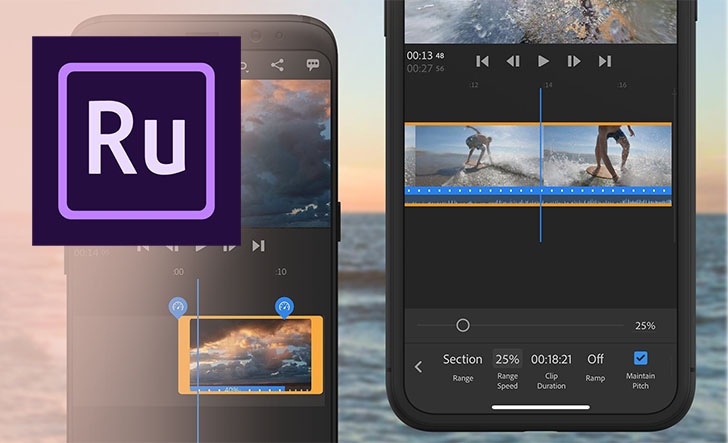
Even though Adobe Premium Rush app is available or Android and iOS users, it is more popular among iPhone and iPad users. The app is free though there are in-app purchases available. Rush Premium has more features and functionalities. Editing any video is quite convenient though Adobe has tried its level best to offer all the possible features of Adobe Premium Pro desktop software on the app. The app supports multitrack timeline for professional videos. Here are all the pros and cons of Adobe Premiere Rush you should be aware of.
Pros:-
- Record video in high-resolution with the app.
- Trim, crop, mirror, and flip videos.
- Add images, overlays, texts, and stickers.
- Pan and zoom effect, animation titles.
- Royalty-free audio tracks, color correction options.
- Easy exporting of files in different formats.
Cons:-
- Rendering projects can be slow.
- Comes with limited features.
3. Filmmaker Pro Video Editor
Best for: 4K quality video editing
Rating: 4.6/5
Download Link: https://apps.apple.com/us/app/filmmaker-pro-video-editor/id1082956994
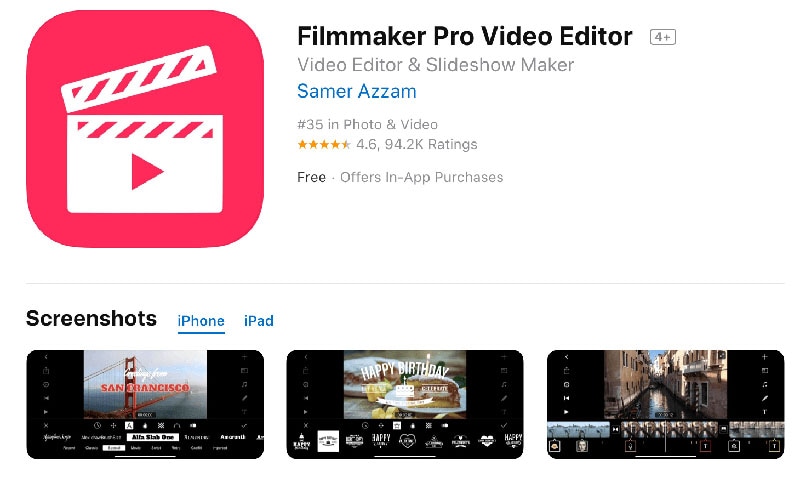
Filmmaker Pro is a highly rated video editor that you can use to trim your videos. Filmmaker Pro app is available for both Android and iOS. The app supports 4K video for editing works. The timeline has color codes for different assets and hence, editing becomes easy. You can edit different video parameters and settings and add different effects. The auto save option is extremely useful when it comes to editing a large file. Even though it is available for free, they have a subscription plan for unlocking all features. Here are the pros and cons of Filmmaker Pro Video Editor.
Pros:-
- Trim, split, crop and rotate videos.
- Adjust video speed, volume, video grading.
- Chroma key, voice to text caption, keyframe and motion tracking.
- Different Picture-in-Picture mode for videos, photos, and GIFs.
- Various transition effects, audio effects, and text overlays.
- Different drawing tools, stickers, and graphical elements present.
Cons:-
- The free version has limited features.
- The number of effects are relatively less.
4. Splice Video Editor and Maker
Best for: Vloggers and social platform video cutting
Rating: 4.7/5
Download Link: https://play.google.com/store/apps/details?id=com.splice.video.editor&hl=en\_US&gl=US
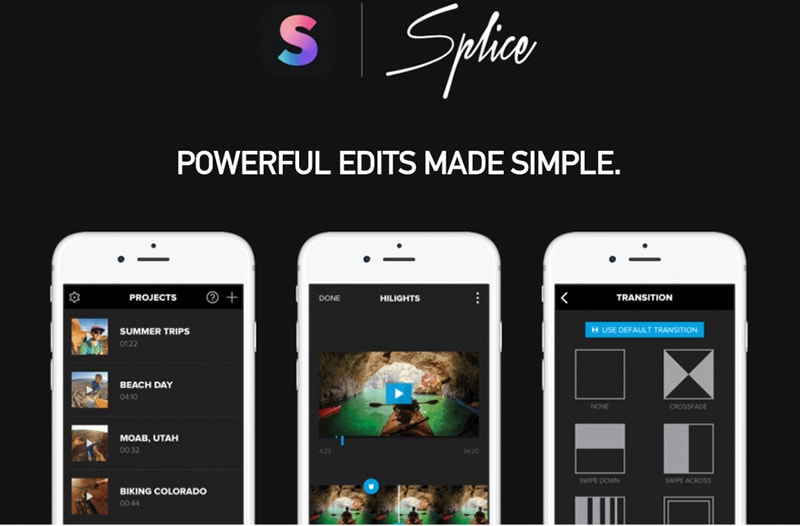
Splice Video Editor and Maker is a free but powerful app that enables you to do pro-level editing. You can trim your video clips, adjust speed, and add music on the go. In fact, you can create videos and slideshows instantly and you can add texts and overlays. The music library has different categories of tracks to apply to videos. You can also merge videos as well as change aspect ratio according. The app is available for Android and iOS users. Here are all the pros and cons of Splice Video Editor and Marker.
Pros:-
- Easy interface for smooth trimming and merging of videos.
- Adjust speed, aspect ratio, and video parameters.
- Organize clips and tracks in the timeline intuitively.
- Add custom texts, titles, tracks, transitions, and effects.
- Comes with a wide stock library of media files.
- Direct uploading video files on different social media platforms.
Cons:-
- Limited effects and filters available.
- Frequent crashes while handling large files.
5. Funimate
Best for: Mobile game video trim to show off gaming skills
Rating: 4.5/5
Download Link: https://play.google.com/store/apps/details?id=com.avcrbt.funimate&hl=en\_US&gl=US
Funimate video editor and maker app is quite highly rated on both Play Store and App Store. It is a very powerful and feature-rich app where you will get all the desired editing tools to publish a professional-quality video. Starting from element library to video masks and AI effects, the app takes your video to the next level. You can obviously perform the basic editing works like trimming, splitting and joining. Here are the pros and cons of Funimate app.
Pros:-
- Trimming, merging, and cutting videos.
- Text effects, video AI effects, and effect mixer.
- Comes with over 100 advanced video effects.
- Allows adding music to videos for engaging videos.
- Supports slow motion and looping videos.
- Advanced keyframing and element library.
- Allows creating a professional photo slideshow.
Cons:-
- No multilingual support and auto-save feature.
- Some lagging issues have been reported.
Part 4 Online Video Trimmers
If you are using a video editor on your computer, it takes considerable amount of space in your storage. The same is applicable to video editors for smartphones. If you do not want to install any app on your device yet trim videos conveniently, the online video trimmers are for you. You can open the video trimmer directly from your web browser and trim your video and save it without installing any application on your device. Here is the list of the best online video trimmers.
# For Beginner Users
1. https://online-video-cutter.com/
Best for: Trimming large videos files.
Ratings: 4.2/5 
Online Video Cutter is a dedicated video trimmer where you need to drag and drop your video file and cut out the required portion. You can even crop and rotate your videos if there is any such requirement. You can access the online platform directly from your web browser. There is no need for installation of any web launcher. The platform is also secured and hence, your videos won’t get leaked. There is also a Chrome extension available that you can use if you are a Chrome user. Here are the pros and cons of Online Video Cutter.
Pros:-
- Easy video trimming by drag-and-drop files.
- Enables uploading different file formats.
- Rotate feature for saving in portrait and landscape mode.
- Automatically deletes files for better security.
- Crop feature for changing frame size.
- Can edit video file of 4GB capacity.
Cons:-
- May reduce the video quality for the editing video.
2. https://clideo.com/cut-video
Best for: Trimming short videos.
Ratings: 4.5/5 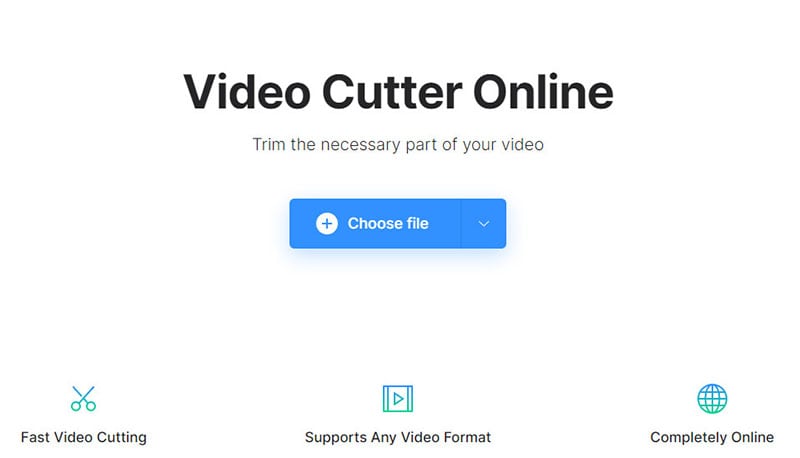
This is another online video trimmer that supports different video file formats. The user interface is sleek for quick video trimming. You can upload file from your device as well as from Cloud storage. In fact, you can use the platform to convert video files. The level of trust and security is high and there are additional settings available for better editing. Here are the pros and cons Clideo Video Cutter.
Pros:-
- Intuitive interface for quick trimming.
- Supports different file formats.
- Converts videos into different formats.
- Offers high-level online security.
- Add fade in and fade out effects.
- Upload video files from Google Drive and Dropbox.
Cons:-
- No drag and drop feature.
- File size is limited to 500 MB only.
3. https://www.kapwing.com/tools/trim-video
Best for: Editing video elaborately.
Ratings: 4.4/5 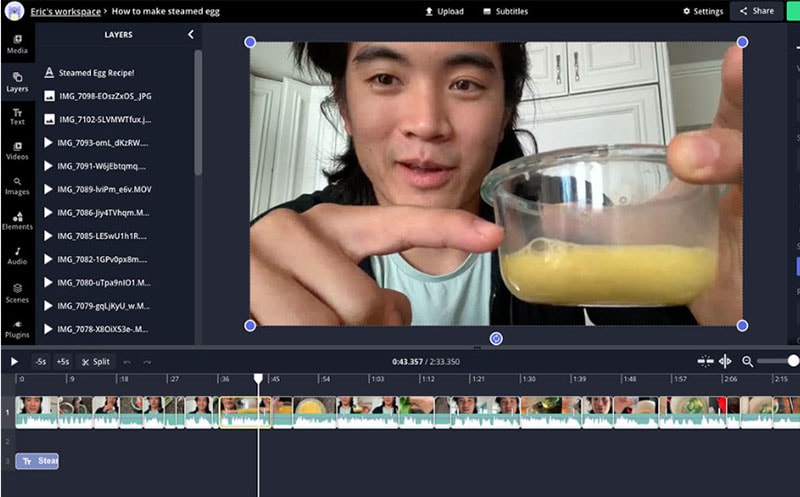
Kapwing is a dedicated online video editor that will give you the vibe of using a desktop video editor. Therefore, it is suitable for those who are looking for an online platform for trimming as well as various other editing works. You can add texts, images, elements, audio, transitions, as well as record videos. You can also export in different file formats. However, the free version attaches a watermark. Therefore, you have to upgrade to its premium version and use the platform is a full-fledged video editor. Here are the pros and cons of Kapwing.
Pros:-
- Trim, crop, zoom videos and adjust video parameters.
- Supports import and export of different file formats.
- Add effects, audio, and elements to the videos.
- You can work with multiple layers while editing.
- Different sound effects, templates, and scenes and emojis present.
- Stunning user interface that looks like a video editor software.
Cons:-
- Free version attaches watermark and lowers video quality.
4. https://www.freeconvert.com/video-trimmer
Best for: Basic video trimming
Ratings: 4.0/5 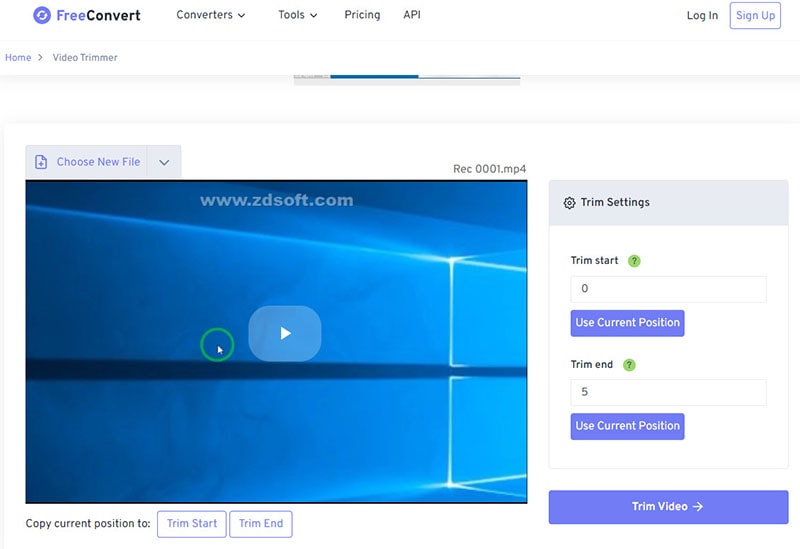
FreeConvert Video Trimmer is a free online tool through which you can trim videos of size up to 1GB easily. The platform supports as many as 40 different video file formats. Therefore, you can trim almost any video file easily. The security is tightened so that the uploaded videos do not get leaked. You can upload video files from your device, Google Drive, Dropbox as well as from URL. Therefore, if you want to trim videos that are available online, you can do it easily with this tool. Here are the pros and cons of FreeConvert Video Trimmer.
Pros:-
- Easy to use, intuitive interface.
- Does not require any registration.
- Supports over 40 file formats.
- Compatible with multiple browsers.
- 256-bit SSL encryption offers better security.
- Allows adjustment of parameters before conversion.
Cons:-
- There are too many annoying ads.
# For Advanced Users
5. https://www.veed.io/tools/video-cutter
Best for: Trimming videos for social media platforms.
Ratings: 4.3/5 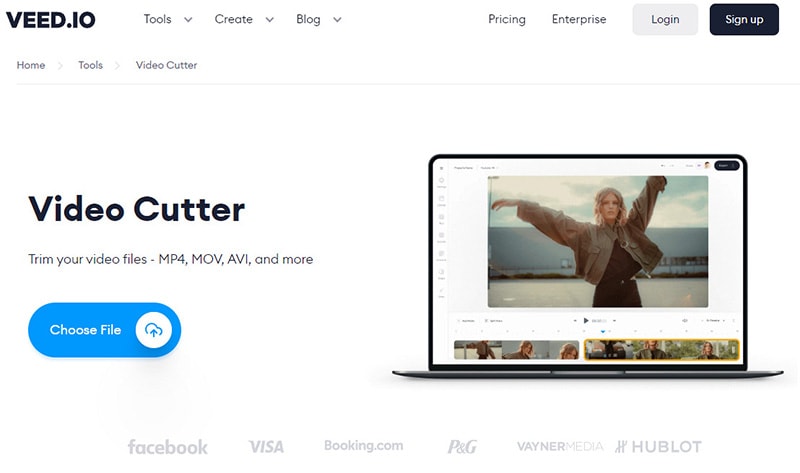
Veed.io has a wide collection of tools for video editing and the video cutter is a dedicated video trimmer. You can trim videos of popular file formats easily. Apart from video files, the platform supports trimming GIFs and audio files. You can upload videos as well as mention URL of videos that are present online for trimming. The online tool does not degrade the video quality and the output file is of high-quality as well. Here are the pros and cons of Veed.io video cutter.
Pros:-
- Allows saving the video in a high-quality format.
- Supports cutting a wide range of audio file formats.
- Ability to upload and cut animated GIFs.
- Allows cutting YouTube videos directly using URL.
- Easy drag and drop feature for saving time.
- “Split” option for removing the middle part of the video.
Cons:-
- Not suitable for trimming large video files.
6. https://www.fastreel.com/video-cutter.html
Best for: Trimming videos for personal use.
Ratings: 4.2/5 
Fastreel online video trimmer lets you trim your videos with a few clicks. Drop your file and mark the points for trimming and there you go. That tool is also useful if you want to split your video. There are several video file formats that the platform supports. The user interface is intuitive and the trimming can be precise. The free version attaches a watermark and hence, the premium version is what you should have. Here are the pros and cons of Fastreel online video trimmer.
Pros:-
- Simple interface for hassle-free trimming.
- Supports different video file formats.
- Feature of data security offers better safety.
- Quick video trimming without using the editor.
- Different file formats while saving the video.
- Precision cutting for removing unwanted segments.
Cons:-
- The free version comes with watermark.
- Free version lowers the video quality.
7. https://flixier.com/tools/video-trimmer
Best for: editing videos as a teamwork
Ratings: 4.4/5 
Flixier Video Trimmer is a premium tool to trim and crop videos instantly. The tool is available in a free version but there are many limitations. Therefore, you need to have a premium version of Flixier Video Trimmer. You can export videos in 1080p and 4K resolution. You can opt for transcribing your videos and store videos in the cloud. In the premium version, two team members can work together. Here are the pros and cons of Flixier Video Trimmer.
Pros:-
- Upload videos from YouTube, Twitch, and cloud platforms.
- No need to create account for instant trimming.
- Trim, crop, cut, and add images to videos.
- Supports multiple file formats.
- Comes with an easy collaborative platform.
- Additional translation and transcribe options.
Cons:-
- There are lots of limitations of premium plans as well.
- Only the highest premium plan supports 4K resolution.
8. https://www.wevideo.com/features/video-cutter
Best for: Best premium online video editor
Ratings: 4.5/5 
WeVideo Video Cutter is a paid video trimmer though you try out the platform for free. The platform supports a wide range of video files. You can drag and drop files and trim videos instantly. Trimming cannot get any easier and the processing speed of the editing video is fast. You can finish trimming your videos in a few seconds. There is a unique zoom feature to trim out videos accurately. You can also add texts and music to your video file before exporting. Here are the pros and cons of WeVideo Video Cutter.
Pros:-
- Drag and drop feature for quick editing.
- Smooth and accurate trimming with zoom function.
- Music and motion titles library.
- Compatible with different web browsers.
- Export edited files in different file formats.
- There is no capping on file size as such.
Cons:-
- The pricing is on the steeper side.
Part 5 Editing Tips to Improve Your Videos
Apart from trimming, you have to edit different other aspects so that you can make the video engaging and eye-catching. Here are some editing tips you should stick to improve your video content.
Get The Best Video Editor - Editing a video is equally important as shooting a video. Once you have the best video editor, you can rest assured that your editing work is half done. This is because you have all the tools to turn your raw video into stunning video. You can experiment and come up with the best editing work to your own surprise.
Get The Length Correct - In today’s world, viewers have very less time to watch videos. Therefore, a lengthy and elaborative video is a bummer. Hence, you should trim the video and keep only the portions that are relevant, engaging, and not boring.
Start with a Bang - The first impression is always the most important, and hence, the intro of your video is extremely crucial to keep the attention of the audiences intact. To make the intro interesting, you should not only focus on the content but also on video effects and animations that are attention-grabbing.
Smooth Cuts and Soothing Colours - When you are cutting from one scene or angle to another, the transition should be smooth so that it does not feel abrupt. Therefore, you should cut scenes when the subjects and objects seem to be static so that the transition is smooth naturally. Play attention to colour and the video editors allow you to enhance the quality by adjusting the colors and picture properties.
Graphical Objects - Use graphical objects and animated texts wherever possible for better explanations. Things can get boring visually when you do not add graphical elements, transitions, and animations appropriately in different places. Similarly, the use of texts and titles makes the video more engaging. Instead of static texts, there are animated texts and titles available with stickers and memes that you can edit your video with.
Play Attention to Sound - Sound is the most neglected part of a video by amateur video creators when one should pay attention to it. The sound effects can keep the audiences hooked to your video and make them not get bored. Certain sound effects refresh the attention of the audiences when it starts to fade, and hence, you should place the sound effects wisely.
Proper Flow - The editing work should be smooth so that the flow of the video is smooth and efficient. It takes time, and hence, you can practice and learn video editing so that your video can stand out instantly after your editing touches. Besides, the editing should be such that the video feels like a story that audiences can invest in and get engaged throughout.
Part 6 How to Share Your Videos
In order to share videos after trimming them, you need to save the video properly. There are different file formats available for video files. For example, MP4 is the most popular video file format among Windows users. On the contrary, MOV is the most popular video file format. Different file formats have different features such as compression and lossless. According to the file format, the file size varies for the same duration of video.
Therefore, the video trimmer you are using must have different file formats for saving and exporting the editing video files. Some video trimmers have in-built features to share videos on social media platforms and upload on video streaming platforms like YouTube. Depending on your target audiences, you need to adjust the parameters like aspect ratio, video resolution, as well as duration. Besides, you can upload videos on cloud storage and share with anyone as per your requirements.
Part 7 Related FAQs about Video Trimming
1. What is the best video trimmer?
Wondershare Filmora is the best video trimmer as all the features are well-balanced. Apart from trimming, it has all the tools for professional-quality video editing. Filmora can also be used for recording videos. Trimming videos is as easy as it gets and you can export the edited video in different file formats.
2. How can I trim a video?
To trim a video, you will need a video trimmer. If you are a desktop user and you need to regularly edit videos, there are video trimmers available for beginners as well as advanced users. Similarly, there are video editor apps available for mobile users. If you need to trim just one video, you should use an online video trimmer.
3. How can I trim a large video?
In order to trim a large video file, you will need a professional video editor like Filmora so that there is no loss in video quality and frequent crashes and screen freezing incidents while trimming. Drag and drop the video file on Filmora’s timeline and trim the unnecessary parts. You can view the changes and export the file in desired file format.
4. What does trim mean in video editing?
Trimming a video means you are cutting off different portions of a video and reducing its length. Trimming is mostly done to remove unnecessary parts from a video so that the video becomes more engaging without any unnecessary fillers.
5. Can I trim a video in VLC?
Here are the steps to trim a video in VLC Media Player.
- Open VLC Player. Go to View> Advanced Controls. This will make the recording buttons appear.
- Open the video that you want to trim. Mark the portion that you want to keep in your video.
- Play the video and go to the point from where you want to keep the video. Click on Record button.
- Go to the point where you want to end the video. Click on Record button again. All other portions are trimmed and the edited video will be saved.
6. How to trim YouTube videos?
In order to trim YouTube videos, you need to download the videos on your device. You can use an online video trimmer where you can upload the files and trim the videos as per your requirements.
02 [Video Trimmer for PC and Mac](#Part 2)
03 [Video Trimmers for Mobile](#Part 3)
04 [Online Video Trimmers](#Part 4)
05 [Editing Tips to Improve Your Videos](#Part 5)
06 [How to Share Your Videos](#Part 6)
07 [Related FAQs about Video Trimming](#Part 7)
Part 1 How to Make a Video before Trimming
Before coming to the trimming of a video section in detail, let us begin with how to make a video. You have two options when it comes to making a video. You can either record a video with recording software or you can shoot a video with your camera. Let us discuss both options in detail now.
-Record a video
You can record a video with recording software when you are capturing video from your webcam or from your computer screen. There are two options you have when it comes to choose a recording software.
- Premium Recorder - A premium recorder is a professional video recording software that you have to purchase to avail all the features and functionalities. Choose the best video recorder.
- Free Recorder - If you are not willing to spend any money on a recording software, there are plenty of free recording applications available. We recommend OBS Studio as the best free video recorder.
-Shoot a video
The second option is shooting a video with your external digital camera. You can also use your phone camera to shoot a video. For example, making vlogs, comedy skits, travel videos, or short films needs a digital camera. If you are using your phone camera, you can cut and crop the video after shooting using the video trimmer apps or online video trimmers. If you are shooting external with an external camera, you can transfer the video to your mobile or computer and use a preferred video trimmer for editing.
Part 2 Video Trimmer for PC and Mac
When it comes to editing and trimming a video, using a computer is the best option. This is because you have a wider screen to pay attention to the details of the video and trim out the unnecessary parts easily. Besides, editing a video requires CPU resources which are best served by a computer. We have divided the video trimmers for computers into two categories for user convenience. You can easily find video trimmers for Windows PC as well as for Mac.
# For Beginner Users
This category is perfect for those who do not have any experience in video editing and they are looking for a basic video trimmer to get the job done. Besides, if you need to trim videos once in a while, these are perfect for you. You can trim video free with the following video trimmers.
1. Windows Photos
Best for: Windows users with no editing skills
G2 rating: 4.0/5
Price: Free
If you are a Windows PC user and you are looking for a basic video trimming application, Windows Photos is right there for you. The application comes pre-installed on Windows PC and hence, there is no need to install any external application. Even though Windows Photos is primarily used for viewing photos, there is a dedicated video editor available where you can trim your recorded video easily. Apart from trimming videos, you can do some basic editing like adding title cards and text, video effects, background music, and filters. Here are the pros and cons of Windows Photos.
Pros:-
- Comes pre-installed in Windows.
- Super easy user interface to operate.
- Quick trimming and cutting out videos.
- Different motion transitions and effects present.
- Add titles, texts, and audio to video.
- AVarious filters and 3D effects available.
Cons:-
- Not suitable for trimming large videos.
- Lack of different file formats for saving the videos.
2. QuickTime Player
Best for: Mac users with basic trimming needs
G2 rating: 4.2/5
Price: Free
If you are a Mac user and you are looking for a free video editor for trimming your video, QuickTime Player is the best application for you. Just like Windows Photos for Windows users, QuickTime Player comes pre-installed for Mac users. In fact, it is the default media player for Mac users. Apart from playing media files, you can use QuickTime Player for video recording as well as editing the recorded video. This includes trimming videos and replaying on the application to reach the level of perfection easily. Here are the pros and cons of QuickTime Player you should be aware of.
Pros:-
- The user interface is super easy to operate.
- Trim, flip, split, and merge videos quickly.
- Option to record video with audio flawlessly.
- Instant preview of the edited video on QuickTime.
- QuickTime is compatible with iPhone and iPad.
- Advanced streaming options available in Pro version.
- Supports playing different video file formats.
Cons:-
- Some of the settings are complicated.
- It can crash while editing large video files.
3. iMovie
Best for: Playing and editing videos
G2 rating: 4.3/5
Price: Free
If you are a Mac user and you are looking for a dedicated video editor, iMovie is a great choice. iMovie also comes pre-install on Mac and it is compatible with iPhone and iPad as well. The application is available completely free for mac users and hence, many prefer it over QuickTime Player for editing videos. You can quickly trim your videos as well as rotate and crop your videos as per your requirements. You can enhance your video with effects and filters available. Here are the pros and cons of iMovie you should be aware of.
Pros:-
- Intuitive user interface for easy operation.
- Quick edits to make a raw video presentable.
- Supports 4K video editing without crashing.
- Add different graphical elements for engaging videos.
- Different types of effects and filters for video enhancement.
- Easy sharing options across devices and online platforms.
- Work on multiple video projects simultaneously.
Cons:-
- Editing MP4 video is complicated.
- Lacks advanced editing features.
4. Media Cope
Best for: Multiple video using needs
G2 rating: 4.0/5
Price: Free
Media Cope is a freeware video trimmer for Windows users only. It is a basic video editor with standard editing options. The software is best suited for those who have older Windows versions such as Windows 7. The lightweight application can act as an audio and video player. You can easily trim your video and extract import parts as well. You can also join audio and video files and convert them into desired file formats. Here are the pros and cons of Media Cope.
Pros:-
- Can play audio and video files of different formats.
- Instantly trim and cut video and audio files.
- Can join audio and video clips and save in desired file format.
- Can convert audio and video files as per requirements.
- Transform photos into slideshow instantly.
- Resize photos and take screenshots from videos.
- Modify different video parameters and export the file.
Cons:-
- Lack of various standard video editing options.
- Looks outdated for modern Windows OS.
5. OpenShot
Best for: Open source software lovers
G2 rating: 4.4/5
Price: Free
If you are looking for a video editor that is compatible with all desktop operating system, OpenShot is the best choice for you. It is a completely free, open-source video editor for Windows, Mac and even Linux users. In this list of video editors for beginners, this is the best in terms of features and functionalities. You can trim and slice video, add animations, insert different layers and video effects to enhance the video content. The user interface is rather intuitive in spite of having all the different options you look for in a video editor. Here are the pros and cons of OpenShot video editor.
Pros:-
- Simple but powerful user interface.
- Trim video instantly without different options.
- Add 3D titles, 3D animations, and slow motion effects.
- Loads of video and audio effects present to apply.
- Add different layers of videos, audio tracks, and images.
- Advanced option for keyframing and time mapping.
- Multi-lingual support and frequent updates for new features.
Cons:-
- Unstable performance for large video files.
- The hardware acceleration is not very powerful.
# For Advanced Users
If you are a regular video creator and you want your videos to stand out, this category is for you. You can edit and trim your videos exactly the way you want. Besides, you can transform your raw videos into professional-quality videos with the following video editors.
1. Filmora
Best for: Rich videos effects and templates
G2 rating: 4.4/5
Price: $49.99
Wondershare Filmora is an outstanding video editor where you can trim your video and audio files like a professional. Since you are an advanced user, you will need more than just trimming to make your raw video look stunning. Filmora offers you all the tools and features you will ever need to take your video to the next level.
Compared to other popular premium video editors, Filmora does not need heavy CPU resource and it has an intuitive user interface. That is why video creators especially YouTubers and Vloggers prefer it for editing their videos regularly. The software is available for both Windows and Mac users. Here are the pros and cons of Filmora that you should be aware of.
For Win 7 or later (64-bit)
For macOS 10.12 or later
Pros:-
- Record screen and webcam video with audio sources.
- Basic tools for trimming, splitting, and joining video files.
- Customize different video settings and parameters.
- Add video and audio effects and graphical elements.
- Wide range of stock library of media files and animations.
- Add multiple layers and work with multiple channels while editing.
- Export the recorded or edited video file in different file formats.
Cons:-
- Saving the edited video takes time due to processing part.
2. Adobe Premiere Pro
Best for: Professional video trim, edit and after effects
G2 rating: 4.5/5
Price: $20.99/month
Adobe Premiere Pro is the most powerful video editor and that is why even professional video editors use it for editing movies. There is hardly any video file format that Premiere does not support. You can edit multiple videos at the same time and switch between scenes and clips. Trimming video and audio files is swift with intuitive controls. There is also option for non-linear video editing for advanced users.
Since it is extremely popular in the videography world, there are many organizational tools available for editing large video projects and integrated workflow. The software supports VR video, 3D video, and multicam video editing. The software is available for Windows as well as Mac users. Here are the pros and cons of Adobe Premiere Pro.
Pros:-
- Customizable layouts for reorganizing user interface.
- Quick trimming and playback option without rendering.
- Supports a wide range of file formats for import and export.
- All the different tools for professional video and audio editing.
- Can work on and render multiple video files easily.
- Cross-app functionality with amazing stabilization features.
Cons:-
- The learning curve is rather steep and takes a lot of time.
- The software is only suitable for high-end computers.
3. Final Cut Pro
Best for: Advanced organizing tools of any professional video editing
G2 rating: 4.4/5
Price: $299
Final Cut Pro is equally popular in the videography world as Adobe Premiere Pro. Final Cut Pro is primarily for Mac users as it is developed by Apple. This is the most powerful video editor for Mac users as it is packed with loads of features for professional video editing. Trimming videos is as easy as it gets, along with other standard editing options.
The software supports editing multicam videos, VR videos, 3D videos as well as 360 degree videos. There are endless presets and effects available that you can apply on your video while editing. You can easily edit 4K videos without performance lag. In fact, Final Cut Pro shines where other video editors fail to perform with high resolution and large video files. Here are the pros and cons of Final Cut Pro.
Pros:-
- Trimming, cutting, splitting and joining videos are easy.
- Seamless video editing with standard and advanced tools.
- Different motion graphics templates available.
- Supports external plug-ins and VR headset playback.
- Proper video files and assets organizing and audio editing options.
- Relatively quick rendering of large video files.
Cons:-
- May take time to get used to all the available options.
- Relatively expensive in comparison to peers.
4. Movavi Video Editor
Best for: People who love more brilliant effects in videos
G2 rating: 4.8/5
Price: $74.95
Movavi Video Editor is a premium software for trimming and editing videos. It is available for both Windows and Mac users. There is a free version available but it puts a watermark on the output video. Apart from trimming and splitting videos, you can add various video effects starting from adding titles and transitions to stickers and elements. Besides, you can opt for greenscreen effect and edit videos in vertical mode. Here are the pros and cons of Movavi Video Editor you should be aware of.
Pros:-
- Integrated video capturing options from different sources.
- Instant trimming, splitting, and joining of videos.
- Loads of titles, filters and transitions present.
- Add video PiP layers as well as voiceover.
- Vertical video editing mode present.
- Video stabilization mode and Chroma key.
- Keyframing, slow motion and motion tracking.
Cons:-
- The rendering is not very fast.
- Lack of color tuning options.
5. Bandicut
Best for: Trim, join and split video with fast speed
G2 rating: 4.0/5
Price: $44.96
Bandicut from Bandicam is a dedicated video trimmer for Windows users. It is a premium application with a one-time purchase fee. The software ensures lossless video trimming, and you can trim video instantly thanks to its intuitive user interface. It is a versatile application that you can use to extract audio from a video as well as joining multiple video files. Splitting a large video file into multiple files is super easy. However, it is not a full-fledged video editor like Filmora or Premiere. Therefore, if your objective is specifically to trim, split, and join videos, this is the one for you. Here are the pros and cons of Bandicut.
Pros:-
- Trim and split videos instantly
- Super intuitive user interface.
- Cut segments from videos.
- Join multiple videos quickly.
- Supports different file formats.
- No loss of video quality during editing.
- Hardware acceleration for high performance.
Cons:-
- Very limited editing features.
6. VSDC
Best for: Movie level video cut with light professional skills
G2 rating: 4.0/5
Price: $19.99
VSDC is a free video editor with all the basic editing tools available. VSDC Pro is a premium video editor where advanced features are available. For trimming a video, VSDC free video editor can get the job done. Even though it is completely free, some features are comparable to many premium video editors. For example, you get access to a large set of filters, effects, and transitions that you can apply to your videos. Even when you have a low-end PC, you can do basic video editing works comfortably. Here are all the pros and cons of VSDC free video editor you should know.
Pros:-
- Instant trimming and basic editing of videos.
- Wide range of effects and filters as well as Chroma key.
- Color correction option and non-linear editing available.
- Supports editing 360 degree videos and split-screen videos.
- Supports different video and audio file formats.
- Lightweight and suitable for low-end computers.
Cons:-
- Lacks standard audio editing options.
- Lacks hotkeys and useful keyboard shortcuts.
7. Camtasia
Best for: Tutorial video recording and editing
G2 rating: 4.6/5
Price: $224.99
Camtasia by TechSmith is a premium video editor for Windows and Mac users. Even though it is more popular as a video editor, you can trim your videos easily on the software. You can record anything on your screen as well as external webcam. You can edit recorded video as well as import external video files for quick editing. The software offers easy share instant through which you can share on popular video streaming platforms. There are various templates and themes available to create and edit videos of different categories. Here are the pros and cons of Camtasia.
Pros:-
- Quick trimming, splitting, joining video options.
- Different templates and packages for versatile video creation.
- Various transitions, annotations, and presets present.
- PowerPoint integration, screen and web cam capture.
- Different cursor and audio effects with royalty-free assets.
- Import different media files and upload directly on video streaming platforms.
Cons:-
- Reports of crashes when working with large files.
- No keyframe and motion tracking.
- Very few customization options.
Part 3 Video Trimmers for Mobile
In today’s world, the cameras of smartphones are extremely powerful, and there are many who shoot videos with phone cameras instead of a dedicated digital camera. For example, there are many popular vloggers who shoot their videos with phone cameras, and video creators make short videos with phone cameras. When you shoot a video on your phone, you must be looking for a video trimmer app for your phone so that you can trim the recorded video instantly and share across social media and video streaming platforms. Here is the list of the best video trimmers for mobile.
# For Beginner Users
1. VidTrim Pro
Best for: Android video trimming, merging, frame grabbing
Rating: 4.1/5
Download Link: https://play.google.com/store/apps/details?id=com.goseet.VidTrimPro&hl=en\_US&gl=US
VidTrim is a dedicated video trimmer available for Android users. The free version adds a watermark to the output video, and hence, you have to opt for VidTrim Pro to avoid all limitations. Apart from trimming videos, you can merge videos and convert videos into audio files. You can also add effects and music tracks to your videos. The user interface is as simple as it gets. Here are the pros and cons of VidTrim Pro app.
Pros:-
- Trim videos as well as merge video clips.
- Convert supported video files into Mp3 audio files.
- Rotate videos as well as save screenshots from videos.
- Add cool video effects, sound effects, and soundtracks.
- Multi-lingual support and video file format converter.
Cons:-
- Limited video editing features for a paid video editor app.
- The user interface is simple but outdated.
2. KineMaster
Best for: Video content downloadable
Rating: 4.2/5
Download Link: https://play.google.com/store/apps/details?id=com.nexstreaming.app.kinemasterfree&hl=en\_US&gl=US
You must have seen many videos online with the watermark “Made with Kinemaster”. This is because KineMaster is very popular among amateur video creators. KineMaster is available for Android as well as iOS users. You can instantly trim and crop videos. Besides, you can add special effects, animations and stickers as well as tweak different video settings for enhancements. KineMaster is available free of cost but it attaches a watermark to the output video at one corner. You can subscribe to KineMaster Premium to remove watermark and unlock more features. Here are the pros and cons of KineMaster.
Pros:-
- Trim, cut, slice, and crop videos instantly.
- Add music, sound effects as well as voiceover.
- Provides amazing visual effects and animations.
- Adjust color filters, modes and video speed.
- Supports keyframing and motion tracking.
- Save 4K videos and share instantly online.
Cons:-
- KineMaster chroma key feature has bugs.
- Can crash or freeze handling large video files.
3. Quik
Best for: Producing cinematic auto-edits.
Rating: 4.3/5
Download Link: https://play.google.com/store/apps/details?id=com.gopro.smarty&hl=en\_US&gl=US
Quick from GoPro is fast becoming a popular video editor app. GoPro is the most popular action camera brand and naturally, its video editing app has garnered enough attention. The app is available for Android and iOS users. The app has a mixed bag of options for editing videos quickly. You can trim your videos, add filters and adjust video speed. Besides, its AI can locate the best shots in a video and enhance them with special effects. Here are the pros and cons of Quick app.
Pros:-
- Trim, crop, adjust speed, remove audio from videos.
- Different preset templates available with effects and filters.
- Add music, titles, effects, and transitions.
- Easy sharing of videos and photos.
- Powerful AI to highlight the best shots in a video.
- Adjust video orientation, save in 1080p resolution.
Cons:-
- Not suitable for large video files.
- No font adjustment options.
4. iMovie
Best for: Create Hollywood-style trailers and beautiful movies
Rating: 4.0/5
Download Link: https://apps.apple.com/us/app/imovie/id377298193
iMovie app by Apple is exclusively available for iOS users. iMovie is also available as a software which we have already discussed. In terms of features, iMovie app is very similar to iMovie software. You can instantly make basic editing works. Apart from editing, the app is ideal for creating different types of videos with ready-made templates. There are loads of graphical effects, animated titles, and video filters available to apply. Here are the pros and cons of iMovie app for you.
Pros:-
- Record, trim, split, join and crop videos on the go.
- Choose from different themes and templates to create videos.
- Animated titles, video filters, graphical effects available.
- Chroma key, PiP mode as well as split screen effect possible.
- Add sound effects, music, and depth of field effect.
- Optimized output for social media and video streaming platforms.
- Supports 4K video editing and easy share across Apple devices.
Cons:-
- Limited resources and customization options.
- The app size is large and uses high CPU resources.
# For Advanced Users
1. LumaFusion
Best for: Professional video trimming for iOS devices
Rating: 4.8/5
Download Link: https://apps.apple.com/us/app/lumafusion/id1062022008
LumaFusion is a top-rated video editor for iPad and iPhone. The app is as good as a premium video editor for desktop users. Therefore, professional video creators who use iPhone or iPad for video editing prefer LumaFusion all the time. You can trim, cut, crop, split, and merge videos intuitively from its timeline. Most importantly, you can edit multiple video and audio files together like a professional. Here are the pros and cons of LumaFusion.
Pros:-
- Trim and export video in different file formats.
- Work with multiple video and audio files.
- Preset transitions, instant preview, markers for timeline.
- Add Chroma and Luma key effects as well as stunning visual effects.
- Adjust speed, audio, use keyframes, correct colors.
- Work with titles, fonts, borders, and share conveniently.
- Wide range of media files available in the library.
Cons:-
- Does not support motion tracking.
- Can be difficult to edit large files.
2. Adobe Premiere Rush
Best for: Shoot, edit, and share online videos anywhere.
Rating: 3.0/5
Download Link: https://play.google.com/store/apps/details?id=com.adobe.premiererush.videoeditor&hl=en\_US&gl=US
Even though Adobe Premium Rush app is available or Android and iOS users, it is more popular among iPhone and iPad users. The app is free though there are in-app purchases available. Rush Premium has more features and functionalities. Editing any video is quite convenient though Adobe has tried its level best to offer all the possible features of Adobe Premium Pro desktop software on the app. The app supports multitrack timeline for professional videos. Here are all the pros and cons of Adobe Premiere Rush you should be aware of.
Pros:-
- Record video in high-resolution with the app.
- Trim, crop, mirror, and flip videos.
- Add images, overlays, texts, and stickers.
- Pan and zoom effect, animation titles.
- Royalty-free audio tracks, color correction options.
- Easy exporting of files in different formats.
Cons:-
- Rendering projects can be slow.
- Comes with limited features.
3. Filmmaker Pro Video Editor
Best for: 4K quality video editing
Rating: 4.6/5
Download Link: https://apps.apple.com/us/app/filmmaker-pro-video-editor/id1082956994
Filmmaker Pro is a highly rated video editor that you can use to trim your videos. Filmmaker Pro app is available for both Android and iOS. The app supports 4K video for editing works. The timeline has color codes for different assets and hence, editing becomes easy. You can edit different video parameters and settings and add different effects. The auto save option is extremely useful when it comes to editing a large file. Even though it is available for free, they have a subscription plan for unlocking all features. Here are the pros and cons of Filmmaker Pro Video Editor.
Pros:-
- Trim, split, crop and rotate videos.
- Adjust video speed, volume, video grading.
- Chroma key, voice to text caption, keyframe and motion tracking.
- Different Picture-in-Picture mode for videos, photos, and GIFs.
- Various transition effects, audio effects, and text overlays.
- Different drawing tools, stickers, and graphical elements present.
Cons:-
- The free version has limited features.
- The number of effects are relatively less.
4. Splice Video Editor and Maker
Best for: Vloggers and social platform video cutting
Rating: 4.7/5
Download Link: https://play.google.com/store/apps/details?id=com.splice.video.editor&hl=en\_US&gl=US
Splice Video Editor and Maker is a free but powerful app that enables you to do pro-level editing. You can trim your video clips, adjust speed, and add music on the go. In fact, you can create videos and slideshows instantly and you can add texts and overlays. The music library has different categories of tracks to apply to videos. You can also merge videos as well as change aspect ratio according. The app is available for Android and iOS users. Here are all the pros and cons of Splice Video Editor and Marker.
Pros:-
- Easy interface for smooth trimming and merging of videos.
- Adjust speed, aspect ratio, and video parameters.
- Organize clips and tracks in the timeline intuitively.
- Add custom texts, titles, tracks, transitions, and effects.
- Comes with a wide stock library of media files.
- Direct uploading video files on different social media platforms.
Cons:-
- Limited effects and filters available.
- Frequent crashes while handling large files.
5. Funimate
Best for: Mobile game video trim to show off gaming skills
Rating: 4.5/5
Download Link: https://play.google.com/store/apps/details?id=com.avcrbt.funimate&hl=en\_US&gl=US
Funimate video editor and maker app is quite highly rated on both Play Store and App Store. It is a very powerful and feature-rich app where you will get all the desired editing tools to publish a professional-quality video. Starting from element library to video masks and AI effects, the app takes your video to the next level. You can obviously perform the basic editing works like trimming, splitting and joining. Here are the pros and cons of Funimate app.
Pros:-
- Trimming, merging, and cutting videos.
- Text effects, video AI effects, and effect mixer.
- Comes with over 100 advanced video effects.
- Allows adding music to videos for engaging videos.
- Supports slow motion and looping videos.
- Advanced keyframing and element library.
- Allows creating a professional photo slideshow.
Cons:-
- No multilingual support and auto-save feature.
- Some lagging issues have been reported.
Part 4 Online Video Trimmers
If you are using a video editor on your computer, it takes considerable amount of space in your storage. The same is applicable to video editors for smartphones. If you do not want to install any app on your device yet trim videos conveniently, the online video trimmers are for you. You can open the video trimmer directly from your web browser and trim your video and save it without installing any application on your device. Here is the list of the best online video trimmers.
# For Beginner Users
1. https://online-video-cutter.com/
Best for: Trimming large videos files.
Ratings: 4.2/5
Online Video Cutter is a dedicated video trimmer where you need to drag and drop your video file and cut out the required portion. You can even crop and rotate your videos if there is any such requirement. You can access the online platform directly from your web browser. There is no need for installation of any web launcher. The platform is also secured and hence, your videos won’t get leaked. There is also a Chrome extension available that you can use if you are a Chrome user. Here are the pros and cons of Online Video Cutter.
Pros:-
- Easy video trimming by drag-and-drop files.
- Enables uploading different file formats.
- Rotate feature for saving in portrait and landscape mode.
- Automatically deletes files for better security.
- Crop feature for changing frame size.
- Can edit video file of 4GB capacity.
Cons:-
- May reduce the video quality for the editing video.
2. https://clideo.com/cut-video
Best for: Trimming short videos.
Ratings: 4.5/5
This is another online video trimmer that supports different video file formats. The user interface is sleek for quick video trimming. You can upload file from your device as well as from Cloud storage. In fact, you can use the platform to convert video files. The level of trust and security is high and there are additional settings available for better editing. Here are the pros and cons Clideo Video Cutter.
Pros:-
- Intuitive interface for quick trimming.
- Supports different file formats.
- Converts videos into different formats.
- Offers high-level online security.
- Add fade in and fade out effects.
- Upload video files from Google Drive and Dropbox.
Cons:-
- No drag and drop feature.
- File size is limited to 500 MB only.
3. https://www.kapwing.com/tools/trim-video
Best for: Editing video elaborately.
Ratings: 4.4/5
Kapwing is a dedicated online video editor that will give you the vibe of using a desktop video editor. Therefore, it is suitable for those who are looking for an online platform for trimming as well as various other editing works. You can add texts, images, elements, audio, transitions, as well as record videos. You can also export in different file formats. However, the free version attaches a watermark. Therefore, you have to upgrade to its premium version and use the platform is a full-fledged video editor. Here are the pros and cons of Kapwing.
Pros:-
- Trim, crop, zoom videos and adjust video parameters.
- Supports import and export of different file formats.
- Add effects, audio, and elements to the videos.
- You can work with multiple layers while editing.
- Different sound effects, templates, and scenes and emojis present.
- Stunning user interface that looks like a video editor software.
Cons:-
- Free version attaches watermark and lowers video quality.
4. https://www.freeconvert.com/video-trimmer
Best for: Basic video trimming
Ratings: 4.0/5
FreeConvert Video Trimmer is a free online tool through which you can trim videos of size up to 1GB easily. The platform supports as many as 40 different video file formats. Therefore, you can trim almost any video file easily. The security is tightened so that the uploaded videos do not get leaked. You can upload video files from your device, Google Drive, Dropbox as well as from URL. Therefore, if you want to trim videos that are available online, you can do it easily with this tool. Here are the pros and cons of FreeConvert Video Trimmer.
Pros:-
- Easy to use, intuitive interface.
- Does not require any registration.
- Supports over 40 file formats.
- Compatible with multiple browsers.
- 256-bit SSL encryption offers better security.
- Allows adjustment of parameters before conversion.
Cons:-
- There are too many annoying ads.
# For Advanced Users
5. https://www.veed.io/tools/video-cutter
Best for: Trimming videos for social media platforms.
Ratings: 4.3/5
Veed.io has a wide collection of tools for video editing and the video cutter is a dedicated video trimmer. You can trim videos of popular file formats easily. Apart from video files, the platform supports trimming GIFs and audio files. You can upload videos as well as mention URL of videos that are present online for trimming. The online tool does not degrade the video quality and the output file is of high-quality as well. Here are the pros and cons of Veed.io video cutter.
Pros:-
- Allows saving the video in a high-quality format.
- Supports cutting a wide range of audio file formats.
- Ability to upload and cut animated GIFs.
- Allows cutting YouTube videos directly using URL.
- Easy drag and drop feature for saving time.
- “Split” option for removing the middle part of the video.
Cons:-
- Not suitable for trimming large video files.
6. https://www.fastreel.com/video-cutter.html
Best for: Trimming videos for personal use.
Ratings: 4.2/5
Fastreel online video trimmer lets you trim your videos with a few clicks. Drop your file and mark the points for trimming and there you go. That tool is also useful if you want to split your video. There are several video file formats that the platform supports. The user interface is intuitive and the trimming can be precise. The free version attaches a watermark and hence, the premium version is what you should have. Here are the pros and cons of Fastreel online video trimmer.
Pros:-
- Simple interface for hassle-free trimming.
- Supports different video file formats.
- Feature of data security offers better safety.
- Quick video trimming without using the editor.
- Different file formats while saving the video.
- Precision cutting for removing unwanted segments.
Cons:-
- The free version comes with watermark.
- Free version lowers the video quality.
7. https://flixier.com/tools/video-trimmer
Best for: editing videos as a teamwork
Ratings: 4.4/5
Flixier Video Trimmer is a premium tool to trim and crop videos instantly. The tool is available in a free version but there are many limitations. Therefore, you need to have a premium version of Flixier Video Trimmer. You can export videos in 1080p and 4K resolution. You can opt for transcribing your videos and store videos in the cloud. In the premium version, two team members can work together. Here are the pros and cons of Flixier Video Trimmer.
Pros:-
- Upload videos from YouTube, Twitch, and cloud platforms.
- No need to create account for instant trimming.
- Trim, crop, cut, and add images to videos.
- Supports multiple file formats.
- Comes with an easy collaborative platform.
- Additional translation and transcribe options.
Cons:-
- There are lots of limitations of premium plans as well.
- Only the highest premium plan supports 4K resolution.
8. https://www.wevideo.com/features/video-cutter
Best for: Best premium online video editor
Ratings: 4.5/5
WeVideo Video Cutter is a paid video trimmer though you try out the platform for free. The platform supports a wide range of video files. You can drag and drop files and trim videos instantly. Trimming cannot get any easier and the processing speed of the editing video is fast. You can finish trimming your videos in a few seconds. There is a unique zoom feature to trim out videos accurately. You can also add texts and music to your video file before exporting. Here are the pros and cons of WeVideo Video Cutter.
Pros:-
- Drag and drop feature for quick editing.
- Smooth and accurate trimming with zoom function.
- Music and motion titles library.
- Compatible with different web browsers.
- Export edited files in different file formats.
- There is no capping on file size as such.
Cons:-
- The pricing is on the steeper side.
Part 5 Editing Tips to Improve Your Videos
Apart from trimming, you have to edit different other aspects so that you can make the video engaging and eye-catching. Here are some editing tips you should stick to improve your video content.
Get The Best Video Editor - Editing a video is equally important as shooting a video. Once you have the best video editor, you can rest assured that your editing work is half done. This is because you have all the tools to turn your raw video into stunning video. You can experiment and come up with the best editing work to your own surprise.
Get The Length Correct - In today’s world, viewers have very less time to watch videos. Therefore, a lengthy and elaborative video is a bummer. Hence, you should trim the video and keep only the portions that are relevant, engaging, and not boring.
Start with a Bang - The first impression is always the most important, and hence, the intro of your video is extremely crucial to keep the attention of the audiences intact. To make the intro interesting, you should not only focus on the content but also on video effects and animations that are attention-grabbing.
Smooth Cuts and Soothing Colours - When you are cutting from one scene or angle to another, the transition should be smooth so that it does not feel abrupt. Therefore, you should cut scenes when the subjects and objects seem to be static so that the transition is smooth naturally. Play attention to colour and the video editors allow you to enhance the quality by adjusting the colors and picture properties.
Graphical Objects - Use graphical objects and animated texts wherever possible for better explanations. Things can get boring visually when you do not add graphical elements, transitions, and animations appropriately in different places. Similarly, the use of texts and titles makes the video more engaging. Instead of static texts, there are animated texts and titles available with stickers and memes that you can edit your video with.
Play Attention to Sound - Sound is the most neglected part of a video by amateur video creators when one should pay attention to it. The sound effects can keep the audiences hooked to your video and make them not get bored. Certain sound effects refresh the attention of the audiences when it starts to fade, and hence, you should place the sound effects wisely.
Proper Flow - The editing work should be smooth so that the flow of the video is smooth and efficient. It takes time, and hence, you can practice and learn video editing so that your video can stand out instantly after your editing touches. Besides, the editing should be such that the video feels like a story that audiences can invest in and get engaged throughout.
Part 6 How to Share Your Videos
In order to share videos after trimming them, you need to save the video properly. There are different file formats available for video files. For example, MP4 is the most popular video file format among Windows users. On the contrary, MOV is the most popular video file format. Different file formats have different features such as compression and lossless. According to the file format, the file size varies for the same duration of video.
Therefore, the video trimmer you are using must have different file formats for saving and exporting the editing video files. Some video trimmers have in-built features to share videos on social media platforms and upload on video streaming platforms like YouTube. Depending on your target audiences, you need to adjust the parameters like aspect ratio, video resolution, as well as duration. Besides, you can upload videos on cloud storage and share with anyone as per your requirements.
Part 7 Related FAQs about Video Trimming
1. What is the best video trimmer?
Wondershare Filmora is the best video trimmer as all the features are well-balanced. Apart from trimming, it has all the tools for professional-quality video editing. Filmora can also be used for recording videos. Trimming videos is as easy as it gets and you can export the edited video in different file formats.
2. How can I trim a video?
To trim a video, you will need a video trimmer. If you are a desktop user and you need to regularly edit videos, there are video trimmers available for beginners as well as advanced users. Similarly, there are video editor apps available for mobile users. If you need to trim just one video, you should use an online video trimmer.
3. How can I trim a large video?
In order to trim a large video file, you will need a professional video editor like Filmora so that there is no loss in video quality and frequent crashes and screen freezing incidents while trimming. Drag and drop the video file on Filmora’s timeline and trim the unnecessary parts. You can view the changes and export the file in desired file format.
4. What does trim mean in video editing?
Trimming a video means you are cutting off different portions of a video and reducing its length. Trimming is mostly done to remove unnecessary parts from a video so that the video becomes more engaging without any unnecessary fillers.
5. Can I trim a video in VLC?
Here are the steps to trim a video in VLC Media Player.
- Open VLC Player. Go to View> Advanced Controls. This will make the recording buttons appear.
- Open the video that you want to trim. Mark the portion that you want to keep in your video.
- Play the video and go to the point from where you want to keep the video. Click on Record button.
- Go to the point where you want to end the video. Click on Record button again. All other portions are trimmed and the edited video will be saved.
6. How to trim YouTube videos?
In order to trim YouTube videos, you need to download the videos on your device. You can use an online video trimmer where you can upload the files and trim the videos as per your requirements.
Also read:
- Easy Steps to Add Miniature Effect to Videos
- Start Your Creative Journey Now. Follow This Step-by-Step Guide on How to Add Double Exposure Effects to Your Personal Videos by Using the Filmora Video Editor for 2024
- New 2024 Approved Best Ways to Convert Video Frame Rate to 60FPS Software and Online Choices
- Updated Easily Cut Large Videos Faster on Mac 7 Solutions Included
- In 2024, Want to Add the Amazing Video Text Effects that You Generally See on Video Streaming Platforms? Use Filmora to Add Popular Video Text Effects Instantly
- Updated How to Create Photoshop GIF The 100 Easy Way
- New In 2024, 3D Ray Traced Settings In After Effects
- New Backup and Organize Your Tons of Footage in Minutes for 2024
- New 2024 Approved How to Make Video Fade to Black in Movie Maker Easily
- 2024 Approved How to Create the Night-to-Day Effect Video
- Updated 2024 Approved | Top GIF to MP4 Converters
- In 2024, Have You Ever Wanted to Stop Your Video and Hold on to a Single Frame to Draw Attention to a Point or for Dramatic Flair? Good News! VEGAS Pro Makes It Easy to Do Just That. In This Tutorial, Well Look at How to Make Sony Vegas Freeze Frame
- 2024 Approved How to Use Deep Fried Meme Maker
- 2024 Approved Using Slow Motion in Adobe After Effects A Step-by-Step Procession
- Updated 2024 Approved Create the Night-to-Day Effect Videos
- New 2024 Approved How to Create Vintage Film Effect 1950S
- 2024 Approved Top 6 Text to Speech Generators for YouTube Videos Windows, Mac, And
- In 2024, Top 31 Video Trimmers That Will Save You Time in Ediitng
- In 2024, Unlock Your Video Editing Potential With Filmora From Wondershare
- 2024 Approved Attaining Slow Motion Video Trend Finding The Best CapCut Templates
- 2024 Approved Create Slide Masking Effect Intro【Filmora】
- Updated 2024 Approved Top Fixes to Resolve Issues with Premiere Pro Slow Playback
- New How to Create Video in Text Intro, In 2024
- Looking for a Way to Learn How to Merge Videos in HandBrake? Theres a Better Solution Waiting for You Inside for 2024
- Updated 2024 Approved Create Your Own Subscribe Channel Graphics
- New Create a Stunning Light Sweep Effect in Filmora. Use Simple and Easy Steps to Export a High-Quality Video that Will Impress Even Pro Video Editors
- 2024 Approved Guide to Add Transition Effects in Premiere Pro
- Updated Mastering DaVinci Resolve Scopes A Comprehensive Guide for 2024
- New Do You Want to Know How to Import or Adjust Clips in Wondershare Filmora? Dont Worry because Importing or Adjusting Video Clips in This Tool Is Pretty Easy
- In 2024, Merging Videos Like a Pro A Step-by-Step Guide to Use FFmpeg
- Updated Step by Step to Cut Video in Adobe Premiere Pro
- Updated 2024 Approved Guide to Add Transition Effects in Premiere Pro
- In 2024, How to Make Discord Logo GIF
- How to Do Motion Graphics in Filmora
- End Your Struggles with Choppy Playback on DaVinci Resolve. Read This Guide to Find Effective Fixes and Reliable DaVinci Resolve Slow Playback Alternatives for 2024
- New 6 Free Tools To Radial Blur Photos Online for 2024
- 2024 Approved Want to Give a Bold and Colorful Look to Your Ad or Abstract Art Project? This Quick and Easy Tutorial Teaches How to Create a Risograph Effect in Photoshop
- In 2024, How to Add Green Screen Effects In Phhotoshop
- In 2024, How to Add Font Effects to Videos
- New 2024 Approved How to Create Cooking Video Intro and End Screen for YouTube Channel?
- Updated In 2024, An Ultimate Guide to Flexclip Online Trimmer
- New In 2024, Mastering OpenCV Object Tracking A Comprehensive Guide for Beginners and Experts
- New How to Create Discord Logo GIF
- Updated This Article Talks in Detail About How to Edit Videos with Windows Movie Maker 10, How to Download or Install It, and so On. It Further Involves the Use of an Alternative to This Tool. Check Out Now
- 2024 Approved Best Free Video Editing Software to Boost Your Content Creation
- Updated In 2024, Steps to Create Gold Text Effects After Effects
- Updated Top 8 Video Grabbers for Chrome
- New Best 10 3D Slideshow Software Review for 2024
- How to Sign Out of Apple ID On iPhone 14 Pro Max without Password?
- In 2024, Mastering Android Device Manager The Ultimate Guide to Unlocking Your Xiaomi Civi 3 Disney 100th Anniversary Edition Device
- Can Life360 Track You When Your OnePlus Nord 3 5G is off? | Dr.fone
- In 2024, A Step-by-Step Guide on Using ADB and Fastboot to Remove FRP Lock from your Infinix Hot 30i
- 9 Best Phone Monitoring Apps for Gionee F3 Pro | Dr.fone
- In 2024, How to Change Netflix Location to Get More Country Version On Nokia 130 Music | Dr.fone
- 11 Best Location Changers for Apple iPhone 6s | Dr.fone
- Itel S23+ Screen Unresponsive? Heres How to Fix It | Dr.fone
- Rootjunky APK To Bypass Google FRP Lock For Realme Narzo N53
- How to Unlock Apple iPhone 14 Plus, Apples New iPhone | Dr.fone
- In 2024, How To Remove Phone Number From Your Apple ID from Your iPhone 12 mini?
- How to Unlock Apple iPhone 11 Pro Max, Apples New iPhone | Dr.fone
- Top 10 Fixes for Phone Keep Disconnecting from Wi-Fi On Google Pixel Fold | Dr.fone
- In 2024, Full Guide to Bypass Infinix Note 30 VIP Racing Edition FRP
- The Top 5 Android Apps That Use Fingerprint Sensor to Lock Your Apps On Samsung Galaxy Z Flip 5
- Fix Unfortunately Settings Has Stopped on Vivo T2x 5G Quickly | Dr.fone
- Top IMEI Unlokers for Your Samsung Galaxy S23+ Phone
- Title: In 2024, Best Tools To Create Blend Image Collage
- Author: Chloe
- Created at : 2024-06-26 06:24:27
- Updated at : 2024-06-27 06:24:27
- Link: https://ai-editing-video.techidaily.com/in-2024-best-tools-to-create-blend-image-collage/
- License: This work is licensed under CC BY-NC-SA 4.0.
