
:max_bytes(150000):strip_icc():format(webp)/how-to-set-up-speech-to-text-on-android-0-928c48ab121248f9aa543a136d971f9a.jpg)
In 2024, Cropping a Video in Final Cut Pro Step by Step
Cropping a Video in Final Cut Pro [Step by Step]
“Storytelling at its most powerful”, - words we read on the first page of the official web-site of Final Cut Pro, non-linear video editing software program which runs on Mac computers. The software lets us to log and transfer videos onto a hard drive, where it can be edited, processed, and output to a wide variety of formats. Final Cut Pro is so advanced that it is used by hobbyist filmmakers and industry professionals in TV, Film, and media. Anyone can get a free trial of the software for their Macs, but, to purchase directly from the Mac App Store it costs $299.99. It’s evident that Final Cut Pro can’t be downloaded, installed, and thus used on Windows, which is unfortunate, but for Mac users, it’s a very powerful video editing software.

What are the features this advanced computer program offers to Mac users? – itreads on the web-site of Final Cut Pro:
- Object Tracker and Cinematic mode;
- Blazing pro performance;
- Editing, audio, motion graphics, color grading, and delivery;
- The best plug-ins, effects, and tools from leading developers.
One of the most impressive things about Final Cut Pro is that through it, you can create 2D and 3D titles right in the program, apply and modify filters, and use the built-in chroma key for high-quality green- and blue-screen effects. But, one should not be alarmed when it comes to experience and knowledge in editing – even though Final Cut Pro seems so advanced with its powerful tools and the possibilities it contains, it is designed for easy use and can be used by amateurs as well as professionals.
The interface, which, when it comes to editing, is one of the most important aspects (if not the main one!), seems quite standard - an ordinary window configuration, sidebar with libraries, events, projects, collections… If you want to know more about the basics of Final Cut Pro, it would be helpful to watch a beginner tutorial , with the length of only 20 minutes, an introduction of the whole program.

Anyway, the main topic of this article is about cropping – how to crop a video in Final Cut Pro? If you are a Mac user and have this program installed on your computer, and you as well have a footage where you want to remove some portions of the video and adjust the size of the cropped clip within a certain area, this article is for you. Even though cropping is especially used when it comes to the images, it is extremely helpful in certain situations about the video clips, as well. So, let’s dive into each step of cropping in Final Cut Pro!
Steps to crop a video in Final Cut Pro
After getting Final Cut Pro ready to work in and opening it, you need to start as always, as in any other software: Of course, choose Import Media.

The software will ask your permission to access files in your computer, so, in order to import some, guess you have to click on OK.

Then, it will let you choose your file – but not by opening the new window (as in most cases), rather, you can choose file within the software.

Once you have your file(s) chosen, you need to find Import Selected button on the down and right.

This will lead you towards the editor again, but if you try to drag and drop your file into the sequence, the program will not follow this simple order…

This is because what the window below reads and looks like – it offers you create a New Project first. So, you need to hit it.

This will create the sequence where you can add the video you have already selected and imported from your media.

Now, it’s time to find where the cropping option is. It’s quite simple – look at the icon below and a little left of the screen where your video clip shows, click on it and you will see three options: Transform, Crop, and Distort. Needless to say, you will choose crop in this case, even if other options sound quite interesting, too!

Choosing Crop also gives you three options: Trim, Crop, and Ken Burns. Stick with the Crop again!

You will notice the kind of rulers on the angles of the video clip – they are there so you can crop your footage manually, by holding and moving them with your cursor to your liking.

Of course, if you direct your cursor in the middle of the cropped video, you can move the whole cropping window around it, so you can find the area where you intend to crop better.

And when the selected area is ready, you need to click on Done button on the right top side of the screen. If you are not satisfied with the result, you can take the step back, by clicking on Reset button right next to Done and modify the area again.

On the right side of the screen, you notice a window where Crop is also written. Alongside it, if you hover over the option with your mouse, you will see the word: Show. Clicking on it will let you crop the video from each side from there, too.

There, you can “play around” with Left, Right, Top, and Bottom sides.

In the process, if you are unsure or you want to compare the original video to the cropped version of it, keep in mind that you can uncheck the Crop button.

Finally, when you feel the result is what you have imagined, you can proceed to saving your work. For it to be done, you need to now find an Export button top right of the whole editor, and then, choose Export File (or else, if that’s what you are willing to do).


The next step would be Export Settings. You will see a new window which has three sections: Info, Settings, and Roles. The most important one here would be considered Settings, where you choose your preferred Format, Video Codec, Resolution, Color Space, Audio Format, and Action.


When you click on Next, you then choose the Name of your project and the location where you want to save it exactly.

Then you click on Save, and in a short amount of time, you have your new cropped video where you chose to save it! So, that’s it with cropping in the Final Cut Pro!


An easier way to crop a video in Wondershare Filmora
When it comes down to Mac, we can also discussed another program which is available on Mac as well as Windows operating system. This software is Filmora Video Editor , which is a simple yet sophisticated video editor that empowers the stories with everything a video editor program can offer to its users. On its official web-site, Filmora is declared as the best video editor, which allows you to edit videos with minimal effort (and isn’t that exactly what one wants when trying to just crop a video?..), enhance videos with 800+ stunning effects, unleash creativity with Hollywood effects, and, import and export in almost any format. One can say that the interface looks quite like that of Final Cut Pro…
For Win 7 or later (64-bit)
For macOS 10.14 or later

So, shall we imagine we use Wondershare Filmora X to crop our video, what would be the steps to do it?..
Needless to say, downloading and installing the software is the first step. To add files, you need to click on Import Media Files Here.

Choose your clip(s) you would like to crop and then drag and drop it in the sequence.

Above your video in the sequence, you will see little icons and find a Crop one.

Click on it and a new window will open – it’s for Crop and Zoom, where you can choose a needed ratio or do it manually (for it, you have to select Custom first).

After clicking OK, your video will be cropped as you like. Then, you can proceed with Exporting it – click on Export, choose your preferred settings, and save the video.

So, in this article, we got to know to software Final Cut Pro better and learned about how to crop our footage using this program; we also discussed how to do the same in Wondershare Filmora X, shall we need a different software.
And now, you can choose your preferred one and follow these step, or, why not try both?..
What are the features this advanced computer program offers to Mac users? – itreads on the web-site of Final Cut Pro:
- Object Tracker and Cinematic mode;
- Blazing pro performance;
- Editing, audio, motion graphics, color grading, and delivery;
- The best plug-ins, effects, and tools from leading developers.
One of the most impressive things about Final Cut Pro is that through it, you can create 2D and 3D titles right in the program, apply and modify filters, and use the built-in chroma key for high-quality green- and blue-screen effects. But, one should not be alarmed when it comes to experience and knowledge in editing – even though Final Cut Pro seems so advanced with its powerful tools and the possibilities it contains, it is designed for easy use and can be used by amateurs as well as professionals.
The interface, which, when it comes to editing, is one of the most important aspects (if not the main one!), seems quite standard - an ordinary window configuration, sidebar with libraries, events, projects, collections… If you want to know more about the basics of Final Cut Pro, it would be helpful to watch a beginner tutorial , with the length of only 20 minutes, an introduction of the whole program.
Anyway, the main topic of this article is about cropping – how to crop a video in Final Cut Pro? If you are a Mac user and have this program installed on your computer, and you as well have a footage where you want to remove some portions of the video and adjust the size of the cropped clip within a certain area, this article is for you. Even though cropping is especially used when it comes to the images, it is extremely helpful in certain situations about the video clips, as well. So, let’s dive into each step of cropping in Final Cut Pro!
Steps to crop a video in Final Cut Pro
After getting Final Cut Pro ready to work in and opening it, you need to start as always, as in any other software: Of course, choose Import Media.
The software will ask your permission to access files in your computer, so, in order to import some, guess you have to click on OK.
Then, it will let you choose your file – but not by opening the new window (as in most cases), rather, you can choose file within the software.
Once you have your file(s) chosen, you need to find Import Selected button on the down and right.
This will lead you towards the editor again, but if you try to drag and drop your file into the sequence, the program will not follow this simple order…
This is because what the window below reads and looks like – it offers you create a New Project first. So, you need to hit it.
This will create the sequence where you can add the video you have already selected and imported from your media.
Now, it’s time to find where the cropping option is. It’s quite simple – look at the icon below and a little left of the screen where your video clip shows, click on it and you will see three options: Transform, Crop, and Distort. Needless to say, you will choose crop in this case, even if other options sound quite interesting, too!
Choosing Crop also gives you three options: Trim, Crop, and Ken Burns. Stick with the Crop again!
You will notice the kind of rulers on the angles of the video clip – they are there so you can crop your footage manually, by holding and moving them with your cursor to your liking.
Of course, if you direct your cursor in the middle of the cropped video, you can move the whole cropping window around it, so you can find the area where you intend to crop better.
And when the selected area is ready, you need to click on Done button on the right top side of the screen. If you are not satisfied with the result, you can take the step back, by clicking on Reset button right next to Done and modify the area again.
On the right side of the screen, you notice a window where Crop is also written. Alongside it, if you hover over the option with your mouse, you will see the word: Show. Clicking on it will let you crop the video from each side from there, too.
There, you can “play around” with Left, Right, Top, and Bottom sides.
In the process, if you are unsure or you want to compare the original video to the cropped version of it, keep in mind that you can uncheck the Crop button.
Finally, when you feel the result is what you have imagined, you can proceed to saving your work. For it to be done, you need to now find an Export button top right of the whole editor, and then, choose Export File (or else, if that’s what you are willing to do).
The next step would be Export Settings. You will see a new window which has three sections: Info, Settings, and Roles. The most important one here would be considered Settings, where you choose your preferred Format, Video Codec, Resolution, Color Space, Audio Format, and Action.
When you click on Next, you then choose the Name of your project and the location where you want to save it exactly.
Then you click on Save, and in a short amount of time, you have your new cropped video where you chose to save it! So, that’s it with cropping in the Final Cut Pro!
An easier way to crop a video in Wondershare Filmora
When it comes down to Mac, we can also discussed another program which is available on Mac as well as Windows operating system. This software is Filmora Video Editor , which is a simple yet sophisticated video editor that empowers the stories with everything a video editor program can offer to its users. On its official web-site, Filmora is declared as the best video editor, which allows you to edit videos with minimal effort (and isn’t that exactly what one wants when trying to just crop a video?..), enhance videos with 800+ stunning effects, unleash creativity with Hollywood effects, and, import and export in almost any format. One can say that the interface looks quite like that of Final Cut Pro…
For Win 7 or later (64-bit)
For macOS 10.14 or later
So, shall we imagine we use Wondershare Filmora X to crop our video, what would be the steps to do it?..
Needless to say, downloading and installing the software is the first step. To add files, you need to click on Import Media Files Here.
Choose your clip(s) you would like to crop and then drag and drop it in the sequence.
Above your video in the sequence, you will see little icons and find a Crop one.
Click on it and a new window will open – it’s for Crop and Zoom, where you can choose a needed ratio or do it manually (for it, you have to select Custom first).
After clicking OK, your video will be cropped as you like. Then, you can proceed with Exporting it – click on Export, choose your preferred settings, and save the video.
So, in this article, we got to know to software Final Cut Pro better and learned about how to crop our footage using this program; we also discussed how to do the same in Wondershare Filmora X, shall we need a different software.
And now, you can choose your preferred one and follow these step, or, why not try both?..
Video Editing Tips to Know Before Editing First Draft
Whether your video is short or long, you may want to make it better and appealing. Video editing involves the manipulation of your videos through which the desired transformation is achieved and you can flaunt every move of your video in a more preferable way. Video editing involves cutting the video short, changing the speed, organizing the video in a seamless flow. In short, the better the cuts of your videos, the better your message/story is conveyed.
Part 1: Things to Learn Before Editing First Draft
You have shot your video and now you’re stuck on the post-processing of that video. Don’t worry! We got you covered through this article which will guide you through the different things which you must learn before editing the first draft of your video.
Start a video project
Your smartphone and digital camera can let you record multiple videos but what now? You head out to edit your first draft by choosing a suitable platform or software and then you can surely lay back and see the software doing wonders to your raw videos. By starting off with editing, you choose your video editing preferences and then you just let the video editing tools do the magic.
Get to know the video editing software workspace
Video editing software offer customizable workspaces for different editing tasks. The software workspace streamlines routine actions you take with clips, like editing clips, making DVD and Blu-ray menus, and sharing movies. By placing panels in the layout that best matches your working style, you can personalize your workspace. The additional panels adjust automatically to fit the window as you rearrange them. For various jobs, such as one for editing and one for preview, you can build and store multiple workspaces.
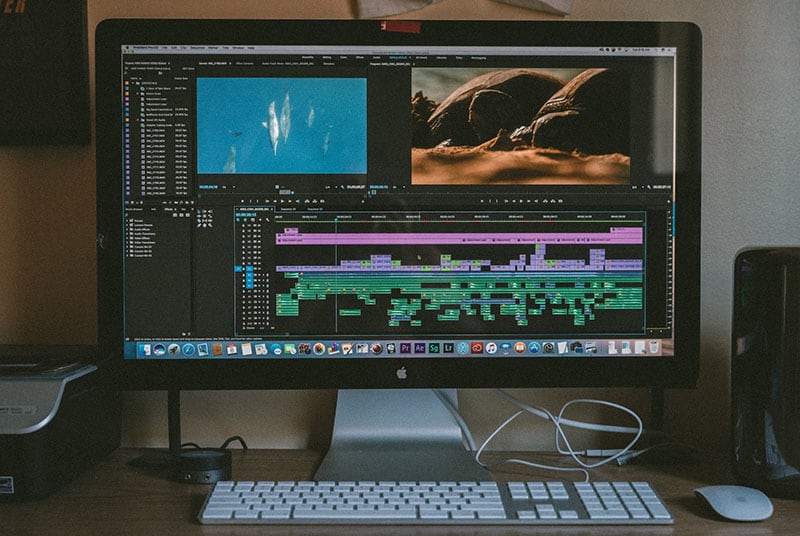
Understand the timeline
The timeline of your video is the backbone of your digital video editing process. It’s called a timeline because the various pieces of video will be lined up horizontally. In a video editing software, the timeline is where you arrange your video clips and plan out all the modifications you want to do. As you work, you will see every single one of your video and audio clips, effects, and transitions sorted chronologically from beginning to end. All the fundamentals of video editing, including reordering, trimming, and enhancing your footage, are available. To preview how your adjustments will turn out, you can also play your project at any point in the timeline.
Add clips to timeline
When you have grasped the idea behind a timeline, the next step you need to follow is to add clips into your timeline. Before adding clips to your timeline, it is suggested that you label each clip. Although it does seem like a lot of work, it will be easier to locate all of the clips later on if you’re working on a large project. after the footages are gathered and named, add important clips in the beginning of the timeline to begin establishing the video’s overall structure and order.
Editing tools
Besides basic cutting, trimming and cropping, video editing software offer multiple professional editing tools which enhance the outlook your videos and make them 10x better. For example, instead of cutting up a clip into a bunch of small clips and unwanted gaps, use the Ripple Edit tool keep your timeline clean. This means when a clip is trimmed, it causes a ripple effect throughout the rest of your timeline, shifting all other clips into a new timeline position.
Similarly, when working with lengthy timelines, the Razor tool is also really helpful because you can select the clip you wish to cut by dragging your razor over it. So, the Razor cut is the tool to use if you need to make a lot of cuts in your videos quickly.
Syncing audio and video
You already know how annoying it can be if audio and video don’t sync while you’re listening to a podcast or viewing a YouTube vlog. The video editing software offer helpful manual and auto sync tools. It can be though a bit of hard work for beginners, but the ‘Lights, Camera, Action’ approach works best in syncing your audio with your video. To sync audio, you need to record audio first and then through matching the wavelengths displayed on your timeline, you can sync the audio with your video.
Edit download talking head/interview footage
Now with professional video editing tools, you can make ‘talking head videos’ if you want to share your expertise as a YouTube vlogger or if you want to do employee training. Talking head films are a fantastic way to stimulate the mind and the heart while increasing learner retention in this digital age.
Additionally, with other video editing tools, you can edit your interview footages and for that, you don’t have to mess with timestamps, cutting or splicing videos, or creating transitions between clips, you just edit the transcript of the video and the video edits itself to match.
Video properties: Scale, position, opacity
Any screen recording, camera-based video, imported video clips, and text picture clips can have their visuals altered using video properties. In video editing software, multiple video properties are offered which include scaling, positioning, rotating, changing the opacity, changing level of reflection and shadow. Additionally, Video properties also include editing the video as a whole or just altering a clip from the video.
Types of cuts: Straight, J-Cut, L-Cut etc
The different types of cuts used in the video editing process is an effective way to make the transitions in your video pop. Basically, these cuts join two or more clips together via audio. Professional editors call these cuts as ‘split edits. The most common cuts are called J-Cut and L-Cut. They help to mix the content’s flow and keep the on-screen narrative in motion. In essence, these edits are necessary to make your scenes feel warm and more authentic.
Part 2: Practical Video Editing Tips
Choose right software
The push start of video editing for beginners is based on one common step: know your software or workspace. Selecting the appropriate software for editing your video is the first step in streamlining your video editing process. Although all software often includes the tools that you need to make ordinary video edits, you could favor one over the others based on its usefulness, digital interface, and features. Instead of just using the latest and trending video editing software available, the key is to choose what functions for you and your editing style.
Use a fast computer
Slow rendering hinders video editing process and other commands given to a computer. From a practical point of view, it is recommended that irrespective of the model of the computer or version of your software; your computer must be efficient to help you to access your files and software easily and to speed up your export time. With a slow computer, you will definitely feel stuck and the video editing complications will haunt you in your dreams.
Watch video editing tutorials
None of us is a pro until we’ve practiced something enough to know everything about it. Video editing requires both; technical knowledge as well as your creativity, so it is better not to do try things on your own. A little guidance can surely help you get through the basics of the video editing process. There are tons of helpful tutorials for making excellent videos on YouTube, vlogs, and educational websites. The majority of tutorials you’ll discover online are free, making the readily available at the tip of your fingers.
Get the project files
Most of the beginner video editors prefer to use the same project files as the tutorial instructors when they are following along. Your work will exactly resemble the demo’s sample, which will aid in your understanding of the steps. For precisely this reason, many tutorials let you download the project files. You can repeat a process with your own video files once you’ve mastered this technique.
Edit for a story
Remembering your creative objective to create a wonderful story or message through your edited video is one of the most crucial lessons you should learn from this article. It is critically important that you make your film visually appealing and dramatically engaging to effectively evoke the right emotions and to communicate your desired message. Instead of merely adding a huge amount of effects to wow your audience, use your practical and technical skills to do this.
Maintain an efficient workflow
You’ll need to be systematic and organized in addition to having an editing software if you want to become a more competent editor. Putting your projects and files in folders that you may use repeatedly is one method to streamline your process. Besides this, organizing your projects and files into an external hard drive or USB is recommended in case of losing access to your intricately designed projects.
Utilize keyboard shortcuts
Keyboard shortcuts speed up the process of video editing and save you ample time. Different keyboard shortcuts are compatible with different video editing software; leaving a few which are mutual in every software. Don’t attempt to put all of these shortcuts into action at once. Pick a small number to begin with, and as they become instinctive, add more. You’ll progress more quickly if you use less mouse while editing your video.
Learn important terms
As a beginner, you may not want to feel a lump in the throat caused by the complicated dictionary of video editing software. There are some broad video editing terms that refer to videography as a whole as well as video editing terms specific to the process of editing footage. You must first learn what these terms means for example you may want to know what the terms like ‘aspect ratio, B-roll, bit rate, close up, compression, crop and compositing’ mean.
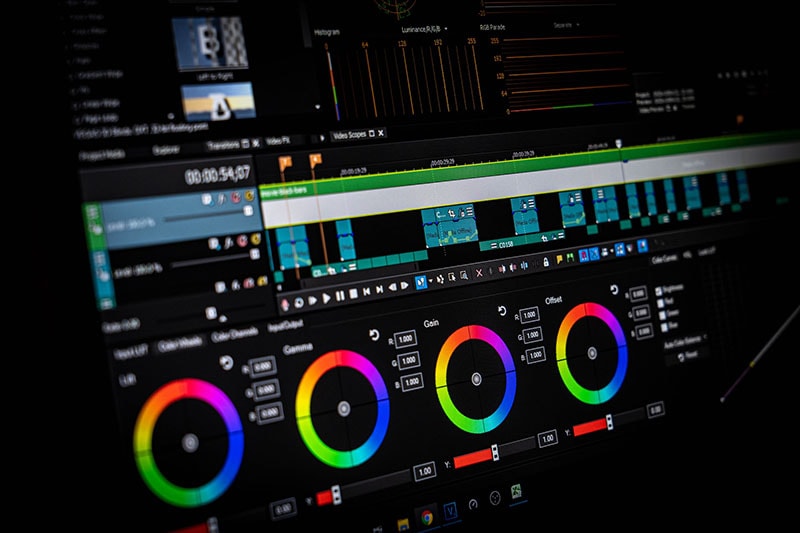
Color correct your clips
Do you own a rather boring video? Perhaps it’s a little too dull or the colors don’t stand out as much as they should? A crucial step is to modify the video’s color. This will assist in reducing the saturation and revive your video. Yet, there are some color correcting presets which can be easily accessed in different video editing apps.

Select good music
You ever saw an ad on YouTube or other social media platforms without an audio background. You may just want to skip it because the video, which may apparently be appealing, fails to strike you. Coordinating and complimenting your video with a music in the background is like cherry on top. It’s a huge plus to attract viewers’ attention. Though it is necessary that the music you choose must be relevant to your video file and should target the majority. So, choose good music to adorn your videos and trigger emotions in your target audience.
Add text and graphics
Some people are attracted more towards textual descriptions rather visual representation of content. It is crucial that considering the preferences of majority, you add significant details to your video which can target your audience in a multidimension. You might need to include more text in addition to the title, opening/closing billboards (for broadcasting), and film credits, depending on the type of film you’re making. However, you can make dazzling visuals using your editing program if you feel the urge to do so.
Export web versions
When your film is finished and is ready to be exported, you would have a natural urge to export it at the highest video resolution possible. If it’s going to be shown in theatres and on ultra-HD screens, this is unquestionably the best course of action. However, you should also export smaller, higher-quality versions for simpler viewing in the modern day where video projects are typically promoted online and on social media.
The objective of creating a file for the web is to keep its high quality while not making it too large for upload and online viewing. Don’t worry if you’re unsure of the export settings to utilize. Websites like Facebook, YouTube, and Vimeo all provide suggested export settings to assist you in correctly resizing your content.
Part 3: 10 Advanced Editing Tips for Professionals
We all definitely have experimented with video editing tools to some extent. But now, it is definitely time to become a pro. Don’t worry, the process isn’t as scary as we imagine it to be. This article is your best stop to grab some fine guidelines about how to become a video editor, in fact, a Pro video editor.
- Make titles stand out
You’re skilled in video editing, but do your titles seem a little…unfinished? Do those lower thirds strike you as being monotonous and boring? Is your typography competing for attention against your pictures? It appears that you would benefit from some basic title design advice, and lucky for you, we have some. Your title must be readable by majority and always choose your safe way in selecting texts for example, a sans-serif typeface is usually going to be a safe choice for video. You can also animate text to highlight it so that it is more captivating.
- Put video inside text or logos effects
Videos resonate with your brand and content if you add a specific logo or text effects to it. Almost all the video editors allow this featuring so that the identification of your work is maintained and copyright claim can be imposed if you see your content being copied or manipulated.
- Add light leaks, film burns and lens flares
Incorporating unique transitions into your monotonous videos can get you your viewer’s attention in a go. Lens flares, light leaks, and film burns can result in a unique look, but are not always easy to add naturally in-camera. Some of the best video editing software which allow access to adding lens flares, light leaks and film burns include: Free 4K Light Leaks – RocketStock, Motion Array Free Light Leaks, WZZLY Free Light Leaks, LIGHT LEAK FILM OVERLAY and many more.
- Add the vintage old film look
The quick Instagram-category of filters are common today but what makes your videos more natural and appealing is the addition of some presets which almost every video editor offers. These presets add a classic vintage old film look to your videos by manipulating color correction effects, framerate settings, overlays, and aspect ratio hacks. Some popular vintage old film effects are found in software namely VSDC, VEED, Adobe Premium Pro and many others in list.
- Add type-on effect
A type-on effect added to your videos comprehend your content more firmly. Simply by tabbing on ‘Add text effect’ in any video editor, you can add type-on effect to your videos and to add ravishing component to the overall structure of your video.
- Zoom in or out effect
The zoom-in or out feature (if available) in your video editing software can allow you to magnify any part of your video quickly and easily. Some of the best video editors featuring this specification include: Wondershare DemoCreator Zoom in Video Effect, DaVinci Resolve, Wondershare Filmora , Windows Movie Maker and Apowersoft Screen Recorder.
- Custom wipe on/off reveal effect
The wipe on/off reveal transition or effect is one of the earliest ways of transitioning from one scene to another. An object (usually a line) moves across the screen, revealing the next scene, while simultaneously removing (or wiping) the previous scene and when used properly, they can create a very powerful effect. It involves creative fading in and out transitions to give a more dramatic look.
- 4k, 8k, HD resolution
The latest video editing software offer the export your edited video in multiple formats, out of which 4k, 8k and HD resolution formats are preferable for majority of the professional video editors. It is necessary that even after the video is uploaded to a platform, the pixels do not decrease and the quality of the video is maintained. Although attractive to the viewers, the higher the resolution, the more the data with which you must deal. It is suggested that a standard or default resolution is chosen to play and replay the video in different computers.
- B-roll
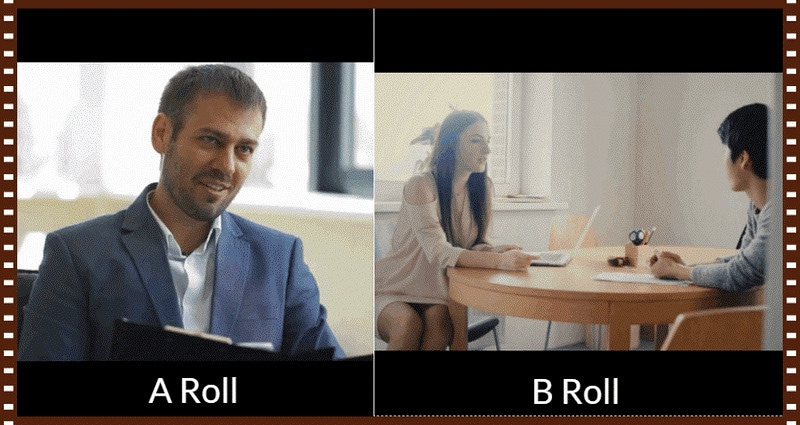
B-roll is secondary video that is frequently used as cutaway video to add context and visual interest to your story. The term is originated from the early days of Hollywood when there used to be an A-roll which was the primary video and B-roll which served as a secondary video footage. This can help you visualize your video from different dimensions, giving it a more realistic look for captivating viewers.
- Compression rate, bit depth, bit
The amount of data the camera records each second is referred to as bit rate. Every single second of a video is subject to significant data processing by cameras. The higher the quality of the video, the more is the bit rate. Bit depth refers to the number of colors your camera can read per pixel. Common bit depths are 8-bit and 10-bit, which enable a camera to read 256 million or 1.07 billion colors respectively. To upload your edited video, a compression is usually required to convert your resolution to internet quality so that the upload can be made simpler, without distorting the video resolution.
Whether your video is short or long, you may want to make it better and appealing. Video editing involves the manipulation of your videos through which the desired transformation is achieved and you can flaunt every move of your video in a more preferable way. Video editing involves cutting the video short, changing the speed, organizing the video in a seamless flow. In short, the better the cuts of your videos, the better your message/story is conveyed.
Part 1: Things to Learn Before Editing First Draft
You have shot your video and now you’re stuck on the post-processing of that video. Don’t worry! We got you covered through this article which will guide you through the different things which you must learn before editing the first draft of your video.
Start a video project
Your smartphone and digital camera can let you record multiple videos but what now? You head out to edit your first draft by choosing a suitable platform or software and then you can surely lay back and see the software doing wonders to your raw videos. By starting off with editing, you choose your video editing preferences and then you just let the video editing tools do the magic.
Get to know the video editing software workspace
Video editing software offer customizable workspaces for different editing tasks. The software workspace streamlines routine actions you take with clips, like editing clips, making DVD and Blu-ray menus, and sharing movies. By placing panels in the layout that best matches your working style, you can personalize your workspace. The additional panels adjust automatically to fit the window as you rearrange them. For various jobs, such as one for editing and one for preview, you can build and store multiple workspaces.
Understand the timeline
The timeline of your video is the backbone of your digital video editing process. It’s called a timeline because the various pieces of video will be lined up horizontally. In a video editing software, the timeline is where you arrange your video clips and plan out all the modifications you want to do. As you work, you will see every single one of your video and audio clips, effects, and transitions sorted chronologically from beginning to end. All the fundamentals of video editing, including reordering, trimming, and enhancing your footage, are available. To preview how your adjustments will turn out, you can also play your project at any point in the timeline.
Add clips to timeline
When you have grasped the idea behind a timeline, the next step you need to follow is to add clips into your timeline. Before adding clips to your timeline, it is suggested that you label each clip. Although it does seem like a lot of work, it will be easier to locate all of the clips later on if you’re working on a large project. after the footages are gathered and named, add important clips in the beginning of the timeline to begin establishing the video’s overall structure and order.
Editing tools
Besides basic cutting, trimming and cropping, video editing software offer multiple professional editing tools which enhance the outlook your videos and make them 10x better. For example, instead of cutting up a clip into a bunch of small clips and unwanted gaps, use the Ripple Edit tool keep your timeline clean. This means when a clip is trimmed, it causes a ripple effect throughout the rest of your timeline, shifting all other clips into a new timeline position.
Similarly, when working with lengthy timelines, the Razor tool is also really helpful because you can select the clip you wish to cut by dragging your razor over it. So, the Razor cut is the tool to use if you need to make a lot of cuts in your videos quickly.
Syncing audio and video
You already know how annoying it can be if audio and video don’t sync while you’re listening to a podcast or viewing a YouTube vlog. The video editing software offer helpful manual and auto sync tools. It can be though a bit of hard work for beginners, but the ‘Lights, Camera, Action’ approach works best in syncing your audio with your video. To sync audio, you need to record audio first and then through matching the wavelengths displayed on your timeline, you can sync the audio with your video.
Edit download talking head/interview footage
Now with professional video editing tools, you can make ‘talking head videos’ if you want to share your expertise as a YouTube vlogger or if you want to do employee training. Talking head films are a fantastic way to stimulate the mind and the heart while increasing learner retention in this digital age.
Additionally, with other video editing tools, you can edit your interview footages and for that, you don’t have to mess with timestamps, cutting or splicing videos, or creating transitions between clips, you just edit the transcript of the video and the video edits itself to match.
Video properties: Scale, position, opacity
Any screen recording, camera-based video, imported video clips, and text picture clips can have their visuals altered using video properties. In video editing software, multiple video properties are offered which include scaling, positioning, rotating, changing the opacity, changing level of reflection and shadow. Additionally, Video properties also include editing the video as a whole or just altering a clip from the video.
Types of cuts: Straight, J-Cut, L-Cut etc
The different types of cuts used in the video editing process is an effective way to make the transitions in your video pop. Basically, these cuts join two or more clips together via audio. Professional editors call these cuts as ‘split edits. The most common cuts are called J-Cut and L-Cut. They help to mix the content’s flow and keep the on-screen narrative in motion. In essence, these edits are necessary to make your scenes feel warm and more authentic.
Part 2: Practical Video Editing Tips
Choose right software
The push start of video editing for beginners is based on one common step: know your software or workspace. Selecting the appropriate software for editing your video is the first step in streamlining your video editing process. Although all software often includes the tools that you need to make ordinary video edits, you could favor one over the others based on its usefulness, digital interface, and features. Instead of just using the latest and trending video editing software available, the key is to choose what functions for you and your editing style.
Use a fast computer
Slow rendering hinders video editing process and other commands given to a computer. From a practical point of view, it is recommended that irrespective of the model of the computer or version of your software; your computer must be efficient to help you to access your files and software easily and to speed up your export time. With a slow computer, you will definitely feel stuck and the video editing complications will haunt you in your dreams.
Watch video editing tutorials
None of us is a pro until we’ve practiced something enough to know everything about it. Video editing requires both; technical knowledge as well as your creativity, so it is better not to do try things on your own. A little guidance can surely help you get through the basics of the video editing process. There are tons of helpful tutorials for making excellent videos on YouTube, vlogs, and educational websites. The majority of tutorials you’ll discover online are free, making the readily available at the tip of your fingers.
Get the project files
Most of the beginner video editors prefer to use the same project files as the tutorial instructors when they are following along. Your work will exactly resemble the demo’s sample, which will aid in your understanding of the steps. For precisely this reason, many tutorials let you download the project files. You can repeat a process with your own video files once you’ve mastered this technique.
Edit for a story
Remembering your creative objective to create a wonderful story or message through your edited video is one of the most crucial lessons you should learn from this article. It is critically important that you make your film visually appealing and dramatically engaging to effectively evoke the right emotions and to communicate your desired message. Instead of merely adding a huge amount of effects to wow your audience, use your practical and technical skills to do this.
Maintain an efficient workflow
You’ll need to be systematic and organized in addition to having an editing software if you want to become a more competent editor. Putting your projects and files in folders that you may use repeatedly is one method to streamline your process. Besides this, organizing your projects and files into an external hard drive or USB is recommended in case of losing access to your intricately designed projects.
Utilize keyboard shortcuts
Keyboard shortcuts speed up the process of video editing and save you ample time. Different keyboard shortcuts are compatible with different video editing software; leaving a few which are mutual in every software. Don’t attempt to put all of these shortcuts into action at once. Pick a small number to begin with, and as they become instinctive, add more. You’ll progress more quickly if you use less mouse while editing your video.
Learn important terms
As a beginner, you may not want to feel a lump in the throat caused by the complicated dictionary of video editing software. There are some broad video editing terms that refer to videography as a whole as well as video editing terms specific to the process of editing footage. You must first learn what these terms means for example you may want to know what the terms like ‘aspect ratio, B-roll, bit rate, close up, compression, crop and compositing’ mean.
Color correct your clips
Do you own a rather boring video? Perhaps it’s a little too dull or the colors don’t stand out as much as they should? A crucial step is to modify the video’s color. This will assist in reducing the saturation and revive your video. Yet, there are some color correcting presets which can be easily accessed in different video editing apps.
Select good music
You ever saw an ad on YouTube or other social media platforms without an audio background. You may just want to skip it because the video, which may apparently be appealing, fails to strike you. Coordinating and complimenting your video with a music in the background is like cherry on top. It’s a huge plus to attract viewers’ attention. Though it is necessary that the music you choose must be relevant to your video file and should target the majority. So, choose good music to adorn your videos and trigger emotions in your target audience.
Add text and graphics
Some people are attracted more towards textual descriptions rather visual representation of content. It is crucial that considering the preferences of majority, you add significant details to your video which can target your audience in a multidimension. You might need to include more text in addition to the title, opening/closing billboards (for broadcasting), and film credits, depending on the type of film you’re making. However, you can make dazzling visuals using your editing program if you feel the urge to do so.
Export web versions
When your film is finished and is ready to be exported, you would have a natural urge to export it at the highest video resolution possible. If it’s going to be shown in theatres and on ultra-HD screens, this is unquestionably the best course of action. However, you should also export smaller, higher-quality versions for simpler viewing in the modern day where video projects are typically promoted online and on social media.
The objective of creating a file for the web is to keep its high quality while not making it too large for upload and online viewing. Don’t worry if you’re unsure of the export settings to utilize. Websites like Facebook, YouTube, and Vimeo all provide suggested export settings to assist you in correctly resizing your content.
Part 3: 10 Advanced Editing Tips for Professionals
We all definitely have experimented with video editing tools to some extent. But now, it is definitely time to become a pro. Don’t worry, the process isn’t as scary as we imagine it to be. This article is your best stop to grab some fine guidelines about how to become a video editor, in fact, a Pro video editor.
- Make titles stand out
You’re skilled in video editing, but do your titles seem a little…unfinished? Do those lower thirds strike you as being monotonous and boring? Is your typography competing for attention against your pictures? It appears that you would benefit from some basic title design advice, and lucky for you, we have some. Your title must be readable by majority and always choose your safe way in selecting texts for example, a sans-serif typeface is usually going to be a safe choice for video. You can also animate text to highlight it so that it is more captivating.
- Put video inside text or logos effects
Videos resonate with your brand and content if you add a specific logo or text effects to it. Almost all the video editors allow this featuring so that the identification of your work is maintained and copyright claim can be imposed if you see your content being copied or manipulated.
- Add light leaks, film burns and lens flares
Incorporating unique transitions into your monotonous videos can get you your viewer’s attention in a go. Lens flares, light leaks, and film burns can result in a unique look, but are not always easy to add naturally in-camera. Some of the best video editing software which allow access to adding lens flares, light leaks and film burns include: Free 4K Light Leaks – RocketStock, Motion Array Free Light Leaks, WZZLY Free Light Leaks, LIGHT LEAK FILM OVERLAY and many more.
- Add the vintage old film look
The quick Instagram-category of filters are common today but what makes your videos more natural and appealing is the addition of some presets which almost every video editor offers. These presets add a classic vintage old film look to your videos by manipulating color correction effects, framerate settings, overlays, and aspect ratio hacks. Some popular vintage old film effects are found in software namely VSDC, VEED, Adobe Premium Pro and many others in list.
- Add type-on effect
A type-on effect added to your videos comprehend your content more firmly. Simply by tabbing on ‘Add text effect’ in any video editor, you can add type-on effect to your videos and to add ravishing component to the overall structure of your video.
- Zoom in or out effect
The zoom-in or out feature (if available) in your video editing software can allow you to magnify any part of your video quickly and easily. Some of the best video editors featuring this specification include: Wondershare DemoCreator Zoom in Video Effect, DaVinci Resolve, Wondershare Filmora , Windows Movie Maker and Apowersoft Screen Recorder.
- Custom wipe on/off reveal effect
The wipe on/off reveal transition or effect is one of the earliest ways of transitioning from one scene to another. An object (usually a line) moves across the screen, revealing the next scene, while simultaneously removing (or wiping) the previous scene and when used properly, they can create a very powerful effect. It involves creative fading in and out transitions to give a more dramatic look.
- 4k, 8k, HD resolution
The latest video editing software offer the export your edited video in multiple formats, out of which 4k, 8k and HD resolution formats are preferable for majority of the professional video editors. It is necessary that even after the video is uploaded to a platform, the pixels do not decrease and the quality of the video is maintained. Although attractive to the viewers, the higher the resolution, the more the data with which you must deal. It is suggested that a standard or default resolution is chosen to play and replay the video in different computers.
- B-roll
B-roll is secondary video that is frequently used as cutaway video to add context and visual interest to your story. The term is originated from the early days of Hollywood when there used to be an A-roll which was the primary video and B-roll which served as a secondary video footage. This can help you visualize your video from different dimensions, giving it a more realistic look for captivating viewers.
- Compression rate, bit depth, bit
The amount of data the camera records each second is referred to as bit rate. Every single second of a video is subject to significant data processing by cameras. The higher the quality of the video, the more is the bit rate. Bit depth refers to the number of colors your camera can read per pixel. Common bit depths are 8-bit and 10-bit, which enable a camera to read 256 million or 1.07 billion colors respectively. To upload your edited video, a compression is usually required to convert your resolution to internet quality so that the upload can be made simpler, without distorting the video resolution.
Change Video Speed with FFmpeg
Have you ever wanted to speed up or slow down a video? Maybe it was too long, or you wanted to draw out an exciting part of the video without having to watch the boring parts.
In this article, we will be showing you how to use FFmpeg to speed up and slow down your videos using CLI. You’ll also find some other useful FFmpeg commands that you can use on your videos.
Finally, we will explain how to automate these commands so that you can run them on all your videos with ease.

Part 1. What is FFmpeg?
FFmpeg is a free and open-source cross-platform software project that can record, convert, and stream audio and video. It was developed by Fabrice Bellard in 2000. It has since become one of the most popular tools for transcoding media content on Linux, Unix, Mac OS X, Windows NT, and more.
One of its lesser-known capabilities is to speed up or slow down videos in just about any design you can think of — with either the audio or the video synced to the other if desired.
Uses of FFmpeg
FFMPEG is a command-line tool that can manipulate and transcode video files. Its uses are as follows:
- FFmpeg can create, trim, join or separate video clips on the fly and encode them into formats including MPEG, VOB, M2TS, TS, RMVB, or AVI.
- It can be used for Video processing, Video packaging support, Video compression, Audio, and Video container support, FFplay, and FFprobe.
- It also has extensive options for altering the look of an image in just about any way imaginable. Whether you want to change the brightness, hue, saturation, or perform multiple operations like subsampling (resizing) without reducing quality—the list goes on!
You could think of it as the Swiss army knife for video manipulation tasks. The interface might seem intimidating at first, but once you get the hang of it, all commands are broken down into simple English phrases.
The most important thing to know before getting started with this is how to use FFmpeg’s -i and -v flags for input and output, respectively. To apply effects like slow motion playback or fast motion playback, use these flags in tandem with one another when specifying which file should be edited.
Benefits and Disadvantages of FFmpeg
FFmpeg has many benefits over other video editing software because it is free and open source, meaning that you have access to the code so that you can modify it if needed. Thus, it’s a better option when compared to other video editing software such as Avidemux, QuickTime Pro 7, and Adobe Premiere Elements 12. Some of these benefits include:
- Being able to edit videos on multiple platforms (Windows, Mac OS X);
- FFmpeg has features to speed up and slow down video;
- Being able to convert from one format into another seamlessly;
- An extensive amount of features are at your disposal.
Some of the drawbacks are that some settings are not configurable, like with YouTube’s built-in editor. The main disadvantage, though, would be the lengthiness of the program’s installation process: not only do you need to download FFmpeg itself but also three external libraries like libx264, libmp3lame, and libfaac; then you must compile all six packages before the installation completes. Luckily this process doesn’t take very long.
Another possible disadvantage is the time required for downloading the various resources since they may not be readily available on standard file hosting sites such as Mediafire or Dropbox (though they can be found through third-party websites). If you’re looking for something more robust than Windows Movie Maker or iMovie, we recommend checking out FFmpeg.
Part 2. How to Speed Up a Video in FFmpeg?
FFmpeg can be used to speed up videos. It’s not the only option, but it’s one of the most common ways to make your videos faster. If you want your video to be faster, then FFmpeg is the right tool for the job. Some speed-up features include: FFmpeg speed up video and audio, ffmpeg speed up video mp4, ffmpeg change video speed, and so on.
The Ultimate Step-by-Step Guide to speed up a video in FFmpeg
The presentation timestamp (PTS) of each video frame can be modified to alter the pace of a video stream.
Step1 Open a terminal and type in FFmpeg. This will open the program.

Step2 Drag and drop the video file onto the window.
Step3 This is accomplished with the command -filter:v “setpts=.”
Step4 According to the documentation, fast motion requires: -filter:v setpts=0.5*PTS.

Step5 Click Enter.

Step6 The result would be a sped-up version of your video.
Part 3. An Alternative to FFmpeg: Wondershare Filmora
FFmpeg is the best video editor in this e-market, and it’s totally free! The only problem with this software, however, is that it isn’t very easy to use for some newbies. If you’re looking for an alternative to FFmpeg but want one with amazing editing capabilities, Wondershare Filmora should be on top of your list! Here are some key features that make Filmora stand out among other video editors.
Wondershare Filmora has all the features you need in a video editor and is also easy enough for beginners to use. It is also compatible with Windows and Mac OS, which means there are no issues with compatibility.
One of the best features of this software, compared to FFmpeg, is its simplicity. With just a few clicks and by following the on-screen instructions, it can be used to create videos that are visually appealing and fun.
Free Download For Win 7 or later(64-bit)
Free Download For macOS 10.14 or later
The supported formats of Filmora are Video formats (AVI, MPEG-2, MPEG-4, MKV, WMV), Video codecs (AVC1, MPEG-4 AVC, VC1/WMV3), Audio formats (AC3/DTS), Picture formats (JPG/JPEG). Supports up to 4K resolution.
Filmora also offers extensive editing features, including:
- Speed Ramping: To produce distinctive dramatic effects, change the speed of your film while having more control over your keyframes.
- Preset Templates: Making a creative film is straightforward using the built-in Filmora Preset template
- Mask and Blend: The masking and blending features in Filmora are user-friendly and packed with valuable capabilities.
- AI Portrait: Easily identify people in your film and increase the fun factor when editing it.
Major approaches to speed up a video in Filmora
As we know that Filmora has the option to change the speed of a video, so let’s find out step-by-step how to do that; you can also watch this Tutorial on Youtube :
Method 1: Use the ‘Fast’ or ‘Slow’ option to change the speed
Just as simple as the heading is, this option is pretty straightforward, but you cannot decide how much speed you want to add to your video or how slow you want it to be.
Method 2: Changing Uniform Speed in Wondershare Filmora
You need to check your video’s FPS and import your clip first.
Pick your preferred video. Go to the menu and select “Download.” After hitting the “Plus” button, you may maintain the video’s quality by choosing “Match to Media.”

After the movie has loaded, you have two options: double-clicking the clip or selecting the speed option provided below the screen.

A window appears when we double-click the chosen video. We shall navigate to the “SPEED” section beneath this window. Additional “Uniform Speed” and “Speed Ramping” panels may be found on this speed panel. We shall operate within the uniform speed panel to alter the video’s tempo consistently. A slider is provided for us to adjust the movie’s pacing.
The general speed of the film is continually increased or decreased when we choose the option for constant pace. If we choose the speed option on the screen, it gives us a built-in range of numbers that we can use to change the video’s pace in addition to presets like rapid and regular slow.

Once we click “OK,” the video’s tempo adjusts automatically.
Method 3: Adjusting the Fast/Slow motion to fit your movie using the Speed Ramping option
To set up the speed ramping feature for your video, double-clicking the video will give us access to the “SPEED RAMPING” option in the speed panel. When we select the speed ramping option, we see a range of graphs. Each graph shows a number of tempo variations that we may use in our movie.
For Instance, when we select the “MONTAGE” preset, the video’s tempo changes based on how many keyframes we choose and at what rate. As previously stated, as the graph rises above one and falls below one, the movie’s tempo will slow down, increasing its regular speed.

Moving these keyframes higher will make the video go more quickly, while moving them downward will make the movie move more slowly. We may also add more keyframes by using the add button up top, as seen in the image. When satisfied with our results, we will produce the video after pressing the “OK” button.
Watch this video and know more about speed ramping.
Conclusion
In conclusion, the first thing you can do to speed up your video is to use FFmpeg. The FFmpeg project is a community-driven, non-profit collaborative project to develop and maintain an open-source code library for handling multimedia files, including video. It has many features including ffmpeg speed-up video, ffmpeg slow-down video, etc. FFmpeg is free software and supports many platforms, including Linux, macOS, iOS, and Android.
Filmora is another great alternative that allows users to speed up their videos much more easily than using FFmpeg alone. Moreover, it has built-in tools that allow users to automatically detect if there are any issues with their videos. Filmora also offers a wide range of features that you may not find in FFmpeg.
Free Download For macOS 10.14 or later
The supported formats of Filmora are Video formats (AVI, MPEG-2, MPEG-4, MKV, WMV), Video codecs (AVC1, MPEG-4 AVC, VC1/WMV3), Audio formats (AC3/DTS), Picture formats (JPG/JPEG). Supports up to 4K resolution.
Filmora also offers extensive editing features, including:
- Speed Ramping: To produce distinctive dramatic effects, change the speed of your film while having more control over your keyframes.
- Preset Templates: Making a creative film is straightforward using the built-in Filmora Preset template
- Mask and Blend: The masking and blending features in Filmora are user-friendly and packed with valuable capabilities.
- AI Portrait: Easily identify people in your film and increase the fun factor when editing it.
Major approaches to speed up a video in Filmora
As we know that Filmora has the option to change the speed of a video, so let’s find out step-by-step how to do that; you can also watch this Tutorial on Youtube :
Method 1: Use the ‘Fast’ or ‘Slow’ option to change the speed
Just as simple as the heading is, this option is pretty straightforward, but you cannot decide how much speed you want to add to your video or how slow you want it to be.
Method 2: Changing Uniform Speed in Wondershare Filmora
You need to check your video’s FPS and import your clip first.
Pick your preferred video. Go to the menu and select “Download.” After hitting the “Plus” button, you may maintain the video’s quality by choosing “Match to Media.”
After the movie has loaded, you have two options: double-clicking the clip or selecting the speed option provided below the screen.
A window appears when we double-click the chosen video. We shall navigate to the “SPEED” section beneath this window. Additional “Uniform Speed” and “Speed Ramping” panels may be found on this speed panel. We shall operate within the uniform speed panel to alter the video’s tempo consistently. A slider is provided for us to adjust the movie’s pacing.
The general speed of the film is continually increased or decreased when we choose the option for constant pace. If we choose the speed option on the screen, it gives us a built-in range of numbers that we can use to change the video’s pace in addition to presets like rapid and regular slow.
Once we click “OK,” the video’s tempo adjusts automatically.
Method 3: Adjusting the Fast/Slow motion to fit your movie using the Speed Ramping option
To set up the speed ramping feature for your video, double-clicking the video will give us access to the “SPEED RAMPING” option in the speed panel. When we select the speed ramping option, we see a range of graphs. Each graph shows a number of tempo variations that we may use in our movie.
For Instance, when we select the “MONTAGE” preset, the video’s tempo changes based on how many keyframes we choose and at what rate. As previously stated, as the graph rises above one and falls below one, the movie’s tempo will slow down, increasing its regular speed.
Moving these keyframes higher will make the video go more quickly, while moving them downward will make the movie move more slowly. We may also add more keyframes by using the add button up top, as seen in the image. When satisfied with our results, we will produce the video after pressing the “OK” button.
Watch this video and know more about speed ramping.
Conclusion
In conclusion, the first thing you can do to speed up your video is to use FFmpeg. The FFmpeg project is a community-driven, non-profit collaborative project to develop and maintain an open-source code library for handling multimedia files, including video. It has many features including ffmpeg speed-up video, ffmpeg slow-down video, etc. FFmpeg is free software and supports many platforms, including Linux, macOS, iOS, and Android.
Filmora is another great alternative that allows users to speed up their videos much more easily than using FFmpeg alone. Moreover, it has built-in tools that allow users to automatically detect if there are any issues with their videos. Filmora also offers a wide range of features that you may not find in FFmpeg.
How to Make Boring Videos Look Cool By B Rolls
Everyone is bored after watching a simple recorded video in which a character explains or tells a story. No one will watch it for more than 4 minutes!
After looking through this article, you will make your video more fascinating and get more views instantly. It’s all just due to B-roll, which will act as a ninja feature in your video. In this regard, Wondershare Filmora will handle everything.
Scroll more to discover two different types of B-roll videos and get an idea of how to make fascinating B-roll videos.
Part 1. What Is a B-roll?
B-roll is alternative or supplementary video footage that editors can use to intercut in between their main video. In that way, B-roll can add more information to a scene.
An additional footage
It is added as a supplementary video to interact with viewers more closely. This feature helps to give more details of a scene.
Visual representation
When the main explanatory video is too boring, you can add a b-roll to represent the movie’s story visually. It can also add to spice up and beat the energy of the narrative.
Without sound
The B-roll shots are mostly without audio or with little background sound. In most cases, the sound of the primary video is continued while the B-roll footage is just shown.
Act as a filler
The criteria for the B-roll is to provide the situation of the storyline. Additionally, it could be utilized as filler in between scenes in a movie or television program. B-roll may be found almost anywhere!
In this article, you will learn about two main kinds of B-rolls and the steps to edit them on Wondershare Filmora . Stick with us to the end!
Free Download For Win 7 or later(64-bit)
Free Download For macOS 10.14 or later
Part 2. Two Types of B-rolls: Explanation Video B-rolls
When recording any explanatory video, the audience may leave it in the middle of a video if a character explains without any visual representation. When explaining something new, showing the object in B-roll can be more effective than just verbally explaining what the audience is seeing.
Let’s take the video we made about microphones as an example. Instead of just verbally introduce the various mics, we inserted B-roll footage to display what they look like and how they can be used. The combination of the visual footage and the background voiceover presents the mic in a more vivid way. Also, it keeps the audience’s attention.

Goal of the explanation B-roll video
The main goal of this type of B-roll is to show your audience what you are talking about instead of just telling them in a dull way.
Part 3. How to Edit Explanation B-roll Footage on Filmora?
After getting the footage and recording shots for B-roll videos, you need to edit it on the Wondershare Filmora. For this, follow the below-mentioned steps:
Step1Download the Wondershare Filmora
There is no need to do any complex process for editing on any platform. Because we have one platform on which every tool is available.
- First of all, you have to download the Wondershare Filmora .
- Then get access to the entire features.
The premium version has new features and effects plugins that make editing more filmy and fun!
Step2Stock media in Filmora
After downloading, it’s time to edit the B-roll video. If you can’t film your own B-roll, you can use stock footage but make sure you have the license to use them.
Filmora has a unique “stock media” option that enables us to use all these elements and more to boost our videos! To add stock media, follow the below steps:
- Open the app or window of Filmora, which you have installed.
- Head towards the tab on the top right side.
- Then click on the Stock Media option and open it.
- A long list of stock videos and images will pop up.

- Select whatever you want, and download it.
- Then drag and drop it in the timeline and insert it between your video.
![]()
Note: Only premium customers will get access to the stock media of the Wondershare Filmora.
Step3Add B-roll in between the main video
The most difficult and frequent asking situation is how you know when to cut to B-roll. To get to know when to insert B-roll, follow the following steps:
- Watch your edits back and check out where you need.
- Sense about the dull and complex points and cut the main video from there.
- The points can be easily fixed with visual aids.

Part 4. Two Types of B-rolls: Storytelling Video B-rolls
During the creation of short films or any storytelling videos, if a person sits and speaks without showing any character or anything else, it will turn boring. Due to this, you have more chances to lose your audience and viewers.
In visual storytelling, if you will insert more clips with close shots, it will make the environment cool. The crazy thing is that you can make mimic shots easily at home by utilizing household objects. Let’s check out one of the examples.
Example 1. Film B-roll footage with food
So let’s add some b-roll to give it more context even if you have a master shot of yourself looking off frame alone.
Step1Write a script
Before making any video, the first step is to write a script for the whole video. If you will have more than two characters, then make dialogues for everyone and practice it again and again to give a fascinating look.
Then speak to your audience, make sure that what you are speaking is vivid and make everything simple and crystal clear.
Step2Shot a primary video
First of all, make a primary video according to your script by implementing a camera at one side, or you can also change the angle of the camera lens during shooting to have a look from all sides.

As you can see that it’s kind of boring for the audience, but we will make it more unique by implementing closer shots. For this, follow the last step:
Step3Make B-roll shots
Make closer shots of things which the character have to select and pick up. Check out two B-roll shots for the main video:
- First, make a closer shot of the object (Snacks) that the character is noticing prior.

- Second, create more intimate footage of the second object (Banana) which the character will select and grab.

Step4Edit both B-roll footages in Main Video
Now, in the last, insert the B-roll footage in between the primary video from the Filmora and get your results. Enjoy it with your viewers!

Now experiment at home with more daily life activities and create all on Filmora. Check out one more example to create B-roll footage!
Example 2. Make B-roll shots with a cardboard
Try using readily accessible cardboard to create light effects in different shapes and give the film a fantastical place. These methods frequently produce artistic videos that transmit unique moods to viewers.
Only experienced photographers and videographers understand how to use these fundamental tricks to gain viewers into the photos.
The intriguing thing is that if the light is more shaped, it will more accurately reflect the image’s background, setting, and context. Try it out!
Step1Cut the cardboard
You may shape the cardboard any way you desire. We’ll experiment with this by cutting cardboard into the shape of window shades.

Step2Make B-roll footage
Create B-roll footage by moving the cardboard around the light source after giving it shape. The person appears to be seated close to the window and conveys aesthetic vibrancy.

Now, use this B-roll footage in your video and give it a more professional look. The more creative you are, the more audience will attract to you.
Conclusion
Making B-roll shots is creative and fun! You can make all the footage at home by following easy steps. Try out different ones to make your video viral and boost the target audience!
You can easily use Wondershare Filmora during editing and their stock media to save your time in video making. Share your hacks with your audience to get more experience!
Free Download For macOS 10.14 or later
Part 2. Two Types of B-rolls: Explanation Video B-rolls
When recording any explanatory video, the audience may leave it in the middle of a video if a character explains without any visual representation. When explaining something new, showing the object in B-roll can be more effective than just verbally explaining what the audience is seeing.
Let’s take the video we made about microphones as an example. Instead of just verbally introduce the various mics, we inserted B-roll footage to display what they look like and how they can be used. The combination of the visual footage and the background voiceover presents the mic in a more vivid way. Also, it keeps the audience’s attention.
Goal of the explanation B-roll video
The main goal of this type of B-roll is to show your audience what you are talking about instead of just telling them in a dull way.
Part 3. How to Edit Explanation B-roll Footage on Filmora?
After getting the footage and recording shots for B-roll videos, you need to edit it on the Wondershare Filmora. For this, follow the below-mentioned steps:
Step1Download the Wondershare Filmora
There is no need to do any complex process for editing on any platform. Because we have one platform on which every tool is available.
- First of all, you have to download the Wondershare Filmora .
- Then get access to the entire features.
The premium version has new features and effects plugins that make editing more filmy and fun!
Step2Stock media in Filmora
After downloading, it’s time to edit the B-roll video. If you can’t film your own B-roll, you can use stock footage but make sure you have the license to use them.
Filmora has a unique “stock media” option that enables us to use all these elements and more to boost our videos! To add stock media, follow the below steps:
- Open the app or window of Filmora, which you have installed.
- Head towards the tab on the top right side.
- Then click on the Stock Media option and open it.
- A long list of stock videos and images will pop up.
- Select whatever you want, and download it.
- Then drag and drop it in the timeline and insert it between your video.
![]()
Note: Only premium customers will get access to the stock media of the Wondershare Filmora.
Step3Add B-roll in between the main video
The most difficult and frequent asking situation is how you know when to cut to B-roll. To get to know when to insert B-roll, follow the following steps:
- Watch your edits back and check out where you need.
- Sense about the dull and complex points and cut the main video from there.
- The points can be easily fixed with visual aids.
Part 4. Two Types of B-rolls: Storytelling Video B-rolls
During the creation of short films or any storytelling videos, if a person sits and speaks without showing any character or anything else, it will turn boring. Due to this, you have more chances to lose your audience and viewers.
In visual storytelling, if you will insert more clips with close shots, it will make the environment cool. The crazy thing is that you can make mimic shots easily at home by utilizing household objects. Let’s check out one of the examples.
Example 1. Film B-roll footage with food
So let’s add some b-roll to give it more context even if you have a master shot of yourself looking off frame alone.
Step1Write a script
Before making any video, the first step is to write a script for the whole video. If you will have more than two characters, then make dialogues for everyone and practice it again and again to give a fascinating look.
Then speak to your audience, make sure that what you are speaking is vivid and make everything simple and crystal clear.
Step2Shot a primary video
First of all, make a primary video according to your script by implementing a camera at one side, or you can also change the angle of the camera lens during shooting to have a look from all sides.
As you can see that it’s kind of boring for the audience, but we will make it more unique by implementing closer shots. For this, follow the last step:
Step3Make B-roll shots
Make closer shots of things which the character have to select and pick up. Check out two B-roll shots for the main video:
- First, make a closer shot of the object (Snacks) that the character is noticing prior.
- Second, create more intimate footage of the second object (Banana) which the character will select and grab.
Step4Edit both B-roll footages in Main Video
Now, in the last, insert the B-roll footage in between the primary video from the Filmora and get your results. Enjoy it with your viewers!
Now experiment at home with more daily life activities and create all on Filmora. Check out one more example to create B-roll footage!
Example 2. Make B-roll shots with a cardboard
Try using readily accessible cardboard to create light effects in different shapes and give the film a fantastical place. These methods frequently produce artistic videos that transmit unique moods to viewers.
Only experienced photographers and videographers understand how to use these fundamental tricks to gain viewers into the photos.
The intriguing thing is that if the light is more shaped, it will more accurately reflect the image’s background, setting, and context. Try it out!
Step1Cut the cardboard
You may shape the cardboard any way you desire. We’ll experiment with this by cutting cardboard into the shape of window shades.
Step2Make B-roll footage
Create B-roll footage by moving the cardboard around the light source after giving it shape. The person appears to be seated close to the window and conveys aesthetic vibrancy.
Now, use this B-roll footage in your video and give it a more professional look. The more creative you are, the more audience will attract to you.
Conclusion
Making B-roll shots is creative and fun! You can make all the footage at home by following easy steps. Try out different ones to make your video viral and boost the target audience!
You can easily use Wondershare Filmora during editing and their stock media to save your time in video making. Share your hacks with your audience to get more experience!
Also read:
- Updated Is Augmented Reality Conferencing the Future of Workplace Collaboration for 2024
- Updated Funny Content Ideas for YouTube Videos
- In 2024, Guide to Create Intro Video with KineMaster
- Updated 2024 Approved What Is Motion Tracking and How to Use It
- Best Free Slow Motion Apps For Android and iPhone
- Updated Unlock the Power of Shotcut The Ultimate Guide to Rotating Videos
- New Create Your Slow Zoom TikTok in Minutes
- 2024 Approved Best 31 Video Trimmers for Computer, Phone and Online
- Updated In 2024, Finding The Best Filmic Pro LUTs For Video Editing
- A Guide to Color Grade Your Picture in LightRoom
- In 2024, Do You Want to Create a Motion Blur Effect in Your Videos? Read This Well-Described Guide to Learn How to Add Motion Blur on CapCut on iPhone and Android Devices
- 2024 Approved How to Use Twixtor Effect to Create Super Slow-Motion Video?
- In 2024, Find Out The Best Dark Moody LUTs During Editing
- Updated In 2024, How to Use Lumetri Color in Adobe After Effects
- You Might Have Difficulty Rotating a Video without an Efficient Media Player or Editing Tool. Below Is a Detailed Guide on Rotating a Video on Any Axes for 2024
- How to Brighten a Video in Windows 10 Easily for 2024
- How to Stabilize Videos with Google Photos App for Free
- 2024 Approved Find The Best Free Canon LUTs
- New Detailed Tutorial to Rotate a Video in Cyberlink PowerDirector
- New 2024 Approved How to Create An Eye-Catching Intro Videos with InVideo
- New Edit FLV Video Files with FLV Editor Windows, Mac,Android, iPhone
- Is Augmented Reality Conferencing the Future of Workplace Collaboration for 2024
- 2024 Approved Easiest Fix Included! Top 5 Ways to Convert HDR to SDR Videos
- Best 8 Animated Video Makers for 2024
- 2024 Approved Troubleshoot Snapchat Camera Zoomed in Issue 4 Tips
- 2024 Approved Best 10 Tools To Make Quiz Videos
- New How To Slow Down GIF Building an Understanding for 2024
- Do You Want to Know How to Import or Adjust Clips in Wondershare Filmora? Dont Worry because Importing or Adjusting Video Clips in This Tool Is Pretty Easy for 2024
- New In 2024, AI Features of Wondershare Filmora - Silence Detection in Videos
- In 2024, Learn Everything About Leeming LUT Pro
- New Make A Countdown Video for 2024
- 2024 Approved 3 Ways to Combine 2 or 3 Videos Into 1
- New List of Supported Whatsapp Video Format You May Want to Know for 2024
- In 2024, Replace Sky Background in Video Figuring Out the Best Options
- New How to Add Freeze Frame to Your Video From Any Device?
- 2024 Approved How to Make an Adobe Slideshow the Easy Way
- Can I use iTools gpx file to catch the rare Pokemon On Poco X5 Pro | Dr.fone
- Unlock iPhone 12 mini With Forgotten Passcode Different Methods You Can Try | Dr.fone
- In 2024, Why Does iTools Virtual Location Not Work For Apple iPhone 13 Pro Max/iPad? Solved | Dr.fone
- Can't play MP4 files on Samsung Galaxy F54 5G
- In 2024, Tutorial to Change Nokia C02 IMEI without Root A Comprehensive Guide
- Complete guide for recovering photos files on Hot 30 5G.
- In 2024, How to Reset a Oppo Reno 11 Pro 5G Phone that is Locked?
- The Best Android SIM Unlock Code Generators Unlock Your Oppo A59 5G Phone Hassle-Free
- In 2024, Switch Cards Between Apple iPhone 15 Pro and other iPhones Will Move All Phone Services? | Dr.fone
- Remove the lock of K11 5G
- In 2024, How to Remove a Previously Synced Google Account from Your Xiaomi Redmi 13C 5G
- In 2024, Bypassing Google Account With vnROM Bypass For Vivo S17t
- Title: In 2024, Cropping a Video in Final Cut Pro Step by Step
- Author: Chloe
- Created at : 2024-05-20 03:37:59
- Updated at : 2024-05-21 03:37:59
- Link: https://ai-editing-video.techidaily.com/in-2024-cropping-a-video-in-final-cut-pro-step-by-step/
- License: This work is licensed under CC BY-NC-SA 4.0.
