
:max_bytes(150000):strip_icc():format(webp)/the-10-best-password-managers-of-2022-6543213-7650bf3ab2eb41a08dbee8713ce811e3.jpg)
In 2024, Deleting White Background in Photoshop Is Hard?
Deleting White Background in Photoshop Is Hard?
Deleting White Background in Photoshop Is Hard? No
An easy yet powerful editor
Numerous effects to choose from
Detailed tutorials provided by the official channel
Know how Photoshop make white background transparent. Learn to create transparent background in Photoshop in simple steps. How to delete white background in image?
In this article
01 [Why Shooting with a White Background Makes Sense](#Part 1)
02 [When We Need to Delete White Background and when Not?](#Part 2)
03 [How to Delete White Background in Photoshop (5 Fast Ways)](#Part 3)
04 [Which Photoshop Selection Tool is Best for White Backdrop Removal](#Part 4)
Part 1 Why Shooting with a White Background Makes Sense

Products have gone online with E-commerce and people explore the products over internet more than they pick it from the stores. So, every business needs to showcase their products in a attractive way to get more customers. This needs an attractive photography by experts. Photography for e-commerce products requires expert product photography or commercial photography. They are very important for a business to get success in long run. To do branding the product image should be accurate and attractive.
So, if your company is going online, your products photography should be attractive enough to make buyers purchase your products. Background is essential part of any photography or video making. Whether it is product catalogue, shoot, advertising or commercial videos, white backdrop and white background are always good. With white background one can pay attention to the product. Every details of the product are highlighted when a white background is used.
When you need bright and highlighted images for any commercial videos, using a right technique for background color is must. White background creates a clean and bright commercial photo. If the same is not done correctly, the white background may turn to be off white or grey. A white background is good for isolating an object in the picture.
So, let’s know why shooting with white background make sense. Here are some reasons for it:

Removal of background becomes Easy and quick:
The most important benefit of applying white background is that it can be easily removed or replaced. In place of the blank white background, one can easily apply other background color or make it transparent. The white background has a speciality that it reflects the color of the product better which makes the product image visually good. This can be done with the help of any tool or application. Thus, using a white background gives an opportunity to apply any other background on it.
Promoting product in every occasion: An image with colorful background may not be useful to present in every event or occasion. For example a simple image with colorful background will not look good in a promotional event, while a colorful background will look happening in any festival event celebration. This, a blank background has the option to change as per the need of the occasion.
An image with white background can be changed as per the occasion. This helps a business to use a single image throughout the year without any additional cost for making a different picture. You can just change the white background of any image through various application or software.
Time saving: Removing white background is easy and streamlined as compared to any other color. The reason is that it does not require much editing and work on the edges. So, the steps in removing the white background are less and thus it saves time of the artist and the editors.
Saves location and bulk shooting expenses: When shooting with a white background is done; the same picture with some changes can be reused for number of times in several occasions. Thus, it saves the cost of shooting different in pictures in different location.
Good to celebrate every special day: A picture with white background is perfect and ready to edit for any special day. Whether it I a father’s day, mother’s day or any special day, a single picture can be edited as per the requirement. It will be a great gifting idea also after changing white background of the picture as per the special day.
Part 2 When We Need to Delete White Background and when Not?

A single picture of a person or product cannot be used for a single instance or purpose. Especially when it is a promotional campaign or commercial advertisements, a product is required to be showcased in several marketing campaign for different categories of consumers. Thus, a white background image is good for several purposes while in some circumstances, it requires changes. So, let’s see when to delete white background and when not:
When a picture requires special editing: When a picture requires some special effects like reflection, highlights and shadow effects, the picture with white background is required to be changed. When improvement in picture is requires, the white, transparent and color background can be changed accordingly.
Enhancing the visual impact of the picture: A white background picture grab the attention of the customers. So, it is good for advertising and promotion. While this needs to be removed when one desire to add some visual impact on the pictures or deliver some message to the viewers. So, it requires adding colorful and visually good background in a picture.
Adding more items to a picture: A white background need to be removed when more items are required to be included in it. Special edits and enhancing the pictures requires removing or adding a white background as per the purpose of the picture.
Part 3 How to Delete White Background in Photoshop (5 Fast Ways)

Editing a picture with white background can be done in easy steps through various applications. Deleting white background in Photoshop can be done through various tools. Some of the top 5 fast ways to clear background Photoshop are**:**
With the object selection tool:
● Start Photoshop and open the picture. Select the “object selection” from the tool bar. Hover cursor over subject till it turns blue. The subject is selected.
● Press the shift key to remove the background while selecting the objects which you want in the picture.
● To invert the selection go to Select>Inverse.
● Unlock the image based on what you want in the background. It will no longer be a background. It can be also used to create transparent background Photoshop.
● Click on Erase tool and start erasing the background.
Removing background with quick action
This is the quick method for removing a background when a user is going for own purpose. It is in-built quick action in Photoshop for removing the background. Although it is good for performing work, but the same cannot meet the perfection level that any other method does. It can be done by following the mentioned steps:
● Open the image in Photoshop, right click on background layer and click Duplicate layer. Then click on OK.
● Always try to open the properties panel by going to Window>Properties.
● Click on new layer at Layer panel. Go to Quick action and click on Remove Background.
● The background gets removed with quick action.
● At this point refinements and adjustments can be made.
Using pen tool to remove the background
● Open image in Photoshop, right click on background layer and go to Duplicate Layer. Name the layer and click OK.
● Select the Pen tool from the toolbox. Zoom the area. Start at the edge of subject. Start working on the object; add anchors which will outline the subject.
● Click-hold-drag to produce a curved line.
● Use the Direct Selection tool in the toolbox if you want to adjust an anchor point or directional lines for fine tuning
● Complete the path from where you started and save it by going to Windows>paths. Go to three bar menu, click New Path to name it and then save.
● Go to path panel and right click New Path. Choose Make selection and click OK. This will give the outline of the path.
● Go to Select> Inverse if you don’t want to delete what is inside the selection. An outline can be seen around the image.
● Press delete to delete the background. It can be also done to add Adobe Photoshop transparent background.
With Magnetic Lasso Tool
● Right click Background layer and click duplicate layer on the image opened in Photoshop. Name the layer and then click OK. From the toolbox, select Magic Lasso tool. Start drawing at the edges of subject.
● Move around the subject and complete till the start point. Marching ants can be seen around the selection.
● Go to Selection>Save selection to save and give it a name.
● Select>Inverse to delete the background. Photoshop checkered background is visible now.
With quick selection tool
● Click on Duplicate Layer by right clicking on background layer of the picture opened on the Photoshop. Name the layer and click OK.
● Go to the tool box and select quick selection tool.
● Paint the subject by using tool.
● Clean up the selection path with click by holding the Option key (macOS) or Alt key (Windows).
● Go to Selection>Save selection to save and give it a name.
● Select>Inverse to delete the background. The white background can be seen now.
Part 4 Which Photoshop Selection Tool is Best for White Backdrop Removal

There are various tools available at Photoshop to turn a background white. Each one of them has great utility based on the applications. Background Eraser tool is one of the good tools if there is need of more control over removing the background in Photoshop. It is highly effective and saves time of the user. It gives the desired outcome with perfection to an image. The visualization of image becomes better when the background is turned into white with the help of Background Eraser tool.
The other application that is very helpful in making background white to any image is Filmora.
Filmora is an excellent image and video editing software which helps the users in creating some amazing images and videos. It has wide range of image and video editing tools that can make any user a professional in image and video editing. It has features to add or remove background of an image to make it more visually good. Changing background and adding special effects to images and videos can be easily done through filmora.
Wondershare Filmora Video Editor allows transformation of pictures and videos in a better way by adding filters and graphics. Availability of support, drawing tools, editing tools, special effects and sound make it a complete application for both beginners and professionals. It can be used with various other applications also. Those who wish to know how to make a layer transparent in Photoshop can learn it from Filmora.
For Win 7 or later (64-bit)
For macOS 10.12 or later
● Ending Thoughts →
● Making white background or transparent background adobe photoshop has many benefits like it highlight the picture and make it good for various applications and occasions. It saves money and cost for the image editors and video makers.
● One should also know when to use the white background for images, catalogue and video shoot. Adding and deleting white background can only be done when required as per the demand of the occasion and the category of the user like marketing, media, customers etc.
● Various tools on Photoshop make it easy for the users to add or remove white background of images. Filmora is one of the applications that is very popular for its image editing features. It can be used to give special effects to any image or video.
Know how Photoshop make white background transparent. Learn to create transparent background in Photoshop in simple steps. How to delete white background in image?
In this article
01 [Why Shooting with a White Background Makes Sense](#Part 1)
02 [When We Need to Delete White Background and when Not?](#Part 2)
03 [How to Delete White Background in Photoshop (5 Fast Ways)](#Part 3)
04 [Which Photoshop Selection Tool is Best for White Backdrop Removal](#Part 4)
Part 1 Why Shooting with a White Background Makes Sense
Products have gone online with E-commerce and people explore the products over internet more than they pick it from the stores. So, every business needs to showcase their products in a attractive way to get more customers. This needs an attractive photography by experts. Photography for e-commerce products requires expert product photography or commercial photography. They are very important for a business to get success in long run. To do branding the product image should be accurate and attractive.
So, if your company is going online, your products photography should be attractive enough to make buyers purchase your products. Background is essential part of any photography or video making. Whether it is product catalogue, shoot, advertising or commercial videos, white backdrop and white background are always good. With white background one can pay attention to the product. Every details of the product are highlighted when a white background is used.
When you need bright and highlighted images for any commercial videos, using a right technique for background color is must. White background creates a clean and bright commercial photo. If the same is not done correctly, the white background may turn to be off white or grey. A white background is good for isolating an object in the picture.
So, let’s know why shooting with white background make sense. Here are some reasons for it:
Removal of background becomes Easy and quick:
The most important benefit of applying white background is that it can be easily removed or replaced. In place of the blank white background, one can easily apply other background color or make it transparent. The white background has a speciality that it reflects the color of the product better which makes the product image visually good. This can be done with the help of any tool or application. Thus, using a white background gives an opportunity to apply any other background on it.
Promoting product in every occasion: An image with colorful background may not be useful to present in every event or occasion. For example a simple image with colorful background will not look good in a promotional event, while a colorful background will look happening in any festival event celebration. This, a blank background has the option to change as per the need of the occasion.
An image with white background can be changed as per the occasion. This helps a business to use a single image throughout the year without any additional cost for making a different picture. You can just change the white background of any image through various application or software.
Time saving: Removing white background is easy and streamlined as compared to any other color. The reason is that it does not require much editing and work on the edges. So, the steps in removing the white background are less and thus it saves time of the artist and the editors.
Saves location and bulk shooting expenses: When shooting with a white background is done; the same picture with some changes can be reused for number of times in several occasions. Thus, it saves the cost of shooting different in pictures in different location.
Good to celebrate every special day: A picture with white background is perfect and ready to edit for any special day. Whether it I a father’s day, mother’s day or any special day, a single picture can be edited as per the requirement. It will be a great gifting idea also after changing white background of the picture as per the special day.
Part 2 When We Need to Delete White Background and when Not?
A single picture of a person or product cannot be used for a single instance or purpose. Especially when it is a promotional campaign or commercial advertisements, a product is required to be showcased in several marketing campaign for different categories of consumers. Thus, a white background image is good for several purposes while in some circumstances, it requires changes. So, let’s see when to delete white background and when not:
When a picture requires special editing: When a picture requires some special effects like reflection, highlights and shadow effects, the picture with white background is required to be changed. When improvement in picture is requires, the white, transparent and color background can be changed accordingly.
Enhancing the visual impact of the picture: A white background picture grab the attention of the customers. So, it is good for advertising and promotion. While this needs to be removed when one desire to add some visual impact on the pictures or deliver some message to the viewers. So, it requires adding colorful and visually good background in a picture.
Adding more items to a picture: A white background need to be removed when more items are required to be included in it. Special edits and enhancing the pictures requires removing or adding a white background as per the purpose of the picture.
Part 3 How to Delete White Background in Photoshop (5 Fast Ways)
Editing a picture with white background can be done in easy steps through various applications. Deleting white background in Photoshop can be done through various tools. Some of the top 5 fast ways to clear background Photoshop are**:**
With the object selection tool:
● Start Photoshop and open the picture. Select the “object selection” from the tool bar. Hover cursor over subject till it turns blue. The subject is selected.
● Press the shift key to remove the background while selecting the objects which you want in the picture.
● To invert the selection go to Select>Inverse.
● Unlock the image based on what you want in the background. It will no longer be a background. It can be also used to create transparent background Photoshop.
● Click on Erase tool and start erasing the background.
Removing background with quick action
This is the quick method for removing a background when a user is going for own purpose. It is in-built quick action in Photoshop for removing the background. Although it is good for performing work, but the same cannot meet the perfection level that any other method does. It can be done by following the mentioned steps:
● Open the image in Photoshop, right click on background layer and click Duplicate layer. Then click on OK.
● Always try to open the properties panel by going to Window>Properties.
● Click on new layer at Layer panel. Go to Quick action and click on Remove Background.
● The background gets removed with quick action.
● At this point refinements and adjustments can be made.
Using pen tool to remove the background
● Open image in Photoshop, right click on background layer and go to Duplicate Layer. Name the layer and click OK.
● Select the Pen tool from the toolbox. Zoom the area. Start at the edge of subject. Start working on the object; add anchors which will outline the subject.
● Click-hold-drag to produce a curved line.
● Use the Direct Selection tool in the toolbox if you want to adjust an anchor point or directional lines for fine tuning
● Complete the path from where you started and save it by going to Windows>paths. Go to three bar menu, click New Path to name it and then save.
● Go to path panel and right click New Path. Choose Make selection and click OK. This will give the outline of the path.
● Go to Select> Inverse if you don’t want to delete what is inside the selection. An outline can be seen around the image.
● Press delete to delete the background. It can be also done to add Adobe Photoshop transparent background.
With Magnetic Lasso Tool
● Right click Background layer and click duplicate layer on the image opened in Photoshop. Name the layer and then click OK. From the toolbox, select Magic Lasso tool. Start drawing at the edges of subject.
● Move around the subject and complete till the start point. Marching ants can be seen around the selection.
● Go to Selection>Save selection to save and give it a name.
● Select>Inverse to delete the background. Photoshop checkered background is visible now.
With quick selection tool
● Click on Duplicate Layer by right clicking on background layer of the picture opened on the Photoshop. Name the layer and click OK.
● Go to the tool box and select quick selection tool.
● Paint the subject by using tool.
● Clean up the selection path with click by holding the Option key (macOS) or Alt key (Windows).
● Go to Selection>Save selection to save and give it a name.
● Select>Inverse to delete the background. The white background can be seen now.
Part 4 Which Photoshop Selection Tool is Best for White Backdrop Removal
There are various tools available at Photoshop to turn a background white. Each one of them has great utility based on the applications. Background Eraser tool is one of the good tools if there is need of more control over removing the background in Photoshop. It is highly effective and saves time of the user. It gives the desired outcome with perfection to an image. The visualization of image becomes better when the background is turned into white with the help of Background Eraser tool.
The other application that is very helpful in making background white to any image is Filmora.
Filmora is an excellent image and video editing software which helps the users in creating some amazing images and videos. It has wide range of image and video editing tools that can make any user a professional in image and video editing. It has features to add or remove background of an image to make it more visually good. Changing background and adding special effects to images and videos can be easily done through filmora.
Wondershare Filmora Video Editor allows transformation of pictures and videos in a better way by adding filters and graphics. Availability of support, drawing tools, editing tools, special effects and sound make it a complete application for both beginners and professionals. It can be used with various other applications also. Those who wish to know how to make a layer transparent in Photoshop can learn it from Filmora.
For Win 7 or later (64-bit)
For macOS 10.12 or later
● Ending Thoughts →
● Making white background or transparent background adobe photoshop has many benefits like it highlight the picture and make it good for various applications and occasions. It saves money and cost for the image editors and video makers.
● One should also know when to use the white background for images, catalogue and video shoot. Adding and deleting white background can only be done when required as per the demand of the occasion and the category of the user like marketing, media, customers etc.
● Various tools on Photoshop make it easy for the users to add or remove white background of images. Filmora is one of the applications that is very popular for its image editing features. It can be used to give special effects to any image or video.
| Change Speed of a Video on iPhone
Versatile Video Editor - Wondershare Filmora
An easy and powerful editor
Numerous effects to choose from
Detailed tutorials provided by the official channel
Do you want to know how to slow down a video on iPhone? Or maybe you want to know how to speed a video up on iPhone.
There might be times you need to speed up or slow down a video that you shoot on iPhone. There are apps and built-in option that allows you to adjust the video’s speed.
This guide will help you out of this problem with step by step process to speed up and slow down iPhone videos.
Let’s get started.
Best Free App for Changing Video Speed on iPhone
Want to know how to slow a video down on iPhone or speed it up? There are numerous apps that let you do this, but not all of them are free and intuitive. However, there’s one such option that stands out from the crowd for its free access and variety of other video editing tools.
Wondershare Filmora is an iOS app available on Apple App Store. You can download the app and install it on your iPhone.
It is essentially a video editing app with an intuitive interface. It can help you speed up videos, slow down videos, or record slowmo iPhone videos that can be shared on social media platforms.
In addition to changing video speed, you can do some basic video editing as well. It includes text effects, stickers effects, music, PIP, and more.
How to Slow Down A Video on iPhone?
Looking for how to slow down a video on iPhone? Keep reading and you’ll find out shortly exactly how to do it.
Have you ever seen a movie trailer and thought that the slow-motion effect looked really cool? Well, you can get the same effect on any of your videos. You can even reverse the effect and speed up your video to create some interesting video effects.
Whatever your reason for slowing down a video, it’s easy to change the speed of your clip using iMovie on iPhone.
Here’s how you can do it:
- You need to have iMovie app installed on your iPhone. If it’s already installed, launch iMovie on your iPhone and start a new project.
- Now, tap the plus sign that’s at the start of the Projects screen.

- Now, a pop-up window will appear where you need to select Movie.

- Now, find and select the video you want to slow down and tap Create Movie button at the center bottom of the screen.

- Now move the playhead to the start of the timeline and tap to select the video. At this point, you’ll see the timeline highlighted in yellow color.
- Look at the bottom of the screen and you’ll find the Speed button with the speedometer icon. Tap the Speed icon and a sliding bar will appear.

- To slow down the video, move the sliding bar to the left side, which’s towards the tortoise. It indicates that the speed of the video will decrease.

- Now click the Play button to preview and then tap Done.
How to Speed Up Videos on iPhone?
Do you want to know how to speed up a video on iPhone? Keep reading to find out.
There are plenty of reasons why you might want to speed up a video. Maybe it’s an educational video that is really slow and boring or it has been recorded in slo-mo. It might be the reason that the video is long and slow, and your audience will get bored midway.
Whatever the reason, speeding up a video is easy to do on iPhone.
Let’s look into two different methods to speed up video on iPhone.
The first method works for videos originally recorded in slo-mo mode on iPhone.
Speed up slo-mo videos using the Photos app
The easiest way to speed up slo-mo videos is using the Photos app that comes pre-installed on iPhone.
Just follow these steps to speed up slo-mo videos:
- Open the Photos app on your iPhone.
- Tap Albums.
- Now, scroll down and tap Slo-mo.

- Tap the slo-mo video you want to speed up.
- Once the video is open, tap Edit.
- You’ll see a set of vertical lines on the bottom of the screen. The vertical lines indicate the video’s speed at that point. Closer lines mean normal speed and a wider distance between lines indicates that the section is in slow motion.

- You can hold and drag a bar and bring it closer to the other one to speed up the slo-mo section of the video. Bringing the lines closer indicates the video is at normal speed.
- Once you have changed the speed, tap Done.

Speed up iPhone videos using iMovie app
Here’s how you can speed up a video on iPhone with iMovie app:
- Launch iMovie on your iPhone and start a new project.
- Now, tap the plus sign visible at the start of the Projects screen.
- A pop-up screen will appear where you need to select Movie.
- Now, you can find and select the video you’re looking to speed up on iPhone. Once sleected, tap Create Movie button at the center bottom of the screen.
- Now move the playhead to the start of the timeline and tap to select the video. At this point, you’ll see the timeline highlighted in yellow color.
- Look at the bottom of the screen and you’ll find the Speed icon. Tap the Speed icon and a sliding bar will appear with a tortoise on its left side and a hare on the right side.
- To speed up the time-lapse video, move the slider to the right side.
- Now click the Play button to preview and then tap Done.
After increasing the speed of the video on iPhone, you can save it or share on your social media accounts or with your friends via messaging apps.
Bonus Tip: How to Change up the speed of a video in Wondershare Filmora
In case you have a video stored on your computer and you need to adjust its speed, you can use Wondershare Filmora.
With Wondershare Filmora, you have the ability to adjust a video’s speed. Flipping through your editing options will reveal your options for doing so. You can increase or decrease the speed of the video with just a few simple clicks.
There are plenty of options around how much you can speed up/down. In fact, you can set a custom speed.
Let’s see how you can slow down and speed up a video using Wondershare Filmora.
How to speed a video up with Filmora
Follow these steps to increase the speed of the video using Wondershare Filmora:
- Download and install Wondershare Filmora on your computer.
- Launch Filmora and click the on new project, or you can just drag and drop the file that you want to edit.

- Click the Import button to load your file or drag and drop the file directly.

- Once imported, you need to drag the file to the timeline.

- Now that the video is on timeline, you need to click the Speed icon and select the Fast option. You can increase the speed by 2x, 4x, 8x, and so on. You can also set a custom speed using Custom Speed option.

- Save the file and use it the way you want.
How to slow down a video using Filmora
To slow down a video using Filmora, you need to follow the below steps:
- Make sure you have Wondershare Filmora installed on your computer.
- Launch Filmora and click the Import button. The browse file window will appear where you need to select the file you want to slow down. You can also drag and drop the file directly.
- Once imported to the media library, drag the file to the timeline.
- Now that the video is on the timeline, click the Speed icon. Since you want to slow down the video, select the Slow option. Filmora lets you slow down a video by 0.5x, 0.25x, 0.1x, 0.05x, and 0.01x. You can also set a custom speed.
- Now, click the Render button to apply the settings.
- Save the file and use it the way you want.
Conclusion
That’s really it! Changing video playback speed on your iPhone couldn’t be simpler, and it will help you save time by leaving you with shorter videos to edit.
We explained the step-by-step process to let you know how to slow down a video on iPhone or speed it up. With the help of a built-in method to speed up slo-mo video and using apps like iMovie and Filmora, you can easily speed up or slow down videos on your iPhone.
When it comes to changing the video’s speed on your computer, Wondershare Filmora is an excellent choice.
We hope this guide helps you to change the speed of videos on your iPhone – without scratching your head.
Do you want to know how to slow down a video on iPhone? Or maybe you want to know how to speed a video up on iPhone.
There might be times you need to speed up or slow down a video that you shoot on iPhone. There are apps and built-in option that allows you to adjust the video’s speed.
This guide will help you out of this problem with step by step process to speed up and slow down iPhone videos.
Let’s get started.
Best Free App for Changing Video Speed on iPhone
Want to know how to slow a video down on iPhone or speed it up? There are numerous apps that let you do this, but not all of them are free and intuitive. However, there’s one such option that stands out from the crowd for its free access and variety of other video editing tools.
Wondershare Filmora is an iOS app available on Apple App Store. You can download the app and install it on your iPhone.
It is essentially a video editing app with an intuitive interface. It can help you speed up videos, slow down videos, or record slowmo iPhone videos that can be shared on social media platforms.
In addition to changing video speed, you can do some basic video editing as well. It includes text effects, stickers effects, music, PIP, and more.
How to Slow Down A Video on iPhone?
Looking for how to slow down a video on iPhone? Keep reading and you’ll find out shortly exactly how to do it.
Have you ever seen a movie trailer and thought that the slow-motion effect looked really cool? Well, you can get the same effect on any of your videos. You can even reverse the effect and speed up your video to create some interesting video effects.
Whatever your reason for slowing down a video, it’s easy to change the speed of your clip using iMovie on iPhone.
Here’s how you can do it:
- You need to have iMovie app installed on your iPhone. If it’s already installed, launch iMovie on your iPhone and start a new project.
- Now, tap the plus sign that’s at the start of the Projects screen.
- Now, a pop-up window will appear where you need to select Movie.
- Now, find and select the video you want to slow down and tap Create Movie button at the center bottom of the screen.
- Now move the playhead to the start of the timeline and tap to select the video. At this point, you’ll see the timeline highlighted in yellow color.
- Look at the bottom of the screen and you’ll find the Speed button with the speedometer icon. Tap the Speed icon and a sliding bar will appear.
- To slow down the video, move the sliding bar to the left side, which’s towards the tortoise. It indicates that the speed of the video will decrease.
- Now click the Play button to preview and then tap Done.
How to Speed Up Videos on iPhone?
Do you want to know how to speed up a video on iPhone? Keep reading to find out.
There are plenty of reasons why you might want to speed up a video. Maybe it’s an educational video that is really slow and boring or it has been recorded in slo-mo. It might be the reason that the video is long and slow, and your audience will get bored midway.
Whatever the reason, speeding up a video is easy to do on iPhone.
Let’s look into two different methods to speed up video on iPhone.
The first method works for videos originally recorded in slo-mo mode on iPhone.
Speed up slo-mo videos using the Photos app
The easiest way to speed up slo-mo videos is using the Photos app that comes pre-installed on iPhone.
Just follow these steps to speed up slo-mo videos:
- Open the Photos app on your iPhone.
- Tap Albums.
- Now, scroll down and tap Slo-mo.
- Tap the slo-mo video you want to speed up.
- Once the video is open, tap Edit.
- You’ll see a set of vertical lines on the bottom of the screen. The vertical lines indicate the video’s speed at that point. Closer lines mean normal speed and a wider distance between lines indicates that the section is in slow motion.
- You can hold and drag a bar and bring it closer to the other one to speed up the slo-mo section of the video. Bringing the lines closer indicates the video is at normal speed.
- Once you have changed the speed, tap Done.
Speed up iPhone videos using iMovie app
Here’s how you can speed up a video on iPhone with iMovie app:
- Launch iMovie on your iPhone and start a new project.
- Now, tap the plus sign visible at the start of the Projects screen.
- A pop-up screen will appear where you need to select Movie.
- Now, you can find and select the video you’re looking to speed up on iPhone. Once sleected, tap Create Movie button at the center bottom of the screen.
- Now move the playhead to the start of the timeline and tap to select the video. At this point, you’ll see the timeline highlighted in yellow color.
- Look at the bottom of the screen and you’ll find the Speed icon. Tap the Speed icon and a sliding bar will appear with a tortoise on its left side and a hare on the right side.
- To speed up the time-lapse video, move the slider to the right side.
- Now click the Play button to preview and then tap Done.
After increasing the speed of the video on iPhone, you can save it or share on your social media accounts or with your friends via messaging apps.
Bonus Tip: How to Change up the speed of a video in Wondershare Filmora
In case you have a video stored on your computer and you need to adjust its speed, you can use Wondershare Filmora.
With Wondershare Filmora, you have the ability to adjust a video’s speed. Flipping through your editing options will reveal your options for doing so. You can increase or decrease the speed of the video with just a few simple clicks.
There are plenty of options around how much you can speed up/down. In fact, you can set a custom speed.
Let’s see how you can slow down and speed up a video using Wondershare Filmora.
How to speed a video up with Filmora
Follow these steps to increase the speed of the video using Wondershare Filmora:
- Download and install Wondershare Filmora on your computer.
- Launch Filmora and click the on new project, or you can just drag and drop the file that you want to edit.
- Click the Import button to load your file or drag and drop the file directly.
- Once imported, you need to drag the file to the timeline.
- Now that the video is on timeline, you need to click the Speed icon and select the Fast option. You can increase the speed by 2x, 4x, 8x, and so on. You can also set a custom speed using Custom Speed option.
- Save the file and use it the way you want.
How to slow down a video using Filmora
To slow down a video using Filmora, you need to follow the below steps:
- Make sure you have Wondershare Filmora installed on your computer.
- Launch Filmora and click the Import button. The browse file window will appear where you need to select the file you want to slow down. You can also drag and drop the file directly.
- Once imported to the media library, drag the file to the timeline.
- Now that the video is on the timeline, click the Speed icon. Since you want to slow down the video, select the Slow option. Filmora lets you slow down a video by 0.5x, 0.25x, 0.1x, 0.05x, and 0.01x. You can also set a custom speed.
- Now, click the Render button to apply the settings.
- Save the file and use it the way you want.
Conclusion
That’s really it! Changing video playback speed on your iPhone couldn’t be simpler, and it will help you save time by leaving you with shorter videos to edit.
We explained the step-by-step process to let you know how to slow down a video on iPhone or speed it up. With the help of a built-in method to speed up slo-mo video and using apps like iMovie and Filmora, you can easily speed up or slow down videos on your iPhone.
When it comes to changing the video’s speed on your computer, Wondershare Filmora is an excellent choice.
We hope this guide helps you to change the speed of videos on your iPhone – without scratching your head.
Top 6 MP4 Mergers to Join Videos Easily
Not all software allows you to combine videos in the MP4 format. And even if they do, the quality you get is not satisfying. The reason is pretty basic – overrated and underrated video merging software. Some tools are complicated, while others are extremely user-friendly with the interface and options.
So, after spending several days on the research, finally, here are the 6 best mp4 mergers along with their tutorials to help you understand the process and complexity of each software and pick the best one in terms of simplicity and user-friendliness.
In this article
04 Media Cope
Part 1: Free Video Joiner (For Windows Users Only)
Free Video Joiner is a free tool to use for Windows users. You can join multiple videos to turn into a big video file. The software allows you to convert WMV, MPG, MPEG, AVI, and MOV files into MP4, MOV, WMV, and AVI. You can also “Save As” videos in VCD and DVD, iPhone, iPod, Zune, or PSP video formats.
The company claims “no quality loss” when the complete video is out. However, you have to be very picky when selecting the first video in your list to merge with others because the Free Video Joiner keeps the same width and height of the merged file as of the first video.
So, for instance, if you have 10 videos in the list to merge in the MP4 format, the first video has 1280 x 720 dimensions while the rest are 1920 x 1080. Then, the final merged video will be available to you in the same width and height as the first video (1280 x 720).
Merging Videos in Free Video Joiner
Step1: Download Free Video Joiner
Open your browser and go to the Free Video Joiner website. Then, click the “Download” button on the page to save the setup on your computer.

Step 2: Install and Run Free Video Joiner
Now, double-click on the Free Video Joiner set up to install it in your system. It will hardly take a few seconds for the entire software to get into your system’s hard drive.
Once the software is installed, open the software, and you will see the interface like this.

Step 3: Add Files
Click on the “Add Files” button.

And select the clips you want to merge in MP4.

To change the order of the videos, you can use the “Move Up” or “Move Down” button.

Step 4: Select Output Folder
Choose your output directory to save the merged file by clicking on the “Select” button.

Then, click on the “Video” tab to choose the format of your joined video. Also, take your time to choose the “Presets” from the drop-down menu below the video tab.
As you can see, MP4 is selected in the screenshot below.

Step 5: Staring Merging in MP4
Now, click on the “Join Now” button.

You will see that the “Overall Progress” bar will begin to increase.

Once the bar is 100%, click on the “Open Folder” button to directly visit the folder where you will find the merged video. Or click the “Finish” button if you wish to start another project.

Part 2: Freemake Video Converter (For Windows Users Only)
Freemake Video Converter is reliable software to convert videos without registration. The program is free to download with more than 180 million users worldwide. And not just the MP4, but you can convert videos in all the popular formats and use the program to copy and burn DVDs.
Apart from the video conversion feature, you can use Freemake to merge your MP4 videos from your Windows operating system. However, the software is unavailable for MAC users, and it is one of the major drawbacks of this video merger.
Merging Videos in Freemake Video Converter
Step 1: Download Freemake Video Converter
First, go to the Freemake Video Converter website and click on the “Free Download” button.

Then, install the software on your computer and open it. The software appears to be simple like this.

Step 2: Add Videos
Click on the “Video” tab from the top menu to select videos you want to merge.

As you can see below, two videos are uploaded on the software.

Step 3: Rearrange Video Order
If you wish to rearrange the videos, you can do it by simply dragging the video up or down with the help of your mouse.

For example, the “Photo Slideshow” video, which was previously on the top, is now placed beneath the “Intro” video.

That means the merged video will begin from the “Intro” video, and then the “Photo Slideshow” will continue right after the first clip ends. All be done without any break or pause.
Step 4: Join Videos
After rearranging the videos, use your mouse to select clips by clicking once on each video. All selected videos will be highlighted in the “light blue” color.

Then, take the mouse cursor on the top-right side of the software and turn on the “Join Files” button by clicking on it.

You will see that a merged video will be added to the software.
For instance, you can see that a new file has been added to the interface, showing the number of merged files in the red circle.

The above screenshot represents a single merged video that includes two files.
Step 5: Choose Your Output Video Format
Look at the bottom of the software to see different video formats, and click on “MP4.”

Click on the “Preset” menu to choose the format and size of the output video. Then, select the output folder.

Step 6: Save Your Video
Lastly, click on the “Convert” button to allow the software to merge the video in MP4 format and save it on your computer.

Part 3: Boilsoft Video Joiner (For Windows and MAC Users)
Boilsoft Video Joiner is a video merger tool to join MP4, WMA, WMV, ASF, 3GP, RMVB/RM, MPG, MPEG, AVI, VOB, FLV, and MKV clips into one complete single video. You can download the free trial version or buy the full software for your MAC and Windows operating systems.
Boilsoft Video Joiner also offers Encode mode and Direct Stream mode, allowing you to merge clips efficiently into different formats at great speed.
Merging Videos in Boilsoft Video Joiner
Step 1: Download and Install Boilsoft Video Joiner
Visit the Boilsoft Video Joiner website from your computer browser and click on the “Download” tab.

If you want to install the software on Windows OS, then click on the “Windows” tab and then click on the “Download” button next to the “Boilsoft Video Joiner” software.

Contrarily, you can download the program for MAC operating system by clicking on the “Mac” tab and clicking the “Download” button.

Now, run the installer to install the software on your computer and open it.

Note: The screenshots are from the previous version of Boilsoft Video Joiner. However, this tutorial’s steps to merge MP4 videos are workable on the latest version.
Step 2: Add Videos in Boilsoft Video Joiner
Click on the “Add File” icon on the top menu to add the clips you want to join together.

Here you can see that two files have been uploaded. Plus, with the small green “arrow” buttons, you can rearrange the order of the clips.

Step 3: Merge Videos
Find the “Merge” option on the top menu, and click it.

Then, choose the “Direct Stream” mode or “Encode Mode” from the merge mode options, and click on the “OK” button.

Note: It is suggested to choose the “Direct Stream” mode if you want files to be converted in the MP4 format.
Step 4: Save Joined Video
After clicking the “OK” button, choose the folder to save the merged video on your computer. And click the “Save” button.

A green progress bar will start until you see the “Finished” message above the bar, confirming that the video has been merged. So, click the “Open Folder” button to see the joined video in MP4 format.

Part 4: Media Cope (For Windows Users Only)
Media Cope is free software with multiple features, including audio and video joiner. The software is available for Windows users only but does not support the latest Windows versions. So, if you are running XP, Vista, Windows 7, or Windows 8, you can easily install the software on your computer.
Although the software doesn’t support MAC, you can still join and save the videos on your iPhone. Nevertheless, the developers assure that the software supports all major formats, such as MP4, MOV, 3GP, AC3, AMR, WAV, MKV, FLV, DIVX, AVI, and many more.
Merging Videos in Media Cope
Step 1: Download and Install Media Cope
Downloading Media Cope is no big deal. All you need to do is go to the official Media Cope’s website and click on the “Download” tab on the top menu.

Once you are taken to another page, click on the “Download” button to save the setup on your computer.

Double click the “MediaCopeSetup.exe” file to install the software. It will only take a few minutes to install the complete program on your PC.
So, after installing Media Cope, open the program, and you will see a blank screen with several options on the top and bottom of the interface.

Step 2: Add Files
Click on the “Audio/Video Joiner” tab to select your video clips.

Select your clips and click on the “Add” button to transfer files on the software.

As you can see, two video files are added to the platform.

Step 3: Choose Output Format
If you look down in the software, you will find the “Output Format” options. So, choose your format (MP4 recommended) and select the video quality from the drop-down menu.

Step 4: Merge Videos and Save
Now, click on the “Join” button, choose your output folder, and give time to complete the process.

After the process ends, enjoy your merged video in the output folder.
Part 5: MP4Joiner by MP4Tools (For Windows, MAC, and Linux Users)
MP4Joiner is a free software to join MP4 format videos into one single video that comes with an MP4Splitter. This software duo is called MP4Tools. So don’t get confused by the name when downloading the program on your PC.
A good thing about MP4Joiner is that it is developed for multiple platforms, such as Windows, MAC, and Linux. But unfortunately, it only supports “win32,” “Mac 10.10 and Catalina,” and “BZ2” file extension.
Merging Videos in MP4Joiner
Step 1: Download MP4Joiner
The first step requires downloading MP4Joiner on your computer according to your operating system. To do that, go to the MP4Joiner’s site. And click on any one of the following “.exe” files to download the setup.

Then, install the program in your Windows, MAC, or Linux, and run it. The interface is extremely simple, with no confusing options.

Step 2: Add Files in MP4Joiner
Next, click on the “Add Video” tab with a green “+” sign.

Doing so will help you choose videos you want to join together. So, select the videos and click on the “Open” button, as shown in the screenshot below.

Step 3: Start Joining Videos
Once all your selected videos are imported on the interface, click on the “Join” tab.

Then, choose the folder where you want the merged video to be saved, and click the “Save” button.

A new window will appear, showing a green progress bar.

Wait until you see the “Successful” note on the top of the progress bar, and then click on the “Close” button.

Go to your output folder to watch the joined video in the MP4 format.
Part 6: Filmora by Wondershare (For Windows and MAC Users - Recommended)
Filmora Video Editor is one of the famous video editing software by Wondershare. It is like a gateway to creativity for beginner and experienced editors. The software offers a wide range of tools and presets, which makes video editing quick and easy.
This video editing tool is for both MAC and Windows users. You can use the software by choosing a suitable pricing plan or downloading the free version if the watermark is not an issue.
Gladly, Filmora can help you merge your videos without destroying a pixel in any format of your choice, including MP4. Also, the process is pretty simple, time-saving, and fun. Furthermore, you can also include flavors to your video merger by adding several transitions and effects to your videos.
For Win 7 or later (64-bit)
For macOS 10.14 or later
Merging Videos in MP4Joiner
Step 1: Download Filmora by Wondershare
Enter Filmora’s website in your browser to visit the homepage and click on the blue “Free Download” button.

After downloading the setup, install the software on your device. The process will only take a few minutes. Then, open Filmora, and you will see a modern-designed interface with all the tools and presets right in front of your eyes.

Step 2: Import Videos You Want to Merge
Use your mouse to click the blue “+” icon in the center of the software to import videos from your computer.

Then, drag-and-drop the videos to your timeline. But make sure that you place both clips on the same timeline. As you can see below, there are two clips. The first clip is named “Travel 05,” while the second video is called “Travel 06.”

Step 3: Fill the Gap to Merge
When you will drag-and-drop videos on the timeline, the chances are that there will be a gap or a blank space between the two clips, like this.

If this blank space is left untreated, the merged video will include this empty black space, as you can see on the preview screen.

Therefore, use your right mouse click to hold the second video and drag it to the wall of the first video without leaving any gap in between both clips.

Great! You have already merged the videos. Now, let’s move on to the final step.
Step 4: Export the Joined Video and Save in MP4
Click on the “Export” option on the left of the preview screen to see the settings window.

Under the “Local” tab, select “MP4” and feel free to perform other changes, such as choosing an output folder, renaming the merged video, picking the resolution, and more. Once you are satisfied with the settings, click on the “Export” button (on the right bottom of the screen) to save the video on your computer.

And it’s done!
Bottom Line
Among the 6 best MP4 mergers, Filmora seems to be winning. It’s not just a video editor with plenty of tools, but you can also join two or more videos in MP4 format without sacrificing the video quality.
On the other hand, video merges like Free Video Joiner, Freemake, Media Cope, Boilsoft Video Joiner, and MP4 Joiner have limited options. Plus, they are time-consuming, and some of them even disturb the video and audio quality when clips are merged through them.
FAQs
Q1. What is the best video merger for MP4?
There are many excellent video mergers to combine MP4 videos. Most users recommend Filmora because it works flawlessly on MAC and Windows operating systems. Besides, it’s a user-friendly software that even non-professional people can use to join MP4 videos.
Q2. What is the fastest video merger for MP4 clips?
Filmora by Wondershare is one of the fastest video mergers. You can merge videos by working on the timeline, which ultimately saves your time. And you can export merged videos in MP4 or any other format without many struggles. The second and third options are Media Cope and Boilsoft Video Joiner. Although they are a bit old-fashioned, you will still find them more accessible and fast than other MP4 mergers.
Q3. How do I merge MP4 videos without losing quality?
Merging MP4 videos without losing the quality depends on your software to combine videos. Filmora never disappoints its users when it comes to quality. As a matter of fact, you can choose your own resolution from the export settings menu when saving the merged MP4 video in your Windows or MAC computer.
04 Media Cope
Part 1: Free Video Joiner (For Windows Users Only)
Free Video Joiner is a free tool to use for Windows users. You can join multiple videos to turn into a big video file. The software allows you to convert WMV, MPG, MPEG, AVI, and MOV files into MP4, MOV, WMV, and AVI. You can also “Save As” videos in VCD and DVD, iPhone, iPod, Zune, or PSP video formats.
The company claims “no quality loss” when the complete video is out. However, you have to be very picky when selecting the first video in your list to merge with others because the Free Video Joiner keeps the same width and height of the merged file as of the first video.
So, for instance, if you have 10 videos in the list to merge in the MP4 format, the first video has 1280 x 720 dimensions while the rest are 1920 x 1080. Then, the final merged video will be available to you in the same width and height as the first video (1280 x 720).
Merging Videos in Free Video Joiner
Step1: Download Free Video Joiner
Open your browser and go to the Free Video Joiner website. Then, click the “Download” button on the page to save the setup on your computer.
Step 2: Install and Run Free Video Joiner
Now, double-click on the Free Video Joiner set up to install it in your system. It will hardly take a few seconds for the entire software to get into your system’s hard drive.
Once the software is installed, open the software, and you will see the interface like this.
Step 3: Add Files
Click on the “Add Files” button.
And select the clips you want to merge in MP4.
To change the order of the videos, you can use the “Move Up” or “Move Down” button.
Step 4: Select Output Folder
Choose your output directory to save the merged file by clicking on the “Select” button.
Then, click on the “Video” tab to choose the format of your joined video. Also, take your time to choose the “Presets” from the drop-down menu below the video tab.
As you can see, MP4 is selected in the screenshot below.
Step 5: Staring Merging in MP4
Now, click on the “Join Now” button.
You will see that the “Overall Progress” bar will begin to increase.
Once the bar is 100%, click on the “Open Folder” button to directly visit the folder where you will find the merged video. Or click the “Finish” button if you wish to start another project.
Part 2: Freemake Video Converter (For Windows Users Only)
Freemake Video Converter is reliable software to convert videos without registration. The program is free to download with more than 180 million users worldwide. And not just the MP4, but you can convert videos in all the popular formats and use the program to copy and burn DVDs.
Apart from the video conversion feature, you can use Freemake to merge your MP4 videos from your Windows operating system. However, the software is unavailable for MAC users, and it is one of the major drawbacks of this video merger.
Merging Videos in Freemake Video Converter
Step 1: Download Freemake Video Converter
First, go to the Freemake Video Converter website and click on the “Free Download” button.
Then, install the software on your computer and open it. The software appears to be simple like this.
Step 2: Add Videos
Click on the “Video” tab from the top menu to select videos you want to merge.
As you can see below, two videos are uploaded on the software.
Step 3: Rearrange Video Order
If you wish to rearrange the videos, you can do it by simply dragging the video up or down with the help of your mouse.
For example, the “Photo Slideshow” video, which was previously on the top, is now placed beneath the “Intro” video.
That means the merged video will begin from the “Intro” video, and then the “Photo Slideshow” will continue right after the first clip ends. All be done without any break or pause.
Step 4: Join Videos
After rearranging the videos, use your mouse to select clips by clicking once on each video. All selected videos will be highlighted in the “light blue” color.
Then, take the mouse cursor on the top-right side of the software and turn on the “Join Files” button by clicking on it.
You will see that a merged video will be added to the software.
For instance, you can see that a new file has been added to the interface, showing the number of merged files in the red circle.
The above screenshot represents a single merged video that includes two files.
Step 5: Choose Your Output Video Format
Look at the bottom of the software to see different video formats, and click on “MP4.”
Click on the “Preset” menu to choose the format and size of the output video. Then, select the output folder.
Step 6: Save Your Video
Lastly, click on the “Convert” button to allow the software to merge the video in MP4 format and save it on your computer.
Part 3: Boilsoft Video Joiner (For Windows and MAC Users)
Boilsoft Video Joiner is a video merger tool to join MP4, WMA, WMV, ASF, 3GP, RMVB/RM, MPG, MPEG, AVI, VOB, FLV, and MKV clips into one complete single video. You can download the free trial version or buy the full software for your MAC and Windows operating systems.
Boilsoft Video Joiner also offers Encode mode and Direct Stream mode, allowing you to merge clips efficiently into different formats at great speed.
Merging Videos in Boilsoft Video Joiner
Step 1: Download and Install Boilsoft Video Joiner
Visit the Boilsoft Video Joiner website from your computer browser and click on the “Download” tab.
If you want to install the software on Windows OS, then click on the “Windows” tab and then click on the “Download” button next to the “Boilsoft Video Joiner” software.
Contrarily, you can download the program for MAC operating system by clicking on the “Mac” tab and clicking the “Download” button.
Now, run the installer to install the software on your computer and open it.
Note: The screenshots are from the previous version of Boilsoft Video Joiner. However, this tutorial’s steps to merge MP4 videos are workable on the latest version.
Step 2: Add Videos in Boilsoft Video Joiner
Click on the “Add File” icon on the top menu to add the clips you want to join together.
Here you can see that two files have been uploaded. Plus, with the small green “arrow” buttons, you can rearrange the order of the clips.
Step 3: Merge Videos
Find the “Merge” option on the top menu, and click it.
Then, choose the “Direct Stream” mode or “Encode Mode” from the merge mode options, and click on the “OK” button.
Note: It is suggested to choose the “Direct Stream” mode if you want files to be converted in the MP4 format.
Step 4: Save Joined Video
After clicking the “OK” button, choose the folder to save the merged video on your computer. And click the “Save” button.
A green progress bar will start until you see the “Finished” message above the bar, confirming that the video has been merged. So, click the “Open Folder” button to see the joined video in MP4 format.
Part 4: Media Cope (For Windows Users Only)
Media Cope is free software with multiple features, including audio and video joiner. The software is available for Windows users only but does not support the latest Windows versions. So, if you are running XP, Vista, Windows 7, or Windows 8, you can easily install the software on your computer.
Although the software doesn’t support MAC, you can still join and save the videos on your iPhone. Nevertheless, the developers assure that the software supports all major formats, such as MP4, MOV, 3GP, AC3, AMR, WAV, MKV, FLV, DIVX, AVI, and many more.
Merging Videos in Media Cope
Step 1: Download and Install Media Cope
Downloading Media Cope is no big deal. All you need to do is go to the official Media Cope’s website and click on the “Download” tab on the top menu.
Once you are taken to another page, click on the “Download” button to save the setup on your computer.
Double click the “MediaCopeSetup.exe” file to install the software. It will only take a few minutes to install the complete program on your PC.
So, after installing Media Cope, open the program, and you will see a blank screen with several options on the top and bottom of the interface.
Step 2: Add Files
Click on the “Audio/Video Joiner” tab to select your video clips.
Select your clips and click on the “Add” button to transfer files on the software.
As you can see, two video files are added to the platform.
Step 3: Choose Output Format
If you look down in the software, you will find the “Output Format” options. So, choose your format (MP4 recommended) and select the video quality from the drop-down menu.
Step 4: Merge Videos and Save
Now, click on the “Join” button, choose your output folder, and give time to complete the process.
After the process ends, enjoy your merged video in the output folder.
Part 5: MP4Joiner by MP4Tools (For Windows, MAC, and Linux Users)
MP4Joiner is a free software to join MP4 format videos into one single video that comes with an MP4Splitter. This software duo is called MP4Tools. So don’t get confused by the name when downloading the program on your PC.
A good thing about MP4Joiner is that it is developed for multiple platforms, such as Windows, MAC, and Linux. But unfortunately, it only supports “win32,” “Mac 10.10 and Catalina,” and “BZ2” file extension.
Merging Videos in MP4Joiner
Step 1: Download MP4Joiner
The first step requires downloading MP4Joiner on your computer according to your operating system. To do that, go to the MP4Joiner’s site. And click on any one of the following “.exe” files to download the setup.
Then, install the program in your Windows, MAC, or Linux, and run it. The interface is extremely simple, with no confusing options.
Step 2: Add Files in MP4Joiner
Next, click on the “Add Video” tab with a green “+” sign.
Doing so will help you choose videos you want to join together. So, select the videos and click on the “Open” button, as shown in the screenshot below.
Step 3: Start Joining Videos
Once all your selected videos are imported on the interface, click on the “Join” tab.
Then, choose the folder where you want the merged video to be saved, and click the “Save” button.
A new window will appear, showing a green progress bar.
Wait until you see the “Successful” note on the top of the progress bar, and then click on the “Close” button.
Go to your output folder to watch the joined video in the MP4 format.
Part 6: Filmora by Wondershare (For Windows and MAC Users - Recommended)
Filmora Video Editor is one of the famous video editing software by Wondershare. It is like a gateway to creativity for beginner and experienced editors. The software offers a wide range of tools and presets, which makes video editing quick and easy.
This video editing tool is for both MAC and Windows users. You can use the software by choosing a suitable pricing plan or downloading the free version if the watermark is not an issue.
Gladly, Filmora can help you merge your videos without destroying a pixel in any format of your choice, including MP4. Also, the process is pretty simple, time-saving, and fun. Furthermore, you can also include flavors to your video merger by adding several transitions and effects to your videos.
For Win 7 or later (64-bit)
For macOS 10.14 or later
Merging Videos in MP4Joiner
Step 1: Download Filmora by Wondershare
Enter Filmora’s website in your browser to visit the homepage and click on the blue “Free Download” button.
After downloading the setup, install the software on your device. The process will only take a few minutes. Then, open Filmora, and you will see a modern-designed interface with all the tools and presets right in front of your eyes.
Step 2: Import Videos You Want to Merge
Use your mouse to click the blue “+” icon in the center of the software to import videos from your computer.
Then, drag-and-drop the videos to your timeline. But make sure that you place both clips on the same timeline. As you can see below, there are two clips. The first clip is named “Travel 05,” while the second video is called “Travel 06.”
Step 3: Fill the Gap to Merge
When you will drag-and-drop videos on the timeline, the chances are that there will be a gap or a blank space between the two clips, like this.
If this blank space is left untreated, the merged video will include this empty black space, as you can see on the preview screen.
Therefore, use your right mouse click to hold the second video and drag it to the wall of the first video without leaving any gap in between both clips.
Great! You have already merged the videos. Now, let’s move on to the final step.
Step 4: Export the Joined Video and Save in MP4
Click on the “Export” option on the left of the preview screen to see the settings window.
Under the “Local” tab, select “MP4” and feel free to perform other changes, such as choosing an output folder, renaming the merged video, picking the resolution, and more. Once you are satisfied with the settings, click on the “Export” button (on the right bottom of the screen) to save the video on your computer.
And it’s done!
Bottom Line
Among the 6 best MP4 mergers, Filmora seems to be winning. It’s not just a video editor with plenty of tools, but you can also join two or more videos in MP4 format without sacrificing the video quality.
On the other hand, video merges like Free Video Joiner, Freemake, Media Cope, Boilsoft Video Joiner, and MP4 Joiner have limited options. Plus, they are time-consuming, and some of them even disturb the video and audio quality when clips are merged through them.
FAQs
Q1. What is the best video merger for MP4?
There are many excellent video mergers to combine MP4 videos. Most users recommend Filmora because it works flawlessly on MAC and Windows operating systems. Besides, it’s a user-friendly software that even non-professional people can use to join MP4 videos.
Q2. What is the fastest video merger for MP4 clips?
Filmora by Wondershare is one of the fastest video mergers. You can merge videos by working on the timeline, which ultimately saves your time. And you can export merged videos in MP4 or any other format without many struggles. The second and third options are Media Cope and Boilsoft Video Joiner. Although they are a bit old-fashioned, you will still find them more accessible and fast than other MP4 mergers.
Q3. How do I merge MP4 videos without losing quality?
Merging MP4 videos without losing the quality depends on your software to combine videos. Filmora never disappoints its users when it comes to quality. As a matter of fact, you can choose your own resolution from the export settings menu when saving the merged MP4 video in your Windows or MAC computer.
Trailer Guide for Creators and Developers
Trailers are a popular means to showcase a product you are about to release to the market. Teasers and trailers are traditionally created for movies, but have eventually evolved to include book trailers, game trailers, and app trailers. In this article, we will explain the key details of a trailer, highlight some examples, and show you how to create an effective trailer.
Part 1. What is a Trailer?
A trailer is a type of video commercial advertisement made to advertise and inform audiences about a specific program or item. To persuade customers to view or use the product, it includes a brief series of previews of the entire material. It also serves as a means of creating anticipation for a show or product that is about to hit the market.

Trailers were originally made for cinema movies. Nowadays, trailers are created for different forms of media like shows, apps, programs, video games, and book videos. A typical traditional trailer lasts between 1 to 3 minutes.
Part 2. What Are the Similarities and Differences Between a Teaser and Trailer?
Teasers and trailers can often be confused with each other. After all, they pretty much have the same objective.
Both are created for the purpose of advertising an upcoming show, product, or service. Teasers and trailers are similarly shown to audiences prior to the release of the thing they are advertising. They are meant to show a small portion of the full experience to create curiosity and excitement towards a targeted market. Both videos are typically short in length - taking up only a maximum of 3 minutes in duration.

The differences between them lie in their content, timeline, and duration. A teaser is much shorter than a trailer - the former runs for only 20-30 seconds while the latter can go between 1-3 minutes in length. This is because teasers are typically made before or during the production process of a movie or feature, whilst trailers are commonly made at the end.
For films, movies, and shows, teasers generally capture only a single part of that media. It focuses on the most intense or impactful scene. Trailers are formed from a series of clips depicting striking scenes derived from the beginning, middle, and end of the show. These scenes are normally arranged in a nonlinear structure, allowing viewers to have a general understanding of the story without revealing the entirety of the plot.
Part 3. Examples of good trailers
An excellent trailer is one who can effectively attract and maintain the audience’s attention. It satisfies its objective of showcasing striking and captivating pieces of the main product and entices viewers to experience its entirety. Here are some examples of trailers who have well fulfilled the criteria of a good trailer.
1. The Suicide Squad
The Suicide Squad is a fresh take featuring DC’s anti-heroes assemble in a single chaotic and unconventional team. James Gunn’s iteration on these characters is brought to life in the trailer with a majestic cast including John Cena, Idris Elba, Margot Robbie, and David Dastmalchian. Several key scenes are shown, highlighting its standout characters in the process while portraying the movie’s setting.
2. Raya and the Last Dragon
The trailer starts out innocently and comes with an adorable and surprising twist. The brief 2-minute trailer is packed with relevant scenes that depict the character’s quest without revealing too much. Many action-packed scenes and emotional interactions are satisfactorily squeezed into the trailer. Excitement builds further with Tamara Bubble’s “I’m That Good” playing in the background on the last minute of the video.
3. Men (2022)
Ingenious combination of sound effects and background music play a distinct role in this 2022 trailer. The female lead’s voice echoing from a tunnel, the haunting piano keys gradually building up the suspense, and the common but cleverly used horror audio effects create a chilling ensemble of haunting scenes in the movie. The sounds gradually rise up as more aggressive and energized scenes flash on the screen, and eventually end back into the sombre intro that leaves the audience with questions.
4. The Farewell
Lulu Wang’s dramatic comedy The Farewell is all about a family hiding the truth of a family member’s terminal illness from the person herself. What makes the trailer special is that it steers away from the sad, melancholic direction and veers toward a feel-good movie vibe. The conflict, struggle, and the beliefs featured in the movie are depicted in the trailer. However, the clever placement of interactions and the uplifting music tug at the audience’s heartstrings and urge them to want to see more.
5. Pokémon Go
Pokémon has become a culture to several generations. Becoming a Pokémon trainer is a secret dream that almost all of us have, even as adults. Niantic’s collaboration with the Pokémon franchise brings people closer to that reality by introducing its AR and location-powered app Pokémon Go. The trailer shows people of all ages living out their trainer dreams in the real world and interacting with Pokémon. The different features of the game are dramatized in a real-life setting, inciting more excitement, and pulling out the nostalgia from its market. The trailer keeps the actual app showcase to a minimum, instead focusing on once again selling that dream to audiences and bringing out the inner child in everyone.
Part 4. How to bring your trailer to the next level?
While it may seem intimidating to create a trailer for your upcoming product, there is no need to worry. It is now easier than ever to create a well-crafted trailer by taking advantage of a program’s tools and templates.
- Stock media
Filmora makes it easy to craft a trailer with only a few clicks. Make use of the program’s media library to gain access to a wealth of resources like stock photos, videos, music, and audio files.
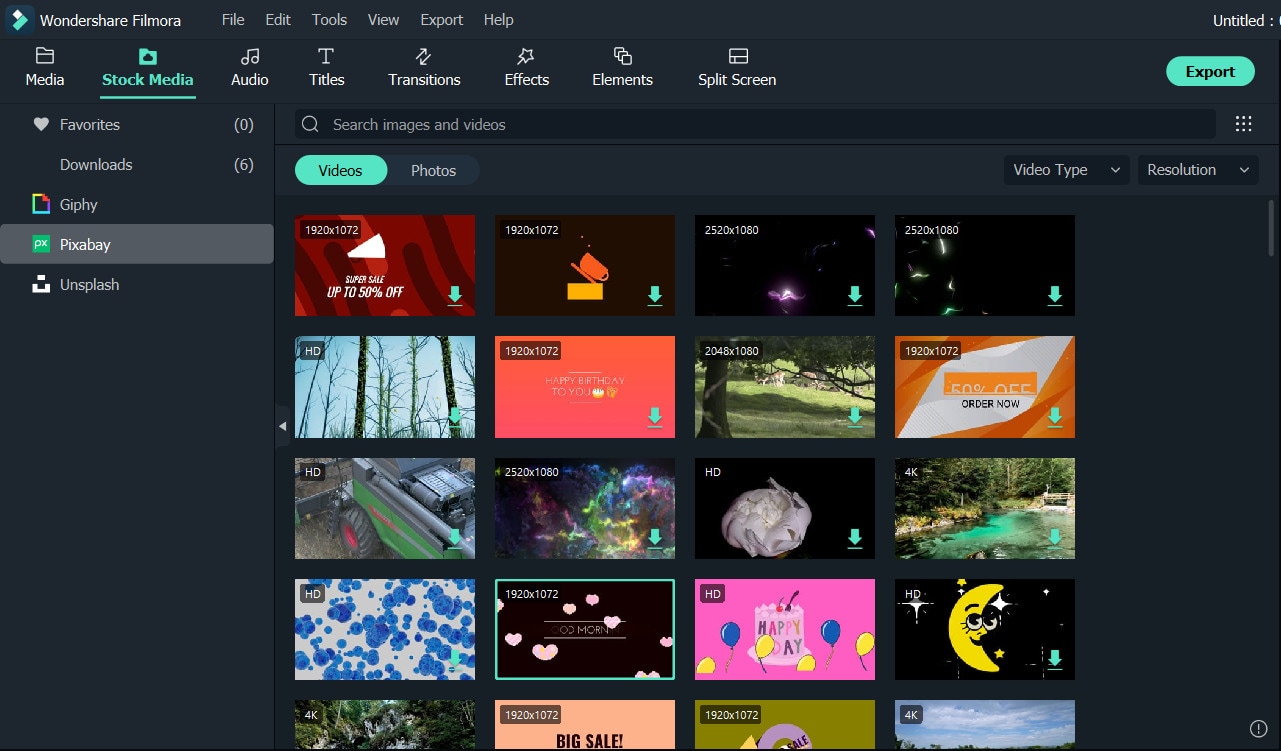
- Keyframing
Keyframing lets you smoothly transition from one scene to another, making it an effective tool for trailers. It is particularly appealing for shows that highlight motion like sports, dancing, and action. Experiment with more than 80 preset templates and create smooth scene transitions with ease.
- Speed Ramping
Speed Ramping is a feature that works perfectly with keyframing. Increase the energy and dynamics in your trailer with 6 preset speed types. You can also customize these templates. There is also no need for concern about the audio - Filmora lets you maintain the audio pitch even when using these features.
- FX Effects
The program also offers many effects and filters for an extra element in your trailer. The Borix FX is an example of that. Designed in collaboration with the award-winning developer of the same name, Boris FX and its extension Continuum features a wide array of tasteful effects for your convenience. There are over 91 customizable and adjustable presets including types like blurs, stylization, and lights. NewBlue is another option that carries choices of filters, titlers, and stylizers.
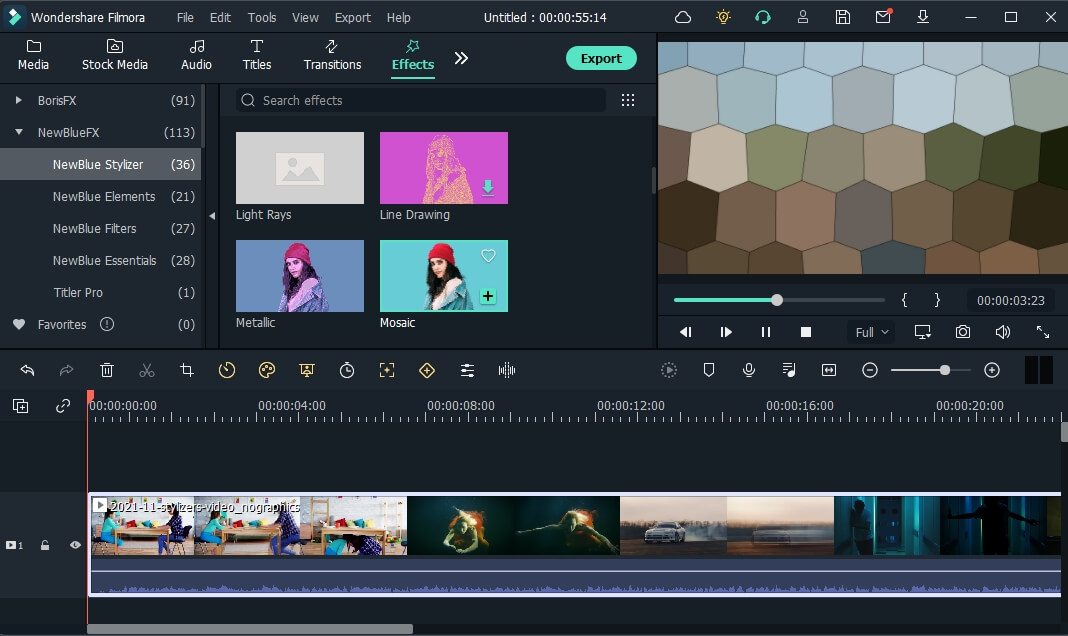
Filmora offers different features, tools, and effects to explore that can help make your trailer editing objectives easier and more convenient. Save time and resources by taking advantage of its powerful yet easy-to-use tools.
Free Download For Win 7 or later(64-bit)
Free Download For macOS 10.14 or later
2. Raya and the Last Dragon
The trailer starts out innocently and comes with an adorable and surprising twist. The brief 2-minute trailer is packed with relevant scenes that depict the character’s quest without revealing too much. Many action-packed scenes and emotional interactions are satisfactorily squeezed into the trailer. Excitement builds further with Tamara Bubble’s “I’m That Good” playing in the background on the last minute of the video.
3. Men (2022)
Ingenious combination of sound effects and background music play a distinct role in this 2022 trailer. The female lead’s voice echoing from a tunnel, the haunting piano keys gradually building up the suspense, and the common but cleverly used horror audio effects create a chilling ensemble of haunting scenes in the movie. The sounds gradually rise up as more aggressive and energized scenes flash on the screen, and eventually end back into the sombre intro that leaves the audience with questions.
4. The Farewell
Lulu Wang’s dramatic comedy The Farewell is all about a family hiding the truth of a family member’s terminal illness from the person herself. What makes the trailer special is that it steers away from the sad, melancholic direction and veers toward a feel-good movie vibe. The conflict, struggle, and the beliefs featured in the movie are depicted in the trailer. However, the clever placement of interactions and the uplifting music tug at the audience’s heartstrings and urge them to want to see more.
5. Pokémon Go
Pokémon has become a culture to several generations. Becoming a Pokémon trainer is a secret dream that almost all of us have, even as adults. Niantic’s collaboration with the Pokémon franchise brings people closer to that reality by introducing its AR and location-powered app Pokémon Go. The trailer shows people of all ages living out their trainer dreams in the real world and interacting with Pokémon. The different features of the game are dramatized in a real-life setting, inciting more excitement, and pulling out the nostalgia from its market. The trailer keeps the actual app showcase to a minimum, instead focusing on once again selling that dream to audiences and bringing out the inner child in everyone.
Part 4. How to bring your trailer to the next level?
While it may seem intimidating to create a trailer for your upcoming product, there is no need to worry. It is now easier than ever to create a well-crafted trailer by taking advantage of a program’s tools and templates.
- Stock media
Filmora makes it easy to craft a trailer with only a few clicks. Make use of the program’s media library to gain access to a wealth of resources like stock photos, videos, music, and audio files.
- Keyframing
Keyframing lets you smoothly transition from one scene to another, making it an effective tool for trailers. It is particularly appealing for shows that highlight motion like sports, dancing, and action. Experiment with more than 80 preset templates and create smooth scene transitions with ease.
- Speed Ramping
Speed Ramping is a feature that works perfectly with keyframing. Increase the energy and dynamics in your trailer with 6 preset speed types. You can also customize these templates. There is also no need for concern about the audio - Filmora lets you maintain the audio pitch even when using these features.
- FX Effects
The program also offers many effects and filters for an extra element in your trailer. The Borix FX is an example of that. Designed in collaboration with the award-winning developer of the same name, Boris FX and its extension Continuum features a wide array of tasteful effects for your convenience. There are over 91 customizable and adjustable presets including types like blurs, stylization, and lights. NewBlue is another option that carries choices of filters, titlers, and stylizers.
Filmora offers different features, tools, and effects to explore that can help make your trailer editing objectives easier and more convenient. Save time and resources by taking advantage of its powerful yet easy-to-use tools.
Free Download For Win 7 or later(64-bit)
Free Download For macOS 10.14 or later
Also read:
- New Adding Text to Your Collage Not only Makes It Look Sophisticated but Also Versatile. So, if You Too Are Looking for Ways to Create a Collage Text, Check Out Our Article
- New In This Article, You Will Learn How to Create an Attractive and Engaging Slideshow Video Using Tools Available in the Wondershare Filmora
- Updated 2024 Approved Add a Miniature Effect on Your Video for Filmy Looks. To Add This Effect, Read the Complete Guide and Make Your Video Cinematic by Wondershare Filmora
- How to Make Strobe Light Text Effect for 2024
- Updated How to Use Frame Blending in Premiere Pro
- Updated In 2024, What Is the Best Filmora Slideshow Templates? Experts Choice
- New 8 Websites to Find 3D Text PNG for 2024
- New In 2024, Best Ways to Slow Down Motion in CapCut
- New In 2024, How to Make Video Slow Motion?
- In 2024, How to Add VHS Green Screen to Your Video
- In 2024, Find Out The Best Dark Moody LUTs During Editing
- What Is the Best FPS for YouTube Videos for 2024
- In 2024, Making Creative and Engaging Youtube Videos Is Now Easy with Several Tools. Now, YouTube Also Offers You Its Own Built-In Video Editor Through Which You Can Edit and Enhance the Video Quality
- Updated Best PDF to GIF Converters
- In 2024, Quickly Turn Any Video Into a Paper Rip Effect
- 2024 Approved Step by Step to Split Clips in VLC
- Updated 2024 Approved Top List 20 Best LUTs for Music Videos
- We Can Say that the Horror Movies of the 90S Laid the Foundation for Current Horror Movies. So, without Wasting Time, Lets Create a 1990S Horror Movie Similar to The Blair Witch Project for 2024
- New Splice Video Editor Online - Get Your Videos Splice Easily
- In 2024, This Article Will Show You the Steps to Make Coin Magic in Videos with Filmora
- 3 Different Methods to Correct Color Distortion in Videos
- New 2024 Approved How to Merge Audio and Video in VLC Media Player
- New How to Create an URL for Your Video, In 2024
- New 10 Recommended Websites to Discover Awesome Premiere Pro Video Templates
- Easy Way to Combine Several Xvid Files Into One Windows, Mac,Android
- In 2024, Do You Want to Excel at Using Adobe Premiere Pro Software for Splitting Videos and Audio? Learn About Splitting a Video and Audio Using Different Tools and Add a New Skill to Your Skillset with a Step-by-Step Guide in This Article
- New In 2024, Adobe Premiere Pro Rec 709 LUTs Finding The Best Choices
- Top 10 Free WhatsApp Video Converter 2023
- 2024 Approved Easy Way to Apply Green Screen to YouTube Videos
- 2024 Approved 10 Catchy Pixel Art Wallpapers and How to Custom Your Own
- Updated In This Article, We Will Be Discussing How to Crop a Video on Android, but Since Most Android Devices Dont Have This Option, You Will Need to Do It Externally, by Downloading and Using Different Apps
- Updated In 2024, Best 12 Best Freeze Frame Video Editing Examples
- The Top Tips for Becoming a Good Podcast Host Are Presented in This Article. How to Start and End the Podcast Show Is All Set Below. You Can Also Learn About the Ways to Call Guests to Your Show
- New Unlink Audio and Video in DaVinci Resolve Detailed Steps
- Can Life360 Track Or See Text Messages? What Can You Do with Life360 On Apple iPhone 6 Plus? | Dr.fone
- How to Reset a Samsung Galaxy M34 5G Phone That Is Locked | Dr.fone
- In 2024, Full Guide to Fix iToolab AnyGO Not Working On Honor Magic Vs 2 | Dr.fone
- Updated 2024 Approved Cloning Voices With Hugging Face Features, Guidance, Alternatives
- 5 Best Route Generator Apps You Should Try On Poco X6 | Dr.fone
- In 2024, Easiest Guide How to Clone Xiaomi Civi 3 Phone? | Dr.fone
- In 2024, How to Share/Fake Location on WhatsApp for Realme C67 5G | Dr.fone
- How to Transfer Photos from Xiaomi Redmi Note 13 Pro 5G to Laptop Without USB | Dr.fone
- Overview of the Best Tecno Pop 7 Pro Screen Mirroring App | Dr.fone
- In 2024, AddROM Bypass An Android Tool to Unlock FRP Lock Screen For your Infinix Smart 7 HD
- 10 Best Free AI Script Generators | Movie Script Generators for 2024
- How To Recover Lost Data of Apple iPhone 13? | Dr.fone
- In 2024, How to Unlock Apple iPhone 14 without Passcode or Face ID | Dr.fone
- How to Stop Life360 from Tracking You On Oppo Find X6? | Dr.fone
- In 2024, How to Remove Forgotten PIN Of Your Infinix Note 30 5G
- In 2024, Will Pokémon Go Ban the Account if You Use PGSharp On Realme Narzo 60 Pro 5G | Dr.fone
- Process of Screen Sharing Honor Magic Vs 2 to PC- Detailed Steps | Dr.fone
- In 2024, How To Bypass iCloud By Checkra1n Even From Apple iPhone 15 If Youve Tried Everything
- In 2024, iPogo will be the new iSpoofer On Vivo X100? | Dr.fone
- Thinking About Changing Your Netflix Region Without a VPN On Xiaomi 14? | Dr.fone
- How to Repair Corrupt Pivot Table of MS Excel File? | Stellar
- A Working Guide For Pachirisu Pokemon Go Map On Lava Blaze Pro 5G | Dr.fone
- Rootjunky APK To Bypass Google FRP Lock For Samsung Galaxy Z Fold 5
- In 2024, How to Fake Snapchat Location without Jailbreak On Nokia C12 | Dr.fone
- In 2024, How to Get and Use Pokemon Go Promo Codes On Nokia 130 Music | Dr.fone
- Title: In 2024, Deleting White Background in Photoshop Is Hard?
- Author: Chloe
- Created at : 2024-05-20 03:38:28
- Updated at : 2024-05-21 03:38:28
- Link: https://ai-editing-video.techidaily.com/in-2024-deleting-white-background-in-photoshop-is-hard/
- License: This work is licensed under CC BY-NC-SA 4.0.
