
:max_bytes(150000):strip_icc():format(webp)/are-you-really-getting-dolby-atmos-sound-135ec4330d004250883e2acab9423191.jpg)
In 2024, Discover How to Create Professional Foggy Text Reflection Effects in the Filmora Video Editor
Discover How to Create Professional Foggy Text Reflection Effects in the Filmora Video Editor
Preparation
What you need to prepare:
- A computer (Windows or macOS)
- Your video materials.
- Filmora video editor
Step 1
Download the Filmora video editor → run it → and click on “New Project”.
Step 2
Go to Titles → drag the Default Title to the Timeline below. Double-click on the clip to open its settings. Here, type in your text → change the font to Montserrat Light. Scroll down and increase Text Spacing to 5.0. Now, select only the first word in the box where you typed your text. Then, change its font to Montserrat Bold. Click OK.

Step 3
Take a Snapshot of the text you just created. Now, delete the Default Title clip from the Timeline and drag the Snapshot you took to the Timeline.

Step 4
Double-click the Snapshot clip → go to the Video tab → click the highlighted button below to flip the text. Then, take a Snapshot of this flipped version of the text and delete the clip from the Timeline.

Step 5
Visit the free stock footage site Mixkit and download any smoke or fog background video you like. Then, go to Filmora → My Media → Import Media → and select the footage you downloaded to import it into the video editor. Then, drag the Smoke clip to the Timeline and make it 6 seconds long.

Step 6
Double-click on the clip → go to Color. Now, change Contrast to “49”, Saturation to “100”, and Brightness to “18”. Below, set the 3D LUT option to “Game of Thrones”. Click OK.

Step 7
Drag the other Smoke clip to Track 2 of the Timeline. Make it 6 seconds long. Then, move the Playhead to the starting point of the video.

Step 8
Double-click on the new smoke clip. Go to Animation. Decrease the Opacity to 0%. Move the Playhead 10 frames forward → increase the Opacity to 6%. Don’t click OK yet.

Step 9
Move the Playhead to 5 seconds. Click on “**+Add**” to add a keyframe to the clip. Then, move the Playhead to the next-to-last frame and increase the Opacity to 100%. Click OK.

Step 10
Set the Playhead to the second frame and drop the first Snapshot we took earlier at that starting point. Drag the clip to be 6 seconds long. Then, double-click on the clip and adjust the settings exactly as you see in this image here. Don’t click on OK yet.

Step 11
Move the Playhead at the 17th frame → increase the Opacity to 6%. Move the Playhead to 5 seconds and 23rd frame → change the X-axis value to “1973”. Click OK.

Step 12
Drag the same Snapshot file to Track 4, directly on top of the clip in Track 3. Make its duration the same too. Now, double-click on this clip and apply the exact same settings as in the image here. Don’t click on OK yet.

Step 13
Move the Playhead to the 17th frame → increase the Opacity to 6%. Now, move the Playhead to 5 seconds and 23rd frame → change X-axis value to “-1944” and the Opacity to 0%. Click OK.

Step 14
Go to Sample Color and drag the White color on Track 6 in the Timeline. Place this clip at the same starting point as the snapshots below it. Set its duration the same as the clips below too. Then, move the Playhead at its starting point.

Step 15
Double-click on the Sample Color clip → go to Video → Mask → Import. Here, select the first Snapshot we created earlier in this tutorial.

Step 16
Now, go straight to the Animation tab and click the “**+Add**” button to add a keyframe. Then, compress the text in the preview screen until it’s not visible anymore on the screen.

Step 17
Add keyframes at the 1-second position and at the 5-second position. Then, move the Playhead once more to the 5-second and 22nd frame. Reduce the Opacity to 1%. Click OK.

Step 18
Drag another White Sample Color to Track 5 this time. Adjust its duration and starting point to be the same as the clip above it. Double-click on it → go to Video → Mask → Import. Here, select the flipped text Snapshot we created earlier.
Step 19
Now, go to Animation and add a keyframe at the starting point. Then, compress the text on the preview screen exactly as we did before with the other one. Then, add a keyframe at the 1-second position of the clip. Then, adjust the Y-axis position to create a reflection effect, just like this.

Step 20
Move the Playhead to the 5-second position and add a keyframe. Now, move the Playhead directly to 5-seconds and 22 frames. Here, reduce the Opacity to 0%.
Step 21
Go back to the Video tab from the upper-left corner of the panel. Now, move the Playhead to the clip’s starting point. Select the Mask tab. Add a keyframe. Move the Playhead to 1 second and set the Blur Strength to 6%.

Step 22
Move the Playhead to 3 seconds. Scroll down and set Vertical to 259%. Set Y-axis to “-157”. Then, increase Blur Strength to 25%. Click OK.

Step 23
Click on the Sample Color in Track 5 and change the Opacity to 40% for the second and third keyframes. You can move between the keyframes on the arrows highlighted below. Click OK.

Step 24
Go to Sample Color and drag the “Gradient 4” color to Track 7 on the Timeline. Allow this clip to start from the very beginning and adjust its end time to be the same as all the other clips.
Step 25
Double-click on the Gradient 4 clip → go to Video → Basic. Change the Blending Mode to “Soft Light”. Reduce the Opacity to 42%. Click OK.

Step 26
Go to Project Media and drag the white smoke clip on Track 8. Place the Playhead at the starting point and double-click on the clip.

Step 27
Change its Blending Mode to “Screen”. Go to the Animation tab and decrease the Opacity to 0%. Move the Playhead to frame 10 → increase Opacity to 12%. Move the Playhead to the 5-second position → add a keyframe. Then, move the Playhead at 5 seconds and 23rd frame → increase the Opacity back to 100%. Click OK.
Step 28
Go to Effects and drag the Cinema effect to Track 9. Adjust its duration to match all the other clips. Double-click on the clip and increase its Border Height to “0.10”. Click OK.

Step 29
Finally, Render the video and watch the final result. You’re done! Congratulations on resting a foggy text reflection effect in Filmora.

Summary
What you’ve learned:
- Create a foggy text reflection effect in the Filmora video editor
- Add and adjust keyframes to clips
- Edit and customize text
- Take and edit snapshots
What you need to prepare:
- A computer (Windows or macOS)
- Your video materials.
- Filmora video editor
Step 1
Download the Filmora video editor → run it → and click on “New Project”.
Step 2
Go to Titles → drag the Default Title to the Timeline below. Double-click on the clip to open its settings. Here, type in your text → change the font to Montserrat Light. Scroll down and increase Text Spacing to 5.0. Now, select only the first word in the box where you typed your text. Then, change its font to Montserrat Bold. Click OK.
Step 3
Take a Snapshot of the text you just created. Now, delete the Default Title clip from the Timeline and drag the Snapshot you took to the Timeline.
Step 4
Double-click the Snapshot clip → go to the Video tab → click the highlighted button below to flip the text. Then, take a Snapshot of this flipped version of the text and delete the clip from the Timeline.
Step 5
Visit the free stock footage site Mixkit and download any smoke or fog background video you like. Then, go to Filmora → My Media → Import Media → and select the footage you downloaded to import it into the video editor. Then, drag the Smoke clip to the Timeline and make it 6 seconds long.
Step 6
Double-click on the clip → go to Color. Now, change Contrast to “49”, Saturation to “100”, and Brightness to “18”. Below, set the 3D LUT option to “Game of Thrones”. Click OK.
Step 7
Drag the other Smoke clip to Track 2 of the Timeline. Make it 6 seconds long. Then, move the Playhead to the starting point of the video.
Step 8
Double-click on the new smoke clip. Go to Animation. Decrease the Opacity to 0%. Move the Playhead 10 frames forward → increase the Opacity to 6%. Don’t click OK yet.
Step 9
Move the Playhead to 5 seconds. Click on “**+Add**” to add a keyframe to the clip. Then, move the Playhead to the next-to-last frame and increase the Opacity to 100%. Click OK.
Step 10
Set the Playhead to the second frame and drop the first Snapshot we took earlier at that starting point. Drag the clip to be 6 seconds long. Then, double-click on the clip and adjust the settings exactly as you see in this image here. Don’t click on OK yet.
Step 11
Move the Playhead at the 17th frame → increase the Opacity to 6%. Move the Playhead to 5 seconds and 23rd frame → change the X-axis value to “1973”. Click OK.
Step 12
Drag the same Snapshot file to Track 4, directly on top of the clip in Track 3. Make its duration the same too. Now, double-click on this clip and apply the exact same settings as in the image here. Don’t click on OK yet.
Step 13
Move the Playhead to the 17th frame → increase the Opacity to 6%. Now, move the Playhead to 5 seconds and 23rd frame → change X-axis value to “-1944” and the Opacity to 0%. Click OK.
Step 14
Go to Sample Color and drag the White color on Track 6 in the Timeline. Place this clip at the same starting point as the snapshots below it. Set its duration the same as the clips below too. Then, move the Playhead at its starting point.
Step 15
Double-click on the Sample Color clip → go to Video → Mask → Import. Here, select the first Snapshot we created earlier in this tutorial.
Step 16
Now, go straight to the Animation tab and click the “**+Add**” button to add a keyframe. Then, compress the text in the preview screen until it’s not visible anymore on the screen.
Step 17
Add keyframes at the 1-second position and at the 5-second position. Then, move the Playhead once more to the 5-second and 22nd frame. Reduce the Opacity to 1%. Click OK.
Step 18
Drag another White Sample Color to Track 5 this time. Adjust its duration and starting point to be the same as the clip above it. Double-click on it → go to Video → Mask → Import. Here, select the flipped text Snapshot we created earlier.
Step 19
Now, go to Animation and add a keyframe at the starting point. Then, compress the text on the preview screen exactly as we did before with the other one. Then, add a keyframe at the 1-second position of the clip. Then, adjust the Y-axis position to create a reflection effect, just like this.
Step 20
Move the Playhead to the 5-second position and add a keyframe. Now, move the Playhead directly to 5-seconds and 22 frames. Here, reduce the Opacity to 0%.
Step 21
Go back to the Video tab from the upper-left corner of the panel. Now, move the Playhead to the clip’s starting point. Select the Mask tab. Add a keyframe. Move the Playhead to 1 second and set the Blur Strength to 6%.
Step 22
Move the Playhead to 3 seconds. Scroll down and set Vertical to 259%. Set Y-axis to “-157”. Then, increase Blur Strength to 25%. Click OK.
Step 23
Click on the Sample Color in Track 5 and change the Opacity to 40% for the second and third keyframes. You can move between the keyframes on the arrows highlighted below. Click OK.
Step 24
Go to Sample Color and drag the “Gradient 4” color to Track 7 on the Timeline. Allow this clip to start from the very beginning and adjust its end time to be the same as all the other clips.
Step 25
Double-click on the Gradient 4 clip → go to Video → Basic. Change the Blending Mode to “Soft Light”. Reduce the Opacity to 42%. Click OK.
Step 26
Go to Project Media and drag the white smoke clip on Track 8. Place the Playhead at the starting point and double-click on the clip.
Step 27
Change its Blending Mode to “Screen”. Go to the Animation tab and decrease the Opacity to 0%. Move the Playhead to frame 10 → increase Opacity to 12%. Move the Playhead to the 5-second position → add a keyframe. Then, move the Playhead at 5 seconds and 23rd frame → increase the Opacity back to 100%. Click OK.
Step 28
Go to Effects and drag the Cinema effect to Track 9. Adjust its duration to match all the other clips. Double-click on the clip and increase its Border Height to “0.10”. Click OK.
Step 29
Finally, Render the video and watch the final result. You’re done! Congratulations on resting a foggy text reflection effect in Filmora.
Summary
What you’ve learned:
- Create a foggy text reflection effect in the Filmora video editor
- Add and adjust keyframes to clips
- Edit and customize text
- Take and edit snapshots
How D AI Video Games Act More Human Than Human?
How Did AI Video Games Act More Human Than Human?
An easy yet powerful editor
Numerous effects to choose from
Detailed tutorials provided by the official channel
The gaming world is ever-changing, with developers looking to create innovative ways to immerse players into their digital worlds. One such technology that has begun to sweep is AI in the game industry.
AI is a powerful tool in many ways to improve the gaming experience. It can make artificial intelligence in computer games more believable and add replayability and immersion to games, and we can expect to see even more impressive applications in the future.
In this article
01 [What Is AI in Gaming?](#Part 1)
02 [Why Does AI in Gaming Matter?](#Part 2)
03 [How AI Will Completely Change Video Games](#Part 3)
04 [8 Games with Incredible Artificial Intelligence](#Part 4)
05 [What AI Video Games Assets Do Filmora Have?](#Part 5)
Part 1 What Is AI in Gaming?
In simple terms, AI is a set of algorithms that allow a computer to learn and improve from experience. Although you can apply it in many ways, artificial intelligence in video games is usually helpful to create more intelligent and more believable non-player characters (NPCs).
For example, an AI system might be helpful to determine how an NPC reacts to the player’s actions. If the player tries to steal from an NPC, the AI might make the NPC angry and more likely to attack the player. Alternatively, if the player is friendly to an NPC, the AI game playing might make the NPC more likely to help the player in future interactions.
Part 2 Why Does AI in Gaming Matter?
One of the most vital aspects of AI in video games is that it can make games more believable and immersive for players. When games can convincingly simulate human-like behavior, it can be a much more enjoyable experience for gamers. AI can make NPCs seem more lifelike and make the game world feel more believable.
AI is also becoming increasingly important for creating procedural content. This is where the game generates content on its own, rather than relying on pre-made assets. For example, a game might use procedural generation to create random dungeons or quests that the player can explore. This can add a lot of replayability to a game, as the player never knows what they will encounter next.
Part 3 How AI Will Completely Change Video Games
It is not a secret that AI is changing the world as we know it. With its ability to enable computers to learn and improve from experience, AI is paving the way for a future where machines can handle more complex tasks. And nowhere is this more apparent than in the world of video gaming.
In the past, developers brought in AI primarily for simple things like making certain NPCs (non-player characters) move and act realistically. But now, artificial intelligence in video games is being used for much more complex tasks like generating procedural content and creating believable human-like behavior. This results in a new generation of AI game playing that are more immersive and playable.
Part 4 Games with Incredible Artificial Intelligence
Now, we will look into eight video games that signify why we need the best ai in video games.
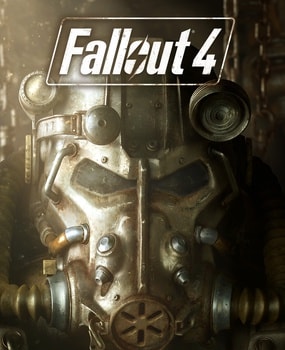
01Fallout 4
One of the most attractive examples of AI in video gaming is Fallout 4. This post-apocalyptic RPG features some of the most believable NPCs ever seen in a game. Each character is fully voiced, and they all have their unique personalities and backstories. The AI generates procedural content, meaning that the game world is always different each time you play.
02The Witcher 3: Wild Hunt
The Witcher 3: Wild Hunt is one more great example of an AI video game. This open-world RPG features a vast array of believable NPCs, each with unique personality traits and motivations. The AI is also used to generate procedural content, resulting in a different game world every time you play.

03Grand Theft Auto V
Grand Theft Auto V is yet another example of AI being used to create believable human-like behavior. The NPCs in this play are some of the most lifelike and realistic ever seen. They react to the player’s actions in believable ways, and the AI is used to generate procedural content, resulting in a game world that is always different.

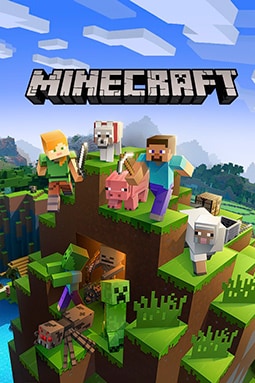
04Minecraft
Minecraft is a game that heavily uses procedural generation to create its content. The terrain and structures in the game are all generated on the fly by the AI, resulting in a different game world every time you play. What’s more, AI is also used to generate the behaviors of mobs (hostile creatures), making them more believable and lifelike.
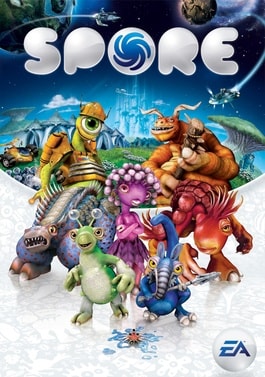
05Spore
Spore is an AI game play that is all about procedural generation. Every creature in the game is generated by AI, meaning that there are many possible creature designs. What’s more, AI is used to create creatures’ behaviors, making them more believable and lifelike.
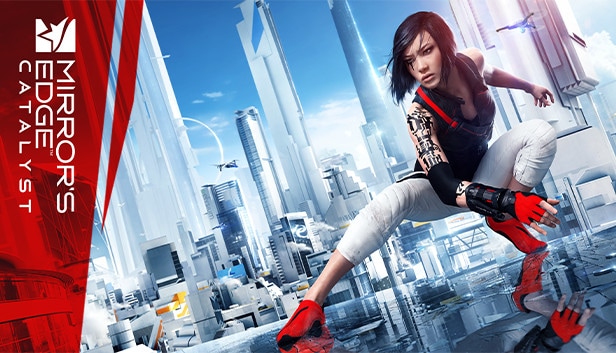
06Mirror’s Edge Catalyst
Mirror’s Edge Catalyst is a game that heavily uses AI to create its content. The levels in the game are all procedurally generated, meaning that they are different every time you play. This is made possible by the game’s AI, which produces the level layouts and obstacles on the fly.
07Civilization VI
One of the most incredible examples of AI in video gaming is Civilization VI. This turn-based strategy game features some of the most believable NPCs ever seen in a game. Each character has its voice fully, and they all have unique personalities and backstories.
08Elite Dangerous
Elite Dangerous is a space simulation game that uses advanced AI to create believable and realistic human-like behavior. The NPCs in the game are some of the most lifelike and realistic ever seen. They react to the player’s actions in believable ways, and the AI is used to generate procedural content, resulting in a game world that is always different.
Part 5 What AI Video Games Assets Do Wondershare Filmora Video Editor Have?
With the increased use of AI in video games, most gamers have found gaming more enjoyable. However, an outstanding video editor has some assets that can significantly make AI video games better and more human. This video editor is one of the most sorted for and is called Filmora. Filmora is a great video editing software for creating stunning videos. It’s effortless to use and has various features to create professional-looking videos. It’s perfect for making videos for social media, YouTube, and other online platforms.
Its many features have a touch of artificial intelligence, making this program stand out from the other video editors and valuable for editing during ai video games creation.
Screen Recording
The Filmora screen recorder allows the user to concurrently record the screen and camera and the system and microphone audio. You can quickly record games, tutorials, YouTube videos, and other videos and then export them to YouTube, Vimeo, and other devices.
AI Portrait
The AI portrait function in Filmora video editor allows you to locate the human in your movie effortlessly and erase the background with a simple drag and click. There are also several portrait effects and AR stickers to add to your video editing enjoyment.
For Win 7 or later (64-bit)
For macOS 10.12 or later
Video Effects
Filmora customers can choose from various effects to utilize in their video editing software. It’s simple to create whatever effect you want with over 900 free effects, including drag-and-drop transitions, titles, filters, and motion components.
Do visit Wondershare Filmora exclusive website to know more about its latest upgrade and new features launch.
● Ending Thoughts →
● Thus, that was about what an ai video game is and why the characters act more like humans.
● So, as a video game lover, you can now explore the best of ai playing video games to have a personal experience of this new video gaming trend. Also, do try the Filmora software to see how you can change the looks and feel of your video game creation.
The gaming world is ever-changing, with developers looking to create innovative ways to immerse players into their digital worlds. One such technology that has begun to sweep is AI in the game industry.
AI is a powerful tool in many ways to improve the gaming experience. It can make artificial intelligence in computer games more believable and add replayability and immersion to games, and we can expect to see even more impressive applications in the future.
In this article
01 [What Is AI in Gaming?](#Part 1)
02 [Why Does AI in Gaming Matter?](#Part 2)
03 [How AI Will Completely Change Video Games](#Part 3)
04 [8 Games with Incredible Artificial Intelligence](#Part 4)
05 [What AI Video Games Assets Do Filmora Have?](#Part 5)
Part 1 What Is AI in Gaming?
In simple terms, AI is a set of algorithms that allow a computer to learn and improve from experience. Although you can apply it in many ways, artificial intelligence in video games is usually helpful to create more intelligent and more believable non-player characters (NPCs).
For example, an AI system might be helpful to determine how an NPC reacts to the player’s actions. If the player tries to steal from an NPC, the AI might make the NPC angry and more likely to attack the player. Alternatively, if the player is friendly to an NPC, the AI game playing might make the NPC more likely to help the player in future interactions.
Part 2 Why Does AI in Gaming Matter?
One of the most vital aspects of AI in video games is that it can make games more believable and immersive for players. When games can convincingly simulate human-like behavior, it can be a much more enjoyable experience for gamers. AI can make NPCs seem more lifelike and make the game world feel more believable.
AI is also becoming increasingly important for creating procedural content. This is where the game generates content on its own, rather than relying on pre-made assets. For example, a game might use procedural generation to create random dungeons or quests that the player can explore. This can add a lot of replayability to a game, as the player never knows what they will encounter next.
Part 3 How AI Will Completely Change Video Games
It is not a secret that AI is changing the world as we know it. With its ability to enable computers to learn and improve from experience, AI is paving the way for a future where machines can handle more complex tasks. And nowhere is this more apparent than in the world of video gaming.
In the past, developers brought in AI primarily for simple things like making certain NPCs (non-player characters) move and act realistically. But now, artificial intelligence in video games is being used for much more complex tasks like generating procedural content and creating believable human-like behavior. This results in a new generation of AI game playing that are more immersive and playable.
Part 4 Games with Incredible Artificial Intelligence
Now, we will look into eight video games that signify why we need the best ai in video games.
01Fallout 4
One of the most attractive examples of AI in video gaming is Fallout 4. This post-apocalyptic RPG features some of the most believable NPCs ever seen in a game. Each character is fully voiced, and they all have their unique personalities and backstories. The AI generates procedural content, meaning that the game world is always different each time you play.
02The Witcher 3: Wild Hunt
The Witcher 3: Wild Hunt is one more great example of an AI video game. This open-world RPG features a vast array of believable NPCs, each with unique personality traits and motivations. The AI is also used to generate procedural content, resulting in a different game world every time you play.
03Grand Theft Auto V
Grand Theft Auto V is yet another example of AI being used to create believable human-like behavior. The NPCs in this play are some of the most lifelike and realistic ever seen. They react to the player’s actions in believable ways, and the AI is used to generate procedural content, resulting in a game world that is always different.
04Minecraft
Minecraft is a game that heavily uses procedural generation to create its content. The terrain and structures in the game are all generated on the fly by the AI, resulting in a different game world every time you play. What’s more, AI is also used to generate the behaviors of mobs (hostile creatures), making them more believable and lifelike.
05Spore
Spore is an AI game play that is all about procedural generation. Every creature in the game is generated by AI, meaning that there are many possible creature designs. What’s more, AI is used to create creatures’ behaviors, making them more believable and lifelike.
06Mirror’s Edge Catalyst
Mirror’s Edge Catalyst is a game that heavily uses AI to create its content. The levels in the game are all procedurally generated, meaning that they are different every time you play. This is made possible by the game’s AI, which produces the level layouts and obstacles on the fly.
07Civilization VI
One of the most incredible examples of AI in video gaming is Civilization VI. This turn-based strategy game features some of the most believable NPCs ever seen in a game. Each character has its voice fully, and they all have unique personalities and backstories.
08Elite Dangerous
Elite Dangerous is a space simulation game that uses advanced AI to create believable and realistic human-like behavior. The NPCs in the game are some of the most lifelike and realistic ever seen. They react to the player’s actions in believable ways, and the AI is used to generate procedural content, resulting in a game world that is always different.
Part 5 What AI Video Games Assets Do Wondershare Filmora Video Editor Have?
With the increased use of AI in video games, most gamers have found gaming more enjoyable. However, an outstanding video editor has some assets that can significantly make AI video games better and more human. This video editor is one of the most sorted for and is called Filmora. Filmora is a great video editing software for creating stunning videos. It’s effortless to use and has various features to create professional-looking videos. It’s perfect for making videos for social media, YouTube, and other online platforms.
Its many features have a touch of artificial intelligence, making this program stand out from the other video editors and valuable for editing during ai video games creation.
Screen Recording
The Filmora screen recorder allows the user to concurrently record the screen and camera and the system and microphone audio. You can quickly record games, tutorials, YouTube videos, and other videos and then export them to YouTube, Vimeo, and other devices.
AI Portrait
The AI portrait function in Filmora video editor allows you to locate the human in your movie effortlessly and erase the background with a simple drag and click. There are also several portrait effects and AR stickers to add to your video editing enjoyment.
For Win 7 or later (64-bit)
For macOS 10.12 or later
Video Effects
Filmora customers can choose from various effects to utilize in their video editing software. It’s simple to create whatever effect you want with over 900 free effects, including drag-and-drop transitions, titles, filters, and motion components.
Do visit Wondershare Filmora exclusive website to know more about its latest upgrade and new features launch.
● Ending Thoughts →
● Thus, that was about what an ai video game is and why the characters act more like humans.
● So, as a video game lover, you can now explore the best of ai playing video games to have a personal experience of this new video gaming trend. Also, do try the Filmora software to see how you can change the looks and feel of your video game creation.
How to Remove Echo From Videos with Adobe Audition
With its various potent tools, Adobe Audition enables audio producers to obtain the absolute best results from their recordings. Adobe Audition removes echo and will have something that will assist you in bringing everything back under control so that your audio sounds great, regardless of whether the problem is unruly instruments or rowdy hosts.
When recording audio, there are numerous factors to consider. Some spaces can generate more reverb than others, like a cluttered echo effect due to various factors, including reflective surfaces, distant objects, and large, cavernous spaces. This will allow you to remove echo auditions for use in podcasts, movies, and musical compositions.

Part 1: How to Remove Echo with Adobe Audition?
Producers may use various compelling features in Adobe Audition to get the most out of your audio. Whether rogue hosts or instruments, Adobe Audition has a solution to help you regain control and make your audio sound great. We’ll demonstrate how to eliminate echo in Adobe Audition in this tutorial. Adobe Auditions can reduce echo from your video files in a few steps. Want to learn how?
Well, here are the five prime steps.
Step1 Pick Audio
Load the project you are currently working on in Audition, and then choose the audio file with the echo that needs removal. Choose a segment of the waveform that is relatively quiet to eliminate some of the ambient noise that your camera or another nearby device may have caused.
Select “Capture Noise Print” from the contextual menu visible when you right-click on the portion. This will assist the Audition in differentiating the primary audio from any background noise.
Step2 Begin Noise Removal
Select the noise that you want to get rid of, and then go to “Effects” > “Noise Reduction / Restoration” > “Noise Reduction (process).” After selecting “Select Entire File,” play your audio file again to see whether the background noise got eliminated.
You may also make the gating effect more noticeable by going to the Advanced tab and lowering the Spectral Decay Rate. When satisfied with the adjustments, you may make them permanent by clicking the “Apply” button.

Step3 Add Effects
Next, choose “Dynamics Processing” from the “Effects” menu after clicking on “Amplitude and Compression.”
This will load an effect like compression, which you can then utilize to modify the waveform. You should be able to see a diagonal line that extends from one side of the Dynamics Processing display to the other when you first launch the program. It will affect the echo if you drag on this line so tiny that it bends below the default route. You will need to experiment with the line’s location and compare the new audio to the old one until you get a satisfactory result.
Step4 Apply Effect
After adjusting the Dynamics Processing settings to your satisfaction, ensure that your complete waveform is chosen before clicking the OK button to apply the effect.
Your audio’s amplitude, or loudness, will reduce as a result; however, you may restore the original level by selecting “Effects” > “Amplitude and Compression” > “Normalize” from the menu bar.

Step5 Clean Up the Audio
Finally, clean up some of the frequencies the echo has produced since they are murky and irritating.
Select “Effects” followed by “Filter and EQ” and then “Parametric Equalizer” from the menu. You will get access to seven primary frequency bands to work with by default and a low-pass and high-pass band devoted to their respective functions. We need a few bands to eliminate those undesirable frequencies in the middle.
When you hear a harsh sound, start by amplifying one band (and the Q value of that band), then gently proceed across the frequency range until you reach the next band. After that, bring the band below 0 dB so that it may remove some of the roughness.
Part 2: How to Remove Echo in an Easy and Free Way?
Although a great deal of software is available to eliminate echo, the Wondershare Filmora Video Editor is the one we suggest you use. Let’s go right down to the meat of the matter. It can remove echo auditions and any other background noise.
Free Download For Win 7 or later(64-bit)
Free Download For macOS 10.14 or later
The newly released version of Filmora includes enhanced waveforms, volume keyframing, peak metering, and audio transitions in addition to the standard audio editing tools. All of these improvements contribute to a more satisfying and high-quality audio editing experience for the user. Here are some advantages of Getting Rid of Echo and Other Background Audio Noise Using Filmora:
- You may adjust the height of the track for more accurate audio manipulation of waveforms.
- Using only one click, the Denoise function may eliminate any unwanted background noise.
- Adjusting the Denoise level to either weak, mid, or strong may provide much improved results in terms of noise reduction.
Filmora Video Editor makes it simple to eliminate background noise from an audio recording or a video recording. It can even do both simultaneously. You may separate the audio from the movie using this user-friendly video editor, then use the Audio Mixer or Audio Equalizer tools to make additional adjustments to the audio. Finally, you can Export the audio in MP3 format after editing it. The specific steps are listed down below.
Step1 Run Filmora and Import Video
Import your video into Wondershare Filmora’s timeline pane. A video preview can help you see the portions you don’t wish to keep can be edited out and removed.
Step2 Choose Detach Audio
A drop-down option will appear when you right-click the video in the timeline. Choose “Audio” from the list. Silence detection, audio modification, audio disconnect, and mute are the four choices you’ll see. If you wish to separate the audio from the video, choose “Detach Audio” from the drop-down menu.

Step3 Tick Remove Background Noise
Double-click the audio track, then choose the Edit panel and the “Remove background noise” option to remove the background noise instantly.

To access the Editing panel without first separating the audio from the video, you may alternatively double-click the video clip in the timeline. Selecting the Audio tab in the Editing panel may adjust the audio and eliminate the noise.
Step4 Fine Tune and Export
You may also make minor adjustments to the audio by utilizing the editor’s Equalizer feature to give it a more realistic tone. To enhance the overall effect, frame-by-frame adjusts the audio to match the picture. You may instantly post the video to YouTube or Vimeo after seeing the findings or click the Export option to save it to your PC with the noise reduction performed.
Part 3: Recording Tips: How to Record Without Echo?
Now that you know how to use Adobe Audition to remove echo let’s share some tips to help you record without an echo.
So, here are a few recording tips.
- Keep things quiet. When recording audio, pay more attention to the peaceful sounds in the background. There may be humming from machines with fans, buzzing from lights, or jingling from your pet’s collar. Pay attention to where you are recording and find ways to shut down anything else.
- Put your mobile phone in airplane mode. Phones send out signals when they receive calls or do searches in the background that the recording system can pick up. By putting your phones in “airplane mode,” you can stop them from making noises during good takes.
- Minimize echo. Set up your recording space, so your voice stays on the walls only a little and back to your microphone. Use things that soak up the sound instead of reflecting it, like a thick rug or a comforter. You can make your voice echo in post-production if you want it to.
- Upgrade your microphone. The hardware you use will be the most significant limit to what you can record. You can improve your recordings by plugging an external microphone into the microphone jack on your camera or with a professional microphone to record the sound separately.
- Adjust your levels. Before you hit the record button, check to see how loud the sound you want to record is. Adjust your levels (the sensitivity of your microphone) until the sound is between -6 DBS and -12 DBS. This range allows your sound room’s source to get louder without the recorded sound getting cut off. Don’t worry because you can always increase the editing volume.
- Start with a sound cue. If you’re recording separate audio that you’ll later sync to your video, start your recording with a short, loud sound like a clap or a high-pitched “beep.” Later, while editing, finding the part where your video and the additional audio match will be much easier.
- Move toward the sound. Move your microphone close to the sound you want to record. The closer your microphone is to the sound source, the lower you can set your microphone’s sensitivity. If you turn down your levels, sounds you don’t want to record will also sound less loud.
Part 4: FAQs
1. How do you remove echo from recording?
Removing Echo in Audacity with Noise Gate: Choose the track you want to work on, go to the Effects menu, and look for the Noise Gate plug-in (scroll down a bit). Check to see that Gate is on Select Function. Use the preview to change the settings. When happy with the effect, click OK to apply it to the whole audio file.
2. How do you remove echo from a microphone?
Lessen the volume of your speakers to get rid of the echo. If your microphone or audio device is close to a wall or other surface that reflects sound but doesn’t absorb it, you should move the microphone away from the surface or change its direction. Additionally, you can use Wondershare Filmora or Adobe Audition echo removal technique.
Conclusion
Hence, as we saw Adobe Audition is a valuable tool for removing echo auditions from audio files. Even if you’re starting, it takes little time to improve the quality of your recordings. There are many ways to dig deeper and improve your audio quality if you are more ambitious or your recordings have many echoes.
But no matter what you do, Adobe Audition reduces echo, and you can look forward to recordings without an echo.
Free Download For macOS 10.14 or later
The newly released version of Filmora includes enhanced waveforms, volume keyframing, peak metering, and audio transitions in addition to the standard audio editing tools. All of these improvements contribute to a more satisfying and high-quality audio editing experience for the user. Here are some advantages of Getting Rid of Echo and Other Background Audio Noise Using Filmora:
- You may adjust the height of the track for more accurate audio manipulation of waveforms.
- Using only one click, the Denoise function may eliminate any unwanted background noise.
- Adjusting the Denoise level to either weak, mid, or strong may provide much improved results in terms of noise reduction.
Filmora Video Editor makes it simple to eliminate background noise from an audio recording or a video recording. It can even do both simultaneously. You may separate the audio from the movie using this user-friendly video editor, then use the Audio Mixer or Audio Equalizer tools to make additional adjustments to the audio. Finally, you can Export the audio in MP3 format after editing it. The specific steps are listed down below.
Step1 Run Filmora and Import Video
Import your video into Wondershare Filmora’s timeline pane. A video preview can help you see the portions you don’t wish to keep can be edited out and removed.
Step2 Choose Detach Audio
A drop-down option will appear when you right-click the video in the timeline. Choose “Audio” from the list. Silence detection, audio modification, audio disconnect, and mute are the four choices you’ll see. If you wish to separate the audio from the video, choose “Detach Audio” from the drop-down menu.
Step3 Tick Remove Background Noise
Double-click the audio track, then choose the Edit panel and the “Remove background noise” option to remove the background noise instantly.
To access the Editing panel without first separating the audio from the video, you may alternatively double-click the video clip in the timeline. Selecting the Audio tab in the Editing panel may adjust the audio and eliminate the noise.
Step4 Fine Tune and Export
You may also make minor adjustments to the audio by utilizing the editor’s Equalizer feature to give it a more realistic tone. To enhance the overall effect, frame-by-frame adjusts the audio to match the picture. You may instantly post the video to YouTube or Vimeo after seeing the findings or click the Export option to save it to your PC with the noise reduction performed.
Part 3: Recording Tips: How to Record Without Echo?
Now that you know how to use Adobe Audition to remove echo let’s share some tips to help you record without an echo.
So, here are a few recording tips.
- Keep things quiet. When recording audio, pay more attention to the peaceful sounds in the background. There may be humming from machines with fans, buzzing from lights, or jingling from your pet’s collar. Pay attention to where you are recording and find ways to shut down anything else.
- Put your mobile phone in airplane mode. Phones send out signals when they receive calls or do searches in the background that the recording system can pick up. By putting your phones in “airplane mode,” you can stop them from making noises during good takes.
- Minimize echo. Set up your recording space, so your voice stays on the walls only a little and back to your microphone. Use things that soak up the sound instead of reflecting it, like a thick rug or a comforter. You can make your voice echo in post-production if you want it to.
- Upgrade your microphone. The hardware you use will be the most significant limit to what you can record. You can improve your recordings by plugging an external microphone into the microphone jack on your camera or with a professional microphone to record the sound separately.
- Adjust your levels. Before you hit the record button, check to see how loud the sound you want to record is. Adjust your levels (the sensitivity of your microphone) until the sound is between -6 DBS and -12 DBS. This range allows your sound room’s source to get louder without the recorded sound getting cut off. Don’t worry because you can always increase the editing volume.
- Start with a sound cue. If you’re recording separate audio that you’ll later sync to your video, start your recording with a short, loud sound like a clap or a high-pitched “beep.” Later, while editing, finding the part where your video and the additional audio match will be much easier.
- Move toward the sound. Move your microphone close to the sound you want to record. The closer your microphone is to the sound source, the lower you can set your microphone’s sensitivity. If you turn down your levels, sounds you don’t want to record will also sound less loud.
Part 4: FAQs
1. How do you remove echo from recording?
Removing Echo in Audacity with Noise Gate: Choose the track you want to work on, go to the Effects menu, and look for the Noise Gate plug-in (scroll down a bit). Check to see that Gate is on Select Function. Use the preview to change the settings. When happy with the effect, click OK to apply it to the whole audio file.
2. How do you remove echo from a microphone?
Lessen the volume of your speakers to get rid of the echo. If your microphone or audio device is close to a wall or other surface that reflects sound but doesn’t absorb it, you should move the microphone away from the surface or change its direction. Additionally, you can use Wondershare Filmora or Adobe Audition echo removal technique.
Conclusion
Hence, as we saw Adobe Audition is a valuable tool for removing echo auditions from audio files. Even if you’re starting, it takes little time to improve the quality of your recordings. There are many ways to dig deeper and improve your audio quality if you are more ambitious or your recordings have many echoes.
But no matter what you do, Adobe Audition reduces echo, and you can look forward to recordings without an echo.
EasyHDR Review: Is This a Good Choice to Create HDR
Any professional photographer knows that “photography” is a broad niche. For example, HDR photography involves taking images in dark and bright areas. But because these images might not show much to the naked eyes, you’ll need an HDR program like EasyHDR. This software can recreate and design incredible HDR photos on Mac and Windows computers. So, this review post advises you whether Easy HDR is worth the money or not. We’ll also advise on the best way to edit and create HDR videos on PC.
Part 1: Summary Box on Easy HDR
| Description | EasyHDR is an HDR photography software for highlighting image details in HDR photos. It supports raw images and batch processing. |
|---|---|
| Pricing | $33 for a lifetime license |
| Operating System | Windows 7/8/10/11 and macOS 10.12 or newer |
| Layout | 4.5/5 |
| Easy to use | 4.8/5 |
| HDQ quality | 4.2/5 |
| Post-processing | 3.5/5 |
Before we dive deeper into this Easy HDRi review, let’s first discuss how this HDR software rates in some critical aspects:
1. Effectiveness - 4.8/5
The HDRi process on this software is very effective, although you shouldn’t have high expectations. It provides manual and automatic lens correction properties, although using the manual option might need a learning curve. Other extras include ghost removal and automatic alignment.
2. Price - 4.7/5
Easy HDR is not necessarily a free program. Although there’s a free demo version, it’s pretty limited in features. Therefore, purchase the premium plan for $33 or $55 for personal and lifetime licenses. As a seasoned HDR editor, you should know that other HDR programs like Aurora HDR cost way more than this.
3. Supported OS - 5/5
This HDR photography program is compatible with Windows and macOS systems, which is a big plus. You can install it on Windows 7 or newer and macOS 10.12 or newer. Sorry, Linux users!
4. Ease of use - 4.8
Easy HDR is one of the most beginner-friendly HDR processing tools despite the advanced management tools. It features automatic lens correction, ghost removal, and HDR merging capabilities.
5. Best for - Beginner HDRi editors
This program’s simple approach makes it perfect for HDRi photographers without prior editing skills. Also, if you’re a beginner on a tight budget, easyHDR is the best software for you.
Our Verdict
Up to this juncture, you might wonder if Easy HDR is worth the money or not. Well, that depends on what you want. If you have minimal HDR editing knowledge, then this is the best professional program for you.
The straightforward layout boasts automatic HDR editing tools to make your work effortless. In addition, it supports a wide array of image formats, including photos taken using your DSLR camera. And the $33/lifetime price should be manageable by many average Joes.
But on the flip side, Easy HDR lacks in-depth post-processing tools. Also, it lacks the all-important “undo” feature, which is vital in HDR image editing. Other than that, it’s the perfect program to make dramatic and realistic HDR photos.
Pros
- Simple layout.
- Make realistic HDR images with automatic tools.
- Easy HDRi Blender and Adobe Lightroom plugins.
- Standalone Easy HDR desktop program.
- Batch processing supported.
- Compatible with multiple image formats, including RAW.
Cons
- It doesn’t have advanced HDR post-processing tools.
- No HDR feature for editing.
Part 2. Detailed Review for Easy HDR
Before diving deeper into the detailed Easy HDR features, it’s important to note that the program has a demo version. You can use this version to practice and study the vital components of easyHDR. But be guided that the demo version exports images with a watermark. In addition, users can’t save HDRi in TIFF format. Let’s get in!
1. High-Quality Bracket Merging
A good quality HDRi software should easily merge different image exposures, making the photo look natural and spectacular. To start incorporating, drag the image brackets to easyHDR and press “Ok” on the pop-up screen. You can now try the different bracket merging effects until you find something that suits your preference.
2. Editing features
EasyHDR goes a step further to provide its users with a comprehensive list of editing features. For example, the “Clone Stamp” tool can remove unwanted objects like cables without blurring the photo. You can also use the “Tone Curve” feature to adjust the brightness of shadows and highlights.
3. Ghost removal
No, this is not the scary ghost that you know. Instead, these ghosting artefacts appear in misaligned photos due to moving objects like leaves, branches, cars, people, etc. With Easy HDR, you can eliminate the “ghosts” manually or automatically. Simply open the photo and turn on “Ghost Removal” to remove them automatically.
4. HDR batch processing
As expected, you can find it pretty tedious to import and merge each HDR bracket individually. For this reason, easyHDR comes with a “Batch Processing” feature that allows users to combine a whole folder of brackets automatically.
5. LDR enhancement
Although we’ve mainly focused on brackets and photos in this post, it’s important to note that easyHDR also works with single images. Instead of having three separate bracketed exposures, LDR (Low Dynamic Range) enhancement allows you to generate exposures from a single JPEG or RAW photo.
Bonus Tips: The Best Way to Edit HDR videos on your Desktop
Like HDR images, HDR videos offer more comprehensive displays in dark and bright surroundings. In short, these videos allow more colourful and detailed highlight representations. Unfortunately, not all HDR editing programs can merge bracketed exposures effortlessly to produce outstanding results. And those that do can cost you an arm and a leg.
With that in mind, we recommend Wondershare Filmora 11 for professional and semi-professional HDR editors. It’s a simple but detailed program that allows users to edit HDR materials quickly and easily. It houses thousands of free effects you’ll use with the Blending Mode to create nice HDR footage. Filmora 11 works with any video format, including RAW footage from your camcorder. And of course, there are many other editing features like color correction, color grading, image stabilization, chroma key/green screen, etc.
Steps to add an HDR effect to a standard video on Filmora 11:
Step1Open the video on Filmora 11

Run Wondershare Filmora 11 on your Mac/Win computer and start a new project. After creating a project, click Import Media to upload the video to edit and move it to the storyboard.
Step2Add a blending mode effect

Next, select the video and choose White as the color overlay. To do that, open the Sample color options and move the While color on the top timeline.

After that, it’s time to change the Blending Mode of the color overlay. To do that, right-click the color track and choose Edit Properties. Then tap Composition and then select Exclusion on the Blending Mode drop-down menu.
Step3Apply the B&W Film color effect

Now tap the Effect tab and search for the B&W Film effect. This film effect should be free to use whether using a paid or free account. After downloading it, add the effect overlay to the video track and export the video.
Step4Import the uploaded video

After creating the video, import it on Filmora 11 and delete the white color overlay and W&B Film effects. Now add the imported video on the first track, then search and apply a Square Blur effect. Also, change the Blending Mode of the footage to Overlay. Meanwhile, click the Effect tab and adjust the Size slider accordingly. For example, you can choose 10.

Don’t stop there. Open the Effects tab and add the Lomo effect to your video. Also, search and add the Luma Sharp effect. Remember that you can retouch these effects accordingly under the Effect tab. And lastly, export the new HDR video. That’s it!
Final Words
There you have it. Easy HDR is arguably the most-beginner friendly program to edit your photos on desktops. Although it doesn’t feature much, the available editing features should be enough to help you create incredible HDR images. And don’t forget to use Wondershare Filmora 11 to apply a cool HDR effect to your footage. Give it a try!
Free Download For Win 7 or later(64-bit)
Free Download For macOS 10.14 or later
Before we dive deeper into this Easy HDRi review, let’s first discuss how this HDR software rates in some critical aspects:
1. Effectiveness - 4.8/5
The HDRi process on this software is very effective, although you shouldn’t have high expectations. It provides manual and automatic lens correction properties, although using the manual option might need a learning curve. Other extras include ghost removal and automatic alignment.
2. Price - 4.7/5
Easy HDR is not necessarily a free program. Although there’s a free demo version, it’s pretty limited in features. Therefore, purchase the premium plan for $33 or $55 for personal and lifetime licenses. As a seasoned HDR editor, you should know that other HDR programs like Aurora HDR cost way more than this.
3. Supported OS - 5/5
This HDR photography program is compatible with Windows and macOS systems, which is a big plus. You can install it on Windows 7 or newer and macOS 10.12 or newer. Sorry, Linux users!
4. Ease of use - 4.8
Easy HDR is one of the most beginner-friendly HDR processing tools despite the advanced management tools. It features automatic lens correction, ghost removal, and HDR merging capabilities.
5. Best for - Beginner HDRi editors
This program’s simple approach makes it perfect for HDRi photographers without prior editing skills. Also, if you’re a beginner on a tight budget, easyHDR is the best software for you.
Our Verdict
Up to this juncture, you might wonder if Easy HDR is worth the money or not. Well, that depends on what you want. If you have minimal HDR editing knowledge, then this is the best professional program for you.
The straightforward layout boasts automatic HDR editing tools to make your work effortless. In addition, it supports a wide array of image formats, including photos taken using your DSLR camera. And the $33/lifetime price should be manageable by many average Joes.
But on the flip side, Easy HDR lacks in-depth post-processing tools. Also, it lacks the all-important “undo” feature, which is vital in HDR image editing. Other than that, it’s the perfect program to make dramatic and realistic HDR photos.
Pros
- Simple layout.
- Make realistic HDR images with automatic tools.
- Easy HDRi Blender and Adobe Lightroom plugins.
- Standalone Easy HDR desktop program.
- Batch processing supported.
- Compatible with multiple image formats, including RAW.
Cons
- It doesn’t have advanced HDR post-processing tools.
- No HDR feature for editing.
Part 2. Detailed Review for Easy HDR
Before diving deeper into the detailed Easy HDR features, it’s important to note that the program has a demo version. You can use this version to practice and study the vital components of easyHDR. But be guided that the demo version exports images with a watermark. In addition, users can’t save HDRi in TIFF format. Let’s get in!
1. High-Quality Bracket Merging
A good quality HDRi software should easily merge different image exposures, making the photo look natural and spectacular. To start incorporating, drag the image brackets to easyHDR and press “Ok” on the pop-up screen. You can now try the different bracket merging effects until you find something that suits your preference.
2. Editing features
EasyHDR goes a step further to provide its users with a comprehensive list of editing features. For example, the “Clone Stamp” tool can remove unwanted objects like cables without blurring the photo. You can also use the “Tone Curve” feature to adjust the brightness of shadows and highlights.
3. Ghost removal
No, this is not the scary ghost that you know. Instead, these ghosting artefacts appear in misaligned photos due to moving objects like leaves, branches, cars, people, etc. With Easy HDR, you can eliminate the “ghosts” manually or automatically. Simply open the photo and turn on “Ghost Removal” to remove them automatically.
4. HDR batch processing
As expected, you can find it pretty tedious to import and merge each HDR bracket individually. For this reason, easyHDR comes with a “Batch Processing” feature that allows users to combine a whole folder of brackets automatically.
5. LDR enhancement
Although we’ve mainly focused on brackets and photos in this post, it’s important to note that easyHDR also works with single images. Instead of having three separate bracketed exposures, LDR (Low Dynamic Range) enhancement allows you to generate exposures from a single JPEG or RAW photo.
Bonus Tips: The Best Way to Edit HDR videos on your Desktop
Like HDR images, HDR videos offer more comprehensive displays in dark and bright surroundings. In short, these videos allow more colourful and detailed highlight representations. Unfortunately, not all HDR editing programs can merge bracketed exposures effortlessly to produce outstanding results. And those that do can cost you an arm and a leg.
With that in mind, we recommend Wondershare Filmora 11 for professional and semi-professional HDR editors. It’s a simple but detailed program that allows users to edit HDR materials quickly and easily. It houses thousands of free effects you’ll use with the Blending Mode to create nice HDR footage. Filmora 11 works with any video format, including RAW footage from your camcorder. And of course, there are many other editing features like color correction, color grading, image stabilization, chroma key/green screen, etc.
Steps to add an HDR effect to a standard video on Filmora 11:
Step1Open the video on Filmora 11
Run Wondershare Filmora 11 on your Mac/Win computer and start a new project. After creating a project, click Import Media to upload the video to edit and move it to the storyboard.
Step2Add a blending mode effect
Next, select the video and choose White as the color overlay. To do that, open the Sample color options and move the While color on the top timeline.
After that, it’s time to change the Blending Mode of the color overlay. To do that, right-click the color track and choose Edit Properties. Then tap Composition and then select Exclusion on the Blending Mode drop-down menu.
Step3Apply the B&W Film color effect
Now tap the Effect tab and search for the B&W Film effect. This film effect should be free to use whether using a paid or free account. After downloading it, add the effect overlay to the video track and export the video.
Step4Import the uploaded video
After creating the video, import it on Filmora 11 and delete the white color overlay and W&B Film effects. Now add the imported video on the first track, then search and apply a Square Blur effect. Also, change the Blending Mode of the footage to Overlay. Meanwhile, click the Effect tab and adjust the Size slider accordingly. For example, you can choose 10.
Don’t stop there. Open the Effects tab and add the Lomo effect to your video. Also, search and add the Luma Sharp effect. Remember that you can retouch these effects accordingly under the Effect tab. And lastly, export the new HDR video. That’s it!
Final Words
There you have it. Easy HDR is arguably the most-beginner friendly program to edit your photos on desktops. Although it doesn’t feature much, the available editing features should be enough to help you create incredible HDR images. And don’t forget to use Wondershare Filmora 11 to apply a cool HDR effect to your footage. Give it a try!
Free Download For Win 7 or later(64-bit)
Free Download For macOS 10.14 or later
Also read:
- New How to Use Rules of Thirds
- If Youre Considering Starting a Podcast Video Recording, You Need to Read This Article and Learn All You Need to Know About Making a Successful Podcast
- Updated 2024 Approved Add Neon Effects to Your Dance Videos with the Help of Wondershare Filmora After Reading This Article. It Will Give a More Thrilling and Exciting Appearance
- Basic Introduction for LumaFusion Color Grading
- Updated Guide To Using Free Luts for OBS for 2024
- New In 2024, Guide Adopting Lumetri Color Presets in Effective Color Grading
- Working Out All Important Details of Slowing Down Video in After Effects
- Find a Video Background Change Online that Works for You. This Article Contains Tools that Can Edit Video Backgrounds Online with Little Effort
- Updated You Can Learn How to Color Grade Your Picture in Lightroom Effectively. By Understanding the Process of Color Grading in Lightroom, You Can Create Unique Works, and Improve Your Abilities
- In 2024, Best 10 Fun Discord Bots You Need
- This Blog Post Shows How to Create an Eye-Catching Paper Rip Effect for Your Videos Using Wondershare Filmora with These Easy-to-Follow Steps
- Updated How To Make a Photo Collage in Microsoft Word — Step by Step Guide
- New 2024 Approved 2 Methods to Crop Video in VLC
- 2024 Approved How To Make a Polaroid Collage
- Updated 2024 Approved Online Video Makers
- Ways to Make Canva Collages for 2024
- New In 2024, How to Create an Alternate Reality Effect
- In 2024, How to Transfer Data from Honor 80 Pro Straight Screen Edition to Other Android Devices? | Dr.fone
- Realme Data Recovery – recover lost data from Realme Narzo 60x 5G
- Detailed guide of ispoofer for pogo installation On Honor X9a | Dr.fone
- Remove the Lock Screen Fingerprint Of Your Nubia Red Magic 9 Pro+
- Why Your Xiaomi Redmi 12 5G Screen Might be Unresponsive and How to Fix It | Dr.fone
- In 2024, Getting the Pokemon Go GPS Signal Not Found 11 Error in Nokia C32 | Dr.fone
- Quick Fixes for Why Is My OnePlus Ace 2 Black and White | Dr.fone
- CatchEmAll Celebrate National Pokémon Day with Virtual Location On Samsung Galaxy A14 5G | Dr.fone
- In 2024, Motorola Moto G Stylus 5G (2023) ADB Format Tool for PC vs. Other Unlocking Tools Which One is the Best?
- 7 Solutions to Fix Error Code 963 on Google Play Of Oppo F23 5G | Dr.fone
- Can I recover permanently deleted photos from P60
- In 2024, 3 Methods to Mirror Google Pixel Fold to Roku | Dr.fone
- Set Your Preferred Job Location on LinkedIn App of your OnePlus Ace 2 | Dr.fone
- Title: In 2024, Discover How to Create Professional Foggy Text Reflection Effects in the Filmora Video Editor
- Author: Chloe
- Created at : 2024-04-24 07:08:18
- Updated at : 2024-04-25 07:08:18
- Link: https://ai-editing-video.techidaily.com/in-2024-discover-how-to-create-professional-foggy-text-reflection-effects-in-the-filmora-video-editor/
- License: This work is licensed under CC BY-NC-SA 4.0.
