
In 2024, Do You Wish to Learn About some Tools to Slow Down a Video? Discover How to Slow Down Time Lapse on iPhone Throughout This Article
Do You Wish to Learn About some Tools to Slow Down a Video? Discover How to Slow Down Time Lapse on iPhone Throughout This Article
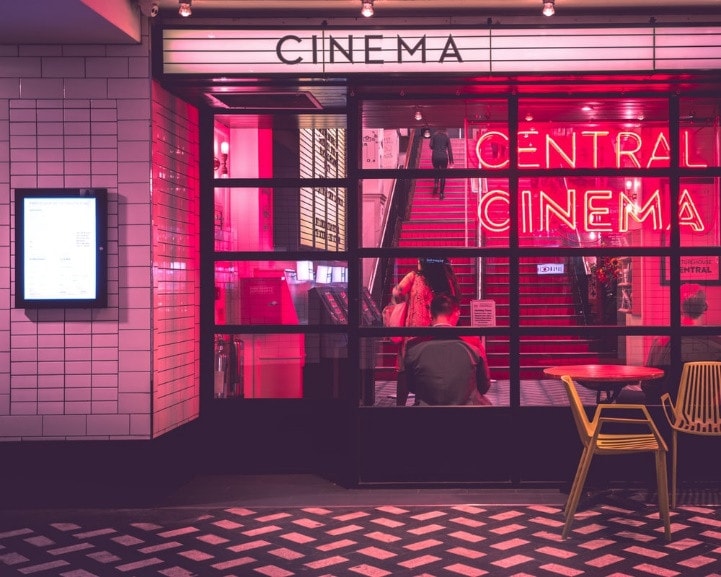
We have all seen time-lapse videos in vlogs or developmental videos. The time-lapse effect has been around the corner for some time and assists in several tasks. However, when it comes to understanding the content of a video, they aren’t helpful. This article will help you understand how to slow down time lapse on an i Phone.
In addition, we’ll provide some insights on slow-down time-lapse videos. You can learn about its advantages for both viewers and creators. The article will highlight some tools for transforming a time-lapse into a slo-mo. We’ll also discuss an offline tool on how to slow down a time-lapse on an iPhone. Start reading this article for a brief overview of slow-motion videos and tools.
Slow Motion Video Maker Slow your video’s speed with better control of your keyframes to create unique cinematic effects!
Make A Slow Motion Video Make A Slow Motion Video More Features

Part 1: How Does Slowing Down Videos Help Viewers and Creators?
A time-lapse video certainly makes some scenes worthy of watching. However, a slow-motion video helps in better comprehension of the topic. In this section, we’ll discuss how slowing down time-lapse video s is helpful. We’ll shed light on their applications for viewers and content creators. Without further delay, let’s dive in to solve this mystery:
For Creators
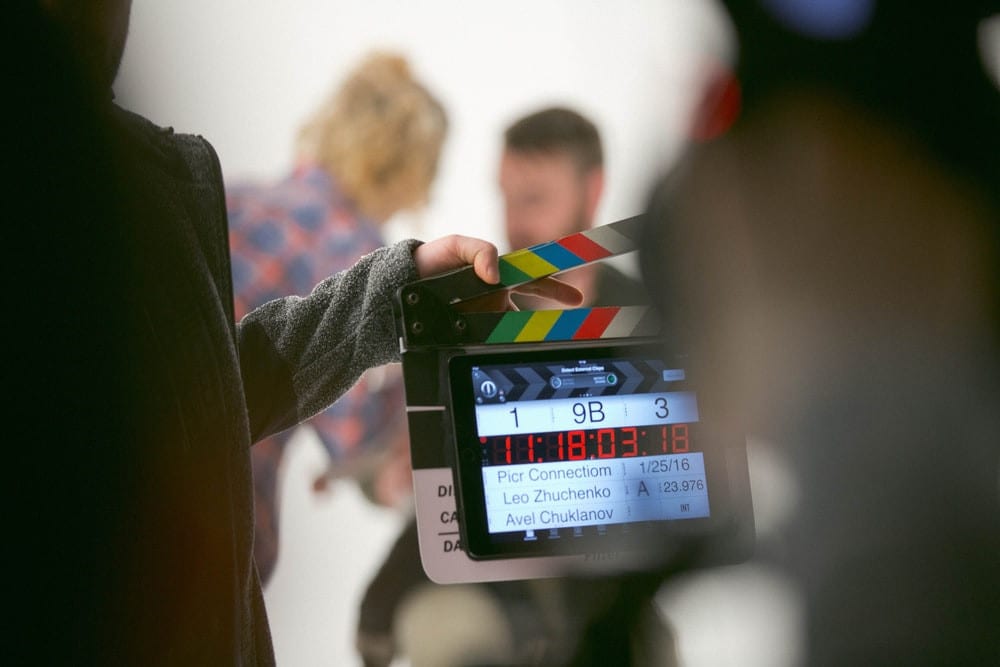
Since the era of social media , content creation has become a new trend. Creators around the globe can interact with their followers from a single platform. It gives them a chance to share their ideas and showcase their talents. Hence, here is how slow-motion videos benefit a creator in his journey:
- In Video Tutorials: Do you have a channel where you post tutorials to perform a specific task? This effect can help you slow down the video for the audience to absorb your words. It helps creators to show their viewers that they genuinely care about them. A video where basics and details are discussed is considered right.
- In Revealing Details: We encounter situations where the camera cannot capture a moment right. This is because the normal playback speed cannot highlight video details. On the other hand, a slo-mo takes proper time to showcase details. These help handle an event planning or dress designing page.
- In Creating Aesthetics: Another application of slo-mos is that they help with creativity. Adding this effect at the right time and duration enhances visuals. Moreover, adding a slo-mo effect gives the video an aesthetic appeal. It can enhance the visuals of a travel, cooking, or fashion video.
For Viewers
Slow-motion videos benefit not only creators but also viewers. They help them with enhanced learning by breaking down complex information. If you are creating slo-mos as a creator, here is how they are helping your viewers:
- In Effective Learning: You are not unaware of tutorial or explainer videos. Whether you are a student or a housewife, you must have used YouTube to your benefit. A slow-motion video can break down a complex concept or steps for a recipe. In addition, it can help you operate technology better, like Word, Excel, and more.
- In Understanding Nature: People out there prefer documentaries over dramas. They are curious about nature and the way it works. In such documentaries, slo-mos are used to present a natural phenomenon. It helps the viewers understand how a certain process occurs. Moreover, it focuses on small details in an ecosystem to explain better.
- In Reflecting Content: Next time you watch reels, notice that slo-mos catch your attention. Videos with the right speed manipulation appeal to the eyes, and viewers often watch them again. In addition, they help focus on the specifics of a gadget, fashion product, or more.
Part 2: A Guide on How to Slow Down Time Lapses on iPhone
Now that you know the benefits of slow motions, let’s proceed to our next segment. Here, we will learn how to slow down a time-lapse on an i Phone using different techniques. This will involve looking into some tools for an i Phone time lapse slowdown:
1. iMovie
This tool is perfect if you are looking for a tool to effectively slow down time-laps e. It offers speed change options to transform your time-lapse videos into slomos. The tool supports popular video formats and creates results in 4K high resolution. Creating a slo-mo is straightforward, and users can also create a high-speed motion.

Key Features
- Provides 14 templates and 20 storyboards to get started with creative videos.
- The tool operates online; hence, it isn’t necessary to download any application.
- You can synchronize your work with devices like macOS, iPad, AirDrop, and iCloud.
Steps
Do you want to know ho w to slow down a time-lapse on i Phone ? The method of performing this function is very plain and accessible, and here is the guide:
Step 1: Open iMovie and click the “Start New Project” option to start editing. Continue to select “Magic Movie” across the pop-up to proceed into the editing section.

Step 2: Choose a file from the iPhone’s video gallery and select the “Pencil” icon to start editing. Go to the “Speed” option and click it to access speed change options.

Step 3: Navigate towards the speed slider and drag it towards the left to slow down. The option “1/2x” means the speed will be half the original speed.

2. Filmmaker Pro - Video Editor
If you want to slow down the time-lapse i Phone with additional editing options, use this tool. It is a professional-level content editor for iDevices and offers to slow down the speed. You can create or slow down timelapses. The editor will export your videos in 4K high resolution. Moreover, 120 royalty-free music tracks can be inserted into your slo-mo afterward.

Key Features
- Decorate your videos with stunning animations using keyframing and track motion.
- You have over 46 transition options to complete trending TikTok and Instagram challenges.
- Over 79 classic fonts, 92 beautiful fonts, 15 Hollywood, and 26 retro fonts options.
3. Video Up! Video Editor and Maker
Adjusting the time-lapse speed of the i Phone is possible via third-party applications. This is a versatile platform for creating slo-mos without any technicalities. You will find speed setting presets when you access its video adjustment options. These presets can automatically slow down or fasten a video at a specific point. However, you can also choose its Custom option to slow down a complete video.

Key Features
- It provides 2 video export resolution options: Ultra – 4K and Full HD – 1080p.
- Offers an option to insert voiceovers and built-in music tracks in your slo-mos or videos.
- CTA to share videos straight to Instagram, Facebook, WhatsApp, and more.
4. Vidma - Video Editor Music
Are you wondering how to slow down time-lapse videos on iPhone for specific durations? Vidma is the right tool for you, offering custom speed change and duration options. The speed slider option is a simple drag and adjust method. In addition, there is an audio pitch adjustment option to maintain audio during speed alteration.

Key Features
- Users have the option to merge, crop, or resize your images or videos using this tool.
- With its AI abilities, you can generate art from text and edit it further.
- The lowest playback speed to create slow motion is 0.1x, and the highest is 10.0x.
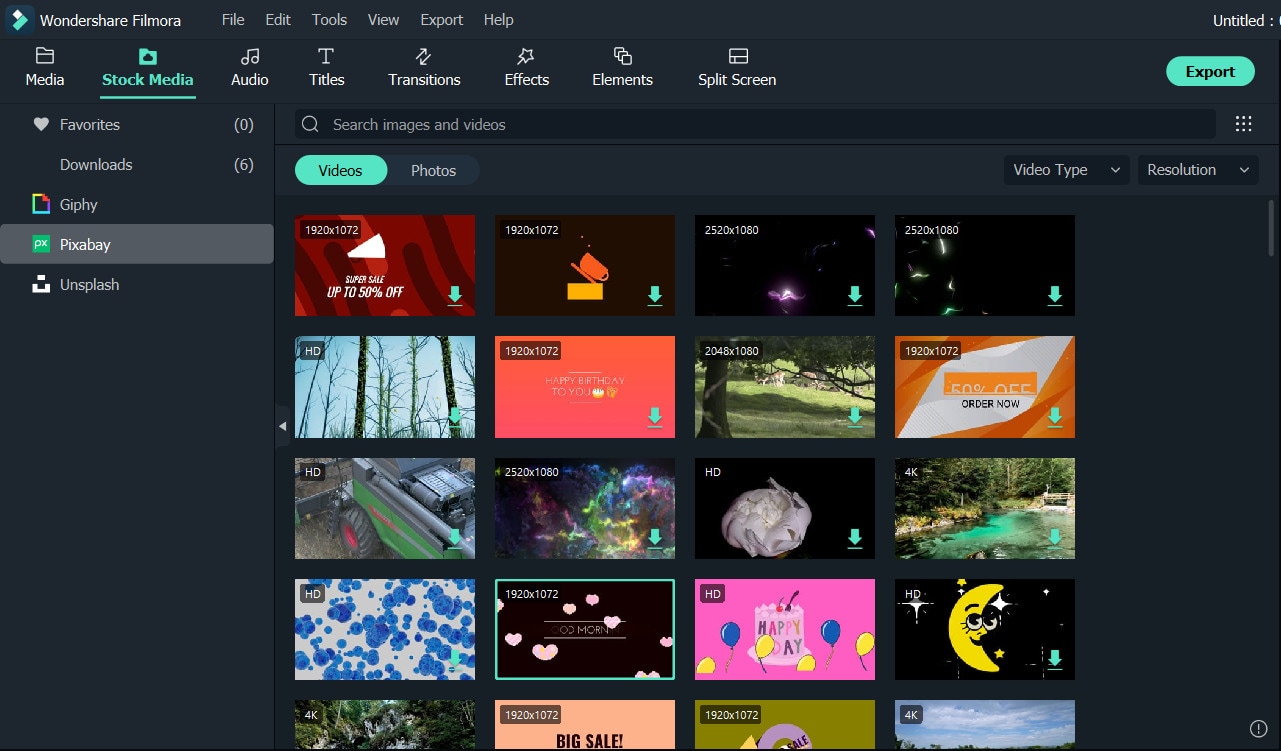
Part 3: A Comprehensive Desktop Solution for Slowing Down Time Lapses: Wondershare Filmora
Wondershare Filmora is a platform with diverse possibilities and compatibility across iOS devices. This allows you to import media using a cable from your iPhone. It doesn’t decline the video quality upon export or import; hence, it proves to be a superior tool to adjust the time-lapse speed of the i Phone. Filmora offers multiple opportunities to transform a time lapse into slo-mo.
You can also select the time period to apply the slow-motion effect via timeline editing. In addition, users can also choose the speed ramping option for professional results. Upon creating a slow motion, you can use Filmora’s video templates, text, and more to enhance visuals. In addition, there is an Optical Flow feature to help in enhancing the slo-mo effect.
Free Download For Win 7 or later(64-bit)
Free Download For macOS 10.14 or later
Step-by-Step Guide to Slow Down a Time Lapse Video into Slow Motion in Filmora
The basic technique to change the time-lapse speed of the i Phone involves Uniform Speed. This method modulates the playback speed of a video through the slider’s position. Here is how do I slow down time lapse on i Phone using Filmora:
Step 1Commence the Speed Change Action
Initiate Filmora by giving a “New Project” command and gaining access to the editing interface. Use the “Import” > “Import from a Camera or Phone” to import files. You need to connect to the iOS device first. Bring the clip to the timeline and access the settings panel that will appear on the screen. Further, choose the “Speed” > “Uniform Speed” option and drag the Speed slider towards the left to reduce it.

Step 2Access the AI Frame Interpolation Settings
In the pursuit of achieving a seamless slow-motion effect, use the AI Frame Interpolation settings. Navigate towards the bottom to access it and opt for the “Optical Flow” option.

Step 3Activate Render Preview for Thorough Evaluation
Upon adjusting, return to the timeline panel and select the video. With the help of your cursor, navigate to the “File” > “Render Preview” option. Enable a preview prior to finalizing the video, and then hit “Export.”

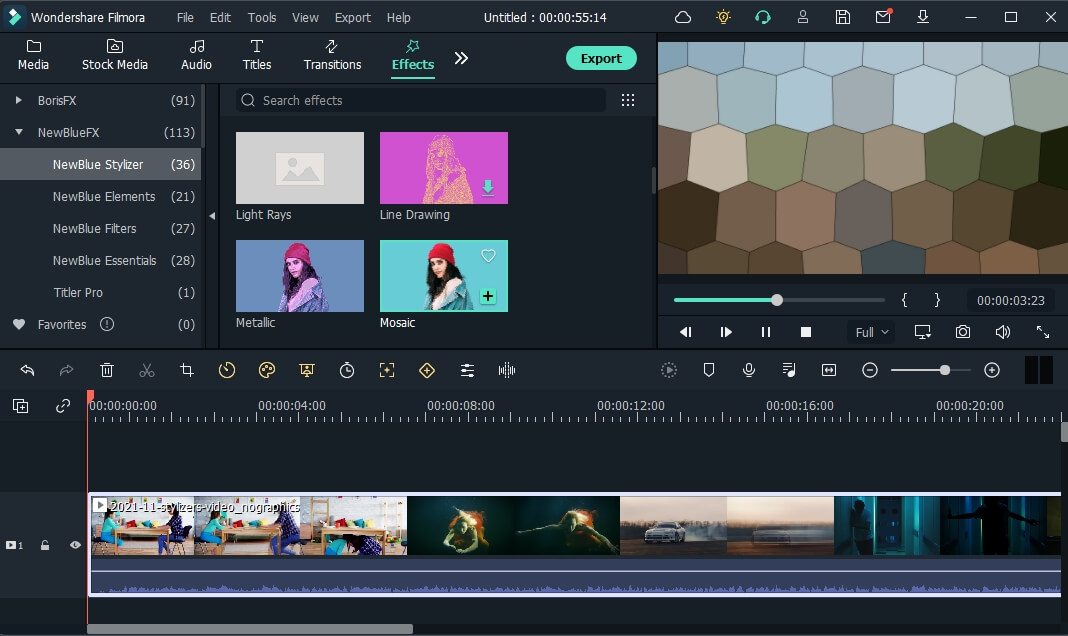
Key Features of Filmora
Filmora is not just confined to creating slow motion; the interface offers much more. There are multiple AI and manual features to edit videos, adjust audio, and insert text. Here are a few video editing features of Filmora amongst many:
Green Screen: Get rid of messy or unwanted backgrounds and replace them with something captivating. For this, film the model or object in front of a green screen and enable Chroma Key. It is an AI-driven function that will auto-remove the background while preserving the object.
AI Text-to-Video: Can’t find the right visuals or time to shoot content for your channel? Use this AI to create videos from prompts without having to put in any effort. The AI will auto-generate graphics to add to the video along with the AI voice insertion.
Compound Clip: Are there multiple clips in your timeline that you want to apply the same effects to? This function will help you transform multiple clips into one. Furthermore, you can apply similar effects or transitions. In addition, this function also ensures a smooth transfer from one clip to another.
AI Thumbnail Creator: Create and edit compelling thumbnails for your videos using this AI. The AI will analyze and select the perfect video frames as thumbnail options. Further, you can edit the thumbnail and insert multiple templates to show what the video is going to be about.
Conclusion
After going through this article, readers have an extensive knowledge of how to slow down time-lapse on i Phones using multiple tools and techniques. We provided a review of these tools but also the benefits of slo-mos in content creation and viewing.
In the end, we suggest Wondershare Filmora as the best alternative to all these applications. The software is not just AI integrated but has everything you need to create slo-mos in one place. Use Filmora for creative slo-mo and other video editing features.
Make A Slow Motion Video Make A Slow Motion Video More Features
Part 1: How Does Slowing Down Videos Help Viewers and Creators?
A time-lapse video certainly makes some scenes worthy of watching. However, a slow-motion video helps in better comprehension of the topic. In this section, we’ll discuss how slowing down time-lapse video s is helpful. We’ll shed light on their applications for viewers and content creators. Without further delay, let’s dive in to solve this mystery:
For Creators
Since the era of social media , content creation has become a new trend. Creators around the globe can interact with their followers from a single platform. It gives them a chance to share their ideas and showcase their talents. Hence, here is how slow-motion videos benefit a creator in his journey:
- In Video Tutorials: Do you have a channel where you post tutorials to perform a specific task? This effect can help you slow down the video for the audience to absorb your words. It helps creators to show their viewers that they genuinely care about them. A video where basics and details are discussed is considered right.
- In Revealing Details: We encounter situations where the camera cannot capture a moment right. This is because the normal playback speed cannot highlight video details. On the other hand, a slo-mo takes proper time to showcase details. These help handle an event planning or dress designing page.
- In Creating Aesthetics: Another application of slo-mos is that they help with creativity. Adding this effect at the right time and duration enhances visuals. Moreover, adding a slo-mo effect gives the video an aesthetic appeal. It can enhance the visuals of a travel, cooking, or fashion video.
For Viewers
Slow-motion videos benefit not only creators but also viewers. They help them with enhanced learning by breaking down complex information. If you are creating slo-mos as a creator, here is how they are helping your viewers:
- In Effective Learning: You are not unaware of tutorial or explainer videos. Whether you are a student or a housewife, you must have used YouTube to your benefit. A slow-motion video can break down a complex concept or steps for a recipe. In addition, it can help you operate technology better, like Word, Excel, and more.
- In Understanding Nature: People out there prefer documentaries over dramas. They are curious about nature and the way it works. In such documentaries, slo-mos are used to present a natural phenomenon. It helps the viewers understand how a certain process occurs. Moreover, it focuses on small details in an ecosystem to explain better.
- In Reflecting Content: Next time you watch reels, notice that slo-mos catch your attention. Videos with the right speed manipulation appeal to the eyes, and viewers often watch them again. In addition, they help focus on the specifics of a gadget, fashion product, or more.
Part 2: A Guide on How to Slow Down Time Lapses on iPhone
Now that you know the benefits of slow motions, let’s proceed to our next segment. Here, we will learn how to slow down a time-lapse on an i Phone using different techniques. This will involve looking into some tools for an i Phone time lapse slowdown:
1. iMovie
This tool is perfect if you are looking for a tool to effectively slow down time-laps e. It offers speed change options to transform your time-lapse videos into slomos. The tool supports popular video formats and creates results in 4K high resolution. Creating a slo-mo is straightforward, and users can also create a high-speed motion.
Key Features
- Provides 14 templates and 20 storyboards to get started with creative videos.
- The tool operates online; hence, it isn’t necessary to download any application.
- You can synchronize your work with devices like macOS, iPad, AirDrop, and iCloud.
Steps
Do you want to know ho w to slow down a time-lapse on i Phone ? The method of performing this function is very plain and accessible, and here is the guide:
Step 1: Open iMovie and click the “Start New Project” option to start editing. Continue to select “Magic Movie” across the pop-up to proceed into the editing section.
Step 2: Choose a file from the iPhone’s video gallery and select the “Pencil” icon to start editing. Go to the “Speed” option and click it to access speed change options.
Step 3: Navigate towards the speed slider and drag it towards the left to slow down. The option “1/2x” means the speed will be half the original speed.
2. Filmmaker Pro - Video Editor
If you want to slow down the time-lapse i Phone with additional editing options, use this tool. It is a professional-level content editor for iDevices and offers to slow down the speed. You can create or slow down timelapses. The editor will export your videos in 4K high resolution. Moreover, 120 royalty-free music tracks can be inserted into your slo-mo afterward.
Key Features
- Decorate your videos with stunning animations using keyframing and track motion.
- You have over 46 transition options to complete trending TikTok and Instagram challenges.
- Over 79 classic fonts, 92 beautiful fonts, 15 Hollywood, and 26 retro fonts options.
3. Video Up! Video Editor and Maker
Adjusting the time-lapse speed of the i Phone is possible via third-party applications. This is a versatile platform for creating slo-mos without any technicalities. You will find speed setting presets when you access its video adjustment options. These presets can automatically slow down or fasten a video at a specific point. However, you can also choose its Custom option to slow down a complete video.
Key Features
- It provides 2 video export resolution options: Ultra – 4K and Full HD – 1080p.
- Offers an option to insert voiceovers and built-in music tracks in your slo-mos or videos.
- CTA to share videos straight to Instagram, Facebook, WhatsApp, and more.
4. Vidma - Video Editor Music
Are you wondering how to slow down time-lapse videos on iPhone for specific durations? Vidma is the right tool for you, offering custom speed change and duration options. The speed slider option is a simple drag and adjust method. In addition, there is an audio pitch adjustment option to maintain audio during speed alteration.
Key Features
- Users have the option to merge, crop, or resize your images or videos using this tool.
- With its AI abilities, you can generate art from text and edit it further.
- The lowest playback speed to create slow motion is 0.1x, and the highest is 10.0x.
Part 3: A Comprehensive Desktop Solution for Slowing Down Time Lapses: Wondershare Filmora
Wondershare Filmora is a platform with diverse possibilities and compatibility across iOS devices. This allows you to import media using a cable from your iPhone. It doesn’t decline the video quality upon export or import; hence, it proves to be a superior tool to adjust the time-lapse speed of the i Phone. Filmora offers multiple opportunities to transform a time lapse into slo-mo.
You can also select the time period to apply the slow-motion effect via timeline editing. In addition, users can also choose the speed ramping option for professional results. Upon creating a slow motion, you can use Filmora’s video templates, text, and more to enhance visuals. In addition, there is an Optical Flow feature to help in enhancing the slo-mo effect.
Free Download For Win 7 or later(64-bit)
Free Download For macOS 10.14 or later
Step-by-Step Guide to Slow Down a Time Lapse Video into Slow Motion in Filmora
The basic technique to change the time-lapse speed of the i Phone involves Uniform Speed. This method modulates the playback speed of a video through the slider’s position. Here is how do I slow down time lapse on i Phone using Filmora:
Step 1Commence the Speed Change Action
Initiate Filmora by giving a “New Project” command and gaining access to the editing interface. Use the “Import” > “Import from a Camera or Phone” to import files. You need to connect to the iOS device first. Bring the clip to the timeline and access the settings panel that will appear on the screen. Further, choose the “Speed” > “Uniform Speed” option and drag the Speed slider towards the left to reduce it.
Step 2Access the AI Frame Interpolation Settings
In the pursuit of achieving a seamless slow-motion effect, use the AI Frame Interpolation settings. Navigate towards the bottom to access it and opt for the “Optical Flow” option.
Step 3Activate Render Preview for Thorough Evaluation
Upon adjusting, return to the timeline panel and select the video. With the help of your cursor, navigate to the “File” > “Render Preview” option. Enable a preview prior to finalizing the video, and then hit “Export.”
Key Features of Filmora
Filmora is not just confined to creating slow motion; the interface offers much more. There are multiple AI and manual features to edit videos, adjust audio, and insert text. Here are a few video editing features of Filmora amongst many:
Green Screen: Get rid of messy or unwanted backgrounds and replace them with something captivating. For this, film the model or object in front of a green screen and enable Chroma Key. It is an AI-driven function that will auto-remove the background while preserving the object.
AI Text-to-Video: Can’t find the right visuals or time to shoot content for your channel? Use this AI to create videos from prompts without having to put in any effort. The AI will auto-generate graphics to add to the video along with the AI voice insertion.
Compound Clip: Are there multiple clips in your timeline that you want to apply the same effects to? This function will help you transform multiple clips into one. Furthermore, you can apply similar effects or transitions. In addition, this function also ensures a smooth transfer from one clip to another.
AI Thumbnail Creator: Create and edit compelling thumbnails for your videos using this AI. The AI will analyze and select the perfect video frames as thumbnail options. Further, you can edit the thumbnail and insert multiple templates to show what the video is going to be about.
Conclusion
After going through this article, readers have an extensive knowledge of how to slow down time-lapse on i Phones using multiple tools and techniques. We provided a review of these tools but also the benefits of slo-mos in content creation and viewing.
In the end, we suggest Wondershare Filmora as the best alternative to all these applications. The software is not just AI integrated but has everything you need to create slo-mos in one place. Use Filmora for creative slo-mo and other video editing features.
How to Add a Green Screen to Zoom
If you are a regular user of Zoom app because you have to attend meetings and video conferences every now and then, you should know how to create a green screen for Zoom calls. There are going to be times when you would not want to show what is in your background because it might look distracting. Besides, changing the background from time to time breaks the monotony of your Zoom calls.
Zoom app allows you to change your background and set any available virtual background. However, the effect of virtual background may not be accurate and smooth unless you have a uniform background color. If you use green screen background for Zoom, you can replace it with any virtual background that will look very realistic to your audiences. We will illustrate how to create a green screen background for Zoom.
Part 1. How to add green screen to Zoom on computer?
Regular Zoom users prefer arranging and attending video conferences from their computers. Zoom desktop app makes it more convenient to attend Zoom conference with a wider screen and better visibility. Make sure you have a uniform green screen in your background before attending Zoom call so that you can replace it with any available virtual background on Zoom. Here are the steps on how to create a green screen for Zoom app on your computer.
Step1Open Zoom app and make sure you are logged into your account. Adjust the webcam so that only you and your green screen should be visible in the frame.
Step2Click on Settings (gear icon) located in the top-right corner.

Step3Once Settings window opens, click on Virtual background option on the left panel.
Step4Turn on the option “I have a green screen” located at the bottom. Thereafter, choose a virtual background with which you want to replace the green screen in your video.

Step5Apart from the present virtual background, you can add photo or video to replace green screen background.

Step6Close Settings window and you will see that your green screen is replaced by your selected virtual background.
Part 2. How to add green screen to Zoom on mobile?
If you are an occasional Zoom user, you are more likely to use your smartphone to attend Zoom conferences. If you want green screen effect on your Zoom call, make sure you have a sizeable green screen in your background. This is because even if you happen to move your phone during the meeting, green screen background should come in the video frame all the time.
It is recommended to use a tripod to keep your smartphone fixed in one spot for better and consistent green screen effect. Here are the steps to answer your question how do you add a green screen to Zoom app on your mobile phone. The steps are the same for Android and iOS users.
Step1Open Zoom app on your smartphone and make sure you are signed into your account.
Step2Start a Zoom meeting and tap on More option located in the bottom-right corner.

Step3Tap on Virtual background and you can select any preset virtual background.

Step4If you want to replace green screen with a customized background, tap on “+” icon and select any photo or video from your phone.

Step5Tap on Close option and the selected virtual background will be applied to your Zoom video.
Part 3. Tips to use green screen on Zoom video
Here are some important tips to use green screen on Zoom video for a better outcome.
Buy Large Green Screen - Since you are going to invest in buying green screen, you should buy a large green screen instead of buying two. Firstly, when you have one large green screen, you can set it up without any wrinkles or overlaps.
Secondly, a large green screen means greater surface area, and even when you slightly change the angle of your camera, your background will still have green screen instead of the exterior wall showing up and ruining virtual background effect.
Buy Green Screen Stand - Along with green screen, you should buy a sizeable green screen stand. A regular green screen stand contains two vertical supports at both ends and one horizontal support where you hand the green screen.
You can buy it according to the size of green screen you have bought. And you need to buy stand because you cannot fix the green screen on the wall properly. If you use any other means, there are going to be wrinkles and uneven virtual background effect.
Green Screen Quality - You can purchase any shade of green screen, but we recommend you opt for vibrant green color for a better outcome. Most importantly, the color should be even across the surface, and there should not be light and dark patches to dampen the virtual background effect and make it look unrealistic. That is why you should not compromise with quality.
Avoid Green Objects - You should not wear anything green. If your green screen has a lighter shade, you can wear deep color dresses and vice versa. Most importantly, you should not keep anything that is green while attending Zoom attending as it will disturb the green screen effect and it will look embarrassing. If you need to keep any green objects in your Zoom meetings, you should have blue screen instead of green screen.
Focus On Lighting - Lighting is extremely important when you want to use green screen. You should place the light so that it spreads evenly across the green screen. Otherwise, there are going to be light and dark patches, and the effect can get disturbed. Make sure you do not cast any shadow on the green screen by positioning the green screen accordingly.
Select A Proper Background - Last but not least, when you change your green screen to any virtual background photo or video, make sure you keep your audiences in mind. If you are attending a meeting, you should keep a professional-looking background. The background should not be distracting and match the theme of your meeting.
Conclusion
We have answered your question, “How do you add a green screen to zoom?” You can use green screen on your Zoom desktop app as well as smartphone app. This will help you to make your usual background cover up with green screen and replace green screen with any virtual background. Keep in mind all the tips we have provided you so that the green screen effect is perfect.
Free Download For Win 7 or later(64-bit)
Free Download For macOS 10.14 or later
How Do You Create In-Camera Transitions in Your Videos? A Complete Guide for Beginners to Create These Transitions Using Their Camera at Home
You must have seen it in videos when a scene changes to another place or time. How is it possible? Video transitions are a post-production technique that connects two different shots together. And it makes the whole video goes smooth and fluent.
Hopping directly from one clip to the next looks pretty queer. It disturbs the whole dynamics and charm of the video. To avoid this, we use video transitions. This makes the video appear much smoother and more linked.
You may think it is not easy, but after reading this article, you will know how simple it is. All you need is a camera and a few skills. In this article, we will focus on different in-camera transitions and let you know how to edit in a powerful video editor Filmora .
Whip Your Camera
You may have noticed that when an object moves quickly, the camera creates a blurred image of the object. We call it motion blur. The idea with this transition is to cut and paste your shots together by whipping your camera at the end of your first shot and at the beginning of your second one. This effect depends on two aspects. The first is by the speedy motion of the object out of the frame, and the second is by the camera’s movement.
Here is a stepwise guide for you to try
- Plan your shots, where and in what direction you will make the whip.
- Then take the first shot and whip the camera at the end of the shot in the direction the object is moving.
- For the next shot, whip the camera into the action and complete the shot.
- Import both shots in your editing tool and find the point of blur in both.
- Cut and paste them to add a blurring effect to your video.
You can whip your camera in any direction you want. Make sure the movement is fast enough to create a motion blur.
The result would be a smooth transition from the first shot to the second, as in this clip:

Fill The Frame
In this in-camera transition technique, you must fill the frame with an object or subject. Compose the shot with the main subject filling the frame from edge to edge. In this way, those who view the video immediately know what you want them to see.
Here is step-by-step guidance for this transition
- Plan the two shots you are going to take.
- Find a subject or an action that will fill the frame during recording.
- In the first shot, please make the subject move toward the frame so that it fills the frame.
- The second shot will take place at another time or place.
- To record the second shot, cover the frame with an object and then reveal the shot.
- Import both shots into Wondershare Filmora .
- Cut the two shots to the point where the frame is filled and paste these shots together.
Free Download For Win 7 or later(64-bit)
Free Download For macOS 10.14 or later
One important thing is to match the color and brightness of the object or subject. It will provide you with much better results. The video attached below explains all the steps of filling the frame.

Match Cut
In a video, a match cut transitions from one shot to another. During this, the composition of the two shots is matched by action, subject, and subject matter. The goal is to make a visual match between two situations that don’t have a direct link. Here are the steps to creating a match-cut transition in your videos.
- Plan the shot you are going to take.
- Record the action in the first shot, for example, clapping your hands.
- Go to another place or scene to record the second shot.
- Repeat the same action in the second shot.
- Import both camera shots to Wondershare Filmora .
- Cut one shot to another when the action is at its peak.
This way, you can smoothly transition from one place or scene to another. There is a video attached below for a better understanding of the steps.

Final Words
You can use these techniques to create sublime in-camera transitions. Make sure to follow all the steps in the correct order. These transitions will make your videos look more creative and artistic. Plan your ideas, add these transitions to your videos, and create cool videos at home to post on social media.
If you find this article informative, remember to share it with your friends. Which of these transitions did you like the most, and are you going to try them?
Free Download For Win 7 or later(64-bit)
Free Download For macOS 10.14 or later
Free Download For macOS 10.14 or later
One important thing is to match the color and brightness of the object or subject. It will provide you with much better results. The video attached below explains all the steps of filling the frame.
Match Cut
In a video, a match cut transitions from one shot to another. During this, the composition of the two shots is matched by action, subject, and subject matter. The goal is to make a visual match between two situations that don’t have a direct link. Here are the steps to creating a match-cut transition in your videos.
- Plan the shot you are going to take.
- Record the action in the first shot, for example, clapping your hands.
- Go to another place or scene to record the second shot.
- Repeat the same action in the second shot.
- Import both camera shots to Wondershare Filmora .
- Cut one shot to another when the action is at its peak.
This way, you can smoothly transition from one place or scene to another. There is a video attached below for a better understanding of the steps.
Final Words
You can use these techniques to create sublime in-camera transitions. Make sure to follow all the steps in the correct order. These transitions will make your videos look more creative and artistic. Plan your ideas, add these transitions to your videos, and create cool videos at home to post on social media.
If you find this article informative, remember to share it with your friends. Which of these transitions did you like the most, and are you going to try them?
Free Download For Win 7 or later(64-bit)
Free Download For macOS 10.14 or later
Trailer Guide for Creators and Developers
Trailers are a popular means to showcase a product you are about to release to the market. Teasers and trailers are traditionally created for movies, but have eventually evolved to include book trailers, game trailers, and app trailers. In this article, we will explain the key details of a trailer, highlight some examples, and show you how to create an effective trailer.
Part 1. What is a Trailer?
A trailer is a type of video commercial advertisement made to advertise and inform audiences about a specific program or item. To persuade customers to view or use the product, it includes a brief series of previews of the entire material. It also serves as a means of creating anticipation for a show or product that is about to hit the market.
Trailers were originally made for cinema movies. Nowadays, trailers are created for different forms of media like shows, apps, programs, video games, and book videos. A typical traditional trailer lasts between 1 to 3 minutes.
Part 2. What Are the Similarities and Differences Between a Teaser and Trailer?
Teasers and trailers can often be confused with each other. After all, they pretty much have the same objective.
Both are created for the purpose of advertising an upcoming show, product, or service. Teasers and trailers are similarly shown to audiences prior to the release of the thing they are advertising. They are meant to show a small portion of the full experience to create curiosity and excitement towards a targeted market. Both videos are typically short in length - taking up only a maximum of 3 minutes in duration.
The differences between them lie in their content, timeline, and duration. A teaser is much shorter than a trailer - the former runs for only 20-30 seconds while the latter can go between 1-3 minutes in length. This is because teasers are typically made before or during the production process of a movie or feature, whilst trailers are commonly made at the end.
For films, movies, and shows, teasers generally capture only a single part of that media. It focuses on the most intense or impactful scene. Trailers are formed from a series of clips depicting striking scenes derived from the beginning, middle, and end of the show. These scenes are normally arranged in a nonlinear structure, allowing viewers to have a general understanding of the story without revealing the entirety of the plot.
Part 3. Examples of good trailers
An excellent trailer is one who can effectively attract and maintain the audience’s attention. It satisfies its objective of showcasing striking and captivating pieces of the main product and entices viewers to experience its entirety. Here are some examples of trailers who have well fulfilled the criteria of a good trailer.
1. The Suicide Squad
The Suicide Squad is a fresh take featuring DC’s anti-heroes assemble in a single chaotic and unconventional team. James Gunn’s iteration on these characters is brought to life in the trailer with a majestic cast including John Cena, Idris Elba, Margot Robbie, and David Dastmalchian. Several key scenes are shown, highlighting its standout characters in the process while portraying the movie’s setting.
2. Raya and the Last Dragon
The trailer starts out innocently and comes with an adorable and surprising twist. The brief 2-minute trailer is packed with relevant scenes that depict the character’s quest without revealing too much. Many action-packed scenes and emotional interactions are satisfactorily squeezed into the trailer. Excitement builds further with Tamara Bubble’s “I’m That Good” playing in the background on the last minute of the video.
3. Men (2022)
Ingenious combination of sound effects and background music play a distinct role in this 2022 trailer. The female lead’s voice echoing from a tunnel, the haunting piano keys gradually building up the suspense, and the common but cleverly used horror audio effects create a chilling ensemble of haunting scenes in the movie. The sounds gradually rise up as more aggressive and energized scenes flash on the screen, and eventually end back into the sombre intro that leaves the audience with questions.
4. The Farewell
Lulu Wang’s dramatic comedy The Farewell is all about a family hiding the truth of a family member’s terminal illness from the person herself. What makes the trailer special is that it steers away from the sad, melancholic direction and veers toward a feel-good movie vibe. The conflict, struggle, and the beliefs featured in the movie are depicted in the trailer. However, the clever placement of interactions and the uplifting music tug at the audience’s heartstrings and urge them to want to see more.
5. Pokémon Go
Pokémon has become a culture to several generations. Becoming a Pokémon trainer is a secret dream that almost all of us have, even as adults. Niantic’s collaboration with the Pokémon franchise brings people closer to that reality by introducing its AR and location-powered app Pokémon Go. The trailer shows people of all ages living out their trainer dreams in the real world and interacting with Pokémon. The different features of the game are dramatized in a real-life setting, inciting more excitement, and pulling out the nostalgia from its market. The trailer keeps the actual app showcase to a minimum, instead focusing on once again selling that dream to audiences and bringing out the inner child in everyone.
Part 4. How to bring your trailer to the next level?
While it may seem intimidating to create a trailer for your upcoming product, there is no need to worry. It is now easier than ever to create a well-crafted trailer by taking advantage of a program’s tools and templates.
- Stock media
Filmora makes it easy to craft a trailer with only a few clicks. Make use of the program’s media library to gain access to a wealth of resources like stock photos, videos, music, and audio files.
- Keyframing
Keyframing lets you smoothly transition from one scene to another, making it an effective tool for trailers. It is particularly appealing for shows that highlight motion like sports, dancing, and action. Experiment with more than 80 preset templates and create smooth scene transitions with ease.
- Speed Ramping
Speed Ramping is a feature that works perfectly with keyframing. Increase the energy and dynamics in your trailer with 6 preset speed types. You can also customize these templates. There is also no need for concern about the audio - Filmora lets you maintain the audio pitch even when using these features.
- FX Effects
The program also offers many effects and filters for an extra element in your trailer. The Borix FX is an example of that. Designed in collaboration with the award-winning developer of the same name, Boris FX and its extension Continuum features a wide array of tasteful effects for your convenience. There are over 91 customizable and adjustable presets including types like blurs, stylization, and lights. NewBlue is another option that carries choices of filters, titlers, and stylizers.
Filmora offers different features, tools, and effects to explore that can help make your trailer editing objectives easier and more convenient. Save time and resources by taking advantage of its powerful yet easy-to-use tools.
Free Download For Win 7 or later(64-bit)
Free Download For macOS 10.14 or later
Also read:
- 15 Simple Steps to Convert YouTube to MPEG Effortlessly
- Best Ways to Blur Zoom Background for Free for 2024
- How to Remove Background From a Video in Premier Pro for 2024
- In 2024, Learn to Create Custom Sequence Presets in Premiere Pro for Efficient Video Editing. Ensure Consistency and Speed up Your Workflow with Personalized Settings
- In 2024, Personalize Facebook Page with Video
- In 2024, Top 7 Skype Hacker to Hack Any Skype Account On your Honor 90 GT | Dr.fone
- New In 2024, How to Create Intro with Legend Intro Maker
- Online Oasis Secure Re-Entry to Social Networks
- Step-by-Step Guide to Repair Your DVD Player for Optimal Performance
- Taming Web Speed Imbalance Between PC, Phone
- Title: In 2024, Do You Wish to Learn About some Tools to Slow Down a Video? Discover How to Slow Down Time Lapse on iPhone Throughout This Article
- Author: Chloe
- Created at : 2025-03-02 00:17:00
- Updated at : 2025-03-03 21:20:51
- Link: https://ai-editing-video.techidaily.com/in-2024-do-you-wish-to-learn-about-some-tools-to-slow-down-a-video-discover-how-to-slow-down-time-lapse-on-iphone-throughout-this-article/
- License: This work is licensed under CC BY-NC-SA 4.0.