
:max_bytes(150000):strip_icc():format(webp)/GettyImages-1198110246-e12a30f2b10645edb984dc66113911c9.jpg)
In 2024, Figuring Out Proper Ways to Play a Video in Slow Motion on iPhone
Figuring Out Proper Ways to Play a Video in Slow Motion on iPhone
Before we dive into how to play a video in slow motion on iPhone, let’s see what they are. In slow motion, the video frame rate is usually manipulated. In manual or automated editing, frame rates increase to add extra seconds to the video. For instance, in normal videos, playback speed is 24, 30, or 60 fps. However, this frame rate can be increased up to 124 or 240 fps in slow motions.
These are the standard values and help achieve accurate and precise slow-motion effects. In this article, the discussion leans toward the making and playing slow-mo. Users will learn how to play videos in slow motion on iPhone. It will introduce tools to create a slow-mo effect and a guide to achieve it.
Part 1:Adding Slow Motion to Video on iPhone (Before & After)
Now that you have an insight into the significance of slow-motion videos, let’s move forward. This section involves a guide on how to play a video in slow motion on iPhone. Here is a guide to adding slow motion in your video before and after recording:
1. Making a Slow Motion Before Recording
This method involves recording a video in slow-motion mode from the start. Apple has already launched this feature in its iPhones and iPads. Here is a step-by-step guide to creating such videos:
Step 1
Open your iPhone and click on the “Camera” application. Once you access it, select “SLO-MO” mode from the bottom.

Step 2
Go back and open the “Settings” and select the “Camera” section. In camera settings, select the “Record Slo-mo 1080p at 240 fps.”

2. Making a Slow Motion After Recording
The first method will record your overall video in slow motion. However, you can use the other method to add a slow-mo effect to a specific part. Follow the given instructions to learn how to operate it:
Step 1
Open the “Photos” application from your home screen and click “Albums.” From the featured slider, select the “Slow-mo” option.

Step 2
Choose a video from this album and go to the “Edit” option at the top right corner.

Step 3
Navigate towards the bottom and access the timeline. Choose the specific area for adding the effect and drag the sliders on the vertical lines below. Once satisfied with the slow-motion effect, click the “Done” button.

Part 2: Some Prominent Third-party Apps Available to Play Video in Slow-Motion
Slow-mo effects enhance the creativity of your videos and let the audience experience new things. Do you still want to learn how to play a video in slow motion on iPhone? Here is a comprehensive guide to creating slow motions:
- Video Speed: Fast, Slow Motion
- Slo Mo – Speed Up Video Editor
- Slow Mo and Fast Motion
- Video Speed Changer – Editor
1. Video Speed: Fast, Slow Motion
This is it if you are looking for an application with advanced features and manual editing. The application offers many video playback options for a suitable slow motion. You can add slow motion to a whole video or a part through timeline editing. The application offers multiple subscriptions with a trial period before use.

Key Features
- After editing a video in this application, you can integrate music and text.
- The speed manipulation doesn’t result in slow-mo but also offers fast speed options.
- It has an insightful and easy user interface; you can apply color filters after editing.
2. Slo Mo – Speed Up Video Editor
Finding answers about how to play videos in slow motion on iPhone? This is an intuitive application to create slow-mo with a high processing rate. To slow down a video using this application, you can manipulate the video frame to 240 fps. The speed modification is available to apply on specific video parts.

Key Features
- Direct video share options to Instagram, YouTube, Twitter, and Facebook.
- The premium version has 170+ music tracks to insert in your edited video.
- Users can record a live video using this application and apply speed options.
3. Slow Mo & Fast Motion
This video editor is specifically designed for those looking to modify video speed. It enables you to change the whole video speed or the marked area. Whether you want to slow an existing video or record a new one through it, the choice is yours. The video control options are not technical, and anyone can understand them.

Key Features
- The tool offers cutting options, and the timeline editing makes it more precise.
- You can use this application’s built-in features to enhance the visual outlook of video.
- The application shows support for multiple languages, including Spanish, French, and more.
4. Video Speed Changer – Editor
Whether it’s about changing speed or doing other types of speed edits, this app fits the best. It resolves your how to play videos in slow motion on iPhone problems. It allows you to change the video playback speed via a simple process. Just upload your video and drag the speed slider backward to create a slow-mo.

Key Features
- The tool offers to import or record media through its built-in recorder option.
- You can also add fast-motion elements like time-lapse, time warp, or hyper-lapse.
- The user interface is straightforward and leaves no room for confusion.
Bonus Part: Make and Play Your Video in Slow Motion: Use Wondershare Filmora
You might wonder if something is missing if you see a slow-motion video using these applications. This is where you need a professional editor for a smooth slow-mo. Wondershare Filmora is one of the editors that offers frame interpolation. With its optical flow option and high-resolution export settings, you can rely on it.
This AI video editor has two methods of creating a low-motion effect. One method involves uniform speed, and the other is speed ramping. The uniform speed option allows you to manipulate video playback speed using a slider. Meanwhile, speed ramping is a more precise method of modifying video parts.
Free Download For Win 7 or later(64-bit)
Free Download For macOS 10.14 or later
Playing and Adding Slow Motion Effect to Video Using Filmora
After hearing about this amazing software, you might want to create a slow-mo. You might wonder how to play videos in slow motion on iPhone using Filmora. Read the step-by-step guide to find your answer:
Step 1Create a New Project and Access Speed Options
Once you have downloaded this software, access the “New Project” button. Then, use the “Command + I” keys to import media and bring it to the timeline. Select the media clip in the timeline and go to the settings panel. Under the “Speed” tab, choose “Uniform Speed” and drag the slider for speed change.

Step 2Activate AI Frame Interpolation Option
Once you finish the speed settings, there is a tip to enhance the slow-mo effect. Find the “AI Frame Interpolation” option in the same section and expand it. Select the “Optical Flow” option at the third to smoothen the video.

Step 3Rendering and Exporting
Once you have activated the optical flow, render it to see the results. For this, navigate towards the timeline toolbar and select the “Render Preview” option. It looks like a player with a doted circle around it. Preview the results, readjust if needed, and select the “Export” option to save the video.

Key Features of Wondershare Filmora
Along with speed modification, Filmora features unlimited features in its interface. The methods of accessing them are easy as accessibility is the concept it was built on. Here are some of the game-changing features for amateurs and professionals:
1. Compound Clip
We need to add a similar effect or filter to all videos in multiple situations. Instead of applying effects one by one, you can do it at once. This feature merges all videos into one and speeds up the workflow. It simplifies the complex sequences between clips and gives smooth results.
2. Green Screen
Running low on a budget for a film but want to shoot at beautiful locations. Use Filmora’s green screen or Chroma Key feature to replace backgrounds in an accurate manner. You can do this by shooting before a green screen and applying the chroma key later. Afterward, import the clip or picture you want in the background to add.
3. Motion Tracking
Do you want to blur out a whole person or apply an effect throughout the video? With Filmora’s motion tracking option, you can do these types of edits. You can insert motion graphics, animations, filters, and effects via it. Just select the object or person you want to track and activate the motion track.
4. Screen Recorder
Screen recording is important to content creation, especially in tutorial channels. In addition, the reaction or roasting channels and their owners also use this. Filmora offers an extensive screen recording option, including microphone and camera recording. You can manipulate the screen resolution, system settings, and more.
Conclusion
This article aimed to increase readers’ knowledge to effectively add slow-mo effect. Not only did we answer how to play videos in slow motion on iPhone, but we also guided to it. The article discussed some of the leading applications for slowing down video on iPhone. For precise and flawless slow-mo creation, we recommended Wondershare Filmora.
Step 2
Go back and open the “Settings” and select the “Camera” section. In camera settings, select the “Record Slo-mo 1080p at 240 fps.”
2. Making a Slow Motion After Recording
The first method will record your overall video in slow motion. However, you can use the other method to add a slow-mo effect to a specific part. Follow the given instructions to learn how to operate it:
Step 1
Open the “Photos” application from your home screen and click “Albums.” From the featured slider, select the “Slow-mo” option.
Step 2
Choose a video from this album and go to the “Edit” option at the top right corner.
Step 3
Navigate towards the bottom and access the timeline. Choose the specific area for adding the effect and drag the sliders on the vertical lines below. Once satisfied with the slow-motion effect, click the “Done” button.
Part 2: Some Prominent Third-party Apps Available to Play Video in Slow-Motion
Slow-mo effects enhance the creativity of your videos and let the audience experience new things. Do you still want to learn how to play a video in slow motion on iPhone? Here is a comprehensive guide to creating slow motions:
- Video Speed: Fast, Slow Motion
- Slo Mo – Speed Up Video Editor
- Slow Mo and Fast Motion
- Video Speed Changer – Editor
1. Video Speed: Fast, Slow Motion
This is it if you are looking for an application with advanced features and manual editing. The application offers many video playback options for a suitable slow motion. You can add slow motion to a whole video or a part through timeline editing. The application offers multiple subscriptions with a trial period before use.
Key Features
- After editing a video in this application, you can integrate music and text.
- The speed manipulation doesn’t result in slow-mo but also offers fast speed options.
- It has an insightful and easy user interface; you can apply color filters after editing.
2. Slo Mo – Speed Up Video Editor
Finding answers about how to play videos in slow motion on iPhone? This is an intuitive application to create slow-mo with a high processing rate. To slow down a video using this application, you can manipulate the video frame to 240 fps. The speed modification is available to apply on specific video parts.
Key Features
- Direct video share options to Instagram, YouTube, Twitter, and Facebook.
- The premium version has 170+ music tracks to insert in your edited video.
- Users can record a live video using this application and apply speed options.
3. Slow Mo & Fast Motion
This video editor is specifically designed for those looking to modify video speed. It enables you to change the whole video speed or the marked area. Whether you want to slow an existing video or record a new one through it, the choice is yours. The video control options are not technical, and anyone can understand them.
Key Features
- The tool offers cutting options, and the timeline editing makes it more precise.
- You can use this application’s built-in features to enhance the visual outlook of video.
- The application shows support for multiple languages, including Spanish, French, and more.
4. Video Speed Changer – Editor
Whether it’s about changing speed or doing other types of speed edits, this app fits the best. It resolves your how to play videos in slow motion on iPhone problems. It allows you to change the video playback speed via a simple process. Just upload your video and drag the speed slider backward to create a slow-mo.
Key Features
- The tool offers to import or record media through its built-in recorder option.
- You can also add fast-motion elements like time-lapse, time warp, or hyper-lapse.
- The user interface is straightforward and leaves no room for confusion.
Bonus Part: Make and Play Your Video in Slow Motion: Use Wondershare Filmora
You might wonder if something is missing if you see a slow-motion video using these applications. This is where you need a professional editor for a smooth slow-mo. Wondershare Filmora is one of the editors that offers frame interpolation. With its optical flow option and high-resolution export settings, you can rely on it.
This AI video editor has two methods of creating a low-motion effect. One method involves uniform speed, and the other is speed ramping. The uniform speed option allows you to manipulate video playback speed using a slider. Meanwhile, speed ramping is a more precise method of modifying video parts.
Free Download For Win 7 or later(64-bit)
Free Download For macOS 10.14 or later
Playing and Adding Slow Motion Effect to Video Using Filmora
After hearing about this amazing software, you might want to create a slow-mo. You might wonder how to play videos in slow motion on iPhone using Filmora. Read the step-by-step guide to find your answer:
Step 1Create a New Project and Access Speed Options
Once you have downloaded this software, access the “New Project” button. Then, use the “Command + I” keys to import media and bring it to the timeline. Select the media clip in the timeline and go to the settings panel. Under the “Speed” tab, choose “Uniform Speed” and drag the slider for speed change.
Step 2Activate AI Frame Interpolation Option
Once you finish the speed settings, there is a tip to enhance the slow-mo effect. Find the “AI Frame Interpolation” option in the same section and expand it. Select the “Optical Flow” option at the third to smoothen the video.
Step 3Rendering and Exporting
Once you have activated the optical flow, render it to see the results. For this, navigate towards the timeline toolbar and select the “Render Preview” option. It looks like a player with a doted circle around it. Preview the results, readjust if needed, and select the “Export” option to save the video.
Key Features of Wondershare Filmora
Along with speed modification, Filmora features unlimited features in its interface. The methods of accessing them are easy as accessibility is the concept it was built on. Here are some of the game-changing features for amateurs and professionals:
1. Compound Clip
We need to add a similar effect or filter to all videos in multiple situations. Instead of applying effects one by one, you can do it at once. This feature merges all videos into one and speeds up the workflow. It simplifies the complex sequences between clips and gives smooth results.
2. Green Screen
Running low on a budget for a film but want to shoot at beautiful locations. Use Filmora’s green screen or Chroma Key feature to replace backgrounds in an accurate manner. You can do this by shooting before a green screen and applying the chroma key later. Afterward, import the clip or picture you want in the background to add.
3. Motion Tracking
Do you want to blur out a whole person or apply an effect throughout the video? With Filmora’s motion tracking option, you can do these types of edits. You can insert motion graphics, animations, filters, and effects via it. Just select the object or person you want to track and activate the motion track.
4. Screen Recorder
Screen recording is important to content creation, especially in tutorial channels. In addition, the reaction or roasting channels and their owners also use this. Filmora offers an extensive screen recording option, including microphone and camera recording. You can manipulate the screen resolution, system settings, and more.
Conclusion
This article aimed to increase readers’ knowledge to effectively add slow-mo effect. Not only did we answer how to play videos in slow motion on iPhone, but we also guided to it. The article discussed some of the leading applications for slowing down video on iPhone. For precise and flawless slow-mo creation, we recommended Wondershare Filmora.
The Top Tools for Converting Slides to Digital - 2024 Review
The Best Tools for Converting Slides to Digital - Review
An easy yet powerful editor
Numerous effects to choose from
Detailed tutorials provided by the official channel
Are you looking to convert your slides into digital form at home? Are you in search of the best tools for converting old slides to digital? Here, you will get every single detail for it. These conversion tools can help you to convert your old slides into digital images just by sitting at home. In this blog, we will discuss the need, how to achieve it, and the best 8 tools for the conversion. The list of these top tools will be based on the user reviews and ratings of 2024.
In this article
01 [Why We Need to Turn Old Slides into Digital Images](#Part 1)
02 [How to Convert Slides to Digital - Step-by-Step Guide](#Part 2)
03 [Best 8 Slide to Digital Image Converters 2024](#Part 3)
04 [FAQ of Converting Slides to Digital](#Part 4)
Part 1 Why We Need to Turn Old Slides into Digital Images
In this digital era, people rather have access to projectors to view old slides. Therefore, it is beneficial to convert those slides into digital form. There are also many benefits of this conversion such as:
● Preserving the photos for future generations without the fear of getting them lost or damaged.
● Old slides might fade up and you can give them a brand new look by using new tools and technologies.
● The organization becomes much easier than the physical ones.
● It will create less clutter.
● You can share the pictures with just one click with your friends, family members, etc to flourish the memories.
● It lets you enjoy your old memories in a better and more enhanced way.
So, you might have understood why there is a need for converting slides to pictures. Now, let’s dig down more on the topic.
Part 2 How to Convert Slides to Digital - Step-by-Step Guide
Here, we will discuss step-by-step ways to turn the old slides into digital images. So, let’s begin:
Step 1: Resolution
The very first step for converting slides to digital photos is measuring and fixing the resolution of the slides. The technical measurement of image resolution is DPI (dot per inch). It helps you to predict the sharpness or clarity of the final image. The overall measurement depends on the size of the slide and the type of converter or scanner you are using. For example,
A 35 mm slide scanned at 10 MP will give you the images of size 13”*9”.
Step 2: Dust and Scratch Removal
If you have slides that have been wrapped in a box and remained untouched for so long, they might require cleaning. Such slides may develop mold buildup, age-related blemishes, or scratches. They need a cleaning process before using them to convert into slides. A lint-free cloth and an anti-static film cleaner are the best combinations to gently clean the slides and make them fresh.
Step 3: Color Correction and Restoration
Color correction and restoration is another important step when you are dealing with converting old slides into digital images. In order to correct the fading and color shift, you can use the built-in scanning software. You can also use other software for such purposes.
Wondershare Filmora is the best tool which can be used for the color correction of old slides. It is a handy tool with a variety of features. Filmora offers a number of options when it comes to color correction and grading. These options include color histogram, white balance, 3D LUT (3D Lookup table), color and light, HSL, vignette, etc.
Step 4: Using the Best Scanner cum Digital Converter
The next step is choosing the best quality scanner according to the requirement. 35 mm is the most common size of the slides. But, it does come with other uncommon formats too such as 110, 126, 120, 127, etc. You will come to know about the actual size when the image is mounted on the cardboard. Therefore, it is essential to select a quality and versatile scanner which can convert slides of any size effectively.
Part 3 Best 8 Slide to Digital Image Converters 2024
Here, you can run down the list of the best tools to convert the photo slides into digital images on the basis of user reviews and ratings.
01Wolverine Titan 8-in-1

Wolverine Titan 8-in-1 is one of the top choices when it comes to converting photo slides to digital. It is easy to use the device with a fast conversion process. It provides a variety of features such as:
● High output resolution
● Large built-in display
● Wide-format compatibility
● Standalone performance
● Small, compact, and lightweight design
● Pretty fast processing
● Fast uploading slide-adapters
● 4.3-inch color display
● Contains HDMI-to-out jack
● Comes in 3 colors
● Highest quality sensors
● Available at a reasonable price
02Digitnow Film Scanner

A digitnow film scanner is a great option for converting physical photo prints or slides into digital images. The easy to use standalone device comes with a small display which can be attached to the TV screen, PC, or MacBook. It provides a lot of additional tools including
● Adapter tray frames to hold photo prints and slides.
● Slots to insert slides into the scanner.
● GB memory card to hold approximately 1000 photos.
● A disc of image retouching software for Windows users.
● A soft brush to clean dust and other debris from slides and film.
● User manual.
● TV cable.
● Standard buttons.
03Plustek ePhoto Z300

Plustek ePhoto Z300 is not just a slide converter but also a photo scanner. It has the capability to convert a photo or slide of size 6*4 in just 2 to 3 seconds. This simple and compact photo scanner can be attached to a PC or Mac. The device also has a built-in editor which provides photo editing options along with the crop and resizes. The major advantage of this tool is its fastest scanning capacity. This is a good option if you own a large collection of old photos and wish to digitize them quickly. You can use this device by combining it with others too.
04Sharper Image Slide and Negative Converter

It is a lightweight slide to digital converter weighing just 0.6 pounds. The tool provides on-screen interfaces in 7 languages. Despite its small size, the tool has as many features as compared to other slide converters. Sharper image slide and negative converter are easy to use with a basic interface and clearly labeled buttons. The additional tools that come with this device are:
● Cleaning brush
● User manual
● Well designed plastic frame trays
The converter does not come with an in-built SD card and you are required to buy one.
05Kodak Scanza Digital Film and Slide Scanner

Kodak scanza digital film and slide scanner is the best tool if you have a large heap of images. It provides the largest storage option and due to which it is a little expensive. Scanza can convert images and reels into JPEG files within seconds of time. The device is an all-rounder and contains all the latest features and specifications. One can easily use this plastic design and lightweight device because of its small and sleek design. The additional features of Scanza include:
● Adjustable brightness option
● Removable SD card slot
● Powerful photo editing option
● USB power cable
● HDMI cable
● AC adapter
● Video cable
● Six adapter trays
● Film cleaning brush
● 3.5 inch TFT LCD screen
06Zonoz FS-3 22MP All-in-1

Zonoz FS-3 22 MP All-in-1 is a wonderful option if you are looking for a digital converter in an affordable range. It can convert up to 35, 110, 126 slides and negatives along with Super 8 film. One benefit of using this converter is the output images look sharper when compared to other converters. The additional features that the tool avail to its users are:
● Photo editing capabilities
● Brightness adjustment
● Mirroring or flipping
● Small built-in color display
● Adapter tray frames
● Cleaning brush
● USB and TV cables
● User manual
07Kodak Mini Digital Films and Slide Scanners

This miniature scanner model is the best selling slide scanner on the internet. Anyone can use it easily without any requirement for external extensions. With a rating of 4.2 upon 5, it is on the list of best slide scanners of 2024. It weighs around 1.4 pounds and measures 3.6*3.4*3.9 inches.
08Magnasonic
Magnasonic is named as the fastest slide scanner. The device is capable of quickly scanning the slides which saves both your time and efforts. It comes with fast scanning speed, 2.4 inch LCD screen, and 22 MP quality. The tool allows you to store upto 100 images. It also comes with some additional tools such as featured film trays etc.
Part 4 FAQ of Converting Slides to Digital
01What to do with the old slides?
Converting slides to digital images can help you to experiment a lot with them. The old slides might be faded and you can use some tools with the option color correction to make them look new and more appealing. Videos are in trend these days. You can create a video out of those slides after converting them into digital. It will help you to enjoy the old memories in the new version with new effects, songs, etc.
Wondershare Filmora Video Editor is the most powerful tool to prepare an effective video in a hassle-free manner. It has many useful features to make your video more enhanced. Also, it has the option of color correction and grading to make the faded old pics colorful and better. There is no need for professionalism to use this tool, but any beginner can also use it effectively with ease. So, make your memories everlasting with Wondershare Filmora.
For Win 7 or later (64-bit)
For macOS 10.12 or later
02Can you clean negatives with alcohol?
Yes, it is possible to clean negatives with alcohol. But make sure to use 98% isopropyl alcohol for this purpose. For cleaning, use a cotton ball and dab it on the alcohol. Then, lightly wipe the negatives and keep them to dry for some time.
● Ending Thoughts →
● So, hope you get all the required knowledge to convert the slides into digital images.
● We have shared the list of top tools for the purpose. Now, it is up to you to choose any according to your suitability and requirement.
● Just use these devices and accomplish your conversion purpose at home without the need for any professional and worrying about the cost of converting slides to digital.
● At last, with the help of Filmora create an effective video to make your memories everlasting and enhanced.
Are you looking to convert your slides into digital form at home? Are you in search of the best tools for converting old slides to digital? Here, you will get every single detail for it. These conversion tools can help you to convert your old slides into digital images just by sitting at home. In this blog, we will discuss the need, how to achieve it, and the best 8 tools for the conversion. The list of these top tools will be based on the user reviews and ratings of 2024.
In this article
01 [Why We Need to Turn Old Slides into Digital Images](#Part 1)
02 [How to Convert Slides to Digital - Step-by-Step Guide](#Part 2)
03 [Best 8 Slide to Digital Image Converters 2024](#Part 3)
04 [FAQ of Converting Slides to Digital](#Part 4)
Part 1 Why We Need to Turn Old Slides into Digital Images
In this digital era, people rather have access to projectors to view old slides. Therefore, it is beneficial to convert those slides into digital form. There are also many benefits of this conversion such as:
● Preserving the photos for future generations without the fear of getting them lost or damaged.
● Old slides might fade up and you can give them a brand new look by using new tools and technologies.
● The organization becomes much easier than the physical ones.
● It will create less clutter.
● You can share the pictures with just one click with your friends, family members, etc to flourish the memories.
● It lets you enjoy your old memories in a better and more enhanced way.
So, you might have understood why there is a need for converting slides to pictures. Now, let’s dig down more on the topic.
Part 2 How to Convert Slides to Digital - Step-by-Step Guide
Here, we will discuss step-by-step ways to turn the old slides into digital images. So, let’s begin:
Step 1: Resolution
The very first step for converting slides to digital photos is measuring and fixing the resolution of the slides. The technical measurement of image resolution is DPI (dot per inch). It helps you to predict the sharpness or clarity of the final image. The overall measurement depends on the size of the slide and the type of converter or scanner you are using. For example,
A 35 mm slide scanned at 10 MP will give you the images of size 13”*9”.
Step 2: Dust and Scratch Removal
If you have slides that have been wrapped in a box and remained untouched for so long, they might require cleaning. Such slides may develop mold buildup, age-related blemishes, or scratches. They need a cleaning process before using them to convert into slides. A lint-free cloth and an anti-static film cleaner are the best combinations to gently clean the slides and make them fresh.
Step 3: Color Correction and Restoration
Color correction and restoration is another important step when you are dealing with converting old slides into digital images. In order to correct the fading and color shift, you can use the built-in scanning software. You can also use other software for such purposes.
Wondershare Filmora is the best tool which can be used for the color correction of old slides. It is a handy tool with a variety of features. Filmora offers a number of options when it comes to color correction and grading. These options include color histogram, white balance, 3D LUT (3D Lookup table), color and light, HSL, vignette, etc.
Step 4: Using the Best Scanner cum Digital Converter
The next step is choosing the best quality scanner according to the requirement. 35 mm is the most common size of the slides. But, it does come with other uncommon formats too such as 110, 126, 120, 127, etc. You will come to know about the actual size when the image is mounted on the cardboard. Therefore, it is essential to select a quality and versatile scanner which can convert slides of any size effectively.
Part 3 Best 8 Slide to Digital Image Converters 2024
Here, you can run down the list of the best tools to convert the photo slides into digital images on the basis of user reviews and ratings.
01Wolverine Titan 8-in-1
Wolverine Titan 8-in-1 is one of the top choices when it comes to converting photo slides to digital. It is easy to use the device with a fast conversion process. It provides a variety of features such as:
● High output resolution
● Large built-in display
● Wide-format compatibility
● Standalone performance
● Small, compact, and lightweight design
● Pretty fast processing
● Fast uploading slide-adapters
● 4.3-inch color display
● Contains HDMI-to-out jack
● Comes in 3 colors
● Highest quality sensors
● Available at a reasonable price
02Digitnow Film Scanner
A digitnow film scanner is a great option for converting physical photo prints or slides into digital images. The easy to use standalone device comes with a small display which can be attached to the TV screen, PC, or MacBook. It provides a lot of additional tools including
● Adapter tray frames to hold photo prints and slides.
● Slots to insert slides into the scanner.
● GB memory card to hold approximately 1000 photos.
● A disc of image retouching software for Windows users.
● A soft brush to clean dust and other debris from slides and film.
● User manual.
● TV cable.
● Standard buttons.
03Plustek ePhoto Z300
Plustek ePhoto Z300 is not just a slide converter but also a photo scanner. It has the capability to convert a photo or slide of size 6*4 in just 2 to 3 seconds. This simple and compact photo scanner can be attached to a PC or Mac. The device also has a built-in editor which provides photo editing options along with the crop and resizes. The major advantage of this tool is its fastest scanning capacity. This is a good option if you own a large collection of old photos and wish to digitize them quickly. You can use this device by combining it with others too.
04Sharper Image Slide and Negative Converter
It is a lightweight slide to digital converter weighing just 0.6 pounds. The tool provides on-screen interfaces in 7 languages. Despite its small size, the tool has as many features as compared to other slide converters. Sharper image slide and negative converter are easy to use with a basic interface and clearly labeled buttons. The additional tools that come with this device are:
● Cleaning brush
● User manual
● Well designed plastic frame trays
The converter does not come with an in-built SD card and you are required to buy one.
05Kodak Scanza Digital Film and Slide Scanner
Kodak scanza digital film and slide scanner is the best tool if you have a large heap of images. It provides the largest storage option and due to which it is a little expensive. Scanza can convert images and reels into JPEG files within seconds of time. The device is an all-rounder and contains all the latest features and specifications. One can easily use this plastic design and lightweight device because of its small and sleek design. The additional features of Scanza include:
● Adjustable brightness option
● Removable SD card slot
● Powerful photo editing option
● USB power cable
● HDMI cable
● AC adapter
● Video cable
● Six adapter trays
● Film cleaning brush
● 3.5 inch TFT LCD screen
06Zonoz FS-3 22MP All-in-1
Zonoz FS-3 22 MP All-in-1 is a wonderful option if you are looking for a digital converter in an affordable range. It can convert up to 35, 110, 126 slides and negatives along with Super 8 film. One benefit of using this converter is the output images look sharper when compared to other converters. The additional features that the tool avail to its users are:
● Photo editing capabilities
● Brightness adjustment
● Mirroring or flipping
● Small built-in color display
● Adapter tray frames
● Cleaning brush
● USB and TV cables
● User manual
07Kodak Mini Digital Films and Slide Scanners
This miniature scanner model is the best selling slide scanner on the internet. Anyone can use it easily without any requirement for external extensions. With a rating of 4.2 upon 5, it is on the list of best slide scanners of 2024. It weighs around 1.4 pounds and measures 3.6*3.4*3.9 inches.
08Magnasonic
Magnasonic is named as the fastest slide scanner. The device is capable of quickly scanning the slides which saves both your time and efforts. It comes with fast scanning speed, 2.4 inch LCD screen, and 22 MP quality. The tool allows you to store upto 100 images. It also comes with some additional tools such as featured film trays etc.
Part 4 FAQ of Converting Slides to Digital
01What to do with the old slides?
Converting slides to digital images can help you to experiment a lot with them. The old slides might be faded and you can use some tools with the option color correction to make them look new and more appealing. Videos are in trend these days. You can create a video out of those slides after converting them into digital. It will help you to enjoy the old memories in the new version with new effects, songs, etc.
Wondershare Filmora Video Editor is the most powerful tool to prepare an effective video in a hassle-free manner. It has many useful features to make your video more enhanced. Also, it has the option of color correction and grading to make the faded old pics colorful and better. There is no need for professionalism to use this tool, but any beginner can also use it effectively with ease. So, make your memories everlasting with Wondershare Filmora.
For Win 7 or later (64-bit)
For macOS 10.12 or later
02Can you clean negatives with alcohol?
Yes, it is possible to clean negatives with alcohol. But make sure to use 98% isopropyl alcohol for this purpose. For cleaning, use a cotton ball and dab it on the alcohol. Then, lightly wipe the negatives and keep them to dry for some time.
● Ending Thoughts →
● So, hope you get all the required knowledge to convert the slides into digital images.
● We have shared the list of top tools for the purpose. Now, it is up to you to choose any according to your suitability and requirement.
● Just use these devices and accomplish your conversion purpose at home without the need for any professional and worrying about the cost of converting slides to digital.
● At last, with the help of Filmora create an effective video to make your memories everlasting and enhanced.
Best 12 AI Video Generators to Pick
Top 12 AI Video Generators to Pick
An easy yet powerful editor
Numerous effects to choose from
Detailed tutorials provided by the official channel
It is a fact that video editing can sometimes be laborious and time-consuming. Even when using the best video editing software, it still requires human effort to get an impressive result. But luckily for us, the invention of the AI video generator has now made a lot of things easier. The AI video generators are the next level as they allow users to automate video creation and editing without compromising quality.
This article will discuss the best AI text to video generators for free that will help make your life easier. Thus, this will soon help you create engaging videos for your personal or business use in just a few clicks.
In this article
01 [What Is an AI Video Generator](#Part 1)
02 [How Does the AI Video Maker Work](#Part 2)
03 [The 12 Best AI Video Generator](#Part 3)
Part 1 What Is an AI Video Generator
AI video generator is the process of using artificial intelligence (AI) to create professional videos. With an AI video generator for free, you do not need any equipment, an editing studio, or a premium video editing application to be able to create a video.
All that is required is that you feed input to the AI tool, and it will automatically help you generate a video. You can edit a blog post into a video within a few minutes with any of these tools listed. In addition, it won’t incur any high costs for video productions because the AI tool will help you carry out most of the tasks.
Part 2 How Does the AI Video Maker Work
Professional AI video editors, are trained by showing them various examples and then providing them feedback by telling them what is wrong and good. The machine then takes note of it and remembers it. However, as the machine continues to learn, it picks the results and then improves itself based on the feedback. Ultimately the device becomes very good or even better than the human that creates it. Here are some breakdowns of the ways video editors work:
● The AI video maker tool, can augment your videos with AR effects, including AR masks, face and color filters, face touch-ups, etc. The tool uses neural networks and computer vision to interrupt, extract, and understand the video content.
● This AI subtitle generator can allow interviews to be delivered and analyzed to the editor fully transcribed, searchable by word or even sentences. Video editors can use AI for keyword extraction, speech-to-text conversion, facial recognition, sentiment analysis, image recognition, and emotion detection.
● AI-video editors can pull sections of a video clip from any source automatically. These AI systems can also detect emotions that allow the creation of warm, appealing videos.
Part 3 The 12 Best AI Video Generator
There are top AI video generators for free that you can choose from for your video editing. These video editors complete work quickly and easily. In addition, if you need video editing software to help you edit your generated videos after generating them, we recommend that you try out Filmora from Wondershare. Wondershare Filmora Video Editor is a perfect video editing software with tons of new features, like keyframing, split video, and adding animations and effects to help you carry out your video editing seamlessly.
For Win 7 or later (64-bit)
For macOS 10.12 or later
01Sora
Sora is an artificial intelligence model that generates videos with textual descriptions, developed by OpenAI. It is a US-based artificial intelligence research organization. Sora stands out as a game-changing platform. It can seamlessly convert text into captivating videos, blending convenience with creativity.
Features
● With Sora, transforming written content into engaging videos is swift and efficient.
● Unlike traditional video editing tools, Sora is designed for users of all levels, eliminating the need for prior video production experience.
● Sora offers a plethora of customization options.
● Generates videos up to 60 seconds long
● Generates complex scenes with multiple characters, motions, and accurate details of the subject
● Creates multiple shots within a single generated video
● Generating videos from text instructions by utilizing the recaptioning technique from DALL·E 3
Pros
● Highly realistic video generation with impressive visual quality
● Text-based control over the content of the video, allowing for precise video generation
● A highly versatile tool that handles a wide range of prompts and styles
Cons
● Lacks implicit understanding of the rules of physics
This software is best realistic and imaginative scenes.
02Wondershare Filmora
Wondershare Filmora is a highly efficient video editing software that comes with AI text to video generation. The software is friendly to both beginner and intermediate creations, offering you a wide range of intuitive features.
Pricing
● Subscription Plan: US$19.99 per month
● Cross-Platform Plan: US$69.99 per year
● Perpetual Plan: US$19.99 Onetime Payment
Features
● User-friendly interface that is easy to learn and use
● Wide range of features for creating and editing videos, including transitions, effects, and text overlays.
● Large stock library of royalty-free music and stock footage
● Readily available templates and presets to quickly generate videos
● Easily export videos directly to popular platforms like YouTube and TikTok
Pros
● User-friendly interface with a learning curve suitable for all kinds of creators
● Extensive library of free and paid assets to enhance your videos
● Wide range of features for video editing
Cons
● Lacks advanced features for AI video prompt generation
This software is best for video creation and editing for freelancers, SMBs, markters.
For Win 7 or later (64-bit)
For macOS 10.12 or later
How to Use Filmora’s AI to Video Feature : AI Video Prompt Sample
Here is a brief step-by-step guide on how to use Filmora to generate AI videos. The process is as simple as writing a text prompt and getting the video ready:
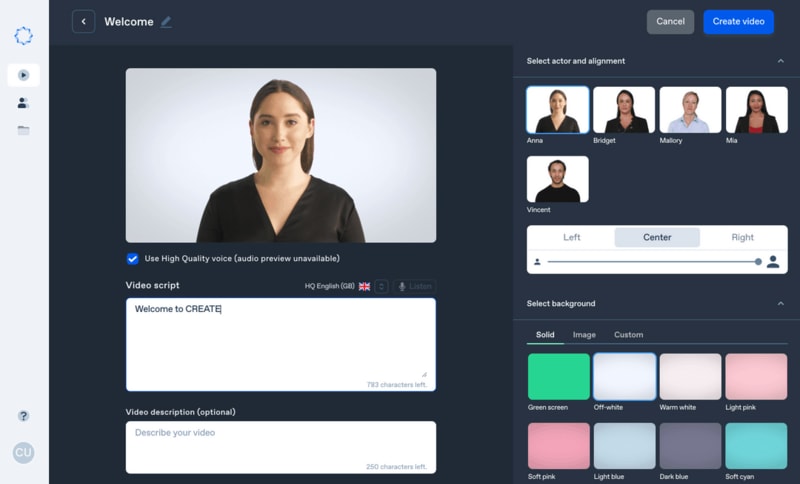
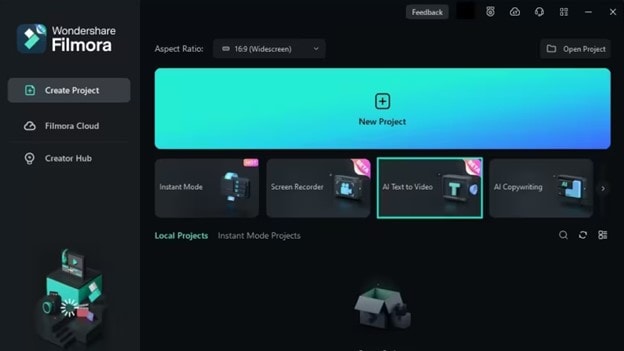
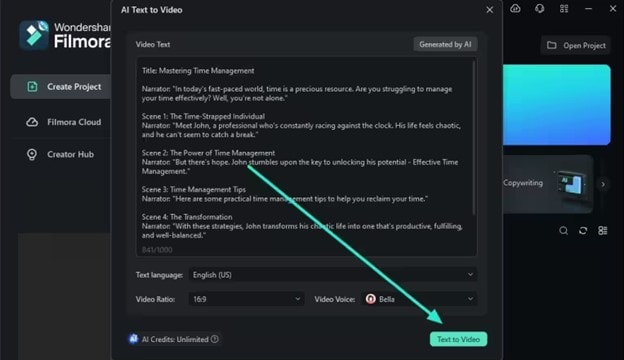
Step 1: Lauch Filmora AI Text-to-Video Features
Once you launch on your PC Filmora, click the AI Text-to-Video option to start the video generation process.
Step 2: Add a Text Prompt or Video Script
On the AI Text-to-Video video, add your text prompt. You can also modify other settings such as text language and video voice. Then click the Text to Video button at the bottom to prompt Filmora to generate the video.
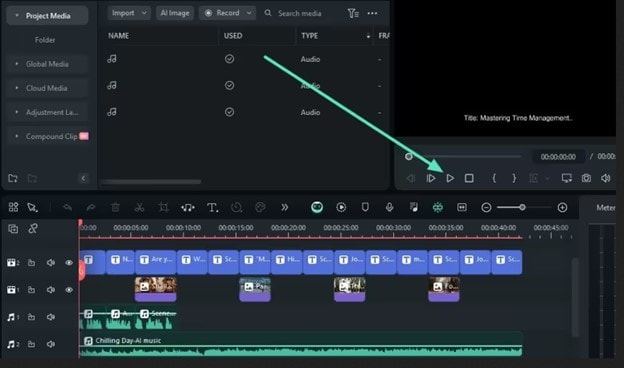
Step 3: Preview the Generated Video
Filmora generates the video based on your prompt and a new editing window. You can now a preview video and make any further editing needed.
AI Video Prompt Sample Using Filmora
Prompt: A young man at his 20s is sitting on a piece of cloud in the sky, reading a book.
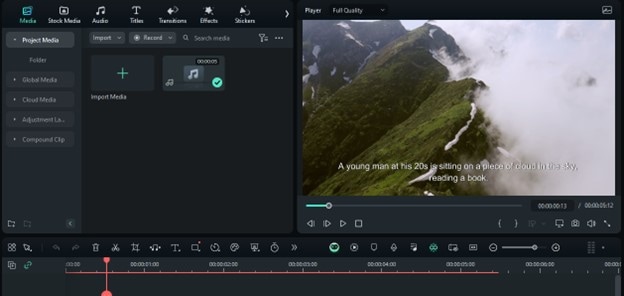
When prompted to generate a video of a young man in his 20s sitting on a piece of cloud in the sky, reading a book, Filmora generated a narration video from the point of view of the young man as shown above.
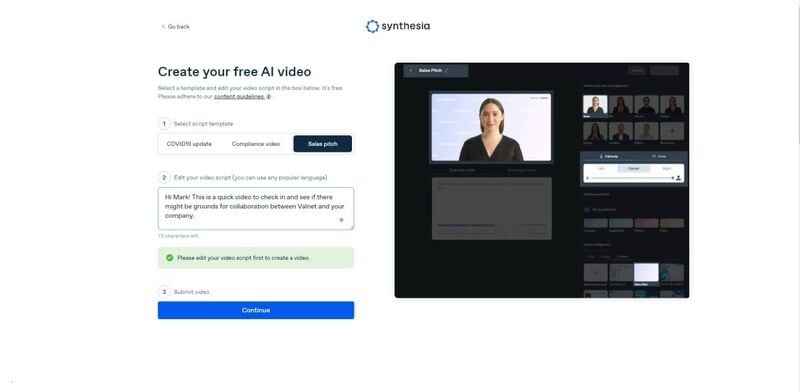
03Synthesia
This is a web-app video generator AI from a text supporting AI-driven video creation used by experts and beginners. Rather than filming content utilizing a microphone and camera, this software AI technology helps to simulate human presenters and real-life videos. Thus, it saves video creators hours of work.
Pricing
● Personal Plan: $30 monthly
● Corporate Plan: custom pricing
Features
● Over 40 supported languages
● Allows template customizations
● Allows users to make their avatars
● It has 50 built-in presenters
● Allows you to create realistic AI videos
● Offers live chat support
● Allows download in Mp4
● Enables users to create videos automatically using integrations with APIs
● Allows the addition of backgrounds
● Users can share their videos on other social media platforms
● Allows the addition of images, shapes, and texts to videos
Pros
● Great for beginners are you do not need prior knowledge
Cons
● It supports only front-facing poses
This software is best for freelancers, agencies, marketers, and content creators looking to create high-quality video content.
04Synths Video
This is an AI video-generating tool primarily concerned with helping users drive leads and traffic from YouTube. It is an AI YouTube title generator that allows users to create professional-looking videos from blog posts on YouTube.
Pricing
● YouTube Start: $399 monthly.
● Premium Custom Package: Custom Pricing.
Features
● Video generation from URLs
● It has built-in integration with YouTube
● 20+ avatars are available
● Allows video upload in HD quality
● Over 40+ languages supported
Cons
● No free plan is available
Best for the owners of YouTube channels.
05Rephrase.ai
Rephrase.ai is a video editing software that uses a sophisticated deep learning engine to create professional videos.
Pricing
● Starter plan: $25 monthly
● Enterprise plan: Custom Pricing
Features
● Produces high-resolution videos
● Supports functionality for presenter customization
● Multiple-use cases supported
● Allows users to select their preferred AI voice
● Support varieties of video editing tools
Cons
● It has a complex pricing plan
It is best for agencies seeking to create customizable and personalized professional videos for marketing and advertising.
06Lumen5
Lumen5 is one of the top AI video-creating tools available for beginners and uses Natural Language Processing algorithms to convert text into high-quality videos.
Pricing
● Free Plan
● Creator plan: $15 monthly.
● Premium plan: $79 monthly.
● Business plan: $199 monthly.
● Enterprise plan: Custom Pricing.
Features
● Transforms text to video within minutes
● Numerous templates are available
● Allows customization of videos resolution, color, and font
Cons
● Limited features in the free plan
Best for beginners who are looking to generate short-duration of videos for social media platforms.
07Designs.ai
This is an AI-powered video maker that is useful for users that do not have any experience in design.
Pricing
● Basic plan: $29 monthly
● Pro plan: $69 monthly
● Enterprise plan: Custom Pricing
Features
● It has an attractive and modern user interface
● Allows the creation of videos from pre-designed templates
● Helps video creation from your custom video files
● Over 20 languages supported
● Coverts texts to video
Cons
● Only allows video download in a paid plan.
This tool is best for creators and designers who are willing to create quick AI videos.
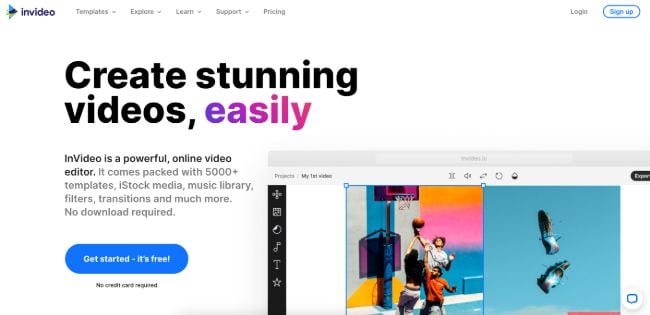
08InVideo
This is a perfect AI generator used for creating explainers or marketing videos easily and quickly. The platform helps produce high-quality videos with varieties of style options to make the ideal video according to your requirements.
Pricing
● Free: Free with watermarks on your videos.
● Business: $15 monthly with no watermarks.
● Unlimited: $30 monthly with unlimited video exports.
Features
● Very affordable
● Comprises an online drag-and-drop video editor
● Over 50 AI-powered themes that help to convert text to video in 3 minutes
● Full iStock media library available in all plans
Cons
● Requires internet connection to use
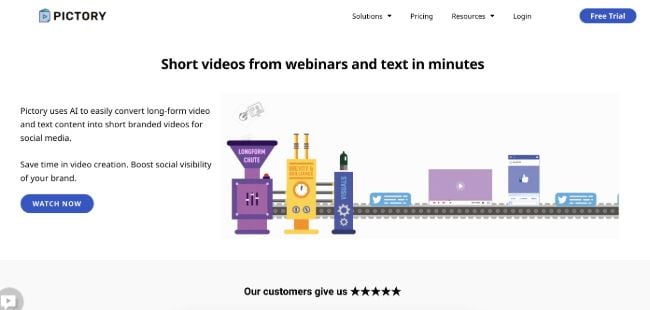
09Pictory.ai
This AI subtitle generator converts your text and turns it into an AI-generated video. This program is simple and easy to get started, requiring no software download. Paste your text into the editor and get started.
Pricing
● Free trial: Only use 3 videos.
● Standard Plan: $29 per month.
● Premium Plan: $59 per month.
Features
● It has a simple user interface.
● Over 6M licensed Shutterstock available
● Unlimited and affordable videos in the premium plan
Cons
● It is quite expensive compared to other tools
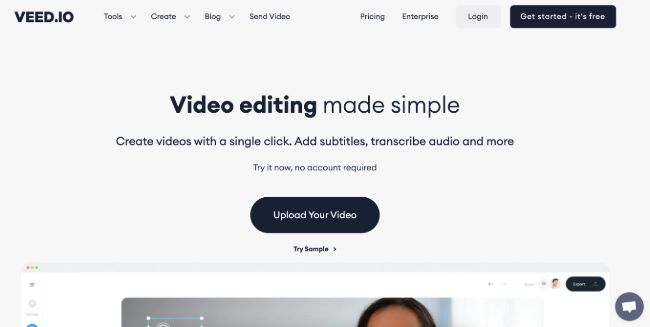
10Veed.io
Veed.io is not specifically an AI video generator but a video editing tool that utilizes AI to simplify the entire process and allows users to create high-quality videos within seconds.
Pricing
● Free: Free with watermarks!
● Basic: $18 monthly.
● Pro: $30 monthly
Features
● It has lots of video templates and a music library to choose
● Easy to learn, user-friendly interface
● Video rendering times are quite fast
● The basic plan has a high-quality resolution
Cons
● Not a typical AI video generator
● Not for beginners
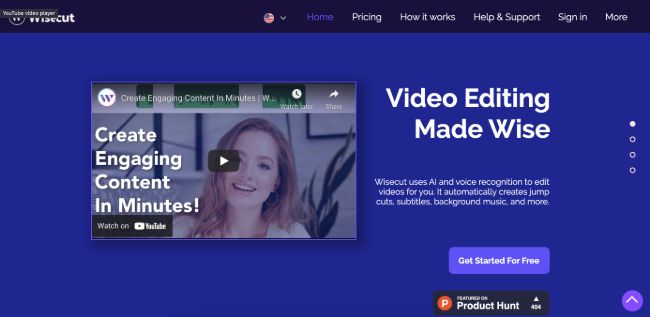
11Wisecut
This free AI video generator platform allows you to turn your text into video. Type in your text and choose a voice actor, and then Wisecut will take care of the rest. It offers excellent editing tools for users to tweak your video until it’s just right.
Pricing
● Basic: Free.
● Professional: $57 per month.
Features
● This platform is easy to use
● It has a simple drag and drops user-interface
● Allows auto subtitles and auto cut silences
● Allows integration with YouTube
● Subtitles auto-translation
● Excellent video quality
Cons
● Has limited effects
12Flexclip
FlexClip makes video creation and editing easy with-it millions of royalty-free stock media and thousands of templates for you to choose from.
Pricing
● Free
● Basic: $5.99 per month.
● Plus: $9.99 per month
● Business: $19.99 per month.
Features
● Thousands of available templates
● Simple tool for creating and editing videos
● Use for creating engaging videos
● Provides millions of royalty stock media
● Versatile and Flexible
Cons
● Not for beginners
● Ending Thoughts →
● In this post, we have listed the top text to video generators that you can choose from to help you perform tasks within minutes.
● The report also explains all you need to know about video AI generators and recommends Filmora as a perfect tool for editing your videos.
It is a fact that video editing can sometimes be laborious and time-consuming. Even when using the best video editing software, it still requires human effort to get an impressive result. But luckily for us, the invention of the AI video generator has now made a lot of things easier. The AI video generators are the next level as they allow users to automate video creation and editing without compromising quality.
This article will discuss the best AI text to video generators for free that will help make your life easier. Thus, this will soon help you create engaging videos for your personal or business use in just a few clicks.
In this article
01 [What Is an AI Video Generator](#Part 1)
02 [How Does the AI Video Maker Work](#Part 2)
03 [The 12 Best AI Video Generator](#Part 3)
Part 1 What Is an AI Video Generator
AI video generator is the process of using artificial intelligence (AI) to create professional videos. With an AI video generator for free, you do not need any equipment, an editing studio, or a premium video editing application to be able to create a video.
All that is required is that you feed input to the AI tool, and it will automatically help you generate a video. You can edit a blog post into a video within a few minutes with any of these tools listed. In addition, it won’t incur any high costs for video productions because the AI tool will help you carry out most of the tasks.
Part 2 How Does the AI Video Maker Work
Professional AI video editors, are trained by showing them various examples and then providing them feedback by telling them what is wrong and good. The machine then takes note of it and remembers it. However, as the machine continues to learn, it picks the results and then improves itself based on the feedback. Ultimately the device becomes very good or even better than the human that creates it. Here are some breakdowns of the ways video editors work:
● The AI video maker tool, can augment your videos with AR effects, including AR masks, face and color filters, face touch-ups, etc. The tool uses neural networks and computer vision to interrupt, extract, and understand the video content.
● This AI subtitle generator can allow interviews to be delivered and analyzed to the editor fully transcribed, searchable by word or even sentences. Video editors can use AI for keyword extraction, speech-to-text conversion, facial recognition, sentiment analysis, image recognition, and emotion detection.
● AI-video editors can pull sections of a video clip from any source automatically. These AI systems can also detect emotions that allow the creation of warm, appealing videos.
Part 3 The 12 Best AI Video Generator
There are top AI video generators for free that you can choose from for your video editing. These video editors complete work quickly and easily. In addition, if you need video editing software to help you edit your generated videos after generating them, we recommend that you try out Filmora from Wondershare. Wondershare Filmora Video Editor is a perfect video editing software with tons of new features, like keyframing, split video, and adding animations and effects to help you carry out your video editing seamlessly.
For Win 7 or later (64-bit)
For macOS 10.12 or later
01Sora
Sora is an artificial intelligence model that generates videos with textual descriptions, developed by OpenAI. It is a US-based artificial intelligence research organization. Sora stands out as a game-changing platform. It can seamlessly convert text into captivating videos, blending convenience with creativity.
Features
● With Sora, transforming written content into engaging videos is swift and efficient.
● Unlike traditional video editing tools, Sora is designed for users of all levels, eliminating the need for prior video production experience.
● Sora offers a plethora of customization options.
● Generates videos up to 60 seconds long
● Generates complex scenes with multiple characters, motions, and accurate details of the subject
● Creates multiple shots within a single generated video
● Generating videos from text instructions by utilizing the recaptioning technique from DALL·E 3
Pros
● Highly realistic video generation with impressive visual quality
● Text-based control over the content of the video, allowing for precise video generation
● A highly versatile tool that handles a wide range of prompts and styles
Cons
● Lacks implicit understanding of the rules of physics
This software is best realistic and imaginative scenes.
02Wondershare Filmora
Wondershare Filmora is a highly efficient video editing software that comes with AI text to video generation. The software is friendly to both beginner and intermediate creations, offering you a wide range of intuitive features.
Pricing
● Subscription Plan: US$19.99 per month
● Cross-Platform Plan: US$69.99 per year
● Perpetual Plan: US$19.99 Onetime Payment
Features
● User-friendly interface that is easy to learn and use
● Wide range of features for creating and editing videos, including transitions, effects, and text overlays.
● Large stock library of royalty-free music and stock footage
● Readily available templates and presets to quickly generate videos
● Easily export videos directly to popular platforms like YouTube and TikTok
Pros
● User-friendly interface with a learning curve suitable for all kinds of creators
● Extensive library of free and paid assets to enhance your videos
● Wide range of features for video editing
Cons
● Lacks advanced features for AI video prompt generation
This software is best for video creation and editing for freelancers, SMBs, markters.
For Win 7 or later (64-bit)
For macOS 10.12 or later
How to Use Filmora’s AI to Video Feature : AI Video Prompt Sample
Here is a brief step-by-step guide on how to use Filmora to generate AI videos. The process is as simple as writing a text prompt and getting the video ready:
Step 1: Lauch Filmora AI Text-to-Video Features
Once you launch on your PC Filmora, click the AI Text-to-Video option to start the video generation process.
Step 2: Add a Text Prompt or Video Script
On the AI Text-to-Video video, add your text prompt. You can also modify other settings such as text language and video voice. Then click the Text to Video button at the bottom to prompt Filmora to generate the video.
Step 3: Preview the Generated Video
Filmora generates the video based on your prompt and a new editing window. You can now a preview video and make any further editing needed.
AI Video Prompt Sample Using Filmora
Prompt: A young man at his 20s is sitting on a piece of cloud in the sky, reading a book.
When prompted to generate a video of a young man in his 20s sitting on a piece of cloud in the sky, reading a book, Filmora generated a narration video from the point of view of the young man as shown above.
03Synthesia
This is a web-app video generator AI from a text supporting AI-driven video creation used by experts and beginners. Rather than filming content utilizing a microphone and camera, this software AI technology helps to simulate human presenters and real-life videos. Thus, it saves video creators hours of work.
Pricing
● Personal Plan: $30 monthly
● Corporate Plan: custom pricing
Features
● Over 40 supported languages
● Allows template customizations
● Allows users to make their avatars
● It has 50 built-in presenters
● Allows you to create realistic AI videos
● Offers live chat support
● Allows download in Mp4
● Enables users to create videos automatically using integrations with APIs
● Allows the addition of backgrounds
● Users can share their videos on other social media platforms
● Allows the addition of images, shapes, and texts to videos
Pros
● Great for beginners are you do not need prior knowledge
Cons
● It supports only front-facing poses
This software is best for freelancers, agencies, marketers, and content creators looking to create high-quality video content.
04Synths Video
This is an AI video-generating tool primarily concerned with helping users drive leads and traffic from YouTube. It is an AI YouTube title generator that allows users to create professional-looking videos from blog posts on YouTube.
Pricing
● YouTube Start: $399 monthly.
● Premium Custom Package: Custom Pricing.
Features
● Video generation from URLs
● It has built-in integration with YouTube
● 20+ avatars are available
● Allows video upload in HD quality
● Over 40+ languages supported
Cons
● No free plan is available
Best for the owners of YouTube channels.
05Rephrase.ai
Rephrase.ai is a video editing software that uses a sophisticated deep learning engine to create professional videos.
Pricing
● Starter plan: $25 monthly
● Enterprise plan: Custom Pricing
Features
● Produces high-resolution videos
● Supports functionality for presenter customization
● Multiple-use cases supported
● Allows users to select their preferred AI voice
● Support varieties of video editing tools
Cons
● It has a complex pricing plan
It is best for agencies seeking to create customizable and personalized professional videos for marketing and advertising.
06Lumen5
Lumen5 is one of the top AI video-creating tools available for beginners and uses Natural Language Processing algorithms to convert text into high-quality videos.
Pricing
● Free Plan
● Creator plan: $15 monthly.
● Premium plan: $79 monthly.
● Business plan: $199 monthly.
● Enterprise plan: Custom Pricing.
Features
● Transforms text to video within minutes
● Numerous templates are available
● Allows customization of videos resolution, color, and font
Cons
● Limited features in the free plan
Best for beginners who are looking to generate short-duration of videos for social media platforms.
07Designs.ai
This is an AI-powered video maker that is useful for users that do not have any experience in design.
Pricing
● Basic plan: $29 monthly
● Pro plan: $69 monthly
● Enterprise plan: Custom Pricing
Features
● It has an attractive and modern user interface
● Allows the creation of videos from pre-designed templates
● Helps video creation from your custom video files
● Over 20 languages supported
● Coverts texts to video
Cons
● Only allows video download in a paid plan.
This tool is best for creators and designers who are willing to create quick AI videos.
08InVideo
This is a perfect AI generator used for creating explainers or marketing videos easily and quickly. The platform helps produce high-quality videos with varieties of style options to make the ideal video according to your requirements.
Pricing
● Free: Free with watermarks on your videos.
● Business: $15 monthly with no watermarks.
● Unlimited: $30 monthly with unlimited video exports.
Features
● Very affordable
● Comprises an online drag-and-drop video editor
● Over 50 AI-powered themes that help to convert text to video in 3 minutes
● Full iStock media library available in all plans
Cons
● Requires internet connection to use
09Pictory.ai
This AI subtitle generator converts your text and turns it into an AI-generated video. This program is simple and easy to get started, requiring no software download. Paste your text into the editor and get started.
Pricing
● Free trial: Only use 3 videos.
● Standard Plan: $29 per month.
● Premium Plan: $59 per month.
Features
● It has a simple user interface.
● Over 6M licensed Shutterstock available
● Unlimited and affordable videos in the premium plan
Cons
● It is quite expensive compared to other tools
10Veed.io
Veed.io is not specifically an AI video generator but a video editing tool that utilizes AI to simplify the entire process and allows users to create high-quality videos within seconds.
Pricing
● Free: Free with watermarks!
● Basic: $18 monthly.
● Pro: $30 monthly
Features
● It has lots of video templates and a music library to choose
● Easy to learn, user-friendly interface
● Video rendering times are quite fast
● The basic plan has a high-quality resolution
Cons
● Not a typical AI video generator
● Not for beginners
11Wisecut
This free AI video generator platform allows you to turn your text into video. Type in your text and choose a voice actor, and then Wisecut will take care of the rest. It offers excellent editing tools for users to tweak your video until it’s just right.
Pricing
● Basic: Free.
● Professional: $57 per month.
Features
● This platform is easy to use
● It has a simple drag and drops user-interface
● Allows auto subtitles and auto cut silences
● Allows integration with YouTube
● Subtitles auto-translation
● Excellent video quality
Cons
● Has limited effects
12Flexclip
FlexClip makes video creation and editing easy with-it millions of royalty-free stock media and thousands of templates for you to choose from.
Pricing
● Free
● Basic: $5.99 per month.
● Plus: $9.99 per month
● Business: $19.99 per month.
Features
● Thousands of available templates
● Simple tool for creating and editing videos
● Use for creating engaging videos
● Provides millions of royalty stock media
● Versatile and Flexible
Cons
● Not for beginners
● Ending Thoughts →
● In this post, we have listed the top text to video generators that you can choose from to help you perform tasks within minutes.
● The report also explains all you need to know about video AI generators and recommends Filmora as a perfect tool for editing your videos.
Are You Finding It Challenging to Convert GIFs Into JPG or PNG Images? Do Not Worry! The Best Free Online Tool and Software to Change Your GIF Into PNG or JPG Images Are Below
Great Video Converter - Wondershare Filmora
Provide abundant video effects - A creative video editor
Powerful color correction and grading
Detailed tutorials provided by the official channel
There are times you may need to convert GIFs into PNG or PNG and avoid losing image quality. Yet still, it can be tricky to carry this out without losing quality. This is the reason you need a powerful third-party image converter. So today, I will give you a list of the best GIF to image converters online. Let’s dive right in!
In addition, before jumping right into the conversion processes, it is paramount to know that many of these tools are free-to-all and offer exciting customization options. However, some might have specific requirements or conversion size limits. That aside, let’s now discuss how we can convert GIF into PNG online:
In this article
Part 1: Best Online GIF to PNG/JPG Converters
Part 2: How to Convert GIF to PNG?
Part 3: How to Convert GIF to JPG?
Part 1: Best Online GIF to PNG/JPG Converters
FileZigZag
This method can transfer GIF to JPG or PNG online, i.e., it does not require users to download any third-party software. In addition, it supports a wide range of formats, including PNG, WMA, SWF, image, documents, ZIP, MOV, etc.
This is a straightforward process: upload your image and choose the required format. Then input your email address, and the converter will send you a mail within minutes with the conversion.
Features
- Images, documents, audio and video files, ebooks, archival files, and webpages can all be converted with FileZigZag.
- Users will upload or drag a file to the platform.
- It supports a wide range of conversion formats.
- Convert files in minutes
Pros
It is convenient and free to use
The process is effortless, and the conversion speed is moderate
it provides users with sharing option
convert images in a real-time
Cons
You need to wait for a confirmation email, making it a little slow compared to other converters.
CoolUtils Online Image Converter
This is an online converter that gets rid of the need to download any software. In addition, you can get the conversion without wasting any time, and there is no need to wait for an email link.
Features
- To convert your files from GIF to JPG, PNG to JPG, and JPG to PNG, JPEG, or TIFF.
- Drag and drop your source file.
- Convert file online in a matter of seconds.
Pros
It allows users to rotate and resize the image before conversion.
It is compatible with nearly all operating system
It supports many file formats like JPEG, GIF, BMP, etc.
Cons
As of now, nothing in particular
ZAMZAR
This is a comprehensive GIF to PNG and JPG online converter that helps users convert GIF files to any photo format, including PNG and JPG format, for free.
Features
- Allows the addition of GIF files from your computer directly without downloading any programs to your PC.
- It requires only a few steps in converting GIF to JPG format
- It supports several video and photo formats in converting different formats easily
Pros
It is 100% simple to use
Support various input and output formats
No software installation is required
The software is free for conversions up to 100MB
Cons
Most users say the conversion process is a little too slow
The restriction of free conversion up to 100 MB makes it difficult in converting huge files
Ezgif
This is a free GIF to JPG converter that allows you to turn your GIF into an image with a single click leaving no watermark on the picture. In addition, the process is relatively easy to use as you need to upload a GIF file up to 35MB, then click the “Convert “ button, and your image will be ready.

Features:
- It performs most picture editing tasks, such as scaling, optimization, and cropping.
- Making, optimizing, trimming, and resizing animated GIFs with gifsicle and lossygif.
- For video conversions and editing, use FFmpeg.
Pros
Fast and free
No watermark
No Ads
No software downloads
Cons
It is sometimes slow
This online editing tool is a complete package that enables you to choose more than 80 different operations, which include the following:
Features:
- It allows Metadata Editing, i.e., editing the data before saving and converting it.
- Transform your pictures as well as resize, rotate, etc.
- Colors can adjust according to users’ preference
- Includes the addition of different filters, including emboss, sharpen, blur, etc.
- Users can do special effects like; vignetting, watermarking, etc.
Pros
Supports 500+ formats
Available on Mac, Windows, and Linux OS
Available in 20+ different languages
Advanced options available.
Cons
Some specific programs require constant updates.
Picresize
This is a free web-based GIF to JPG Converter that lets users add pictures for editing by uploading, linking, URL, etc. It is a customizable, lightweight tool for free editing images and photos online.
Features:
- Shrink and enlarge your photos
- It can crop your images for print or social media.
- Flip and rotate your pictures.
- Reduce the file size of your photos to the desired quality or disk size.
- Get web-ready image files by converting your photos or graphics into BMP, GIF. JPG or PNG format
Pros
It is an easy-to-use software
Support many formats
Compatible with a lot of Operating System
Allows changing the quality of the output file
Cons
There are limited settings compared to other editing software
This is a free Image Convert and Resize editor that is compact yet powerful for batch mode image processing. In addition, the program can easily convert separate images and file folders containing images into different renames, graphic formats, and reorders and changes their size following the set parameters. The supported image file formats for this software include; JPG, PNG, BMP, GIF, TGA, and PDF (export only).
Features:
- It is a compact program required for batch mode image processing.
- It allows the conversion of separate images and file folders to resize them accordingly
- The software is safe to run and use
- There is an option to install additional features according to your requirement
Pros
A secure option for beginners.
This small program is quite light on your system.
It is customizable.
Cons
Not all image format is supported compared to other converters
This software allows the conversion of all your digital pictures for sending email, on your website, posting on auction sites, etc. It provides a straight way to batch convert your digital images according to your need and add your watermark.
Features:
- Allows users to carry out batch conversion
- Enables users to import multiple photos from a folder
- Allows users to add their watermark
- Users can rotate, resize, and alter the images before and after conversion.
- Enables the creation of thumbnail pictures
- Users can upload their pictures to a dedicated server using the built-in FTP client.
Pros
The online help desk is highly responsive
Exceptional quality
Reasonable price
There are no prerequisites related to knowledge or experience.
Massive demands
Cons
Based on users’ preferences, nothing major.
Based on the above list, we have picked two excellent GIF to PNG and GIF to JPG converters that will serve you the best across the industry. Let us look at them one by one.
Part 2: How to Convert GIF to PNG?
Undeniably, Convertio is the clearest GIF to PNG online converter on this list. The numbered steps make it super-easy to use as users can convert GIF to PNG, TIFF, TGA, JPG, BMP, and many others.
Step 1: Access the Website and Add Files
Log in to Convertio and click the Add Files button to add your GIF file. You can besides directly drag and drop your GIF file to the timeline.

Step 2: Search and Choose the Format
Open the File drop-down list and select PNG open under the Image Formats.

Step 3: Convert and Download
Finally, click the Convert Now button to convert GIF to PNG.
Part 3: How to Convert GIF to JPG?
Ezgif is also a robust GIF converter that supports converting any image format to JPG without losing quality. It also supports the conversion of GIFs to other formats like PNG, WebP, or PDF formats.
Step 1: Import GIF
After logging in to the website and clicking the Choose file button to import your local GIF file, you can import multiple files having a total file size of less than 35MB.

Step 2: Start Editing GIF
Next is to click the Upload button to start editing your GIF file (cut, add text, resize, rotate) before converting it.

Step 3: Convert to APNG and Save
Finally, click the Convert to APNG! button to start converting, and your image is ready.
Conclusion
This article gave a detailed breakdown of GIF to PNG converter and explained how to convert GIF into JPG or PNG effectively.
Also, in the last two parts, you got details on how to use Convertio and Ezgif to convert GIF to PNG in a few simple steps.
There are times you may need to convert GIFs into PNG or PNG and avoid losing image quality. Yet still, it can be tricky to carry this out without losing quality. This is the reason you need a powerful third-party image converter. So today, I will give you a list of the best GIF to image converters online. Let’s dive right in!
In addition, before jumping right into the conversion processes, it is paramount to know that many of these tools are free-to-all and offer exciting customization options. However, some might have specific requirements or conversion size limits. That aside, let’s now discuss how we can convert GIF into PNG online:
In this article
Part 1: Best Online GIF to PNG/JPG Converters
Part 2: How to Convert GIF to PNG?
Part 3: How to Convert GIF to JPG?
Part 1: Best Online GIF to PNG/JPG Converters
FileZigZag
This method can transfer GIF to JPG or PNG online, i.e., it does not require users to download any third-party software. In addition, it supports a wide range of formats, including PNG, WMA, SWF, image, documents, ZIP, MOV, etc.
This is a straightforward process: upload your image and choose the required format. Then input your email address, and the converter will send you a mail within minutes with the conversion.
Features
- Images, documents, audio and video files, ebooks, archival files, and webpages can all be converted with FileZigZag.
- Users will upload or drag a file to the platform.
- It supports a wide range of conversion formats.
- Convert files in minutes
Pros
It is convenient and free to use
The process is effortless, and the conversion speed is moderate
it provides users with sharing option
convert images in a real-time
Cons
You need to wait for a confirmation email, making it a little slow compared to other converters.
CoolUtils Online Image Converter
This is an online converter that gets rid of the need to download any software. In addition, you can get the conversion without wasting any time, and there is no need to wait for an email link.
Features
- To convert your files from GIF to JPG, PNG to JPG, and JPG to PNG, JPEG, or TIFF.
- Drag and drop your source file.
- Convert file online in a matter of seconds.
Pros
It allows users to rotate and resize the image before conversion.
It is compatible with nearly all operating system
It supports many file formats like JPEG, GIF, BMP, etc.
Cons
As of now, nothing in particular
ZAMZAR
This is a comprehensive GIF to PNG and JPG online converter that helps users convert GIF files to any photo format, including PNG and JPG format, for free.
Features
- Allows the addition of GIF files from your computer directly without downloading any programs to your PC.
- It requires only a few steps in converting GIF to JPG format
- It supports several video and photo formats in converting different formats easily
Pros
It is 100% simple to use
Support various input and output formats
No software installation is required
The software is free for conversions up to 100MB
Cons
Most users say the conversion process is a little too slow
The restriction of free conversion up to 100 MB makes it difficult in converting huge files
Ezgif
This is a free GIF to JPG converter that allows you to turn your GIF into an image with a single click leaving no watermark on the picture. In addition, the process is relatively easy to use as you need to upload a GIF file up to 35MB, then click the “Convert “ button, and your image will be ready.
Features:
- It performs most picture editing tasks, such as scaling, optimization, and cropping.
- Making, optimizing, trimming, and resizing animated GIFs with gifsicle and lossygif.
- For video conversions and editing, use FFmpeg.
Pros
Fast and free
No watermark
No Ads
No software downloads
Cons
It is sometimes slow
This online editing tool is a complete package that enables you to choose more than 80 different operations, which include the following:
Features:
- It allows Metadata Editing, i.e., editing the data before saving and converting it.
- Transform your pictures as well as resize, rotate, etc.
- Colors can adjust according to users’ preference
- Includes the addition of different filters, including emboss, sharpen, blur, etc.
- Users can do special effects like; vignetting, watermarking, etc.
Pros
Supports 500+ formats
Available on Mac, Windows, and Linux OS
Available in 20+ different languages
Advanced options available.
Cons
Some specific programs require constant updates.
Picresize
This is a free web-based GIF to JPG Converter that lets users add pictures for editing by uploading, linking, URL, etc. It is a customizable, lightweight tool for free editing images and photos online.
Features:
- Shrink and enlarge your photos
- It can crop your images for print or social media.
- Flip and rotate your pictures.
- Reduce the file size of your photos to the desired quality or disk size.
- Get web-ready image files by converting your photos or graphics into BMP, GIF. JPG or PNG format
Pros
It is an easy-to-use software
Support many formats
Compatible with a lot of Operating System
Allows changing the quality of the output file
Cons
There are limited settings compared to other editing software
This is a free Image Convert and Resize editor that is compact yet powerful for batch mode image processing. In addition, the program can easily convert separate images and file folders containing images into different renames, graphic formats, and reorders and changes their size following the set parameters. The supported image file formats for this software include; JPG, PNG, BMP, GIF, TGA, and PDF (export only).
Features:
- It is a compact program required for batch mode image processing.
- It allows the conversion of separate images and file folders to resize them accordingly
- The software is safe to run and use
- There is an option to install additional features according to your requirement
Pros
A secure option for beginners.
This small program is quite light on your system.
It is customizable.
Cons
Not all image format is supported compared to other converters
This software allows the conversion of all your digital pictures for sending email, on your website, posting on auction sites, etc. It provides a straight way to batch convert your digital images according to your need and add your watermark.
Features:
- Allows users to carry out batch conversion
- Enables users to import multiple photos from a folder
- Allows users to add their watermark
- Users can rotate, resize, and alter the images before and after conversion.
- Enables the creation of thumbnail pictures
- Users can upload their pictures to a dedicated server using the built-in FTP client.
Pros
The online help desk is highly responsive
Exceptional quality
Reasonable price
There are no prerequisites related to knowledge or experience.
Massive demands
Cons
Based on users’ preferences, nothing major.
Based on the above list, we have picked two excellent GIF to PNG and GIF to JPG converters that will serve you the best across the industry. Let us look at them one by one.
Part 2: How to Convert GIF to PNG?
Undeniably, Convertio is the clearest GIF to PNG online converter on this list. The numbered steps make it super-easy to use as users can convert GIF to PNG, TIFF, TGA, JPG, BMP, and many others.
Step 1: Access the Website and Add Files
Log in to Convertio and click the Add Files button to add your GIF file. You can besides directly drag and drop your GIF file to the timeline.
Step 2: Search and Choose the Format
Open the File drop-down list and select PNG open under the Image Formats.
Step 3: Convert and Download
Finally, click the Convert Now button to convert GIF to PNG.
Part 3: How to Convert GIF to JPG?
Ezgif is also a robust GIF converter that supports converting any image format to JPG without losing quality. It also supports the conversion of GIFs to other formats like PNG, WebP, or PDF formats.
Step 1: Import GIF
After logging in to the website and clicking the Choose file button to import your local GIF file, you can import multiple files having a total file size of less than 35MB.
Step 2: Start Editing GIF
Next is to click the Upload button to start editing your GIF file (cut, add text, resize, rotate) before converting it.
Step 3: Convert to APNG and Save
Finally, click the Convert to APNG! button to start converting, and your image is ready.
Conclusion
This article gave a detailed breakdown of GIF to PNG converter and explained how to convert GIF into JPG or PNG effectively.
Also, in the last two parts, you got details on how to use Convertio and Ezgif to convert GIF to PNG in a few simple steps.
Also read:
- Updated 10 Creative AR Teaching Examples to Tell You What Is AR in Teaching for 2024
- In 2024, What Are The Stages Of Film Production
- Updated Create Kinetice Typography Text Effect in Filmora
- How to Create Intro with Legend Intro Maker for 2024
- 2024 Approved To Get Cinematographs of a Music Video, You Need to Understand the Basics of Camera Movement. As Well Framing and Lighting of the Setup Are Illustrated in This Article
- Want to Convert MP4 Video To 60 FPS GIF? Read This for 2024
- Updated Do You Find Choosing a Good LUT to Color-Correct Your Media Files Difficult? Discover some of the Best Professional LUTs From 3D LUT Creator to Download
- 2024 Approved How To Create Quiz Videos Detailed Guide
- What Is TS Format and How To Play TS Files?
- 2024 Approved Do You Want to Remove the Unnecessary Scene From Your TikTok Video? This Article Will Help You to Adjust the Length of TikTok Clip by Providing Easy Methods
- 2024 Approved Detailed Steps to Rotate Videos in Windows Media Player
- New 2024 Approved Best 10 Tools to Convert a GIF Into a PDF
- Updated Guide To Slowing Down Videos in Snapchat Discussing the Details
- Updated Using Slow Motion in Adobe After Effects A Step-by-Step Procession
- In 2024, In This Article We Will Be Covering the Most Important Topics You Have to Remember when Becoming a Successful YouTube-Star
- 2 Methods to Crop Video in VLC for 2024
- New Have You Ever Watched YouTube Live Streams? In Fact, You Can Also Start a Live Streaming on YouTube if You Want. Here Well Share some Tips to Live Stream on YouTube
- Detailed Tutorial to Crop a Video Using Openshot, In 2024
- Updated Top 8 Augmented Reality Video Games for 2024
- New 10 Best Video Editing Apps With Templates for 2024
- Motion Tracking Is the Process of Tracking the Movements of a Project in a Video. This Article Will Show You How to Apply Motion Tracking Effect Into Videos
- In 2024, The Ultimate Guide to Use LUTS to Color Grade on iPhone
- Updated Create an Awesome Logo Reveal with Logo Intro Templates for 2024
- Slow-Motion Innovation with Sony S&Q Feature for 2024
- 2024 Approved Are You Convincingly Fascinated by the Whole Idea of Augmented Reality and Want to Level up Your Marketing Skills with an AR Integration? Rest Assured, Youve Found the Right Place
- In 2024, A Comprehensive Guide on Converting Slo-Mo Videos to Normal Speed Videos On iPhone
- How to Create Chroma Key Written Text Effects in Filmora
- 2024 Approved 3 Ways to Create Motion Text Effects for Your Video
- Updated So, You Are a Gamer and Have Been on the Cool App Discord for a While, and You Keep Hearing People Talk About Game Bots in Discord, Like, Robot Gamers? This Article Will Discuss All Discord Game Bots and Much More
- New 2024 Approved Best Filmic Pro LUTs For Video Editing
- Updated This Article Discusses the Splitting of the Video Clips in DaVinci Resolve Explicitly. There Is Also a Brief Description of Its Best Alternative, Wondershare Filmora. This Is Also Practically Relevant and Reasonable as Well
- Updated How to Use GIMP GREEN SCREEN
- 2024 Approved How to Create a Dynamic Text Animation in Filmora — Step-By-Step
- In 2024, Easy Ways to Make Procreate GIFs
- This Article Talks in Detail About How to Edit Videos with Windows Movie Maker 10, How to Download or Install It, and so On. It Further Involves the Use of an Alternative to This Tool. Check Out Now
- Updated In 2024, How to Make an Aesthetic Slideshow
- In 2024, Add Stylish Text to Videos
- This Article Discusses What Is Adobe Premiere Pro, How to Download, Install and Use It, and Its Key Features. It Further Discusses Its Alternative for Editing Your Videos and More. Check Out Now for 2024
- Updated In 2024, A Roster of 8 Top Color Match Generators
- In 2024, Some Top Methods to Create AI Slow Motion Videos
- New In 2024, 8 Frame Rate Video Converters for a Professional Finish
- 2024 Approved Do You Know How You Can Trim or Merge Using Wondershare Filmora? Trimming and Merging Using This Tool Is an Easy Task; Learn How
- New 2024 Approved How to Create Loop Videos with Filmora
- 15 Best Strongest Pokémon To Use in Pokémon GO PvP Leagues For Nokia C110 | Dr.fone
- New Maximizing Yandex Translate in Video Translation and Beyond
- In 2024, Guide to Mirror Your Poco X6 to Other Android devices | Dr.fone
- Guide How To Unbrick a Bricked Vivo V29e Phone | Dr.fone
- Dose Life360 Notify Me When Someone Checks My Location On Meizu 21 Pro? | Dr.fone
- 4 Ways to Fix Android Blue Screen of Death On Samsung Galaxy F54 5G | Dr.fone
- Looking For A Location Changer On Vivo X100? Look No Further | Dr.fone
- Users Guide How To Create Photo Talking Videos With the Best Tools for 2024
- In 2024, 3 Effective Ways to Unlock iCloud Account Without Password From Apple iPhone 6s
- A How-To Guide on Bypassing the iPhone XS iCloud Lock
- In 2024, How to Spy on Text Messages from Computer & Samsung Galaxy A23 5G | Dr.fone
- Top IMEI Unlokers for iPhone 6 and Android Phones
- How To Transfer WhatsApp From iPhone 6s Plus to Android? | Dr.fone
- How to Successfully Bypass iCloud Activation Lock from iPhone 13 Pro Max
- Full Guide to Hard Reset Your Realme Narzo N55 | Dr.fone
- Trouble with iPhone 15 Pro Swipe-Up? Try These 11 Solutions
- How to Share/Fake Location on WhatsApp for Samsung Galaxy A34 5G | Dr.fone
- Want to Uninstall Google Play Service from Tecno Camon 20 Premier 5G? Here is How | Dr.fone
- How to Fix Error 495 While Download/Updating Android Apps On Honor X8b | Dr.fone
- In 2024, Network Locked SIM Card Inserted On Your Vivo S17e Phone? Unlock It Now
- In 2024, 5 Easy Ways to Copy Contacts from Huawei Nova Y91 to iPhone 14 and 15 | Dr.fone
- In 2024, Tips and Tricks for Apple ID Locked Issue From iPhone 6 Plus
- How To Bypass the Required Apple Store Verification For Apple iPhone X
- In 2024, How Do You Get Sun Stone Evolutions in Pokémon For Nokia 130 Music? | Dr.fone
- Google Play Services Wont Update? 12 Fixes are Here on Vivo Y55s 5G (2023) | Dr.fone
- Title: In 2024, Figuring Out Proper Ways to Play a Video in Slow Motion on iPhone
- Author: Chloe
- Created at : 2024-05-20 03:38:30
- Updated at : 2024-05-21 03:38:30
- Link: https://ai-editing-video.techidaily.com/in-2024-figuring-out-proper-ways-to-play-a-video-in-slow-motion-on-iphone/
- License: This work is licensed under CC BY-NC-SA 4.0.
