
:max_bytes(150000):strip_icc():format(webp)/Sonyplaystation5-dc53869451d7416cbb32881a35c3fc32.jpg)
In 2024, Find Out How to Create Your Own Custom Motion Graphics in Filmora. Add Unique Objects, Manipulate Text, and Animate Anything You Want
Find Out How to Create Your Own Custom Motion Graphics in Filmora. Add Unique Objects, Manipulate Text, and Animate Anything You Want
Preparation
What you need to prepare:
- A computer (Windows or macOS)
- Your video materials.
- Filmora video editor
Step 1
Visit the filmora.wondershare.com website and download Filmora . Install the program and wait for it to Run. Then, click on New Project.
Step 2
Go to File → Project Settings and set the FPS to 60. Also, ensure that the project is in Full Resolution (1920x1080). Click OK.

Step 3
Open the Titles tab and drag the Default Title to the Timeline. Then, double-click on the Default Title and click on ADVANCED.

Step 4
From the Advanced settings panel, delete the existing text and add a Rectangle shape.

Step 5
Disable the Text Fill and the Shape Border options from the panel on the left side.

Step 6
Click the drop-down arrow on the Shape Fill option and change the Type to Gradient Fill. Then, adjust the two color pallets from lighter to darker to create a gradient effect. Finally, adjust the rectangle to fit the entire screen. Click OK.

Step 7
Go to the Transitions tab → search for “Push” → drag the Push transition to the Default Title in the Timeline. Then, move the Playhead to the 1-second marker and drag another Default Title to that point from the Titles tab.

Step 8
Double-click on the new Default Title → go to Advanced. Delete the default text and add a Circle shape this time instead of a Rectangle. Disable the Text Fill and Shape Fill options this time.
Step 9
Scroll down to Shape Border and increase the Thickness bar all the way up. Then, change the circle’s color to match your background as closely as possible. Click OK.

Step 10
Copy the Title you just edited and paste it into the above layer. Then, double-click on the copied Title and go to its Advanced settings panel.

Step 11
In the Advanced panel, copy the circle and paste it somewhere else on the screen. Change its size if you want, and change the shade of its color to match the background once more. You can add as many new copies of the Default Titles and copy as many circles as you want. Click OK.

Step 12
After you’re done copying and pasting more Default Titles with more Circles inside, you can start animating them. Start with the first one. Double-click on the first Default Title with the Circle inside. Make sure you place the Playhead at the beginning of that clip. Then, go to the Animation tab.

Step 13
You need to add 3 keyframes. Add the first one right now. Just click on the “**+Add” button. Then, move the Playhead somewhere in the middle and click “+Add” again. Last, move the Playhead at the end of the clip, and click “+Add**” again to add the third keyframe.

Step 14
Now, go back to the first keyframe to edit its settings. Click the arrows to move between keyframes. Once you’re at the first one, start decreasing the Scale and the Position values as you move the Playhead toward the second keyframe. There are no rules here. Move each value based on how it looks best to you.
For the second keyframe, just increase the Scale and adjust the Position value based on how it looks on the screen.

Step 15
Now, apply the same method as in Step 14 to all the other circles in your video. Then, adjust the keyframe positions for all layers to create more unique movement throughout the video.

Step 16
Move the Playhead to 1 second and 30 frames. Then, add a new Default Title in the Timeline and go to its Advanced settings panel. From there, Enable the Outline option and Disable the Fill option. In the Outline option, change the color to White, set Opacity to 50%, and decrease Thickness to 1.

Step 17
Next, choose your favorite font and type in your text inside the textbox. Then, change the value you see highlighted in this image to “-20”. Finally, increase the text size to almost fit the entire screen. Don’t worry about the fact that you can’t see all of it on the screen.

Step 18
Go to the Animation tab and apply the “Type Writer” animation. Then, drag the yellow lines below just like you see in the image here. The arrows show you the length to which you need to drag these lines. Click OK.

Step 19
Set the Playhead to 1 second and 40 frames. Now, double-click on the last Default Title we just created and go to its Animation settings. NOTE: Don’t open its Advanced settings this time. Next, add a keyframe. Then, move the Playhead near the end of this clip in the Timeline. Now, drag the X position to the left until you see the last letter of your text appear on the screen. Click OK.

Step 20
Now, add another Default Title to the Timeline. Open its Advanced settings and type in your main text. Then, go to its Animation tab and apply the “Random 2” animation. Change its starting and end times according to your preference. Click OK.

Step 21
That’s it. You’re done! Feel free to preview the video and Render it. Congratulations on creating unique motion graphics in Filmora.
Summary
What you’ve learned:
- How to create custom motion graphics in Filmora
- How to edit and add animations to titles in Filmora
- Customize text and shapes in Filmora
What you need to prepare:
- A computer (Windows or macOS)
- Your video materials.
- Filmora video editor
Step 1
Visit the filmora.wondershare.com website and download Filmora . Install the program and wait for it to Run. Then, click on New Project.
Step 2
Go to File → Project Settings and set the FPS to 60. Also, ensure that the project is in Full Resolution (1920x1080). Click OK.
Step 3
Open the Titles tab and drag the Default Title to the Timeline. Then, double-click on the Default Title and click on ADVANCED.
Step 4
From the Advanced settings panel, delete the existing text and add a Rectangle shape.
Step 5
Disable the Text Fill and the Shape Border options from the panel on the left side.
Step 6
Click the drop-down arrow on the Shape Fill option and change the Type to Gradient Fill. Then, adjust the two color pallets from lighter to darker to create a gradient effect. Finally, adjust the rectangle to fit the entire screen. Click OK.
Step 7
Go to the Transitions tab → search for “Push” → drag the Push transition to the Default Title in the Timeline. Then, move the Playhead to the 1-second marker and drag another Default Title to that point from the Titles tab.
Step 8
Double-click on the new Default Title → go to Advanced. Delete the default text and add a Circle shape this time instead of a Rectangle. Disable the Text Fill and Shape Fill options this time.
Step 9
Scroll down to Shape Border and increase the Thickness bar all the way up. Then, change the circle’s color to match your background as closely as possible. Click OK.
Step 10
Copy the Title you just edited and paste it into the above layer. Then, double-click on the copied Title and go to its Advanced settings panel.
Step 11
In the Advanced panel, copy the circle and paste it somewhere else on the screen. Change its size if you want, and change the shade of its color to match the background once more. You can add as many new copies of the Default Titles and copy as many circles as you want. Click OK.
Step 12
After you’re done copying and pasting more Default Titles with more Circles inside, you can start animating them. Start with the first one. Double-click on the first Default Title with the Circle inside. Make sure you place the Playhead at the beginning of that clip. Then, go to the Animation tab.
Step 13
You need to add 3 keyframes. Add the first one right now. Just click on the “**+Add” button. Then, move the Playhead somewhere in the middle and click “+Add” again. Last, move the Playhead at the end of the clip, and click “+Add**” again to add the third keyframe.
Step 14
Now, go back to the first keyframe to edit its settings. Click the arrows to move between keyframes. Once you’re at the first one, start decreasing the Scale and the Position values as you move the Playhead toward the second keyframe. There are no rules here. Move each value based on how it looks best to you.
For the second keyframe, just increase the Scale and adjust the Position value based on how it looks on the screen.
Step 15
Now, apply the same method as in Step 14 to all the other circles in your video. Then, adjust the keyframe positions for all layers to create more unique movement throughout the video.
Step 16
Move the Playhead to 1 second and 30 frames. Then, add a new Default Title in the Timeline and go to its Advanced settings panel. From there, Enable the Outline option and Disable the Fill option. In the Outline option, change the color to White, set Opacity to 50%, and decrease Thickness to 1.
Step 17
Next, choose your favorite font and type in your text inside the textbox. Then, change the value you see highlighted in this image to “-20”. Finally, increase the text size to almost fit the entire screen. Don’t worry about the fact that you can’t see all of it on the screen.
Step 18
Go to the Animation tab and apply the “Type Writer” animation. Then, drag the yellow lines below just like you see in the image here. The arrows show you the length to which you need to drag these lines. Click OK.
Step 19
Set the Playhead to 1 second and 40 frames. Now, double-click on the last Default Title we just created and go to its Animation settings. NOTE: Don’t open its Advanced settings this time. Next, add a keyframe. Then, move the Playhead near the end of this clip in the Timeline. Now, drag the X position to the left until you see the last letter of your text appear on the screen. Click OK.
Step 20
Now, add another Default Title to the Timeline. Open its Advanced settings and type in your main text. Then, go to its Animation tab and apply the “Random 2” animation. Change its starting and end times according to your preference. Click OK.
Step 21
That’s it. You’re done! Feel free to preview the video and Render it. Congratulations on creating unique motion graphics in Filmora.
Summary
What you’ve learned:
- How to create custom motion graphics in Filmora
- How to edit and add animations to titles in Filmora
- Customize text and shapes in Filmora
Top 12 AI Video Generators to Pick
Top 12 AI Video Generators to Pick
An easy yet powerful editor
Numerous effects to choose from
Detailed tutorials provided by the official channel
It is a fact that video editing can sometimes be laborious and time-consuming. Even when using the best video editing software, it still requires human effort to get an impressive result. But luckily for us, the invention of the AI video generator has now made a lot of things easier. The AI video generators are the next level as they allow users to automate video creation and editing without compromising quality.
This article will discuss the best AI text to video generators for free that will help make your life easier. Thus, this will soon help you create engaging videos for your personal or business use in just a few clicks.
In this article
01 [What Is an AI Video Generator](#Part 1)
02 [How Does the AI Video Maker Work](#Part 2)
03 [The 12 Best AI Video Generator](#Part 3)
Part 1 What Is an AI Video Generator
AI video generator is the process of using artificial intelligence (AI) to create professional videos. With an AI video generator for free, you do not need any equipment, an editing studio, or a premium video editing application to be able to create a video.
All that is required is that you feed input to the AI tool, and it will automatically help you generate a video. You can edit a blog post into a video within a few minutes with any of these tools listed. In addition, it won’t incur any high costs for video productions because the AI tool will help you carry out most of the tasks.
Part 2 How Does the AI Video Maker Work
Professional AI video editors, are trained by showing them various examples and then providing them feedback by telling them what is wrong and good. The machine then takes note of it and remembers it. However, as the machine continues to learn, it picks the results and then improves itself based on the feedback. Ultimately the device becomes very good or even better than the human that creates it. Here are some breakdowns of the ways video editors work:
● The AI video maker tool, can augment your videos with AR effects, including AR masks, face and color filters, face touch-ups, etc. The tool uses neural networks and computer vision to interrupt, extract, and understand the video content.
● This AI subtitle generator can allow interviews to be delivered and analyzed to the editor fully transcribed, searchable by word or even sentences. Video editors can use AI for keyword extraction, speech-to-text conversion, facial recognition, sentiment analysis, image recognition, and emotion detection.
● AI-video editors can pull sections of a video clip from any source automatically. These AI systems can also detect emotions that allow the creation of warm, appealing videos.
Part 3 The 12 Best AI Video Generator
There are top AI video generators for free that you can choose from for your video editing. These video editors complete work quickly and easily. In addition, if you need video editing software to help you edit your generated videos after generating them, we recommend that you try out Filmora from Wondershare. Wondershare Filmora Video Editor is a perfect video editing software with tons of new features, like keyframing, split video, and adding animations and effects to help you carry out your video editing seamlessly.
For Win 7 or later (64-bit)
For macOS 10.12 or later
01Sora
Sora is an artificial intelligence model that generates videos with textual descriptions, developed by OpenAI. It is a US-based artificial intelligence research organization. Sora stands out as a game-changing platform. It can seamlessly convert text into captivating videos, blending convenience with creativity.
Features
● With Sora, transforming written content into engaging videos is swift and efficient.
● Unlike traditional video editing tools, Sora is designed for users of all levels, eliminating the need for prior video production experience.
● Sora offers a plethora of customization options.
● Generates videos up to 60 seconds long
● Generates complex scenes with multiple characters, motions, and accurate details of the subject
● Creates multiple shots within a single generated video
● Generating videos from text instructions by utilizing the recaptioning technique from DALL·E 3
Pros
● Highly realistic video generation with impressive visual quality
● Text-based control over the content of the video, allowing for precise video generation
● A highly versatile tool that handles a wide range of prompts and styles
Cons
● Lacks implicit understanding of the rules of physics
This software is best realistic and imaginative scenes.
02Wondershare Filmora
Wondershare Filmora is a highly efficient video editing software that comes with AI text to video generation. The software is friendly to both beginner and intermediate creations, offering you a wide range of intuitive features.
Pricing
● Subscription Plan: US$19.99 per month
● Cross-Platform Plan: US$69.99 per year
● Perpetual Plan: US$19.99 Onetime Payment
Features
● User-friendly interface that is easy to learn and use
● Wide range of features for creating and editing videos, including transitions, effects, and text overlays.
● Large stock library of royalty-free music and stock footage
● Readily available templates and presets to quickly generate videos
● Easily export videos directly to popular platforms like YouTube and TikTok
Pros
● User-friendly interface with a learning curve suitable for all kinds of creators
● Extensive library of free and paid assets to enhance your videos
● Wide range of features for video editing
Cons
● Lacks advanced features for AI video prompt generation
This software is best for video creation and editing for freelancers, SMBs, markters.
For Win 7 or later (64-bit)
For macOS 10.12 or later
How to Use Filmora’s AI to Video Feature : AI Video Prompt Sample
Here is a brief step-by-step guide on how to use Filmora to generate AI videos. The process is as simple as writing a text prompt and getting the video ready:
Step 1: Lauch Filmora AI Text-to-Video Features
Once you launch on your PC Filmora, click the AI Text-to-Video option to start the video generation process.
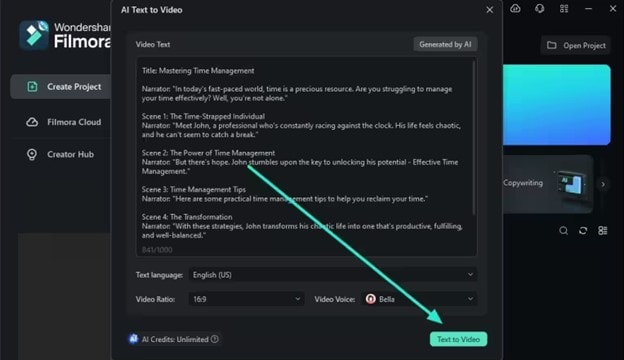
Step 2: Add a Text Prompt or Video Script
On the AI Text-to-Video video, add your text prompt. You can also modify other settings such as text language and video voice. Then click the Text to Video button at the bottom to prompt Filmora to generate the video.
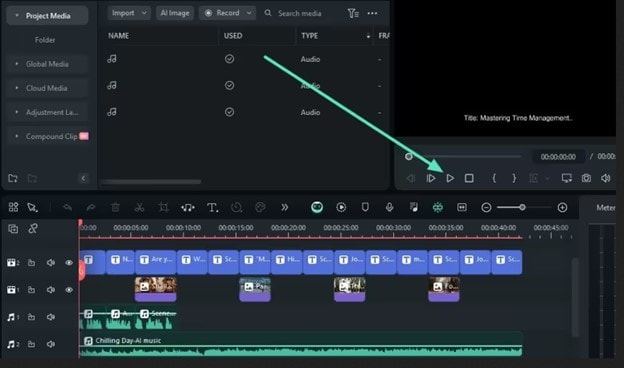
Step 3: Preview the Generated Video
Filmora generates the video based on your prompt and a new editing window. You can now a preview video and make any further editing needed.
AI Video Prompt Sample Using Filmora
Prompt: A young man at his 20s is sitting on a piece of cloud in the sky, reading a book.
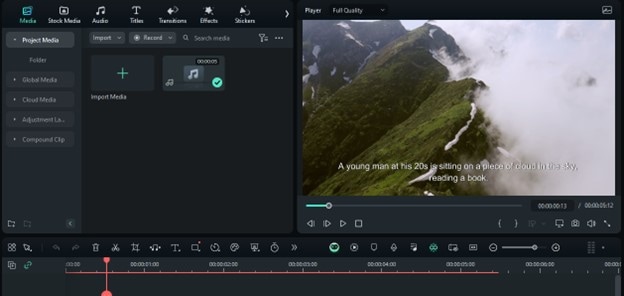
When prompted to generate a video of a young man in his 20s sitting on a piece of cloud in the sky, reading a book, Filmora generated a narration video from the point of view of the young man as shown above.
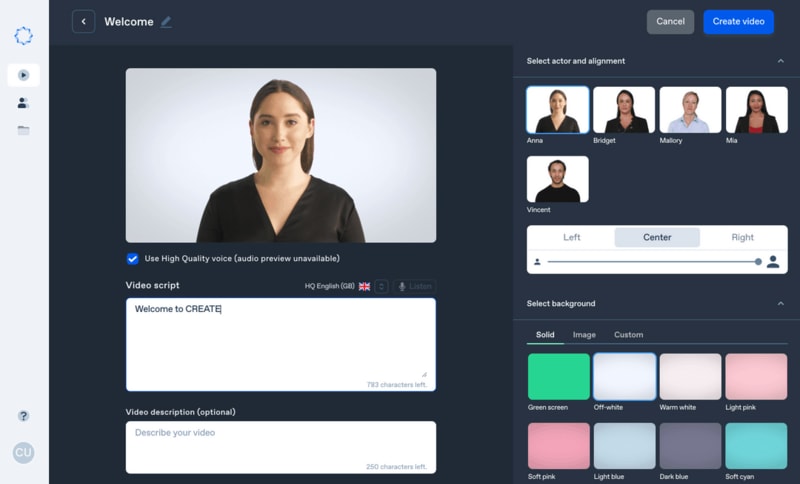
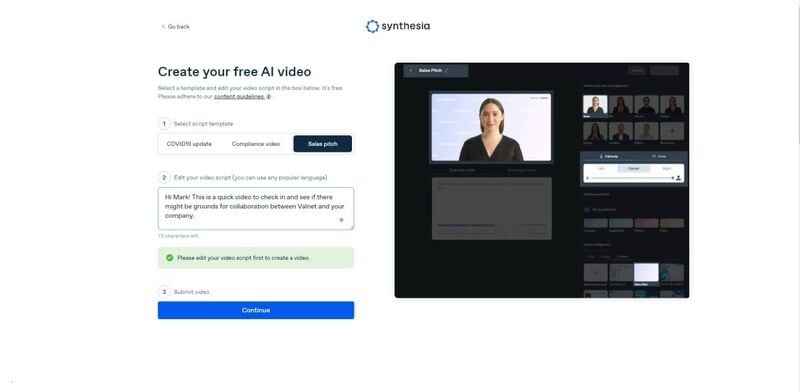
03Synthesia
This is a web-app video generator AI from a text supporting AI-driven video creation used by experts and beginners. Rather than filming content utilizing a microphone and camera, this software AI technology helps to simulate human presenters and real-life videos. Thus, it saves video creators hours of work.
Pricing
● Personal Plan: $30 monthly
● Corporate Plan: custom pricing
Features
● Over 40 supported languages
● Allows template customizations
● Allows users to make their avatars
● It has 50 built-in presenters
● Allows you to create realistic AI videos
● Offers live chat support
● Allows download in Mp4
● Enables users to create videos automatically using integrations with APIs
● Allows the addition of backgrounds
● Users can share their videos on other social media platforms
● Allows the addition of images, shapes, and texts to videos
Pros
● Great for beginners are you do not need prior knowledge
Cons
● It supports only front-facing poses
This software is best for freelancers, agencies, marketers, and content creators looking to create high-quality video content.
04Synths Video
This is an AI video-generating tool primarily concerned with helping users drive leads and traffic from YouTube. It is an AI YouTube title generator that allows users to create professional-looking videos from blog posts on YouTube.
Pricing
● YouTube Start: $399 monthly.
● Premium Custom Package: Custom Pricing.
Features
● Video generation from URLs
● It has built-in integration with YouTube
● 20+ avatars are available
● Allows video upload in HD quality
● Over 40+ languages supported
Cons
● No free plan is available
Best for the owners of YouTube channels.
05Rephrase.ai
Rephrase.ai is a video editing software that uses a sophisticated deep learning engine to create professional videos.
Pricing
● Starter plan: $25 monthly
● Enterprise plan: Custom Pricing
Features
● Produces high-resolution videos
● Supports functionality for presenter customization
● Multiple-use cases supported
● Allows users to select their preferred AI voice
● Support varieties of video editing tools
Cons
● It has a complex pricing plan
It is best for agencies seeking to create customizable and personalized professional videos for marketing and advertising.
06Lumen5
Lumen5 is one of the top AI video-creating tools available for beginners and uses Natural Language Processing algorithms to convert text into high-quality videos.
Pricing
● Free Plan
● Creator plan: $15 monthly.
● Premium plan: $79 monthly.
● Business plan: $199 monthly.
● Enterprise plan: Custom Pricing.
Features
● Transforms text to video within minutes
● Numerous templates are available
● Allows customization of videos resolution, color, and font
Cons
● Limited features in the free plan
Best for beginners who are looking to generate short-duration of videos for social media platforms.
07Designs.ai
This is an AI-powered video maker that is useful for users that do not have any experience in design.
Pricing
● Basic plan: $29 monthly
● Pro plan: $69 monthly
● Enterprise plan: Custom Pricing
Features
● It has an attractive and modern user interface
● Allows the creation of videos from pre-designed templates
● Helps video creation from your custom video files
● Over 20 languages supported
● Coverts texts to video
Cons
● Only allows video download in a paid plan.
This tool is best for creators and designers who are willing to create quick AI videos.
08InVideo
This is a perfect AI generator used for creating explainers or marketing videos easily and quickly. The platform helps produce high-quality videos with varieties of style options to make the ideal video according to your requirements.
Pricing
● Free: Free with watermarks on your videos.
● Business: $15 monthly with no watermarks.
● Unlimited: $30 monthly with unlimited video exports.
Features
● Very affordable
● Comprises an online drag-and-drop video editor
● Over 50 AI-powered themes that help to convert text to video in 3 minutes
● Full iStock media library available in all plans
Cons
● Requires internet connection to use
09Pictory.ai
This AI subtitle generator converts your text and turns it into an AI-generated video. This program is simple and easy to get started, requiring no software download. Paste your text into the editor and get started.
Pricing
● Free trial: Only use 3 videos.
● Standard Plan: $29 per month.
● Premium Plan: $59 per month.
Features
● It has a simple user interface.
● Over 6M licensed Shutterstock available
● Unlimited and affordable videos in the premium plan
Cons
● It is quite expensive compared to other tools
10Veed.io
Veed.io is not specifically an AI video generator but a video editing tool that utilizes AI to simplify the entire process and allows users to create high-quality videos within seconds.
Pricing
● Free: Free with watermarks!
● Basic: $18 monthly.
● Pro: $30 monthly
Features
● It has lots of video templates and a music library to choose
● Easy to learn, user-friendly interface
● Video rendering times are quite fast
● The basic plan has a high-quality resolution
Cons
● Not a typical AI video generator
● Not for beginners
11Wisecut
This free AI video generator platform allows you to turn your text into video. Type in your text and choose a voice actor, and then Wisecut will take care of the rest. It offers excellent editing tools for users to tweak your video until it’s just right.
Pricing
● Basic: Free.
● Professional: $57 per month.
Features
● This platform is easy to use
● It has a simple drag and drops user-interface
● Allows auto subtitles and auto cut silences
● Allows integration with YouTube
● Subtitles auto-translation
● Excellent video quality
Cons
● Has limited effects
12Flexclip
FlexClip makes video creation and editing easy with-it millions of royalty-free stock media and thousands of templates for you to choose from.
Pricing
● Free
● Basic: $5.99 per month.
● Plus: $9.99 per month
● Business: $19.99 per month.
Features
● Thousands of available templates
● Simple tool for creating and editing videos
● Use for creating engaging videos
● Provides millions of royalty stock media
● Versatile and Flexible
Cons
● Not for beginners
● Ending Thoughts →
● In this post, we have listed the top text to video generators that you can choose from to help you perform tasks within minutes.
● The report also explains all you need to know about video AI generators and recommends Filmora as a perfect tool for editing your videos.
It is a fact that video editing can sometimes be laborious and time-consuming. Even when using the best video editing software, it still requires human effort to get an impressive result. But luckily for us, the invention of the AI video generator has now made a lot of things easier. The AI video generators are the next level as they allow users to automate video creation and editing without compromising quality.
This article will discuss the best AI text to video generators for free that will help make your life easier. Thus, this will soon help you create engaging videos for your personal or business use in just a few clicks.
In this article
01 [What Is an AI Video Generator](#Part 1)
02 [How Does the AI Video Maker Work](#Part 2)
03 [The 12 Best AI Video Generator](#Part 3)
Part 1 What Is an AI Video Generator
AI video generator is the process of using artificial intelligence (AI) to create professional videos. With an AI video generator for free, you do not need any equipment, an editing studio, or a premium video editing application to be able to create a video.
All that is required is that you feed input to the AI tool, and it will automatically help you generate a video. You can edit a blog post into a video within a few minutes with any of these tools listed. In addition, it won’t incur any high costs for video productions because the AI tool will help you carry out most of the tasks.
Part 2 How Does the AI Video Maker Work
Professional AI video editors, are trained by showing them various examples and then providing them feedback by telling them what is wrong and good. The machine then takes note of it and remembers it. However, as the machine continues to learn, it picks the results and then improves itself based on the feedback. Ultimately the device becomes very good or even better than the human that creates it. Here are some breakdowns of the ways video editors work:
● The AI video maker tool, can augment your videos with AR effects, including AR masks, face and color filters, face touch-ups, etc. The tool uses neural networks and computer vision to interrupt, extract, and understand the video content.
● This AI subtitle generator can allow interviews to be delivered and analyzed to the editor fully transcribed, searchable by word or even sentences. Video editors can use AI for keyword extraction, speech-to-text conversion, facial recognition, sentiment analysis, image recognition, and emotion detection.
● AI-video editors can pull sections of a video clip from any source automatically. These AI systems can also detect emotions that allow the creation of warm, appealing videos.
Part 3 The 12 Best AI Video Generator
There are top AI video generators for free that you can choose from for your video editing. These video editors complete work quickly and easily. In addition, if you need video editing software to help you edit your generated videos after generating them, we recommend that you try out Filmora from Wondershare. Wondershare Filmora Video Editor is a perfect video editing software with tons of new features, like keyframing, split video, and adding animations and effects to help you carry out your video editing seamlessly.
For Win 7 or later (64-bit)
For macOS 10.12 or later
01Sora
Sora is an artificial intelligence model that generates videos with textual descriptions, developed by OpenAI. It is a US-based artificial intelligence research organization. Sora stands out as a game-changing platform. It can seamlessly convert text into captivating videos, blending convenience with creativity.
Features
● With Sora, transforming written content into engaging videos is swift and efficient.
● Unlike traditional video editing tools, Sora is designed for users of all levels, eliminating the need for prior video production experience.
● Sora offers a plethora of customization options.
● Generates videos up to 60 seconds long
● Generates complex scenes with multiple characters, motions, and accurate details of the subject
● Creates multiple shots within a single generated video
● Generating videos from text instructions by utilizing the recaptioning technique from DALL·E 3
Pros
● Highly realistic video generation with impressive visual quality
● Text-based control over the content of the video, allowing for precise video generation
● A highly versatile tool that handles a wide range of prompts and styles
Cons
● Lacks implicit understanding of the rules of physics
This software is best realistic and imaginative scenes.
02Wondershare Filmora
Wondershare Filmora is a highly efficient video editing software that comes with AI text to video generation. The software is friendly to both beginner and intermediate creations, offering you a wide range of intuitive features.
Pricing
● Subscription Plan: US$19.99 per month
● Cross-Platform Plan: US$69.99 per year
● Perpetual Plan: US$19.99 Onetime Payment
Features
● User-friendly interface that is easy to learn and use
● Wide range of features for creating and editing videos, including transitions, effects, and text overlays.
● Large stock library of royalty-free music and stock footage
● Readily available templates and presets to quickly generate videos
● Easily export videos directly to popular platforms like YouTube and TikTok
Pros
● User-friendly interface with a learning curve suitable for all kinds of creators
● Extensive library of free and paid assets to enhance your videos
● Wide range of features for video editing
Cons
● Lacks advanced features for AI video prompt generation
This software is best for video creation and editing for freelancers, SMBs, markters.
For Win 7 or later (64-bit)
For macOS 10.12 or later
How to Use Filmora’s AI to Video Feature : AI Video Prompt Sample
Here is a brief step-by-step guide on how to use Filmora to generate AI videos. The process is as simple as writing a text prompt and getting the video ready:
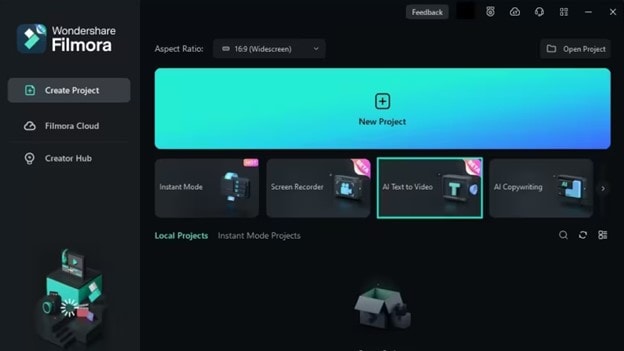
Step 1: Lauch Filmora AI Text-to-Video Features
Once you launch on your PC Filmora, click the AI Text-to-Video option to start the video generation process.
Step 2: Add a Text Prompt or Video Script
On the AI Text-to-Video video, add your text prompt. You can also modify other settings such as text language and video voice. Then click the Text to Video button at the bottom to prompt Filmora to generate the video.
Step 3: Preview the Generated Video
Filmora generates the video based on your prompt and a new editing window. You can now a preview video and make any further editing needed.
AI Video Prompt Sample Using Filmora
Prompt: A young man at his 20s is sitting on a piece of cloud in the sky, reading a book.
When prompted to generate a video of a young man in his 20s sitting on a piece of cloud in the sky, reading a book, Filmora generated a narration video from the point of view of the young man as shown above.
03Synthesia
This is a web-app video generator AI from a text supporting AI-driven video creation used by experts and beginners. Rather than filming content utilizing a microphone and camera, this software AI technology helps to simulate human presenters and real-life videos. Thus, it saves video creators hours of work.
Pricing
● Personal Plan: $30 monthly
● Corporate Plan: custom pricing
Features
● Over 40 supported languages
● Allows template customizations
● Allows users to make their avatars
● It has 50 built-in presenters
● Allows you to create realistic AI videos
● Offers live chat support
● Allows download in Mp4
● Enables users to create videos automatically using integrations with APIs
● Allows the addition of backgrounds
● Users can share their videos on other social media platforms
● Allows the addition of images, shapes, and texts to videos
Pros
● Great for beginners are you do not need prior knowledge
Cons
● It supports only front-facing poses
This software is best for freelancers, agencies, marketers, and content creators looking to create high-quality video content.
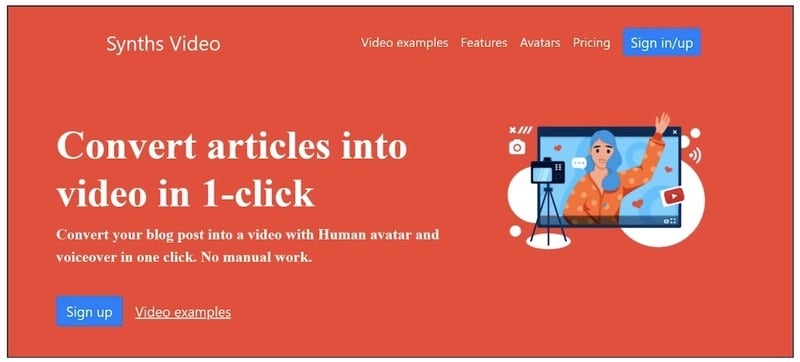
04Synths Video
This is an AI video-generating tool primarily concerned with helping users drive leads and traffic from YouTube. It is an AI YouTube title generator that allows users to create professional-looking videos from blog posts on YouTube.
Pricing
● YouTube Start: $399 monthly.
● Premium Custom Package: Custom Pricing.
Features
● Video generation from URLs
● It has built-in integration with YouTube
● 20+ avatars are available
● Allows video upload in HD quality
● Over 40+ languages supported
Cons
● No free plan is available
Best for the owners of YouTube channels.
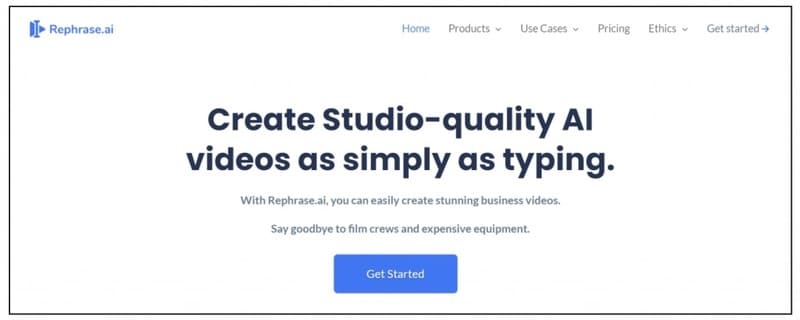
05Rephrase.ai
Rephrase.ai is a video editing software that uses a sophisticated deep learning engine to create professional videos.
Pricing
● Starter plan: $25 monthly
● Enterprise plan: Custom Pricing
Features
● Produces high-resolution videos
● Supports functionality for presenter customization
● Multiple-use cases supported
● Allows users to select their preferred AI voice
● Support varieties of video editing tools
Cons
● It has a complex pricing plan
It is best for agencies seeking to create customizable and personalized professional videos for marketing and advertising.
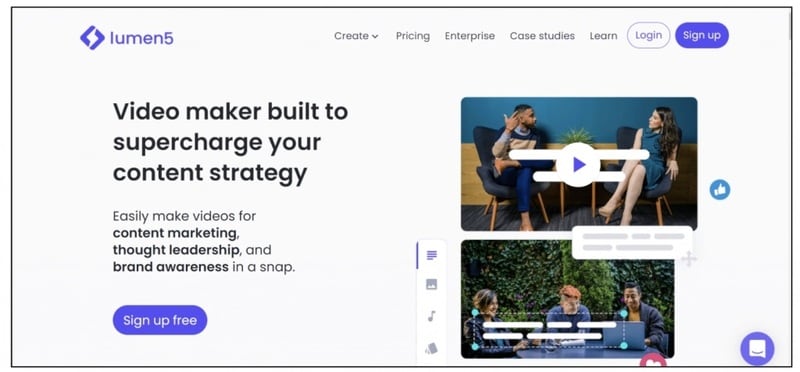
06Lumen5
Lumen5 is one of the top AI video-creating tools available for beginners and uses Natural Language Processing algorithms to convert text into high-quality videos.
Pricing
● Free Plan
● Creator plan: $15 monthly.
● Premium plan: $79 monthly.
● Business plan: $199 monthly.
● Enterprise plan: Custom Pricing.
Features
● Transforms text to video within minutes
● Numerous templates are available
● Allows customization of videos resolution, color, and font
Cons
● Limited features in the free plan
Best for beginners who are looking to generate short-duration of videos for social media platforms.
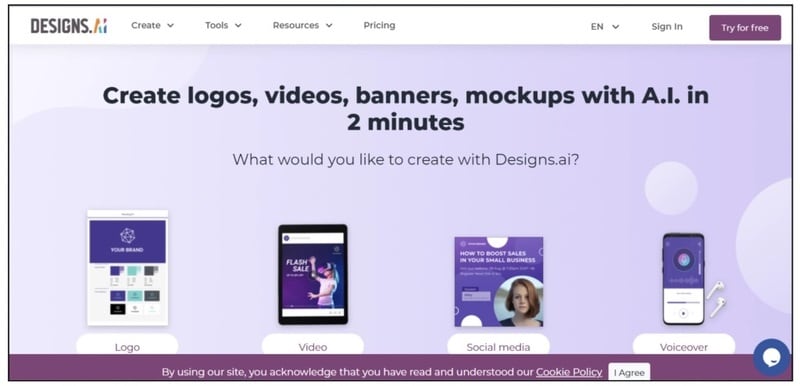
07Designs.ai
This is an AI-powered video maker that is useful for users that do not have any experience in design.
Pricing
● Basic plan: $29 monthly
● Pro plan: $69 monthly
● Enterprise plan: Custom Pricing
Features
● It has an attractive and modern user interface
● Allows the creation of videos from pre-designed templates
● Helps video creation from your custom video files
● Over 20 languages supported
● Coverts texts to video
Cons
● Only allows video download in a paid plan.
This tool is best for creators and designers who are willing to create quick AI videos.
08InVideo
This is a perfect AI generator used for creating explainers or marketing videos easily and quickly. The platform helps produce high-quality videos with varieties of style options to make the ideal video according to your requirements.
Pricing
● Free: Free with watermarks on your videos.
● Business: $15 monthly with no watermarks.
● Unlimited: $30 monthly with unlimited video exports.
Features
● Very affordable
● Comprises an online drag-and-drop video editor
● Over 50 AI-powered themes that help to convert text to video in 3 minutes
● Full iStock media library available in all plans
Cons
● Requires internet connection to use
09Pictory.ai
This AI subtitle generator converts your text and turns it into an AI-generated video. This program is simple and easy to get started, requiring no software download. Paste your text into the editor and get started.
Pricing
● Free trial: Only use 3 videos.
● Standard Plan: $29 per month.
● Premium Plan: $59 per month.
Features
● It has a simple user interface.
● Over 6M licensed Shutterstock available
● Unlimited and affordable videos in the premium plan
Cons
● It is quite expensive compared to other tools
10Veed.io
Veed.io is not specifically an AI video generator but a video editing tool that utilizes AI to simplify the entire process and allows users to create high-quality videos within seconds.
Pricing
● Free: Free with watermarks!
● Basic: $18 monthly.
● Pro: $30 monthly
Features
● It has lots of video templates and a music library to choose
● Easy to learn, user-friendly interface
● Video rendering times are quite fast
● The basic plan has a high-quality resolution
Cons
● Not a typical AI video generator
● Not for beginners
11Wisecut
This free AI video generator platform allows you to turn your text into video. Type in your text and choose a voice actor, and then Wisecut will take care of the rest. It offers excellent editing tools for users to tweak your video until it’s just right.
Pricing
● Basic: Free.
● Professional: $57 per month.
Features
● This platform is easy to use
● It has a simple drag and drops user-interface
● Allows auto subtitles and auto cut silences
● Allows integration with YouTube
● Subtitles auto-translation
● Excellent video quality
Cons
● Has limited effects
12Flexclip
FlexClip makes video creation and editing easy with-it millions of royalty-free stock media and thousands of templates for you to choose from.
Pricing
● Free
● Basic: $5.99 per month.
● Plus: $9.99 per month
● Business: $19.99 per month.
Features
● Thousands of available templates
● Simple tool for creating and editing videos
● Use for creating engaging videos
● Provides millions of royalty stock media
● Versatile and Flexible
Cons
● Not for beginners
● Ending Thoughts →
● In this post, we have listed the top text to video generators that you can choose from to help you perform tasks within minutes.
● The report also explains all you need to know about video AI generators and recommends Filmora as a perfect tool for editing your videos.
It is a fact that video editing can sometimes be laborious and time-consuming. Even when using the best video editing software, it still requires human effort to get an impressive result. But luckily for us, the invention of the AI video generator has now made a lot of things easier. The AI video generators are the next level as they allow users to automate video creation and editing without compromising quality.
This article will discuss the best AI text to video generators for free that will help make your life easier. Thus, this will soon help you create engaging videos for your personal or business use in just a few clicks.
In this article
01 [What Is an AI Video Generator](#Part 1)
02 [How Does the AI Video Maker Work](#Part 2)
03 [The 12 Best AI Video Generator](#Part 3)
Part 1 What Is an AI Video Generator
AI video generator is the process of using artificial intelligence (AI) to create professional videos. With an AI video generator for free, you do not need any equipment, an editing studio, or a premium video editing application to be able to create a video.
All that is required is that you feed input to the AI tool, and it will automatically help you generate a video. You can edit a blog post into a video within a few minutes with any of these tools listed. In addition, it won’t incur any high costs for video productions because the AI tool will help you carry out most of the tasks.
Part 2 How Does the AI Video Maker Work
Professional AI video editors, are trained by showing them various examples and then providing them feedback by telling them what is wrong and good. The machine then takes note of it and remembers it. However, as the machine continues to learn, it picks the results and then improves itself based on the feedback. Ultimately the device becomes very good or even better than the human that creates it. Here are some breakdowns of the ways video editors work:
● The AI video maker tool, can augment your videos with AR effects, including AR masks, face and color filters, face touch-ups, etc. The tool uses neural networks and computer vision to interrupt, extract, and understand the video content.
● This AI subtitle generator can allow interviews to be delivered and analyzed to the editor fully transcribed, searchable by word or even sentences. Video editors can use AI for keyword extraction, speech-to-text conversion, facial recognition, sentiment analysis, image recognition, and emotion detection.
● AI-video editors can pull sections of a video clip from any source automatically. These AI systems can also detect emotions that allow the creation of warm, appealing videos.
Part 3 The 12 Best AI Video Generator
There are top AI video generators for free that you can choose from for your video editing. These video editors complete work quickly and easily. In addition, if you need video editing software to help you edit your generated videos after generating them, we recommend that you try out Filmora from Wondershare. Wondershare Filmora Video Editor is a perfect video editing software with tons of new features, like keyframing, split video, and adding animations and effects to help you carry out your video editing seamlessly.
For Win 7 or later (64-bit)
For macOS 10.12 or later
01Sora
Sora is an artificial intelligence model that generates videos with textual descriptions, developed by OpenAI. It is a US-based artificial intelligence research organization. Sora stands out as a game-changing platform. It can seamlessly convert text into captivating videos, blending convenience with creativity.
Features
● With Sora, transforming written content into engaging videos is swift and efficient.
● Unlike traditional video editing tools, Sora is designed for users of all levels, eliminating the need for prior video production experience.
● Sora offers a plethora of customization options.
● Generates videos up to 60 seconds long
● Generates complex scenes with multiple characters, motions, and accurate details of the subject
● Creates multiple shots within a single generated video
● Generating videos from text instructions by utilizing the recaptioning technique from DALL·E 3
Pros
● Highly realistic video generation with impressive visual quality
● Text-based control over the content of the video, allowing for precise video generation
● A highly versatile tool that handles a wide range of prompts and styles
Cons
● Lacks implicit understanding of the rules of physics
This software is best realistic and imaginative scenes.
02Wondershare Filmora
Wondershare Filmora is a highly efficient video editing software that comes with AI text to video generation. The software is friendly to both beginner and intermediate creations, offering you a wide range of intuitive features.
Pricing
● Subscription Plan: US$19.99 per month
● Cross-Platform Plan: US$69.99 per year
● Perpetual Plan: US$19.99 Onetime Payment
Features
● User-friendly interface that is easy to learn and use
● Wide range of features for creating and editing videos, including transitions, effects, and text overlays.
● Large stock library of royalty-free music and stock footage
● Readily available templates and presets to quickly generate videos
● Easily export videos directly to popular platforms like YouTube and TikTok
Pros
● User-friendly interface with a learning curve suitable for all kinds of creators
● Extensive library of free and paid assets to enhance your videos
● Wide range of features for video editing
Cons
● Lacks advanced features for AI video prompt generation
This software is best for video creation and editing for freelancers, SMBs, markters.
For Win 7 or later (64-bit)
For macOS 10.12 or later
How to Use Filmora’s AI to Video Feature : AI Video Prompt Sample
Here is a brief step-by-step guide on how to use Filmora to generate AI videos. The process is as simple as writing a text prompt and getting the video ready:
Step 1: Lauch Filmora AI Text-to-Video Features
Once you launch on your PC Filmora, click the AI Text-to-Video option to start the video generation process.
Step 2: Add a Text Prompt or Video Script
On the AI Text-to-Video video, add your text prompt. You can also modify other settings such as text language and video voice. Then click the Text to Video button at the bottom to prompt Filmora to generate the video.
Step 3: Preview the Generated Video
Filmora generates the video based on your prompt and a new editing window. You can now a preview video and make any further editing needed.
AI Video Prompt Sample Using Filmora
Prompt: A young man at his 20s is sitting on a piece of cloud in the sky, reading a book.
When prompted to generate a video of a young man in his 20s sitting on a piece of cloud in the sky, reading a book, Filmora generated a narration video from the point of view of the young man as shown above.
03Synthesia
This is a web-app video generator AI from a text supporting AI-driven video creation used by experts and beginners. Rather than filming content utilizing a microphone and camera, this software AI technology helps to simulate human presenters and real-life videos. Thus, it saves video creators hours of work.
Pricing
● Personal Plan: $30 monthly
● Corporate Plan: custom pricing
Features
● Over 40 supported languages
● Allows template customizations
● Allows users to make their avatars
● It has 50 built-in presenters
● Allows you to create realistic AI videos
● Offers live chat support
● Allows download in Mp4
● Enables users to create videos automatically using integrations with APIs
● Allows the addition of backgrounds
● Users can share their videos on other social media platforms
● Allows the addition of images, shapes, and texts to videos
Pros
● Great for beginners are you do not need prior knowledge
Cons
● It supports only front-facing poses
This software is best for freelancers, agencies, marketers, and content creators looking to create high-quality video content.
04Synths Video
This is an AI video-generating tool primarily concerned with helping users drive leads and traffic from YouTube. It is an AI YouTube title generator that allows users to create professional-looking videos from blog posts on YouTube.
Pricing
● YouTube Start: $399 monthly.
● Premium Custom Package: Custom Pricing.
Features
● Video generation from URLs
● It has built-in integration with YouTube
● 20+ avatars are available
● Allows video upload in HD quality
● Over 40+ languages supported
Cons
● No free plan is available
Best for the owners of YouTube channels.
05Rephrase.ai
Rephrase.ai is a video editing software that uses a sophisticated deep learning engine to create professional videos.
Pricing
● Starter plan: $25 monthly
● Enterprise plan: Custom Pricing
Features
● Produces high-resolution videos
● Supports functionality for presenter customization
● Multiple-use cases supported
● Allows users to select their preferred AI voice
● Support varieties of video editing tools
Cons
● It has a complex pricing plan
It is best for agencies seeking to create customizable and personalized professional videos for marketing and advertising.
06Lumen5
Lumen5 is one of the top AI video-creating tools available for beginners and uses Natural Language Processing algorithms to convert text into high-quality videos.
Pricing
● Free Plan
● Creator plan: $15 monthly.
● Premium plan: $79 monthly.
● Business plan: $199 monthly.
● Enterprise plan: Custom Pricing.
Features
● Transforms text to video within minutes
● Numerous templates are available
● Allows customization of videos resolution, color, and font
Cons
● Limited features in the free plan
Best for beginners who are looking to generate short-duration of videos for social media platforms.
07Designs.ai
This is an AI-powered video maker that is useful for users that do not have any experience in design.
Pricing
● Basic plan: $29 monthly
● Pro plan: $69 monthly
● Enterprise plan: Custom Pricing
Features
● It has an attractive and modern user interface
● Allows the creation of videos from pre-designed templates
● Helps video creation from your custom video files
● Over 20 languages supported
● Coverts texts to video
Cons
● Only allows video download in a paid plan.
This tool is best for creators and designers who are willing to create quick AI videos.
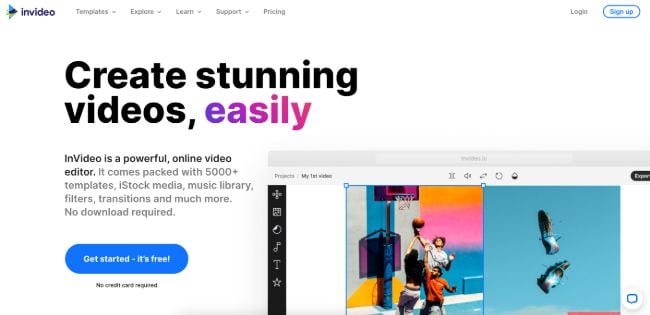
08InVideo
This is a perfect AI generator used for creating explainers or marketing videos easily and quickly. The platform helps produce high-quality videos with varieties of style options to make the ideal video according to your requirements.
Pricing
● Free: Free with watermarks on your videos.
● Business: $15 monthly with no watermarks.
● Unlimited: $30 monthly with unlimited video exports.
Features
● Very affordable
● Comprises an online drag-and-drop video editor
● Over 50 AI-powered themes that help to convert text to video in 3 minutes
● Full iStock media library available in all plans
Cons
● Requires internet connection to use
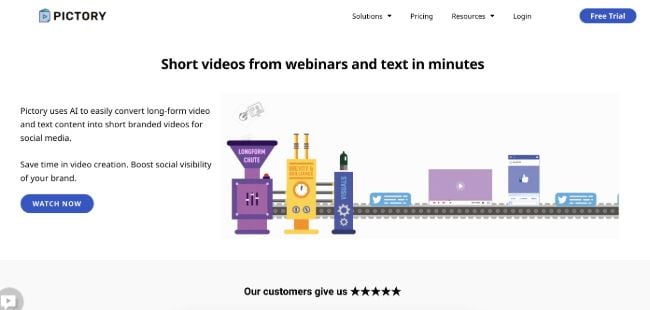
09Pictory.ai
This AI subtitle generator converts your text and turns it into an AI-generated video. This program is simple and easy to get started, requiring no software download. Paste your text into the editor and get started.
Pricing
● Free trial: Only use 3 videos.
● Standard Plan: $29 per month.
● Premium Plan: $59 per month.
Features
● It has a simple user interface.
● Over 6M licensed Shutterstock available
● Unlimited and affordable videos in the premium plan
Cons
● It is quite expensive compared to other tools
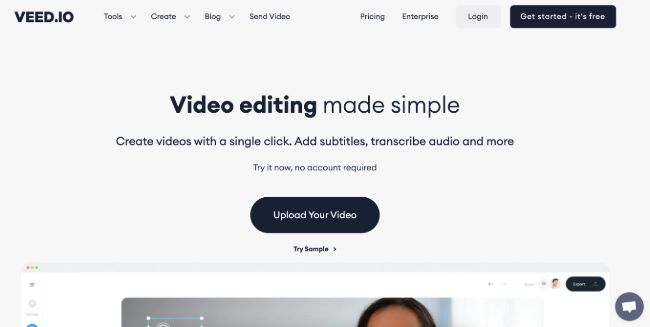
10Veed.io
Veed.io is not specifically an AI video generator but a video editing tool that utilizes AI to simplify the entire process and allows users to create high-quality videos within seconds.
Pricing
● Free: Free with watermarks!
● Basic: $18 monthly.
● Pro: $30 monthly
Features
● It has lots of video templates and a music library to choose
● Easy to learn, user-friendly interface
● Video rendering times are quite fast
● The basic plan has a high-quality resolution
Cons
● Not a typical AI video generator
● Not for beginners
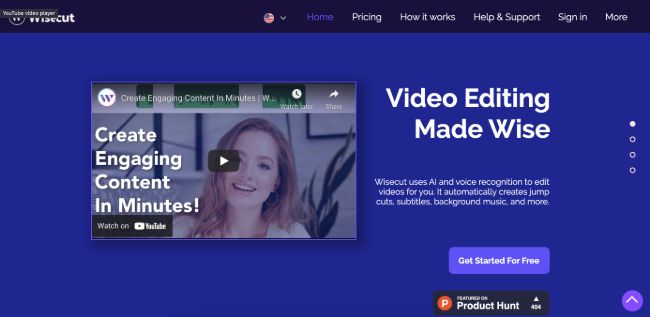
11Wisecut
This free AI video generator platform allows you to turn your text into video. Type in your text and choose a voice actor, and then Wisecut will take care of the rest. It offers excellent editing tools for users to tweak your video until it’s just right.
Pricing
● Basic: Free.
● Professional: $57 per month.
Features
● This platform is easy to use
● It has a simple drag and drops user-interface
● Allows auto subtitles and auto cut silences
● Allows integration with YouTube
● Subtitles auto-translation
● Excellent video quality
Cons
● Has limited effects
12Flexclip
FlexClip makes video creation and editing easy with-it millions of royalty-free stock media and thousands of templates for you to choose from.
Pricing
● Free
● Basic: $5.99 per month.
● Plus: $9.99 per month
● Business: $19.99 per month.
Features
● Thousands of available templates
● Simple tool for creating and editing videos
● Use for creating engaging videos
● Provides millions of royalty stock media
● Versatile and Flexible
Cons
● Not for beginners
● Ending Thoughts →
● In this post, we have listed the top text to video generators that you can choose from to help you perform tasks within minutes.
● The report also explains all you need to know about video AI generators and recommends Filmora as a perfect tool for editing your videos.
It is a fact that video editing can sometimes be laborious and time-consuming. Even when using the best video editing software, it still requires human effort to get an impressive result. But luckily for us, the invention of the AI video generator has now made a lot of things easier. The AI video generators are the next level as they allow users to automate video creation and editing without compromising quality.
This article will discuss the best AI text to video generators for free that will help make your life easier. Thus, this will soon help you create engaging videos for your personal or business use in just a few clicks.
In this article
01 [What Is an AI Video Generator](#Part 1)
02 [How Does the AI Video Maker Work](#Part 2)
03 [The 12 Best AI Video Generator](#Part 3)
Part 1 What Is an AI Video Generator
AI video generator is the process of using artificial intelligence (AI) to create professional videos. With an AI video generator for free, you do not need any equipment, an editing studio, or a premium video editing application to be able to create a video.
All that is required is that you feed input to the AI tool, and it will automatically help you generate a video. You can edit a blog post into a video within a few minutes with any of these tools listed. In addition, it won’t incur any high costs for video productions because the AI tool will help you carry out most of the tasks.
Part 2 How Does the AI Video Maker Work
Professional AI video editors, are trained by showing them various examples and then providing them feedback by telling them what is wrong and good. The machine then takes note of it and remembers it. However, as the machine continues to learn, it picks the results and then improves itself based on the feedback. Ultimately the device becomes very good or even better than the human that creates it. Here are some breakdowns of the ways video editors work:
● The AI video maker tool, can augment your videos with AR effects, including AR masks, face and color filters, face touch-ups, etc. The tool uses neural networks and computer vision to interrupt, extract, and understand the video content.
● This AI subtitle generator can allow interviews to be delivered and analyzed to the editor fully transcribed, searchable by word or even sentences. Video editors can use AI for keyword extraction, speech-to-text conversion, facial recognition, sentiment analysis, image recognition, and emotion detection.
● AI-video editors can pull sections of a video clip from any source automatically. These AI systems can also detect emotions that allow the creation of warm, appealing videos.
Part 3 The 12 Best AI Video Generator
There are top AI video generators for free that you can choose from for your video editing. These video editors complete work quickly and easily. In addition, if you need video editing software to help you edit your generated videos after generating them, we recommend that you try out Filmora from Wondershare. Wondershare Filmora Video Editor is a perfect video editing software with tons of new features, like keyframing, split video, and adding animations and effects to help you carry out your video editing seamlessly.
For Win 7 or later (64-bit)
For macOS 10.12 or later
01Sora
Sora is an artificial intelligence model that generates videos with textual descriptions, developed by OpenAI. It is a US-based artificial intelligence research organization. Sora stands out as a game-changing platform. It can seamlessly convert text into captivating videos, blending convenience with creativity.
Features
● With Sora, transforming written content into engaging videos is swift and efficient.
● Unlike traditional video editing tools, Sora is designed for users of all levels, eliminating the need for prior video production experience.
● Sora offers a plethora of customization options.
● Generates videos up to 60 seconds long
● Generates complex scenes with multiple characters, motions, and accurate details of the subject
● Creates multiple shots within a single generated video
● Generating videos from text instructions by utilizing the recaptioning technique from DALL·E 3
Pros
● Highly realistic video generation with impressive visual quality
● Text-based control over the content of the video, allowing for precise video generation
● A highly versatile tool that handles a wide range of prompts and styles
Cons
● Lacks implicit understanding of the rules of physics
This software is best realistic and imaginative scenes.
02Wondershare Filmora
Wondershare Filmora is a highly efficient video editing software that comes with AI text to video generation. The software is friendly to both beginner and intermediate creations, offering you a wide range of intuitive features.
Pricing
● Subscription Plan: US$19.99 per month
● Cross-Platform Plan: US$69.99 per year
● Perpetual Plan: US$19.99 Onetime Payment
Features
● User-friendly interface that is easy to learn and use
● Wide range of features for creating and editing videos, including transitions, effects, and text overlays.
● Large stock library of royalty-free music and stock footage
● Readily available templates and presets to quickly generate videos
● Easily export videos directly to popular platforms like YouTube and TikTok
Pros
● User-friendly interface with a learning curve suitable for all kinds of creators
● Extensive library of free and paid assets to enhance your videos
● Wide range of features for video editing
Cons
● Lacks advanced features for AI video prompt generation
This software is best for video creation and editing for freelancers, SMBs, markters.
For Win 7 or later (64-bit)
For macOS 10.12 or later
How to Use Filmora’s AI to Video Feature : AI Video Prompt Sample
Here is a brief step-by-step guide on how to use Filmora to generate AI videos. The process is as simple as writing a text prompt and getting the video ready:
Step 1: Lauch Filmora AI Text-to-Video Features
Once you launch on your PC Filmora, click the AI Text-to-Video option to start the video generation process.
Step 2: Add a Text Prompt or Video Script
On the AI Text-to-Video video, add your text prompt. You can also modify other settings such as text language and video voice. Then click the Text to Video button at the bottom to prompt Filmora to generate the video.
Step 3: Preview the Generated Video
Filmora generates the video based on your prompt and a new editing window. You can now a preview video and make any further editing needed.
AI Video Prompt Sample Using Filmora
Prompt: A young man at his 20s is sitting on a piece of cloud in the sky, reading a book.
When prompted to generate a video of a young man in his 20s sitting on a piece of cloud in the sky, reading a book, Filmora generated a narration video from the point of view of the young man as shown above.
03Synthesia
This is a web-app video generator AI from a text supporting AI-driven video creation used by experts and beginners. Rather than filming content utilizing a microphone and camera, this software AI technology helps to simulate human presenters and real-life videos. Thus, it saves video creators hours of work.
Pricing
● Personal Plan: $30 monthly
● Corporate Plan: custom pricing
Features
● Over 40 supported languages
● Allows template customizations
● Allows users to make their avatars
● It has 50 built-in presenters
● Allows you to create realistic AI videos
● Offers live chat support
● Allows download in Mp4
● Enables users to create videos automatically using integrations with APIs
● Allows the addition of backgrounds
● Users can share their videos on other social media platforms
● Allows the addition of images, shapes, and texts to videos
Pros
● Great for beginners are you do not need prior knowledge
Cons
● It supports only front-facing poses
This software is best for freelancers, agencies, marketers, and content creators looking to create high-quality video content.
04Synths Video
This is an AI video-generating tool primarily concerned with helping users drive leads and traffic from YouTube. It is an AI YouTube title generator that allows users to create professional-looking videos from blog posts on YouTube.
Pricing
● YouTube Start: $399 monthly.
● Premium Custom Package: Custom Pricing.
Features
● Video generation from URLs
● It has built-in integration with YouTube
● 20+ avatars are available
● Allows video upload in HD quality
● Over 40+ languages supported
Cons
● No free plan is available
Best for the owners of YouTube channels.
05Rephrase.ai
Rephrase.ai is a video editing software that uses a sophisticated deep learning engine to create professional videos.
Pricing
● Starter plan: $25 monthly
● Enterprise plan: Custom Pricing
Features
● Produces high-resolution videos
● Supports functionality for presenter customization
● Multiple-use cases supported
● Allows users to select their preferred AI voice
● Support varieties of video editing tools
Cons
● It has a complex pricing plan
It is best for agencies seeking to create customizable and personalized professional videos for marketing and advertising.
06Lumen5
Lumen5 is one of the top AI video-creating tools available for beginners and uses Natural Language Processing algorithms to convert text into high-quality videos.
Pricing
● Free Plan
● Creator plan: $15 monthly.
● Premium plan: $79 monthly.
● Business plan: $199 monthly.
● Enterprise plan: Custom Pricing.
Features
● Transforms text to video within minutes
● Numerous templates are available
● Allows customization of videos resolution, color, and font
Cons
● Limited features in the free plan
Best for beginners who are looking to generate short-duration of videos for social media platforms.
07Designs.ai
This is an AI-powered video maker that is useful for users that do not have any experience in design.
Pricing
● Basic plan: $29 monthly
● Pro plan: $69 monthly
● Enterprise plan: Custom Pricing
Features
● It has an attractive and modern user interface
● Allows the creation of videos from pre-designed templates
● Helps video creation from your custom video files
● Over 20 languages supported
● Coverts texts to video
Cons
● Only allows video download in a paid plan.
This tool is best for creators and designers who are willing to create quick AI videos.
08InVideo
This is a perfect AI generator used for creating explainers or marketing videos easily and quickly. The platform helps produce high-quality videos with varieties of style options to make the ideal video according to your requirements.
Pricing
● Free: Free with watermarks on your videos.
● Business: $15 monthly with no watermarks.
● Unlimited: $30 monthly with unlimited video exports.
Features
● Very affordable
● Comprises an online drag-and-drop video editor
● Over 50 AI-powered themes that help to convert text to video in 3 minutes
● Full iStock media library available in all plans
Cons
● Requires internet connection to use
09Pictory.ai
This AI subtitle generator converts your text and turns it into an AI-generated video. This program is simple and easy to get started, requiring no software download. Paste your text into the editor and get started.
Pricing
● Free trial: Only use 3 videos.
● Standard Plan: $29 per month.
● Premium Plan: $59 per month.
Features
● It has a simple user interface.
● Over 6M licensed Shutterstock available
● Unlimited and affordable videos in the premium plan
Cons
● It is quite expensive compared to other tools
10Veed.io
Veed.io is not specifically an AI video generator but a video editing tool that utilizes AI to simplify the entire process and allows users to create high-quality videos within seconds.
Pricing
● Free: Free with watermarks!
● Basic: $18 monthly.
● Pro: $30 monthly
Features
● It has lots of video templates and a music library to choose
● Easy to learn, user-friendly interface
● Video rendering times are quite fast
● The basic plan has a high-quality resolution
Cons
● Not a typical AI video generator
● Not for beginners
11Wisecut
This free AI video generator platform allows you to turn your text into video. Type in your text and choose a voice actor, and then Wisecut will take care of the rest. It offers excellent editing tools for users to tweak your video until it’s just right.
Pricing
● Basic: Free.
● Professional: $57 per month.
Features
● This platform is easy to use
● It has a simple drag and drops user-interface
● Allows auto subtitles and auto cut silences
● Allows integration with YouTube
● Subtitles auto-translation
● Excellent video quality
Cons
● Has limited effects
12Flexclip
FlexClip makes video creation and editing easy with-it millions of royalty-free stock media and thousands of templates for you to choose from.
Pricing
● Free
● Basic: $5.99 per month.
● Plus: $9.99 per month
● Business: $19.99 per month.
Features
● Thousands of available templates
● Simple tool for creating and editing videos
● Use for creating engaging videos
● Provides millions of royalty stock media
● Versatile and Flexible
Cons
● Not for beginners
● Ending Thoughts →
● In this post, we have listed the top text to video generators that you can choose from to help you perform tasks within minutes.
● The report also explains all you need to know about video AI generators and recommends Filmora as a perfect tool for editing your videos.
2 Methods to Crop a Video in VLC
Want to crop your videos but don’t know how to start?
A video editor needs to know how he can crop his videos. There is a way to do this using the VLC that is installed in your computer. This guide will teach you a simple way to get what you want. This might appear as complicated at first sight but it will be shown to you in a digestible way. An alternative way would be to use Wondershare Filmora. You will also be guided on how to use this software to crop your videos. Don’t worry and just take it one step at a time.
Method 1: Cropping a Video using VLC
Have you ever heard of the VLC media player? If not, you can browse through it online and install it on your computer. Aside from watching content, you can also crop videos with it. Cropping is a way to remove spaces that you would not want to be included on your video.
Find the software on your computer and don’t be overwhelmed by the interface.

Then click the Media and select Open File to choose the video that you want to crop. You should prepare the videos that you want to be cropped and rename them to avoid confusion.

Click the Tools on the menu and select the Effects and Filters.

After that, click on the Video Effects and under that select Crop. Doing this, will open the cropping editor.

You need to enter specific pixels on the left, right, top and bottom. This will depend on your preferences. If it is your first time and you don’t know the exact pixels then just input what you think would be enough.

After entering your preferred pixels, you can preview it. If you would like to adjust then just simply repeat entering the specific pixels.

You decided to save the cropped video. Find the Tools menu and select Preferences.

Find the Show settings and click All. In the search bar type Croppadd then save your previous preferred pixel settings. Lastly, click Save.

In the Media menu select the Convert/Save. You can drag and drop the cropped video to the File box.

You can select your file format and codecs by clicking Convert/Save.

Find the Edit Selected Profile and click the Video Codec. Then under the Filters tab, select the Video cropping filter. Finally, click Save.

In the Destination file select where you want it to be saved.

Then click Start.

Congratulations on getting here! You finally cropped your video using the VLC media player.
Although there are disadvantages to using this as your cropping tool. Like for example you want the real-time preview of what you’ve changed in your video. This would be a turn off for some that want their outputs to be shown to them immediately. Aside from this, there is a chance that you will forget one step to make and thus, the whole process would need to start over from scratch. Lastly, is the freedom to batch crop multiple videos. This is especially important for those that need to have many clips in one video. A user might lose the continuity of the story within his video.
While one of its strong suits is the affordability of the software. It is completely free and has no additional charges that may surprise you in the future. Finally, your output won’t have watermarks that could destroy the aesthetics of your video.
What are your experiences with using it as a cropping tool? What would you recommend to improve it? It is up to you the user if you want to continue using this as your partner in removing the excess in your videos.
Method 2: Cropping a Video using Wondershare Filmora
Have you heard of an editing tool called Wondershare Filmora Video Editor ? What are your first impressions of this software? You can download this for free by going to the official site.
For Win 7 or later (64-bit)
For macOS 10.14 or later
Wondershare Filmora is a useful editor that can help you produce the content that you want. It is packed with beneficial tools that you can learn to apply. If it is already installed on your computer then proceed to opening it.

Prepare your videos that you need to crop. You can drag and drop your video or click the Import.

Select the video clip that you want to crop. Then, click the Crop tool and choose if you want the Crop or Pan & Zoom.

You can also right click the video clip .Under the Video tab you can select the Crop and Zoom or Crop to Fit then adjust to your preferred ratio.

One of the advantages of Filmora is you can preview what you have cropped immediately. This will greatly help you if you’re not sure what kind of crop that you want. If you’ve thought that you made a mistake then a simple Undo button could fix it. In short, you’re not going through the gruesome process of starting all over again. You can also do the batch cropping of multiple videos helping you ensure the smoothness of flow in the final output.
Although the Filmora is not free, there is a trial that you can use to test it to check if this video editor would meet your needs. It has tools that a beginner to expert video editor could use to produce high quality videos that would make the audience think that it was life from the movies.
The Bottom Line
The journey of exploring different options would help you make the decision. Both VLC media player and Wondershare Filmora have their great features which would aid the user to crop his videos in an efficient way. What are your thoughts on each of them? As an individual you have varied needs that a video tool should meet.
After reading this, you’ve had a clearer view of what these video softwares offers. Did this guide help you decide which would fit your needs as a video editor? What are your suggestions for improvement?
You could share with us the tips and tricks you know on cropping videos using these applications.
Then click the Media and select Open File to choose the video that you want to crop. You should prepare the videos that you want to be cropped and rename them to avoid confusion.
Click the Tools on the menu and select the Effects and Filters.
After that, click on the Video Effects and under that select Crop. Doing this, will open the cropping editor.
You need to enter specific pixels on the left, right, top and bottom. This will depend on your preferences. If it is your first time and you don’t know the exact pixels then just input what you think would be enough.
After entering your preferred pixels, you can preview it. If you would like to adjust then just simply repeat entering the specific pixels.
You decided to save the cropped video. Find the Tools menu and select Preferences.
Find the Show settings and click All. In the search bar type Croppadd then save your previous preferred pixel settings. Lastly, click Save.
In the Media menu select the Convert/Save. You can drag and drop the cropped video to the File box.
You can select your file format and codecs by clicking Convert/Save.
Find the Edit Selected Profile and click the Video Codec. Then under the Filters tab, select the Video cropping filter. Finally, click Save.
In the Destination file select where you want it to be saved.
Then click Start.
Congratulations on getting here! You finally cropped your video using the VLC media player.
Although there are disadvantages to using this as your cropping tool. Like for example you want the real-time preview of what you’ve changed in your video. This would be a turn off for some that want their outputs to be shown to them immediately. Aside from this, there is a chance that you will forget one step to make and thus, the whole process would need to start over from scratch. Lastly, is the freedom to batch crop multiple videos. This is especially important for those that need to have many clips in one video. A user might lose the continuity of the story within his video.
While one of its strong suits is the affordability of the software. It is completely free and has no additional charges that may surprise you in the future. Finally, your output won’t have watermarks that could destroy the aesthetics of your video.
What are your experiences with using it as a cropping tool? What would you recommend to improve it? It is up to you the user if you want to continue using this as your partner in removing the excess in your videos.
Method 2: Cropping a Video using Wondershare Filmora
Have you heard of an editing tool called Wondershare Filmora Video Editor ? What are your first impressions of this software? You can download this for free by going to the official site.
For Win 7 or later (64-bit)
For macOS 10.14 or later
Wondershare Filmora is a useful editor that can help you produce the content that you want. It is packed with beneficial tools that you can learn to apply. If it is already installed on your computer then proceed to opening it.
Prepare your videos that you need to crop. You can drag and drop your video or click the Import.
Select the video clip that you want to crop. Then, click the Crop tool and choose if you want the Crop or Pan & Zoom.
You can also right click the video clip .Under the Video tab you can select the Crop and Zoom or Crop to Fit then adjust to your preferred ratio.
One of the advantages of Filmora is you can preview what you have cropped immediately. This will greatly help you if you’re not sure what kind of crop that you want. If you’ve thought that you made a mistake then a simple Undo button could fix it. In short, you’re not going through the gruesome process of starting all over again. You can also do the batch cropping of multiple videos helping you ensure the smoothness of flow in the final output.
Although the Filmora is not free, there is a trial that you can use to test it to check if this video editor would meet your needs. It has tools that a beginner to expert video editor could use to produce high quality videos that would make the audience think that it was life from the movies.
The Bottom Line
The journey of exploring different options would help you make the decision. Both VLC media player and Wondershare Filmora have their great features which would aid the user to crop his videos in an efficient way. What are your thoughts on each of them? As an individual you have varied needs that a video tool should meet.
After reading this, you’ve had a clearer view of what these video softwares offers. Did this guide help you decide which would fit your needs as a video editor? What are your suggestions for improvement?
You could share with us the tips and tricks you know on cropping videos using these applications.
Frame Rates, Speed, and Wondershare Filmora
Ensuring smoother playback along with enhanced fluidity is a crucial part of boosting the engagement of videos. You also need to add the slow-motion effect at some points in videos. Along with this, syncing audio to video is also essential. Thus, you can take assistance from frame rates and speed to ensure you have these key features in the videos.
There is no need to be concerned about what video editor to choose because Wondershare Filmora can help you with this issue. In this article, you will find basic information about Filmora and the uses of frame rate and speed ramping. We will also provide the procedure for changing video frame rates with Filmora.
- Part 1: What is Frame Rate and How Important It Is In Videos?
- Part 2: What Are The Different Uses of Speed Ramping in Video Editing?
- Part 3: Perform Basic Speed Adjustments and Speed Ramping on Wondershare Filmora
- Part 4: [Basic] How to Change The Frame Rate in Wondershare Filmora?
- Conclusion
Part 1: What is Frame Rate and How Important It Is In Videos?
One of the most important metrics in videos is the frame rate. This term refers to the individual frames present in the video. While the frame represents a single second, this defines the frequency of the video. This is the display of consecutive frames every second, which brings up the illusion of motion for the viewers. In this way, the entire frame rate is explained as terminology to users new to video editing.
Importance of Frame Rate in Videos
We will highlight some prominent points explaining the importance of video frame rates. Continuing with these points, this will help users understand how essential video frame rate is:
01of 04Defines Smoothness in Videos
Having a higher frame rate in a video is equivalent to a smooth video. Users who consider having smoothness in their videos always consider the frame rates. Higher frame rates have better transitions and seamless motion.
02of 04The detail in the Video
If you have a low frame rate in your video, you cannot observe the details in the fast-moving objects. In such a scenario, you need to have a video with a good frame rate. This will help display the explicit details of the video, which cannot be viewed under every frame rate quality.
03of 04Realistic Effects
Old videos never had the kick that made them feel real. Videos with higher frame rates have changed the dynamics in the current system. Realism and immersive video experience are prominent getaways achieved with better frame rates.
04of 04Realistic Effects
The use of better frame rates gives the option of improving the effects of the video. Videos that did not have impressive frame rates are not able to display the mood or atmosphere. Better frame rates help display the environment better, thus explaining the importance.
Changing Video Frame Rates And Speed Editor A wonderful video editor - Wondershare Filmora providing frame rate and speed ramping features for all creators.
Free Download Free Download Learn More

Part 2: What Are The Different Uses of Speed Ramping in Video Editing?
Speed ramping and video frame rate are one of the most known techniques which are widely used in video editing. You must be wondering why paying attention to speed ramping is so important. Nothing to worry about because this part will give you the most implementable uses of speed ramping in video editing. Have a look below to discover further information about this:
Highlighting Actions and Dramas
You can use speed ramping to emphasize the actional and dramatic sequences. It also helps you draw the audience’s attention and make the essential factors more notable. Above all, the speed ramping also integrates the useable effects which can add a drastic touch of drama to your videos,
Transitions and Motion Tracking
With the good use of speed ramping, you can achieve a smooth transition in videos. It also helps you add seamless transitions in the videos to add a sense of consistency. One of the best things is adding slow-motion and motion-tracking effects in simple videos.
Syncing Audios
Syncing the audio beats with videos is crucial to enhance the user experience. Speed ramping offers capabilities through which you can easily sync the audio to the length of videos. As it never compromises the content or layout of videos, you don’t have to worry about anything.
Emphasized Storytelling
If you need to induce a sense of storytelling and optimize the video quality, consider speed ramping. You can control the overall speed of actions and dramas and convey a particular narrative to add depth to videos. It also helps to increase the frame rate of video.
Part 3: Perform Basic Speed Adjustments and Speed Ramping on Wondershare Filmora
Wondershare Filmora is a great video editor providing exquisite features and details to users. It embeds simple video editing tools and AI functionalities to provide a quick editing experience. However, the focus on the details is not lacking in this tool. Filmora provides a comprehensive set of effects, transitions, and elements to induce in videos.
Free Download For Win 7 or later(64-bit)
Free Download For macOS 10.14 or later
Along with that, it also includes multiple functionalities which cannot be observed in many video editors. However, since we are putting our focus on discussing the speed adjustments in Filmora, let’s look at the comprehensive steps explained below:
Method 1: Uniform Speed Adjustments in Videos
Step 1Import Video on Filmora for Speed Adjustments
Firstly, launch Wondershare Filmora on your computer and continue to open a new project. Once a window enters the display, lead into the “Import” section for importing the media files that need adjustment.

Step 2Select the Speed Option
After adding the videos and dragging them to the timeline, continue to locate the “Speed “ option in the bar above the timeline. This opens a drop-down menu where you have to select “Uniform Speed” or use “Ctrl + R.”

Step 3Manage Speed Uniformly
A new section opens on the video editor where you can define the speed using the slider. Also, you can activate options like “Reverse Speed,” “Ripple Edit,” and “Maintain Pitch,” if needed.

Method 2: Utilize the Option of Speed Ramping
Step 1Access Speed Ramping Option
Once you have opened Filmora and imported a video on the timeline, lead to the “Speed” button again. Select the option of “Speed Ramping ” in the drop-down to continue.

Step 2Manage Speed Ramping of Video
As you find a new screen on your front, select the type of Speed Ramping you want to perform. Adjust the speed ramp on the line graph that comes in display and click “OK” to conclude.

Step 3Export the Final Video
Once you are done editing your videos, lead to the “Export” button to save the videos on the device.

Part 4: [Basic] How to Change The Frame Rate in Wondershare Filmora?
While you find out the ways to change the speed of your videos, you can also change their frame rate. Filmora offers dedicated options on its platform to its users, which can be understood in the steps below:
Free Download For Win 7 or later(64-bit)
Free Download For macOS 10.14 or later
Step 1Open Settings For Changing Frame Rate
As you open Filmora and import a video, drag it to the timeline. Once the video is imported, lead to the “Preview quality and display settings” button on the right side of the screen.

Step 2Manage Speed Ramping of Video
This opens a drop-down menu where you have to select the option “Change Project Aspect Ratio.”

Step 3Change Frame Rate Successfully
You will be led to a new screen where you can find the option of “Frame Rate” in the list. Change the frame rate according to the requirements and options available and click “OK.” The frame rate of your video will be changed using Filmora.

Conclusion
This article has displayed a conspicuous detail of what the frame rate in the video is and how it implicates video editing. Wondershare Filmora has been observed as the perfect way to manage the speeds of videos. Video frame rates can also be managed using the exquisite video editor. Those who wish to manage such features of the videos should consider using this tool.
Part 1: What is Frame Rate and How Important It Is In Videos?
One of the most important metrics in videos is the frame rate. This term refers to the individual frames present in the video. While the frame represents a single second, this defines the frequency of the video. This is the display of consecutive frames every second, which brings up the illusion of motion for the viewers. In this way, the entire frame rate is explained as terminology to users new to video editing.
Importance of Frame Rate in Videos
We will highlight some prominent points explaining the importance of video frame rates. Continuing with these points, this will help users understand how essential video frame rate is:
01of 04Defines Smoothness in Videos
Having a higher frame rate in a video is equivalent to a smooth video. Users who consider having smoothness in their videos always consider the frame rates. Higher frame rates have better transitions and seamless motion.
02of 04The detail in the Video
If you have a low frame rate in your video, you cannot observe the details in the fast-moving objects. In such a scenario, you need to have a video with a good frame rate. This will help display the explicit details of the video, which cannot be viewed under every frame rate quality.
03of 04Realistic Effects
Old videos never had the kick that made them feel real. Videos with higher frame rates have changed the dynamics in the current system. Realism and immersive video experience are prominent getaways achieved with better frame rates.
04of 04Realistic Effects
The use of better frame rates gives the option of improving the effects of the video. Videos that did not have impressive frame rates are not able to display the mood or atmosphere. Better frame rates help display the environment better, thus explaining the importance.
Changing Video Frame Rates And Speed Editor A wonderful video editor - Wondershare Filmora providing frame rate and speed ramping features for all creators.
Free Download Free Download Learn More
Part 2: What Are The Different Uses of Speed Ramping in Video Editing?
Speed ramping and video frame rate are one of the most known techniques which are widely used in video editing. You must be wondering why paying attention to speed ramping is so important. Nothing to worry about because this part will give you the most implementable uses of speed ramping in video editing. Have a look below to discover further information about this:
Highlighting Actions and Dramas
You can use speed ramping to emphasize the actional and dramatic sequences. It also helps you draw the audience’s attention and make the essential factors more notable. Above all, the speed ramping also integrates the useable effects which can add a drastic touch of drama to your videos,
Transitions and Motion Tracking
With the good use of speed ramping, you can achieve a smooth transition in videos. It also helps you add seamless transitions in the videos to add a sense of consistency. One of the best things is adding slow-motion and motion-tracking effects in simple videos.
Syncing Audios
Syncing the audio beats with videos is crucial to enhance the user experience. Speed ramping offers capabilities through which you can easily sync the audio to the length of videos. As it never compromises the content or layout of videos, you don’t have to worry about anything.
Emphasized Storytelling
If you need to induce a sense of storytelling and optimize the video quality, consider speed ramping. You can control the overall speed of actions and dramas and convey a particular narrative to add depth to videos. It also helps to increase the frame rate of video.
Part 3: Perform Basic Speed Adjustments and Speed Ramping on Wondershare Filmora
Wondershare Filmora is a great video editor providing exquisite features and details to users. It embeds simple video editing tools and AI functionalities to provide a quick editing experience. However, the focus on the details is not lacking in this tool. Filmora provides a comprehensive set of effects, transitions, and elements to induce in videos.
Free Download For Win 7 or later(64-bit)
Free Download For macOS 10.14 or later
Along with that, it also includes multiple functionalities which cannot be observed in many video editors. However, since we are putting our focus on discussing the speed adjustments in Filmora, let’s look at the comprehensive steps explained below:
Method 1: Uniform Speed Adjustments in Videos
Step 1Import Video on Filmora for Speed Adjustments
Firstly, launch Wondershare Filmora on your computer and continue to open a new project. Once a window enters the display, lead into the “Import” section for importing the media files that need adjustment.
Step 2Select the Speed Option
After adding the videos and dragging them to the timeline, continue to locate the “Speed “ option in the bar above the timeline. This opens a drop-down menu where you have to select “Uniform Speed” or use “Ctrl + R.”
Step 3Manage Speed Uniformly
A new section opens on the video editor where you can define the speed using the slider. Also, you can activate options like “Reverse Speed,” “Ripple Edit,” and “Maintain Pitch,” if needed.
Method 2: Utilize the Option of Speed Ramping
Step 1Access Speed Ramping Option
Once you have opened Filmora and imported a video on the timeline, lead to the “Speed” button again. Select the option of “Speed Ramping ” in the drop-down to continue.
Step 2Manage Speed Ramping of Video
As you find a new screen on your front, select the type of Speed Ramping you want to perform. Adjust the speed ramp on the line graph that comes in display and click “OK” to conclude.
Step 3Export the Final Video
Once you are done editing your videos, lead to the “Export” button to save the videos on the device.
Part 4: [Basic] How to Change The Frame Rate in Wondershare Filmora?
While you find out the ways to change the speed of your videos, you can also change their frame rate. Filmora offers dedicated options on its platform to its users, which can be understood in the steps below:
Free Download For Win 7 or later(64-bit)
Free Download For macOS 10.14 or later
Step 1Open Settings For Changing Frame Rate
As you open Filmora and import a video, drag it to the timeline. Once the video is imported, lead to the “Preview quality and display settings” button on the right side of the screen.
Step 2Manage Speed Ramping of Video
This opens a drop-down menu where you have to select the option “Change Project Aspect Ratio.”
Step 3Change Frame Rate Successfully
You will be led to a new screen where you can find the option of “Frame Rate” in the list. Change the frame rate according to the requirements and options available and click “OK.” The frame rate of your video will be changed using Filmora.
Conclusion
This article has displayed a conspicuous detail of what the frame rate in the video is and how it implicates video editing. Wondershare Filmora has been observed as the perfect way to manage the speeds of videos. Video frame rates can also be managed using the exquisite video editor. Those who wish to manage such features of the videos should consider using this tool.
Also read:
- Updated Mask Tracking Is Believed to Be a Helpful Procedure for Marking Proper Areas in Videos. Learn How to Perform Premiere Pro Mask Tracking in This Guide
- Updated Lets Create a New Premiere Pro Project, Import some Video, and Control Video Playback Speed. Also, Find Alternative Software (WonderShare Filmora) to Control Playback Speed in Minutes
- New Enhance Social Media Posts with Transparent GIFs that Leave Your Peers in Awe
- New Using The AI Auto Reframe Feature | Wondershare Filmora Tutorial
- Updated In 2024, How to Create Vintage Film Effect 1920S
- In 2024, Do You Want to Make TikTok Videos More Elemental by Using Countdown but Dont Know How to Do This? Here We Will Thoroughly Guide You About This
- Updated How To Change Font In Premiere Pro for 2024
- New In 2024, Detailed Steps to Add Border to Video Using Premiere Pro
- In 2024, AI Features of Wondershare Filmora - Silence Detection in Videos
- Updated 2024 Approved Best Free LUTs to Use
- Updated Add Green Screen Video on TikTok for 2024
- New Whats The Best Laptops For Video Editing
- New Best Ideas for Time Lapse Video for 2024
- Updated 2024 Approved Top 10 iPad Slideshow Apps to Create a Slideshow
- Updated 2024 Approved Experience Time Differently with The Top Slow-Motion Applications
- 2024 Approved How to Make a Slideshow GIF?
- New 6 Instant Ways to Make Windows 10 Slideshow
- 2024 Approved Are You Looking for the Best Video Marketing Agency to Help Your Business Grow Exponentially with Engaging Video Content? Here Is How to Find a High-Quality Video Marketing Company that Takes Your Videos to the Next Level
- New Adobe Lightroom Color Grading Tutorial for 2024
- New Best Options to Replace Sky of Any Photo Online + Offline
- New What Is AI Influencer? | Wondershare Virbo Glossary for 2024
- In 2024, Unlocking the Power of Smart Lock A Beginners Guide for Xiaomi Redmi A2+ Users
- Fix the Error of Unfortunately the Process.com.android.phone Has Stopped on Xiaomi 13T | Dr.fone
- In 2024, Best 3 Motorola Moto G24 Emulator for Mac to Run Your Wanted Android Apps | Dr.fone
- The Magnificent Art of Pokemon Go Streaming On Vivo V30 Pro? | Dr.fone
- In 2024, 5 Easy Ways to Copy Contacts from Poco X5 to iPhone 14 and 15 | Dr.fone
- Full Guide How To Fix Connection Is Not Private on Motorola Edge 40 Neo | Dr.fone
- Full Guide to Catch 100 IV Pokémon Using a Map On Vivo Y100i Power 5G | Dr.fone
- In 2024, How to Mirror Apple iPhone 14 Pro to Windows 10? | Dr.fone
- How to Change/Fake Your Oppo F23 5G Location on Viber | Dr.fone
- In 2024, Full Guide on Mirroring Your Poco C51 to Your PC/Mac | Dr.fone
- How to Restore Deleted Infinix Hot 40i Pictures An Easy Method Explained.
- About Vivo Y77t FRP Bypass
- In 2024, Android to Apple How To Transfer Photos From Infinix Hot 40 Pro to iPad Easily | Dr.fone
- How to Fix Android App Not Installed Error on Samsung Galaxy S23 FE Quickly? | Dr.fone
- Guide on How To Change Your Apple ID Email Address On Apple iPhone SE (2020) | Dr.fone
- In 2024, Best 3 Xiaomi Redmi Note 13 Pro 5G Emulator for Mac to Run Your Wanted Android Apps | Dr.fone
- Best 3 Samsung Galaxy S23+ Emulator for Mac to Run Your Wanted Android Apps | Dr.fone
- Title: In 2024, Find Out How to Create Your Own Custom Motion Graphics in Filmora. Add Unique Objects, Manipulate Text, and Animate Anything You Want
- Author: Chloe
- Created at : 2024-04-24 07:08:19
- Updated at : 2024-04-25 07:08:19
- Link: https://ai-editing-video.techidaily.com/in-2024-find-out-how-to-create-your-own-custom-motion-graphics-in-filmora-add-unique-objects-manipulate-text-and-animate-anything-you-want/
- License: This work is licensed under CC BY-NC-SA 4.0.
