:max_bytes(150000):strip_icc():format(webp)/full-frame-shot-of-speakers-1138109687-33289baddc314b44ae87abc2fc8060cd-e7bccad6d81244509ed97ddf557f89e4.jpg)
In 2024, Free Ways to Download Mobile Phone Green Screen Videos and Pictures No Copyright

Free Ways to Download Mobile Phone Green Screen Videos and Pictures: No Copyright
The digital landscape is bustling with content creators showcasing their talent, brands promoting their products, and educators teaching various skills. Amidst all this digital hustle, have you ever stopped to wonder how some creators seamlessly integrate themselves into dreamy, otherworldly, or even fantastical backgrounds?
How does one moment show them standing in their living room, and the next, they’re strolling through the sandy beaches of the Maldives or floating in space?
The answer to these mesmerizing effects is the magic of green screens.
Part1:What is Green Screen Footages and Application Scenarios
The concept of the green screen, or the green screen mobile frame, isn’t new. Hollywood has used it for decades to transport actors to distant planets, into the heart of battles, or atop treacherous mountain peaks. The principle is simple: film your subject against a vibrant green backdrop, then use software to replace that green with any video or image you choose.
So, why green?
The color green is distinct, easily distinguishable, and not typically worn as a primary color in clothing. This makes it simpler for software to isolate and replace without accidentally morphing the subject into the new background. The result is a clean, nearly flawless integration of the subject with whatever setting or scene you can imagine.
But it’s not just about transporting subjects to new locations. A green screen mobile frame or video green screen frame allows for interactive presentations, imaginative storytelling, and even sophisticated effects, like adding dynamic weather elements or supernatural phenomena. It can turn a static, dull scene into something vibrant, interactive, and engaging.
Application Scenarios:
- Entertainment & Films: This is the most obvious. From massive Hollywood productions to amateur short films, green screens create different worlds, enhance scenes with visual effects, or simply transport characters to diverse locations.
- Education: Educators use green screens for virtual field trips or to create interactive lessons, making learning more dynamic and interesting.
- Gaming & Streaming: Have you ever seen a game streamer with just their figure visible over the gameplay? That’s a green screen at work.
- Digital Marketing: Brands use it to produce compelling ads without the hefty cost of actual locations or sets.
- Social Media Content: TikTokers, YouTubers, and Instagram influencers employ green screens to add a layer of creativity and uniqueness to their content, standing out in the ever-crowded space.
The magic of green screens is everywhere, bridging the gap between imagination and reality. With the rise of accessible technology and software, what was once restricted to big-budget studios is now at the fingertips of anyone with a camera, a green cloth, and a vision. And with the platforms we’re about to delve into, sourcing green screen mobile frame HD content has never been easier. So, ready to jump into this world?
Part2: Free Websites to Download Mobile Phone Green Screen Videos and Pictures
In today’s digital age, the demand for high-quality visuals is at an all-time high. Green-screen videos and images can elevate your content, whether you’re a budding YouTuber, a professional filmmaker, or someone trying to make a memorable Instagram story. Thankfully, there are numerous platforms where you can find green-screen mobile frame content; even better, they’re free! Let’s dive deeper into these treasure troves:
01Adobe Stock
While Adobe Stock is renowned for its premium visuals, a lesser-known section offers complimentary content. Once in a while, you can find a beautiful green screen mobile frame HD ready for download. The content here is curated, ensuring that even the freebies maintain a high-quality standard. This makes it a great starting point for those new to the green screen world.
02iStock
Another heavyweight in the digital asset market, iStock occasionally surprises its users with free content. By rummaging through their vast library, you might come across a perfect video frame green screen for your next project. It’s a testament to their commitment to cater to all types of users, regardless of budget.
03Videezy
Videezy stands out for its user-friendly interface and many free green screen video frame options. Ranging from simple mobile frames to intricate animations, the platform has a rich variety. This makes Videezy a favorite for both novices and professionals. Its community-driven approach ensures a constant influx of fresh content.
04Pixabay
One can’t discuss free visual content without mentioning Pixabay. This platform is a goldmine for both videos and images. Their collection of background green screen mobile frame assets is extensive. The community-driven nature means there’s a diverse range of content, suitable for different cultural and thematic needs. Plus, the no-copyright angle ensures peace of mind.
05Pexels
Pexels mirrors Pixabay in many ways, offering various video green screen frame content. However, what sets Pexels apart is its emphasis on contemporary and trendy visuals. For those keen on staying ahead of the curve and ensuring their content resonates with younger audiences, Pexels is a go-to resource.
06Coverr
While it might not have the extensive library of the earlier mentions, Coverr compensates with uniqueness. Their green screen video frame content leans more towards the artistic side, making it ideal for projects that require a distinct touch. If you’re after something that stands out and deviates from the norm, Coverr should be on your radar.
07Shutterstock
Typically, Shutterstock would be the last place to look for free content. Known for its premium offerings, the platform occasionally throws in some freebies. It’s like a lucky draw. When you find a green screen frame video without the price tag, rest assured, it’s a high-quality piece.
Part3: Summary
So, there you have it. Green screens are the secret behind those cool videos where anything seems possible. And now, you can make those videos with all these resources too. Dive in, get creative, and have fun with it!
Blender Tips - How to Make Blender Render Transparent Background
Blender Tips - How to Make Blender Render Transparent Background
An easy yet powerful editor
Numerous effects to choose from
Detailed tutorials provided by the official channel
Want to explore open source 2D/3D content creation through Blender? Stay here to embark your graphic creations with over the top dimensional detailing!
In this article
01 [What’s Blender and What’s Its Advantages?](#Part 1)
02 [How to Make a Material Transparent in Blender](#Part 2)
03 [How to Make a Background Transparent in Blender](#Part 3)
Part 1 What’s Blender and What’s Its Advantages?
When landing into the world of 3D graphic design, the Blender software suite is a one stop access to everything you would possibly think of exploring with. Right from modeling, animation, rendering and compositing to rigging, motion tracking and simulation; the software is a complete video editor and game developer kit.
Some high rated professional applications of the software include, API based Python and allied tool scripting to customize different applications, most of which are a part of the suite’s later releases. The software further supports a common graphic pipeline; compatible to studio based professional as well as individual usage and undergoes continuous upgrade to ascertain maximum graphic productivity.
Talking of the software’s platform compatibility, you are free to use Blender on any of your Windows, Mac and Linux supported devices with utmost ease. The suite works on the OpenGL platform for the most responsive user experience and quick output response.
You can further, conveniently regard the software as your personal 3D graphic designer, owing to the fact that the software’s General Public License grants the liberty of minor and major code alterations to its users, which often results in making the suite additively responsive, with the inclusion of improved features, receptive bug fixes and interactive usage.
Potential Advantages
Choosing the Blender 3D design suite for dimensional and motion graphic editing, you are entitled to benefit from the following advantages:
01A Free Graphic Suite
Almost every software user has the obvious habit of prioritizing financial equity before all other program credibility. However, you should be relieved to realize that the Blender 3D Suite is available to you without a price tag. Loyal users of the software claim the product to outshine its priced counterparts in terms of features and responsive flexibility.
If you are at the shore of graphic design and 3D modeling, there’s absolutely no better software to jump with, in the creation pool. Talking of the concerns of long term free usage and hidden feature blocking pay walls, there’s no cause to worry.
The software earns most of it financial credits through sales merchandise, donations and Cloud Service, which is a reasonably priced and optional graphic design assistant and application resource.
02Open Source Software
Essentially programmed and developed by an expert and skilled core team, the software is liberal enough to entertain open source modifications. Public users of the suite are permitted to make functionality alterations with Python coding. This flexibility of the Blender software is the underlying reason to a community driven increment to the existing top class suite functionalities.
While the public user creativity is responsible for adding a heap of free and paid software functionalities, the suite offers a sale of the specific feature scripts at marketplaces like, Blendermarket.com as a developer support initiative to promote the creation of highly productive graphic tools.
03Extensive Pipeline Support
As already stated, the software supports a plethora of creative utilities ranging from still and motion image graphics, movie developments, dimensional modeling, gaming, studio VFX and lots more. What’s best is, you are entitled to all this without having to spend a single penny from your pocket.
While most creators take up Blender graphic designing as a full time earning source, the bottom line is, if you are wondering, whether or not Blender supports a particular design task, most of the times it possibly can!
04Rendering Flexibility
You can work with two rendering options, viz., Eevee and Cycles within Blender. Using the Eevee render option, users can render their design models in physical, real time outputs in a quick time span. T5her biggest advantage of this rendering engine happens to be its working speed. While it does not require you wait for tedious rendering durations, you can additionally escape individual frame renders.
The Cycles is a physical, path tracing render engine, using light rays to interpret design looks. Compatible to GPU and CPU rendering, this one is a bit slow, but delivers a much precise image than Eevee.
Part 2 How to Make a Material Transparent in Blender
Blender is a top class graphic modulation tool; you can use to play with your editing creativity to your heart’s content, catering to a variety of design requirements, while adhering to a distinguished professional outlook. If you are pondering over the perfect task choice to start your editing journey with Blender, you can begin with making a material transparent in the software.
When beginning to create transparent artworks in Blender, you need to be familiar with the Transparent BSDF node. Here’s a quick explanation:
Transparent BSDF Node
When working with Blender, you get to access a variety of graphic nodes that cater to specific design purposes. Likewise, the transparent BSDF, as the name suggests, is an exclusive transparency creation graphic node that is essential to make materials transparent in Blender. Talking of the specific node function, it is there to facilitate the control of different transparency modes, in cohesion with specific user requirements.
Browse through the following section for a guided tutorial to make a material transparent using Blender:
Step 1:
Prepare a suitable BSDF material by selecting any image from your device and applying it to the object in the Blender’s viewport.
Step 2:
To start working with the Transparent BSDF node, you first need to insert the same into the node tree amongst the Principle BSDF and the Mix Shader nodes. To do this, you need to select ‘Add’ or press ‘Ctrl + A’, followed by locating the same in the ‘Shader’ submenu. Do not forget to add the ‘Mix Shader’ node, which is again, present in the ‘Shader’ submenu, to the node tree.
Step 3:
Plug in the Transparent BSDF output into the top Shader input of the Mix Shader, while dragging the latter into the connecting link between the Material Output and Principle BSDF nodes. This enables the Mix Shader node to pass through the two output generating nodes. The resultant ‘Transparency Effect’ can be seen on the viewpoint object within a few seconds.
Step 4:
Make an additional connection of two fresh nodes into the node tree as follows:
● Transparent BSDF output to the Mix Shader input
● Principal BSDF output to the Mix Shader input
● Mix Shader output to the Surface input
This will finally fetch a transparent material output for the selected image object.
Part 3 How to Make a Background Transparent in Blender
Having experimented with object material transparency in Blender, you can try hands at taking your creativity to the next level by creating Blender render transparent backgrounds in the software. Here’s what you need to do to take up the creation process:
Step 1:
Begin with choosing a suitable image to create a transparent background in either of the Eevee or Cycles render engines, followed by navigating to the ‘Render Properties’ tab in the software’s main interface. Click on the same to get a related drop down menu for activating selected image effects.
Step 2:
From the dropdown that appears, reach to the ‘Film’ option and click on the ‘Transparency’ checkbox to activate it.
You will now observe the image background in the Blender object viewport to disappear.
Step 3:
Press F12 to receive the render output. You can now save the transparent background image in your device. Take note use a transparency compatible image format, preferably PNG.
Blender is undoubtedly a viable graphic editing software to create transparent background images, but if you are in search of a different editor alternative, the Filmora Image Creator and Editor software to take up the aforesaid task with utmost ease.
Wondershare Filmora Video Editor
Essentially a Wondershare software utility, Filmora is conveniently regarded as one among the finest and top curated image editor software. Adhering to the particular interest of transparent background creation, Filmora’s exclusive ‘Green Screen’ attribute is a viable solution to create masterpieces of professional quality, transparent background images. The huge effects library of the software is there to infuse the additional tint of class to your creative excellence.
Making Transparent Background Images in Filmora
Follow the stepwise guided tutorial given below to create images with excellent quality transparent background in Filmora:
Step 1: Software Download and Installation
Log in to your favorite web browser in a Mac or Windows device to download Filmora from its official site and proceed with the software installation process.
For Win 7 or later (64-bit)
For macOS 10.12 or later
Step 2: Import Image File
When you are done with the installation, launch the software and navigate to the ’Import’ tab in its welcome interface. Click and tap ‘Import Media File’ from the dropdown that appears to import the desired image to Filmora’s media library.
Step 3: Drag to Timeline
The next step is to drag your image selection from the software’s media library to its editor timeline. Either right click the image and select ‘Insert’ option from the submenu that appears, or use the conventional ‘Drag and Drop’ method to accomplish this task.
Step 4: Transparency Adjustments
Once the image reaches the timeline, tap the same to see the ‘Settings’ tab get opened. Navigate through the tab options until you find ‘Chroma Key Settings’. Enable the ‘Chroma Key’ with a right side toggle to see your selected image get transparent with a ‘Green’ color in the background.
An alternative to the above method is to hit the ‘Color Picker’ option to the right of the ‘Select Color’ tab and navigate to a desired section of the image to make it transparent with a single click.
If you observe partial transparency in the resultant image background, consider making additional adjustments in ’Chroma Key’ setting parameters like, offset, edge thickness, tolerance, edge feather, etc., to ensure that the image background is totally transparent. When the final artwork makes you happy, tap ‘OK’.
**Step 4: Time to Export!**Your creation is now all set for a media export to your favorite social media handles. Just click on the ‘Export’ tab in the top right of the software timeline and that’s it!
● Ending Thoughts →
● Exploring your creative abilities with different graphic design tools and editing variations is an absolute fun. Among the various design alternatives, playing with dimensional graphic creativity is a remarkable craft that can be mastered with convenient market based software like Blender.
● However, if you are keen on trying other alternatives, you can prefer the Filmora Image Editor software for top class, professional quality image and video creation.
Are You Looking for an Ideal Halloween Countdown Video Clip for Your Video? This Article Will Walk You Through the Best Ones You Can Use to Get the Job Done Perfectly
Halloween is fast approaching, and as a content creator, you’re looking to take advantage of the season and give your viewers unique Halloween vibes in your videos, but you don’t know how to go about it. Don’t panic, we got just the right idea for you. Some might ask; What idea? Well, it’s none other than a Halloween countdown video clip.
Adding a Halloween countdown clip to your video is a great way to spice it up. However, it can be quite difficult to find a perfect clip that will suit the theme of your video. To help you out, we’ve curated a list of the best 15 Halloween countdown video clips that you can use in your videos to make them fancier.
- Fog Stones Halloween Dead
- Scary Sadako ghost
- Transferring Halloween Cupcakes From The Tray To The Table Moments
- Skeleton breaking screen
- Dark Monster Halloween Horror
- Face Portrait Halloween Clown
- A Family Wearing Handmade Halloween Mask At Home
- Halloween Buckets Stacked Together
- Carving Of Pumpkin For Halloween
- Dough Halloween Cookies Bakery Products
- Woman Decorating for Halloween [TikTok]
- Girl Blonde Portrait Halloween
- An Outdoor Table With Halloween Theme Settings
- A Kid In A Mummy Costume Holding A Halloween Bucket
- Stop Motion Of Halloween Candy
Halloween Countdown Clips Editor The best editor helps you add a Halloween countdown clip to your video.
Free Download Free Download Learn More

Part 1: Top 10 Halloween-Themed Footage for Halloween Countdown Clock Video
Here we provide footage exclusively for horizontal videos, so that you can use them for your videos for YouTube, Vimeo, Twitch, etc. If you just want some clips for TikTok, Ins story, or anything else, go ahead Halloween footage for vertical videos.
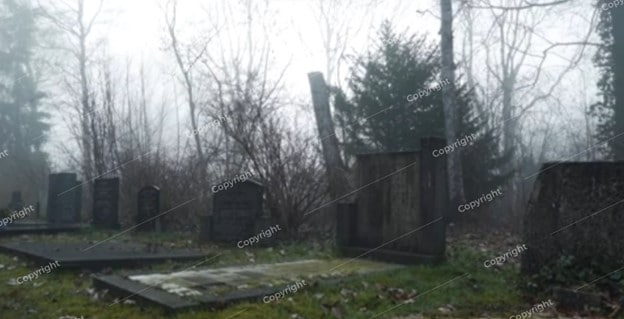
1. Fog Stones Halloween Dead
Spooky graveyard with scary tombstones is another good way to go about it when you are looking for vacation countdown clock videos. The mixture of the turbulent and serene environment is enough to set the Halloween mood and even scare some folks.
Remember the scene from the movie “The Fog” and its famous dialogues: When the fog rolls in the terror begin! If you do not, take a look at a scene and judge for yourself if scary enough or not.
2. Scary Sadako ghost
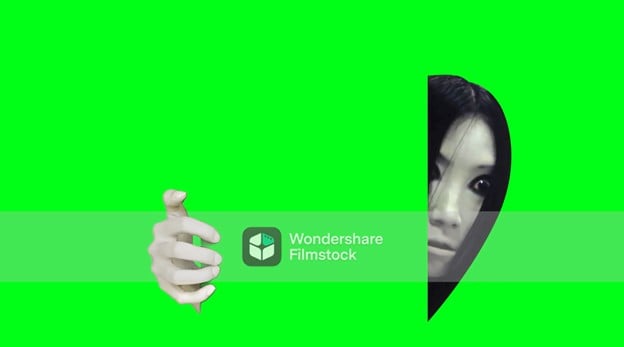
What’s better than the Sadako ghost 7-day video call threat on Halloween? Well, nothing! So, why not create a prank video for your friends and family, especially those afraid of Sadako? Plus, Sadako creates a perfect backdrop for the countdown. Look at this Philippines creator who went to great lengths to scare his friends via a Sadako video call.
But you do not have to go through all that costume and scenery setup. Instead, you can use the video footage on any premium video and apply Sadako ghost via Green Screen.
3. Transferring Halloween Cupcakes From The Tray To The Table Moments
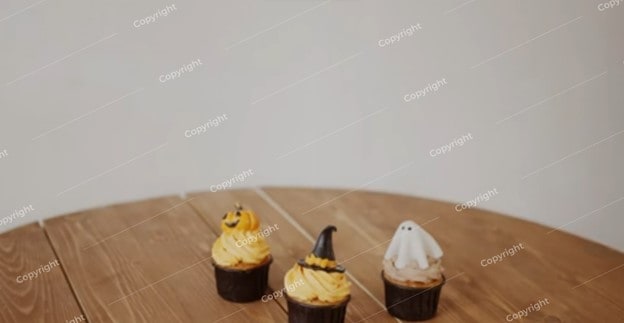
Halloween is adored for its trick-or-treat, but what about the party? What will you serve? Cupcakes sound like a good idea. But how will you entice your guest with your Halloween cupcakes? Well, you can include the cupcakes in the invitation video. While you can find many Halloween creative and savory cupcake recipes on YouTube, you can use stock footage to have them in the video.
4. Skeleton breaking screen
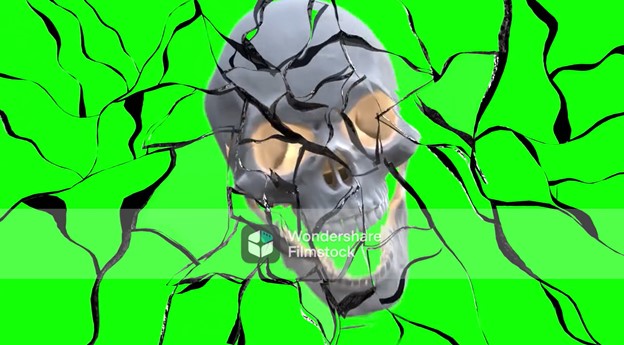
The broken screen is the classic prank suitable for any event and day. But simply using apps or replacing the wallpaper on your friend’s or spouse’s mobile doesn’t cut in this age and day. With new technology coming in, you have to get creative. Plus, it’s for Halloween, meaning dead skulls are a must.
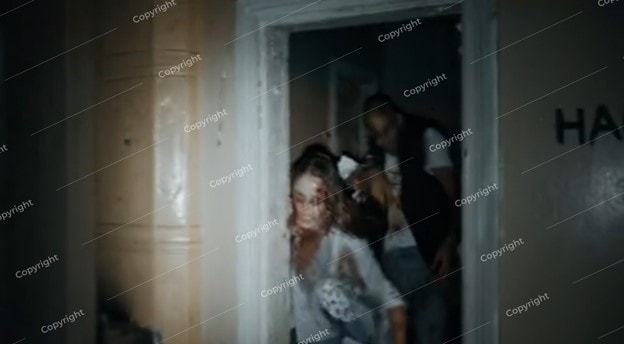
5. Dark Monster Halloween Horror
Halloween house horror is another great backdrop for scaring your friends after a vacation countdown clock. You will find tons of videos on Halloween Horror houses on the internet. Look at how Jackie from Super Enthused (YouTube channel) gets scared while touring the 10 Halloween horror houses at the theme park. That was really scary, and this Halloween countdown effect can also help you do the same to your viewers.
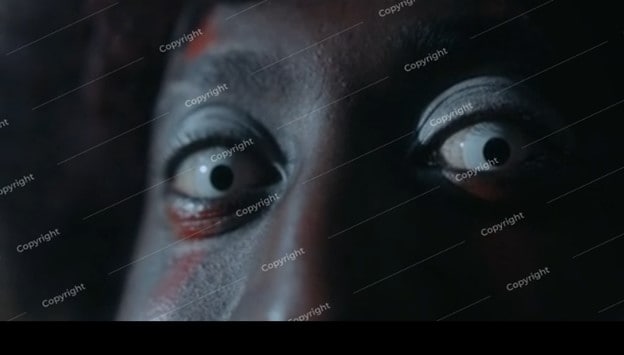
6. Face Portrait Halloween Clown
Scary clowns against a kid’s window have been the long norm of scaring the small ones. No doubt, such pranks can scare anyone, not just kids. If you do not believe me, look at the reaction video from Infinite featuring scaring clowns’ pranks.
But how about dropping such a scary face bomb in a vacation countdown clock video? You can easily get your hands on creepy clowns’ portraits for videos via premium stock libraries like Filmora’s Filmstock.
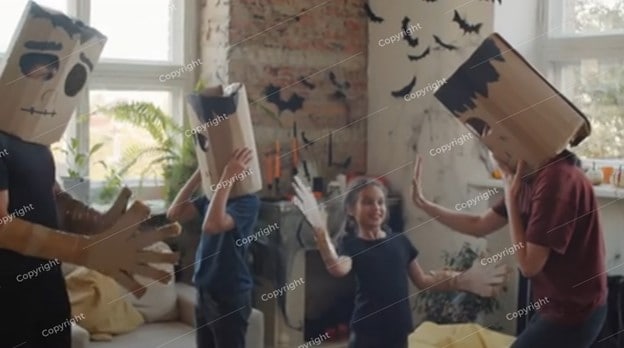
7. A Family Wearing Handmade Halloween Mask At Home
Another not-so-fancy, subtle, and understated appeal for the Halloween vacation countdown clock video is a family together with Halloween masks. Given everyone will be in their costumes, you can also consider distributing self-made masks for everyone. You can take ideas from any of the numerous videos about Halloween mask design ideas.
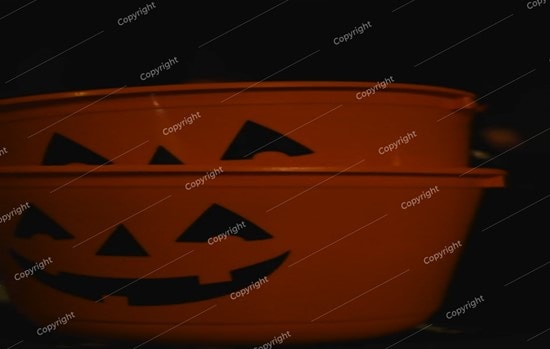
8. Halloween Buckets Stacked Together
What’s the simplest and most fitting footage for the Halloween vacation countdown clock? Well, it is the scary pumpkins. Carving out Jack-o’-lantern has long been the Halloween “tradition,” and featuring it in your countdown timer at the party is the most classic way to go about it. The vibe from simple Halloween buckets stacked together is on the next level; if you do not believe me, look at Angie Bellemare’s Halloween Bucket ideas and creativity:
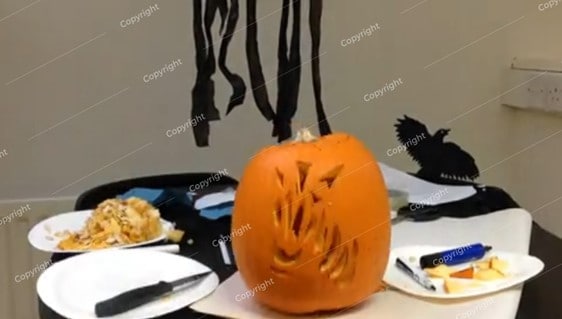
9. Carving Of Pumpkin For Halloween
Another Jack-o’-lantern idea for the vacation countdown clock video is the DIY Pumpin projects in the video. It doesn’t sound like much, but it really is enough to give the best feeling about Halloween without really indulging in the scary stuff. Take a look at how Jenn designs her Pumpkin Stack Fall Planter:
10. Dough Halloween Cookies Bakery Products
If Halloween is more about spending time with friends and family, a bunch of laughter, fun, and creating memories, then it cannot get better than focusing on the sweet stuff, like the dough used to cook the Halloween cookies. When you imagine the scenario of dough mixing for the Halloween countdown timer video, it does not sound like much! But they are cool-looking and set the perfect backdrop for a countdown timer video:
You can use such clips individually or mix them with other stock video footage mentioned here to create a perfect Halloween vacation countdown clock video clip.

Halloween Footage for Vertical Videos [TikTok/Instagram Story]:
The above list discusses the panoramic footage suitable for big screens. If your screen is rather a vertical one, then you might be looking for vertical stock footage for the Halloween vacation countdown clock clip. Here are some vertical footage ideas and links to stock footage to create the perfect vertical vacation countdown clock video for Halloween:
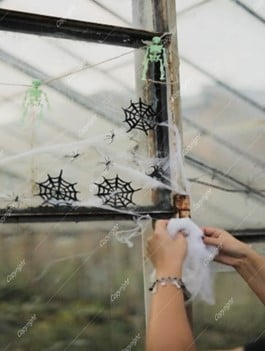
1. Woman Decorating for Halloween [TikTok]
Another simple backdrop for the Halloween countdown timer video is the decorations process to transform your indoors or outdoors for Halloween. And while you can use your own footage of decorating the house, chances are you may have missed filming yourself while decorating the house, given not everyone films themselves decorating the house and use it for their TikTok video. Here’s a video from Spooky Bones featuring the indoor decoration process for Halloween.
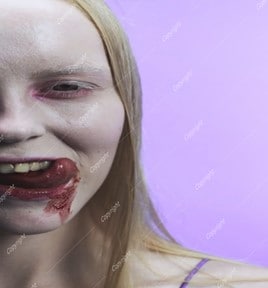
2. Girl Blonde Portrait Halloween
Another simple idea for a vertical countdown timer for Halloween is a scary face. In fact, if you are looking for the users to focus on the timer instead of footage is to use a slo-mo video, like this one from Tay. Tay tells a story about a real haunted house in her neighborhood while wearing scary Halloween makeup.
Of course, you can replace the story; and instead, use a clock with a girl wearing Halloween makeup.
3. An Outdoor Table With Halloween Theme Settings
If you are looking to feature the vacation countdown clock outdoors in a vertical setup, then a table with a Halloween theme might create the perfect setting. After all, Halloween is all about setting the perfect theme, and featuring a non-relevant indoor or scary video outdoors spoils the theme. Take a look at how Stephanie Cunningham on TikTok showcases her outdoor table decoration setup for Halloween.

4. A Kid In A Mummy Costume Holding A Halloween Bucket
If you are going for the classic mummy theme on Halloween, then how can you include any other footage than an actual mummy in the vertical countdown timer video? There are many ways to go about when looking to feature a mummy in the countdown clock; one idea is to show you made the mummy costumes, like Vina’s getup video on TikTok.

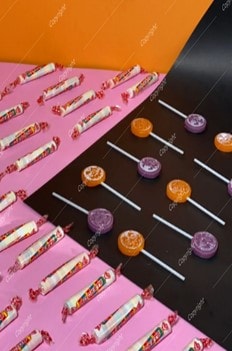
5. Stop Motion Of Halloween Candy
Hosting a Halloween party for kids and in search of the perfect vertical footage for a Halloween vacation countdown clock video? It cannot get better than simply featuring a bunch of candy to lure the kids toward the countdown clock. When you look at this video and imagine using a clock for the countdown clock.
Part 2: How to Apply a Halloween Countdown Clock to Your Video?
To make a unique Halloween Countdown Clock that ticks boxes around, you need software like Wondershare Filmora to implement the right element seamlessly.
Filmora library is filled with numerous such videos that will create the perfect backdrop for Halloween vacation countdown clock clips.
Coming to using the footage in your videos and making the Halloween countdown clock; well, you can do that easily using the Filmora Video editor (the video editor includes the Filmstock plug-in for easy navigation).
- Aside from Halloween-themed video footage, Filmora’s Filmstock also includes numerous audio, image, and other such elements.
- Filmora, primarily, is a video editor. You can combine all the elements like the stock footage videos discussed above and scary soundtracks and create a clock-down timer video easily.
- From trimming to splitting, to cool effects, there are several editing tools in Filmora.
- Transitions**, filters, text animations, and other editing features** are all supported.
Here’s how to use Filmora to Create a Halloween Countdown Clock Video
Free Download For Win 7 or later(64-bit)
Free Download For macOS 10.14 or later
Step1 Download and install Filmora on your Mac or PC.
Step2 Start the installed software and click Import from the main interface to upload the Halloween countdown clip. Alternatively, you can just drag-n-drop the video.

Step3 Drag-n-drop the uploaded video to the timeline.

Step4 Next, click on Stock Media and select the countdown effect that you want to use in the Halloween video. Then, drag-n-drop it to the timeline.

Step5 double click on the countdown effect and adjust it according to your requirement. You can adjust the time length too.

After that, play the video to preview it.
Step6 If you’re satisfied with the editing, scroll to the top of the screen and click Export, then, select ‘Burn DVD’.

Step7 Enter a name for your file in the Label box of the pop-up that appears on your screen, then in the Folder Path, choose the location where you want the file to be saved. Click the ‘Export’ button to finish.

Conclusion
There you have it - the top 15 Halloween countdown videos that can be used to spice up videos. Not to mention, you can find the stock footage on this page via Filmstock’s vast library containing tons of such videos. Also, is better to use subtle and not-so-horrifying clips if you want everything to be serene in the Halloween vacation countdown clock video.
Free Download For Win 7 or later(64-bit)
Free Download For macOS 10.14 or later
Halloween Countdown Clips Editor The best editor helps you add a Halloween countdown clip to your video.
Free Download Free Download Learn More

Part 1: Top 10 Halloween-Themed Footage for Halloween Countdown Clock Video
Here we provide footage exclusively for horizontal videos, so that you can use them for your videos for YouTube, Vimeo, Twitch, etc. If you just want some clips for TikTok, Ins story, or anything else, go ahead Halloween footage for vertical videos.
1. Fog Stones Halloween Dead
Spooky graveyard with scary tombstones is another good way to go about it when you are looking for vacation countdown clock videos. The mixture of the turbulent and serene environment is enough to set the Halloween mood and even scare some folks.
Remember the scene from the movie “The Fog” and its famous dialogues: When the fog rolls in the terror begin! If you do not, take a look at a scene and judge for yourself if scary enough or not.

2. Scary Sadako ghost
What’s better than the Sadako ghost 7-day video call threat on Halloween? Well, nothing! So, why not create a prank video for your friends and family, especially those afraid of Sadako? Plus, Sadako creates a perfect backdrop for the countdown. Look at this Philippines creator who went to great lengths to scare his friends via a Sadako video call.
But you do not have to go through all that costume and scenery setup. Instead, you can use the video footage on any premium video and apply Sadako ghost via Green Screen.

3. Transferring Halloween Cupcakes From The Tray To The Table Moments
Halloween is adored for its trick-or-treat, but what about the party? What will you serve? Cupcakes sound like a good idea. But how will you entice your guest with your Halloween cupcakes? Well, you can include the cupcakes in the invitation video. While you can find many Halloween creative and savory cupcake recipes on YouTube, you can use stock footage to have them in the video.

4. Skeleton breaking screen
The broken screen is the classic prank suitable for any event and day. But simply using apps or replacing the wallpaper on your friend’s or spouse’s mobile doesn’t cut in this age and day. With new technology coming in, you have to get creative. Plus, it’s for Halloween, meaning dead skulls are a must.

5. Dark Monster Halloween Horror
Halloween house horror is another great backdrop for scaring your friends after a vacation countdown clock. You will find tons of videos on Halloween Horror houses on the internet. Look at how Jackie from Super Enthused (YouTube channel) gets scared while touring the 10 Halloween horror houses at the theme park. That was really scary, and this Halloween countdown effect can also help you do the same to your viewers.

6. Face Portrait Halloween Clown
Scary clowns against a kid’s window have been the long norm of scaring the small ones. No doubt, such pranks can scare anyone, not just kids. If you do not believe me, look at the reaction video from Infinite featuring scaring clowns’ pranks.
But how about dropping such a scary face bomb in a vacation countdown clock video? You can easily get your hands on creepy clowns’ portraits for videos via premium stock libraries like Filmora’s Filmstock.

7. A Family Wearing Handmade Halloween Mask At Home
Another not-so-fancy, subtle, and understated appeal for the Halloween vacation countdown clock video is a family together with Halloween masks. Given everyone will be in their costumes, you can also consider distributing self-made masks for everyone. You can take ideas from any of the numerous videos about Halloween mask design ideas.

8. Halloween Buckets Stacked Together
What’s the simplest and most fitting footage for the Halloween vacation countdown clock? Well, it is the scary pumpkins. Carving out Jack-o’-lantern has long been the Halloween “tradition,” and featuring it in your countdown timer at the party is the most classic way to go about it. The vibe from simple Halloween buckets stacked together is on the next level; if you do not believe me, look at Angie Bellemare’s Halloween Bucket ideas and creativity:

9. Carving Of Pumpkin For Halloween
Another Jack-o’-lantern idea for the vacation countdown clock video is the DIY Pumpin projects in the video. It doesn’t sound like much, but it really is enough to give the best feeling about Halloween without really indulging in the scary stuff. Take a look at how Jenn designs her Pumpkin Stack Fall Planter:

10. Dough Halloween Cookies Bakery Products
If Halloween is more about spending time with friends and family, a bunch of laughter, fun, and creating memories, then it cannot get better than focusing on the sweet stuff, like the dough used to cook the Halloween cookies. When you imagine the scenario of dough mixing for the Halloween countdown timer video, it does not sound like much! But they are cool-looking and set the perfect backdrop for a countdown timer video:
You can use such clips individually or mix them with other stock video footage mentioned here to create a perfect Halloween vacation countdown clock video clip.

Halloween Footage for Vertical Videos [TikTok/Instagram Story]:
The above list discusses the panoramic footage suitable for big screens. If your screen is rather a vertical one, then you might be looking for vertical stock footage for the Halloween vacation countdown clock clip. Here are some vertical footage ideas and links to stock footage to create the perfect vertical vacation countdown clock video for Halloween:
1. Woman Decorating for Halloween [TikTok]
Another simple backdrop for the Halloween countdown timer video is the decorations process to transform your indoors or outdoors for Halloween. And while you can use your own footage of decorating the house, chances are you may have missed filming yourself while decorating the house, given not everyone films themselves decorating the house and use it for their TikTok video. Here’s a video from Spooky Bones featuring the indoor decoration process for Halloween.

2. Girl Blonde Portrait Halloween
Another simple idea for a vertical countdown timer for Halloween is a scary face. In fact, if you are looking for the users to focus on the timer instead of footage is to use a slo-mo video, like this one from Tay. Tay tells a story about a real haunted house in her neighborhood while wearing scary Halloween makeup.
Of course, you can replace the story; and instead, use a clock with a girl wearing Halloween makeup.

3. An Outdoor Table With Halloween Theme Settings
If you are looking to feature the vacation countdown clock outdoors in a vertical setup, then a table with a Halloween theme might create the perfect setting. After all, Halloween is all about setting the perfect theme, and featuring a non-relevant indoor or scary video outdoors spoils the theme. Take a look at how Stephanie Cunningham on TikTok showcases her outdoor table decoration setup for Halloween.

4. A Kid In A Mummy Costume Holding A Halloween Bucket
If you are going for the classic mummy theme on Halloween, then how can you include any other footage than an actual mummy in the vertical countdown timer video? There are many ways to go about when looking to feature a mummy in the countdown clock; one idea is to show you made the mummy costumes, like Vina’s getup video on TikTok.

5. Stop Motion Of Halloween Candy
Hosting a Halloween party for kids and in search of the perfect vertical footage for a Halloween vacation countdown clock video? It cannot get better than simply featuring a bunch of candy to lure the kids toward the countdown clock. When you look at this video and imagine using a clock for the countdown clock.

Part 2: How to Apply a Halloween Countdown Clock to Your Video?
To make a unique Halloween Countdown Clock that ticks boxes around, you need software like Wondershare Filmora to implement the right element seamlessly.
Filmora library is filled with numerous such videos that will create the perfect backdrop for Halloween vacation countdown clock clips.
Coming to using the footage in your videos and making the Halloween countdown clock; well, you can do that easily using the Filmora Video editor (the video editor includes the Filmstock plug-in for easy navigation).
- Aside from Halloween-themed video footage, Filmora’s Filmstock also includes numerous audio, image, and other such elements.
- Filmora, primarily, is a video editor. You can combine all the elements like the stock footage videos discussed above and scary soundtracks and create a clock-down timer video easily.
- From trimming to splitting, to cool effects, there are several editing tools in Filmora.
- Transitions**, filters, text animations, and other editing features** are all supported.
Here’s how to use Filmora to Create a Halloween Countdown Clock Video
Free Download For Win 7 or later(64-bit)
Free Download For macOS 10.14 or later
Step1 Download and install Filmora on your Mac or PC.
Step2 Start the installed software and click Import from the main interface to upload the Halloween countdown clip. Alternatively, you can just drag-n-drop the video.

Step3 Drag-n-drop the uploaded video to the timeline.

Step4 Next, click on Stock Media and select the countdown effect that you want to use in the Halloween video. Then, drag-n-drop it to the timeline.

Step5 double click on the countdown effect and adjust it according to your requirement. You can adjust the time length too.

After that, play the video to preview it.
Step6 If you’re satisfied with the editing, scroll to the top of the screen and click Export, then, select ‘Burn DVD’.

Step7 Enter a name for your file in the Label box of the pop-up that appears on your screen, then in the Folder Path, choose the location where you want the file to be saved. Click the ‘Export’ button to finish.

Conclusion
There you have it - the top 15 Halloween countdown videos that can be used to spice up videos. Not to mention, you can find the stock footage on this page via Filmstock’s vast library containing tons of such videos. Also, is better to use subtle and not-so-horrifying clips if you want everything to be serene in the Halloween vacation countdown clock video.
Free Download For Win 7 or later(64-bit)
Free Download For macOS 10.14 or later
How to Use Frame Blending in Premiere Pro
Create High-Quality Video - Wondershare Filmora
An easy and powerful YouTube video editor
Numerous video and audio effects to choose from
Detailed tutorials are provided by the official channel
Frame blending is a video editing technique used to create smooth transitions between two video frames. This process is often used to create special effects or transition between two different video clips. Frame blending can be done manually or with the help of software.
When frame blending is done manually, the editor will take two consecutive frames and blend them. This is done by using a process called cross-fading. Cross-fading is when the first frame gradually fades out while the second frame gradually fades in. The result is a seamless transition between the two frames.
Frame blending can also be done with the help of software. Many software programs offer frame blending capabilities Like Adobe Premiere Pro and more. These software programs typically have a user interface that allows the user to select the two frames that they want to blend. The software will then perform the cross-fading process automatically.

In this article
01 What is frame blending in Premiere Pro?
02 How to Choose from Frame Blending/ Frame Sampling/ Optical Flow
03 How to use Frame Blanding in Adobe Premiere Pro?
What is frame blending in Premiere Pro?
In Adobe Premiere Pro, frame blending is a built-in feature that can be used to create smooth transitions between two video frames. This feature can be accessed by selecting the “Effects” tab and choosing the “Frame Blending” option.
When using frame blending in Premiere Pro, the user will first need to select the two frames they want to blend. The user can then specify the amount of cross-fade they want to apply. The software will then automatically perform the frame blending process.

How to Choose from Frame Blending/ Frame Sampling/ Optical Flow
The different types of frame blending are:
- Frame Sampling: best for smooth movements, no image distortion.
- Optical Flow: smoother results but can cause image distortion.
- Frame Blending: a mix of the two, some image distortion but smoother results.
So, choosing which type of frame blending to use depends on the footage and the desired results. If you want smooth results with no image distortion, frame sampling is the best option. However, if you don’t mind some image distortion in exchange for smoother results, optical flow or frame blending would be better choices.
How to decide which option is the best for your use? Let’s explain more, and It depends on the footage and the desired results. If you want smooth results with no image distortion, frame sampling is the best option. However, if you don’t mind some image distortion in exchange for smoother results, optical flow or frame blending would be better choices.

How to use Frame Blanding in Adobe Premiere Pro?
Step 1\
Using frame blending in Adobe Premiere Pro is a simple process. First, the user will need to select the two frames that they want to blend. The user can then specify the amount of cross-fade they want to apply. The software will then automatically perform the frame blending process.
Open up Adobe Premiere Pro and load the two frames that you want to blend to get started. Once the frames are loaded, select the “Effects” tab and then choose the “Frame Blending” option.
Step 2\
Next, select the two frames that you want to blend. You can perform this by clicking on the first frame and then holding down the “Shift” key while clicking on the second frame.
Once the two frames are selected, specify the amount of cross-fade that you want to apply. You can do this by adjusting the “Crossfade Duration” slider. The software will then automatically perform the frame blending process.

Frame blending is a simple and effective way to create smooth transitions between two video frames. This technique can create a variety of different effects, such as dissolves, fades, and more. Frame blending is a built-in feature in Adobe Premiere Pro and can be accessed by selecting the “Effects” tab and then choosing the “Frame Blending” option. To use frame blending, simply select the two frames you want to blend and specify the amount of cross-fade you want to apply. The software will then automatically perform the frame blending process.
You can also consider Filmora for Blending Frame
Filmora is a video editing software that allows you to create, edit, and export videos. The software includes various features, such as the ability to add text, transitions, and effects. You can also use Filmora to create titles, lower thirds, etc.
How to use Filmora?
To use Filmora, simply load the video you want to edit and make the changes you want. Once you’re happy with the results, export the video, and it will be saved in the format of your choice.
How to use Frame Blending in Filmora?
There are things to keep in mind when using frame blending in Filmora.
First, the software only supports AVI and WMV files. Second, the frame blending feature is only available in the paid version of the software. Lastly, frame blending can only be used on two video frames at a time.
The video is made up of distinct layers blended together to create a unique and appealing look. There is a craft of making a running frame out of more than one video or picture. Even though the technique is considerably older, and individuals undertake it with much work, it has recently become simpler. We now have the easier method of combining two or more clips in a single frame, which we term Blend Modes.

How to composite with blending modes?
- Choose the videos and effects that you wish to overlay.
- Double-click the overlay clip on the timeline to view and adjust the video options for the split-screen effect.
- Go to the Compositing section and choose Blending Mode from the drop-down menu to apply an effect. Select Screen from the drop-down menu if you’d like to overlay an effect over a video.
Frame blending is a simple and effective way to create smooth transitions between two video frames. This technique can create a variety of different effects, such as dissolves, fades, and more. Frame blending is a built-in feature in Filmora and can be accessed by loading the video you want to edit and then making the changes you want. Once you’re happy with the results, export the video, and it will be saved in the format of your choice.
Advance features in Filmora 11
The latest version of Filmora (11.2.1) includes several new and improved features, such as:
- The ability to add textured background images
- An updated user interface
- A wider variety of title templates
- More video and audio effects
- Improved performance and stability
Filmora is a good choice for video editors who want to do more with their software. The program contains all of the essential functions of a video editor, such as the ability to add text, transitions, and effects. In addition, Filmora also includes some more advanced features, such as the ability to add textured background images and the ability to create titles, lower thirds, and more.
For Win 7 or later (64-bit)
For macOS 10.12 or later
Conclusion
● Frame blending is a simple and effective way to create smooth transitions between two video frames. This technique can be used to create a variety of different effects, such as dissolves, fades, and more. Frame blending is a built-in feature in Filmora and can be accessed by loading the video you want to edit and then making the changes you want. Once you’re happy with the results, export the video, and it will be saved in the format of your choice.
Frame blending is a video editing technique used to create smooth transitions between two video frames. This process is often used to create special effects or transition between two different video clips. Frame blending can be done manually or with the help of software.
When frame blending is done manually, the editor will take two consecutive frames and blend them. This is done by using a process called cross-fading. Cross-fading is when the first frame gradually fades out while the second frame gradually fades in. The result is a seamless transition between the two frames.
Frame blending can also be done with the help of software. Many software programs offer frame blending capabilities Like Adobe Premiere Pro and more. These software programs typically have a user interface that allows the user to select the two frames that they want to blend. The software will then perform the cross-fading process automatically.

In this article
01 What is frame blending in Premiere Pro?
02 How to Choose from Frame Blending/ Frame Sampling/ Optical Flow
03 How to use Frame Blanding in Adobe Premiere Pro?
What is frame blending in Premiere Pro?
In Adobe Premiere Pro, frame blending is a built-in feature that can be used to create smooth transitions between two video frames. This feature can be accessed by selecting the “Effects” tab and choosing the “Frame Blending” option.
When using frame blending in Premiere Pro, the user will first need to select the two frames they want to blend. The user can then specify the amount of cross-fade they want to apply. The software will then automatically perform the frame blending process.

How to Choose from Frame Blending/ Frame Sampling/ Optical Flow
The different types of frame blending are:
- Frame Sampling: best for smooth movements, no image distortion.
- Optical Flow: smoother results but can cause image distortion.
- Frame Blending: a mix of the two, some image distortion but smoother results.
So, choosing which type of frame blending to use depends on the footage and the desired results. If you want smooth results with no image distortion, frame sampling is the best option. However, if you don’t mind some image distortion in exchange for smoother results, optical flow or frame blending would be better choices.
How to decide which option is the best for your use? Let’s explain more, and It depends on the footage and the desired results. If you want smooth results with no image distortion, frame sampling is the best option. However, if you don’t mind some image distortion in exchange for smoother results, optical flow or frame blending would be better choices.

How to use Frame Blanding in Adobe Premiere Pro?
Step 1\
Using frame blending in Adobe Premiere Pro is a simple process. First, the user will need to select the two frames that they want to blend. The user can then specify the amount of cross-fade they want to apply. The software will then automatically perform the frame blending process.
Open up Adobe Premiere Pro and load the two frames that you want to blend to get started. Once the frames are loaded, select the “Effects” tab and then choose the “Frame Blending” option.
Step 2\
Next, select the two frames that you want to blend. You can perform this by clicking on the first frame and then holding down the “Shift” key while clicking on the second frame.
Once the two frames are selected, specify the amount of cross-fade that you want to apply. You can do this by adjusting the “Crossfade Duration” slider. The software will then automatically perform the frame blending process.

Frame blending is a simple and effective way to create smooth transitions between two video frames. This technique can create a variety of different effects, such as dissolves, fades, and more. Frame blending is a built-in feature in Adobe Premiere Pro and can be accessed by selecting the “Effects” tab and then choosing the “Frame Blending” option. To use frame blending, simply select the two frames you want to blend and specify the amount of cross-fade you want to apply. The software will then automatically perform the frame blending process.
You can also consider Filmora for Blending Frame
Filmora is a video editing software that allows you to create, edit, and export videos. The software includes various features, such as the ability to add text, transitions, and effects. You can also use Filmora to create titles, lower thirds, etc.
How to use Filmora?
To use Filmora, simply load the video you want to edit and make the changes you want. Once you’re happy with the results, export the video, and it will be saved in the format of your choice.
How to use Frame Blending in Filmora?
There are things to keep in mind when using frame blending in Filmora.
First, the software only supports AVI and WMV files. Second, the frame blending feature is only available in the paid version of the software. Lastly, frame blending can only be used on two video frames at a time.
The video is made up of distinct layers blended together to create a unique and appealing look. There is a craft of making a running frame out of more than one video or picture. Even though the technique is considerably older, and individuals undertake it with much work, it has recently become simpler. We now have the easier method of combining two or more clips in a single frame, which we term Blend Modes.

How to composite with blending modes?
- Choose the videos and effects that you wish to overlay.
- Double-click the overlay clip on the timeline to view and adjust the video options for the split-screen effect.
- Go to the Compositing section and choose Blending Mode from the drop-down menu to apply an effect. Select Screen from the drop-down menu if you’d like to overlay an effect over a video.
Frame blending is a simple and effective way to create smooth transitions between two video frames. This technique can create a variety of different effects, such as dissolves, fades, and more. Frame blending is a built-in feature in Filmora and can be accessed by loading the video you want to edit and then making the changes you want. Once you’re happy with the results, export the video, and it will be saved in the format of your choice.
Advance features in Filmora 11
The latest version of Filmora (11.2.1) includes several new and improved features, such as:
- The ability to add textured background images
- An updated user interface
- A wider variety of title templates
- More video and audio effects
- Improved performance and stability
Filmora is a good choice for video editors who want to do more with their software. The program contains all of the essential functions of a video editor, such as the ability to add text, transitions, and effects. In addition, Filmora also includes some more advanced features, such as the ability to add textured background images and the ability to create titles, lower thirds, and more.
For Win 7 or later (64-bit)
For macOS 10.12 or later
Conclusion
● Frame blending is a simple and effective way to create smooth transitions between two video frames. This technique can be used to create a variety of different effects, such as dissolves, fades, and more. Frame blending is a built-in feature in Filmora and can be accessed by loading the video you want to edit and then making the changes you want. Once you’re happy with the results, export the video, and it will be saved in the format of your choice.
Frame blending is a video editing technique used to create smooth transitions between two video frames. This process is often used to create special effects or transition between two different video clips. Frame blending can be done manually or with the help of software.
When frame blending is done manually, the editor will take two consecutive frames and blend them. This is done by using a process called cross-fading. Cross-fading is when the first frame gradually fades out while the second frame gradually fades in. The result is a seamless transition between the two frames.
Frame blending can also be done with the help of software. Many software programs offer frame blending capabilities Like Adobe Premiere Pro and more. These software programs typically have a user interface that allows the user to select the two frames that they want to blend. The software will then perform the cross-fading process automatically.

In this article
01 What is frame blending in Premiere Pro?
02 How to Choose from Frame Blending/ Frame Sampling/ Optical Flow
03 How to use Frame Blanding in Adobe Premiere Pro?
What is frame blending in Premiere Pro?
In Adobe Premiere Pro, frame blending is a built-in feature that can be used to create smooth transitions between two video frames. This feature can be accessed by selecting the “Effects” tab and choosing the “Frame Blending” option.
When using frame blending in Premiere Pro, the user will first need to select the two frames they want to blend. The user can then specify the amount of cross-fade they want to apply. The software will then automatically perform the frame blending process.

How to Choose from Frame Blending/ Frame Sampling/ Optical Flow
The different types of frame blending are:
- Frame Sampling: best for smooth movements, no image distortion.
- Optical Flow: smoother results but can cause image distortion.
- Frame Blending: a mix of the two, some image distortion but smoother results.
So, choosing which type of frame blending to use depends on the footage and the desired results. If you want smooth results with no image distortion, frame sampling is the best option. However, if you don’t mind some image distortion in exchange for smoother results, optical flow or frame blending would be better choices.
How to decide which option is the best for your use? Let’s explain more, and It depends on the footage and the desired results. If you want smooth results with no image distortion, frame sampling is the best option. However, if you don’t mind some image distortion in exchange for smoother results, optical flow or frame blending would be better choices.

How to use Frame Blanding in Adobe Premiere Pro?
Step 1\
Using frame blending in Adobe Premiere Pro is a simple process. First, the user will need to select the two frames that they want to blend. The user can then specify the amount of cross-fade they want to apply. The software will then automatically perform the frame blending process.
Open up Adobe Premiere Pro and load the two frames that you want to blend to get started. Once the frames are loaded, select the “Effects” tab and then choose the “Frame Blending” option.
Step 2\
Next, select the two frames that you want to blend. You can perform this by clicking on the first frame and then holding down the “Shift” key while clicking on the second frame.
Once the two frames are selected, specify the amount of cross-fade that you want to apply. You can do this by adjusting the “Crossfade Duration” slider. The software will then automatically perform the frame blending process.

Frame blending is a simple and effective way to create smooth transitions between two video frames. This technique can create a variety of different effects, such as dissolves, fades, and more. Frame blending is a built-in feature in Adobe Premiere Pro and can be accessed by selecting the “Effects” tab and then choosing the “Frame Blending” option. To use frame blending, simply select the two frames you want to blend and specify the amount of cross-fade you want to apply. The software will then automatically perform the frame blending process.
You can also consider Filmora for Blending Frame
Filmora is a video editing software that allows you to create, edit, and export videos. The software includes various features, such as the ability to add text, transitions, and effects. You can also use Filmora to create titles, lower thirds, etc.
How to use Filmora?
To use Filmora, simply load the video you want to edit and make the changes you want. Once you’re happy with the results, export the video, and it will be saved in the format of your choice.
How to use Frame Blending in Filmora?
There are things to keep in mind when using frame blending in Filmora.
First, the software only supports AVI and WMV files. Second, the frame blending feature is only available in the paid version of the software. Lastly, frame blending can only be used on two video frames at a time.
The video is made up of distinct layers blended together to create a unique and appealing look. There is a craft of making a running frame out of more than one video or picture. Even though the technique is considerably older, and individuals undertake it with much work, it has recently become simpler. We now have the easier method of combining two or more clips in a single frame, which we term Blend Modes.

How to composite with blending modes?
- Choose the videos and effects that you wish to overlay.
- Double-click the overlay clip on the timeline to view and adjust the video options for the split-screen effect.
- Go to the Compositing section and choose Blending Mode from the drop-down menu to apply an effect. Select Screen from the drop-down menu if you’d like to overlay an effect over a video.
Frame blending is a simple and effective way to create smooth transitions between two video frames. This technique can create a variety of different effects, such as dissolves, fades, and more. Frame blending is a built-in feature in Filmora and can be accessed by loading the video you want to edit and then making the changes you want. Once you’re happy with the results, export the video, and it will be saved in the format of your choice.
Advance features in Filmora 11
The latest version of Filmora (11.2.1) includes several new and improved features, such as:
- The ability to add textured background images
- An updated user interface
- A wider variety of title templates
- More video and audio effects
- Improved performance and stability
Filmora is a good choice for video editors who want to do more with their software. The program contains all of the essential functions of a video editor, such as the ability to add text, transitions, and effects. In addition, Filmora also includes some more advanced features, such as the ability to add textured background images and the ability to create titles, lower thirds, and more.
For Win 7 or later (64-bit)
For macOS 10.12 or later
Conclusion
● Frame blending is a simple and effective way to create smooth transitions between two video frames. This technique can be used to create a variety of different effects, such as dissolves, fades, and more. Frame blending is a built-in feature in Filmora and can be accessed by loading the video you want to edit and then making the changes you want. Once you’re happy with the results, export the video, and it will be saved in the format of your choice.
Frame blending is a video editing technique used to create smooth transitions between two video frames. This process is often used to create special effects or transition between two different video clips. Frame blending can be done manually or with the help of software.
When frame blending is done manually, the editor will take two consecutive frames and blend them. This is done by using a process called cross-fading. Cross-fading is when the first frame gradually fades out while the second frame gradually fades in. The result is a seamless transition between the two frames.
Frame blending can also be done with the help of software. Many software programs offer frame blending capabilities Like Adobe Premiere Pro and more. These software programs typically have a user interface that allows the user to select the two frames that they want to blend. The software will then perform the cross-fading process automatically.

In this article
01 What is frame blending in Premiere Pro?
02 How to Choose from Frame Blending/ Frame Sampling/ Optical Flow
03 How to use Frame Blanding in Adobe Premiere Pro?
What is frame blending in Premiere Pro?
In Adobe Premiere Pro, frame blending is a built-in feature that can be used to create smooth transitions between two video frames. This feature can be accessed by selecting the “Effects” tab and choosing the “Frame Blending” option.
When using frame blending in Premiere Pro, the user will first need to select the two frames they want to blend. The user can then specify the amount of cross-fade they want to apply. The software will then automatically perform the frame blending process.

How to Choose from Frame Blending/ Frame Sampling/ Optical Flow
The different types of frame blending are:
- Frame Sampling: best for smooth movements, no image distortion.
- Optical Flow: smoother results but can cause image distortion.
- Frame Blending: a mix of the two, some image distortion but smoother results.
So, choosing which type of frame blending to use depends on the footage and the desired results. If you want smooth results with no image distortion, frame sampling is the best option. However, if you don’t mind some image distortion in exchange for smoother results, optical flow or frame blending would be better choices.
How to decide which option is the best for your use? Let’s explain more, and It depends on the footage and the desired results. If you want smooth results with no image distortion, frame sampling is the best option. However, if you don’t mind some image distortion in exchange for smoother results, optical flow or frame blending would be better choices.

How to use Frame Blanding in Adobe Premiere Pro?
Step 1\
Using frame blending in Adobe Premiere Pro is a simple process. First, the user will need to select the two frames that they want to blend. The user can then specify the amount of cross-fade they want to apply. The software will then automatically perform the frame blending process.
Open up Adobe Premiere Pro and load the two frames that you want to blend to get started. Once the frames are loaded, select the “Effects” tab and then choose the “Frame Blending” option.
Step 2\
Next, select the two frames that you want to blend. You can perform this by clicking on the first frame and then holding down the “Shift” key while clicking on the second frame.
Once the two frames are selected, specify the amount of cross-fade that you want to apply. You can do this by adjusting the “Crossfade Duration” slider. The software will then automatically perform the frame blending process.

Frame blending is a simple and effective way to create smooth transitions between two video frames. This technique can create a variety of different effects, such as dissolves, fades, and more. Frame blending is a built-in feature in Adobe Premiere Pro and can be accessed by selecting the “Effects” tab and then choosing the “Frame Blending” option. To use frame blending, simply select the two frames you want to blend and specify the amount of cross-fade you want to apply. The software will then automatically perform the frame blending process.
You can also consider Filmora for Blending Frame
Filmora is a video editing software that allows you to create, edit, and export videos. The software includes various features, such as the ability to add text, transitions, and effects. You can also use Filmora to create titles, lower thirds, etc.
How to use Filmora?
To use Filmora, simply load the video you want to edit and make the changes you want. Once you’re happy with the results, export the video, and it will be saved in the format of your choice.
How to use Frame Blending in Filmora?
There are things to keep in mind when using frame blending in Filmora.
First, the software only supports AVI and WMV files. Second, the frame blending feature is only available in the paid version of the software. Lastly, frame blending can only be used on two video frames at a time.
The video is made up of distinct layers blended together to create a unique and appealing look. There is a craft of making a running frame out of more than one video or picture. Even though the technique is considerably older, and individuals undertake it with much work, it has recently become simpler. We now have the easier method of combining two or more clips in a single frame, which we term Blend Modes.

How to composite with blending modes?
- Choose the videos and effects that you wish to overlay.
- Double-click the overlay clip on the timeline to view and adjust the video options for the split-screen effect.
- Go to the Compositing section and choose Blending Mode from the drop-down menu to apply an effect. Select Screen from the drop-down menu if you’d like to overlay an effect over a video.
Frame blending is a simple and effective way to create smooth transitions between two video frames. This technique can create a variety of different effects, such as dissolves, fades, and more. Frame blending is a built-in feature in Filmora and can be accessed by loading the video you want to edit and then making the changes you want. Once you’re happy with the results, export the video, and it will be saved in the format of your choice.
Advance features in Filmora 11
The latest version of Filmora (11.2.1) includes several new and improved features, such as:
- The ability to add textured background images
- An updated user interface
- A wider variety of title templates
- More video and audio effects
- Improved performance and stability
Filmora is a good choice for video editors who want to do more with their software. The program contains all of the essential functions of a video editor, such as the ability to add text, transitions, and effects. In addition, Filmora also includes some more advanced features, such as the ability to add textured background images and the ability to create titles, lower thirds, and more.
For Win 7 or later (64-bit)
For macOS 10.12 or later
Conclusion
● Frame blending is a simple and effective way to create smooth transitions between two video frames. This technique can be used to create a variety of different effects, such as dissolves, fades, and more. Frame blending is a built-in feature in Filmora and can be accessed by loading the video you want to edit and then making the changes you want. Once you’re happy with the results, export the video, and it will be saved in the format of your choice.
Also read:
- New Are You Excited to Learn About a File Format that Helps in Easy Transfer? We Are Talking About the 3GP Format. Stay with Us and Get to Know More About It
- New In 2024, Add Camera Shake to Video in Adobe After Effects
- 2024 Approved There Are Many Vlogging Cameras You Can Find in the Market. However, to Get a Good Start in Vlogging, some Sony Vlogging Cameras and Canon Vlog Cameras Are to Consider. This Article Introduces You to the Respective List
- New 2024 Approved Basic Introduction of LumaFusion Color Grading
- Why Did Filmora AI Portrait Attract People, In 2024
- New How to Remove Audio From Video on Mac? Free and Official Solutions
- New Do You Want to Get Green Screen Effects on Your Video without Green Screen Setup in Your Background? Learn How to Get Virtual Green Screen Background and Shoot Videos Like a Pro
- Add Background to Video With/Without a Green Screen
- New 2024 Approved Step by Step to Resize Video in Davinci Resolve
- Updated How to Speed Up and Slow Down a Video
- New 2024 Approved How to Create Intro Video with Filmora
- Updated 2024 Approved Best 10 Mind-Blowing Video Collage Maker for PC
- In 2024, Discover the Best Video Frame Rate Converters for Smooth Playback, Including Online and Offline Options. Learn How to Convert Frame Rates for Free and Elevate Your Video Quality with These Top 8 Tools
- Do You Have the Habit to Create Subtitle for Your Video? You Can Always Add Open and Close Subtitles to Your Video to Make It Perfect. Follow This Article to Learn More About It
- In 2024, This Article Is a Guide on How to Download and Install Final Cut Pro, Its Key Features, and More. It Also Discusses an Alternative Option to It so the Creators or Editors Can Opt for Editing Videos Accordingly
- Planning and Storyboarding Is the Most Important Part of Creating a Music Video. Here Are some Easy Tips for Planning and Storyboarding a Music Video in Filmora for 2024
- How to Soft Reset Samsung Galaxy A23 5G phone? | Dr.fone
- How To Change Poco C50 Lock Screen Clock in Seconds
- About Tecno Spark 20 Pro FRP Bypass
- Ultimate Guide to Catch the Regional-Located Pokemon For Lava Blaze Curve 5G | Dr.fone
- Different Methods for Resetting Xiaomi Redmi K70 Phones with Screen Locked and Not | Dr.fone
- In 2024, Pokemon Go No GPS Signal? Heres Every Possible Solution On Honor Magic 5 | Dr.fone
- 3 Effective Methods to Fake GPS location on Android For your Vivo Y02T | Dr.fone
- In 2024, How To Transfer Data from Apple iPhone 7 to New iPhone 15 | Dr.fone
- In 2024, How to Change your Huawei Nova Y91 Location on Twitter | Dr.fone
- Hassle-Free Ways to Remove FRP Lock from Infinix Note 30 VIP Racing Edition Phones with/without a PC
- In 2024, Quick Steps to Change Weather Location on Apple iPhone 12 Pro Max | Dr.fone
- How To Unlock Any Infinix Zero 30 5G Phone Password Using Emergency Call
- Title: In 2024, Free Ways to Download Mobile Phone Green Screen Videos and Pictures No Copyright
- Author: Chloe
- Created at : 2024-05-20 03:38:03
- Updated at : 2024-05-21 03:38:03
- Link: https://ai-editing-video.techidaily.com/in-2024-free-ways-to-download-mobile-phone-green-screen-videos-and-pictures-no-copyright/
- License: This work is licensed under CC BY-NC-SA 4.0.


