
:max_bytes(150000):strip_icc():format(webp)/GettyImages-136612668-5c640cc5c9e77c00010a4ff4.jpg)
In 2024, Hey! Are You Looking for Video Reverse Effects in Your Videos? Then, You Are at the Right Place. This Article Will Guide You in Creating a Video Reverse Effect
Hey! Are You Looking for Video Reverse Effects in Your Videos? Then, You Are at the Right Place. This Article Will Guide You in Creating a Video Reverse Effect
All great video editors use phenomenal video effects in their videos. One of the most professional effects is the reverse video effect. This unique effect is always challenging for the makers to shoot and portray on the screen flawlessly.
At the same time, it is intriguing and always draws the audience’s attention. In this article, you will learn to shoot and edit the video for reverse effects using Filmora. But first, we will learn what does video reverse effect mean. So let us get into this!
Part 1. What Is Video Reverse Effect?
It is a special video effect in which a motion of things starts in the backward direction. This unique effect is used to intrigue the audience.
For example, if a bullet is fired from a gun. With the reverse effect, you can rewind the footage, and the shot goes back into the gun. So today, you can easily rewind fast action scenes and get a wow reaction from the audience.
Famous Examples of Reverse Effect in Films
1- Demolition of a Wall (1896)
Filmmakers first used this striking effect in 1896 in a 90 seconds film, “Demolition of a wall.” Louis Lumiere was the one who made that video. Below is shown an image from the film.

2- Tenet (2020)
It is a viral film by Christopher Nolan, which was a great success. He explained the concept of reverse entropy, in which you start moving back chronologically in time instead of forward. This concept is all shown through this special video reverse effect. Unfortunately, the audience had difficulty digesting this unique concept, which generated an awful response.

Part 2. How To Shoot Video Reverse Effect?
The reverse effect is unique, so special attention should be paid while filming a video. This section will cover some of the crucial prerequisites to film a video.
Steady Camera
It would be best to have your camera placed on a steady surface or mounted on a tripod stand to lock the focus. We will split the area and perform different tasks to make it look smooth. The audience will not get the idea that you completed the tasks separately. And it helps in the editing process as well.

A Spacious Area
You will need a spacious area in which you will perform different tasks. Make sure your camera stands still while shooting all the frames of video. In an ample space, it becomes easier to do movements freely. It also helps prevent glitches in the final product.
Splitting of Area into Portions
Now you have to split your area into portions. Each task is in its part of the frame, and actions in one frame should not pass over into another. You will do one activity per portion. It makes the editing process a lot easier. Finally, we get all three videos to merge and make it look like a single video.

After covering the prerequisites, we will now learn the editing process of creating a video reverse effect.
Part 3. How To Edit Video Reverse Effect In Filmora? [Stepwise Guide]
Creating video reverse effects is much easier these days. Wondershare Filmora is going to help you a lot. Filmora is an exceptional platform for creating innovative and creative videos. It has advanced editing features, which help make professional videos.
Free Download For Win 7 or later(64-bit)
Free Download For macOS 10.14 or later
Applying video reverse effects to your shots here is a wise guide. Please follow the instructions given below.
Step1 Downloading Filmora and Importing Files
- After recording your shots, you will edit them in Filmora. But first, download Filmora from the website and install it.
- After opening the software, import the recording files by clicking “Import Media.”

Step2 Drag the Shots to the Timeline
- Drag the shots to the timeline and drop it. If Filmora asks for a matching resolution on the timeline, please click “Match to Media.” It will adjust your media resolution according to the timeline.

- Add videos of each action on the layers above by drag and drop.
Step3 Adding Image Mask to the Clips
- Now you will add an image mask to the clips you shot at the area’s corners.
- To simultaneously show each action in the final video, go to “Effects” and click on the search tab.
- Please search “Image Mask.”
- Now drag and drop this effect to the footage shot at corners of the area.

Step4 Adjustment of the Image Mask of each Footage
- Now we will adjust the image mask of each footage so that each will show the task without any glitches.
- For that purpose, double-click on the video. Next, click on “Effects” in the top right corner of the screen. Then select “Image Mask” and make the necessary adjustments so that each mask shows each footage.

Step5 Trimming the Video Clip
- You can trim the footage to create a smooth movement in each portion. In this way, all the clips gel together in a single frame.

- We have successfully gelled together three video clips in a single frame.
- But all these videos are moving forward. So let us now apply the reverse effect to a video clip.
Step6 Apply Reverse Speed to Video Clip
- Please right-click on the video and select “Show speed control.”
- The Control panel will open in the right corner of the screen.
- Then enable the “Reverse Speed” option. You will apply a reverse effect to that clip.

- Your video is ready now, with one clip moving in reverse and two in the forward direction.
- Take a look at the preview of your final product.
- Apply some changes to it if needed.
Step7 Export the Final Project
- Now it’s time to export the project to the device.
- Please select “Export” in the top right corner of the screen. And ship it to the device.

Step8 Final Video
Now have a look at the final project. How smooth and perfect it looks. That’s it!

Conclusion
The reverse video effect has a unique characteristic of its own. And it will always work when you use it in your videos. The great success of many popular films is evident by the captivating feature that this effect has got. In this article, we have discussed the prerequisites and steps of creating a reverse video effect.
If this article has helped you, please mention your experience in the comment box. Also, please share this article with your friends and colleagues. Keep creating!
Free Download For macOS 10.14 or later
Applying video reverse effects to your shots here is a wise guide. Please follow the instructions given below.
Step1 Downloading Filmora and Importing Files
- After recording your shots, you will edit them in Filmora. But first, download Filmora from the website and install it.
- After opening the software, import the recording files by clicking “Import Media.”
Step2 Drag the Shots to the Timeline
- Drag the shots to the timeline and drop it. If Filmora asks for a matching resolution on the timeline, please click “Match to Media.” It will adjust your media resolution according to the timeline.
- Add videos of each action on the layers above by drag and drop.
Step3 Adding Image Mask to the Clips
- Now you will add an image mask to the clips you shot at the area’s corners.
- To simultaneously show each action in the final video, go to “Effects” and click on the search tab.
- Please search “Image Mask.”
- Now drag and drop this effect to the footage shot at corners of the area.
Step4 Adjustment of the Image Mask of each Footage
- Now we will adjust the image mask of each footage so that each will show the task without any glitches.
- For that purpose, double-click on the video. Next, click on “Effects” in the top right corner of the screen. Then select “Image Mask” and make the necessary adjustments so that each mask shows each footage.
Step5 Trimming the Video Clip
- You can trim the footage to create a smooth movement in each portion. In this way, all the clips gel together in a single frame.
- We have successfully gelled together three video clips in a single frame.
- But all these videos are moving forward. So let us now apply the reverse effect to a video clip.
Step6 Apply Reverse Speed to Video Clip
- Please right-click on the video and select “Show speed control.”
- The Control panel will open in the right corner of the screen.
- Then enable the “Reverse Speed” option. You will apply a reverse effect to that clip.
- Your video is ready now, with one clip moving in reverse and two in the forward direction.
- Take a look at the preview of your final product.
- Apply some changes to it if needed.
Step7 Export the Final Project
- Now it’s time to export the project to the device.
- Please select “Export” in the top right corner of the screen. And ship it to the device.
Step8 Final Video
Now have a look at the final project. How smooth and perfect it looks. That’s it!
Conclusion
The reverse video effect has a unique characteristic of its own. And it will always work when you use it in your videos. The great success of many popular films is evident by the captivating feature that this effect has got. In this article, we have discussed the prerequisites and steps of creating a reverse video effect.
If this article has helped you, please mention your experience in the comment box. Also, please share this article with your friends and colleagues. Keep creating!
How to Make a Custom Slide Show in PowerPoint
How to Create a Custom Slide Shows in Powerpoint
An easy yet powerful editor
Numerous effects to choose from
Detailed tutorials provided by the official channel
Designing custom slideshows in PowerPoint is an absolute fun to do activity for infotainment and information sharing needs. Stay here to get an insight into creating the same, all in a wink!
In this article
01 [How to Create a Custom Slide Show in PowerPoint?](#Part 1)
02 [How to Show a Custom Show in PowerPoint?](#Part 2)
03 [How to Hide Slides in PowerPoint?](#Part 3)
Part 1 How to Create a Custom Slide Show in PowerPoint?
PowerPoint presentations are an already elusive and captivating media of information delivery and content sharing, be it a personal entertainment need or a high end professional requirement, PowerPoint presentations can do it all! Responding to the day to day IT upgrades of modern times, the aforesaid MS Office utility program has introduced its custom slideshow feature, which you can work upon to expand your creative skills in graphic design.
Custom slideshows are a convenient means of abstracting a required set of contents from a rather detailed slideshow presentation to address the needs of a specific audience, instead of distracting them with showcasing the entire content, most of which turns irrelevant to their exclusive requirements.
Talking about the knowhow to work with the feature, the following section encompasses a comprehensive understanding of the custom slide show creation process with the finest details:
User’s Guide to Create Custom Slideshows in PowerPoint
Step 1: Launch the PowerPoint Tool
Start the custom slide show PowerPoint creation process with launching the PowerPoint tool in any of your preferred devices. It would be better to work on a desktop or a PC. Proceed to open the presentation that you wish to create a custom slideshow from.
Step 2: Custom Slide Show Option
In the welcome interface of PowerPoint, navigate to the ribbon at the top and hit the ‘Slide Show’ tab, followed by clicking on the ‘Custom Slide Show’ button from the ‘Options Panel’ that appears. As you tap the aforesaid button, a dropdown menu follows next, from where you need to choose the ‘Custom Shows…’ option.

Step 3: Custom Shows Dialog Box
The completion of Step 2 brings up the ‘Custom Shows’ dialog box, with a blank area at the left, indicating the absence of any custom slide show as yet. To create one, navigate to and click on the ‘New’ button at the right side within the dialog box.

Step 4: Define Custom Show Dialog Box
As you tap the ‘New’ button, the ‘Define Custom Shows’ dialog box pops up with a display of the following fields and buttons:
● Slide Show Name Box
Use this field to assign a name to your custom slideshow. In case you don’t add a name of your choice, PowerPoint will assign the name ‘Custom Show 1’ to your custom presentation.
● Slides in Presentation
Below the ‘Slide Show Name’ box, appears a list of slides in the chosen presentation which you can use to create the custom slide show. To add slides to the same, click on the respective slide names.
● Add Button
The ‘Add’ button in the middle of the ‘Define Custom Show’ dialog box is used to include selected slides from the main list explained above to the ‘Slides in Custom Show’ list at the right. The ‘Add’ button however, remains disabled until you make a selection from the main slides list to include within the custom slides list. Take note that you can choose to repeat the slides within the custom list.
● Remove Button
You can use this button to select and delete specific slides from the ‘Slides in Custom Show’ list. The button however, remains disabled till you make a slide selection to be removed.
● Slides in Custom Show
This is a list of slides that you have selected from the main slides list to include in the custom slideshow.
● Re-Order Buttons
These are ‘Up’ and ‘Down’ arrows at the right side of the ‘Define Custom Show’ dialog box, which are active only if the ‘Slides in Custom Show’ list has more than one slide to its credit. In such a case, you can use these arrows to change the sequence of appearance of the slides within the custom presentation.

Step 5: Back to Custom Shows Dialog Box
When you have finished making all the required entries in the aforesaid fields, click on ‘OK’ to create your custom slideshow, which is visible in the ‘Custom Shows’ dialog box. You can preview the just created custom presentation by selecting the slideshow in the ‘Custom Shows’ list, followed by clicking on the ‘Show’ button at the bottom right of the dialog box.

The ‘Custom Shows’ dialog box has an additional list of buttons, which are explained as follows:
● The ‘New’ button, which you can click on to continue creating as many custom slideshows as you like.
● The ‘Edit’ button, which allows you to make changes to a specific custom slideshow.
● The ‘Remove’ button, which you can use to select and delete an existing custom presentation.
● The ‘Copy’ button, that lets you create multiple copies of a selected slideshow. This utility comes handy when you need to work on creating similar custom presentations with an affordably small number of differential elements.
When you are satisfied with your work, navigate to and hit the ‘Close’ button to finalize and save the custom presentation within your device.

Part 2 How to Show a Custom Show in PowerPoint?
When working to share any kind of information through slideshow presentations, creating a custom show is just half the job, with the significant part of a flawless content presentation remains still under the line. Having understood the process of creating a custom slide show in PowerPoint in enough detail, let us now move ahead with learning how to show the same in PowerPoint in the following section:
User’s Guide to Play a Custom Slideshow in PowerPoint
Step 1: Launch the Parent Presentation
In any suitable device of your preference, proceed with opening the presentation in which you have worked on creating the custom slideshow, followed by hitting the ‘Slide Show’ tab in the PowerPoint ribbon at the top. From the list of options that appears next, click on the ‘Custom Slide Show’ button.

Step 2: Custom Slideshow Dropdown Menu
Clicking on the ‘Custom Slide Show’ button in step 2 causes the latter’s dropdown menu to get displayed, with a list of all the created custom shows within the currently accessed parent slideshow presentation. Navigate to and click on the name of the custom presentation that you wish to play.

How to Set a Custom Show as the Default Slideshow?
If you are interested in playing the custom show as a default presentation, see through the following stepwise tutorial guide to go ahead with the process:
Step 1: Set Up Slideshow Button
After you have launched the parent presentation, navigate to and click on the ‘Slide Show’ tab within the topmost PowerPoint ribbon and tap the ‘Set Up Slide Show’ button from the list of options that follows.

Step 2: Set Up Show Dialog Box
Clicking on the aforesaid button makes the ‘Set Up Show’ dialog box to appear, where you are required to hit the ‘Custom Show’ radio button. You can now click on the dropdown arrow below the radio buttons to select your specific one from the list of custom shows that pops down. Hit ‘OK’ at the bottom right corner of the dialog box when you have made your choice.

The custom show is now your default slideshow. In your future launches of ‘Slide Show View’, only the selected custom show slides will appear to be used as a presentation.
Part 3 How to Hide Slides in PowerPoint?
In case you have worked on a detailed slideshow presentation in the PowerPoint tool, that consists of selective contents for different audience groups, all within the main presentation, it is a wise step to hide the content slides that are not useful to particular audiences, lest your viewers might get distracted with the irrelevant content.
By far, you must have developed a significant understanding of the custom slideshow PowerPoint creation and presentation procedure in much detail. Moving further into our discussion, let us now work on hiding slides within a PowerPoint presentation through the following step by step guide:
How to Hide or Unhide a Slide in PowerPoint?
Step 1: Launch the PowerPoint Presentation
Start with opening a desired PowerPoint Presentation in your preferred device.
Step 2: Make Your Selection
Visit the slide navigation pane at the left to select slide you wish to delete. Your selections will be highlighted as you tap on them. You can either delete the slides one at a time, or make multiple selections to delete them all at once.

Step 3: Hide Slide Option
When you have made the required selections, right click on the same, followed by choosing the ‘Hide Slide’ option from the dropdown menu that appears next. The selected slides will now be hidden and you can recognize them in the ‘Presenter View’ with lighter thumbnails as compared to the included slides, in the slide navigation pane.


Step 4: Unhiding the Presentation Slides
If you wish to unhide a previously hidden presentation slide, reach to the slide navigation pane in the left and right click on the hidden slide thumbnail. The dropdown menu in Step 3 pops up again, and you need to tap on the ‘Hide Slide’ option. The selected slide will now be included in the presentation.

An alternative to show a hidden slide within a running presentation, while remaining in the ‘Presenter View’, make a random right click anywhere within the currently running slide. The ‘Options Panel’ pops up, and you are required to choose the ‘See All Slides’ option.

All the slides of your presentation will now get displayed in the slide navigation pane, with the hidden ones being grayed out with a crossed slide number. Click on the thumbnail of the respective hidden slides that you want to present before the audience.
asterpieces crea

Creating PowerPoint Presentation Slides in Filmora
The Wondershare Filmora Video Editor franchise of graphic editor software is a pioneer in creating stunning masterpieces of content presentation alternatives. Talking of slideshow presentations, you can work with the software program to create and edit slideshow presentations in high end professional quality. The inbuilt library of the program is a vast trunk of features, effects and tools that allow you to explore your graphic creation abilities to your heart’s content and design top quality slideshows.
For Win 7 or later (64-bit)
For macOS 10.12 or later
Apart from creating slideshow presentations, you can use the software program to convert the same into video edits and customize them to suit your needs. As an example, you can work with removing the slideshow background, overlaying the slide contents; add tons of audio-visual effects and transitions to the slides and supplement them with pleasing background music.
Additional advantages of the application are a welcoming and user cohesive interface, high speed output response characteristics, high end, professional quality slideshow output and an extensive device compatibility. The bottom line is, the Filmora graphic editor package is an all in one solution to your most diverse and specific slideshow creation needs.
● Ending Thoughts →
● Custom slideshows are an important part of PowerPoint presentations, especially when you need to showcase selective contents of a detailed project.
● Apart from creating, you also get to play the custom slideshow, make it your default presentation and hide the latter’s slides using the PowerPoint tool.
● If you are searching for a PowerPoint alternative to create custom slideshows, picking the Wondershare Filmora slideshow creator tool is indeed a smart choice.
Designing custom slideshows in PowerPoint is an absolute fun to do activity for infotainment and information sharing needs. Stay here to get an insight into creating the same, all in a wink!
In this article
01 [How to Create a Custom Slide Show in PowerPoint?](#Part 1)
02 [How to Show a Custom Show in PowerPoint?](#Part 2)
03 [How to Hide Slides in PowerPoint?](#Part 3)
Part 1 How to Create a Custom Slide Show in PowerPoint?
PowerPoint presentations are an already elusive and captivating media of information delivery and content sharing, be it a personal entertainment need or a high end professional requirement, PowerPoint presentations can do it all! Responding to the day to day IT upgrades of modern times, the aforesaid MS Office utility program has introduced its custom slideshow feature, which you can work upon to expand your creative skills in graphic design.
Custom slideshows are a convenient means of abstracting a required set of contents from a rather detailed slideshow presentation to address the needs of a specific audience, instead of distracting them with showcasing the entire content, most of which turns irrelevant to their exclusive requirements.
Talking about the knowhow to work with the feature, the following section encompasses a comprehensive understanding of the custom slide show creation process with the finest details:
User’s Guide to Create Custom Slideshows in PowerPoint
Step 1: Launch the PowerPoint Tool
Start the custom slide show PowerPoint creation process with launching the PowerPoint tool in any of your preferred devices. It would be better to work on a desktop or a PC. Proceed to open the presentation that you wish to create a custom slideshow from.
Step 2: Custom Slide Show Option
In the welcome interface of PowerPoint, navigate to the ribbon at the top and hit the ‘Slide Show’ tab, followed by clicking on the ‘Custom Slide Show’ button from the ‘Options Panel’ that appears. As you tap the aforesaid button, a dropdown menu follows next, from where you need to choose the ‘Custom Shows…’ option.
Step 3: Custom Shows Dialog Box
The completion of Step 2 brings up the ‘Custom Shows’ dialog box, with a blank area at the left, indicating the absence of any custom slide show as yet. To create one, navigate to and click on the ‘New’ button at the right side within the dialog box.
Step 4: Define Custom Show Dialog Box
As you tap the ‘New’ button, the ‘Define Custom Shows’ dialog box pops up with a display of the following fields and buttons:
● Slide Show Name Box
Use this field to assign a name to your custom slideshow. In case you don’t add a name of your choice, PowerPoint will assign the name ‘Custom Show 1’ to your custom presentation.
● Slides in Presentation
Below the ‘Slide Show Name’ box, appears a list of slides in the chosen presentation which you can use to create the custom slide show. To add slides to the same, click on the respective slide names.
● Add Button
The ‘Add’ button in the middle of the ‘Define Custom Show’ dialog box is used to include selected slides from the main list explained above to the ‘Slides in Custom Show’ list at the right. The ‘Add’ button however, remains disabled until you make a selection from the main slides list to include within the custom slides list. Take note that you can choose to repeat the slides within the custom list.
● Remove Button
You can use this button to select and delete specific slides from the ‘Slides in Custom Show’ list. The button however, remains disabled till you make a slide selection to be removed.
● Slides in Custom Show
This is a list of slides that you have selected from the main slides list to include in the custom slideshow.
● Re-Order Buttons
These are ‘Up’ and ‘Down’ arrows at the right side of the ‘Define Custom Show’ dialog box, which are active only if the ‘Slides in Custom Show’ list has more than one slide to its credit. In such a case, you can use these arrows to change the sequence of appearance of the slides within the custom presentation.
Step 5: Back to Custom Shows Dialog Box
When you have finished making all the required entries in the aforesaid fields, click on ‘OK’ to create your custom slideshow, which is visible in the ‘Custom Shows’ dialog box. You can preview the just created custom presentation by selecting the slideshow in the ‘Custom Shows’ list, followed by clicking on the ‘Show’ button at the bottom right of the dialog box.
The ‘Custom Shows’ dialog box has an additional list of buttons, which are explained as follows:
● The ‘New’ button, which you can click on to continue creating as many custom slideshows as you like.
● The ‘Edit’ button, which allows you to make changes to a specific custom slideshow.
● The ‘Remove’ button, which you can use to select and delete an existing custom presentation.
● The ‘Copy’ button, that lets you create multiple copies of a selected slideshow. This utility comes handy when you need to work on creating similar custom presentations with an affordably small number of differential elements.
When you are satisfied with your work, navigate to and hit the ‘Close’ button to finalize and save the custom presentation within your device.
Part 2 How to Show a Custom Show in PowerPoint?
When working to share any kind of information through slideshow presentations, creating a custom show is just half the job, with the significant part of a flawless content presentation remains still under the line. Having understood the process of creating a custom slide show in PowerPoint in enough detail, let us now move ahead with learning how to show the same in PowerPoint in the following section:
User’s Guide to Play a Custom Slideshow in PowerPoint
Step 1: Launch the Parent Presentation
In any suitable device of your preference, proceed with opening the presentation in which you have worked on creating the custom slideshow, followed by hitting the ‘Slide Show’ tab in the PowerPoint ribbon at the top. From the list of options that appears next, click on the ‘Custom Slide Show’ button.
Step 2: Custom Slideshow Dropdown Menu
Clicking on the ‘Custom Slide Show’ button in step 2 causes the latter’s dropdown menu to get displayed, with a list of all the created custom shows within the currently accessed parent slideshow presentation. Navigate to and click on the name of the custom presentation that you wish to play.
How to Set a Custom Show as the Default Slideshow?
If you are interested in playing the custom show as a default presentation, see through the following stepwise tutorial guide to go ahead with the process:
Step 1: Set Up Slideshow Button
After you have launched the parent presentation, navigate to and click on the ‘Slide Show’ tab within the topmost PowerPoint ribbon and tap the ‘Set Up Slide Show’ button from the list of options that follows.
Step 2: Set Up Show Dialog Box
Clicking on the aforesaid button makes the ‘Set Up Show’ dialog box to appear, where you are required to hit the ‘Custom Show’ radio button. You can now click on the dropdown arrow below the radio buttons to select your specific one from the list of custom shows that pops down. Hit ‘OK’ at the bottom right corner of the dialog box when you have made your choice.
The custom show is now your default slideshow. In your future launches of ‘Slide Show View’, only the selected custom show slides will appear to be used as a presentation.
Part 3 How to Hide Slides in PowerPoint?
In case you have worked on a detailed slideshow presentation in the PowerPoint tool, that consists of selective contents for different audience groups, all within the main presentation, it is a wise step to hide the content slides that are not useful to particular audiences, lest your viewers might get distracted with the irrelevant content.
By far, you must have developed a significant understanding of the custom slideshow PowerPoint creation and presentation procedure in much detail. Moving further into our discussion, let us now work on hiding slides within a PowerPoint presentation through the following step by step guide:
How to Hide or Unhide a Slide in PowerPoint?
Step 1: Launch the PowerPoint Presentation
Start with opening a desired PowerPoint Presentation in your preferred device.
Step 2: Make Your Selection
Visit the slide navigation pane at the left to select slide you wish to delete. Your selections will be highlighted as you tap on them. You can either delete the slides one at a time, or make multiple selections to delete them all at once.
Step 3: Hide Slide Option
When you have made the required selections, right click on the same, followed by choosing the ‘Hide Slide’ option from the dropdown menu that appears next. The selected slides will now be hidden and you can recognize them in the ‘Presenter View’ with lighter thumbnails as compared to the included slides, in the slide navigation pane.
Step 4: Unhiding the Presentation Slides
If you wish to unhide a previously hidden presentation slide, reach to the slide navigation pane in the left and right click on the hidden slide thumbnail. The dropdown menu in Step 3 pops up again, and you need to tap on the ‘Hide Slide’ option. The selected slide will now be included in the presentation.
An alternative to show a hidden slide within a running presentation, while remaining in the ‘Presenter View’, make a random right click anywhere within the currently running slide. The ‘Options Panel’ pops up, and you are required to choose the ‘See All Slides’ option.
All the slides of your presentation will now get displayed in the slide navigation pane, with the hidden ones being grayed out with a crossed slide number. Click on the thumbnail of the respective hidden slides that you want to present before the audience.
asterpieces crea
Creating PowerPoint Presentation Slides in Filmora
The Wondershare Filmora Video Editor franchise of graphic editor software is a pioneer in creating stunning masterpieces of content presentation alternatives. Talking of slideshow presentations, you can work with the software program to create and edit slideshow presentations in high end professional quality. The inbuilt library of the program is a vast trunk of features, effects and tools that allow you to explore your graphic creation abilities to your heart’s content and design top quality slideshows.
For Win 7 or later (64-bit)
For macOS 10.12 or later
Apart from creating slideshow presentations, you can use the software program to convert the same into video edits and customize them to suit your needs. As an example, you can work with removing the slideshow background, overlaying the slide contents; add tons of audio-visual effects and transitions to the slides and supplement them with pleasing background music.
Additional advantages of the application are a welcoming and user cohesive interface, high speed output response characteristics, high end, professional quality slideshow output and an extensive device compatibility. The bottom line is, the Filmora graphic editor package is an all in one solution to your most diverse and specific slideshow creation needs.
● Ending Thoughts →
● Custom slideshows are an important part of PowerPoint presentations, especially when you need to showcase selective contents of a detailed project.
● Apart from creating, you also get to play the custom slideshow, make it your default presentation and hide the latter’s slides using the PowerPoint tool.
● If you are searching for a PowerPoint alternative to create custom slideshows, picking the Wondershare Filmora slideshow creator tool is indeed a smart choice.
10 Best Cartoon Video Makers (Online and Desktop Solution)
Abundant Video Effects - Wondershare Filmora
Provide abundant video effects - A creative video editor
Powerful color correction and grading
Detailed tutorials are provided by the official channel
Introduction
There are some issues common to the video production process. However, animated or cartoon videos have helped to combat such issues. You do not need to scout for locations, go through a seemingly endless casting process, or rent the pricey equipment. A cartoon is simply a type of animation or an illustration that usually appears in a semi-realistic or an unreal style. In addition, it uses simple, satirical, and humorous drawing language to tell the story.
Although there are restrictions, there are a lot of possibilities cartoon video makers still offer to their users. Therefore, this article will share the top 10 best cartoon video makers online and on PC that you can use before diving into an animated video world.
So, here is what we shall learn about cartoon makers today:
In this article
01 Best 5 Online Cartoon Makers
02 Cartoon Video Maker for Desktop (Win and Mac)
03 How Can I Create My Own Cartoon Using Wondershare Anireel
Part 1: Best 5 Online Cartoon Makers
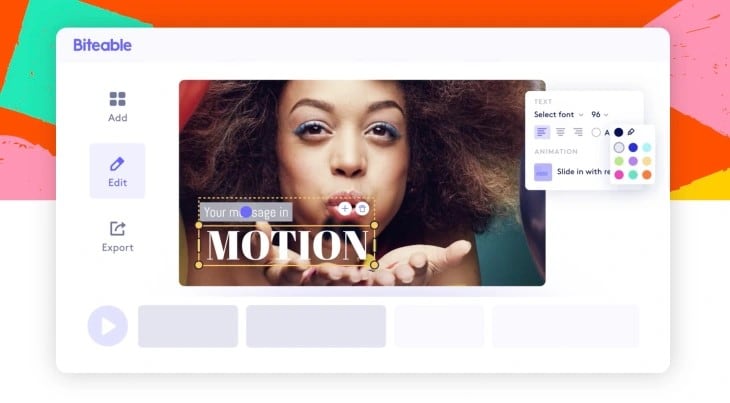
1. Biteable
Biteable provides a seemingly endless list of template categories to cater to your online media marketing needs. Aside from offering entertaining cartoon-making templates, the platform also allows users to create motion graphics or content, and Facebook covers for their social media channels.
Price: Free, $23 per month, billed annually.
Features:
- Offering library with lots of templates to choose from
- Free to use, except you are looking for additional features
- Five simple steps to an incredible cartoon video
- It has an easily customizable template
Pros
- It is a perfect option for social media managers
- Quickly create entertaining cartoons
- Used by biggies like Amazon, Microsoft, Google, Disney, BBC, Shopify, Samsung, and salesforce.
- Over 9 million users
Cons
- There is a mandatory registration
- There are no audio editing options
- The file-sharing capabilities are limited to YouTube and Facebook
- The download option is disabled in the free version
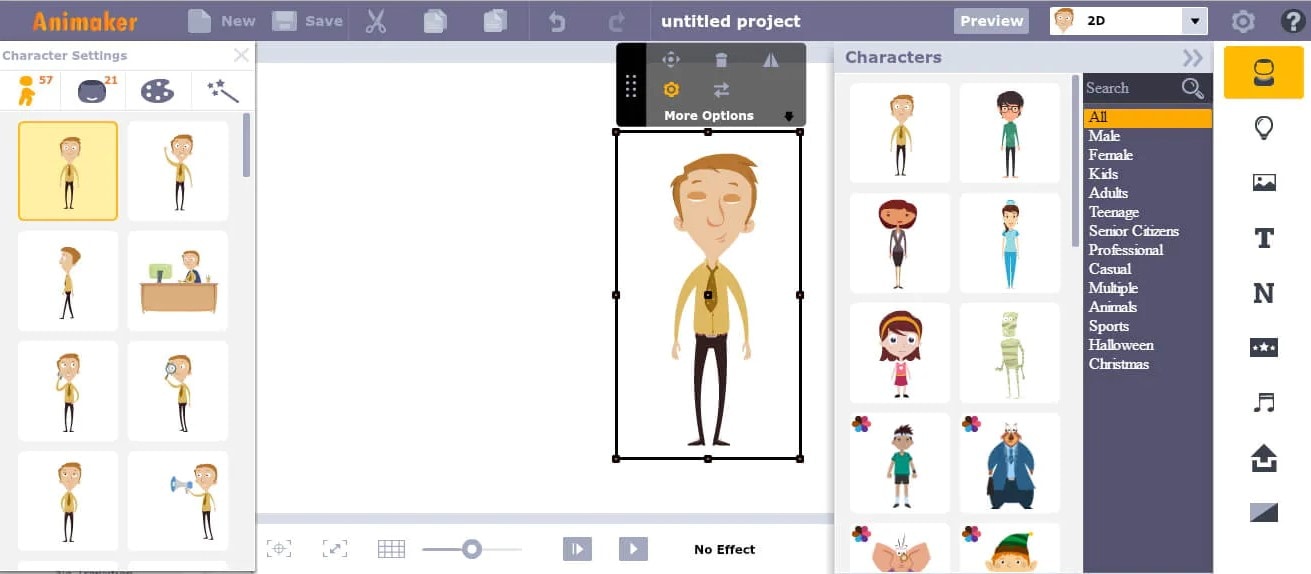
2. Animaker
With this animated maker, you get access to hundreds of animated characters, maps, and backgrounds. There are six (6) video styles available in this cartoon maker: Typography, Infographic, or 2D for different types of projects.
Price: Free version available. Subscription plans start at $12 per month/billed annually.
Features
- Different video styles, marketing, explainer, or 2D animation.
- Posts itself as the number 1 cartoon maker
- No need for a credit card to start.
- Four-step process; select template, customize it, add music, and download or share.
- 200+ voices, 25+ languages, and loads of customizable options.
- It offers auto-lip sync with advanced animation effects.
- There is a rich selection of 1000+ templates
Pros:
- Superb audio editing options
- Excellent and quick animation tools.
- Over 10 million users so far and still counting.
- Currently used by Amazon, Bosch, HP, Nokia, and Philips.
Cons:
- The monthly fee is pricey
- Account creation is mandatory for a free version
- The free version contains a watermark
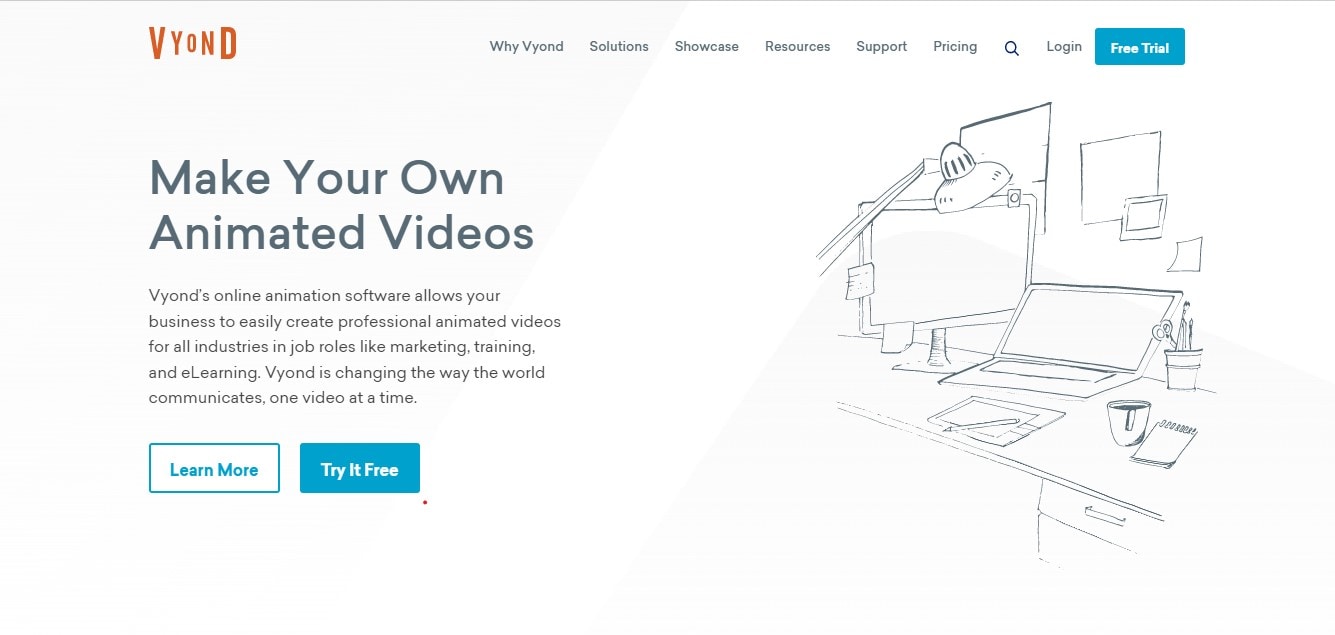
3. Vyond
Vyond, the cartoon creator launched in 2007, is probably one of the oldest online cartoon video makers. Additionally, it is still one of the most popular online destinations meant for anyone who wants to create an animated video quickly.
Price: Subscription plans start from $39 per month, billed annually.
Features:
- Perfect for animated video creation
- There is automatic character lip-syncing
- Try it for free before purchasing
- Make videos for training, e-learning, marketing, human resources, etc.
- The maximum duration of the video is 120 minutes
Pros:
- It has a fully customizable template
- There are high-end object and character animated features
- Certified by GDPR, TrustArc, BSI, and CCPA
- A wholesome cartoon makerfor enterprise and individual
- Data security and privacy assurance by BSI, CCPA, and GPDR.
Cons:
- It is quite expensive
- Vyond is not the best option for inexperienced animators
- The features depend on the subscription model
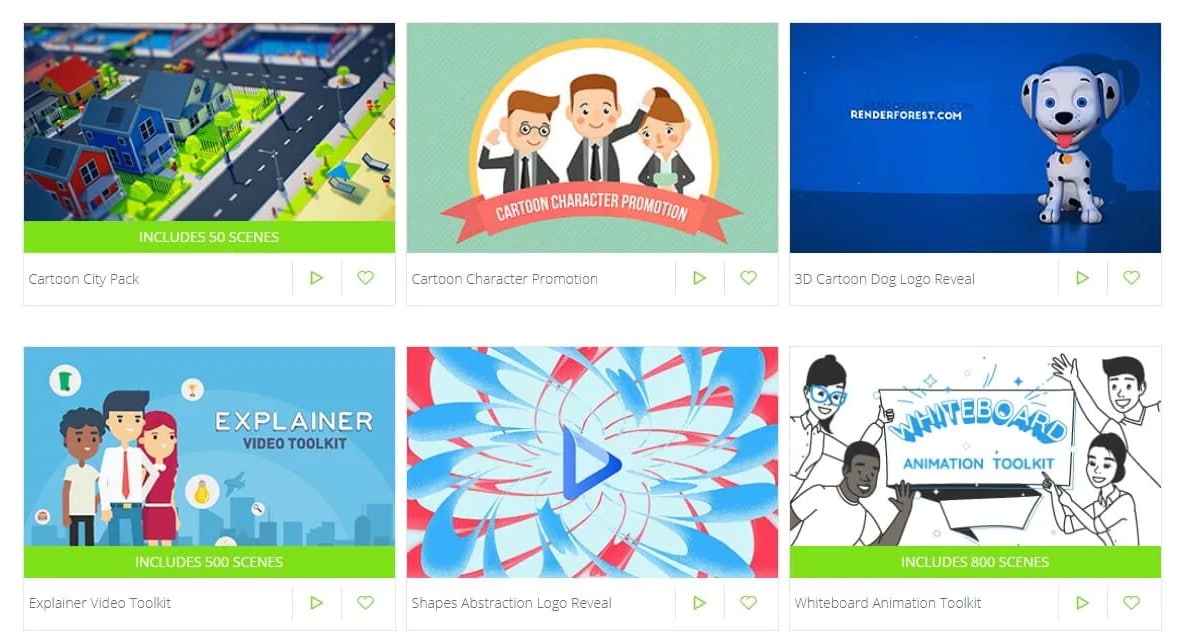
4. Renderforest
This is a famous online cartoon video maker for many purposes. Among the numerous options, the platform offers to its user. They include; 3D explainer videos, logo animations, or professional presentations.
Price: Free version available. Subscription plans start at $16 per month, billed annually.
Features:
- There is an extensive library of templates with numerous options
- Has a large online storage
- Was among the top 100 software companies in 2019.
- Top ranked solution holder for 2020
- Up to 250GB of online storage space
- Use the in-built template to make a story, customize the video, and then export it to share with your friends.
- Amadeus, Bose, BBC, Vodafone, Sony Music, and many others use Renderforest.
Pros:
- Produce videos like a pro
- Comes with an ultimate animation pack.
- Trusted by millions and one of the oldest cartoon makers.
Cons:
- A limited amount of commercial music tracks
- There are modest export options
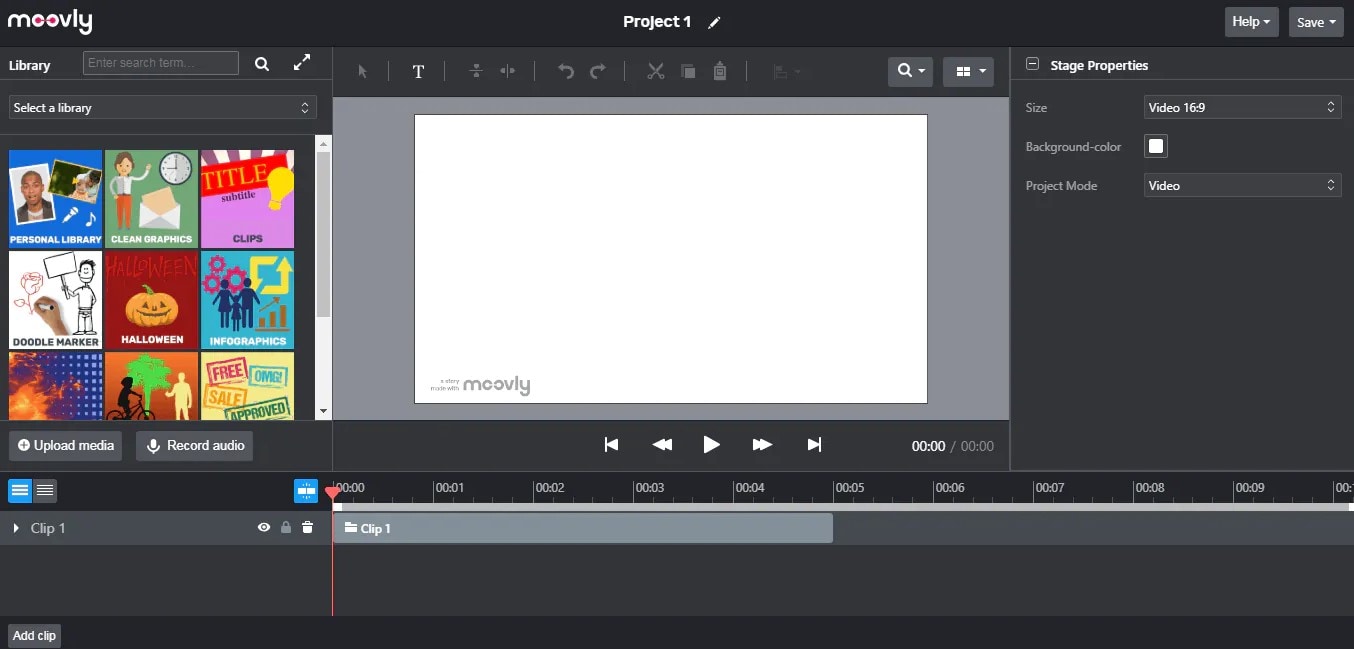
5. Moovly
With this cartoon maker, users must first log in. However, there is no need to create a new account as you can use your LinkedIn or Google account to sign in quickly.
Price: Free 30-day trial, $24.92 per month billed annually.
Features:
- Moovly is the perfect cartoon video maker for sales&marketing, human resources, internal communication, learning&development, agencies, and education.
- Apply expert features in one click with Moovly.
- Create videos and edit with browser-based or drag and drop features without installing software.
- Moovly has over 1.3 million free media, like images, sounds, music, and royalty-free stock videos at no extra charge.
- Besides, it offers 100 million extra media you can try and then purchase.
- You can add your images, music, and videos to create unique clips in style.
- Add text, remove color, add subtitles or generate them, auto-translate your text and subtitles, import PPT files, structure your content, record yourself or your computer screen, edit, mix, etc.
Pros:
- Even if users need to log in, they don’t need to create an account
- Allows users to import content from online sources like Storyblock, Shutterstock, etc.
- It is the number 1 customizable and straightforward solution to making cartoons.
- Use by Colgate-Palmolive, NHS, Teradata, Amadeus, Cisco, Continental, and Logitech.
- The interface is intuitive and user-friendly.
Cons:
- Watermarked videos during the free trial
- To export videos in HD 1080p quality, one needs to purchase one of the available plans.
Renderforest is the best cartoon maker online of the listed five in this article due to the vast library template and large online bandwidth.
Part 2: Cartoon Video Maker for Desktop (Win and Mac)
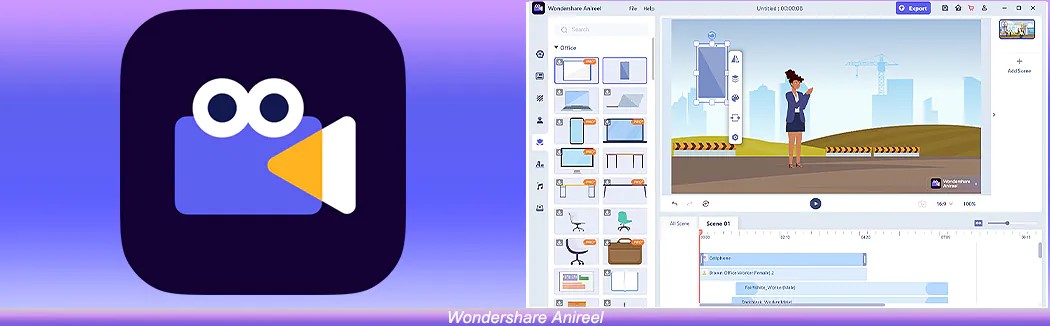
1. Wondershare Anireel
Anireel is one of the top animation software on the internet that allows users to bring their imaginations to life with a huge range of customizable elements and features.
Price: $9.99 per month billed annually and $19.99 monthly
Features:
- 40+ customizable templates
- Top animation software
- Compatible with Windows 11/10/8.1 (64 bit OS)
- Only three steps to an excellent animated video.
- Import images, videos, and sound in almost all formats.
- Create unique avatar, logo images, and more specific to your brand.
- The Deep Learning tech offers quick text-to-speech conversion.
- Animate camera movements, entry and exit effects, motion path, etc.
- Use the one-click option and change scripts to clips.
- Anireel cartoon video makercan lip-sync your characters with perfection.
- Quick and easy drag and drop editing.
Pros:
- It is convenient and simple to use
- Anireel has an intuitive interface
- The cartoon makeroffers a practical and seamless animated video editing
- It comes at an affordable and competitive price
Cons:
- It has a limited amount of assets
- Not suitable for too professional people to use.
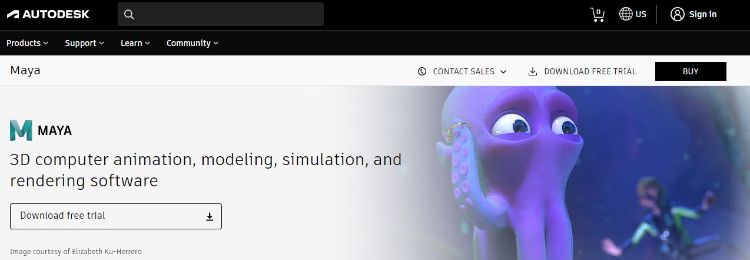
2. Autodesk Maya
Autodesk Maya is one of the best animation tools used to create animation pictures, video games, and add 3D effects in motion pictures. Plus, this cartoon maker is the best if you require a high-quality visual impact.
Price: Free trial, $225 billed monthly.
Features:
- It offers AutoDesk financing for new buyers.
- Maya is the go-to shop for architects, engineers, designers, media, and entertainment.
- Shape 3D objects and add realistic effects with Maya cartoon maker’s NURBS modeling.
- The Integrated Arnold rendering technology lets you view scene changes in real-time.
- Maya has been part of the top movie makers, including the MCU.
- This cartoon video maker offers geometry-based polygon modeling and helps create accurate simulations for visual programming.
- Maya can load and change vast data sets at a faster pace.
Pros:
- It makes complex hand-made animation tasks extremely easy
- Efficient color management
- Allows the creation of realistic effects like cloth simulations and explosions
- 30-day free trial and 30-day money-back guarantee
- Meet deadlines, add fine details to develop even the most complex shots or characters.
- Excellent tool for professionals
Cons:
- The pro is quite expensive
3. Adobe Animate
This is one of the most powerful animation software products on the internet that has been available for decades. It can animate images used for games, film, or online and produce HTML 5, WebGL, or Flash content.
Price: This cartoon creator offers three pricing plans starting at US$24.14/month
Features:
- Excellent for complex animation
- The capability of freehand drawing
- Animate, illustrate, and make 3D typography.
- Import and add vector drawings for further editing.
- Export your work as HTML5 Canvas, WebGL, Flash/Adobe AIR, GIF, or QuickTime movie.
- With the Bone tool, make your cartoon characters fluid and natural.
- Synchronize sounds and music for your project.
- Choose parts of the clip to be animated.
Pros:
- It has Puppeting features
- It is an excellent choice for complex animations
- It includes freehand drawing capability
Cons:
- It is not suitable for beginners
- Other Adobe software may be required while working on a project
4. Adobe Character Animator
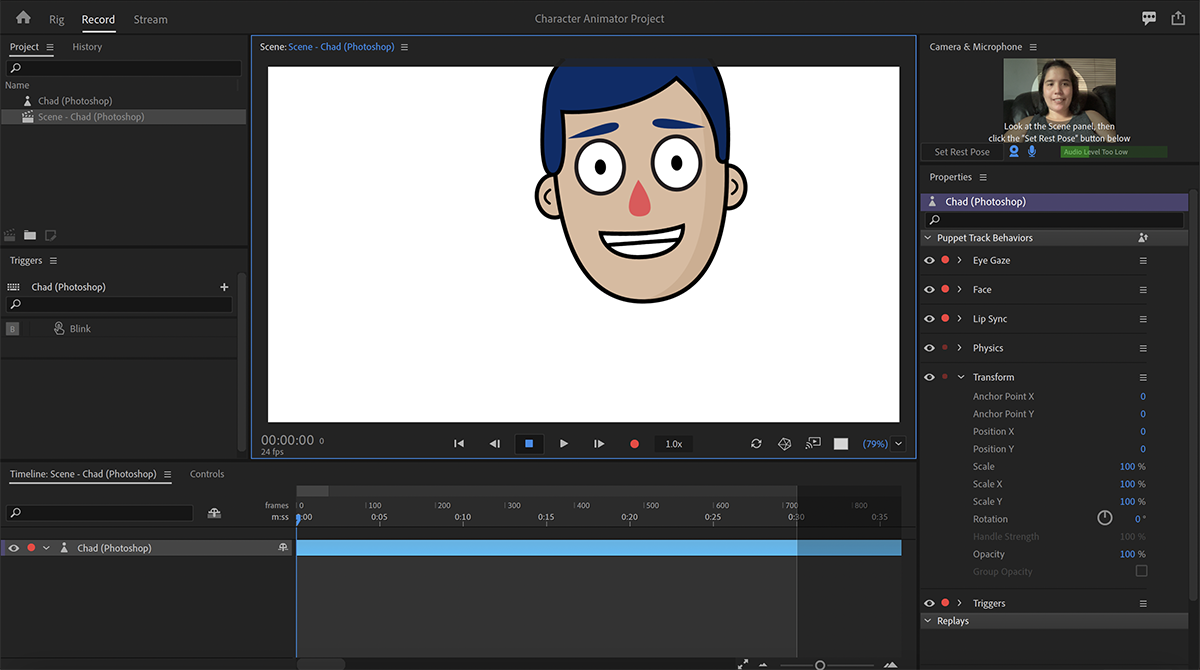
Adobe Character Animator is another type of Adobe’s animation software stack that allows users to use motion to capture and create live animations of their 2D characters.
Price: Adobe Character Animator has two pricing plans starting at US$34,49/month for the first year
Features:
- This product requires other Adobe products to function
- Lots of options to export and import.
- Make your real-life cartoon using the Motion Capture feature in five steps.
- The Avatar will walk, talk, and copy your expressions in real-time.
- Integrate and add assets from other Adobe Creative Cloud apps.
- Auto lip-syncing and real-time facial movement capture.
- Works on iOS and Android.
Pros:
- Easy to replicate real-life movements and expressions with facial tracking.
- There are various import and export options.
Cons:
- It is not a standalone product.
- Users need to have a webcam and microphone to use the motion capture feature.
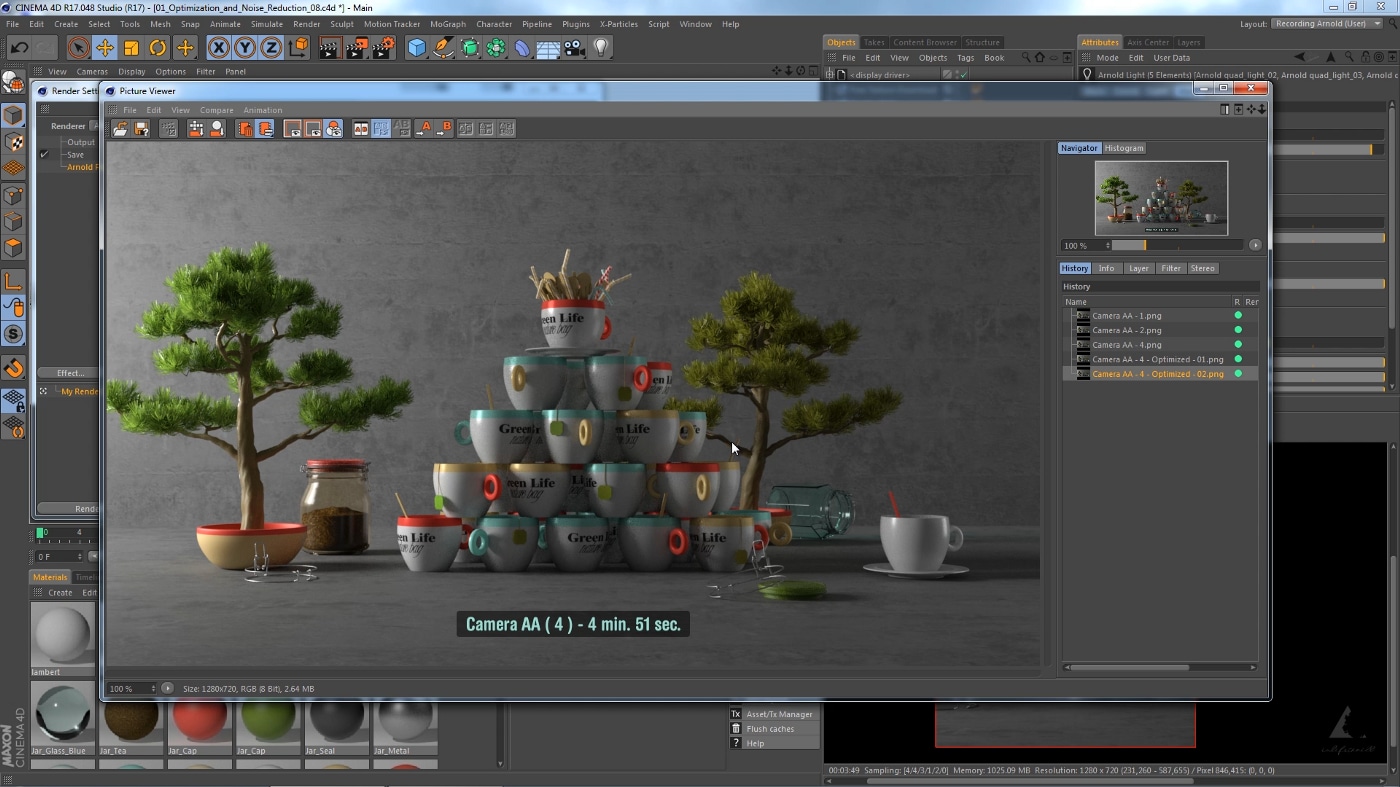
5. Cinema 4D
This cartoon maker has a 3D application interface that offers a keyframe animation, life-like characters, simulation building, object tracking, flexible rig building, cartoon styling, and animation basics.
Price: 4 pricing plans, starting at $99.91/month and $1199.00 billed annually.
Features:
- Keyframing animation effect
- It has a 3d interface
- The ZRemesher for retopology and new tools for modeling add to the new features.
- The Cloth Simulation features help make your cartoon more real.
- It supports CPU rendering with Redshift, which helps you preview, import, and export in high quality.
Pros:
- It is pretty easy to use.
- Lots of exciting design templates are available
- Many editing features are available
Cons
- It is pretty expensive compared to other software
- Not good for beginners
Wondershare Anireel is the best cartoon maker of the five listed in this article. It has lots of advanced features and templates to choose from.
Part 3: How Can I Create My Own Cartoon Using Wondershare Anireel
As stated, Wondershare Anireel has become our top cartoon creator pick due to its affordable pricing, secure server, and ease of use.
So, let us view the simple steps to create your cartoon using the Anireel software.
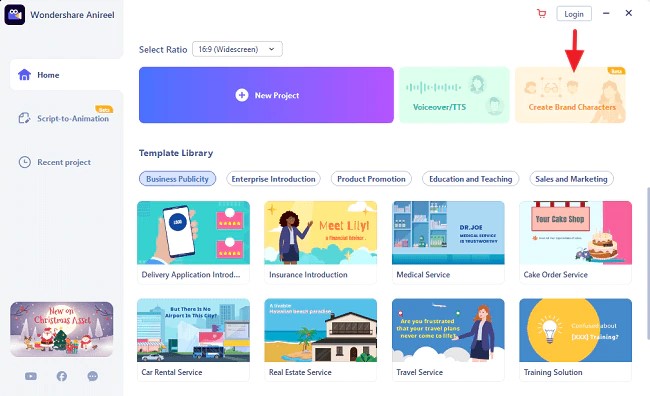
Step 1: Download, install and Create Character
Run Anireel on your device, visit Characters Tab and then click on Create a Character option, or you may click on the Create Brand Characters tab on the home screen.
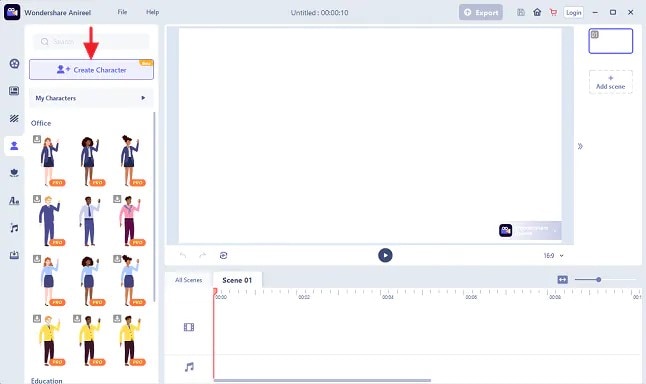
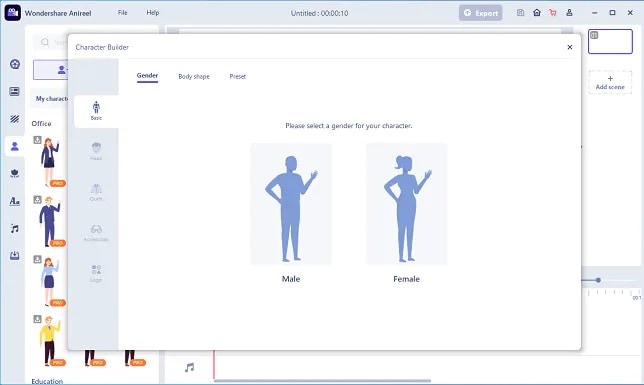
Step 2: Start Creating your Cartoon Character
Choose your gender and body shape, and apply some preset suits.
Now, you can start building facial features using the Head tab to customize the shape of the face, eyes, hairstyle, nose, mouth, ears, and eyebrows.
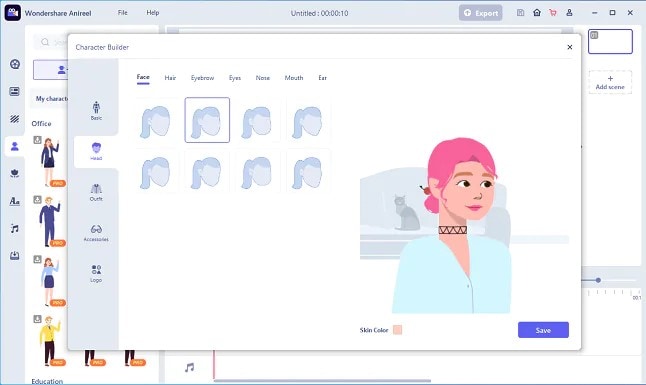
You can also choose to change the skin tone to match yours.
Step 3: Add an Outfit and Accessories
Choose the Outfit tab in Character Builder to select the base layer, outfit, bottom wear, and footwear. Pick what you want to use on your cartoon and keep adding.
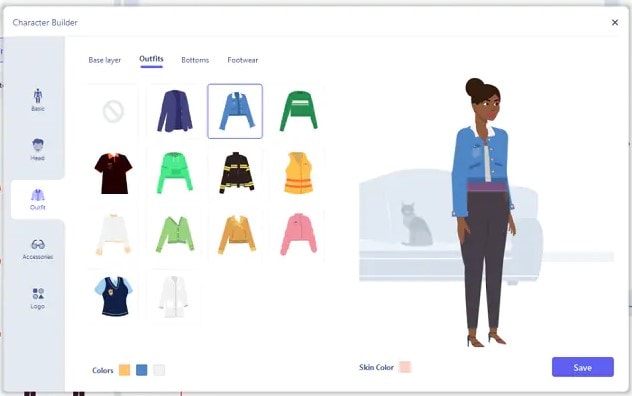
Next, reach the Accessories tab to add glasses, necklaces, and more to your cartoon character.
Step 4: Name your Cartoon and Apply
Click on Save and add a name to your cartoon when all done. Finally, click Apply Now to add your cartoon character to your Anireel cartoon maker canvas or My Characters tab.
Part 4: People Also Want to Know
Below are some answers to a few queries about cartoon creators. Let us look at them one by one.
1. What is the best free cartoon maker?
Wondershare Anireel is the best cartoon maker for Android as it is free to use with lots of advanced features and templates to choose from.
2. What is the best app to make a cartoon?
Wondershare Anireel’s Microsoft app is also one of the best cartoon applications that are very flexible and easy to use on the go.
Conclusion
In this article, we explained the best cartoon creators in the industry. Also, we gave the best cartoon video maker from the list. Thus, as you saw, in this report, we have summarized a few essential points regarding cartoon video makers. You learned:
- The cartoon video maker for free that you should know of.
- The ten best cartoon video makers.
- Why are Wondershare Anireel and Renderforest excellent online cartoon video makers?
- How does Anireel, cartoon creator, work?
- Finally, a few FAQs for users to better understand the cartoon maker
Introduction
There are some issues common to the video production process. However, animated or cartoon videos have helped to combat such issues. You do not need to scout for locations, go through a seemingly endless casting process, or rent the pricey equipment. A cartoon is simply a type of animation or an illustration that usually appears in a semi-realistic or an unreal style. In addition, it uses simple, satirical, and humorous drawing language to tell the story.
Although there are restrictions, there are a lot of possibilities cartoon video makers still offer to their users. Therefore, this article will share the top 10 best cartoon video makers online and on PC that you can use before diving into an animated video world.
So, here is what we shall learn about cartoon makers today:
In this article
01 Best 5 Online Cartoon Makers
02 Cartoon Video Maker for Desktop (Win and Mac)
03 How Can I Create My Own Cartoon Using Wondershare Anireel
Part 1: Best 5 Online Cartoon Makers
1. Biteable
Biteable provides a seemingly endless list of template categories to cater to your online media marketing needs. Aside from offering entertaining cartoon-making templates, the platform also allows users to create motion graphics or content, and Facebook covers for their social media channels.
Price: Free, $23 per month, billed annually.
Features:
- Offering library with lots of templates to choose from
- Free to use, except you are looking for additional features
- Five simple steps to an incredible cartoon video
- It has an easily customizable template
Pros
- It is a perfect option for social media managers
- Quickly create entertaining cartoons
- Used by biggies like Amazon, Microsoft, Google, Disney, BBC, Shopify, Samsung, and salesforce.
- Over 9 million users
Cons
- There is a mandatory registration
- There are no audio editing options
- The file-sharing capabilities are limited to YouTube and Facebook
- The download option is disabled in the free version
2. Animaker
With this animated maker, you get access to hundreds of animated characters, maps, and backgrounds. There are six (6) video styles available in this cartoon maker: Typography, Infographic, or 2D for different types of projects.
Price: Free version available. Subscription plans start at $12 per month/billed annually.
Features
- Different video styles, marketing, explainer, or 2D animation.
- Posts itself as the number 1 cartoon maker
- No need for a credit card to start.
- Four-step process; select template, customize it, add music, and download or share.
- 200+ voices, 25+ languages, and loads of customizable options.
- It offers auto-lip sync with advanced animation effects.
- There is a rich selection of 1000+ templates
Pros:
- Superb audio editing options
- Excellent and quick animation tools.
- Over 10 million users so far and still counting.
- Currently used by Amazon, Bosch, HP, Nokia, and Philips.
Cons:
- The monthly fee is pricey
- Account creation is mandatory for a free version
- The free version contains a watermark
3. Vyond
Vyond, the cartoon creator launched in 2007, is probably one of the oldest online cartoon video makers. Additionally, it is still one of the most popular online destinations meant for anyone who wants to create an animated video quickly.
Price: Subscription plans start from $39 per month, billed annually.
Features:
- Perfect for animated video creation
- There is automatic character lip-syncing
- Try it for free before purchasing
- Make videos for training, e-learning, marketing, human resources, etc.
- The maximum duration of the video is 120 minutes
Pros:
- It has a fully customizable template
- There are high-end object and character animated features
- Certified by GDPR, TrustArc, BSI, and CCPA
- A wholesome cartoon makerfor enterprise and individual
- Data security and privacy assurance by BSI, CCPA, and GPDR.
Cons:
- It is quite expensive
- Vyond is not the best option for inexperienced animators
- The features depend on the subscription model
4. Renderforest
This is a famous online cartoon video maker for many purposes. Among the numerous options, the platform offers to its user. They include; 3D explainer videos, logo animations, or professional presentations.
Price: Free version available. Subscription plans start at $16 per month, billed annually.
Features:
- There is an extensive library of templates with numerous options
- Has a large online storage
- Was among the top 100 software companies in 2019.
- Top ranked solution holder for 2020
- Up to 250GB of online storage space
- Use the in-built template to make a story, customize the video, and then export it to share with your friends.
- Amadeus, Bose, BBC, Vodafone, Sony Music, and many others use Renderforest.
Pros:
- Produce videos like a pro
- Comes with an ultimate animation pack.
- Trusted by millions and one of the oldest cartoon makers.
Cons:
- A limited amount of commercial music tracks
- There are modest export options
5. Moovly
With this cartoon maker, users must first log in. However, there is no need to create a new account as you can use your LinkedIn or Google account to sign in quickly.
Price: Free 30-day trial, $24.92 per month billed annually.
Features:
- Moovly is the perfect cartoon video maker for sales&marketing, human resources, internal communication, learning&development, agencies, and education.
- Apply expert features in one click with Moovly.
- Create videos and edit with browser-based or drag and drop features without installing software.
- Moovly has over 1.3 million free media, like images, sounds, music, and royalty-free stock videos at no extra charge.
- Besides, it offers 100 million extra media you can try and then purchase.
- You can add your images, music, and videos to create unique clips in style.
- Add text, remove color, add subtitles or generate them, auto-translate your text and subtitles, import PPT files, structure your content, record yourself or your computer screen, edit, mix, etc.
Pros:
- Even if users need to log in, they don’t need to create an account
- Allows users to import content from online sources like Storyblock, Shutterstock, etc.
- It is the number 1 customizable and straightforward solution to making cartoons.
- Use by Colgate-Palmolive, NHS, Teradata, Amadeus, Cisco, Continental, and Logitech.
- The interface is intuitive and user-friendly.
Cons:
- Watermarked videos during the free trial
- To export videos in HD 1080p quality, one needs to purchase one of the available plans.
Renderforest is the best cartoon maker online of the listed five in this article due to the vast library template and large online bandwidth.
Part 2: Cartoon Video Maker for Desktop (Win and Mac)
1. Wondershare Anireel
Anireel is one of the top animation software on the internet that allows users to bring their imaginations to life with a huge range of customizable elements and features.
Price: $9.99 per month billed annually and $19.99 monthly
Features:
- 40+ customizable templates
- Top animation software
- Compatible with Windows 11/10/8.1 (64 bit OS)
- Only three steps to an excellent animated video.
- Import images, videos, and sound in almost all formats.
- Create unique avatar, logo images, and more specific to your brand.
- The Deep Learning tech offers quick text-to-speech conversion.
- Animate camera movements, entry and exit effects, motion path, etc.
- Use the one-click option and change scripts to clips.
- Anireel cartoon video makercan lip-sync your characters with perfection.
- Quick and easy drag and drop editing.
Pros:
- It is convenient and simple to use
- Anireel has an intuitive interface
- The cartoon makeroffers a practical and seamless animated video editing
- It comes at an affordable and competitive price
Cons:
- It has a limited amount of assets
- Not suitable for too professional people to use.
2. Autodesk Maya
Autodesk Maya is one of the best animation tools used to create animation pictures, video games, and add 3D effects in motion pictures. Plus, this cartoon maker is the best if you require a high-quality visual impact.
Price: Free trial, $225 billed monthly.
Features:
- It offers AutoDesk financing for new buyers.
- Maya is the go-to shop for architects, engineers, designers, media, and entertainment.
- Shape 3D objects and add realistic effects with Maya cartoon maker’s NURBS modeling.
- The Integrated Arnold rendering technology lets you view scene changes in real-time.
- Maya has been part of the top movie makers, including the MCU.
- This cartoon video maker offers geometry-based polygon modeling and helps create accurate simulations for visual programming.
- Maya can load and change vast data sets at a faster pace.
Pros:
- It makes complex hand-made animation tasks extremely easy
- Efficient color management
- Allows the creation of realistic effects like cloth simulations and explosions
- 30-day free trial and 30-day money-back guarantee
- Meet deadlines, add fine details to develop even the most complex shots or characters.
- Excellent tool for professionals
Cons:
- The pro is quite expensive
3. Adobe Animate
This is one of the most powerful animation software products on the internet that has been available for decades. It can animate images used for games, film, or online and produce HTML 5, WebGL, or Flash content.
Price: This cartoon creator offers three pricing plans starting at US$24.14/month
Features:
- Excellent for complex animation
- The capability of freehand drawing
- Animate, illustrate, and make 3D typography.
- Import and add vector drawings for further editing.
- Export your work as HTML5 Canvas, WebGL, Flash/Adobe AIR, GIF, or QuickTime movie.
- With the Bone tool, make your cartoon characters fluid and natural.
- Synchronize sounds and music for your project.
- Choose parts of the clip to be animated.
Pros:
- It has Puppeting features
- It is an excellent choice for complex animations
- It includes freehand drawing capability
Cons:
- It is not suitable for beginners
- Other Adobe software may be required while working on a project
4. Adobe Character Animator
Adobe Character Animator is another type of Adobe’s animation software stack that allows users to use motion to capture and create live animations of their 2D characters.
Price: Adobe Character Animator has two pricing plans starting at US$34,49/month for the first year
Features:
- This product requires other Adobe products to function
- Lots of options to export and import.
- Make your real-life cartoon using the Motion Capture feature in five steps.
- The Avatar will walk, talk, and copy your expressions in real-time.
- Integrate and add assets from other Adobe Creative Cloud apps.
- Auto lip-syncing and real-time facial movement capture.
- Works on iOS and Android.
Pros:
- Easy to replicate real-life movements and expressions with facial tracking.
- There are various import and export options.
Cons:
- It is not a standalone product.
- Users need to have a webcam and microphone to use the motion capture feature.
5. Cinema 4D
This cartoon maker has a 3D application interface that offers a keyframe animation, life-like characters, simulation building, object tracking, flexible rig building, cartoon styling, and animation basics.
Price: 4 pricing plans, starting at $99.91/month and $1199.00 billed annually.
Features:
- Keyframing animation effect
- It has a 3d interface
- The ZRemesher for retopology and new tools for modeling add to the new features.
- The Cloth Simulation features help make your cartoon more real.
- It supports CPU rendering with Redshift, which helps you preview, import, and export in high quality.
Pros:
- It is pretty easy to use.
- Lots of exciting design templates are available
- Many editing features are available
Cons
- It is pretty expensive compared to other software
- Not good for beginners
Wondershare Anireel is the best cartoon maker of the five listed in this article. It has lots of advanced features and templates to choose from.
Part 3: How Can I Create My Own Cartoon Using Wondershare Anireel
As stated, Wondershare Anireel has become our top cartoon creator pick due to its affordable pricing, secure server, and ease of use.
So, let us view the simple steps to create your cartoon using the Anireel software.
Step 1: Download, install and Create Character
Run Anireel on your device, visit Characters Tab and then click on Create a Character option, or you may click on the Create Brand Characters tab on the home screen.
Step 2: Start Creating your Cartoon Character
Choose your gender and body shape, and apply some preset suits.
Now, you can start building facial features using the Head tab to customize the shape of the face, eyes, hairstyle, nose, mouth, ears, and eyebrows.
You can also choose to change the skin tone to match yours.
Step 3: Add an Outfit and Accessories
Choose the Outfit tab in Character Builder to select the base layer, outfit, bottom wear, and footwear. Pick what you want to use on your cartoon and keep adding.
Next, reach the Accessories tab to add glasses, necklaces, and more to your cartoon character.
Step 4: Name your Cartoon and Apply
Click on Save and add a name to your cartoon when all done. Finally, click Apply Now to add your cartoon character to your Anireel cartoon maker canvas or My Characters tab.
Part 4: People Also Want to Know
Below are some answers to a few queries about cartoon creators. Let us look at them one by one.
1. What is the best free cartoon maker?
Wondershare Anireel is the best cartoon maker for Android as it is free to use with lots of advanced features and templates to choose from.
2. What is the best app to make a cartoon?
Wondershare Anireel’s Microsoft app is also one of the best cartoon applications that are very flexible and easy to use on the go.
Conclusion
In this article, we explained the best cartoon creators in the industry. Also, we gave the best cartoon video maker from the list. Thus, as you saw, in this report, we have summarized a few essential points regarding cartoon video makers. You learned:
- The cartoon video maker for free that you should know of.
- The ten best cartoon video makers.
- Why are Wondershare Anireel and Renderforest excellent online cartoon video makers?
- How does Anireel, cartoon creator, work?
- Finally, a few FAQs for users to better understand the cartoon maker
Twitch Green Screen Guide
Green screens are a fun way for creators to bring their personality to their stream, allowing them to dynamically alter their stream background and make their content appear even more engaging and polished. With Twitch green screen background, you can easily configure Chroma key settings and detect your green screen with a single click.
The twitch green screen attaches directly to the back of your chair. You don’t have to worry about stands, or spacing behind your chair. Just attach it and go. This portable green screen can fit on the back of your chair a feature that makes it easy to assemble and use for start-up twitchers.
How to set up a Green Screen with Twitch Studio
**Set Up Your Camera
First things first, make sure that your camera is being detected on Twitch Studio. If you do not already have a layer with your webcam on your scene, click Edit Scene and add a webcam layer by clicking the + icon on the left next to Layers.
Once your webcam layer has been created, make sure that the desired device is selected, plugged in, and that you have not turned off every webcam (Camera icon on the bottom left of Twitch Studio).
**Set Up Your Green Screen
Once your green screen is set up in your background, select your webcam layers to display your webcam settings.
We recommend using the Auto-Detect Color feature as it will automatically detect the best color code for you and will be a great base to work from. If you prefer, you can manually pick the color code by either providing the color code in the Color to Remove field or clicking on the colored square to display a color spectrum that you can select from.
The Chroma Key section is located at the bottom of the webcam settings, and you will be able to toggle the chroma key on and off by clicking the eye icon.
To adjust the chroma key settings, you can click on Edit Chroma Key. You will be able to change the color code and change similarity, edge transparency and color correction for the perfect fit.
Other free ways to set up green screen for Twitch streams
OBS
OBS Studio is a free and open-source app for screen-casting and live streaming. Written in C/C++ and built with Qt, OBS Studio provides real-time capture, scene composition, recording, encoding, and broadcasting via the Real Time Messaging Protocol(RTMP).It can stream Videos to any RTMP supporting destination including YouTube, Twitch, Instagram and Facebook.
OBS Green Screen Set-up Steps
- Make sure you have the following equipment prepared: a solid green background, webcam or video camera, lighting, and OBS Studio.
- Download the latest stable version of OBS Studio from the official website and install the software. Open OBS and let the Auto-Configuration Wizard optimize the software’s settings based on your hardware.
- Now you can add a video source.
- Right-click on the video source you’ve created and select Filter.
- Click the +button under the Effects Filters section and select Chroma Key.
- Type in a name for this effect layer.
- After you add a chroma key, OBS will automatically create and adjust the baseline settings for the filter. You can experiment with the sliders and settle when you are satisfied with the result.
- Make sure you aren’t wearing any green or reflective material. You can double-checkthe performance on the preview screen.
- If things are working smoothly, you are all set to start streamingwith the green screen on.
Pro tip:
You can follow the instructions above and live stream to multiple platforms at once with Restream. Multistreaming to platforms like YouTube, Facebook, Twitter, Twitch, and LinkedIn allows you to drastically increase the audience reach and grow your followers.
XBOX
It is a video gaming brand created and owned by Microsoft. The brand consists of five video game consoles, as well as applications(games), streaming services, an online service by the name of Xbox network, and the development arm by the name of Xbox Game Studios. The brand was first introduced in the United States in November 2001, with the launch of the original Xbox console.
Steps on Using Xbox Green Screen
Make your Xbox console reflect your personal style by changing its look and feel. Choose a favourite colour, update your background with game art or a customised image, or select a different theme.
Choose your color
The color you choose will appear in tiles and accents on your Xbox. It also follows you to any console you sign in to.
- Press the Xboxbutton on your controller to open the guide, and then select Profile & system > Settings > General > Personalisation > My color & theme > My color.
- Select a color, and then select OK.
**Choose your background
Your background appears where you’d expect it to—in the background of Home. It can be a solid color or an image, such as game art, achievement art, a screenshot, or a customized image. Achievement art follows you to any Xbox, but screenshots and customized images stay on the console that they’re set to.
To choose your background, press the Xbox button on your controller to open the guide, and then select Profile & system > Settings > General > Personalization > My background.
From here, choose from the following options:
**Solid color and game art
Select a background color, and then select OK. To then add game art, choose the game most recently played and the game art will appear as the background.
**Achievement art
- Select Achievement art> Gaming.
- Select a game from your list of games with achievements.
- Select the achievement with the background art you want.
- Select Set as background.
**Custom image
Note Customized images must be smaller than 3 MB, and the best size for backgrounds is 1920 x 1080.
- Copy a JPG or PNG file that you want to use to a USB device, and then plug it into your Xbox.
- On your Xbox, select Customized image. A dialogue box appears that shows the contents of your console and attached USB device.
- Select the USB device, and then choose your image.
**Screenshot
- Select Screenshot, then choose the one you want.
- Select More actions> Set as background.
**Dynamic background
Note Dynamic backgrounds are only available on Xbox Series X|S.
- Select Dynamic background.
- Select the background art you want.
- Select Apply.
Note Some dynamic backgrounds are only available through promotions with special edition hardware (like the 20th Anniversary Special Edition controller). To see one of these special dynamic backgrounds in your list of options, make sure your special edition hardware is turned on and in use with your console when you set your background.
**Remove customized background
If you want to remove your background, select Remove customized background.
**Choose your theme
Themes can be set to dark or light and can also be scheduled. To set a theme:
- Press the Xboxbutton on your controller to open the guide, and then select Profile & system > Settings > General > Personalization.
- Select My color & theme.
- Under System theme, select Darkor Light. Select Scheduled to activate your theme according to specific times, or to start at sunrise and sunset.
Themes stay on the console they’re set to.
Solid Color
Achievement Art
Custom Image
Remove Custom Background
Filmora
Wondershare Filmora is the one of best video editing software with cool features that compares to other competing video editing Softwares. Many video editing programs claim to offer professional results; Filmora is one of a few consumer-level tools that actually delivers.
For Win 7 or later (64-bit)
For macOS 10.12 or later
Key Features
4k editing support
GIF support
Noise removal
Color tuning
Advanced tech editor
Audio mixer
Video stabilization
Scene detection
Conclusion
You probably already have an idea of how to use a green screen, at least in principle. You film something or someone in front of a colored background — the green screen — then you replace everything that’s in the color of the screen with other footage, images, charts, presentations, or whatever visuals you want. However, Chroma keying a live stream works almost the same way. The main difference is that you have to replace the green screen as you’re filming, rather than during editing.
Also read:
- Do You Seek a Guide to Add Motion in Blender? This Article Explains the Blender Motion Blur Effect in Detail and Helps You Master It
- In 2024, The Ultimate Guide to Make a Text Collage
- 5 Excellent Tools To Convert Video to 60 FPS
- Updated What Are the Best Video Background Changers Online for 2024
- Updated Deep Learning of AI Video Recognition
- Updated In This Article, We Will Discuss What Lens Distortion Is, How It May Be Fixed, and the Factors You Need to Pay Attention to Avoid Lens Distortion when Taking or Recording Videos
- Updated How To Be A Successful YouTuber
- In 2024, If You Want to Color Grading Your Video, Final Cut Pro Can Be One of the Best Choices. However, Its Not Easy for Everyone to Use Color Grading Feature, and in This Guide Well Show You How to Do That
- New Here Is a Step-by-Step Guide to Color Correct and Color Grade a Video Professionally with Wondershare Filmora. Lets Get Going
- In 2024, Motion Tracking Is the Process of Tracking the Movements of a Project in a Video. This Article Will Show You How to Apply Motion Tracking Effect Into Videos
- New Do You Want to Create Adjustment Layers in Final Cut Pro? This Article Will Discuss a Simple yet Efficient Method to Generate Adjustment Layers in Final Cut Pro
- In 2024, Make Eye Zoom Transition Effect with Filmora
- New In 2024, 6 Websites to Free Download Motivational Video Footage
- Updated What Is Animated GIF | GIF Example & Advantages of GIF for 2024
- New In 2024, 3 Actionable Ways to Create Countdown Animation for Videos
- New 2024 Approved 5 Tools to Create a Time-Lapse Video Online
- Updated How to Create Discord GIF Avatar in Depth Guide
- What Is the Best FPS for YouTube Videos?
- Updated Focusing On The Best Ways To Convert Slow-Motion Video to Normal
- Use This Color Match Paint Technique to Find the Exact Shade of Any Hue You Have in Mind for Your Paint Project. Match the Paint to Your Desired Color Even without Knowing the Paint Name or Brand with Automotive Paint Matching for 2024
- 2024 Approved Best Method to Split the Video Into Parts Online
- New Easy Guide to Apply Slow Zoom Effects to Videos
- Updated Doable Ways to Create Transparent Background in Procreate
- New This Article Aim to Teach You How to Make a Night to Day Effect Video with Filmora. Follow the Steps to Figure It Out
- Updated 2024 Approved Top 18 Video Editors for PC and Mac
- Updated Easy Ways to Change Aspect Ratio in iMovie?
- New How To Polish Your Music Video Edits Using Filmora
- In 2024, Which Is the Best Video Slideshow Maker Available Online? Methods to Prepare Custom Slideshows for Google Presentation. How to Make a Slide Show Video?
- Updated Step by Step to Cut a Video in QuickTime
- In 2024, Event Videography Is Popular in Weddings, Graduation, Family Reunion and Other Great Moments. Here Im Going to Share some of the Tips to Make a Better Event Videography
- Updated 2024 Approved 10 Best Free Text to Speech Software Windows, Mac,Android, iPhone & Online
- 2024 Approved TikTok Slow Zoom | Create Your Slow Zoom TikTok in Minutes
- New The Way to Make Dynamic Video Collages?
- New In 2024, Which 10 Best Video Editing Online Makers Is Worth Your Attention?
- New 2024 Approved Unraveling How the Slow Motion Guys Have Revolutionized The Slow Motion Game
- New In 2024, Color Match Game Tips for You
- Updated Special Animated Transition Tutorial【SUPER EASY】
- New Easy Way to Add Effects to Art Video
- Updated How to Create Intro Video with KineMaster
- This Article Talks About Pixel Art Wallpapers. It Gives Examples of Different Pixel Art to Show You How to Customize Your Own Pixel Art Wallpapers, and How to Make a Pixel Art Gif on Filmora
- 2024 Approved Make A Countdown Video
- Updated In 2024, Splitting the Clips in Adobe After Effects Step by Step
- In 2024, The Glitch Filter Is Similar to an Error or a Distorted Effect in the Video. The Article Enables the Users to Get the VHS Filter in One of Their Travel Videos and Instagram Accounts
- In 2024, 6 Websites to Free Download Motivational Video Footage
- New 2024 Approved Learn Top Best Free LUTs For Premiere Pro
- In 2024, Getting the Pokemon Go GPS Signal Not Found 11 Error in Itel A70 | Dr.fone
- In 2024, How To Track IMEI Number Of Nokia C02 Through Google Earth?
- Best Ways to Bypass iCloud Activation Lock on iPhone 13/iPad/iPod
- In 2024, 4 Ways to Transfer Music from Itel P55 to iPhone | Dr.fone
- How to Share/Fake Location on WhatsApp for Nokia C12 Plus | Dr.fone
- How to Find iSpoofer Pro Activation Key On Infinix Hot 40i? | Dr.fone
- In 2024, Complete Review & Guide to Techeligible FRP Bypass and More For Motorola Edge 2023
- 5 Ways to Restart Samsung Galaxy F14 5G Without Power Button | Dr.fone
- In 2024, Easy Tutorial for Activating iCloud on Apple iPhone 8 Plus Safe and Legal
- How to Factory Reset Xiaomi Mix Fold 3 in 5 Easy Ways | Dr.fone
- In 2024, Getting the Pokemon Go GPS Signal Not Found 11 Error in OnePlus Ace 2 | Dr.fone
- In 2024, How to Migrate Android Data From Honor X50i to New Android Phone? | Dr.fone
- In 2024, 15 Best Strongest Pokémon To Use in Pokémon GO PvP Leagues For Apple iPhone 12 Pro Max | Dr.fone
- 2024 Approved Top 10 Hindi Video Translators with Step-by-Step Guidance
- In 2024, Unova Stone Pokémon Go Evolution List and How Catch Them For Samsung Galaxy A54 5G | Dr.fone
- Methods to Change GPS Location On Oppo K11 5G | Dr.fone
- Remove Google FRP lock on Lava Blaze 2 5G
- In 2024, How to Change/Add Location Filters on Snapchat For your Gionee F3 Pro | Dr.fone
- In 2024, About Oppo A38 FRP Bypass
- In 2024, Top 5 OnePlus Nord 3 5G Bypass FRP Tools for PC That Actually Work
- 8 Quick Fixes Unfortunately, Snapchat has Stopped on Oppo A78 | Dr.fone
- In 2024, How To Bypass Samsung Galaxy Z Fold 5 FRP In 3 Different Ways
- Reasons for Samsung Galaxy XCover 7 Stuck on Startup Screen and Ways To Fix Them | Dr.fone
- In 2024, 3 Solutions to Find Your Apple iPhone 14 Pro Max Current Location of a Mobile Number | Dr.fone
- 7 Fixes for Unfortunately, Phone Has Stopped on OnePlus Ace 2 | Dr.fone
- How to Transfer Data from Samsung Galaxy M34 to Any iOS Devices | Dr.fone
- In 2024, The Ultimate Guide How to Bypass Swipe Screen to Unlock on Xiaomi 14 Device
- Title: In 2024, Hey! Are You Looking for Video Reverse Effects in Your Videos? Then, You Are at the Right Place. This Article Will Guide You in Creating a Video Reverse Effect
- Author: Chloe
- Created at : 2024-04-24 07:08:20
- Updated at : 2024-04-25 07:08:20
- Link: https://ai-editing-video.techidaily.com/in-2024-hey-are-you-looking-for-video-reverse-effects-in-your-videos-then-you-are-at-the-right-place-this-article-will-guide-you-in-creating-a-video-reverse/
- License: This work is licensed under CC BY-NC-SA 4.0.
