
:max_bytes(150000):strip_icc():format(webp)/dormroomentfeatured-5b5e9dd3c9e77c004f28632e.jpg)
In 2024, How to Animate Your Designs With Canva GIF
How to Animate Designs With Canva GIF
How to Animate Your Designs With Canva GIF
An easy yet powerful editor
Numerous effects to choose from
Detailed tutorials provided by the official channel
If you are using social media daily in 2022, you must come across GIFs and maybe wonder how to make one. GIFs are the most helpful and eye-catching advertisements that can connect you with your followers through your choices. GIFs stand in the middle of images and videos. The biggest reason we use GIFs is that it represents the story or the expression in a flash. Besides, GIFs are smaller files to load and are perfect for your mobile.
In recent years, GIFs have taken the limelight in the market. The web’s most popular GIF database, GIPHY, has taken over 300 million daily active users. In 2018, Google bought the keyboard app and GIF archive to search for GIFs, Tenor. The app Tenor now has over 400 million GIF searches per day. Thus, you can realize the demand for creating GIFs is increasing now. Canva GIF is a great place to design your own GIFs.
After you create a GIF in Canva, you can use it in many fun ways in business, like promoting new sales on your products or a blog post, announcing a new webinar. In addition, you may announce your Instagram or Facebook live, share your point of view, advertise new launches, etc. In this article, we will discuss making GIFs and animating designs with GIF in Canva.
In this article
01 [How to Create a GIF in Canva](#Part 1)
02 [How to Animate Your Designs With Canva GIF](#Part 2)
Part 1 How to Create a GIF in Canva
Canva GIF has made creating your own GIFs very easy. It is one of the best GIF makers online. The plus point of using Canva to make online GIFs is that you do not require creating an account. You can straight get to work. However, if you wish to try out their premium designs and templates, you need a subscription to their premium plan. Let us now talk about making GIF in Canva and some of its tools and features to make your GIF more eye-catching.
Follow the steps below:
● Go to the web browser. Navigate to Canva. Open the GIF maker page on Canva. Select the “Make a free GIF” button to get started.

● On the left, go to the “Uploads” tab. Then, click on the “Upload media button” to add images.

● After the images are added, they will arrive under the “Images” tab. Now you have to drag and drop the images in the GIF maker.

● Next, click on the “+” button in the timeline and add the next picture. You have to repeat this step if you want to add more pictures.

● Now click on the clock icon present in the toolbar at the top. This is for defining the “duration” for how long the image will appear in the GIF. The timer can be set anywhere from 0.1 seconds to 30 seconds.

Adding Elements:
After you add the images, you need to make a GIF in Canva; you can put life into your GIF by adding multiple elements. Follow the steps to know more.
● Switch to the “Elements” tab present at the left. Now, you can explore the extensive library of Canva filled with stickers, photos, graphics, charts, etc. In addition, you can check out the “Graphics” tab for GIFs and select designs, stickers, badgers, and more of your choices.
● You have to select, drag, and drop the elements you want in your GIF. After you add them, resize, rotate, move and fit them as per your choice.

Adding Texts:
Besides graphics and stickers, you may also add text to your GIF to convey a message and make it more descriptive. Check out how.
● Click on the “Text” tab at the left. Next, select the type of texting you want, i.e., heading, sub-heading, or regular text.
● Now, you require to choose a “Text style.” Canva has more than a hundred styles and designs. Select any one of them of your choice and add it to your GIF.
● After you select the style, you can edit the text inside it. Change the font size, style, color, spacing, position, and more from the toolbar at the top. You may also animate it or add more effects to it and make it eye-catching. Use all the tools and edit accordingly.

Preview and download your GIF in Canva
After you have edited the images, preview the GIF using the “Play” button from the timeline. If you are satisfied with the GIF, it’s time to download it.
Click on the “Download button” present at the top right corner. Next, you need to go to the “File type” and select “GIF”. Select all the pages that you wish to include in your GIF. Then click on the “Download” tab. Your GIF will get successfully downloaded.

Pro Tips:
Keep it simple- The more clean and simple designs and GIFs you prepare, the more effective it looks. Also, you must focus on the message you want to convey to your audience to connect better.
Design page limit- The limit to animate design is less than ten pages. So, you need to decide and design accordingly.
Posting GIFs to Facebook- For uploading GIFs to Facebook, you have to upload them on a site like gimphy.com to hose the GIF for you.
Part 1 How to Animate Your Designs With Canva GIF
As you have already seen how to make a GIF on Canva, let’s talk about animating GIFs. You can always make your designs and GIFs look more attractive and over the top. You can use Canva to animate your designs with Canva GIFs
Follow the steps to do so:
● Select your dimension
Go to your web browser open Canva. Click on “Create a design” and select “Animated Social Media”. Then resize accordingly.
After you select the “Animated Social Media” template, a timer pops up. Here you can select for how long you need the frames to be. Using this function, you change the speed i.e., create faster or slower GIFs.
● Design your frames
Now you are about to design the first frame. When you have set everything, duplicate the first frame. In the second frame, you can move, replace or adjust graphics, which you want according to your choice.
● Change the speed of the slides
Next, you have to edit the timer and choose how long you want them to be going. It is present at the top of both of the graphics. The graphic will move faster if you shorten the time frame. You can select a slightly slower time frame to make the frameless distracting.
● Download
At the end, download the finished images and GIFs by selecting all the pages. Then, you can play it from the Downloads folder by simply pressing the space bar.
● Filmora
Apart from using Canva GIF maker, you can also use Wondershare Filmora Video Editor for making GIFs and videos. Filmora is considered one of the best video editing tools that can turn your videos into GIF images. Moreover, it has fabulous animation effects and texts. Filmora video editor has the following features:

Wondershare Filmora - Best Video Editor for Mac/Windows
5,481,435 people have downloaded it.
Build unique custom animations without breaking a sweat.
Focus on creating epic stories and leave the details to Filmora’s auto features.
Start a creative adventure with drag & drop effects and endless possibilities.
Filmora simplifies advanced features to save you time and effort.
Filmora cuts out repetition so you can move on to your next creative breakthrough.
● Add texts, titles, and animations in just a few clicks.
● Export to GIF format or other trending video formats
● More than 300 built-in outstanding visual effects are available.
Benefits of using Filmora to create GIFs and animated videos:
● Any technical and non-technical person can handle it. In addition, it is easy to use.
● You can create GIFs here on popular video formats such as .wav, .mpeg, .wmv, .mp4, .mkv, .evo, .dat, .avi, and more. There will not be any issues present while saving.
● The best part of this software tool is that you can edit .gif files with basic editing tools like color correction, splitting, rotation, cropping, combining two or more frames, speeding up the frame motion, or slowing it down requirement.
● You can edit files with interesting elements and graphics.
Filmora is a user-friendly software that is available for installation on their official website. You can turn videos into GIFs, edit them, and download them on your system.
● Key Takeaways from This Episode →
● Canva GIF is a great platform for designing your own GIFs.
● There are various features available to create eye-catching GIFs.
● Besides, Filmora software can also be used to create GIFs out of videos.
If you are using social media daily in 2022, you must come across GIFs and maybe wonder how to make one. GIFs are the most helpful and eye-catching advertisements that can connect you with your followers through your choices. GIFs stand in the middle of images and videos. The biggest reason we use GIFs is that it represents the story or the expression in a flash. Besides, GIFs are smaller files to load and are perfect for your mobile.
In recent years, GIFs have taken the limelight in the market. The web’s most popular GIF database, GIPHY, has taken over 300 million daily active users. In 2018, Google bought the keyboard app and GIF archive to search for GIFs, Tenor. The app Tenor now has over 400 million GIF searches per day. Thus, you can realize the demand for creating GIFs is increasing now. Canva GIF is a great place to design your own GIFs.
After you create a GIF in Canva, you can use it in many fun ways in business, like promoting new sales on your products or a blog post, announcing a new webinar. In addition, you may announce your Instagram or Facebook live, share your point of view, advertise new launches, etc. In this article, we will discuss making GIFs and animating designs with GIF in Canva.
In this article
01 [How to Create a GIF in Canva](#Part 1)
02 [How to Animate Your Designs With Canva GIF](#Part 2)
Part 1 How to Create a GIF in Canva
Canva GIF has made creating your own GIFs very easy. It is one of the best GIF makers online. The plus point of using Canva to make online GIFs is that you do not require creating an account. You can straight get to work. However, if you wish to try out their premium designs and templates, you need a subscription to their premium plan. Let us now talk about making GIF in Canva and some of its tools and features to make your GIF more eye-catching.
Follow the steps below:
● Go to the web browser. Navigate to Canva. Open the GIF maker page on Canva. Select the “Make a free GIF” button to get started.
● On the left, go to the “Uploads” tab. Then, click on the “Upload media button” to add images.
● After the images are added, they will arrive under the “Images” tab. Now you have to drag and drop the images in the GIF maker.
● Next, click on the “+” button in the timeline and add the next picture. You have to repeat this step if you want to add more pictures.
● Now click on the clock icon present in the toolbar at the top. This is for defining the “duration” for how long the image will appear in the GIF. The timer can be set anywhere from 0.1 seconds to 30 seconds.
Adding Elements:
After you add the images, you need to make a GIF in Canva; you can put life into your GIF by adding multiple elements. Follow the steps to know more.
● Switch to the “Elements” tab present at the left. Now, you can explore the extensive library of Canva filled with stickers, photos, graphics, charts, etc. In addition, you can check out the “Graphics” tab for GIFs and select designs, stickers, badgers, and more of your choices.
● You have to select, drag, and drop the elements you want in your GIF. After you add them, resize, rotate, move and fit them as per your choice.
Adding Texts:
Besides graphics and stickers, you may also add text to your GIF to convey a message and make it more descriptive. Check out how.
● Click on the “Text” tab at the left. Next, select the type of texting you want, i.e., heading, sub-heading, or regular text.
● Now, you require to choose a “Text style.” Canva has more than a hundred styles and designs. Select any one of them of your choice and add it to your GIF.
● After you select the style, you can edit the text inside it. Change the font size, style, color, spacing, position, and more from the toolbar at the top. You may also animate it or add more effects to it and make it eye-catching. Use all the tools and edit accordingly.
Preview and download your GIF in Canva
After you have edited the images, preview the GIF using the “Play” button from the timeline. If you are satisfied with the GIF, it’s time to download it.
Click on the “Download button” present at the top right corner. Next, you need to go to the “File type” and select “GIF”. Select all the pages that you wish to include in your GIF. Then click on the “Download” tab. Your GIF will get successfully downloaded.
Pro Tips:
Keep it simple- The more clean and simple designs and GIFs you prepare, the more effective it looks. Also, you must focus on the message you want to convey to your audience to connect better.
Design page limit- The limit to animate design is less than ten pages. So, you need to decide and design accordingly.
Posting GIFs to Facebook- For uploading GIFs to Facebook, you have to upload them on a site like gimphy.com to hose the GIF for you.
Part 1 How to Animate Your Designs With Canva GIF
As you have already seen how to make a GIF on Canva, let’s talk about animating GIFs. You can always make your designs and GIFs look more attractive and over the top. You can use Canva to animate your designs with Canva GIFs
Follow the steps to do so:
● Select your dimension
Go to your web browser open Canva. Click on “Create a design” and select “Animated Social Media”. Then resize accordingly.
After you select the “Animated Social Media” template, a timer pops up. Here you can select for how long you need the frames to be. Using this function, you change the speed i.e., create faster or slower GIFs.
● Design your frames
Now you are about to design the first frame. When you have set everything, duplicate the first frame. In the second frame, you can move, replace or adjust graphics, which you want according to your choice.
● Change the speed of the slides
Next, you have to edit the timer and choose how long you want them to be going. It is present at the top of both of the graphics. The graphic will move faster if you shorten the time frame. You can select a slightly slower time frame to make the frameless distracting.
● Download
At the end, download the finished images and GIFs by selecting all the pages. Then, you can play it from the Downloads folder by simply pressing the space bar.
● Filmora
Apart from using Canva GIF maker, you can also use Wondershare Filmora Video Editor for making GIFs and videos. Filmora is considered one of the best video editing tools that can turn your videos into GIF images. Moreover, it has fabulous animation effects and texts. Filmora video editor has the following features:
Wondershare Filmora - Best Video Editor for Mac/Windows
5,481,435 people have downloaded it.
Build unique custom animations without breaking a sweat.
Focus on creating epic stories and leave the details to Filmora’s auto features.
Start a creative adventure with drag & drop effects and endless possibilities.
Filmora simplifies advanced features to save you time and effort.
Filmora cuts out repetition so you can move on to your next creative breakthrough.
● Add texts, titles, and animations in just a few clicks.
● Export to GIF format or other trending video formats
● More than 300 built-in outstanding visual effects are available.
Benefits of using Filmora to create GIFs and animated videos:
● Any technical and non-technical person can handle it. In addition, it is easy to use.
● You can create GIFs here on popular video formats such as .wav, .mpeg, .wmv, .mp4, .mkv, .evo, .dat, .avi, and more. There will not be any issues present while saving.
● The best part of this software tool is that you can edit .gif files with basic editing tools like color correction, splitting, rotation, cropping, combining two or more frames, speeding up the frame motion, or slowing it down requirement.
● You can edit files with interesting elements and graphics.
Filmora is a user-friendly software that is available for installation on their official website. You can turn videos into GIFs, edit them, and download them on your system.
● Key Takeaways from This Episode →
● Canva GIF is a great platform for designing your own GIFs.
● There are various features available to create eye-catching GIFs.
● Besides, Filmora software can also be used to create GIFs out of videos.
How to Create Discord GIF Avatar in Depth Guide
How to Create Discord GIF Avatar in Depth Guide
An easy yet powerful editor
Numerous effects to choose from
Detailed tutorials provided by the official channel
Discord is no secret, gradually becoming one of the most popular platforms for everyone. And why not when it allows users to communicate via different channels, including video calls, texts, media, voice calls, and files through private channels.
The digital platform is under Discord Inc and became official a while back. It operates under multiple operating systems, including macOS, Android, Linux, iOS, Android, iPadOS, and web browsers. As a result, it is an excellent way for everyone. The platform has risen to fame in the last six months, with many people using it.
As much as the platform is doing great, many things often arise, especially creating Discord GIF Avatar. In other words, how to deliver the best PFP or avatar for your account. Since Discord has recently gained maximum fame, there are fewer details. Fortunately, this article is here to save the day. It includes relevant information about an animated avatar for Discord or GIF discord avatar. Read through the summary below.
In this article
01 [Why Discord Is Becoming Popular Recently?](#Part 1)
02 [Why Discord Emojis?](#Part 2)
03 [How to Create Discord Emoji GIF?](#Part 3)
Part 1 Why is Discord Becoming Popular Recently?
How often do you visit social media? You probably know that the current trending networking platform is Discord if it is frequent. After all, it has risen to fame with millions of users in no time. Plus, the introduction of the GIF Avatar Discord has left many fans amazed with the application. You can also confirm its popularity with the many friends using it.
Discord features multiple good points that explain why most people love it, including the avatar Discord GIF. However, many people still question its popularity and its rise recently. As a result, this section will answer this question using relevant facts.
● It is suitable for gaming communication: Discord is primarily popular among gamers. The platform is new, but it has quickly overtaken its competitors, Skype and TeamSpeak. Why? Many gamers consider it a revolutionized application that solves all their worries making gaming communication bigger and better. Before Discord, gaming communication was difficult and dangerous. After all, you need to share personal Skype details that connect with your phone, making it a not-safe option. When we consider TeamSpeak, you realize that it is limiting with the option available since you only have a voice call. Discord brings out the best network channel; gamers and friends have quickly started using it.
● Most services are free: Discord includes multiple benefits that make communication straightforward and convenient. Luckily, most of the services available are free, meaning that almost everyone can access them. As a result, many people would quickly settle for Discord compared to other platforms since you can get so much at no cost. Currently, they have the Discord Nitro gif avatar, which is affordable and multiplies the fun.
● Create Discord bots are no cost: Discord allows users to create bots for free without including any hosting fee hence an affordable option.
● Constant updates that match the audiences’ needs: Things change in no time for Discord. Why? The developers are active and listen to the community’s opinion of what they want and why they need it. Therefore, it delivers the show that people urgently need leading to popularity rise.
● It rarely includes ads in private chats: A platform can become frustrating, mainly when it features multiple ads every minute. However, Discord is different since it almost has no ads. Therefore, people can freely chat with friends and other gamers.
● Discord is safe: The settings under Discord are safe since they include suitable privacy options and monitoring. Thus, it is a safe option. But many people often raise the question of open chatting in apps and the security issues that come with them. Many people can confirm that Discord is a safe option and if you feel otherwise, ensure that you only add friends you know.
Part 2 Why Discord Emojis?
From the information above, you can tell that Discord’s primary role is communication. And we all know that emojis are the real deal in every conversation since emojis easily communicate our feelings. Currently, most platforms with messaging options include emojis to multiply the fun. The same case happens for Discord emojis. They are there to make communication appealing, interesting, funny and reveal how you feel about a situation.
Importance of Discord emojis
● Emojis help you to communicate the right emotions. Sometimes, it’s impossible to express the right feelings using words, and emojis come to the rescue in such situations. Of course, they are useless for formal communication, but Discord holds a considerable weight for various issues.
● They are fun and exciting. Sometimes you can choose to use an emoji instead of writing some phrase, and this option works for all. Besides, it feels good to see different emojis instead of a long paragraph that tells the same story.
● Emojis make communication easy. We are in the 21st century with multiple revolutionary changes with our communication channels. Young people prefer emojis for different conversations.
● It offers a sense of presence in a conversation. People believed that they could only hold exciting discussions when they were together. Over time, this statement has been proved impossible since we can’t always be there to hold serious talks. We need Discord emojis since they give a sense of physical presence.
● They liven up a serious conversation. Have you ever noticed, people tend to include emojis when having serious talks making them more casual and creating a friendly environment that suits everyone? And this trick often works.
Discord emojis are conversation aids that every communication channel need. Why not, when it gives a sense of friendliness. Try out the Discord emojis and discover the simplest ways to make a conversation lively.
Part 3 How to Create Discord Emoji GIF
There are two popular ways to create an emoji Discord GIF avatar, Discord Nitro animated avatar and Discord GIF avatar without Nitro. The emoji GIF you make depends on the Nitro version you are using.
Creating a Discord account is simple and free, not even considering the hosting cost. However, the developers include the Discord Nitro version, which contains multiple features that make conversations bigger and better. However, the Nitro version is a paid subscription of $4.99 monthly. Creating a discord emoji GIF is quite simple if you are under the later version. After all, it includes the available GIF options that you can choose from depending on your taste. However, if you are under the free option, you won’t have this option.

For standard Discord users, things work differently. They can still add Discord GIF Avatar emojis but via a long process. Check out the details below referencing MiniTool content creator Zoe in an article about making Discord PFP a GIF.
Step 1: Download Application of Choice
We have many websites that offer Discord GIF avatar free. The animated avatars for Discord emojis are readily available for all. Some popular apps are Giphy, Tenor, and Emoji.gg. The latter is a simple platform with multiple animated Discord emojis; you can download those that match your taste.
Step 2: Search for the GIF you need
You can then search for or download a discord avatar gif that suits well as per your need.

Step 3: Click the GIF and open it on a new tab
Next, click the GIF for discord avatar to let it open into the new tab.
Step 4: Save on the GIF and export it to your PC.
In the end, save your selected avatar gif discord.
Another convenient option for non-nitro users is adding animated emojis to a Discord Server using the NQN Discord bot. Note that you need to have a server to include the NQN bot.
Part 1 How to Make a Discord PFP Avatar Online
If you are a Discord user, you understand that the platform is flexible when dealing with servers and profile names but limiting the PFP (your profile picture). Hence, it is necessary to invest in suitable options. If you wish to design something unique, you must create the GIF file or image online using different websites and resources. Besides, the communication platform is yet to introduce editing features. Here is a straightforward way to make GIF Avatar in Discord online referencing Peter Davis’ article, how to make discord PFP online.
Step 1: Search Online
First, you need to identify what face, personality, or character you want to symbolize through your Avatar. For this purpose, you can Google search also, to figure out different characters such as cartoon characters, drawings, illustrations, illusions, etc. Find the right site to download the PFP you need or take the help of multiple emojis and GIFs available under the Wondershare Filmora Video Editor application.
Step 2: Launch Filmora to Upload Character
Next, launch Filmora, upload your character and resize it to a circular shape.
Step 3: Edit your work
Now, go to the editing process using Filmora video editors
Filmora video editor is among the top editing software. The platform is friendly and supports the GIF format. It includes powerful editing skills, and you can easily import your file through drag and drop. After that, customize your PFP avatar GIF discord.
Wondershare Filmora - Best Video Editor for Mac/Windows
5,481,435 people have downloaded it.
Build unique custom animations without breaking a sweat.
Focus on creating epic stories and leave the details to Filmora’s auto features.
Start a creative adventure with drag & drop effects and endless possibilities.
Filmora simplifies advanced features to save you time and effort.
Filmora cuts out repetition so you can move on to your next creative breakthrough.
Edit the background and noise, add filters and the necessary text. Of course, the editor includes features such as rotate, crop, split, trim, merge, and flip settings. After confirming the required changes, export the files to your PC.
Step 4: Add the PFP to your Discord account
Now, open the discord account, upload your customized PFP, and make the difference.
For that, go to your profile in Discord and settle for the user settings. Click on your current PFP, and the edit file conversation will prompt you. Upload the file from your PC.
Follow the above steps to easily make the best Discord GIF avatar using Filmora.
● Ending Thoughts →
● The GIF needs to be at most 8Mbs so that Discord can confirm it.
●Discord Nitro offers many privileges to the users and is available at a monthly fee of $4.99.
●Filmora is among the top editing software you can use.
●Creating a Discord animated avatar is probably the trickiest process in the platform, especially for newbies. However, with the right hacks, the operation is straightforward. This article offers you the most convenient way to create GIF for a Discord avatar.
Discord is no secret, gradually becoming one of the most popular platforms for everyone. And why not when it allows users to communicate via different channels, including video calls, texts, media, voice calls, and files through private channels.
The digital platform is under Discord Inc and became official a while back. It operates under multiple operating systems, including macOS, Android, Linux, iOS, Android, iPadOS, and web browsers. As a result, it is an excellent way for everyone. The platform has risen to fame in the last six months, with many people using it.
As much as the platform is doing great, many things often arise, especially creating Discord GIF Avatar. In other words, how to deliver the best PFP or avatar for your account. Since Discord has recently gained maximum fame, there are fewer details. Fortunately, this article is here to save the day. It includes relevant information about an animated avatar for Discord or GIF discord avatar. Read through the summary below.
In this article
01 [Why Discord Is Becoming Popular Recently?](#Part 1)
02 [Why Discord Emojis?](#Part 2)
03 [How to Create Discord Emoji GIF?](#Part 3)
Part 1 Why is Discord Becoming Popular Recently?
How often do you visit social media? You probably know that the current trending networking platform is Discord if it is frequent. After all, it has risen to fame with millions of users in no time. Plus, the introduction of the GIF Avatar Discord has left many fans amazed with the application. You can also confirm its popularity with the many friends using it.
Discord features multiple good points that explain why most people love it, including the avatar Discord GIF. However, many people still question its popularity and its rise recently. As a result, this section will answer this question using relevant facts.
● It is suitable for gaming communication: Discord is primarily popular among gamers. The platform is new, but it has quickly overtaken its competitors, Skype and TeamSpeak. Why? Many gamers consider it a revolutionized application that solves all their worries making gaming communication bigger and better. Before Discord, gaming communication was difficult and dangerous. After all, you need to share personal Skype details that connect with your phone, making it a not-safe option. When we consider TeamSpeak, you realize that it is limiting with the option available since you only have a voice call. Discord brings out the best network channel; gamers and friends have quickly started using it.
● Most services are free: Discord includes multiple benefits that make communication straightforward and convenient. Luckily, most of the services available are free, meaning that almost everyone can access them. As a result, many people would quickly settle for Discord compared to other platforms since you can get so much at no cost. Currently, they have the Discord Nitro gif avatar, which is affordable and multiplies the fun.
● Create Discord bots are no cost: Discord allows users to create bots for free without including any hosting fee hence an affordable option.
● Constant updates that match the audiences’ needs: Things change in no time for Discord. Why? The developers are active and listen to the community’s opinion of what they want and why they need it. Therefore, it delivers the show that people urgently need leading to popularity rise.
● It rarely includes ads in private chats: A platform can become frustrating, mainly when it features multiple ads every minute. However, Discord is different since it almost has no ads. Therefore, people can freely chat with friends and other gamers.
● Discord is safe: The settings under Discord are safe since they include suitable privacy options and monitoring. Thus, it is a safe option. But many people often raise the question of open chatting in apps and the security issues that come with them. Many people can confirm that Discord is a safe option and if you feel otherwise, ensure that you only add friends you know.
Part 2 Why Discord Emojis?
From the information above, you can tell that Discord’s primary role is communication. And we all know that emojis are the real deal in every conversation since emojis easily communicate our feelings. Currently, most platforms with messaging options include emojis to multiply the fun. The same case happens for Discord emojis. They are there to make communication appealing, interesting, funny and reveal how you feel about a situation.
Importance of Discord emojis
● Emojis help you to communicate the right emotions. Sometimes, it’s impossible to express the right feelings using words, and emojis come to the rescue in such situations. Of course, they are useless for formal communication, but Discord holds a considerable weight for various issues.
● They are fun and exciting. Sometimes you can choose to use an emoji instead of writing some phrase, and this option works for all. Besides, it feels good to see different emojis instead of a long paragraph that tells the same story.
● Emojis make communication easy. We are in the 21st century with multiple revolutionary changes with our communication channels. Young people prefer emojis for different conversations.
● It offers a sense of presence in a conversation. People believed that they could only hold exciting discussions when they were together. Over time, this statement has been proved impossible since we can’t always be there to hold serious talks. We need Discord emojis since they give a sense of physical presence.
● They liven up a serious conversation. Have you ever noticed, people tend to include emojis when having serious talks making them more casual and creating a friendly environment that suits everyone? And this trick often works.
Discord emojis are conversation aids that every communication channel need. Why not, when it gives a sense of friendliness. Try out the Discord emojis and discover the simplest ways to make a conversation lively.
Part 3 How to Create Discord Emoji GIF
There are two popular ways to create an emoji Discord GIF avatar, Discord Nitro animated avatar and Discord GIF avatar without Nitro. The emoji GIF you make depends on the Nitro version you are using.
Creating a Discord account is simple and free, not even considering the hosting cost. However, the developers include the Discord Nitro version, which contains multiple features that make conversations bigger and better. However, the Nitro version is a paid subscription of $4.99 monthly. Creating a discord emoji GIF is quite simple if you are under the later version. After all, it includes the available GIF options that you can choose from depending on your taste. However, if you are under the free option, you won’t have this option.
For standard Discord users, things work differently. They can still add Discord GIF Avatar emojis but via a long process. Check out the details below referencing MiniTool content creator Zoe in an article about making Discord PFP a GIF.
Step 1: Download Application of Choice
We have many websites that offer Discord GIF avatar free. The animated avatars for Discord emojis are readily available for all. Some popular apps are Giphy, Tenor, and Emoji.gg. The latter is a simple platform with multiple animated Discord emojis; you can download those that match your taste.
Step 2: Search for the GIF you need
You can then search for or download a discord avatar gif that suits well as per your need.
Step 3: Click the GIF and open it on a new tab
Next, click the GIF for discord avatar to let it open into the new tab.
Step 4: Save on the GIF and export it to your PC.
In the end, save your selected avatar gif discord.
Another convenient option for non-nitro users is adding animated emojis to a Discord Server using the NQN Discord bot. Note that you need to have a server to include the NQN bot.
Part 1 How to Make a Discord PFP Avatar Online
If you are a Discord user, you understand that the platform is flexible when dealing with servers and profile names but limiting the PFP (your profile picture). Hence, it is necessary to invest in suitable options. If you wish to design something unique, you must create the GIF file or image online using different websites and resources. Besides, the communication platform is yet to introduce editing features. Here is a straightforward way to make GIF Avatar in Discord online referencing Peter Davis’ article, how to make discord PFP online.
Step 1: Search Online
First, you need to identify what face, personality, or character you want to symbolize through your Avatar. For this purpose, you can Google search also, to figure out different characters such as cartoon characters, drawings, illustrations, illusions, etc. Find the right site to download the PFP you need or take the help of multiple emojis and GIFs available under the Wondershare Filmora Video Editor application.
Step 2: Launch Filmora to Upload Character
Next, launch Filmora, upload your character and resize it to a circular shape.
Step 3: Edit your work
Now, go to the editing process using Filmora video editors
Filmora video editor is among the top editing software. The platform is friendly and supports the GIF format. It includes powerful editing skills, and you can easily import your file through drag and drop. After that, customize your PFP avatar GIF discord.
Wondershare Filmora - Best Video Editor for Mac/Windows
5,481,435 people have downloaded it.
Build unique custom animations without breaking a sweat.
Focus on creating epic stories and leave the details to Filmora’s auto features.
Start a creative adventure with drag & drop effects and endless possibilities.
Filmora simplifies advanced features to save you time and effort.
Filmora cuts out repetition so you can move on to your next creative breakthrough.
Edit the background and noise, add filters and the necessary text. Of course, the editor includes features such as rotate, crop, split, trim, merge, and flip settings. After confirming the required changes, export the files to your PC.
Step 4: Add the PFP to your Discord account
Now, open the discord account, upload your customized PFP, and make the difference.
For that, go to your profile in Discord and settle for the user settings. Click on your current PFP, and the edit file conversation will prompt you. Upload the file from your PC.
Follow the above steps to easily make the best Discord GIF avatar using Filmora.
● Ending Thoughts →
● The GIF needs to be at most 8Mbs so that Discord can confirm it.
●Discord Nitro offers many privileges to the users and is available at a monthly fee of $4.99.
●Filmora is among the top editing software you can use.
●Creating a Discord animated avatar is probably the trickiest process in the platform, especially for newbies. However, with the right hacks, the operation is straightforward. This article offers you the most convenient way to create GIF for a Discord avatar.
How to Split Videos - 33 Best Video Splitter Recommend
A video splitter is necessary when you need to extract a crucial or particular portion of a video file. Many users trim or reduce video segments by deleting superfluous or undesired elements. While splitting a video into smaller clips is a challenging task in and of itself, don’t overlook the importance of keeping the quality of the video clip you plan to obtain. While there are various online video splitter software available today, most of them do not achieve what they claim. We’ve put together a compelling list of the best video splitters in this post, including full-featured software and lightweight editing solutions. Continue reading to learn more about them and choose the one that most appeals to you.
- Filmora
- Boilsoft Video Splitter
- Solveigmm Video Splitter
- BandiCut
- Free Video Cutter
- Easy Video Splitter
- Avidemux
- Ultra Video Splitter
- VideoPad Video Editor
- Windows Movie Maker
- Windows Photos
- VLC
- iMovie
- Format Factory
- 7 Best Free Video Splitter Online
- 10 Best Video Splitter for Mobile Phone
- Filmora
- AndroVid Video Editor
- Easy Video Cutter
- Video Editor
- VideoShow – Video Editor
- Trim Video
- Video Splitter
- Crop video
- Video Crop
- Video Trim & Cut
Part 1: Backup Your Original Video
Making several backups is perhaps the most critical thing you can do for your project. Whether your computer dies suddenly or your editing application crashes, you’ll have a point to fall back on if you have a backup. Making this a habit will save you a lot of time and work in the long term. How many copies of your data should you make? You should create at least three project duplicates in the best-case scenario. Also, make sure they’re preserved in various formats and places—one on an SD card, another on a hard drive, or a USB drive.
14 Best Video Splitter for Windows/Mac
1. Filmora
Wondershare Filmora Video Editor is a superb video editor for those seeking software that can split videos and has a lot of functions. It was originally only accessible for Windows, but thanks to the developers, Mac users may now use this high-quality video splitter. Using this program to split and join videos is pretty basic and straightforward. It’s an intriguing tool since it allows users to produce high-quality films using filters, effects, and other features in an easier method than employing professional editors. This program also lets you export video at a breakneck speed, up to 4k quality.
![]()
Platform: Windows/Mac
Price: Free Trial
Features
- Editing is intuitive and quick.
- Export video in 4k quality.
- There are several graphic effects and transitions.
- Footage from the internet.
- Regularly upgraded features.
Pros
- Large films can be easily cut, trimmed, and combined without compromising quality.
- On the exported video, there is no watermark.
- Both Windows and Mac computers are supported.
- Splitting a video is such a breeze.
- For novices, it has a lot of handy options that will help you create a stunning film.
Cons
- Large-scale content editing might be slow at times.
2. Boilsoft Video Splitter
Boilsoft Video Splitter can divide, edit, or trim a big AVI, MPEG, RM, ASF, WMV, 3GP, MKV, FLV, or MP4 video file without re-encoding smaller video segments. It has a built-in player that allows you to effortlessly split/cut video files according to time or selection.
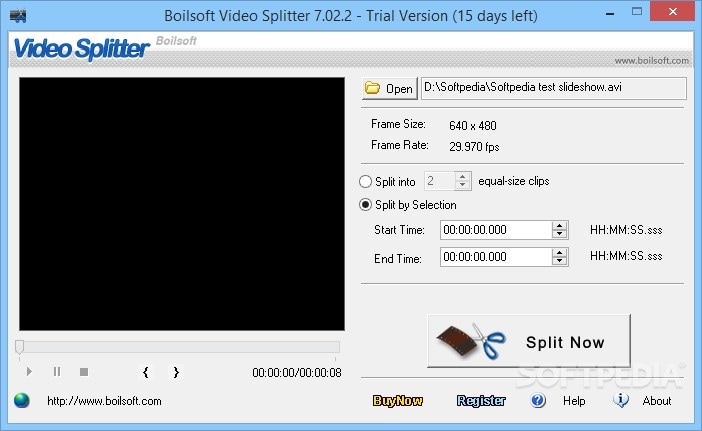
Platform: Windows/Mac
Price:$34.95 one-time payment
Features
- Split Video
- Cut video
- Built-in player
Pros
- It supports lots of video format.
- User-friendly software.
Cons
- Because you can’t adjust the program window, using the slider for selection becomes increasingly difficult as your video becomes longer.
3. Solveigmm Video Splitter
SolveigMM Video Splitter is suitable for simple editing processes such as removing an extra section from a video, removing an advertisement from a movie, muting the sound on a selected video fragment, saving only a video or audio track from a file, cutting a video into parts, saving segments into separate files, and so on. The editing procedure takes just a few seconds.
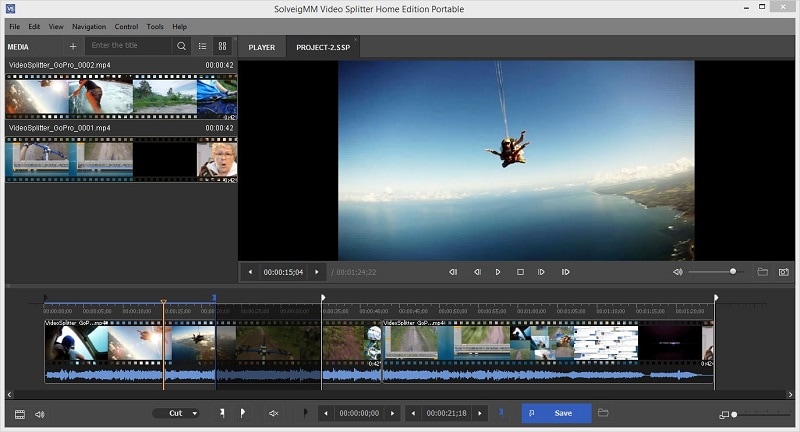
Platform: Windows/Mac
Price:$7.99 per month
Features
- Video cutter
- Video editor
- Video Joiner
Pros
- No previous training or knowledge is necessary to understand how to use the software.
- All major file formats are supported.
- The output file quality is unaffected.
Cons
- It sometimes crashes depending on the file size.
4. BandiCut
Bandicut is a video splitting and joining program for Windows systems only. It has a straightforward UI and simple settings. It may also be used as a video converter, allowing you to modify the format of the output clips. The tool is useful for both newcomers and seasoned users.
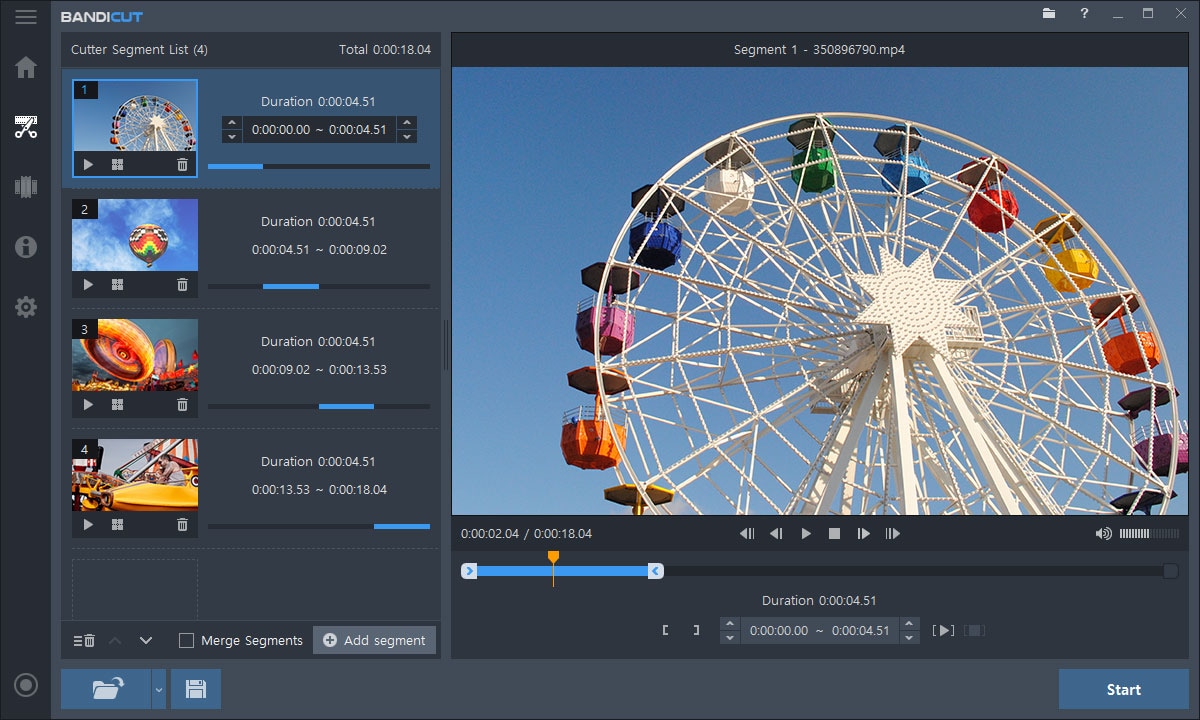
Platform: Windows
Price:$29.95 per user per month
Features
- Easy and fast video cutter
- Video splitter
Pros
- The interface is pleasing to the eye, and the functions are simple.
- High-capacity mode
Cons
- There isn’t a fully working free version available.
5. Free Video Cutter
This is a basic tool for reducing the size of large video files. It allows you to cut a clip from a movie or video in various formats and save it in four other formats. The hand-drawn interface, by the way, is incredibly charming.
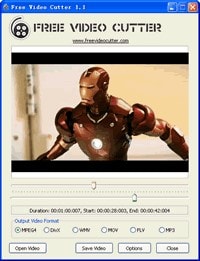
Platform: Windows
**Price:**a free version and premium version ($17.99 per month)
Features
- An irregularly shaped hand-drawn art style interface.
- Videos in a variety of formats are accepted.
- The control panel is small, with just three major buttons.
Pros
- Save as new videos in a variety of formats without compromising quality.
- It may be used to trim lengthy movies, mobile videos, and camera recordings, among other things.
Cons
- For huge files, there are a lot of crashes.
- For Mac users, this tool is not accessible.
6. Easy Video Splitter
Easy Video Splitter is a simple video editing application that allows you to divide your video into many segments. It can play AVI, MPEG, WMV, and ASF files. The scroll bats may be used to cut the movie precisely where you want it to be cut or to divide the film at certain intervals.
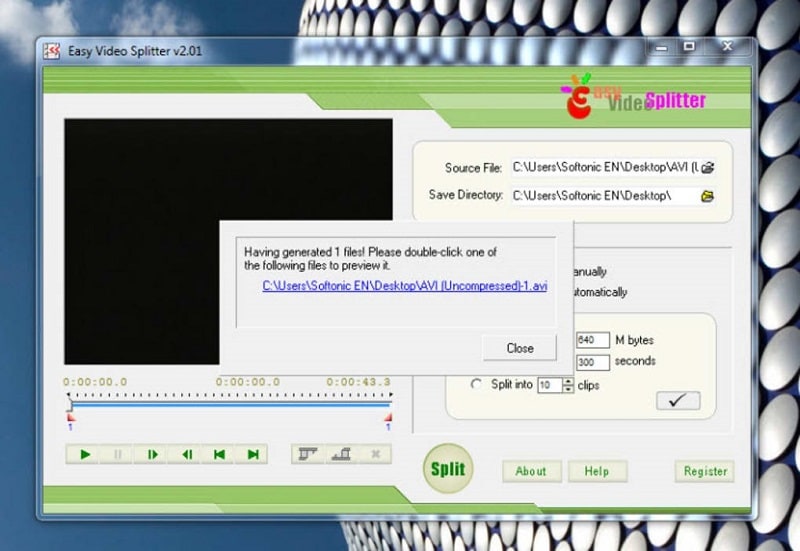
**Platform:**Windows/Mac
**Price:**free with ads
Features
- Has a batch processor
- Multiple file support
- Easy to use
Pros
- Batch processing is supported.
Cons
- Only one frame at a time may be fine-tuned.
7. Avidemux
Avidemux is perfect if you have a video to encode or arrange for a certain speaker system. It’s also an ideal choice if you just require a basic video editor, although there are many more extensive applications available that may be better appropriate.
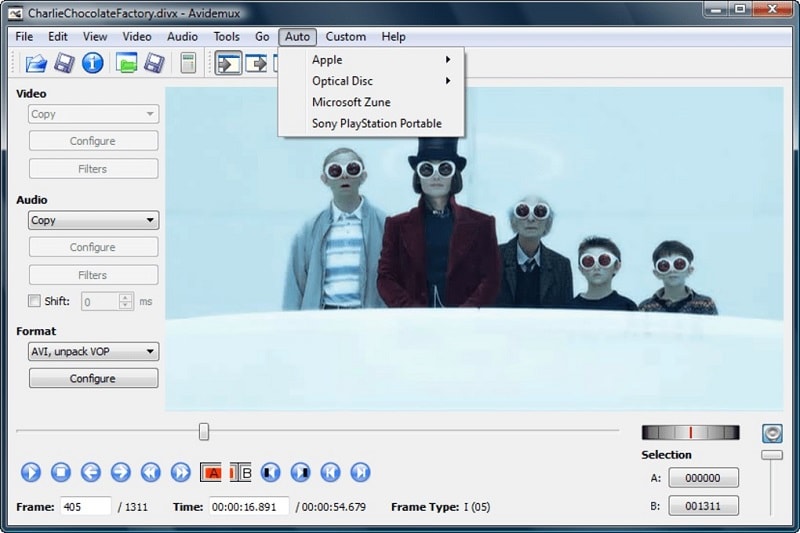
**Platform:**Windows/Mac
**Price:**free
Features
- This program can handle a variety of subtitle formats, including SUB and SRT.
- They also provide a variety of filtering options.
- You may export videos in various formats, including MKV, MPEG, and MP4.
Pros
- A user-friendly interface
- Excellent alternatives for encoding
- Filters for sharpening and de-noising
Cons
- There is no timeline.
- There are no innovative transitions or effects.
8. Ultra Video Splitter
Ultra Video Splitter is an excellent solution for people who just need to complete this one operation and hence do not need the usage of sophisticated video editing software. The tool enables you to choose from a variety of parameters for the final file or files, such as file size, final format, and bitrate.
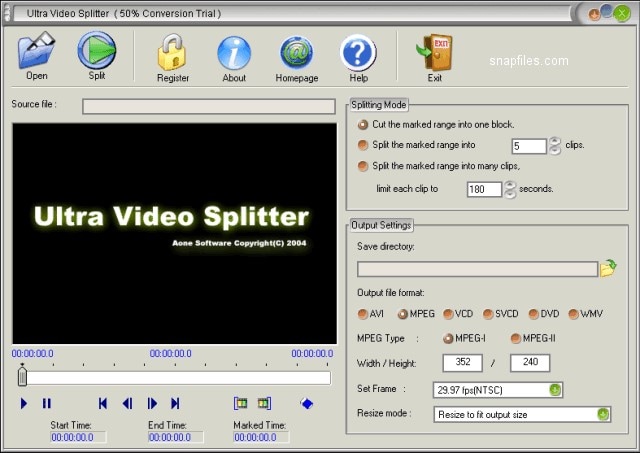
**Platform:**Windows/Mac
Price:$25.00 one-time payment
Features
- Supports videos in WMV, XviD, MPEG, ASF, AVI, RM, MOV, 3GP, Divx, and MP4 format.
- Can export the final video in VCD, SVCD, DVD, AVI, DivX, MPEG, or WMV format.
Pros
- Video trimming and exporting are both quick.
- Multiple video formats are supported.
Cons
- Has just a few video editing options.
9. VideoPad Video Editor
On Mac and Windows, the VideoPad video editor allows you to edit clips and produce professional-quality films. Its divide and merge functions are also straightforward to utilize. VideoPad editing software can be used to create visually appealing videos. As a result, the video splitter software for Mac can rapidly and efficiently manipulate video streams.
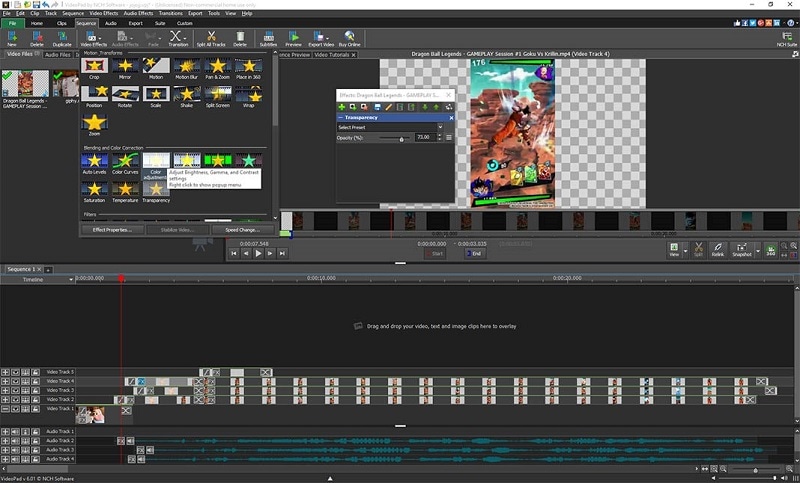
**Platform:**Windows/Mac
Price:$60.00 one-time payment
Features
- It supports a variety of file formats, offering users additional choices for how to utilize the tool with different file kinds.
Pros
- The cost of a professional business video is surprisingly low.
- Importing video is as simple as dragging and dropping.
Cons
- The free edition offers a restricted number of functions.
10. Windows Movie Maker
This video editing software comes with Windows OS and is focused on simplicity: There’s no easier method to split videos and save into lossless codecs with titles, transitions, background music, and effects than this. Earlier versions of the application were so basic that they couldn’t accomplish what most people required. Still, over time, features like voiceover recording and even anti-shake have crept into what is today a highly useful free video splitter.
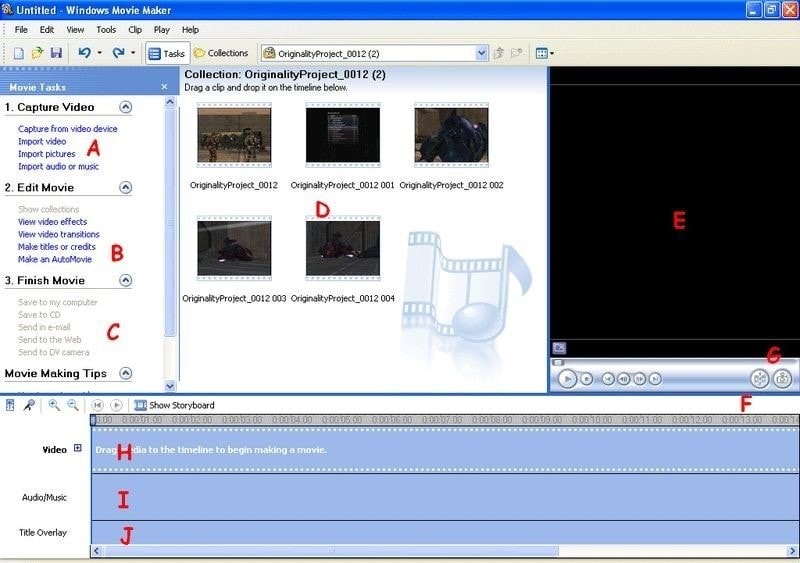
**Platform:**Windows
**Price:**free
Features
- Cool transitions
- Effects on video
- Voiceovers are some of the audio features
Pros
- Effects are automatically previewed.
- Audio features such as voiceovers and other audio enhancements.
- Excellent choices for sharing.
- Simple to use
- Stabilization.
Cons
- There are no modifications to the contrast or saturation.
- The effects aren’t flexible.
11. Windows Photos
Many users will never require more than Windows 10’s built-in picture and video editor . It is an automatic video splitter with sophisticated effects like 3D overlays and animated titles are among the extras.
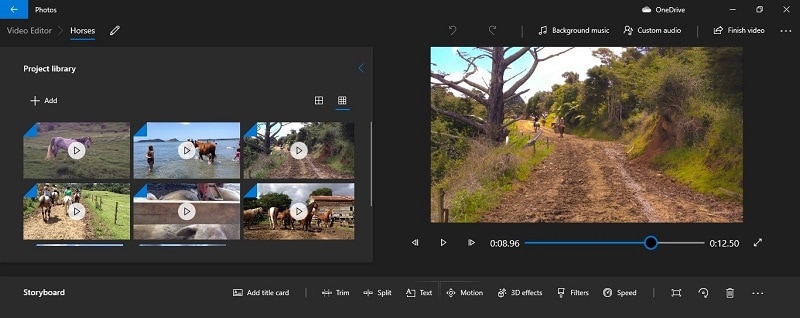
**Platform:**Windows
**Price:**free
Features
- Face recognition
- Video cutter
- 3D overlays
Pros
- A simple interface.
- Detecting faces and objects.
- Album creation is done automatically.
- It works with OneDrive.
- Soundtracks, text, and transitions are all used in video editing.
Cons
- There isn’t a before-and-after comparison.
- Panorama stitching and selective focus are not supported.
- There is no geometry correction or chromatic aberration correction.
12. VLC
VLC Media Player , for good reasons, is a hugely popular video splitter. It is completely free, supports almost everything without the need to download additional codecs, supports streaming, can enhance video and audio playback for your chosen device, and can be extended almost infinitely with plugins downloadable from the internet.
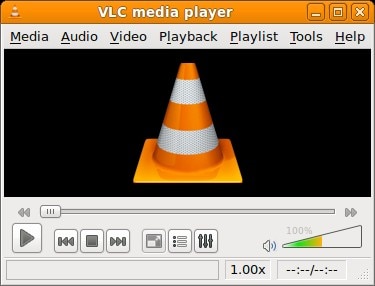
**Platform:**Windows/Mac
**Price:**free
Features
- Allows streaming of MPEG and DivX files
- Excellent video and audio playback modifying tools
Pros
- It can play all kinds of music and video formats, even compressed ones.
Cons
- It is GPU-dependent and may crash at random moments.
13. iMovie
If you’re using a Mac,iMovie video editing program can help you split videos. Mac users will find this to be one of the finest video splitters available. It contains a wide range of capabilities that may improve the quality of your video in a variety of ways. The video may be trimmed and enhanced with many features, such as text, special effects, and audio. Video quality may be improved with this software’s special effects and video upgrades. In addition, the interface is so user-friendly that even novices may generate stunning results. On the other hand, iMovie is capable of storing 4K films.
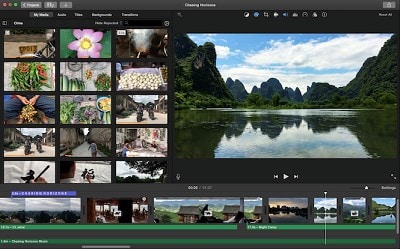
**Platform:**Mac
**Price:**free
Features
- An easy-to-use video splitter that is already built-in
- It’s simple to use
Pros
- An easy-to-use video splitter that is already built-in
- It’s simple to use
Cons
- Uploading and exporting videos takes a long time.
14. Format Factory
Multifunctional document and multimedia processing software -Format Factory - is only available for Windows. It’s meticulously designed to keep you from getting lost in the weeds when working on any project. It is designed to be a stand-alone file management application, and judging by the wealth of options available, it has done an excellent job.

**Platform:**Windows
**Price:**free
Features
- Video joining and muxing are available.
- It has a screen recorder built right in.
- A built-in video player and downloader are included.
- Allows for hardware acceleration.
- Disk ripping options are provided.
- Processing may be done in a batch.
Pros
- Removes watermarks and logos.
- File formats supported include video, audio, images, and documents.
Cons
- Unnecessary software is installed when installing the program.
7 Best Free Video Splitter Online
2. VEED.IO
Veed.io is a free online video editing tool that allows anybody to make powerful movies and expand their audiences. It has several useful features, such as cutting and filtering films based on their appearance. Users may cut, add text, and draw on the videos. Veed may also be used to generate videos on social media channels.

**Price:**free
Features
- Video splitter and joiner
Pros
- Simple and quick.
- A preview of the cutting result is available.
Cons
- The maximum file size is 50 MB.
3. Flixier
Flixier is a web-based video editor that offers 1-minute exports to any device, easy collaboration, and lots of cloud storage. Flixier enables customers to export whatever video they want, independent of their technology. It keeps all stakeholders in the loop by allowing each team member and contributor to remain in sync across all platforms. Teams may interact in real time without fear of losing track of the project. Cloud storage, version history, feedback comments, sophisticated exports, and email alerts are all available. The tool supports Windows, Mac, Linux, and Chromebooks.
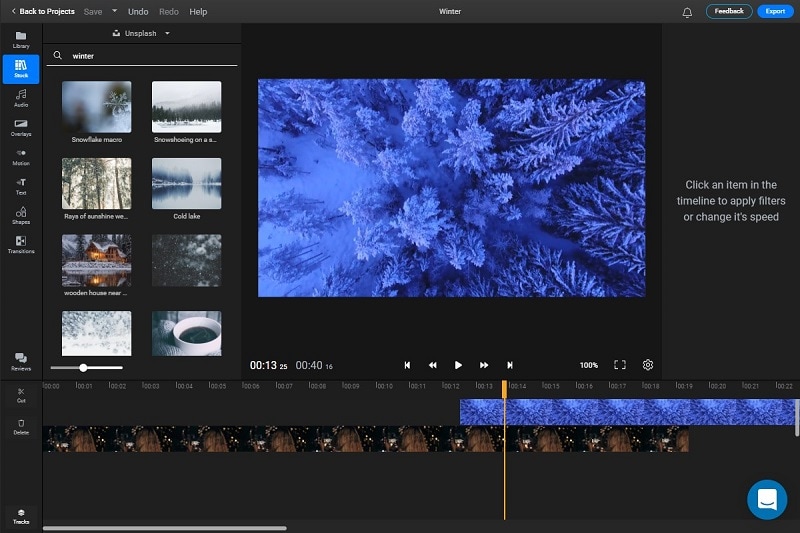
**Price:**free
Features
- Video splitter and joiner
Pros
- iPhone version is available.
- Automatic sound amplification.
Cons
- May seem too overloaded with functions.
4. Split Video
Split Video program may also be used to edit and split huge videos into smaller segments. It’s quite simple to work with. All you have to do now is choose the video to divide. Tell the app how you’d want the video to be divided. Choose how many parts you want in your video. You may watch the app-split clips before sharing them.
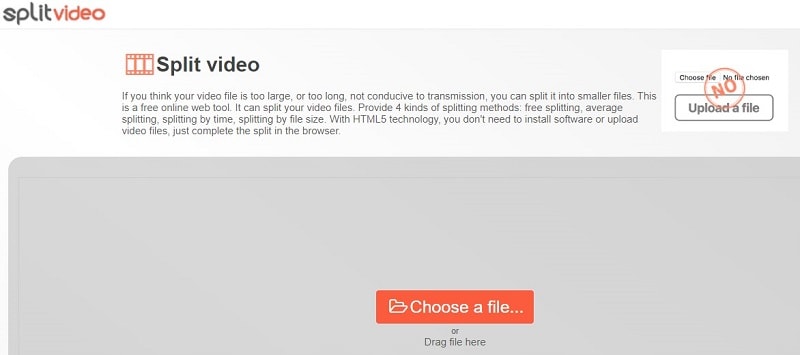
**Price:**free
Features
- Video splitter and joiner
Pros
- Interface that is easy to use.
Cons
- The maximum file size is 200 MB.
5. Kapwing
This application primarily advertises itself as a video trimmer. It lets you edit films by removing unwanted bits and trimming them to the appropriate length. It also has some basic settings, such as utilizing it as a free online MP4 splitter. The user interface is simple, and uploading a movie takes just a few moments. The primary drawback is that your film may only be 300 MB in size and must be under 30 minutes in length.
**Price:**free
Features
- Video splitter and joiner
Pros
- Interface that is simple to use.
Cons
- A little watermark appears in the corner of your video with the free version.
- Only supports films up to 300 MB in size and up to half an hour in length.
6. Typito
Typito is a video collaboration tool that allows you and your team to work together to make better films for your business. Typito allows you to make and utilize professionally created graphic overlays for free, as well as generate full-length HR movies in both square and portrait formats. It enables you to produce movies consistent with your brand, allowing you to change and customize elements like font, color, and logo with a few mouse clicks. You may save time for your organization by producing videos quicker and working with your team to publish professional-looking films while previewing them on the move. Inviting team members to the project and assigning responsibilities for editing and reviewing videos are just a few collaboration tools.
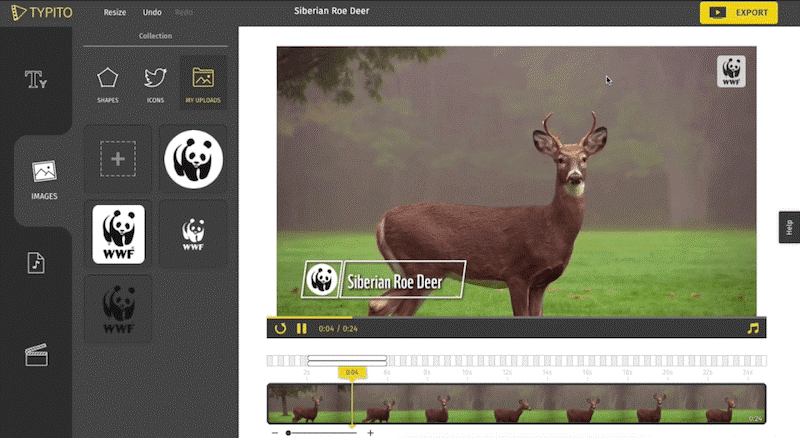
**Price:**free
Features
- Video splitter and joiner
Pros
- Simple features to use
Cons
- Few transition templates.
7. Clideo
Clideo is a one-of-a-kind platform that allows you to easily produce and modify any video, GIFS, and picture files in one spot. Merging, compressing, resizing, slideshow, cropping, rotation, and other video editing tools are included in the program. Users may add music or text to videos to help them stand out and draw in the right audience. The video editing platform supports various video formats such as MP4, AVI, MPG, VOB, WMV, MOV, and others. There is no need to download or install any applications since everything may be done entirely online. The premium security encryption that comes with it ensures that all video files are always well-protected.
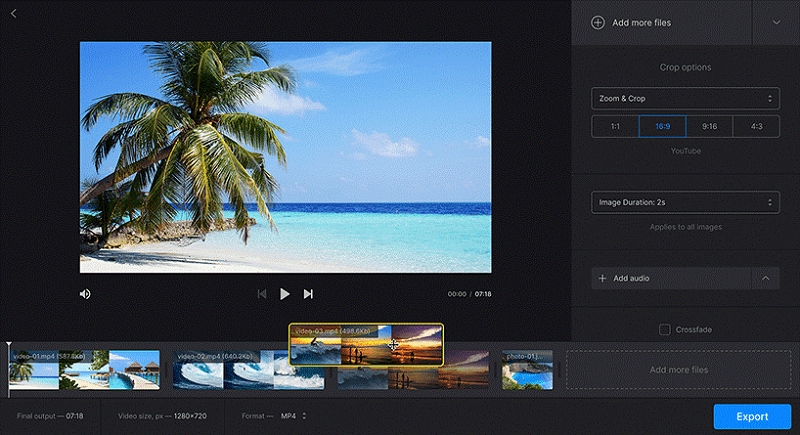
**Price:**free
Features
- Video splitter and joiner
Pros
- Much easier to use than other video editing software.
- Projects are stored on the cloud, so they don’t take up any computer resources.
- There is no need to download any program.
Cons
- The feature set is limited in comparison to other video editing suites.
- Visual artistry is required.
- Some undertakings need a significant amount of time to complete.
10 Best Video Splitter for Mobile Phone
1. Filmora
A good video editor is required to split a video qualitatively.Filmora Video Editor & Maker might be the answer. It works with high-definition videos. It comes with all of the necessary editing tools. As a result, you will not be sorry for installing this software. Not only will you be able to edit and divide films effortlessly, but you’ll also be able to add fun filters.
The sticker library in Filmora Video Editor & Maker is extensive. The number is in the thousands. You’ll be able to apply both realistic and humorous animated stickers. Use video transitions such as Flash, Page Cut, Cross Zoom, Blurry Roll, and Cube. You have complete control over the speed of your edited video.
**Price:**free
Features
- Video splitter and joiner
- Video editor
Pros
- Files may be readily exported and imported.
Cons
- Compatibility of exported videos is limited.
2. AndroVid Video Editor
AndroVid is a video-splitting program with all the tools you’ll ever need. This program is jam-packed with editing tools, allowing you to create a polished video quickly. The program is also quite user-friendly, so even if this is your first time splitting a video, you will be able to handle it.
**Platform:**Android
**Price:**free
Features
- Video splitter and joiner
- Video editor
Pros
- Simple video cutting tool; can extract single-frame pictures from videos.
Cons
- There are no sophisticated editing choices, and the audio options are quite restricted.
- There is no tool for full-screen graphics, and the user interface is a little complicated.
- The ad-free version is nearly as expensive as KineMaster Pro, which is more sophisticated.
3. Easy Video Cutter
Becausethis program is only devoted to video editing, it can handle a wide range of tasks. The program, for example, may clip videos, combine them, rotate them, and so on. You may also adjust the pace of the videos as needed. It should be noted that trimming the video in this program is quite simple — just pick the range with the slider instrument, and that’s it. Because this program is only devoted to video editing, it can handle a wide range of tasks. The program, for example, may clip videos, combine them, rotate them, and so on. You may also adjust the pace of the videos as needed. It should be noted that trimming the video in this program is quite simple — just pick the range with the slider instrument and that’s it.

**Platform:**Android
**Price:**free
Features
- Video splitter and joiner
- Video editor
Pros
- It’s quite simple to use.
- It’s ideal for simple video cutting tasks.
Cons
- There are no additional editing options available.
4. Video Editor
Video Editor is a fantastic app for Android users who want to edit and enhance their videos. It can break a video into segments, combine several films, crop videos, and adjust the video’s size. You may also add audio to the video of your choosing.
**Platform:**Android
**Price:**free
Features
- Video splitter and joiner
- Video editor
Pros
- You may rearrange your clips in any order you choose.
- Many older file types are supported by the program.
Cons
- The video scroll bar might be a little tricky to use.
- It’s quite basic.
5. VideoShow – Video Editor
On the Google Play market,VideoShow is one of the most popular video editing applications. There are several themes, filters, music, and audio to choose from while creating great videos. It’s a fantastic video trimming software.
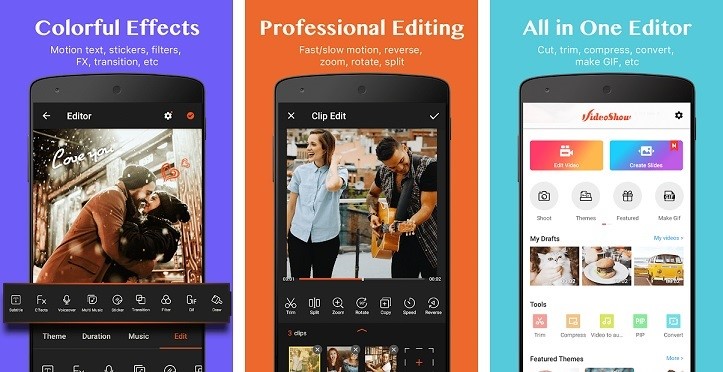
**Platform:**Android/iPhone
**Price:**free
Features
- Video splitter and joiner
- Video editor
Pros
- It has the ability to both connect and cut clips.
- It’ll run on almost any android phone.
Cons
- Video Scissors has taken the place of the iPhone version.
- Cutting is fast, but re-encoding might take a long time.
6. Trim Video
Trim Video is the greatest app for iPhone video editing and cutting of huge videos. From the huge file, you may easily crop a video clip. Although the program is highly useful and entertaining for video makers, it is not free and costs $0.99.
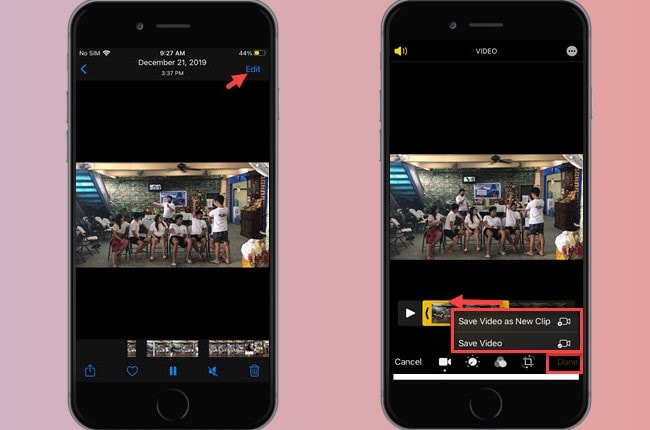
**Platform:**iPhone
Price:$0.99 per month
Features
- Video splitter
Pros
- All major video and audio formats are supported.
- When you’re finished, there’s no need to re-render the video.
- There are no watermarks.
Cons
- This software does not include video joining; it must be downloaded separately.
- This app’s main purpose is to cut.
7. Video Splitter
Video Splitter is an iPhone software that allows you to edit and divide videos into segments. It’s a free program that combines all of your editing tools into one application. The tool successfully splits a huge video into little chunks, which can be quickly texted or uploaded to social media.
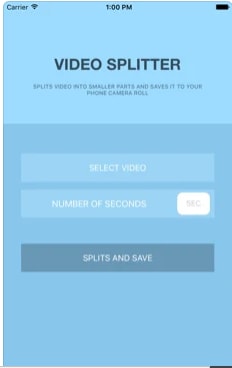
**Platform:**iPhone
**Price:**free
Features
- Video splitter and joiner
- Video editor
Pros
- A broad number of formats, including audio, are supported.
- It’s a breeze to use.
Cons
- There are no choices for video converting.
- It’s been a long time since it’s been updated.
8. Crop video
Crop Video is another handy iPhone app if you wish to cut your movie to a lesser size. It is one of the most popular tools for cutting videos and altering them for a better impact. It contains several features that boost the app’s versatility. It’ll set you back $2.99.
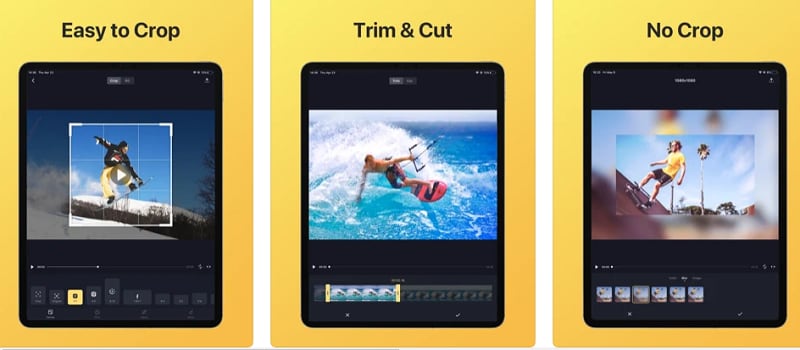
**Platform:**iPhone
Price:$2.99 per month
Features
- Video splitter and joiner
- Video editor
Pros
- The video cutter is helpful for novices.
- It works with every iPhone version.
Cons
- The free version has a lot of limitations.
- The videos of free users are watermarked.
9. Video Crop
Video Crop is a free iPhone software that allows you to crop videos. There are many more options in the software that may be used to modify and improve a video. This program has a lot of flexibility when it comes to video editing and other video settings. This program may also be used to split videos.
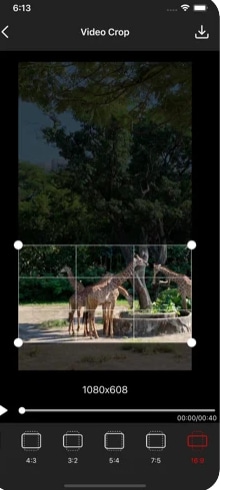
**Platform:**iPhone
**Price:**free
Features
- Video splitter and joiner
- Video editor
Pros
- Splitting and joining MP4 files is simple and effective.
Cons
- It’s only compatible with MP4 files.
- The UI is really sluggish.
10. Video Trim & Cut
Video Trim & Cut is an iPhone software that allows you to divide or trim videos. Adding effects, cropping, altering color, and changing themes are just a few things you can do with the app.
**Platform:**iPhone
**Price:**free
Features
- Video splitter and joiner
- Video editor
Pros
- Excellent templates.
- It has the appearance and functionality of a more costly app.
Cons
- It’s only available on iPhone.
- It might take a long time for a video to render.
Part 5: How to Split Video with Filmora
Step1Import your videos to Filmora Video Cutter
Launch the video cutter once it has been installed and click New Project to access the video editing interface. Now you must import the video, which must be divided into numerous portions.
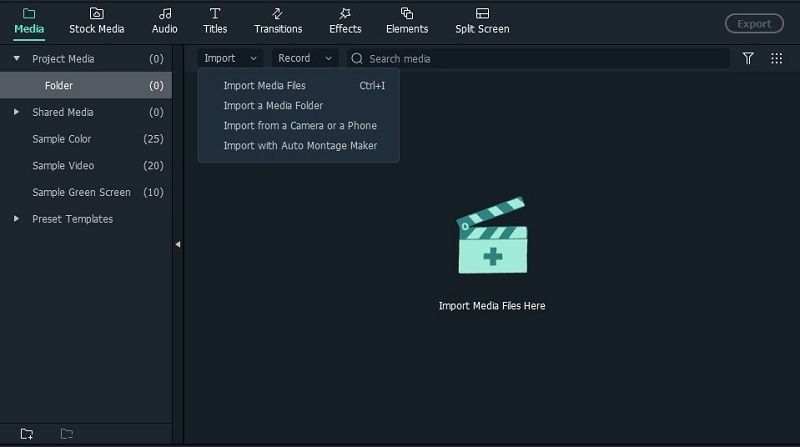
Upload files
You can either drag and drop files to the media library before adding them to the timeline for editing, or you can click “Import” on the main interface and choose files from your computer.
VOB, 3GP, 3G2, MP4, FLV, AVI, MOV, F4V, M4V, TRP, M2TS, MTS, TP, DAT, WMV, MPG, MPEG, TS, MKV, ASF, DV, EVO, MOD, NSV, and TOD files are all supported by Filmora video cutter.
If your video contains a lot of distinct sequences, Filmora can help you discover the clip you want to trim. The “Scene Detection” tool will assist you in rapidly locating the part you wish to clip. To open the Scene Detection window, choose the video in the media library (not the timeline), right-click it, and select “Scene Detection.”

Detect video
When you click Detect, Filmora will automatically split your films into multiple segments depending on scene changes.
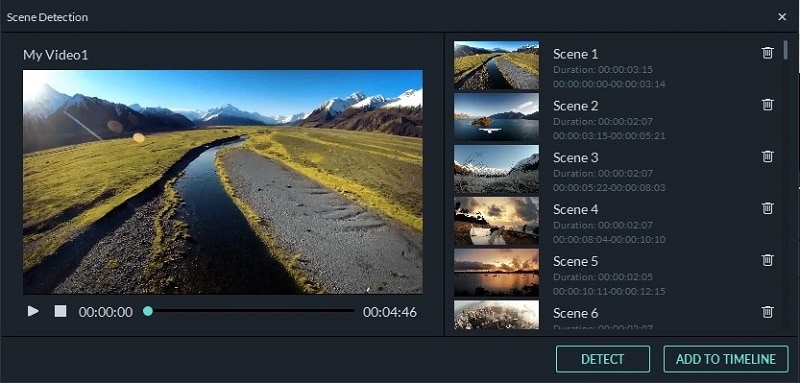
Scenes detected automatically
By clicking the Delete symbol next to the clip, you may delete the undesired sequences and quickly get to the section you want. When you click the Add to Timeline button, all of the segmented video sections will be instantly imported into the timeline, which you can then modify.
Step2Manually trim/split/cut/delete videos
To trim video files, drag clips from the media library to the video track on the timeline and follow these steps. You may use the trim option to chop off the beginning or conclusion of a video swiftly.
Trim video using filmora
- i.Zoom in on the frames you wish to remove from the timeline. Drag the trim symbol to the right to remove the video’s beginning segments from the timeline or to the left to remove the video’s undesired ending segments. You may use the trim tool to cut the beginning and end parts of a sentence with a single drag.
- ii.You may edit a movie into portions, eliminate unnecessary aspects, and combine them into a new film, in addition to chopping off segments at the beginning or conclusion.
- iii.Move the play head to the beginning of the video part you want to cut, then click the Split icon (scissor icon) on the toolbar or the Split button on the play head to split the video. You will get the starting frame, then move the play head to the ending frame and click the Split button again to get the ending part.
- iv.To cut a video into many sections, repeat the procedure. You will get multiple clipped portions, which you may either remove or re-order and alter further.
- v.You may edit out an undesirable cut video by hitting the Delete symbol on the toolbar.
Add trim start and end
Step3Export your video
Click the Export button on the screen after you’ve completed cutting and basic editing. By choosing “Format” and specifying the essential options such as frame rate and resolution, you may save the video in different formats on your local computer.
If you wish to see your video production on your iPod, iPhone, or iPad, go to “Device” and choose your device’s thumbnail. You may also instantly post your films on YouTube or Vimeo, or burn them to DVDs for long-term storage.
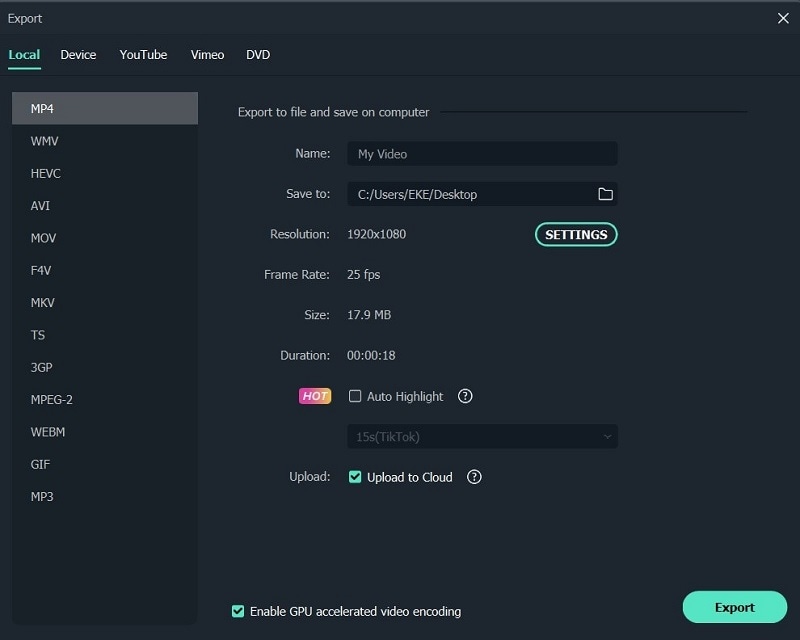
Export video after splitting
Bottom Line
Video splitting can be a daunting task when you don’t have the right tools to help you. If you are a Windows or a Mac user then Wondershare Filmora will help you split videos in just few clicks. The software is completely free with an option to go pro for a cheaper price compared to other premium apps. If you prefer splitting your video online then still Filmora online editor will help you in this. Moreover, some good news for android and iPhone users as Filmora comes with all features to split and join videos. With all these tools you can take your video creation process to the next level.
- Filmora
- AndroVid Video Editor
- Easy Video Cutter
- Video Editor
- VideoShow – Video Editor
- Trim Video
- Video Splitter
- Crop video
- Video Crop
- Video Trim & Cut
Part 1: Backup Your Original Video
Making several backups is perhaps the most critical thing you can do for your project. Whether your computer dies suddenly or your editing application crashes, you’ll have a point to fall back on if you have a backup. Making this a habit will save you a lot of time and work in the long term. How many copies of your data should you make? You should create at least three project duplicates in the best-case scenario. Also, make sure they’re preserved in various formats and places—one on an SD card, another on a hard drive, or a USB drive.
14 Best Video Splitter for Windows/Mac
1. Filmora
Wondershare Filmora Video Editor is a superb video editor for those seeking software that can split videos and has a lot of functions. It was originally only accessible for Windows, but thanks to the developers, Mac users may now use this high-quality video splitter. Using this program to split and join videos is pretty basic and straightforward. It’s an intriguing tool since it allows users to produce high-quality films using filters, effects, and other features in an easier method than employing professional editors. This program also lets you export video at a breakneck speed, up to 4k quality.
![]()
Platform: Windows/Mac
Price: Free Trial
Features
- Editing is intuitive and quick.
- Export video in 4k quality.
- There are several graphic effects and transitions.
- Footage from the internet.
- Regularly upgraded features.
Pros
- Large films can be easily cut, trimmed, and combined without compromising quality.
- On the exported video, there is no watermark.
- Both Windows and Mac computers are supported.
- Splitting a video is such a breeze.
- For novices, it has a lot of handy options that will help you create a stunning film.
Cons
- Large-scale content editing might be slow at times.
2. Boilsoft Video Splitter
Boilsoft Video Splitter can divide, edit, or trim a big AVI, MPEG, RM, ASF, WMV, 3GP, MKV, FLV, or MP4 video file without re-encoding smaller video segments. It has a built-in player that allows you to effortlessly split/cut video files according to time or selection.
Platform: Windows/Mac
Price:$34.95 one-time payment
Features
- Split Video
- Cut video
- Built-in player
Pros
- It supports lots of video format.
- User-friendly software.
Cons
- Because you can’t adjust the program window, using the slider for selection becomes increasingly difficult as your video becomes longer.
3. Solveigmm Video Splitter
SolveigMM Video Splitter is suitable for simple editing processes such as removing an extra section from a video, removing an advertisement from a movie, muting the sound on a selected video fragment, saving only a video or audio track from a file, cutting a video into parts, saving segments into separate files, and so on. The editing procedure takes just a few seconds.
Platform: Windows/Mac
Price:$7.99 per month
Features
- Video cutter
- Video editor
- Video Joiner
Pros
- No previous training or knowledge is necessary to understand how to use the software.
- All major file formats are supported.
- The output file quality is unaffected.
Cons
- It sometimes crashes depending on the file size.
4. BandiCut
Bandicut is a video splitting and joining program for Windows systems only. It has a straightforward UI and simple settings. It may also be used as a video converter, allowing you to modify the format of the output clips. The tool is useful for both newcomers and seasoned users.
Platform: Windows
Price:$29.95 per user per month
Features
- Easy and fast video cutter
- Video splitter
Pros
- The interface is pleasing to the eye, and the functions are simple.
- High-capacity mode
Cons
- There isn’t a fully working free version available.
5. Free Video Cutter
This is a basic tool for reducing the size of large video files. It allows you to cut a clip from a movie or video in various formats and save it in four other formats. The hand-drawn interface, by the way, is incredibly charming.
Platform: Windows
**Price:**a free version and premium version ($17.99 per month)
Features
- An irregularly shaped hand-drawn art style interface.
- Videos in a variety of formats are accepted.
- The control panel is small, with just three major buttons.
Pros
- Save as new videos in a variety of formats without compromising quality.
- It may be used to trim lengthy movies, mobile videos, and camera recordings, among other things.
Cons
- For huge files, there are a lot of crashes.
- For Mac users, this tool is not accessible.
6. Easy Video Splitter
Easy Video Splitter is a simple video editing application that allows you to divide your video into many segments. It can play AVI, MPEG, WMV, and ASF files. The scroll bats may be used to cut the movie precisely where you want it to be cut or to divide the film at certain intervals.
**Platform:**Windows/Mac
**Price:**free with ads
Features
- Has a batch processor
- Multiple file support
- Easy to use
Pros
- Batch processing is supported.
Cons
- Only one frame at a time may be fine-tuned.
7. Avidemux
Avidemux is perfect if you have a video to encode or arrange for a certain speaker system. It’s also an ideal choice if you just require a basic video editor, although there are many more extensive applications available that may be better appropriate.
**Platform:**Windows/Mac
**Price:**free
Features
- This program can handle a variety of subtitle formats, including SUB and SRT.
- They also provide a variety of filtering options.
- You may export videos in various formats, including MKV, MPEG, and MP4.
Pros
- A user-friendly interface
- Excellent alternatives for encoding
- Filters for sharpening and de-noising
Cons
- There is no timeline.
- There are no innovative transitions or effects.
8. Ultra Video Splitter
Ultra Video Splitter is an excellent solution for people who just need to complete this one operation and hence do not need the usage of sophisticated video editing software. The tool enables you to choose from a variety of parameters for the final file or files, such as file size, final format, and bitrate.
**Platform:**Windows/Mac
Price:$25.00 one-time payment
Features
- Supports videos in WMV, XviD, MPEG, ASF, AVI, RM, MOV, 3GP, Divx, and MP4 format.
- Can export the final video in VCD, SVCD, DVD, AVI, DivX, MPEG, or WMV format.
Pros
- Video trimming and exporting are both quick.
- Multiple video formats are supported.
Cons
- Has just a few video editing options.
9. VideoPad Video Editor
On Mac and Windows, the VideoPad video editor allows you to edit clips and produce professional-quality films. Its divide and merge functions are also straightforward to utilize. VideoPad editing software can be used to create visually appealing videos. As a result, the video splitter software for Mac can rapidly and efficiently manipulate video streams.
**Platform:**Windows/Mac
Price:$60.00 one-time payment
Features
- It supports a variety of file formats, offering users additional choices for how to utilize the tool with different file kinds.
Pros
- The cost of a professional business video is surprisingly low.
- Importing video is as simple as dragging and dropping.
Cons
- The free edition offers a restricted number of functions.
10. Windows Movie Maker
This video editing software comes with Windows OS and is focused on simplicity: There’s no easier method to split videos and save into lossless codecs with titles, transitions, background music, and effects than this. Earlier versions of the application were so basic that they couldn’t accomplish what most people required. Still, over time, features like voiceover recording and even anti-shake have crept into what is today a highly useful free video splitter.
**Platform:**Windows
**Price:**free
Features
- Cool transitions
- Effects on video
- Voiceovers are some of the audio features
Pros
- Effects are automatically previewed.
- Audio features such as voiceovers and other audio enhancements.
- Excellent choices for sharing.
- Simple to use
- Stabilization.
Cons
- There are no modifications to the contrast or saturation.
- The effects aren’t flexible.
11. Windows Photos
Many users will never require more than Windows 10’s built-in picture and video editor . It is an automatic video splitter with sophisticated effects like 3D overlays and animated titles are among the extras.
**Platform:**Windows
**Price:**free
Features
- Face recognition
- Video cutter
- 3D overlays
Pros
- A simple interface.
- Detecting faces and objects.
- Album creation is done automatically.
- It works with OneDrive.
- Soundtracks, text, and transitions are all used in video editing.
Cons
- There isn’t a before-and-after comparison.
- Panorama stitching and selective focus are not supported.
- There is no geometry correction or chromatic aberration correction.
12. VLC
VLC Media Player , for good reasons, is a hugely popular video splitter. It is completely free, supports almost everything without the need to download additional codecs, supports streaming, can enhance video and audio playback for your chosen device, and can be extended almost infinitely with plugins downloadable from the internet.
**Platform:**Windows/Mac
**Price:**free
Features
- Allows streaming of MPEG and DivX files
- Excellent video and audio playback modifying tools
Pros
- It can play all kinds of music and video formats, even compressed ones.
Cons
- It is GPU-dependent and may crash at random moments.
13. iMovie
If you’re using a Mac,iMovie video editing program can help you split videos. Mac users will find this to be one of the finest video splitters available. It contains a wide range of capabilities that may improve the quality of your video in a variety of ways. The video may be trimmed and enhanced with many features, such as text, special effects, and audio. Video quality may be improved with this software’s special effects and video upgrades. In addition, the interface is so user-friendly that even novices may generate stunning results. On the other hand, iMovie is capable of storing 4K films.
**Platform:**Mac
**Price:**free
Features
- An easy-to-use video splitter that is already built-in
- It’s simple to use
Pros
- An easy-to-use video splitter that is already built-in
- It’s simple to use
Cons
- Uploading and exporting videos takes a long time.
14. Format Factory
Multifunctional document and multimedia processing software -Format Factory - is only available for Windows. It’s meticulously designed to keep you from getting lost in the weeds when working on any project. It is designed to be a stand-alone file management application, and judging by the wealth of options available, it has done an excellent job.
**Platform:**Windows
**Price:**free
Features
- Video joining and muxing are available.
- It has a screen recorder built right in.
- A built-in video player and downloader are included.
- Allows for hardware acceleration.
- Disk ripping options are provided.
- Processing may be done in a batch.
Pros
- Removes watermarks and logos.
- File formats supported include video, audio, images, and documents.
Cons
- Unnecessary software is installed when installing the program.
7 Best Free Video Splitter Online
2. VEED.IO
Veed.io is a free online video editing tool that allows anybody to make powerful movies and expand their audiences. It has several useful features, such as cutting and filtering films based on their appearance. Users may cut, add text, and draw on the videos. Veed may also be used to generate videos on social media channels.
**Price:**free
Features
- Video splitter and joiner
Pros
- Simple and quick.
- A preview of the cutting result is available.
Cons
- The maximum file size is 50 MB.
3. Flixier
Flixier is a web-based video editor that offers 1-minute exports to any device, easy collaboration, and lots of cloud storage. Flixier enables customers to export whatever video they want, independent of their technology. It keeps all stakeholders in the loop by allowing each team member and contributor to remain in sync across all platforms. Teams may interact in real time without fear of losing track of the project. Cloud storage, version history, feedback comments, sophisticated exports, and email alerts are all available. The tool supports Windows, Mac, Linux, and Chromebooks.
**Price:**free
Features
- Video splitter and joiner
Pros
- iPhone version is available.
- Automatic sound amplification.
Cons
- May seem too overloaded with functions.
4. Split Video
Split Video program may also be used to edit and split huge videos into smaller segments. It’s quite simple to work with. All you have to do now is choose the video to divide. Tell the app how you’d want the video to be divided. Choose how many parts you want in your video. You may watch the app-split clips before sharing them.
**Price:**free
Features
- Video splitter and joiner
Pros
- Interface that is easy to use.
Cons
- The maximum file size is 200 MB.
5. Kapwing
This application primarily advertises itself as a video trimmer. It lets you edit films by removing unwanted bits and trimming them to the appropriate length. It also has some basic settings, such as utilizing it as a free online MP4 splitter. The user interface is simple, and uploading a movie takes just a few moments. The primary drawback is that your film may only be 300 MB in size and must be under 30 minutes in length.
**Price:**free
Features
- Video splitter and joiner
Pros
- Interface that is simple to use.
Cons
- A little watermark appears in the corner of your video with the free version.
- Only supports films up to 300 MB in size and up to half an hour in length.
6. Typito
Typito is a video collaboration tool that allows you and your team to work together to make better films for your business. Typito allows you to make and utilize professionally created graphic overlays for free, as well as generate full-length HR movies in both square and portrait formats. It enables you to produce movies consistent with your brand, allowing you to change and customize elements like font, color, and logo with a few mouse clicks. You may save time for your organization by producing videos quicker and working with your team to publish professional-looking films while previewing them on the move. Inviting team members to the project and assigning responsibilities for editing and reviewing videos are just a few collaboration tools.
**Price:**free
Features
- Video splitter and joiner
Pros
- Simple features to use
Cons
- Few transition templates.
7. Clideo
Clideo is a one-of-a-kind platform that allows you to easily produce and modify any video, GIFS, and picture files in one spot. Merging, compressing, resizing, slideshow, cropping, rotation, and other video editing tools are included in the program. Users may add music or text to videos to help them stand out and draw in the right audience. The video editing platform supports various video formats such as MP4, AVI, MPG, VOB, WMV, MOV, and others. There is no need to download or install any applications since everything may be done entirely online. The premium security encryption that comes with it ensures that all video files are always well-protected.
**Price:**free
Features
- Video splitter and joiner
Pros
- Much easier to use than other video editing software.
- Projects are stored on the cloud, so they don’t take up any computer resources.
- There is no need to download any program.
Cons
- The feature set is limited in comparison to other video editing suites.
- Visual artistry is required.
- Some undertakings need a significant amount of time to complete.
10 Best Video Splitter for Mobile Phone
1. Filmora
A good video editor is required to split a video qualitatively.Filmora Video Editor & Maker might be the answer. It works with high-definition videos. It comes with all of the necessary editing tools. As a result, you will not be sorry for installing this software. Not only will you be able to edit and divide films effortlessly, but you’ll also be able to add fun filters.
The sticker library in Filmora Video Editor & Maker is extensive. The number is in the thousands. You’ll be able to apply both realistic and humorous animated stickers. Use video transitions such as Flash, Page Cut, Cross Zoom, Blurry Roll, and Cube. You have complete control over the speed of your edited video.
**Price:**free
Features
- Video splitter and joiner
- Video editor
Pros
- Files may be readily exported and imported.
Cons
- Compatibility of exported videos is limited.
2. AndroVid Video Editor
AndroVid is a video-splitting program with all the tools you’ll ever need. This program is jam-packed with editing tools, allowing you to create a polished video quickly. The program is also quite user-friendly, so even if this is your first time splitting a video, you will be able to handle it.
**Platform:**Android
**Price:**free
Features
- Video splitter and joiner
- Video editor
Pros
- Simple video cutting tool; can extract single-frame pictures from videos.
Cons
- There are no sophisticated editing choices, and the audio options are quite restricted.
- There is no tool for full-screen graphics, and the user interface is a little complicated.
- The ad-free version is nearly as expensive as KineMaster Pro, which is more sophisticated.
3. Easy Video Cutter
Becausethis program is only devoted to video editing, it can handle a wide range of tasks. The program, for example, may clip videos, combine them, rotate them, and so on. You may also adjust the pace of the videos as needed. It should be noted that trimming the video in this program is quite simple — just pick the range with the slider instrument, and that’s it. Because this program is only devoted to video editing, it can handle a wide range of tasks. The program, for example, may clip videos, combine them, rotate them, and so on. You may also adjust the pace of the videos as needed. It should be noted that trimming the video in this program is quite simple — just pick the range with the slider instrument and that’s it.
**Platform:**Android
**Price:**free
Features
- Video splitter and joiner
- Video editor
Pros
- It’s quite simple to use.
- It’s ideal for simple video cutting tasks.
Cons
- There are no additional editing options available.
4. Video Editor
Video Editor is a fantastic app for Android users who want to edit and enhance their videos. It can break a video into segments, combine several films, crop videos, and adjust the video’s size. You may also add audio to the video of your choosing.
**Platform:**Android
**Price:**free
Features
- Video splitter and joiner
- Video editor
Pros
- You may rearrange your clips in any order you choose.
- Many older file types are supported by the program.
Cons
- The video scroll bar might be a little tricky to use.
- It’s quite basic.
5. VideoShow – Video Editor
On the Google Play market,VideoShow is one of the most popular video editing applications. There are several themes, filters, music, and audio to choose from while creating great videos. It’s a fantastic video trimming software.
**Platform:**Android/iPhone
**Price:**free
Features
- Video splitter and joiner
- Video editor
Pros
- It has the ability to both connect and cut clips.
- It’ll run on almost any android phone.
Cons
- Video Scissors has taken the place of the iPhone version.
- Cutting is fast, but re-encoding might take a long time.
6. Trim Video
Trim Video is the greatest app for iPhone video editing and cutting of huge videos. From the huge file, you may easily crop a video clip. Although the program is highly useful and entertaining for video makers, it is not free and costs $0.99.
**Platform:**iPhone
Price:$0.99 per month
Features
- Video splitter
Pros
- All major video and audio formats are supported.
- When you’re finished, there’s no need to re-render the video.
- There are no watermarks.
Cons
- This software does not include video joining; it must be downloaded separately.
- This app’s main purpose is to cut.
7. Video Splitter
Video Splitter is an iPhone software that allows you to edit and divide videos into segments. It’s a free program that combines all of your editing tools into one application. The tool successfully splits a huge video into little chunks, which can be quickly texted or uploaded to social media.
**Platform:**iPhone
**Price:**free
Features
- Video splitter and joiner
- Video editor
Pros
- A broad number of formats, including audio, are supported.
- It’s a breeze to use.
Cons
- There are no choices for video converting.
- It’s been a long time since it’s been updated.
8. Crop video
Crop Video is another handy iPhone app if you wish to cut your movie to a lesser size. It is one of the most popular tools for cutting videos and altering them for a better impact. It contains several features that boost the app’s versatility. It’ll set you back $2.99.
**Platform:**iPhone
Price:$2.99 per month
Features
- Video splitter and joiner
- Video editor
Pros
- The video cutter is helpful for novices.
- It works with every iPhone version.
Cons
- The free version has a lot of limitations.
- The videos of free users are watermarked.
9. Video Crop
Video Crop is a free iPhone software that allows you to crop videos. There are many more options in the software that may be used to modify and improve a video. This program has a lot of flexibility when it comes to video editing and other video settings. This program may also be used to split videos.
**Platform:**iPhone
**Price:**free
Features
- Video splitter and joiner
- Video editor
Pros
- Splitting and joining MP4 files is simple and effective.
Cons
- It’s only compatible with MP4 files.
- The UI is really sluggish.
10. Video Trim & Cut
Video Trim & Cut is an iPhone software that allows you to divide or trim videos. Adding effects, cropping, altering color, and changing themes are just a few things you can do with the app.
**Platform:**iPhone
**Price:**free
Features
- Video splitter and joiner
- Video editor
Pros
- Excellent templates.
- It has the appearance and functionality of a more costly app.
Cons
- It’s only available on iPhone.
- It might take a long time for a video to render.
Part 5: How to Split Video with Filmora
Step1Import your videos to Filmora Video Cutter
Launch the video cutter once it has been installed and click New Project to access the video editing interface. Now you must import the video, which must be divided into numerous portions.
Upload files
You can either drag and drop files to the media library before adding them to the timeline for editing, or you can click “Import” on the main interface and choose files from your computer.
VOB, 3GP, 3G2, MP4, FLV, AVI, MOV, F4V, M4V, TRP, M2TS, MTS, TP, DAT, WMV, MPG, MPEG, TS, MKV, ASF, DV, EVO, MOD, NSV, and TOD files are all supported by Filmora video cutter.
If your video contains a lot of distinct sequences, Filmora can help you discover the clip you want to trim. The “Scene Detection” tool will assist you in rapidly locating the part you wish to clip. To open the Scene Detection window, choose the video in the media library (not the timeline), right-click it, and select “Scene Detection.”
Detect video
When you click Detect, Filmora will automatically split your films into multiple segments depending on scene changes.
Scenes detected automatically
By clicking the Delete symbol next to the clip, you may delete the undesired sequences and quickly get to the section you want. When you click the Add to Timeline button, all of the segmented video sections will be instantly imported into the timeline, which you can then modify.
Step2Manually trim/split/cut/delete videos
To trim video files, drag clips from the media library to the video track on the timeline and follow these steps. You may use the trim option to chop off the beginning or conclusion of a video swiftly.
Trim video using filmora
- i.Zoom in on the frames you wish to remove from the timeline. Drag the trim symbol to the right to remove the video’s beginning segments from the timeline or to the left to remove the video’s undesired ending segments. You may use the trim tool to cut the beginning and end parts of a sentence with a single drag.
- ii.You may edit a movie into portions, eliminate unnecessary aspects, and combine them into a new film, in addition to chopping off segments at the beginning or conclusion.
- iii.Move the play head to the beginning of the video part you want to cut, then click the Split icon (scissor icon) on the toolbar or the Split button on the play head to split the video. You will get the starting frame, then move the play head to the ending frame and click the Split button again to get the ending part.
- iv.To cut a video into many sections, repeat the procedure. You will get multiple clipped portions, which you may either remove or re-order and alter further.
- v.You may edit out an undesirable cut video by hitting the Delete symbol on the toolbar.
Add trim start and end
Step3Export your video
Click the Export button on the screen after you’ve completed cutting and basic editing. By choosing “Format” and specifying the essential options such as frame rate and resolution, you may save the video in different formats on your local computer.
If you wish to see your video production on your iPod, iPhone, or iPad, go to “Device” and choose your device’s thumbnail. You may also instantly post your films on YouTube or Vimeo, or burn them to DVDs for long-term storage.
Export video after splitting
Bottom Line
Video splitting can be a daunting task when you don’t have the right tools to help you. If you are a Windows or a Mac user then Wondershare Filmora will help you split videos in just few clicks. The software is completely free with an option to go pro for a cheaper price compared to other premium apps. If you prefer splitting your video online then still Filmora online editor will help you in this. Moreover, some good news for android and iPhone users as Filmora comes with all features to split and join videos. With all these tools you can take your video creation process to the next level.
How to Make a Time-Lapse Video Online
If you’re looking for a way to create a time-lapse video online, you have come to the right place. There are different reasons why people use online time-lapse video makers. Let us take an example, if you want to make a time-lapse video of someone holding a phone in their hand then this would be pretty easy to do with the help of an online time-lapse maker.
Why do people use an online time-lapse maker because they want to get some good quality videos without spending much money on them? That’s something that many people who are just starting their business can do easily since it can be done by anyone who knows how to use online time-lapse makers properly! Let’s have a look at some online tools on which you can make time-lapse videos online.
1. Clideo Timelapse Video Tool
A video timelapse video is a type of video that shows the progression of time. It allows you to create an engaging experience for your viewers, and it can also be used to promote your business. Whether you’re a content creator, brand manager, or just a fan of videos, creating a time-lapse video is one of the most popular and effective ways to produce impressive content.
With Clideo Time-lapse Video Tool you can create incredible videos with ease. You can choose from dozens of beautiful templates, music tracks, transitions, and more. You can also add your photos or video clips and make your unique time-lapse video. By using this tool, you can:
- Capture your events in real-time and save them for later. Once captured, you can use the timeline function to move backward or forwards through the events of your day.
- Add filters and effects such as blur or freeze frame.
- Share your videos on social media with ease!
Steps to make a time-lapse video on Clideo:
Step1 Open Clideo and Create an account
You can use this online time-lapse maker from any browser e.g Google Chrome, Mozilla Firefox, Internet Explorer, etc. After that you don’t have an account on it then you have to create it first. You can Sign in by using different platforms like Google, Facebook, apple, etc.

Step2 Create a project and select a tool
When you create an account on Clideo, a page appears where you will get the option of creating a project. A list of several features will be provided by this online time-lapse video maker. You will get to add subtitles, compress videos, resize the video, and many more features in it.

Step3 Create a video on Clideo
If you want to create a video then click on video maker and after that choose a file whether it is an image, video, gif, or music.

Step4 Edit the video and export
With Clideo, you can make amazing videos with just one click. You can choose the length of your video, as well as the format, and save it to your computer’s hard drive.
You can also adjust the duration of your video and add music to make it more interesting. This way you can make sure that your video is the right length for the content you’re putting in it.

2. Flixier Timelapse Video Maker
Flixier Timelapse Video Maker is the easiest way to create beautiful timelapse videos. You can create beautiful, high-quality videos with ease. What’s more, you don’t have to know any programming languages! You’ll be able to export your videos in just one step.
The program’s intuitive user interface makes it easy for beginners to get started while still providing advanced features that professionals will love. The program supports drag-and-drop editing and has an intuitive layout designed for maximum efficiency.
Step1 Create a video without having an account
Flixier Timelapse Video Maker is a powerful video editing tool that allows you to create beautiful, high-quality timelapse videos. The best thing about Flixier is it does not require any account. You can easily click on Get Started and move on to the next step.

Step2 Drop and Browse any file
The Flixier Timelapse Video Maker is a new and exciting way to create HD videos from your favorite photos. It makes it easy for you to choose the photo you want to use, and then attach it to your video.
Flixier works with all of your favorite services: Google Drive, Google Photos, Dropbox, Flowplayer, and more! Flixier has a massive library of videos that you can use as inspiration for your project. There are thousands of them, some of which are free.

Step3 Edit the video and save it
This online time-lapse maker is easy to use, and it allows you to edit your videos in a few simple steps. You can add text, motion, position, and scale to your videos in just a few clicks. After that, you can export it to your hard drive.

Flixier has tons of useful features for creating content for social media marketing. You can upload multiple clips at once and easily customize the length and format of each clip. You can also add music to your videos and adjust the volume levels for each clip individually so that they blend seamlessly when viewed as a whole.
3. Kapwing
Are you looking for a way to speed up and down your video without having to rewind and fast-forward? Kapwing is the tool that can help you do just that. With Kapwing, you can change the speed of your video from 1x to 10x faster. And because it’s easy to use and can be used on any device, you can take your videos anywhere!
There’s nothing worse than having your video slowdown in the middle of a high-speed chase. That’s why, this tool can speed up and down your videos as much as you want, whenever you want it. Now move to steps that how can we use it:
Step1 Sign in and export the file
If you’re looking for a way to speed up your video editing process, look no further. Kapwing Video Speed Changer is here to help!
With Kapwing, you have to create an account, add media like pictures and videos, and then easily tweak the speed of your video without ever having to create a new one.

Step2 Create video and change speed
Kapwing is a video editing software that lets you create videos as well as control the speed according to your needs. This feature makes it easy for you to create videos with different features. You can create videos with size, transitions, layers, and fonts. You can add text to your video as well as record audio from your computer’s microphone.
The software also includes other tools such as watermarking and adding subtitles to your video.

Step3 Export the video
This online tool provides you with different formats to export your video like mp4, mp3, GIF, and JPEG. You can download or export your video in full HD form. It provides you full resolution video.

4. Veed.io Video Speed Controller
Are you looking to speed up or slow down your videos? We’ve got you covered. With Veed.io, you can easily adjust the speed of your video to your liking. You can also use a slider to control the speed of the video itself, which allows for more flexibility and control.
To use this tool, all you have to do is enter the URL of your video and select how fast you want it to be played back. And if you need even more flexibility, go ahead and add buttons so that you can easily change between faster and slower speeds without having to pause or rewind your video at all!
How can we control the speed on Veed.io let’s have a look at some steps:
Step1 Open the tool and create an account
Check out Veed.io Video Speed Controller, a new tool that allows you to control the speed of your videos. It’s super easy to use and can be accessed from any browser. Just create an account and you’ll be able to adjust the speed of your video on the go!

Step2 Create, edit the video and add subtitles
Veed.io is a video speed controller that allows you to create videos, edit your footage, and add voice-over in one simple app.
This is perfect for content creators who want to create more engaging videos and increase their profits by selling subscriptions or advertising within their content. With Veed.io, you can use the built-in editor to easily add text overlays, adjust the speed of your video, and add voice-over effects to create professional videos that people will love watching!

Step3 Add elements, and emojis in the video
Are you tired of your videos just being boring? Worried that they’re not engaging enough? Don’t worry, Veed.io has a solution for that.
With this editor, you can add elements to your videos to increase engagement and make them more interesting. You can also select the size and color of each element, so you can customize the look of your video to stand out from the crowd!

Step4 Export video without the watermark
After all the editing you can export or download the video without watermarks. The resolution of the video will be HD.

5. Typito Time Lapse Maker
Typito Time Lapse Maker is a tool that allows you to create videos with a timelapse effect. It is easy to use, and the interface is extremely simple. The first step is to select your video source and output format. You can choose from several different video formats, including MP4, MOV, and AVI.
Next, you’ll be prompted to select what you want your video to do. You have the option of creating a looping video or not it’s up to you! Once you’ve made your choices, you will be taken to the final step: entering text into the text editor for your video. This is where you can add captions or text overlays to spice up your video’s storyline.
Move to steps to create a lapse video online:
Step1 Create an account and make a video
Firstly, create an account on Typito and once you are done with the creation of the account click on the “Create Video” button in the middle of the screen. The video creation tool will begin loading, so please be patient!

Step2 Add media, title, elements, music
Time-lapse is a great way to create visual content. But how do you do it without spending a fortune? Typito Time Lapse Maker can help you make your time-lapse videos with the click of a button!
Just select media, add titles, elements, and anything else you want, and we’ll handle the rest—whether you’re using your music or not. You can add music according to your taste.

Step3 Export video and re-edit
When you are done with the video export it. And the great thing is video can be re-edited again and again. You can apply changes many times.

Conclusion
We hope that these ideas can motivate you to make timelapse videos. If you want to create a time-lapse video but don’t want to use a big and expensive camera just set up your online time-lapse. Moreover, there are lots of excellent platforms out there to share the finished product. Refer to the above recommendations to choose your favorite one.
Free Download For Win 7 or later(64-bit)
Free Download For macOS 10.14 or later
Free Download For macOS 10.14 or later
Also read:
- Updated How to Create Cinematic Style Videos for 2024
- New In 2024, How To Change Sky Background With Adobe Photoshop Best Ways
- Updated In 2024, Adobe Premiere Pro Download and Use Guide In Depth
- In 2024, 11 Tools To Create Radial Blur Photo Mobile And Desktop
- Updated Splitting Audio From a Video in Sony Vegas Step by Step
- How to Add Subtitles to MKV Videos on All Platforms
- New Add Stylish Text to Videos for 2024
- New Using the Best Templates to Create Slow Motion Videos on CapCut for 2024
- 2024 Approved The Complete Guide to Converting GIF to SVG With Ease
- What Is TS Format and How To Play TS Files? Basic Tips
- Repeated Text Animation Tutorial in Filmora
- Updated You Can Learn How to Color Grade Your Picture in Lightroom Effectively. By Understanding the Process of Color Grading in Lightroom, You Can Create Unique Works, and Improve Your Abilities
- Updated How to Choose A Nice GoPro for Vlogging for 2024
- In 2024, Create True 3D Text Effects Using After Effects
- New How to Remove Audio From Video Without Watermark?
- Updated Reviewing Efectum App For Smartphone Users Create Slow Motion Videos
- How to Concatenate Videos Using FFmpeg
- New To Closely Observe the Content on Screen, We Often Zoom in to Catch the Details. This Article Will Provide You with a Brief Note on How to Zoom in on YouTube Videos Quickly on Your Devices
- In 2024, Overview of Best LUTs for Vlog
- Updated With Looping Videos, People Stay on Your Site Longer, Boosting Engagement. With Video Being Watched on Mobile over 3X More than Any Other Content, Its an Essential Part of Mobile Advertising
- New How to Color-Correct an S-Log Footage for 2024
- 2024 Approved How to Add Custom Subtitles to Netflix
- New How to Add Miniature Effect in Video with Filmora for 2024
- New A Guide to Speed up a Video on Splice for 2024
- New 2024 Approved How to Loop Videos with iMovie
- 2024 Approved Best Text Animations In After Effects
- 2024 Approved There Are a Few Ways to Remove or Mute Audio in a Video, but How? Read This Article and Learn How to Do It Using Recommended Android Apps
- Got No Luck with MP4 Video Joining Software? Try These 6 Best MP4 Mergers to Combine Videos on Your MAC and Windows
- Updated 10 Matching Color Combination That Works Together for 2024
- New Try This Simple Trick to Make Instant 3D GIF that Pops Out of Your Screen. Here Are a Few Memorable Examples of the Most Popular 3D GIFs
- In This Article We Will Be Covering the Most Important Topics You Have to Remember when Becoming a Successful YouTube-Star for 2024
- New How To Make a Photo Collage in Microsoft Word — Step by Step Guide for 2024
- 2024 Approved And when It Comes to Voice Changers for Discord, None Is as Easy to Operate as the Voicemod. Here Is a Detailed Guide About How to Use Voicemod on Discord on Mobile and Desktop Devices
- Updated In 2024, Top 10 Transparent Image Online Tools That Give You an Advantage
- In 2024, Discover the Best Video Filter Software . Elevate Your Video Editing with Top Contenders Like Filmora, DaVinci Resolve, HitFilm Express, and More
- In 2024, How to Unlock iPhone 6s With an Apple Watch & What to Do if It Doesnt Work | Dr.fone
- Methods to Change GPS Location On Realme C53 | Dr.fone
- In 2024, How to get the dragon scale and evolution-enabled pokemon On Poco X5? | Dr.fone
- In 2024, What Pokémon Evolve with A Dawn Stone For Vivo X90S? | Dr.fone
- Top 11 Free Apps to Check IMEI on Apple iPhone 6
- Unlock android phone if you don't have Honor fingerprint
- In 2024, How to Unlock iPhone 12 Pro Max without Passcode or Face ID
- App Wont Open on Your Infinix Hot 30i? Here Are All Fixes | Dr.fone
- About Samsung Galaxy A05s FRP Bypass
- Video Fixer Software for all Corrupt Videos of Tecno Pop 8
- How to Sign Out of Apple ID From Apple iPhone 13 mini without Password?
- In 2024, Unlock Your Samsung Galaxy A15 5Gs Potential The Top 20 Lock Screen Apps You Need to Try
- In 2024, How to Cast Realme Narzo 60 Pro 5G Screen to PC Using WiFi | Dr.fone
- How to Turn Off Find My Apple iPhone 11 Pro Max when Phone is Broken?
- How to Bypass FRP on Nokia 105 Classic?
- In 2024, How to Lock Apps on Realme 11X 5G to Protect Your Individual Information
- 10 Fake GPS Location Apps on Android Of your Nubia Red Magic 8S Pro+ | Dr.fone
- In 2024, How To Unlock Any Infinix Note 30i Phone Password Using Emergency Call
- In 2024, Unlock Your Nokia C12 Plus Phone with Ease The 3 Best Lock Screen Removal Tools
- Title: In 2024, How to Animate Your Designs With Canva GIF
- Author: Chloe
- Created at : 2024-05-20 03:38:05
- Updated at : 2024-05-21 03:38:05
- Link: https://ai-editing-video.techidaily.com/in-2024-how-to-animate-your-designs-with-canva-gif/
- License: This work is licensed under CC BY-NC-SA 4.0.
