
:max_bytes(150000):strip_icc():format(webp)/GettyImages-1094009490-2694d308001d46049e0755f4dd7fdf4c.jpg)
In 2024, How to Combine Multiple Videos Into One on Instagram
How to Combine Multiple Videos Into One on Instagram
Instagram is your favorite social media platform, and even if you use it frequently, there are still some features you’d like to master. You’d like to post a series of films on the stories, but you’re unsure how to put them together.
Suppose things are exactly like this, and you’re wondering how to combine numerous videos in Instagram stories. In that case, you’ll be happy to know that I’ll show you how to do it using the native capability built into the Instagram app for smartphones. I’ll also give you some pointers on accomplishing similar tasks utilizing well-known third-party software.
Combine many clips into a single video and share it on Instagram.

Here are a few simple methods for combining two or more videos into one and posting them on Instagram (IG).
Using the Instagram official app
There is no simple way to combine many videos into one on Instagram. You can, however, utilize the Story technique.
Create an Instagram Story with two or more videos. You can add stickers, text, and other elements if you like.
Tap the three dots icon on your Instagram Tale > Save > Save story. Your current Instagram Stories films and photos will be saved to the Photos app as a single video file.
Upload the resulting Video to Instagram!
Tools To Use to Combine videos for Instagram.
- Wondershare Filmora is an easy-to-use video merger.
Before I detail online video joiners, I’d like to mention Wondershare Filmora, which can automatically merge video files without or with transitions. It merges video files with the same or various file extensions in 1:1 quality (.mp4, .mov, .mkv, .avi, etc). Continue reading to learn more about this simple video merging and how to merge videos.
Part 2: Using Filmora to combine, merge, and join clips
To join videos, first, import them.

You can drag the files from Windows File Explorer to the User’s Album or click the “Import” button on the window and choose files from your computer. All imported files will appear in thumbnail format in the User’s Album. To preview a file in the right-hand preview window, double-click it.
- To merge video files, drag & drop them.

Move videos from the User’s Album to the video track on the Timeline after that. All video files will be combined into a single video with no transition. However, you can use the following method to add transitions between video clips.
- Add transitions in the third step (optional)

Add transitions between clips for a smooth transition from one to the next to make the linked videos look like a complete movie. Go to the Transition tab and drag the desired change to the intersection of two clips. You can also right-click any transition to bring up a menu with choices such as “Apply to All” and “Random to All” for your convenience.
Step 4: Combine video files into a single file.

Now that you’ve seen the merged Movie click the “Export” option to save the several video segments to a single file. Select any format from the list under the Format tab. All of the most common video formats are supported. Choose “Device” and choose the thumbnail of your device to play the combined video file on iPod, iPhone, or iPad. You may also publish the combined Video on YouTube or burn it to DVDs to watch on television.
Other Online Video Mergers
- Androvid

Androvid is a video joiner and video editor in one. Multiple files can be easily combined into a single video. This tool also allows you to divide videos, apply effects, convert videos, and do a lot more. Use this program to effortlessly merge video files in MPEG, 3GP, MP4, AVI, and more formats.
- Video Toolbox

Users can merge and unite videos up to 600MB in size using this fantastic video editing tool. This platform is popular among professionals due to its comprehensive cutting, cropping, combining, and effects editing services. More significantly, joining videos is completely free.
- Inshot

This is a free video editing app that allows you to merge multiple videos into a single file. This is how:
Install and run Inshot.
Select Video.
Tap the check button after selecting multiple videos.
Optional: Here is where you can edit the videos. Select the 16:9 comprehensive video layout or another option by tapping Canvas.
- With iMovie

Apple’s iMovie app is available for free on iPhones, iPad, and Mac. Here’s how to combine two or more videos for an Instagram post:
Get iMovie and open it on your iPhone.
Select Movie from the Create Project menu.
Choose your movies. To see only the clips, go to the top left and tap Media, then Video. Choose a video and press the check button.
Tap Create Movie after selecting two or more video clips.
Swipe horizontally to the point where one video clip ends and another begins if desired. You can edit or remove the transition effect between videos by tapping the two triangle icon.
Optional: You can also experiment with other iMovie features such as adding music, text, and video speed changes. You can tap a video clip, tap the tiny plus icon, and zoom in and out with two fingers.
When you’re done, tap Done in the top left corner.
From the bottom, tap the share button and select Save Video.
Your iPhone’s Photos app now contains the merged clip. Open Instagram and make an individual post with the final combined Video.
This is how you can combine multiple clips into one Instagram video. I hope you found this quick tutorial helpful. Of course, you can merge two or more clips into one single video file using any other video editing app besides the ones listed above.
Here are a few simple methods for combining two or more videos into one and posting them on Instagram (IG).
Using the Instagram official app
There is no simple way to combine many videos into one on Instagram. You can, however, utilize the Story technique.
Create an Instagram Story with two or more videos. You can add stickers, text, and other elements if you like.
Tap the three dots icon on your Instagram Tale > Save > Save story. Your current Instagram Stories films and photos will be saved to the Photos app as a single video file.
Upload the resulting Video to Instagram!
Tools To Use to Combine videos for Instagram.
- Wondershare Filmora is an easy-to-use video merger.
Before I detail online video joiners, I’d like to mention Wondershare Filmora, which can automatically merge video files without or with transitions. It merges video files with the same or various file extensions in 1:1 quality (.mp4, .mov, .mkv, .avi, etc). Continue reading to learn more about this simple video merging and how to merge videos.
Part 2: Using Filmora to combine, merge, and join clips
To join videos, first, import them.
You can drag the files from Windows File Explorer to the User’s Album or click the “Import” button on the window and choose files from your computer. All imported files will appear in thumbnail format in the User’s Album. To preview a file in the right-hand preview window, double-click it.
- To merge video files, drag & drop them.
Move videos from the User’s Album to the video track on the Timeline after that. All video files will be combined into a single video with no transition. However, you can use the following method to add transitions between video clips.
- Add transitions in the third step (optional)
Add transitions between clips for a smooth transition from one to the next to make the linked videos look like a complete movie. Go to the Transition tab and drag the desired change to the intersection of two clips. You can also right-click any transition to bring up a menu with choices such as “Apply to All” and “Random to All” for your convenience.
Step 4: Combine video files into a single file.
Now that you’ve seen the merged Movie click the “Export” option to save the several video segments to a single file. Select any format from the list under the Format tab. All of the most common video formats are supported. Choose “Device” and choose the thumbnail of your device to play the combined video file on iPod, iPhone, or iPad. You may also publish the combined Video on YouTube or burn it to DVDs to watch on television.
Other Online Video Mergers
- Androvid
Androvid is a video joiner and video editor in one. Multiple files can be easily combined into a single video. This tool also allows you to divide videos, apply effects, convert videos, and do a lot more. Use this program to effortlessly merge video files in MPEG, 3GP, MP4, AVI, and more formats.
- Video Toolbox
Users can merge and unite videos up to 600MB in size using this fantastic video editing tool. This platform is popular among professionals due to its comprehensive cutting, cropping, combining, and effects editing services. More significantly, joining videos is completely free.
- Inshot
This is a free video editing app that allows you to merge multiple videos into a single file. This is how:
Install and run Inshot.
Select Video.
Tap the check button after selecting multiple videos.
Optional: Here is where you can edit the videos. Select the 16:9 comprehensive video layout or another option by tapping Canvas.
- With iMovie
Apple’s iMovie app is available for free on iPhones, iPad, and Mac. Here’s how to combine two or more videos for an Instagram post:
Get iMovie and open it on your iPhone.
Select Movie from the Create Project menu.
Choose your movies. To see only the clips, go to the top left and tap Media, then Video. Choose a video and press the check button.
Tap Create Movie after selecting two or more video clips.
Swipe horizontally to the point where one video clip ends and another begins if desired. You can edit or remove the transition effect between videos by tapping the two triangle icon.
Optional: You can also experiment with other iMovie features such as adding music, text, and video speed changes. You can tap a video clip, tap the tiny plus icon, and zoom in and out with two fingers.
When you’re done, tap Done in the top left corner.
From the bottom, tap the share button and select Save Video.
Your iPhone’s Photos app now contains the merged clip. Open Instagram and make an individual post with the final combined Video.
This is how you can combine multiple clips into one Instagram video. I hope you found this quick tutorial helpful. Of course, you can merge two or more clips into one single video file using any other video editing app besides the ones listed above.
How to Add Text Animation Online
Before you can publish your recorded video to your viewers, you need to polish the video so that you can get everyone’s appreciation. This is where the magic of video editing comes into the scene. Editing your video is not just about trimming unnecessary parts and adding transitions and effects. The titles and texts you display on your video play a major role in your video content. In fact, you can create a video based on texts and titles only.
Instead of showing static texts, you should create animated texts and place them in the video wherever appropriate. You do not need to download a video editor on your computer or smartphone to add animated text to your video. You can make text animation online using an online text animation maker. We will illustrate the steps to create animated text with three different online editors.
Part 1. Use Biteable Animated Text
Biteable is a popular online platform where you can create amazing animated text video using Biteable text video maker. You can add animated text to your videos as well as photos. The user interface of Biteable is extremely easy for all users. You have to first create an account for free to get started. There are various templates available to create your animated text video from scratch. Here are the steps to use Biteable online text animation maker to create a video based on animated texts.
Step1Open your web browser and visit “biteable.com/animated/text”. Click on “Make a video with animated text” button.

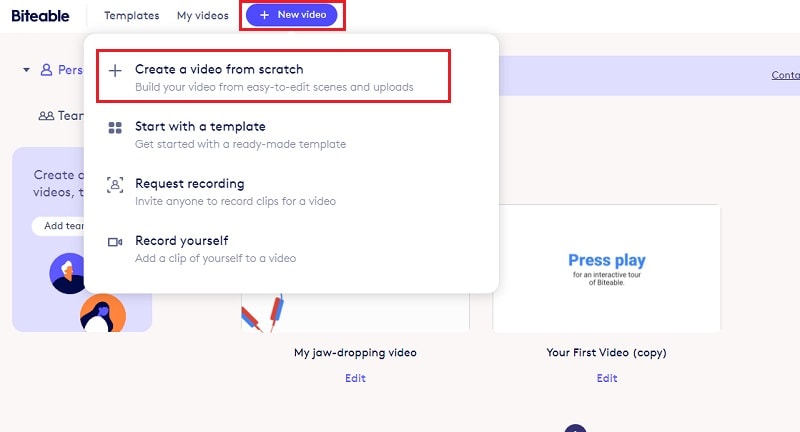
Step2Create an account by following the on-screen instructions. Click on New Video button and select “Create a video from scratch”.
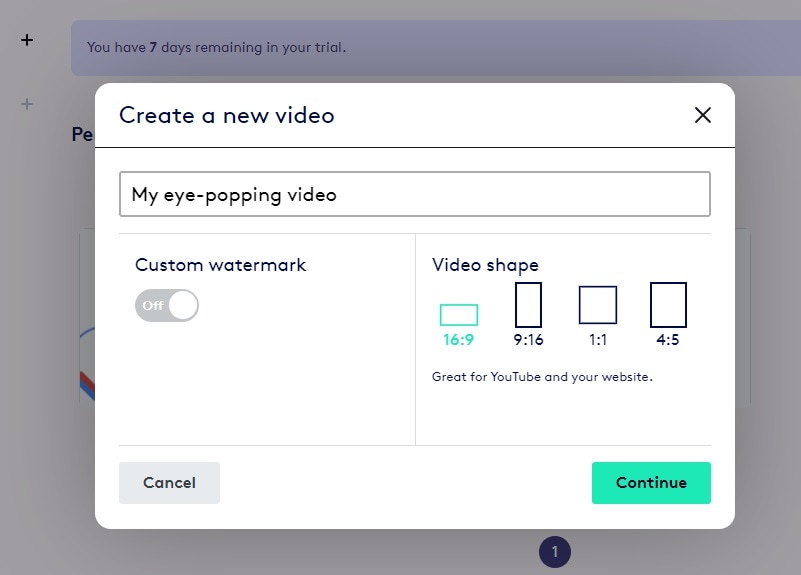
Step3Enter a name for the video and select a video shape as per your preference. Click on Continue button.
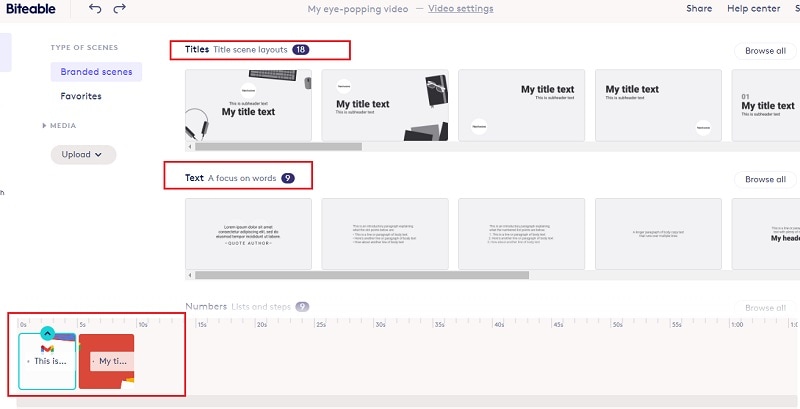
Step4Under Titles, select any template and it will be added to the Timeline. Similarly, you can add multiple titles templates, text templates, number templates and likewise. You will see them in the Timeline placed side by side. You can stretch their durations as per your requirements.
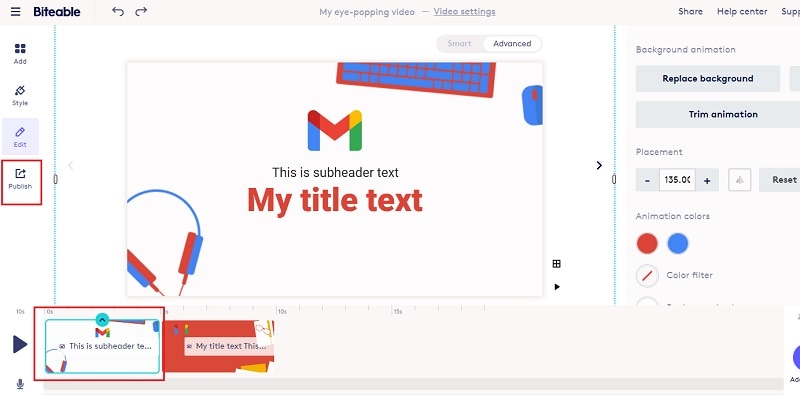
Step5Double-click on each template to edit the text in them and select the text animations as per your preference. Play the video and if you are satisfied, click on Publish button to save the video.
Part 2. Use Motionden Video Maker
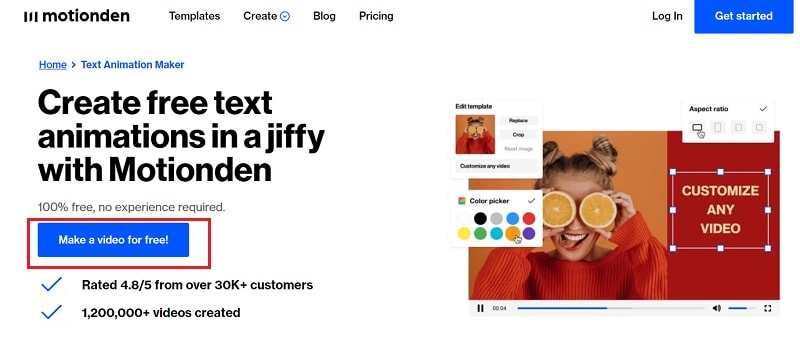
Motionden is yet another powerful text animation maker where you can create free text animations instantly. There are over 1500 templates available to choose from in order to create text videos from scratch. You can choose video templates from any category as per the video theme you want. Besides, you can upload your video or photo and add texts and music as per your preference. Here are the steps to create animated text online using Motionden Video Maker.
Step1Open your web browser and visit “motionden.com/video-maker/text-animation”. Click on “Make a video for free” button.
Step2Go to Create menu option and select any category of video templates. You can also check out the popular video templates and select anyone as per your preference.
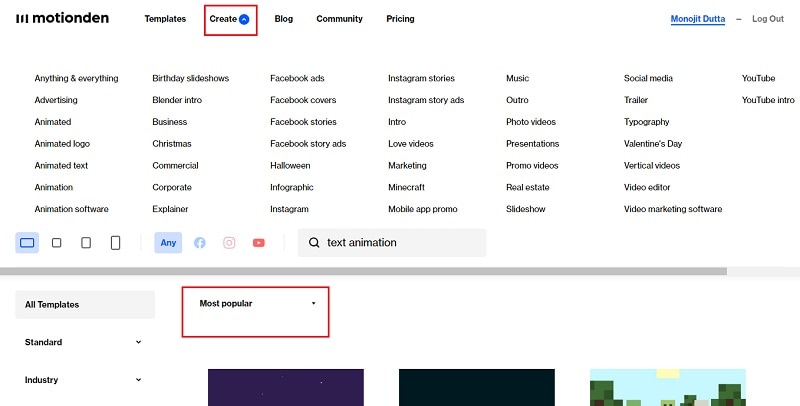
Step3For the selected category, you need to select the desired video template. Click on Edit Video and you can make changes to the template on the video editor as per your requirements. You need to sign up for free in order to continue and edit the template.
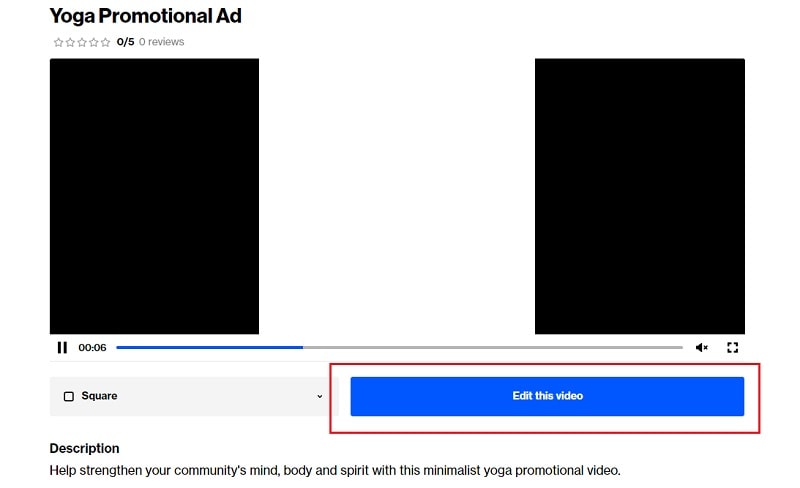
Step4Click on individual scenes and click on texts to customize them. Once the editing is done for each scene, click on Make Video button to build and save the text video.

Part 3. Use Flexclip Text Animation Tool
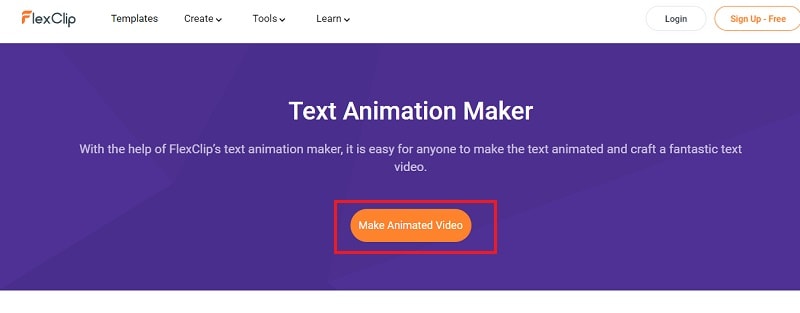
You can use Flexclip Text Animation Tool to create text video from scratch as well as add text to your recorded video. You should use Biteable and Motionden to create video with text effects only directly using video template while you should use Flexclip to edit your video and add text. You can add text effects to photos and videos and here are the steps to follow.
Step1Open web browser and visit “flexclip.com/features/text-animation.html”. Click on Make Animated Video button.
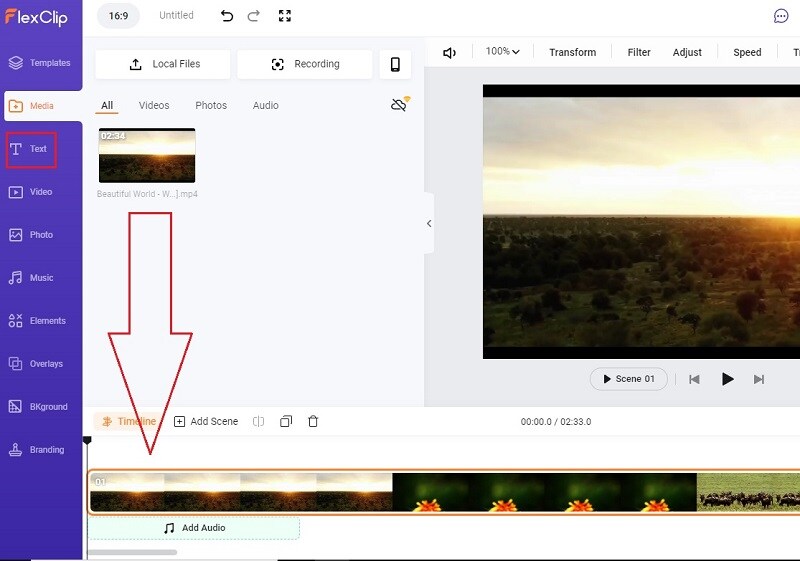
Step2You can choose from the available templates to create video with text from scratch. If you want to add text to your recorded video, go to Media tab. Click on Local Files button and upload your recorded video.

Step3Drag and drop the uploaded video into the Timeline. Thereafter, go to Text tab.
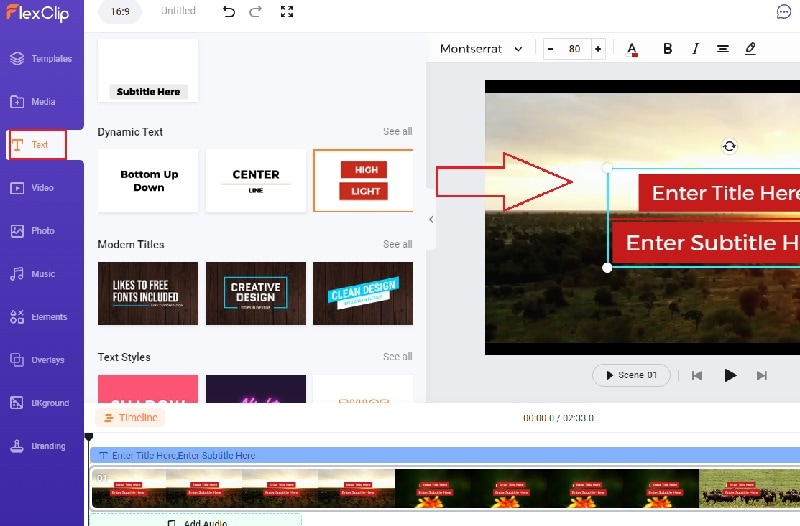
Step4You will see all the different text effects and animations. Place your mouse pointer to preview the animation. Drag and drop the select text template to the video on the Viewer. You can check the Timeline and stretch or compress the text layer as per your requirements.
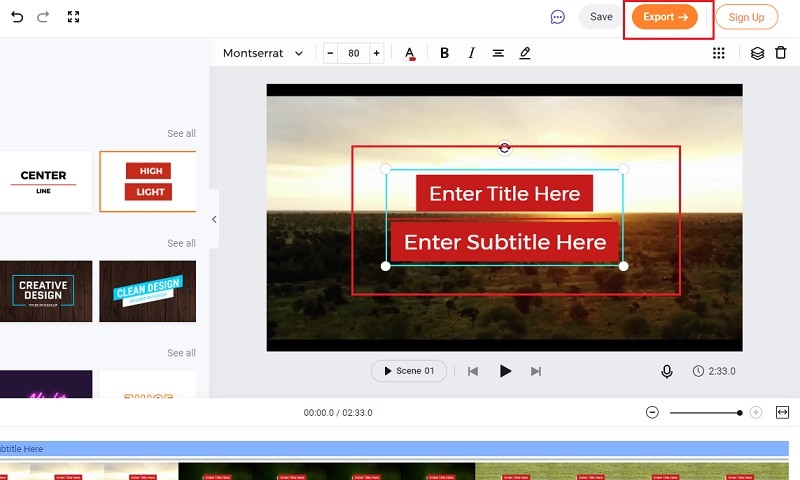
Step5Double-click on the text on Viewer window and customize the text as per your preference. Finally, click on Export button to save the edited video.
Conclusion
You can make video with animated text to make your presentation video eye-catching and attention-grabbing. We have mentioned three different online text animation makers that you can use to create animated text video from scratch by choosing different video templates. You can also edit your recorded video and add animated text wherever you want using Flexclip Text Animation Tool.
Free Download For Win 7 or later(64-bit)
Free Download For macOS 10.14 or later
How to Use Frame Blending in Premiere Pro
Create High-Quality Video - Wondershare Filmora
An easy and powerful YouTube video editor
Numerous video and audio effects to choose from
Detailed tutorials are provided by the official channel
Frame blending is a video editing technique used to create smooth transitions between two video frames. This process is often used to create special effects or transition between two different video clips. Frame blending can be done manually or with the help of software.
When frame blending is done manually, the editor will take two consecutive frames and blend them. This is done by using a process called cross-fading. Cross-fading is when the first frame gradually fades out while the second frame gradually fades in. The result is a seamless transition between the two frames.
Frame blending can also be done with the help of software. Many software programs offer frame blending capabilities Like Adobe Premiere Pro and more. These software programs typically have a user interface that allows the user to select the two frames that they want to blend. The software will then perform the cross-fading process automatically.

In this article
01 What is frame blending in Premiere Pro?
02 How to Choose from Frame Blending/ Frame Sampling/ Optical Flow
03 How to use Frame Blanding in Adobe Premiere Pro?
What is frame blending in Premiere Pro?
In Adobe Premiere Pro, frame blending is a built-in feature that can be used to create smooth transitions between two video frames. This feature can be accessed by selecting the “Effects” tab and choosing the “Frame Blending” option.
When using frame blending in Premiere Pro, the user will first need to select the two frames they want to blend. The user can then specify the amount of cross-fade they want to apply. The software will then automatically perform the frame blending process.

How to Choose from Frame Blending/ Frame Sampling/ Optical Flow
The different types of frame blending are:
- Frame Sampling: best for smooth movements, no image distortion.
- Optical Flow: smoother results but can cause image distortion.
- Frame Blending: a mix of the two, some image distortion but smoother results.
So, choosing which type of frame blending to use depends on the footage and the desired results. If you want smooth results with no image distortion, frame sampling is the best option. However, if you don’t mind some image distortion in exchange for smoother results, optical flow or frame blending would be better choices.
How to decide which option is the best for your use? Let’s explain more, and It depends on the footage and the desired results. If you want smooth results with no image distortion, frame sampling is the best option. However, if you don’t mind some image distortion in exchange for smoother results, optical flow or frame blending would be better choices.

How to use Frame Blanding in Adobe Premiere Pro?
Step 1\
Using frame blending in Adobe Premiere Pro is a simple process. First, the user will need to select the two frames that they want to blend. The user can then specify the amount of cross-fade they want to apply. The software will then automatically perform the frame blending process.
Open up Adobe Premiere Pro and load the two frames that you want to blend to get started. Once the frames are loaded, select the “Effects” tab and then choose the “Frame Blending” option.
Step 2\
Next, select the two frames that you want to blend. You can perform this by clicking on the first frame and then holding down the “Shift” key while clicking on the second frame.
Once the two frames are selected, specify the amount of cross-fade that you want to apply. You can do this by adjusting the “Crossfade Duration” slider. The software will then automatically perform the frame blending process.

Frame blending is a simple and effective way to create smooth transitions between two video frames. This technique can create a variety of different effects, such as dissolves, fades, and more. Frame blending is a built-in feature in Adobe Premiere Pro and can be accessed by selecting the “Effects” tab and then choosing the “Frame Blending” option. To use frame blending, simply select the two frames you want to blend and specify the amount of cross-fade you want to apply. The software will then automatically perform the frame blending process.
You can also consider Filmora for Blending Frame
Filmora is a video editing software that allows you to create, edit, and export videos. The software includes various features, such as the ability to add text, transitions, and effects. You can also use Filmora to create titles, lower thirds, etc.
How to use Filmora?
To use Filmora, simply load the video you want to edit and make the changes you want. Once you’re happy with the results, export the video, and it will be saved in the format of your choice.
How to use Frame Blending in Filmora?
There are things to keep in mind when using frame blending in Filmora.
First, the software only supports AVI and WMV files. Second, the frame blending feature is only available in the paid version of the software. Lastly, frame blending can only be used on two video frames at a time.
The video is made up of distinct layers blended together to create a unique and appealing look. There is a craft of making a running frame out of more than one video or picture. Even though the technique is considerably older, and individuals undertake it with much work, it has recently become simpler. We now have the easier method of combining two or more clips in a single frame, which we term Blend Modes.

How to composite with blending modes?
- Choose the videos and effects that you wish to overlay.
- Double-click the overlay clip on the timeline to view and adjust the video options for the split-screen effect.
- Go to the Compositing section and choose Blending Mode from the drop-down menu to apply an effect. Select Screen from the drop-down menu if you’d like to overlay an effect over a video.
Frame blending is a simple and effective way to create smooth transitions between two video frames. This technique can create a variety of different effects, such as dissolves, fades, and more. Frame blending is a built-in feature in Filmora and can be accessed by loading the video you want to edit and then making the changes you want. Once you’re happy with the results, export the video, and it will be saved in the format of your choice.
Advance features in Filmora 11
The latest version of Filmora (11.2.1) includes several new and improved features, such as:
- The ability to add textured background images
- An updated user interface
- A wider variety of title templates
- More video and audio effects
- Improved performance and stability
Filmora is a good choice for video editors who want to do more with their software. The program contains all of the essential functions of a video editor, such as the ability to add text, transitions, and effects. In addition, Filmora also includes some more advanced features, such as the ability to add textured background images and the ability to create titles, lower thirds, and more.
For Win 7 or later (64-bit)
For macOS 10.12 or later
Conclusion
● Frame blending is a simple and effective way to create smooth transitions between two video frames. This technique can be used to create a variety of different effects, such as dissolves, fades, and more. Frame blending is a built-in feature in Filmora and can be accessed by loading the video you want to edit and then making the changes you want. Once you’re happy with the results, export the video, and it will be saved in the format of your choice.
Frame blending is a video editing technique used to create smooth transitions between two video frames. This process is often used to create special effects or transition between two different video clips. Frame blending can be done manually or with the help of software.
When frame blending is done manually, the editor will take two consecutive frames and blend them. This is done by using a process called cross-fading. Cross-fading is when the first frame gradually fades out while the second frame gradually fades in. The result is a seamless transition between the two frames.
Frame blending can also be done with the help of software. Many software programs offer frame blending capabilities Like Adobe Premiere Pro and more. These software programs typically have a user interface that allows the user to select the two frames that they want to blend. The software will then perform the cross-fading process automatically.
In this article
01 What is frame blending in Premiere Pro?
02 How to Choose from Frame Blending/ Frame Sampling/ Optical Flow
03 How to use Frame Blanding in Adobe Premiere Pro?
What is frame blending in Premiere Pro?
In Adobe Premiere Pro, frame blending is a built-in feature that can be used to create smooth transitions between two video frames. This feature can be accessed by selecting the “Effects” tab and choosing the “Frame Blending” option.
When using frame blending in Premiere Pro, the user will first need to select the two frames they want to blend. The user can then specify the amount of cross-fade they want to apply. The software will then automatically perform the frame blending process.
How to Choose from Frame Blending/ Frame Sampling/ Optical Flow
The different types of frame blending are:
- Frame Sampling: best for smooth movements, no image distortion.
- Optical Flow: smoother results but can cause image distortion.
- Frame Blending: a mix of the two, some image distortion but smoother results.
So, choosing which type of frame blending to use depends on the footage and the desired results. If you want smooth results with no image distortion, frame sampling is the best option. However, if you don’t mind some image distortion in exchange for smoother results, optical flow or frame blending would be better choices.
How to decide which option is the best for your use? Let’s explain more, and It depends on the footage and the desired results. If you want smooth results with no image distortion, frame sampling is the best option. However, if you don’t mind some image distortion in exchange for smoother results, optical flow or frame blending would be better choices.
How to use Frame Blanding in Adobe Premiere Pro?
Step 1\
Using frame blending in Adobe Premiere Pro is a simple process. First, the user will need to select the two frames that they want to blend. The user can then specify the amount of cross-fade they want to apply. The software will then automatically perform the frame blending process.
Open up Adobe Premiere Pro and load the two frames that you want to blend to get started. Once the frames are loaded, select the “Effects” tab and then choose the “Frame Blending” option.
Step 2\
Next, select the two frames that you want to blend. You can perform this by clicking on the first frame and then holding down the “Shift” key while clicking on the second frame.
Once the two frames are selected, specify the amount of cross-fade that you want to apply. You can do this by adjusting the “Crossfade Duration” slider. The software will then automatically perform the frame blending process.
Frame blending is a simple and effective way to create smooth transitions between two video frames. This technique can create a variety of different effects, such as dissolves, fades, and more. Frame blending is a built-in feature in Adobe Premiere Pro and can be accessed by selecting the “Effects” tab and then choosing the “Frame Blending” option. To use frame blending, simply select the two frames you want to blend and specify the amount of cross-fade you want to apply. The software will then automatically perform the frame blending process.
You can also consider Filmora for Blending Frame
Filmora is a video editing software that allows you to create, edit, and export videos. The software includes various features, such as the ability to add text, transitions, and effects. You can also use Filmora to create titles, lower thirds, etc.
How to use Filmora?
To use Filmora, simply load the video you want to edit and make the changes you want. Once you’re happy with the results, export the video, and it will be saved in the format of your choice.
How to use Frame Blending in Filmora?
There are things to keep in mind when using frame blending in Filmora.
First, the software only supports AVI and WMV files. Second, the frame blending feature is only available in the paid version of the software. Lastly, frame blending can only be used on two video frames at a time.
The video is made up of distinct layers blended together to create a unique and appealing look. There is a craft of making a running frame out of more than one video or picture. Even though the technique is considerably older, and individuals undertake it with much work, it has recently become simpler. We now have the easier method of combining two or more clips in a single frame, which we term Blend Modes.
How to composite with blending modes?
- Choose the videos and effects that you wish to overlay.
- Double-click the overlay clip on the timeline to view and adjust the video options for the split-screen effect.
- Go to the Compositing section and choose Blending Mode from the drop-down menu to apply an effect. Select Screen from the drop-down menu if you’d like to overlay an effect over a video.
Frame blending is a simple and effective way to create smooth transitions between two video frames. This technique can create a variety of different effects, such as dissolves, fades, and more. Frame blending is a built-in feature in Filmora and can be accessed by loading the video you want to edit and then making the changes you want. Once you’re happy with the results, export the video, and it will be saved in the format of your choice.
Advance features in Filmora 11
The latest version of Filmora (11.2.1) includes several new and improved features, such as:
- The ability to add textured background images
- An updated user interface
- A wider variety of title templates
- More video and audio effects
- Improved performance and stability
Filmora is a good choice for video editors who want to do more with their software. The program contains all of the essential functions of a video editor, such as the ability to add text, transitions, and effects. In addition, Filmora also includes some more advanced features, such as the ability to add textured background images and the ability to create titles, lower thirds, and more.
For Win 7 or later (64-bit)
For macOS 10.12 or later
Conclusion
● Frame blending is a simple and effective way to create smooth transitions between two video frames. This technique can be used to create a variety of different effects, such as dissolves, fades, and more. Frame blending is a built-in feature in Filmora and can be accessed by loading the video you want to edit and then making the changes you want. Once you’re happy with the results, export the video, and it will be saved in the format of your choice.
Step by Step to Rotate Videos in Davinci Resolve
The first video editing machine in 1924 (Moviola) left an indelible print on the minds of the media industry. It was a maiden attempt to make edits while simultaneously viewing the film. Over time, editing videos followed the trajectory of various transitions letting the imagination run wild. According to a survey, the video editing software market will grow to 932.7 million U.S. dollars by 2025.
As video editing has become a pillar stone in post-production work, you might need to upgrade your knowledge about it. In this article, you will learn how to rotate the video.
Whether your video has an issue in the aspect ratio or you want the desired output in the mirror or flipped version, you need not panic. By exploring different options of Davinci Resolve and Filmora, you can easily change the orientation of your video.
You’ll see a complete picture guide of the above-mentioned softwares.
Changing the orientation of video by Davinci Resolve
Davinci Resolve is a comprehensive video editing software. It performs functions from colour grading to auto-enhancement for the post-production work. Though, professionals usually use this and pitch it as comparatively complex. But even novices need not worry. It comes with features that can change the entire output of the video. One of such functions is the rotation of the videos. You can give a professional and top-notch touch to your post-production work by changing the orientation of the videos. That will bring a new dimension to your project. The flipped version of videos can make the output more prompt and subtle as they stitch different videos scenes together.
Here is the step by step guide for rotating the video
Step 1: Entering the Edit Mode
Set DaVinci Resolve to Edit mode and in the upper-right corner of your workspace, select the Inspector tab.

The drop-down menu with different options will appear. Search for the Transform section. There you have to select the **Rotation Angle.**You can also enter the value of rotation.After entering the value, you will notice that your vidoe is rotated.

Tip: By pressing Ctrl + R, you can rotate the video 90 degrees clockwise.
Editing a portrait video in DaVinci Resolve
The Transform Panel has the XY Zoom fields. You can use this to scale your video to fit the vertical frame by increasing the size to ~1.750.
Voilà, you now have a vertical video you can edit and export.
Horizontal and Vertical Flip in DaVinci Resolve
You want to create a mirror effect for your video. Flipp it. You would love the results.
You can edit it by going to the same Inspector drop-down menu.

Select the kind of flip you want at the bottom of the Transform section. It can be horizontal or vertical.

How to change the direction of animation in the DaVinci Resolve?
Keyframes are an essential part of video animations. Davinci Resolve facilitates you to play a little with its keyframes parameters.
The keyframe system is not that complex.
All you need to do is select a region on your Timeline. Choose the parameters that need animation by clicking the small diamond. You can see the small diamond next to each parameter’s value.
Apart from Davinci Resolve, there is also an alternate software which has this versatility.You can also use Filmora Wonder for rotation of your vidoes
Changing the direction of video using Filmora Wondershare
If you have mistakenly taken a video at the wrong angle and don’t want to lose it. Filmora Video Editor is there to keep you out of trouble. It comes with the option of changing the orientation of your videos in your desired way. You can even zoom in or crop the unwanted parts in the videos. Adding more to it, it offers you preset ratios (16:9, 9:16; 4:5, 1:1) to find the perfect aspect ratio for YuoTube, Instagram, etc.
For Win 7 or later (64-bit)
For macOS 10.14 or later
Here is the step-by-step guide to rotating the direction of the video by using it.
Step 1: Drag and Drop
It starts with importing the desired file you wish to edit. Afterwards, you have to drag-drop it to the timeline.

Step 2: Enter the video-editing Panel
To start editing, you need to double-click on the video clip in the timeline. You’ll see various tabs above the timeline header from transformation to auto-enhance.

Step 3: Explore your options
Click on the Transform menu. It will display various options from rotation to scaling. You’ll find the “Rotate” option.

Either you can drag the slider or enter the specific value to adjust to the desired rotation.
For example, if you want to rotate this clip 170 degrees, enter the value in the box.

Moreover, you can adjust the scale. You have to drag the Scale slider to have a full-screen image. You can also edit the shape, size and position in the Viewer Panel.

Step 4:Ready to Export
Now, you have achieved the desired rotation for your video. You can export it and select the option that you want.

You can flip the direction of your video in a jiff by following these simple steps.
Conclusion
Stitching different scenes by video rotation has brought video editing to a new dimension altogether. Creating transitions in the videos has become easy more than ever. By adding effects in video editing, you can achieve your editing goals. Hence, you can have that “wow part of editing” without breaking a sweat. When the scenes with different directions are combined, they help in creating the subtle mood prompts for creating the desired flow. You can even adjust the angle of your video if you captured it at the wrong angle.
There are a variety of softwares in the digital world for this purpose. Davinci Resolve and Filmora Wondershare come with dynamic options for your post-production work. Owing to their versatility, these also have the feature of rotating your videos. Their user-friendly interface has made the entire experience of post-production work enjoyable.
The drop-down menu with different options will appear. Search for the Transform section. There you have to select the **Rotation Angle.**You can also enter the value of rotation.After entering the value, you will notice that your vidoe is rotated.
Tip: By pressing Ctrl + R, you can rotate the video 90 degrees clockwise.
Editing a portrait video in DaVinci Resolve
The Transform Panel has the XY Zoom fields. You can use this to scale your video to fit the vertical frame by increasing the size to ~1.750.
Voilà, you now have a vertical video you can edit and export.
Horizontal and Vertical Flip in DaVinci Resolve
You want to create a mirror effect for your video. Flipp it. You would love the results.
You can edit it by going to the same Inspector drop-down menu.
Select the kind of flip you want at the bottom of the Transform section. It can be horizontal or vertical.
How to change the direction of animation in the DaVinci Resolve?
Keyframes are an essential part of video animations. Davinci Resolve facilitates you to play a little with its keyframes parameters.
The keyframe system is not that complex.
All you need to do is select a region on your Timeline. Choose the parameters that need animation by clicking the small diamond. You can see the small diamond next to each parameter’s value.
Apart from Davinci Resolve, there is also an alternate software which has this versatility.You can also use Filmora Wonder for rotation of your vidoes
Changing the direction of video using Filmora Wondershare
If you have mistakenly taken a video at the wrong angle and don’t want to lose it. Filmora Video Editor is there to keep you out of trouble. It comes with the option of changing the orientation of your videos in your desired way. You can even zoom in or crop the unwanted parts in the videos. Adding more to it, it offers you preset ratios (16:9, 9:16; 4:5, 1:1) to find the perfect aspect ratio for YuoTube, Instagram, etc.
For Win 7 or later (64-bit)
For macOS 10.14 or later
Here is the step-by-step guide to rotating the direction of the video by using it.
Step 1: Drag and Drop
It starts with importing the desired file you wish to edit. Afterwards, you have to drag-drop it to the timeline.
Step 2: Enter the video-editing Panel
To start editing, you need to double-click on the video clip in the timeline. You’ll see various tabs above the timeline header from transformation to auto-enhance.
Step 3: Explore your options
Click on the Transform menu. It will display various options from rotation to scaling. You’ll find the “Rotate” option.
Either you can drag the slider or enter the specific value to adjust to the desired rotation.
For example, if you want to rotate this clip 170 degrees, enter the value in the box.
Moreover, you can adjust the scale. You have to drag the Scale slider to have a full-screen image. You can also edit the shape, size and position in the Viewer Panel.
Step 4:Ready to Export
Now, you have achieved the desired rotation for your video. You can export it and select the option that you want.
You can flip the direction of your video in a jiff by following these simple steps.
Conclusion
Stitching different scenes by video rotation has brought video editing to a new dimension altogether. Creating transitions in the videos has become easy more than ever. By adding effects in video editing, you can achieve your editing goals. Hence, you can have that “wow part of editing” without breaking a sweat. When the scenes with different directions are combined, they help in creating the subtle mood prompts for creating the desired flow. You can even adjust the angle of your video if you captured it at the wrong angle.
There are a variety of softwares in the digital world for this purpose. Davinci Resolve and Filmora Wondershare come with dynamic options for your post-production work. Owing to their versatility, these also have the feature of rotating your videos. Their user-friendly interface has made the entire experience of post-production work enjoyable.
Also read:
- New In 2024, Tips for Choosing Location and Scheduling Music Video
- Transform Your Videos Into 90S VHS Nostalgia for Free! Learn Where to Get Overlays and Use Filmoras Built-In Presets. Dive Into the Retro Realm Now for 2024
- New How to Create Sports Intro and Outro for YouTube Video, In 2024
- Top 10 Old Film Overlays to Make Your Videos Look Vintage
- New 2024 Approved Updated 8 Ways to Merge SRT with MP4
- Make A Countdown Video
- Finding The Best Filmic Pro LUTs For Video Editing
- In 2024, Using the Best Templates to Create Slow Motion Videos on CapCut
- Updated Detailed Tutorial to Crop a Video Using Openshot for 2024
- 2024 Approved How to Merge Videos in HandBrake? Expectation Vs. Reality
- In 2024, Do You Want to Know About the Photo Video Maker with Song? Are You Ready to Discover It in Detail? This Article Will Give You Valuable Insights on This Topic
- Updated Top 5 Apps To Add Song To Video for 2024
- How to Make Cool COD Warzone Thumbnail
- Movavi Slideshow Maker Is a Powerful Video Editing Tool that Can Be Used to Add Rich Effects to Videos Easily. This Guide Will Introduce the Features and Show You How to Apply Effects to Videos with This Tool
- 2024 Approved 4 Methods for Rotating Your GoPro Videos Professionally
- New 2024 Approved 4 Ways to Add White Border to Video on Mobile and Desktop
- How to Create Discord Emoji GIF for 2024
- Updated Searching for the Best Video Editor to Make Your Video More Attractive? This Article Introduce You Everything About Choosing a Video Editing Software
- 2024 Approved Mask Tracking with Adobe Premiere Pro A Detailed Guide
- Updated How to Do Perfect Match Paint 100 the Easy Way
- New 8 Websites to Find 3D Text PNG for 2024
- New In 2024, Easy Way to Inset Text in Video
- New How to Make a Movie with Windows Movie Maker?
- Adjust Background to Black for Your Product Review Video for 2024
- New 2024 Approved Learn the Step-by-Step Process of Slowing Down Time-Lapse Videos on Your iPhone
- Updated What Is Animated GIF | GIF Example & Advantages of GIF for 2024
- So, You Are a Gamer and Have Been on the Cool App Discord for a While, and You Keep Hearing People Talk About Game Bots in Discord, Like, Robot Gamers? This Article Will Discuss All Discord Game Bots and Much More
- In 2024, Full Guide to Fix iToolab AnyGO Not Working On Nokia C12 | Dr.fone
- How Can Realme GT 3Mirror Share to PC? | Dr.fone
- Updated How to Send and Add Snapchat GIFs 100 in Easy Way for 2024
- In 2024, 4 Ways to Unlock iPhone 14 Pro to Use USB Accessories Without Passcode | Dr.fone
- 5 Best Route Generator Apps You Should Try On Lava Yuva 2 | Dr.fone
- How To Update or Downgrade Apple iPhone 6s Plus Without Losing Data? | Dr.fone
- New Secret Shortcut to Adobe Animate Character Tutorial for 2024
- 6 Solutions to Fix Error 505 in Google Play Store on Xiaomi Redmi Note 12 Pro 5G | Dr.fone
- In 2024, How to Bypass FRP on Honor Magic 5 Pro?
- Turning Off Two Factor Authentication From Apple iPhone 7? 5 Tips You Must Know
- Title: In 2024, How to Combine Multiple Videos Into One on Instagram
- Author: Chloe
- Created at : 2024-05-20 03:38:06
- Updated at : 2024-05-21 03:38:06
- Link: https://ai-editing-video.techidaily.com/in-2024-how-to-combine-multiple-videos-into-one-on-instagram/
- License: This work is licensed under CC BY-NC-SA 4.0.
