
:max_bytes(150000):strip_icc():format(webp)/how-to-fix-a-critical-process-dies-windows-11-error-952a1ad6325f455aaef36516fb3f7120.jpg)
In 2024, How To Create a Polaroid Collage?
How To Make a Polaroid Collage
How To Create a Polaroid Collage?
An easy yet powerful editor
Numerous effects to choose from
Detailed tutorials provided by the official channel
As it is said that “Old is gold”, the same holds true when it comes to collages. No matter how advanced the technology has become or the design has evolved with collages the old-fashioned polaroid collages are never out of fashion. Polaroid images are small pocket-sized images having a white border developed using polaroid cameras. When it comes to collages, you can develop these images using your special camera and then lay them out in the desired pattern.
With everything taking the digital route, collage creation is no exception and now you can quickly create customized polarised collages using all your favorite pictures. Learn more about polaroid collages, the best tools for their creation, and more in the following parts.
In this article
01 [How to Create an Impressive Polaroid Collage](#Part 1)
02 [How to Create a Polaroid Photo Collage in Photoshop](#Part 2)
03 [Best Place to Get Stock Images for Your Polaroid Collage](#Part 3)
04 [How to Make a Photo Collage Online](#Part 4)
Part 1 How to Create an Impressive Polaroid Collage
Like any other collage, a polaroid collage is one where several polaroid styles images are placed together in the desired pattern. To create an eye-catchy polaroid collage, some of the basic requirements are as follows.

01Use the right tool
First of all, select the right tool that can help you create the desired collage. There are several online as well as desktop programs available for this. Choose a tool that comes with multiple polaroid collage template and offers different editing options.
02Select a layout/design/template
Next, select the desired layout or the polaroid frame collage template from the available options that match your requirements.
03Add high-quality images
Now it’s time to add the images to the template. To make an impressive collage make sure to add high-quality images. You can either use the images captured by you or can also use the stock images available at different online sites.
04Personalize and customize the collage
Next, it’s time to customize the collage. After the images are added, you can further add elements like text, filters, effects, and others to make your collage look more appealing.
05Save, print, or share the collage
Finally, it’s time to save the collage, print it, or share it over online sites, social media platforms, or with your near and dear ones.
Part 2 How to Create a Polaroid Photo Collage in Photoshop
To create an interesting polaroid collage Photoshop works as a good tool. Both Photoshop CS6 and Photoshop Creative Cloud can be used for creating the desired collage with slight changes in the functioning of both versions.
01Steps to create polaroid collage using Photoshop polaroid collage maker
Step 1. Launch the Photoshop tool and add the first image. Choose the Rectangle Tool using its icon which is present in the lower half of the Tools panel.

Step 2. Next, at the left corner of the interface set the Shape option as Tool Mode for drawing the vector shapes.

Step 3. Next, choose the color of the rectangle shape, and to fill this select black at the Fill color swatch in the Options bar. A dialog box will appear to choose the type of fill and here you need to select the Solid Color option.
Click on the Enter button to close the dialog box.

Step 4. Also, ensure that there are no strokes around the edges, and for this tap on the Stroke swatch box on the right side of the Options bar. A Stroke Type dialog box will open where you need to select the None icon. Click on Enter to close the pop-up window.
Step 5. When all the above settings are done, press and hold the Shift key and then you need to click and drag the shape to move into the square box.

Step 6. A newly added shape layer will now appear at the Layers panel. Now you need to make a copy of this shape and then resize it for creating the outer frame of the polaroid.
The duplicate shape layer will be created and will appear on the Layers panel. Rename these shapes as desired.
Step 7. Now after selecting the border layer in the layers panel click again on the Fill color swatch and choose the White color (to make it look like a polaroid image).
Step 8. Next, move to the Edit menu and select Free Transform Path which will create the transform handles around the shape which can also be used for resizing.
Step 9. A shadow to the border can also be added by clicking on the icon of Layer Styles and then choosing the Drop Shadow option from the list.
Step 10. Choose the image area from the Layers panel.
Step 11. Next, use the Knockout function from the Blending Options.
Step 12. Now select both shape layers and group the layers by clicking on New Group from Layers in the menu. Give a desired name to the group.
Step 13. Next, click on the Background layer and choose New Fill or Adjustment Layer.
Step 14. Tap on the Polaroid layer group from the Layers panel and select it.
Step 15. Go to the Edit menu and select the Free Transform option.
Step 16. Now when all the major work is done, it’s time to create a duplicate layer group to create a new polaroid.

When multiple layer groups are added your polaroid photo collage will be ready.
Part 3 How to Make a Photo Collage Online
Creating a polaroid collage using Photoshop is quite complicated and a lengthy process. So, if you are looking for a simpler and quicker way to create the desired collage, we suggest using an online tool. Fotor is one such decent tool that works from your browser and comes with several pre-designed collage templates including polaroid.
The interface of this polaroid collage app is simple where you just need to select the polaroid-based template from the available options, add images, customize the collage by adding a text, filter, or any other element, and then download the created collage.
The interface is simple and user-friendly and the process of creating the collage is fast.

Part 4 Best Place To Get Stock Images For Your Polaroid Collage
To create an eye-catchy collage, the images added also need to be interesting. Besides your local pictures, you can even get stock images available at several sites. One such tool for stock images that we recommend is Wondershare Filmora Video Editor . Though this is an advanced video editing tool supporting a wide range of functions, it also comes with a library of images and other media files that can be used.
You can search from a vast collection of images in different categories and genres to be used for your collage. Additionally, the software also supports a split-screen feature where multiple videos can be played that appears like a video collage.
For Win 7 or later (64-bit)
For macOS 10.12 or later
● Ending Thoughts →
● Polaroid picture collage is one of the most interesting ways of making a collage.
● Photoshop is a great tool for creating a polaroid collage like a pro.
● Online tools like Fotor and others are simple and user-friendly and come with pre-designed templates for creating a polaroid collage.
● Wondershare Filmora is an excellent software to search for stock images and other files, editing videos, and also create a video collage.
As it is said that “Old is gold”, the same holds true when it comes to collages. No matter how advanced the technology has become or the design has evolved with collages the old-fashioned polaroid collages are never out of fashion. Polaroid images are small pocket-sized images having a white border developed using polaroid cameras. When it comes to collages, you can develop these images using your special camera and then lay them out in the desired pattern.
With everything taking the digital route, collage creation is no exception and now you can quickly create customized polarised collages using all your favorite pictures. Learn more about polaroid collages, the best tools for their creation, and more in the following parts.
In this article
01 [How to Create an Impressive Polaroid Collage](#Part 1)
02 [How to Create a Polaroid Photo Collage in Photoshop](#Part 2)
03 [Best Place to Get Stock Images for Your Polaroid Collage](#Part 3)
04 [How to Make a Photo Collage Online](#Part 4)
Part 1 How to Create an Impressive Polaroid Collage
Like any other collage, a polaroid collage is one where several polaroid styles images are placed together in the desired pattern. To create an eye-catchy polaroid collage, some of the basic requirements are as follows.
01Use the right tool
First of all, select the right tool that can help you create the desired collage. There are several online as well as desktop programs available for this. Choose a tool that comes with multiple polaroid collage template and offers different editing options.
02Select a layout/design/template
Next, select the desired layout or the polaroid frame collage template from the available options that match your requirements.
03Add high-quality images
Now it’s time to add the images to the template. To make an impressive collage make sure to add high-quality images. You can either use the images captured by you or can also use the stock images available at different online sites.
04Personalize and customize the collage
Next, it’s time to customize the collage. After the images are added, you can further add elements like text, filters, effects, and others to make your collage look more appealing.
05Save, print, or share the collage
Finally, it’s time to save the collage, print it, or share it over online sites, social media platforms, or with your near and dear ones.
Part 2 How to Create a Polaroid Photo Collage in Photoshop
To create an interesting polaroid collage Photoshop works as a good tool. Both Photoshop CS6 and Photoshop Creative Cloud can be used for creating the desired collage with slight changes in the functioning of both versions.
01Steps to create polaroid collage using Photoshop polaroid collage maker
Step 1. Launch the Photoshop tool and add the first image. Choose the Rectangle Tool using its icon which is present in the lower half of the Tools panel.
Step 2. Next, at the left corner of the interface set the Shape option as Tool Mode for drawing the vector shapes.
Step 3. Next, choose the color of the rectangle shape, and to fill this select black at the Fill color swatch in the Options bar. A dialog box will appear to choose the type of fill and here you need to select the Solid Color option.
Click on the Enter button to close the dialog box.
Step 4. Also, ensure that there are no strokes around the edges, and for this tap on the Stroke swatch box on the right side of the Options bar. A Stroke Type dialog box will open where you need to select the None icon. Click on Enter to close the pop-up window.
Step 5. When all the above settings are done, press and hold the Shift key and then you need to click and drag the shape to move into the square box.
Step 6. A newly added shape layer will now appear at the Layers panel. Now you need to make a copy of this shape and then resize it for creating the outer frame of the polaroid.
The duplicate shape layer will be created and will appear on the Layers panel. Rename these shapes as desired.
Step 7. Now after selecting the border layer in the layers panel click again on the Fill color swatch and choose the White color (to make it look like a polaroid image).
Step 8. Next, move to the Edit menu and select Free Transform Path which will create the transform handles around the shape which can also be used for resizing.
Step 9. A shadow to the border can also be added by clicking on the icon of Layer Styles and then choosing the Drop Shadow option from the list.
Step 10. Choose the image area from the Layers panel.
Step 11. Next, use the Knockout function from the Blending Options.
Step 12. Now select both shape layers and group the layers by clicking on New Group from Layers in the menu. Give a desired name to the group.
Step 13. Next, click on the Background layer and choose New Fill or Adjustment Layer.
Step 14. Tap on the Polaroid layer group from the Layers panel and select it.
Step 15. Go to the Edit menu and select the Free Transform option.
Step 16. Now when all the major work is done, it’s time to create a duplicate layer group to create a new polaroid.
When multiple layer groups are added your polaroid photo collage will be ready.
Part 3 How to Make a Photo Collage Online
Creating a polaroid collage using Photoshop is quite complicated and a lengthy process. So, if you are looking for a simpler and quicker way to create the desired collage, we suggest using an online tool. Fotor is one such decent tool that works from your browser and comes with several pre-designed collage templates including polaroid.
The interface of this polaroid collage app is simple where you just need to select the polaroid-based template from the available options, add images, customize the collage by adding a text, filter, or any other element, and then download the created collage.
The interface is simple and user-friendly and the process of creating the collage is fast.
Part 4 Best Place To Get Stock Images For Your Polaroid Collage
To create an eye-catchy collage, the images added also need to be interesting. Besides your local pictures, you can even get stock images available at several sites. One such tool for stock images that we recommend is Wondershare Filmora Video Editor . Though this is an advanced video editing tool supporting a wide range of functions, it also comes with a library of images and other media files that can be used.
You can search from a vast collection of images in different categories and genres to be used for your collage. Additionally, the software also supports a split-screen feature where multiple videos can be played that appears like a video collage.
For Win 7 or later (64-bit)
For macOS 10.12 or later
● Ending Thoughts →
● Polaroid picture collage is one of the most interesting ways of making a collage.
● Photoshop is a great tool for creating a polaroid collage like a pro.
● Online tools like Fotor and others are simple and user-friendly and come with pre-designed templates for creating a polaroid collage.
● Wondershare Filmora is an excellent software to search for stock images and other files, editing videos, and also create a video collage.
Add Text Animation to A Video Online
Do you want to make a creative video? Do you want your presentation or video to be easy to follow and entertaining? You can take the video to another level with the help of text animation. This article will discuss how to add text animation to online videos. You can use a good video editor from where you can select fresh styles and make the best video from there. One of the simplest ways to elevate your movie from good to excellent is with understandable text animation.
Text animation and short captions can broaden the audience for your content as more consumers view videos without sound these days. It matters what fonts you use in the videos, and they establish the mood and facilitate interaction with most viewers who rely on video captions. Add text, alter the font, add transitions, and use text effects to draw the user’s attention as they scroll. Please continue reading to discover how simple it is to make interactive video titles, words, and supers.
1. Use Kapwing animation text editor
(https://www.kapwing.com/animated-text-video-maker )
You can use the potent online editor Kapwing to add animated text to videos online, utilizing music, videos, GIFs, and images. There are no downloads required because everything is already present inside the browser. Kapwing is a capable tool for content production that is simple enough for everyone to use. The majority of video formats, GIF and image, including avi, png, jpg, gif, MOV, mp4, and more, are supported by Kapwing.
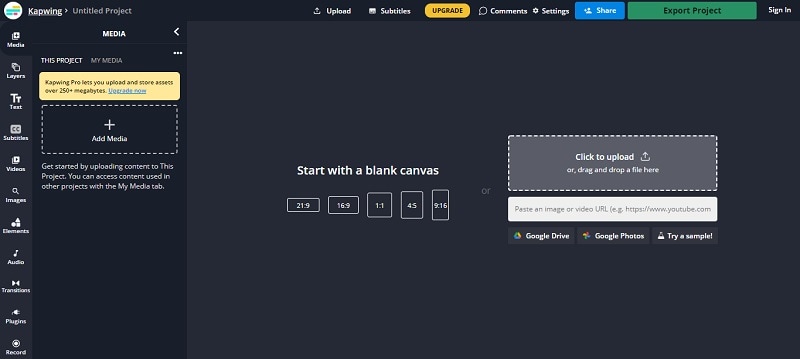
Step1 Upload the Video to Kapwing
You can open Kapwing with the device and tap on “Start Editing” to open up Kapwimg studio. After that, one can use the drag and drop option to upload the video in the studio. You can click on upload or use the link to upload.
If you have a more than 250 MB video, then you will require the Pro version.
Step2 Add the Text
When the video gets uploaded, now you can add your text. You must click the “Text” option on the left and type the text. After that, you can pick your favorite color, background, and color to add style.
You will always want that your text to get animated, but it doesn’t mean that you will have to use explosive fonts or funky or bright, which are very funky. The animation will make your text look attractive, and you can experiment with the colors and fonts to find the best combination.
Step3 Animate the Text
Now the fun part starts; choose the text box present on the right side and click on the “Animate” tab. It will allow the user to select animations like fade, flicker, hue rotates, and many more. Choose the speed according to your requirement, and if you want to change the background and color, you can do it too.
Use “Apply To” for applying this animation in the outro, intro, or both. It will help you to make the text fade out, fade in, or transition out and in with animation. Now the animation library has nine options:
- Drop: It appears on top of the text box
- Flicker: This one is like a candle’s flicker, and text flashes disappear and appear before staying.
- Fade: Opacity can be changed from 0% to 100%.
- Pop:- This grows the text more extensive than the text box and shrinks back to the place.
- Reveal:- Rolls from the left side to the right side
- Wipe:- Rolls from the left side to the right side with a colored background.
- Vibrate: The text box shakes in every direction.
- Hue rotates:- Colour of text cycles through the hue values..
You can use a timeline to adjust the animation’s termination when you set text animation. You can even drag that layer after the start time or use it on end/start time sliders to decrease or increase the time of your video. Text animation can get started when the cursor reaches the start time.
Step4 Export
The video with animated text is now ready to boom. You can click on “Export Video” present at the top and wait for the process. After that, you can download that video and use the links to share it on your social media platform.
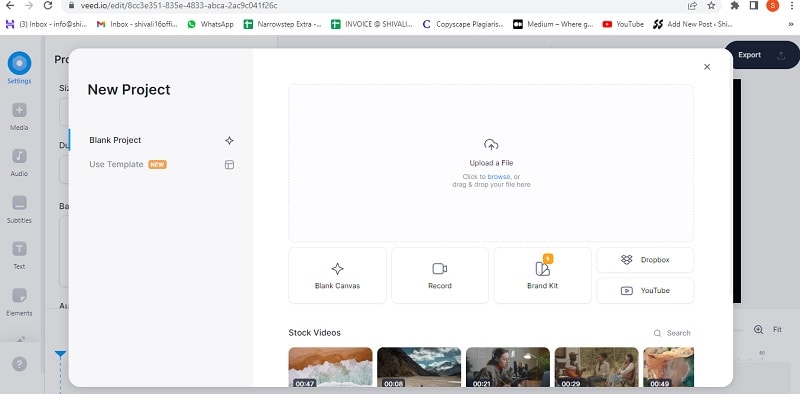
2. Use veed.io text video editor
(https://www.veed.io/create/text-video-maker )
Veed is one of the best video editor text effects online, which allows you to add text to online videos. You can easily add style, color, text, and font in a few clicks. You can upload the video and tap the text to get started. Add title and text or select handwriting font. One can select it from templates. Change transparency, alignment, and font size of the text.
This online software is perfect for creating attractive videos on social media. This is free, which omits the usage of expensive software. It is much easier to avoid many complex video editor apps. With the help of VEED, you can create an excellent video without any experience and do it with a few clicks. Let’s see how to add animated text to photos online.
Step1 Upload the video
Tap on “Choose Video” and choose the file you want to upload on VEED. One can even use the drag and drop option from the folder to the editor.
Step2 Add text
After that, you can add the text by tapping on the “Text” option on the left menu. You can select the text style and start typing.
Step3 Export
Save the video with the text you placed by tapping on “Export.” The video gets saved in an MP4 file.
3. Use Animaker text maker
(https://www.animaker.com/text-animation-maker )
The Animaker is one of the best-animated video makers. This app offers the best collection of charts, BGs, and animated characters. With the help of Animaker, you can make the text disappear or appear off-screen in the best way. After you finish your video, you can download the format in MP4.
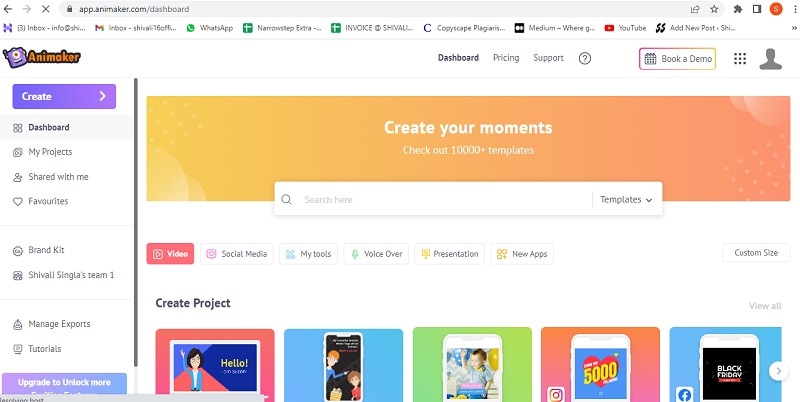
Step1 Upload the video clip
First, you can upload your video clip present on top that you wish to add text animation.
- Tap on the “Upload section” on the bottom left. You can upload your video where you wish to add the animated text.
- The video will get uploaded to “My Files.”
- Click on the uploaded video in the library to load it on the workspace.
Step2 Add text to the video
- You can add text in their text section
- In the next section, one can find two different text types. At the top, you will discover plain text options, and at the bottom, you can find pre-designed boxes seasoned at Animaker.
Let’s see how you can use pre-built text boxes.
- Tap on pre-built designs for your text animation. One can see the text appearing in the center of the workspace, and you can click it and type new text if you want to customize it.
- You can notice widespread options appearing with your text. It is known as the item menu. It will allow the user to modify their text. One can change font size, color, style, etc. Your text will come with pre-defined effects, which will help you to animate text instantly.
- You must have noticed that the purple color bar appears on the timeline, representing the duration of the text visible in the video. For example, if you want that text to get visible between 4rth to 8th seconds, then you will have to drag the edges of that purple bar to the same duration.
To see the scene, you must click on the play button on top of the timeline.
Let’s check the other ways of adding animated text to the video. In the previous one, you have seen how you can add text animation using pre-built boxes. Now you will get to know about doing it by using blank boxes.
- Start tapping the “text section”. Select the bank textbox.
- Click on them and then opt to add new text.
- Opt for clicking the cog icon that is there in the item menu.
- You will notice the settings tab that is on the screen’s right side.
- You can easily opt for the customization of the text in the way you wish. You can start by modifying the style of the font. One can change the size and color of the font as well.
- Use these options and opt for the application of enter and/or exit effects to text. Now, opt to click on the effect option to get more than 50 options. You can select the effect from there.
- Once the animation effect is applied to your timeline, you can notice the pink part in the bar i.e. purple. This completes creating text animation by using Animaker.
Step3 Download the Video
- You can visit the publish option in the right window to download the video.
- Tap on the “download video” option for downloading.
Conclusion
Now, you are aware of how to add text animation to video online and the three best video editors that will help you add animated text to your videos. At this point, you can choose the best one according to your needs and usage. These steps will help you create a unique and good video that will be easy to understand and entertaining.
Free Download For Win 7 or later(64-bit)
Free Download For macOS 10.14 or later
Free Download For macOS 10.14 or later
VSDC Free Video Editor Review
If you are a Window user and you are looking for a free video editor without a watermark, VSDC free video editor is definitely a great application. There are only a handful of free video editors available where the output video will not have a watermark, and there is no limitation on the video length. VSDC video editor belongs to the non-liner video editor group where you can combine video clips, photos, objects, and blend and overlap them as per your requirements.
For a beginner, VSDC free video editor is undoubtedly one of the best video editors. It supports different types of video and audio formats as well as codes. The system requirements are very basic, and hence, it is perfect for low-end computers? But can you rely on VSDC editor when you need slightly advanced video editing? Check out our VSDC editor review and find a better alternative.
Part 1. How to Download and Install VSDC?
VSDC editor download is only available for Windows users. It is tailor-made for those who have a low-end computer with older Windows version OS. The software is compatible with Windows 2000 to Windows 11. The minimum RAM requirement is 128MB and free disk space of 200 MB. Here are the steps to download and install VSDC editor.
Step 1: Open your web browser and visit ‘www.videosoftdev.com/free-video-editor/download” .
Step 2: Click on Download Video Editor button based on 32-bit or 64-bit version of your computer. If you have Windows XP, you have to download VDSC video editor version 6.4 instead of the latest version for compatibility.
Step 3: Give some time for the installer file to get downloaded. It is merely 100 MB and it should not take long. After downloading the installer, launch it and follow the on-screen instruction to complete the installation.
Step 4: After proper installation, launch VSDC video editor. You will get the options to create a new project and capture screen, start editing an existing video and export the finished project in a proper video format.
Part 2. Key Features of VSDC
There are two versions of VSDC video editor available – Free video editor and Pro video editor. The free version has limited features while Pro version has advanced features. Here are going to discuss the key features of VSDC Free Video Editor.
Low System Requirements – One of the reasons for the wide popularity of VSDC video editor is that it does not demand high system configurations like most other video editors. If you have a low-end computer with an outdated Windows operating system, you can use VSDC video editor without any issue.
Basic Editing – Among the basic editing tools, you can cut, trim, split and join video clips. There are options for rotating and resizing videos. You can also go for color correction and put overlays on videos as applicable. Besides, you can edit 36-degree videos with zoom and chart tools.
Effects – VSDC has a wide collection of video, audio and text effects. You can also add objects to your video and apply different ready-made filters. There are also transitions to apply in between video clips and slides. You can also use green screen effect to change your background. The special split-screen effect and picture-in-picture effects are quite eye-catching.
Capture Video – VSDC video editor is equally competent in capturing videos from your webcam as well as recording your screen video. In fact, there is a dedicated option available for creating slideshow videos from photos. You can even record your voiceover if you want to.
File Formats - VSDC supports all the popular file formats for importing and exporting video and audio files. There are different export profiles available so that you can save your edited video for different devices conveniently.
Apart from these, if you opt for the Pro version, you get motion tracking, video masking, video stabilization, and much more such advanced video editing tools.
Part 3. How to Edit Videos with VSDC
If you have the recorded video and you want to edit it with VSDC video editor, the steps are quite simple. You can even record your webcam and screen video with audio if you want to start from scratch. Coming to the editing part, you can split large video files, merge video clips, add transitions in between, add objects in the video as well as crop and rotate videos. There are different effects you can apply to uplift video content. Here are the steps to edit videos with VSDC editor.
Step 1: Open VSDC Video Editor and click on Blank Project option. Name the project and change parameters, and click on Finish.

Step 2: Click on Add Object option at the top and select Video. Import the video clips saved on your hard drive. Similarly, you can go to Add Objects> Audio to import audio files.

Step 3: All the imported media files will appear on the timeline. If you have multiple video clips, you can shift the position of clips on the timeline so that one video clip ends and the other begins.
Step 4: If you want to add transitions in between the video clips, go to Video Effects> Transitions> select the effect you want to apply. Check the on-screen parameters such as duration and click on Ok button.

Step 5: If you want to add objects, go to Add Object and select shapes, texts, animations, charts, and much more. You can also add Audio Effects as well as Text Effects from the top bar.
Step 6: Once you are happy with the preview of the edited video, go to Export Project and check all the parameters. Click on Export Project option.

Part 4. Best VSDC Alternative Video Editor
Since VSDC video editor is available completely free, there is no hard in downloading the application and trying it out. But soon, you will understand that the video editor is limited as far as tools and features are concerned. If you want to get more than just basic tools, you will have to upgrade to its Pro version. However, there are better premium video editors available. We recommend Wondershare Filmora as a better alternative to VSDC video editor.
Filmora is extremely popular in the professional video editing world as it has an intuitive interface and does not demand high-end computers. There are tons of transitions, effects, filters, and objects available to add to your edit. You can perform all standard and advanced video editing to take your video to the next level. Here are all the steps to edit videos on Filmora.
For Win 7 or later (64-bit)
For macOS 10.12 or later
Step 1: Download and install Filmora and it is available for Windows and Mac. Launch Filmora and click on New Project. Import all your media files into Project Media folder by drag and drop action.

Step 2: Arrange the video clips and audio clips on the timeline by drag and drop action. You should be placing the video and audio files on different tracks. This is where you can do all the basic editing such as trimming, cutting, splitting, and merging.

Step 3: To add transitions in between the video clips, go to Transitions from the top bar and drag and drop any transition in between the clips. Check out Titles, Effects, and Elements from the top bar and insert them on the timeline as you think appropriate.

Step 4: Play the video to see if everything is perfect and click on Export button to save your video to your hard drive.

Part 5. FAQs about VSDC
1. Is VSDC video editor really free?
Yes, VSDC video editor is completely free to use. However, there is a pro version available where more features are present. But the free version does not put watermark on the output video and has all the standard tools for video editing without any limitation.
2. Is VSDC better than Adobe Premiere Pro?
No, VSDC is not better than Adobe Premiere Pro. VSDC is a free video tor while Adobe Premiere Pro is a premium one. Naturally, Adobe Premiere Pro has more features and functionalities. However, VSDC is better for beginners and those who have low-end computers if you compare it with Adobe Premiere Pro.
3. Is VSDC safe?
Yes VSDC video editor is safe and stable to use. However, there was an incident in 2019 where VSDC video editor’s official website was hacked, but the software itself is safe to use on Windows computers.
For macOS 10.12 or later
Step 1: Download and install Filmora and it is available for Windows and Mac. Launch Filmora and click on New Project. Import all your media files into Project Media folder by drag and drop action.
Step 2: Arrange the video clips and audio clips on the timeline by drag and drop action. You should be placing the video and audio files on different tracks. This is where you can do all the basic editing such as trimming, cutting, splitting, and merging.
Step 3: To add transitions in between the video clips, go to Transitions from the top bar and drag and drop any transition in between the clips. Check out Titles, Effects, and Elements from the top bar and insert them on the timeline as you think appropriate.
Step 4: Play the video to see if everything is perfect and click on Export button to save your video to your hard drive.
Part 5. FAQs about VSDC
1. Is VSDC video editor really free?
Yes, VSDC video editor is completely free to use. However, there is a pro version available where more features are present. But the free version does not put watermark on the output video and has all the standard tools for video editing without any limitation.
2. Is VSDC better than Adobe Premiere Pro?
No, VSDC is not better than Adobe Premiere Pro. VSDC is a free video tor while Adobe Premiere Pro is a premium one. Naturally, Adobe Premiere Pro has more features and functionalities. However, VSDC is better for beginners and those who have low-end computers if you compare it with Adobe Premiere Pro.
3. Is VSDC safe?
Yes VSDC video editor is safe and stable to use. However, there was an incident in 2019 where VSDC video editor’s official website was hacked, but the software itself is safe to use on Windows computers.
Detailed Review of Kodak LUTs
If you’re from the 20th century, you might have used Kodak cameras. Those cameras had a distinct look and feel, creating a nostalgic look. However, as technology has advanced, we now have access to more advanced cameras. Moreover, these new cameras can capture high-quality images with accurate details. However, you can still achieve that classic Kodak look with the help of LUTs.
To add up, these LUTs can mimic the characteristics of specific films or looks, including Kodak films. There are various LUTs available to download, offering different film looks and styles. In contrast, you can get the classic Kodak film look with your modern cameras. There are different options for Kodak 2383 LUTs free download on the internet. You can download these LUTs to apply on your digital media.
Part 1: An Overview of Some Famous Kodak LUTs and Powergrade Print Films
There are many different presets available that give you Kodak films-like color grading. Here are some of the Kodak film presets that you can use.
Kodak 2383
Kodak 2383 is a color film known for its unique qualities. When used, it enhances the richness of black shades, adding depth and intensity to your images. Additionally, it brings out neutral highlights, creating a distinctive Kodak film look. Moreover, this color film is suitable for both traditional camera films and digital prints. Additionally, you can expect your images to have a timeless quality and a distinct character.
Moreover, you can give your photos a dramatic touch with black shades and neutral highlights. These color films are a unique way to give your content a classic Kodak film look. You can experience the richness and clarity it brings to your images using this film. You can get the Kodak 2383 LUT download link online.
Kodak 2393
Kodak 2393 is a Powergrade film preset that you can use. This editable LUT can improve your media files by adding richer colors, especially in the shadows. When you apply this LUT, it brings out the natural beauty of your video with the right amount of saturation. Furthermore, you can make your videos a more natural and lifelike appearance with this Powergrade.
Moreover, it works particularly well in adding depth and richness to darker areas of your footage. Similarly, it ensures that every detail is visible in a natural way. Furthermore, this LUT can achieve a more natural and realistic look. Additionally, it is a great choice if you’re looking to add vibrance and naturalness to your media files.
Kodak 2302
Kodak 2302 is a high-resolution black-and-white color print film. Furthermore, this film is specifically designed for blue-sensitive printing. It allows for the precise reproduction of details and tones in black-and-white imagery. Moreover, this Kodak 2302 film offers exceptional image quality. Additionally, it uses electron beam recorders to create positive and negative titles.
In addition to this, it also creates RGB separations using beam recorders. Similarly, this technology creates accurate color reproduction and improves the final print’s quality. Kodak 2302 is coated with an ESTAR base to enhance its performance further. This special coating improves the film’s physical properties, making it more durable and resistant.
Empower your videos with a new mood using different LUTs. Filmora now offers 100+ top-quality 3D LUTs cover a broad range of scenarios. Transform your videos with Filmora’s powerful 3D LUTs.
Apply LUT on Videos Apply LUT on Videos Learn More


Part 2: The Best Kodak LUTs Free Available in the Market
You might find many Kodak 2393 LUT free download links, but some of them are not authentic. Here is a list of authentic Kodak-inspired LUTs that you can download and use.
1. Kinetic
Kinetic LUT is a great preset inspired by the iconic Kodak 2383 and 2393 films. With Kinetic, you can bring a vibrant and dynamic color palette to your digital media. This LUT enhances shades such as deep blues and rich reds, adding depth and intensity to your visuals. Moreover, it creates dynamic shadows to bring a sense of richness and dimension to your content. It is a pack of 5 Kodak-inspired LUTs.

2. Kodak Film 2383 - Vlog
The Kodak Film 2383 - Vlog LUT is a perfect choice for adding a Kodak-inspired look to your vlogs. This LUT brings an authentic touch to your content. Moreover, this LUT enhances the color grading of your content with yellowish and bluish tones. Furthermore, it aims to recreate the look and feel of shooting with Kodak film stock. Experiment, explore, and find the perfect balance that brings out the best in your vlogs.

3. Kodak 2383 Print Film LUT
The Kodak 2383 Print Film LUT allows you to create a modern cinematic look. You can use digital videos and transform them into old-style Kodak films look. Moreover, this LUT replicates the color grading of the Kodak 2383 print film. Additionally, it captures the essence of the original film stock, providing an authentic feel. It is a great LUT to make your video content look more natural.

4. Free LUTs Kodak Color
It is a collection of LUTs inspired by the iconic Kodak film look. LUTs Kodak Color is created to enhance your media with vibrant colors and a cinematic look. It is a Kodak LUT free pack that you can download from the internet. Moreover, it adds vibrancy to your media, making the colors pop and come to life. Additionally, these LUTs decrease the white balance, giving your media a warmer tone.

5. KODAK Film Emulation LUT
The KODAK Film Emulation LUT is a collection of 16 cinematic LUTs. These LUTs are inspired by the iconic Kodak 2383 film. Furthermore, these LUTs allow you to achieve the timeless and distinctive look of Kodak film. Moreover, to increase the authenticity of Kodak films, this LUT highlights rich red and blue tones. This LUT replicates Kodak film stock to improve the character of your digital media files.

6. Kodak Film LUTs and Presets
The Kodak Film LUTs and Presets pack features 17 LUTs inspired by the iconic Kodak film look. These LUTs are created to give your digital files a timeless aesthetic. Moreover, it fades certain colors and adds vibrant tones to your media files. Furthermore, replicating Kodak films adds richness and depth to your content with color grading. Additionally, it maintains a perfect balance between classic and modern looks.

7. CL-Kodak
CL-Kodak is a collection of 28 Kodak-style LUTs. Each LUT is designed to elevate your color grading game. Furthermore, you can color grade your media with the iconic reddish tones of Kodak films. Additionally, these LUTs add a grainy texture to your media. These LUTs support Kodak cameras up to 8K resolution. Using these LUTs, you can give your digital files the authentic nostalgic feel of Kodak films.

Part 3: Wondershare Filmora: Reviewing LUTs in Video Editor
There are many great video editing software that exist in the market. Wondershare Filmora , being among the best, offers features to enhance your videos, including color grading and adjustment capabilities. With Filmora, you can modify the colors and tones of your videos to get the desired look and feel. Furthermore, you can apply LUTs using Wondershare Filmora. You can import different LUTs in the tool and apply them directly to your files.
Add LUTs on Video For Win 7 or later(64-bit)
Add LUTs on Video For macOS 10.14 or later
In its newest update, Filmora has introduced over 200+ LUTs you can download and use. Filmora has expanded your creative color grading and adjustment options with this feature. These LUTs cover many styles, from bold and modern to retro and vintage looks. With such a vast selection, you can easily find the perfect LUT to match the mood and tone of your video project.

Key Features of Wondershare Filmora
- Filmora offers complete video editing features to help you edit your videos. You can trim and merge clips and apply transitions. Moreover, you can add text and titles, import music and sound effects, and much more.
- Furthermore, Wondershare Filmora provides advanced tools for precise control over your videos. You can adjust the brightness and contrast. Furthermore, you can control saturation and other parameters.
- You can create dynamic animations and apply effects at any frame with keyframing. Moreover, using this feature, you can add effects to specific sections of your video.
Conclusion
To conclude, using LUTs is a simple and effective way to transform your media files. Moreover, you can also add a nostalgic or cinematic feel to your videos. You can experiment with different film looks by exploring different LUTs. Furthermore, you can even get Kodak 2393 Powergrade free download options online. These Kodak-film-inspired LUTs can take you back to the 20th century.
Apply LUT on Videos Apply LUT on Videos Learn More
Part 2: The Best Kodak LUTs Free Available in the Market
You might find many Kodak 2393 LUT free download links, but some of them are not authentic. Here is a list of authentic Kodak-inspired LUTs that you can download and use.
1. Kinetic
Kinetic LUT is a great preset inspired by the iconic Kodak 2383 and 2393 films. With Kinetic, you can bring a vibrant and dynamic color palette to your digital media. This LUT enhances shades such as deep blues and rich reds, adding depth and intensity to your visuals. Moreover, it creates dynamic shadows to bring a sense of richness and dimension to your content. It is a pack of 5 Kodak-inspired LUTs.
2. Kodak Film 2383 - Vlog
The Kodak Film 2383 - Vlog LUT is a perfect choice for adding a Kodak-inspired look to your vlogs. This LUT brings an authentic touch to your content. Moreover, this LUT enhances the color grading of your content with yellowish and bluish tones. Furthermore, it aims to recreate the look and feel of shooting with Kodak film stock. Experiment, explore, and find the perfect balance that brings out the best in your vlogs.
3. Kodak 2383 Print Film LUT
The Kodak 2383 Print Film LUT allows you to create a modern cinematic look. You can use digital videos and transform them into old-style Kodak films look. Moreover, this LUT replicates the color grading of the Kodak 2383 print film. Additionally, it captures the essence of the original film stock, providing an authentic feel. It is a great LUT to make your video content look more natural.
4. Free LUTs Kodak Color
It is a collection of LUTs inspired by the iconic Kodak film look. LUTs Kodak Color is created to enhance your media with vibrant colors and a cinematic look. It is a Kodak LUT free pack that you can download from the internet. Moreover, it adds vibrancy to your media, making the colors pop and come to life. Additionally, these LUTs decrease the white balance, giving your media a warmer tone.
5. KODAK Film Emulation LUT
The KODAK Film Emulation LUT is a collection of 16 cinematic LUTs. These LUTs are inspired by the iconic Kodak 2383 film. Furthermore, these LUTs allow you to achieve the timeless and distinctive look of Kodak film. Moreover, to increase the authenticity of Kodak films, this LUT highlights rich red and blue tones. This LUT replicates Kodak film stock to improve the character of your digital media files.
6. Kodak Film LUTs and Presets
The Kodak Film LUTs and Presets pack features 17 LUTs inspired by the iconic Kodak film look. These LUTs are created to give your digital files a timeless aesthetic. Moreover, it fades certain colors and adds vibrant tones to your media files. Furthermore, replicating Kodak films adds richness and depth to your content with color grading. Additionally, it maintains a perfect balance between classic and modern looks.
7. CL-Kodak
CL-Kodak is a collection of 28 Kodak-style LUTs. Each LUT is designed to elevate your color grading game. Furthermore, you can color grade your media with the iconic reddish tones of Kodak films. Additionally, these LUTs add a grainy texture to your media. These LUTs support Kodak cameras up to 8K resolution. Using these LUTs, you can give your digital files the authentic nostalgic feel of Kodak films.
Part 3: Wondershare Filmora: Reviewing LUTs in Video Editor
There are many great video editing software that exist in the market. Wondershare Filmora , being among the best, offers features to enhance your videos, including color grading and adjustment capabilities. With Filmora, you can modify the colors and tones of your videos to get the desired look and feel. Furthermore, you can apply LUTs using Wondershare Filmora. You can import different LUTs in the tool and apply them directly to your files.
Add LUTs on Video For Win 7 or later(64-bit)
Add LUTs on Video For macOS 10.14 or later
In its newest update, Filmora has introduced over 200+ LUTs you can download and use. Filmora has expanded your creative color grading and adjustment options with this feature. These LUTs cover many styles, from bold and modern to retro and vintage looks. With such a vast selection, you can easily find the perfect LUT to match the mood and tone of your video project.
Key Features of Wondershare Filmora
- Filmora offers complete video editing features to help you edit your videos. You can trim and merge clips and apply transitions. Moreover, you can add text and titles, import music and sound effects, and much more.
- Furthermore, Wondershare Filmora provides advanced tools for precise control over your videos. You can adjust the brightness and contrast. Furthermore, you can control saturation and other parameters.
- You can create dynamic animations and apply effects at any frame with keyframing. Moreover, using this feature, you can add effects to specific sections of your video.
Conclusion
To conclude, using LUTs is a simple and effective way to transform your media files. Moreover, you can also add a nostalgic or cinematic feel to your videos. You can experiment with different film looks by exploring different LUTs. Furthermore, you can even get Kodak 2393 Powergrade free download options online. These Kodak-film-inspired LUTs can take you back to the 20th century.
Also read:
- In 2024, Experience Time Differently with The Top Slow-Motion Applications
- Updated Do You Want to Remove the Video Background in Premier Pro Using the Ultra Key but Dont Know About the Whole Process? Please Read Our Complete Step-by-Step Tutorial and Learn From Scratch as a Beginner
- Do You Want to Know How to Add a VHS Effect Premiere Look? You Can Easily Apply the VHS Effect to Your Videos Using Adobe Premiere Pro
- New 2024 Approved 15 Best CapCut Templates for Slow Motion Editing
- Updated 2024 Approved How to Loop a Video on Vimeo?
- New In 2024, 15 Amazing GIF Splitter Examples You Need to Bookmark
- The Benefits Of Using Video For Social Media Marketing for 2024
- New Methods on How to Speed Up Video on Splice for 2024
- Updated Do You Want a LUT that You Can Use for Your High-Definition Content? You Can Use Rec 709 LUT Premiere Pro for Your HD Digital Media to Give the Perfect Result
- A Detailed Guid to Remove Background From a Video in Premier Pro for 2024
- Updated 2024 Approved An Ultimate Guide To Edit a Music Video Aspect Ratio and First Cut
- New TOP 10 Types of Video Framing From Novice to Master for 2024
- In 2024, How to Make an Instant Slideshow on Mac
- In 2024, Do You Want to Get Green Screen Effects on Your Video without Green Screen Setup in Your Background? Learn How to Get Virtual Green Screen Background and Shoot Videos Like a Pro
- Updated 2024 Approved A Review of Efectum App Making Slow Motion Video
- Updated In 2024, Best GIF to MOV Converters
- How Can You DIY VHS Overlay in After Effects for 2024
- Splitting Video Into Frames with the FFmpeg Step by Step
- Updated 2024 Approved Step by Step Guide on Make Gimp Transparent Background PNG
- New 3 Effective Methods to Correct Color Distortion in Videos
- In 2024, How To Add Text In After Effects
- New Learn About some of the Best Apps for Photo Collage for PC
- Unlocking the Power of DaVinci Resolve Scopes Enhance Your Color Grad
- In 2024, Do You Want to Record Videos with a Phantom High-Speed Camera? In This Guide, You Can Get a Detailed Note on the Phantom Camera
- In 2024, Craft Powerful Motivational Status Videos for All Occasions, Including Republic Day. Download, Edit, and Inspire with Our Tips and Tricks
- In 2024, Detailed Tutorial to Merge Videos in VLC Media Player
- 2024 Approved LUTs Can Make Ordinary-Looking Footage Look More Attractive. Read This Guide to Learn How You Can Easily Create Your Own LUTs Using Filmora
- Updated 2024 Approved How to Polish Your Music Video Edits Using Filmora
- Updated Have You Tried a Discord Boost Before? What Does a Discord Server Boost Entail, and Is It Worthwhile? What Are the Advantages? Heres a Quick Guide to Assist You in Making Your Decision
- Updated Discover the Process of Slowing Down Time-Lapse Videos on Your iPhone for 2024
- In 2024, Easily Combine Videos and Audios with 5 Simple Online Tools
- How to Crop Videos in Windows Media Player
- 2024 Approved Steps to Denoise in Final Cut Pro – Reduce Video and Audio Noise
- New Have You Ever Tried Using the Premiere Pro Motion Blur Plugin? Read This Article to Learn How to Efficiently Use the ReelSmart Motion Blur Plugin in Premiere Pro
- In 2024, Do You Want to Stream and Record at the Same Time but Cant Find an Easy Solution? This Guide Will Help You Get This Done Using Three Easy-to-Follow Methods
- 2024 Approved 3 Best Motion Blur Plugins for Adobe After Effects
- Updated 2024 Approved Guide to Create a Timelapse Video in After Effects
- New 2024 Approved Best 5 PDF to GIF Converters You Should Know
- Updated Explore the Potential of Slow-Motion Video for Different Industries. Read This Guide and Choose the Best Slow-Motion Camera App to Create Stunning Videos
- In 2024, Overview of the Best Itel P55 5G Screen Mirroring App | Dr.fone
- Full Solutions to Fix Error Code 920 In Google Play on HTC U23 | Dr.fone
- How to Make Well Done Animated GIF By Yourself, In 2024
- Top 15 Augmented Reality Games Like Pokémon GO To Play On Lava Yuva 2 | Dr.fone
- How Can I Use a Fake GPS Without Mock Location On Oppo Reno 9A? | Dr.fone
- My Videos Arent Playing on Asus ROG Phone 7 Ultimate – What Can I Do? | Dr.fone
- Will the iPogo Get You Banned and How to Solve It On Vivo Y100t | Dr.fone
- How to Bypass Activation Lock on Apple iPhone 14 Pro Max or iPad?
- In 2024, How To Transfer Messages From Apple iPhone X to other iPhone All iOS Versions | Dr.fone
- In 2024, iPhone Is Disabled? Here Is The Way To Unlock Disabled Apple iPhone 6 | Dr.fone
- 9 Mind-Blowing Tricks to Hatch Eggs in Pokemon Go Without Walking On Apple iPhone 14 Plus | Dr.fone
- New Multiple Ways How To Remove iCloud Activation Lock On your Apple iPhone 11 Pro
- In 2024, Top 15 Augmented Reality Games Like Pokémon GO To Play On Honor Magic 6 | Dr.fone
- Updated The Most Direct Guide to Learning How to Clone Your Voice for 2024
- How to Fix when Apple Account Locked From iPhone X?
- How Many Attempts To Unlock Apple iPhone 15 Pro Max
- How to recover deleted photos from Xiaomi Redmi A2.
- In 2024, How to use iSpoofer on Realme GT 5 (240W)? | Dr.fone
- Full Guide to Bypass Samsung Galaxy M14 4G FRP
- In 2024, What is the best Pokemon for pokemon pvp ranking On Lava Yuva 2? | Dr.fone
- How to Use Pokémon Emerald Master Ball Cheat On Motorola Razr 40 | Dr.fone
- In 2024, Unova Stone Pokémon Go Evolution List and How Catch Them For Vivo Y27s | Dr.fone
- How To Free Up Apple iPhone 14 Pro Max Space | Dr.fone
- In 2024, 5 Ways To Teach You To Transfer Files from Honor X9b to Other Android Devices Easily | Dr.fone
- 11 Ways to Fix it When My Vivo V27e Wont Charge | Dr.fone
- In 2024, 11 Best Location Changers for Oppo Find N3 Flip | Dr.fone
- How to Turn Off Google Location to Stop Tracking You on ZTE Axon 40 Lite | Dr.fone
- In 2024, 5 Solutions For Xiaomi Redmi Note 12 4G Unlock Without Password
- 4 solution to get rid of pokemon fail to detect location On Huawei P60 | Dr.fone
- What You Need To Know To Improve Your Gionee F3 Pro Hard Reset | Dr.fone
- In 2024, How To Enable USB Debugging on a Locked Oppo Find N3 Phone
- In 2024, A Quick Guide to Samsung Galaxy Z Flip 5 FRP Bypass Instantly
- Title: In 2024, How To Create a Polaroid Collage?
- Author: Chloe
- Created at : 2024-05-20 03:38:06
- Updated at : 2024-05-21 03:38:06
- Link: https://ai-editing-video.techidaily.com/in-2024-how-to-create-a-polaroid-collage/
- License: This work is licensed under CC BY-NC-SA 4.0.
