
In 2024, How to Make Random Letter Reveal Intro?

How to Make Random Letter Reveal Intro?
The introductions in the video can create a major feel for the rest of the video in the viewers’ minds. So, most film and video makers focus on developing different styles of appealing and visually vibrant intro title formats for their projects.
Currently, one of the unique types of title format that is popular today among Youtubers and filmmakers is the style of random letters appearing on screen until the main title forms.

Wondering how to have the same effect for your video? This process will work easily with certain software tools, the most user-friendly and simple being the Wondershare Filmora software. Let’s understand the steps that go into this process here.
1. Launch Filmora on your Device
On Filmora’s official website, you can get the latest software version when you click on the Download button at the top or in the description box. After you do so, the free software will download automatically into your device in an installer format.
Free Download For Win 7 or later(64-bit)
Free Download For macOS 10.14 or later
From the Downloads section of your browser, double-click on it and press the Install button when it appears. Give the necessary permissions that it prompts.

Then, the software will start the installation instantly, likely taking a few seconds to complete.
2. Add the Default Title and Edit its Font
After Filmora launches, click on the “Create New Project” button on the homepage of the editor. Then, click on the Title tab from the top toolbar and choose the default title available here. Drag it and drop it onto the editing timeline below on Track 1.
Double-click on the title on the timeline, which will open the text editing window. Under the Text’s Preset tab, you will find the parameters for changing the main fault. Adjust the font style to the Impact style (or any bold title style you prefer), and click on the text field to add your custom title.
Following that, click on the text size option and change it to 15. Scroll down the menu to the Text Spacing section. Change the value to 20 and tap on the OK button afterward.

3. Split the title
On the editing timeline, tap on the Track 1 clip and click on the Snapshot icon at the far right side of the toolbar just above the timeline. This will automatically save in the media library section.
Then, take hold of the playhead on the timeline at the 3rd frame mark. Then, tap on the Scissor icon on the play head, which will split the clip into two portions. Click on the part following the 3rd frame mark and delete it.

4. Copy the clipped section multiple times
Then, double-click on the amount still available on the timeline to open the title editor section again. Make changes to the title you added here, only keeping the first letter.
Click on this clipped section on the timeline and copy it. Next, keep copying this clip multiple times continuously until the length of the collection on Track 1 to the 5-second mark.
Following that, zoom in on the timeline for a better view of these clipped parts. Choose the last clip that you copied and drag it to expand its time duration to the 6:15 mark.

5. Change the character of each clip
After making the previous edits, use your cursor to move to the first part of the timeline instead of zooming outward. Tap on the first clip that you had edited and double-click on it. In the text editing window, change the character to another random alphabet.

Repeat the same for all the split parts following the first one, changing the character to any random alphabet. At this time, ensure that you do not make two consecutive letters have the same alphabet, as that will put off the effect. However, keep the last elongated clip the same character as you originally put it.
6. Export the first letter clip
Then, please tap on the Export button at the top of the screen and add a name, like the first letter of your title. Click on the Settings button on this page to adjust the resolution and quality of the clip to the highest resolution for the best results.
Press Export again to save it to your device.
7. Edit the second letter clip and so on
After exporting the first file that will ultimately become the first letter of your random letter reveal intro title, you have to make the second letter-related clip.
For this, tap on the last clip on the timeline and double-click on it. Change the text in this clip to the second letter of your title. After doing this, go back to the first clip of your collection and double-click on it after selling it. Tap on the text field and give it another random letter.

Like with the first clip, continue doing this step for all of the next clips, except for the final clip. Then, export it in the same manner as the first clip.
Now that you know how to edit the first and second letters in sequence, repeat this process for all of the letters of your title to create a full clip for all of the intro title letters. When you are done, please select these clips and press the Delete button to remove them from the timeline.

8. Add all clips back to Filmora
Now it’s time to add all of the clips to Filmora and merge them into one cohesive intro title.
For this, click on My Media and go to Project Media. Right-click on the library section and press the Import button. This will take you to your device storage. Find the location where you saved all cut clips, and select them all. Press the Open button, and all of them will import into Filmora.

9. Drag the Snapshot to Timeline
Tap on the Snapshot you saved earlier sitting on the media library and drag it onto the Track 1 of the editing timeline. Double-click on it to open the video editing window.
Click on the Opacity option in the Video editing section and change it to 20%. Press the OK button after that.

10. Drop the Clip into the Timeline
Select the first letter clip from the media library section and drag it onto the timeline. Drop it above the Snapshot in Track 2 part. Then, choose the first Snapshot clip and increase its duration to the 8-second mark.
Next, double-click on the first letter clip on the Track 2 section to open its editing window. Click on the Blending Mode option and choose Screen from the drop-down menu.

Then, right-click on the first letter clip in the timeline and choose the Copy Effects option from the next drop-down menu. Move the playhead to the ending position on the timeline and change the value on the relevant axis of Position until it matches its letter position on the original title.
See the preview playing on the side for a better reference while adjusting the position.
11. Drop the next clips
Following this, click on the second letter clip and drag and drop it onto Track 3 on the timeline. Make sure to move the playhead to mark the starting position of this letter at the 5th frame mark.
Tap on this clip and move your playhead to the end position. Then, right-click on it and choose the Paste Effects option. Double-click on this clip on the timeline and change the position axis value until the letter aligns with its original position per the snapshot. Again, look at the Preview to ensure you align them correctly.

Repeat this with all the other letters, making sure to change the starting position for each consecutive one-two frame forward.
12. Hide and elongate each clip with snapshots
Then, click on the Snapshot clip on Track 1 and delete it. Following that, click the Hide icon on Track 3, Track 4, and onwards till the last one. Then, move the playhead to the end of the Track 2 clip and click on the Snapshot icon.
Choose the saved snapshot in the library window and drag-and-drop it behind Track 2 clip so it continues into it. Double-click on this Snapshot and choose Screen under Blending Mode. Then, right-click on this Snapshot and select “Copy Effects” from the menu.

Then, hide the Track 2 clip, unhide the Track 3 and Track 4 clip, and take a snapshot of that. As you did with Track 1’s screenshot, take this snapshot and place it beside Track 3 clip. Right-click on it and tap on “Paste Effects”. Repeat this one by one for all the clips after unhiding them for their particular step.
13. Finishing touches to Opacity
Finally, unhide all the clips and move the playhead to the 8-second mark. Click on the Scissor icon to Split them all at this position and remove the excess. Then, place the playhead at the beginning of Track 3 and double-click on it. Tap the Animation tab this time and adjust the Opacity to 0. Then, move the playhead ten frames forward and increase the Opacity to 100. Repeat this for all of the steps.

14. Preview and Export
After everything, tap on the Render Preview icon. Make sure to move the second clip on Track 2 as the starting point of the video by moving it to the beginning position. Now, press the Play button under the Preview player.

Conclusion
Finally, you are ready to use the same tactics as explained to optimize the quality and style of your video introduction title. Besides this, you can utilize other preset title options on video projects via Filmora. Try out multiple options and practice this particular approach on different video projects. Then, prepare stunning, visually captivating movies, vlogs, and documentaries quickly.
Free Download For macOS 10.14 or later
From the Downloads section of your browser, double-click on it and press the Install button when it appears. Give the necessary permissions that it prompts.

Then, the software will start the installation instantly, likely taking a few seconds to complete.
2. Add the Default Title and Edit its Font
After Filmora launches, click on the “Create New Project” button on the homepage of the editor. Then, click on the Title tab from the top toolbar and choose the default title available here. Drag it and drop it onto the editing timeline below on Track 1.
Double-click on the title on the timeline, which will open the text editing window. Under the Text’s Preset tab, you will find the parameters for changing the main fault. Adjust the font style to the Impact style (or any bold title style you prefer), and click on the text field to add your custom title.
Following that, click on the text size option and change it to 15. Scroll down the menu to the Text Spacing section. Change the value to 20 and tap on the OK button afterward.

3. Split the title
On the editing timeline, tap on the Track 1 clip and click on the Snapshot icon at the far right side of the toolbar just above the timeline. This will automatically save in the media library section.
Then, take hold of the playhead on the timeline at the 3rd frame mark. Then, tap on the Scissor icon on the play head, which will split the clip into two portions. Click on the part following the 3rd frame mark and delete it.

4. Copy the clipped section multiple times
Then, double-click on the amount still available on the timeline to open the title editor section again. Make changes to the title you added here, only keeping the first letter.
Click on this clipped section on the timeline and copy it. Next, keep copying this clip multiple times continuously until the length of the collection on Track 1 to the 5-second mark.
Following that, zoom in on the timeline for a better view of these clipped parts. Choose the last clip that you copied and drag it to expand its time duration to the 6:15 mark.

5. Change the character of each clip
After making the previous edits, use your cursor to move to the first part of the timeline instead of zooming outward. Tap on the first clip that you had edited and double-click on it. In the text editing window, change the character to another random alphabet.

Repeat the same for all the split parts following the first one, changing the character to any random alphabet. At this time, ensure that you do not make two consecutive letters have the same alphabet, as that will put off the effect. However, keep the last elongated clip the same character as you originally put it.
6. Export the first letter clip
Then, please tap on the Export button at the top of the screen and add a name, like the first letter of your title. Click on the Settings button on this page to adjust the resolution and quality of the clip to the highest resolution for the best results.
Press Export again to save it to your device.
7. Edit the second letter clip and so on
After exporting the first file that will ultimately become the first letter of your random letter reveal intro title, you have to make the second letter-related clip.
For this, tap on the last clip on the timeline and double-click on it. Change the text in this clip to the second letter of your title. After doing this, go back to the first clip of your collection and double-click on it after selling it. Tap on the text field and give it another random letter.

Like with the first clip, continue doing this step for all of the next clips, except for the final clip. Then, export it in the same manner as the first clip.
Now that you know how to edit the first and second letters in sequence, repeat this process for all of the letters of your title to create a full clip for all of the intro title letters. When you are done, please select these clips and press the Delete button to remove them from the timeline.

8. Add all clips back to Filmora
Now it’s time to add all of the clips to Filmora and merge them into one cohesive intro title.
For this, click on My Media and go to Project Media. Right-click on the library section and press the Import button. This will take you to your device storage. Find the location where you saved all cut clips, and select them all. Press the Open button, and all of them will import into Filmora.

9. Drag the Snapshot to Timeline
Tap on the Snapshot you saved earlier sitting on the media library and drag it onto the Track 1 of the editing timeline. Double-click on it to open the video editing window.
Click on the Opacity option in the Video editing section and change it to 20%. Press the OK button after that.

10. Drop the Clip into the Timeline
Select the first letter clip from the media library section and drag it onto the timeline. Drop it above the Snapshot in Track 2 part. Then, choose the first Snapshot clip and increase its duration to the 8-second mark.
Next, double-click on the first letter clip on the Track 2 section to open its editing window. Click on the Blending Mode option and choose Screen from the drop-down menu.

Then, right-click on the first letter clip in the timeline and choose the Copy Effects option from the next drop-down menu. Move the playhead to the ending position on the timeline and change the value on the relevant axis of Position until it matches its letter position on the original title.
See the preview playing on the side for a better reference while adjusting the position.
11. Drop the next clips
Following this, click on the second letter clip and drag and drop it onto Track 3 on the timeline. Make sure to move the playhead to mark the starting position of this letter at the 5th frame mark.
Tap on this clip and move your playhead to the end position. Then, right-click on it and choose the Paste Effects option. Double-click on this clip on the timeline and change the position axis value until the letter aligns with its original position per the snapshot. Again, look at the Preview to ensure you align them correctly.

Repeat this with all the other letters, making sure to change the starting position for each consecutive one-two frame forward.
12. Hide and elongate each clip with snapshots
Then, click on the Snapshot clip on Track 1 and delete it. Following that, click the Hide icon on Track 3, Track 4, and onwards till the last one. Then, move the playhead to the end of the Track 2 clip and click on the Snapshot icon.
Choose the saved snapshot in the library window and drag-and-drop it behind Track 2 clip so it continues into it. Double-click on this Snapshot and choose Screen under Blending Mode. Then, right-click on this Snapshot and select “Copy Effects” from the menu.

Then, hide the Track 2 clip, unhide the Track 3 and Track 4 clip, and take a snapshot of that. As you did with Track 1’s screenshot, take this snapshot and place it beside Track 3 clip. Right-click on it and tap on “Paste Effects”. Repeat this one by one for all the clips after unhiding them for their particular step.
13. Finishing touches to Opacity
Finally, unhide all the clips and move the playhead to the 8-second mark. Click on the Scissor icon to Split them all at this position and remove the excess. Then, place the playhead at the beginning of Track 3 and double-click on it. Tap the Animation tab this time and adjust the Opacity to 0. Then, move the playhead ten frames forward and increase the Opacity to 100. Repeat this for all of the steps.

14. Preview and Export
After everything, tap on the Render Preview icon. Make sure to move the second clip on Track 2 as the starting point of the video by moving it to the beginning position. Now, press the Play button under the Preview player.

Conclusion
Finally, you are ready to use the same tactics as explained to optimize the quality and style of your video introduction title. Besides this, you can utilize other preset title options on video projects via Filmora. Try out multiple options and practice this particular approach on different video projects. Then, prepare stunning, visually captivating movies, vlogs, and documentaries quickly.
Introduction to LUTs: Their Overview and Benefits
In video editing, you mainly face problems related to color grading and lower attractiveness of video. To cater to these issues, you can use the LUTs because they can upscale the performance of your video in no time. Yet, if you are not familiar with the concept of LUTs, this article is for you. Here, we will discuss the meaning of having LUTs in editing and other metrics of this exceptional element.
By the end of this article, you will also discover a tool that will help you with LUTs video editing. Thus, let’s get below to learn more about LUTs.
Part 1: What Do You Know About LUTs?
LUTs are data files that stand for Look-Up Tables. These are used in video editing because they have mathematical algorithms that can color-transform both videos and photos. LUTs can also upscale the contrast and color grading of simple videos and make them color-friendly. If you are a filmmaker or a videographer, you should be familiar with the concept of LUTs.
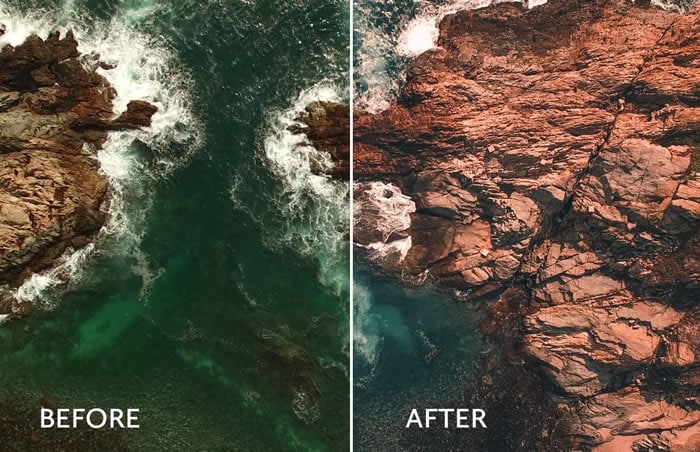
LUTs video editing also ensures that white balance and all the color metrics in your videos are consistent so they can be used for professional purposes. Moreover, you can also implement your creativity in the video with them. There are several formats of LUTs, such as 3DL, CUBE, DAT, CSP, and more, that you can discover in various editing tools. You can find them across several platforms, such as Adobe Photoshop, DaVinci Resolve, and more.
Empower your videos with a new mood using different LUTs. Filmora now offers 100+ top-quality 3D LUTs cover a broad range of scenarios. Transform your videos with Filmora’s powerful 3D LUTs.
Apply LUT on Videos Apply LUT on Videos Learn More

Part 2: What Are the Different Types of LUTs Available for Utility?
To fully understand LUT editing, you need to be aware of the types of LUTs. In this section, we will discuss the types of LUTs. Have a look below to find out more about them:
Technical LUTs
You can use technical LUTs for postproduction editing. It can help with gamma correction, white balance adjustments, and color grading. Moreover, the main purpose of using this LUT is to ensure consistency in the videos.
Creative LUTs
If you are an artist and want to work on art photos and videos, you can use creative LUTs. With this, you can adjust colors and contrast to customize the outlook of your media. Moreover, it can also create cozy and environment-friendly looks in your videos.
Camera Specific LUTs
As the name indicates, you can use camera-specific LUTs to work with different camera brands. The camera can lead to several color dysfunctionality, but you can correct them with camera-specific LUTs. It never compromises the quality of the video, so you can use it without any issues.
Display LUTs
If you wish to customize the colors of videos or photos for a specific display device, this is your best option. It can modify the video as per the computer or television specifications. Above all, you can match the output look of your video with your intentional look with this.
Input LUTs
With this, you can manage the colors of your video from the beginning. It can help you to apply a consistent starting point to your video in an optimized manner.
Part 3: Why Are LUTs Beneficial in the Current Video Editing Fraternity?
There are several reasons that show that LUTs are beneficial for the current video editing fraternity. While you have learned some important points explaining what are LUTs, here are some of the reasons explaining their importance:
Improved Color Grading
By using LUTs, you can apply predesigned colors to the videos and photos. It can save you both time and effort and fasten the procedure of working. Thus, if you are working on tight deadlines, this can be your savior.
Highest Consistency
If you don’t have consistency in your videos, no one will watch them for a long time. To solve this issue, you can use LUTs because they can add a sense of consistency to any type of video.
Creativity Ratio
There is a wide array of creative options in LUTs. From adding vibrant colors to modifying styles, LUTs can help you with everything. Thus, it is an optimized solution to add creativity to videos.
Compatibility of LUTs
LUTs are compatible with a considerable number of video editing software. So, you can also streamline your workflow efficiency with the help of LUTs while editing your favorite videos.
Part 4: What Do You Believe About The Future of LUTs in the Video Industry?
In this digital world, you need to work with the most modernized solutions to solve your digital problems. We all make videos and photos, but bad colors can degrade their performance and attractiveness. For this reason, you can use LUTs editing. However, to import or apply LUTs, you need to know the best video editing platform.
The best and most optimized platform that can be used for this purpose is Wondershare Filmora . With this tool, you can apply LUTs to the videos and can also preview them before actually downloading the video. Other than this, it also has an effect mask by which you can apply special effect filters to the videos. It also offers video cover and export process optimization.
Add LUTs on Video For Win 7 or later(64-bit)
Add LUTs on Video For macOS 10.14 or later

Key Features of Wondershare Filmora
Wondershare Filmora has built much in LUTs video editing over time. From changing its existence from a category to a dedicated section, Filmora has come a long way. Find out some important features about Filmora and its exceptional functionality:
- With Filmora, you can optimize the cache file management along with using the feedback channels.
- You can make the interface adjustments and can also customize the intensity of LUTs from 0 to 100%.
- There are several adjustment filters in it, and you can also work on several types of videos with it, including travel and more.
Conclusion
In the following article, you have learned what are LUTs in video editing. From the definition to the compatible video editing software, you can find everything about LUTs above. Moreover, there are several types of LUTs, and you can use them as per your need. If you are looking for a platform to apply LUTs to the video, the answer is Wondershare Filmora.
Apply LUT on Videos Apply LUT on Videos Learn More

Part 2: What Are the Different Types of LUTs Available for Utility?
To fully understand LUT editing, you need to be aware of the types of LUTs. In this section, we will discuss the types of LUTs. Have a look below to find out more about them:
Technical LUTs
You can use technical LUTs for postproduction editing. It can help with gamma correction, white balance adjustments, and color grading. Moreover, the main purpose of using this LUT is to ensure consistency in the videos.
Creative LUTs
If you are an artist and want to work on art photos and videos, you can use creative LUTs. With this, you can adjust colors and contrast to customize the outlook of your media. Moreover, it can also create cozy and environment-friendly looks in your videos.
Camera Specific LUTs
As the name indicates, you can use camera-specific LUTs to work with different camera brands. The camera can lead to several color dysfunctionality, but you can correct them with camera-specific LUTs. It never compromises the quality of the video, so you can use it without any issues.
Display LUTs
If you wish to customize the colors of videos or photos for a specific display device, this is your best option. It can modify the video as per the computer or television specifications. Above all, you can match the output look of your video with your intentional look with this.
Input LUTs
With this, you can manage the colors of your video from the beginning. It can help you to apply a consistent starting point to your video in an optimized manner.
Part 3: Why Are LUTs Beneficial in the Current Video Editing Fraternity?
There are several reasons that show that LUTs are beneficial for the current video editing fraternity. While you have learned some important points explaining what are LUTs, here are some of the reasons explaining their importance:
Improved Color Grading
By using LUTs, you can apply predesigned colors to the videos and photos. It can save you both time and effort and fasten the procedure of working. Thus, if you are working on tight deadlines, this can be your savior.
Highest Consistency
If you don’t have consistency in your videos, no one will watch them for a long time. To solve this issue, you can use LUTs because they can add a sense of consistency to any type of video.
Creativity Ratio
There is a wide array of creative options in LUTs. From adding vibrant colors to modifying styles, LUTs can help you with everything. Thus, it is an optimized solution to add creativity to videos.
Compatibility of LUTs
LUTs are compatible with a considerable number of video editing software. So, you can also streamline your workflow efficiency with the help of LUTs while editing your favorite videos.
Part 4: What Do You Believe About The Future of LUTs in the Video Industry?
In this digital world, you need to work with the most modernized solutions to solve your digital problems. We all make videos and photos, but bad colors can degrade their performance and attractiveness. For this reason, you can use LUTs editing. However, to import or apply LUTs, you need to know the best video editing platform.
The best and most optimized platform that can be used for this purpose is Wondershare Filmora . With this tool, you can apply LUTs to the videos and can also preview them before actually downloading the video. Other than this, it also has an effect mask by which you can apply special effect filters to the videos. It also offers video cover and export process optimization.
Add LUTs on Video For Win 7 or later(64-bit)
Add LUTs on Video For macOS 10.14 or later

Key Features of Wondershare Filmora
Wondershare Filmora has built much in LUTs video editing over time. From changing its existence from a category to a dedicated section, Filmora has come a long way. Find out some important features about Filmora and its exceptional functionality:
- With Filmora, you can optimize the cache file management along with using the feedback channels.
- You can make the interface adjustments and can also customize the intensity of LUTs from 0 to 100%.
- There are several adjustment filters in it, and you can also work on several types of videos with it, including travel and more.
Conclusion
In the following article, you have learned what are LUTs in video editing. From the definition to the compatible video editing software, you can find everything about LUTs above. Moreover, there are several types of LUTs, and you can use them as per your need. If you are looking for a platform to apply LUTs to the video, the answer is Wondershare Filmora.
How To Make a Timelapse in After Effects
Time-Lapse movies are great for a variety of projects; you can use them as establishing shots in sitcoms, corporate marketing videos, and they can make lovely backgrounds for animated slideshows. A time-lapse video is essentially a series of photographs taken at regular intervals to depict how the environment changes gradually over a shorter period of time. In this article, we’ll demonstrate how you may quickly and easily build an After Effects time-lapse effect.
With that said, let’s start!
Step 1. Create a new composition
Calculating your composition length to accommodate the frame rate and number of images is the first step in generating a time-lapse video.
- Verify the number of images you have for your Sequence.
- New Composition Creation. Selecting a frame rate: A time lapse film produced at 30 frames per second will flow smoothly, but you can select any frame rate you like.
- To determine the duration of your composition, divide the number of photographs you have by the frame rate you’ve chosen. For instance, if you use 600 photos at 30 frames per second, your composition will last 20 seconds.
Step 2. Import your images
You are prepared to make a time-lapse sequence if all of your photographs are saved to the same folder and are in the same order. If you are working directly from your Camera, you will likely have Camera Raw files, although this procedure works with PNG and JPEG sequences.
- Press Command/Control I on your keyboard or select File > Import. Find the folder holding your image sequence.
- To begin, select the first picture in the sequence. If all of your images have accurate names, After Effects will be able to identify a sequence of images.
- Make sure the Force Alphabetical Order and Camera Raw Sequence checkboxes are selected. Your Time-Lapse Sequence will display in the Project Browser Panel after you click Import.
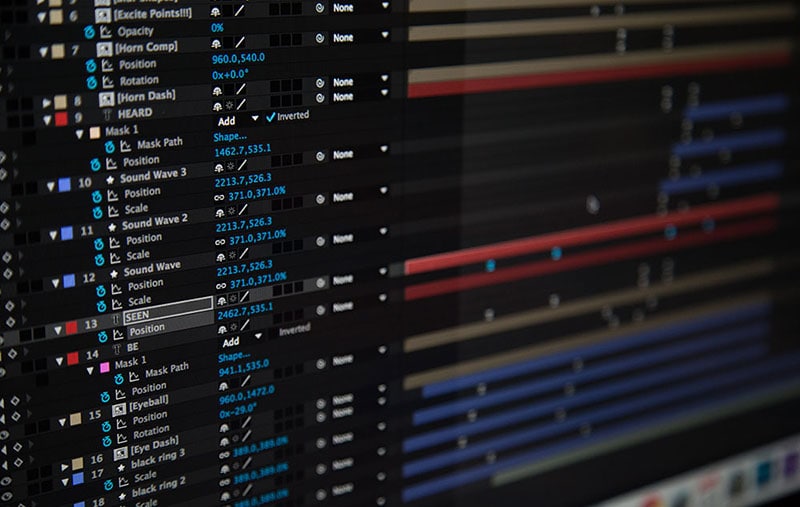
- Once you’ve watched how it plays, you can adjust the Frame Rate by right-clicking the Sequence in the Project Browser and selecting Interpret Footage > Main.
- To update your time-lapse, modify the Frame Rate setting and click OK.
Step 3. Create movements
- After Effects’ Time-Lapse Sequence can be used just like any other standalone clip. This implies that you may give your time-lapse clip movement by adding Keyframes and Effects.
- Place your Playhead at the beginning of the clip after choosing the Image Sequence. Make a keyframe for the scale or position.
- To generate a second Keyframe for the value of your choice, move to the end of the clip. Make any necessary Clip modifications.
- Right-click on the timeline, choose New > Adjustment Layer, then add your effects to the Adjustment Layer to add effects like noise and grain.
Step 4. Create slow motion from a video
You can import your video after you’ve shot it to prepare it for editing. The same steps, including naming your photos in order, must be taken for the Time Lapse sequence. It may be advantageous to entirely rename both your Image Sequence and Performer clip.
- Drag the finished Time Lapse sequence to your Timeline after completing it as previously explained.
- Over the Time Lapse, add the Performer Clip to the Timeline.
- Choose Time>Time Stretch by performing a right-click on the performer clip.
- You can alter the Stretch Factor or Duration in the dialogue box. When you alter one parameter, the other will reflect the new Stretch Factor or Duration for you.
Step 5. Make an overlay
You can alter the Stretch Factor or Duration in the dialogue box. When you alter one parameter, the other will reflect the new Stretch Factor or Duration for you.
- Find Luma Key in the Effect Control Panel and drag it to your clip.
- Change the Key Type setting in the Effect Control Panel to Key Out Brighter.
- The Threshold, Tolerance, and Edge settings should be adjusted until only the silhouette is visible.
- Use the Pen or Mask Tool to create a circle around the parts you want to delete if you discover any corners of your clip that are still visible.
- Add any Effects, such as Light Leaks, to your Adjustment Layer by choosing “Right-click > New > Adjustment layer.”
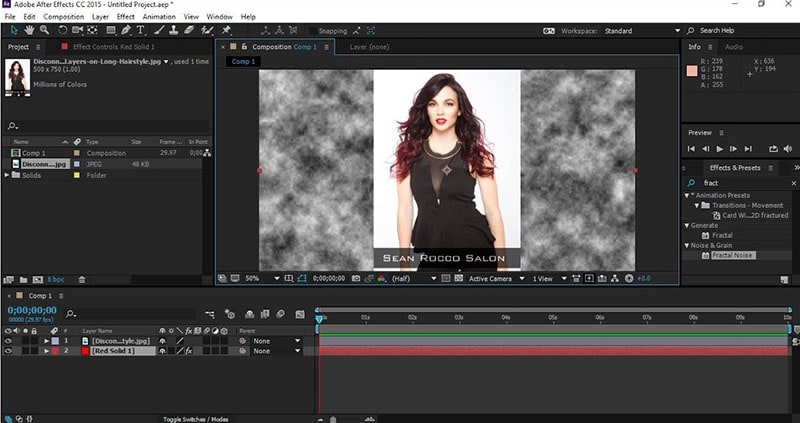
After Effects CC must be opened, a new project must be created, the Import File menu option must be selected, and the appropriate folder containing the altered still images must be located and selected before the time-lapse photos can be turned into a film. You need to make sure that the JPEG Series box is checked, as well as the Force Alphabetical Order box.
Once you have clicked on the first image in the sequence. The time-lapse video that you uploaded appears in the project library. After performing a right-click on the filename, select “New Comp from Selection” from the context menu.
Step 6. Exporting your video
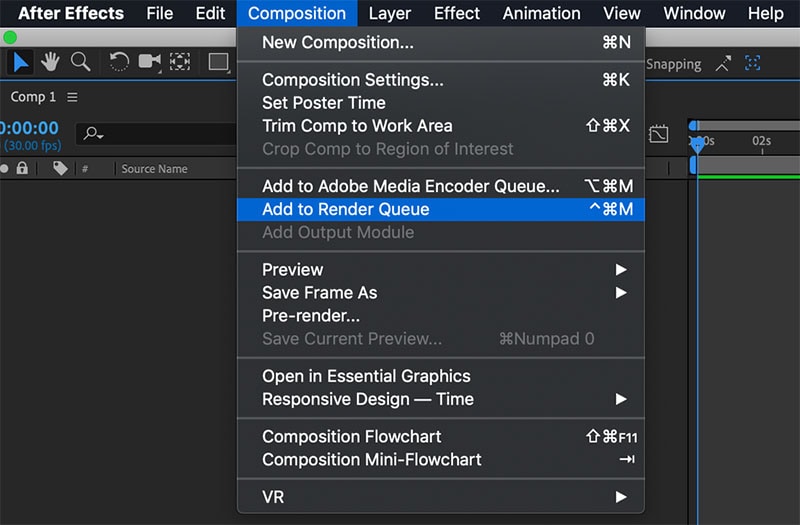
After getting our sequence to perform some kind of slow, understated animation so that it appears as though the camera is moving dramatically, we will need to export a video file. Go to File > Export > Add to Render Queue, then open the Render Queue dialog box by going to Window > Render Queue. From there, you can choose the Output Module and change the settings in the options dialog box. Finally, choose the Output To option and select the location on your computer where you would like to save the video clip that we are currently rendering and exporting.
Conclusion
No matter how you make your time lapse videos, After Effects has a ton of features you can use to modify and enhance the way they look. Now that you are familiar with the fundamentals, you can play with the Frame Rates and Composition options. Check out this helpful manual for more information on Time Stretching and Remapping in After Effects.
Free Download For Win 7 or later(64-bit)
Free Download For macOS 10.14 or later
Free Download For macOS 10.14 or later
Tips for Choosing Location & Scheduling Music Video
Making viral music videos is everyone’s dream; what if you get exact tips to follow before shooting your music video to make it high-ranked? Obviously, it’ll be a treat for you!
Planning and preparing before the shoot is the key to making a music video successful. You can only achieve this after location scouting and emerging with the best one. And scheduling for big projects before the day is more important. Let’s directly move towards the things to consider before shooting!
Location scouting
The pleasant and eye-catchy location always makes your music video trending or flopping. You should first go with your budget and then come up with location ideas. In the upcoming tip, we will use 3lau’s song “Tokyo” as an example.
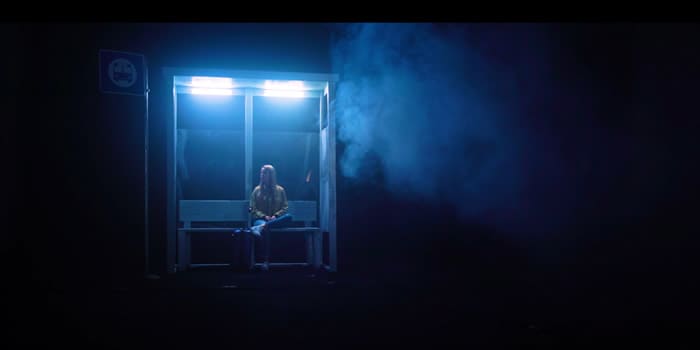
If you are going with large projects, you need to consider the following requirements!
1. Availability of electricity
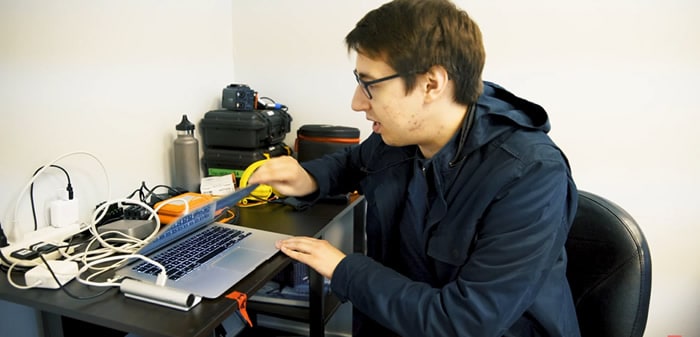
You need rig lights and a large lighting setup to make your video more glow and give them aesthetic vibes. For this, make sure you choose a location where light is readily available.
2. Separate room
During shooting for big projects, you need room to store all gear and sensitive equipment in one place for many days.
3. Check the size
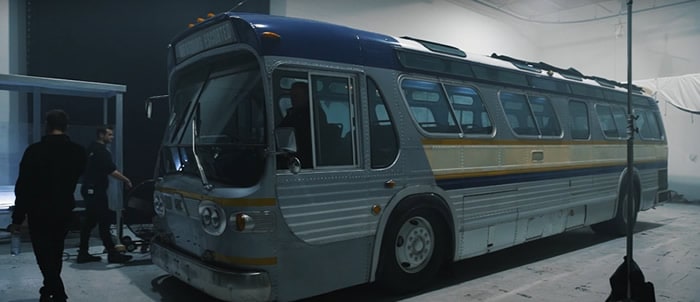
The foremost thing in choosing the location is to check the Height and Width of the studio. They should be enough to rig the lights in the studio easily and place every required thing in a decided space.
For Example, while shooting a 3lau song, there is a need for a bus to come into the studio easily, but there is an issue in entering the bus due to height issues of the door. Due to this, the director changed the location at the spot to sort out this issue.
A cross-platform for making videos anywhere for all creators

Why your video editing isn’t good enough? How about some creative inspo?
- 100 Million+ Users
- 150+ Countries and Regions
- 4 Million+ Social Media Followers
- 5 Million+ Stock Media for Use
* Secure Download

Alternate Ways of Location Scouting
If you don’t have enough budget to get a studio space, then you can easily shoot by selecting spaces that are in your use or available. These are the following locations you should regard!
Location 1. Your Home
You should go with the space available at your home to shoot, such as: on couches or in the bedroom, to give a good impression to your music video.
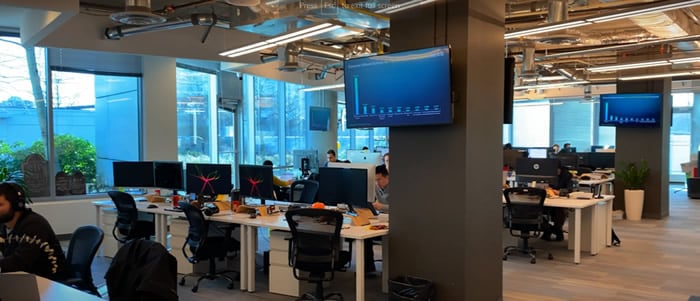
Location 2. Office Space
You can also make scenes of your music video in office space to better describe the work in the video.
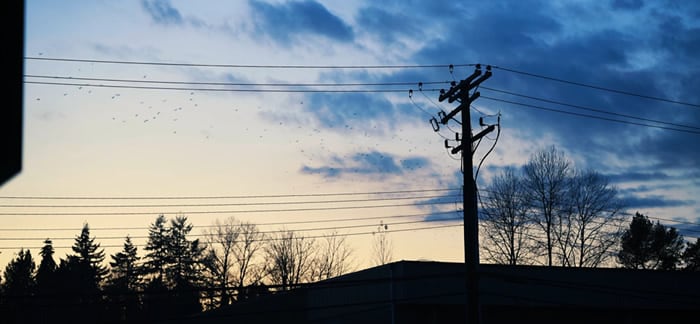
Location 3. Outdoor Locations
For better daylight and illustrations in the music video, you can go with the outdoor location, which is free of cost.
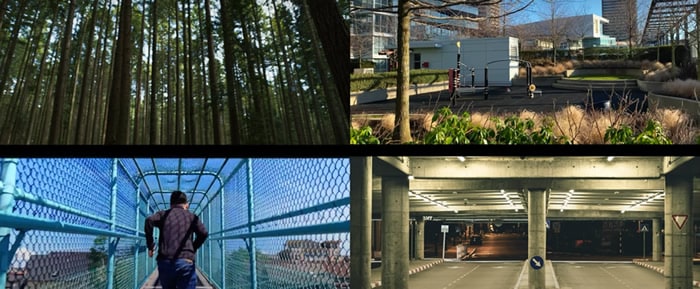
Location 4. Public Places
Public places are easily available and have many options, such as public parks, playgrounds, bridges, and public parking.
![]()
Note: During public shooting, ensure that the space is empty, and there should be no interruption of the public in filming the shots.
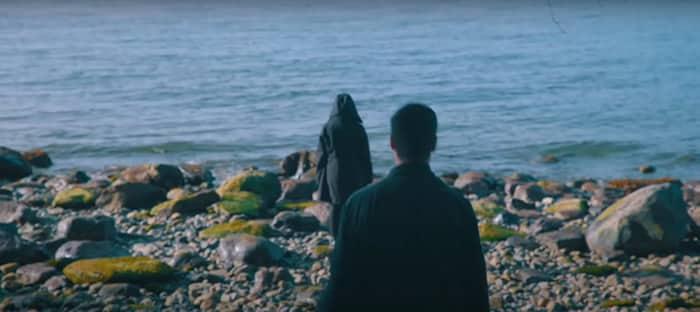
The weather is also a major factor when shooting a video, which you must check before the shoot days. After selecting and scouting the location, now it’s time to make a schedule which you’ll get in hand in the below lines!
Scheduling for the Music Video
If you have a big project and more scenes to shoot, it’s better to make a whole plan about each and everything. You have to make a schedule of using even a single light at a specific time and space. The following are the main considerations you should take care of!
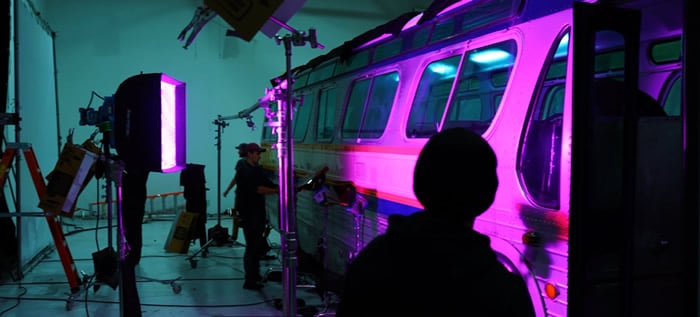
1. Pre-Rig Day
You need to come to the setup before the filming day to check the main things like electricity, measure exact spaces, check the lightning setup, loaded everything such as the bus, crew, and gears.
2. A Call Sheet
A call sheet is a daily shot list given to the cast and crew to follow the timelines, and it contains the phone number of everyone, their location, and the time to arrive on set. It also includes the nearest hospital, sunset, and sun-rising timing.
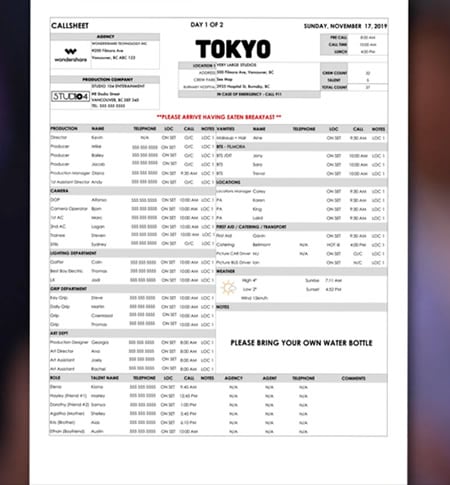
It consists of one to two pages according to shoot days and has a plan of everything that happens after the Pre-Rig day.
![]()
Note: When you wrap up for day 1, you have another call sheet for day 2, day 3, and so on!
3. Do Planning
You need to work efficiently and smartly to maintain everything according to the plan. You can cut the filming into halves to have a better lighting setup and character availability. On the shot day, you must change the lighting and rigging setup as little as possible.
Examples
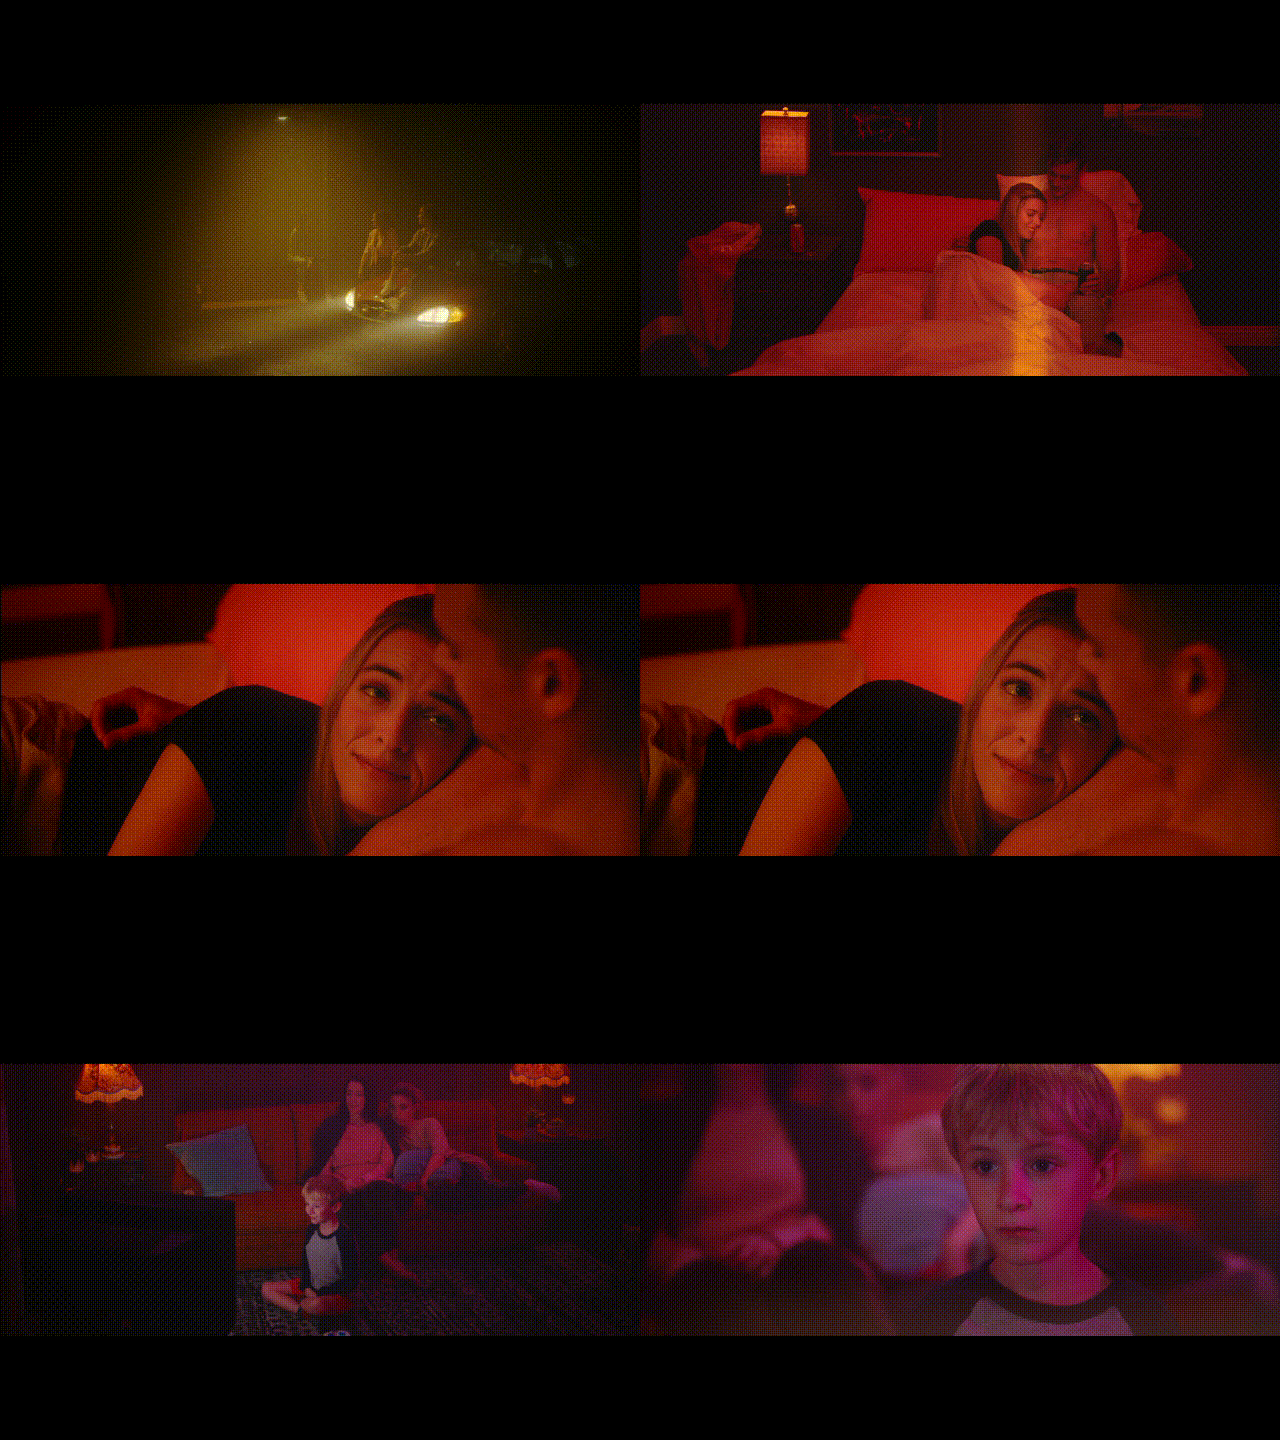
On day 1 of the Tokyo song, the filming is done in two halves; the first half day goes towards filming everything in the bus, and the other half day, there is a shoot of everything outside the bus.
While in day 2, there is a filming of every memory. For this, there are setups of rooms and homes for making perfect shots according to the requirements of a music video.
4. Take No Stress
You should not blow up and take stress during shoot day because it’ll obviously cause chaos in every little scene and give a bad impression to the music video. You just should work hard and get all done.
Conclusion
After checking and following the above tips for location scouting and scheduling, you’ll obviously come up with an amazing filming setup and music video. There is no need to worry, just get the whole planning and then do all scenes one after the other patiently.
Filming with people is not always bulky and flopping, but if you have a cooperative team and follow all the timelines of shooting. Then you’ll rock the music video!
A cross-platform for making videos anywhere for all creators! 
Why your video editing isn’t good enough? How about some creative inspo?
- 100 Million+ Users
- 150+ Countries and Regions
- 4 Million+ Social Media Followers
- 5 Million+ Stock Media for Use
* Secure Download

Alternate Ways of Location Scouting
If you don’t have enough budget to get a studio space, then you can easily shoot by selecting spaces that are in your use or available. These are the following locations you should regard!
Location 1. Your Home
You should go with the space available at your home to shoot, such as: on couches or in the bedroom, to give a good impression to your music video.
Location 2. Office Space
You can also make scenes of your music video in office space to better describe the work in the video.

Location 3. Outdoor Locations
For better daylight and illustrations in the music video, you can go with the outdoor location, which is free of cost.

Location 4. Public Places
Public places are easily available and have many options, such as public parks, playgrounds, bridges, and public parking.

![]()
Note: During public shooting, ensure that the space is empty, and there should be no interruption of the public in filming the shots.

The weather is also a major factor when shooting a video, which you must check before the shoot days. After selecting and scouting the location, now it’s time to make a schedule which you’ll get in hand in the below lines!
Scheduling for the Music Video
If you have a big project and more scenes to shoot, it’s better to make a whole plan about each and everything. You have to make a schedule of using even a single light at a specific time and space. The following are the main considerations you should take care of!
1. Pre-Rig Day
You need to come to the setup before the filming day to check the main things like electricity, measure exact spaces, check the lightning setup, loaded everything such as the bus, crew, and gears.

2. A Call Sheet
A call sheet is a daily shot list given to the cast and crew to follow the timelines, and it contains the phone number of everyone, their location, and the time to arrive on set. It also includes the nearest hospital, sunset, and sun-rising timing.

It consists of one to two pages according to shoot days and has a plan of everything that happens after the Pre-Rig day.
![]()
Note: When you wrap up for day 1, you have another call sheet for day 2, day 3, and so on!
3. Do Planning
You need to work efficiently and smartly to maintain everything according to the plan. You can cut the filming into halves to have a better lighting setup and character availability. On the shot day, you must change the lighting and rigging setup as little as possible.
Examples
On day 1 of the Tokyo song, the filming is done in two halves; the first half day goes towards filming everything in the bus, and the other half day, there is a shoot of everything outside the bus.
While in day 2, there is a filming of every memory. For this, there are setups of rooms and homes for making perfect shots according to the requirements of a music video.

4. Take No Stress
You should not blow up and take stress during shoot day because it’ll obviously cause chaos in every little scene and give a bad impression to the music video. You just should work hard and get all done.
Conclusion
After checking and following the above tips for location scouting and scheduling, you’ll obviously come up with an amazing filming setup and music video. There is no need to worry, just get the whole planning and then do all scenes one after the other patiently.
Filming with people is not always bulky and flopping, but if you have a cooperative team and follow all the timelines of shooting. Then you’ll rock the music video!
Also read:
- [New] Orbiting Imagery Advanced Methods for Drone Video Editing for 2024
- [Updated] In 2024, The Efficient Host's Guide to Online Meeting Planning
- [Updated] Mastering Video Direction on Instagram in Reverse
- 2024 Approved Mastering Netflix Recording Mac Edition - 6 Essential Steps
- Accelerate Your PC Performance on Windows 11 or 10 [Fixes Inside]
- Best VHS 80S Effects to Use in Video Editing
- Complete Guide For iPhone 12 mini Lock Screen
- Error Code 24 Explained: Ensuring Your Device Appears in Windows Systems WS 11, 8 or 7
- Explore with AKASO's EK7000: High-Quality, Economical Adventure Tool
- Fix Your CoD: Modern Warfare Voice Chat - A Comprehensive Solution
- Fixing Performance Lags & Stutter in Modern Warfare 2 on Windows Systems
- In 2024, Concoct Clever Caricatures
- In 2024, Top 10 Fingerprint Lock Apps to Lock Your Samsung Galaxy F34 5G Phone
- PUBG No Volume? Here's How You Can Get Game Audio Back!
- Solution to Stuttering Glitch in Mass Effect Legendary Anthology Released
- Solving Your Razer Mic Issues: Five Simple Solutions to Restore Audio Functionality
- Success Story: Escaping the Sea of Thieves Loading Screen Glitch
- The Ultimate Guide to the Best of the Best: Linksys WRT3200ACM and Its Open-Source Superiority
- Vyncs Link Analysis: Unrivaled Monitoring Capabilities Overshadowed by Puzzling Pricing Structures
- Title: In 2024, How to Make Random Letter Reveal Intro?
- Author: Chloe
- Created at : 2025-01-17 01:55:37
- Updated at : 2025-01-23 19:00:33
- Link: https://ai-editing-video.techidaily.com/in-2024-how-to-make-random-letter-reveal-intro/
- License: This work is licensed under CC BY-NC-SA 4.0.


