
:max_bytes(150000):strip_icc():format(webp)/free-language-exchange-websites-1357059-d87c92dbdba3429dbf17d51ba313b1ff.png)
In 2024, How to Use LUTs in VN Editor – Complete Guide and Best LUTs Download
How to Use LUTs in VN Editor – Complete Guide and Best LUTs Download
Hello and welcome to another article full of information and excitement. The topic of this article is LUT for the VN editor. So it will be exciting for those who want to use LUTs in their video to make them look nice and well. As we will discuss today that what is VN editor and how you can add LUTs to your videos using it on the devices it is compatible for. Moreover, where you can download some fantastic LUTs like moody LUTs, which help your videos to look nice, and which software you should use for this purpose if you are running a device on which the VN editor is not compatible. So let’s begin!
Part 1. What is VN editor?
VN editor is one of the best choices for video editing on mobiles and Mac. Fast editing, transitions, effects, filters, colors, subtitles, music, and many other features make the VN video editing app a great tool for producing and editing videos. It aims to make editing shorter and more feature-rich, empowering everyone to take control of their own lives. You cannot only produce great videos but good films as well. In the following, we will discuss how you can add LUTs to your videos using it.

Part 2. How to use LUTs in VN editor?
First, we must know that it is compatible with which platforms. So, it is now available for Android, iOS, and Mac OS only. However, you can also use it on Windows with some Android or iOS emulators, but it is not a very continent way in our suggestions. Even after doing this, it does not work well on your Windows. Maybe you will face some glitches or malfunctioning problems. So it is better to use it on only those platforms for which it is primarily available. Please read the instructions below since we will go through how to use LUTs in it later on.
On Mac:
First of all, we will learn how you can do it on Mac:
- Download the VN Editor for Mac and open it.
- Add your video and then tap the filters option.
- Now choose custom filters and then select the LUTs pack.

- Select the desired LUT and apply.
On Mobile:
Secondly, we will discuss how we can do this on our mobiles (Android or iOS). The procedure on both devices (Android or iOS) is almost comparable. Therefore, we will discuss the steps from the perspective of both of these here:
- First, download the VN editor from your mobile app store (Android or iOS) and the LUTs pack you want to use in your video.
- After downloading them on your mobile, open the VN editor application.
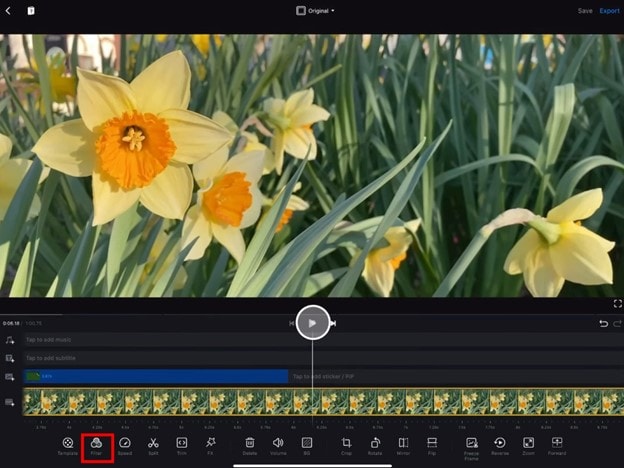
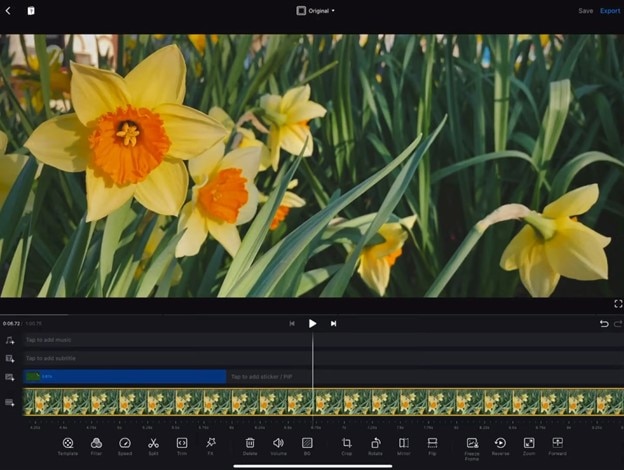
- Create a new project and add your video to it.

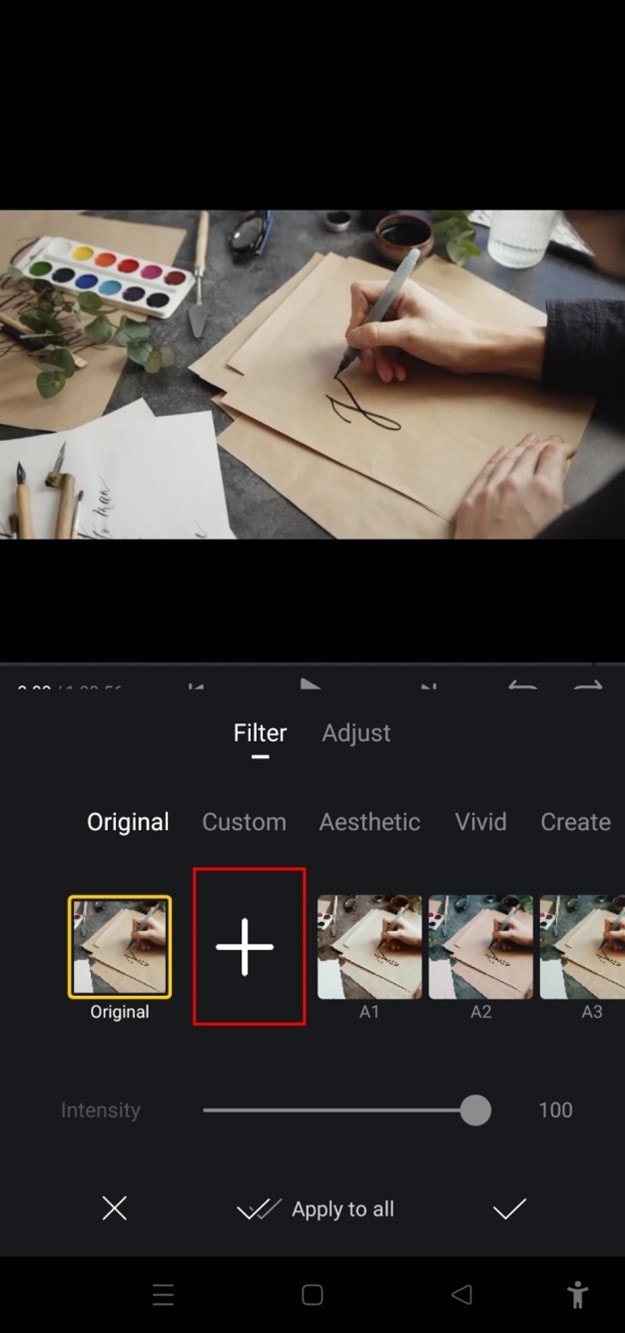
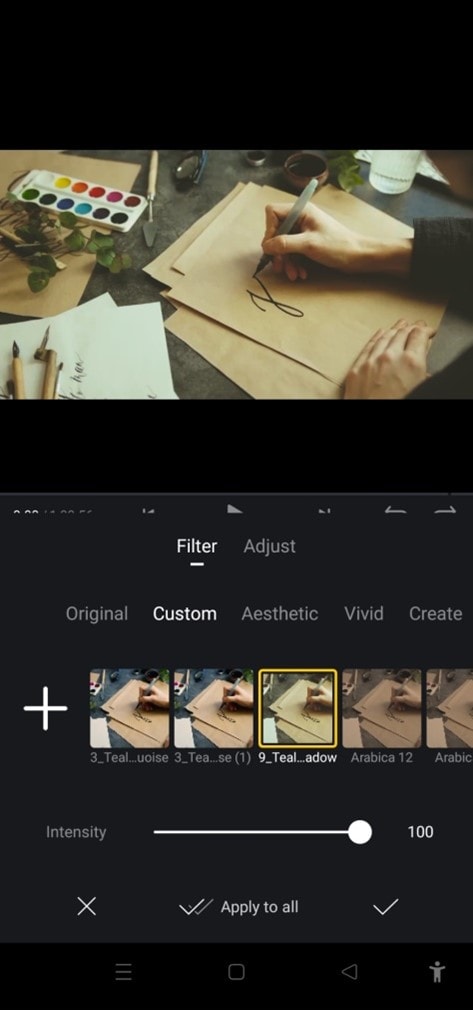
- Then click on the Filters option and select add external or custom filters option next to the existing filters.
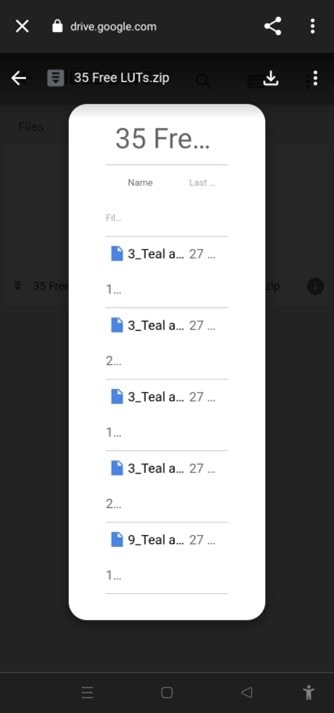
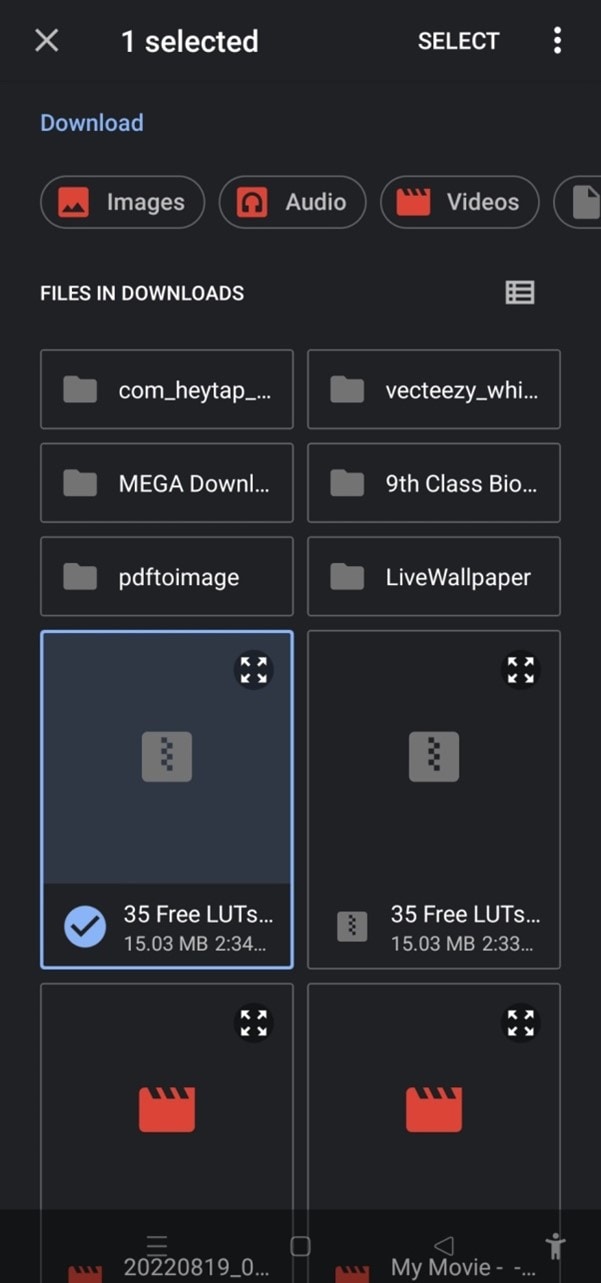
- It will take you to the File manager of your mobile, from which you have to find the folder in which you have stored your LUTs.
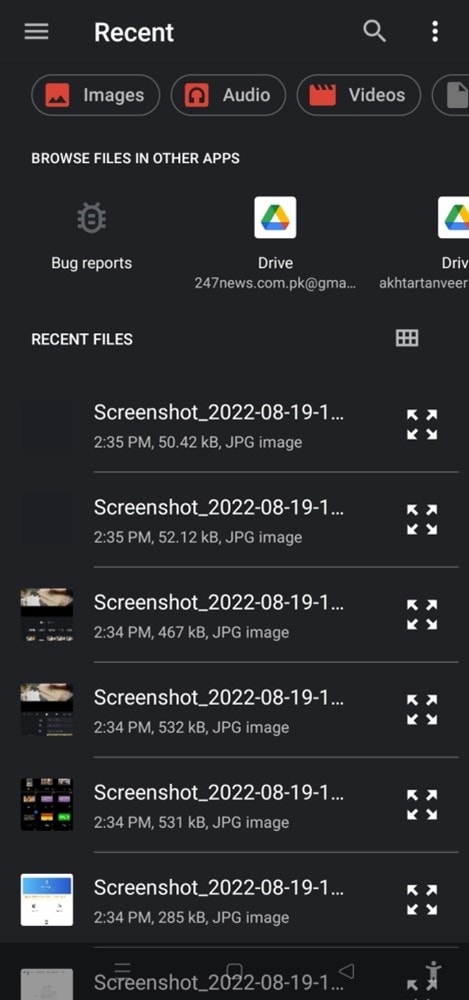
- After finding them, you can select those LUTs you want to use in your video and then click on the done or select button.
- Your downloaded LUTs start showing in the VN editor, and you can use them in your videos as you want.
Part 3. Best LUTs resource for VN video editor
1. Presets Store
Presets Store is an online platform that helps you with various Filters, LUTs, and other presets. So you can download LUTs for your videos for the VN editor using it. However, it’s not a free service. You have to pay for the LUTs you want to download from here. You can visit their YouTube channel to follow the latest LUTs, Filters and other presets on this platform.
2. Apna Editz
Apna Editz is another online platform you can use for this purpose. It also provides you with a fantastic variety of Presets like LUTs, Filters, and many other similar effects, which you can use in your video using the VN editor. The main Pros of this recommendation are that it’s a free website. So you can download LUTs for your videos from it for free. Keep an eye on their YouTube channel to be updated about the latest LUTs.
3. Lut Preset
Lut Preset is another alternative to all the above ones. You can get almost all your favorite LUTs for VN editor for free here and then use them in your videos as you want. They also share the latest LUTs on their YouTube Channel.
4. Pencil Hub
Pencil Hub is also a good option in this concern. However, it does not have too much variety of VN LUTs, but you can still use it to download some of the best LUTs for VN editors. To get informed of their every new effect and LUTs, their YouTube channel is the primary source.
5. YRP EDITZ
YRP ETIDZ is another good option if you are still looking for some fantastic VN LUTs. They, too not have a large variety of presets and LUTs. However, if you want some most commonly used LUTs for VN Editor, then they are a good option. You’ll notify of their most website updates by checking their YouTube channel.
Part 4. How to add LUTs to the best alternative to the VN editor?
VN Editor is undoubtedly an excellent choice to add LUTs to your videos. However, the VN editor is best suitable for mobile devices. To enhance your LUTs and effects, it would be great if you used some desktop software. Wondershare Filmora offers a great variety of built-in LUTs to choose from. Let’s look at how we can use Filmora to add LUTs:
- Add your video and tap the tools, then click the Color option.
- Now select the Color Correction option and then choose 3D LUT.
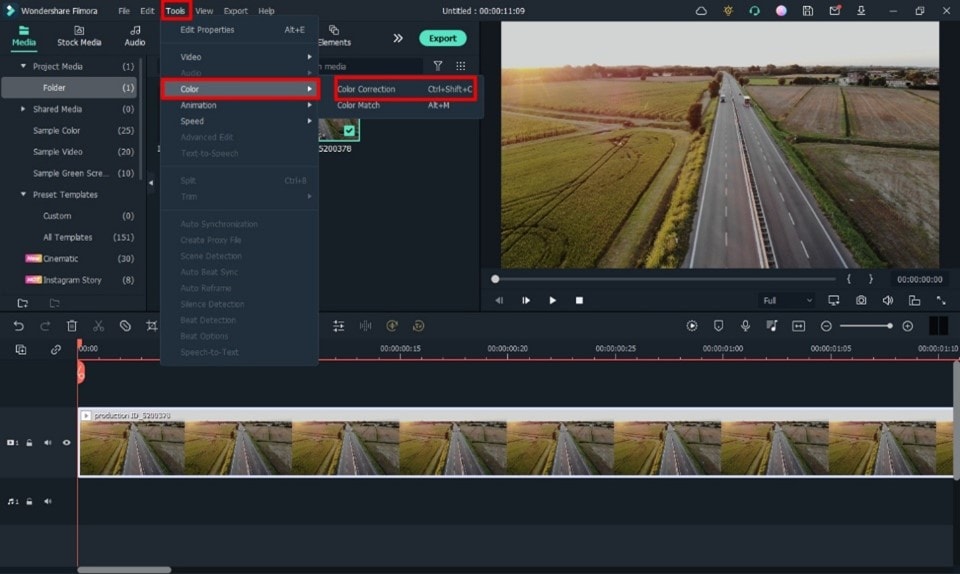
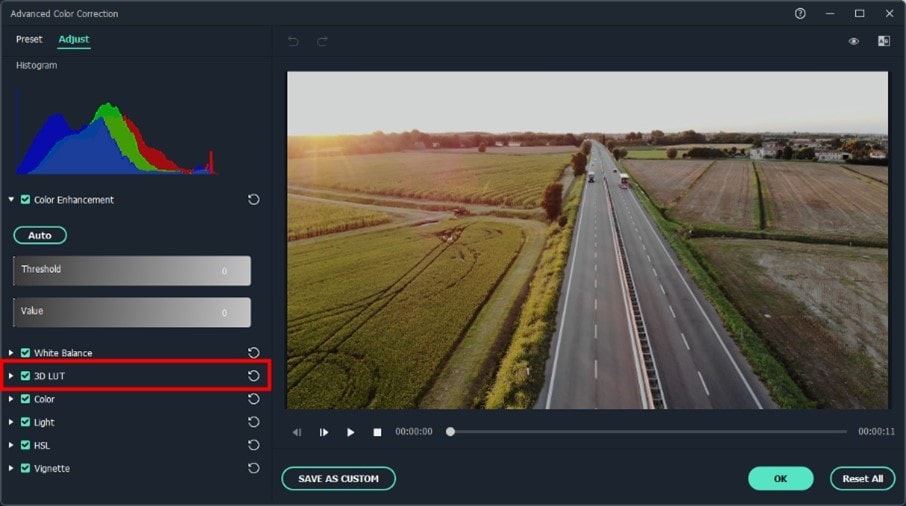
- Click the drop-down menu and select the Load new LUT option. Here you can import other downloaded preset LUTs to use
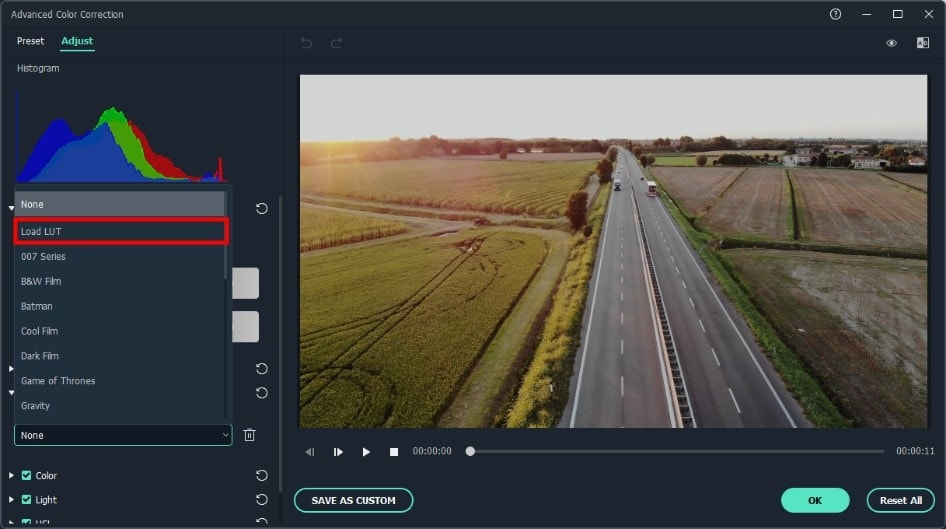
- Choose the LUT and click OK. Your new fantastic video is ready now.

Closing Thoughts
This post recommends several lut resources and demonstrates how to import them if you are a devoted user of VN editor and want to learn how to utilize it for video color grading. The more potent desktop editor Wondershare Filmora, which offers a range of built-in LUT sources and supports color grading settings, is of course recommended if you want to take your videos to the next level. Thanks for reading.
Free Download For Win 7 or later(64-bit)
Free Download For macOS 10.14 or later
2. Apna Editz
Apna Editz is another online platform you can use for this purpose. It also provides you with a fantastic variety of Presets like LUTs, Filters, and many other similar effects, which you can use in your video using the VN editor. The main Pros of this recommendation are that it’s a free website. So you can download LUTs for your videos from it for free. Keep an eye on their YouTube channel to be updated about the latest LUTs.
3. Lut Preset
Lut Preset is another alternative to all the above ones. You can get almost all your favorite LUTs for VN editor for free here and then use them in your videos as you want. They also share the latest LUTs on their YouTube Channel.
4. Pencil Hub
Pencil Hub is also a good option in this concern. However, it does not have too much variety of VN LUTs, but you can still use it to download some of the best LUTs for VN editors. To get informed of their every new effect and LUTs, their YouTube channel is the primary source.
5. YRP EDITZ
YRP ETIDZ is another good option if you are still looking for some fantastic VN LUTs. They, too not have a large variety of presets and LUTs. However, if you want some most commonly used LUTs for VN Editor, then they are a good option. You’ll notify of their most website updates by checking their YouTube channel.
Part 4. How to add LUTs to the best alternative to the VN editor?
VN Editor is undoubtedly an excellent choice to add LUTs to your videos. However, the VN editor is best suitable for mobile devices. To enhance your LUTs and effects, it would be great if you used some desktop software. Wondershare Filmora offers a great variety of built-in LUTs to choose from. Let’s look at how we can use Filmora to add LUTs:
- Add your video and tap the tools, then click the Color option.
- Now select the Color Correction option and then choose 3D LUT.
- Click the drop-down menu and select the Load new LUT option. Here you can import other downloaded preset LUTs to use
- Choose the LUT and click OK. Your new fantastic video is ready now.
Closing Thoughts
This post recommends several lut resources and demonstrates how to import them if you are a devoted user of VN editor and want to learn how to utilize it for video color grading. The more potent desktop editor Wondershare Filmora, which offers a range of built-in LUT sources and supports color grading settings, is of course recommended if you want to take your videos to the next level. Thanks for reading.
Free Download For Win 7 or later(64-bit)
Free Download For macOS 10.14 or later
In This Article, We Are Going to Learn the Simplest Procedure on How to Cut And/Or Trim Videos Using VLC Media Player. Each Step Is Carefully Explained, with Screenshots Attached
Other than playing videos and music, VLC Media Player can also be used as a video editing tool. While advanced video editing requires unconventional and powerful video editing software, VLC offers a simpler and easy-to-learn process of cutting and/or trimming videos.
You can cut a section of your video and make shorter video clips. This means that you can now get rid of parts of a video that you do not need and preserve those that you like. VLC automatically saves the video clips made, so you do not have to save them again.
In this article, we are going to learn the simplest procedure on how to cut and/or trim videos using VLC Media Player. Each step is carefully explained, with screenshots attached.
To Cut Video Using VLC Media Player
- Download VLC Media Player
You need to have the app before using it. To download it, visit Google Play Store or any other suitable app, search and download. There are a variety of versions that is, 32-bit, 64-bit and Windows ARM. You may as well narrow down your search to the version of your gadget, be it Android, iOS, Linux or Windows.
- Install and Open VLC Media Player
The installation process is simple. You click on the icon indicating ‘install’ then open. On opening, you will come across a page that looks like the one attached below.

This is the dashboard of the VLC Media Player.
- Select the file you would like to cut
On the top of the screen is the menu with ‘Media’ being the first on the far left. On clicking the ‘Media’ button, a drop-down menu will appear. Select the first option, ‘Open File’ to access your files. From the dialogue box that appears, locate your video (the one you would like to cut), select it then click to open. The video will start playing.

- Click on Advanced Controls (View > Advanced Controls)
Some videos will play automatically while others will wait for an action. In case your video plays automatically, it is advisable that you pause it.
On the menu is a tab labelled ‘View’. Choose the tab, click open it and on the drop-down menu, select ‘Advanced Options’.

On selecting ‘Advanced Options’, a red button will appear at the bottom-left corner of the VLC. This is the record button.

Its purpose is to indicate the recording of the section of the video that you would like to cut.
- Click to Cut or Trim
If you had paused your video, you can play it at this stage. If you do not want to cut/trim your video from the start, scroll to the point from which you would like to cut it. Click on the red button for the recording to start. If the video does not play automatically, click to play.
After the video has played till the point where you would like to end, click on the red button again to stop the recording. The cut section will be automatically saved on the videos’ folder on C:\Users\Username\Videos.
An easier way to cut videos with Wondershare Filmora
Wondershare Filmora Video Editor is an alternative video editor. Unlike VLC Media Player, Filmora gives you more options. It allows you to split, trim, edit, combine, and crop a video, among others. It also gives you room to add footnotes, a variety of transitions, lower thirds, among other features. You can as well resize your video and enhance its quality.
For Win 7 or later (64-bit)
For macOS 10.14 or later
To Cut/Trim Videos with Wondershare Filmora:
- Drag and Drop the Video
Assuming that you have already downloaded and installed Wondershare Filmora app, click to open. There are two ways through which you can locate your video.
One, you can opt to drag and drop the video from its location to the app’s timeline. Secondly, you can right click on the space at the top left then select the video to be edited from the dialogue box that will appear.

- Trimming the video
After dropping the video on the timeline, it is likely to take up a lot of space, especially if it is long.
To trim the video from the beginning, place your cursor at the starting point and wait for the pointer to appear. Then move the point forward. To trim from the end, place the cursor at that point, hold and move the pointer forward till the required point.


Trimming the video does not mean that you lose the parts. It is more like shortening it to fit in place.
- Cutting the video
Unlike trimming, cutting involves getting rid of a section of the video completely. To do so, you need to first of all isolate that section.
With the video on the timeline, move and point your cursor at the starting point of the video and click on the scissors icon at the top. Then move it to the end of the video section and click on the scissors icon again. By so doing, you will have selected that section.
Once the section has been selected, right click on the video, select and click to delete. You can then drag the remaining parts to make them one.

After cutting or trimming, you can choose to add several effects to the video. Transitions, watermarks, cropping, resizing, ripple effects among others are some of the changes you could make. All these appear on the menu at the top.
- Save and/or Import your video
The final step is saving or importing your file to prevent its loss. By clicking on the ‘Import’ button, you save the file to the Media Library. By selecting ‘save as’, you select the location where you want to store your file.

Conclusion
There are so many video editors, each with different features. Some are simple to use while others will require advanced software to operate. Whether you use VLC Media Player or Wondershare Filmora, the results will be the same. The difference comes in where you have the knowledge and skills to use one app better than the other one.
The above steps on how to use both VLC Media Player and Wondershare Filmora will guide you through the whole process. It is said that, ‘practice makes perfect’. So yes, keep practicing and putting these skills into use. Sooner or later you will be an expert!
This is the dashboard of the VLC Media Player.
- Select the file you would like to cut
On the top of the screen is the menu with ‘Media’ being the first on the far left. On clicking the ‘Media’ button, a drop-down menu will appear. Select the first option, ‘Open File’ to access your files. From the dialogue box that appears, locate your video (the one you would like to cut), select it then click to open. The video will start playing.
- Click on Advanced Controls (View > Advanced Controls)
Some videos will play automatically while others will wait for an action. In case your video plays automatically, it is advisable that you pause it.
On the menu is a tab labelled ‘View’. Choose the tab, click open it and on the drop-down menu, select ‘Advanced Options’.
On selecting ‘Advanced Options’, a red button will appear at the bottom-left corner of the VLC. This is the record button.
Its purpose is to indicate the recording of the section of the video that you would like to cut.
- Click to Cut or Trim
If you had paused your video, you can play it at this stage. If you do not want to cut/trim your video from the start, scroll to the point from which you would like to cut it. Click on the red button for the recording to start. If the video does not play automatically, click to play.
After the video has played till the point where you would like to end, click on the red button again to stop the recording. The cut section will be automatically saved on the videos’ folder on C:\Users\Username\Videos.
An easier way to cut videos with Wondershare Filmora
Wondershare Filmora Video Editor is an alternative video editor. Unlike VLC Media Player, Filmora gives you more options. It allows you to split, trim, edit, combine, and crop a video, among others. It also gives you room to add footnotes, a variety of transitions, lower thirds, among other features. You can as well resize your video and enhance its quality.
For Win 7 or later (64-bit)
For macOS 10.14 or later
To Cut/Trim Videos with Wondershare Filmora:
- Drag and Drop the Video
Assuming that you have already downloaded and installed Wondershare Filmora app, click to open. There are two ways through which you can locate your video.
One, you can opt to drag and drop the video from its location to the app’s timeline. Secondly, you can right click on the space at the top left then select the video to be edited from the dialogue box that will appear.
- Trimming the video
After dropping the video on the timeline, it is likely to take up a lot of space, especially if it is long.
To trim the video from the beginning, place your cursor at the starting point and wait for the pointer to appear. Then move the point forward. To trim from the end, place the cursor at that point, hold and move the pointer forward till the required point.
Trimming the video does not mean that you lose the parts. It is more like shortening it to fit in place.
- Cutting the video
Unlike trimming, cutting involves getting rid of a section of the video completely. To do so, you need to first of all isolate that section.
With the video on the timeline, move and point your cursor at the starting point of the video and click on the scissors icon at the top. Then move it to the end of the video section and click on the scissors icon again. By so doing, you will have selected that section.
Once the section has been selected, right click on the video, select and click to delete. You can then drag the remaining parts to make them one.
After cutting or trimming, you can choose to add several effects to the video. Transitions, watermarks, cropping, resizing, ripple effects among others are some of the changes you could make. All these appear on the menu at the top.
- Save and/or Import your video
The final step is saving or importing your file to prevent its loss. By clicking on the ‘Import’ button, you save the file to the Media Library. By selecting ‘save as’, you select the location where you want to store your file.
Conclusion
There are so many video editors, each with different features. Some are simple to use while others will require advanced software to operate. Whether you use VLC Media Player or Wondershare Filmora, the results will be the same. The difference comes in where you have the knowledge and skills to use one app better than the other one.
The above steps on how to use both VLC Media Player and Wondershare Filmora will guide you through the whole process. It is said that, ‘practice makes perfect’. So yes, keep practicing and putting these skills into use. Sooner or later you will be an expert!
Create Kinetice Typography Text Effect in Filmora
Preparation
What you need to prepare:
- A computer (Windows or macOS)
- Your video materials.
- Filmora video editor
Step 1
Go ahead and download the Filmora video editor before all else. The program will install and start automatically. Just hit “Download” and then “Install”.
Step 2
Once the program starts, open a New Project. Then, go to “Sample Color” and drag any color you want to the Timeline.

Step 3
Now, head over to the “Titles” tab and drag the Basic Title to the Timeline. Place it above the Sample Color clip.

Step 4
Right-click on the Title clip in the Timeline and select Edit Properties from the menu. From there, click on “ADVANCED” to open the advanced settings. Here, you can change the font, adjust the text size, and place your titles wherever you want on the screen.

Step 5
Now, start with the second text layer from the bottom and move it 5 frames forward. Move each text layer above 5 layers forward from the previous layer. This will display each word a few milliseconds after the previous one.
When you’re done, click OK.

Step 6
Export the Timeline to save your text animation as a new clip.

Step 7
Now, delete all the clips from the Timeline and import the text video you just exported. Drag it to the Timeline.

Step 8
Right-click on the clip in the Timeline and go to Edit Properties.
Step 9
Click on the Animation tab. Then, go to the Customize tab. Here, change the Scale setting to 120%.

Step 10
Next, move the Playhead to the end of the clip in the timeline. Then, reset the Scale and click OK.

Step 11
Watch the final preview. Then, Render and Export the video and you’re done. Congratulations.
Summary
What you’ve learned:
- How to create a kinetic movement effect on text in Filmora
- How to adjust the scale of a video in Filmora
- Adjust and manipulate text layers
What you need to prepare:
- A computer (Windows or macOS)
- Your video materials.
- Filmora video editor
Step 1
Go ahead and download the Filmora video editor before all else. The program will install and start automatically. Just hit “Download” and then “Install”.
Step 2
Once the program starts, open a New Project. Then, go to “Sample Color” and drag any color you want to the Timeline.
Step 3
Now, head over to the “Titles” tab and drag the Basic Title to the Timeline. Place it above the Sample Color clip.
Step 4
Right-click on the Title clip in the Timeline and select Edit Properties from the menu. From there, click on “ADVANCED” to open the advanced settings. Here, you can change the font, adjust the text size, and place your titles wherever you want on the screen.
Step 5
Now, start with the second text layer from the bottom and move it 5 frames forward. Move each text layer above 5 layers forward from the previous layer. This will display each word a few milliseconds after the previous one.
When you’re done, click OK.
Step 6
Export the Timeline to save your text animation as a new clip.
Step 7
Now, delete all the clips from the Timeline and import the text video you just exported. Drag it to the Timeline.
Step 8
Right-click on the clip in the Timeline and go to Edit Properties.
Step 9
Click on the Animation tab. Then, go to the Customize tab. Here, change the Scale setting to 120%.
Step 10
Next, move the Playhead to the end of the clip in the timeline. Then, reset the Scale and click OK.
Step 11
Watch the final preview. Then, Render and Export the video and you’re done. Congratulations.
Summary
What you’ve learned:
- How to create a kinetic movement effect on text in Filmora
- How to adjust the scale of a video in Filmora
- Adjust and manipulate text layers
Detailed Tutorial to Merge Videos in VLC Media Player
Sometimes, when working on a project, we really need to combine several videos - this way some content needs to be conveyed, there are shots that, when neatly sorted and merged together, really create visual and content value which we aspire to make; The process becomes more enjoyable if we work on the videos produced by ourselves, or if the work is to be done for our side project. People always take special care of their own work, and the same can be emphasized freely about the editing as well - about the packaging with which we have to deliver our videos to the audience. Even in the absence of an audience, maybe we want to make a kind of video collage for ourselves, our children, or in general, for the family to make delightful memories?
Of course, not everyone who has taken a camera or a mobile phone to take videos at least one time, even so, for family and friends, has the experience of editing and making various manipulations. However, the function of merging videos in various editing programs or on online platforms is so simple that it can be learned in just a few minutes, without the help of other people, and with a kind of small, though very useful result at the same time.
One of the programs where videos can be uploaded is VLC Media Player, which is a free-to-use, robust, and feature-packed software that plays a wide range of audio, image, and video files. It can play multimedia files directly from extractable devices or the PC. The program is unique, as it can stream from popular websites like Disney +, Hulu, Gaia, and Netflix. VLC Multimedia Player also accepts live video from PlayStation Live, Xbox Live, Facebook, Twitter, and YouTube. While most competing programs display advertisements, VLC Player does not, as it receives support from a non-profit organization.

Interestingly, we can, as though with the help of a magic wand, turn this particular video player into video editing software. When one computer program delivers too many functions, it might make us think of the situation where one person claims to serve ten professions at the same time - there is a mood that they will not be good in any of them. It’s not true with VLC Player, which, from experience, seems to be both a good “player” as well as a fairly user-friendly editing software with many interesting features and functions.
Before we move on to video streaming, let’s look at two features that we can use in VLC player:
In the player, right when our video clip starts to play, we may find that the footage is taken vertically instead of horizontally! This is not a nightmare just for video enthusiasts. If you don’t know how to rotate the video, then you have to rotate your head 90 degrees, and at this time you can not even get pleasure from watching, not to mention that it can even cause your neck to lock up. VLC Player took care of that - in the top panel, just click on Tools, then select Effects & Filters. In the opened window, we find Video Effects, select Geometry and check the Rotate option - so, the whole 360 degrees are at our disposal!
Sometimes it happens that we watch the video, we are crazy about one part of it, and the other part of it seems to spoil everything! Even if we are ready to publish the raw material on social media or just save it for ourselves, we just don’t want some parts of the video to be there. So, it can be said - we are not satisfied with the full version and we wish to cut our clip and/or reduce its timeframe. VLC Player solves this problem “without any problem” - we find the View in the top panel, then we demand the cursor to aim for Advanced Controls button. As a result, a sort of video editor will appear, with its red record button on which we will click and the video will play until we reach the point where we want to split the footage. The cut video will be automatically saved in My Computer’s My Video folder.
How to Merge Multiple Videos in VLC Media Player
Here we are, now the main topic of interest of this article - how to put together several videos so that they become one? This case, unlike other possibilities we discussed above, is more complicated, so we will study this feature step by step .
Technique one:
- Step one:
Open VLC media player.

Probably, you have already decided exactly which files you want to merge, so choose Open Multiple Files…

In the opened window, click on Add in the File tab.

Select the desired clips from the newly opened window (selecting order matters, because it dictates which clips will come first and which ones will be next in the finished version), then click Open.

- Step two:
The selected videos are shown in the File Selection list. At the bottom of the window, click the Arrow button next to the Play button, where you need to select Convert.

In the Profile, it is desirable to specify the following format: Video - + MP3 (MP4), and below you can choose the Destination file - the location where you want to save the merged video. Also, to find the edited video easily, check the following: Append ‘-converted’ to file name. Click on Start. Wait until it is done - then you can play the video.

Technique two:
- Create a New Folder and move the videos that you would like to merge Rename the videos (e.g. to 1, 2 etc.).

- Create a new text file. Copy and paste this line below:
vlc_location video1.mp4 video2.mp4 –sout “#gather:std{access=file,dst=final_file_name.mp4}” –sout-keep

- Type VLC in the taskbar search and right-click on the app. Choose Open File location.

Right-click on the app and choose Properties. A new window will be opened, where you need to go to Target. Select and copy the line.

Go to the text document file. Remove vlc_location and paste the copied text instead. Change the names of the video to match the names in the folder.

- Open the folder with videos. Click on the address line. Type cmd and press Enter.

sA new window will open. Cope the line from the text file and paste it into cmd window; then, click on Enter.

- VLC player will open and will play the merged video file.

An Easier Way to Merge Videos in A Few Clicks
It’s true that merging videos in VLC Media Player takes quite a few steps, so to speak. But is this the only editing program in which a similar operation can be performed? Of course not. Therefore, in our article, we decided to offer you an alternative, where you can also easily merge the videos. This is the famous Filmora Video Editor , a software that is one of the easiest and most convenient to work with, especially for those who want to edit videos without having much experience in “complicated” software before. So again, step by step guideline on how to put together our video clips in Wondershare Filmora.
For Win 7 or later (64-bit)
For macOS 10.14 or later
- Open the program.
- Choose Import Media Files Here.

- Choose your

- We can click and drag, essentially, “insert” a video in a sequence below. The Linear Timeline allows us to understand exactly when a video clip ends and when a new one starts.

- Accordingly, we can make one video “sit” next to another. If we want or need it, we will add the third video clip, fourth, and so on.

- We can view the entire video and save the video afterwards.
- Start to save video - we make sure the result is exactly what we wanted, find the Export button above the timeline and click on it.

- In the opened window, on the left side, to be precise, if we observe well, we can already choose in which format we want to save our clip. On the right we can indicate what name we want to give to our video; The location where we want to store it; Also, we see the resolution (which we can modify freely after clicking on Settings); Size; Duration.

- In Settings, we can decide how much quality the video should have, how many kbps will be the Bit Rate, how many fps the Frame Rate should be, etc., but most likely, beginners will not need to change all this.

- After selecting everything, right-click on the Export button in the lower right corner of the window and the program will start saving the material.


Filmora 9, though, works a little differently.
- In the Import dropdown menu, select Import with instant cutting tool…

This will open the Filmora Instant Cutter window with two options - Trim and Merge. Since we need Merge in this case, this is what we choose.

- Then Open File, which will allow you to select multiple clips. Select the desired video clips and to Import, click Open.

- The window will show the files we selected and the entire video, and to save it, we click on Export.

- Specify File name, Save to (location), When done - the latter is what the program should do after the material is exported, e.g. open the containing folder. The export window also shows the approximate size of the footage.

- After hitting on Ok, the project will be saved, which will happen very quickly, since the program does not decode and encode the material.


That’s it! In this article, we have tried to teach you how to use VLC Media Player as a video editor software, what features we can use and, most importantly, how to merge multiple videos in this dual program; We also learned an alternative way of how we can combine different video clips with the help of Wondershare Filmora. The choice is yours, the main thing is to know all the alternatives and find the most time and energy saving, preferable option for you personally!
Interestingly, we can, as though with the help of a magic wand, turn this particular video player into video editing software. When one computer program delivers too many functions, it might make us think of the situation where one person claims to serve ten professions at the same time - there is a mood that they will not be good in any of them. It’s not true with VLC Player, which, from experience, seems to be both a good “player” as well as a fairly user-friendly editing software with many interesting features and functions.
Before we move on to video streaming, let’s look at two features that we can use in VLC player:
In the player, right when our video clip starts to play, we may find that the footage is taken vertically instead of horizontally! This is not a nightmare just for video enthusiasts. If you don’t know how to rotate the video, then you have to rotate your head 90 degrees, and at this time you can not even get pleasure from watching, not to mention that it can even cause your neck to lock up. VLC Player took care of that - in the top panel, just click on Tools, then select Effects & Filters. In the opened window, we find Video Effects, select Geometry and check the Rotate option - so, the whole 360 degrees are at our disposal!
Sometimes it happens that we watch the video, we are crazy about one part of it, and the other part of it seems to spoil everything! Even if we are ready to publish the raw material on social media or just save it for ourselves, we just don’t want some parts of the video to be there. So, it can be said - we are not satisfied with the full version and we wish to cut our clip and/or reduce its timeframe. VLC Player solves this problem “without any problem” - we find the View in the top panel, then we demand the cursor to aim for Advanced Controls button. As a result, a sort of video editor will appear, with its red record button on which we will click and the video will play until we reach the point where we want to split the footage. The cut video will be automatically saved in My Computer’s My Video folder.
How to Merge Multiple Videos in VLC Media Player
Here we are, now the main topic of interest of this article - how to put together several videos so that they become one? This case, unlike other possibilities we discussed above, is more complicated, so we will study this feature step by step .
Technique one:
- Step one:
Open VLC media player.
Probably, you have already decided exactly which files you want to merge, so choose Open Multiple Files…
In the opened window, click on Add in the File tab.
Select the desired clips from the newly opened window (selecting order matters, because it dictates which clips will come first and which ones will be next in the finished version), then click Open.
- Step two:
The selected videos are shown in the File Selection list. At the bottom of the window, click the Arrow button next to the Play button, where you need to select Convert.
In the Profile, it is desirable to specify the following format: Video - + MP3 (MP4), and below you can choose the Destination file - the location where you want to save the merged video. Also, to find the edited video easily, check the following: Append ‘-converted’ to file name. Click on Start. Wait until it is done - then you can play the video.
Technique two:
- Create a New Folder and move the videos that you would like to merge Rename the videos (e.g. to 1, 2 etc.).
- Create a new text file. Copy and paste this line below:
vlc_location video1.mp4 video2.mp4 –sout “#gather:std{access=file,dst=final_file_name.mp4}” –sout-keep
- Type VLC in the taskbar search and right-click on the app. Choose Open File location.
Right-click on the app and choose Properties. A new window will be opened, where you need to go to Target. Select and copy the line.
Go to the text document file. Remove vlc_location and paste the copied text instead. Change the names of the video to match the names in the folder.
- Open the folder with videos. Click on the address line. Type cmd and press Enter.
sA new window will open. Cope the line from the text file and paste it into cmd window; then, click on Enter.
- VLC player will open and will play the merged video file.
An Easier Way to Merge Videos in A Few Clicks
It’s true that merging videos in VLC Media Player takes quite a few steps, so to speak. But is this the only editing program in which a similar operation can be performed? Of course not. Therefore, in our article, we decided to offer you an alternative, where you can also easily merge the videos. This is the famous Filmora Video Editor , a software that is one of the easiest and most convenient to work with, especially for those who want to edit videos without having much experience in “complicated” software before. So again, step by step guideline on how to put together our video clips in Wondershare Filmora.
For Win 7 or later (64-bit)
For macOS 10.14 or later
- Open the program.
- Choose Import Media Files Here.
- Choose your
- We can click and drag, essentially, “insert” a video in a sequence below. The Linear Timeline allows us to understand exactly when a video clip ends and when a new one starts.
- Accordingly, we can make one video “sit” next to another. If we want or need it, we will add the third video clip, fourth, and so on.
- We can view the entire video and save the video afterwards.
- Start to save video - we make sure the result is exactly what we wanted, find the Export button above the timeline and click on it.
- In the opened window, on the left side, to be precise, if we observe well, we can already choose in which format we want to save our clip. On the right we can indicate what name we want to give to our video; The location where we want to store it; Also, we see the resolution (which we can modify freely after clicking on Settings); Size; Duration.
- In Settings, we can decide how much quality the video should have, how many kbps will be the Bit Rate, how many fps the Frame Rate should be, etc., but most likely, beginners will not need to change all this.
- After selecting everything, right-click on the Export button in the lower right corner of the window and the program will start saving the material.
Filmora 9, though, works a little differently.
- In the Import dropdown menu, select Import with instant cutting tool…
This will open the Filmora Instant Cutter window with two options - Trim and Merge. Since we need Merge in this case, this is what we choose.
- Then Open File, which will allow you to select multiple clips. Select the desired video clips and to Import, click Open.
- The window will show the files we selected and the entire video, and to save it, we click on Export.
- Specify File name, Save to (location), When done - the latter is what the program should do after the material is exported, e.g. open the containing folder. The export window also shows the approximate size of the footage.
- After hitting on Ok, the project will be saved, which will happen very quickly, since the program does not decode and encode the material.
That’s it! In this article, we have tried to teach you how to use VLC Media Player as a video editor software, what features we can use and, most importantly, how to merge multiple videos in this dual program; We also learned an alternative way of how we can combine different video clips with the help of Wondershare Filmora. The choice is yours, the main thing is to know all the alternatives and find the most time and energy saving, preferable option for you personally!
Also read:
- New Are You Looking for the Best Way to Add Subtitles to Your Video? The Top SRT File Creators Can Help You Do That
- Updated In 2024, 15 Camera Shake Preset for Adobe Premiere Pro
- New Top 5 Ways To Convert Hdr To Sdr Videos
- In 2024, This Article Talks About Pixel Art Wallpapers. It Gives Examples of Different Pixel Art to Show You How to Customize Your Own Pixel Art Wallpapers, and How to Make a Pixel Art Gif on Filmora
- Best Practical Tips to Improve Your Lighting in the Sun
- New Easy Ways to Remove Motion Blur In Photoshop
- New Split a Video in the Lightworks Step by Step
- In 2024, Guide to Synchronizing Your Audio And Videos Properly?
- New We All Know Very Well that a 1-Second-Video Has Several Images in a Single Row. Even with iMovie Time-Lapse, You Can Create This! So, without Any Further Ado, Lets Learn How to Make a Timelapse in iMovie
- New In 2024, Demystifying the Vectorscope A Comprehensive Guide for Premiere Pro Color Correction
- New All Things About Adding Effects In Kinemaster for 2024
- Updated Difference Between Time Lapse and Hyperlapse
- Do You Want Your Videos to Look Like Danny Gevirtz? You Can Use some Inspired Presets. There Are Different Danny Gevirtz LUTs that You Can Download and Use
- New 8 Apps to Custom Your GIF Stickers
- In 2024, 10 Matching Color Combination That Works Together
- New How to Delete White Background in Photoshop. How to Create a Transparent Background in Photoshop? Steps to Get Rid of White Background in Photoshop
- In 2024, Top Apps and Online Tools To Track Realme 12 Pro+ 5G Phone With/Without IMEI Number
- 10 Free Location Spoofers to Fake GPS Location on your Vivo Y56 5G | Dr.fone
- Best Methods for Tecno Spark 10 4G Wont Turn On | Dr.fone
- How to Change Realme V30T Location on Skout | Dr.fone
- Guide How To Unbrick a Bricked Oppo A18 Phone | Dr.fone
- Unlock Your Samsung Galaxy S23 FE Phone with Ease The 3 Best Lock Screen Removal Tools
- How do I reset my Infinix Smart 8 Phone without technical knowledge? | Dr.fone
- In 2024, How to Unlock Itel A70 Phone Password Without Factory Reset?
- 6 Methods to Share Apple iPhone 11 Pro Screen with PC | Dr.fone
- How To Deal With the Oppo Find N3 Screen Black But Still Works? | Dr.fone
- In 2024, iPhone 7 Asking for Passcode after iOS 17/14 Update, What to Do?
- Title: In 2024, How to Use LUTs in VN Editor – Complete Guide and Best LUTs Download
- Author: Chloe
- Created at : 2024-04-24 07:08:12
- Updated at : 2024-04-25 07:08:12
- Link: https://ai-editing-video.techidaily.com/in-2024-how-to-use-luts-in-vn-editor-complete-guide-and-best-luts-download/
- License: This work is licensed under CC BY-NC-SA 4.0.
