
:max_bytes(150000):strip_icc():format(webp)/mothersday_NataliaCampbell_Getty-5a4baef6c7822d00371e56cd.jpg)
In 2024, Minecraft Pixel Art Is a Trending Subject, and They Simply Consist of In-Game Pixel Artworks, Besides the Minecraft Houses, Farms, or Cities. Lets Explore the Fantastic World of Minecraft Pixel Art
Minecraft Pixel Art Is a Trending Subject, and They Simply Consist of In-Game Pixel Artworks, Besides the Minecraft Houses, Farms, or Cities. Let’s Explore the Fantastic World of Minecraft Pixel Art
Versatile Video Editor - Wondershare Filmora
An easy yet powerful editor
Numerous effects to choose from
Detailed tutorials provided by the official channel
Minecraft pixel art is a trending subject, and they simply consist of in-game pixel artworks, besides the Minecraft houses, farms or cities.
In this article
01 What is Pixel Art Minecraft?
02 5 Most Popular Minecraft Pixel Art for Minecraft Die-Hard Fans
03 Best Tools to Make Minecraft Pixel Art
04 How to Make Pixel Art Minecraft In-game?
05 Tips for Creating a Wonderful Minecraft Pixel Art
Part 1: What is Pixel Art Minecraft?
This art can range from drawings to 3D models and even statues. Anything the players would like is just up to their imagination.
Like any Minecraft thing you do in-game, you just stack piles of blocks over blocks to do it, except what the player is doing is creating pixelated art, in general in large proportions. In terms of in-game, pixel art really doesn’t do much, but it is to be appreciated like any art.
Many players state that Minecraft pixel art is rewarding and realistic in terms of the game.
Part 2: 5 Most Popular Minecraft Pixel Art for Minecraft Die-Hard Fans
1. The Sandshrew
In this Minecraft pixel art, we see a mural of a Sandshrew; a pokemon depicted sitting down and with a palette color ranging from yellow to light brown and dark brown.
![]()
2. The Obama
In this Minecraft Pixel art, we can see the former president of the USA, Barack Obama portrait, in reference to a famous picture of him in real life. The color palette ranges from white to blue and red.
![]()
3. The Goomba
In this pixel art Minecraft, we have Goomba, a character from Super Mario. The colors are very simple and range from black to white and brown.
![]()
4. Spongebob
In this Minecraft pixel art, we have depicted SpongeBob Square pants in the game. Its color goes from yellow to green, blue, white and black to be faithful to the original cartoon.
![]()
5. The Joker
In this Minecraft pixel art, we have Joker from the Batman universe. A famous villain in that universe. Its color pattern ranges from several tones of green, red, purple, white, and blue.
![]()
Part 3: Best Tools to Make Minecraft Pixel Art
There are a few apps that you can use to create Minecraft pixel art, for example:
1. Scriptolab.com
In this small web application, you are able to transform your image or any photo of your choice into Minecraft pixel art and blocks.
It’s very easy to use. All you have to do is go to the website and pic your image. Resize the image or picture to the desired size to correspond to the number of blocks in the game.
It also has an easy-to-contact platform to communicate with the website owner that can guide you through the steps if you are ever in doubt.
2. Filmora
This is an application that you can download onto your PC or Mac for free. It is a powerful tool that does more than pixel art, but we will use it for such.
With Filmora, you can use a range of tools to create your Minecraft pixel art, like posterize effect to add a different gradient to the pixel art. The tool CC Black Load can help you perfect the square pixels to make it look more defined. You also have tools such as tint and grid to give a retro look to your art. Or even an animation effect for your wallpapers.
Also, in Filmora, you can add many effects to your pixel art like the 8-bit style or 16-bit style. You can also share your creations and export them and send them to your friends.
![]()
Wondershare Filmora
Get started easily with Filmora’s powerful performance, intuitive interface, and countless effects!
Try It Free Try It Free Try It Free Learn More >

3. Pixel Art Builder
In this mobile app, you can create Minecraft pixel art from the palm of your hand.
You can draw on grids rather than in real pixels to help you be more precise with your art. It has a very easy-to-use interface, and it is completely free.
Many of its key features are, for example, exporting images, dynamic size adjustment of the ability to save in several different formats. Its tools range from the regular pencil to eraser, paint bucket, line and circle drawer, move/zoom function, color wheel, and eyedropper.
Part 4: How to Make Pixel Art Minecraft In-game?
It is very easy to create pixel art Minecraft in-game. Of course, each artist’s ability differs, and so does art as well, but to start out, you do not need much. You need, though, careful planning and knowing the exact scale of your art.
You can break the creation of pixel art in Minecraft into four different steps:
1. Choose an image that you like
It is important that you reference the original work and can easily access it, as you might need to peek often while building your own art. The best thing to do is when you are starting to copy an image and work on it, rather than start it from scratch, as it takes an enormous amount of time and you need to be an expert to do it.
2. Break the image down into single-color sections
This is the part where “careful planning” comes in. You need to be looking at your original piece constantly to know if you are going in the right direction. Also, take all the colors and try to group them. Deconstructing the original image into colored shapes is a process that will help you outline the shape and color of the original design.
3. Obtain the necessary resources
You can start this step by opening Minecraft and start collecting blocks that you think will be useful for your pixel art. It does not matter if you play in Survival, Hardcore, or Adventure mode. The process is the same. It is ideal, though, that you work on creative mode when making pixel art, as the game gives you unlimited resources. You are also able to fly in this mode, making it easier to pick up blocks, and there is no risk of your art being destroyed.
4. Start building
Now you can start building your masterpiece. Start with the foundation and build from there; although you can virtually start anywhere, these blocks can float, unlike art or buildings outside the game. The time the process takes depends on the amount of work that needs to be done and the piece’s complexity.
Part 5: Tips for Creating a Wonderful Minecraft Pixel Art
There are many ways to draw Minecraft pixel art, but here are some tips to help you out.
- Have a clear idea of what kind of art you want to do. And start with something pre-made if you are only starting out. It is extremely hard to start something from scratch.
- Plan the pixel art you are going to do. Gather around all the block materials and colors that you’ll need to make your pixel art.
- Use creative mode. Because with the creative mode, you are not limited to the number of blocks you can find, and also, no one can come and destroy your art.
- If it is easier, you can first draft your pixel art on another app to help you map out your own project.
Conclusion
Minecraft pixel art is a growing trend in the video games world. It can range from easy and accessible to beginners to extremely complicated pieces of art. Players are becoming more engaged with this type of art in-game, and the future only predicts a bigger expansion. There are several tools that you can use to start out in your pixel art, as well as many tutorials.
Minecraft pixel art is a trending subject, and they simply consist of in-game pixel artworks, besides the Minecraft houses, farms or cities.
In this article
01 What is Pixel Art Minecraft?
02 5 Most Popular Minecraft Pixel Art for Minecraft Die-Hard Fans
03 Best Tools to Make Minecraft Pixel Art
04 How to Make Pixel Art Minecraft In-game?
05 Tips for Creating a Wonderful Minecraft Pixel Art
Part 1: What is Pixel Art Minecraft?
This art can range from drawings to 3D models and even statues. Anything the players would like is just up to their imagination.
Like any Minecraft thing you do in-game, you just stack piles of blocks over blocks to do it, except what the player is doing is creating pixelated art, in general in large proportions. In terms of in-game, pixel art really doesn’t do much, but it is to be appreciated like any art.
Many players state that Minecraft pixel art is rewarding and realistic in terms of the game.
Part 2: 5 Most Popular Minecraft Pixel Art for Minecraft Die-Hard Fans
1. The Sandshrew
In this Minecraft pixel art, we see a mural of a Sandshrew; a pokemon depicted sitting down and with a palette color ranging from yellow to light brown and dark brown.
![]()
2. The Obama
In this Minecraft Pixel art, we can see the former president of the USA, Barack Obama portrait, in reference to a famous picture of him in real life. The color palette ranges from white to blue and red.
![]()
3. The Goomba
In this pixel art Minecraft, we have Goomba, a character from Super Mario. The colors are very simple and range from black to white and brown.
![]()
4. Spongebob
In this Minecraft pixel art, we have depicted SpongeBob Square pants in the game. Its color goes from yellow to green, blue, white and black to be faithful to the original cartoon.
![]()
5. The Joker
In this Minecraft pixel art, we have Joker from the Batman universe. A famous villain in that universe. Its color pattern ranges from several tones of green, red, purple, white, and blue.
![]()
Part 3: Best Tools to Make Minecraft Pixel Art
There are a few apps that you can use to create Minecraft pixel art, for example:
1. Scriptolab.com
In this small web application, you are able to transform your image or any photo of your choice into Minecraft pixel art and blocks.
It’s very easy to use. All you have to do is go to the website and pic your image. Resize the image or picture to the desired size to correspond to the number of blocks in the game.
It also has an easy-to-contact platform to communicate with the website owner that can guide you through the steps if you are ever in doubt.
2. Filmora
This is an application that you can download onto your PC or Mac for free. It is a powerful tool that does more than pixel art, but we will use it for such.
With Filmora, you can use a range of tools to create your Minecraft pixel art, like posterize effect to add a different gradient to the pixel art. The tool CC Black Load can help you perfect the square pixels to make it look more defined. You also have tools such as tint and grid to give a retro look to your art. Or even an animation effect for your wallpapers.
Also, in Filmora, you can add many effects to your pixel art like the 8-bit style or 16-bit style. You can also share your creations and export them and send them to your friends.
![]()
Wondershare Filmora
Get started easily with Filmora’s powerful performance, intuitive interface, and countless effects!
Try It Free Try It Free Try It Free Learn More >
3. Pixel Art Builder
In this mobile app, you can create Minecraft pixel art from the palm of your hand.
You can draw on grids rather than in real pixels to help you be more precise with your art. It has a very easy-to-use interface, and it is completely free.
Many of its key features are, for example, exporting images, dynamic size adjustment of the ability to save in several different formats. Its tools range from the regular pencil to eraser, paint bucket, line and circle drawer, move/zoom function, color wheel, and eyedropper.
Part 4: How to Make Pixel Art Minecraft In-game?
It is very easy to create pixel art Minecraft in-game. Of course, each artist’s ability differs, and so does art as well, but to start out, you do not need much. You need, though, careful planning and knowing the exact scale of your art.
You can break the creation of pixel art in Minecraft into four different steps:
1. Choose an image that you like
It is important that you reference the original work and can easily access it, as you might need to peek often while building your own art. The best thing to do is when you are starting to copy an image and work on it, rather than start it from scratch, as it takes an enormous amount of time and you need to be an expert to do it.
2. Break the image down into single-color sections
This is the part where “careful planning” comes in. You need to be looking at your original piece constantly to know if you are going in the right direction. Also, take all the colors and try to group them. Deconstructing the original image into colored shapes is a process that will help you outline the shape and color of the original design.
3. Obtain the necessary resources
You can start this step by opening Minecraft and start collecting blocks that you think will be useful for your pixel art. It does not matter if you play in Survival, Hardcore, or Adventure mode. The process is the same. It is ideal, though, that you work on creative mode when making pixel art, as the game gives you unlimited resources. You are also able to fly in this mode, making it easier to pick up blocks, and there is no risk of your art being destroyed.
4. Start building
Now you can start building your masterpiece. Start with the foundation and build from there; although you can virtually start anywhere, these blocks can float, unlike art or buildings outside the game. The time the process takes depends on the amount of work that needs to be done and the piece’s complexity.
Part 5: Tips for Creating a Wonderful Minecraft Pixel Art
There are many ways to draw Minecraft pixel art, but here are some tips to help you out.
- Have a clear idea of what kind of art you want to do. And start with something pre-made if you are only starting out. It is extremely hard to start something from scratch.
- Plan the pixel art you are going to do. Gather around all the block materials and colors that you’ll need to make your pixel art.
- Use creative mode. Because with the creative mode, you are not limited to the number of blocks you can find, and also, no one can come and destroy your art.
- If it is easier, you can first draft your pixel art on another app to help you map out your own project.
Conclusion
Minecraft pixel art is a growing trend in the video games world. It can range from easy and accessible to beginners to extremely complicated pieces of art. Players are becoming more engaged with this type of art in-game, and the future only predicts a bigger expansion. There are several tools that you can use to start out in your pixel art, as well as many tutorials.
How to Add Filters on iMovie
There are times when you record a video and find out that the light and color in the video have been up to the mark. The light could be too bright or too dark while there could be some color overlays in certain portion as well as the entire frame of the video. Thanks to the video editing apps, you can correct any lighting and coloration issues with different filters available to apply to your video.
If you are using iPhone or Mac, you can use Apple’s iMovie app easily. Therefore, you should know how to add filters on iMovie to get the desired output. iMovie app is available for both iPhone and iPad users as well as Mac users. You do not need prior experience in video editing to add filter to your videos to enhance and improve them. We will illustrate the steps on how to add filters in iMovie as well as suggest a better iMovie alternative.
Part 1. How to add filters on iMovie iPhone
If you have an iPhone, you are more likely to record a video with your iPhone. This is because the camera quality of iPhones is extremely good and there are various modes available for capturing different types of videos like slow-motion and time-lapse. Once you capture a video with your iPhone, you can edit the video and add filters to enhance the video quality using iMovie app available for iPhone.
You have to install iMovie app from App Store as it does not come pre-install. If you already have it installed, make sure you update it to the latest version to get all the filters. Here are the steps how to put a filter on a video in iMovie app.
Step1 Open iMovie app on your iPhone. Tap on Create Project option and tap on Movie on the next screen.

Step2 Select the video from your iPhone that you want to edit and add filters. After your selection, tap on Create Movie option located at the bottom.

Step3 Your selected video will now be available on the Timeline where you can edit your video. Tap on Filters icon located at the bottom-right corner.

Step4 You will see all the different filters available on iMovie app. You can also find a slider above each selected filter. You can adjust the filter to increase or decrease the filter intensity.

Step5 Tap on Play icon to check how the filter is looking on your video. Once you are satisfied, tap on Done option located at the top-left corner.

Step6 Tap on Share icon at the bottom and then tap on Save Video option to save the modified video on your iPhone.

Part 2. How to add filters on Mac iMovie
If you are someone who regularly makes videos for social media account or video streaming channel, you are more likely to record your video using a video camera and transfer the recorded video to you Mac for editing purposes. iMovie comes pre-installed on Mac, and therefore, once you have transferred the video, you can get started with editing and adding filters immediately. Here are the steps on how to add filters to iMovie on your Mac.
Step1 Launch iMovie from Applications folder. Click on Create New option to start a new Project.

Step2 Drag and drop the target video from Photos app to Desktop. Thereafter, drag and drop the video file from Desktop to the Timeline of iMovie project.
Step3 Click on the video clip on the Timeline and click on Crop Filter and Audio Effects icon above the Viewer.

Step4 Click on Clip Filter option and you will see different filters in a window to the left. Place the mouse pointer over the filters, and you will see the filter in the Viewer.

Step5 Once you are satisfied with a filter, click on that filter to apply it to the video clip.
Part 3. iMovie Alternative to add filters on Computer
There are several reasons iMovie filters may not always serve your purpose. For example, there is no way on how to add face filters on iMovie. The collection of filters is rather limited. If you are not satisfied with the filters available on iMovie, there are several iMovie alternatives available. We recommend Wondershare Filmora due to its vast collection of filters of all categories to enhance your video to the next level. Here are steps on how to add filters to your video using Filmora on your computer.
Free Download For Win 7 or later(64-bit)
Free Download For macOS 10.14 or later
Step1 Download and install Wondershare Filmora and it is available for Mac as well as Windows users. Open Filmora and click New Project.
Step2 Drag and drop video clips under Project Media folder. Thereafter, drag and drop video clips to Timeline.

Step3 Go to Effects from the top panel and click on Filters from the left panel. You will see all the different categories of filters.

Step4 Select any filter and drag and drop it on Timeline. You can stretch the duration of the filter as per your requirements.
You can also check Overlay> Utility option from the left panel to add face filters to your video in the same manner. If you want to save the modified video, click on Export button.
Conclusion
If you are an iPhone user or a Mac user, you can add filters to your video using iMovie app. You have to install iMovie app on your iPhone, but iMovie comes pre-installed on Mac. But there are limited filters available on iMovie and there is a lack of face filters which are trending in today’s viral videos. That is why we recommend Wondershare Filmora where there is a wide range of filters available to apply to your video conveniently as per your requirements.
Free Download For macOS 10.14 or later
Step1 Download and install Wondershare Filmora and it is available for Mac as well as Windows users. Open Filmora and click New Project.
Step2 Drag and drop video clips under Project Media folder. Thereafter, drag and drop video clips to Timeline.
Step3 Go to Effects from the top panel and click on Filters from the left panel. You will see all the different categories of filters.
Step4 Select any filter and drag and drop it on Timeline. You can stretch the duration of the filter as per your requirements.
You can also check Overlay> Utility option from the left panel to add face filters to your video in the same manner. If you want to save the modified video, click on Export button.
Conclusion
If you are an iPhone user or a Mac user, you can add filters to your video using iMovie app. You have to install iMovie app on your iPhone, but iMovie comes pre-installed on Mac. But there are limited filters available on iMovie and there is a lack of face filters which are trending in today’s viral videos. That is why we recommend Wondershare Filmora where there is a wide range of filters available to apply to your video conveniently as per your requirements.
Premiere Pro Slow Playback Issues: Finding The Best Solutions
Video editors are massively relying on Adobe Premiere Pro for their professional projects. This tool ensures workflow in video production and relieves several complex editing tasks. Unfortunately, it does have some errors, like Premiere Pro playback slow, which users refer to as patience-testing. Apart from being the most stable video editor, Premiere Pro consumes many resources.
Due to this, users encounter Premiere playback issues during video editing. If your choppy playback and unexpected freeze have annoyed you, keep reading this article. Here, you will find the best 8 solutions to instantly fix Premiere Pro’s slow playback. Plus, there will be an alternative that you can consider for error-free video editing.
Slow Motion Video Maker Slow your video’s speed with better control of your keyframes to create unique cinematic effects!
Make A Slow Motion Video Make A Slow Motion Video More Features

Part 1: What Does a Video with a Slow Playback Mean?
Premiere Pro Playback Slow is a common issue faced by editors these days. It refers to playback slowness and choppiness of a fresh or edited video. Many users report a complete blackout in video footage during the playback. Lagging in playback might result from insufficient RAM or inadequate storage space. Maybe an outdated GPU, heavy video effects, or active background programs cause it.
Such playback lagging can prove incredibly frustrating or test your patience beyond limits. It can desync the audio and video components of files during the playback. You can consider it a sign that your computer does not have the right specs for Adobe Premiere Pro . Also, it could mean that this tool is dropping frames in the Playback of videos.
Part 2: Fixing the Premiere Pro Slow Playback Issue [100% Effective Solutions]
If your Premiere Pro is not smoothly playing the videos, this section is for you. Firstly, you should confirm that your playback is lagging or slowing down. To do so, analyze whether your playhead is making small jumps or playing smoothly. There are plenty of things that you can do to reduce or minimize the Premiere playback slow.
- Solution 1: Disable High-Quality Playback
- Solution 2: Delete Media Cache Files
- Solution 3: Optimize Rendering for Performance
- Solution 4: Close Unnecessary Applications
- Solution 5: Turn on GPU Acceleration
- Solution 6: Change Playback Resolution
- Solution 7: Use Proxy Videos in Adobe
- Solution 8: Mute FX Effects
Solution 1: Disable High-Quality Playback
Adobe Premiere Pro enables a High-Quality playback option by default. It helps in watching videos clearly but causes trouble. Thus, turning it off can fix the playback lagging. Tap on the “Settings” icon, which is next to the playback resolution menu. From there, disable the “High-Quality Playback” option by selecting it.

Solution 2: Delete Media Cache Files
In Premiere Pro, the Media cache is a temporary storage space that keeps copies of files. It allows you to access the files faster and cause a good playback. If these media caches use hefty hard disk space, then to enhance playback performance.
To do so, open the Premiere Pro and go to the “Preferences” menu. From the list, select “Media Cache.” Now browse to select the media and tap on the “Delete Unused” next to the “Delete Unused Media Cache Files. After choosing the option to delete cache files, click on “OK and the files will be removed.

Solution 3: Optimize Rendering for Performance
If Premiere Pro slow playback still exists, then use this method to fix it. Set the optimized rendering to fix the performance of playback. Press the “Edit” option from the top toolbar and choose the “Preferences.” Then, navigate toward “Memory” and find a pop-up window. From that screen, click on “Memory” dropdown and pick “Performance.” Finally, tap on “OK” and get a better playback.

Solution 4: Close Unnecessary Applications
Sometimes, lagging in playback occurs when you work on multiple applications. The system gets burdened and might slow down every process at that time. For a quick and effective solution, you should close the other tabs immediately. Only Adobe Premiere Pro and your file manager can remain open for continuous playback.

Solution 5: Turn on GPU Acceleration
There is another fix you can try to overcome Premiere Pro playback slow. Without any delay, ensure that the Render is set to GPU Acceleration. Simply go to the “File” option at the top toolbar and click on the “Project Settings.” Then, pick “General” and set it to “Mercury Playback Engine GPU Acceleration.” This option is under the Playback Section and Video Render.

Solution 6: Change Playback Resolution
Due to the higher resolution of videos, playback lagging occurs. It has a quick solution: changing the playback resolution to a lower rate. For this purpose, go to “Settings” at the top right and choose the “Dynamic Quality” option. Select a lower resolution, like 1:2 or lower. You should look for options that can reduce resolution from the original resolution of the clip.

Solution 7: Use Proxy Videos in Adobe
Proxy videos are proxy files that are compressed versions of original projects. They help users edit heavy and lengthy videos with any Premiere Playback slow. In your project panel, select your video and right-click on it. From the list, choose “Proxy” and explore “Create Proxies.”
Now, pick the “Codec” option from another window and tap “QuickTime.” Specify a location for proxies and try to keep them in a new folder with the original media. Lastly, click “OK,” and Adobe Media Encoder will instantly produce video proxies.

Solution 8: Mute FX Effects
The working size of video files gets increased with visual and audio effects. If your videos are still lagging in playbacks, then head to mute those effects to fix this issue. From the playback toolbar, choose the “fx” button. Alternatively, click on the “+” icon at the top right side of Program Monitor. Drag it to the button panel and press the “fx” button to toggle it “Off.”

Part 3: Make the Slow-Motion Video Making Easy with Wondershare Filmora
Apart from Premiere Pro’s slow playback, it’s a difficult tool to work with. Even professional video editors face several challenges and look for fix guides. As an effective solution, Wondershare Filmora is a good option for all users. It is a great video editor with AI-integrated features. Non-tech persons can even maintain smooth editing with Filmora’s AI assistant.
This software equips you with a complete video editing suit. Using any feature, you will not face laggings during the editing process. Many editors want to add slow motion or speed ramping in their videos to embrace creativity. They can freely use Filmora without fearing system crashes or playback slowing down.
Step-by-Step Guide to Perform Slow Motion Effect with Optical Flow
Without any playback, slow down and enjoy slow-motion effects in your videos. To add such an effect with optical flow, you can follow the steps below.
Free Download For Win 7 or later(64-bit)
Free Download For macOS 10.14 or later
Step 1Import Project in the Timeline Section
Successfully install Filmora and head to its main interface. Start working on your project by tapping “New Project” and importing the file into the timeline. You can press the “Ctrl + I” keys, browse the project to import, and drag it into the timeline.

Step 2Slow Down Video with the Optical Flow Option
Right-click on your clip and pick “Speed Ramping” from the list. Now, choose the “Customize” option and move below to edit it. Hold the dots and adjust their location to change the video speed. You can select Montage and Jumper effects to change the speed of clips.
Now, scroll down and find “AI Frame Interpolation.” Click on the downward icon and tap “Optical Flow” for slow but high-quality video.

Step 3Export After Finalizing
After making edits, look for the “Export” option at the top right side. Make changes in resolution, project name, and other aspects. Press “Export” to get the file to your assigned location.

Effective Key Features of Filmora
Besides smooth playback, Filmora offers powerful AI features to edit videos. Let’s explore some of its dynamic and innovative options.
AI Copilot: This tool provides you with an AI assistant in case you are unfamiliar with editing basics. It can not only guide you but also navigate towards the respective features. Users can ask anything and find solutions with natural language prompts.
AI Music Generator: Are you tired of internet surfing but haven’t found perfect music? Filmora offers AI-generated music that perfectly aligns with your content needs. It allows you to choose the number of music tracks, moods, and duration of the videos.
AI Image: With Filmora, getting a copyright-free image is not a big deal. Users have to describe an image and pick one style to grab their dream image. Also, they can select an aspect ratio to start creating an image.
AI Smart Masking: Often, the best-captured media seems useless because of its messy background. AI masking comes to rescue your projects. You can use the Chroma key or AI portrait to remove or change the backgrounds of the media.
Conclusion
To wrap up, Adobe Premiere Pro’s slow playback can occur for several reasons. Many solutions are discussed above to tackle such errors and avoid frustration. Meanwhile, you can use Wondershare Filmora, which is much easier. Also, it does not cause any errors while working and ensures a smooth workflow. With AI features, users can effectively perform every kind of video editing task.
Make A Slow Motion Video Make A Slow Motion Video More Features
Part 1: What Does a Video with a Slow Playback Mean?
Premiere Pro Playback Slow is a common issue faced by editors these days. It refers to playback slowness and choppiness of a fresh or edited video. Many users report a complete blackout in video footage during the playback. Lagging in playback might result from insufficient RAM or inadequate storage space. Maybe an outdated GPU, heavy video effects, or active background programs cause it.
Such playback lagging can prove incredibly frustrating or test your patience beyond limits. It can desync the audio and video components of files during the playback. You can consider it a sign that your computer does not have the right specs for Adobe Premiere Pro . Also, it could mean that this tool is dropping frames in the Playback of videos.
Part 2: Fixing the Premiere Pro Slow Playback Issue [100% Effective Solutions]
If your Premiere Pro is not smoothly playing the videos, this section is for you. Firstly, you should confirm that your playback is lagging or slowing down. To do so, analyze whether your playhead is making small jumps or playing smoothly. There are plenty of things that you can do to reduce or minimize the Premiere playback slow.
- Solution 1: Disable High-Quality Playback
- Solution 2: Delete Media Cache Files
- Solution 3: Optimize Rendering for Performance
- Solution 4: Close Unnecessary Applications
- Solution 5: Turn on GPU Acceleration
- Solution 6: Change Playback Resolution
- Solution 7: Use Proxy Videos in Adobe
- Solution 8: Mute FX Effects
Solution 1: Disable High-Quality Playback
Adobe Premiere Pro enables a High-Quality playback option by default. It helps in watching videos clearly but causes trouble. Thus, turning it off can fix the playback lagging. Tap on the “Settings” icon, which is next to the playback resolution menu. From there, disable the “High-Quality Playback” option by selecting it.
Solution 2: Delete Media Cache Files
In Premiere Pro, the Media cache is a temporary storage space that keeps copies of files. It allows you to access the files faster and cause a good playback. If these media caches use hefty hard disk space, then to enhance playback performance.
To do so, open the Premiere Pro and go to the “Preferences” menu. From the list, select “Media Cache.” Now browse to select the media and tap on the “Delete Unused” next to the “Delete Unused Media Cache Files. After choosing the option to delete cache files, click on “OK and the files will be removed.
Solution 3: Optimize Rendering for Performance
If Premiere Pro slow playback still exists, then use this method to fix it. Set the optimized rendering to fix the performance of playback. Press the “Edit” option from the top toolbar and choose the “Preferences.” Then, navigate toward “Memory” and find a pop-up window. From that screen, click on “Memory” dropdown and pick “Performance.” Finally, tap on “OK” and get a better playback.
Solution 4: Close Unnecessary Applications
Sometimes, lagging in playback occurs when you work on multiple applications. The system gets burdened and might slow down every process at that time. For a quick and effective solution, you should close the other tabs immediately. Only Adobe Premiere Pro and your file manager can remain open for continuous playback.
Solution 5: Turn on GPU Acceleration
There is another fix you can try to overcome Premiere Pro playback slow. Without any delay, ensure that the Render is set to GPU Acceleration. Simply go to the “File” option at the top toolbar and click on the “Project Settings.” Then, pick “General” and set it to “Mercury Playback Engine GPU Acceleration.” This option is under the Playback Section and Video Render.
Solution 6: Change Playback Resolution
Due to the higher resolution of videos, playback lagging occurs. It has a quick solution: changing the playback resolution to a lower rate. For this purpose, go to “Settings” at the top right and choose the “Dynamic Quality” option. Select a lower resolution, like 1:2 or lower. You should look for options that can reduce resolution from the original resolution of the clip.
Solution 7: Use Proxy Videos in Adobe
Proxy videos are proxy files that are compressed versions of original projects. They help users edit heavy and lengthy videos with any Premiere Playback slow. In your project panel, select your video and right-click on it. From the list, choose “Proxy” and explore “Create Proxies.”
Now, pick the “Codec” option from another window and tap “QuickTime.” Specify a location for proxies and try to keep them in a new folder with the original media. Lastly, click “OK,” and Adobe Media Encoder will instantly produce video proxies.
Solution 8: Mute FX Effects
The working size of video files gets increased with visual and audio effects. If your videos are still lagging in playbacks, then head to mute those effects to fix this issue. From the playback toolbar, choose the “fx” button. Alternatively, click on the “+” icon at the top right side of Program Monitor. Drag it to the button panel and press the “fx” button to toggle it “Off.”
Part 3: Make the Slow-Motion Video Making Easy with Wondershare Filmora
Apart from Premiere Pro’s slow playback, it’s a difficult tool to work with. Even professional video editors face several challenges and look for fix guides. As an effective solution, Wondershare Filmora is a good option for all users. It is a great video editor with AI-integrated features. Non-tech persons can even maintain smooth editing with Filmora’s AI assistant.
This software equips you with a complete video editing suit. Using any feature, you will not face laggings during the editing process. Many editors want to add slow motion or speed ramping in their videos to embrace creativity. They can freely use Filmora without fearing system crashes or playback slowing down.
Step-by-Step Guide to Perform Slow Motion Effect with Optical Flow
Without any playback, slow down and enjoy slow-motion effects in your videos. To add such an effect with optical flow, you can follow the steps below.
Free Download For Win 7 or later(64-bit)
Free Download For macOS 10.14 or later
Step 1Import Project in the Timeline Section
Successfully install Filmora and head to its main interface. Start working on your project by tapping “New Project” and importing the file into the timeline. You can press the “Ctrl + I” keys, browse the project to import, and drag it into the timeline.
Step 2Slow Down Video with the Optical Flow Option
Right-click on your clip and pick “Speed Ramping” from the list. Now, choose the “Customize” option and move below to edit it. Hold the dots and adjust their location to change the video speed. You can select Montage and Jumper effects to change the speed of clips.
Now, scroll down and find “AI Frame Interpolation.” Click on the downward icon and tap “Optical Flow” for slow but high-quality video.
Step 3Export After Finalizing
After making edits, look for the “Export” option at the top right side. Make changes in resolution, project name, and other aspects. Press “Export” to get the file to your assigned location.
Effective Key Features of Filmora
Besides smooth playback, Filmora offers powerful AI features to edit videos. Let’s explore some of its dynamic and innovative options.
AI Copilot: This tool provides you with an AI assistant in case you are unfamiliar with editing basics. It can not only guide you but also navigate towards the respective features. Users can ask anything and find solutions with natural language prompts.
AI Music Generator: Are you tired of internet surfing but haven’t found perfect music? Filmora offers AI-generated music that perfectly aligns with your content needs. It allows you to choose the number of music tracks, moods, and duration of the videos.
AI Image: With Filmora, getting a copyright-free image is not a big deal. Users have to describe an image and pick one style to grab their dream image. Also, they can select an aspect ratio to start creating an image.
AI Smart Masking: Often, the best-captured media seems useless because of its messy background. AI masking comes to rescue your projects. You can use the Chroma key or AI portrait to remove or change the backgrounds of the media.
Conclusion
To wrap up, Adobe Premiere Pro’s slow playback can occur for several reasons. Many solutions are discussed above to tackle such errors and avoid frustration. Meanwhile, you can use Wondershare Filmora, which is much easier. Also, it does not cause any errors while working and ensures a smooth workflow. With AI features, users can effectively perform every kind of video editing task.
Top 12 AI Video Generators to Pick
Top 12 AI Video Generators to Pick
An easy yet powerful editor
Numerous effects to choose from
Detailed tutorials provided by the official channel
It is a fact that video editing can sometimes be laborious and time-consuming. Even when using the best video editing software, it still requires human effort to get an impressive result. But luckily for us, the invention of the AI video generator has now made a lot of things easier. The AI video generators are the next level as they allow users to automate video creation and editing without compromising quality.
This article will discuss the best AI text to video generators for free that will help make your life easier. Thus, this will soon help you create engaging videos for your personal or business use in just a few clicks.
In this article
01 [What Is an AI Video Generator](#Part 1)
02 [How Does the AI Video Maker Work](#Part 2)
03 [The 12 Best AI Video Generator](#Part 3)
Part 1 What Is an AI Video Generator
AI video generator is the process of using artificial intelligence (AI) to create professional videos. With an AI video generator for free, you do not need any equipment, an editing studio, or a premium video editing application to be able to create a video.
All that is required is that you feed input to the AI tool, and it will automatically help you generate a video. You can edit a blog post into a video within a few minutes with any of these tools listed. In addition, it won’t incur any high costs for video productions because the AI tool will help you carry out most of the tasks.
Part 2 How Does the AI Video Maker Work
Professional AI video editors, are trained by showing them various examples and then providing them feedback by telling them what is wrong and good. The machine then takes note of it and remembers it. However, as the machine continues to learn, it picks the results and then improves itself based on the feedback. Ultimately the device becomes very good or even better than the human that creates it. Here are some breakdowns of the ways video editors work:
● The AI video maker tool, can augment your videos with AR effects, including AR masks, face and color filters, face touch-ups, etc. The tool uses neural networks and computer vision to interrupt, extract, and understand the video content.
● This AI subtitle generator can allow interviews to be delivered and analyzed to the editor fully transcribed, searchable by word or even sentences. Video editors can use AI for keyword extraction, speech-to-text conversion, facial recognition, sentiment analysis, image recognition, and emotion detection.
● AI-video editors can pull sections of a video clip from any source automatically. These AI systems can also detect emotions that allow the creation of warm, appealing videos.
Part 3 The 12 Best AI Video Generator
There are top AI video generators for free that you can choose from for your video editing. These video editors complete work quickly and easily. In addition, if you need video editing software to help you edit your generated videos after generating them, we recommend that you try out Filmora from Wondershare. Wondershare Filmora Video Editor is a perfect video editing software with tons of new features, like keyframing, split video, and adding animations and effects to help you carry out your video editing seamlessly.
For Win 7 or later (64-bit)
For macOS 10.12 or later
01Sora
Sora is an artificial intelligence model that generates videos with textual descriptions, developed by OpenAI. It is a US-based artificial intelligence research organization. Sora stands out as a game-changing platform. It can seamlessly convert text into captivating videos, blending convenience with creativity.
Features
● With Sora, transforming written content into engaging videos is swift and efficient.
● Unlike traditional video editing tools, Sora is designed for users of all levels, eliminating the need for prior video production experience.
● Sora offers a plethora of customization options.
● Generates videos up to 60 seconds long
● Generates complex scenes with multiple characters, motions, and accurate details of the subject
● Creates multiple shots within a single generated video
● Generating videos from text instructions by utilizing the recaptioning technique from DALL·E 3
Pros
● Highly realistic video generation with impressive visual quality
● Text-based control over the content of the video, allowing for precise video generation
● A highly versatile tool that handles a wide range of prompts and styles
Cons
● Lacks implicit understanding of the rules of physics
This software is best realistic and imaginative scenes.
02Wondershare Filmora
Wondershare Filmora is a highly efficient video editing software that comes with AI text to video generation. The software is friendly to both beginner and intermediate creations, offering you a wide range of intuitive features.
Pricing
● Subscription Plan: US$19.99 per month
● Cross-Platform Plan: US$69.99 per year
● Perpetual Plan: US$19.99 Onetime Payment
Features
● User-friendly interface that is easy to learn and use
● Wide range of features for creating and editing videos, including transitions, effects, and text overlays.
● Large stock library of royalty-free music and stock footage
● Readily available templates and presets to quickly generate videos
● Easily export videos directly to popular platforms like YouTube and TikTok
Pros
● User-friendly interface with a learning curve suitable for all kinds of creators
● Extensive library of free and paid assets to enhance your videos
● Wide range of features for video editing
Cons
● Lacks advanced features for AI video prompt generation
This software is best for video creation and editing for freelancers, SMBs, markters.
For Win 7 or later (64-bit)
For macOS 10.12 or later
How to Use Filmora’s AI to Video Feature : AI Video Prompt Sample
Here is a brief step-by-step guide on how to use Filmora to generate AI videos. The process is as simple as writing a text prompt and getting the video ready:
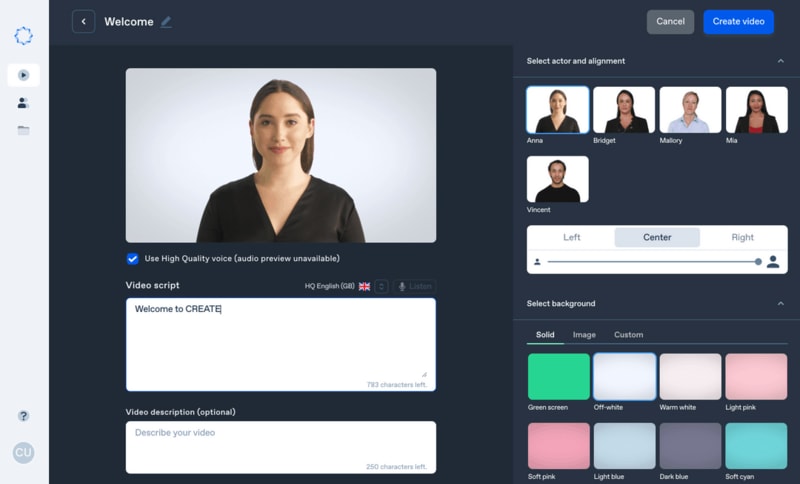
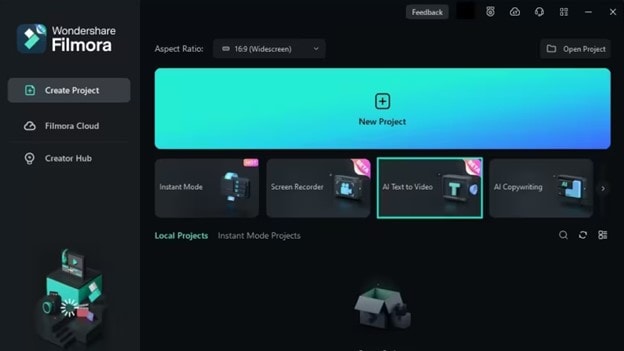
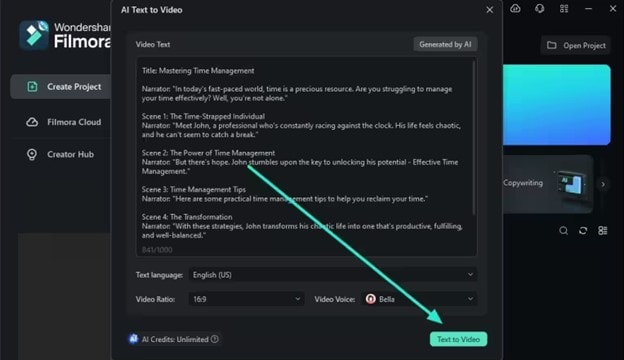
Step 1: Lauch Filmora AI Text-to-Video Features
Once you launch on your PC Filmora, click the AI Text-to-Video option to start the video generation process.
Step 2: Add a Text Prompt or Video Script
On the AI Text-to-Video video, add your text prompt. You can also modify other settings such as text language and video voice. Then click the Text to Video button at the bottom to prompt Filmora to generate the video.
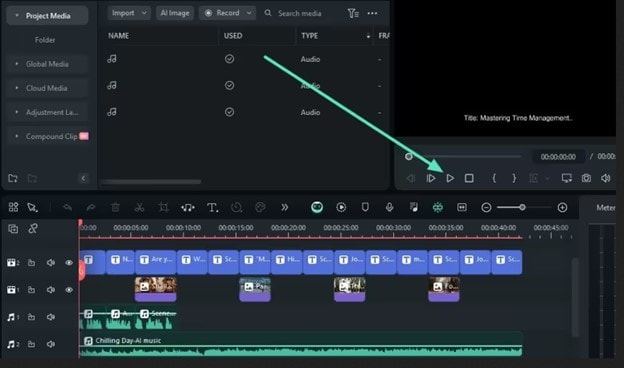
Step 3: Preview the Generated Video
Filmora generates the video based on your prompt and a new editing window. You can now a preview video and make any further editing needed.
AI Video Prompt Sample Using Filmora
Prompt: A young man at his 20s is sitting on a piece of cloud in the sky, reading a book.
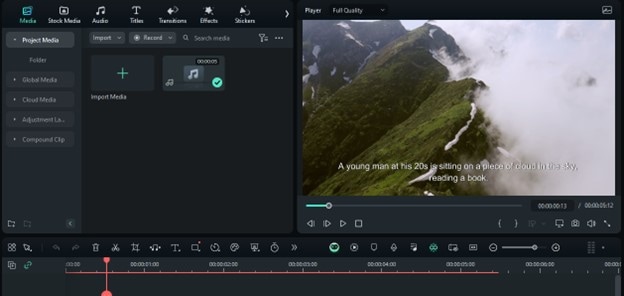
When prompted to generate a video of a young man in his 20s sitting on a piece of cloud in the sky, reading a book, Filmora generated a narration video from the point of view of the young man as shown above.
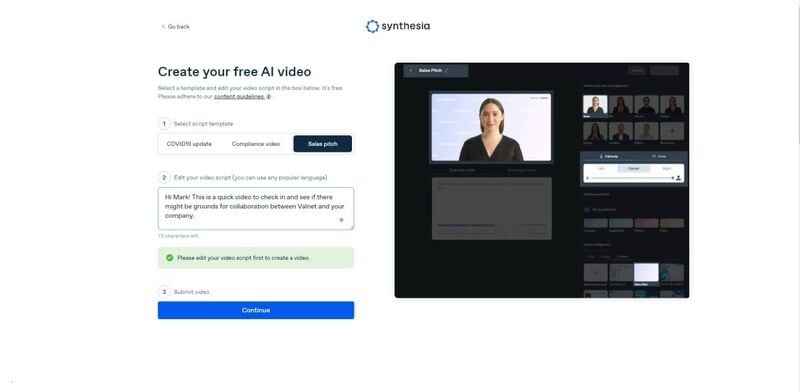
03Synthesia
This is a web-app video generator AI from a text supporting AI-driven video creation used by experts and beginners. Rather than filming content utilizing a microphone and camera, this software AI technology helps to simulate human presenters and real-life videos. Thus, it saves video creators hours of work.
Pricing
● Personal Plan: $30 monthly
● Corporate Plan: custom pricing
Features
● Over 40 supported languages
● Allows template customizations
● Allows users to make their avatars
● It has 50 built-in presenters
● Allows you to create realistic AI videos
● Offers live chat support
● Allows download in Mp4
● Enables users to create videos automatically using integrations with APIs
● Allows the addition of backgrounds
● Users can share their videos on other social media platforms
● Allows the addition of images, shapes, and texts to videos
Pros
● Great for beginners are you do not need prior knowledge
Cons
● It supports only front-facing poses
This software is best for freelancers, agencies, marketers, and content creators looking to create high-quality video content.
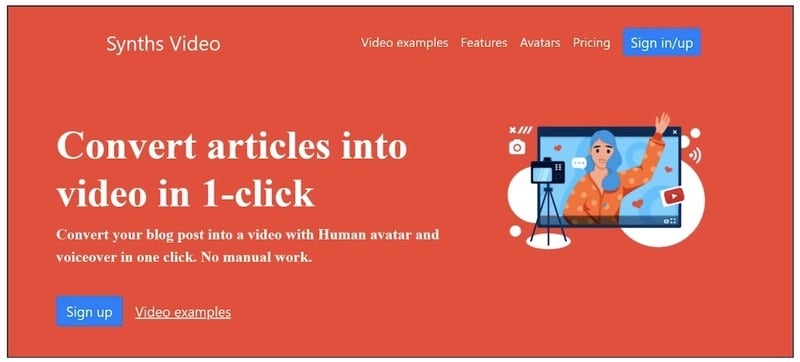
04Synths Video
This is an AI video-generating tool primarily concerned with helping users drive leads and traffic from YouTube. It is an AI YouTube title generator that allows users to create professional-looking videos from blog posts on YouTube.
Pricing
● YouTube Start: $399 monthly.
● Premium Custom Package: Custom Pricing.
Features
● Video generation from URLs
● It has built-in integration with YouTube
● 20+ avatars are available
● Allows video upload in HD quality
● Over 40+ languages supported
Cons
● No free plan is available
Best for the owners of YouTube channels.
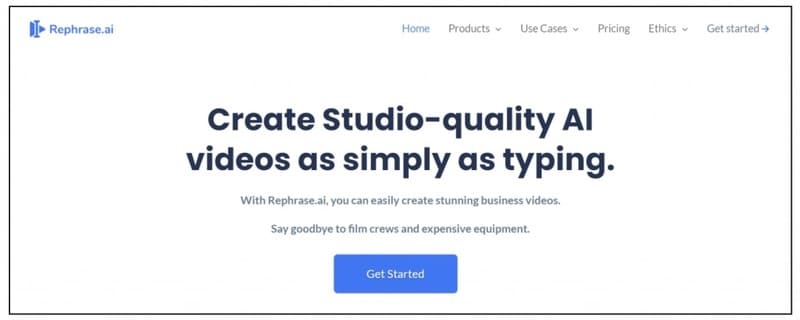
05Rephrase.ai
Rephrase.ai is a video editing software that uses a sophisticated deep learning engine to create professional videos.
Pricing
● Starter plan: $25 monthly
● Enterprise plan: Custom Pricing
Features
● Produces high-resolution videos
● Supports functionality for presenter customization
● Multiple-use cases supported
● Allows users to select their preferred AI voice
● Support varieties of video editing tools
Cons
● It has a complex pricing plan
It is best for agencies seeking to create customizable and personalized professional videos for marketing and advertising.
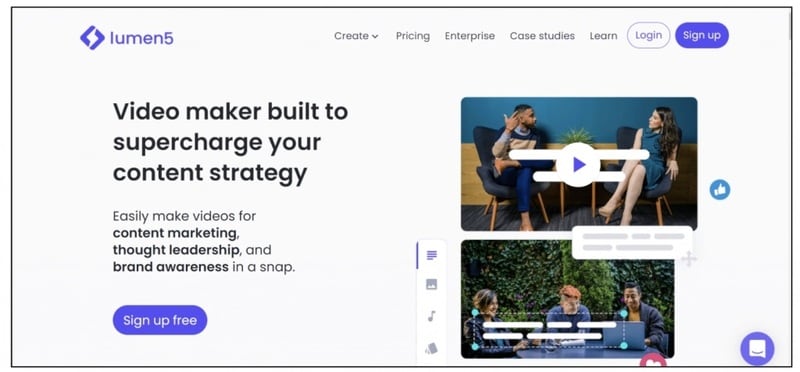
06Lumen5
Lumen5 is one of the top AI video-creating tools available for beginners and uses Natural Language Processing algorithms to convert text into high-quality videos.
Pricing
● Free Plan
● Creator plan: $15 monthly.
● Premium plan: $79 monthly.
● Business plan: $199 monthly.
● Enterprise plan: Custom Pricing.
Features
● Transforms text to video within minutes
● Numerous templates are available
● Allows customization of videos resolution, color, and font
Cons
● Limited features in the free plan
Best for beginners who are looking to generate short-duration of videos for social media platforms.
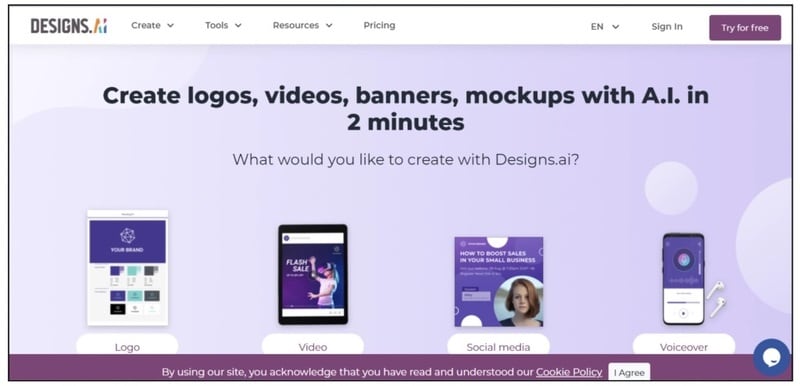
07Designs.ai
This is an AI-powered video maker that is useful for users that do not have any experience in design.
Pricing
● Basic plan: $29 monthly
● Pro plan: $69 monthly
● Enterprise plan: Custom Pricing
Features
● It has an attractive and modern user interface
● Allows the creation of videos from pre-designed templates
● Helps video creation from your custom video files
● Over 20 languages supported
● Coverts texts to video
Cons
● Only allows video download in a paid plan.
This tool is best for creators and designers who are willing to create quick AI videos.
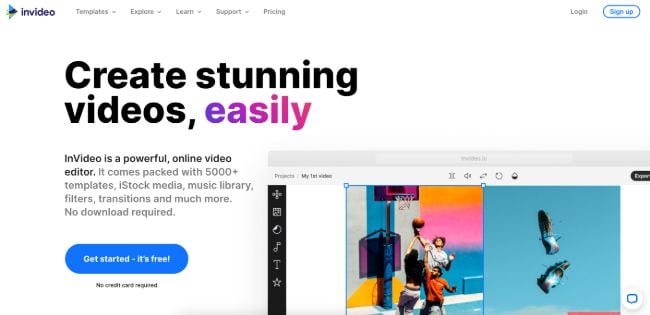
08InVideo
This is a perfect AI generator used for creating explainers or marketing videos easily and quickly. The platform helps produce high-quality videos with varieties of style options to make the ideal video according to your requirements.
Pricing
● Free: Free with watermarks on your videos.
● Business: $15 monthly with no watermarks.
● Unlimited: $30 monthly with unlimited video exports.
Features
● Very affordable
● Comprises an online drag-and-drop video editor
● Over 50 AI-powered themes that help to convert text to video in 3 minutes
● Full iStock media library available in all plans
Cons
● Requires internet connection to use
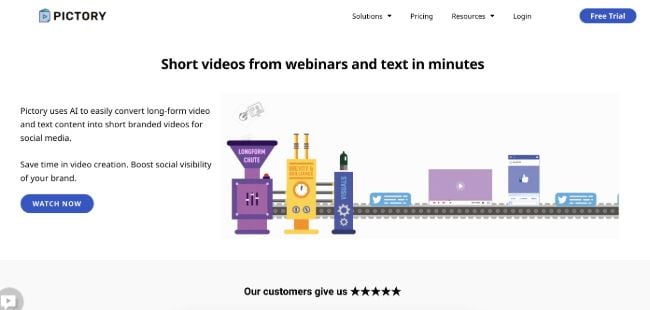
09Pictory.ai
This AI subtitle generator converts your text and turns it into an AI-generated video. This program is simple and easy to get started, requiring no software download. Paste your text into the editor and get started.
Pricing
● Free trial: Only use 3 videos.
● Standard Plan: $29 per month.
● Premium Plan: $59 per month.
Features
● It has a simple user interface.
● Over 6M licensed Shutterstock available
● Unlimited and affordable videos in the premium plan
Cons
● It is quite expensive compared to other tools
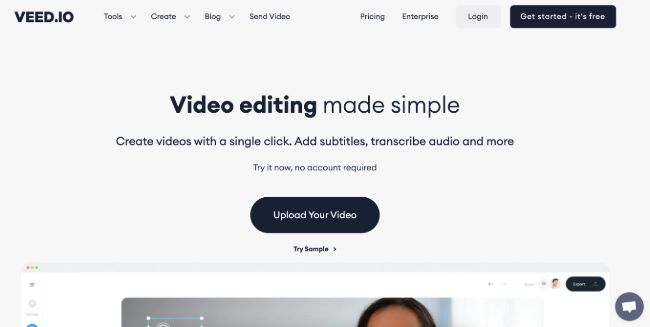
10Veed.io
Veed.io is not specifically an AI video generator but a video editing tool that utilizes AI to simplify the entire process and allows users to create high-quality videos within seconds.
Pricing
● Free: Free with watermarks!
● Basic: $18 monthly.
● Pro: $30 monthly
Features
● It has lots of video templates and a music library to choose
● Easy to learn, user-friendly interface
● Video rendering times are quite fast
● The basic plan has a high-quality resolution
Cons
● Not a typical AI video generator
● Not for beginners
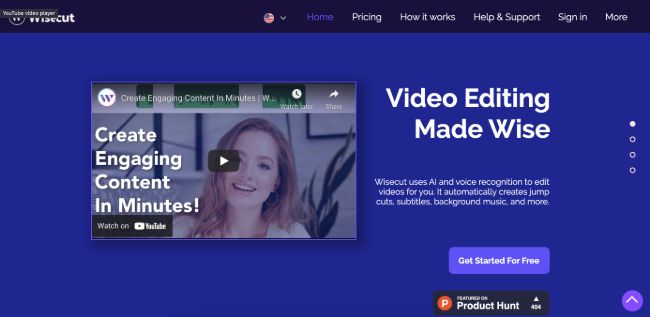
11Wisecut
This free AI video generator platform allows you to turn your text into video. Type in your text and choose a voice actor, and then Wisecut will take care of the rest. It offers excellent editing tools for users to tweak your video until it’s just right.
Pricing
● Basic: Free.
● Professional: $57 per month.
Features
● This platform is easy to use
● It has a simple drag and drops user-interface
● Allows auto subtitles and auto cut silences
● Allows integration with YouTube
● Subtitles auto-translation
● Excellent video quality
Cons
● Has limited effects
12Flexclip
FlexClip makes video creation and editing easy with-it millions of royalty-free stock media and thousands of templates for you to choose from.
Pricing
● Free
● Basic: $5.99 per month.
● Plus: $9.99 per month
● Business: $19.99 per month.
Features
● Thousands of available templates
● Simple tool for creating and editing videos
● Use for creating engaging videos
● Provides millions of royalty stock media
● Versatile and Flexible
Cons
● Not for beginners
● Ending Thoughts →
● In this post, we have listed the top text to video generators that you can choose from to help you perform tasks within minutes.
● The report also explains all you need to know about video AI generators and recommends Filmora as a perfect tool for editing your videos.
It is a fact that video editing can sometimes be laborious and time-consuming. Even when using the best video editing software, it still requires human effort to get an impressive result. But luckily for us, the invention of the AI video generator has now made a lot of things easier. The AI video generators are the next level as they allow users to automate video creation and editing without compromising quality.
This article will discuss the best AI text to video generators for free that will help make your life easier. Thus, this will soon help you create engaging videos for your personal or business use in just a few clicks.
In this article
01 [What Is an AI Video Generator](#Part 1)
02 [How Does the AI Video Maker Work](#Part 2)
03 [The 12 Best AI Video Generator](#Part 3)
Part 1 What Is an AI Video Generator
AI video generator is the process of using artificial intelligence (AI) to create professional videos. With an AI video generator for free, you do not need any equipment, an editing studio, or a premium video editing application to be able to create a video.
All that is required is that you feed input to the AI tool, and it will automatically help you generate a video. You can edit a blog post into a video within a few minutes with any of these tools listed. In addition, it won’t incur any high costs for video productions because the AI tool will help you carry out most of the tasks.
Part 2 How Does the AI Video Maker Work
Professional AI video editors, are trained by showing them various examples and then providing them feedback by telling them what is wrong and good. The machine then takes note of it and remembers it. However, as the machine continues to learn, it picks the results and then improves itself based on the feedback. Ultimately the device becomes very good or even better than the human that creates it. Here are some breakdowns of the ways video editors work:
● The AI video maker tool, can augment your videos with AR effects, including AR masks, face and color filters, face touch-ups, etc. The tool uses neural networks and computer vision to interrupt, extract, and understand the video content.
● This AI subtitle generator can allow interviews to be delivered and analyzed to the editor fully transcribed, searchable by word or even sentences. Video editors can use AI for keyword extraction, speech-to-text conversion, facial recognition, sentiment analysis, image recognition, and emotion detection.
● AI-video editors can pull sections of a video clip from any source automatically. These AI systems can also detect emotions that allow the creation of warm, appealing videos.
Part 3 The 12 Best AI Video Generator
There are top AI video generators for free that you can choose from for your video editing. These video editors complete work quickly and easily. In addition, if you need video editing software to help you edit your generated videos after generating them, we recommend that you try out Filmora from Wondershare. Wondershare Filmora Video Editor is a perfect video editing software with tons of new features, like keyframing, split video, and adding animations and effects to help you carry out your video editing seamlessly.
For Win 7 or later (64-bit)
For macOS 10.12 or later
01Sora
Sora is an artificial intelligence model that generates videos with textual descriptions, developed by OpenAI. It is a US-based artificial intelligence research organization. Sora stands out as a game-changing platform. It can seamlessly convert text into captivating videos, blending convenience with creativity.
Features
● With Sora, transforming written content into engaging videos is swift and efficient.
● Unlike traditional video editing tools, Sora is designed for users of all levels, eliminating the need for prior video production experience.
● Sora offers a plethora of customization options.
● Generates videos up to 60 seconds long
● Generates complex scenes with multiple characters, motions, and accurate details of the subject
● Creates multiple shots within a single generated video
● Generating videos from text instructions by utilizing the recaptioning technique from DALL·E 3
Pros
● Highly realistic video generation with impressive visual quality
● Text-based control over the content of the video, allowing for precise video generation
● A highly versatile tool that handles a wide range of prompts and styles
Cons
● Lacks implicit understanding of the rules of physics
This software is best realistic and imaginative scenes.
02Wondershare Filmora
Wondershare Filmora is a highly efficient video editing software that comes with AI text to video generation. The software is friendly to both beginner and intermediate creations, offering you a wide range of intuitive features.
Pricing
● Subscription Plan: US$19.99 per month
● Cross-Platform Plan: US$69.99 per year
● Perpetual Plan: US$19.99 Onetime Payment
Features
● User-friendly interface that is easy to learn and use
● Wide range of features for creating and editing videos, including transitions, effects, and text overlays.
● Large stock library of royalty-free music and stock footage
● Readily available templates and presets to quickly generate videos
● Easily export videos directly to popular platforms like YouTube and TikTok
Pros
● User-friendly interface with a learning curve suitable for all kinds of creators
● Extensive library of free and paid assets to enhance your videos
● Wide range of features for video editing
Cons
● Lacks advanced features for AI video prompt generation
This software is best for video creation and editing for freelancers, SMBs, markters.
For Win 7 or later (64-bit)
For macOS 10.12 or later
How to Use Filmora’s AI to Video Feature : AI Video Prompt Sample
Here is a brief step-by-step guide on how to use Filmora to generate AI videos. The process is as simple as writing a text prompt and getting the video ready:
Step 1: Lauch Filmora AI Text-to-Video Features
Once you launch on your PC Filmora, click the AI Text-to-Video option to start the video generation process.
Step 2: Add a Text Prompt or Video Script
On the AI Text-to-Video video, add your text prompt. You can also modify other settings such as text language and video voice. Then click the Text to Video button at the bottom to prompt Filmora to generate the video.
Step 3: Preview the Generated Video
Filmora generates the video based on your prompt and a new editing window. You can now a preview video and make any further editing needed.
AI Video Prompt Sample Using Filmora
Prompt: A young man at his 20s is sitting on a piece of cloud in the sky, reading a book.
When prompted to generate a video of a young man in his 20s sitting on a piece of cloud in the sky, reading a book, Filmora generated a narration video from the point of view of the young man as shown above.
03Synthesia
This is a web-app video generator AI from a text supporting AI-driven video creation used by experts and beginners. Rather than filming content utilizing a microphone and camera, this software AI technology helps to simulate human presenters and real-life videos. Thus, it saves video creators hours of work.
Pricing
● Personal Plan: $30 monthly
● Corporate Plan: custom pricing
Features
● Over 40 supported languages
● Allows template customizations
● Allows users to make their avatars
● It has 50 built-in presenters
● Allows you to create realistic AI videos
● Offers live chat support
● Allows download in Mp4
● Enables users to create videos automatically using integrations with APIs
● Allows the addition of backgrounds
● Users can share their videos on other social media platforms
● Allows the addition of images, shapes, and texts to videos
Pros
● Great for beginners are you do not need prior knowledge
Cons
● It supports only front-facing poses
This software is best for freelancers, agencies, marketers, and content creators looking to create high-quality video content.
04Synths Video
This is an AI video-generating tool primarily concerned with helping users drive leads and traffic from YouTube. It is an AI YouTube title generator that allows users to create professional-looking videos from blog posts on YouTube.
Pricing
● YouTube Start: $399 monthly.
● Premium Custom Package: Custom Pricing.
Features
● Video generation from URLs
● It has built-in integration with YouTube
● 20+ avatars are available
● Allows video upload in HD quality
● Over 40+ languages supported
Cons
● No free plan is available
Best for the owners of YouTube channels.
05Rephrase.ai
Rephrase.ai is a video editing software that uses a sophisticated deep learning engine to create professional videos.
Pricing
● Starter plan: $25 monthly
● Enterprise plan: Custom Pricing
Features
● Produces high-resolution videos
● Supports functionality for presenter customization
● Multiple-use cases supported
● Allows users to select their preferred AI voice
● Support varieties of video editing tools
Cons
● It has a complex pricing plan
It is best for agencies seeking to create customizable and personalized professional videos for marketing and advertising.
06Lumen5
Lumen5 is one of the top AI video-creating tools available for beginners and uses Natural Language Processing algorithms to convert text into high-quality videos.
Pricing
● Free Plan
● Creator plan: $15 monthly.
● Premium plan: $79 monthly.
● Business plan: $199 monthly.
● Enterprise plan: Custom Pricing.
Features
● Transforms text to video within minutes
● Numerous templates are available
● Allows customization of videos resolution, color, and font
Cons
● Limited features in the free plan
Best for beginners who are looking to generate short-duration of videos for social media platforms.
07Designs.ai
This is an AI-powered video maker that is useful for users that do not have any experience in design.
Pricing
● Basic plan: $29 monthly
● Pro plan: $69 monthly
● Enterprise plan: Custom Pricing
Features
● It has an attractive and modern user interface
● Allows the creation of videos from pre-designed templates
● Helps video creation from your custom video files
● Over 20 languages supported
● Coverts texts to video
Cons
● Only allows video download in a paid plan.
This tool is best for creators and designers who are willing to create quick AI videos.
08InVideo
This is a perfect AI generator used for creating explainers or marketing videos easily and quickly. The platform helps produce high-quality videos with varieties of style options to make the ideal video according to your requirements.
Pricing
● Free: Free with watermarks on your videos.
● Business: $15 monthly with no watermarks.
● Unlimited: $30 monthly with unlimited video exports.
Features
● Very affordable
● Comprises an online drag-and-drop video editor
● Over 50 AI-powered themes that help to convert text to video in 3 minutes
● Full iStock media library available in all plans
Cons
● Requires internet connection to use
09Pictory.ai
This AI subtitle generator converts your text and turns it into an AI-generated video. This program is simple and easy to get started, requiring no software download. Paste your text into the editor and get started.
Pricing
● Free trial: Only use 3 videos.
● Standard Plan: $29 per month.
● Premium Plan: $59 per month.
Features
● It has a simple user interface.
● Over 6M licensed Shutterstock available
● Unlimited and affordable videos in the premium plan
Cons
● It is quite expensive compared to other tools
10Veed.io
Veed.io is not specifically an AI video generator but a video editing tool that utilizes AI to simplify the entire process and allows users to create high-quality videos within seconds.
Pricing
● Free: Free with watermarks!
● Basic: $18 monthly.
● Pro: $30 monthly
Features
● It has lots of video templates and a music library to choose
● Easy to learn, user-friendly interface
● Video rendering times are quite fast
● The basic plan has a high-quality resolution
Cons
● Not a typical AI video generator
● Not for beginners
11Wisecut
This free AI video generator platform allows you to turn your text into video. Type in your text and choose a voice actor, and then Wisecut will take care of the rest. It offers excellent editing tools for users to tweak your video until it’s just right.
Pricing
● Basic: Free.
● Professional: $57 per month.
Features
● This platform is easy to use
● It has a simple drag and drops user-interface
● Allows auto subtitles and auto cut silences
● Allows integration with YouTube
● Subtitles auto-translation
● Excellent video quality
Cons
● Has limited effects
12Flexclip
FlexClip makes video creation and editing easy with-it millions of royalty-free stock media and thousands of templates for you to choose from.
Pricing
● Free
● Basic: $5.99 per month.
● Plus: $9.99 per month
● Business: $19.99 per month.
Features
● Thousands of available templates
● Simple tool for creating and editing videos
● Use for creating engaging videos
● Provides millions of royalty stock media
● Versatile and Flexible
Cons
● Not for beginners
● Ending Thoughts →
● In this post, we have listed the top text to video generators that you can choose from to help you perform tasks within minutes.
● The report also explains all you need to know about video AI generators and recommends Filmora as a perfect tool for editing your videos.
Also read:
- New 2024 Approved CapCut Lenta Template How It Benefits Slow Motion Video
- In 2024, How to Create a Clideo Slideshow Simply
- 2 Solutions to Cut Video in VLC on Windows for 2024
- Updated 2024 Approved Top LUTs for Sony HLG to Download
- 2024 Approved AI Features of Filmora - Silence Detection in Videos
- Step by Step to Rotate Video Using KMPlayer for 2024
- New 4 Solutions to Resize a WebM File for 2024
- Updated In 2024, How to Apply Gaussian Blur Effect to Videos In Premiere Pro?
- Updated In 2024, Reviewing Efectum App and The Best Alternatives for Smartphone Users
- New 2024 Approved How to Apply Video Filters Mobile and Desktop
- New In 2024, How to Use LUTs in Lumafusion & Free LUTs Resource
- How To Quick Guide for Making Google Slideshows for 2024
- Updated Magic Effects Video Making How To
- New 2024 Approved Change Aspect Ratio of Video
- What Are the Top 15 Slideshow Presentation Examples Your Audience Will for 2024
- 4 Ways to Add White Border to Video on Mobile and Desktop
- Updated Steps to Create Makeup Videos
- How to Make Random Letter Reveal Intro?
- In 2024, How to Make Stunning Glitch Effect in Photoshop?
- New How to Create Your Own LUTs for Your Video with Filmora for 2024
- Adobe After Effects Review for 2024
- New Best Guide of 8 Photo Collage Apps for PC for 2024
- Updated In 2024, Add Text Animation to A Video Online
- Updated How to Add Expression in After Effects for 2024
- In 2024, Dubbing Videos With Voiceovers | Wondershare Filmora Tutorial
- Updated Easy Guide to Zoom Video in VLC for 2024
- 2024 Approved How to Add Green Screen in OBS
- New 2024 Approved How to Shoot Cinematic Footage From a Smartphone
- Updated How to Add Camera Shake to Video in Adobe After Effects
- Updated Top 16 Motion Blur Apps for Videos & Photos
- Updated Easy Guide to Apply Slow Zoom Effects to Videos for 2024
- Updated Unlock Your Video Editing Potential With Wondershare Filmora
- Updated Video Maker with Song
- New Full Guide to Discord Boost for 2024
- Updated Are You Trying to Create a Stunning Intro for Your Video for Free? This Article Will Show You How to Make an Intro Video Using InVideo in a Few Simple Steps
- In 2024, Easy Ways to Edit Recorded Video
- Home Button Not Working on Realme 12 Pro 5G? Here Are Real Fixes | Dr.fone
- Top-Notch Solutions for Disabled Apple ID From Apple iPhone SE (2022) Making It Possible
- Forgot Pattern Lock? Heres How You Can Unlock Samsung Galaxy A14 4G Pattern Lock Screen
- In 2024, 5 Techniques to Transfer Data from Oppo Find X7 to iPhone 15/14/13/12 | Dr.fone
- In 2024, How To Open Your iPhone SE (2020) Without a Home Button
- Full Tutorial to Bypass Your Poco C50 Face Lock?
- In 2024, Things You Should Know When Unlocking Total Wireless Of iPhone SE (2022)
- How To Unlock iPhone 6 Plus 3 Ways To Unlock
- Set Your Preferred Job Location on LinkedIn App of your Motorola Moto G23 | Dr.fone
- 8 Quick Fixes Unfortunately, Snapchat has Stopped on Oppo Reno 11F 5G | Dr.fone
- In 2024, Pokemon Go Error 12 Failed to Detect Location On Vivo V29 Pro? | Dr.fone
- Full Solutions to Fix Error Code 920 In Google Play on Xiaomi Redmi Note 12 Pro 5G | Dr.fone
- Thinking About Changing Your Netflix Region Without a VPN On ZTE Axon 40 Lite? | Dr.fone
- Fixing Persistent Pandora Crashes on Samsung Galaxy A05s | Dr.fone
- New 2024 Approved Animate Your Photo Online with These Awesome Tools
- In 2024, CatchEmAll Celebrate National Pokémon Day with Virtual Location On Nokia C32 | Dr.fone
- In 2024, Best Ways to Bypass iCloud Activation Lock on iPhone 6s Plus/iPad/iPod
- List of Pokémon Go Joysticks On Vivo Y27 4G | Dr.fone
- Delete Gmail Account With/Without Password On Tecno Pova 5
- Detailed guide of ispoofer for pogo installation On Realme V30T | Dr.fone
- 3 Ways to Erase iPhone 13 When Its Locked Within Seconds | Dr.fone
- Your Complete Guide To Reset Tecno Spark 10 5G | Dr.fone
- Latest way to get Shiny Meltan Box in Pokémon Go Mystery Box On Oppo Reno 11 5G | Dr.fone
- In 2024, Complete Tutorial to Use GPS Joystick to Fake GPS Location On Motorola G54 5G | Dr.fone
- Read This Guide to Find a Reliable Alternative to Fake GPS On Motorola G24 Power | Dr.fone
- A Working Guide For Pachirisu Pokemon Go Map On Motorola Moto E13 | Dr.fone
- How To Revive Your Bricked Infinix Smart 8 Plus in Minutes | Dr.fone
- In 2024, Complete Fixes To Solve Apple iPhone 8 Randomly Asking for Apple ID Password
- 15 Best Strongest Pokémon To Use in Pokémon GO PvP Leagues For Oppo Reno 10 Pro+ 5G | Dr.fone
- How to Easily Hard reset my Vivo X Fold 2 | Dr.fone
- FRP Hijacker by Hagard Download and Bypass your Tecno Camon 20 FRP Locks
- How to Unlock Nubia Z50S Pro Phone with Broken Screen
- How to Fix Android App Not Installed Error on OnePlus Open Quickly? | Dr.fone
- Top iPhone SE (2022) Message Recovery Software | Stellar
- Title: In 2024, Minecraft Pixel Art Is a Trending Subject, and They Simply Consist of In-Game Pixel Artworks, Besides the Minecraft Houses, Farms, or Cities. Lets Explore the Fantastic World of Minecraft Pixel Art
- Author: Chloe
- Created at : 2024-04-24 07:08:22
- Updated at : 2024-04-25 07:08:22
- Link: https://ai-editing-video.techidaily.com/in-2024-minecraft-pixel-art-is-a-trending-subject-and-they-simply-consist-of-in-game-pixel-artworks-besides-the-minecraft-houses-farms-or-cities-lets-explor/
- License: This work is licensed under CC BY-NC-SA 4.0.
