

In 2024, Slow-Motion Edits Are Pretty Mesmerizing, and Weve All Imagined Ourselves in One of Those Visually Appealing, Slowed-Down Movies. Well Teach You How to Make a Smooth Slo-Mo Video Using Twixtor in This Article. Stay Tuned Until the End
Slow-Motion Edits Are Pretty Mesmerizing, and We’ve All Imagined Ourselves in One of Those Visually Appealing, Slowed-Down Movies. We’ll Teach You How to Make a Smooth Slo-Mo Video Using Twixtor in This Article. Stay Tuned Until the End
Twixtor is a plug-in program for the After Effects software that allows you to create slow-motion effects from any video clip by adjusting the settings of the plug-in software. But what Twixtor is and why it is utilized are the topics we will cover in this article.
In addition, we will learn how to manipulate its characteristics to get the best possible outcome for our working composition in the Premiere Pro and After Effects plug-ins. Without any further ado, let’s get straight to the business!
In this article
01 What is Twixtor and How Does It Work?
02 How to Use Twixtor to Create Super Slow-Mo in Adobe Premiere Pro?
03 How to Create Super Slow Motion in After Effects with Twixtor?
04 How to Get the Twixtor Style Effect on iPhone?
Part 1: What is Twixtor and How Does It Work?
Twixtor is a plug-in developed by RevisionFX. It is available for purchase. The plug-in gives users the ability to speed up, slow down, or convert the frame rate of picture sequences, all with special effects. Twixtor can visually estimate what a video is meant to look like in a slow-motion setting using video analysis and interoperability.
Due to the need for unparalleled image quality, RE: Vision Effects developed unique tracking technology that determines every individual pixel’s motion. This technology allows Twixtor to synthesize new innovative frames by warping and interpolating frames from the original sequence, resulting in unprecedented image quality.
Reset the clock to a single-speed setting. Always remember that you can customize the retiming on a frame-by-frame basis!
When items are crossing in the scene, Twixtor is more accurate and shows fewer artifacts than other rendering engines. This reduces the ripping and stretching of items when they cross the frame or exit it completely.
But how does Twixtor work is the million-dollar question! While Premiere includes the ability to slow down your film and has a newer, better-quality version dubbed Optical Flow, it cannot zoom in on your footage (called Pixel Motion in After Effects).
The slow-motion quality is undoubtedly superior to that of simple frame blending, but it is not the finest grade slow motion available. The TWIXTOR from Re: Vision Effects has long been the go-to solution for the most excellent post-slow motion. It is pricey, but it is well worth it.
The Pro edition provides you with the opportunity to fine-tune the pitch of the auto track, as well as the option to employ mattes and alphas to enrich your tracks and the ability to deal with motion vectors from a 3D system, among other features.
Part 2: How to Use Twixtor to Create Super Slow-Mo in Adobe Premiere Pro?
As we’ve already mentioned, we will be analyzing how Twixtor makes slow mos; we will be starting with the Adobe Premiere Pro. The following are the steps you need to learn to perform it yourself.
Step 1: After importing the video to the timeline, do some basic editing such as trimming and removing audio from the video.

Step 2: Nest the sequence to convert the video into a new sequence automatically.
Step 3: Go to the Effects tab and search for Twixtor, and then drop the Twixtor Pro to the video clip in the timeline.

Step 5: Right-click the video in the timeline again and scroll down to Show Clip Keyframes to enable the Speed option under Time Remapping. You can now enable the GPU acceleration to fast rendering.
Step 6: Click the Keyframe icon to mark the points where you want to begin with the slow-motion effect, and then mark the end part of the slow-motion effect video.

Step 7: Now, drag the line lower to add a slo-mo effect to video.

Remember that your video can sometimes lag if you set the video speed at a meager percentage. To avoid that, utilize settings in a better way to ensure your video works flawlessly.
Part 3: How to Create Super Slow Motion in After Effects with Twixtor?
When working with After Effects software, Twixtor is a convenient plug-in since it allows us to create slow-motion effects from any video source.
We’ll look at an example to better comprehend what we’re talking about in this post. Before we begin our study of the Twixtor plug-in, let us get acquainted with the software’s operating screen to quickly understand the content of this article as we go through our assessment of the Twixtor plug-in.
Step 1: When you launch After Effects, go to File>Import>File to import your footage. Here you can see the actual frame rate of your film. You may drag your film onto the timeline by right-clicking it and selecting New Comp from Selection.
Step 2: Select your video from the timeline in the composition, then go to Effects & Presets pane to search Twixtor, and you will find Twixtor or Twixtor Pro under RE: Vision plug-ins, depending on your version. Drag and drop it to the video in the timeline.

Step 3: In the Twixtor effect controls, enter the frame rate of the film you found previously. The faster and better your slowed footage will become, the higher the frame rate.
For organizational reasons, After Effects employs the “tree-ing“ concept, sometimes known as drop-down menus. Click on the yellow number next to Input: Frame Rate under Source Control. It should be set to 29.97 by default. Please set it to the frame rate you discovered previously in the tutorial.

You can then adjust the speed and time remap mode accordingly. For more information, you can watch the video tutorial below to find out how to create smooth Twixtor effects in Adobe After Effects.
Part 4: How to Get the Twixtor Style Effect on iPhone?
It is possible to shoot videos in slow motion and then play them back at average speed using SloPro – 1000fps Slow Motion Video from Sand Mountain Studios, a fantastic video editing effects tool.
Inserting slow motion cues and changing playback speeds without waiting is possible with renderless editing. It allows you to produce slow-motion films and enables you to insert extremely rapid sequences and cycle between various speeds.
SloPro even enables you to edit your films as they are being recorded, allowing you to choose between slow and fast motion while recording.
This program provides complete support for sharing through social media platforms such as Facebook, Twitter, and YouTube, allowing you to show off your impressive video creations to the rest of the world. It has already been established that SloPro is one of the few videos editing software that includes optical flow as a stand-alone effect.

Step 1: After you’ve imported your video, click on the red Edit button in the top-right corner of the screen to bring up the editing window.
Step 2: Trim the video down to the section that you wish to modify if required using the Clip In and Clip Out functions. It is divided into clips using the speed in and speeds out controls.
Step 3: Tap on the top-left box to bring up a list of fast and slow speed choices. Drag the cursor over the clip to bring up a fast and slow speed options list.
Step 4: If you want to use a slow speed, press the box in the upper right corner and choose Optical Flow from the menu.
This will render the clip with optical flow, resulting in the smooth Twixtor effect you are familiar with. There will be a watermark on your video if you use the program’s free version, but you can easily crop it out.
Conclusion
Slow-Mo videos are undoubtedly watch-worthy. They allow us to observe the fine details and appreciate the video content. But creating one isn’t child’s play. So, we decided to compile this article to inform our worthy readers on how they can get started using Twixtor on Adobe Premiere Pro and After Effects. We hope you had a fun time learning!
02 How to Use Twixtor to Create Super Slow-Mo in Adobe Premiere Pro?
03 How to Create Super Slow Motion in After Effects with Twixtor?
04 How to Get the Twixtor Style Effect on iPhone?
Part 1: What is Twixtor and How Does It Work?
Twixtor is a plug-in developed by RevisionFX. It is available for purchase. The plug-in gives users the ability to speed up, slow down, or convert the frame rate of picture sequences, all with special effects. Twixtor can visually estimate what a video is meant to look like in a slow-motion setting using video analysis and interoperability.
Due to the need for unparalleled image quality, RE: Vision Effects developed unique tracking technology that determines every individual pixel’s motion. This technology allows Twixtor to synthesize new innovative frames by warping and interpolating frames from the original sequence, resulting in unprecedented image quality.
Reset the clock to a single-speed setting. Always remember that you can customize the retiming on a frame-by-frame basis!
When items are crossing in the scene, Twixtor is more accurate and shows fewer artifacts than other rendering engines. This reduces the ripping and stretching of items when they cross the frame or exit it completely.
But how does Twixtor work is the million-dollar question! While Premiere includes the ability to slow down your film and has a newer, better-quality version dubbed Optical Flow, it cannot zoom in on your footage (called Pixel Motion in After Effects).
The slow-motion quality is undoubtedly superior to that of simple frame blending, but it is not the finest grade slow motion available. The TWIXTOR from Re: Vision Effects has long been the go-to solution for the most excellent post-slow motion. It is pricey, but it is well worth it.
The Pro edition provides you with the opportunity to fine-tune the pitch of the auto track, as well as the option to employ mattes and alphas to enrich your tracks and the ability to deal with motion vectors from a 3D system, among other features.
Part 2: How to Use Twixtor to Create Super Slow-Mo in Adobe Premiere Pro?
As we’ve already mentioned, we will be analyzing how Twixtor makes slow mos; we will be starting with the Adobe Premiere Pro. The following are the steps you need to learn to perform it yourself.
Step 1: After importing the video to the timeline, do some basic editing such as trimming and removing audio from the video.
Step 2: Nest the sequence to convert the video into a new sequence automatically.
Step 3: Go to the Effects tab and search for Twixtor, and then drop the Twixtor Pro to the video clip in the timeline.
Step 5: Right-click the video in the timeline again and scroll down to Show Clip Keyframes to enable the Speed option under Time Remapping. You can now enable the GPU acceleration to fast rendering.
Step 6: Click the Keyframe icon to mark the points where you want to begin with the slow-motion effect, and then mark the end part of the slow-motion effect video.
Step 7: Now, drag the line lower to add a slo-mo effect to video.
Remember that your video can sometimes lag if you set the video speed at a meager percentage. To avoid that, utilize settings in a better way to ensure your video works flawlessly.
Part 3: How to Create Super Slow Motion in After Effects with Twixtor?
When working with After Effects software, Twixtor is a convenient plug-in since it allows us to create slow-motion effects from any video source.
We’ll look at an example to better comprehend what we’re talking about in this post. Before we begin our study of the Twixtor plug-in, let us get acquainted with the software’s operating screen to quickly understand the content of this article as we go through our assessment of the Twixtor plug-in.
Step 1: When you launch After Effects, go to File>Import>File to import your footage. Here you can see the actual frame rate of your film. You may drag your film onto the timeline by right-clicking it and selecting New Comp from Selection.
Step 2: Select your video from the timeline in the composition, then go to Effects & Presets pane to search Twixtor, and you will find Twixtor or Twixtor Pro under RE: Vision plug-ins, depending on your version. Drag and drop it to the video in the timeline.
Step 3: In the Twixtor effect controls, enter the frame rate of the film you found previously. The faster and better your slowed footage will become, the higher the frame rate.
For organizational reasons, After Effects employs the “tree-ing“ concept, sometimes known as drop-down menus. Click on the yellow number next to Input: Frame Rate under Source Control. It should be set to 29.97 by default. Please set it to the frame rate you discovered previously in the tutorial.
You can then adjust the speed and time remap mode accordingly. For more information, you can watch the video tutorial below to find out how to create smooth Twixtor effects in Adobe After Effects.
Part 4: How to Get the Twixtor Style Effect on iPhone?
It is possible to shoot videos in slow motion and then play them back at average speed using SloPro – 1000fps Slow Motion Video from Sand Mountain Studios, a fantastic video editing effects tool.
Inserting slow motion cues and changing playback speeds without waiting is possible with renderless editing. It allows you to produce slow-motion films and enables you to insert extremely rapid sequences and cycle between various speeds.
SloPro even enables you to edit your films as they are being recorded, allowing you to choose between slow and fast motion while recording.
This program provides complete support for sharing through social media platforms such as Facebook, Twitter, and YouTube, allowing you to show off your impressive video creations to the rest of the world. It has already been established that SloPro is one of the few videos editing software that includes optical flow as a stand-alone effect.
Step 1: After you’ve imported your video, click on the red Edit button in the top-right corner of the screen to bring up the editing window.
Step 2: Trim the video down to the section that you wish to modify if required using the Clip In and Clip Out functions. It is divided into clips using the speed in and speeds out controls.
Step 3: Tap on the top-left box to bring up a list of fast and slow speed choices. Drag the cursor over the clip to bring up a fast and slow speed options list.
Step 4: If you want to use a slow speed, press the box in the upper right corner and choose Optical Flow from the menu.
This will render the clip with optical flow, resulting in the smooth Twixtor effect you are familiar with. There will be a watermark on your video if you use the program’s free version, but you can easily crop it out.
Conclusion
Slow-Mo videos are undoubtedly watch-worthy. They allow us to observe the fine details and appreciate the video content. But creating one isn’t child’s play. So, we decided to compile this article to inform our worthy readers on how they can get started using Twixtor on Adobe Premiere Pro and After Effects. We hope you had a fun time learning!
Best Video Editors to Add Text to a Video
While it can be very easy to add text to an image, the same cannot be said when it comes to adding even the simplest text to a video. You will need video editing software that is designed with the necessary features to help you add text to your video.
There are very many programs in the market that can technically be used to add text to a video. But the ones we will look at are video editors that make the process easy, but also give you a wide range of options to customize your text in numerous ways.
Filmora
Filmora by Wondershare is one of the best video editors in the market. Its user interface is so easy to use that adding text to the video is a simple 3-step process. Aside from adding text to the video, Filmora also allows you to edit other aspects of the video including adding transitions, overlays, and animations to any section of the video.

Key Features:
- You can use Filmora to add text to any section of the video
- It gives you the freedom to move the text to any section of the video
- Customizing the text, you add to the video can be done in numerous ways including changing the color, and font and adding animations to the text.
- It offers numerous templates to choose from and different font styles that you can use
- It has a simple user interface that makes the video editing process very easy
- It has numerous other video editing capabilities that allow you to create and edit videos in different ways including splitting videos, trimming videos, and even merging videos clips into one
- You can upload the videos directly to YouTube after editing.
After Effects
Adobe After Effects is a motion picture editing program that you can also use to add text and other animations to your video. While you can use it to add simple text to the video, it is an ideal solution when your goal is to add advanced text animations. It is however by no means a simple solution, especially for beginners who may find it hard to get going with After Effects.

Key Features:
- You can add simple lines of text to any section of the video
- Text is easily customizable by changing the color, font, and size of the text
- You can also choose to change the entire text layer and add advanced animations and effects
- There are a lot of text, animations, and effects templates to choose from
- You can easily copy text from other Adobe applications to use in After Effects
Movavi Editor
Movavi video editor is another great video editor that you can use to add and edit text on a video. Like most similar tools it is designed to simplify the process, allowing you to add text to any section of the document, move the text to any location on the video and even add text effects to customize the text. It has a very simple user interface that allows you to do that quickly and easily.

Key Features:
- You can add text to any section of the video
- Customizing the text by changing the font, color and size is also very easy
- The user interface is very easy to use, allowing you to add even blocks of text very quickly
- You also have additional options to edit the video including splitting and merging the video or adjusting the brightness, saturation, and color.
iMovie
This is a built-in video editor that you will find on macOS and iOS devices. Even though it is free, iMovie has a lot of features that come in handy when you want to add and edit text on a video. The fact that it can be used on iOS devices is an added advantage when you want to edit videos on the go.

Key Features:
- It allows users to add transitions and effects to the text you add to the video
- It comes with a lot of title templates to choose from
- Adding animated text is also very simple including Sideways Drift, Lens Flare, and more
- You can customize the text in very many ways including adding fonts, drop shadows, changing the color, and even resizing or repositioning the text.
Camtasia
TechSmith Camtasia is one of the most popular tools to create and edit videos. Of the numerous features that you get when you choose to use Camtasia is adding and editing text to the video. It has numerous templates that can be used to customize the text you add in various ways.

Key Features:
- It gives you numerous options to add text to the images including text boxes, templates, and effects
- It has a speech-to-text feature that is perfect for adding captions and subtitles to the video
- You can easily customize the text by adding transitions and effects or even by simply changing the font, color, and size of the text
- The text can be moved to any section of the video
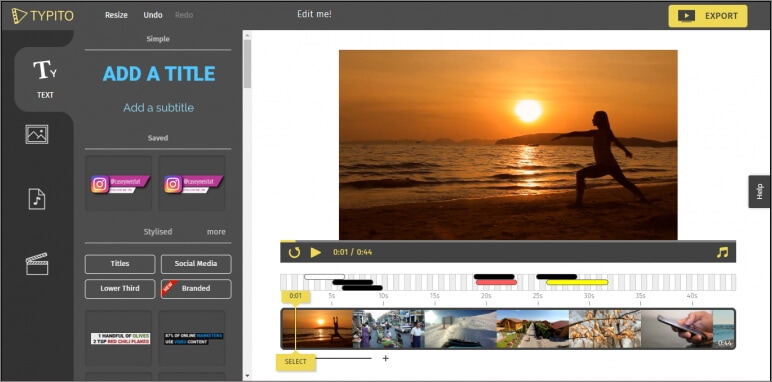
Typito
Typito is an online video editor with simple tools that can help you make changes to any video. designed to help YouTube content creators and video editors, Typito can be used to add all kinds of text and text effects to any video. It is accessible on all browsers and it is also very easy to use.
Key Features:
- It is very easy to use, allowing you to add text to any video in a few simple steps
- It has numerous templates to choose from
- Changing the font size, color, and style of the text is very easy
- You can publish videos directly to numerous video-sharing sites after editing
- It allows users to add animations, transitions, and effects to the text
Splice
Splice is an iOS app designed to help you add text to videos on iOS devices. Adding text to any video using Splice can be easily done using the overlay feature. It also has numerous other video editing features including allowing you to easily synchronize your videos and music, adding filters and transitions, and more.

Key Features:
- it has a simple user interface that makes adding text very easy
- You can customize the text in various ways including changing the font size, color and style or even adding various text effects
- Videos can be saved on the device or shared directly on social media apps like Facebook, Instagram, and YouTube
- It has numerous other video editing features including filters and animations
Clipomatic
If the text you want to add to the video is in the form of captions or subtitles, then Clipomatic is perhaps the best choice. It supports various languages including German, French, Portuguese, and even Chinese. You can also use it to add regular text to any video, reposition the text on any section of the video and customize the text in various ways.

Key Features:
- It is available for both Android and iOS
- Adding text to the video is very easy
- You can easily customize the text by changing the font color, and size and adding transitions and text effects
- It supports various languages, making it ideal for captions and subtitles
MySubtitle
MySubtitle is a simple but highly effective app that you can use to add text to your video. As the name suggests, this tool is ideal for adding subtitles and you can do that very easily by simply typing in the text and syncing the text to the video’s content.

Key Features:
- It is available for both iOS and Android devices
- You can type in your subtitles directly on the video
- Subtitles can then be paced to suit the video’s playback speed
- It is completely free to use
- You can share the videos you edit directly on various social media platforms
Free Download For Win 7 or later(64-bit)
Free Download For macOS 10.14 or later
Free Download For macOS 10.14 or later
How to Do Perfect Match Paint 100% the Easy Way
How to Do Perfect Match Paint 100% the Easy Way
An easy yet powerful editor
Numerous effects to choose from
Detailed tutorials provided by the official channel
You always have to be highly precise and appropriate when choosing the color for your wall. If you are not accurate enough, you might not choose the right shade, which would never look good on your walls. But, to help you match the paint colors perfectly, we have discussed three methods.
And lastly, we have also introduced a video editing tool Perfect Match Paint that will help you match the color in your videos as well. So, you can have the perfect desired color on your walls and also in your videos!
In this article
01 [How to Match Paint Color Without a Sample](#Part 1)
02 [Need to Color Match in Video? There’s an App for That…](#Part 2)
Part 1 How to Match Paint Color Without a Sample
We will be discussing three methods in which you will get the perfect answer to the question of how can I match my paint color perfectly. So, let us jump right into the first method without further delay.
01Method 1 Perfect Match Paint without a sample
The following steps will help you attain Perfect Match Paint without the necessity of a sample.
Step Clean the print area
The first and the most essential step is to make the area where you will be painting clean and tidy. As time passes, fingerprints, marks, dust, and many other things accumulate and make the area dirty. And if you do not clean the same, then the paint you do on it becomes much darker, dull, and gives a shabby outlook.
Use a damp sponge, and if possible, it is better to use soap on the sponge. And most importantly, you will have to let the area dry out completely before you put it on to test the paint. Moreover, the new paint adheres much better than before when you clean the area.

Step Scraping off
The next step requires you to use a utility knife. And with that utility knife, you will have to scrap an inch or 2.5 cm of your wall paint. It is because, when you have a sample, you can easily bring that to the store for paint matching near me. Use a plastic bag to secure the sample price. It will prevent the paint of the sample to smudge or getting any marks or destruction.
And after you find paint colors that match the ones you need, try to dab a little of that paint on the sample. As a result, you will precisely know how perfectly the new shade of paint matches with the new one. It ensures optimum precision and can be the best way to match paint.

Step Bring the object if possible
The best way to maintain absolute precision in the match is by bringing an object to the store. You can also opt for a car paint match near me. If you bring the object with the color for matching, it ensures perfect matching and 10precision. Nowadays, the technology is highly advanced and will help you obtain the best paint match.
02Method 2 Using a sample
Since we have discussed the steps for matching paint without the sample, you must know how to match color with the help of samples. So, here are the steps for doing so.
Step 1: Click a Picture of the original hue
This step is necessary for better precision and matching the color as perfectly as possible. Clock a picture of the original color sample. The color in the photo might not be absolutely precise. But it can help to a large extent to match the color as perfectly as possible. You can easily take the sample to any renowned color matching store, like, dupli color paint match and have the perfect color matching done.
And it is better to not one picture or from just one angel. It will be best to take numerous snaps and that too, from different angles, sides and lighting conditions. It will help you get the original color shades in different angles, shades and lights, and it increases the possibility of matching the color as impeccably as possible.
Step 2: Bring home more than one sample
You will see numerous samples of paints that you feel will match the color you brought from your home as a sample of the original color. You might not be sure which sample perfectly matches the original sample color at that exact moment. However, if you find a sample that seems t match perfectly, you must not make your decision right at that moment. Because in the store, the lighting, angles, and many other factors play a hugely influential role in enhancing the shades of the sample colors.
So, the color you see in the store often does not remain the same in natural light settings; it might get a bit darker or lighter. So, it is always better to bring home those samples that you feel match the original shade of the sample you brought. This increases the possibility of being the most precise and impeccable in matching the colors.

Step 3: stick the sample and compare.
This is the final step for matching the colors of paint with the help of a sample. After bringing home the samples that you found similar to the original sample, tape them to the wall. Take a sample at a time and use a tap to place them on the wall. You can also tape all the samples side by side, leaving enough gap between them.
It helps better compare and matches the sample’s colors and the wall. A common thing that occurs is that in the daytime, you find one color matching perfectly, whereas, in the nighttime, some other sample color is matching perfectly. In such an instance, it is best to ask the store if they can give you the shade by mixing both the colors: the color that perfectly matched with the sample in the daytime and the color that perfectly matched with the sample in the time.

Step 4: Paint the samples on the wall
It is an optional step, and you can opt for this step if you are not getting a hundred per cent confidence in choosing the correct color. Try to paint the colors of the samples that you are finding similar to the wall. Since the wall already has the original color, when you paint the sample colors on it, the sample colors clearly distinguish which samples match more impeccably with the actual color.

03Method 3 with the help of apps
Since the technology has advanced in the most progressive way possible, you can easily match the paint colors through an application. So now, we will be listing down the steps that will help you match the paints with the help of mobile applications. The steps are given as follows.
Step 1 Install the application
You will find numerous mobile applications meant for matching paint colors. Opt for the ones you find the best and most efficient. Download it and install it on your phone. If you have used a renowned brand for painting, you can use their application. For example, you can use Asian paints color matching if you have used their brand of paints before.

Step 2 Scan the shade
Now, even the original paint shade. There are factors such as lighting, angel and shadow that you must remover to consider while you scan the color of the original sample.

Step 3 Paint the sample
To be most precise and sure, paint the sample of the paint you have chosen. It will be a way of double-checking your division and ensuring a perfect paint match.

Step 4 Use a color scanner
It is another optional step, but there will be absolutely no doubt in the precision of paint matching if you use it. You can either borrow or buy a paint scanner. If you are not planning to paint again soon, it is best to borrow the paint scanner.

Part 2 Need to Color Match in Video? There’s an App for That
Right now, we talked about mobile apps that can help you match paint colors for your walls. Well, you can ever match colors in the videos that you capture! Yes, that is possible in the highest quality and most effortlessly. And color match paint from photos can be likely through the best video editing tool- Wondershare Filmora Video Editor . More precisely, it has numerous features; one among them is the “Color Match: a feature which makes this possible.
The “Color Match” feature of Filmora allows you to extract a clip from the video where you want to match the colors and then carries out the process most effortlessly. You can apply any color you wish to within a few minutes.
For Win 7 or later (64-bit)
For macOS 10.12 or later
You can use this incredible tool on any device, and it will work equally proficiently and help you create fantastic videos!
● Key Takeaways from This Episode →
● How to match paint colors without samples
● Two more methods of matching paint colors
● We introduced Filmora and its feature of “Color Match” that can help you match the colors of your videos most profoundly.
You always have to be highly precise and appropriate when choosing the color for your wall. If you are not accurate enough, you might not choose the right shade, which would never look good on your walls. But, to help you match the paint colors perfectly, we have discussed three methods.
And lastly, we have also introduced a video editing tool Perfect Match Paint that will help you match the color in your videos as well. So, you can have the perfect desired color on your walls and also in your videos!
In this article
01 [How to Match Paint Color Without a Sample](#Part 1)
02 [Need to Color Match in Video? There’s an App for That…](#Part 2)
Part 1 How to Match Paint Color Without a Sample
We will be discussing three methods in which you will get the perfect answer to the question of how can I match my paint color perfectly. So, let us jump right into the first method without further delay.
01Method 1 Perfect Match Paint without a sample
The following steps will help you attain Perfect Match Paint without the necessity of a sample.
Step Clean the print area
The first and the most essential step is to make the area where you will be painting clean and tidy. As time passes, fingerprints, marks, dust, and many other things accumulate and make the area dirty. And if you do not clean the same, then the paint you do on it becomes much darker, dull, and gives a shabby outlook.
Use a damp sponge, and if possible, it is better to use soap on the sponge. And most importantly, you will have to let the area dry out completely before you put it on to test the paint. Moreover, the new paint adheres much better than before when you clean the area.
Step Scraping off
The next step requires you to use a utility knife. And with that utility knife, you will have to scrap an inch or 2.5 cm of your wall paint. It is because, when you have a sample, you can easily bring that to the store for paint matching near me. Use a plastic bag to secure the sample price. It will prevent the paint of the sample to smudge or getting any marks or destruction.
And after you find paint colors that match the ones you need, try to dab a little of that paint on the sample. As a result, you will precisely know how perfectly the new shade of paint matches with the new one. It ensures optimum precision and can be the best way to match paint.
Step Bring the object if possible
The best way to maintain absolute precision in the match is by bringing an object to the store. You can also opt for a car paint match near me. If you bring the object with the color for matching, it ensures perfect matching and 10precision. Nowadays, the technology is highly advanced and will help you obtain the best paint match.
02Method 2 Using a sample
Since we have discussed the steps for matching paint without the sample, you must know how to match color with the help of samples. So, here are the steps for doing so.
Step 1: Click a Picture of the original hue
This step is necessary for better precision and matching the color as perfectly as possible. Clock a picture of the original color sample. The color in the photo might not be absolutely precise. But it can help to a large extent to match the color as perfectly as possible. You can easily take the sample to any renowned color matching store, like, dupli color paint match and have the perfect color matching done.
And it is better to not one picture or from just one angel. It will be best to take numerous snaps and that too, from different angles, sides and lighting conditions. It will help you get the original color shades in different angles, shades and lights, and it increases the possibility of matching the color as impeccably as possible.
Step 2: Bring home more than one sample
You will see numerous samples of paints that you feel will match the color you brought from your home as a sample of the original color. You might not be sure which sample perfectly matches the original sample color at that exact moment. However, if you find a sample that seems t match perfectly, you must not make your decision right at that moment. Because in the store, the lighting, angles, and many other factors play a hugely influential role in enhancing the shades of the sample colors.
So, the color you see in the store often does not remain the same in natural light settings; it might get a bit darker or lighter. So, it is always better to bring home those samples that you feel match the original shade of the sample you brought. This increases the possibility of being the most precise and impeccable in matching the colors.
Step 3: stick the sample and compare.
This is the final step for matching the colors of paint with the help of a sample. After bringing home the samples that you found similar to the original sample, tape them to the wall. Take a sample at a time and use a tap to place them on the wall. You can also tape all the samples side by side, leaving enough gap between them.
It helps better compare and matches the sample’s colors and the wall. A common thing that occurs is that in the daytime, you find one color matching perfectly, whereas, in the nighttime, some other sample color is matching perfectly. In such an instance, it is best to ask the store if they can give you the shade by mixing both the colors: the color that perfectly matched with the sample in the daytime and the color that perfectly matched with the sample in the time.
Step 4: Paint the samples on the wall
It is an optional step, and you can opt for this step if you are not getting a hundred per cent confidence in choosing the correct color. Try to paint the colors of the samples that you are finding similar to the wall. Since the wall already has the original color, when you paint the sample colors on it, the sample colors clearly distinguish which samples match more impeccably with the actual color.
03Method 3 with the help of apps
Since the technology has advanced in the most progressive way possible, you can easily match the paint colors through an application. So now, we will be listing down the steps that will help you match the paints with the help of mobile applications. The steps are given as follows.
Step 1 Install the application
You will find numerous mobile applications meant for matching paint colors. Opt for the ones you find the best and most efficient. Download it and install it on your phone. If you have used a renowned brand for painting, you can use their application. For example, you can use Asian paints color matching if you have used their brand of paints before.
Step 2 Scan the shade
Now, even the original paint shade. There are factors such as lighting, angel and shadow that you must remover to consider while you scan the color of the original sample.
Step 3 Paint the sample
To be most precise and sure, paint the sample of the paint you have chosen. It will be a way of double-checking your division and ensuring a perfect paint match.
Step 4 Use a color scanner
It is another optional step, but there will be absolutely no doubt in the precision of paint matching if you use it. You can either borrow or buy a paint scanner. If you are not planning to paint again soon, it is best to borrow the paint scanner.
Part 2 Need to Color Match in Video? There’s an App for That
Right now, we talked about mobile apps that can help you match paint colors for your walls. Well, you can ever match colors in the videos that you capture! Yes, that is possible in the highest quality and most effortlessly. And color match paint from photos can be likely through the best video editing tool- Wondershare Filmora Video Editor . More precisely, it has numerous features; one among them is the “Color Match: a feature which makes this possible.
The “Color Match” feature of Filmora allows you to extract a clip from the video where you want to match the colors and then carries out the process most effortlessly. You can apply any color you wish to within a few minutes.
For Win 7 or later (64-bit)
For macOS 10.12 or later
You can use this incredible tool on any device, and it will work equally proficiently and help you create fantastic videos!
● Key Takeaways from This Episode →
● How to match paint colors without samples
● Two more methods of matching paint colors
● We introduced Filmora and its feature of “Color Match” that can help you match the colors of your videos most profoundly.
How to Create an Aesthetic Slideshow Presentation
How to Make an Aesthetic Slideshow Presentation
An easy yet powerful editor
Numerous effects to choose from
Detailed tutorials provided by the official channel
The slideshow must be engaging and attractive. And the recent trend is all about making things around your aesthetic, that is, visually pleasant. You might want to know how you, too, can make such aesthetic slideshows? Well, in the following discussion, we will discuss all of it, along with the best tool for making the best aesthetic slideshows.
In this article
01 The Best 8 Premium Aesthetic Slideshow Template Designs
02 [How to Make an Aesthetic Slideshow Presentation](#Part 2)
03 [FAQ of Making Aesthetic Slideshow](#Part 3)
Part 1 The Best 8 Premium Aesthetic Slideshow Template Designs
One of the best ways of making marvellous aesthetic slideshows is by using an aesthetic slideshow template. The templates have readymade elements that emit aesthetic and minimalistic vibes to your slideshow.
You will find numerous templates that have an aesthetic and minimalistic theme. You can choose any among the countless for your slideshows. There are many designs of templates available for making aesthetic slideshows.
We will discuss eight premium aesthetic slideshow template designs that you can readily use in your slideshows to make your work a lot easier. These template designs will be some of the best ones and can serve and suit every possible purpose for creating a slideshow.
So, here are the best and the most useful eight aesthetic slideshow template designs that you can use for making fantastic aesthetic slideshows.
01Leafy Template Design
The Leafy template design is best suitable for making the best aesthetic slideshows with a classy presentation theme. It is available in Google Slides, and it consists of as many as 120 unique designed slides and two variations of colours.
You can readily make changes and edits and customize the tinplated design according to your imagination, reference and skills. It is best for making classy presentations because the designs are simple, yet they reflect the quality of elegance that helps you create the best aesthetic sideshows.

02Cinematic Reel Template
The Cinematic Reel template is a premiere pro template design by Videomaker. It consists of 22 media layers and 12 editable tact layers, and it has a very stylish design and includes simple yet impactful text animations.

Any trailers, demos, reel videos, short movie trails and the like can be ideally and perfectly created with this template design. Using this template design is absolutely effortless, and you can make any content-related slideshows effortlessly and ideally with this slideshow template design by Videomaker.
03B-Clinique
B-Clinique is the template design for making a minimalist aesthetic slideshow avowable on Google Slides. This template design is best suited for creating trendy aesthetic slideshows. It includes designs of line arts, subtle pleasant shares and all the other components that solely and perfectly reflect an aesthetic aura.
It was primarily designed for making slides for cosmetology purposes. It has 30 different slide designs and is ideal for creating slides for the industry by integrating a few edits. It ideally reflects a calming aura as it uses the earthy brown tone and shade for the design of the template.

04YouTube Pack Template
We all know that various social media platforms have become the most influential factor in our lives. And YouTube is the most renowned among all the other social media platforms, and now, it has even become a mode of earning a livelihood.
And for making slideshows that are to be put up on one or more social media platforms, especially on YouTube, they need to be presented in a particular manner. And you can readily make aesthetic slideshows ideal for social media platforms, especially YouTube, with the YouTube Pack Templated designs, which is Mirs.
This template includes all the necessary elements, such as the “Subscribe” panel, other buttons, side frames, and the like. One can readily use it to make incredible aesthetic slides for their social media channels.

05Sunlike Template
The Sunlike Templates by the Google Slides. It is a beautiful and professional aesthetic slideshow template with design slides that can create a clean and highly professional. It is a modern-creative type of template that consists of 39 distinctive design slides. You can readily edit and thus, customise the slides according to your overreference, needs and skills.
It helps you create a lively and aesthetic presentation at the same time. It includes a lot of vibrant colours that make your presentation look exuberant and engaging.

06Fast Glitch Transitions Template
The Fast Glitch Transitions template is by Red Feathers. Transitions have been the recent trend, and in every other video, we see different and unique transitions. And when you integrate transitions in your slideshows, they become more eye-catching.
And the glitch transitions can create a unique yet pleasing effect for your slideshows when you use the many among the uncountable options available.

07Solv Template
The Solv template is by Google Slides. It is best suitable for creating your start-up business slideshow presentation when you are a big fan of aesthetic presentations. 36 slides are present with attractive pop colours, which, although they look vibrant, are gladly aesthetic too.

08Text Messages Template
The Text Messages template by Blinque can be the trendiest and the most aesthetic template design one can find. It helps you create slideshow videos in the form of text messages. So, if you want to narrate anything and do it uniquely, this template can be the best fit for you.

Part 2 How to Make an Aesthetic Slideshow Presentation
Making a slideshow presentation is quite simple and an aspect that is well-known to many. But, how can you make your slideshows look aesthetic? If you include them in your slideshows, there are a few factors that can readily turn them aesthetic.
So, let us look into the different aspects that can help you turn your slides aesthetic when you integrate them into it.
● Minimalistic Text Designs
Minimalism and aesthetic aura go simultaneously. So, the more your efforts to keep your texts and writings in your slide minimalistic, the more aesthetic your slide would look. Several such finds or text designs are available, and you can readily choose among them and integrate them into your slides.
● Use soft and pastel colours for your theme of the template
Every aesthetic object’s most common and signature feature is its subtle, pastel shade. So, stick to using a soft pastel shade for the theme of your template. The colours, such as lavender, sift purple, millennial pink, powder blue or tones of silver, can ideally fit under the collection of aesthetic shades for the youth template of the slideshows.
● Minimalistic Pictures
The images you use in your slideshow will play a considerable role in deeming how aesthetic your slides look. So, choose them after enough analysis. See whether the photos have an aesthetic or minimalistic feature. By that, we are referring to the copper tone of the picture, its content and its size. It is best to include small images to reflect the slide’s minimalistic character.
Part 3 FAQ of Making Aesthetic Slideshow
Here are some of the FAQs about making aesthetic slideshows.
01How can I make an aesthetic slideshow in PowerPoint?
One can effortlessly do so with the templates available. Also, it is best to use small images, subtle pastel shades for the theme and minimalistic text designs or fonts in the slides.
02Which is the best tool for creating aesthetic slideshows?
Filmore is one of the most effective and ideal tools for making the most aesthetically pleasing slideshows. It has over 700 filters, innumerable templates and uncountable beneficial features to make your slides look minimalistic and aesthetic.
03How can I use Filmora for making aesthetic slideshows?
Filmora has several templates that reflect minimalistic designs. You can readily use them for your slideshow video. You can also use several filters to give a subtle pastel tone to your slideshow. Lastly, the different motion control features and fonts available can help you make the most aesthetically pleasing slideshows with Filmora.
04Is Filmora suitable for slideshows?
Wondershare Filmora Video Editor is one of the best and renowned tools for video editing. And for making slideshow videos, it Is equally competent and helps make the best and the most aesthetic slideshows with its incredible features.
For Win 7 or later (64-bit)
For macOS 10.12 or later
Filmora is the best video editing tool that one can come across. It has the best and the most advanced features for editing and is ideal for professionals. But, the beginners, too, can use it to enhance their editing skills, as Filmora is not difficult to use.
Also, it is ideal for creating aesthetic slideshow videos. It is because-
● There are more than 800 templates, and among them, there are numerous aesthetic design templates that you can use
● The filters can help add an aesthetic and minimalistic tone to your slideshow video
● You can integrate different aesthetic fonts from the many available.
● Ending Thoughts →
● Now that you know all about creating the best minimalist aesthetic slideshow, bring out all your creative skills and make the most wholesome and engaging slideshow!
● Choose the best templates, and for the ideal results, pick from the templates mentioned above.
● Follow the above steps to create the most aesthetic slideshows that would perfectly mirror your imagination.
● Lastly, use the best video editing tool, Filmora, that will help you make such aesthetic slideshows that will definitely be incomparable and inimitable  Try It Free
The slideshow must be engaging and attractive. And the recent trend is all about making things around your aesthetic, that is, visually pleasant. You might want to know how you, too, can make such aesthetic slideshows? Well, in the following discussion, we will discuss all of it, along with the best tool for making the best aesthetic slideshows.
In this article
01 The Best 8 Premium Aesthetic Slideshow Template Designs
02 [How to Make an Aesthetic Slideshow Presentation](#Part 2)
03 [FAQ of Making Aesthetic Slideshow](#Part 3)
Part 1 The Best 8 Premium Aesthetic Slideshow Template Designs
One of the best ways of making marvellous aesthetic slideshows is by using an aesthetic slideshow template. The templates have readymade elements that emit aesthetic and minimalistic vibes to your slideshow.
You will find numerous templates that have an aesthetic and minimalistic theme. You can choose any among the countless for your slideshows. There are many designs of templates available for making aesthetic slideshows.
We will discuss eight premium aesthetic slideshow template designs that you can readily use in your slideshows to make your work a lot easier. These template designs will be some of the best ones and can serve and suit every possible purpose for creating a slideshow.
So, here are the best and the most useful eight aesthetic slideshow template designs that you can use for making fantastic aesthetic slideshows.
01Leafy Template Design
The Leafy template design is best suitable for making the best aesthetic slideshows with a classy presentation theme. It is available in Google Slides, and it consists of as many as 120 unique designed slides and two variations of colours.
You can readily make changes and edits and customize the tinplated design according to your imagination, reference and skills. It is best for making classy presentations because the designs are simple, yet they reflect the quality of elegance that helps you create the best aesthetic sideshows.
02Cinematic Reel Template
The Cinematic Reel template is a premiere pro template design by Videomaker. It consists of 22 media layers and 12 editable tact layers, and it has a very stylish design and includes simple yet impactful text animations.
Any trailers, demos, reel videos, short movie trails and the like can be ideally and perfectly created with this template design. Using this template design is absolutely effortless, and you can make any content-related slideshows effortlessly and ideally with this slideshow template design by Videomaker.
03B-Clinique
B-Clinique is the template design for making a minimalist aesthetic slideshow avowable on Google Slides. This template design is best suited for creating trendy aesthetic slideshows. It includes designs of line arts, subtle pleasant shares and all the other components that solely and perfectly reflect an aesthetic aura.
It was primarily designed for making slides for cosmetology purposes. It has 30 different slide designs and is ideal for creating slides for the industry by integrating a few edits. It ideally reflects a calming aura as it uses the earthy brown tone and shade for the design of the template.
04YouTube Pack Template
We all know that various social media platforms have become the most influential factor in our lives. And YouTube is the most renowned among all the other social media platforms, and now, it has even become a mode of earning a livelihood.
And for making slideshows that are to be put up on one or more social media platforms, especially on YouTube, they need to be presented in a particular manner. And you can readily make aesthetic slideshows ideal for social media platforms, especially YouTube, with the YouTube Pack Templated designs, which is Mirs.
This template includes all the necessary elements, such as the “Subscribe” panel, other buttons, side frames, and the like. One can readily use it to make incredible aesthetic slides for their social media channels.
05Sunlike Template
The Sunlike Templates by the Google Slides. It is a beautiful and professional aesthetic slideshow template with design slides that can create a clean and highly professional. It is a modern-creative type of template that consists of 39 distinctive design slides. You can readily edit and thus, customise the slides according to your overreference, needs and skills.
It helps you create a lively and aesthetic presentation at the same time. It includes a lot of vibrant colours that make your presentation look exuberant and engaging.
06Fast Glitch Transitions Template
The Fast Glitch Transitions template is by Red Feathers. Transitions have been the recent trend, and in every other video, we see different and unique transitions. And when you integrate transitions in your slideshows, they become more eye-catching.
And the glitch transitions can create a unique yet pleasing effect for your slideshows when you use the many among the uncountable options available.
07Solv Template
The Solv template is by Google Slides. It is best suitable for creating your start-up business slideshow presentation when you are a big fan of aesthetic presentations. 36 slides are present with attractive pop colours, which, although they look vibrant, are gladly aesthetic too.
08Text Messages Template
The Text Messages template by Blinque can be the trendiest and the most aesthetic template design one can find. It helps you create slideshow videos in the form of text messages. So, if you want to narrate anything and do it uniquely, this template can be the best fit for you.
Part 2 How to Make an Aesthetic Slideshow Presentation
Making a slideshow presentation is quite simple and an aspect that is well-known to many. But, how can you make your slideshows look aesthetic? If you include them in your slideshows, there are a few factors that can readily turn them aesthetic.
So, let us look into the different aspects that can help you turn your slides aesthetic when you integrate them into it.
● Minimalistic Text Designs
Minimalism and aesthetic aura go simultaneously. So, the more your efforts to keep your texts and writings in your slide minimalistic, the more aesthetic your slide would look. Several such finds or text designs are available, and you can readily choose among them and integrate them into your slides.
● Use soft and pastel colours for your theme of the template
Every aesthetic object’s most common and signature feature is its subtle, pastel shade. So, stick to using a soft pastel shade for the theme of your template. The colours, such as lavender, sift purple, millennial pink, powder blue or tones of silver, can ideally fit under the collection of aesthetic shades for the youth template of the slideshows.
● Minimalistic Pictures
The images you use in your slideshow will play a considerable role in deeming how aesthetic your slides look. So, choose them after enough analysis. See whether the photos have an aesthetic or minimalistic feature. By that, we are referring to the copper tone of the picture, its content and its size. It is best to include small images to reflect the slide’s minimalistic character.
Part 3 FAQ of Making Aesthetic Slideshow
Here are some of the FAQs about making aesthetic slideshows.
01How can I make an aesthetic slideshow in PowerPoint?
One can effortlessly do so with the templates available. Also, it is best to use small images, subtle pastel shades for the theme and minimalistic text designs or fonts in the slides.
02Which is the best tool for creating aesthetic slideshows?
Filmore is one of the most effective and ideal tools for making the most aesthetically pleasing slideshows. It has over 700 filters, innumerable templates and uncountable beneficial features to make your slides look minimalistic and aesthetic.
03How can I use Filmora for making aesthetic slideshows?
Filmora has several templates that reflect minimalistic designs. You can readily use them for your slideshow video. You can also use several filters to give a subtle pastel tone to your slideshow. Lastly, the different motion control features and fonts available can help you make the most aesthetically pleasing slideshows with Filmora.
04Is Filmora suitable for slideshows?
Wondershare Filmora Video Editor is one of the best and renowned tools for video editing. And for making slideshow videos, it Is equally competent and helps make the best and the most aesthetic slideshows with its incredible features.
For Win 7 or later (64-bit)
For macOS 10.12 or later
Filmora is the best video editing tool that one can come across. It has the best and the most advanced features for editing and is ideal for professionals. But, the beginners, too, can use it to enhance their editing skills, as Filmora is not difficult to use.
Also, it is ideal for creating aesthetic slideshow videos. It is because-
● There are more than 800 templates, and among them, there are numerous aesthetic design templates that you can use
● The filters can help add an aesthetic and minimalistic tone to your slideshow video
● You can integrate different aesthetic fonts from the many available.
● Ending Thoughts →
● Now that you know all about creating the best minimalist aesthetic slideshow, bring out all your creative skills and make the most wholesome and engaging slideshow!
● Choose the best templates, and for the ideal results, pick from the templates mentioned above.
● Follow the above steps to create the most aesthetic slideshows that would perfectly mirror your imagination.
● Lastly, use the best video editing tool, Filmora, that will help you make such aesthetic slideshows that will definitely be incomparable and inimitable Try It Free
The slideshow must be engaging and attractive. And the recent trend is all about making things around your aesthetic, that is, visually pleasant. You might want to know how you, too, can make such aesthetic slideshows? Well, in the following discussion, we will discuss all of it, along with the best tool for making the best aesthetic slideshows.
In this article
01 The Best 8 Premium Aesthetic Slideshow Template Designs
02 [How to Make an Aesthetic Slideshow Presentation](#Part 2)
03 [FAQ of Making Aesthetic Slideshow](#Part 3)
Part 1 The Best 8 Premium Aesthetic Slideshow Template Designs
One of the best ways of making marvellous aesthetic slideshows is by using an aesthetic slideshow template. The templates have readymade elements that emit aesthetic and minimalistic vibes to your slideshow.
You will find numerous templates that have an aesthetic and minimalistic theme. You can choose any among the countless for your slideshows. There are many designs of templates available for making aesthetic slideshows.
We will discuss eight premium aesthetic slideshow template designs that you can readily use in your slideshows to make your work a lot easier. These template designs will be some of the best ones and can serve and suit every possible purpose for creating a slideshow.
So, here are the best and the most useful eight aesthetic slideshow template designs that you can use for making fantastic aesthetic slideshows.
01Leafy Template Design
The Leafy template design is best suitable for making the best aesthetic slideshows with a classy presentation theme. It is available in Google Slides, and it consists of as many as 120 unique designed slides and two variations of colours.
You can readily make changes and edits and customize the tinplated design according to your imagination, reference and skills. It is best for making classy presentations because the designs are simple, yet they reflect the quality of elegance that helps you create the best aesthetic sideshows.
02Cinematic Reel Template
The Cinematic Reel template is a premiere pro template design by Videomaker. It consists of 22 media layers and 12 editable tact layers, and it has a very stylish design and includes simple yet impactful text animations.
Any trailers, demos, reel videos, short movie trails and the like can be ideally and perfectly created with this template design. Using this template design is absolutely effortless, and you can make any content-related slideshows effortlessly and ideally with this slideshow template design by Videomaker.
03B-Clinique
B-Clinique is the template design for making a minimalist aesthetic slideshow avowable on Google Slides. This template design is best suited for creating trendy aesthetic slideshows. It includes designs of line arts, subtle pleasant shares and all the other components that solely and perfectly reflect an aesthetic aura.
It was primarily designed for making slides for cosmetology purposes. It has 30 different slide designs and is ideal for creating slides for the industry by integrating a few edits. It ideally reflects a calming aura as it uses the earthy brown tone and shade for the design of the template.
04YouTube Pack Template
We all know that various social media platforms have become the most influential factor in our lives. And YouTube is the most renowned among all the other social media platforms, and now, it has even become a mode of earning a livelihood.
And for making slideshows that are to be put up on one or more social media platforms, especially on YouTube, they need to be presented in a particular manner. And you can readily make aesthetic slideshows ideal for social media platforms, especially YouTube, with the YouTube Pack Templated designs, which is Mirs.
This template includes all the necessary elements, such as the “Subscribe” panel, other buttons, side frames, and the like. One can readily use it to make incredible aesthetic slides for their social media channels.
05Sunlike Template
The Sunlike Templates by the Google Slides. It is a beautiful and professional aesthetic slideshow template with design slides that can create a clean and highly professional. It is a modern-creative type of template that consists of 39 distinctive design slides. You can readily edit and thus, customise the slides according to your overreference, needs and skills.
It helps you create a lively and aesthetic presentation at the same time. It includes a lot of vibrant colours that make your presentation look exuberant and engaging.
06Fast Glitch Transitions Template
The Fast Glitch Transitions template is by Red Feathers. Transitions have been the recent trend, and in every other video, we see different and unique transitions. And when you integrate transitions in your slideshows, they become more eye-catching.
And the glitch transitions can create a unique yet pleasing effect for your slideshows when you use the many among the uncountable options available.
07Solv Template
The Solv template is by Google Slides. It is best suitable for creating your start-up business slideshow presentation when you are a big fan of aesthetic presentations. 36 slides are present with attractive pop colours, which, although they look vibrant, are gladly aesthetic too.
08Text Messages Template
The Text Messages template by Blinque can be the trendiest and the most aesthetic template design one can find. It helps you create slideshow videos in the form of text messages. So, if you want to narrate anything and do it uniquely, this template can be the best fit for you.
Part 2 How to Make an Aesthetic Slideshow Presentation
Making a slideshow presentation is quite simple and an aspect that is well-known to many. But, how can you make your slideshows look aesthetic? If you include them in your slideshows, there are a few factors that can readily turn them aesthetic.
So, let us look into the different aspects that can help you turn your slides aesthetic when you integrate them into it.
● Minimalistic Text Designs
Minimalism and aesthetic aura go simultaneously. So, the more your efforts to keep your texts and writings in your slide minimalistic, the more aesthetic your slide would look. Several such finds or text designs are available, and you can readily choose among them and integrate them into your slides.
● Use soft and pastel colours for your theme of the template
Every aesthetic object’s most common and signature feature is its subtle, pastel shade. So, stick to using a soft pastel shade for the theme of your template. The colours, such as lavender, sift purple, millennial pink, powder blue or tones of silver, can ideally fit under the collection of aesthetic shades for the youth template of the slideshows.
● Minimalistic Pictures
The images you use in your slideshow will play a considerable role in deeming how aesthetic your slides look. So, choose them after enough analysis. See whether the photos have an aesthetic or minimalistic feature. By that, we are referring to the copper tone of the picture, its content and its size. It is best to include small images to reflect the slide’s minimalistic character.
Part 3 FAQ of Making Aesthetic Slideshow
Here are some of the FAQs about making aesthetic slideshows.
01How can I make an aesthetic slideshow in PowerPoint?
One can effortlessly do so with the templates available. Also, it is best to use small images, subtle pastel shades for the theme and minimalistic text designs or fonts in the slides.
02Which is the best tool for creating aesthetic slideshows?
Filmore is one of the most effective and ideal tools for making the most aesthetically pleasing slideshows. It has over 700 filters, innumerable templates and uncountable beneficial features to make your slides look minimalistic and aesthetic.
03How can I use Filmora for making aesthetic slideshows?
Filmora has several templates that reflect minimalistic designs. You can readily use them for your slideshow video. You can also use several filters to give a subtle pastel tone to your slideshow. Lastly, the different motion control features and fonts available can help you make the most aesthetically pleasing slideshows with Filmora.
04Is Filmora suitable for slideshows?
Wondershare Filmora Video Editor is one of the best and renowned tools for video editing. And for making slideshow videos, it Is equally competent and helps make the best and the most aesthetic slideshows with its incredible features.
For Win 7 or later (64-bit)
For macOS 10.12 or later
Filmora is the best video editing tool that one can come across. It has the best and the most advanced features for editing and is ideal for professionals. But, the beginners, too, can use it to enhance their editing skills, as Filmora is not difficult to use.
Also, it is ideal for creating aesthetic slideshow videos. It is because-
● There are more than 800 templates, and among them, there are numerous aesthetic design templates that you can use
● The filters can help add an aesthetic and minimalistic tone to your slideshow video
● You can integrate different aesthetic fonts from the many available.
● Ending Thoughts →
● Now that you know all about creating the best minimalist aesthetic slideshow, bring out all your creative skills and make the most wholesome and engaging slideshow!
● Choose the best templates, and for the ideal results, pick from the templates mentioned above.
● Follow the above steps to create the most aesthetic slideshows that would perfectly mirror your imagination.
● Lastly, use the best video editing tool, Filmora, that will help you make such aesthetic slideshows that will definitely be incomparable and inimitable!
Also read:
- New In 2024, How to Make Boring Videos Look Cool By B Rolls
- In 2024, Methods to Make Sure Your Recording Slideshow in Powerpoint Is Not Wro
- In 2024, Detailed Guide to Crop Video in Sony Vegas Pro
- Updated Camtasia Review – Is It The Best Video Editor, In 2024
- In 2024, It Is Crucial to Introduce Your Kids to the Different Colors and Practice the Color Matching Game. So, Here Are the Various Factors Related to Color Matching for Your Child with a Tool to Help You in It Ideally
- Updated In 2024, How to Brighten a Video in Windows 10 | Step-By-Step Guide
- In 2024, A Guide to Adding Audio in Wondershare Filmora
- 2024 Approved Whatsapp Video converterKeywords Convert Video for Whatsapp 6600; Video Converter for Whatsapp 6600; Reduce Video Size for Whatsapp 1600; Whatsapp Supported Video Formats 720; Convert Video to Whatsapp Format 590
- Updated Adobe Premiere Pro Rec 709 LUTs Finding The Best Options
- New Do You Find Choosing a Good LUT to Color-Correct Your Media Files Difficult? Discover some of the Best Professional LUTs From 3D LUT Creator to Download
- Learn How to Perform Velocity Edits on Your PC for 2024
- Are You a Newbie Across YouTube? Want to Know Who the Best Vloggers Are? This Article Provides You with the Best Vloggers on YouTube for 2024
- 3D Ray Traced Settings In After Effects A Comprehensive Guide for 2024
- New A Comprehensive Guide on VHS Technology and Its Influence on Video Editing
- In 2024, Looking for the Ways by Which Subtitles Can Be Extracted From Your MKV Files without Affecting the File Quality? Look No Further as We Are Here to Help You Know the Best Tools that Can Easily Extract SRT From MKV
- Updated Do You Want to Know How to Add a VHS Effect Premiere Look? You Can Easily Apply the VHS Effect to Your Videos Using Adobe Premiere Pro
- Progressive Solutions to Add VHS Effects to Video with Ease
- New In 2024, How to Create Your Own LOL Montage Video
- In 2024, Want to Know the Full Process of Adding the Falling Text Effect as a Video Introduction? Detailed Guidelines on All the Steps Are Mentioned Here for Filmora Users
- All You Need to Know About Transparent Logos and How You Can Make Them. Top Transparent Logos You Can Take Inspiration From
- 2024 Approved Everything That You Need to Know About Video Montages- Ideas, Techniqu
- Updated Create Your Face Zoom TikTok Now for 2024
- Filmora Is a Great Video Editor that Many Users Are Making Intro Video with It. This Article Will Guide You How to Create an Intro Video with Filmora for 2024
- Updated Learn How to Make Modern TikTok Velocity Dance Videos in Filmora Just Like the Ones You See on TikTok and Instagram Reels
- New Steps to Create Gold Text Effects After Effects for 2024
- New Learning Some Perfect Ways to Convert a Slow-Motion Video to Normal
- In 2024, 8 Excellent Video and Photo Mergers on Desktop/Mobile/Online
- Updated 2024 Approved Best Text Animations In After Effects
- In 2024, How to Comment on YouTube Live Chat
- Updated Finding LUTs Made by Danny Gevirtz
- 2024 Approved 10 Apps to Make Videos with Pictures and Music
- New Text Animation Intro Tutorial in Filmora
- New 2024 Approved Whatre the Best Alternatives to Pexels?
- Transparent Logo and Images Look Cool when You Are Planning to Create a Brand Identity. An Image with Unique Features Catches the Attention of Viewers and Leaves Impression for 2024
- Updated How to Combine Videos Into One on Instagram for 2024
- Updated Create a Movie with Windows Movie Maker for 2024
- How to Create a Slideshow GIF, In 2024
- Updated Blender Green Screen Effects for 2024
- Why Is My Nokia C110 Offline? Troubleshooting Guide | Dr.fone
- In 2024, Top 5 Car Locator Apps for Vivo X100 Pro | Dr.fone
- In 2024, A Working Guide For Pachirisu Pokemon Go Map On Apple iPhone 14 Pro | Dr.fone
- In 2024, How and Where to Find a Shiny Stone Pokémon For Samsung Galaxy F15 5G? | Dr.fone
- In 2024, Bypass Activation Lock From iPhone XS - 4 Easy Ways
- 3 Easy Solutions to Hard Reset Samsung Galaxy Z Fold 5 | Dr.fone
- In 2024, 5 Ways To Teach You To Transfer Files from Samsung Galaxy XCover 7 to Other Android Devices Easily | Dr.fone
- Will Pokémon Go Ban the Account if You Use PGSharp On Oppo Reno 11 5G | Dr.fone
- In 2024, 5 Ways to Track Realme 11 Pro without App | Dr.fone
- In 2024, A Working Guide For Pachirisu Pokemon Go Map On Oppo Reno 8T | Dr.fone
- In 2024, How to Mirror PC Screen to Samsung Galaxy S24+ Phones? | Dr.fone
- How to Fix Life360 Shows Wrong Location On Xiaomi 13T Pro? | Dr.fone
- Can Life360 Track Or See Text Messages? What Can You Do with Life360 On Tecno Phantom V Fold? | Dr.fone
- In 2024, Network Locked SIM Card Inserted On Your Nokia C22 Phone? Unlock It Now
- In 2024, How To Do ZTE Blade A73 5G Screen Sharing | Dr.fone
- How PGSharp Save You from Ban While Spoofing Pokemon Go On Samsung Galaxy Z Flip 5? | Dr.fone
- In 2024, Best 10 Popular Cartoons You Forgot Existed
- Unova Stone Pokémon Go Evolution List and How Catch Them For Vivo X Fold 2 | Dr.fone
- Top 5 Nokia C12 Plus Bypass FRP Tools for PC That Actually Work
- The Best Android Unlock Software For Xiaomi 13 Ultra Device Top 5 Picks to Remove Android Locks
- How to Turn Off Find My Apple iPhone 7 Plus when Phone is Broken? | Dr.fone
- 3 Ways to Erase iPhone 13 mini When Its Locked Within Seconds | Dr.fone
- Android Call History Recovery - recover deleted call logs from Samsung Galaxy A05s
- Title: In 2024, Slow-Motion Edits Are Pretty Mesmerizing, and Weve All Imagined Ourselves in One of Those Visually Appealing, Slowed-Down Movies. Well Teach You How to Make a Smooth Slo-Mo Video Using Twixtor in This Article. Stay Tuned Until the End
- Author: Chloe
- Created at : 2024-06-26 06:23:50
- Updated at : 2024-06-27 06:23:50
- Link: https://ai-editing-video.techidaily.com/in-2024-slow-motion-edits-are-pretty-mesmerizing-and-weve-all-imagined-ourselves-in-one-of-those-visually-appealing-slowed-down-movies-well-teach-you-how-to/
- License: This work is licensed under CC BY-NC-SA 4.0.
