
In 2024, Special Animated Transition Tutorial【SUPER EASY】

Special Animated Transition Tutorial【SUPER EASY】
Preparation
What you need to prepare:
- A computer (Windows or macOS)
- Your video materials.
- Filmora video editor
Step 1
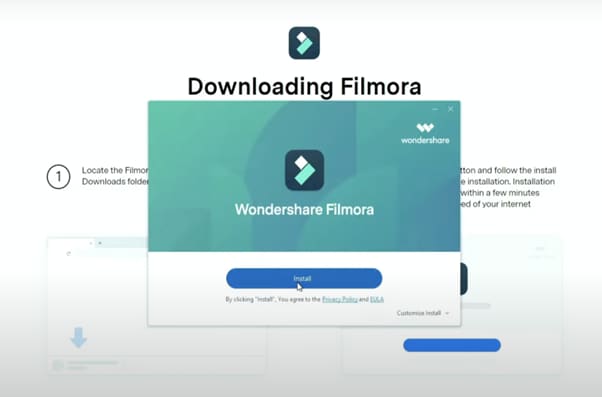
First off, download the Filmora video editor . After it downloads, click install and follow the provided steps.
Step 2
After installing, the editor will start automatically. When it does, click on the “New Project” button to finally open the editor.

Step 3
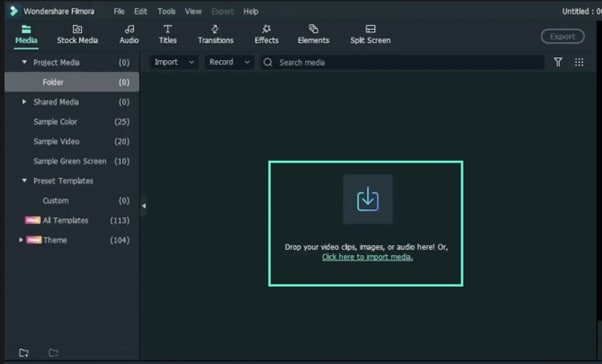
From the upper-left side of the screen, click the highlighted text to import media. This is where you insert your video files into the editor. Once the folder opens, select the videos you want to import and click “Open”.
Step 4
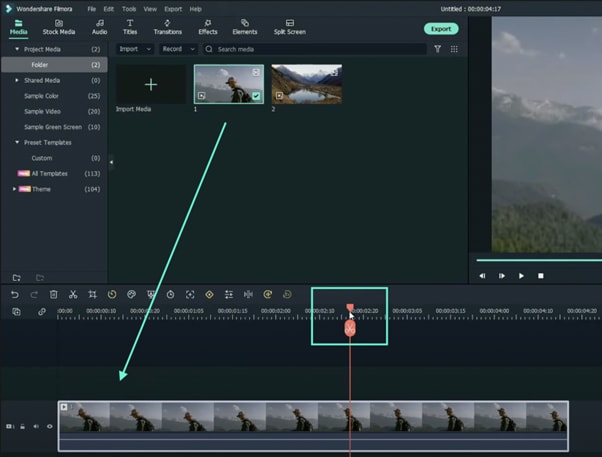
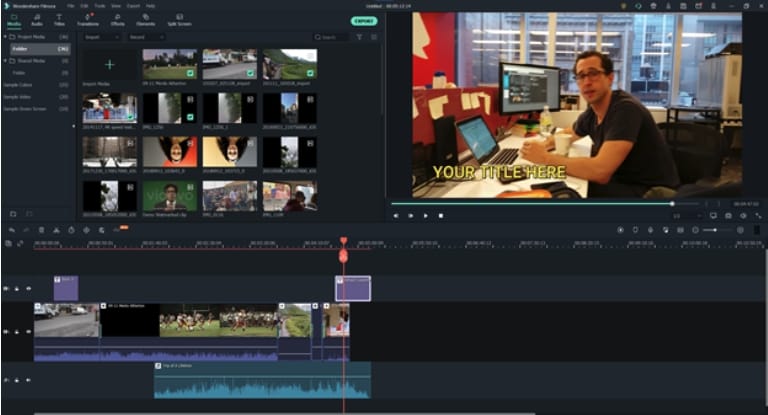
Drag your first clip to the timeline. Then, move the Playhead to where you want to start your transition.
Step 5
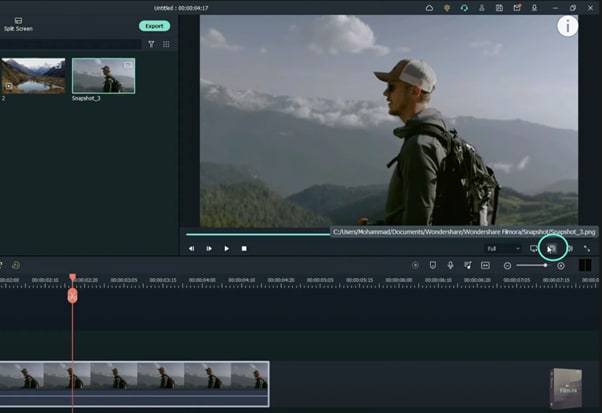
Take a snapshot of this frame.
Step 6
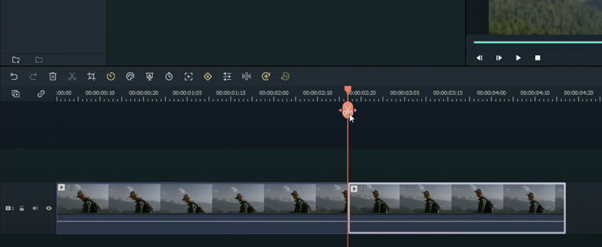
Split the footage and delete the part on the right side of the Playhead.
Step 7
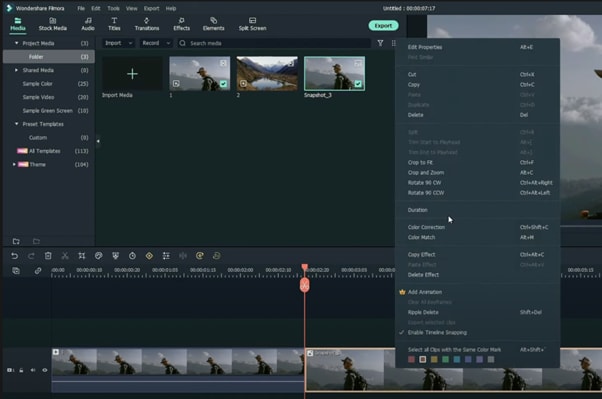
Without moving the Playhead, simply drag the snapshot you took earlier. Right-click on the snapshot in the timeline and click on “Duration”. Then, set the duration to 1 second. Finally, click “OK”.
Step 8
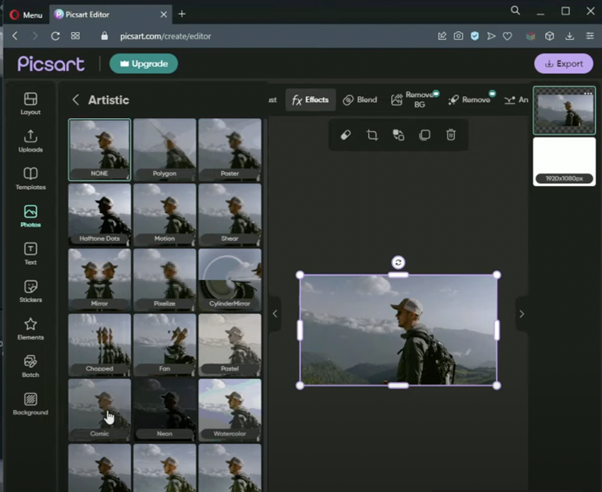
Open your browser and go to the Picsart photo effects editor . Upload the same snapshot we made in Filmora and apply the “Comic” preset on it. Then, download the photo and import it back into Filmora.
Step 9
Drag the snapshot with the Comic preset to the Timeline and set its duration to 1 second as well.
Step 10
Repeat the same process with the second clip. Take a snapshot, add the Comic effect, and import it back into Filmora. But this time, align the clips as follows: Add the snapshot with the comic preset first, then the snapshot without any effects, and then the video. It should look like this.

Step 11
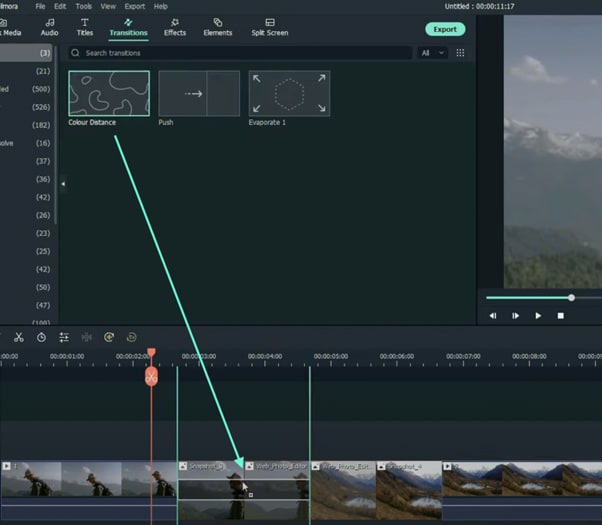
Go to the Transitions tab and drag the “Color Distance” transition between the first and second snapshot on your Timeline. Then, right-click on the transition box in the timeline and select “Edit Properties”. From there, change the duration of the transition to 1 second and click “OK”.
Step 12
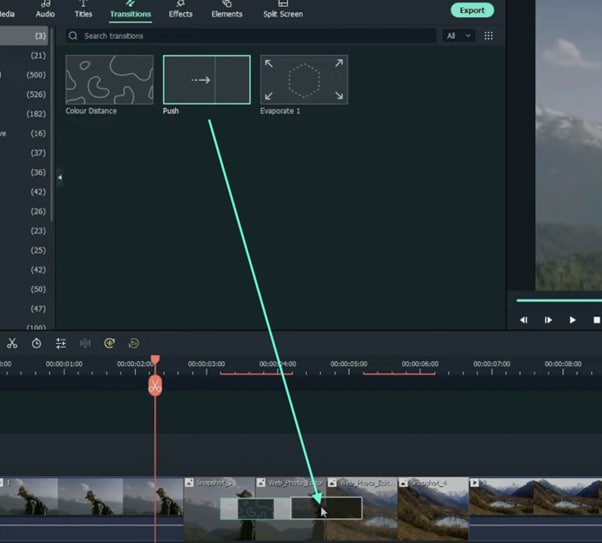
Drag the “Push” transition between the next two snapshots. Set its duration to 1 second as well by right clicking the transition and going to “Edit Properties”.
Step 13
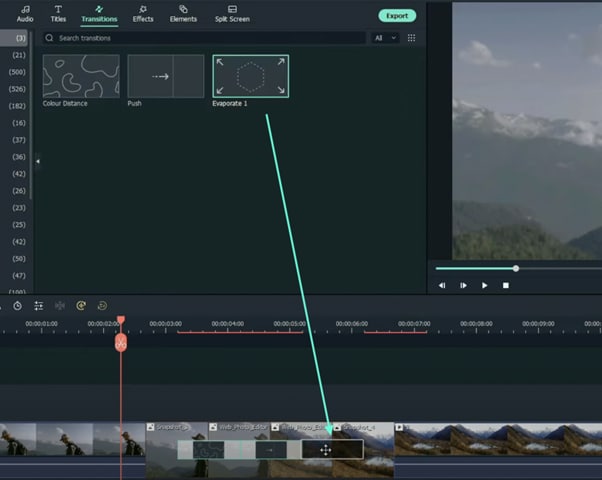
Place the last transition between the last two snapshots in your timeline. This time, we’re going to use the “Evaporate” transition. Set its duration to 1 second as well.
Step 14
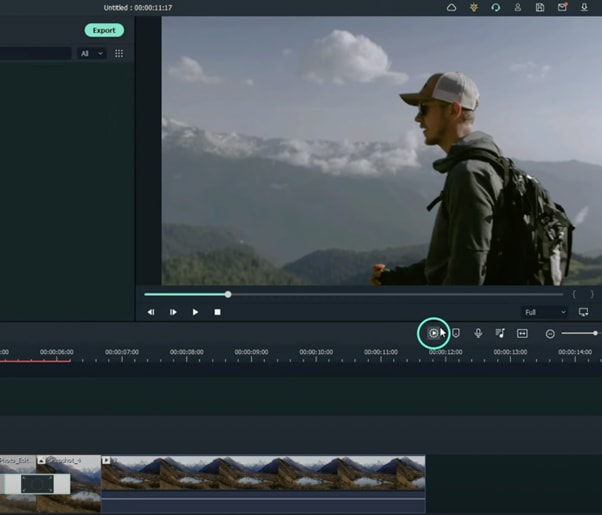
The final step is to render the video. Click this button and you will finally be done.
Summary
What you’ve learned:
- How to add any type of transition to video clips and images in Filmora
- How to take quick snapshots of any frame in Filmora
- A quick way to Render videos and watch the final preview
- Add custom effects to images
What you need to prepare:
- A computer (Windows or macOS)
- Your video materials.
- Filmora video editor
Step 1
First off, download the Filmora video editor . After it downloads, click install and follow the provided steps.

Step 2
After installing, the editor will start automatically. When it does, click on the “New Project” button to finally open the editor.

Step 3
From the upper-left side of the screen, click the highlighted text to import media. This is where you insert your video files into the editor. Once the folder opens, select the videos you want to import and click “Open”.

Step 4
Drag your first clip to the timeline. Then, move the Playhead to where you want to start your transition.

Step 5
Take a snapshot of this frame.

Step 6
Split the footage and delete the part on the right side of the Playhead.

Step 7
Without moving the Playhead, simply drag the snapshot you took earlier. Right-click on the snapshot in the timeline and click on “Duration”. Then, set the duration to 1 second. Finally, click “OK”.

Step 8
Open your browser and go to the Picsart photo effects editor . Upload the same snapshot we made in Filmora and apply the “Comic” preset on it. Then, download the photo and import it back into Filmora.

Step 9
Drag the snapshot with the Comic preset to the Timeline and set its duration to 1 second as well.
Step 10
Repeat the same process with the second clip. Take a snapshot, add the Comic effect, and import it back into Filmora. But this time, align the clips as follows: Add the snapshot with the comic preset first, then the snapshot without any effects, and then the video. It should look like this.

Step 11
Go to the Transitions tab and drag the “Color Distance” transition between the first and second snapshot on your Timeline. Then, right-click on the transition box in the timeline and select “Edit Properties”. From there, change the duration of the transition to 1 second and click “OK”.

Step 12
Drag the “Push” transition between the next two snapshots. Set its duration to 1 second as well by right clicking the transition and going to “Edit Properties”.

Step 13
Place the last transition between the last two snapshots in your timeline. This time, we’re going to use the “Evaporate” transition. Set its duration to 1 second as well.

Step 14
The final step is to render the video. Click this button and you will finally be done.

Summary
What you’ve learned:
- How to add any type of transition to video clips and images in Filmora
- How to take quick snapshots of any frame in Filmora
- A quick way to Render videos and watch the final preview
- Add custom effects to images
What you need to prepare:
- A computer (Windows or macOS)
- Your video materials.
- Filmora video editor
Step 1
First off, download the Filmora video editor . After it downloads, click install and follow the provided steps.

Step 2
After installing, the editor will start automatically. When it does, click on the “New Project” button to finally open the editor.

Step 3
From the upper-left side of the screen, click the highlighted text to import media. This is where you insert your video files into the editor. Once the folder opens, select the videos you want to import and click “Open”.

Step 4
Drag your first clip to the timeline. Then, move the Playhead to where you want to start your transition.

Step 5
Take a snapshot of this frame.

Step 6
Split the footage and delete the part on the right side of the Playhead.

Step 7
Without moving the Playhead, simply drag the snapshot you took earlier. Right-click on the snapshot in the timeline and click on “Duration”. Then, set the duration to 1 second. Finally, click “OK”.

Step 8
Open your browser and go to the Picsart photo effects editor . Upload the same snapshot we made in Filmora and apply the “Comic” preset on it. Then, download the photo and import it back into Filmora.

Step 9
Drag the snapshot with the Comic preset to the Timeline and set its duration to 1 second as well.
Step 10
Repeat the same process with the second clip. Take a snapshot, add the Comic effect, and import it back into Filmora. But this time, align the clips as follows: Add the snapshot with the comic preset first, then the snapshot without any effects, and then the video. It should look like this.

Step 11
Go to the Transitions tab and drag the “Color Distance” transition between the first and second snapshot on your Timeline. Then, right-click on the transition box in the timeline and select “Edit Properties”. From there, change the duration of the transition to 1 second and click “OK”.

Step 12
Drag the “Push” transition between the next two snapshots. Set its duration to 1 second as well by right clicking the transition and going to “Edit Properties”.

Step 13
Place the last transition between the last two snapshots in your timeline. This time, we’re going to use the “Evaporate” transition. Set its duration to 1 second as well.

Step 14
The final step is to render the video. Click this button and you will finally be done.

Summary
What you’ve learned:
- How to add any type of transition to video clips and images in Filmora
- How to take quick snapshots of any frame in Filmora
- A quick way to Render videos and watch the final preview
- Add custom effects to images
What you need to prepare:
- A computer (Windows or macOS)
- Your video materials.
- Filmora video editor
Step 1
First off, download the Filmora video editor . After it downloads, click install and follow the provided steps.

Step 2
After installing, the editor will start automatically. When it does, click on the “New Project” button to finally open the editor.

Step 3
From the upper-left side of the screen, click the highlighted text to import media. This is where you insert your video files into the editor. Once the folder opens, select the videos you want to import and click “Open”.

Step 4
Drag your first clip to the timeline. Then, move the Playhead to where you want to start your transition.

Step 5
Take a snapshot of this frame.

Step 6
Split the footage and delete the part on the right side of the Playhead.

Step 7
Without moving the Playhead, simply drag the snapshot you took earlier. Right-click on the snapshot in the timeline and click on “Duration”. Then, set the duration to 1 second. Finally, click “OK”.

Step 8
Open your browser and go to the Picsart photo effects editor . Upload the same snapshot we made in Filmora and apply the “Comic” preset on it. Then, download the photo and import it back into Filmora.

Step 9
Drag the snapshot with the Comic preset to the Timeline and set its duration to 1 second as well.
Step 10
Repeat the same process with the second clip. Take a snapshot, add the Comic effect, and import it back into Filmora. But this time, align the clips as follows: Add the snapshot with the comic preset first, then the snapshot without any effects, and then the video. It should look like this.

Step 11
Go to the Transitions tab and drag the “Color Distance” transition between the first and second snapshot on your Timeline. Then, right-click on the transition box in the timeline and select “Edit Properties”. From there, change the duration of the transition to 1 second and click “OK”.

Step 12
Drag the “Push” transition between the next two snapshots. Set its duration to 1 second as well by right clicking the transition and going to “Edit Properties”.

Step 13
Place the last transition between the last two snapshots in your timeline. This time, we’re going to use the “Evaporate” transition. Set its duration to 1 second as well.

Step 14
The final step is to render the video. Click this button and you will finally be done.

Summary
What you’ve learned:
- How to add any type of transition to video clips and images in Filmora
- How to take quick snapshots of any frame in Filmora
- A quick way to Render videos and watch the final preview
- Add custom effects to images
How to Rotate Videos With Media Player Classic
The Internet and social media have become a staple in our daily lives. Internet users post thousands of videos every day that you can watch online or download and rewatch in your free time. Suppose you encounter a video that is upside down or shot at an angle that makes it difficult for you to enjoy it fully.
It would be nice to find a way to rotate the video to portrait mode so you can watch it without any distractions. Fortunately, this article will discuss using Media Player Classic to rotate any video. We also discuss an excellent alternative to the aforementioned media player.
What Is Media Player Classic?
In a nutshell, Media Player Classic is an open-source media player suitable for 32-bit and 64-bit Microsoft Windows. If you have used the original interface, you might notice that it resembles Windows Media Player 6.4. The only key difference is that the former is more feature-rich and provides more options. In addition, Media Player Classic is very compact and lightweight.

A programmer named “Gabest’’ created and designed this platform as a closed-source application. Things changed, and he later relicensed the media player as free under the terms of the GLP-2.0 license. He released the final version, MPC 6.4.9.0, on 20th March 2006.
Unfortunately, development stalled in 2006, much to the disappointment of many users who had grown to love it. Gabest made a public statement in 2007 saying that Media Player Classic was not dead, just that he couldn’t work on it anymore.
How To Rotate Video in Media Player Classic?
Media Player Classic allows you to rotate your video around three axes, X, Y, and Z. Once you are done, you can fix a video that was initially upside down or in landscape mode for a better viewing experience. Another perk of using Media Player Classic to rotate a video is that you can use shortcuts to make your work easier.
Before we teach you how to rotate video in windows Media Player Classic, there are a few things you should know. Unfortunately, this platform doesn’t allow you to rotate a video in its graphical user interface. You can’t also use it to edit a video. Suppose you want to add text or overwrite the original video clip. Media Player Classic can only allow you to playback a video or rotate it.
Here is a simple guide on how to rotate videos in Media Player Classic.
Step1 Launch Media Player Classic and click on the “View” tab. Select “Options” or click “O” to display the “Options” window.

Step2 Navigate to the left pane to the Player Group and click on “Keys.” If the Player Group is not expanded by the time, you launch the platform, double-click it and wait a few seconds. You can then navigate to the “PnS Rotate” command on the Keys list.

Step3 Go to the “PnS Rotate+” command and double-click the “Key” field. You can then click on any key to rotate your video around the x-axis. Once you are satisfied with the results, click “…” to apply the changes you have made.

Step4 You can now assign shortcuts to “PnS Rotate” commands. For instance, you could assign PnS Rotate Y for rotation along the Y axis and PnS Z for rotation along the Z axis. After each axis has a shortcut, select “Apply” then “OK” to save your changes and close the Options window respectively.

Step5 Select “Output” on the Options window and navigate to the DirectShow Video section to confirm whether the Media Classic Player supports rotation for the rendered video. Ascertain the Rotation feature has a green check mark, which indicates that the platform promotes rotation for the video. If the video has a red X, select “Apply” and click “OK.”

Step6 Use the shortcuts you assigned to the keys in Step 4 to rotate your video as you see fit. Since the rotation occurs gradually, you might need to press the keys numerous times or press and hold to see a visible change.
For instance, you can rotate your video from landscape to portrait by clicking “Alt-Num 1” and “Alt-Num 3,” respectively. To revert your video to its original state, press “Alt-Num 5.”
Need an alternative to Media Player Classic? Try Wondershare Filmora To Rotate a Video
Free Download For Win 7 or later(64-bit)
Free Download For macOS 10.14 or later
You might need a better alternative to Media Classic Player to help rotate your videos. As we mentioned, Media Classic Player doesn’t allow you to change the video. The scope of this platform only extends to playing and rotating videos along three axes. In our opinion, Wondershare Filmora is an excellent alternative.

This feature-rich platform is your one-stop solution for any creator who wants to make a mark with their videos. You can download it free on your desktop, laptop, or smartphone and use it anytime. The cloud storage allows you to snap a photo and upload it for editing at a later time.
In addition, the platform has a co-creation space where you can share your work with other users and compare notes. Here is a list of other nifty features we guarantee you will enjoy.
- Motion tracking
- Auto beat sync
- Split screen
- Title Editing
- Preset templates
- AI Portrait
- Mask and blend
- Text to speech
- Silence detection
- Audio visualizer
How To Rotate a Video 90 Degrees With Wondershare Filmora?
Now that you have seen how different this platform is from Media Classic Player, you might be curious about how effectively it rotates your videos. Perhaps our detailed guide will help you decide whether you want to give Wondershare Filmora a shot.
Stick around to learn how to rotate a video 90 degrees with Wondershare Filmora.
Step1 Import the video you want to rotate to Wondershare Filmora and drag and drop it to the timeline as shown below.

Step2 Click on the monitor icon and select “Change Project Aspect Ratio” in the drop-down menu.

Step3 In the “Project Settings” window, you can change your video’s Aspect Ratio, Resolution, Frame Rate, and Color space.

Step4 Once you are happy with your changes, click “OK” and close the window.

Step5 Double-click the video track and navigate to the Rotate option in the window. Hover your mouse over the dot in the Rotate tab until you get to 90 degrees. You could also adjust the rotation of the video by clicking on the pivot in the media player till the video is at 90 degrees.

Step6 Click “Export” to save a copy of the rotated video to your device.

Which Is Better To Rotate a Video? Media Player Classic or Wondershare Filmora?
Having seen both sides of the coin, you might wonder which option is better to help you rotate a video. In this section of the article, we pit Wondershare Filmora against Media Player Classic to help you determine which option will work best for you.
Take a look at the table below.
| Media Player Classic | Wondershare Filmora | |
|---|---|---|
| Operating System | Microsoft Windows | Windows & Mac |
| Ratings from G2 | N/A | 4.4/5 stars |
| Pricing | Free | Annual Plan – US$49.99/yearCross Platform Plan - US$59.99/YearPerpetual Plan - US$79.99 |
| Features | ● Enhanced video rendering● Removal of tearing● Supports SVCD, VCD, and DVD playback● AVI subtitles● Customizable toolbar | ● AI Portrait● Mask and blend● Text to speech● Silence detection● Audio visualizer● Motion tracking● Auto beat sync● Split screen● Title Editing● Preset templates |
As you have seen, Media player Classic doesn’t have the Rotate feature per se. However, you can assign shortcuts to the keys to rotate a video along three axes as you see fit. You can also use a combination of keys like Alt and Num to change how your video sits so you can enjoy it as you like.
On the other hand, Wondershare Filmora has a more comprehensive Rotate feature that allows you to drag your pointer along a bar till the video sits at the correct number of degrees.
This platform also provides additional features, like allowing you to scale the video to fit the screen and adjusting project settings like the resolution and frame rate. If you don’t want to use the sliding bar, you can use your pointer to manually adjust the rotation by clicking on the pivot with your pointer.
In a nutshell, Windows Media Player is the ideal choice if you want to rotate your video and leave it at that. However, if you are looking for more advanced features, you are better off choosing Wondershare Filmora. The latter option also makes your videos look more polished like they were edited by a professional.
Conclusion
Videos might be trickier to edit than photos, especially when you want to rotate them. Fortunately, developers have been working tirelessly to ensure you have many tools at your disposal to edit your videos from any device at any time.
If you don’t fancy editing videos on your laptop, you could download the software to your smartphone and rotate videos on the move. Technology is truly a blessing that has come to make our work easier. Hopefully, after reading this article, you can effortlessly rotate any video you encounter.
Free Download For macOS 10.14 or later
You might need a better alternative to Media Classic Player to help rotate your videos. As we mentioned, Media Classic Player doesn’t allow you to change the video. The scope of this platform only extends to playing and rotating videos along three axes. In our opinion, Wondershare Filmora is an excellent alternative.

This feature-rich platform is your one-stop solution for any creator who wants to make a mark with their videos. You can download it free on your desktop, laptop, or smartphone and use it anytime. The cloud storage allows you to snap a photo and upload it for editing at a later time.
In addition, the platform has a co-creation space where you can share your work with other users and compare notes. Here is a list of other nifty features we guarantee you will enjoy.
- Motion tracking
- Auto beat sync
- Split screen
- Title Editing
- Preset templates
- AI Portrait
- Mask and blend
- Text to speech
- Silence detection
- Audio visualizer
How To Rotate a Video 90 Degrees With Wondershare Filmora?
Now that you have seen how different this platform is from Media Classic Player, you might be curious about how effectively it rotates your videos. Perhaps our detailed guide will help you decide whether you want to give Wondershare Filmora a shot.
Stick around to learn how to rotate a video 90 degrees with Wondershare Filmora.
Step1 Import the video you want to rotate to Wondershare Filmora and drag and drop it to the timeline as shown below.

Step2 Click on the monitor icon and select “Change Project Aspect Ratio” in the drop-down menu.

Step3 In the “Project Settings” window, you can change your video’s Aspect Ratio, Resolution, Frame Rate, and Color space.

Step4 Once you are happy with your changes, click “OK” and close the window.

Step5 Double-click the video track and navigate to the Rotate option in the window. Hover your mouse over the dot in the Rotate tab until you get to 90 degrees. You could also adjust the rotation of the video by clicking on the pivot in the media player till the video is at 90 degrees.

Step6 Click “Export” to save a copy of the rotated video to your device.

Which Is Better To Rotate a Video? Media Player Classic or Wondershare Filmora?
Having seen both sides of the coin, you might wonder which option is better to help you rotate a video. In this section of the article, we pit Wondershare Filmora against Media Player Classic to help you determine which option will work best for you.
Take a look at the table below.
| Media Player Classic | Wondershare Filmora | |
|---|---|---|
| Operating System | Microsoft Windows | Windows & Mac |
| Ratings from G2 | N/A | 4.4/5 stars |
| Pricing | Free | Annual Plan – US$49.99/yearCross Platform Plan - US$59.99/YearPerpetual Plan - US$79.99 |
| Features | ● Enhanced video rendering● Removal of tearing● Supports SVCD, VCD, and DVD playback● AVI subtitles● Customizable toolbar | ● AI Portrait● Mask and blend● Text to speech● Silence detection● Audio visualizer● Motion tracking● Auto beat sync● Split screen● Title Editing● Preset templates |
As you have seen, Media player Classic doesn’t have the Rotate feature per se. However, you can assign shortcuts to the keys to rotate a video along three axes as you see fit. You can also use a combination of keys like Alt and Num to change how your video sits so you can enjoy it as you like.
On the other hand, Wondershare Filmora has a more comprehensive Rotate feature that allows you to drag your pointer along a bar till the video sits at the correct number of degrees.
This platform also provides additional features, like allowing you to scale the video to fit the screen and adjusting project settings like the resolution and frame rate. If you don’t want to use the sliding bar, you can use your pointer to manually adjust the rotation by clicking on the pivot with your pointer.
In a nutshell, Windows Media Player is the ideal choice if you want to rotate your video and leave it at that. However, if you are looking for more advanced features, you are better off choosing Wondershare Filmora. The latter option also makes your videos look more polished like they were edited by a professional.
Conclusion
Videos might be trickier to edit than photos, especially when you want to rotate them. Fortunately, developers have been working tirelessly to ensure you have many tools at your disposal to edit your videos from any device at any time.
If you don’t fancy editing videos on your laptop, you could download the software to your smartphone and rotate videos on the move. Technology is truly a blessing that has come to make our work easier. Hopefully, after reading this article, you can effortlessly rotate any video you encounter.
Top 5 Online Video Converter for Instagram 2024
Instagram is a powerful platform currently that worldwide people share videos and photos. However, Instagram has specific restrictions for video files, which prompts the search for a capable online video converter Instagram can use.
Companies, content creators, and regular users post various videos to increase engagement, promote products/services, and memorialize moments. But the app allows only specific dimensions, aspect ratio, format, and duration with videos.
If that concerns you, here are some best solutions we have gathered for you to try out. Let’s move on.
Part 1 : Top 5 Online Video Converters for Instagram
To know how to use an online video converter Instagram users download, you should learn its features and uses. The following are the vital details we uncovered about the tools we tested while preparing this countdown.
1. InstaVideoSave
This online Instagram video converter is the most straightforward tool to convert IG-centric content to different offline formats. You can easily choose the category of the IG element you want to convert, and the software will quickly follow through.

Main Features:
- You only need to paste the IG video link and then download it.
- It supports downloading various Instagram content, like live videos, IG reels, IG videos, etc.
- Covertly view/download from other accounts.
- Save it directly to a connected device, like a PC, iPhone, or Android phone.
Pros
- No login is required.
- Output videos in total HD quality.
- Download bio data, profile picture, etc.
Cons
- You cannot download live video files that the private IG user did not save to their account beforehand.
- Private accounts are not viewable.
How to Use This:
Step1Copy the post link from Instagram and paste it.
Step2Click on View.
Step3Press the Download button to save.
2. YouTube4KDownloader (4K Stogram)
While this online Instagram video converter is mainly for YouTube content download, users can freely operate it to convert IG content. In addition, it has been recommended by many professional product reviewers, like TrustRadar, for its good user experience and high-level format support.

Main Features:
- Save full tagged posts/Saved posts to the device.
- Browse through accounts anonymously.
- Download private IG content.
- Save posts from specific timelines.
Pros
- Back up your files.
- Comments/likes are automatically saved in content metadata.
- New posts update in real-time on the feed.
Cons
- Free users can only download one video at a time.
- Pro users must pay USD 45 to use all features like tagged post downloading.
How to Use This:
Step1Download the 4K Stogram link.
Step2Tick the T&C agreements.
Step3Install and run.
Step4Add File.
Step5Press Convert to begin the process.
3. iGram
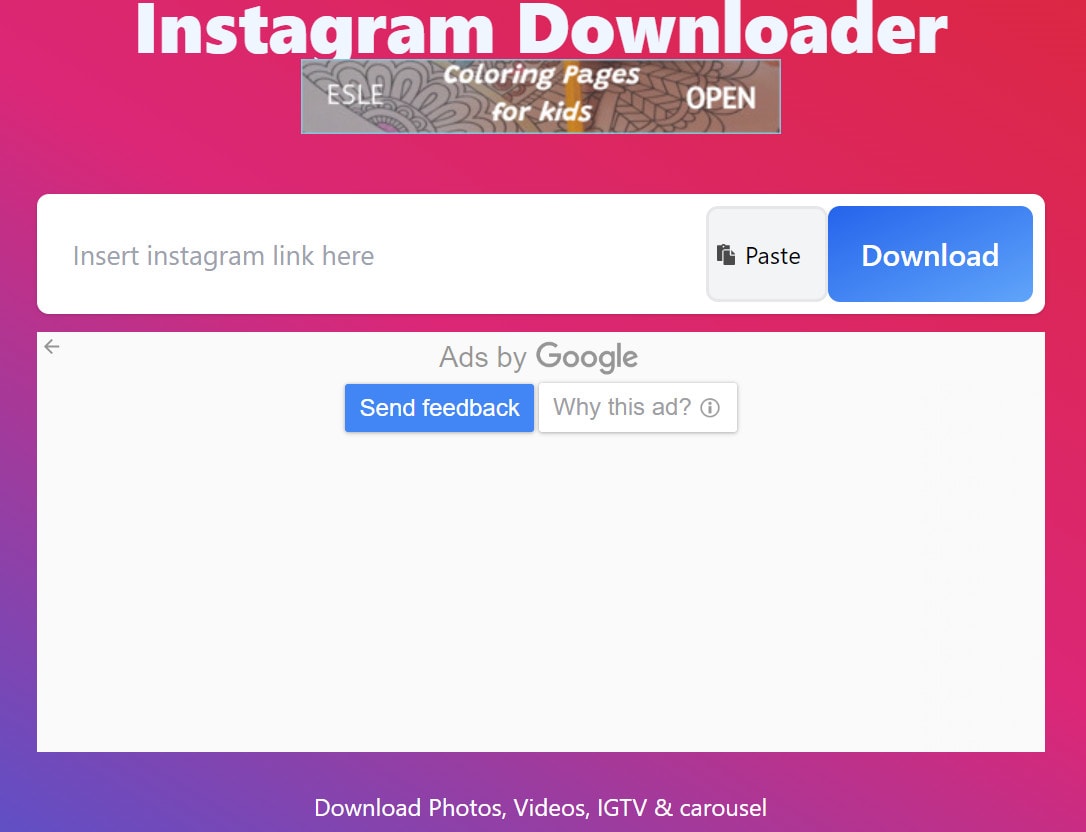
iGram is one of the best choices for selecting an online video converter Instagram users can utilize daily. It supports converting all types of IG content, like Reels, videos, images, and even carousels. The software has strong privacy support as well.
Main Features:
- Convert Reels and IGTV content.
- Save pictures and videos offline.
- Support carousel downloading from IG accounts.
- Saves into diverse phones, computers, and tablets.
Pros
- The simple process of conversion.
- View and download anonymously.
- Multiple output formats are supported.
Cons
- You cannot download files from any private account.
- The output video format supported does not cross 720p.
How to Use This:
Step1Go to Instagram and copy the post link of the video.
Step2Open this site and add the link into the text field.
Step2Press Start.
Step4The conversion would occur automatically.
4. F2mp
This online Instagram video converter is not the simplest choice for Instagram-to-video conversions, but the quality can improve over time. Compared to other options, it does not support all types of IG content. But it does assure a fast conversion and saving process.

Main Features:
- Paste the video URL from Instagram.
- Customize output settings like the video format.
- Instant conversion of files is possible.
- Direct download to the device.
Pros
- A wide range of conversion formats is supported.
- Free online converter.
- Works web-based on many browsers.
Cons
- Does not convert all types of IG content.
- Users cannot choose video resolution and other formatting steps.
How to Use This:
Step1Add keywords/file URLs in the tool search field.
Step2Select output type.
Step3Press the Start button.
5. AceThinker
One of the top converter tools of IG is AceThinker, which is relatively simple to utilize and learn. Different types of users can add files from different platforms and run the conversion automatically.
Main Features:
- Add links, download content, and share videos easily across platforms.
- Compatible with many social media platforms.
- Works on various browsers like Chrome, Firefox, Edge, Safari, etc.
- Web-based tool.
Pros
- Works with different operating systems like Mac and other devices.
- Free to use.
- Quick conversions are possible.
Cons
- Conversion to MP3 format only.
- No batch conversions are allowed.
How to Use This:
Step1Copy the IG video link and paste it.
Step2Click the Download icon.
Step3It would turn to an MP3 file and save automatically.
Part 2: Comparison Table of the 5 Online Instagram Video Converters
Now that you know which apps to try out, you must decide the right tool to use based on its uses. Namely, how well a particular app would handle your main requirement with an online Instagram video converter.
| Converter Tool | InstaVideoSave | 4K Stogram | iGram | F2mp | AceThinker |
|---|---|---|---|---|---|
| Converting Speed | Fast | Medium-Fast | Fast | Fast | Medium-Fast |
| User Experience | Easy to use for different IG content. | Browse, view, and download anonymously, even from Private users. | Simple and direct IG video to MP4 downloader. | Quick searching and link pasting process for downloading. | Simple online tool to convert IG music videos into MP3 files. |
| Ratings | - | 4.6/5 (TrustPilot) | 3.1/5 (TrustPilot) | 400/100 (AEtrustscore) | 4.5/5 (TrustPilot) |
| Type of Instagram content it Supports. | Reels, Videos, Images, Profile, Stories. | Photos, videos, Highlights, Reels. | Videos, Images, Carousel, Reels, IGTV. | Videos | Videos |
| Compatible Social Media Apps | Instagram, Facebook, Vimeo, Flicker, Soundcloud, Bilibili, DailyMotion, Tiktok, Likee, Niconiko, Twitch | Instagram, Facebook, Twitter | |||
| Supported conversion output formats | MP4, AVI, MOV, JPG, etc. | MP3, MP4, JPG, etc. | Mp4 and JPG primarily. | 4A, WAV, OGG, 3GP, WMA, FLAC, AVI, MPG, MP4, MOV, MKV, WMV, M4V, MP3, WEBM, FLV. | MP3 |
Part 3: Hot FAQs on Online Video Converter for Instagram
1. Is it illegal to download Instagram videos?
Many applications, online converter tools, and sites are available for safely downloading Instagram videos. However, the service provider does not permit third-party content download from the app. Yet, these online converter tools are not entirely illegal- you should only download personal use instead of commercial usage. Also, downloads are allowed from public IG accounts primarily.
2. How to download reels video with Original HD Quality?
Many converter tools are available for downloading high-quality videos from Instagram Reels. The best ones we tested out with these benefits are InstaVideoSave and iGram. In the former, you can download HD quality videos to 1080p resolution, while iGram allows video downloads to 720p.
3. How can I download reels audio or sound only?
There are specific tools that users can opt for to download Instagram videos in audio format. AceThinker, for example, is the best online converter to download only the audio from the Instagram video links you add. Users opt for this software to convert IG-based music videos into MP3 files.
Final Words
Overall, multiple online converter tools are available for downloading different IG content like Reels, Videos, and Images to video/audio/image file format. Among them, InstaVideoSave and F2mp are the two tools where we noticed the best benefits. However, F2mp is a paid software, so choose it only for premium features.
How to Use This:
Step1Copy the post link from Instagram and paste it.
Step2Click on View.
Step3Press the Download button to save.
2. YouTube4KDownloader (4K Stogram)
While this online Instagram video converter is mainly for YouTube content download, users can freely operate it to convert IG content. In addition, it has been recommended by many professional product reviewers, like TrustRadar, for its good user experience and high-level format support.

Main Features:
- Save full tagged posts/Saved posts to the device.
- Browse through accounts anonymously.
- Download private IG content.
- Save posts from specific timelines.
Pros
- Back up your files.
- Comments/likes are automatically saved in content metadata.
- New posts update in real-time on the feed.
Cons
- Free users can only download one video at a time.
- Pro users must pay USD 45 to use all features like tagged post downloading.
How to Use This:
Step1Download the 4K Stogram link.
Step2Tick the T&C agreements.
Step3Install and run.
Step4Add File.
Step5Press Convert to begin the process.
3. iGram
iGram is one of the best choices for selecting an online video converter Instagram users can utilize daily. It supports converting all types of IG content, like Reels, videos, images, and even carousels. The software has strong privacy support as well.

Main Features:
- Convert Reels and IGTV content.
- Save pictures and videos offline.
- Support carousel downloading from IG accounts.
- Saves into diverse phones, computers, and tablets.
Pros
- The simple process of conversion.
- View and download anonymously.
- Multiple output formats are supported.
Cons
- You cannot download files from any private account.
- The output video format supported does not cross 720p.
How to Use This:
Step1Go to Instagram and copy the post link of the video.
Step2Open this site and add the link into the text field.
Step2Press Start.
Step4The conversion would occur automatically.
4. F2mp
This online Instagram video converter is not the simplest choice for Instagram-to-video conversions, but the quality can improve over time. Compared to other options, it does not support all types of IG content. But it does assure a fast conversion and saving process.

Main Features:
- Paste the video URL from Instagram.
- Customize output settings like the video format.
- Instant conversion of files is possible.
- Direct download to the device.
Pros
- A wide range of conversion formats is supported.
- Free online converter.
- Works web-based on many browsers.
Cons
- Does not convert all types of IG content.
- Users cannot choose video resolution and other formatting steps.
How to Use This:
Step1Add keywords/file URLs in the tool search field.
Step2Select output type.
Step3Press the Start button.
5. AceThinker
One of the top converter tools of IG is AceThinker, which is relatively simple to utilize and learn. Different types of users can add files from different platforms and run the conversion automatically.

Main Features:
- Add links, download content, and share videos easily across platforms.
- Compatible with many social media platforms.
- Works on various browsers like Chrome, Firefox, Edge, Safari, etc.
- Web-based tool.
Pros
- Works with different operating systems like Mac and other devices.
- Free to use.
- Quick conversions are possible.
Cons
- Conversion to MP3 format only.
- No batch conversions are allowed.
How to Use This:
Step1Copy the IG video link and paste it.
Step2Click the Download icon.
Step3It would turn to an MP3 file and save automatically.
Part 2: Comparison Table of the 5 Online Instagram Video Converters
Now that you know which apps to try out, you must decide the right tool to use based on its uses. Namely, how well a particular app would handle your main requirement with an online Instagram video converter.
| Converter Tool | InstaVideoSave | 4K Stogram | iGram | F2mp | AceThinker |
|---|---|---|---|---|---|
| Converting Speed | Fast | Medium-Fast | Fast | Fast | Medium-Fast |
| User Experience | Easy to use for different IG content. | Browse, view, and download anonymously, even from Private users. | Simple and direct IG video to MP4 downloader. | Quick searching and link pasting process for downloading. | Simple online tool to convert IG music videos into MP3 files. |
| Ratings | - | 4.6/5 (TrustPilot) | 3.1/5 (TrustPilot) | 400/100 (AEtrustscore) | 4.5/5 (TrustPilot) |
| Type of Instagram content it Supports. | Reels, Videos, Images, Profile, Stories. | Photos, videos, Highlights, Reels. | Videos, Images, Carousel, Reels, IGTV. | Videos | Videos |
| Compatible Social Media Apps | Instagram, Facebook, Vimeo, Flicker, Soundcloud, Bilibili, DailyMotion, Tiktok, Likee, Niconiko, Twitch | Instagram, Facebook, Twitter | |||
| Supported conversion output formats | MP4, AVI, MOV, JPG, etc. | MP3, MP4, JPG, etc. | Mp4 and JPG primarily. | 4A, WAV, OGG, 3GP, WMA, FLAC, AVI, MPG, MP4, MOV, MKV, WMV, M4V, MP3, WEBM, FLV. | MP3 |
Part 3: Hot FAQs on Online Video Converter for Instagram
1. Is it illegal to download Instagram videos?
Many applications, online converter tools, and sites are available for safely downloading Instagram videos. However, the service provider does not permit third-party content download from the app. Yet, these online converter tools are not entirely illegal- you should only download personal use instead of commercial usage. Also, downloads are allowed from public IG accounts primarily.
2. How to download reels video with Original HD Quality?
Many converter tools are available for downloading high-quality videos from Instagram Reels. The best ones we tested out with these benefits are InstaVideoSave and iGram. In the former, you can download HD quality videos to 1080p resolution, while iGram allows video downloads to 720p.
3. How can I download reels audio or sound only?
There are specific tools that users can opt for to download Instagram videos in audio format. AceThinker, for example, is the best online converter to download only the audio from the Instagram video links you add. Users opt for this software to convert IG-based music videos into MP3 files.
Final Words
Overall, multiple online converter tools are available for downloading different IG content like Reels, Videos, and Images to video/audio/image file format. Among them, InstaVideoSave and F2mp are the two tools where we noticed the best benefits. However, F2mp is a paid software, so choose it only for premium features.
What Are the Best 15 Slideshow Presentation Examples Your Audience Will Love
What’s the Best 15 Slideshow Presentation Examples Your Audience Will Love
An easy yet powerful editor
Numerous effects to choose from
Detailed tutorials provided by the official channel
No matter what type of industry or business you are in, slideshow presentations have become an important tool for several tasks like showcasing your products, and services, engaging with the clients and prospective buyers, changing their perceptions, leading to sales, and much more. Great presentations are a combination of style, content, effects, text, media files, and much more. There are several tools and software available these days that can help you create a slideshow presentation of your choice.
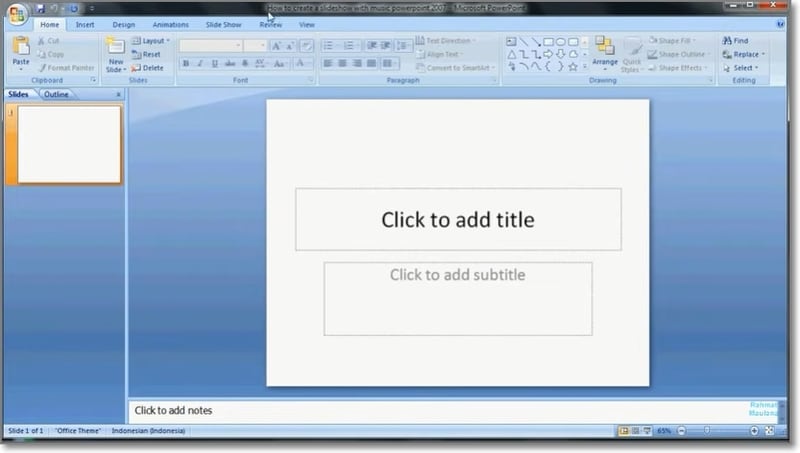
More in detail about these presentations, best powerpoint slideshow examples, and more are discussed in the following parts of the topic.
In this article
01 [Tips for creating an impressive slideshow presentation](#Part 1)
02 [Best 15 slideshow presentation examples](#Part 2)
03 [The best tool to edit your videos for slideshow presentations- Wondershare Filmora](#Part 3)
Part 1 Tips For Creating An Impressive Slideshow Presentation
To create a unique and engaging slideshow presentation, we have shortlisted some tips that will surely work. Check them as below.
● Have a theme
First of all, have a theme for a slideshow based on which the other elements can be selected. The theme or the story you want to portray can be based on the target audience and the purpose of creating a slideshow. For instance, if you want to generate sales from your products, create a slideshow that shows the benefits of your products and compares them with others in the same category.
● Keep it simple
The real purpose of a slideshow presentation is to convey your data or message in a simple manner that can be easily related. Since the slides move one after the other in a slideshow, they should be created in a manner so that the viewer can quickly understand them.
● Keep minimum text
Though text can be included in a slideshow, keep them to a minimum. A slideshow is a creative presentation having pictures, videos, graphs, and several other elements. So, keep the text whenever necessary and don’t include too much-written content. Moreover, a viewer can relate to and recall the product, brand, or service more through a message rather than a text.
● Include compelling visuals
Include relevant visuals like videos and images into your slideshow. Make sure that the files are in high resolution and clear and support the theme or the message you are trying to convey through the presentation.
● Add effects, filters, overlays, and other elements
Instead of adding the raw image and video footage, edit and customize them to make them more interesting and engaging. There are several professional video editing tools like Wondershare Filmora and others that can help you add effects, transitions, overlays, filters, and customize files as needed. Additional elements like graphs, charts, and more can also be added to the presentation.
● Use Templates
Templates are ready-made design that helps you create a slideshow presentation quickly and easily. The templates in a variety of designs in different categories are available for you to choose the most suitable one. You can check the collection of templates from various online sites and tools.
Part 2 Best 15 Slideshow Presentation Examples
A wide range of presentations in different categories is created by people. To help you check what a unique and engaging presentation looks like, below listed are the top slideshow examples.
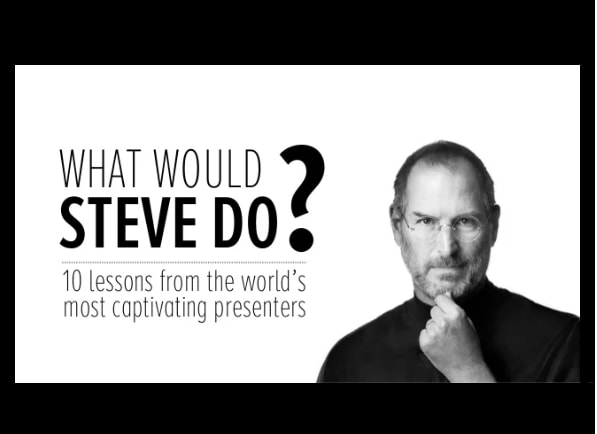
What would Steve Do? 10 Lessons from the World’s most captivating presenters by HubSpot
Powerful Body Language Tips for your next presentation

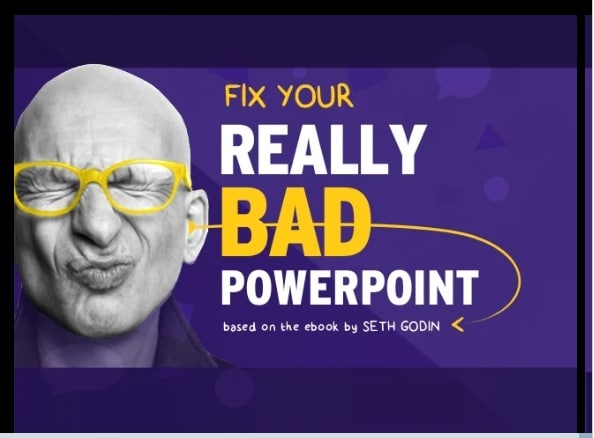
Fix your bad PowerPoint by Seth Godin
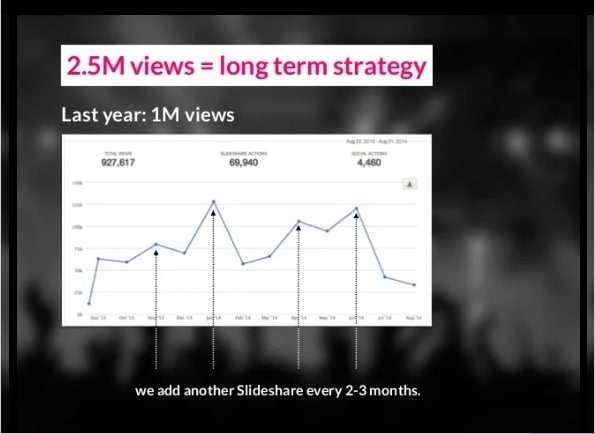
How I got 2.5 million views on SlideShare by Nick Demey
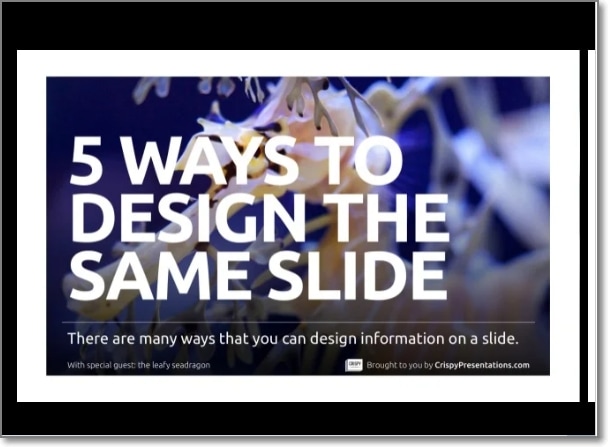
Killer ways to design the same slide
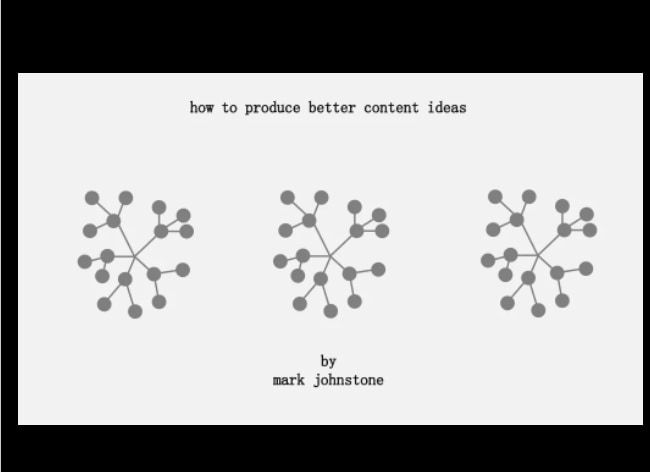
How to Produce Better Content Ideas by Mark Johnstone
How Google Works by Eric Schmid

Why Content Marketing Fails by Rand Fishkin

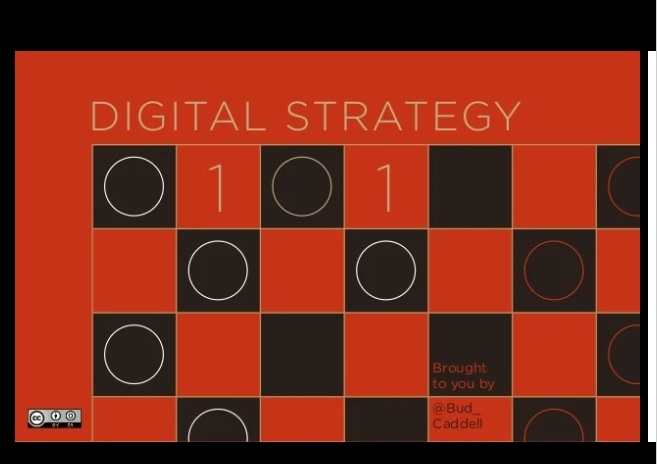
Digital Strategy 101 By Bud Caddell
The History of SEO by HubSpot

How to really get into marketing by Inbound.org

Search for meaning in B2B Marketing by Velocity Partners

The What If techniques by Motivate Design

Ways to Win the Internets by Upworthy

Crap: The Content Marketing Deluge by Velocity Partners

Part 3 The Best Tool To Edit Your Videos For Slideshow Presentations - Wondershare Filmora
As discussed in the above parts of the article, images and videos play a very crucial role in creating an impressive slideshow presentation. To further make these media files bright, clear, and relevant to your theme editing and customization can be done for this task, several software and programs are available. One such excellent tool is Wondershare Filmora Video Editor which works as a complete video editing software with advanced features.
Your files can be edited like a professional and that too in a hassle-free manner using the program. Some of the key editing features of the software include cropping, cutting, adding effects, transitions, overlays, green screen, split screen, AI portrait, masking, and more.
For Win 7 or later (64-bit)
For macOS 10.12 or later
Additionally, the tool also supports making a slideshow with music files and also has a built-in media library. Templates in different categories are also present.
● Ending Thoughts →
● Slideshow presentations are used for creating awareness about products and services, sending a message, presenting data, and several other tasks.
● To create a slideshow, several factors like media files, theme, colors, text, effects and other factors have to be considered.
● Several popular great slideshow presentation examples can be referred to as what a unique presentation looks like.
● Wondershare Filmora is an excellent tool for editing slideshow videos and also for creating a slideshow.
No matter what type of industry or business you are in, slideshow presentations have become an important tool for several tasks like showcasing your products, and services, engaging with the clients and prospective buyers, changing their perceptions, leading to sales, and much more. Great presentations are a combination of style, content, effects, text, media files, and much more. There are several tools and software available these days that can help you create a slideshow presentation of your choice.

More in detail about these presentations, best powerpoint slideshow examples, and more are discussed in the following parts of the topic.
In this article
01 [Tips for creating an impressive slideshow presentation](#Part 1)
02 [Best 15 slideshow presentation examples](#Part 2)
03 [The best tool to edit your videos for slideshow presentations- Wondershare Filmora](#Part 3)
Part 1 Tips For Creating An Impressive Slideshow Presentation
To create a unique and engaging slideshow presentation, we have shortlisted some tips that will surely work. Check them as below.
● Have a theme
First of all, have a theme for a slideshow based on which the other elements can be selected. The theme or the story you want to portray can be based on the target audience and the purpose of creating a slideshow. For instance, if you want to generate sales from your products, create a slideshow that shows the benefits of your products and compares them with others in the same category.
● Keep it simple
The real purpose of a slideshow presentation is to convey your data or message in a simple manner that can be easily related. Since the slides move one after the other in a slideshow, they should be created in a manner so that the viewer can quickly understand them.
● Keep minimum text
Though text can be included in a slideshow, keep them to a minimum. A slideshow is a creative presentation having pictures, videos, graphs, and several other elements. So, keep the text whenever necessary and don’t include too much-written content. Moreover, a viewer can relate to and recall the product, brand, or service more through a message rather than a text.
● Include compelling visuals
Include relevant visuals like videos and images into your slideshow. Make sure that the files are in high resolution and clear and support the theme or the message you are trying to convey through the presentation.
● Add effects, filters, overlays, and other elements
Instead of adding the raw image and video footage, edit and customize them to make them more interesting and engaging. There are several professional video editing tools like Wondershare Filmora and others that can help you add effects, transitions, overlays, filters, and customize files as needed. Additional elements like graphs, charts, and more can also be added to the presentation.
● Use Templates
Templates are ready-made design that helps you create a slideshow presentation quickly and easily. The templates in a variety of designs in different categories are available for you to choose the most suitable one. You can check the collection of templates from various online sites and tools.
Part 2 Best 15 Slideshow Presentation Examples
A wide range of presentations in different categories is created by people. To help you check what a unique and engaging presentation looks like, below listed are the top slideshow examples.
What would Steve Do? 10 Lessons from the World’s most captivating presenters by HubSpot

Powerful Body Language Tips for your next presentation

Fix your bad PowerPoint by Seth Godin

How I got 2.5 million views on SlideShare by Nick Demey

Killer ways to design the same slide

How to Produce Better Content Ideas by Mark Johnstone

How Google Works by Eric Schmid

Why Content Marketing Fails by Rand Fishkin

Digital Strategy 101 By Bud Caddell

The History of SEO by HubSpot

How to really get into marketing by Inbound.org

Search for meaning in B2B Marketing by Velocity Partners

The What If techniques by Motivate Design

Ways to Win the Internets by Upworthy

Crap: The Content Marketing Deluge by Velocity Partners

Part 3 The Best Tool To Edit Your Videos For Slideshow Presentations - Wondershare Filmora
As discussed in the above parts of the article, images and videos play a very crucial role in creating an impressive slideshow presentation. To further make these media files bright, clear, and relevant to your theme editing and customization can be done for this task, several software and programs are available. One such excellent tool is Wondershare Filmora Video Editor which works as a complete video editing software with advanced features.
Your files can be edited like a professional and that too in a hassle-free manner using the program. Some of the key editing features of the software include cropping, cutting, adding effects, transitions, overlays, green screen, split screen, AI portrait, masking, and more.
For Win 7 or later (64-bit)
For macOS 10.12 or later
Additionally, the tool also supports making a slideshow with music files and also has a built-in media library. Templates in different categories are also present.

● Ending Thoughts →
● Slideshow presentations are used for creating awareness about products and services, sending a message, presenting data, and several other tasks.
● To create a slideshow, several factors like media files, theme, colors, text, effects and other factors have to be considered.
● Several popular great slideshow presentation examples can be referred to as what a unique presentation looks like.
● Wondershare Filmora is an excellent tool for editing slideshow videos and also for creating a slideshow.
No matter what type of industry or business you are in, slideshow presentations have become an important tool for several tasks like showcasing your products, and services, engaging with the clients and prospective buyers, changing their perceptions, leading to sales, and much more. Great presentations are a combination of style, content, effects, text, media files, and much more. There are several tools and software available these days that can help you create a slideshow presentation of your choice.

More in detail about these presentations, best powerpoint slideshow examples, and more are discussed in the following parts of the topic.
In this article
01 [Tips for creating an impressive slideshow presentation](#Part 1)
02 [Best 15 slideshow presentation examples](#Part 2)
03 [The best tool to edit your videos for slideshow presentations- Wondershare Filmora](#Part 3)
Part 1 Tips For Creating An Impressive Slideshow Presentation
To create a unique and engaging slideshow presentation, we have shortlisted some tips that will surely work. Check them as below.
● Have a theme
First of all, have a theme for a slideshow based on which the other elements can be selected. The theme or the story you want to portray can be based on the target audience and the purpose of creating a slideshow. For instance, if you want to generate sales from your products, create a slideshow that shows the benefits of your products and compares them with others in the same category.
● Keep it simple
The real purpose of a slideshow presentation is to convey your data or message in a simple manner that can be easily related. Since the slides move one after the other in a slideshow, they should be created in a manner so that the viewer can quickly understand them.
● Keep minimum text
Though text can be included in a slideshow, keep them to a minimum. A slideshow is a creative presentation having pictures, videos, graphs, and several other elements. So, keep the text whenever necessary and don’t include too much-written content. Moreover, a viewer can relate to and recall the product, brand, or service more through a message rather than a text.
● Include compelling visuals
Include relevant visuals like videos and images into your slideshow. Make sure that the files are in high resolution and clear and support the theme or the message you are trying to convey through the presentation.
● Add effects, filters, overlays, and other elements
Instead of adding the raw image and video footage, edit and customize them to make them more interesting and engaging. There are several professional video editing tools like Wondershare Filmora and others that can help you add effects, transitions, overlays, filters, and customize files as needed. Additional elements like graphs, charts, and more can also be added to the presentation.
● Use Templates
Templates are ready-made design that helps you create a slideshow presentation quickly and easily. The templates in a variety of designs in different categories are available for you to choose the most suitable one. You can check the collection of templates from various online sites and tools.
Part 2 Best 15 Slideshow Presentation Examples
A wide range of presentations in different categories is created by people. To help you check what a unique and engaging presentation looks like, below listed are the top slideshow examples.
What would Steve Do? 10 Lessons from the World’s most captivating presenters by HubSpot

Powerful Body Language Tips for your next presentation

Fix your bad PowerPoint by Seth Godin

How I got 2.5 million views on SlideShare by Nick Demey

Killer ways to design the same slide

How to Produce Better Content Ideas by Mark Johnstone

How Google Works by Eric Schmid

Why Content Marketing Fails by Rand Fishkin

Digital Strategy 101 By Bud Caddell

The History of SEO by HubSpot

How to really get into marketing by Inbound.org

Search for meaning in B2B Marketing by Velocity Partners

The What If techniques by Motivate Design

Ways to Win the Internets by Upworthy

Crap: The Content Marketing Deluge by Velocity Partners

Part 3 The Best Tool To Edit Your Videos For Slideshow Presentations - Wondershare Filmora
As discussed in the above parts of the article, images and videos play a very crucial role in creating an impressive slideshow presentation. To further make these media files bright, clear, and relevant to your theme editing and customization can be done for this task, several software and programs are available. One such excellent tool is Wondershare Filmora Video Editor which works as a complete video editing software with advanced features.
Your files can be edited like a professional and that too in a hassle-free manner using the program. Some of the key editing features of the software include cropping, cutting, adding effects, transitions, overlays, green screen, split screen, AI portrait, masking, and more.
For Win 7 or later (64-bit)
For macOS 10.12 or later
Additionally, the tool also supports making a slideshow with music files and also has a built-in media library. Templates in different categories are also present.

● Ending Thoughts →
● Slideshow presentations are used for creating awareness about products and services, sending a message, presenting data, and several other tasks.
● To create a slideshow, several factors like media files, theme, colors, text, effects and other factors have to be considered.
● Several popular great slideshow presentation examples can be referred to as what a unique presentation looks like.
● Wondershare Filmora is an excellent tool for editing slideshow videos and also for creating a slideshow.
No matter what type of industry or business you are in, slideshow presentations have become an important tool for several tasks like showcasing your products, and services, engaging with the clients and prospective buyers, changing their perceptions, leading to sales, and much more. Great presentations are a combination of style, content, effects, text, media files, and much more. There are several tools and software available these days that can help you create a slideshow presentation of your choice.

More in detail about these presentations, best powerpoint slideshow examples, and more are discussed in the following parts of the topic.
In this article
01 [Tips for creating an impressive slideshow presentation](#Part 1)
02 [Best 15 slideshow presentation examples](#Part 2)
03 [The best tool to edit your videos for slideshow presentations- Wondershare Filmora](#Part 3)
Part 1 Tips For Creating An Impressive Slideshow Presentation
To create a unique and engaging slideshow presentation, we have shortlisted some tips that will surely work. Check them as below.
● Have a theme
First of all, have a theme for a slideshow based on which the other elements can be selected. The theme or the story you want to portray can be based on the target audience and the purpose of creating a slideshow. For instance, if you want to generate sales from your products, create a slideshow that shows the benefits of your products and compares them with others in the same category.
● Keep it simple
The real purpose of a slideshow presentation is to convey your data or message in a simple manner that can be easily related. Since the slides move one after the other in a slideshow, they should be created in a manner so that the viewer can quickly understand them.
● Keep minimum text
Though text can be included in a slideshow, keep them to a minimum. A slideshow is a creative presentation having pictures, videos, graphs, and several other elements. So, keep the text whenever necessary and don’t include too much-written content. Moreover, a viewer can relate to and recall the product, brand, or service more through a message rather than a text.
● Include compelling visuals
Include relevant visuals like videos and images into your slideshow. Make sure that the files are in high resolution and clear and support the theme or the message you are trying to convey through the presentation.
● Add effects, filters, overlays, and other elements
Instead of adding the raw image and video footage, edit and customize them to make them more interesting and engaging. There are several professional video editing tools like Wondershare Filmora and others that can help you add effects, transitions, overlays, filters, and customize files as needed. Additional elements like graphs, charts, and more can also be added to the presentation.
● Use Templates
Templates are ready-made design that helps you create a slideshow presentation quickly and easily. The templates in a variety of designs in different categories are available for you to choose the most suitable one. You can check the collection of templates from various online sites and tools.
Part 2 Best 15 Slideshow Presentation Examples
A wide range of presentations in different categories is created by people. To help you check what a unique and engaging presentation looks like, below listed are the top slideshow examples.
What would Steve Do? 10 Lessons from the World’s most captivating presenters by HubSpot

Powerful Body Language Tips for your next presentation

Fix your bad PowerPoint by Seth Godin

How I got 2.5 million views on SlideShare by Nick Demey

Killer ways to design the same slide

How to Produce Better Content Ideas by Mark Johnstone

How Google Works by Eric Schmid

Why Content Marketing Fails by Rand Fishkin

Digital Strategy 101 By Bud Caddell

The History of SEO by HubSpot

How to really get into marketing by Inbound.org

Search for meaning in B2B Marketing by Velocity Partners

The What If techniques by Motivate Design

Ways to Win the Internets by Upworthy

Crap: The Content Marketing Deluge by Velocity Partners

Part 3 The Best Tool To Edit Your Videos For Slideshow Presentations - Wondershare Filmora
As discussed in the above parts of the article, images and videos play a very crucial role in creating an impressive slideshow presentation. To further make these media files bright, clear, and relevant to your theme editing and customization can be done for this task, several software and programs are available. One such excellent tool is Wondershare Filmora Video Editor which works as a complete video editing software with advanced features.
Your files can be edited like a professional and that too in a hassle-free manner using the program. Some of the key editing features of the software include cropping, cutting, adding effects, transitions, overlays, green screen, split screen, AI portrait, masking, and more.
For Win 7 or later (64-bit)
For macOS 10.12 or later
Additionally, the tool also supports making a slideshow with music files and also has a built-in media library. Templates in different categories are also present.

● Ending Thoughts →
● Slideshow presentations are used for creating awareness about products and services, sending a message, presenting data, and several other tasks.
● To create a slideshow, several factors like media files, theme, colors, text, effects and other factors have to be considered.
● Several popular great slideshow presentation examples can be referred to as what a unique presentation looks like.
● Wondershare Filmora is an excellent tool for editing slideshow videos and also for creating a slideshow.
Also read:
- Editing Videos Was Never so Easy as It Is Now. With Video Enhancer Ai, This Task Is Very Simple to Do and No Trouble Will Be There in Getting the Things Done as Needed. Choose the Right AI Video Enhancer for Task Completion
- 2024 Approved What Is First Impression Review Video
- New In 2024, How to Make Loop Video in PowerPoint
- New Clone Yourself in Videos with Filmora for 2024
- New 2024 Approved How to Create Intro Video with Filmora
- Cropping a Video in Final Cut Pro Step by Step for 2024
- In 2024, Top Photo Video Maker Apps with Song
- Best 15 Subtitle Apps for 2024
- 2 Solutions to Crop a Video Using After Effects
- Updated Detailed Tutorial to Crop a Video in KineMaster
- Updated In 2024, Add Effects to Video Online
- How To Add Fade In Windows Video Editor
- New As an Online Marketer, It Is Important to Know the Algorithm of YouTube Platform. Ill Share You the History of Algorithm of YouTube and the New Changes in This Year
- 3 In-Camera Transitions Tricks To Make Videos Like a Pro
- Updated How to Make Discord GIF PFP? Solved for 2024
- How Long Does It Take To Edit A Video
- New Ways to Make Canva Collages
- How Windows Movie Maker Save MP4 File
- 2024 Approved Gifs Can Convey Your Emotions in a Way that Words Cannot, so They Are Becoming a Popular Way to Express Yourself, and You Must Know How to Make a Gif and You Wont Believe that Its Not Difficult to Do
- Updated Complete Tutorial to Make an Impressive Countdown Timer Video for 2024
- Do You Want to Create Slow-Motion Videos? This Article Shows Methods to Create Slow-Mo Videos without Changing the Medias Quality for 2024
- In 2024, Best Video Format Converter for PC and Online
- How to Convert SRT to DOCX
- 2024 Approved 3 In-Camera Transitions Tricks To Make Videos Like a Pro
- Updated 2024 Approved How to Loop YouTube Videos on iPhone
- Updated Track Mattes The Ultimate Guide For After Effects
- Best 10 Anime Movies for All Time for 2024
- 2024 Approved How to Make Simple Slideshow Word
- In 2024, How to Loop Video in Canva
- Updated Unlink Audio and Video in DaVinci Resolve Detailed Steps
- You Might Have Difficulty Rotating a Video without an Efficient Media Player or Editing Tool. Below Is a Detailed Guide on Rotating a Video on Any Axes
- How to Create the Night-to-Day Effect Video
- 2024 Approved Do You Want to Know How to Make a Collage in Lightroom? It Doesnt Matter Whether You Are a Novice or a Professional; This Guide Will Teach You to Do It Well
- Updated 2024 Approved 3GP Video Format What Is 3GP Format And How To Open It?
- 2024 Approved How to Uue Adobe Lightroom Color Grading
- Updated 2024 Approved OBS Green Screen Guide
- Updated In 2024, Complete Tutorial to Make an Impressive Countdown Timer Video
- The Complete Guide to Making Fortnite Montage for 2024
- 2024 Approved Green Screen YouTube Videos
- Updated Applications and Software Take up Your Devices Storage to Create Slow-Mo. Explore This Piece to Learn About some Slow-Motion Video Online Makers
- Updated 2024 Approved 5 Tried-And-True Ways to GIF Making
- 2024 Approved Have You Ever Watched a Movie Where You Felt the Filmmakers Left You Hanging? Yea, Thats What Freeze Frame Does. Here We Will Enlighten You on What It Is, Freeze Frame Examples Where It Has Been Helpful to Drive Our Point Home
- In 2024, Here Is a Complete Overview of VSCO Video Editor; the Best Photo-Editing App that Helps You Adjust Your Pictures Right After You Capture Them
- New 2024 Approved Online Video Makers
- New Steps to Remove Background Noise From Video Sony Vegas
- In 2024, How to Unlock Vivo X90S Bootloader Easily
- In 2024, Top 6 Apps/Services to Trace Any Lava Blaze Pro 5G Location By Mobile Number | Dr.fone
- Unlock Your Motorola G24 Power Phone with Ease The 3 Best Lock Screen Removal Tools
- In 2024, A Step-by-Step Guide on Using ADB and Fastboot to Remove FRP Lock on your Motorola Moto G24
- How to Unlock Oppo Reno 11 Pro 5G Without Password?
- How to Fix iPhone 15 Pro Max Passcode not Working? | Dr.fone
- In 2024, Did Your Apple iPhone 11 Pro Max Passcode Change Itself? Unlock It Now | Dr.fone
- How to Unlock AT&T Apple iPhone 14 with 3 Methods
- Fixing Persistent Pandora Crashes on Realme Narzo N55 | Dr.fone
- In 2024, Top 11 Free Apps to Check IMEI on iPhone 6s Plus
- Possible solutions to restore deleted call logs from Realme 11 Pro+
- CatchEmAll Celebrate National Pokémon Day with Virtual Location On Nokia G22 | Dr.fone
- How to Rescue Lost Messages from Nokia C210
- How to Change Spotify Location After Moving to Another Country On Nokia C32 | Dr.fone
- In 2024, How to Hide/Fake Snapchat Location on Your OnePlus Nord N30 5G | Dr.fone
- How To Transfer Data From Apple iPhone 11 Pro Max To Other iPhone 13 Pro devices? | Dr.fone
- How to Transfer Data from Realme 11 Pro to Any iOS Devices | Dr.fone
- In 2024, Android Unlock Code Sim Unlock Your Vivo Y36 Phone and Remove Locked Screen
- In 2024, Android Unlock Code Sim Unlock Your Oppo Reno 11 5G Phone and Remove Locked Screen
- In 2024, The Ultimate Guide How to Bypass Swipe Screen to Unlock on Infinix Hot 30i Device
- How to Unlock Samsung Phone without Google Account?
- 3 Ways to Unlock Your Apple iPhone 11 for Free
- Tecno Camon 20 Premier 5G Not Connecting to Wi-Fi? 12 Quick Ways to Fix | Dr.fone
- A Comprehensive Guide to Mastering iPogo for Pokémon GO On Apple iPhone 14 Pro Max | Dr.fone
- AddROM Bypass An Android Tool to Unlock FRP Lock Screen For your Xiaomi 14 Ultra
- In 2024, For People Wanting to Mock GPS on Realme 12 Pro+ 5G Devices | Dr.fone
- Strategies for Apps That Wont Download From Play Store On Tecno Camon 20 | Dr.fone
- Title: In 2024, Special Animated Transition Tutorial【SUPER EASY】
- Author: Chloe
- Created at : 2024-06-09 16:15:11
- Updated at : 2024-06-10 16:15:11
- Link: https://ai-editing-video.techidaily.com/in-2024-special-animated-transition-tutorialsuper-easy/
- License: This work is licensed under CC BY-NC-SA 4.0.


