
:max_bytes(150000):strip_icc():format(webp)/movie-night-at-home-with-popcorn_t20_yv3PA9-5c815f7fc9e77c0001fd5b49.jpg)
In 2024, Top 10 Fun Discord Bots You Need
Top 10 Fun Discord Bots You Need
Top 10 Fun Discord Bots You Need in 2024
An easy yet powerful editor
Numerous effects to choose from
Detailed tutorials provided by the official channel
Consumers enjoy discord because it serves as a hub for their social groups and communities. It’s a haven where users can be themselves while socializing with others who share their interests and hobbies. There is no algorithm selecting what they should see, no continuous scrolling, and no news feed. Common interests fuel conversations and you can use some fun discord bots to pep up the conversation.

Fun bots to add discord with artificial intelligence (AI) technologies are among the most helpful tools available on the discord platform. Funny emojis for discord may be beneficial to greet new members and have funny light conversations! This aids in the creation and maintenance of a vibrant online community. You can add music, games, and fun memes to your server using these bots if you wish to.
In this article
01 [10 Fun Discord Bots You Need in 2024](#Part 1)
02 [Fun Discord Bots FAQs](#Part 2)
Part 1 Fun Discord Bots You Need in 2024
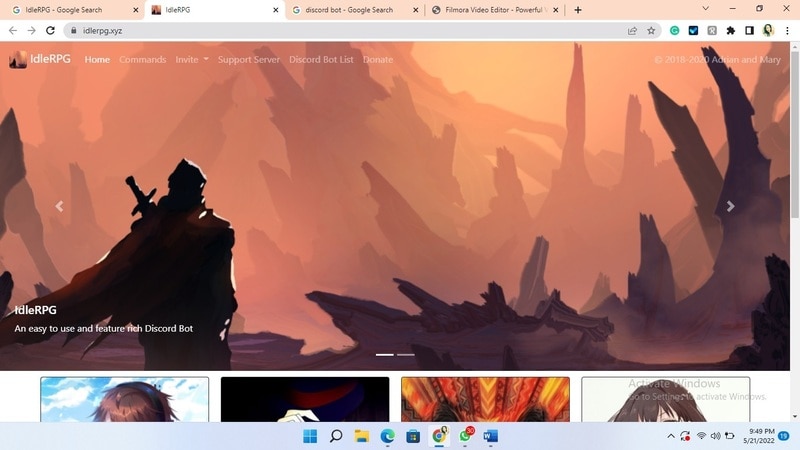
01IdleRPG
The IdleRPG is another enjoyable and engaging fun discord bot in the RPG gaming experience. It rewards server members for participating in the game while gaining XP and having fun. It offers character advancement and is comparable to other RPG games.
You may travel on a quest, trade various things, fight other players, and even find love. There’s also a scoreboard for the top ten loves, top ten PvP players, top ten wealthiest, and top ten XP players. IdleRPG also allows you to wager in various ways to help you boost your gaming money.
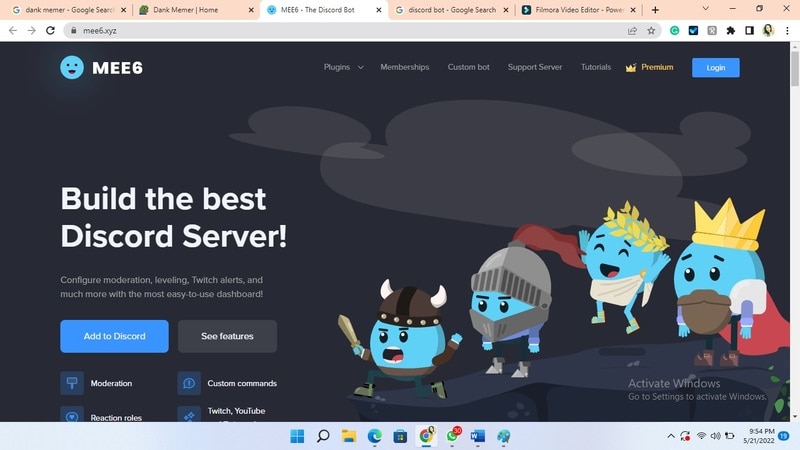
02MEE6
MEE6 is a widespread moderation and one of the greatest fun bots for discord. It takes care of many tasks that a mod team would typically do. This includes greeting new members, informing your server when you or your favorite content producers go live on Twitch or YouTube, and allowing users to assign roles depending on their reactions.
A command tool that allows you to generate custom commands and an XP leveling system that users may grind to earn access to various channels and permissions depending on activity are two of MEE6’s more complicated features. MEE6 also includes plugins for music and developing your fun discord bot.
03Dank Memer
Dank Memer is another fun bot to add to discord with a lighthearted tone. It offers one of the most extensive built-in economies, allowing participants to engage in text-based thievery, bank robbery, and gambling experiences.
As its name implies, it also offers a slew of meme-related commands. You can use simple chat instructions to create memes. Other memes automatically publish.
Even more impressive is that awesome memes are collected daily from Reddit’s top meme collections.

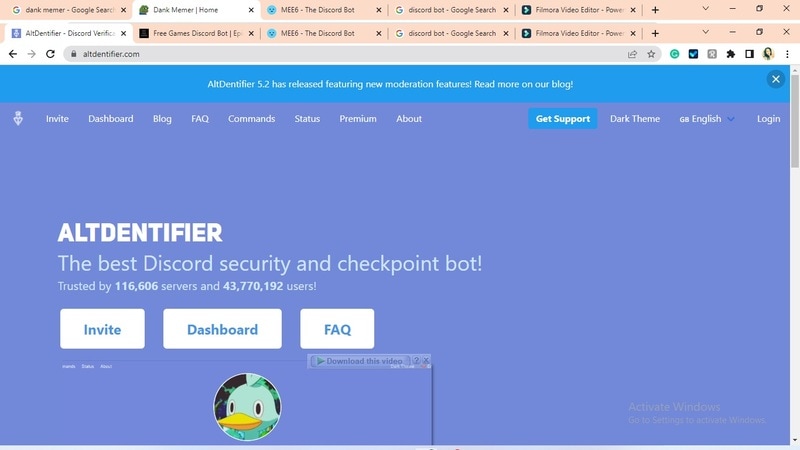
04AltDentifier
Another unique funny discord emoji bot is AltDentifier, which maintains your server clean and spam-free. It’s simple to set up and takes only a few minutes to get up and run. It now has over 35 million users spread across 100,000 servers. It also includes several more moderation commands to make administration easier.
The AltDentifier bot contains:
● An automated anti-raid system.
● A robust verification mechanism.
● Multilingual support.
● A review record.
It will also notify you if a user attempts to circumvent any limitations by utilizing a VPN.
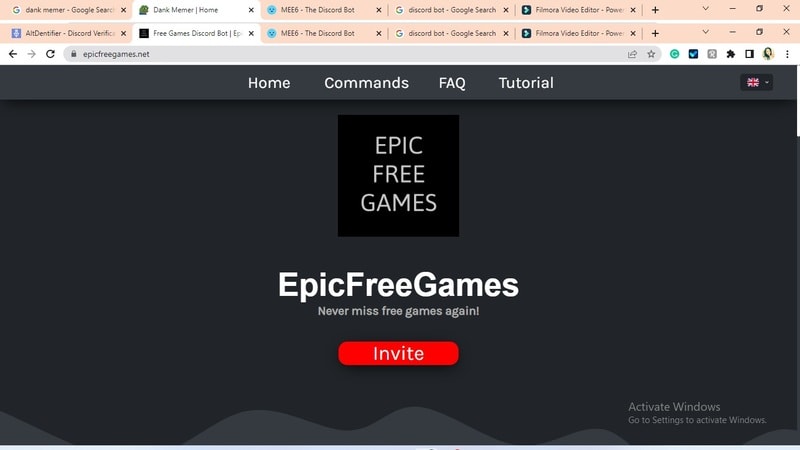
05EpicFreeGames
Over the last two years, Epic Free Games has given away thousands of free games. GTA V, Dead By Daylight, and NBA 2K21 are among the given-away titles. It even-handed away Discord Nitro lately. Have any of these free games ever escaped your notice? Fear not, for the EpicFreeGames bot has your back.
The EpicFreeGames bot delivers a message to a channel, reminding everyone of Epic’s free game(s). It only has one task, yet it can provide you with hundreds of dollars worth of games. Never miss another fantastic free Epic Games game again.
06**Rythm **
Rythm is a great fun discord bot for playing music in the voice stream of your server. This one features a beautiful user interface that includes a music player that you can interact with. This makes controlling the channel’s queue a breeze.
The options are changeable. You can designate DJ duties, prohibit the same songs from appearing in queues again, and block particular channels from playing music. Rhythm is less platform-agnostic than Groovy. Spotify, YouTube, SoundCloud, and Bandcamp are among the options. Apple Music is not currently supported.
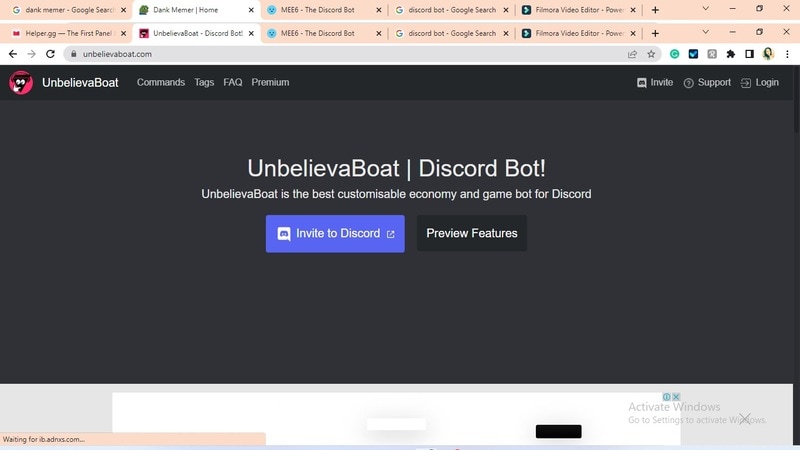
07Unbelievaboat
UnbelievaBoat is a versatile, fun bot to add to discord that uses exciting activities to keep server members engaged. These capabilities, fortunately, include a moderation mechanism that you may utilize to issue warnings and enforce bans. Your moderators may keep track of each action by assigning it a case number.
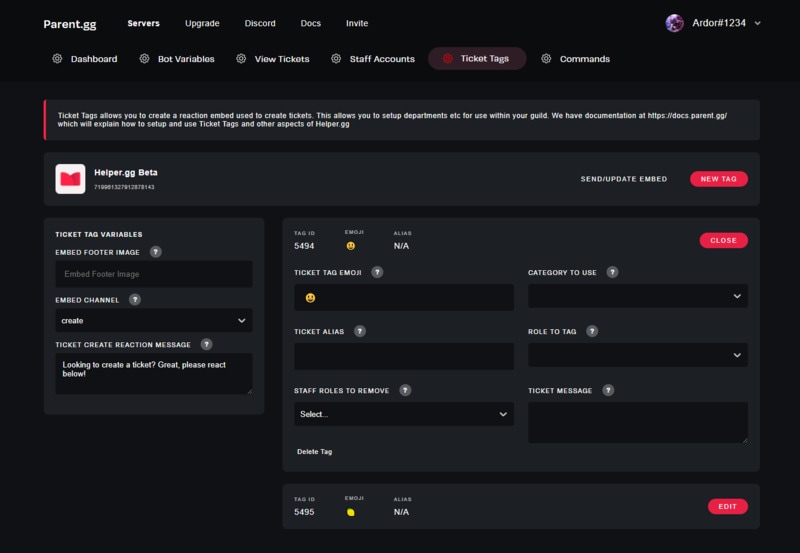
08Helper.gg
Helper.gg enables you to transform your discord server into a support ticket system. It’s a board ticket bot with a stunning UI that makes managing and responding to client tickets simple.
Create staff accounts for your company’s customer support representatives and manage their access. Ticket logging with the flexibility to rename and relocate tickets, add and delete users, and the contentment of having tickets close automatically based on the amount of time that has passed since the previous reply are all accessible.
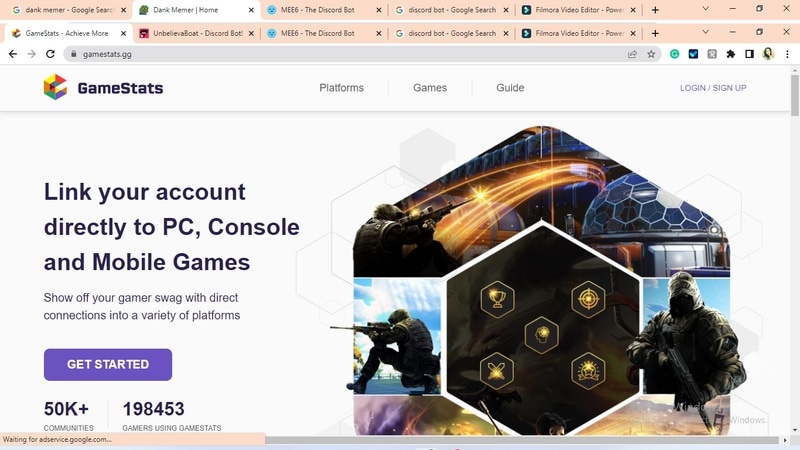
09GameStats
Next, GameStats has one-of-a-kind funny emojis for the discord bot. We all enjoy looking at our in-game statistics and comparing them. The GameStats Discord bot makes sharing and displaying your impressive numbers simple.
Connect to your game or platform, make a personalized profile card, and begin sharing your tryhard statistics.
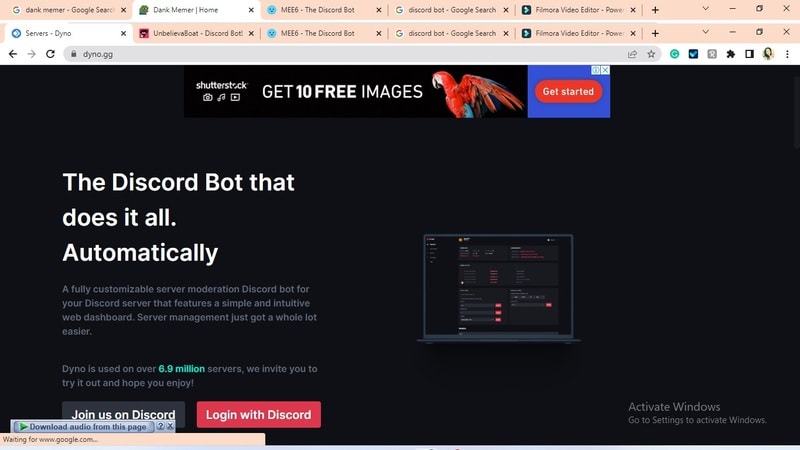
10Dyno
Dyno is another well-crafted fun discord bot. It’s an utterly customizable server moderation bot that assists with server automation. You also receive a basic online dashboard with Dyno that you can use to monitor and control your server.
It has functions such as creating positions, making announcements, banning members, and even requesting puppy or cat images. Dyno is a fun bot that allows you to automate your server management effortlessly. Premium subscriptions, which start at $4.99 per month and unlock more exclusive features, are also available.
However, if you are a creative video editor who likes sharing their experience on discord, Filmora is for you. With Filmora, you can bring your recorded experiences with funny discord emojis to life!
But Wait, What is Wondershare Filmora Video Editor ?
Filmora is a famous video editing program for those who wish to focus on editing and producing high-quality videos with the support of 4K video editing. It’s a reasonably priced software featuring tools like split, trim, add text, color, etc. When it comes to designing, adding effects, and modifying movies, it provides users with many possibilities. Users can add overlays, create animations and objects, add music, and more with Wondershare’s Filmora. It’s an excellent tool for individuals who wish to include dedications, tributes, fun emojis and anecdotes in their films. Any video can also benefit from voiceovers.
For Win 7 or later (64-bit)
For macOS 10.12 or later
Part 2 Fun Discord Bots FAQs
Q. What does MEE6 stand for?
A. MEE6 is a discord role bot that lets users assign roles to themselves via discord replies. This discord role generator will change user rights in discord automatically.
Q. Are these fun bots free?
A. Yes and no. Most fun bots for discord are free to use, although you must pay for some features.
Q. What is the top level I can reach on the MEE6 bot?
A. The maximum level accessible is 1,768,802, which would take 935 billion years if messages sent every minute.
Q. Help! My discord got hacked; how did that even happen?
A. Users may edit discord javascript files. A cybercriminal can install harmful malware to discord client files if they get user authorization. When people open the file, the code also gets executed. After then, the hacker has access to the user’s discord data.
Q. What can discord bots do?
A. On your server, the bots can conduct a variety of helpful automated chores and bot commands, like welcoming new users, monitoring content, and banning rule violators. Using fun discord bots’ instructions, you can add music, humor, games, and other emojis to your server.
● Ending Thoughts →
● In short, moderators and administrators can use funny discord emojis to administer their servers better, make them attractive, and get more users. There are many vanilla discord commands to choose from, and when you put fun bots to add to discord, the possibilities become unlimited.
● Besides, there are several funny emojis for discord to improve your discord skills and establish your discord server. Finally, Filmora can assist you in beautifying your recorded videos make funny emojis for discord.
Consumers enjoy discord because it serves as a hub for their social groups and communities. It’s a haven where users can be themselves while socializing with others who share their interests and hobbies. There is no algorithm selecting what they should see, no continuous scrolling, and no news feed. Common interests fuel conversations and you can use some fun discord bots to pep up the conversation.
Fun bots to add discord with artificial intelligence (AI) technologies are among the most helpful tools available on the discord platform. Funny emojis for discord may be beneficial to greet new members and have funny light conversations! This aids in the creation and maintenance of a vibrant online community. You can add music, games, and fun memes to your server using these bots if you wish to.
In this article
01 [10 Fun Discord Bots You Need in 2024](#Part 1)
02 [Fun Discord Bots FAQs](#Part 2)
Part 1 Fun Discord Bots You Need in 2024
01IdleRPG
The IdleRPG is another enjoyable and engaging fun discord bot in the RPG gaming experience. It rewards server members for participating in the game while gaining XP and having fun. It offers character advancement and is comparable to other RPG games.
You may travel on a quest, trade various things, fight other players, and even find love. There’s also a scoreboard for the top ten loves, top ten PvP players, top ten wealthiest, and top ten XP players. IdleRPG also allows you to wager in various ways to help you boost your gaming money.
02MEE6
MEE6 is a widespread moderation and one of the greatest fun bots for discord. It takes care of many tasks that a mod team would typically do. This includes greeting new members, informing your server when you or your favorite content producers go live on Twitch or YouTube, and allowing users to assign roles depending on their reactions.
A command tool that allows you to generate custom commands and an XP leveling system that users may grind to earn access to various channels and permissions depending on activity are two of MEE6’s more complicated features. MEE6 also includes plugins for music and developing your fun discord bot.
03Dank Memer
Dank Memer is another fun bot to add to discord with a lighthearted tone. It offers one of the most extensive built-in economies, allowing participants to engage in text-based thievery, bank robbery, and gambling experiences.
As its name implies, it also offers a slew of meme-related commands. You can use simple chat instructions to create memes. Other memes automatically publish.
Even more impressive is that awesome memes are collected daily from Reddit’s top meme collections.
04AltDentifier
Another unique funny discord emoji bot is AltDentifier, which maintains your server clean and spam-free. It’s simple to set up and takes only a few minutes to get up and run. It now has over 35 million users spread across 100,000 servers. It also includes several more moderation commands to make administration easier.
The AltDentifier bot contains:
● An automated anti-raid system.
● A robust verification mechanism.
● Multilingual support.
● A review record.
It will also notify you if a user attempts to circumvent any limitations by utilizing a VPN.
05EpicFreeGames
Over the last two years, Epic Free Games has given away thousands of free games. GTA V, Dead By Daylight, and NBA 2K21 are among the given-away titles. It even-handed away Discord Nitro lately. Have any of these free games ever escaped your notice? Fear not, for the EpicFreeGames bot has your back.
The EpicFreeGames bot delivers a message to a channel, reminding everyone of Epic’s free game(s). It only has one task, yet it can provide you with hundreds of dollars worth of games. Never miss another fantastic free Epic Games game again.
06**Rythm **
Rythm is a great fun discord bot for playing music in the voice stream of your server. This one features a beautiful user interface that includes a music player that you can interact with. This makes controlling the channel’s queue a breeze.
The options are changeable. You can designate DJ duties, prohibit the same songs from appearing in queues again, and block particular channels from playing music. Rhythm is less platform-agnostic than Groovy. Spotify, YouTube, SoundCloud, and Bandcamp are among the options. Apple Music is not currently supported.
07Unbelievaboat
UnbelievaBoat is a versatile, fun bot to add to discord that uses exciting activities to keep server members engaged. These capabilities, fortunately, include a moderation mechanism that you may utilize to issue warnings and enforce bans. Your moderators may keep track of each action by assigning it a case number.
08Helper.gg
Helper.gg enables you to transform your discord server into a support ticket system. It’s a board ticket bot with a stunning UI that makes managing and responding to client tickets simple.
Create staff accounts for your company’s customer support representatives and manage their access. Ticket logging with the flexibility to rename and relocate tickets, add and delete users, and the contentment of having tickets close automatically based on the amount of time that has passed since the previous reply are all accessible.
09GameStats
Next, GameStats has one-of-a-kind funny emojis for the discord bot. We all enjoy looking at our in-game statistics and comparing them. The GameStats Discord bot makes sharing and displaying your impressive numbers simple.
Connect to your game or platform, make a personalized profile card, and begin sharing your tryhard statistics.
10Dyno
Dyno is another well-crafted fun discord bot. It’s an utterly customizable server moderation bot that assists with server automation. You also receive a basic online dashboard with Dyno that you can use to monitor and control your server.
It has functions such as creating positions, making announcements, banning members, and even requesting puppy or cat images. Dyno is a fun bot that allows you to automate your server management effortlessly. Premium subscriptions, which start at $4.99 per month and unlock more exclusive features, are also available.
However, if you are a creative video editor who likes sharing their experience on discord, Filmora is for you. With Filmora, you can bring your recorded experiences with funny discord emojis to life!
But Wait, What is Wondershare Filmora Video Editor ?
Filmora is a famous video editing program for those who wish to focus on editing and producing high-quality videos with the support of 4K video editing. It’s a reasonably priced software featuring tools like split, trim, add text, color, etc. When it comes to designing, adding effects, and modifying movies, it provides users with many possibilities. Users can add overlays, create animations and objects, add music, and more with Wondershare’s Filmora. It’s an excellent tool for individuals who wish to include dedications, tributes, fun emojis and anecdotes in their films. Any video can also benefit from voiceovers.
For Win 7 or later (64-bit)
For macOS 10.12 or later
Part 2 Fun Discord Bots FAQs
Q. What does MEE6 stand for?
A. MEE6 is a discord role bot that lets users assign roles to themselves via discord replies. This discord role generator will change user rights in discord automatically.
Q. Are these fun bots free?
A. Yes and no. Most fun bots for discord are free to use, although you must pay for some features.
Q. What is the top level I can reach on the MEE6 bot?
A. The maximum level accessible is 1,768,802, which would take 935 billion years if messages sent every minute.
Q. Help! My discord got hacked; how did that even happen?
A. Users may edit discord javascript files. A cybercriminal can install harmful malware to discord client files if they get user authorization. When people open the file, the code also gets executed. After then, the hacker has access to the user’s discord data.
Q. What can discord bots do?
A. On your server, the bots can conduct a variety of helpful automated chores and bot commands, like welcoming new users, monitoring content, and banning rule violators. Using fun discord bots’ instructions, you can add music, humor, games, and other emojis to your server.
● Ending Thoughts →
● In short, moderators and administrators can use funny discord emojis to administer their servers better, make them attractive, and get more users. There are many vanilla discord commands to choose from, and when you put fun bots to add to discord, the possibilities become unlimited.
● Besides, there are several funny emojis for discord to improve your discord skills and establish your discord server. Finally, Filmora can assist you in beautifying your recorded videos make funny emojis for discord.
A Detailed Guide to Do Color Correction in OBS
Create High-Quality Video - Wondershare Filmora
An easy and powerful YouTube video editor
Numerous video and audio effects to choose from
Detailed tutorials are provided by the official channel
Color Correction is an outstanding functionality that allows editing photos and videos by altering their consistency to match a particular standard. Besides, color correction is available in the premium tool and free applications. And one of the established free software tools with color correction is the OBS.
Even though the Open Broadcaster Software is mainly known for live streaming and offline video recording, it also offers color correction functionality from its open canvas. Read this article to completion and get to the bottom line of how to do color correction in OBS.
More about OBS
In this article
01 What is OBS?
What is OBS?
Open Broadcaster Software (OBS) is free and open-source software that allows users to record videos and live stream events right at their comfort. The software functions effectively on Mac, Windows, and Linux computers.
Open Broadcaster Software (OBS) is free and open-source software that allows users to record videos and live stream events right at their comfort. The software functions effectively on Mac, Windows, and Linux computers.
Since its initial launch in 2012, OBS has made tremendous moves – This is not only from the constant release of its new versions but also the relentless increase in the functionality features. Besides, OBS is equipped with a robust API that enables plugins and scripts which provide extensive customization to precisely suit one’s needs.
However, OBS being a free application can function to date due to enough support from sponsors and backers.
How to Apply Color Correction in OBS
When you carry out basic edits to your videos or images with OBS and realize that your project has poor shade, color, or tone, you don’t have to export it to another software to correct it. Instead, you can use filters for color correction in OBS.
Apart from using OBS filters to color correct video clips and images, you can correct games, browser sources, and video capture devices.
There are various aspects of color correction in OBS. It includes:
1. Gamma
Gamma is a fundamental aspect in OBS that functions by balancing the brightness of an image through contrast. To be precise, Gamma works almost similarly to change in brightness while simultaneously increasing or decreasing the contrast.
In editing, Gamma is applicable mainly for removing shiny foreheads and webcam footage in gaming and browsing.
High Gamma is represented by “L,” whereas low Gamm is represented by “R.”
2. Contrast
Contrast is the difference in the degree of colors and tones in an image. Usually, the low contrast image has a narrow color range, whereas the high contrast images have dark shadows and bright highlights.
“L” represents high contrast in OBS contrast, whereas “R” represents low contrast.
3. Brightness
Brightness is the degree to how light or dark a picture is. To be able to understand an image clearly, it is best to correct its brightness. A change in brightness of a picture has a simultaneous change in pixels of that image.
High brightness in OBS is denounced by the letter “L,” whereas Low brightness is denounced by “R.”
4. Saturation
Saturation is the intensity of colors in a video or an image. High saturated images are bright, strong, and are rich, whereas the low saturated photos appear washed out. Black and white (grayscale) photos have no color saturation. In OBS, high saturation and low saturation are represented as “L” and “R.”
5. Hue Shift
Hue shift is the change in an image’s saturation, lightness, and hue colors. Hue shifting occurs when highlighting or shading images. In OBS, you can use the hue shift functionality to reimage your image with a completely different color palette.
With the hue shift functionality in OBS, you can place the image on top of another and have an 80% opacity. It means that you will still see the first image when you place the second one on top of it.
The “L” sign in the OBS hue shift represents 50% opacity, while the “R” represents 100% Opacity.
Color Grade in OBS
Color grading is the process of enhancing the appearance of an image through attributes such as contrast, saturation, and color, making them enchanting for presentations. Color grading is not only done for still images but also for motion pictures and images.
Color grading functionality in OBS is encompassed with several tools – This includes:
1. Lift tool
As the name suggests, lift tools are used in lifting or removing specific colors from an image. It does so without necessarily affecting other colors in an image.
With this tool, you can selectively remove unwanted colors from your image or video, replace them with your desired ones, and create astonishing results.
2. Offset
Offset is another outstanding tool in OBS color grading that controls the blacks/Shadows of an image. It functions by altering the brightness levels and leaving the highlights and the mid-tones unaffected.
3. Gain
A gain is a tool in OBS color correction that functions by only adjusting the white levels in an image. With the gain tool, brighter colors become brighter or darker.
Many people, especially beginner editors, experience difficulty differentiating between the Gamma and Offset tools. Yes, there is a closer similarity between the two, and for you to be on the safe side, you need to know that Gamma goes with the mid-tones (middle gray levels) whereas the Gain goes with highlights/whites.
How to Apply LUTs in OBS
Look up tables (LUTs) is a functionality feature that allows editors, colorists, and filmmakers to save certain colors as their templates. Therefore, when working on a particular project, they don’t have to create new working color grades; instead, you pick it from your LUT.
Using LUTs OBS is not rocket science. With LUTs, you can create unique projects with a vibrant feel. Here are the simple steps of using LUTs in OBS.
Step 1. Prepare your LUT
First, check and establish whether you have your LUT ready. If you don’t have it, you can download one from the internet. Make sure you download it as a folder. Even though OBS has LUT, It has limited color grades; therefore, it is best to download one. You can extract it to an OBS folder if you downloaded it in a zip file.
Step 2. Add your project to the OBS timeline
Open your OBS software and add your project file. Drag and drop your file to the OBS timeline.

Step 3. Add LUTs to your project
Right-click on the area in your project that you wish to apply LUTs, then click on “Filters.” Select “Apply LUT” from the drop-down menu,” which is usually at the top of the list.

Step 4. Apply your LUT as a filter
On the LUTs section, click on the browser, then open your downloaded LUT folder. Usually, the LUT is in the form of a .cube file. You can adjust your LUT by simply clicking on the “Adjust” option.
Bonus! How to Apply Color Correction for Webcam and Camera
People who primarily use their computers for recording sessions often find it difficult to capture quality videos. It is because most computer cameras are not straightforward. To do away with purchasing a new camera due to poor quality video capture, they can freely use OBS LUTs. For their camera and webcam. LUTs for webcam play a vital role in correcting the quality of photos and videos by using filters.
Here are the simple steps on how to use LUTs for color correction in webcam and camera
Step 1. Check whether your camera has additional software
Most webcams and cameras are controlled by external software, so you first need to check whether yours is also controlled. A thing with these cameras are controlled by their software is that the software determines the color settings and the specific image.
Double click on camera source and select “Configure video.” Computers with external software cameras will have a pop-up window that displays various customizable settings. Here, you can adjust the different settings based on your preference.

Step 2. Download your LUTs
Download online the LUTs you want to use. Download them as folders and extract the files you downloaded as zip files. Save them in the OBS folder.
Step 3. Apply your LUTs
Still, in your OBS software, open your camera and then right-click on it. From the displayed menu, click on “Filters.”
On the bottom left corner of your interface, hit the “+” sign, then select “Apply LUTs” > “Browse.”
Open your already downloaded OBS files. Usually, there is an “Adjust” that allows you to regulate the intensity of the LUT by sliding it.

Step 4. Start recording with LUTs on
After turning on your LUT, you can start recording videos and taking photos. There is an eye icon on the left-hand side of your screen. You can use it to turn on or off LUT.
Conclusion
● And that is how to do color correction in OBS. Besides, you do not have to go to the extremes of getting a new camera because of your webcam faultiness. With OBS, you can correct your camera and webcam and get outstanding results.
● Download LUTs from the internet and use them as a template in OBS. Besides, you don’t have to pay for the LUTs, but you can use the free ones.
Color Correction is an outstanding functionality that allows editing photos and videos by altering their consistency to match a particular standard. Besides, color correction is available in the premium tool and free applications. And one of the established free software tools with color correction is the OBS.
Even though the Open Broadcaster Software is mainly known for live streaming and offline video recording, it also offers color correction functionality from its open canvas. Read this article to completion and get to the bottom line of how to do color correction in OBS.
More about OBS
In this article
01 What is OBS?
What is OBS?
Open Broadcaster Software (OBS) is free and open-source software that allows users to record videos and live stream events right at their comfort. The software functions effectively on Mac, Windows, and Linux computers.
Open Broadcaster Software (OBS) is free and open-source software that allows users to record videos and live stream events right at their comfort. The software functions effectively on Mac, Windows, and Linux computers.
Since its initial launch in 2012, OBS has made tremendous moves – This is not only from the constant release of its new versions but also the relentless increase in the functionality features. Besides, OBS is equipped with a robust API that enables plugins and scripts which provide extensive customization to precisely suit one’s needs.
However, OBS being a free application can function to date due to enough support from sponsors and backers.
How to Apply Color Correction in OBS
When you carry out basic edits to your videos or images with OBS and realize that your project has poor shade, color, or tone, you don’t have to export it to another software to correct it. Instead, you can use filters for color correction in OBS.
Apart from using OBS filters to color correct video clips and images, you can correct games, browser sources, and video capture devices.
There are various aspects of color correction in OBS. It includes:
1. Gamma
Gamma is a fundamental aspect in OBS that functions by balancing the brightness of an image through contrast. To be precise, Gamma works almost similarly to change in brightness while simultaneously increasing or decreasing the contrast.
In editing, Gamma is applicable mainly for removing shiny foreheads and webcam footage in gaming and browsing.
High Gamma is represented by “L,” whereas low Gamm is represented by “R.”
2. Contrast
Contrast is the difference in the degree of colors and tones in an image. Usually, the low contrast image has a narrow color range, whereas the high contrast images have dark shadows and bright highlights.
“L” represents high contrast in OBS contrast, whereas “R” represents low contrast.
3. Brightness
Brightness is the degree to how light or dark a picture is. To be able to understand an image clearly, it is best to correct its brightness. A change in brightness of a picture has a simultaneous change in pixels of that image.
High brightness in OBS is denounced by the letter “L,” whereas Low brightness is denounced by “R.”
4. Saturation
Saturation is the intensity of colors in a video or an image. High saturated images are bright, strong, and are rich, whereas the low saturated photos appear washed out. Black and white (grayscale) photos have no color saturation. In OBS, high saturation and low saturation are represented as “L” and “R.”
5. Hue Shift
Hue shift is the change in an image’s saturation, lightness, and hue colors. Hue shifting occurs when highlighting or shading images. In OBS, you can use the hue shift functionality to reimage your image with a completely different color palette.
With the hue shift functionality in OBS, you can place the image on top of another and have an 80% opacity. It means that you will still see the first image when you place the second one on top of it.
The “L” sign in the OBS hue shift represents 50% opacity, while the “R” represents 100% Opacity.
Color Grade in OBS
Color grading is the process of enhancing the appearance of an image through attributes such as contrast, saturation, and color, making them enchanting for presentations. Color grading is not only done for still images but also for motion pictures and images.
Color grading functionality in OBS is encompassed with several tools – This includes:
1. Lift tool
As the name suggests, lift tools are used in lifting or removing specific colors from an image. It does so without necessarily affecting other colors in an image.
With this tool, you can selectively remove unwanted colors from your image or video, replace them with your desired ones, and create astonishing results.
2. Offset
Offset is another outstanding tool in OBS color grading that controls the blacks/Shadows of an image. It functions by altering the brightness levels and leaving the highlights and the mid-tones unaffected.
3. Gain
A gain is a tool in OBS color correction that functions by only adjusting the white levels in an image. With the gain tool, brighter colors become brighter or darker.
Many people, especially beginner editors, experience difficulty differentiating between the Gamma and Offset tools. Yes, there is a closer similarity between the two, and for you to be on the safe side, you need to know that Gamma goes with the mid-tones (middle gray levels) whereas the Gain goes with highlights/whites.
How to Apply LUTs in OBS
Look up tables (LUTs) is a functionality feature that allows editors, colorists, and filmmakers to save certain colors as their templates. Therefore, when working on a particular project, they don’t have to create new working color grades; instead, you pick it from your LUT.
Using LUTs OBS is not rocket science. With LUTs, you can create unique projects with a vibrant feel. Here are the simple steps of using LUTs in OBS.
Step 1. Prepare your LUT
First, check and establish whether you have your LUT ready. If you don’t have it, you can download one from the internet. Make sure you download it as a folder. Even though OBS has LUT, It has limited color grades; therefore, it is best to download one. You can extract it to an OBS folder if you downloaded it in a zip file.
Step 2. Add your project to the OBS timeline
Open your OBS software and add your project file. Drag and drop your file to the OBS timeline.
Step 3. Add LUTs to your project
Right-click on the area in your project that you wish to apply LUTs, then click on “Filters.” Select “Apply LUT” from the drop-down menu,” which is usually at the top of the list.
Step 4. Apply your LUT as a filter
On the LUTs section, click on the browser, then open your downloaded LUT folder. Usually, the LUT is in the form of a .cube file. You can adjust your LUT by simply clicking on the “Adjust” option.
Bonus! How to Apply Color Correction for Webcam and Camera
People who primarily use their computers for recording sessions often find it difficult to capture quality videos. It is because most computer cameras are not straightforward. To do away with purchasing a new camera due to poor quality video capture, they can freely use OBS LUTs. For their camera and webcam. LUTs for webcam play a vital role in correcting the quality of photos and videos by using filters.
Here are the simple steps on how to use LUTs for color correction in webcam and camera
Step 1. Check whether your camera has additional software
Most webcams and cameras are controlled by external software, so you first need to check whether yours is also controlled. A thing with these cameras are controlled by their software is that the software determines the color settings and the specific image.
Double click on camera source and select “Configure video.” Computers with external software cameras will have a pop-up window that displays various customizable settings. Here, you can adjust the different settings based on your preference.
Step 2. Download your LUTs
Download online the LUTs you want to use. Download them as folders and extract the files you downloaded as zip files. Save them in the OBS folder.
Step 3. Apply your LUTs
Still, in your OBS software, open your camera and then right-click on it. From the displayed menu, click on “Filters.”
On the bottom left corner of your interface, hit the “+” sign, then select “Apply LUTs” > “Browse.”
Open your already downloaded OBS files. Usually, there is an “Adjust” that allows you to regulate the intensity of the LUT by sliding it.
Step 4. Start recording with LUTs on
After turning on your LUT, you can start recording videos and taking photos. There is an eye icon on the left-hand side of your screen. You can use it to turn on or off LUT.
Conclusion
● And that is how to do color correction in OBS. Besides, you do not have to go to the extremes of getting a new camera because of your webcam faultiness. With OBS, you can correct your camera and webcam and get outstanding results.
● Download LUTs from the internet and use them as a template in OBS. Besides, you don’t have to pay for the LUTs, but you can use the free ones.
Video Course and Online Learning Are Very Popular Nowadays. Here We Are Going to Recommend some of the Best Video Websites for Teachers to Use
The examples below are the only few that are possible to find on the internet and offer a thousand free educational videos usable in the classroom or online classroom. It’s up to you if you can use or follow all the websites I provide. Of course, the internet offers unlimited help for teachers to tap into, but it has dangers around quality, inappropriate content, advertisement, and copyrights. Double-check everything before you use in your classes and show it to your students.
Khan Academy (https://www.khanacademy.org/ )
Provides a free personalized learning resource for all ages. Khan Academy also offers different exercises and instructional videos that empower the students to study at their own pace inside the classroom or outside. For the students who want to learn something, these are the following subjects they tackle: Science, Mathematics, History, Economics, Reading & Language, Life Skills, and more.

They are working hard to ensure that Khan Academy gives teachers of all stripes the tools they need to understand better the students’ activities and how to assist them effectively. The Khan Academy teacher dashboard offers an overview of the overall performance of the class as well as comprehensive student profiles. Khan Academy is free, and anyone can learn anything. They are nonprofit because, according to Khan Academy, they believe in free, world-class education anywhere.
Is Khan Academy suitable for learning?
An excellent and convenient resource for academic study is Khan Academy. Anyone who desires to study may benefit from Khan, even though it is specially designed for kids in grade school through the college level stage. The website has several fantastic features, like the ability to enable subtitles for each video and the availability of the whole Khan Academy course in at least 18 other languages.
However, it would be convenient if the text-only material could use the built-in text-to-speech feature. Students may now access all courses using the Khan Academy app, which also enables downloading for offline learning. It’s doubtful that many students will open Khan Academy and be eager to start using it because its organization and interface are both rather formal, and its activities are simple.
SchoolTube (https://www.schooltube.com/ )
- is a secure platform for sharing videos without distraction-causing side video suggestions and advertising. Teachers and students can upload a YouTube video to their SchoolTube playlist. Still, all ancillary material, including advertising that would typically be included on the YouTube website, has been stripped off.

Many choices are available on the SchoolTube website, including the ability to submit movies, screenshot a device’s display, record video inside the application, add attachments to films, and add a video quiz. Further exploration of the application reveals more possibilities for the editor. SchoolTube is suitable for teachers and students since it lets them contribute or make their movies with brand-new features that encourage more interactive learning in a secure digital setting.
Is SchoolTube suitable for learning?
This product is an excellent place to submit student-made movies or to obtain videos related to your classroom topics. The subject or topic they are discussing can be used to filter channels for students and teachers. I think it is a fantastic alternative to using YouTube, a more restricted site in the classroom. When you require students to watch films related to the ideas you are discussing, SchoolTube is a terrific resource to use. It is a safer or more closely supervised website than YouTube.
TeacherTube (https://www.teachertube.com/ )
- is an online community for sharing instructional videos. They seek to offer a safe venue or site for teachers, schools, and students to access educationally focused videos. Currently, they provide an incredible 60 topics or subjects for all ages from Science, Math, History, Social Studies, Language & Arts, and more. They also have educational songs for kids and programming languages for the higher level. TeacherTube also provides anytime, anywhere professional development for teachers. And the site where teachers can post educational videos on their own designed for students to view to learn a concept or skill.

Is TeacherTube suitable for learning?
Despite being helpful in situations with no access to YouTube, this has a restricted search function. For each topic searched, there are just a few relevant search results. Results might range widely in terms of quality. If required, this would be a helpful resource, but it might be even better if it were more thorough.
TED-Ed (https://www.ed.ted.com/ )
- the videos and courses on TED-Ed may be used to supplement practically any topic by adding video learning, knowledge tests, and conversation prompts. Students are likely to get immediately engaged with the content because it is outstanding and comes from some of the top brains in the world. Videos are excellent for group viewing or use in flipped classrooms.

You can use TED-Ed’s videos and lessons to supplement almost any subject with video learning, basic knowledge checks, and discussion questions. Browse by topic or subtopic or search by keyword. You can filter by target age, content type, subtitles, etc. The content is remarkable and comes from some of the world’s best minds, and the students will likely engage with it immediately. Videos can be great to watch as a class or to include as part of a flipped classroom.
Is Ted-Ed suitable for learning?
TED-Ed is a fantastic tool for students and instructors searching for inspiration, knowledge, and perhaps even some fun, thanks to the high-quality videos and the vast library of lesson ideas. The cartoons and films are just as well-made and engaging as some of the most remarkable television programming. The website presents a complicated subject intelligently, while a few students may feel bored or annoyed with videos on more advanced topics.
Crash Course (https://thecrashcourse.com/ )
Can provide a free high-quality educational video on various subjects. Crash Course also alters the traditional textbook model by presenting information in a fast-paced format to enhance students’ learning experience. With the help of the Crash Course team, they created different kinds of videos on 21 subjects for high school and college learners.

Primary and Intermediate or grade school students can also use this site. According to Crash Course, they also have hundreds of millions of views on their YouTube channel. While the show is a beneficial tool for teachers and students, it also has an extensive viewership of casual learners seeking online educational content independently.
Is Crash Course suitable for learning?
The sarcastic tone and rapid speed of Crash Course will undoubtedly keep students intrigued, but the material is often dubious, and the videos offer primarily passive learning. Each Crash Course video’s host is enthusiastic about the subject. The majority of the Crash Course videos are pretty accurate. However, in an attempt to simplify topics, several Crash Course Kids videos fall short.
National Geographic Kids (https://kids.nationalgeographic.com/ )
It offers educational videos, games, and other activities, especially on animals and the natural world. The students will enjoy playing games with simple instructions and a range of difficulties and frequently practice memory, logic, and other skills. They can contribute to the site by leaving some comments, taking quizzes, viewing user photos, and sharing their own.

Is National Geographic Kids suitable for learning?
The National Geographic Kids website is easy to navigate and contains exciting materials for students, while some content isn’t properly structured and may be challenging to find. Clicking on a menu choice at the top of the screen leads you to a related page, but lingering over that same option brings up extra alternatives that you wouldn’t see if you clicked. Keyword searches and links supplied by the teacher will be helpful here. For example, the site has tools such as a Homework Help section that teaches kids how to be an expert fact-checker, write an animal report, and more. Still, it’s not precisely apparent how to get there unless you search for it.
NeoK12 (https://www.neok12.com/ )
Uses educational videos and animations for the students. It is a great way to learn, allowing the students to build a visual model in their minds by watching their videos. The graphical representation of the ideas aids their comprehension, piques their interest, and promotes self-directed learning in each learner. Educational videos in NeoK12 and games are possibly one of the most effective learning tools. Even the higher levels of students will find the platform enriching and entertaining. NeoK12’s website also features tools not only for learners but also for teachers.

Is NeoK12 suitable for learning?
This platform is a rather extensive library of interesting educational tools, and the films and brain games are both free and well worth a look. Kids may augment the movie with other resources, such as interactive diagrams, flowcharts, fun, and puzzles, for a relatively inexpensive monthly charge. The films are simple teaching tools that usually contain supplementary resources that help youngsters to put what they’ve learned into practice. There are various “Universe” films, for example, under the Earth and Space area. Children who watch these films may also access relevant games, diagrams, activities, and photographs to prepare presentations.
Discovery Education (https://www.discoveryeducation.com/ )
Has made a name for itself as the top supplier of digital content, curriculum resources, and professional development for grades K–12. Discovery Education is used by almost 5.6 million students in Canada, all 50 states, and other countries. Why not give it a shot in the Philippines or somewhere else in Asia?

Teachers can use the free resources on Discovery Education to enhance their existing curriculum from the Grade School Level up to High School Level. An example of a tool with this platform is the Puzzlemaker, whose vocabulary makes crosswords and other types of puzzles. They can also be assigned specific videos or interactive activities to introduce new ideas at home.
Is Discovery Education suitable for learning?
Discovery Education is an excellent free resource. The commercial edition has considerably more resources, and after using it, I sincerely wished they would make it accessible for free or at a lower cost. The items aimed at students are straightforward and uninspiring; the website is intended for teachers. I would love to see them unlock more of the stuff that is locked behind the barrier, maybe in a cyclical manner where some films or resources are made available for free for a month at a time.
Free Download For Win 7 or later(64-bit)
Free Download For macOS 10.14 or later
Free Download For macOS 10.14 or later
If You Want to Keep Your Memories in Form of Video or Slideshow Then Keynote Is Great App for You. It Has Amazing and Powerful Tools Which Give Your Slideshow a Great and Beautiful Look
Tactics to Make Keynote Slideshow
An easy yet powerful editor
Numerous effects to choose from
Detailed tutorials provided by the official channel
Designing custom slideshows in keynote slideshow is an absolute fun to do activity for infotainment and information sharing needs
In this article
01 [What is Keynote Slideshow and Why is It Popular?](#Part 1)
02 [How to Use Keynote Slides](#Part 2)
03 [How to Loop a Slideshow in Keynote?](#Part 3)
04 [4 Hot Faqs About Keynote Slideshow](#Part 4)
Part 1 What is Keynote Slideshow and Why is It Popular?
Keynote is slideshow presentation software developed by Apple. You can make a slideshow presentation using keynote. Using keynote is easier to work with and can give you a quality presentation. It is packed with intuitive design tools that aid in making an interactive and engaging presentation. Its readymade templates are amazing and you can focus on the content rather than focusing on the design of the templates.
Keynote is popular because of the following features:
● Its design is simple so it is easy to make presentations.
● It has easy to use tools and amazing quality transitions.
● It has impressive charts, columns, bars, pies etc.
● It is built in your Mac devices. You can use it on your Mac, iPhone, iPad or even for your PC if you have an iCloud account.
● Voice over support for reading notes.
01Themes
Most of us are not design professionals, so you can use keynote’s predefined themes. These inbuilt templates have enchanting font style and object placement with professional designs to create an efficacious presentation.
Apple introduced three new templates – Exhibition, Drafting and Modern Type which are Bold, Colorful and sketch- like. Black, White, Gradient and Classic are popular theme. When creating a presentation instead of selecting the default theme, scroll to the themes options and you can choose the desired theme.
02Media Browser
Apples iWork apps like Pages, Numbers and Keynote it supports for adding customizable art elements, also it has the ability to browse, select and import the images which are present in the user’s photos app.
Clicking on the menu bar media option will open the Media Browser. Users can access specific folders using the media browser. Selecting the appropriate folder from collections and by double clicking on the image, you can insert that image in your presentation.
03Split View
Apple has introduced the split view with EI Capitan. Spilt view provides the ability to use applications side by side while each app will remain in full-screen. It helps you to do multitasking and to do cross-referencing data between the Keynotes, Pages and Numbers.
For example – You wish to open Pages and Keynote simultaneously within Split View mode; you can start it by opening the Pages and then opening the Keynote presentation. Click and hold keynote’s green full screen icon and after holding the green screen the left half of the Mac will turn blue and then release the icon. The application will enter on full-screen, covering the remaining half screen. Repeat the steps for Pages also and you will end up with both the applications open side by side.
Part 2 How To Use Keynote Slides
Apple’s keynote is a great option for Mac users to make beautiful slides for their presentations. Making a presentation focuses on idea or information you want to deliver to your audience. Designing a keynote slide includes, keynote slides sizes and dimensions which are very important.
Here are some important things to consider to make the best use of keynote slides.
01Keynote Slide Size Matters
Before designing your slides think about the screen size you’ll be presenting your presentation. Every screen has an aspect ratio. The aim is to create a keynote presentation that matches the aspect ratio of the screen on which you are going to present.
Screens on which your presentation will appear are:
● iPad and tablets
● Conference room projectors
● Laptop
● Widescreen, large format display
Setting the size of the keynote slide will ensure that your slides will match to the screen on which you are going to present. Keynote slides can be changed in different ways which includes changing the designs, dimensions and ruler options etc.
02Change Keynote Layout Dimensions and Size
Start off in keynote by clicking on the document option given at the top right corner. A new panel will open and all the changes will be done in that panel.When you will click on the document panel, there will be two tabs on the panels, make sure you are working on the labeled document panel.

On the slide size at the down side, you can set the size of the slide. By default you have two options 4:3 and 16:9 slide sizes. When you will create a new document, its size will be 4:3 by default, so before making a keynote slide make sure you check the size.

Keep in mind that the content should be on the keynote slides. When you turn your widescreen content into a square shaped layout, to make it look fit in the square shaped layout you have to rearrange the content on slide.
03Changing the Keynote Design Options
You can make changes to the keynote themes that you are using with ease. Keynote theme can change or can enhance the look of your presentation. Even if you have started working on your presentation, you can still change the theme in just few clicks.
On the document panel, click on change theme button you will see different theme styles pop up on your screen.

Choose another theme for your presentation from this windows and click on choose button to re-theme your presentation. When you will choose your desired theme, all your content will be adapted to the newly selected theme.
04Entitle Rulers
Rulers are the important as they help in aligning element in your slide. A ruler ensures you that you are making each slide corresponding to the screen dimensions. Rulers can help you attain pixel – perfect design.
You can enable rulers by clicking on view > show rulers. At the top and the sides of the keynote documents, you will see the pixel measurements. These rulers will help you in aligning everything perfectly on your slide.

How To Loop A Slideshow In Keynote?
This is an easy to continue the slideshow when it ends. Presentation options in keynote o iPhone or iPad.
Step 1: select your presentation and open it in keynote. Get into the settings option by clicking on the three dots present at the top.
Step 2: select the settings option and then click on presentation type.
Step 3: Now allow the toggles for loop slideshow or restart slideshow if idle.
Step 4: Now tap ondone.

Part 3 Hot FAQ’S About Keynote Slideshow
● What are the requisites of a good Keynote presentation?The most essential element within a Keynote presentation is the latter’s unity of purpose. The slideshow content should be presented before the audience in a captivating manner, while taking care to maintain a logical sync between the different presentation elements. The slideshow should clearly depict its creation objective without the slightest ambiguity.
01What is the maximum number of slides that a Keynote presentation can hold?
In the light of the fact that the Keynote slideshow creator program works to split the slideshow information into a series of folders and files for a convenient and need specific access, you can deck up a Keynote presentation with 200 slides in one go without any hustle.
02What is the affordable size of Keynote presentation slide?
The ideal layout of a Keynote presentation fits in 3 typical slide sizes. You can work with the 16:19, 16:10 and 4:3 aspect ratios. When choosing a particular size constraint for your presentation slides, do keep in mind the aspect ratio of the display screen on which the slideshow has to be presented.
03What is the ideal screen resolution of a Keynote slideshow?
Keynote presentations work most effectively within the Full HD, 1920 x 1080 pixels resolution. Whether you choose to download the presentation images or use the locally saved ones, take care of them being in the correct screen dimensions to ensure a clear and sharpened display irrespective of the screen type.
04Is it possible to work with PowerPoint presentations in Keynote?
You can easily import your PowerPoint presentations in the Keynote application. All you need to do is, launch Keynote on your Mac compatible device, head to and tap the ‘Import an Existing File’ option and select the PowerPoint presentation you wish to work with in Keynote.
For Win 7 or later (64-bit)
For macOS 10.12 or later
● Ending Thoughts →
● Keynote slideshows are a sophisticated means to work with content delivery through a variety of media elements.
● Working with Keynote, you can add the most desired professional spunk to your slideshow presentations to make them stand out of the crowd.
● When looking for the most feasible slideshow creator alternatives to Keynote, picking the Wondershare Filmora software can be an intelligent choice.
Designing custom slideshows in keynote slideshow is an absolute fun to do activity for infotainment and information sharing needs
In this article
01 [What is Keynote Slideshow and Why is It Popular?](#Part 1)
02 [How to Use Keynote Slides](#Part 2)
03 [How to Loop a Slideshow in Keynote?](#Part 3)
04 [4 Hot Faqs About Keynote Slideshow](#Part 4)
Part 1 What is Keynote Slideshow and Why is It Popular?
Keynote is slideshow presentation software developed by Apple. You can make a slideshow presentation using keynote. Using keynote is easier to work with and can give you a quality presentation. It is packed with intuitive design tools that aid in making an interactive and engaging presentation. Its readymade templates are amazing and you can focus on the content rather than focusing on the design of the templates.
Keynote is popular because of the following features:
● Its design is simple so it is easy to make presentations.
● It has easy to use tools and amazing quality transitions.
● It has impressive charts, columns, bars, pies etc.
● It is built in your Mac devices. You can use it on your Mac, iPhone, iPad or even for your PC if you have an iCloud account.
● Voice over support for reading notes.
01Themes
Most of us are not design professionals, so you can use keynote’s predefined themes. These inbuilt templates have enchanting font style and object placement with professional designs to create an efficacious presentation.
Apple introduced three new templates – Exhibition, Drafting and Modern Type which are Bold, Colorful and sketch- like. Black, White, Gradient and Classic are popular theme. When creating a presentation instead of selecting the default theme, scroll to the themes options and you can choose the desired theme.
02Media Browser
Apples iWork apps like Pages, Numbers and Keynote it supports for adding customizable art elements, also it has the ability to browse, select and import the images which are present in the user’s photos app.
Clicking on the menu bar media option will open the Media Browser. Users can access specific folders using the media browser. Selecting the appropriate folder from collections and by double clicking on the image, you can insert that image in your presentation.
03Split View
Apple has introduced the split view with EI Capitan. Spilt view provides the ability to use applications side by side while each app will remain in full-screen. It helps you to do multitasking and to do cross-referencing data between the Keynotes, Pages and Numbers.
For example – You wish to open Pages and Keynote simultaneously within Split View mode; you can start it by opening the Pages and then opening the Keynote presentation. Click and hold keynote’s green full screen icon and after holding the green screen the left half of the Mac will turn blue and then release the icon. The application will enter on full-screen, covering the remaining half screen. Repeat the steps for Pages also and you will end up with both the applications open side by side.
Part 2 How To Use Keynote Slides
Apple’s keynote is a great option for Mac users to make beautiful slides for their presentations. Making a presentation focuses on idea or information you want to deliver to your audience. Designing a keynote slide includes, keynote slides sizes and dimensions which are very important.
Here are some important things to consider to make the best use of keynote slides.
01Keynote Slide Size Matters
Before designing your slides think about the screen size you’ll be presenting your presentation. Every screen has an aspect ratio. The aim is to create a keynote presentation that matches the aspect ratio of the screen on which you are going to present.
Screens on which your presentation will appear are:
● iPad and tablets
● Conference room projectors
● Laptop
● Widescreen, large format display
Setting the size of the keynote slide will ensure that your slides will match to the screen on which you are going to present. Keynote slides can be changed in different ways which includes changing the designs, dimensions and ruler options etc.
02Change Keynote Layout Dimensions and Size
Start off in keynote by clicking on the document option given at the top right corner. A new panel will open and all the changes will be done in that panel.When you will click on the document panel, there will be two tabs on the panels, make sure you are working on the labeled document panel.
On the slide size at the down side, you can set the size of the slide. By default you have two options 4:3 and 16:9 slide sizes. When you will create a new document, its size will be 4:3 by default, so before making a keynote slide make sure you check the size.
Keep in mind that the content should be on the keynote slides. When you turn your widescreen content into a square shaped layout, to make it look fit in the square shaped layout you have to rearrange the content on slide.
03Changing the Keynote Design Options
You can make changes to the keynote themes that you are using with ease. Keynote theme can change or can enhance the look of your presentation. Even if you have started working on your presentation, you can still change the theme in just few clicks.
On the document panel, click on change theme button you will see different theme styles pop up on your screen.
Choose another theme for your presentation from this windows and click on choose button to re-theme your presentation. When you will choose your desired theme, all your content will be adapted to the newly selected theme.
04Entitle Rulers
Rulers are the important as they help in aligning element in your slide. A ruler ensures you that you are making each slide corresponding to the screen dimensions. Rulers can help you attain pixel – perfect design.
You can enable rulers by clicking on view > show rulers. At the top and the sides of the keynote documents, you will see the pixel measurements. These rulers will help you in aligning everything perfectly on your slide.
How To Loop A Slideshow In Keynote?
This is an easy to continue the slideshow when it ends. Presentation options in keynote o iPhone or iPad.
Step 1: select your presentation and open it in keynote. Get into the settings option by clicking on the three dots present at the top.
Step 2: select the settings option and then click on presentation type.
Step 3: Now allow the toggles for loop slideshow or restart slideshow if idle.
Step 4: Now tap ondone.
Part 3 Hot FAQ’S About Keynote Slideshow
● What are the requisites of a good Keynote presentation?The most essential element within a Keynote presentation is the latter’s unity of purpose. The slideshow content should be presented before the audience in a captivating manner, while taking care to maintain a logical sync between the different presentation elements. The slideshow should clearly depict its creation objective without the slightest ambiguity.
01What is the maximum number of slides that a Keynote presentation can hold?
In the light of the fact that the Keynote slideshow creator program works to split the slideshow information into a series of folders and files for a convenient and need specific access, you can deck up a Keynote presentation with 200 slides in one go without any hustle.
02What is the affordable size of Keynote presentation slide?
The ideal layout of a Keynote presentation fits in 3 typical slide sizes. You can work with the 16:19, 16:10 and 4:3 aspect ratios. When choosing a particular size constraint for your presentation slides, do keep in mind the aspect ratio of the display screen on which the slideshow has to be presented.
03What is the ideal screen resolution of a Keynote slideshow?
Keynote presentations work most effectively within the Full HD, 1920 x 1080 pixels resolution. Whether you choose to download the presentation images or use the locally saved ones, take care of them being in the correct screen dimensions to ensure a clear and sharpened display irrespective of the screen type.
04Is it possible to work with PowerPoint presentations in Keynote?
You can easily import your PowerPoint presentations in the Keynote application. All you need to do is, launch Keynote on your Mac compatible device, head to and tap the ‘Import an Existing File’ option and select the PowerPoint presentation you wish to work with in Keynote.
For Win 7 or later (64-bit)
For macOS 10.12 or later
● Ending Thoughts →
● Keynote slideshows are a sophisticated means to work with content delivery through a variety of media elements.
● Working with Keynote, you can add the most desired professional spunk to your slideshow presentations to make them stand out of the crowd.
● When looking for the most feasible slideshow creator alternatives to Keynote, picking the Wondershare Filmora software can be an intelligent choice.
Also read:
- 2024 Approved Create the Night-to-Day Effect Videos
- Updated Want to Add the Amazing Video Text Effects that You Generally See on Video Streaming Platforms? Use Filmora to Add Popular Video Text Effects Instantly
- In 2024, The Definite Guide to Craig Bot Discord
- New 2024 Approved Replacing the Sky in Adobe After Effects An Extensive Guide
- New Finding the Best Voice Changers for WhatsApp Free and Paid for 2024
- In 2024, Understanding the Dynamics Underlying in AI Slow Motion Editing
- 2024 Approved In This Article, We Will Review Movavi Video Editor and List Out Movavi Video Suites Features
- Updated Special Animated Transition Tutorial【SUPER EASY】
- Updated In 2024, How to Create Simple Slideshow Word
- How to Add Background to Video With/Without a Green Screen
- 2 Solutions to Crop a Video Using After Effects
- There Are a Few Ways to Remove or Mute Audio in a Video, but How? Read This Article and Learn How to Do It Using Recommended Android Apps for 2024
- In 2024, Learn How to Use and Download KineMaster Templates Like a Pro. Discover Alternative Video Templates to Elevate Your Video Creation
- 2024 Approved Guide To Make a YouTube Intro by Filmora
- New Getting To Know More About the Video Editing Interface of Wondershare Filmora
- Zoom In and Zoom Out on YouTube
- 2024 Approved Basic Introduction for LumaFusion Color Grading
- Updated In 2024, How Can I Control Speed of a Video
- New An Ultimate Guide to Flexclip Online Trimmer for 2024
- 2024 Approved Lets Look at Four Different Ways of Merging Audios and Videos. The Tools Will Help You Craft High-End Videos without Involving Any Complex Steps. You Can Make Your Videos Beautiful by Using the Following Easy to Use Tools
- Transparent Logo and Images Look Cool when You Are Planning to Create a Brand Identity. An Image with Unique Features Catches the Attention of Viewers and Leaves Impression for 2024
- New How to Make a Slow Motion Video in Wondershare Filmora
- Updated Top 10 iPad Slideshow Apps to Create a Slideshow
- New In 2024, 20 Must-Have Graduation Songs for Slideshow
- Best Method to Split Video Into Parts Online
- Updated How to Add Camera Shake to Video in Adobe After Effects
- 2024 Approved Mask Tracking Is Believed to Be a Helpful Procedure for Marking Proper Areas in Videos. Learn How to Perform Premiere Pro Mask Tracking in This Guide
- 2024 Approved Replacing the Sky in Adobe After Effects An Extensive Guide
- New How to Add a Slideshow in PowerPoint for 2024
- Recover lost data from Nokia C110
- The best electronic signature way to sign Word 2016 documents online
- How and Where to Find a Shiny Stone Pokémon For Apple iPhone SE (2022)? | Dr.fone
- 3 Methods to Mirror Vivo Y27 5G to Roku | Dr.fone
- 8 Solutions to Fix Find My Friends Location Not Available On OnePlus Open | Dr.fone
- How To Fix Part of the Touch Screen Not Working on Realme GT 5 Pro | Dr.fone
- In 2024, 10 Free Location Spoofers to Fake GPS Location on your Infinix Note 30i | Dr.fone
- In 2024, Best 3 Realme GT 3 Emulator for Mac to Run Your Wanted Android Apps | Dr.fone
- In 2024, Full Guide to Fix iToolab AnyGO Not Working On Apple iPhone X | Dr.fone
- Updated 2024 Approved Fuel Creativity with 10 Awesome Collection of 2D Animation Examples
- How To Open Your Apple iPhone 12 mini Without a Home Button
- In 2024, Full Guide on Mirroring Your Honor Magic 6 Lite to Your PC/Mac | Dr.fone
- Tecno Data Recovery – recover lost data from Tecno Spark Go (2023)
- How To Bypass iCloud Activation Lock on Mac For iPhone SE (2020)?
- In 2024, How to Track WhatsApp Messages on Oppo A78 Without Them Knowing? | Dr.fone
- In 2024, Detailed Review of doctorSIM Unlock Service For Apple iPhone 15 Pro
- In 2024, Edit and Send Fake Location on Telegram For your Meizu 21 Pro in 3 Ways | Dr.fone
- Preparation to Beat Giovani in Pokemon Go For Itel P55T | Dr.fone
- Title: In 2024, Top 10 Fun Discord Bots You Need
- Author: Chloe
- Created at : 2024-05-20 03:38:19
- Updated at : 2024-05-21 03:38:19
- Link: https://ai-editing-video.techidaily.com/in-2024-top-10-fun-discord-bots-you-need/
- License: This work is licensed under CC BY-NC-SA 4.0.
