
:max_bytes(150000):strip_icc():format(webp)/GettyImages-971165690-1e0af1d9299f4fdba1225c2d20c739f2.jpg)
In 2024, Ultimate Guide to Making Cinematography for Music Video
Ultimate Guide to Making Cinematography for Music Video
To visually represent the story in the music video, cinematography shots are helpful. It’ll obviously and pleasing and eye-catchy effect in your video. These major requirements for making that cinematography can be covered as the following:
- Light a subject
- Create atmosphere
- Light a set
- Camera techniques
- Aspect ratio
- Framing
- Camera movement
Before, we go deeper to the details on how to make a cinematography for music, let us know first about the cinematography for music video. Everything is represented in this article, from the camera movement to the setting of the lights in the studio. You will also learn about aspect ratio and framing while making shots from the DSLR.
What Is Cinematography?
Cinematography covers all aspects of how a movie or music video is made, including choosing the lighting for the scene. The type of camera equipment to use, how to frame your photographs, and how to decide on camera movement are also included in this. Let’s move toward the next lines to get the cool cinematography on display.
Light a subject
Although you may assume that cinematography is just concerned with the usage of the camera, lighting plays an equally important role. While planning your photographs, you should think about how the scene is lit and how your subject is illuminated.

The cinematographer should consider the hard and soft lights for perfect illustrations during shooting. These are depicted with the following requirements!
Hard light and soft light
The cinematographers mainly focus on the hard and soft lights during filmmaking. The hard lights give a softer look to the subject. They are pointing to the light sources which are closer to the subject in the video. It makes the photographs and shots harsher and more dramatic.

The soft light is trying to wrap around the subject. It gives diffused shadows and soft edges to the character of the music video.

![]()
Note: To get better results of the soft look, you need to add diffusion to lower the intensity.
Create Atmosphere
You need a haze machine to create the atmosphere and give the environment true vibes. The haze machine gives a foggy appearance in every shoot and scene.

Filmora Video Editor Easily create video with plenty of video effects and filters.
Free Download Free Download Learn More

![]()
Light a Set
To give proper lights in the set is illustrated with the help of an example as shown below!
Examples
In this music video of the 3lau’s, the main prop used is a bus, which is presented in the middle of the set and lit very well. The bus is rounded by many tungsten lights, which give a resemblance to those street lights. They are set up automatically in such a way that this stimulates the real movement of the bus on the road.

The three projectors are set to give the street footage at the back scene to add more realism.
The three lights are set in the queue by the production team to get the memory of the protagonist. In the setup, soft lights are also added on top of all the upper windows of the bus to give blue interior light to the bus.
Camera Techniques
The cameras used during filming play a major role in giving the cinematographic shots. All the techniques shown below are applied to the DSLRs and even the smartphones you use for filming.
Prime lenses
The foremost and most helpful lenses in filming are called prime lenses, which have fixed focal lengths. There is no Johns to zoom out and zoom-in in prime lenses.
For filming, we need to choose the right level of zoom, which the DP does by picking the right lens for the footage.

In the close-up scenes, there is a requirement for a wider field of view which also depends on the aspect ratio of shooting.
Aspect Ratio
In filmy view, the most appropriate aspect ratio is 2.35, which is also a cinematic ratio. There is also another ratio of 16:9, which is a wider ratio. While 2.35 gives a more narrow perspective as compared to the prior one.
![]()
Note: The narrow ratio is helpful in showing the relationships between the subjects.

Whenever we use a microscope, we are dealing with the aspect ratio and narrowing down to the required point where we want to look, and this is all about framing, which is discussed as shown below!
Framing
Framing is a way used to illustrate the concepts such as the rule of thirds and leading lines. To give customized headroom to the subject, the framing is used from the top of the head and the top of the frame.
Camera Movement
The camera movement actually shows the real story presented in the music video. The camera movements used for filming are mainly the pedestal, truck, pan, tilt, and roll.

Whenever the protagonist looks out the bus’s window, the camera operator will use the “Dolly” and “Trucking” movements.
Trucking Movement
The trucking movement of the camera is done in left-to-right motion in the filming. This is used for emotional purposes and whenever the subject is in a pull-out shot.
Dolly Movement
The dolly movement of the camera is done by moving towards or away from the subject. This often gives a sense of importance to the character.
Final Words
The above article gives the exact preferences of the “Tokyo” song by which you learned a lot of techniques for your future use. By following the above rules and tips, you’ll obviously come up with a viral music video.
Create Atmosphere
You need a haze machine to create the atmosphere and give the environment true vibes. The haze machine gives a foggy appearance in every shoot and scene.
Filmora Video Editor Easily create video with plenty of video effects and filters.
Free Download Free Download Learn More
![]()
Light a Set
To give proper lights in the set is illustrated with the help of an example as shown below!
Examples
In this music video of the 3lau’s, the main prop used is a bus, which is presented in the middle of the set and lit very well. The bus is rounded by many tungsten lights, which give a resemblance to those street lights. They are set up automatically in such a way that this stimulates the real movement of the bus on the road.
The three projectors are set to give the street footage at the back scene to add more realism.
The three lights are set in the queue by the production team to get the memory of the protagonist. In the setup, soft lights are also added on top of all the upper windows of the bus to give blue interior light to the bus.
Camera Techniques
The cameras used during filming play a major role in giving the cinematographic shots. All the techniques shown below are applied to the DSLRs and even the smartphones you use for filming.
Prime lenses
The foremost and most helpful lenses in filming are called prime lenses, which have fixed focal lengths. There is no Johns to zoom out and zoom-in in prime lenses.
For filming, we need to choose the right level of zoom, which the DP does by picking the right lens for the footage.
In the close-up scenes, there is a requirement for a wider field of view which also depends on the aspect ratio of shooting.
Aspect Ratio
In filmy view, the most appropriate aspect ratio is 2.35, which is also a cinematic ratio. There is also another ratio of 16:9, which is a wider ratio. While 2.35 gives a more narrow perspective as compared to the prior one.
![]()
Note: The narrow ratio is helpful in showing the relationships between the subjects.
Whenever we use a microscope, we are dealing with the aspect ratio and narrowing down to the required point where we want to look, and this is all about framing, which is discussed as shown below!
Framing
Framing is a way used to illustrate the concepts such as the rule of thirds and leading lines. To give customized headroom to the subject, the framing is used from the top of the head and the top of the frame.
Camera Movement
The camera movement actually shows the real story presented in the music video. The camera movements used for filming are mainly the pedestal, truck, pan, tilt, and roll.
Whenever the protagonist looks out the bus’s window, the camera operator will use the “Dolly” and “Trucking” movements.
Trucking Movement
The trucking movement of the camera is done in left-to-right motion in the filming. This is used for emotional purposes and whenever the subject is in a pull-out shot.
Dolly Movement
The dolly movement of the camera is done by moving towards or away from the subject. This often gives a sense of importance to the character.
Final Words
The above article gives the exact preferences of the “Tokyo” song by which you learned a lot of techniques for your future use. By following the above rules and tips, you’ll obviously come up with a viral music video.
Hyperlapse VS Timelapse Videos
You’ve probably heard the terms “hyperlapse” and “timelapse” before. Whether it was in a blog post, a how-to guide, or on your preferred social media platform. Each of us has seen at least one image of one of them. However, what makes a difference? You’re about to learn in this article!
With that said, let’s begin!
Part 1. What is a timelapse, and how is it used?
Timelapses are familiar to you, whether they were used in a series to demonstrate a swift change from night today or at the beginning of your favorite influencer’s vlog. But exactly what is it? The term “timelapse” refers to a photography method in which static images are stitched together to produce a time-warping video. When the video is played, the time seems to pass more quickly, creating the illusion that time is slipping away.
Put your camera in a fixed position, stop it from moving, panning, or tilting, then record for a long time to make your own timelapse. This period of time could last for five minutes, an hour, days, or even years. Once the film is gathered, all that’s left to do is speed everything up.
The fact that time-lapses make for a pleasant visual effect is what makes them so popular in Vlogs and other media. This method enables you to describe the passage of time, the movement of individuals through space, etc. utilizes time-lapse.

Part 2. What is a hyperlapse?
On the other side, there are these things that we refer to as hyperlapses. In the subgenre of time-lapse photography known as cinematography, a hyperlapse is a filmmaking method used to generate motion shots by capturing movies rather than taking images. In order to create a hyperlapse, the camera does not remain stationary; rather, it follows the subject around and is typically held by the photographer.
The amount of time that elapses between pictures in a stop-motion video typically ranges from tenths of a second up to a few fractions of a second, although this can change significantly depending on what you want to show. However, after you have picked it, it must remain consistent in the same way that the timelapse does.
The attractive 3D look that hyperlapse produces is the primary draw for its utilization. The hyperlapse that is formed can produce a dreamy image, regardless of whether the camera is attached to a moving vehicle or is mounted on a tripod that is moving towards its target.
Additionally, you may use this approach to make stunning photographs with motion blur by employing long exposures. In most cases, the final image will be stabilized in post-production in order to eliminate some of the flaws that may have been captured in the original photo.

Part 3. What differentiates them from each other?
The movement of the camera is what differentiates these two approaches the most from one another. When capturing a time lapse, the camera is kept relatively still and in the same position throughout. In addition, when you use a hyperlapse, the camera is continuously moving, which creates a 3D appearance in the image.
You could be scratching your head right about now, wondering when you should employ one of the two methods. If your subject is moving, you should take a time-lapse photograph; if the camera is moving, you should take a hyperlapse photograph. This question has a relatively straightforward answer.
The act of recording video for a hyperlapse can cause your storage to be filled up really rapidly. Therefore, you may wish to swap between the two methods depending on the length of time that you want to shoot for. If you are going to be filming for a significant amount of time, you should consider using a timelapse.
It is simple to determine the timelapse interval if you already know these answers. Choose the video’s final frame rate. It may be 24, 25, or 30 fps. You shouldn’t select more quickly. Choose the option that best fits your audience and location. Additionally, a time-lapse calculator is available.
The shoot time should then be converted to seconds. For instance, two hours are equal to 2 x 60 x 60 seconds, or 7200 seconds. Determine how many frames are required for your chosen timelapse now. For instance, the final product should be 30 seconds of 25fps video. You’ll need to capture 750 frames in total because 30 x 25 is 750.
Divide the time (7200s in this case) by the number of frames to obtain the interval (750). You can round up the result, which is 9.6, which is pretty near to 10 seconds. Therefore, in our case, your interval should be set to 10s.
Part 4. Motion control timelapse
Now that we understand how the timelapse images that are static are created, we are able to incorporate some movement into the shots that are static. Moving the camera around during a timelapse is much more difficult than it appears to be in the video. Every movement of the camera is slowed down when using slow motion, which means that you can make even a shaky handheld movie look good when using slow motion. The situation is completely reversed while viewing a timelapse.
Because every movement of the camera is sped up, shooting with the handheld mode is nearly impossible. If you want the camera to appear to be moving slowly in the final timelapse, you will need to move it very slowly while shooting in order to achieve this effect.
For this reason, we will need to make use of motion control devices in order to accomplish our goal. Therefore, we refer to these kinds of photos as motion control timelapses. The camera can be moved very slowly and accurately along one, two, or all three axes using motors that are controlled electronically. The three-axis systems, which include a slider as well as a pan-tilt head, are by far the most popular.
Extra Info: Best Time Lapse Video Maker – Filmora
To create a time lapse video with cool effects, you can use the best video editor with rich effects – Filmora . This software offers many video speed change settings and creative effects to help make a time lapse video easily. Just download the software on your PC or Mac and then start creating a video on your own.
Conclusion
The finest results can be achieved by utilizing a variety of filmmaking approaches concurrently. Therefore, you shouldn’t be afraid to try out new things by combining time-lapse photography with slow motion and video. In addition, make sure you visit the Hyperlapse Academy so you can become familiar with all of the different approaches. Use your imagination, and don’t stop firing.
Free Download For Win 7 or later(64-bit)
Free Download For macOS 10.14 or later
Free Download For macOS 10.14 or later
How to Split Videos - 33 Best Video Splitter Recommend
A video splitter is necessary when you need to extract a crucial or particular portion of a video file. Many users trim or reduce video segments by deleting superfluous or undesired elements. While splitting a video into smaller clips is a challenging task in and of itself, don’t overlook the importance of keeping the quality of the video clip you plan to obtain. While there are various online video splitter software available today, most of them do not achieve what they claim. We’ve put together a compelling list of the best video splitters in this post, including full-featured software and lightweight editing solutions. Continue reading to learn more about them and choose the one that most appeals to you.
- Filmora
- Boilsoft Video Splitter
- Solveigmm Video Splitter
- BandiCut
- Free Video Cutter
- Easy Video Splitter
- Avidemux
- Ultra Video Splitter
- VideoPad Video Editor
- Windows Movie Maker
- Windows Photos
- VLC
- iMovie
- Format Factory
- 7 Best Free Video Splitter Online
- 10 Best Video Splitter for Mobile Phone
- Filmora
- AndroVid Video Editor
- Easy Video Cutter
- Video Editor
- VideoShow – Video Editor
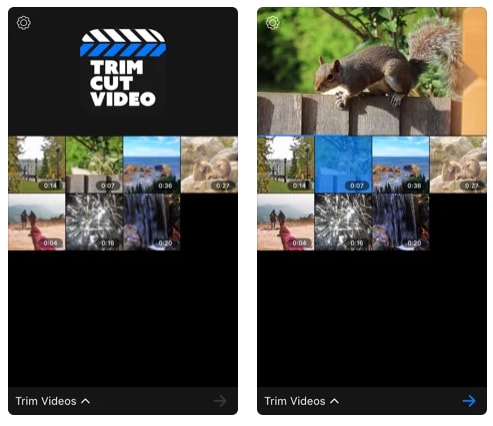
- Trim Video
- Video Splitter
- Crop video
- Video Crop
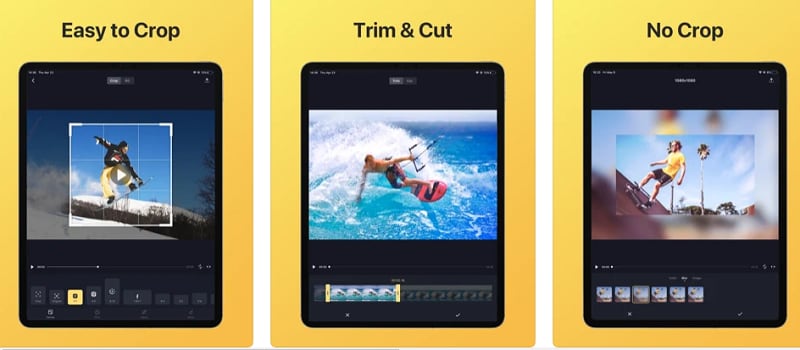
- Video Trim & Cut
Part 1: Backup Your Original Video
Making several backups is perhaps the most critical thing you can do for your project. Whether your computer dies suddenly or your editing application crashes, you’ll have a point to fall back on if you have a backup. Making this a habit will save you a lot of time and work in the long term. How many copies of your data should you make? You should create at least three project duplicates in the best-case scenario. Also, make sure they’re preserved in various formats and places—one on an SD card, another on a hard drive, or a USB drive.
14 Best Video Splitter for Windows/Mac
1. Filmora
Wondershare Filmora Video Editor is a superb video editor for those seeking software that can split videos and has a lot of functions. It was originally only accessible for Windows, but thanks to the developers, Mac users may now use this high-quality video splitter. Using this program to split and join videos is pretty basic and straightforward. It’s an intriguing tool since it allows users to produce high-quality films using filters, effects, and other features in an easier method than employing professional editors. This program also lets you export video at a breakneck speed, up to 4k quality.
![]()
Platform: Windows/Mac
Price: Free Trial
Features
- Editing is intuitive and quick.
- Export video in 4k quality.
- There are several graphic effects and transitions.
- Footage from the internet.
- Regularly upgraded features.
Pros
- Large films can be easily cut, trimmed, and combined without compromising quality.
- On the exported video, there is no watermark.
- Both Windows and Mac computers are supported.
- Splitting a video is such a breeze.
- For novices, it has a lot of handy options that will help you create a stunning film.
Cons
- Large-scale content editing might be slow at times.
2. Boilsoft Video Splitter
Boilsoft Video Splitter can divide, edit, or trim a big AVI, MPEG, RM, ASF, WMV, 3GP, MKV, FLV, or MP4 video file without re-encoding smaller video segments. It has a built-in player that allows you to effortlessly split/cut video files according to time or selection.
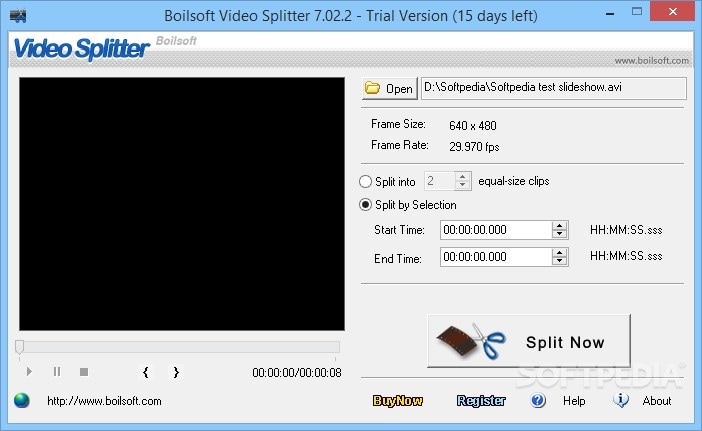
Platform: Windows/Mac
Price:$34.95 one-time payment
Features
- Split Video
- Cut video
- Built-in player
Pros
- It supports lots of video format.
- User-friendly software.
Cons
- Because you can’t adjust the program window, using the slider for selection becomes increasingly difficult as your video becomes longer.
3. Solveigmm Video Splitter
SolveigMM Video Splitter is suitable for simple editing processes such as removing an extra section from a video, removing an advertisement from a movie, muting the sound on a selected video fragment, saving only a video or audio track from a file, cutting a video into parts, saving segments into separate files, and so on. The editing procedure takes just a few seconds.
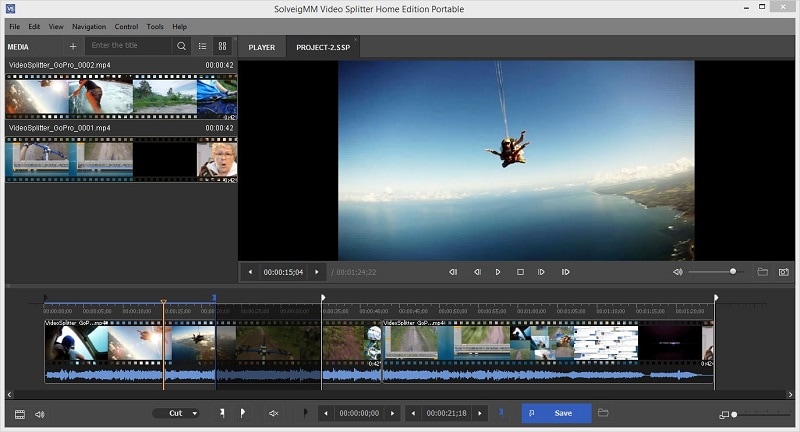
Platform: Windows/Mac
Price:$7.99 per month
Features
- Video cutter
- Video editor
- Video Joiner
Pros
- No previous training or knowledge is necessary to understand how to use the software.
- All major file formats are supported.
- The output file quality is unaffected.
Cons
- It sometimes crashes depending on the file size.
4. BandiCut
Bandicut is a video splitting and joining program for Windows systems only. It has a straightforward UI and simple settings. It may also be used as a video converter, allowing you to modify the format of the output clips. The tool is useful for both newcomers and seasoned users.
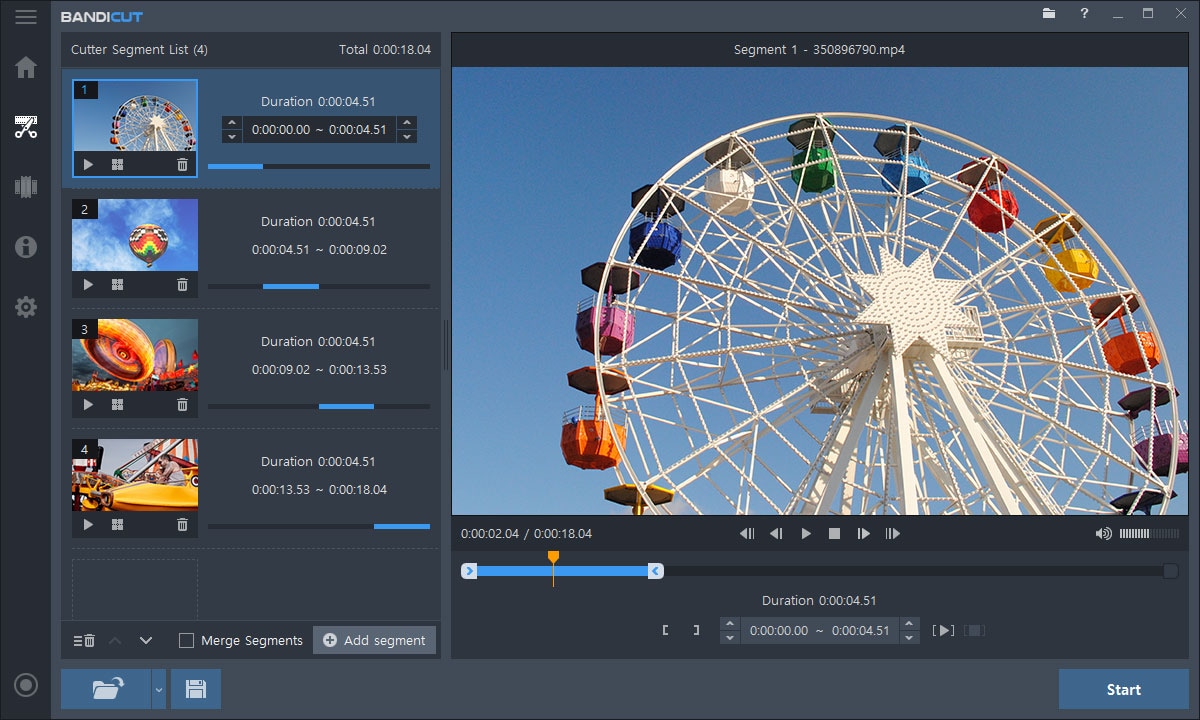
Platform: Windows
Price:$29.95 per user per month
Features
- Easy and fast video cutter
- Video splitter
Pros
- The interface is pleasing to the eye, and the functions are simple.
- High-capacity mode
Cons
- There isn’t a fully working free version available.
5. Free Video Cutter
This is a basic tool for reducing the size of large video files. It allows you to cut a clip from a movie or video in various formats and save it in four other formats. The hand-drawn interface, by the way, is incredibly charming.
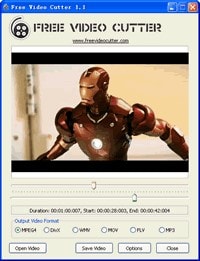
Platform: Windows
**Price:**a free version and premium version ($17.99 per month)
Features
- An irregularly shaped hand-drawn art style interface.
- Videos in a variety of formats are accepted.
- The control panel is small, with just three major buttons.
Pros
- Save as new videos in a variety of formats without compromising quality.
- It may be used to trim lengthy movies, mobile videos, and camera recordings, among other things.
Cons
- For huge files, there are a lot of crashes.
- For Mac users, this tool is not accessible.
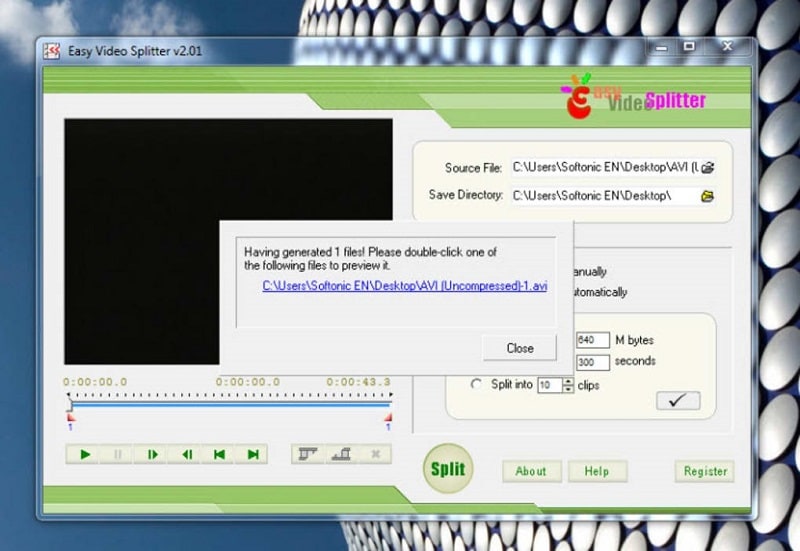
6. Easy Video Splitter
Easy Video Splitter is a simple video editing application that allows you to divide your video into many segments. It can play AVI, MPEG, WMV, and ASF files. The scroll bats may be used to cut the movie precisely where you want it to be cut or to divide the film at certain intervals.
**Platform:**Windows/Mac
**Price:**free with ads
Features
- Has a batch processor
- Multiple file support
- Easy to use
Pros
- Batch processing is supported.
Cons
- Only one frame at a time may be fine-tuned.
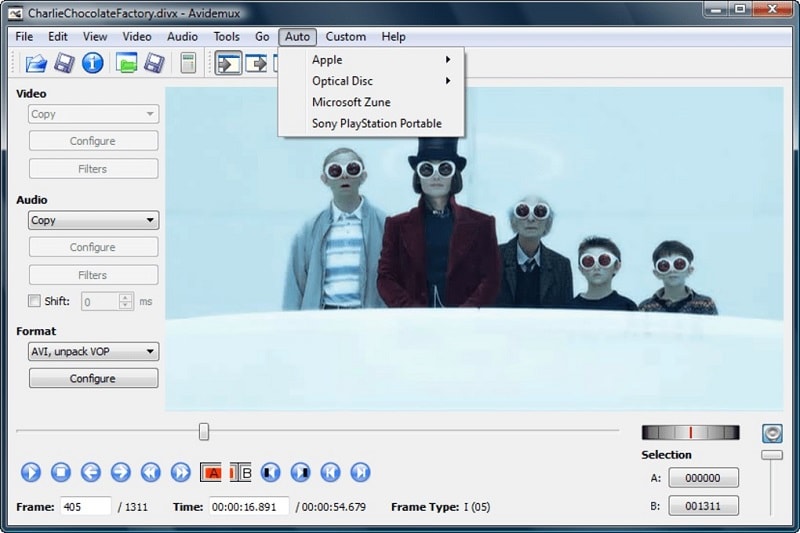
7. Avidemux
Avidemux is perfect if you have a video to encode or arrange for a certain speaker system. It’s also an ideal choice if you just require a basic video editor, although there are many more extensive applications available that may be better appropriate.
**Platform:**Windows/Mac
**Price:**free
Features
- This program can handle a variety of subtitle formats, including SUB and SRT.
- They also provide a variety of filtering options.
- You may export videos in various formats, including MKV, MPEG, and MP4.
Pros
- A user-friendly interface
- Excellent alternatives for encoding
- Filters for sharpening and de-noising
Cons
- There is no timeline.
- There are no innovative transitions or effects.
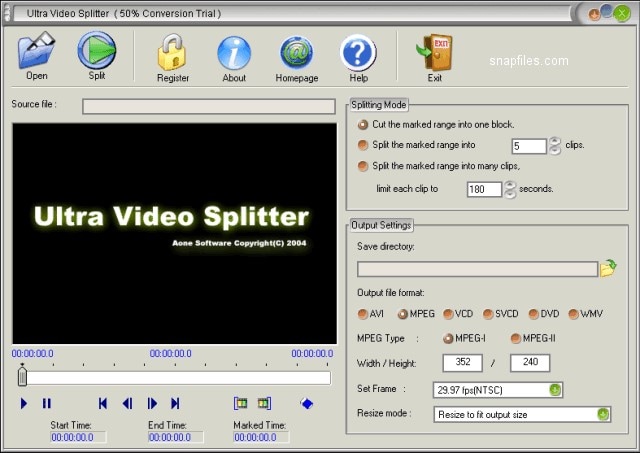
8. Ultra Video Splitter
Ultra Video Splitter is an excellent solution for people who just need to complete this one operation and hence do not need the usage of sophisticated video editing software. The tool enables you to choose from a variety of parameters for the final file or files, such as file size, final format, and bitrate.
**Platform:**Windows/Mac
Price:$25.00 one-time payment
Features
- Supports videos in WMV, XviD, MPEG, ASF, AVI, RM, MOV, 3GP, Divx, and MP4 format.
- Can export the final video in VCD, SVCD, DVD, AVI, DivX, MPEG, or WMV format.
Pros
- Video trimming and exporting are both quick.
- Multiple video formats are supported.
Cons
- Has just a few video editing options.
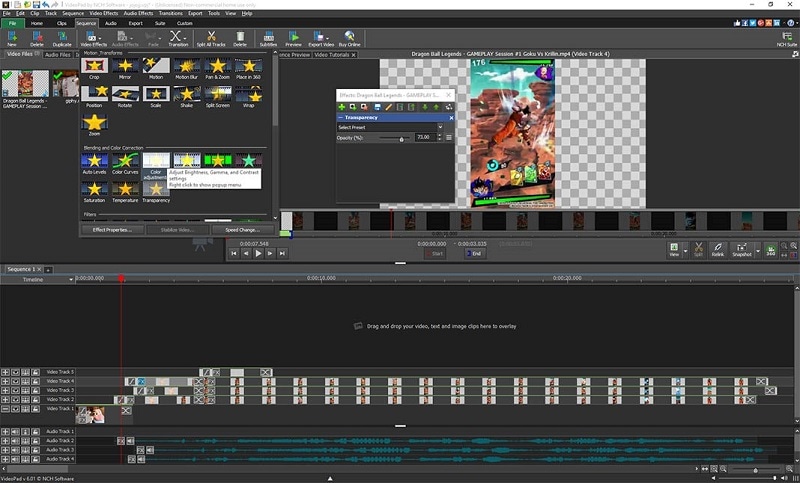
9. VideoPad Video Editor
On Mac and Windows, the VideoPad video editor allows you to edit clips and produce professional-quality films. Its divide and merge functions are also straightforward to utilize. VideoPad editing software can be used to create visually appealing videos. As a result, the video splitter software for Mac can rapidly and efficiently manipulate video streams.
**Platform:**Windows/Mac
Price:$60.00 one-time payment
Features
- It supports a variety of file formats, offering users additional choices for how to utilize the tool with different file kinds.
Pros
- The cost of a professional business video is surprisingly low.
- Importing video is as simple as dragging and dropping.
Cons
- The free edition offers a restricted number of functions.
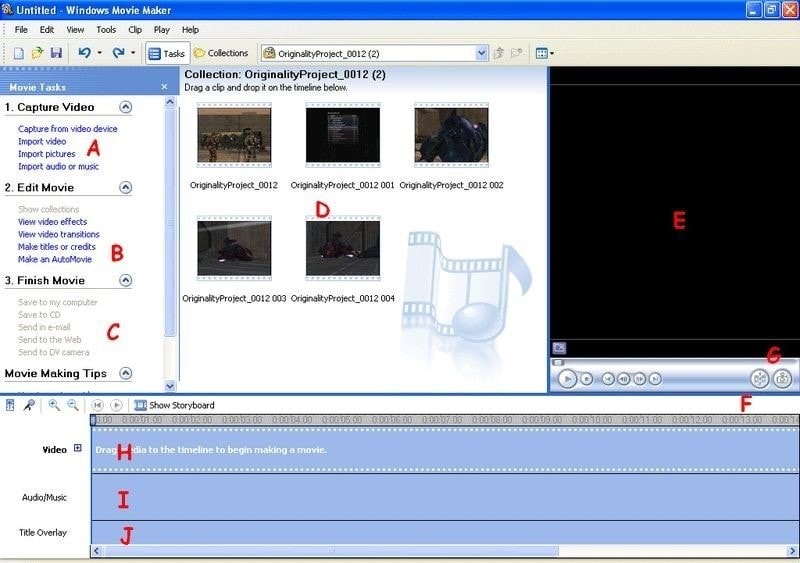
10. Windows Movie Maker
This video editing software comes with Windows OS and is focused on simplicity: There’s no easier method to split videos and save into lossless codecs with titles, transitions, background music, and effects than this. Earlier versions of the application were so basic that they couldn’t accomplish what most people required. Still, over time, features like voiceover recording and even anti-shake have crept into what is today a highly useful free video splitter.
**Platform:**Windows
**Price:**free
Features
- Cool transitions
- Effects on video
- Voiceovers are some of the audio features
Pros
- Effects are automatically previewed.
- Audio features such as voiceovers and other audio enhancements.
- Excellent choices for sharing.
- Simple to use
- Stabilization.
Cons
- There are no modifications to the contrast or saturation.
- The effects aren’t flexible.
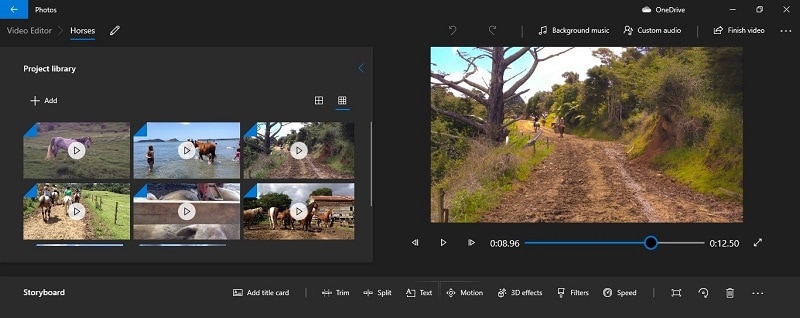
11. Windows Photos
Many users will never require more than Windows 10’s built-in picture and video editor . It is an automatic video splitter with sophisticated effects like 3D overlays and animated titles are among the extras.
**Platform:**Windows
**Price:**free
Features
- Face recognition
- Video cutter
- 3D overlays
Pros
- A simple interface.
- Detecting faces and objects.
- Album creation is done automatically.
- It works with OneDrive.
- Soundtracks, text, and transitions are all used in video editing.
Cons
- There isn’t a before-and-after comparison.
- Panorama stitching and selective focus are not supported.
- There is no geometry correction or chromatic aberration correction.
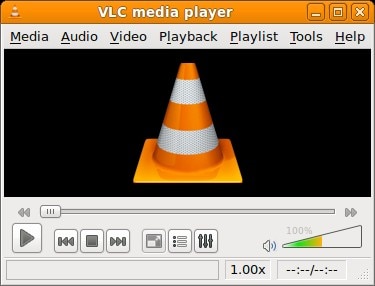
12. VLC
VLC Media Player , for good reasons, is a hugely popular video splitter. It is completely free, supports almost everything without the need to download additional codecs, supports streaming, can enhance video and audio playback for your chosen device, and can be extended almost infinitely with plugins downloadable from the internet.
**Platform:**Windows/Mac
**Price:**free
Features
- Allows streaming of MPEG and DivX files
- Excellent video and audio playback modifying tools
Pros
- It can play all kinds of music and video formats, even compressed ones.
Cons
- It is GPU-dependent and may crash at random moments.
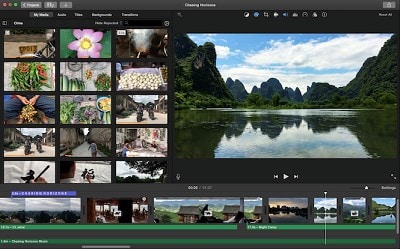
13. iMovie
If you’re using a Mac,iMovie video editing program can help you split videos. Mac users will find this to be one of the finest video splitters available. It contains a wide range of capabilities that may improve the quality of your video in a variety of ways. The video may be trimmed and enhanced with many features, such as text, special effects, and audio. Video quality may be improved with this software’s special effects and video upgrades. In addition, the interface is so user-friendly that even novices may generate stunning results. On the other hand, iMovie is capable of storing 4K films.
**Platform:**Mac
**Price:**free
Features
- An easy-to-use video splitter that is already built-in
- It’s simple to use
Pros
- An easy-to-use video splitter that is already built-in
- It’s simple to use
Cons
- Uploading and exporting videos takes a long time.
14. Format Factory
Multifunctional document and multimedia processing software -Format Factory - is only available for Windows. It’s meticulously designed to keep you from getting lost in the weeds when working on any project. It is designed to be a stand-alone file management application, and judging by the wealth of options available, it has done an excellent job.

**Platform:**Windows
**Price:**free
Features
- Video joining and muxing are available.
- It has a screen recorder built right in.
- A built-in video player and downloader are included.
- Allows for hardware acceleration.
- Disk ripping options are provided.
- Processing may be done in a batch.
Pros
- Removes watermarks and logos.
- File formats supported include video, audio, images, and documents.
Cons
- Unnecessary software is installed when installing the program.
7 Best Free Video Splitter Online
2. VEED.IO
Veed.io is a free online video editing tool that allows anybody to make powerful movies and expand their audiences. It has several useful features, such as cutting and filtering films based on their appearance. Users may cut, add text, and draw on the videos. Veed may also be used to generate videos on social media channels.

**Price:**free
Features
- Video splitter and joiner
Pros
- Simple and quick.
- A preview of the cutting result is available.
Cons
- The maximum file size is 50 MB.
3. Flixier
Flixier is a web-based video editor that offers 1-minute exports to any device, easy collaboration, and lots of cloud storage. Flixier enables customers to export whatever video they want, independent of their technology. It keeps all stakeholders in the loop by allowing each team member and contributor to remain in sync across all platforms. Teams may interact in real time without fear of losing track of the project. Cloud storage, version history, feedback comments, sophisticated exports, and email alerts are all available. The tool supports Windows, Mac, Linux, and Chromebooks.
**Price:**free
Features
- Video splitter and joiner
Pros
- iPhone version is available.
- Automatic sound amplification.
Cons
- May seem too overloaded with functions.
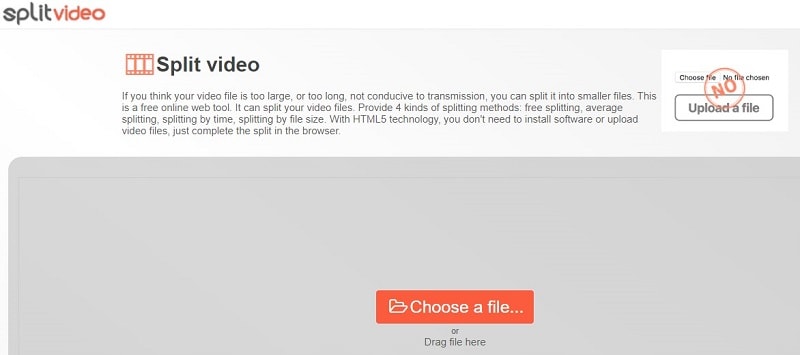
4. Split Video
Split Video program may also be used to edit and split huge videos into smaller segments. It’s quite simple to work with. All you have to do now is choose the video to divide. Tell the app how you’d want the video to be divided. Choose how many parts you want in your video. You may watch the app-split clips before sharing them.
**Price:**free
Features
- Video splitter and joiner
Pros
- Interface that is easy to use.
Cons
- The maximum file size is 200 MB.
5. Kapwing
This application primarily advertises itself as a video trimmer. It lets you edit films by removing unwanted bits and trimming them to the appropriate length. It also has some basic settings, such as utilizing it as a free online MP4 splitter. The user interface is simple, and uploading a movie takes just a few moments. The primary drawback is that your film may only be 300 MB in size and must be under 30 minutes in length.

**Price:**free
Features
- Video splitter and joiner
Pros
- Interface that is simple to use.
Cons
- A little watermark appears in the corner of your video with the free version.
- Only supports films up to 300 MB in size and up to half an hour in length.
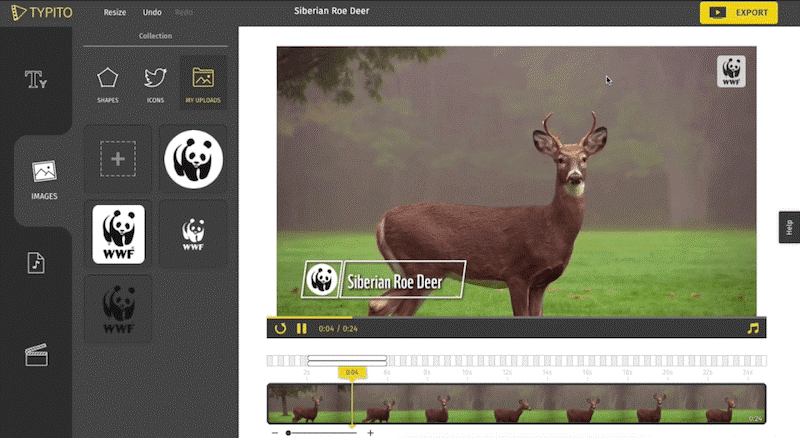
6. Typito
Typito is a video collaboration tool that allows you and your team to work together to make better films for your business. Typito allows you to make and utilize professionally created graphic overlays for free, as well as generate full-length HR movies in both square and portrait formats. It enables you to produce movies consistent with your brand, allowing you to change and customize elements like font, color, and logo with a few mouse clicks. You may save time for your organization by producing videos quicker and working with your team to publish professional-looking films while previewing them on the move. Inviting team members to the project and assigning responsibilities for editing and reviewing videos are just a few collaboration tools.
**Price:**free
Features
- Video splitter and joiner
Pros
- Simple features to use
Cons
- Few transition templates.
7. Clideo
Clideo is a one-of-a-kind platform that allows you to easily produce and modify any video, GIFS, and picture files in one spot. Merging, compressing, resizing, slideshow, cropping, rotation, and other video editing tools are included in the program. Users may add music or text to videos to help them stand out and draw in the right audience. The video editing platform supports various video formats such as MP4, AVI, MPG, VOB, WMV, MOV, and others. There is no need to download or install any applications since everything may be done entirely online. The premium security encryption that comes with it ensures that all video files are always well-protected.
**Price:**free
Features
- Video splitter and joiner
Pros
- Much easier to use than other video editing software.
- Projects are stored on the cloud, so they don’t take up any computer resources.
- There is no need to download any program.
Cons
- The feature set is limited in comparison to other video editing suites.
- Visual artistry is required.
- Some undertakings need a significant amount of time to complete.
10 Best Video Splitter for Mobile Phone
1. Filmora
A good video editor is required to split a video qualitatively.Filmora Video Editor & Maker might be the answer. It works with high-definition videos. It comes with all of the necessary editing tools. As a result, you will not be sorry for installing this software. Not only will you be able to edit and divide films effortlessly, but you’ll also be able to add fun filters.
The sticker library in Filmora Video Editor & Maker is extensive. The number is in the thousands. You’ll be able to apply both realistic and humorous animated stickers. Use video transitions such as Flash, Page Cut, Cross Zoom, Blurry Roll, and Cube. You have complete control over the speed of your edited video.
**Price:**free
Features
- Video splitter and joiner
- Video editor
Pros
- Files may be readily exported and imported.
Cons
- Compatibility of exported videos is limited.
2. AndroVid Video Editor
AndroVid is a video-splitting program with all the tools you’ll ever need. This program is jam-packed with editing tools, allowing you to create a polished video quickly. The program is also quite user-friendly, so even if this is your first time splitting a video, you will be able to handle it.
**Platform:**Android
**Price:**free
Features
- Video splitter and joiner
- Video editor
Pros
- Simple video cutting tool; can extract single-frame pictures from videos.
Cons
- There are no sophisticated editing choices, and the audio options are quite restricted.
- There is no tool for full-screen graphics, and the user interface is a little complicated.
- The ad-free version is nearly as expensive as KineMaster Pro, which is more sophisticated.
3. Easy Video Cutter
Becausethis program is only devoted to video editing, it can handle a wide range of tasks. The program, for example, may clip videos, combine them, rotate them, and so on. You may also adjust the pace of the videos as needed. It should be noted that trimming the video in this program is quite simple — just pick the range with the slider instrument, and that’s it. Because this program is only devoted to video editing, it can handle a wide range of tasks. The program, for example, may clip videos, combine them, rotate them, and so on. You may also adjust the pace of the videos as needed. It should be noted that trimming the video in this program is quite simple — just pick the range with the slider instrument and that’s it.

**Platform:**Android
**Price:**free
Features
- Video splitter and joiner
- Video editor
Pros
- It’s quite simple to use.
- It’s ideal for simple video cutting tasks.
Cons
- There are no additional editing options available.
4. Video Editor
Video Editor is a fantastic app for Android users who want to edit and enhance their videos. It can break a video into segments, combine several films, crop videos, and adjust the video’s size. You may also add audio to the video of your choosing.
**Platform:**Android
**Price:**free
Features
- Video splitter and joiner
- Video editor
Pros
- You may rearrange your clips in any order you choose.
- Many older file types are supported by the program.
Cons
- The video scroll bar might be a little tricky to use.
- It’s quite basic.
5. VideoShow – Video Editor
On the Google Play market,VideoShow is one of the most popular video editing applications. There are several themes, filters, music, and audio to choose from while creating great videos. It’s a fantastic video trimming software.
**Platform:**Android/iPhone
**Price:**free
Features
- Video splitter and joiner
- Video editor
Pros
- It has the ability to both connect and cut clips.
- It’ll run on almost any android phone.
Cons
- Video Scissors has taken the place of the iPhone version.
- Cutting is fast, but re-encoding might take a long time.
6. Trim Video
Trim Video is the greatest app for iPhone video editing and cutting of huge videos. From the huge file, you may easily crop a video clip. Although the program is highly useful and entertaining for video makers, it is not free and costs $0.99.
**Platform:**iPhone
Price:$0.99 per month
Features
- Video splitter
Pros
- All major video and audio formats are supported.
- When you’re finished, there’s no need to re-render the video.
- There are no watermarks.
Cons
- This software does not include video joining; it must be downloaded separately.
- This app’s main purpose is to cut.
7. Video Splitter
Video Splitter is an iPhone software that allows you to edit and divide videos into segments. It’s a free program that combines all of your editing tools into one application. The tool successfully splits a huge video into little chunks, which can be quickly texted or uploaded to social media.
**Platform:**iPhone
**Price:**free
Features
- Video splitter and joiner
- Video editor
Pros
- A broad number of formats, including audio, are supported.
- It’s a breeze to use.
Cons
- There are no choices for video converting.
- It’s been a long time since it’s been updated.
8. Crop video
Crop Video is another handy iPhone app if you wish to cut your movie to a lesser size. It is one of the most popular tools for cutting videos and altering them for a better impact. It contains several features that boost the app’s versatility. It’ll set you back $2.99.
**Platform:**iPhone
Price:$2.99 per month
Features
- Video splitter and joiner
- Video editor
Pros
- The video cutter is helpful for novices.
- It works with every iPhone version.
Cons
- The free version has a lot of limitations.
- The videos of free users are watermarked.
9. Video Crop
Video Crop is a free iPhone software that allows you to crop videos. There are many more options in the software that may be used to modify and improve a video. This program has a lot of flexibility when it comes to video editing and other video settings. This program may also be used to split videos.
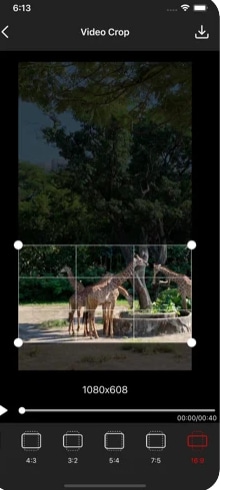
**Platform:**iPhone
**Price:**free
Features
- Video splitter and joiner
- Video editor
Pros
- Splitting and joining MP4 files is simple and effective.
Cons
- It’s only compatible with MP4 files.
- The UI is really sluggish.
10. Video Trim & Cut
Video Trim & Cut is an iPhone software that allows you to divide or trim videos. Adding effects, cropping, altering color, and changing themes are just a few things you can do with the app.
**Platform:**iPhone
**Price:**free
Features
- Video splitter and joiner
- Video editor
Pros
- Excellent templates.
- It has the appearance and functionality of a more costly app.
Cons
- It’s only available on iPhone.
- It might take a long time for a video to render.
Part 5: How to Split Video with Filmora
Step1Import your videos to Filmora Video Cutter
Launch the video cutter once it has been installed and click New Project to access the video editing interface. Now you must import the video, which must be divided into numerous portions.
Upload files
You can either drag and drop files to the media library before adding them to the timeline for editing, or you can click “Import” on the main interface and choose files from your computer.
VOB, 3GP, 3G2, MP4, FLV, AVI, MOV, F4V, M4V, TRP, M2TS, MTS, TP, DAT, WMV, MPG, MPEG, TS, MKV, ASF, DV, EVO, MOD, NSV, and TOD files are all supported by Filmora video cutter.
If your video contains a lot of distinct sequences, Filmora can help you discover the clip you want to trim. The “Scene Detection” tool will assist you in rapidly locating the part you wish to clip. To open the Scene Detection window, choose the video in the media library (not the timeline), right-click it, and select “Scene Detection.”

Detect video
When you click Detect, Filmora will automatically split your films into multiple segments depending on scene changes.
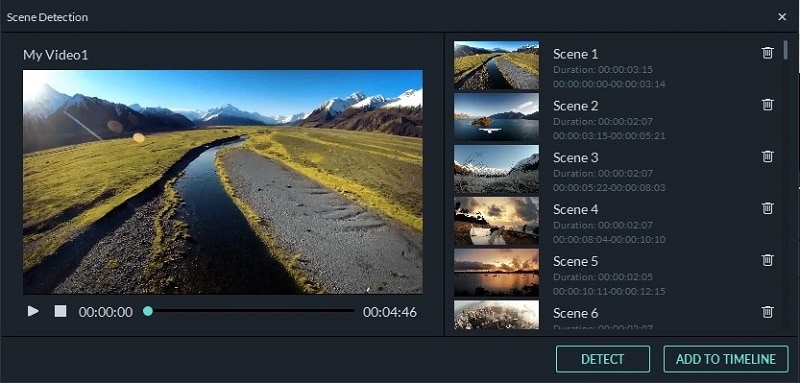
Scenes detected automatically
By clicking the Delete symbol next to the clip, you may delete the undesired sequences and quickly get to the section you want. When you click the Add to Timeline button, all of the segmented video sections will be instantly imported into the timeline, which you can then modify.
Step2Manually trim/split/cut/delete videos
To trim video files, drag clips from the media library to the video track on the timeline and follow these steps. You may use the trim option to chop off the beginning or conclusion of a video swiftly.
Trim video using filmora
- i.Zoom in on the frames you wish to remove from the timeline. Drag the trim symbol to the right to remove the video’s beginning segments from the timeline or to the left to remove the video’s undesired ending segments. You may use the trim tool to cut the beginning and end parts of a sentence with a single drag.
- ii.You may edit a movie into portions, eliminate unnecessary aspects, and combine them into a new film, in addition to chopping off segments at the beginning or conclusion.
- iii.Move the play head to the beginning of the video part you want to cut, then click the Split icon (scissor icon) on the toolbar or the Split button on the play head to split the video. You will get the starting frame, then move the play head to the ending frame and click the Split button again to get the ending part.
- iv.To cut a video into many sections, repeat the procedure. You will get multiple clipped portions, which you may either remove or re-order and alter further.
- v.You may edit out an undesirable cut video by hitting the Delete symbol on the toolbar.
Add trim start and end
Step3Export your video
Click the Export button on the screen after you’ve completed cutting and basic editing. By choosing “Format” and specifying the essential options such as frame rate and resolution, you may save the video in different formats on your local computer.
If you wish to see your video production on your iPod, iPhone, or iPad, go to “Device” and choose your device’s thumbnail. You may also instantly post your films on YouTube or Vimeo, or burn them to DVDs for long-term storage.
Export video after splitting
Bottom Line
Video splitting can be a daunting task when you don’t have the right tools to help you. If you are a Windows or a Mac user then Wondershare Filmora will help you split videos in just few clicks. The software is completely free with an option to go pro for a cheaper price compared to other premium apps. If you prefer splitting your video online then still Filmora online editor will help you in this. Moreover, some good news for android and iPhone users as Filmora comes with all features to split and join videos. With all these tools you can take your video creation process to the next level.
- Filmora
- AndroVid Video Editor
- Easy Video Cutter
- Video Editor
- VideoShow – Video Editor
- Trim Video
- Video Splitter
- Crop video
- Video Crop
- Video Trim & Cut
Part 1: Backup Your Original Video
Making several backups is perhaps the most critical thing you can do for your project. Whether your computer dies suddenly or your editing application crashes, you’ll have a point to fall back on if you have a backup. Making this a habit will save you a lot of time and work in the long term. How many copies of your data should you make? You should create at least three project duplicates in the best-case scenario. Also, make sure they’re preserved in various formats and places—one on an SD card, another on a hard drive, or a USB drive.
14 Best Video Splitter for Windows/Mac
1. Filmora
Wondershare Filmora Video Editor is a superb video editor for those seeking software that can split videos and has a lot of functions. It was originally only accessible for Windows, but thanks to the developers, Mac users may now use this high-quality video splitter. Using this program to split and join videos is pretty basic and straightforward. It’s an intriguing tool since it allows users to produce high-quality films using filters, effects, and other features in an easier method than employing professional editors. This program also lets you export video at a breakneck speed, up to 4k quality.
![]()
Platform: Windows/Mac
Price: Free Trial
Features
- Editing is intuitive and quick.
- Export video in 4k quality.
- There are several graphic effects and transitions.
- Footage from the internet.
- Regularly upgraded features.
Pros
- Large films can be easily cut, trimmed, and combined without compromising quality.
- On the exported video, there is no watermark.
- Both Windows and Mac computers are supported.
- Splitting a video is such a breeze.
- For novices, it has a lot of handy options that will help you create a stunning film.
Cons
- Large-scale content editing might be slow at times.
2. Boilsoft Video Splitter
Boilsoft Video Splitter can divide, edit, or trim a big AVI, MPEG, RM, ASF, WMV, 3GP, MKV, FLV, or MP4 video file without re-encoding smaller video segments. It has a built-in player that allows you to effortlessly split/cut video files according to time or selection.
Platform: Windows/Mac
Price:$34.95 one-time payment
Features
- Split Video
- Cut video
- Built-in player
Pros
- It supports lots of video format.
- User-friendly software.
Cons
- Because you can’t adjust the program window, using the slider for selection becomes increasingly difficult as your video becomes longer.
3. Solveigmm Video Splitter
SolveigMM Video Splitter is suitable for simple editing processes such as removing an extra section from a video, removing an advertisement from a movie, muting the sound on a selected video fragment, saving only a video or audio track from a file, cutting a video into parts, saving segments into separate files, and so on. The editing procedure takes just a few seconds.
Platform: Windows/Mac
Price:$7.99 per month
Features
- Video cutter
- Video editor
- Video Joiner
Pros
- No previous training or knowledge is necessary to understand how to use the software.
- All major file formats are supported.
- The output file quality is unaffected.
Cons
- It sometimes crashes depending on the file size.
4. BandiCut
Bandicut is a video splitting and joining program for Windows systems only. It has a straightforward UI and simple settings. It may also be used as a video converter, allowing you to modify the format of the output clips. The tool is useful for both newcomers and seasoned users.
Platform: Windows
Price:$29.95 per user per month
Features
- Easy and fast video cutter
- Video splitter
Pros
- The interface is pleasing to the eye, and the functions are simple.
- High-capacity mode
Cons
- There isn’t a fully working free version available.
5. Free Video Cutter
This is a basic tool for reducing the size of large video files. It allows you to cut a clip from a movie or video in various formats and save it in four other formats. The hand-drawn interface, by the way, is incredibly charming.
Platform: Windows
**Price:**a free version and premium version ($17.99 per month)
Features
- An irregularly shaped hand-drawn art style interface.
- Videos in a variety of formats are accepted.
- The control panel is small, with just three major buttons.
Pros
- Save as new videos in a variety of formats without compromising quality.
- It may be used to trim lengthy movies, mobile videos, and camera recordings, among other things.
Cons
- For huge files, there are a lot of crashes.
- For Mac users, this tool is not accessible.
6. Easy Video Splitter
Easy Video Splitter is a simple video editing application that allows you to divide your video into many segments. It can play AVI, MPEG, WMV, and ASF files. The scroll bats may be used to cut the movie precisely where you want it to be cut or to divide the film at certain intervals.
**Platform:**Windows/Mac
**Price:**free with ads
Features
- Has a batch processor
- Multiple file support
- Easy to use
Pros
- Batch processing is supported.
Cons
- Only one frame at a time may be fine-tuned.
7. Avidemux
Avidemux is perfect if you have a video to encode or arrange for a certain speaker system. It’s also an ideal choice if you just require a basic video editor, although there are many more extensive applications available that may be better appropriate.
**Platform:**Windows/Mac
**Price:**free
Features
- This program can handle a variety of subtitle formats, including SUB and SRT.
- They also provide a variety of filtering options.
- You may export videos in various formats, including MKV, MPEG, and MP4.
Pros
- A user-friendly interface
- Excellent alternatives for encoding
- Filters for sharpening and de-noising
Cons
- There is no timeline.
- There are no innovative transitions or effects.
8. Ultra Video Splitter
Ultra Video Splitter is an excellent solution for people who just need to complete this one operation and hence do not need the usage of sophisticated video editing software. The tool enables you to choose from a variety of parameters for the final file or files, such as file size, final format, and bitrate.
**Platform:**Windows/Mac
Price:$25.00 one-time payment
Features
- Supports videos in WMV, XviD, MPEG, ASF, AVI, RM, MOV, 3GP, Divx, and MP4 format.
- Can export the final video in VCD, SVCD, DVD, AVI, DivX, MPEG, or WMV format.
Pros
- Video trimming and exporting are both quick.
- Multiple video formats are supported.
Cons
- Has just a few video editing options.
9. VideoPad Video Editor
On Mac and Windows, the VideoPad video editor allows you to edit clips and produce professional-quality films. Its divide and merge functions are also straightforward to utilize. VideoPad editing software can be used to create visually appealing videos. As a result, the video splitter software for Mac can rapidly and efficiently manipulate video streams.
**Platform:**Windows/Mac
Price:$60.00 one-time payment
Features
- It supports a variety of file formats, offering users additional choices for how to utilize the tool with different file kinds.
Pros
- The cost of a professional business video is surprisingly low.
- Importing video is as simple as dragging and dropping.
Cons
- The free edition offers a restricted number of functions.
10. Windows Movie Maker
This video editing software comes with Windows OS and is focused on simplicity: There’s no easier method to split videos and save into lossless codecs with titles, transitions, background music, and effects than this. Earlier versions of the application were so basic that they couldn’t accomplish what most people required. Still, over time, features like voiceover recording and even anti-shake have crept into what is today a highly useful free video splitter.
**Platform:**Windows
**Price:**free
Features
- Cool transitions
- Effects on video
- Voiceovers are some of the audio features
Pros
- Effects are automatically previewed.
- Audio features such as voiceovers and other audio enhancements.
- Excellent choices for sharing.
- Simple to use
- Stabilization.
Cons
- There are no modifications to the contrast or saturation.
- The effects aren’t flexible.
11. Windows Photos
Many users will never require more than Windows 10’s built-in picture and video editor . It is an automatic video splitter with sophisticated effects like 3D overlays and animated titles are among the extras.
**Platform:**Windows
**Price:**free
Features
- Face recognition
- Video cutter
- 3D overlays
Pros
- A simple interface.
- Detecting faces and objects.
- Album creation is done automatically.
- It works with OneDrive.
- Soundtracks, text, and transitions are all used in video editing.
Cons
- There isn’t a before-and-after comparison.
- Panorama stitching and selective focus are not supported.
- There is no geometry correction or chromatic aberration correction.
12. VLC
VLC Media Player , for good reasons, is a hugely popular video splitter. It is completely free, supports almost everything without the need to download additional codecs, supports streaming, can enhance video and audio playback for your chosen device, and can be extended almost infinitely with plugins downloadable from the internet.
**Platform:**Windows/Mac
**Price:**free
Features
- Allows streaming of MPEG and DivX files
- Excellent video and audio playback modifying tools
Pros
- It can play all kinds of music and video formats, even compressed ones.
Cons
- It is GPU-dependent and may crash at random moments.
13. iMovie
If you’re using a Mac,iMovie video editing program can help you split videos. Mac users will find this to be one of the finest video splitters available. It contains a wide range of capabilities that may improve the quality of your video in a variety of ways. The video may be trimmed and enhanced with many features, such as text, special effects, and audio. Video quality may be improved with this software’s special effects and video upgrades. In addition, the interface is so user-friendly that even novices may generate stunning results. On the other hand, iMovie is capable of storing 4K films.
**Platform:**Mac
**Price:**free
Features
- An easy-to-use video splitter that is already built-in
- It’s simple to use
Pros
- An easy-to-use video splitter that is already built-in
- It’s simple to use
Cons
- Uploading and exporting videos takes a long time.
14. Format Factory
Multifunctional document and multimedia processing software -Format Factory - is only available for Windows. It’s meticulously designed to keep you from getting lost in the weeds when working on any project. It is designed to be a stand-alone file management application, and judging by the wealth of options available, it has done an excellent job.
**Platform:**Windows
**Price:**free
Features
- Video joining and muxing are available.
- It has a screen recorder built right in.
- A built-in video player and downloader are included.
- Allows for hardware acceleration.
- Disk ripping options are provided.
- Processing may be done in a batch.
Pros
- Removes watermarks and logos.
- File formats supported include video, audio, images, and documents.
Cons
- Unnecessary software is installed when installing the program.
7 Best Free Video Splitter Online
2. VEED.IO
Veed.io is a free online video editing tool that allows anybody to make powerful movies and expand their audiences. It has several useful features, such as cutting and filtering films based on their appearance. Users may cut, add text, and draw on the videos. Veed may also be used to generate videos on social media channels.
**Price:**free
Features
- Video splitter and joiner
Pros
- Simple and quick.
- A preview of the cutting result is available.
Cons
- The maximum file size is 50 MB.
3. Flixier
Flixier is a web-based video editor that offers 1-minute exports to any device, easy collaboration, and lots of cloud storage. Flixier enables customers to export whatever video they want, independent of their technology. It keeps all stakeholders in the loop by allowing each team member and contributor to remain in sync across all platforms. Teams may interact in real time without fear of losing track of the project. Cloud storage, version history, feedback comments, sophisticated exports, and email alerts are all available. The tool supports Windows, Mac, Linux, and Chromebooks.
**Price:**free
Features
- Video splitter and joiner
Pros
- iPhone version is available.
- Automatic sound amplification.
Cons
- May seem too overloaded with functions.
4. Split Video
Split Video program may also be used to edit and split huge videos into smaller segments. It’s quite simple to work with. All you have to do now is choose the video to divide. Tell the app how you’d want the video to be divided. Choose how many parts you want in your video. You may watch the app-split clips before sharing them.
**Price:**free
Features
- Video splitter and joiner
Pros
- Interface that is easy to use.
Cons
- The maximum file size is 200 MB.
5. Kapwing
This application primarily advertises itself as a video trimmer. It lets you edit films by removing unwanted bits and trimming them to the appropriate length. It also has some basic settings, such as utilizing it as a free online MP4 splitter. The user interface is simple, and uploading a movie takes just a few moments. The primary drawback is that your film may only be 300 MB in size and must be under 30 minutes in length.
**Price:**free
Features
- Video splitter and joiner
Pros
- Interface that is simple to use.
Cons
- A little watermark appears in the corner of your video with the free version.
- Only supports films up to 300 MB in size and up to half an hour in length.
6. Typito
Typito is a video collaboration tool that allows you and your team to work together to make better films for your business. Typito allows you to make and utilize professionally created graphic overlays for free, as well as generate full-length HR movies in both square and portrait formats. It enables you to produce movies consistent with your brand, allowing you to change and customize elements like font, color, and logo with a few mouse clicks. You may save time for your organization by producing videos quicker and working with your team to publish professional-looking films while previewing them on the move. Inviting team members to the project and assigning responsibilities for editing and reviewing videos are just a few collaboration tools.
**Price:**free
Features
- Video splitter and joiner
Pros
- Simple features to use
Cons
- Few transition templates.
7. Clideo
Clideo is a one-of-a-kind platform that allows you to easily produce and modify any video, GIFS, and picture files in one spot. Merging, compressing, resizing, slideshow, cropping, rotation, and other video editing tools are included in the program. Users may add music or text to videos to help them stand out and draw in the right audience. The video editing platform supports various video formats such as MP4, AVI, MPG, VOB, WMV, MOV, and others. There is no need to download or install any applications since everything may be done entirely online. The premium security encryption that comes with it ensures that all video files are always well-protected.
**Price:**free
Features
- Video splitter and joiner
Pros
- Much easier to use than other video editing software.
- Projects are stored on the cloud, so they don’t take up any computer resources.
- There is no need to download any program.
Cons
- The feature set is limited in comparison to other video editing suites.
- Visual artistry is required.
- Some undertakings need a significant amount of time to complete.
10 Best Video Splitter for Mobile Phone
1. Filmora
A good video editor is required to split a video qualitatively.Filmora Video Editor & Maker might be the answer. It works with high-definition videos. It comes with all of the necessary editing tools. As a result, you will not be sorry for installing this software. Not only will you be able to edit and divide films effortlessly, but you’ll also be able to add fun filters.
The sticker library in Filmora Video Editor & Maker is extensive. The number is in the thousands. You’ll be able to apply both realistic and humorous animated stickers. Use video transitions such as Flash, Page Cut, Cross Zoom, Blurry Roll, and Cube. You have complete control over the speed of your edited video.
**Price:**free
Features
- Video splitter and joiner
- Video editor
Pros
- Files may be readily exported and imported.
Cons
- Compatibility of exported videos is limited.
2. AndroVid Video Editor
AndroVid is a video-splitting program with all the tools you’ll ever need. This program is jam-packed with editing tools, allowing you to create a polished video quickly. The program is also quite user-friendly, so even if this is your first time splitting a video, you will be able to handle it.
**Platform:**Android
**Price:**free
Features
- Video splitter and joiner
- Video editor
Pros
- Simple video cutting tool; can extract single-frame pictures from videos.
Cons
- There are no sophisticated editing choices, and the audio options are quite restricted.
- There is no tool for full-screen graphics, and the user interface is a little complicated.
- The ad-free version is nearly as expensive as KineMaster Pro, which is more sophisticated.
3. Easy Video Cutter
Becausethis program is only devoted to video editing, it can handle a wide range of tasks. The program, for example, may clip videos, combine them, rotate them, and so on. You may also adjust the pace of the videos as needed. It should be noted that trimming the video in this program is quite simple — just pick the range with the slider instrument, and that’s it. Because this program is only devoted to video editing, it can handle a wide range of tasks. The program, for example, may clip videos, combine them, rotate them, and so on. You may also adjust the pace of the videos as needed. It should be noted that trimming the video in this program is quite simple — just pick the range with the slider instrument and that’s it.
**Platform:**Android
**Price:**free
Features
- Video splitter and joiner
- Video editor
Pros
- It’s quite simple to use.
- It’s ideal for simple video cutting tasks.
Cons
- There are no additional editing options available.
4. Video Editor
Video Editor is a fantastic app for Android users who want to edit and enhance their videos. It can break a video into segments, combine several films, crop videos, and adjust the video’s size. You may also add audio to the video of your choosing.
**Platform:**Android
**Price:**free
Features
- Video splitter and joiner
- Video editor
Pros
- You may rearrange your clips in any order you choose.
- Many older file types are supported by the program.
Cons
- The video scroll bar might be a little tricky to use.
- It’s quite basic.
5. VideoShow – Video Editor
On the Google Play market,VideoShow is one of the most popular video editing applications. There are several themes, filters, music, and audio to choose from while creating great videos. It’s a fantastic video trimming software.
**Platform:**Android/iPhone
**Price:**free
Features
- Video splitter and joiner
- Video editor
Pros
- It has the ability to both connect and cut clips.
- It’ll run on almost any android phone.
Cons
- Video Scissors has taken the place of the iPhone version.
- Cutting is fast, but re-encoding might take a long time.
6. Trim Video
Trim Video is the greatest app for iPhone video editing and cutting of huge videos. From the huge file, you may easily crop a video clip. Although the program is highly useful and entertaining for video makers, it is not free and costs $0.99.
**Platform:**iPhone
Price:$0.99 per month
Features
- Video splitter
Pros
- All major video and audio formats are supported.
- When you’re finished, there’s no need to re-render the video.
- There are no watermarks.
Cons
- This software does not include video joining; it must be downloaded separately.
- This app’s main purpose is to cut.
7. Video Splitter
Video Splitter is an iPhone software that allows you to edit and divide videos into segments. It’s a free program that combines all of your editing tools into one application. The tool successfully splits a huge video into little chunks, which can be quickly texted or uploaded to social media.
**Platform:**iPhone
**Price:**free
Features
- Video splitter and joiner
- Video editor
Pros
- A broad number of formats, including audio, are supported.
- It’s a breeze to use.
Cons
- There are no choices for video converting.
- It’s been a long time since it’s been updated.
8. Crop video
Crop Video is another handy iPhone app if you wish to cut your movie to a lesser size. It is one of the most popular tools for cutting videos and altering them for a better impact. It contains several features that boost the app’s versatility. It’ll set you back $2.99.
**Platform:**iPhone
Price:$2.99 per month
Features
- Video splitter and joiner
- Video editor
Pros
- The video cutter is helpful for novices.
- It works with every iPhone version.
Cons
- The free version has a lot of limitations.
- The videos of free users are watermarked.
9. Video Crop
Video Crop is a free iPhone software that allows you to crop videos. There are many more options in the software that may be used to modify and improve a video. This program has a lot of flexibility when it comes to video editing and other video settings. This program may also be used to split videos.
**Platform:**iPhone
**Price:**free
Features
- Video splitter and joiner
- Video editor
Pros
- Splitting and joining MP4 files is simple and effective.
Cons
- It’s only compatible with MP4 files.
- The UI is really sluggish.
10. Video Trim & Cut
Video Trim & Cut is an iPhone software that allows you to divide or trim videos. Adding effects, cropping, altering color, and changing themes are just a few things you can do with the app.
**Platform:**iPhone
**Price:**free
Features
- Video splitter and joiner
- Video editor
Pros
- Excellent templates.
- It has the appearance and functionality of a more costly app.
Cons
- It’s only available on iPhone.
- It might take a long time for a video to render.
Part 5: How to Split Video with Filmora
Step1Import your videos to Filmora Video Cutter
Launch the video cutter once it has been installed and click New Project to access the video editing interface. Now you must import the video, which must be divided into numerous portions.
Upload files
You can either drag and drop files to the media library before adding them to the timeline for editing, or you can click “Import” on the main interface and choose files from your computer.
VOB, 3GP, 3G2, MP4, FLV, AVI, MOV, F4V, M4V, TRP, M2TS, MTS, TP, DAT, WMV, MPG, MPEG, TS, MKV, ASF, DV, EVO, MOD, NSV, and TOD files are all supported by Filmora video cutter.
If your video contains a lot of distinct sequences, Filmora can help you discover the clip you want to trim. The “Scene Detection” tool will assist you in rapidly locating the part you wish to clip. To open the Scene Detection window, choose the video in the media library (not the timeline), right-click it, and select “Scene Detection.”
Detect video
When you click Detect, Filmora will automatically split your films into multiple segments depending on scene changes.
Scenes detected automatically
By clicking the Delete symbol next to the clip, you may delete the undesired sequences and quickly get to the section you want. When you click the Add to Timeline button, all of the segmented video sections will be instantly imported into the timeline, which you can then modify.
Step2Manually trim/split/cut/delete videos
To trim video files, drag clips from the media library to the video track on the timeline and follow these steps. You may use the trim option to chop off the beginning or conclusion of a video swiftly.
Trim video using filmora
- i.Zoom in on the frames you wish to remove from the timeline. Drag the trim symbol to the right to remove the video’s beginning segments from the timeline or to the left to remove the video’s undesired ending segments. You may use the trim tool to cut the beginning and end parts of a sentence with a single drag.
- ii.You may edit a movie into portions, eliminate unnecessary aspects, and combine them into a new film, in addition to chopping off segments at the beginning or conclusion.
- iii.Move the play head to the beginning of the video part you want to cut, then click the Split icon (scissor icon) on the toolbar or the Split button on the play head to split the video. You will get the starting frame, then move the play head to the ending frame and click the Split button again to get the ending part.
- iv.To cut a video into many sections, repeat the procedure. You will get multiple clipped portions, which you may either remove or re-order and alter further.
- v.You may edit out an undesirable cut video by hitting the Delete symbol on the toolbar.
Add trim start and end
Step3Export your video
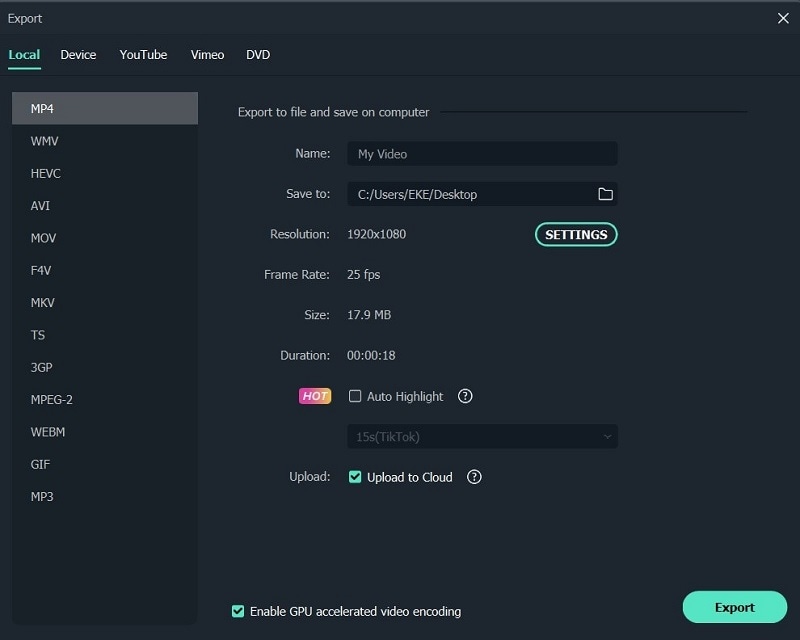
Click the Export button on the screen after you’ve completed cutting and basic editing. By choosing “Format” and specifying the essential options such as frame rate and resolution, you may save the video in different formats on your local computer.
If you wish to see your video production on your iPod, iPhone, or iPad, go to “Device” and choose your device’s thumbnail. You may also instantly post your films on YouTube or Vimeo, or burn them to DVDs for long-term storage.
Export video after splitting
Bottom Line
Video splitting can be a daunting task when you don’t have the right tools to help you. If you are a Windows or a Mac user then Wondershare Filmora will help you split videos in just few clicks. The software is completely free with an option to go pro for a cheaper price compared to other premium apps. If you prefer splitting your video online then still Filmora online editor will help you in this. Moreover, some good news for android and iPhone users as Filmora comes with all features to split and join videos. With all these tools you can take your video creation process to the next level.
Are You Looking to Freeze-Frame in FCP? If Yes, Read One, as Here Is a Guide About How to Freeze-Frame in Final Cut Pro (FCP) with Ease
Best Way to Freeze Frame in Final Cut Pro
An easy yet powerful editor
Numerous effects to choose from
Detailed tutorials provided by the official channel
The primary purpose of freezing frames is to hold a particular frame in clips in one place, temporarily to stop the action onscreen. You can create the Freeze-Frame clip from any video clip in the browser or the timeline. If a Freeze-Frame clip is created from the browser, it gets affixed to the major storyline at the Playhead location as a connecting clip.

Now, Final Cut Pro is a fantastic video editor available for macOS. It is an entire video editing tool perfect for basic video editing. In addition, it can be valuable to Freeze-Frames in a video. This article will explain why to Freeze-Frame in FCP and its alternatives. We will also introduce how to add a Freeze-Frame Final Cut Pro video editor that can make your videos more appealing.
In this article
01 [Why Do You Need to Freeze-Frame](#Part 1)
02 [How to Freeze-Frames in Final Cut Pro?](#Part 2)
03 [3 Alternative to Freeze-Frames and Why](#Part 3)
Part 1 Why Do You Need to Freeze-Frame
Freeze-Frames is an effective and quick way to begin a drama session when you want to edit a movie. Besides, users of any age, ranging from children to adults, can easily handle it. Participants can use it to create an image using their bodies with no movement, and Freeze-Frames can also be made by individuals, a whole group, or a small group.
Another perfect way to describe a Freeze-Frame is a “still image.” It is a way of pressing the pause button on the remote control and making a statue or taking a photo. The image creation can be quick without discussion, planned, or rehearsed.
Here are some reasons you need a Freeze-Frame app:
● They are beneficial as a quick way of communicating ideas or telling a story.
● In addition, Freeze-Frame can represent objects or people and even abstract concepts like atmosphere or emotions.
● Freeze-Frames can help shyer performers to gain confidence, as there are no lines to learn.

Part 2 How to Freeze-Frames in Final Cut Pro?
FCPX Freeze-Frame clips can temporarily hold a particular frame in place and stop the action onscreen. The Freeze-Frame, as its phrase, freezes or contains the specific frame you want to feature or focus on in a video.
You have to pick or select the frame you want to freeze and follow the steps in the article to freeze the frame of your choice.
In addition, if you do not want to create a separate freeze-frame clip, make a hold segment to stop the action for part of a clip temporarily. This action offers more precise control, especially when a variable speed effect is created.
You can Freeze-Frame on the fly by navigating to a specific frame in a clip or during playback. Thus, A Freeze-Frame clip will preserve any attributes applied to the source clip, such as settings and effects.
Here is how to Freeze-Frame in Final Cut Pro effectively.
Step 1: In the browser or in the timeline in Final Cut Pro, do any one of the following:
● Begin playback of the clip and pause
● Move the Skimmer or Playhead to the portion you wish to freeze.

Step 2: Choose Edit > Add Freeze-Frame (or press Option-F).
Note: How Freeze-Frame gets added to the project depends on whether it got created from the browser or the timeline:
● If the Freeze-Frame was from a browser clip, a new freeze-frame clip gets attached as a connected clip at the Playhead site in the timeline.
● Alternatively, if the freeze-frame was from the timeline, a new freeze-frame clip gets inserted at the Playhead location or the Skimmer in the timeline.

Part 3 Alternative to Freeze-Frames and Why
There are a lot of alternatives to Freeze-Frame in Final-Cut Pro all over the Internet. However, you must be careful while choosing when you want to add customization to your videos.
Additionally, if you are looking for the best editor to add a Freeze-Frame effect to your video, we recommend trying Filmora. Wondershare Filmora Video Editor for Mac and Windows devices comes with tons of Freeze-Frame impacts that you can use to spice-up your video.
For Win 7 or later (64-bit)
For macOS 10.12 or later
Some of the alternatives to adding a Freeze-Frame on Final Cut Pro include:
01AZ Screen Recorder
This is a free android APK alternative to Freeze-Frames in FCP. It is a great application available for anyone who needs to have the ability to record what is happening on their Android device’s screen. One great benefit of using this application is that your Android device does need to be rooted to experience the best the app has to offer.
A blinking red dot will be noticed in the screen’s right bottom corner when users begin to record with this application. This is an indicator that the recording is in progress. In addition, users can pause the recording as per their requirements by just tapping the screen. If you are not comfortable with the location of the blinking red dot, hold and move it to anywhere on the screen that can better suit your needs. Thus, this is an excellent alternative to Final Cut Pro X Freeze-Frame with the exceptional video quality.
Features
● Simple, clean, and easy to use interface
● The application settings options allow users to adjust things like the video output quality and how the clip recording interacts with the screen while the application is running.
● The four icons located in the middle of the application’s home screen clearly outline their options when the application is first open. The four options include adjusting the application’s settings, accessing previously recorded video files, starting recording, and the option to exit.
Pros:
● It has options to increase video quality.
● No watermark
● No time limits
● No frame loss
Cons:
● No option to live stream.

02AndroVid
This Android application allows the creation of new videos by cutting and combining two or more video effects on your phone. Additionally, this application is typically different from the others that let you watch videos or share them with other sites. Bits and pieces can be cut from two or more videos and combined to make a new video. In addition, it is fun to use if you want to create a new music video that features the same song but different steps made when various people are being used.
Users can easily cut and paste with simple instructions, and the application also lets you work with any video stored on your phone.
Features
● Add subtitles to the videos that you create
● Create titles in any color or font that is available with the application
● making the videos from the clips a little more personal and customized before sharing.
Pros
● Allows multiple videos editing
● Allows the addition of a subtitle
● Users can reverse video content
Cons
● You cannot save a lot of work automatically
● It takes time to get the video adjusted

03Action Director
This Android editor also serves as an alternative to Final Cut Pro X Freeze-Frame. This video editing tool allows users to create quality compositions in no time at all. Additionally, you can change the image’s color, cut video clips, add a soundtrack, or insert text with this Video Editor using effortless control. With just a few finger taps on the screen, you can customize any video. This excellent video editing tool lets you create and share your videos quickly and easily.
Features
● Record videos with this Android app.
● Edit video and apply effects from its exclusive list.
● Get more than 12 transitions for your videos
● The useful movie editing guide helps you create videos with action effects and edits.
● Share your videos with your friends.
Pros
● It is fast and easy to use
● It is elementary to control
● Has video sharing option to share videos on another website
Cons
● Requires premium version to export video in high quality
● Ending Thoughts →
● About Final Cut Pro X Freeze-Frame and explained to the user how to use Freeze-Frame in FCP.
● Additionally, the article listed and presented three alternatives to Freeze-Frame and
● Recommended Filmora as the best editing software to use Freeze-Frame effects due to its many editing options.
The primary purpose of freezing frames is to hold a particular frame in clips in one place, temporarily to stop the action onscreen. You can create the Freeze-Frame clip from any video clip in the browser or the timeline. If a Freeze-Frame clip is created from the browser, it gets affixed to the major storyline at the Playhead location as a connecting clip.
Now, Final Cut Pro is a fantastic video editor available for macOS. It is an entire video editing tool perfect for basic video editing. In addition, it can be valuable to Freeze-Frames in a video. This article will explain why to Freeze-Frame in FCP and its alternatives. We will also introduce how to add a Freeze-Frame Final Cut Pro video editor that can make your videos more appealing.
In this article
01 [Why Do You Need to Freeze-Frame](#Part 1)
02 [How to Freeze-Frames in Final Cut Pro?](#Part 2)
03 [3 Alternative to Freeze-Frames and Why](#Part 3)
Part 1 Why Do You Need to Freeze-Frame
Freeze-Frames is an effective and quick way to begin a drama session when you want to edit a movie. Besides, users of any age, ranging from children to adults, can easily handle it. Participants can use it to create an image using their bodies with no movement, and Freeze-Frames can also be made by individuals, a whole group, or a small group.
Another perfect way to describe a Freeze-Frame is a “still image.” It is a way of pressing the pause button on the remote control and making a statue or taking a photo. The image creation can be quick without discussion, planned, or rehearsed.
Here are some reasons you need a Freeze-Frame app:
● They are beneficial as a quick way of communicating ideas or telling a story.
● In addition, Freeze-Frame can represent objects or people and even abstract concepts like atmosphere or emotions.
● Freeze-Frames can help shyer performers to gain confidence, as there are no lines to learn.
Part 2 How to Freeze-Frames in Final Cut Pro?
FCPX Freeze-Frame clips can temporarily hold a particular frame in place and stop the action onscreen. The Freeze-Frame, as its phrase, freezes or contains the specific frame you want to feature or focus on in a video.
You have to pick or select the frame you want to freeze and follow the steps in the article to freeze the frame of your choice.
In addition, if you do not want to create a separate freeze-frame clip, make a hold segment to stop the action for part of a clip temporarily. This action offers more precise control, especially when a variable speed effect is created.
You can Freeze-Frame on the fly by navigating to a specific frame in a clip or during playback. Thus, A Freeze-Frame clip will preserve any attributes applied to the source clip, such as settings and effects.
Here is how to Freeze-Frame in Final Cut Pro effectively.
Step 1: In the browser or in the timeline in Final Cut Pro, do any one of the following:
● Begin playback of the clip and pause
● Move the Skimmer or Playhead to the portion you wish to freeze.
Step 2: Choose Edit > Add Freeze-Frame (or press Option-F).
Note: How Freeze-Frame gets added to the project depends on whether it got created from the browser or the timeline:
● If the Freeze-Frame was from a browser clip, a new freeze-frame clip gets attached as a connected clip at the Playhead site in the timeline.
● Alternatively, if the freeze-frame was from the timeline, a new freeze-frame clip gets inserted at the Playhead location or the Skimmer in the timeline.
Part 3 Alternative to Freeze-Frames and Why
There are a lot of alternatives to Freeze-Frame in Final-Cut Pro all over the Internet. However, you must be careful while choosing when you want to add customization to your videos.
Additionally, if you are looking for the best editor to add a Freeze-Frame effect to your video, we recommend trying Filmora. Wondershare Filmora Video Editor for Mac and Windows devices comes with tons of Freeze-Frame impacts that you can use to spice-up your video.
For Win 7 or later (64-bit)
For macOS 10.12 or later
Some of the alternatives to adding a Freeze-Frame on Final Cut Pro include:
01AZ Screen Recorder
This is a free android APK alternative to Freeze-Frames in FCP. It is a great application available for anyone who needs to have the ability to record what is happening on their Android device’s screen. One great benefit of using this application is that your Android device does need to be rooted to experience the best the app has to offer.
A blinking red dot will be noticed in the screen’s right bottom corner when users begin to record with this application. This is an indicator that the recording is in progress. In addition, users can pause the recording as per their requirements by just tapping the screen. If you are not comfortable with the location of the blinking red dot, hold and move it to anywhere on the screen that can better suit your needs. Thus, this is an excellent alternative to Final Cut Pro X Freeze-Frame with the exceptional video quality.
Features
● Simple, clean, and easy to use interface
● The application settings options allow users to adjust things like the video output quality and how the clip recording interacts with the screen while the application is running.
● The four icons located in the middle of the application’s home screen clearly outline their options when the application is first open. The four options include adjusting the application’s settings, accessing previously recorded video files, starting recording, and the option to exit.
Pros:
● It has options to increase video quality.
● No watermark
● No time limits
● No frame loss
Cons:
● No option to live stream.
02AndroVid
This Android application allows the creation of new videos by cutting and combining two or more video effects on your phone. Additionally, this application is typically different from the others that let you watch videos or share them with other sites. Bits and pieces can be cut from two or more videos and combined to make a new video. In addition, it is fun to use if you want to create a new music video that features the same song but different steps made when various people are being used.
Users can easily cut and paste with simple instructions, and the application also lets you work with any video stored on your phone.
Features
● Add subtitles to the videos that you create
● Create titles in any color or font that is available with the application
● making the videos from the clips a little more personal and customized before sharing.
Pros
● Allows multiple videos editing
● Allows the addition of a subtitle
● Users can reverse video content
Cons
● You cannot save a lot of work automatically
● It takes time to get the video adjusted
03Action Director
This Android editor also serves as an alternative to Final Cut Pro X Freeze-Frame. This video editing tool allows users to create quality compositions in no time at all. Additionally, you can change the image’s color, cut video clips, add a soundtrack, or insert text with this Video Editor using effortless control. With just a few finger taps on the screen, you can customize any video. This excellent video editing tool lets you create and share your videos quickly and easily.
Features
● Record videos with this Android app.
● Edit video and apply effects from its exclusive list.
● Get more than 12 transitions for your videos
● The useful movie editing guide helps you create videos with action effects and edits.
● Share your videos with your friends.
Pros
● It is fast and easy to use
● It is elementary to control
● Has video sharing option to share videos on another website
Cons
● Requires premium version to export video in high quality
● Ending Thoughts →
● About Final Cut Pro X Freeze-Frame and explained to the user how to use Freeze-Frame in FCP.
● Additionally, the article listed and presented three alternatives to Freeze-Frame and
● Recommended Filmora as the best editing software to use Freeze-Frame effects due to its many editing options.
Also read:
- Guide To Selecting and Using the Best Braw Luts for 2024
- How to Find a High-Quality Video Marketing Agency?
- Updated AVI Editor for Windows 11/10/8.1/8/7 Easily Edit AVI Files on PC
- Updated Want to Know How to Slow Down a Video on iPhone or Speed It Up? This Guide Provides Step by Step Method to Do so Using Simple Techniques. Find Out More About It
- Updated 2024 Approved Little Known Ways of Adding Emojis to Photos on iPhone & Android 2023
- In 2024, Experience Time Differently with The Top Slow-Motion Applications
- New 4 Simple Methods for Making a High-Quality Recap Video for 2024
- Confused About Which GoPro Should You Use? This Article Introduces and Provides a Detailed Overview of the Best GoPro for YouTubers You Can Find in the Market for Vlogging
- Updated 2024 Approved Detailed Review of Kodak LUTs
- 2024 Approved Are You Looking for Ways to Add Background to Green Screen Video Online? Worry Not, as in This Article; We Shall Discuss Using a Green Screen Background Adder in Filmora
- New Replacing Sky Background Using Adobe Photoshop A Comprehensive Guide
- In 2024, Easy Guide to Overlay Videos in Premiere Pro
- Updated In This Article, You Will Learn How to Record Creative Cinematic Videos Using a Smartphone and Edit the Video with Wondershare Filmora
- Ideas for Time-Lapse Video
- What Is the Best MP4 Cutters for YouTubers on Mac?
- New In 2024, Detailed Guide to Merge Videos in VLC Media Player
- A Detailed Guide on Faking Your Location in Mozilla Firefox On Honor 70 Lite 5G | Dr.fone
- In 2024, Pokemon Go Error 12 Failed to Detect Location On Samsung Galaxy S23+? | Dr.fone
- In 2024, Complete Tutorial to Use VPNa to Fake GPS Location On Oppo Find N3 | Dr.fone
- Prank Your Friends! Easy Ways to Fake and Share Google Maps Location On Infinix Smart 8 HD | Dr.fone
- 2024 Approved The Best Tools to Convert Text to MP3 With the Best Natural Voices
- How to Recover Files after iPhone 15 Pro Factory Reset? | Stellar
- Recommended Best Applications for Mirroring Your Vivo S17t Screen | Dr.fone
- How to identify missing or malfunctioning your drivers with Windows Device Manager on Windows 11/10/7
- Why does the pokemon go battle league not available On Nokia C210 | Dr.fone
- In 2024, Additional Tips About Sinnoh Stone For Xiaomi Civi 3 | Dr.fone
- Fix the Error of Unfortunately the Process.com.android.phone Has Stopped on Itel A60s | Dr.fone
- iSpoofer is not working On Vivo V30 Lite 5G? Fixed | Dr.fone
- 3 Things You Must Know about Fake Snapchat Location On Tecno Spark 20C | Dr.fone
- Title: In 2024, Ultimate Guide to Making Cinematography for Music Video
- Author: Chloe
- Created at : 2024-05-20 03:38:21
- Updated at : 2024-05-21 03:38:21
- Link: https://ai-editing-video.techidaily.com/in-2024-ultimate-guide-to-making-cinematography-for-music-video/
- License: This work is licensed under CC BY-NC-SA 4.0.
