
Learn How to Make a Gaming Montage - Guide & Tips
Learn How to Make a Gaming Montage - Guide & Tips
The popularity of gaming montage is growing every day in today’s pop culture. There are currently more than 2.5 billion gamers, and most of them love watching gaming video content on YouTube. Whether people use a montage to parody gaming montages themselves or show off their skills, the effort and time put into them create impressive results.
We will explain how to create gaming montages and give you some tips that you might want to keep in mind to make epic videos.
How to Make a Gaming Montage
You have several options when it comes to creating gaming montages. You can include a random cut of great scenes, a mixture of the highlighted moments you found thrilling and would like to share with other gamers. In other cases, you’ll have to think of an engaging story in advance, then base your gameplay on this story.
Essentially, the workflow will be slightly different for these two scenarios. It’s much easier with the random cut type, especially when using a reliable video editor. Editing montages is as exciting as playing the game.
With that in mind, here is how to make a gaming montage.
1) Decide Your Montage Story/Type
Deciding your montage type beforehand helps clear your mind and create an epic gaming montage that will keep viewers watching. It allows you to choose the relevant video clips for your gaming montage.
Choose the topic of the video and decide the length of each clip and the sequence of the clips. Be sure to put the most epic or funny clips in the last section of your video. And this will make your viewers watch the video until the end.
2) Record Your Gameplay Footage
The methods to capture the gameplay varies depending on the platform where the game is. The most important thing you have to keep in mind is to ensure your recorder supports Replay Buffer; this will allow you to record scenes that occurred minutes or seconds ago.
That means you do not need to record the gameplay the whole time and burn your hardware. Instead, you’ll capture the moment after interesting things occur.
Game consoles like PS4 allow you to record the video natively for a maximum of one hour with the gamepad. A capture card lets you record it longer than 60 minutes.
Once you’ve all the clips you want on your PC, head over to https://filmora.wondershare.net/filmora-video-editor.html and download Filmora and install the software on your computer. This program allows you to edit your video clips and add cool effects that will make viewers keep watching.
3) Import You Videos to Media Library
You only have to import the videos to Filmora’s media library and then drag and drop them into the timeline, where you can start making the edits.
By right-clicking on the clip in your timeline, you’ll see the options to zoom, speed, change, split, or trim your videos. You can also add sound effects by going to the Audio Tab.

Import Videos
4) Choose Background Music for Your Montage
Music will help make your gaming montage engaging. Make sure you use a license-free track if you plan to post it on social media.
Using copyrighted music tracks and uploading the video on social media platforms can lead to video strikes. Luckily, Filmora has loads of non-copyrighted music tracks.
Navigate to Stock Media, where you’ll find non-copyrighted music on Pixabay, and choose the one you prefer.

Choose Background Music
5) Edit the Gaming Montage
With Filmora’s auto gaming montage maker, you can watch the video clip with the music you have selected. This tool will analyze beat points to change the video and effects.
Additionally, the tool can identify any bad parts in your video and delete them so that the video matches the music.
The Effects tab allows you to add multiple overlays and filters to your gaming montage video. Filmora has different categories of overlays that let you add emotions or personality to your montage. You can also use it to set the tone in your video.
Filters allow you to spice up your gaming videos. There are also different types of filters on Filmora.

Edit Gaming Montage
6) Export Your Gaming Montage Video
Once you have finished editing your video and added music, hit the Export button. Doing this will allow you to export your edited video and save it on your computer.
You can now enter your login details and upload your gaming montage video on your YouTube channel to share it with other players.
Useful Tips for Making a Gaming Montage
Making gaming montages can help you build a large online community if you do the right thing. When making a gaming montage, there are a few tips that you should keep in mind. They include:
1. Apply Velocity Effects
Adding velocity effects to your montage will help get the attention of viewers. You can couple the transition between scenes with a speed ramping effect.
Include slow motion where there is a gunshot or other big gaming moment. You can then speed up things to quickly move into another scene. You can create these velocity effects in Filmora and make it smooth.
2. Avoid Game Loading Scenes
Do not include game loading scenes or any unnecessary clips in the gaming montage. Your audience does not have the time to wait for the scenes to load because they want to see action fast.
3. Sync Gunshot with Music Beat
Try to match gunshot sounds with beats and rhythms in shooter video games. The beats of the music and the soothing sync of gunshots will catch viewers’ attention and your video will become popular among gamers.
4. Add Creative Transitions
You can spice up your gaming montage by adding transitions, especially when you have loads of clips for the montage. But avoid overusing it, as you could confuse your audience with a range of dazzling and glaring transitions.
5. Color Grade the Video for the Mood
Use color grading to your advantage, as it can set the mood of your viewers. You can decide to make some scenes black and white to catch the viewers’ attention.
6. Add Video Vignettes for Special Occasions
You can add dark edges around the corners of your video to highlight action or create a certain mood. For gameplay based on a story, use vignetting to add a sense of nostalgia or as a flashback that shows viewers the past.
You can use Filmora to apply the vignetting effect by heading to Advanced Color Tuning, then clicking the Vignette option. You can then add the vignette effect to the video. Additionally, you can adjust the vignette’s exposure, feather, roundness, size, and highlights.
Best Gaming Montage for Studying
Here are three gaming montages that are good for studying.
1. Call of Duty: Modern Warfare
Uploaded by DemixB, the Call of Duty Game Montage uses Jacques Offenbach’s Can Can Music track. It’s a happy song that has a tempo of 81 BPM. The track has average danceable energy, and it’s somewhat danceable.
DemixB set the gunshot in the montage video to the music tune. The track builds up to the climax when the gunshot echoes with the attention-grabbing orchestral explosions.

Call of Duty: Modern Warfare
2. ShutteR’s Gaming Montage
In the gaming montage uploaded by ShutteR on his YouTube channel, he used velocity effects to enhance the video. You’ll see that the transition in each scene is paired with adrenaline-pumping, speed-ramping effects.
ShutteR used a slow-motion to highlight action in each scene, then speeds up again when he wants to fast out into the next scene.; this makes the video more engaging to keep viewers glued to their screens.

ShutteR’s Gaming Montage
3. NEVERMORE [CS: GO]
NEVERMORE [CS: GO] was uploaded by Fuze on his YouTube channel, and it has creative gameplay. The gaming montage is based on a story. He did the project with Apel, an artist who designed the Fever Dream series skins in the video.
The basic idea of this gaming montage was that the main game character is a corrupted policeman with purple glowing eyes because he’s not human.
When the edits begin, the shape of the main character will shift from CS: GO CT models and turn into his real corrupt CT shape. So that’s why his name keeps changing. You can get his real identity by pausing some of the frames and looking at the “Killfeed.”

NEVERMORE [CS: GO]
Closing Thoughts:
Gaming montage involves picking and editing a range of video clips, which are brought together to create engaging video content. It consists of the best scenes from gameplay and non-copyrighted background music.
Use Filmora to edit and add effects to your video, including transitions and overlays. Your gaming montage will get more views, hence becoming popular among players.
The popularity of gaming montage is growing every day in today’s pop culture. There are currently more than 2.5 billion gamers, and most of them love watching gaming video content on YouTube. Whether people use a montage to parody gaming montages themselves or show off their skills, the effort and time put into them create impressive results.
We will explain how to create gaming montages and give you some tips that you might want to keep in mind to make epic videos.
How to Make a Gaming Montage
You have several options when it comes to creating gaming montages. You can include a random cut of great scenes, a mixture of the highlighted moments you found thrilling and would like to share with other gamers. In other cases, you’ll have to think of an engaging story in advance, then base your gameplay on this story.
Essentially, the workflow will be slightly different for these two scenarios. It’s much easier with the random cut type, especially when using a reliable video editor. Editing montages is as exciting as playing the game.
With that in mind, here is how to make a gaming montage.
1) Decide Your Montage Story/Type
Deciding your montage type beforehand helps clear your mind and create an epic gaming montage that will keep viewers watching. It allows you to choose the relevant video clips for your gaming montage.
Choose the topic of the video and decide the length of each clip and the sequence of the clips. Be sure to put the most epic or funny clips in the last section of your video. And this will make your viewers watch the video until the end.
2) Record Your Gameplay Footage
The methods to capture the gameplay varies depending on the platform where the game is. The most important thing you have to keep in mind is to ensure your recorder supports Replay Buffer; this will allow you to record scenes that occurred minutes or seconds ago.
That means you do not need to record the gameplay the whole time and burn your hardware. Instead, you’ll capture the moment after interesting things occur.
Game consoles like PS4 allow you to record the video natively for a maximum of one hour with the gamepad. A capture card lets you record it longer than 60 minutes.
Once you’ve all the clips you want on your PC, head over to https://filmora.wondershare.net/filmora-video-editor.html and download Filmora and install the software on your computer. This program allows you to edit your video clips and add cool effects that will make viewers keep watching.
3) Import You Videos to Media Library
You only have to import the videos to Filmora’s media library and then drag and drop them into the timeline, where you can start making the edits.
By right-clicking on the clip in your timeline, you’ll see the options to zoom, speed, change, split, or trim your videos. You can also add sound effects by going to the Audio Tab.
Import Videos
4) Choose Background Music for Your Montage
Music will help make your gaming montage engaging. Make sure you use a license-free track if you plan to post it on social media.
Using copyrighted music tracks and uploading the video on social media platforms can lead to video strikes. Luckily, Filmora has loads of non-copyrighted music tracks.
Navigate to Stock Media, where you’ll find non-copyrighted music on Pixabay, and choose the one you prefer.
Choose Background Music
5) Edit the Gaming Montage
With Filmora’s auto gaming montage maker, you can watch the video clip with the music you have selected. This tool will analyze beat points to change the video and effects.
Additionally, the tool can identify any bad parts in your video and delete them so that the video matches the music.
The Effects tab allows you to add multiple overlays and filters to your gaming montage video. Filmora has different categories of overlays that let you add emotions or personality to your montage. You can also use it to set the tone in your video.
Filters allow you to spice up your gaming videos. There are also different types of filters on Filmora.
Edit Gaming Montage
6) Export Your Gaming Montage Video
Once you have finished editing your video and added music, hit the Export button. Doing this will allow you to export your edited video and save it on your computer.
You can now enter your login details and upload your gaming montage video on your YouTube channel to share it with other players.
Useful Tips for Making a Gaming Montage
Making gaming montages can help you build a large online community if you do the right thing. When making a gaming montage, there are a few tips that you should keep in mind. They include:
1. Apply Velocity Effects
Adding velocity effects to your montage will help get the attention of viewers. You can couple the transition between scenes with a speed ramping effect.
Include slow motion where there is a gunshot or other big gaming moment. You can then speed up things to quickly move into another scene. You can create these velocity effects in Filmora and make it smooth.
2. Avoid Game Loading Scenes
Do not include game loading scenes or any unnecessary clips in the gaming montage. Your audience does not have the time to wait for the scenes to load because they want to see action fast.
3. Sync Gunshot with Music Beat
Try to match gunshot sounds with beats and rhythms in shooter video games. The beats of the music and the soothing sync of gunshots will catch viewers’ attention and your video will become popular among gamers.
4. Add Creative Transitions
You can spice up your gaming montage by adding transitions, especially when you have loads of clips for the montage. But avoid overusing it, as you could confuse your audience with a range of dazzling and glaring transitions.
5. Color Grade the Video for the Mood
Use color grading to your advantage, as it can set the mood of your viewers. You can decide to make some scenes black and white to catch the viewers’ attention.
6. Add Video Vignettes for Special Occasions
You can add dark edges around the corners of your video to highlight action or create a certain mood. For gameplay based on a story, use vignetting to add a sense of nostalgia or as a flashback that shows viewers the past.
You can use Filmora to apply the vignetting effect by heading to Advanced Color Tuning, then clicking the Vignette option. You can then add the vignette effect to the video. Additionally, you can adjust the vignette’s exposure, feather, roundness, size, and highlights.
Best Gaming Montage for Studying
Here are three gaming montages that are good for studying.
1. Call of Duty: Modern Warfare
Uploaded by DemixB, the Call of Duty Game Montage uses Jacques Offenbach’s Can Can Music track. It’s a happy song that has a tempo of 81 BPM. The track has average danceable energy, and it’s somewhat danceable.
DemixB set the gunshot in the montage video to the music tune. The track builds up to the climax when the gunshot echoes with the attention-grabbing orchestral explosions.
Call of Duty: Modern Warfare
2. ShutteR’s Gaming Montage
In the gaming montage uploaded by ShutteR on his YouTube channel, he used velocity effects to enhance the video. You’ll see that the transition in each scene is paired with adrenaline-pumping, speed-ramping effects.
ShutteR used a slow-motion to highlight action in each scene, then speeds up again when he wants to fast out into the next scene.; this makes the video more engaging to keep viewers glued to their screens.
ShutteR’s Gaming Montage
3. NEVERMORE [CS: GO]
NEVERMORE [CS: GO] was uploaded by Fuze on his YouTube channel, and it has creative gameplay. The gaming montage is based on a story. He did the project with Apel, an artist who designed the Fever Dream series skins in the video.
The basic idea of this gaming montage was that the main game character is a corrupted policeman with purple glowing eyes because he’s not human.
When the edits begin, the shape of the main character will shift from CS: GO CT models and turn into his real corrupt CT shape. So that’s why his name keeps changing. You can get his real identity by pausing some of the frames and looking at the “Killfeed.”
NEVERMORE [CS: GO]
Closing Thoughts:
Gaming montage involves picking and editing a range of video clips, which are brought together to create engaging video content. It consists of the best scenes from gameplay and non-copyrighted background music.
Use Filmora to edit and add effects to your video, including transitions and overlays. Your gaming montage will get more views, hence becoming popular among players.
Fun & Easy Masking Tricks: Wondershare Filmora Tutorial
Masking is a video effect that allows you to cut out a scene and use the overlay to duplicate, hide, modify, or reveal your video footage. Just think of it as cutting something on your video so you can see what’s in the bottom layer. So, without wasting time, let me show you how to mask a video in Wondershare Filmora . Let’s get started!
Free Download For Win 7 or later(64-bit)
Free Download For macOS 10.14 or later
Masking Trick 1:
First, you need to shoot footage to add the masking effect. To do that, find a doorway with enough space to walk back and forth before setting up a camera with a tripod facing the entrance. Make sure you set the camera at the center height of the door to prevent lens distortion.

With the tripod set up, film yourself walking behind the door toward the camera. Get close to the camera, then walk back to the door. Then, cross the doorway slowly before walking out of the frame. Now let’s get editing with Wondershare Filmora.

Step 1 Fire up Wondershare Filmora, then import the clip on the video editor. After that, move the clip to the timeline by merely dragging it. Add two clips on the first and second tracks.

Step 2 Now proceed to hide the first track before adding a freeze frame on the second track. To do that, move the playhead to find the starting scene with the door frame without your subject. Then, right-click the clip and tap Add Freeze Frame. After that, extend the freeze frame area and cut out the rest of the clip.

Step 3 Next, click the Effect button and find the Image Mask effect in the Utility folder. Now drag the effect to the top layer.

Step 4 Double-click the clip to open the video editing options, then choose a rectangle image mast under Video Effects. Ensure the mask is inverted by clicking the Invert Mask checkbox. Now adjust the mast to match the door frame before clicking Ok.

Step 5 Up to this point, unhide the first track, then find the scene where the subject appears on the door frame. On the first track, cut the clip before the subject appears on the stage before cutting the scene where the subject crosses the door frame for the second time on the second track. Now play the video to view your masking effect.

Masking Trick: 2
In the second masking effect, we want to create a subject walking in and outside a tree. To do that, find a tree with a clear background, then place your camera to film the center of the tree trunk where the subject will be walking.

Now film the subject walking from one side of the tree, stop for a second, and then turn back. They should repeat the same action, but this time they’ll walk forward outside the frame after the one-second stop. That’s all!

Step 1 Import the clip on Filmora, then add the footage on the first and second timelines. After that, hide the first track, then find the scene where the subject walks forward away from the tree in the second track. Cut off the area before that action.

Step 2 Next, click Effects, choose Utility, then drag the Image Mask effect on the second video track. Then, double-click the second clip, select Video Effects, and choose a rectangular option that masks the right side of the frame.
Now adjust the mask until it covers the entire right side of the tree. After that, unhide the first clip and move the second to match the first clip’s timing. You can also cut out everything outside the scene of the first clip.

Step 3 Play the video to see your subject walking in both directions of the tree.

Masking Trick 3:
For this masking illusion, we’ll create a video with a subject jumping over a house. So, set up your camera tripod on a low level in front of the building. You can also add a mark on the ground for your subject to know where to jump.

Now tell your subject to walk to the marker before jumping and walking out of the scene.

Step 1 Import the clip into Filmora and add it to the first and second tracks. Now hide the first track before finding the scene without the subject in the second track and add a freeze frame. After that, extend the freeze frame area and cut out the rest of the clip.

Step 2 Now, it’s time to customize the clip with a mask. To do that, head to the Utility folder under Effects and choose Image Mask. Click the Invert Mask box to invert the mask.

Step 3 Double-click the video track and choose an image mask under Video Effects. Note that you may need several combinations of masks to mask out the sky and leave the building. So, play around with different masking shapes until the sky is covered.

Step 4 After masking, unhide the first track on the timeline before playing the video to find the scene where the subject appears and cut off everything before that scene. Also, find the scene where the subject jumps in the air and cut the clip in the second track. Then, delete everything after that scene.

Step 5 Play the video to see your subject jumping over the building and walking away from the scene.

Conclusion
That was easy, right? Playing around with Filmora’s masking tools can create incredible masking illusions like the ones we’ve discussed. And don’t forget this video editor has many more creative possibilities. You should try these masking tricks!
Free Download For macOS 10.14 or later
Masking Trick 1:
First, you need to shoot footage to add the masking effect. To do that, find a doorway with enough space to walk back and forth before setting up a camera with a tripod facing the entrance. Make sure you set the camera at the center height of the door to prevent lens distortion.
With the tripod set up, film yourself walking behind the door toward the camera. Get close to the camera, then walk back to the door. Then, cross the doorway slowly before walking out of the frame. Now let’s get editing with Wondershare Filmora.
Step 1 Fire up Wondershare Filmora, then import the clip on the video editor. After that, move the clip to the timeline by merely dragging it. Add two clips on the first and second tracks.
Step 2 Now proceed to hide the first track before adding a freeze frame on the second track. To do that, move the playhead to find the starting scene with the door frame without your subject. Then, right-click the clip and tap Add Freeze Frame. After that, extend the freeze frame area and cut out the rest of the clip.
Step 3 Next, click the Effect button and find the Image Mask effect in the Utility folder. Now drag the effect to the top layer.
Step 4 Double-click the clip to open the video editing options, then choose a rectangle image mast under Video Effects. Ensure the mask is inverted by clicking the Invert Mask checkbox. Now adjust the mast to match the door frame before clicking Ok.
Step 5 Up to this point, unhide the first track, then find the scene where the subject appears on the door frame. On the first track, cut the clip before the subject appears on the stage before cutting the scene where the subject crosses the door frame for the second time on the second track. Now play the video to view your masking effect.
Masking Trick: 2
In the second masking effect, we want to create a subject walking in and outside a tree. To do that, find a tree with a clear background, then place your camera to film the center of the tree trunk where the subject will be walking.
Now film the subject walking from one side of the tree, stop for a second, and then turn back. They should repeat the same action, but this time they’ll walk forward outside the frame after the one-second stop. That’s all!
Step 1 Import the clip on Filmora, then add the footage on the first and second timelines. After that, hide the first track, then find the scene where the subject walks forward away from the tree in the second track. Cut off the area before that action.
Step 2 Next, click Effects, choose Utility, then drag the Image Mask effect on the second video track. Then, double-click the second clip, select Video Effects, and choose a rectangular option that masks the right side of the frame.
Now adjust the mask until it covers the entire right side of the tree. After that, unhide the first clip and move the second to match the first clip’s timing. You can also cut out everything outside the scene of the first clip.
Step 3 Play the video to see your subject walking in both directions of the tree.
Masking Trick 3:
For this masking illusion, we’ll create a video with a subject jumping over a house. So, set up your camera tripod on a low level in front of the building. You can also add a mark on the ground for your subject to know where to jump.
Now tell your subject to walk to the marker before jumping and walking out of the scene.
Step 1 Import the clip into Filmora and add it to the first and second tracks. Now hide the first track before finding the scene without the subject in the second track and add a freeze frame. After that, extend the freeze frame area and cut out the rest of the clip.
Step 2 Now, it’s time to customize the clip with a mask. To do that, head to the Utility folder under Effects and choose Image Mask. Click the Invert Mask box to invert the mask.
Step 3 Double-click the video track and choose an image mask under Video Effects. Note that you may need several combinations of masks to mask out the sky and leave the building. So, play around with different masking shapes until the sky is covered.
Step 4 After masking, unhide the first track on the timeline before playing the video to find the scene where the subject appears and cut off everything before that scene. Also, find the scene where the subject jumps in the air and cut the clip in the second track. Then, delete everything after that scene.
Step 5 Play the video to see your subject jumping over the building and walking away from the scene.
Conclusion
That was easy, right? Playing around with Filmora’s masking tools can create incredible masking illusions like the ones we’ve discussed. And don’t forget this video editor has many more creative possibilities. You should try these masking tricks!
3 Ways to Make Time-Lapse Video on MacBook
The process of time-lapse speeds up the passage of time so that events seem to be happening faster. A time-lapse video is to create photos at regular intervals and assemble them into the video to record changes that would be slow for the human eye to see. Time-Lapse video shows the technique of slow-motion videos using the same principle.
Time-lapse is usually for several purposes but mostly it is utilized to show the passage of time in a fast-forward format. time-lapse means that the camera takes the picture and then combined them into one video that seems to something happen in quickly. The lapse is set into video form in post-production, so movie mode is not necessary. Once the lapse is finished, it’s time to take it into post-production to bring it to life.
Part 1. Use QuickTime Player to Create Timelapse Video
QuickTime player creates a high-resolution video file from the series of photos without having to render the photos twice. The result of QuickTime is a much higher quality result. With this toolkit, after the recording is done, the illusion of fast-moving footage i-e time-lapse is to be created. QuickTime will always ask you what frame rate would you like to video in.
Steps to Create Timelapse Video with QuickTime Player:
To produce a timelapse movie using QuickTime Player, follow these steps:
Step 1: Launch the Recording
By selecting the File * New Screen Recording option in QuickTime, you may record your screen. After choosing the region to record, your screen will start to be recorded. Real-time video will be captured, and it will be archived.

Step 2: Import the Files
Go to the file > Open Image Sequence menu after starting QuickTime. One of the video files you want to turn into a time-lapse should be opened in QuickTime Player. “Open File.” may be found by clicking the File menu link in the menu bar.
Step 3: Create the Timelapse
Within QuickTime, the series of images will be turned into time-lapse films. Choose one picture from the series, and then change the settings as necessary. Use the Higher Quality Apple Pro Resolution video codec, Actual size resolution, and 25 frames per second.

Step 4: Export Your Video
Finally, you may access the Speed option by selecting Tools>Edit from the top menu’s Imported section. At the conclusion, this will produce your time-lapse, and then choose Save under File. This will open a window where you can choose the codec you want to export it in.

Part 2. Create Timelapse Video with iMovie
To make an iMovie time-lapse on Mac, you have to capture the video and create a time-lapse out of it. For a multiple-hour recording in a few seconds to be fit, you will need software of time-lapse. Timelapse is utilized for accelerated or slow-motion videos with changes in the frame rate and playback videos in speed. The time-lapse software is available to handle the tasks without sacrificing the quality, size, and format of the video.
Steps To Create Timelapse Video with iMovie
Step 1: Launch iMovie
On your Mac, launch the iMovie application, and then import the video clip from the library that you wish to use to create a time-lapse. Drag the video to the timeline. Then you may see additional frames in the timeline by clicking the setting bar below.

Step 2: Import videos and adjust
By clicking the icon that resembles a camera below the Viewer panel, drag images into the project library. Drag the desired images to the Project Library. By choosing File and then selecting Project Properties, you may modify the default settings. Set the first picture location to Fit Frame and the transition length to 1 second.

Step 3: Modify the Clips’ Speed
Select it if you wish to alter the clip’s pace. On the preview window’s top toolbar, tap the clock symbol. You may pick “8x” for the default frame rate or “20x” for “Speed” > “Fast.” In iMovie, the minimum time is 0.1 seconds or around 10 frames. As a result, you must first export the time-lapse sequence before speeding up the clip.

Step 4: Share the Video
Using the Share option at the bottom, you can then save, export, or share your slowed-down time-lapse film. Refer to the “Share” option to decide whether to store or immediately share the iMovie time-lapse.

Part 3. Turn Video into Timelapse with Filmora
Time-Lapse videos can be easily created using Wondershare Filmora which is a very powerful video editing tool . The speed change feature of Filmora works well for time-lapse video editing. Filmora software can be used on both Windows and Mac platforms, it contains the features of a wide range of video effects with filters. it allows you to produce and create amazing video creations from images or video clips.
Filmora is packed with a plethora of editing features that will make your time lapses more appalling. The color tuning feature can be used to adjust the white balance and dynamic range of the video clips. The advanced text editor allows you to edit the size, font, color, and even the animation of text. The feature of video stabilization eliminates the effects of the camera shake. All in all, you can have an all-in-one editor to create your timelapse handily.
Wondershare Filmora Best Way to Make Timelapse Video on Computer.
Free Download Free Download Learn More

![]()
Steps to Create a Timelapse Video with Filmora:
Step 1: Launch Filmora Editor
Download the program and launch Filmora in full feature mode. Drag and drop the video clip into the application after selecting the Import option from the software’s menu. Drag the imported video clip to the timeline below, as seen in the figure above.

Free Download For Win 7 or later(64-bit)
Free Download For macOS 10.14 or later
Step 2: Setup the Footage Speed
To adjust the speed, drag the video clip into the timeline by clicking twice, and then slide the speed tool to the desired speed for your time-lapse. The speed is changed to be 100 times faster.

Step 3: Render the Timelapse
The Render Timeline button is recognized by the window’s preview when you click it to guarantee the speed changes your clip has to be adjusted to. You would take off the audio that was in the original video. Utilizing the image’s visible volume tool button, change the volume and then render it again by hitting the render icon as shown here:
Step 4: Edit the Video
To change the perspective of the video to wherever you want it, click right on the video clip on the timeline and choose Crop & Zoom, followed by Pan & Zoom. Additionally, you may add text using the text and title tool that is already built-in, add music using royalty-free music files or apply filters and other features.

Step 5: Share your Timelapse
As you can see, you can drag and drop the pre-built templates from the library onto the timeline. Next, click the Export button at the top to start exporting. The Filmora’s features include support for 4K editing, GIF compatibility, noise reduction, color tuning, a sophisticated text editor, an audio mixer, video stabilization, scene identification, and audio equalization.
Conclusion
Time-lapse is the video editing technique in that the speed is lower and the frequency of video and picture. A time-lapse software, Filmora is a video editor that lets you create a smooth time-lapse where time appears to be passing quickly. This app is very helpful to create the video on time-lapse, making the appearance in the series of quick succession about a long term or period to denote something that happens over a long period.
Free Download Free Download Learn More
![]()
Steps to Create a Timelapse Video with Filmora:
Step 1: Launch Filmora Editor
Download the program and launch Filmora in full feature mode. Drag and drop the video clip into the application after selecting the Import option from the software’s menu. Drag the imported video clip to the timeline below, as seen in the figure above.
Free Download For Win 7 or later(64-bit)
Free Download For macOS 10.14 or later
Step 2: Setup the Footage Speed
To adjust the speed, drag the video clip into the timeline by clicking twice, and then slide the speed tool to the desired speed for your time-lapse. The speed is changed to be 100 times faster.
Step 3: Render the Timelapse
The Render Timeline button is recognized by the window’s preview when you click it to guarantee the speed changes your clip has to be adjusted to. You would take off the audio that was in the original video. Utilizing the image’s visible volume tool button, change the volume and then render it again by hitting the render icon as shown here:
Step 4: Edit the Video
To change the perspective of the video to wherever you want it, click right on the video clip on the timeline and choose Crop & Zoom, followed by Pan & Zoom. Additionally, you may add text using the text and title tool that is already built-in, add music using royalty-free music files or apply filters and other features.
Step 5: Share your Timelapse
As you can see, you can drag and drop the pre-built templates from the library onto the timeline. Next, click the Export button at the top to start exporting. The Filmora’s features include support for 4K editing, GIF compatibility, noise reduction, color tuning, a sophisticated text editor, an audio mixer, video stabilization, scene identification, and audio equalization.
Conclusion
Time-lapse is the video editing technique in that the speed is lower and the frequency of video and picture. A time-lapse software, Filmora is a video editor that lets you create a smooth time-lapse where time appears to be passing quickly. This app is very helpful to create the video on time-lapse, making the appearance in the series of quick succession about a long term or period to denote something that happens over a long period.
Best Video Editors to Add Text to a Video
While it can be very easy to add text to an image, the same cannot be said when it comes to adding even the simplest text to a video. You will need video editing software that is designed with the necessary features to help you add text to your video.
There are very many programs in the market that can technically be used to add text to a video. But the ones we will look at are video editors that make the process easy, but also give you a wide range of options to customize your text in numerous ways.
Filmora
Filmora by Wondershare is one of the best video editors in the market. Its user interface is so easy to use that adding text to the video is a simple 3-step process. Aside from adding text to the video, Filmora also allows you to edit other aspects of the video including adding transitions, overlays, and animations to any section of the video.

Key Features:
- You can use Filmora to add text to any section of the video
- It gives you the freedom to move the text to any section of the video
- Customizing the text, you add to the video can be done in numerous ways including changing the color, and font and adding animations to the text.
- It offers numerous templates to choose from and different font styles that you can use
- It has a simple user interface that makes the video editing process very easy
- It has numerous other video editing capabilities that allow you to create and edit videos in different ways including splitting videos, trimming videos, and even merging videos clips into one
- You can upload the videos directly to YouTube after editing.
After Effects
Adobe After Effects is a motion picture editing program that you can also use to add text and other animations to your video. While you can use it to add simple text to the video, it is an ideal solution when your goal is to add advanced text animations. It is however by no means a simple solution, especially for beginners who may find it hard to get going with After Effects.

Key Features:
- You can add simple lines of text to any section of the video
- Text is easily customizable by changing the color, font, and size of the text
- You can also choose to change the entire text layer and add advanced animations and effects
- There are a lot of text, animations, and effects templates to choose from
- You can easily copy text from other Adobe applications to use in After Effects
Movavi Editor
Movavi video editor is another great video editor that you can use to add and edit text on a video. Like most similar tools it is designed to simplify the process, allowing you to add text to any section of the document, move the text to any location on the video and even add text effects to customize the text. It has a very simple user interface that allows you to do that quickly and easily.

Key Features:
- You can add text to any section of the video
- Customizing the text by changing the font, color and size is also very easy
- The user interface is very easy to use, allowing you to add even blocks of text very quickly
- You also have additional options to edit the video including splitting and merging the video or adjusting the brightness, saturation, and color.
iMovie
This is a built-in video editor that you will find on macOS and iOS devices. Even though it is free, iMovie has a lot of features that come in handy when you want to add and edit text on a video. The fact that it can be used on iOS devices is an added advantage when you want to edit videos on the go.

Key Features:
- It allows users to add transitions and effects to the text you add to the video
- It comes with a lot of title templates to choose from
- Adding animated text is also very simple including Sideways Drift, Lens Flare, and more
- You can customize the text in very many ways including adding fonts, drop shadows, changing the color, and even resizing or repositioning the text.
Camtasia
TechSmith Camtasia is one of the most popular tools to create and edit videos. Of the numerous features that you get when you choose to use Camtasia is adding and editing text to the video. It has numerous templates that can be used to customize the text you add in various ways.

Key Features:
- It gives you numerous options to add text to the images including text boxes, templates, and effects
- It has a speech-to-text feature that is perfect for adding captions and subtitles to the video
- You can easily customize the text by adding transitions and effects or even by simply changing the font, color, and size of the text
- The text can be moved to any section of the video
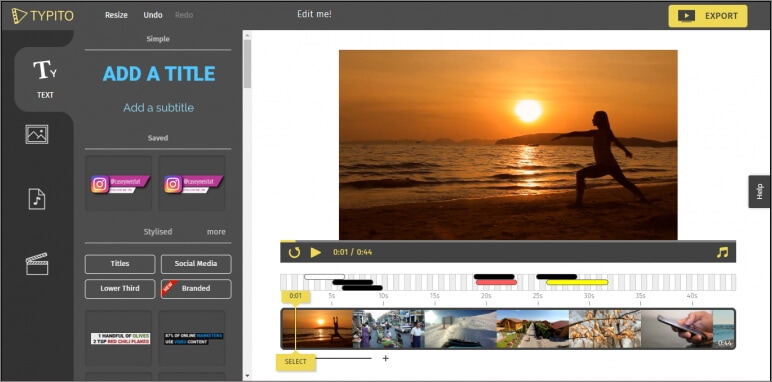
Typito
Typito is an online video editor with simple tools that can help you make changes to any video. designed to help YouTube content creators and video editors, Typito can be used to add all kinds of text and text effects to any video. It is accessible on all browsers and it is also very easy to use.
Key Features:
- It is very easy to use, allowing you to add text to any video in a few simple steps
- It has numerous templates to choose from
- Changing the font size, color, and style of the text is very easy
- You can publish videos directly to numerous video-sharing sites after editing
- It allows users to add animations, transitions, and effects to the text
Splice
Splice is an iOS app designed to help you add text to videos on iOS devices. Adding text to any video using Splice can be easily done using the overlay feature. It also has numerous other video editing features including allowing you to easily synchronize your videos and music, adding filters and transitions, and more.

Key Features:
- it has a simple user interface that makes adding text very easy
- You can customize the text in various ways including changing the font size, color and style or even adding various text effects
- Videos can be saved on the device or shared directly on social media apps like Facebook, Instagram, and YouTube
- It has numerous other video editing features including filters and animations
Clipomatic
If the text you want to add to the video is in the form of captions or subtitles, then Clipomatic is perhaps the best choice. It supports various languages including German, French, Portuguese, and even Chinese. You can also use it to add regular text to any video, reposition the text on any section of the video and customize the text in various ways.

Key Features:
- It is available for both Android and iOS
- Adding text to the video is very easy
- You can easily customize the text by changing the font color, and size and adding transitions and text effects
- It supports various languages, making it ideal for captions and subtitles
MySubtitle
MySubtitle is a simple but highly effective app that you can use to add text to your video. As the name suggests, this tool is ideal for adding subtitles and you can do that very easily by simply typing in the text and syncing the text to the video’s content.

Key Features:
- It is available for both iOS and Android devices
- You can type in your subtitles directly on the video
- Subtitles can then be paced to suit the video’s playback speed
- It is completely free to use
- You can share the videos you edit directly on various social media platforms
Free Download For Win 7 or later(64-bit)
Free Download For macOS 10.14 or later
Free Download For macOS 10.14 or later
Also read:
- New Top 10 3D Slideshow Software Review
- New 3 Different Methods to Correct Color Distortion in Videos
- Guide Cropping and Combining Content in Wondershare Filmora Latest
- How to Trim/Crop Video in Microsoft Powerpoint for 2024
- Make A Countdown Video for 2024
- There Are Many Vlogging Cameras You Can Find in the Market. However, to Get a Good Start in Vlogging, some Sony Vlogging Cameras and Canon Vlog Cameras Are to Consider. This Article Introduces You to the Respective List for 2024
- New Ways to Learn Discord Game Bots – Even if Youre Just Starting Out for 2024
- New Slow-Motion Edits Are Pretty Mesmerizing, and Weve All Imagined Ourselves in One of Those Visually Appealing, Slowed-Down Movies. Well Teach You How to Make a Smooth Slo-Mo Video Using Twixtor in This Article. Stay Tuned Until the End
- New What Anime Character Are You Look Like?
- Updated Are You a Gaming YouTuber or Content Creator Whose Main Game Is COD Warzone? How Kickass Are Your Warzone Thumbnails? Heres a Guide on How to Make One for Free
- Updated 2024 Top Free Vintage LUTs to Use
- In 2024, How To Create A Green Screen Video In After Effects
- New How to Put Emoji on Mac That Take Less Than 10 Mins for 2024
- Updated 2024 Approved Best 8 Online GIF to APNG Converters
- New In 2024, Top 18 Video Editors for PC and Mac
- How to Create One Click Video Reverse Effect in Filmora for 2024
- New How to Add Green Screen in OBS for 2024
- New How to Add Text Animation Online for 2024
- New How to Add Text to Video for 2024
- Updated In 2024, Detailed Guide to Crop Videos in Sony Vegas Pro
- LUTs Can Make Ordinary-Looking Footage Look More Attractive. Read This Guide to Learn How You Can Easily Create Your Own LUTs Using Filmora for 2024
- New 2024 Approved Ideas for Time-Lapse Video
- Updated 2024 Approved Best GIF to Video Converters
- Bandicut Video Editor Download and Review
- In 2024, Whatre the Best Alternatives to Pexels?
- In 2024, This Article Talks in Detail About How to Download Windows Movie Maker 2012 Version, the Key Features, How to Use It, Etc. It Further Discusses an Alternative Way to Create Videos on Windows PC. Check Out
- New In 2024, Best Voice Changers for WhatsApp Free Included
- Updated In 2024, An Ultimate Guide to Flexclip Online Trimmer
- 2024 Approved Despite the Aforementioned Restrictions, Cartoon Video Makers Still Offer a Sea of Possibilities to Their Users, so Lets Dive Into the Magical World of Animated Videos
- 2024 Approved It Is Easy to Separate the Audio From the Video in DaVinci Resolve. But, to Avail of This Feature, You Need to Follow Proper Steps, and This Article Is All About It
- 2024 Approved Deep Learning of AI Video Recognition
- In 2024, Easy Guide to Overlay Videos in Premiere Pro
- In 2024, Recommended Video Background Changers
- Life360 Learn How Everything Works On Infinix Note 30i | Dr.fone
- How to get the dragon scale and evolution-enabled pokemon On Oppo Reno 10 5G? | Dr.fone
- How To Transfer Data From Apple iPhone XR To Other iPhone 15 Pro devices? | Dr.fone
- How to Downgrade iPhone 7 Plus to the Previous iOS/iPadOS Version? | Dr.fone
- In 2024, How to Cast Realme C67 4G Screen to PC Using WiFi | Dr.fone
- 5 Easy Ways to Change Location on YouTube TV On Honor X7b | Dr.fone
- Ultimate Guide on Infinix Smart 8 HD FRP Bypass
- Ways To Find Unlocking Codes For Oppo Reno 11 5G Phones
- 3 Effective Ways to Bypass Activation Lock from Apple iPhone XR
- Ways to stop parent tracking your Vivo Y100t | Dr.fone
- How to Fix It Oppo Find N3 Wont Turn On | Dr.fone
- In 2024, Ultimate guide to get the meltan box pokemon go For Samsung Galaxy A05s | Dr.fone
- In 2024, Here Are Some Reliable Ways to Get Pokemon Go Friend Codes For Xiaomi Redmi Note 12 Pro 4G | Dr.fone
- In 2024, How to Lock Apps on Samsung Galaxy S23+ to Protect Your Individual Information
- updated 2024 Approved Ultimate Guide to Translating YouTube Videos Without CC
- All Must-Knows to Use Fake GPS GO Location Spoofer On Infinix Note 30 VIP | Dr.fone
- In 2024, How Can I Catch the Regional Pokémon without Traveling On Honor Magic 5 Lite | Dr.fone
- How To Upgrade or Downgrade iPhone 7? | Dr.fone
- Does find my friends work on Honor X7b | Dr.fone
- Which is the Best Fake GPS Joystick App On Vivo V29e? | Dr.fone
- Two Ways to Track My Boyfriends Samsung Galaxy M54 5G without Him Knowing | Dr.fone
- Title: Learn How to Make a Gaming Montage - Guide & Tips
- Author: Chloe
- Created at : 2024-05-20 03:37:30
- Updated at : 2024-05-21 03:37:30
- Link: https://ai-editing-video.techidaily.com/learn-how-to-make-a-gaming-montage-guide-and-tips/
- License: This work is licensed under CC BY-NC-SA 4.0.
