:max_bytes(150000):strip_icc():format(webp)/GettyImages-1342255561-483b636ee00f40a1b3d91d1969b1aaf6.jpg)
Learn to Create Custom Sequence Presets in Premiere Pro for Efficient Video Editing. Ensure Consistency and Speed up Your Workflow with Personalized Settings

Learn to Create Custom Sequence Presets in Premiere Pro for Efficient Video Editing. Ensure Consistency and Speed up Your Workflow with Personalized Settings
You’ve probably heard of Adobe Premiere Pro – it’s a top-tier video editing software that’s widely recognized in the market. But have you delved into the nitty-gritty of sequence presets? A custom sequence preset is your best friend for maintaining consistency across projects.
It allows users to save specific settings for sequence attributes like frame rate, resolution, and audio settings. Instead of reconfiguring these settings for each new project, a custom sequence preset lets you jump right into editing. Now, how do you create one? Keep reading!
Part 1: How to Create a Custom Sequence in Premiere Pro
Creating a custom sequence is like tailoring a shirt to fit you perfectly. Here’s a step-by-step guide to help you do just that:
Step 1: Displays the New Sequence Window
Begin by launching Adobe Premiere Pro. Once opened, navigate to the top menu and select File > New > Sequence. This will open up the New Sequence window, where all the magic happens!
Step 2: Change the Editing Mode to Custom in the Settings Panel
You’ll see several tabs in the New Sequence window, but we will focus on the “Settings” tab for our purposes. Click on it.
Here, you’ll find the ‘Editing Mode’ dropdown menu. By default, it’s set to a specific format like ‘DSLR’ or ‘AVCHD.’ Change this to ‘Custom.’ This will unlock a plethora of options for you to play with.
Deep Dive into Settings:
- Frame Size: Define your video’s width and height. Remember, 1920x1080 is Full HD, and 3840x2160 is 4K. Choose based on your project needs.
- Frame Rate: 24fps is the cinematic standard, but if you’re creating content for TV or web, 30fps or 60fps might be more suitable.
- Pixel Aspect Ratio: Stick with ‘Square Pixels’ unless you have a specific reason to do otherwise.
- Fields: Choose ‘No Fields’ for progressive footage. If you’re unsure, this is a safe bet.
- Audio Settings: Here, you can configure the sample rate, among other things. 48000Hz is standard for video.
Step 3: Give the New Preset a Name and Save It
Once you’ve customized the settings to your satisfaction, it’s time to save this configuration for future use. At the bottom of the New Sequence window, you’ll see a ‘Save Preset’ button. Click on it.
A pop-up window will show up, requesting you to provide a name for your new preset. Choose something descriptive so you can easily recognize it later. Once named, click ‘OK’.
Your custom sequence preset is now saved and will appear under the ‘Custom’ folder in the ‘Sequence Presets’ tab.
Part 2: Why Custom Sequence Presets are Essential for Efficient Editing
As you delve deeper into video editing, you’ll begin to appreciate the little things that shave off minutes from your workflow, allowing you to dedicate more time to the creative process. This is precisely where the utility of custom sequence presets in Premiere Pro comes into play. But why are these presets so crucial?
- Consistency Across Projects: If you’re managing multiple projects or a series of videos, having a standard format ensures that all your content has a uniform look and feel. Consistency is a hallmark of professional-grade content. It’s not just about the visuals – maintaining a uniform audio quality and format is equally significant. With a preset, you no longer need to remember the minutiae of each setting, ensuring consistency effortlessly.
- Speed Up Your Workflow: Every minute you spend adjusting the sequence settings is a minute less you have for cutting, color correcting, audio mixing, or adding those special effects that make your videos pop. Over time, those minutes can add up to hours. By using a custom sequence preset, you can jump straight into the creative part of editing without the preliminary setup.
- Avoid Common Mistakes: Have you ever rendered an entire project only to find that the frame rate was off or the audio was set to the wrong sample rate? These kinds of errors can occur when setting up a new sequence from scratch each time. By relying on a preset, you mitigate the risks of such oversights.
- Personalized Templates for Different Platforms: Different platforms may have varying preferred settings. For instance, the ideal video format for YouTube might differ from that of Instagram or TikTok. Instead of Googling these settings each time, you can have a custom sequence preset ready for each platform, ensuring your content is optimized wherever it’s destined.
- Ease of Collaboration: If you’re working as part of a team, having standard sequence presets ensures everyone is on the same page. This is particularly handy when multiple editors are working on different segments of the same project. With custom presets, you’re not just aligning sequences but also visions.
Incorporating this practice into your editing routine might initially seem trivial, but its benefits compound with time.
Part 3: Summary
Creating a custom sequence preset in Adobe Premiere Pro isn’t just about streamlining your workflow – it’s about ensuring consistency across your projects.
By saving your most-used settings, you’re creating a base template that can be pulled up any time, granting you more time for the creative process.
Adobe Premiere Pro’s interface is designed to make tasks like these intuitive, so even if you’re a beginner, with a bit of practice, you’ll be creating custom sequence presets like a pro.
What Are the Top 15 Slideshow Presentation Examples Your Audience Will
What’s the Best 15 Slideshow Presentation Examples Your Audience Will Love
An easy yet powerful editor
Numerous effects to choose from
Detailed tutorials provided by the official channel
No matter what type of industry or business you are in, slideshow presentations have become an important tool for several tasks like showcasing your products, and services, engaging with the clients and prospective buyers, changing their perceptions, leading to sales, and much more. Great presentations are a combination of style, content, effects, text, media files, and much more. There are several tools and software available these days that can help you create a slideshow presentation of your choice.
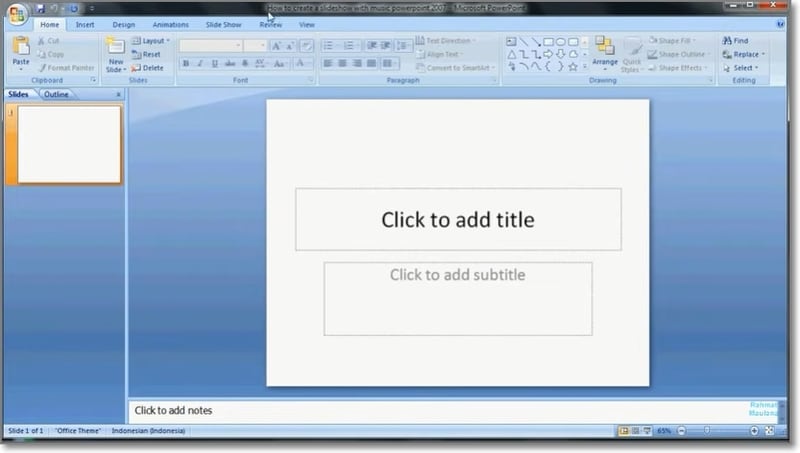
More in detail about these presentations, best powerpoint slideshow examples, and more are discussed in the following parts of the topic.
In this article
01 [Tips for creating an impressive slideshow presentation](#Part 1)
02 [Best 15 slideshow presentation examples](#Part 2)
03 [The best tool to edit your videos for slideshow presentations- Wondershare Filmora](#Part 3)
Part 1 Tips For Creating An Impressive Slideshow Presentation
To create a unique and engaging slideshow presentation, we have shortlisted some tips that will surely work. Check them as below.
● Have a theme
First of all, have a theme for a slideshow based on which the other elements can be selected. The theme or the story you want to portray can be based on the target audience and the purpose of creating a slideshow. For instance, if you want to generate sales from your products, create a slideshow that shows the benefits of your products and compares them with others in the same category.
● Keep it simple
The real purpose of a slideshow presentation is to convey your data or message in a simple manner that can be easily related. Since the slides move one after the other in a slideshow, they should be created in a manner so that the viewer can quickly understand them.
● Keep minimum text
Though text can be included in a slideshow, keep them to a minimum. A slideshow is a creative presentation having pictures, videos, graphs, and several other elements. So, keep the text whenever necessary and don’t include too much-written content. Moreover, a viewer can relate to and recall the product, brand, or service more through a message rather than a text.
● Include compelling visuals
Include relevant visuals like videos and images into your slideshow. Make sure that the files are in high resolution and clear and support the theme or the message you are trying to convey through the presentation.
● Add effects, filters, overlays, and other elements
Instead of adding the raw image and video footage, edit and customize them to make them more interesting and engaging. There are several professional video editing tools like Wondershare Filmora and others that can help you add effects, transitions, overlays, filters, and customize files as needed. Additional elements like graphs, charts, and more can also be added to the presentation.
● Use Templates
Templates are ready-made design that helps you create a slideshow presentation quickly and easily. The templates in a variety of designs in different categories are available for you to choose the most suitable one. You can check the collection of templates from various online sites and tools.
Part 2 Best 15 Slideshow Presentation Examples
A wide range of presentations in different categories is created by people. To help you check what a unique and engaging presentation looks like, below listed are the top slideshow examples.
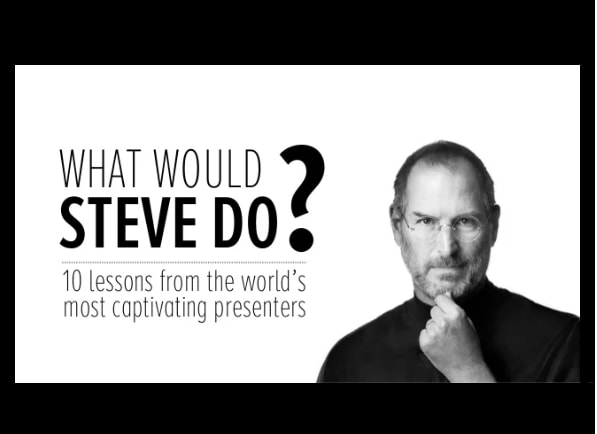
What would Steve Do? 10 Lessons from the World’s most captivating presenters by HubSpot
Powerful Body Language Tips for your next presentation

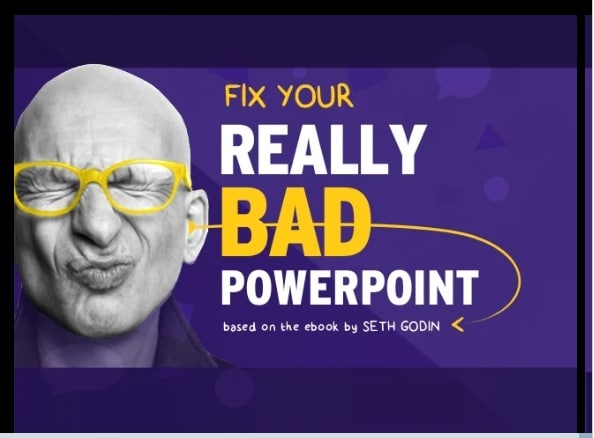
Fix your bad PowerPoint by Seth Godin
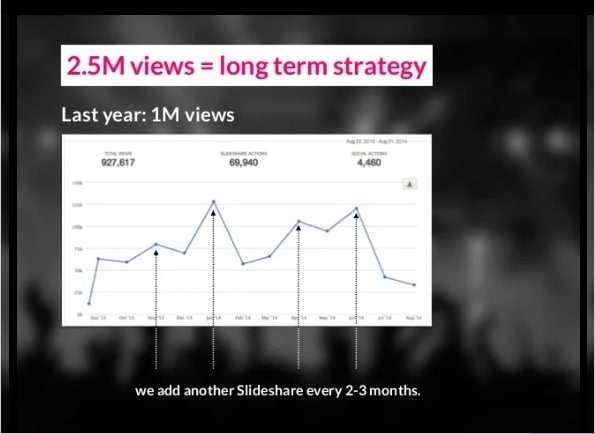
How I got 2.5 million views on SlideShare by Nick Demey
Killer ways to design the same slide
How to Produce Better Content Ideas by Mark Johnstone
How Google Works by Eric Schmid

Why Content Marketing Fails by Rand Fishkin

Digital Strategy 101 By Bud Caddell
The History of SEO by HubSpot

How to really get into marketing by Inbound.org

Search for meaning in B2B Marketing by Velocity Partners

The What If techniques by Motivate Design
Ways to Win the Internets by Upworthy

Crap: The Content Marketing Deluge by Velocity Partners

Part 3 The Best Tool To Edit Your Videos For Slideshow Presentations - Wondershare Filmora
As discussed in the above parts of the article, images and videos play a very crucial role in creating an impressive slideshow presentation. To further make these media files bright, clear, and relevant to your theme editing and customization can be done for this task, several software and programs are available. One such excellent tool is Wondershare Filmora Video Editor which works as a complete video editing software with advanced features.
Your files can be edited like a professional and that too in a hassle-free manner using the program. Some of the key editing features of the software include cropping, cutting, adding effects, transitions, overlays, green screen, split screen, AI portrait, masking, and more.
For Win 7 or later (64-bit)
For macOS 10.12 or later
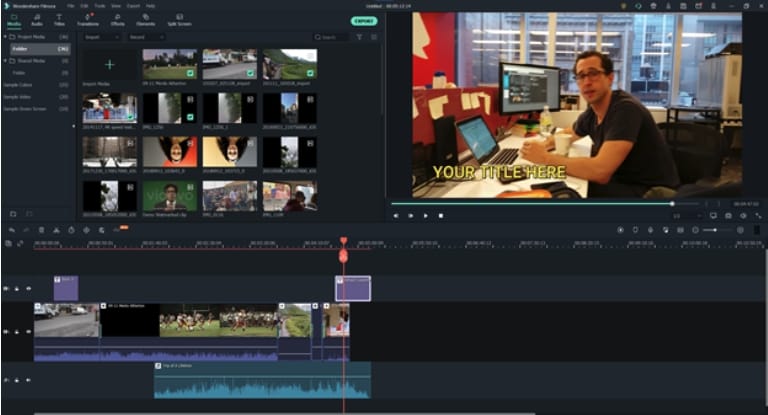
Additionally, the tool also supports making a slideshow with music files and also has a built-in media library. Templates in different categories are also present.
● Ending Thoughts →
● Slideshow presentations are used for creating awareness about products and services, sending a message, presenting data, and several other tasks.
● To create a slideshow, several factors like media files, theme, colors, text, effects and other factors have to be considered.
● Several popular great slideshow presentation examples can be referred to as what a unique presentation looks like.
● Wondershare Filmora is an excellent tool for editing slideshow videos and also for creating a slideshow.
No matter what type of industry or business you are in, slideshow presentations have become an important tool for several tasks like showcasing your products, and services, engaging with the clients and prospective buyers, changing their perceptions, leading to sales, and much more. Great presentations are a combination of style, content, effects, text, media files, and much more. There are several tools and software available these days that can help you create a slideshow presentation of your choice.

More in detail about these presentations, best powerpoint slideshow examples, and more are discussed in the following parts of the topic.
In this article
01 [Tips for creating an impressive slideshow presentation](#Part 1)
02 [Best 15 slideshow presentation examples](#Part 2)
03 [The best tool to edit your videos for slideshow presentations- Wondershare Filmora](#Part 3)
Part 1 Tips For Creating An Impressive Slideshow Presentation
To create a unique and engaging slideshow presentation, we have shortlisted some tips that will surely work. Check them as below.
● Have a theme
First of all, have a theme for a slideshow based on which the other elements can be selected. The theme or the story you want to portray can be based on the target audience and the purpose of creating a slideshow. For instance, if you want to generate sales from your products, create a slideshow that shows the benefits of your products and compares them with others in the same category.
● Keep it simple
The real purpose of a slideshow presentation is to convey your data or message in a simple manner that can be easily related. Since the slides move one after the other in a slideshow, they should be created in a manner so that the viewer can quickly understand them.
● Keep minimum text
Though text can be included in a slideshow, keep them to a minimum. A slideshow is a creative presentation having pictures, videos, graphs, and several other elements. So, keep the text whenever necessary and don’t include too much-written content. Moreover, a viewer can relate to and recall the product, brand, or service more through a message rather than a text.
● Include compelling visuals
Include relevant visuals like videos and images into your slideshow. Make sure that the files are in high resolution and clear and support the theme or the message you are trying to convey through the presentation.
● Add effects, filters, overlays, and other elements
Instead of adding the raw image and video footage, edit and customize them to make them more interesting and engaging. There are several professional video editing tools like Wondershare Filmora and others that can help you add effects, transitions, overlays, filters, and customize files as needed. Additional elements like graphs, charts, and more can also be added to the presentation.
● Use Templates
Templates are ready-made design that helps you create a slideshow presentation quickly and easily. The templates in a variety of designs in different categories are available for you to choose the most suitable one. You can check the collection of templates from various online sites and tools.
Part 2 Best 15 Slideshow Presentation Examples
A wide range of presentations in different categories is created by people. To help you check what a unique and engaging presentation looks like, below listed are the top slideshow examples.
What would Steve Do? 10 Lessons from the World’s most captivating presenters by HubSpot

Powerful Body Language Tips for your next presentation

Fix your bad PowerPoint by Seth Godin

How I got 2.5 million views on SlideShare by Nick Demey

Killer ways to design the same slide

How to Produce Better Content Ideas by Mark Johnstone

How Google Works by Eric Schmid

Why Content Marketing Fails by Rand Fishkin

Digital Strategy 101 By Bud Caddell

The History of SEO by HubSpot

How to really get into marketing by Inbound.org

Search for meaning in B2B Marketing by Velocity Partners

The What If techniques by Motivate Design

Ways to Win the Internets by Upworthy

Crap: The Content Marketing Deluge by Velocity Partners

Part 3 The Best Tool To Edit Your Videos For Slideshow Presentations - Wondershare Filmora
As discussed in the above parts of the article, images and videos play a very crucial role in creating an impressive slideshow presentation. To further make these media files bright, clear, and relevant to your theme editing and customization can be done for this task, several software and programs are available. One such excellent tool is Wondershare Filmora Video Editor which works as a complete video editing software with advanced features.
Your files can be edited like a professional and that too in a hassle-free manner using the program. Some of the key editing features of the software include cropping, cutting, adding effects, transitions, overlays, green screen, split screen, AI portrait, masking, and more.
For Win 7 or later (64-bit)
For macOS 10.12 or later
Additionally, the tool also supports making a slideshow with music files and also has a built-in media library. Templates in different categories are also present.

● Ending Thoughts →
● Slideshow presentations are used for creating awareness about products and services, sending a message, presenting data, and several other tasks.
● To create a slideshow, several factors like media files, theme, colors, text, effects and other factors have to be considered.
● Several popular great slideshow presentation examples can be referred to as what a unique presentation looks like.
● Wondershare Filmora is an excellent tool for editing slideshow videos and also for creating a slideshow.
No matter what type of industry or business you are in, slideshow presentations have become an important tool for several tasks like showcasing your products, and services, engaging with the clients and prospective buyers, changing their perceptions, leading to sales, and much more. Great presentations are a combination of style, content, effects, text, media files, and much more. There are several tools and software available these days that can help you create a slideshow presentation of your choice.

More in detail about these presentations, best powerpoint slideshow examples, and more are discussed in the following parts of the topic.
In this article
01 [Tips for creating an impressive slideshow presentation](#Part 1)
02 [Best 15 slideshow presentation examples](#Part 2)
03 [The best tool to edit your videos for slideshow presentations- Wondershare Filmora](#Part 3)
Part 1 Tips For Creating An Impressive Slideshow Presentation
To create a unique and engaging slideshow presentation, we have shortlisted some tips that will surely work. Check them as below.
● Have a theme
First of all, have a theme for a slideshow based on which the other elements can be selected. The theme or the story you want to portray can be based on the target audience and the purpose of creating a slideshow. For instance, if you want to generate sales from your products, create a slideshow that shows the benefits of your products and compares them with others in the same category.
● Keep it simple
The real purpose of a slideshow presentation is to convey your data or message in a simple manner that can be easily related. Since the slides move one after the other in a slideshow, they should be created in a manner so that the viewer can quickly understand them.
● Keep minimum text
Though text can be included in a slideshow, keep them to a minimum. A slideshow is a creative presentation having pictures, videos, graphs, and several other elements. So, keep the text whenever necessary and don’t include too much-written content. Moreover, a viewer can relate to and recall the product, brand, or service more through a message rather than a text.
● Include compelling visuals
Include relevant visuals like videos and images into your slideshow. Make sure that the files are in high resolution and clear and support the theme or the message you are trying to convey through the presentation.
● Add effects, filters, overlays, and other elements
Instead of adding the raw image and video footage, edit and customize them to make them more interesting and engaging. There are several professional video editing tools like Wondershare Filmora and others that can help you add effects, transitions, overlays, filters, and customize files as needed. Additional elements like graphs, charts, and more can also be added to the presentation.
● Use Templates
Templates are ready-made design that helps you create a slideshow presentation quickly and easily. The templates in a variety of designs in different categories are available for you to choose the most suitable one. You can check the collection of templates from various online sites and tools.
Part 2 Best 15 Slideshow Presentation Examples
A wide range of presentations in different categories is created by people. To help you check what a unique and engaging presentation looks like, below listed are the top slideshow examples.
What would Steve Do? 10 Lessons from the World’s most captivating presenters by HubSpot

Powerful Body Language Tips for your next presentation

Fix your bad PowerPoint by Seth Godin

How I got 2.5 million views on SlideShare by Nick Demey

Killer ways to design the same slide

How to Produce Better Content Ideas by Mark Johnstone

How Google Works by Eric Schmid

Why Content Marketing Fails by Rand Fishkin

Digital Strategy 101 By Bud Caddell

The History of SEO by HubSpot

How to really get into marketing by Inbound.org

Search for meaning in B2B Marketing by Velocity Partners

The What If techniques by Motivate Design

Ways to Win the Internets by Upworthy

Crap: The Content Marketing Deluge by Velocity Partners

Part 3 The Best Tool To Edit Your Videos For Slideshow Presentations - Wondershare Filmora
As discussed in the above parts of the article, images and videos play a very crucial role in creating an impressive slideshow presentation. To further make these media files bright, clear, and relevant to your theme editing and customization can be done for this task, several software and programs are available. One such excellent tool is Wondershare Filmora Video Editor which works as a complete video editing software with advanced features.
Your files can be edited like a professional and that too in a hassle-free manner using the program. Some of the key editing features of the software include cropping, cutting, adding effects, transitions, overlays, green screen, split screen, AI portrait, masking, and more.
For Win 7 or later (64-bit)
For macOS 10.12 or later
Additionally, the tool also supports making a slideshow with music files and also has a built-in media library. Templates in different categories are also present.

● Ending Thoughts →
● Slideshow presentations are used for creating awareness about products and services, sending a message, presenting data, and several other tasks.
● To create a slideshow, several factors like media files, theme, colors, text, effects and other factors have to be considered.
● Several popular great slideshow presentation examples can be referred to as what a unique presentation looks like.
● Wondershare Filmora is an excellent tool for editing slideshow videos and also for creating a slideshow.
No matter what type of industry or business you are in, slideshow presentations have become an important tool for several tasks like showcasing your products, and services, engaging with the clients and prospective buyers, changing their perceptions, leading to sales, and much more. Great presentations are a combination of style, content, effects, text, media files, and much more. There are several tools and software available these days that can help you create a slideshow presentation of your choice.

More in detail about these presentations, best powerpoint slideshow examples, and more are discussed in the following parts of the topic.
In this article
01 [Tips for creating an impressive slideshow presentation](#Part 1)
02 [Best 15 slideshow presentation examples](#Part 2)
03 [The best tool to edit your videos for slideshow presentations- Wondershare Filmora](#Part 3)
Part 1 Tips For Creating An Impressive Slideshow Presentation
To create a unique and engaging slideshow presentation, we have shortlisted some tips that will surely work. Check them as below.
● Have a theme
First of all, have a theme for a slideshow based on which the other elements can be selected. The theme or the story you want to portray can be based on the target audience and the purpose of creating a slideshow. For instance, if you want to generate sales from your products, create a slideshow that shows the benefits of your products and compares them with others in the same category.
● Keep it simple
The real purpose of a slideshow presentation is to convey your data or message in a simple manner that can be easily related. Since the slides move one after the other in a slideshow, they should be created in a manner so that the viewer can quickly understand them.
● Keep minimum text
Though text can be included in a slideshow, keep them to a minimum. A slideshow is a creative presentation having pictures, videos, graphs, and several other elements. So, keep the text whenever necessary and don’t include too much-written content. Moreover, a viewer can relate to and recall the product, brand, or service more through a message rather than a text.
● Include compelling visuals
Include relevant visuals like videos and images into your slideshow. Make sure that the files are in high resolution and clear and support the theme or the message you are trying to convey through the presentation.
● Add effects, filters, overlays, and other elements
Instead of adding the raw image and video footage, edit and customize them to make them more interesting and engaging. There are several professional video editing tools like Wondershare Filmora and others that can help you add effects, transitions, overlays, filters, and customize files as needed. Additional elements like graphs, charts, and more can also be added to the presentation.
● Use Templates
Templates are ready-made design that helps you create a slideshow presentation quickly and easily. The templates in a variety of designs in different categories are available for you to choose the most suitable one. You can check the collection of templates from various online sites and tools.
Part 2 Best 15 Slideshow Presentation Examples
A wide range of presentations in different categories is created by people. To help you check what a unique and engaging presentation looks like, below listed are the top slideshow examples.
What would Steve Do? 10 Lessons from the World’s most captivating presenters by HubSpot

Powerful Body Language Tips for your next presentation

Fix your bad PowerPoint by Seth Godin

How I got 2.5 million views on SlideShare by Nick Demey

Killer ways to design the same slide

How to Produce Better Content Ideas by Mark Johnstone

How Google Works by Eric Schmid

Why Content Marketing Fails by Rand Fishkin

Digital Strategy 101 By Bud Caddell

The History of SEO by HubSpot

How to really get into marketing by Inbound.org

Search for meaning in B2B Marketing by Velocity Partners

The What If techniques by Motivate Design

Ways to Win the Internets by Upworthy

Crap: The Content Marketing Deluge by Velocity Partners

Part 3 The Best Tool To Edit Your Videos For Slideshow Presentations - Wondershare Filmora
As discussed in the above parts of the article, images and videos play a very crucial role in creating an impressive slideshow presentation. To further make these media files bright, clear, and relevant to your theme editing and customization can be done for this task, several software and programs are available. One such excellent tool is Wondershare Filmora Video Editor which works as a complete video editing software with advanced features.
Your files can be edited like a professional and that too in a hassle-free manner using the program. Some of the key editing features of the software include cropping, cutting, adding effects, transitions, overlays, green screen, split screen, AI portrait, masking, and more.
For Win 7 or later (64-bit)
For macOS 10.12 or later
Additionally, the tool also supports making a slideshow with music files and also has a built-in media library. Templates in different categories are also present.

● Ending Thoughts →
● Slideshow presentations are used for creating awareness about products and services, sending a message, presenting data, and several other tasks.
● To create a slideshow, several factors like media files, theme, colors, text, effects and other factors have to be considered.
● Several popular great slideshow presentation examples can be referred to as what a unique presentation looks like.
● Wondershare Filmora is an excellent tool for editing slideshow videos and also for creating a slideshow.
In This Article, You Will Learn About Splitting the Video Into the Frames in FFmpeg and Mentioning the Easy Option for Doing the Same Task in a Few Seconds by Wondershare Filmora
FFmpeg is the particular framework that is leading in the multimedia industry. It is a complete solution that runs on multiple platforms for converting, recording and streaming videos and audios. FFmpeg allows you to encode, decode, filter, mux, demux, and transcode much better than humans. FFmpeg runs, complies, and tests using the FATE infrastructure on different operating systems.
It includes Mac OS X, Linux, Windows, Solaris and BSDs. This framework works in a number of built-in environment configurations and architectures of the types of machinery from a technical point of view. It is the appropriate solution for the developers for their applications, and the end-users are similar. You can share the codes at the maximum level in the parts of the FFmpeg. Online support is available for your assistance.
In this article, you will learn about splitting the Video into the frames in FFmpeg and mentioning the easy option for doing the same task in a few seconds by Wondershare Filmora.
How can you split the video clips into frames by using FFmpeg?
There is 7 number of ways, or you can say 7 functions are available splitting the video clips in FFmpeg that are as follows:
- Splitting Video into frames
- Splitting Video by their sizes
- Dividing the videos into the parts with the same duration
- Split the videos by width and in the horizontal direction
To split the Video in FFmpeg, you need to use the correct command to fulfil all your tasks. It helps in extracting the particular frames from your Video. These are the files of the images that are making the whole Video. The working of this command is the following:
Step 1:
The first step is opening the terminal in Mac operating system. Enter the command below for navigating the folder of pictures and videos. Must change the directory whenever you are in the terminal. First, change the location wherever the video file is in your system. Remember that you run these commands in the same folder where the source of the videos is.
Cd ~/Videos and press enter.

Step 2:
This specific command is for splitting the videos into frames. It saves every image separately as the thumbnail file. FFmpeg -I video.mp4 thumb%04d.jpg -hide_banner
splitting is done into the frames. Go to your same folder and choose your image according to your requirement.
An easier way to split the video into the frames
As you see above, it is just 2 significant steps for splitting the Video into frames by FFmpeg. But what if you don’t remember the command or are not familiar with the technical background. Then you need to look for better options and even most straightforward than FFmpeg. There is just one answer to all these questions that is Filmora Video Editor . It is not only a powerful tool but also all the tools are right in front of the screen—no need to enter any command or change of the directory.
For Win 7 or later (64-bit)
For macOS 10.14 or later
Features
- Trimming, rotating, resizing of the clips
- Easy to remove the noise in the background
- Simple to export and share the videos
- Splitting of the screens
- Correcting and matching of the colours
- Availability of controls for audio and Video
The best part is that the Video’s quality remains the same in this software. It is just a few clicks, and the extraction will be done. All the images are high resolution, so no worries about losing any frame quality and images saved in your media library. Follow the easy steps below to begin the extraction of the frames from the Video in Wondershare Filmora.
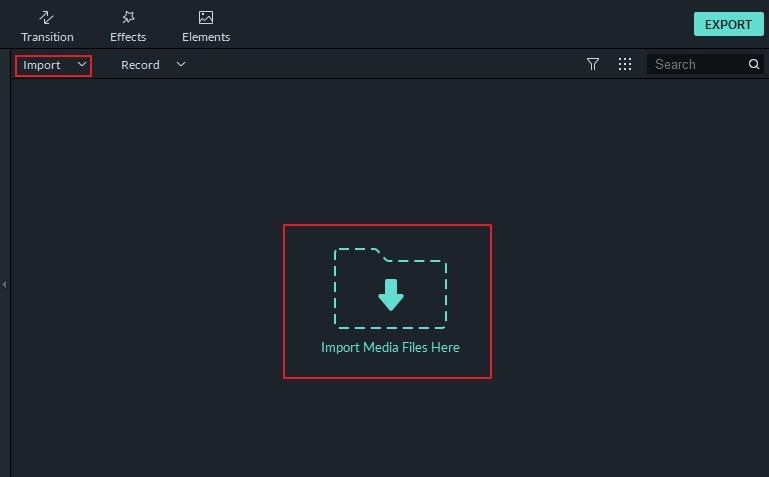
Step 1. First, import the video file or drag and drop it in the window. Videos are visible in the library so that you can select them accordingly. Click on the Video’s thumbnail if you want the same resolution of the frame as the Video.
Click the Play button for the preview. After the preview, click on the Camera icon to extract frames. Automatically, all the frames are saved in the library of media files.
Step 2. Sometimes, you require to see the preview of the Video in the form of frames for extraction purposes. Simply drag and drop the file in the timeline. To begin the preview, press the space bar on the keyboard and take the screenshot whenever the Video starts.
Press the icon of snapshot or press the keys CRTL+ALT+S. Use the left or right keys for playing back the video frame to frame and save it in the form of an image. Select the “Reveal in Explorer” option when you click the screenshot in the library of media files.
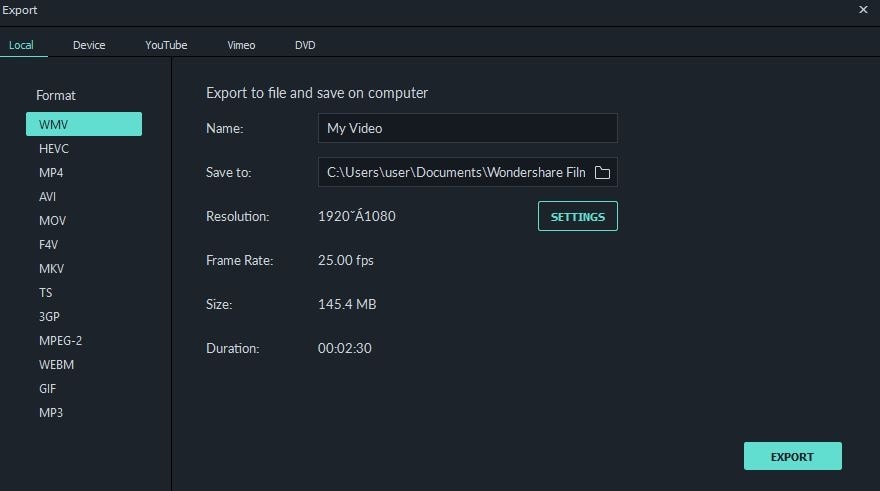
The frame extractor of Wondershare Filmora is absolutely free so that you won’t find any watermark on the images. You won’t face any difficulty while extracting your frames as a user. Even you can edit these frames and save them in the format of your own choice.

Although there is a huge range of editing software, including FFmpeg, they always have some disadvantages when you keep finding the replacement. Even FFmpeg is an open-source program, and beginners can’t handle it properly.
They need to be familiar with the technicalities. There are many benefits to using Wondershare Filmora for extracting the frames from the videos.
It is supportive to 4K resolution means saving the images in the same resolution. No loss of video quality enables you to explore all the details very clearly. The whole editor appears right before you to edit all the frames.
You can also export these images wherever you want or save them for backup purposes. Even you can upload them on your social networking sites. So, what are you waiting for? No more thinking now; let’s start exploring and using Wondershare Filmora
Step 2:
This specific command is for splitting the videos into frames. It saves every image separately as the thumbnail file. FFmpeg -I video.mp4 thumb%04d.jpg -hide_banner
splitting is done into the frames. Go to your same folder and choose your image according to your requirement.
An easier way to split the video into the frames
As you see above, it is just 2 significant steps for splitting the Video into frames by FFmpeg. But what if you don’t remember the command or are not familiar with the technical background. Then you need to look for better options and even most straightforward than FFmpeg. There is just one answer to all these questions that is Filmora Video Editor . It is not only a powerful tool but also all the tools are right in front of the screen—no need to enter any command or change of the directory.
For Win 7 or later (64-bit)
For macOS 10.14 or later
Features
- Trimming, rotating, resizing of the clips
- Easy to remove the noise in the background
- Simple to export and share the videos
- Splitting of the screens
- Correcting and matching of the colours
- Availability of controls for audio and Video
The best part is that the Video’s quality remains the same in this software. It is just a few clicks, and the extraction will be done. All the images are high resolution, so no worries about losing any frame quality and images saved in your media library. Follow the easy steps below to begin the extraction of the frames from the Video in Wondershare Filmora.
Step 1. First, import the video file or drag and drop it in the window. Videos are visible in the library so that you can select them accordingly. Click on the Video’s thumbnail if you want the same resolution of the frame as the Video.
Click the Play button for the preview. After the preview, click on the Camera icon to extract frames. Automatically, all the frames are saved in the library of media files.

Step 2. Sometimes, you require to see the preview of the Video in the form of frames for extraction purposes. Simply drag and drop the file in the timeline. To begin the preview, press the space bar on the keyboard and take the screenshot whenever the Video starts.
Press the icon of snapshot or press the keys CRTL+ALT+S. Use the left or right keys for playing back the video frame to frame and save it in the form of an image. Select the “Reveal in Explorer” option when you click the screenshot in the library of media files.
The frame extractor of Wondershare Filmora is absolutely free so that you won’t find any watermark on the images. You won’t face any difficulty while extracting your frames as a user. Even you can edit these frames and save them in the format of your own choice.


Although there is a huge range of editing software, including FFmpeg, they always have some disadvantages when you keep finding the replacement. Even FFmpeg is an open-source program, and beginners can’t handle it properly.
They need to be familiar with the technicalities. There are many benefits to using Wondershare Filmora for extracting the frames from the videos.
It is supportive to 4K resolution means saving the images in the same resolution. No loss of video quality enables you to explore all the details very clearly. The whole editor appears right before you to edit all the frames.
You can also export these images wherever you want or save them for backup purposes. Even you can upload them on your social networking sites. So, what are you waiting for? No more thinking now; let’s start exploring and using Wondershare Filmora
Step 2:
This specific command is for splitting the videos into frames. It saves every image separately as the thumbnail file. FFmpeg -I video.mp4 thumb%04d.jpg -hide_banner
splitting is done into the frames. Go to your same folder and choose your image according to your requirement.
An easier way to split the video into the frames
As you see above, it is just 2 significant steps for splitting the Video into frames by FFmpeg. But what if you don’t remember the command or are not familiar with the technical background. Then you need to look for better options and even most straightforward than FFmpeg. There is just one answer to all these questions that is Filmora Video Editor . It is not only a powerful tool but also all the tools are right in front of the screen—no need to enter any command or change of the directory.
For Win 7 or later (64-bit)
For macOS 10.14 or later
Features
- Trimming, rotating, resizing of the clips
- Easy to remove the noise in the background
- Simple to export and share the videos
- Splitting of the screens
- Correcting and matching of the colours
- Availability of controls for audio and Video
The best part is that the Video’s quality remains the same in this software. It is just a few clicks, and the extraction will be done. All the images are high resolution, so no worries about losing any frame quality and images saved in your media library. Follow the easy steps below to begin the extraction of the frames from the Video in Wondershare Filmora.
Step 1. First, import the video file or drag and drop it in the window. Videos are visible in the library so that you can select them accordingly. Click on the Video’s thumbnail if you want the same resolution of the frame as the Video.
Click the Play button for the preview. After the preview, click on the Camera icon to extract frames. Automatically, all the frames are saved in the library of media files.

Step 2. Sometimes, you require to see the preview of the Video in the form of frames for extraction purposes. Simply drag and drop the file in the timeline. To begin the preview, press the space bar on the keyboard and take the screenshot whenever the Video starts.
Press the icon of snapshot or press the keys CRTL+ALT+S. Use the left or right keys for playing back the video frame to frame and save it in the form of an image. Select the “Reveal in Explorer” option when you click the screenshot in the library of media files.
The frame extractor of Wondershare Filmora is absolutely free so that you won’t find any watermark on the images. You won’t face any difficulty while extracting your frames as a user. Even you can edit these frames and save them in the format of your own choice.


Although there is a huge range of editing software, including FFmpeg, they always have some disadvantages when you keep finding the replacement. Even FFmpeg is an open-source program, and beginners can’t handle it properly.
They need to be familiar with the technicalities. There are many benefits to using Wondershare Filmora for extracting the frames from the videos.
It is supportive to 4K resolution means saving the images in the same resolution. No loss of video quality enables you to explore all the details very clearly. The whole editor appears right before you to edit all the frames.
You can also export these images wherever you want or save them for backup purposes. Even you can upload them on your social networking sites. So, what are you waiting for? No more thinking now; let’s start exploring and using Wondershare Filmora
Step 2:
This specific command is for splitting the videos into frames. It saves every image separately as the thumbnail file. FFmpeg -I video.mp4 thumb%04d.jpg -hide_banner
splitting is done into the frames. Go to your same folder and choose your image according to your requirement.
An easier way to split the video into the frames
As you see above, it is just 2 significant steps for splitting the Video into frames by FFmpeg. But what if you don’t remember the command or are not familiar with the technical background. Then you need to look for better options and even most straightforward than FFmpeg. There is just one answer to all these questions that is Filmora Video Editor . It is not only a powerful tool but also all the tools are right in front of the screen—no need to enter any command or change of the directory.
For Win 7 or later (64-bit)
For macOS 10.14 or later
Features
- Trimming, rotating, resizing of the clips
- Easy to remove the noise in the background
- Simple to export and share the videos
- Splitting of the screens
- Correcting and matching of the colours
- Availability of controls for audio and Video
The best part is that the Video’s quality remains the same in this software. It is just a few clicks, and the extraction will be done. All the images are high resolution, so no worries about losing any frame quality and images saved in your media library. Follow the easy steps below to begin the extraction of the frames from the Video in Wondershare Filmora.
Step 1. First, import the video file or drag and drop it in the window. Videos are visible in the library so that you can select them accordingly. Click on the Video’s thumbnail if you want the same resolution of the frame as the Video.
Click the Play button for the preview. After the preview, click on the Camera icon to extract frames. Automatically, all the frames are saved in the library of media files.

Step 2. Sometimes, you require to see the preview of the Video in the form of frames for extraction purposes. Simply drag and drop the file in the timeline. To begin the preview, press the space bar on the keyboard and take the screenshot whenever the Video starts.
Press the icon of snapshot or press the keys CRTL+ALT+S. Use the left or right keys for playing back the video frame to frame and save it in the form of an image. Select the “Reveal in Explorer” option when you click the screenshot in the library of media files.
The frame extractor of Wondershare Filmora is absolutely free so that you won’t find any watermark on the images. You won’t face any difficulty while extracting your frames as a user. Even you can edit these frames and save them in the format of your own choice.


Although there is a huge range of editing software, including FFmpeg, they always have some disadvantages when you keep finding the replacement. Even FFmpeg is an open-source program, and beginners can’t handle it properly.
They need to be familiar with the technicalities. There are many benefits to using Wondershare Filmora for extracting the frames from the videos.
It is supportive to 4K resolution means saving the images in the same resolution. No loss of video quality enables you to explore all the details very clearly. The whole editor appears right before you to edit all the frames.
You can also export these images wherever you want or save them for backup purposes. Even you can upload them on your social networking sites. So, what are you waiting for? No more thinking now; let’s start exploring and using Wondershare Filmora
Best 9 Amv Makers for Computer
Anime music videos, or AMVs, have become increasingly popular over the years. They allow fans to showcase their creativity and love for their favorite anime series through the use of music and video editing. However, creating a high-quality AMV requires the right software. In this article, we will introduce you to the best AMV maker software available on the market.
Best AMV Maker for Computer
If you would like to create the AMVs on your computer, the following are some of your best options;
Filmora
Best For: Vloggers, teachers and social media users
Supported OS: Windows 11/10/8/7 and macOS
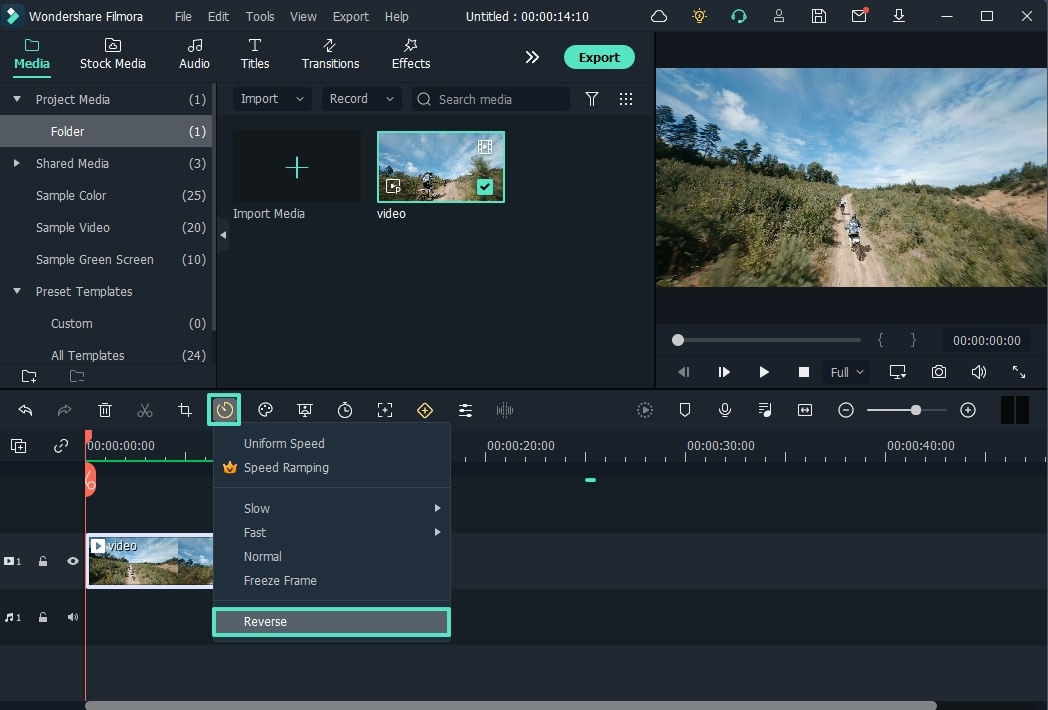
Speaking of the best AMV video maker, I would recommend Filmora as the first choice. It is easy to learn and use for beginner, and come with rich video editing features: split screen, key framing, motion tracking, speed ramping, instant mode, speech to text, audio ducking and more.
Meanwhile, it also helps teachers or business people to record tutorials, files or PowerPoint from their screen wit no limit. For vloggers and other advanced users, Filmora provides green screen, AI Protrait, colorful video effect templates, color match and so forth. You can directly share the video to YouTube, Vimeo and other social media platforms.
For Win 7 or later (64-bit)
For macOS 10.12 or later
Adobe Premiere
Best For: Animators, professional cartoonists, and marketers
Supported OS: Windows and Mac

Adobe Premiere is a video editing program that can be used to create and edit all types of video projects including AMVs. It has numerous features that can make it very easy to come up with the most professional video that you want to create. Because of these very many, but very useful features, using Adobe Premiere can be difficult at first. But once you gate a hang of it, it is one of the best ways to create any video including AMVs.
Adobe Premiere can be used on both Mac and Windows operating systems and it is compatible with most video and audio formats. But like most Adobe software it is not a free solution. You do get a 7-day free trial that you can use without limitation, but you will need to pay a subscription fee to continue using it.
Apple iMovie
Best For: Marketers, freelancers, YouTubers, Bloggers
Supported OS: Mac

Apple iMovie is one of the best video editing programs for Mac and is therefore one of the best tools to choose if you will be creating your AMV on a Mac. It has all the basic video editing features that you need for a project of this magnitude including the ability to merge videos and apply filters.
This makes it the most ideal tool for creating AMVs since you typically need to break a file into various sections for your AMV. You can then add audio to the video and choose one of the effects and filters to add to it. Once the video is complete, you can then export it in 4K resolution or upload it to YouTube directly.
Sony Vegas
Best For: Animators, Marketers, Video Editors and Bloggers
Supported OS: Windows and Mac

If you are looking for a program that is designed with AMVs in mind then Sony Vegas might be a good choice. Its main purpose is to help users create stunning anime videos and it has all the necessary features to make that happen.
Sony Vegas comes with a universal editor that allows you to create your video using the multi-cam editing feature or crossfades. You can also add various effects to the video including various colors and other special effects. But as you can probably guess, Sony Vegas may be a bit complicated for the beginner user, although there are numerous tutorials to help you through this process.
Final Cut Pro
Best For: Marketers, Animators, YouTubers, Freelancers, and Professional video editors
Supported OS: Windows and Mac

Final Cut Pro is another professional and highly effective video editor that you can use to create AMVs. It has very many video editing capabilities, allowing you to edit your video in numerous ways including cropping, rotating, blending, and more. It also has over 100 different transitions and more than 149 different visual effects to create your video any way you want to.
But perhaps the best feature that Final Cut Pro has when it comes to creating and editing AMV videos is the ability to organize and crop videos easily. The “Compounding Clips” feature, in particular, will come in handy when combining footage, soundtracks, and effects into one perfect AMV.
Lightworks
Best For: YouTubers, Freelancers, Bloggers, and Marketers
Supported OS: Windows and Mac

Lightworks is an easy-to-use solution that you can use to create stunning AMV videos. The drag and drop interface makes it the most ideal solution even for beginners and it offers a lot of options for designing and customizing the videos. One other major benefit of choosing Lightworks is that it does come with a free version that is not as limited as you would expect.
The timeline is easy to use, allowing you to create AMVs from scratch or merge clips to create the video. You can also use numerous effects on the video and even add music to the video.
Windows Movie Maker
Best For: Freelancers, bloggers, marketers, and YouTubers
Supported OS: Windows
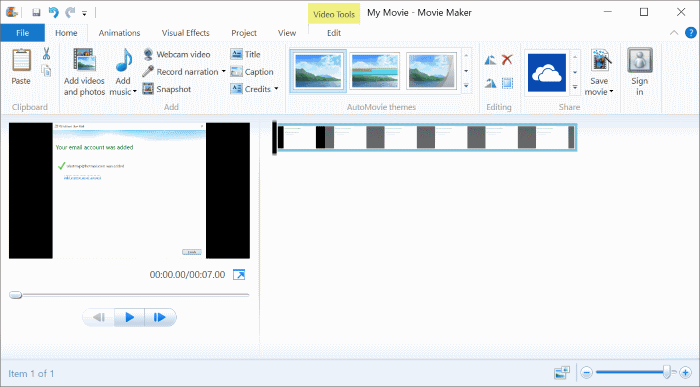
Windows Movie Maker is one of the most popular video editing tools on the Windows OS and it has all the necessary editing features that you will need when you want to create AMV videos. On this free video editing tool, you can cut, split and crop the video or even add audio files and subtitles as needed,
It can work with numerous video and image formats, offering a wide range of options when it comes to video editing. Some of the functions that you can expect to use include video trimming, which can easily be done by simply dragging the slider to the desired location. But you will find that Windows Movie Maker lacks some of the features that can make your AMVs truly stand out.
Best AMV Maker for Mobile Phones
If you want to make AMVs on your mobile device, the following are some of the best options;
Filmora
Best For: Professional Animators, Marketers, YouTubes, and Bloggers
Supported OS: Android and iOS
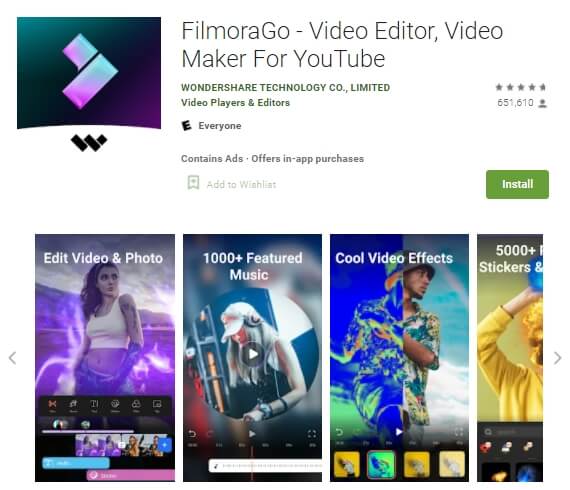
Filmora is one of the best video editing apps that you can download. It somehow manages to offer tools and video editing features that can otherwise be found only on desktop tools. Some of the features that can you can expect when using Filmora include reverse play, transitions, cropping, rotating, adding voiceovers, audio mixing, color tuning, and even picture-in-picture.
Filmora further simplifies the editing process by providing you with premade templates and themes that you can use to customize your AMV in many ways. It will also let you add music to the video from a huge library of licensed audio tracks.
KineMaster
Best For: Professional Animators, Bloggers, Marketers, and YouTubers
Supported OS: iOS and Android
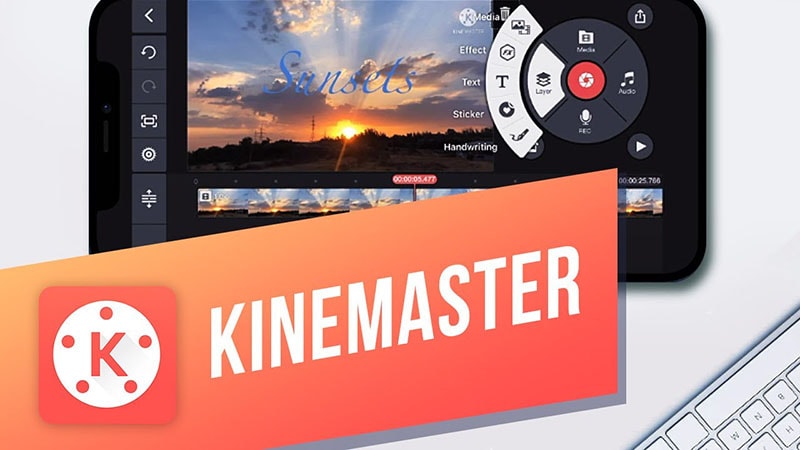
KineMaster is a video editing app that is designed for professionals but is easy enough to use that it can be useful to you even if it is your first time using it. It has a lot of very useful video editing features including frame-by-frame editing, instant previews as well as support for up to four audio tracks that you can add to the video project.
This app also allows you to work with two video layers that you can animate in various ways including chroma key compositing, precise color adjustment, speed control, and keyframe animation.
VivaVideo
Best For: YouTubers, Freelancers, and Marketers
Supported OS: iOS and Android
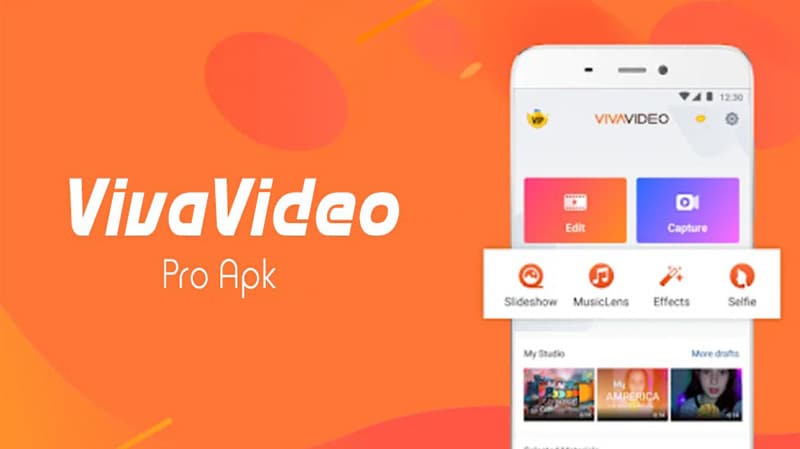
VivaVideo is another very easy-to-use app that you can install on your device to create AMVs. It has hundreds of features to choose from including stickers, filters, special effects, and animated clips. It also features slow/fast motion control, a huge library of background music that you can add to the video, and premade templates to make everything easier.
It allows you to share your creation with more than 200 million users of the app or even directly share the video on social media platforms.
Related FAQs
1.Is Making AMV illegal?
If you don’t have permission from the copyright owner of the song you are using to create the AMV, then you violate the law. And considering that it can be very difficult to get permission from the copyright owner, usually the record label, most AMVs are not exactly legal.
2.How Do You Make an AMV?
It depends on the kind of AMV that you want to make. But several steps are common to all AMVs. The first thing you want to do is pick the subject of your video, which usually means choosing the character or characters that will make up your video. Then, you will want to pick the song that you will use for the AMV, and finally, choose a video editor that will allow you to put the two together.
3.What Program is Used to Make AMVs?
AMVs are made using video editing software with the necessary features to put together different video components and animate them. We have provided you with various options above.
Conclusion
Creating AMVs can be a fun experience, but only if you have the right tool for the job. The solutions we have discussed in this article can all help you create a great AMV. Choose one that suits your project
For macOS 10.12 or later
Adobe Premiere
Best For: Animators, professional cartoonists, and marketers
Supported OS: Windows and Mac

Adobe Premiere is a video editing program that can be used to create and edit all types of video projects including AMVs. It has numerous features that can make it very easy to come up with the most professional video that you want to create. Because of these very many, but very useful features, using Adobe Premiere can be difficult at first. But once you gate a hang of it, it is one of the best ways to create any video including AMVs.
Adobe Premiere can be used on both Mac and Windows operating systems and it is compatible with most video and audio formats. But like most Adobe software it is not a free solution. You do get a 7-day free trial that you can use without limitation, but you will need to pay a subscription fee to continue using it.
Apple iMovie
Best For: Marketers, freelancers, YouTubers, Bloggers
Supported OS: Mac

Apple iMovie is one of the best video editing programs for Mac and is therefore one of the best tools to choose if you will be creating your AMV on a Mac. It has all the basic video editing features that you need for a project of this magnitude including the ability to merge videos and apply filters.
This makes it the most ideal tool for creating AMVs since you typically need to break a file into various sections for your AMV. You can then add audio to the video and choose one of the effects and filters to add to it. Once the video is complete, you can then export it in 4K resolution or upload it to YouTube directly.
Sony Vegas
Best For: Animators, Marketers, Video Editors and Bloggers
Supported OS: Windows and Mac

If you are looking for a program that is designed with AMVs in mind then Sony Vegas might be a good choice. Its main purpose is to help users create stunning anime videos and it has all the necessary features to make that happen.
Sony Vegas comes with a universal editor that allows you to create your video using the multi-cam editing feature or crossfades. You can also add various effects to the video including various colors and other special effects. But as you can probably guess, Sony Vegas may be a bit complicated for the beginner user, although there are numerous tutorials to help you through this process.
Final Cut Pro
Best For: Marketers, Animators, YouTubers, Freelancers, and Professional video editors
Supported OS: Windows and Mac

Final Cut Pro is another professional and highly effective video editor that you can use to create AMVs. It has very many video editing capabilities, allowing you to edit your video in numerous ways including cropping, rotating, blending, and more. It also has over 100 different transitions and more than 149 different visual effects to create your video any way you want to.
But perhaps the best feature that Final Cut Pro has when it comes to creating and editing AMV videos is the ability to organize and crop videos easily. The “Compounding Clips” feature, in particular, will come in handy when combining footage, soundtracks, and effects into one perfect AMV.
Lightworks
Best For: YouTubers, Freelancers, Bloggers, and Marketers
Supported OS: Windows and Mac

Lightworks is an easy-to-use solution that you can use to create stunning AMV videos. The drag and drop interface makes it the most ideal solution even for beginners and it offers a lot of options for designing and customizing the videos. One other major benefit of choosing Lightworks is that it does come with a free version that is not as limited as you would expect.
The timeline is easy to use, allowing you to create AMVs from scratch or merge clips to create the video. You can also use numerous effects on the video and even add music to the video.
Windows Movie Maker
Best For: Freelancers, bloggers, marketers, and YouTubers
Supported OS: Windows

Windows Movie Maker is one of the most popular video editing tools on the Windows OS and it has all the necessary editing features that you will need when you want to create AMV videos. On this free video editing tool, you can cut, split and crop the video or even add audio files and subtitles as needed,
It can work with numerous video and image formats, offering a wide range of options when it comes to video editing. Some of the functions that you can expect to use include video trimming, which can easily be done by simply dragging the slider to the desired location. But you will find that Windows Movie Maker lacks some of the features that can make your AMVs truly stand out.
Best AMV Maker for Mobile Phones
If you want to make AMVs on your mobile device, the following are some of the best options;
Filmora
Best For: Professional Animators, Marketers, YouTubes, and Bloggers
Supported OS: Android and iOS

Filmora is one of the best video editing apps that you can download. It somehow manages to offer tools and video editing features that can otherwise be found only on desktop tools. Some of the features that can you can expect when using Filmora include reverse play, transitions, cropping, rotating, adding voiceovers, audio mixing, color tuning, and even picture-in-picture.
Filmora further simplifies the editing process by providing you with premade templates and themes that you can use to customize your AMV in many ways. It will also let you add music to the video from a huge library of licensed audio tracks.
KineMaster
Best For: Professional Animators, Bloggers, Marketers, and YouTubers
Supported OS: iOS and Android

KineMaster is a video editing app that is designed for professionals but is easy enough to use that it can be useful to you even if it is your first time using it. It has a lot of very useful video editing features including frame-by-frame editing, instant previews as well as support for up to four audio tracks that you can add to the video project.
This app also allows you to work with two video layers that you can animate in various ways including chroma key compositing, precise color adjustment, speed control, and keyframe animation.
VivaVideo
Best For: YouTubers, Freelancers, and Marketers
Supported OS: iOS and Android

VivaVideo is another very easy-to-use app that you can install on your device to create AMVs. It has hundreds of features to choose from including stickers, filters, special effects, and animated clips. It also features slow/fast motion control, a huge library of background music that you can add to the video, and premade templates to make everything easier.
It allows you to share your creation with more than 200 million users of the app or even directly share the video on social media platforms.
Related FAQs
1.Is Making AMV illegal?
If you don’t have permission from the copyright owner of the song you are using to create the AMV, then you violate the law. And considering that it can be very difficult to get permission from the copyright owner, usually the record label, most AMVs are not exactly legal.
2.How Do You Make an AMV?
It depends on the kind of AMV that you want to make. But several steps are common to all AMVs. The first thing you want to do is pick the subject of your video, which usually means choosing the character or characters that will make up your video. Then, you will want to pick the song that you will use for the AMV, and finally, choose a video editor that will allow you to put the two together.
3.What Program is Used to Make AMVs?
AMVs are made using video editing software with the necessary features to put together different video components and animate them. We have provided you with various options above.
Conclusion
Creating AMVs can be a fun experience, but only if you have the right tool for the job. The solutions we have discussed in this article can all help you create a great AMV. Choose one that suits your project
For macOS 10.12 or later
Adobe Premiere
Best For: Animators, professional cartoonists, and marketers
Supported OS: Windows and Mac

Adobe Premiere is a video editing program that can be used to create and edit all types of video projects including AMVs. It has numerous features that can make it very easy to come up with the most professional video that you want to create. Because of these very many, but very useful features, using Adobe Premiere can be difficult at first. But once you gate a hang of it, it is one of the best ways to create any video including AMVs.
Adobe Premiere can be used on both Mac and Windows operating systems and it is compatible with most video and audio formats. But like most Adobe software it is not a free solution. You do get a 7-day free trial that you can use without limitation, but you will need to pay a subscription fee to continue using it.
Apple iMovie
Best For: Marketers, freelancers, YouTubers, Bloggers
Supported OS: Mac

Apple iMovie is one of the best video editing programs for Mac and is therefore one of the best tools to choose if you will be creating your AMV on a Mac. It has all the basic video editing features that you need for a project of this magnitude including the ability to merge videos and apply filters.
This makes it the most ideal tool for creating AMVs since you typically need to break a file into various sections for your AMV. You can then add audio to the video and choose one of the effects and filters to add to it. Once the video is complete, you can then export it in 4K resolution or upload it to YouTube directly.
Sony Vegas
Best For: Animators, Marketers, Video Editors and Bloggers
Supported OS: Windows and Mac

If you are looking for a program that is designed with AMVs in mind then Sony Vegas might be a good choice. Its main purpose is to help users create stunning anime videos and it has all the necessary features to make that happen.
Sony Vegas comes with a universal editor that allows you to create your video using the multi-cam editing feature or crossfades. You can also add various effects to the video including various colors and other special effects. But as you can probably guess, Sony Vegas may be a bit complicated for the beginner user, although there are numerous tutorials to help you through this process.
Final Cut Pro
Best For: Marketers, Animators, YouTubers, Freelancers, and Professional video editors
Supported OS: Windows and Mac

Final Cut Pro is another professional and highly effective video editor that you can use to create AMVs. It has very many video editing capabilities, allowing you to edit your video in numerous ways including cropping, rotating, blending, and more. It also has over 100 different transitions and more than 149 different visual effects to create your video any way you want to.
But perhaps the best feature that Final Cut Pro has when it comes to creating and editing AMV videos is the ability to organize and crop videos easily. The “Compounding Clips” feature, in particular, will come in handy when combining footage, soundtracks, and effects into one perfect AMV.
Lightworks
Best For: YouTubers, Freelancers, Bloggers, and Marketers
Supported OS: Windows and Mac

Lightworks is an easy-to-use solution that you can use to create stunning AMV videos. The drag and drop interface makes it the most ideal solution even for beginners and it offers a lot of options for designing and customizing the videos. One other major benefit of choosing Lightworks is that it does come with a free version that is not as limited as you would expect.
The timeline is easy to use, allowing you to create AMVs from scratch or merge clips to create the video. You can also use numerous effects on the video and even add music to the video.
Windows Movie Maker
Best For: Freelancers, bloggers, marketers, and YouTubers
Supported OS: Windows

Windows Movie Maker is one of the most popular video editing tools on the Windows OS and it has all the necessary editing features that you will need when you want to create AMV videos. On this free video editing tool, you can cut, split and crop the video or even add audio files and subtitles as needed,
It can work with numerous video and image formats, offering a wide range of options when it comes to video editing. Some of the functions that you can expect to use include video trimming, which can easily be done by simply dragging the slider to the desired location. But you will find that Windows Movie Maker lacks some of the features that can make your AMVs truly stand out.
Best AMV Maker for Mobile Phones
If you want to make AMVs on your mobile device, the following are some of the best options;
Filmora
Best For: Professional Animators, Marketers, YouTubes, and Bloggers
Supported OS: Android and iOS

Filmora is one of the best video editing apps that you can download. It somehow manages to offer tools and video editing features that can otherwise be found only on desktop tools. Some of the features that can you can expect when using Filmora include reverse play, transitions, cropping, rotating, adding voiceovers, audio mixing, color tuning, and even picture-in-picture.
Filmora further simplifies the editing process by providing you with premade templates and themes that you can use to customize your AMV in many ways. It will also let you add music to the video from a huge library of licensed audio tracks.
KineMaster
Best For: Professional Animators, Bloggers, Marketers, and YouTubers
Supported OS: iOS and Android

KineMaster is a video editing app that is designed for professionals but is easy enough to use that it can be useful to you even if it is your first time using it. It has a lot of very useful video editing features including frame-by-frame editing, instant previews as well as support for up to four audio tracks that you can add to the video project.
This app also allows you to work with two video layers that you can animate in various ways including chroma key compositing, precise color adjustment, speed control, and keyframe animation.
VivaVideo
Best For: YouTubers, Freelancers, and Marketers
Supported OS: iOS and Android

VivaVideo is another very easy-to-use app that you can install on your device to create AMVs. It has hundreds of features to choose from including stickers, filters, special effects, and animated clips. It also features slow/fast motion control, a huge library of background music that you can add to the video, and premade templates to make everything easier.
It allows you to share your creation with more than 200 million users of the app or even directly share the video on social media platforms.
Related FAQs
1.Is Making AMV illegal?
If you don’t have permission from the copyright owner of the song you are using to create the AMV, then you violate the law. And considering that it can be very difficult to get permission from the copyright owner, usually the record label, most AMVs are not exactly legal.
2.How Do You Make an AMV?
It depends on the kind of AMV that you want to make. But several steps are common to all AMVs. The first thing you want to do is pick the subject of your video, which usually means choosing the character or characters that will make up your video. Then, you will want to pick the song that you will use for the AMV, and finally, choose a video editor that will allow you to put the two together.
3.What Program is Used to Make AMVs?
AMVs are made using video editing software with the necessary features to put together different video components and animate them. We have provided you with various options above.
Conclusion
Creating AMVs can be a fun experience, but only if you have the right tool for the job. The solutions we have discussed in this article can all help you create a great AMV. Choose one that suits your project
For macOS 10.12 or later
Adobe Premiere
Best For: Animators, professional cartoonists, and marketers
Supported OS: Windows and Mac

Adobe Premiere is a video editing program that can be used to create and edit all types of video projects including AMVs. It has numerous features that can make it very easy to come up with the most professional video that you want to create. Because of these very many, but very useful features, using Adobe Premiere can be difficult at first. But once you gate a hang of it, it is one of the best ways to create any video including AMVs.
Adobe Premiere can be used on both Mac and Windows operating systems and it is compatible with most video and audio formats. But like most Adobe software it is not a free solution. You do get a 7-day free trial that you can use without limitation, but you will need to pay a subscription fee to continue using it.
Apple iMovie
Best For: Marketers, freelancers, YouTubers, Bloggers
Supported OS: Mac

Apple iMovie is one of the best video editing programs for Mac and is therefore one of the best tools to choose if you will be creating your AMV on a Mac. It has all the basic video editing features that you need for a project of this magnitude including the ability to merge videos and apply filters.
This makes it the most ideal tool for creating AMVs since you typically need to break a file into various sections for your AMV. You can then add audio to the video and choose one of the effects and filters to add to it. Once the video is complete, you can then export it in 4K resolution or upload it to YouTube directly.
Sony Vegas
Best For: Animators, Marketers, Video Editors and Bloggers
Supported OS: Windows and Mac

If you are looking for a program that is designed with AMVs in mind then Sony Vegas might be a good choice. Its main purpose is to help users create stunning anime videos and it has all the necessary features to make that happen.
Sony Vegas comes with a universal editor that allows you to create your video using the multi-cam editing feature or crossfades. You can also add various effects to the video including various colors and other special effects. But as you can probably guess, Sony Vegas may be a bit complicated for the beginner user, although there are numerous tutorials to help you through this process.
Final Cut Pro
Best For: Marketers, Animators, YouTubers, Freelancers, and Professional video editors
Supported OS: Windows and Mac

Final Cut Pro is another professional and highly effective video editor that you can use to create AMVs. It has very many video editing capabilities, allowing you to edit your video in numerous ways including cropping, rotating, blending, and more. It also has over 100 different transitions and more than 149 different visual effects to create your video any way you want to.
But perhaps the best feature that Final Cut Pro has when it comes to creating and editing AMV videos is the ability to organize and crop videos easily. The “Compounding Clips” feature, in particular, will come in handy when combining footage, soundtracks, and effects into one perfect AMV.
Lightworks
Best For: YouTubers, Freelancers, Bloggers, and Marketers
Supported OS: Windows and Mac

Lightworks is an easy-to-use solution that you can use to create stunning AMV videos. The drag and drop interface makes it the most ideal solution even for beginners and it offers a lot of options for designing and customizing the videos. One other major benefit of choosing Lightworks is that it does come with a free version that is not as limited as you would expect.
The timeline is easy to use, allowing you to create AMVs from scratch or merge clips to create the video. You can also use numerous effects on the video and even add music to the video.
Windows Movie Maker
Best For: Freelancers, bloggers, marketers, and YouTubers
Supported OS: Windows

Windows Movie Maker is one of the most popular video editing tools on the Windows OS and it has all the necessary editing features that you will need when you want to create AMV videos. On this free video editing tool, you can cut, split and crop the video or even add audio files and subtitles as needed,
It can work with numerous video and image formats, offering a wide range of options when it comes to video editing. Some of the functions that you can expect to use include video trimming, which can easily be done by simply dragging the slider to the desired location. But you will find that Windows Movie Maker lacks some of the features that can make your AMVs truly stand out.
Best AMV Maker for Mobile Phones
If you want to make AMVs on your mobile device, the following are some of the best options;
Filmora
Best For: Professional Animators, Marketers, YouTubes, and Bloggers
Supported OS: Android and iOS

Filmora is one of the best video editing apps that you can download. It somehow manages to offer tools and video editing features that can otherwise be found only on desktop tools. Some of the features that can you can expect when using Filmora include reverse play, transitions, cropping, rotating, adding voiceovers, audio mixing, color tuning, and even picture-in-picture.
Filmora further simplifies the editing process by providing you with premade templates and themes that you can use to customize your AMV in many ways. It will also let you add music to the video from a huge library of licensed audio tracks.
KineMaster
Best For: Professional Animators, Bloggers, Marketers, and YouTubers
Supported OS: iOS and Android

KineMaster is a video editing app that is designed for professionals but is easy enough to use that it can be useful to you even if it is your first time using it. It has a lot of very useful video editing features including frame-by-frame editing, instant previews as well as support for up to four audio tracks that you can add to the video project.
This app also allows you to work with two video layers that you can animate in various ways including chroma key compositing, precise color adjustment, speed control, and keyframe animation.
VivaVideo
Best For: YouTubers, Freelancers, and Marketers
Supported OS: iOS and Android

VivaVideo is another very easy-to-use app that you can install on your device to create AMVs. It has hundreds of features to choose from including stickers, filters, special effects, and animated clips. It also features slow/fast motion control, a huge library of background music that you can add to the video, and premade templates to make everything easier.
It allows you to share your creation with more than 200 million users of the app or even directly share the video on social media platforms.
Related FAQs
1.Is Making AMV illegal?
If you don’t have permission from the copyright owner of the song you are using to create the AMV, then you violate the law. And considering that it can be very difficult to get permission from the copyright owner, usually the record label, most AMVs are not exactly legal.
2.How Do You Make an AMV?
It depends on the kind of AMV that you want to make. But several steps are common to all AMVs. The first thing you want to do is pick the subject of your video, which usually means choosing the character or characters that will make up your video. Then, you will want to pick the song that you will use for the AMV, and finally, choose a video editor that will allow you to put the two together.
3.What Program is Used to Make AMVs?
AMVs are made using video editing software with the necessary features to put together different video components and animate them. We have provided you with various options above.
Conclusion
Creating AMVs can be a fun experience, but only if you have the right tool for the job. The solutions we have discussed in this article can all help you create a great AMV. Choose one that suits your project
Also read:
- 2024 Approved Looking for a Video Editor Where You Can Edit Your Tutorial and Training Videos? Camtasia Is a Great Choice. But Is It the Best Video Editor Available? Find Out From Our Camtasia Review
- Are You Looking to Make Transparent Background in Canva Then You Can Learn About It in This Article for 2024
- Updated In 2024, How to Merge FLV Files Windows, Mac,Android, iPhone & Online
- Updated How to Create a Clideo Slideshow Simply
- Updated 2024 Approved Zoom In and Out on Snapchat
- In 2024, Add Green Screen Video on TikTok
- Updated 2024 Approved How To Export Video in Filmora
- Applying and Creating Gif Background on Your Devices and Presentations Is Not Hard. Read Below to Learn How to Apply a GIF Background on All Devices
- Updated How to Combine Several Xvid Files Into One Windows, Mac,Android, iPhone & Online
- Convert MP4 to 60 FPS GIF A Step-by-Step Guide
- In 2024, KineMaster Templates 101 How to Get the Most Out of Video Templates
- New Are You in Search for a Step-by-Step Guide to How to Add Effects in TikTok? Here It Is. To Add some Flavor to Your TikTok Videos. Use These How to Add Effect to TikTok Recommendations
- How Can You Deny These Top 10 Free Speech to Text Software for 2024
- How to Create Freeze Frame Clone Effect
- Learn How to Make Your CSGO Montage Impressive
- In 2024, Do You Have the Habit to Create Subtitle for Your Video? You Can Always Add Open and Close Subtitles to Your Video to Make It Perfect. Follow This Article to Learn More About It
- In 2024, Want to Know the Simplest Way to Match the Colors of Your Photos in Photoshop? The Following Discussion Will Help Match Color in Photoshop, Almost Effortlessly
- New Want to Add Subtitles to Netflix Videos in Your Preferred Language? Read This Article to Learn Two Different Methods for Uploading Custom Subtitles to Netflix
- Do You Want to Download Slow-Motion Apps that Can Edit Video Professionally? This Article Will Discuss some Slomo Makers for Both iOS and Android for 2024
- Updated In 2024, Top 10 Fun Discord Bots You Need
- Updated Top 5 Solutions on How to Add Emojis to iPhone for 2024
- Updated 2024 Approved Basic Introduction of LumaFusion Color Grading
- A Comprehensive Guide on Converting Slo-Mo Videos to Normal Speed Videos On iPhone
- 2024 Approved Blender - A Video Editor for All Professor
- Updated Are You Looking to Make a Thumbnail for Your Fortnite Video? This Article Features a Guide Explaining Creating a Fortnite Motion Blur Thumbnail
- Updated Best 5 Tools to Help You Know More Freeze-Frame Video Editing Skills for 2024
- How to Create Your Own LUTs for Your Video
- Denoise Video in Adobe Premiere Pro – Audio and Video Noise Removal
- Updated Color Match Game Tips for You
- Updated Top 20 Slideshow Makers for Win/Mac/Online Review
- 2024 Approved Want to Apply a Filter on Your Video Using Your iPhone or Mac? Here Are the Simple Steps to Put Add Filters on iMovie. Find Out a Better iMovie Alternative with More Filters
- 2024 Approved Here Is a Step-by-Step Guide to Color Correct and Color Grade a Video Professionally with Wondershare Filmora. Lets Get Going
- 2024 Approved Get to Know How Excellent Sparkle Video Effects Can Significantly Impact Different Projects. Its Miraculous. Read Below to Learn More and Add Sparkle Effect to Your Videos
- In 2024, Here are Some of the Best Pokemon Discord Servers to Join On Realme 12 Pro 5G | Dr.fone
- Honor Bypass Tools to Bypass Lock Screen(Honor 100 Pro)
- In 2024, Pokemon Go No GPS Signal? Heres Every Possible Solution On Poco M6 Pro 5G | Dr.fone
- Wondering the Best Alternative to Hola On Apple iPhone 6s Plus? Here Is the Answer | Dr.fone
- In 2024, How Can I Use a Fake GPS Without Mock Location On Xiaomi Redmi Note 13 Pro 5G? | Dr.fone
- Full Guide to Catch 100 IV Pokémon Using a Map On Oppo A38 | Dr.fone
- Quick Fixes for Why Is My Samsung Galaxy F04 Black and White | Dr.fone
- Top 4 Ways to Trace Vivo Y78t Location | Dr.fone
- Undelete lost call logs from Huawei Nova Y91
- In 2024, Top 11 Free Apps to Check IMEI on Sony Xperia 5 V Phones
- Complete Tutorial Sending Photos From Apple iPhone 14 Plus to iPad | Dr.fone
- How to Downgrade iPhone 14 without Losing Any Content? | Dr.fone
- Ultimate guide to get the meltan box pokemon go For Samsung Galaxy A14 4G | Dr.fone
- How To Remove Flashlight From Apple iPhone 7 Plus Lock Screen | Dr.fone
- In 2024, How to Cast Itel A05s Screen to PC Using WiFi | Dr.fone
- In 2024, 6 Proven Ways to Unlock ZTE Nubia Z60 Ultra Phone When You Forget the Password
- In 2024, Fake Android Location without Rooting For Your Vivo X100 | Dr.fone
- Title: Learn to Create Custom Sequence Presets in Premiere Pro for Efficient Video Editing. Ensure Consistency and Speed up Your Workflow with Personalized Settings
- Author: Chloe
- Created at : 2024-05-20 03:37:35
- Updated at : 2024-05-21 03:37:35
- Link: https://ai-editing-video.techidaily.com/learn-to-create-custom-sequence-presets-in-premiere-pro-for-efficient-video-editing-ensure-consistency-and-speed-up-your-workflow-with-personalized-settings/
- License: This work is licensed under CC BY-NC-SA 4.0.

