
:max_bytes(150000):strip_icc():format(webp)/young-muslim-woman-using-phone-1137305438-75947aa7fb484506bf9da8c38fc68a03.jpg)
Montage Makes It Easy to Create and Share Videos. This Article Will Explain What It Can Do and Show You Examples of Movies that Use Montage
Montage Makes It Easy to Create and Share Videos. This Article Will Explain What It Can Do and Show You Examples of Movies that Use Montage
As with many new things in life, Montage isn’t your best friend right off the bat. So, if you want to learn to use montages with movies, they need to be the right ones. If you don’t know what Montage is, it is a way of compressing an action or series of actions into a short amount of time. We look at movies because they are a common type of entertainment everyone has seen before, which makes them easier to understand as a concept.
Using Montage is a great way to create engaging video content. There are many people interested in the topic of Montage, so if you get that video out there, you can easily find an audience. When used in conjunction with YouTube advertising, creating videos about Montage could be an excellent business idea for you.
Learning how to use Montage properly can be challenging. The process isn’t intuitive, and using it can feel like hiding random pieces around your page. But, when you watch the right movies, they can help you understand how to use this tool effectively. So, take some time, check out these movies, and learn how to get the most out of Montage!
What Is A Montage?
The definition of a montage is a “series of short scenes or episodes forming a unified whole.” That definition can lead to different interpretations of a montage and can be applied to any art medium. A “montage” isn’t just for movies. Music artists use montages to tell stories that often describe their emotions and experiences; writers create poetry and prose contained in such an artistic form, and painters often use this art form. However, many people are most familiar with the term associated with movies: a montage is essentially a collection of images or scenes that populate a movie with music.
If you’ve seen any blockbuster Hollywood films in the last ten years, you’ve probably seen some Montage. The Montage is a sequence that takes place over a set period and shows us how the lead character goes from being an ordinary person to an extraordinary one. The difference between these two states is dramatic, so we see so many montages in movies. They are meant to grab your attention and excitingly introduce a character.
Purpose of Montage
Montage movies are made up of a compilation of short yet powerful scenes put together to make one movie or project. Even though these types of movies have become a common genre, there’s a list of reasons why this is popular in movies today.
- Montage has several uses in movies. Of course, Montage can be used to show events such as battles or dancing. It can also describe emotions, including sadness, happiness, and sarcasm. These different uses of Montage do come with their styles, but they all share a few common traits.
- They’re often used to condense periods of storytime into much smaller but more entertaining segments. The word montage is French for “to construct from many parts .”Montages can now be seen everywhere in film and television, from silent films to blockbuster action movies.
- This is frequently used in narratives when the story needs to advance quickly. The characters are going somewhere or doing something else not within the context of the moment in time that represents them. A great example of a montage was used in Rocky when Rocky was training for his fight with Apollo Creed.
- A montage allows filmmakers to explore a theme using several sequential shots that can’t be covered in a single shot.
Learn To Use Montage With These Movies
1. Rocky (1976)
The training montage is popular in cinema. A montage like this helps us follow how the protagonist prepares himself for a life-threatening fight and claims honor in society. Sylvester Stallone plays Robert “Rocky” Balboa, going through the rigorous preparations for his fight. A song by Bill Conti called “Gonna Fly Now” is playing in the background, contributing to the scene’s energy.
Rocky (1976)
2. Scarface (1983)
A fictional Cuban Tony (Al Pacino) becomes a gangster in Brian De Palma’s 1983 film Scarface against the backdrop of the cocaine boom of the 1980s. He is portrayed as a criminal rising to the echelons of the underworld and slowly falling. In this montage sequence, Tony becomes the biggest drug lord in Miami and controls nearly all the cocaine that comes through the city.
Scarface (1983)
3. Goodfellas (1990)
Martin Scorsese’s Goodfellas is a gangster film set in 1950s New York City, one of the best. In it, Irish-Italian Henry Hill (Ray Liotta) is portrayed as he rises through the ranks of the crime branch of his Brooklyn neighborhood. As we watch this Montage, we see Henry and his gang members viciously murdering anyone who stands in their path. This edit is beautifully complemented by Eric Clapton’s “Layla.” voice-over.
Goodfellas (1990)
4. Trainspotting (1996)
Ewan McGregor stars in Danny Boyle’s black comedy, which tells the tale of drug addict Mark Renton (Danny Boyle). Mark tries to get clean and get back on his feet. Despite this, drug enticements and friend influence are major deterrents. Through this introductory Montage, we are introduced to the protagonist’s lifestyle. In addition, the film explores the themes of drug abuse, addiction, and nihilism.
Trainspotting (1996)
5. Run Lola Run (1998)
In his movie Run Lola Run (1998), Tom Tykwer tells the story of Lola (Franka Potente) and Mani (Moritz Bleibtreu) as they face the different possibilities that arise from a single event in their lives. This Montage shows Lola bumping into various people as she begins to sprint. Her encounter has a profound impact on their lives. Through Montage, the film is given a sense of exhilarating pace and multi-layered visual design.
Run Lola Run (1998)
6. Requiem for a Dream (2000)
Hubert Selby Jr.’s titular novel is the source material for Darren Aronofsky’s psychological drama. Four people trapped by their addictions are the focus of the narrative. By watching this Montage, a viewer can get a better sense of the world or the film’s characters. As a result of their drug addictions, four ambitious people will eventually have their dreams dashed. As a result, we gain insight into how addiction takes hold of the characters’ minds and bodies.
Requiem for a Dream (2000)
7. Swades (2004)
Songs have played an integral role in bringing the story of the film to life in the hands of some of India’s most thoughtful filmmakers. Among them is Ashutosh Gowariker. Montage techniques are used to create the title song sequence of his film Swades. The fictional Indian village of Charanpur, where the protagonist Mohan Bhargava (Shahrukh Khan) has lived, is a source of great trauma for the protagonist. As he ends up returning to India, the song signifies his development psychologically.
Swades (2004)
8. Whiplash (2014)
Miles Teller plays Andrew Neiman, a promising young drummer who enrolls in a tough music conservatory. Damien Chazelle directs the film. Terence Fletcher (J. K. Simmons) mentors him, and he is determined to see his students’ dreams come true. Neiman pushes himself to his limits in this Montage, suffering a breakdown as a result. Edited shots and tempo match the visual images to accentuate the protagonist’s mental state.
Whiplash (2014)
9. Gone Girl (2014)
Gillian Flynn’s eponymous novel is the basis for David Fincher’s psychological crime drama. On their fifth wedding anniversary, Amy Elliott Dunne (Rosamund Pike) disappears, and Nicholas Dunne (Ben Affleck) becomes the prime suspect. Amy carefully crafts her new identity in this Montage as we learn she is alive. The Montage ends as Amy sets up her cabin and begins purchasing supplies. After hitting herself with a hammer, the sequence ends.
Whiplash (2014)
10. Parasite (2019)
In Bong Joon-ho’s Oscar-winning dark comedy thriller, the Kim family lives on the edge of poverty. They are suddenly thrown into a world of affluence when a family member gets a job at an affluent family. Moon-Gwang (Lee Jung-Eun) is a long-time housekeeper for the Kim family. The family comes up with a cunning plan to exploit her allergy to peaches. In the closing montage, they convince Mrs. Park (Cho Yeo-Jeong) that Moon-Gwang has tuberculosis.
Whiplash (2014)
Wondershare Filmora11 Express Better
Achieve More
Grow Together
Free Download Free Download Learn More

![]()
Summarize:
If you’re thinking about using Montage, check out movies and trailers in the Action and Comedy genres. Keep in mind that finding material that works well with montages is no accident. They are filled with some of the best soundtracks, action scenes, and comedy routines that can help guide your project through its rough spots. Montage can do amazing things for any movie, so it’s important to learn when and where it should be used.
Rocky (1976)
2. Scarface (1983)
A fictional Cuban Tony (Al Pacino) becomes a gangster in Brian De Palma’s 1983 film Scarface against the backdrop of the cocaine boom of the 1980s. He is portrayed as a criminal rising to the echelons of the underworld and slowly falling. In this montage sequence, Tony becomes the biggest drug lord in Miami and controls nearly all the cocaine that comes through the city.
Scarface (1983)
3. Goodfellas (1990)
Martin Scorsese’s Goodfellas is a gangster film set in 1950s New York City, one of the best. In it, Irish-Italian Henry Hill (Ray Liotta) is portrayed as he rises through the ranks of the crime branch of his Brooklyn neighborhood. As we watch this Montage, we see Henry and his gang members viciously murdering anyone who stands in their path. This edit is beautifully complemented by Eric Clapton’s “Layla.” voice-over.
Goodfellas (1990)
4. Trainspotting (1996)
Ewan McGregor stars in Danny Boyle’s black comedy, which tells the tale of drug addict Mark Renton (Danny Boyle). Mark tries to get clean and get back on his feet. Despite this, drug enticements and friend influence are major deterrents. Through this introductory Montage, we are introduced to the protagonist’s lifestyle. In addition, the film explores the themes of drug abuse, addiction, and nihilism.
Trainspotting (1996)
5. Run Lola Run (1998)
In his movie Run Lola Run (1998), Tom Tykwer tells the story of Lola (Franka Potente) and Mani (Moritz Bleibtreu) as they face the different possibilities that arise from a single event in their lives. This Montage shows Lola bumping into various people as she begins to sprint. Her encounter has a profound impact on their lives. Through Montage, the film is given a sense of exhilarating pace and multi-layered visual design.
Run Lola Run (1998)
6. Requiem for a Dream (2000)
Hubert Selby Jr.’s titular novel is the source material for Darren Aronofsky’s psychological drama. Four people trapped by their addictions are the focus of the narrative. By watching this Montage, a viewer can get a better sense of the world or the film’s characters. As a result of their drug addictions, four ambitious people will eventually have their dreams dashed. As a result, we gain insight into how addiction takes hold of the characters’ minds and bodies.
Requiem for a Dream (2000)
7. Swades (2004)
Songs have played an integral role in bringing the story of the film to life in the hands of some of India’s most thoughtful filmmakers. Among them is Ashutosh Gowariker. Montage techniques are used to create the title song sequence of his film Swades. The fictional Indian village of Charanpur, where the protagonist Mohan Bhargava (Shahrukh Khan) has lived, is a source of great trauma for the protagonist. As he ends up returning to India, the song signifies his development psychologically.
Swades (2004)
8. Whiplash (2014)
Miles Teller plays Andrew Neiman, a promising young drummer who enrolls in a tough music conservatory. Damien Chazelle directs the film. Terence Fletcher (J. K. Simmons) mentors him, and he is determined to see his students’ dreams come true. Neiman pushes himself to his limits in this Montage, suffering a breakdown as a result. Edited shots and tempo match the visual images to accentuate the protagonist’s mental state.
Whiplash (2014)
9. Gone Girl (2014)
Gillian Flynn’s eponymous novel is the basis for David Fincher’s psychological crime drama. On their fifth wedding anniversary, Amy Elliott Dunne (Rosamund Pike) disappears, and Nicholas Dunne (Ben Affleck) becomes the prime suspect. Amy carefully crafts her new identity in this Montage as we learn she is alive. The Montage ends as Amy sets up her cabin and begins purchasing supplies. After hitting herself with a hammer, the sequence ends.
Whiplash (2014)
10. Parasite (2019)
In Bong Joon-ho’s Oscar-winning dark comedy thriller, the Kim family lives on the edge of poverty. They are suddenly thrown into a world of affluence when a family member gets a job at an affluent family. Moon-Gwang (Lee Jung-Eun) is a long-time housekeeper for the Kim family. The family comes up with a cunning plan to exploit her allergy to peaches. In the closing montage, they convince Mrs. Park (Cho Yeo-Jeong) that Moon-Gwang has tuberculosis.
Whiplash (2014)
Wondershare Filmora11 Express Better
Achieve More
Grow Together
Free Download Free Download Learn More
![]()
Summarize:
If you’re thinking about using Montage, check out movies and trailers in the Action and Comedy genres. Keep in mind that finding material that works well with montages is no accident. They are filled with some of the best soundtracks, action scenes, and comedy routines that can help guide your project through its rough spots. Montage can do amazing things for any movie, so it’s important to learn when and where it should be used.
How to Make Eye Zoom Transition Effect with Filmora
What is an eye zoom transition effect? It’s a close-up video effect allowing viewers to transit to the next clip from the eye. This effect is commonly used by musicians and travel bloggers to give their videos a more cinematic feel. So, without wasting time, let’s learn how to create an eye zoom transition with Wondershare Filmora .
Free Download For Win 7 or later(64-bit)
Free Download For macOS 10.14 or later
Preparation:
First, you need to create a close-up eye video. Although you can do that with your digital camera, a standard smartphone should do it just fine. Just ask a friend or family member to use your phone’s rear camera to record your eye centered on the screen. Ensure that the eye is as close as possible and you don’t lose focus. The camera should be around 10cm away from your face. And lest I forget, the flash should be ON.

How to Create an Eye-zoom Transition
Step 1 Align the video clips on Filmora
After recording a close-up eye video, add it on Wondershare Filmora and duplicate it. Alternatively, you can add the video to the first and second tracks.

Step 2 Add a freeze frame to the video
Next, we want to add a freeze frame to the section where the eye opens fully. To do that, select the second video track and place the playhead where the eye is fully open. After that, right-click the video track, then choose the Add Freeze Frame option.

Now trim the first video track from where the freeze frame starts on the second video. Also, cut the second video track to leave only the freeze frame
Step 3 Add a masking effect to the eye
With the two video tracks ready, it’s time to apply a masking effect. Tap the Effect tab on the top menu bar and then find the Shape Mask under the utility section. Now drag and drop the effect to the freeze frame.

Double-click on the freeze frame clip to adjust the Shape Mask on the preview screen. Ensure the mask reveals the eye pupil only and check the Invert Mask box. Also, set the Feather number to 10.

Step 4 Add the transition video
Next, add the video you want to edit with an eye-zoom effect next to the first video track. Preview the video, and you’ll notice your new video playing inside the eye mask.
With that done, move the playhead to the start of the freeze frame video and double-click the video clip to launch the settings window. Click the Animation tab before clicking Customize to see the keyframe settings. Tap the Add button to add a keyframe. Then, add a few frames using the playhead before clicking Add. But because we’re zooming in, increase the scale to 160%. You can also add the rotation and position.

After setting the second keyframe, move the playhead to the right and add the third keyframe. This time, increase the scale number to 400%, as well as the rotation and position. Now preview the video, and you’ll notice the rotating eye-zoom effect.
Summary
There you go! That’s how to create an eye-zoom transition using Wondershare Filmora. Don’t forget to play around with this feature-rich video editor to unlock its full capabilities. Enjoy!
Free Download For macOS 10.14 or later
Preparation:
First, you need to create a close-up eye video. Although you can do that with your digital camera, a standard smartphone should do it just fine. Just ask a friend or family member to use your phone’s rear camera to record your eye centered on the screen. Ensure that the eye is as close as possible and you don’t lose focus. The camera should be around 10cm away from your face. And lest I forget, the flash should be ON.
How to Create an Eye-zoom Transition
Step 1 Align the video clips on Filmora
After recording a close-up eye video, add it on Wondershare Filmora and duplicate it. Alternatively, you can add the video to the first and second tracks.
Step 2 Add a freeze frame to the video
Next, we want to add a freeze frame to the section where the eye opens fully. To do that, select the second video track and place the playhead where the eye is fully open. After that, right-click the video track, then choose the Add Freeze Frame option.
Now trim the first video track from where the freeze frame starts on the second video. Also, cut the second video track to leave only the freeze frame
Step 3 Add a masking effect to the eye
With the two video tracks ready, it’s time to apply a masking effect. Tap the Effect tab on the top menu bar and then find the Shape Mask under the utility section. Now drag and drop the effect to the freeze frame.
Double-click on the freeze frame clip to adjust the Shape Mask on the preview screen. Ensure the mask reveals the eye pupil only and check the Invert Mask box. Also, set the Feather number to 10.
Step 4 Add the transition video
Next, add the video you want to edit with an eye-zoom effect next to the first video track. Preview the video, and you’ll notice your new video playing inside the eye mask.
With that done, move the playhead to the start of the freeze frame video and double-click the video clip to launch the settings window. Click the Animation tab before clicking Customize to see the keyframe settings. Tap the Add button to add a keyframe. Then, add a few frames using the playhead before clicking Add. But because we’re zooming in, increase the scale to 160%. You can also add the rotation and position.
After setting the second keyframe, move the playhead to the right and add the third keyframe. This time, increase the scale number to 400%, as well as the rotation and position. Now preview the video, and you’ll notice the rotating eye-zoom effect.
Summary
There you go! That’s how to create an eye-zoom transition using Wondershare Filmora. Don’t forget to play around with this feature-rich video editor to unlock its full capabilities. Enjoy!
How to Add Zoom Blur Effect In Photoshop
People add blurry effects to their photos to add a sense of focus effortlessly. It helps to grasp the viewers’ attention as blurry effects add a depth of field. There are various kinds of blurry effects, such as motion blur, zoom blur, etc.
One of the commonly used blurry effects is zoom blur which helps to highlight a specific area of the image. This article will help you to add zoom blur Photoshop through simple means.
Part 1: What is Zoom Blur?
Zoom blur is a creative effect that adds a new dimension to your captured photos. It creates an illusion where the captured shot appears to blur from the center direction. It gives an abstract feel and adds a certain movement to the picture. You can quickly draw attention to your subject by adding a zoom motion blur.

To create a zoom blur effect while capturing the photo, you should consider some conditions. For example, you can successfully create this effect by taking a picture in low-light conditions. Moreover, you should use a tripod to acquire the best results.
Part 2: How to Add Zoom Blur Effect to Photos in Photoshop?
Photoshop is widely used to alter images with distinct features. It can easily handle diverse file types with great efficiency. It gives complete control to the user as it comprises a friendly user interface. Moreover, you can utilize its color grading tools to adjust the saturation, hue, contrast, and brightness of the photo.
You can also discover AI-supported neural filters that can be a game-changer for you. It also provides a sky replacement tool that you can use to replace the sky in your captured photos effortlessly. For zoom blur Photoshop, you can manually create this effect with a few clicks. For this purpose, you can take help from the following guidelines:
Step1 Navigate to your Photoshop tool and import your desired photo. Go to the “Layers” section on your screen and press “Ctrl + J” to duplicate the first layer. If you are a MacBook user, you can press “Command + J.”

Step2 To proceed, go to the “Filter” option given above and select the “Blur” option. From its drop-down menu, select “Radial Blur .”Now you would be able to see a new window of Radial Blur on your screen. Here, change the amount to 10, and under the “Blur Method” section, select “Zoom .”Also, choose “Best” in the “Quality” section.

Step3 By staying on the Radial Blur window, adjust the “Blur Center” according to your desire. It will add focus to the central point while blurring the surroundings of your image. Once done, hit the “OK” button. To add further modifications, you can open the Radial Blur window again and modify the “Blur Center” easily.

Part 3: Add the Motion Blur with an Alternative to Photoshop
Are you searching the alternatives to Photoshop? It may be possible that you don’t get desired final results using zoom blur Photoshop. For this, you can check the following tools to achieve the best results.
1. GIFGIT.com
This online tool is an easy-to-use platform through which you can edit your images without any complications. It contains different tools through which you can add modifications instantly. For instance, you can utilize its advanced features such as Color Picker, Background Eraser, Gradient Tool, Magic Eraser, etc. Through its Blur Tool, you can defocus an image precisely in the desired manner.
To use this tool, navigate to the website of GIFGIT through your web browser. From its various tools, select the “Blur” tool. Afterward, click the “Choose File” button and upload your image. From the above editing toolbar, access the “Zoom Blur” slider to use the blur option. Adjust the ratio of the blur by increasing or decreasing the value through the slider or by entering the number inside the box.

2. Luxa.org
Do you want a professional tool to add a zoom blur effect? Luxa.org has a friendly user interface that comprises different options, such as PDF tools and image tools. For the image tools, you can find various options to execute the editing. For instance, you can add colored borders to your images and text in the desired font. You can also modify the brightness level of your pictures through this tool.
To add a zoom motion blur effect, this tool provides a special online blur tool. To utilize it, access the website of Luxa.org and go to its image tools. From there, navigate to the zoom blur feature. Now upload your image on this tool and set the horizontal and vertical strengths. Also, adjust the blur strength accordingly. Once the zoom blur effect gets added to your photo, click on the “Download” button.

3. Wondershare Filmora
Have you ever tried Wondershare Filmora before? Filmora is a complete toolbox through which you can execute basic and advanced image editing without complications. It contains different kinds of built-in presets that can help you express your creativity. Moreover, it provides stock images that you use without any restrictions.
Free Download For Win 7 or later(64-bit)
Free Download For macOS 10.14 or later
To enhance your images, Filmora provides you with tons of professional effects. Using these effects, you can also add a zoom blur effect to your photos along with modification options. Furthermore, you can also export the edited image in the desired file format and resolution on this platform. To use this platform for adding a zoom blur effect, check the following instructions:
Step1 Import the Particular Image
After launching Filmora, select the “Create New Project” option to begin. Afterward, import the image from your computer to which you want to add the zoom blur effect. Once done, drag and drop the picture into the timeline.

Step2 Add the Zoom Blur Effect
Go to the Effect section and select “Utility” under the “Video Effects” section. From there, search “Tilt-Shift Circle” effect. Select and drop this effect to the timeline to proceed. Also, make sure to adjust the duration of the added effect according to your clip.

Step3 Adjust the Blur Settings
Now, double-click the added effect to adjust the intensity of the effect. Through the circle, you can apply the zoom blur effect to the photo precisely. You can adjust the intensity and size of the zoom motion blur effect.

Last Words
The zoom blur effect can instantly add focus to the subject in a dramatic manner. It can also highlight a specific point of the image effortlessly. In this article, we have addressed how to add zoom motion blur using Photoshop. To use the best alternative to Photoshop, we highly recommend using Wondershare Filmora. This tool has an easy-to-use interface and enables you to add a zoom blur effect easily.
Part 1: What is Zoom Blur?
Zoom blur is a creative effect that adds a new dimension to your captured photos. It creates an illusion where the captured shot appears to blur from the center direction. It gives an abstract feel and adds a certain movement to the picture. You can quickly draw attention to your subject by adding a zoom motion blur.
To create a zoom blur effect while capturing the photo, you should consider some conditions. For example, you can successfully create this effect by taking a picture in low-light conditions. Moreover, you should use a tripod to acquire the best results.
Part 2: How to Add Zoom Blur Effect to Photos in Photoshop?
Photoshop is widely used to alter images with distinct features. It can easily handle diverse file types with great efficiency. It gives complete control to the user as it comprises a friendly user interface. Moreover, you can utilize its color grading tools to adjust the saturation, hue, contrast, and brightness of the photo.
You can also discover AI-supported neural filters that can be a game-changer for you. It also provides a sky replacement tool that you can use to replace the sky in your captured photos effortlessly. For zoom blur Photoshop, you can manually create this effect with a few clicks. For this purpose, you can take help from the following guidelines:
Step1 Navigate to your Photoshop tool and import your desired photo. Go to the “Layers” section on your screen and press “Ctrl + J” to duplicate the first layer. If you are a MacBook user, you can press “Command + J.”
Step2 To proceed, go to the “Filter” option given above and select the “Blur” option. From its drop-down menu, select “Radial Blur .”Now you would be able to see a new window of Radial Blur on your screen. Here, change the amount to 10, and under the “Blur Method” section, select “Zoom .”Also, choose “Best” in the “Quality” section.
Step3 By staying on the Radial Blur window, adjust the “Blur Center” according to your desire. It will add focus to the central point while blurring the surroundings of your image. Once done, hit the “OK” button. To add further modifications, you can open the Radial Blur window again and modify the “Blur Center” easily.
Part 3: Add the Motion Blur with an Alternative to Photoshop
Are you searching the alternatives to Photoshop? It may be possible that you don’t get desired final results using zoom blur Photoshop. For this, you can check the following tools to achieve the best results.
1. GIFGIT.com
This online tool is an easy-to-use platform through which you can edit your images without any complications. It contains different tools through which you can add modifications instantly. For instance, you can utilize its advanced features such as Color Picker, Background Eraser, Gradient Tool, Magic Eraser, etc. Through its Blur Tool, you can defocus an image precisely in the desired manner.
To use this tool, navigate to the website of GIFGIT through your web browser. From its various tools, select the “Blur” tool. Afterward, click the “Choose File” button and upload your image. From the above editing toolbar, access the “Zoom Blur” slider to use the blur option. Adjust the ratio of the blur by increasing or decreasing the value through the slider or by entering the number inside the box.
2. Luxa.org
Do you want a professional tool to add a zoom blur effect? Luxa.org has a friendly user interface that comprises different options, such as PDF tools and image tools. For the image tools, you can find various options to execute the editing. For instance, you can add colored borders to your images and text in the desired font. You can also modify the brightness level of your pictures through this tool.
To add a zoom motion blur effect, this tool provides a special online blur tool. To utilize it, access the website of Luxa.org and go to its image tools. From there, navigate to the zoom blur feature. Now upload your image on this tool and set the horizontal and vertical strengths. Also, adjust the blur strength accordingly. Once the zoom blur effect gets added to your photo, click on the “Download” button.
3. Wondershare Filmora
Have you ever tried Wondershare Filmora before? Filmora is a complete toolbox through which you can execute basic and advanced image editing without complications. It contains different kinds of built-in presets that can help you express your creativity. Moreover, it provides stock images that you use without any restrictions.
Free Download For Win 7 or later(64-bit)
Free Download For macOS 10.14 or later
To enhance your images, Filmora provides you with tons of professional effects. Using these effects, you can also add a zoom blur effect to your photos along with modification options. Furthermore, you can also export the edited image in the desired file format and resolution on this platform. To use this platform for adding a zoom blur effect, check the following instructions:
Step1 Import the Particular Image
After launching Filmora, select the “Create New Project” option to begin. Afterward, import the image from your computer to which you want to add the zoom blur effect. Once done, drag and drop the picture into the timeline.
Step2 Add the Zoom Blur Effect
Go to the Effect section and select “Utility” under the “Video Effects” section. From there, search “Tilt-Shift Circle” effect. Select and drop this effect to the timeline to proceed. Also, make sure to adjust the duration of the added effect according to your clip.
Step3 Adjust the Blur Settings
Now, double-click the added effect to adjust the intensity of the effect. Through the circle, you can apply the zoom blur effect to the photo precisely. You can adjust the intensity and size of the zoom motion blur effect.
Last Words
The zoom blur effect can instantly add focus to the subject in a dramatic manner. It can also highlight a specific point of the image effortlessly. In this article, we have addressed how to add zoom motion blur using Photoshop. To use the best alternative to Photoshop, we highly recommend using Wondershare Filmora. This tool has an easy-to-use interface and enables you to add a zoom blur effect easily.
The Only Guide You’ll Ever Need to Learn GIF Design
The Only Guide You’ll Ever Need to Learn GIF Design That Get Shared Like Crazy
An easy yet powerful editor
Numerous effects to choose from
Detailed tutorials provided by the official channel
The Only Guide You’ll Ever Need to Learn GIF Design That Get Shared Like Crazy
In this article
01 [8 Principles for Great GIF Design](#Part 1)
02 [6 Amazing Examples of Animated Gifs in Web Design](#Part 2)
03 [Learn How to Create and Add Gifs to Interactive Layouts in Filmora](#Part 3)
Part 1 Principles for Great GIF Design
Creating GIFs for infotainment or casual information sharing is the current talk of the trend. You might have visibly landed across a heap of tantalizing GIFs in blogs, social media posts, product promotion websites and almost every other domain you can possibly think of. Using GIFs for any type of content promotion is bound to captivate the target audience in impressive multiplicities. Ever wondered what’s the cue behind the mass appeal that GIFs create? Well, an obvious answer is the stunning GIF design.
When going for GIF creation and selection, design plays the key role in creating considerable buzz about the information being transmitted. To add impact to your creation, you need to pay considerable attention to its design implications, thus ensuring that the right things get presented in the right way. Outlined below are some amazing principles you can use to enhance your GIF design to the next level:
01Ensure Accuracy and Preciseness
The primary concern you need to be attentive about while designing a GIF is its preciseness. Ensure ban exactness of information and confine your creation to the theme and requirement of your creation, like, the message you want to deliver or the impact you want to create through the GIF. Balance your creativity within specific content parameters and avoid getting carried away or overdoing on the beautifying aspect.
As an example, it is visibly not appealing to add a wholesome mix of 15 shades and 20 different elements in a nature-based GIF. You will end up getting too harsh on the viewers’ eyes, confusing them with a hoard of speeding elements and banging colors. You can instead stick to 2 or 3 frames with an intelligent mix of 2 complementary shades.
02Maintain Visual Identity
An important aspect to keep in mind while attempting to design GIF is, it should visually relate to the underlying content. For instance, if you are intending a brand promotion through your GIF, lay stress on adding elements like, brand definition, product specifications, know-how of your work patterns, etc. ensure that your content flows naturally and has exactness.
Other alternatives are, using your product logo as the GIF background, character representation of your brand or using some explicit product oriented themes. While, you are free to pick anything that suits your preferences and needs, just make sure that using it in your GIF adds value to your brand instead of giving an out of the box feel.
Image Name: The-only-guide-you’ll-ever-need-to-learn-gif-design-that-get-shared-like-crazy-1

03Cut Down on Unnecessary Frames
Have you ever encountered a halt in the natural loop of your GIF out of nowhere? While pondering over the underlying cause, it is a common assumption to take this as an animation fallacy, but that’s evidently not the case. The actual culprits behind this glitch are those extra frames that contribute towards nothing but adding weight to an already heavy file.
To set this straight, you should switch to removing any extra frames, while saving a particular one which you may stretch to a desired duration according to the break point of your contents in the GIF. However, take caution to maintain the visual quality of your GIF while you remove those extra frames.
04Make Your GIF Accessible
You should always adhere to the concern of accessibility while creating a GIF. The reason being, your content is visibly going to get mass attention across the web and you cannot filter out visitors, make sure your GIF is easily accessible to all kind of users, particularly those with vision limitations, like, epileptic patients or the ones using screen readers.
Focus on describing your GIF content with alt text and using a limited blinking and flashing rate. In case your GIF content is primarily text based, take care to limit the effective color and image movement and adjust the frames rates to avoid constant and quick movement of image frames when adding many clips on a single page.
Pay additional heed to the auto play feature of your GIFs. It can be visibly annoying to be welcomed on a site homepage with GIFs enjoying an auto play session of their own. You can alternatively, incorporate a ‘Click to Play’ option or grant your site visitors the liberty to decide on what is to be played when.

05Use Storyboards
When aiming to create visibly appealing GIFs, you need to lay considerable stress on choosing an apt background story. Don’t get misled by the wrong assumption of using any random background, owing to the short play duration of GIFs. An impressive solution to this concern is taking the help of a storyboard to keep track of your GIF’s content flow.
Using a storyboard is quite effective means of being in line with the direction of content movement, rescuing you from the hustle of going off the track. This comes explicitly handy when you are working with a team of creators. The storyboard is there to keep everything at the exact place, thus improving member communications and boosting up the design process.

06Focus on Creating Loops
Consider creating an animated motion loop for your GIF allowing a repeated and comprehensive view of your content. Looping projects a deeper observation of the clip and its contents in a seamless transition. However, creating an infinite motion loop in GIFs is quite tricky, as you need to pay utmost concern to ensure a smooth content flow and chances of even the slightest errors are not entertained.
Any loopholes in placement of your GIF elements will get noticed within a blink and lead to an unsatisfactory user experience. Hence, you need to check each of your content frames separately to eliminate chances of possible errors. If you are a beginner, try working with geometrical animations to get the initial pickup. This will be advantageous in deciding the exact element positions at the start and end of the GIF.
07Make Use of Motion Blur
Using the concept of motion blur is pivotal in providing a natural flow and feel to your GIF, which, in an otherwise case would ordinarily appear as a mere collection of static images clubbed together. This would give a wobbling feel with unsteady frame movements to your viewers. The motion blur effect potentially ensures a smooth content flow, and your GIF looks like a short video captured from a camera.
08Stick to a Reduced File Size
Creating GIF of within a standard size range is quite difficult, owing to the fact that these are shared across a variety of media platforms, each having a different file size constraint. It is, however, recommended to stick to a file size as low as possible to escape the notch of modifying the same, ener5y time you need to work with the GIF on a different platform.
Listed below are a few ways to limit your GIF to a lower file size:
● Restrict your GIF to a frame count under 150, exceeding which, it will get difficult to export the GIF to most of the commonly visited social media and content sharing platforms.
● When your GIF is ready to export, adjust its lossy parameter between 5 and 10 to boost the file compression rate. Look for a setting that decreases the effective file size without compromising with the overall GIF design.
● Restrict to a minimum possible color usage. This will not only intensify the GIF design, but also contribute in maintaining a decreased file size. You can instead, focus on playing with animations or adjusting your image frames to longer play durations.
● Don’t experiment with multiple background gradients in your GIF. You can select from either a completely opaque, or a totally transparent background. Adding unnecessary gradients will end up giving your GIF a hazy look, along with a visibly large file that will be difficult to export non any platform.
Part 2 Amazing Examples of Animated Gifs in Web Design
GIFs are an effective means of adding appeal to brand promotions and achieving improved market buildup by delivering just the right content in the most captivating and interesting ways. You can use them as creative web design tools to add spark to your product sites, which can potentially boost the market value and reach of your product by multiplying the number of visitors to your site.
Discussed below are some stunning examples of using animated GIFs to enhance commercial web design, which you can use to create a significant buzz about your product among a target audience:
01Marie Weber
This is a shoe designer company in France, famous for its classy, handmade shoes. On visiting the company’s site, you are welcomed by a simple and subtle, animated product logo on each page. This animated logo is a masterpiece in itself, telling you the about the lavishness of the associated product.
On navigating further, you will find animated elements, like; shoe images and collection names, which appear on the screen before a zoom out. There are underlined links that pop up to animate beneath the name, indicating the link you are going to visit.

02Wonderful Weekends Festival
This is an absolute animation delight, where the welcome page of the site greets you with vibrant pieces in motion, and a pop up box informs you of the festival’s arrival time and asks you to select one from the options of ‘Play Now’ or ‘Show Me the Festival’.
As you click to make a choice, the Google brand shines with associated colors. As you continue to browse through the site, pages open up with brand color animations, along with colored active links flashing on the pages.
03Google
This is a brand name that needs no introduction. Google has launched its ‘Your Plan, Your Planet’ site to infuse awareness about environment conservation and eco friendly lifestyles, guiding visitors on ways and means of introducing related changes. The site greets you with a simple layout, with a short text moving in and getting still. Click on ‘Let’s Get Started’ and you will see 4 amazingly animated icons that open up to more vibrant animations.
Tap any one of the swinging refrigerator door, the illuminated light bulb, the running faucet or the teddy bear waving at you, to land on a schema that informs you about effective means of improving on conservation in within your selected section. This is a perfect example of using animations as a marketing strategy to captivate people’s attention on a subject that evidently turns them off.
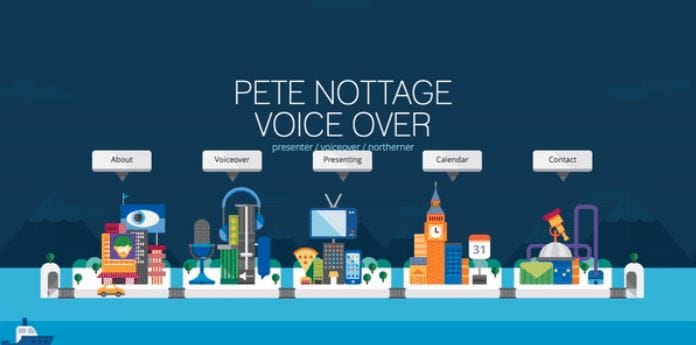
04Pete Nottage
Designed explicitly as a hiring site for voice presenter Pete Nottage, this website tells you everything about the actor and the credibility of hiring him. The site lands among the best examples of web animation usage. The welcome page of the site greets you with the brand logo. Tap on the red swipe and you will get to know that the brand infuses vibrancy to something that’s originally dull.
Next, you will find a plethora of dynamic and elegant animations in a plying plane, cityscape, flowing sea and sailing boats, moving cars and excusive motion graphics on each building. Visiting the animated site links provides you an insight of the actor’s personality. In the ‘About’ section, you can find a headshot animation, that disappears on clicking, and is followed by a more dynamic motion snippet.
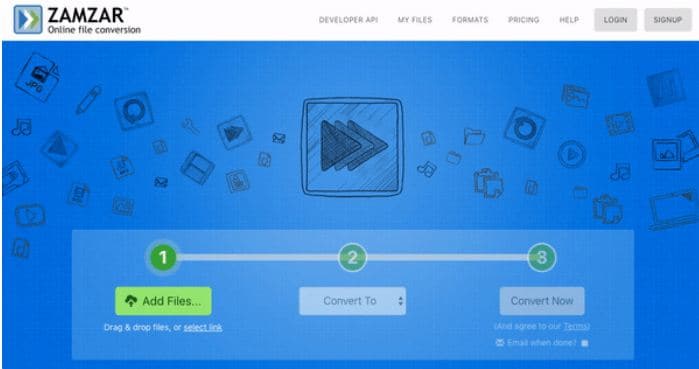
05Zamzar
This one is an online file conversion site and lives up to its tagline ‘File Conversion Made Easy’ through a concrete animation on the welcome page. The file conversion on this site is quick, 3-step process, with a blinking animation indicating the current conversion stage.
For instance, when you are at the first step of selecting a file to convert, the animation shoes a blinking glow on number 1. This continues for the rest of the steps, till your file is finally converted into the desired file format.
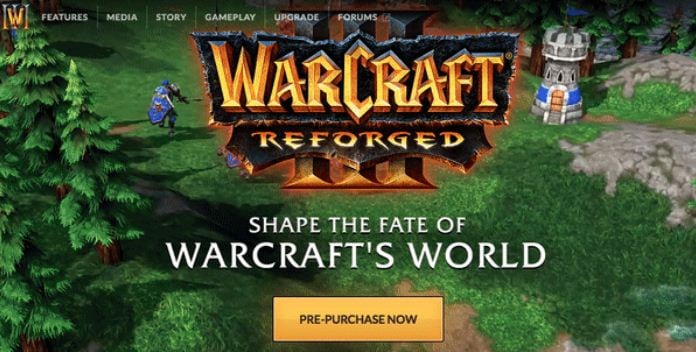
06Blizzard: Warcraft III Reforged
Warcraft was one complete heaven of adventure and thrill for console gamers. While the enticing cutscenes with stunning motion graphics were an absolute favorite, the game had a plenty of other exciting elements.
The relaunched game (Warcraft III Reforged) website has a mix of gaming adventures and cutscenes running in the site’s background with the game title and pitch appearing as an overlaid animation. On navigating through the site, you will find classy animated elements that take you on a nostalgic trip of the original game.
Part 3 Learn How to Create and Add Gifs to Interactive Layouts in Filmora
Now that you are quite familiar with the utility of GIFs in almost every market field, and have seen stunning examples of GIF design and usage for an impressive brand promotion, let’s take a dive into creating and using these motion clips to make interactive graphic layouts for websites, social media blogs and posts, and a variety of other applications that require some brilliant imagery for market promotion.
When looking for the perfect GIF designer software, Wondershare Filmora Video Editor is the most affordable pick. This is a free and an enhanced GIF design tool, packed with world class and premium quality features that are most suitable for giving the much appreciated professional touch to your graphic artwork. Here’s how you can work with Filmora to make alluring graphic layouts:
Step 1: Launch Filmora
The software is readily compatible to your Windows and MacOS devices and you don’t even require a signup to use the application. Just download and install the software in your preferred device and launch the same to reach the software’s welcome interface.
Filmora Free Download Link:
Step 2: Upload Media Files
Select and import the desired media files from your device to upload them to the Filmora timeline. You can either pick a video or choose a series of static images.
Step 3: Add to Timeline
Once imported, you need to add the selected files to the software’s editor timeline. You can use the ‘Drag and Drop’ method to get this done.

Wondershare Filmora - Best Video Editor for Mac/Windows
5,481,435 people have downloaded it.
Build unique custom animations without breaking a sweat.
Focus on creating epic stories and leave the details to Filmora’s auto features.
Start a creative adventure with drag & drop effects and endless possibilities.
Filmora simplifies advanced features to save you time and effort.
Filmora cuts out repetition so you can move on to your next creative breakthrough.
Step 4: Explore Your Editing Skills
As already stated, the Filmora effects library is an extensive inventory of stunning features to compliment your artwork with matchless class. You are free to choose from tons of image and video editing effects and filters suited to your GIF content to create excellent pieces of graphic art.
When starting to customize your GIF in Filmora, you can begin with cropping and trimming your images or video to the perfect part, or even cut and split them to ward off unwanted portions, or rotate and flip the images to set them in the perfect orientation.
You can further add elements like, graphic transitions, overlays, animations and texts, and etc., to customize your artwork to your heart’s content. The software’s audio-visual library facilitates you with around 300 audio-visual effects and music choices to supplement your creation with a conducive sound feel. You can also make adjustments in frame speed and play durations to get the best most snippet ever!
You are granted the liberty to choose almost any common file format to create and customize GIFs in Filmora. A more convincing feature is, the software does not leave a watermark on your artwork and you can easily share your creation across media platforms.

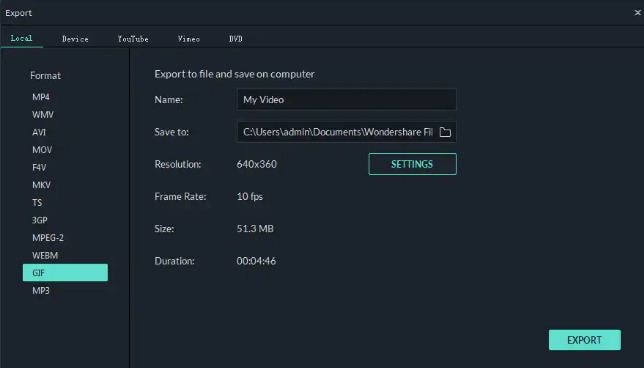
Step 5: Save and Export
Once your creation satisfies you, save it to your device with a .gif extension, from where it can be exported to various media sharing platforms with ease.
● Key Takeaways from This Episode →
● When planning a perfect and appealing product marketing strategy, you can consider using GIFs to enhance the feel. Complement your product site with suitable GIF design and graphic transitions can prove pivotal to target and hold your related audience.
● Looking for the best GIF creator and customization software, you can rely on Filmora to create and customize professional quality GIFs with utmost convenience.
The Only Guide You’ll Ever Need to Learn GIF Design That Get Shared Like Crazy
In this article
01 [8 Principles for Great GIF Design](#Part 1)
02 [6 Amazing Examples of Animated Gifs in Web Design](#Part 2)
03 [Learn How to Create and Add Gifs to Interactive Layouts in Filmora](#Part 3)
Part 1 Principles for Great GIF Design
Creating GIFs for infotainment or casual information sharing is the current talk of the trend. You might have visibly landed across a heap of tantalizing GIFs in blogs, social media posts, product promotion websites and almost every other domain you can possibly think of. Using GIFs for any type of content promotion is bound to captivate the target audience in impressive multiplicities. Ever wondered what’s the cue behind the mass appeal that GIFs create? Well, an obvious answer is the stunning GIF design.
When going for GIF creation and selection, design plays the key role in creating considerable buzz about the information being transmitted. To add impact to your creation, you need to pay considerable attention to its design implications, thus ensuring that the right things get presented in the right way. Outlined below are some amazing principles you can use to enhance your GIF design to the next level:
01Ensure Accuracy and Preciseness
The primary concern you need to be attentive about while designing a GIF is its preciseness. Ensure ban exactness of information and confine your creation to the theme and requirement of your creation, like, the message you want to deliver or the impact you want to create through the GIF. Balance your creativity within specific content parameters and avoid getting carried away or overdoing on the beautifying aspect.
As an example, it is visibly not appealing to add a wholesome mix of 15 shades and 20 different elements in a nature-based GIF. You will end up getting too harsh on the viewers’ eyes, confusing them with a hoard of speeding elements and banging colors. You can instead stick to 2 or 3 frames with an intelligent mix of 2 complementary shades.
02Maintain Visual Identity
An important aspect to keep in mind while attempting to design GIF is, it should visually relate to the underlying content. For instance, if you are intending a brand promotion through your GIF, lay stress on adding elements like, brand definition, product specifications, know-how of your work patterns, etc. ensure that your content flows naturally and has exactness.
Other alternatives are, using your product logo as the GIF background, character representation of your brand or using some explicit product oriented themes. While, you are free to pick anything that suits your preferences and needs, just make sure that using it in your GIF adds value to your brand instead of giving an out of the box feel.
Image Name: The-only-guide-you’ll-ever-need-to-learn-gif-design-that-get-shared-like-crazy-1
03Cut Down on Unnecessary Frames
Have you ever encountered a halt in the natural loop of your GIF out of nowhere? While pondering over the underlying cause, it is a common assumption to take this as an animation fallacy, but that’s evidently not the case. The actual culprits behind this glitch are those extra frames that contribute towards nothing but adding weight to an already heavy file.
To set this straight, you should switch to removing any extra frames, while saving a particular one which you may stretch to a desired duration according to the break point of your contents in the GIF. However, take caution to maintain the visual quality of your GIF while you remove those extra frames.
04Make Your GIF Accessible
You should always adhere to the concern of accessibility while creating a GIF. The reason being, your content is visibly going to get mass attention across the web and you cannot filter out visitors, make sure your GIF is easily accessible to all kind of users, particularly those with vision limitations, like, epileptic patients or the ones using screen readers.
Focus on describing your GIF content with alt text and using a limited blinking and flashing rate. In case your GIF content is primarily text based, take care to limit the effective color and image movement and adjust the frames rates to avoid constant and quick movement of image frames when adding many clips on a single page.
Pay additional heed to the auto play feature of your GIFs. It can be visibly annoying to be welcomed on a site homepage with GIFs enjoying an auto play session of their own. You can alternatively, incorporate a ‘Click to Play’ option or grant your site visitors the liberty to decide on what is to be played when.
05Use Storyboards
When aiming to create visibly appealing GIFs, you need to lay considerable stress on choosing an apt background story. Don’t get misled by the wrong assumption of using any random background, owing to the short play duration of GIFs. An impressive solution to this concern is taking the help of a storyboard to keep track of your GIF’s content flow.
Using a storyboard is quite effective means of being in line with the direction of content movement, rescuing you from the hustle of going off the track. This comes explicitly handy when you are working with a team of creators. The storyboard is there to keep everything at the exact place, thus improving member communications and boosting up the design process.
06Focus on Creating Loops
Consider creating an animated motion loop for your GIF allowing a repeated and comprehensive view of your content. Looping projects a deeper observation of the clip and its contents in a seamless transition. However, creating an infinite motion loop in GIFs is quite tricky, as you need to pay utmost concern to ensure a smooth content flow and chances of even the slightest errors are not entertained.
Any loopholes in placement of your GIF elements will get noticed within a blink and lead to an unsatisfactory user experience. Hence, you need to check each of your content frames separately to eliminate chances of possible errors. If you are a beginner, try working with geometrical animations to get the initial pickup. This will be advantageous in deciding the exact element positions at the start and end of the GIF.
07Make Use of Motion Blur
Using the concept of motion blur is pivotal in providing a natural flow and feel to your GIF, which, in an otherwise case would ordinarily appear as a mere collection of static images clubbed together. This would give a wobbling feel with unsteady frame movements to your viewers. The motion blur effect potentially ensures a smooth content flow, and your GIF looks like a short video captured from a camera.
08Stick to a Reduced File Size
Creating GIF of within a standard size range is quite difficult, owing to the fact that these are shared across a variety of media platforms, each having a different file size constraint. It is, however, recommended to stick to a file size as low as possible to escape the notch of modifying the same, ener5y time you need to work with the GIF on a different platform.
Listed below are a few ways to limit your GIF to a lower file size:
● Restrict your GIF to a frame count under 150, exceeding which, it will get difficult to export the GIF to most of the commonly visited social media and content sharing platforms.
● When your GIF is ready to export, adjust its lossy parameter between 5 and 10 to boost the file compression rate. Look for a setting that decreases the effective file size without compromising with the overall GIF design.
● Restrict to a minimum possible color usage. This will not only intensify the GIF design, but also contribute in maintaining a decreased file size. You can instead, focus on playing with animations or adjusting your image frames to longer play durations.
● Don’t experiment with multiple background gradients in your GIF. You can select from either a completely opaque, or a totally transparent background. Adding unnecessary gradients will end up giving your GIF a hazy look, along with a visibly large file that will be difficult to export non any platform.
Part 2 Amazing Examples of Animated Gifs in Web Design
GIFs are an effective means of adding appeal to brand promotions and achieving improved market buildup by delivering just the right content in the most captivating and interesting ways. You can use them as creative web design tools to add spark to your product sites, which can potentially boost the market value and reach of your product by multiplying the number of visitors to your site.
Discussed below are some stunning examples of using animated GIFs to enhance commercial web design, which you can use to create a significant buzz about your product among a target audience:
01Marie Weber
This is a shoe designer company in France, famous for its classy, handmade shoes. On visiting the company’s site, you are welcomed by a simple and subtle, animated product logo on each page. This animated logo is a masterpiece in itself, telling you the about the lavishness of the associated product.
On navigating further, you will find animated elements, like; shoe images and collection names, which appear on the screen before a zoom out. There are underlined links that pop up to animate beneath the name, indicating the link you are going to visit.
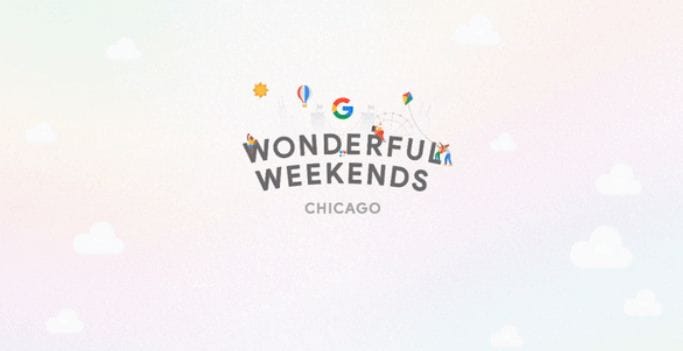
02Wonderful Weekends Festival
This is an absolute animation delight, where the welcome page of the site greets you with vibrant pieces in motion, and a pop up box informs you of the festival’s arrival time and asks you to select one from the options of ‘Play Now’ or ‘Show Me the Festival’.
As you click to make a choice, the Google brand shines with associated colors. As you continue to browse through the site, pages open up with brand color animations, along with colored active links flashing on the pages.
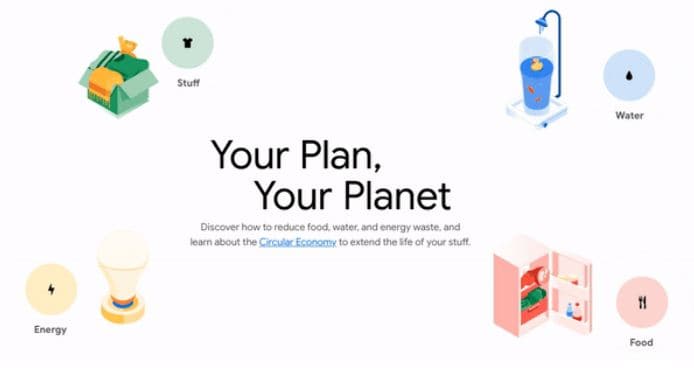
03Google
This is a brand name that needs no introduction. Google has launched its ‘Your Plan, Your Planet’ site to infuse awareness about environment conservation and eco friendly lifestyles, guiding visitors on ways and means of introducing related changes. The site greets you with a simple layout, with a short text moving in and getting still. Click on ‘Let’s Get Started’ and you will see 4 amazingly animated icons that open up to more vibrant animations.
Tap any one of the swinging refrigerator door, the illuminated light bulb, the running faucet or the teddy bear waving at you, to land on a schema that informs you about effective means of improving on conservation in within your selected section. This is a perfect example of using animations as a marketing strategy to captivate people’s attention on a subject that evidently turns them off.
04Pete Nottage
Designed explicitly as a hiring site for voice presenter Pete Nottage, this website tells you everything about the actor and the credibility of hiring him. The site lands among the best examples of web animation usage. The welcome page of the site greets you with the brand logo. Tap on the red swipe and you will get to know that the brand infuses vibrancy to something that’s originally dull.
Next, you will find a plethora of dynamic and elegant animations in a plying plane, cityscape, flowing sea and sailing boats, moving cars and excusive motion graphics on each building. Visiting the animated site links provides you an insight of the actor’s personality. In the ‘About’ section, you can find a headshot animation, that disappears on clicking, and is followed by a more dynamic motion snippet.
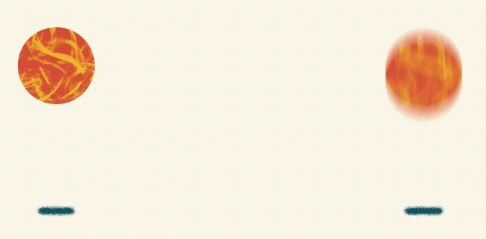
05Zamzar
This one is an online file conversion site and lives up to its tagline ‘File Conversion Made Easy’ through a concrete animation on the welcome page. The file conversion on this site is quick, 3-step process, with a blinking animation indicating the current conversion stage.
For instance, when you are at the first step of selecting a file to convert, the animation shoes a blinking glow on number 1. This continues for the rest of the steps, till your file is finally converted into the desired file format.
06Blizzard: Warcraft III Reforged
Warcraft was one complete heaven of adventure and thrill for console gamers. While the enticing cutscenes with stunning motion graphics were an absolute favorite, the game had a plenty of other exciting elements.
The relaunched game (Warcraft III Reforged) website has a mix of gaming adventures and cutscenes running in the site’s background with the game title and pitch appearing as an overlaid animation. On navigating through the site, you will find classy animated elements that take you on a nostalgic trip of the original game.
Part 3 Learn How to Create and Add Gifs to Interactive Layouts in Filmora
Now that you are quite familiar with the utility of GIFs in almost every market field, and have seen stunning examples of GIF design and usage for an impressive brand promotion, let’s take a dive into creating and using these motion clips to make interactive graphic layouts for websites, social media blogs and posts, and a variety of other applications that require some brilliant imagery for market promotion.
When looking for the perfect GIF designer software, Wondershare Filmora Video Editor is the most affordable pick. This is a free and an enhanced GIF design tool, packed with world class and premium quality features that are most suitable for giving the much appreciated professional touch to your graphic artwork. Here’s how you can work with Filmora to make alluring graphic layouts:
Step 1: Launch Filmora
The software is readily compatible to your Windows and MacOS devices and you don’t even require a signup to use the application. Just download and install the software in your preferred device and launch the same to reach the software’s welcome interface.
Filmora Free Download Link:
Step 2: Upload Media Files
Select and import the desired media files from your device to upload them to the Filmora timeline. You can either pick a video or choose a series of static images.
Step 3: Add to Timeline
Once imported, you need to add the selected files to the software’s editor timeline. You can use the ‘Drag and Drop’ method to get this done.
Wondershare Filmora - Best Video Editor for Mac/Windows
5,481,435 people have downloaded it.
Build unique custom animations without breaking a sweat.
Focus on creating epic stories and leave the details to Filmora’s auto features.
Start a creative adventure with drag & drop effects and endless possibilities.
Filmora simplifies advanced features to save you time and effort.
Filmora cuts out repetition so you can move on to your next creative breakthrough.
Step 4: Explore Your Editing Skills
As already stated, the Filmora effects library is an extensive inventory of stunning features to compliment your artwork with matchless class. You are free to choose from tons of image and video editing effects and filters suited to your GIF content to create excellent pieces of graphic art.
When starting to customize your GIF in Filmora, you can begin with cropping and trimming your images or video to the perfect part, or even cut and split them to ward off unwanted portions, or rotate and flip the images to set them in the perfect orientation.
You can further add elements like, graphic transitions, overlays, animations and texts, and etc., to customize your artwork to your heart’s content. The software’s audio-visual library facilitates you with around 300 audio-visual effects and music choices to supplement your creation with a conducive sound feel. You can also make adjustments in frame speed and play durations to get the best most snippet ever!
You are granted the liberty to choose almost any common file format to create and customize GIFs in Filmora. A more convincing feature is, the software does not leave a watermark on your artwork and you can easily share your creation across media platforms.
Step 5: Save and Export
Once your creation satisfies you, save it to your device with a .gif extension, from where it can be exported to various media sharing platforms with ease.
● Key Takeaways from This Episode →
● When planning a perfect and appealing product marketing strategy, you can consider using GIFs to enhance the feel. Complement your product site with suitable GIF design and graphic transitions can prove pivotal to target and hold your related audience.
● Looking for the best GIF creator and customization software, you can rely on Filmora to create and customize professional quality GIFs with utmost convenience.
The Only Guide You’ll Ever Need to Learn GIF Design That Get Shared Like Crazy
In this article
01 [8 Principles for Great GIF Design](#Part 1)
02 [6 Amazing Examples of Animated Gifs in Web Design](#Part 2)
03 [Learn How to Create and Add Gifs to Interactive Layouts in Filmora](#Part 3)
Part 1 Principles for Great GIF Design
Creating GIFs for infotainment or casual information sharing is the current talk of the trend. You might have visibly landed across a heap of tantalizing GIFs in blogs, social media posts, product promotion websites and almost every other domain you can possibly think of. Using GIFs for any type of content promotion is bound to captivate the target audience in impressive multiplicities. Ever wondered what’s the cue behind the mass appeal that GIFs create? Well, an obvious answer is the stunning GIF design.
When going for GIF creation and selection, design plays the key role in creating considerable buzz about the information being transmitted. To add impact to your creation, you need to pay considerable attention to its design implications, thus ensuring that the right things get presented in the right way. Outlined below are some amazing principles you can use to enhance your GIF design to the next level:
01Ensure Accuracy and Preciseness
The primary concern you need to be attentive about while designing a GIF is its preciseness. Ensure ban exactness of information and confine your creation to the theme and requirement of your creation, like, the message you want to deliver or the impact you want to create through the GIF. Balance your creativity within specific content parameters and avoid getting carried away or overdoing on the beautifying aspect.
As an example, it is visibly not appealing to add a wholesome mix of 15 shades and 20 different elements in a nature-based GIF. You will end up getting too harsh on the viewers’ eyes, confusing them with a hoard of speeding elements and banging colors. You can instead stick to 2 or 3 frames with an intelligent mix of 2 complementary shades.
02Maintain Visual Identity
An important aspect to keep in mind while attempting to design GIF is, it should visually relate to the underlying content. For instance, if you are intending a brand promotion through your GIF, lay stress on adding elements like, brand definition, product specifications, know-how of your work patterns, etc. ensure that your content flows naturally and has exactness.
Other alternatives are, using your product logo as the GIF background, character representation of your brand or using some explicit product oriented themes. While, you are free to pick anything that suits your preferences and needs, just make sure that using it in your GIF adds value to your brand instead of giving an out of the box feel.
Image Name: The-only-guide-you’ll-ever-need-to-learn-gif-design-that-get-shared-like-crazy-1
03Cut Down on Unnecessary Frames
Have you ever encountered a halt in the natural loop of your GIF out of nowhere? While pondering over the underlying cause, it is a common assumption to take this as an animation fallacy, but that’s evidently not the case. The actual culprits behind this glitch are those extra frames that contribute towards nothing but adding weight to an already heavy file.
To set this straight, you should switch to removing any extra frames, while saving a particular one which you may stretch to a desired duration according to the break point of your contents in the GIF. However, take caution to maintain the visual quality of your GIF while you remove those extra frames.
04Make Your GIF Accessible
You should always adhere to the concern of accessibility while creating a GIF. The reason being, your content is visibly going to get mass attention across the web and you cannot filter out visitors, make sure your GIF is easily accessible to all kind of users, particularly those with vision limitations, like, epileptic patients or the ones using screen readers.
Focus on describing your GIF content with alt text and using a limited blinking and flashing rate. In case your GIF content is primarily text based, take care to limit the effective color and image movement and adjust the frames rates to avoid constant and quick movement of image frames when adding many clips on a single page.
Pay additional heed to the auto play feature of your GIFs. It can be visibly annoying to be welcomed on a site homepage with GIFs enjoying an auto play session of their own. You can alternatively, incorporate a ‘Click to Play’ option or grant your site visitors the liberty to decide on what is to be played when.
05Use Storyboards
When aiming to create visibly appealing GIFs, you need to lay considerable stress on choosing an apt background story. Don’t get misled by the wrong assumption of using any random background, owing to the short play duration of GIFs. An impressive solution to this concern is taking the help of a storyboard to keep track of your GIF’s content flow.
Using a storyboard is quite effective means of being in line with the direction of content movement, rescuing you from the hustle of going off the track. This comes explicitly handy when you are working with a team of creators. The storyboard is there to keep everything at the exact place, thus improving member communications and boosting up the design process.
06Focus on Creating Loops
Consider creating an animated motion loop for your GIF allowing a repeated and comprehensive view of your content. Looping projects a deeper observation of the clip and its contents in a seamless transition. However, creating an infinite motion loop in GIFs is quite tricky, as you need to pay utmost concern to ensure a smooth content flow and chances of even the slightest errors are not entertained.
Any loopholes in placement of your GIF elements will get noticed within a blink and lead to an unsatisfactory user experience. Hence, you need to check each of your content frames separately to eliminate chances of possible errors. If you are a beginner, try working with geometrical animations to get the initial pickup. This will be advantageous in deciding the exact element positions at the start and end of the GIF.
07Make Use of Motion Blur
Using the concept of motion blur is pivotal in providing a natural flow and feel to your GIF, which, in an otherwise case would ordinarily appear as a mere collection of static images clubbed together. This would give a wobbling feel with unsteady frame movements to your viewers. The motion blur effect potentially ensures a smooth content flow, and your GIF looks like a short video captured from a camera.
08Stick to a Reduced File Size
Creating GIF of within a standard size range is quite difficult, owing to the fact that these are shared across a variety of media platforms, each having a different file size constraint. It is, however, recommended to stick to a file size as low as possible to escape the notch of modifying the same, ener5y time you need to work with the GIF on a different platform.
Listed below are a few ways to limit your GIF to a lower file size:
● Restrict your GIF to a frame count under 150, exceeding which, it will get difficult to export the GIF to most of the commonly visited social media and content sharing platforms.
● When your GIF is ready to export, adjust its lossy parameter between 5 and 10 to boost the file compression rate. Look for a setting that decreases the effective file size without compromising with the overall GIF design.
● Restrict to a minimum possible color usage. This will not only intensify the GIF design, but also contribute in maintaining a decreased file size. You can instead, focus on playing with animations or adjusting your image frames to longer play durations.
● Don’t experiment with multiple background gradients in your GIF. You can select from either a completely opaque, or a totally transparent background. Adding unnecessary gradients will end up giving your GIF a hazy look, along with a visibly large file that will be difficult to export non any platform.
Part 2 Amazing Examples of Animated Gifs in Web Design
GIFs are an effective means of adding appeal to brand promotions and achieving improved market buildup by delivering just the right content in the most captivating and interesting ways. You can use them as creative web design tools to add spark to your product sites, which can potentially boost the market value and reach of your product by multiplying the number of visitors to your site.
Discussed below are some stunning examples of using animated GIFs to enhance commercial web design, which you can use to create a significant buzz about your product among a target audience:
01Marie Weber
This is a shoe designer company in France, famous for its classy, handmade shoes. On visiting the company’s site, you are welcomed by a simple and subtle, animated product logo on each page. This animated logo is a masterpiece in itself, telling you the about the lavishness of the associated product.
On navigating further, you will find animated elements, like; shoe images and collection names, which appear on the screen before a zoom out. There are underlined links that pop up to animate beneath the name, indicating the link you are going to visit.
02Wonderful Weekends Festival
This is an absolute animation delight, where the welcome page of the site greets you with vibrant pieces in motion, and a pop up box informs you of the festival’s arrival time and asks you to select one from the options of ‘Play Now’ or ‘Show Me the Festival’.
As you click to make a choice, the Google brand shines with associated colors. As you continue to browse through the site, pages open up with brand color animations, along with colored active links flashing on the pages.
03Google
This is a brand name that needs no introduction. Google has launched its ‘Your Plan, Your Planet’ site to infuse awareness about environment conservation and eco friendly lifestyles, guiding visitors on ways and means of introducing related changes. The site greets you with a simple layout, with a short text moving in and getting still. Click on ‘Let’s Get Started’ and you will see 4 amazingly animated icons that open up to more vibrant animations.
Tap any one of the swinging refrigerator door, the illuminated light bulb, the running faucet or the teddy bear waving at you, to land on a schema that informs you about effective means of improving on conservation in within your selected section. This is a perfect example of using animations as a marketing strategy to captivate people’s attention on a subject that evidently turns them off.
04Pete Nottage
Designed explicitly as a hiring site for voice presenter Pete Nottage, this website tells you everything about the actor and the credibility of hiring him. The site lands among the best examples of web animation usage. The welcome page of the site greets you with the brand logo. Tap on the red swipe and you will get to know that the brand infuses vibrancy to something that’s originally dull.
Next, you will find a plethora of dynamic and elegant animations in a plying plane, cityscape, flowing sea and sailing boats, moving cars and excusive motion graphics on each building. Visiting the animated site links provides you an insight of the actor’s personality. In the ‘About’ section, you can find a headshot animation, that disappears on clicking, and is followed by a more dynamic motion snippet.
05Zamzar
This one is an online file conversion site and lives up to its tagline ‘File Conversion Made Easy’ through a concrete animation on the welcome page. The file conversion on this site is quick, 3-step process, with a blinking animation indicating the current conversion stage.
For instance, when you are at the first step of selecting a file to convert, the animation shoes a blinking glow on number 1. This continues for the rest of the steps, till your file is finally converted into the desired file format.
06Blizzard: Warcraft III Reforged
Warcraft was one complete heaven of adventure and thrill for console gamers. While the enticing cutscenes with stunning motion graphics were an absolute favorite, the game had a plenty of other exciting elements.
The relaunched game (Warcraft III Reforged) website has a mix of gaming adventures and cutscenes running in the site’s background with the game title and pitch appearing as an overlaid animation. On navigating through the site, you will find classy animated elements that take you on a nostalgic trip of the original game.
Part 3 Learn How to Create and Add Gifs to Interactive Layouts in Filmora
Now that you are quite familiar with the utility of GIFs in almost every market field, and have seen stunning examples of GIF design and usage for an impressive brand promotion, let’s take a dive into creating and using these motion clips to make interactive graphic layouts for websites, social media blogs and posts, and a variety of other applications that require some brilliant imagery for market promotion.
When looking for the perfect GIF designer software, Wondershare Filmora Video Editor is the most affordable pick. This is a free and an enhanced GIF design tool, packed with world class and premium quality features that are most suitable for giving the much appreciated professional touch to your graphic artwork. Here’s how you can work with Filmora to make alluring graphic layouts:
Step 1: Launch Filmora
The software is readily compatible to your Windows and MacOS devices and you don’t even require a signup to use the application. Just download and install the software in your preferred device and launch the same to reach the software’s welcome interface.
Filmora Free Download Link:
Step 2: Upload Media Files
Select and import the desired media files from your device to upload them to the Filmora timeline. You can either pick a video or choose a series of static images.
Step 3: Add to Timeline
Once imported, you need to add the selected files to the software’s editor timeline. You can use the ‘Drag and Drop’ method to get this done.
Wondershare Filmora - Best Video Editor for Mac/Windows
5,481,435 people have downloaded it.
Build unique custom animations without breaking a sweat.
Focus on creating epic stories and leave the details to Filmora’s auto features.
Start a creative adventure with drag & drop effects and endless possibilities.
Filmora simplifies advanced features to save you time and effort.
Filmora cuts out repetition so you can move on to your next creative breakthrough.
Step 4: Explore Your Editing Skills
As already stated, the Filmora effects library is an extensive inventory of stunning features to compliment your artwork with matchless class. You are free to choose from tons of image and video editing effects and filters suited to your GIF content to create excellent pieces of graphic art.
When starting to customize your GIF in Filmora, you can begin with cropping and trimming your images or video to the perfect part, or even cut and split them to ward off unwanted portions, or rotate and flip the images to set them in the perfect orientation.
You can further add elements like, graphic transitions, overlays, animations and texts, and etc., to customize your artwork to your heart’s content. The software’s audio-visual library facilitates you with around 300 audio-visual effects and music choices to supplement your creation with a conducive sound feel. You can also make adjustments in frame speed and play durations to get the best most snippet ever!
You are granted the liberty to choose almost any common file format to create and customize GIFs in Filmora. A more convincing feature is, the software does not leave a watermark on your artwork and you can easily share your creation across media platforms.
Step 5: Save and Export
Once your creation satisfies you, save it to your device with a .gif extension, from where it can be exported to various media sharing platforms with ease.
● Key Takeaways from This Episode →
● When planning a perfect and appealing product marketing strategy, you can consider using GIFs to enhance the feel. Complement your product site with suitable GIF design and graphic transitions can prove pivotal to target and hold your related audience.
● Looking for the best GIF creator and customization software, you can rely on Filmora to create and customize professional quality GIFs with utmost convenience.
Also read:
- Best 6 WMV to GIF Converters for 2024
- In 2024, What Is the Top Filmora Slideshow Templates? Experts Choice
- In 2024, The Top 10 Effective SRT Editors Online
- 2024 Approved 3 Best Effects to Appear on Camera
- Updated In 2024, How to Vlog? A Ultimate Guide for Beginners
- New How to Loop a Video with iMovie on Mac and iPhone
- 2024 Approved There Are Many Vlogging Cameras You Can Find in the Market. However, to Get a Good Start in Vlogging, some Sony Vlogging Cameras and Canon Vlog Cameras Are to Consider. This Article Introduces You to the Respective List
- New Step By Step Guide on Using Media Player Classic To Rotate A Video
- 2024 Approved Guide Create The Perfect VHS Effect Look in Premiere Pro
- Learning How to Slow Down a Video on iPhone Properly for 2024
- New Best Photo Video Maker Apps with Song PC, Mobile, Online for 2024
- New 2024 Approved Guide of 8 Photo Collage Apps for PC
- Updated 2024 Approved Add Emoji to Linkedin Post – 5 Tips You Need to Know
- Updated 2024 Approved How to Create an Instant Slideshow on Mac
- In 2024, Useful Guide to Speed Up/Down Videos in VLC
- 2024 Approved Mask Tracking with Adobe Premiere Pro A Detailed Guide
- Updated How Can You Import and Adjust the Video Clips on Wondershare Filmora?
- New How to Easily Create a Free Eye-Catching Intro Videos with Invideo
- 6 Best Text to Speech Generators for YouTube Videos Windows, Mac, Android, iPhone & Online
- New In 2024, How to Trim/Crop Video in Microsoft Powerpoint
- Top 5 Websites and Software to Convert Powerpoint to Mp4 for 2024
- Updated In 2024, Best 31 Video Trimmers for Computer, Phone and Online
- How to Calculate & Change Video Aspect Ratio Online
- Updated In 2024, How to Create a Light Sweep (Shine) Effect with Filmora
- Updated How to Edit Facebook Video Ads for E-Commerce Business
- In 2024, Something That You Should Know About MP4 Video Format
- 2024 Approved Do You Know How to Zoom on Facebook Livestream Videos? Through This Article, You Will Find Multiple Ways and Detailed Steps to Zoom in on the Facebook Livestream Videos
- New How To Create 3D Text In Video
- 2 Methods to Crop Video in VLC
- Updated 3 Best Effects to Appear on Camera Made with Filmora
- Updated 2024 Approved Top 12 AI Video Generators to Pick
- Updated How To Change Font In Premiere Pro
- Updated Mastering the Art of Video Framing
- New 2024 Approved 8 Apps to Custom GIF Stickers
- Updated In 2024, Guide of 8 Photo Collage Apps for PC
- Do You Need More Time to Explain a Particular Screen or Moment in Your Recording Using an Extended Freeze-Frame? Learn How to Use Camtasia Freeze-Frame to Extend Parts of a Video Effectively
- 2024 Approved Google Meet Green Screen Is the Latest Addition to the Virtual Meeting App. It Is a Crucial Feature as It Allows Users to Maintain a Semblance of Privacy Through Virtual Backgrounds
- In 2024, A Roster of 8 Best Color Match Generators
- In This Article, Youll Find Four Solutions for Rotating Your Go-Pro Videos. The Following Tools Will Be Used for This Purpose
- Updated 2024 Approved Premiere Pro Text Effects Beginner Guide
- 2024 Approved Shotcut Video Editor Review
- New How To Fade Audio With Movavi Editor
- Looking for the Best Way to Create Stunning Video Animations? Here, We Look at some of the Best Animated Video Maker Solutions to Use for 2024
- Updated 5 Tips for Aquasoft Slideshow for 2024
- In 2024, How to Access Your iPhone 15 Pro Max When You Forget the Passcode? | Dr.fone
- Ultimate Guide from Samsung FRP Bypass
- How to Delete iCloud Account From iPhone 12 mini without Password?
- Latest way to get Shiny Meltan Box in Pokémon Go Mystery Box On Samsung Galaxy F34 5G | Dr.fone
- How To Fix Unresponsive Phone Touchscreen Of Motorola Moto G84 5G | Dr.fone
- In 2024, Reset iTunes Backup Password Of iPhone SE (2020) Prevention & Solution | Dr.fone
- 10 Easy-to-Use FRP Bypass Tools for Unlocking Google Accounts On Xiaomi Redmi 13C 5G
- In 2024, Mastering Lock Screen Settings How to Enable and Disable on Vivo V30 Pro
- Fix Honor X50i+ Android System Webview Crash 2024 Issue | Dr.fone
- In 2024, How to Cast Infinix Hot 40 to Computer for iPhone and Android? | Dr.fone
- In 2024, Easy Ways to Manage Your Lava Yuva 3 Location Settings | Dr.fone
- How to fix iCloud lock from your Apple iPhone 13 and iPad
- Complete Tutorial to Use GPS Joystick to Fake GPS Location On Asus ROG Phone 8 Pro | Dr.fone
- Catch or Beat Sleeping Snorlax on Pokemon Go For Infinix Smart 8 HD | Dr.fone
- In 2024, How to Mirror PC Screen to Infinix Smart 8 Pro Phones? | Dr.fone
- Lock Your Infinix Hot 40i Phone in Style The Top 5 Gesture Lock Screen Apps
- In 2024, iSpoofer is not working On Nubia Z50S Pro? Fixed | Dr.fone
- 5 Best Route Generator Apps You Should Try On Nokia C02 | Dr.fone
- In 2024, 6 Proven Ways to Unlock Xiaomi Redmi A2+ Phone When You Forget the Password
- How to recover deleted photos from Android Gallery after format on Camon 20
- In 2024, Ultimate Guide to Catch the Regional-Located Pokemon For Vivo Y27 4G | Dr.fone
- How to Reset Gmail Password on Xiaomi Redmi K70 Pro Devices
- Hard Resetting an Infinix Note 30 VIP Racing Edition Device Made Easy | Dr.fone
- How to Stop Life360 from Tracking You On Asus ROG Phone 8? | Dr.fone
- How to Unlock Apple iPhone 6s, Apples New iPhone | Dr.fone
- In 2024, Unlocking iPhone 15 Pro Max Passcode without a Computer | Dr.fone
- 3 Ways to Fake GPS Without Root On Vivo X100 | Dr.fone
- How to Change Netflix Location to Get More Country Version On Realme 12+ 5G | Dr.fone
- Is GSM Flasher ADB Legit? Full Review To Bypass Your Samsung Galaxy A05sFRP Lock
- In 2024, Everything You Need to Know about Lock Screen Settings on your Oppo A18
- In 2024, What You Want To Know About Two-Factor Authentication for iCloud On your iPhone 13
- Fix Google Pixel Fold Android System Webview Crash 2024 Issue | Dr.fone
- A Guide Poco X6 Wireless and Wired Screen Mirroring | Dr.fone
- How to Unlock iPhone 12 Pro Passcode without Computer?
- How to Fix Life360 Shows Wrong Location On Honor 80 Pro Straight Screen Edition? | Dr.fone
- The Best 8 VPN Hardware Devices Reviewed On Lava Blaze 2 | Dr.fone
- How to Repair Corrupt Excel Workbook?
- Title: Montage Makes It Easy to Create and Share Videos. This Article Will Explain What It Can Do and Show You Examples of Movies that Use Montage
- Author: Chloe
- Created at : 2024-05-20 03:37:36
- Updated at : 2024-05-21 03:37:36
- Link: https://ai-editing-video.techidaily.com/montage-makes-it-easy-to-create-and-share-videos-this-article-will-explain-what-it-can-do-and-show-you-examples-of-movies-that-use-montage/
- License: This work is licensed under CC BY-NC-SA 4.0.
