
:max_bytes(150000):strip_icc():format(webp)/free-language-exchange-websites-1357059-d87c92dbdba3429dbf17d51ba313b1ff.png)
New 2 Solutions to Cut Video in VLC on Windows
2 Solutions to Cut Video in VLC on Windows
Other than playing videos and music, VLC Media Player can also be used as a video editing tool. While advanced video editing requires unconventional and powerful video editing software, VLC offers a simpler and easy-to-learn process of cutting and/or trimming videos.
You can cut a section of your video and make shorter video clips. This means that you can now get rid of parts of a video that you do not need and preserve those that you like. VLC automatically saves the video clips made, so you do not have to save them again.
In this article, we are going to learn the simplest procedure on how to cut and/or trim videos using VLC Media Player. Each step is carefully explained, with screenshots attached.
To Cut Video Using VLC Media Player
- Download VLC Media Player
You need to have the app before using it. To download it, visit Google Play Store or any other suitable app, search and download. There are a variety of versions that is, 32-bit, 64-bit and Windows ARM. You may as well narrow down your search to the version of your gadget, be it Android, iOS, Linux or Windows.
- Install and Open VLC Media Player
The installation process is simple. You click on the icon indicating ‘install’ then open. On opening, you will come across a page that looks like the one attached below.

This is the dashboard of the VLC Media Player.
- Select the file you would like to cut
On the top of the screen is the menu with ‘Media’ being the first on the far left. On clicking the ‘Media’ button, a drop-down menu will appear. Select the first option, ‘Open File’ to access your files. From the dialogue box that appears, locate your video (the one you would like to cut), select it then click to open. The video will start playing.

- Click on Advanced Controls (View > Advanced Controls)
Some videos will play automatically while others will wait for an action. In case your video plays automatically, it is advisable that you pause it.
On the menu is a tab labelled ‘View’. Choose the tab, click open it and on the drop-down menu, select ‘Advanced Options’.

On selecting ‘Advanced Options’, a red button will appear at the bottom-left corner of the VLC. This is the record button.

Its purpose is to indicate the recording of the section of the video that you would like to cut.
- Click to Cut or Trim
If you had paused your video, you can play it at this stage. If you do not want to cut/trim your video from the start, scroll to the point from which you would like to cut it. Click on the red button for the recording to start. If the video does not play automatically, click to play.
After the video has played till the point where you would like to end, click on the red button again to stop the recording. The cut section will be automatically saved on the videos’ folder on C:\Users\Username\Videos.
An easier way to cut videos with Wondershare Filmora
Wondershare Filmora Video Editor is an alternative video editor. Unlike VLC Media Player, Filmora gives you more options. It allows you to split, trim, edit, combine, and crop a video, among others. It also gives you room to add footnotes, a variety of transitions, lower thirds, among other features. You can as well resize your video and enhance its quality.
For Win 7 or later (64-bit)
For macOS 10.14 or later
To Cut/Trim Videos with Wondershare Filmora:
- Drag and Drop the Video
Assuming that you have already downloaded and installed Wondershare Filmora app, click to open. There are two ways through which you can locate your video.
One, you can opt to drag and drop the video from its location to the app’s timeline. Secondly, you can right click on the space at the top left then select the video to be edited from the dialogue box that will appear.

- Trimming the video
After dropping the video on the timeline, it is likely to take up a lot of space, especially if it is long.
To trim the video from the beginning, place your cursor at the starting point and wait for the pointer to appear. Then move the point forward. To trim from the end, place the cursor at that point, hold and move the pointer forward till the required point.


Trimming the video does not mean that you lose the parts. It is more like shortening it to fit in place.
- Cutting the video
Unlike trimming, cutting involves getting rid of a section of the video completely. To do so, you need to first of all isolate that section.
With the video on the timeline, move and point your cursor at the starting point of the video and click on the scissors icon at the top. Then move it to the end of the video section and click on the scissors icon again. By so doing, you will have selected that section.
Once the section has been selected, right click on the video, select and click to delete. You can then drag the remaining parts to make them one.

After cutting or trimming, you can choose to add several effects to the video. Transitions, watermarks, cropping, resizing, ripple effects among others are some of the changes you could make. All these appear on the menu at the top.
- Save and/or Import your video
The final step is saving or importing your file to prevent its loss. By clicking on the ‘Import’ button, you save the file to the Media Library. By selecting ‘save as’, you select the location where you want to store your file.

Conclusion
There are so many video editors, each with different features. Some are simple to use while others will require advanced software to operate. Whether you use VLC Media Player or Wondershare Filmora, the results will be the same. The difference comes in where you have the knowledge and skills to use one app better than the other one.
The above steps on how to use both VLC Media Player and Wondershare Filmora will guide you through the whole process. It is said that, ‘practice makes perfect’. So yes, keep practicing and putting these skills into use. Sooner or later you will be an expert!
This is the dashboard of the VLC Media Player.
- Select the file you would like to cut
On the top of the screen is the menu with ‘Media’ being the first on the far left. On clicking the ‘Media’ button, a drop-down menu will appear. Select the first option, ‘Open File’ to access your files. From the dialogue box that appears, locate your video (the one you would like to cut), select it then click to open. The video will start playing.
- Click on Advanced Controls (View > Advanced Controls)
Some videos will play automatically while others will wait for an action. In case your video plays automatically, it is advisable that you pause it.
On the menu is a tab labelled ‘View’. Choose the tab, click open it and on the drop-down menu, select ‘Advanced Options’.
On selecting ‘Advanced Options’, a red button will appear at the bottom-left corner of the VLC. This is the record button.
Its purpose is to indicate the recording of the section of the video that you would like to cut.
- Click to Cut or Trim
If you had paused your video, you can play it at this stage. If you do not want to cut/trim your video from the start, scroll to the point from which you would like to cut it. Click on the red button for the recording to start. If the video does not play automatically, click to play.
After the video has played till the point where you would like to end, click on the red button again to stop the recording. The cut section will be automatically saved on the videos’ folder on C:\Users\Username\Videos.
An easier way to cut videos with Wondershare Filmora
Wondershare Filmora Video Editor is an alternative video editor. Unlike VLC Media Player, Filmora gives you more options. It allows you to split, trim, edit, combine, and crop a video, among others. It also gives you room to add footnotes, a variety of transitions, lower thirds, among other features. You can as well resize your video and enhance its quality.
For Win 7 or later (64-bit)
For macOS 10.14 or later
To Cut/Trim Videos with Wondershare Filmora:
- Drag and Drop the Video
Assuming that you have already downloaded and installed Wondershare Filmora app, click to open. There are two ways through which you can locate your video.
One, you can opt to drag and drop the video from its location to the app’s timeline. Secondly, you can right click on the space at the top left then select the video to be edited from the dialogue box that will appear.
- Trimming the video
After dropping the video on the timeline, it is likely to take up a lot of space, especially if it is long.
To trim the video from the beginning, place your cursor at the starting point and wait for the pointer to appear. Then move the point forward. To trim from the end, place the cursor at that point, hold and move the pointer forward till the required point.
Trimming the video does not mean that you lose the parts. It is more like shortening it to fit in place.
- Cutting the video
Unlike trimming, cutting involves getting rid of a section of the video completely. To do so, you need to first of all isolate that section.
With the video on the timeline, move and point your cursor at the starting point of the video and click on the scissors icon at the top. Then move it to the end of the video section and click on the scissors icon again. By so doing, you will have selected that section.
Once the section has been selected, right click on the video, select and click to delete. You can then drag the remaining parts to make them one.
After cutting or trimming, you can choose to add several effects to the video. Transitions, watermarks, cropping, resizing, ripple effects among others are some of the changes you could make. All these appear on the menu at the top.
- Save and/or Import your video
The final step is saving or importing your file to prevent its loss. By clicking on the ‘Import’ button, you save the file to the Media Library. By selecting ‘save as’, you select the location where you want to store your file.
Conclusion
There are so many video editors, each with different features. Some are simple to use while others will require advanced software to operate. Whether you use VLC Media Player or Wondershare Filmora, the results will be the same. The difference comes in where you have the knowledge and skills to use one app better than the other one.
The above steps on how to use both VLC Media Player and Wondershare Filmora will guide you through the whole process. It is said that, ‘practice makes perfect’. So yes, keep practicing and putting these skills into use. Sooner or later you will be an expert!
Trailer Guide for Creators and Developers
Trailers are a popular means to showcase a product you are about to release to the market. Teasers and trailers are traditionally created for movies, but have eventually evolved to include book trailers, game trailers, and app trailers. In this article, we will explain the key details of a trailer, highlight some examples, and show you how to create an effective trailer.
Part 1. What is a Trailer?
A trailer is a type of video commercial advertisement made to advertise and inform audiences about a specific program or item. To persuade customers to view or use the product, it includes a brief series of previews of the entire material. It also serves as a means of creating anticipation for a show or product that is about to hit the market.

Trailers were originally made for cinema movies. Nowadays, trailers are created for different forms of media like shows, apps, programs, video games, and book videos. A typical traditional trailer lasts between 1 to 3 minutes.
Part 2. What Are the Similarities and Differences Between a Teaser and Trailer?
Teasers and trailers can often be confused with each other. After all, they pretty much have the same objective.
Both are created for the purpose of advertising an upcoming show, product, or service. Teasers and trailers are similarly shown to audiences prior to the release of the thing they are advertising. They are meant to show a small portion of the full experience to create curiosity and excitement towards a targeted market. Both videos are typically short in length - taking up only a maximum of 3 minutes in duration.

The differences between them lie in their content, timeline, and duration. A teaser is much shorter than a trailer - the former runs for only 20-30 seconds while the latter can go between 1-3 minutes in length. This is because teasers are typically made before or during the production process of a movie or feature, whilst trailers are commonly made at the end.
For films, movies, and shows, teasers generally capture only a single part of that media. It focuses on the most intense or impactful scene. Trailers are formed from a series of clips depicting striking scenes derived from the beginning, middle, and end of the show. These scenes are normally arranged in a nonlinear structure, allowing viewers to have a general understanding of the story without revealing the entirety of the plot.
Part 3. Examples of good trailers
An excellent trailer is one who can effectively attract and maintain the audience’s attention. It satisfies its objective of showcasing striking and captivating pieces of the main product and entices viewers to experience its entirety. Here are some examples of trailers who have well fulfilled the criteria of a good trailer.
1. The Suicide Squad
The Suicide Squad is a fresh take featuring DC’s anti-heroes assemble in a single chaotic and unconventional team. James Gunn’s iteration on these characters is brought to life in the trailer with a majestic cast including John Cena, Idris Elba, Margot Robbie, and David Dastmalchian. Several key scenes are shown, highlighting its standout characters in the process while portraying the movie’s setting.
2. Raya and the Last Dragon
The trailer starts out innocently and comes with an adorable and surprising twist. The brief 2-minute trailer is packed with relevant scenes that depict the character’s quest without revealing too much. Many action-packed scenes and emotional interactions are satisfactorily squeezed into the trailer. Excitement builds further with Tamara Bubble’s “I’m That Good” playing in the background on the last minute of the video.
3. Men (2022)
Ingenious combination of sound effects and background music play a distinct role in this 2022 trailer. The female lead’s voice echoing from a tunnel, the haunting piano keys gradually building up the suspense, and the common but cleverly used horror audio effects create a chilling ensemble of haunting scenes in the movie. The sounds gradually rise up as more aggressive and energized scenes flash on the screen, and eventually end back into the sombre intro that leaves the audience with questions.
4. The Farewell
Lulu Wang’s dramatic comedy The Farewell is all about a family hiding the truth of a family member’s terminal illness from the person herself. What makes the trailer special is that it steers away from the sad, melancholic direction and veers toward a feel-good movie vibe. The conflict, struggle, and the beliefs featured in the movie are depicted in the trailer. However, the clever placement of interactions and the uplifting music tug at the audience’s heartstrings and urge them to want to see more.
5. Pokémon Go
Pokémon has become a culture to several generations. Becoming a Pokémon trainer is a secret dream that almost all of us have, even as adults. Niantic’s collaboration with the Pokémon franchise brings people closer to that reality by introducing its AR and location-powered app Pokémon Go. The trailer shows people of all ages living out their trainer dreams in the real world and interacting with Pokémon. The different features of the game are dramatized in a real-life setting, inciting more excitement, and pulling out the nostalgia from its market. The trailer keeps the actual app showcase to a minimum, instead focusing on once again selling that dream to audiences and bringing out the inner child in everyone.
Part 4. How to bring your trailer to the next level?
While it may seem intimidating to create a trailer for your upcoming product, there is no need to worry. It is now easier than ever to create a well-crafted trailer by taking advantage of a program’s tools and templates.
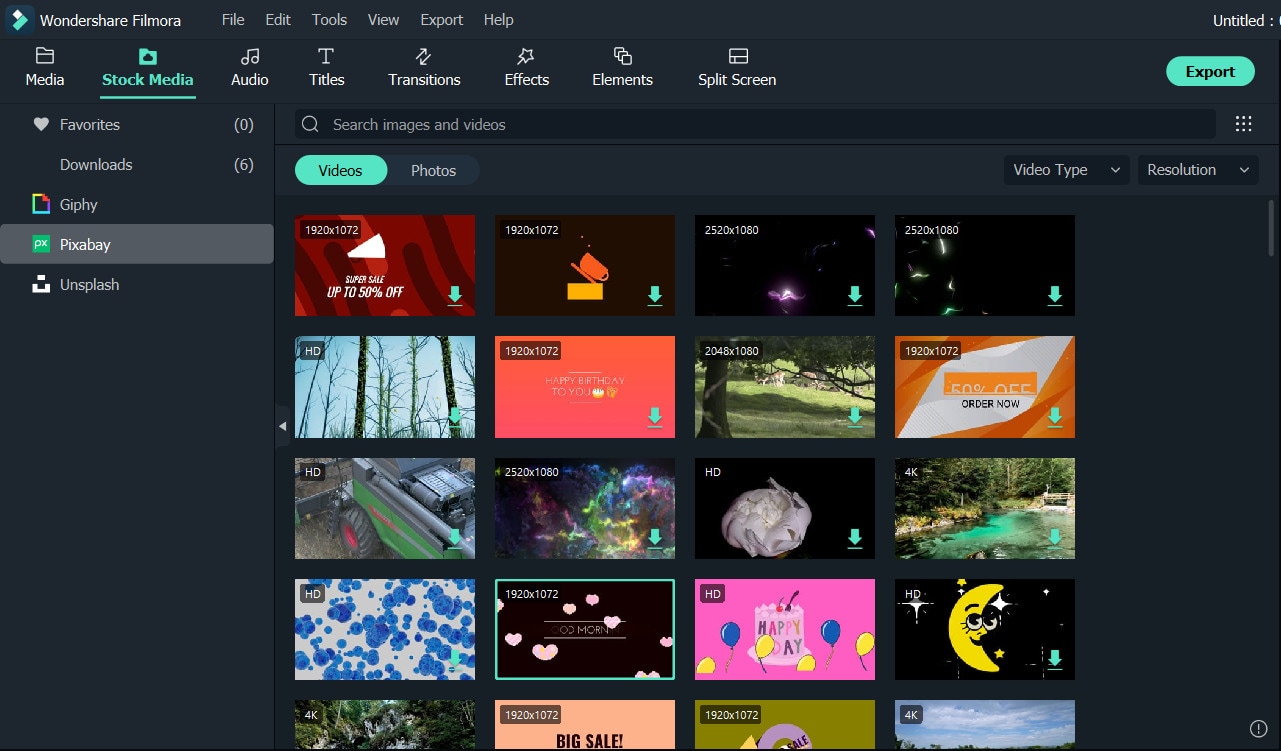
- Stock media
Filmora makes it easy to craft a trailer with only a few clicks. Make use of the program’s media library to gain access to a wealth of resources like stock photos, videos, music, and audio files.
- Keyframing
Keyframing lets you smoothly transition from one scene to another, making it an effective tool for trailers. It is particularly appealing for shows that highlight motion like sports, dancing, and action. Experiment with more than 80 preset templates and create smooth scene transitions with ease.
- Speed Ramping
Speed Ramping is a feature that works perfectly with keyframing. Increase the energy and dynamics in your trailer with 6 preset speed types. You can also customize these templates. There is also no need for concern about the audio - Filmora lets you maintain the audio pitch even when using these features.
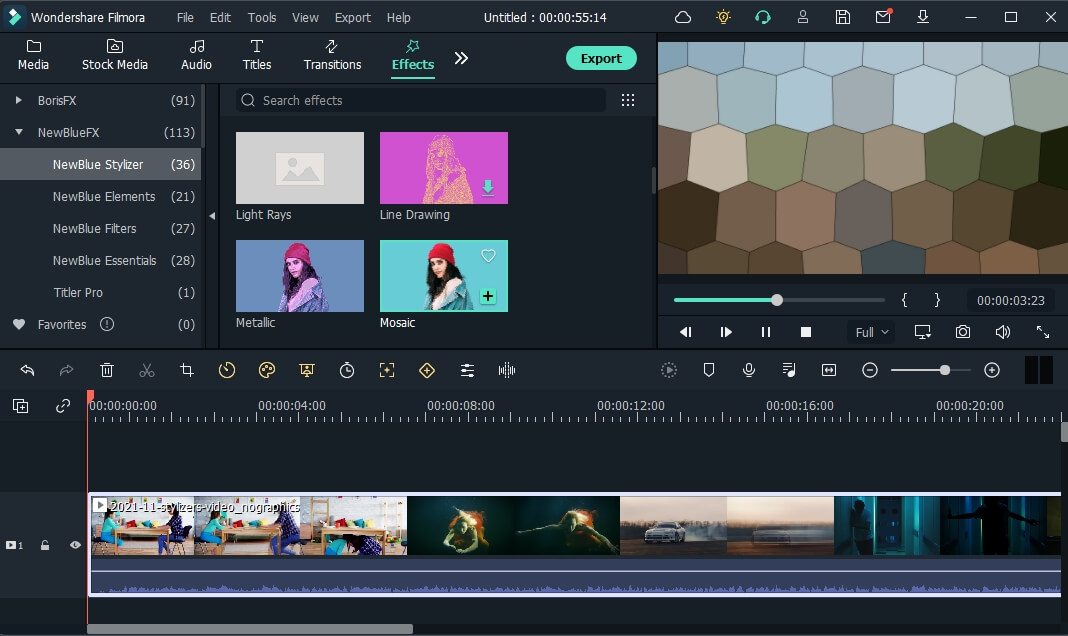
- FX Effects
The program also offers many effects and filters for an extra element in your trailer. The Borix FX is an example of that. Designed in collaboration with the award-winning developer of the same name, Boris FX and its extension Continuum features a wide array of tasteful effects for your convenience. There are over 91 customizable and adjustable presets including types like blurs, stylization, and lights. NewBlue is another option that carries choices of filters, titlers, and stylizers.
Filmora offers different features, tools, and effects to explore that can help make your trailer editing objectives easier and more convenient. Save time and resources by taking advantage of its powerful yet easy-to-use tools.
Free Download For Win 7 or later(64-bit)
Free Download For macOS 10.14 or later
2. Raya and the Last Dragon
The trailer starts out innocently and comes with an adorable and surprising twist. The brief 2-minute trailer is packed with relevant scenes that depict the character’s quest without revealing too much. Many action-packed scenes and emotional interactions are satisfactorily squeezed into the trailer. Excitement builds further with Tamara Bubble’s “I’m That Good” playing in the background on the last minute of the video.
3. Men (2022)
Ingenious combination of sound effects and background music play a distinct role in this 2022 trailer. The female lead’s voice echoing from a tunnel, the haunting piano keys gradually building up the suspense, and the common but cleverly used horror audio effects create a chilling ensemble of haunting scenes in the movie. The sounds gradually rise up as more aggressive and energized scenes flash on the screen, and eventually end back into the sombre intro that leaves the audience with questions.
4. The Farewell
Lulu Wang’s dramatic comedy The Farewell is all about a family hiding the truth of a family member’s terminal illness from the person herself. What makes the trailer special is that it steers away from the sad, melancholic direction and veers toward a feel-good movie vibe. The conflict, struggle, and the beliefs featured in the movie are depicted in the trailer. However, the clever placement of interactions and the uplifting music tug at the audience’s heartstrings and urge them to want to see more.
5. Pokémon Go
Pokémon has become a culture to several generations. Becoming a Pokémon trainer is a secret dream that almost all of us have, even as adults. Niantic’s collaboration with the Pokémon franchise brings people closer to that reality by introducing its AR and location-powered app Pokémon Go. The trailer shows people of all ages living out their trainer dreams in the real world and interacting with Pokémon. The different features of the game are dramatized in a real-life setting, inciting more excitement, and pulling out the nostalgia from its market. The trailer keeps the actual app showcase to a minimum, instead focusing on once again selling that dream to audiences and bringing out the inner child in everyone.
Part 4. How to bring your trailer to the next level?
While it may seem intimidating to create a trailer for your upcoming product, there is no need to worry. It is now easier than ever to create a well-crafted trailer by taking advantage of a program’s tools and templates.
- Stock media
Filmora makes it easy to craft a trailer with only a few clicks. Make use of the program’s media library to gain access to a wealth of resources like stock photos, videos, music, and audio files.
- Keyframing
Keyframing lets you smoothly transition from one scene to another, making it an effective tool for trailers. It is particularly appealing for shows that highlight motion like sports, dancing, and action. Experiment with more than 80 preset templates and create smooth scene transitions with ease.
- Speed Ramping
Speed Ramping is a feature that works perfectly with keyframing. Increase the energy and dynamics in your trailer with 6 preset speed types. You can also customize these templates. There is also no need for concern about the audio - Filmora lets you maintain the audio pitch even when using these features.
- FX Effects
The program also offers many effects and filters for an extra element in your trailer. The Borix FX is an example of that. Designed in collaboration with the award-winning developer of the same name, Boris FX and its extension Continuum features a wide array of tasteful effects for your convenience. There are over 91 customizable and adjustable presets including types like blurs, stylization, and lights. NewBlue is another option that carries choices of filters, titlers, and stylizers.
Filmora offers different features, tools, and effects to explore that can help make your trailer editing objectives easier and more convenient. Save time and resources by taking advantage of its powerful yet easy-to-use tools.
Free Download For Win 7 or later(64-bit)
Free Download For macOS 10.14 or later
Adding Slow Motion in DaVinci Resolve: A Comprehensive Overview
In content creation and filmmaking, slow-motion videos have achieved recognition. There are multiple scenarios that slow-motion videos can help with. They assist in emphasizing important shots in footage and bring perfection. According to creators, slow motion reveals video details that often go unnoticed. The ability of software to offer adjustable frame rates does the trick in such videos.
This article highlights slow-motion videos with reference to DaVinci Resolve’s slow motion. A comprehensive guide will be given to operate slow-motion DaVinci Resolve. The article will also commence a brief discussion on the importance of slow-mo. An AI alternative to DaVinci’s slow motion will be discussed. This software also assists in creating slow-motion videos in multiple methods.
Slow Motion Video Maker Slow your video’s speed with better control of your keyframes to create unique cinematic effects!
Make A Slow Motion Video Make A Slow Motion Video More Features

Part 1: Learning the Best Ways to Add Slow Motion in DaVinci Resolve [100% Working]
Post-production editing is what adds value and perfection to your shots. DaVinci Resolve is an all-in-one editor designed to assist in post-production tasks. You can do professional-level editing, apply effects, infuse cinematic visuals, and more. In addition, it possesses multipurpose high-grade audio editing tools for videos.
With its custom settings options, you can create slow motions in DaVinci Resolve. It has multiple options for manipulating the speed of the entire video clip. With its speed ramping option, you can slow down a specific portion of the video. The Optical Flow feature in it brings precision to your slow-motion videos. If you want to get rid of switching between software, DaVinci slow motion is an option.
Methods of Creating Slow Motion Videos in DaVinci Resolve 18
There are multiple options and techniques for producing slow-motion DaVinci Resolve. The following section contains the step-by-step guide to doing that:
Method 1. Using the Timeline Settings
Are you looking for a speedy and straightforward method to slow down a video? In this DaVinci Resolve slow motion smooth, speed is adjustable via percentage. Here is a step-by-step guide to commence this action in DaVinci:
Step 1: After importing your clip into this software, bring it to the timeline. Then, right-click on this clip in the timeline; a selection panel will appear. In this panel, locate the “Retime Controls” option and click it.

Step 2: Commencing this action will feature a speed change option on your clip. Click on the navigation icon adjacent to the speed percentage in the timeline clip. As this opens a dropdown menu, select the “Change Speed” option to continue. Further, select a slower percentage in the given panel to slow down your video.

Step 3: There is a built-in option to bring smoothness to your slow-motion video. For this, select your clip and navigate towards the top-right panel. In the “Video” tab, scroll down and access the “Retime and Scaling” section. Here, expand the “Retime Process” option and select “Optical Flow.” This will add extra smoothness to your DaVinci slow-motion video.

Method 2. Using the Clip Attribution Settings
This method is suitable if you have shot a video at a higher frame rate. This method is also plain and requires a few clicks to complete. Following is the detailed guide to creating a DaVinci Resolve slow-motion smooth:
Step 1: Once you have imported the video in the timeline, navigate towards the Media Pool. From there, find your clip, right-click on it, and click the “Clip Attributes” option.

Step 2: From the Clip Attributes window, go to the “Video” tab and expand “Video Frame Rate.” From the appearing frame rate options, select a lesser frame rate.

Step 3: To sync the audio with your clip, navigate towards the timeline panel. Select the audio track and right-click on it to access settings. From the options menu, locate and uncheck the “Link Clips” option.

Step 4: Navigate toward the bottom of the editing interface and select “Fairlight.” In here, go to the right-side panel and access the “Audio” tab. From there, find and adjust the “Speed Change” settings. Your audio is now synced with the duration of your video.

Part 2: Making Slow Motion Video Making Easy with Wondershare Filmora
Slow motion in DaVinci Resolve gives accurate and precise results. However, the editing interface of this software can appear tricky to some users. If you are new to video editing or have beginner-level skills, using it can be difficult. To liberate you from such technicalities, we introduce you to Wondershare Filmora . This is an AI-driven desktop tool offering slow-motion video functions.
Methods to Make a Slow Motion Video in Wondershare Filmora
Filmora is a reliable alternative to slow motion in DaVinci Resolve, offering two methods. We have discussed both methods in the following section below:
Free Download For Win 7 or later(64-bit)
Free Download For macOS 10.14 or later
- Method 1. Using the Manual Speed Adjustment Option
- Method 2: Using the AI Frame Interpolation Option
Method 1. Using the Manual Speed Adjustment Option
If you are someone who prefers to oversee the editing task, Filmora offers the manual option. To commence this action, follow the step-by-step guide below:
Step 1Import Media and Access Uniform Speed
After downloading Filmora on your device, launch it and create a new project. Upon accessing the media “Import” option, import files and bring them to the timeline. Right-click on the clip within the timeline and select “Uniform Speed” from the drop-down menu.

Step 2Access the Settings Panel
Navigate towards the settings panel and access the “Uniform Speed” tab. Under this tab, adjust the “Speed” slider or set the values. You can also adjust the “Duration” of the clip to do so.

Method 2. Using the AI Frame Interpolation Option
If you want better results while slowing down video frames, you can opt for this option. You can commence Optical Flow action for smooth video frames. Given below is the detailed instructional manual for this:
Step 1Access the Speed Ramping Option
After importing media and dropping it into the timeline, select the video in the timeline. Then, navigate towards the right-side panel and go to the “Speed” tab. Under this tab, select the “Speed Ramping” option and enable the “Optical Flow” option after selecting any particular speed ramping preset. You can access this option by expanding the “AI Frame Interpolation” options.

Step 2Render Preview and Export
Afterward, navigate towards the timeline panel and select the “Render Preview” option. Once the rendering is done, play your video to see the results. If the results are satisfactory, click the “Export” button to export your video.

This DaVinci slow-motion alternative has more to offer when it comes to editing. Filmora offers a wide range of video, audio, and text editing features. The majority of these features are AI-backed and speed up task completion. Along with slow motion, you can increase the speed of a video and customize it. Filmora offers a built-in Stock Media library with effects and preset options.
AI-Backed Video Editing Features of Wondershare Filmora
Wondershare Filmora is a multifunctional software designed to increase productivity. Its AI technology enhances an editor’s productivity by offering automated options. This section emphasizes some of the AI-driven video editing features of Filmora:
1. AI Copilot Editing
Have you just started using Filmora and feel confused while editing? There is no need to see videos or read articles for it. Wondershare Filmora has a built-in AI chatbot assistant to guide you. You can ask its AI copilot feature anything about accessing effects or functions. It will give you detailed directions on it along with CTA buttons for direct access.

2. AI Text-to-Video
If you have an idea for a video but not the skill to create it, Filmora has got you covered. Using this feature, you can craft a proper video from text. You just need to add a script or textual direction in the prompt section. AI will handle and insert the AI voice, text, and graphics independently.

3. AI Copywriting
Wondering what to enter as a prompt in Filmora’s Text-to-Video AI? There is no need to switch with AI copywriters as Filmora offers its own. With its ChatGPT integration, this feature generates accurate and rapid scripts. Users just need to add a description for a script, and it will generate content on it.

4. AI Smart Masking
Everyone loves those unique and high-quality transitions and effects. However, incorporating such transitions and effects can be tricky in manual editing. With its AI masking feature, you just need to activate the feature, and it will do the rest. When you enable AI masking and specify the area to mask, it will operate within seconds. You can later add transitions and effects to the unmasked area.

Conclusion
Upon conclusion, let’s rewind the complete knowledge of this article. At first, the article discussed how slow-motion videos have a significant contribution. Along with video editing, they contribute to research, training, and education. Moreover, we discussed DaVinci’s resolve in slow motion and a guide to use it. Although, we recommend you use Wondershare Filmora as it is an easy-to-use alternative.
Make A Slow Motion Video Make A Slow Motion Video More Features
Part 1: Learning the Best Ways to Add Slow Motion in DaVinci Resolve [100% Working]
Post-production editing is what adds value and perfection to your shots. DaVinci Resolve is an all-in-one editor designed to assist in post-production tasks. You can do professional-level editing, apply effects, infuse cinematic visuals, and more. In addition, it possesses multipurpose high-grade audio editing tools for videos.
With its custom settings options, you can create slow motions in DaVinci Resolve. It has multiple options for manipulating the speed of the entire video clip. With its speed ramping option, you can slow down a specific portion of the video. The Optical Flow feature in it brings precision to your slow-motion videos. If you want to get rid of switching between software, DaVinci slow motion is an option.
Methods of Creating Slow Motion Videos in DaVinci Resolve 18
There are multiple options and techniques for producing slow-motion DaVinci Resolve. The following section contains the step-by-step guide to doing that:
Method 1. Using the Timeline Settings
Are you looking for a speedy and straightforward method to slow down a video? In this DaVinci Resolve slow motion smooth, speed is adjustable via percentage. Here is a step-by-step guide to commence this action in DaVinci:
Step 1: After importing your clip into this software, bring it to the timeline. Then, right-click on this clip in the timeline; a selection panel will appear. In this panel, locate the “Retime Controls” option and click it.
Step 2: Commencing this action will feature a speed change option on your clip. Click on the navigation icon adjacent to the speed percentage in the timeline clip. As this opens a dropdown menu, select the “Change Speed” option to continue. Further, select a slower percentage in the given panel to slow down your video.
Step 3: There is a built-in option to bring smoothness to your slow-motion video. For this, select your clip and navigate towards the top-right panel. In the “Video” tab, scroll down and access the “Retime and Scaling” section. Here, expand the “Retime Process” option and select “Optical Flow.” This will add extra smoothness to your DaVinci slow-motion video.
Method 2. Using the Clip Attribution Settings
This method is suitable if you have shot a video at a higher frame rate. This method is also plain and requires a few clicks to complete. Following is the detailed guide to creating a DaVinci Resolve slow-motion smooth:
Step 1: Once you have imported the video in the timeline, navigate towards the Media Pool. From there, find your clip, right-click on it, and click the “Clip Attributes” option.
Step 2: From the Clip Attributes window, go to the “Video” tab and expand “Video Frame Rate.” From the appearing frame rate options, select a lesser frame rate.
Step 3: To sync the audio with your clip, navigate towards the timeline panel. Select the audio track and right-click on it to access settings. From the options menu, locate and uncheck the “Link Clips” option.
Step 4: Navigate toward the bottom of the editing interface and select “Fairlight.” In here, go to the right-side panel and access the “Audio” tab. From there, find and adjust the “Speed Change” settings. Your audio is now synced with the duration of your video.
Part 2: Making Slow Motion Video Making Easy with Wondershare Filmora
Slow motion in DaVinci Resolve gives accurate and precise results. However, the editing interface of this software can appear tricky to some users. If you are new to video editing or have beginner-level skills, using it can be difficult. To liberate you from such technicalities, we introduce you to Wondershare Filmora . This is an AI-driven desktop tool offering slow-motion video functions.
Methods to Make a Slow Motion Video in Wondershare Filmora
Filmora is a reliable alternative to slow motion in DaVinci Resolve, offering two methods. We have discussed both methods in the following section below:
Free Download For Win 7 or later(64-bit)
Free Download For macOS 10.14 or later
- Method 1. Using the Manual Speed Adjustment Option
- Method 2: Using the AI Frame Interpolation Option
Method 1. Using the Manual Speed Adjustment Option
If you are someone who prefers to oversee the editing task, Filmora offers the manual option. To commence this action, follow the step-by-step guide below:
Step 1Import Media and Access Uniform Speed
After downloading Filmora on your device, launch it and create a new project. Upon accessing the media “Import” option, import files and bring them to the timeline. Right-click on the clip within the timeline and select “Uniform Speed” from the drop-down menu.
Step 2Access the Settings Panel
Navigate towards the settings panel and access the “Uniform Speed” tab. Under this tab, adjust the “Speed” slider or set the values. You can also adjust the “Duration” of the clip to do so.
Method 2. Using the AI Frame Interpolation Option
If you want better results while slowing down video frames, you can opt for this option. You can commence Optical Flow action for smooth video frames. Given below is the detailed instructional manual for this:
Step 1Access the Speed Ramping Option
After importing media and dropping it into the timeline, select the video in the timeline. Then, navigate towards the right-side panel and go to the “Speed” tab. Under this tab, select the “Speed Ramping” option and enable the “Optical Flow” option after selecting any particular speed ramping preset. You can access this option by expanding the “AI Frame Interpolation” options.
Step 2Render Preview and Export
Afterward, navigate towards the timeline panel and select the “Render Preview” option. Once the rendering is done, play your video to see the results. If the results are satisfactory, click the “Export” button to export your video.
This DaVinci slow-motion alternative has more to offer when it comes to editing. Filmora offers a wide range of video, audio, and text editing features. The majority of these features are AI-backed and speed up task completion. Along with slow motion, you can increase the speed of a video and customize it. Filmora offers a built-in Stock Media library with effects and preset options.
AI-Backed Video Editing Features of Wondershare Filmora
Wondershare Filmora is a multifunctional software designed to increase productivity. Its AI technology enhances an editor’s productivity by offering automated options. This section emphasizes some of the AI-driven video editing features of Filmora:
1. AI Copilot Editing
Have you just started using Filmora and feel confused while editing? There is no need to see videos or read articles for it. Wondershare Filmora has a built-in AI chatbot assistant to guide you. You can ask its AI copilot feature anything about accessing effects or functions. It will give you detailed directions on it along with CTA buttons for direct access.
2. AI Text-to-Video
If you have an idea for a video but not the skill to create it, Filmora has got you covered. Using this feature, you can craft a proper video from text. You just need to add a script or textual direction in the prompt section. AI will handle and insert the AI voice, text, and graphics independently.
3. AI Copywriting
Wondering what to enter as a prompt in Filmora’s Text-to-Video AI? There is no need to switch with AI copywriters as Filmora offers its own. With its ChatGPT integration, this feature generates accurate and rapid scripts. Users just need to add a description for a script, and it will generate content on it.
4. AI Smart Masking
Everyone loves those unique and high-quality transitions and effects. However, incorporating such transitions and effects can be tricky in manual editing. With its AI masking feature, you just need to activate the feature, and it will do the rest. When you enable AI masking and specify the area to mask, it will operate within seconds. You can later add transitions and effects to the unmasked area.
Conclusion
Upon conclusion, let’s rewind the complete knowledge of this article. At first, the article discussed how slow-motion videos have a significant contribution. Along with video editing, they contribute to research, training, and education. Moreover, we discussed DaVinci’s resolve in slow motion and a guide to use it. Although, we recommend you use Wondershare Filmora as it is an easy-to-use alternative.
Top Tips on How to Design Travel Slideshow
Best Tips on How to Design Travel Slideshow
An easy yet powerful editor
Numerous effects to choose from
Detailed tutorials provided by the official channel
A single travel trip besides numerous memories also has innumerable pictures and videos. Sharing all of these pictures and videos with your friends, and dear ones are tedious and not a practical thing to do. Here comes your creativity, where you can make an impressive slideshow using some of the most interesting images and videos from your clips. Creating a digital slideshow will not only help you to share your files online with your loved ones but will also work as a keepsake where you relive the moments later.

So now when decided to create a slideshow, the next question is how, tips, tools, templates, and software can be used. The article below will cover all these aspects that will help you in designing and creating a wonderful travel slideshow.
In this article
01 [Tips and steps for creating a travel slideshow](#Part 1)
02 [Importance of using a travel slideshow template](#Part 2)
03 [Best tool for creating a travel slideshow- Wondershare Filmora](#Part 3)
Part 1 Tips and steps for creating a travel slideshow
Want to hear the words- cool and wow when you play your slideshow in front of your dear ones. The below-listed tips will help you create an engaging and engrossing slideshow.

01Identify the audience
Before creating a slideshow, you first need to ascertain who is your target audience. The slideshow can be created for your friends, family, relatives, or YouTube or social media platform viewers. Depending on the target audience, the content and other slideshow elements will vary.
02Choose a travel story
Next, you need to decide upon the story of your travel slideshow. Depending on the story, you can pick up the content to be included. The story can be based on the places you visited, food, local shopping, and others. Also draft a story that has an introduction, a middle part, and an end.
03Sort the pictures and videos
Next comes the trickiest part of selecting the pictures and videos to be added to the slideshow. For any trip, there are hundreds of images but you cannot add them all to your slideshow. So, depending on the target audience and your travel story, pick up the most appropriate ones. Pick up the number of images and videos so that the total slideshow length is around 5-7 minutes.
04Edit images and add effects
Next comes the editing part. Check out the images that need editing like cropping, color correction, and others. Also, you can add some effects to make your slideshow interesting. To edit the files and add effects, there are several editing online and desktop-based tools available. You can choose the ones that meet your requirements.
05Add transitions
Next, choose the transitions you want to add between the images and the videos. There are slideshow-making tools where you can check out different types of transition effects and use them.
06Add Music
Music will set the right tone and mood for your slideshow. You can either download the relevant song from any online site or a music library or can also combine multiple audio clips to be added to the slideshow.
Part 2 Importance of using a travel slideshow template
For some, slideshow creation can be a simple task of adding a few images and videos but for the ones who need to create something interesting, several elements go into the making of a slideshow. Moreover, when it comes to travel, the task becomes even trickier with so many things to include and grab the attention of the viewers.
So, if you are not experienced or a pro at making a slideshow but want to create something impressive, templates come to a great rescue. The templates are like ready-to-use designs where you simply need to add the required elements that in turn will create a travel slideshow.
Using a template for creating a travel slideshow served several benefits as enlisted below.
● Save time in drafting a design.
● Save efforts.
● Helps in creating a professional-looking impressive slideshow.
● Multiple elements can be added.
● Helps in creating a slideshow with some story.
There are several online sites and tools available from where you can select and pick a travel slideshow template of your choice.

Part 3 Best tool for creating a travel slideshow- Wondershare Filmora
For creating your travel slideshow in an interesting manner and that too in a hassle-free manner, Wondershare Filmora Video Editor is excellent. Though it is a professional video editing tool with advanced features, it supports multiple additional tasks as well including slideshow making. Using the software, your slideshow having pictures, videos, and music files can be created in no time.
For Win 7 or later (64-bit)
For macOS 10.12 or later
You can even edit the files for further customization using the built-in functions. Add transitions, filters, effects, and other elements for creating a slideshow of your choice. An array of templates in different categories will further help you to quickly create a presentation based on your theme. There is also a stock collection of videos, images, and other files that can be used for your slideshow.

Steps to create a travel slideshow using Wondershare Filmora
Step 1. From the official software page, download and install the program, and at the main interface choose the New Project option.
Step 2. Next, the videos and images that need to be included in the slideshow have to be imported and added to the Media Library of the software. Next, drag and move these files to the timeline. The sequence can be changed as desired.
Note: Before moving the files to the timeline, you can edit and customize them by using the built-in features of the software like rotate, crop, and zoom.
Step 3. An array of transitions is available in the software from which you can choose the ones that fit into your theme. Some of the popular ones are cross-merge, sweep clockwise, cross split, and others.
Step 4. Also add filters, overlays, effects, and other elements to your slideshow.
Step 5. Next comes the music, add the local music file or use the one from the inbuilt audio library. The Voice-over recording option is also available in the software.
Step 6. Finally, export and save the slideshow. You can save it to your local system, or DVD, or can even share it directly to YouTube or Vimeo.
● Ending Thoughts →
● For creating an interesting travel slideshow consider all the important elements like the story, theme, pictures, music, and others.
● Templates help to a great extent for creating a slideshow in a simple quick-manner.
● Wondershare Filmora is an excellent tool for finding a template as well as creating a travel slideshow.
A single travel trip besides numerous memories also has innumerable pictures and videos. Sharing all of these pictures and videos with your friends, and dear ones are tedious and not a practical thing to do. Here comes your creativity, where you can make an impressive slideshow using some of the most interesting images and videos from your clips. Creating a digital slideshow will not only help you to share your files online with your loved ones but will also work as a keepsake where you relive the moments later.
So now when decided to create a slideshow, the next question is how, tips, tools, templates, and software can be used. The article below will cover all these aspects that will help you in designing and creating a wonderful travel slideshow.
In this article
01 [Tips and steps for creating a travel slideshow](#Part 1)
02 [Importance of using a travel slideshow template](#Part 2)
03 [Best tool for creating a travel slideshow- Wondershare Filmora](#Part 3)
Part 1 Tips and steps for creating a travel slideshow
Want to hear the words- cool and wow when you play your slideshow in front of your dear ones. The below-listed tips will help you create an engaging and engrossing slideshow.
01Identify the audience
Before creating a slideshow, you first need to ascertain who is your target audience. The slideshow can be created for your friends, family, relatives, or YouTube or social media platform viewers. Depending on the target audience, the content and other slideshow elements will vary.
02Choose a travel story
Next, you need to decide upon the story of your travel slideshow. Depending on the story, you can pick up the content to be included. The story can be based on the places you visited, food, local shopping, and others. Also draft a story that has an introduction, a middle part, and an end.
03Sort the pictures and videos
Next comes the trickiest part of selecting the pictures and videos to be added to the slideshow. For any trip, there are hundreds of images but you cannot add them all to your slideshow. So, depending on the target audience and your travel story, pick up the most appropriate ones. Pick up the number of images and videos so that the total slideshow length is around 5-7 minutes.
04Edit images and add effects
Next comes the editing part. Check out the images that need editing like cropping, color correction, and others. Also, you can add some effects to make your slideshow interesting. To edit the files and add effects, there are several editing online and desktop-based tools available. You can choose the ones that meet your requirements.
05Add transitions
Next, choose the transitions you want to add between the images and the videos. There are slideshow-making tools where you can check out different types of transition effects and use them.
06Add Music
Music will set the right tone and mood for your slideshow. You can either download the relevant song from any online site or a music library or can also combine multiple audio clips to be added to the slideshow.
Part 2 Importance of using a travel slideshow template
For some, slideshow creation can be a simple task of adding a few images and videos but for the ones who need to create something interesting, several elements go into the making of a slideshow. Moreover, when it comes to travel, the task becomes even trickier with so many things to include and grab the attention of the viewers.
So, if you are not experienced or a pro at making a slideshow but want to create something impressive, templates come to a great rescue. The templates are like ready-to-use designs where you simply need to add the required elements that in turn will create a travel slideshow.
Using a template for creating a travel slideshow served several benefits as enlisted below.
● Save time in drafting a design.
● Save efforts.
● Helps in creating a professional-looking impressive slideshow.
● Multiple elements can be added.
● Helps in creating a slideshow with some story.
There are several online sites and tools available from where you can select and pick a travel slideshow template of your choice.
Part 3 Best tool for creating a travel slideshow- Wondershare Filmora
For creating your travel slideshow in an interesting manner and that too in a hassle-free manner, Wondershare Filmora Video Editor is excellent. Though it is a professional video editing tool with advanced features, it supports multiple additional tasks as well including slideshow making. Using the software, your slideshow having pictures, videos, and music files can be created in no time.
For Win 7 or later (64-bit)
For macOS 10.12 or later
You can even edit the files for further customization using the built-in functions. Add transitions, filters, effects, and other elements for creating a slideshow of your choice. An array of templates in different categories will further help you to quickly create a presentation based on your theme. There is also a stock collection of videos, images, and other files that can be used for your slideshow.
Steps to create a travel slideshow using Wondershare Filmora
Step 1. From the official software page, download and install the program, and at the main interface choose the New Project option.
Step 2. Next, the videos and images that need to be included in the slideshow have to be imported and added to the Media Library of the software. Next, drag and move these files to the timeline. The sequence can be changed as desired.
Note: Before moving the files to the timeline, you can edit and customize them by using the built-in features of the software like rotate, crop, and zoom.
Step 3. An array of transitions is available in the software from which you can choose the ones that fit into your theme. Some of the popular ones are cross-merge, sweep clockwise, cross split, and others.
Step 4. Also add filters, overlays, effects, and other elements to your slideshow.
Step 5. Next comes the music, add the local music file or use the one from the inbuilt audio library. The Voice-over recording option is also available in the software.
Step 6. Finally, export and save the slideshow. You can save it to your local system, or DVD, or can even share it directly to YouTube or Vimeo.
● Ending Thoughts →
● For creating an interesting travel slideshow consider all the important elements like the story, theme, pictures, music, and others.
● Templates help to a great extent for creating a slideshow in a simple quick-manner.
● Wondershare Filmora is an excellent tool for finding a template as well as creating a travel slideshow.
Also read:
- New 2024 Approved Cropping Videos in Final Cut Pro Step by Step
- Updated 2024 Approved Introduction to The Best Cinematic LUTs in The Market
- Best GIF to AVI Converters (Online + Software Solutions)
- Whats The Best Laptops For Video Editing for 2024
- Updated In 2024, Final Cut Pro - How to Download and Install It
- Updated The Complete Guide to Converting GIF to SVG With Ease for 2024
- New Learn 4 Proven Methods for Creating Engaging and Memorable Recap Videos. Elevate Your Event Coverage and Engage Your Audience with These Tips and Tricks
- Updated Discover How You Can Use Vectorscope to Adjust Luminance, Color Grading, and More in Your Video Editing Projects
- 2024 Approved How to Crop a Video in Windows Media Player
- Updated Best LUTs for Vlog A 2024 Overview
- In 2024, How to Overlay Video in Premiere Pro
- 2024 Approved 10 Apps to Make Videos with Pictures and Music
- In 2024, Do You Want to Create Adjustment Layers in Final Cut Pro? This Article Will Discuss a Simple yet Efficient Method to Generate Adjustment Layers in Final Cut Pro
- Guide to Add Transition Effects in Premiere Pro
- 4 Ways to Merge MP4 and MP3 for 2024
- Updated In 2024, 10 Top Suggestions for AI Video Interviews
- Updated In 2024, Easy Ways to Create Procreate GIFs
- 2024 Approved Do You Want to Learn How to Use Premiere Pro Distortion Effects in Your Videos? We Have Provided a List of Distortion Premiere Pro Effects and How to Use Them
- New 2024 Approved How to Rotate Video in iMovie with Alternative
- New In 2024, How to Make Flying Objects in Wondershare Filmora
- Updated 2024 Approved How to Create One Click Video Reverse Effect in Filmora
- 2024 Approved Find Out How to Add Subtitles in the VLC Media Player on Your Windows and Mac System with Quick and Simple Instructions
- How To Track and Blur Faces in Premiere Pro for 2024
- 2024 Approved Color Match Game Tips for You
- Best Free LUTs To Use in Shotcut
- How to Get Motion Blur in Valorant?
- Updated 2024 Approved Add a Miniature Effect on Your Video for Filmy Looks. To Add This Effect, Read the Complete Guide and Make Your Video Cinematic by Wondershare Filmora
- Do You Know Adding Subtitles Can Benefit Video Content? Meanwhile, for Adding Subtitles to a Video, Wondershare Filmora Can Help You for 2024
- New 2024 Approved Free Ways to Download Mobile Phone Green Screen Videos and Pictures No Copyright
- New 15 Camera Shake Preset for Adobe Premiere Pro
- New In 2024, Looking Into The Top Free Slow Motion Apps (Android & iOS)
- New Convert Slow Motion Videos to Regular Videos in Your iOS Device |A How
- Updated Do You Know that You Can Apply Different LUTs and Create Your Own? There Are Many LUT Online and Offline Generators that You Can Use to Create Your LUT
- New Easy Steps to Create Intro Video with After Effects for 2024
- 2024 Approved Learn Topaz Video Enhance AI Review
- New How to Add Video Effects with Movavi Slideshow Maker
- Slowing Down GIF With The Best Available Methods for 2024
- New 2024 Approved 10 Catchy Pixel Art Wallpapers and How to Custom Your Own
- Updated Top 22 Free Video Editing Software
- Recording Slow-Motion Videos Is Not More Difficult Using a Smartphone. Learn Everything From How to Record Slow-Motion Video and Edit a Video to Slow Down It
- 2024 Approved How to Resize FLV Video EfficientlyWindows, Mac, Android, iPhone &
- 2024 Approved 100+ Best TikTok Captions Enhance Your Content
- Updated Steps to Create Makeup Videos
- A Complete Guide To OEM Unlocking on Samsung Galaxy F15 5G
- The way to convert MTS for Samsung Galaxy F14 5G
- How to Fix Poco C55 Find My Friends No Location Found? | Dr.fone
- In 2024, Unova Stone Pokémon Go Evolution List and How Catch Them For Lava Storm 5G | Dr.fone
- In 2024, Trouble with iPhone XR Swipe-Up? Try These 11 Solutions | Dr.fone
- Easily Unlock Your Oppo A59 5G Device SIM
- Fixing Foneazy MockGo Not Working On Honor Magic5 Ultimate | Dr.fone
- In 2024, List of Pokémon Go Joysticks On Motorola Moto G13 | Dr.fone
- In 2024, 2 Ways to Monitor Motorola Moto G73 5G Activity | Dr.fone
- 3 Methods to Mirror Sony Xperia 5 V to Roku | Dr.fone
- Looking For A Location Changer On Lava Yuva 2 Pro? Look No Further | Dr.fone
- How To Remove Passcode From iPhone 15 Pro Max? Complete Guide | Dr.fone
- Identify malfunctioning hardware drivers with Windows Device Manager on Windows 7
- In 2024, How to Fake Snapchat Location on Nubia Z50 Ultra | Dr.fone
- New 2024 Approved Boost Sales with Live Shopping Learn Winning Strategies From Top Brands
- In 2024, Removing Device From Apple ID For your iPhone 13
- How to Track Apple iPhone 15 Pro Max by Phone Number | Dr.fone
- How to Send and Fake Live Location on Facebook Messenger Of your Samsung Galaxy A54 5G | Dr.fone
- 10 Easy-to-Use FRP Bypass Tools for Unlocking Google Accounts On Itel P55 5G
- Detailed Review of doctorSIM Unlock Service For Apple iPhone 11 | Dr.fone
- How to Use Pokémon Emerald Master Ball Cheat On Tecno Spark 20 Pro+ | Dr.fone
- new 2024 Approved How To Translate Videos in Tamil for a Wider Reach
- Full Guide to Unlock Your Xiaomi Redmi Note 13 Pro+ 5G
- How to Unlock Samsung Galaxy S23 FE PIN Code/Pattern Lock/Password
- In 2024, How To Do Motorola Moto G13 Screen Sharing | Dr.fone
- In 2024, How to Transfer Everything from Apple iPhone 14 to iPhone 8/X/11 | Dr.fone
- Guide to Completely Erase Data on iPhone X to Avoid Privacy Leak | Stellar
- In 2024, How to Turn Off Google Location to Stop Tracking You on Oppo Reno 11F 5G | Dr.fone
- How to Screen Mirror on Apple iPhone 14 Pro? | Dr.fone
- In 2024, How to Mirror Apple iPhone 6 to Mac? | Dr.fone
- In 2024, Ultimate Guide from iPhone 13 iCloud Activation Lock Bypass
- How To Transfer Data From Apple iPhone 6s Plus To Other iPhone 13 Pro Max devices? | Dr.fone
- Detailed guide of ispoofer for pogo installation On Nokia C300 | Dr.fone
- How To Erase an Apple iPhone 8 Without Apple ID Password?
- Title: New 2 Solutions to Cut Video in VLC on Windows
- Author: Chloe
- Created at : 2024-05-20 03:37:41
- Updated at : 2024-05-21 03:37:41
- Link: https://ai-editing-video.techidaily.com/new-2-solutions-to-cut-video-in-vlc-on-windows/
- License: This work is licensed under CC BY-NC-SA 4.0.
