
:max_bytes(150000):strip_icc():format(webp)/tclsclass-0185b3ecd41d454589d2a9984629b919.jpg)
New 2024 Approved 10 Best Meme Text to Speech Tools Windows, Mac, Android, iPhone
10 Best Meme Text to Speech Tools [Windows, Mac, Android, iPhone
Best Text To Speech Converter and Video Editor
Filmora’s Text to Speech (TTS) function allows you to convert your text files to voiceover and bring more elements to enrich your video.
Free Download Free Download Free Download Learn More >

Technology is changing really fast. To keep up, we must be able to adapt to the current trends.
Various technological advancements have played a big role in the improvement of our daily lives. Nowadays, you no longer have to pay voice-over artists thousands of dollars each month, thanks to the invention of text-to-speech technology.
Text-to-speech helps improve accessibility as many people don’t like reading long bodies of text. Furthermore, it eliminates the language barrier and helps you reach a global audience.
In this guide, we’ll focus more on the best meme text to speech, fro their compatibility, features, pricing, and cons.
What is the best meme text to speech?
| Software | Do prices start from? | Free plan/trial | Support |
|---|---|---|---|
| Ispring Suite | $770 (per year) | ✔ | Windows |
| Murf | $13 | ✔ | Windows & IOS |
| Speechelo | $37 | ✘ | Windows & IOS |
| Synthesys | $29 | ✘ | Windows & IOS |
| Nuance Dragon | $200 | ✔ | Windows & IOS |
| Note Vibes | $99 | ✔ | Windows & IOS |
| Natural Reader | $49 | ✔ | Windows & IOS |
| Linguatec Voice Reader | $49 | ✘ | Windows & IOS |
| Capti Voice | $2 | ✔ | Windows & IOS |
| Voice Drea Reader | $9.99 | ✔ | Windows & IOS |
1. iSpring Suite
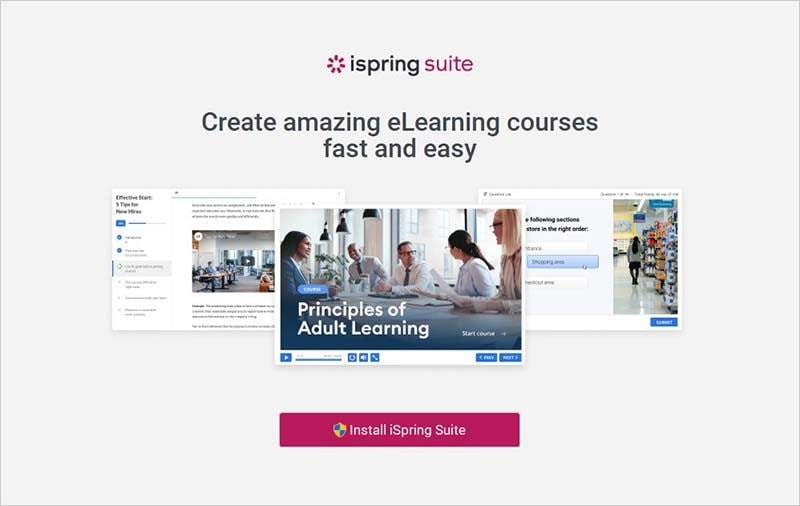
The ispring Suite is a user-friendly eLearning authoring tool whose system incorporates PowerPoint. The navigation tabs are designed with simplicity making it easier for user interaction. The system is only compatible with Windows. The technical staff is prompt and responsive to any matters arising.
Features
- The ispring Suite allows quick conversion of PowerPoint training materials to eLearning.
- Supports multiple users to attend the training and get the same information.
- Creates eLearning content with synched voice narrations and exams for certification.
- Tools such as the Quiz Maker aid a user in creating content with ease.
- Taking training slide decks and working with the ispring Suite creates magical interactivity for the user.
- The ispring Suite provides access to create SCROM content with ease.
Cons
One cannot use a shared drive and auto-sync for content creation.
It is incompatible with Mac users.
Limited options were added for accessibility.
Cost
Ispring Suite costs $770 per year
Ispring Suite Max costs $970 annually
- Murf
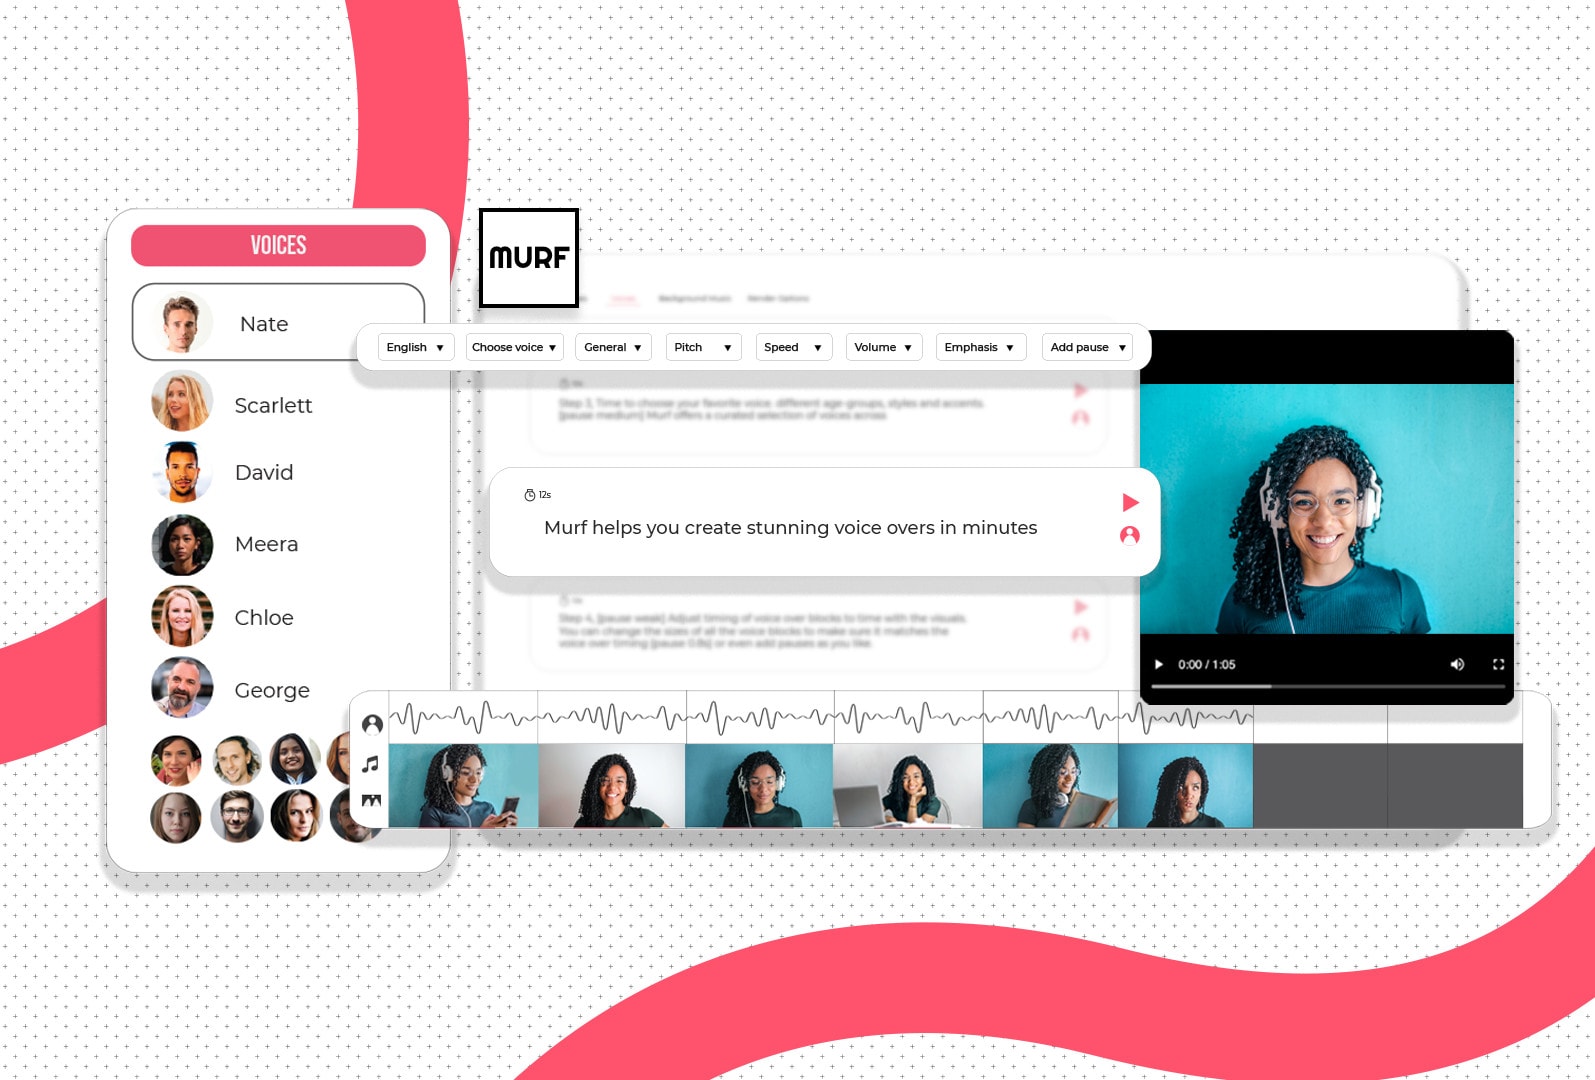
Murf is a versatile AI voice generator that converts text to natural-sounding speech. Cuts down the cost of hiring a voice-over artist, renting out a studio, and investing inexpensive resources. Its simplicity and flexibility generate a studio quality and professional sounding voice-over.
Murf studio creates and edits voice-overs from a range of 120+ natural-sounding voices in 20+ languages and accents. The Murf studio aids one in doing product reviews, promotional videos, and eLearning course modules for audiobooks. Murf’s library incorporates a list of natural-sounding voice covers across several languages.
The Murf provides powerful features to create voice-over videos by adding pause and editing. The clients rate the Murf as the best text-to-speech editor in comparison to other Software since it is cost-effective and efficient. The ability to sync high-quality voice-overs to video creates a slick video quickly.
Features
- The ability to sync voice-overs with images, videos and background music takes away the need to integrate into a third-party tool.
- Incorporates voice cloning as a service.
- Customization of voice that suits the brand position by signing for a custom voice demo.
- Features adding pauses and changing the speed of narration and emphasis help build a more realistic and natural output.
- Murf integrates advanced team collaboration features, access control, pronunciation library, and SLA.
- The text-based voice-over maker allows one to typescript and uploads voice recordings as the tool converts them into hyper-realistic AI voices. The voice converters are editable, just like a word document.
- It has the capability of syncing the time of your voice-over with the visuals.
- The interface is easy to use and super-friendly for beginners to effectively navigate.
- It runs through the system to identify multiple parameters.
- Murf provides voices trained by professional voice-over artists.
- Makes studio-quality voice-overs with no training and little time coverage.
- Supports both audio and text-based inputs.
- Allows the user to enhance e-learning content by providing an audio element to enrich content.
Cons
The soundtrack has a glitch as one cannot upload music under the voice waveform.
Using the tool to its full potential is a learning curve, but it is not that difficult.
Expensive for Individuals; the premium plans are ideal for businesses that regularly create voice-over content but may prove pricey for individuals. The free plan comes in handy in such a case.
Price
Murf pricing exists in four plans: Free, Basic ($13/month), Pro ($26/month), and Enterprise ($69/ month). The free plan package offers all 120+ voices with a share link for audio/video output. It is for a single user with 10 mins of voice generation and transcription.
The basic plan has unlimited downloads with 24 hours of voice generation with access to 60 voices which sums to 10 languages. It is a single user with commercial usage rights.
The Pro plan has 96 hours of voice generation and 48 hours of transcription per year. Supports up to 3 users with recorded voice editing.
The enterprise package has custom voice generation time and transcription time. Works with a specific number of users and collaboration features. Prompts a user to centralized invoicing and account manager.
- Speechelo
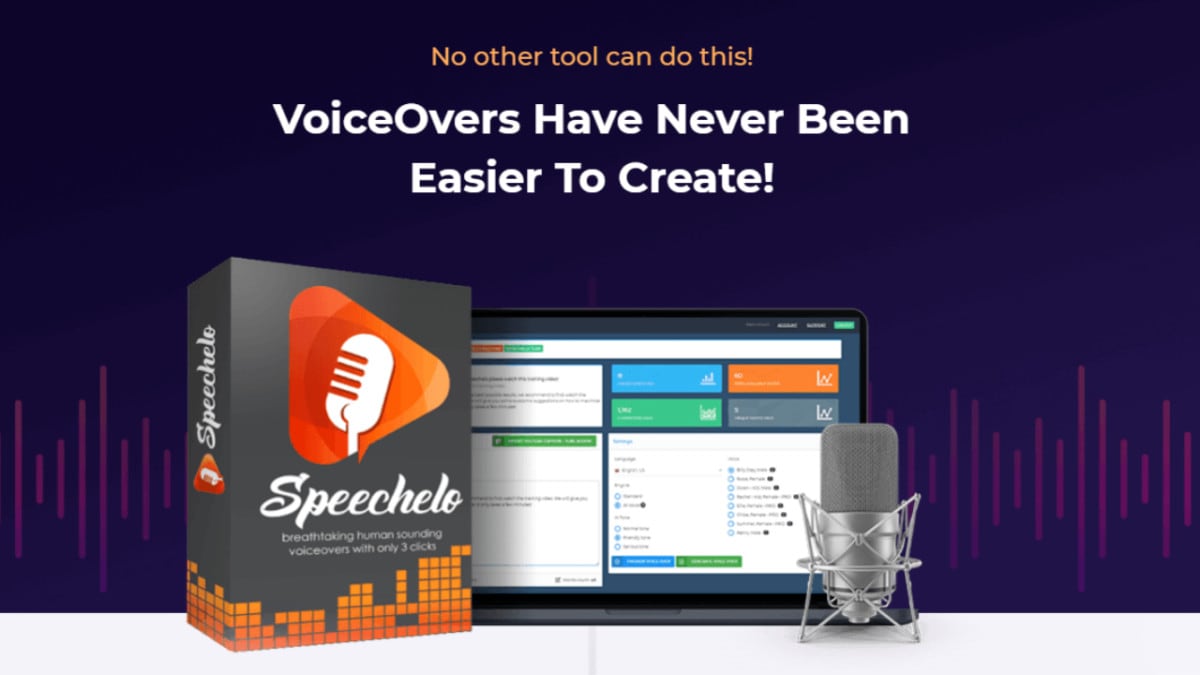
Suites Cloud-based solution to create a voice-over. Provides original voice sound with all expressions increasing the interactivity with the users. It is essential for sales videos, training videos, and educational videos. Speechelo incorporates breathing & pauses and voice tones, changing speed & pitch, and support for 23 languages.
It is a cloud-based solution to create voice-over. Speechelo remains the best text-to-speech Software on the market to help several content creators around the world create videos and podcasts that effectively engage the audience.
Features
- Add inflections in the voice with the aid of an AI engine that increases the naturalness of the audio production and allows a user to choose between tones.
- Transforms any text into speech within 5 seconds.
- Reads text in three ways, normal tone, joyful tone, and Serious tone.
- Incorporates over 30 human-sounding voices.
- Works in English and 23 other languages.
- Compatible with most video creation software such as Adobe, iMovie, Premiere, Camtasia, and Audacity.
- Has both male and female voices.
- The ability to include breathes and pauses increases the human-like quality of voice production.
- Provides an online text editor who checks through a script to identify errors (Punctuation errors).
- Offers its users over fifty voices to choose from.
- The easiest text-to-speech converter in the market comes with three clicks; you must paste the text, then choose the voice, and then download the generated audio.
Cons
Quite expensive when in need of an upgrade to the Pro version or to download an add-on.
Pricing
Speechelo has three main package plans for users: the Starter pack, Speechelo pro, and speechelo tube add-on. The starter pack offers a special discount for a first-time user. For this plan, it is a one-time payment fee of $47. It gives the user access to all features of speechelo; however, it limits the words you can convert to 700 words.
For Speechelo pro, a user pays $47 every three months of the year. This subscription limits the number of words one can convert.
The Speechelo tube add-on allows the user to link directly to YouTube. It costs $37 and gives access to YouTube templates.
- Synthesys
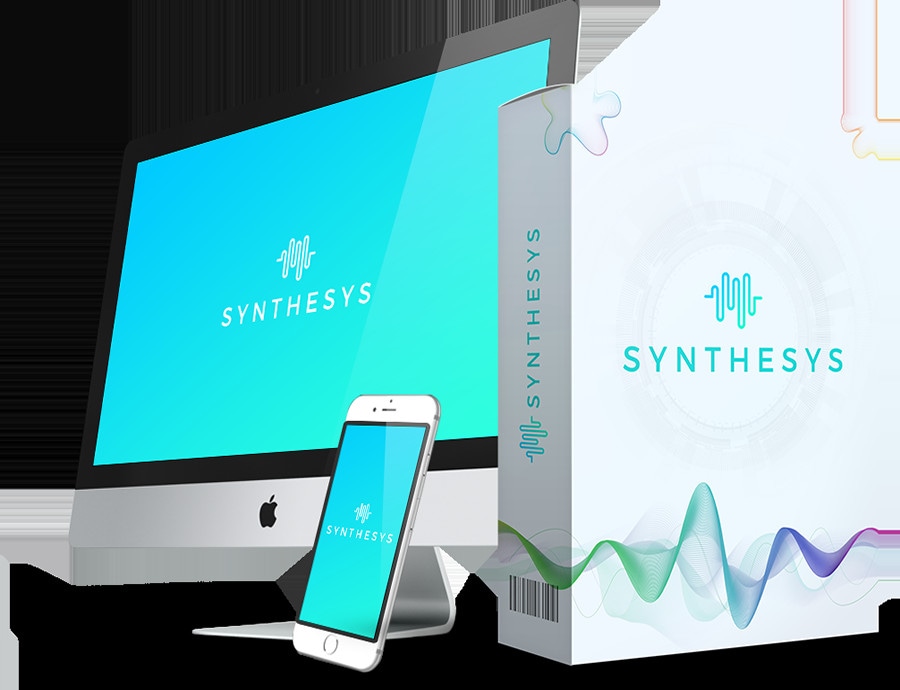
This tool is a large professional AI voice library, 3-click text-to-speech recognition, cloud-based, unlimited speech generation.
They generate natural-sounding voices from texts with a wide variety of tones, languages, male and female voices, and reading speeds to choose from. Takes a few steps to generate natural-sounding artificial speech to fit a wide range of commercial purposes.
First, choose the gender, accent, and tone you would like to transform into. The next step is to write the text to convert to speech into Synthesys’s AI voice-generating interface. Finally, click ‘create’ to generate the artificial speech.
With Human Synthesys , you can create sales videos, ads, demo videos, commercials, training videos, and animation videos. This opens business production to a hike as clients keep flocking. It is as easy as pie, open a YouTube channel and upload videos about your niche, sell voice-overs, ads, explainer videos, or help other businesses get more clients.
Features
- Full customization on cloud-based applications.
- Interactive user interface for editing and rendering.
- High-resolution output
- Suits explainer videos, eLearning, social media, product descriptions, and more.
- Creates room for unlimited voices with over 35 female and 30 male voices.
- It has over 66 languages to choose from, and a total voice bank of 254 unique styles.
- Offers endless possibilities in marketing
- A more compelling alternative to animations and avatars.
- Lip-syncing done by Artificial Intelligence gives it a more realistic appearance.
- Human Synthesys studio’s breakthrough technology solves all the problems, giving high quality at an affordable price.
- Supports multi-slide Videos and MP4 downloads.
- Contains a wide range of high-quality and realistic synthetic voices.
Cons
Require a user to purchase further credits after the license purchase.
Requires an active and stable internet connection.
Pricing
Audio Synthesys costs $29 per month, Human Studio Synthesys $39 per month, and both Audio and Human Studio Synthesys cost $59 per month.
- Nuance Dragon
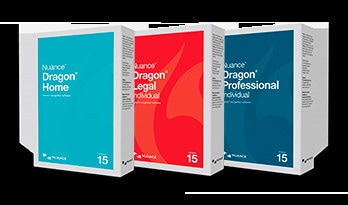
AI-powered speech recognition solution for both home and professional use. Creates cloud solutions and runs on geographically dispersed data centres. The AES 256-bit encryption sync data across devices 99% accuracy with typing. It guarantees a user superior speed and accuracy. The deep learning technology used in Dragon Nuance design ensures the Software adapts to the user’s voice and environmental variables.
Nuance Dragon software is a better pick for ambiguous projects and applications. They are reliable and offer accurate output. There are four versions of Nuance Dragon Software: Dragon Home, Professional, Legal, and Anywhere.
The Dragon Home Software suits personal use and is easy to use with deep learning technology and high accuracy. The Professional suits freelancers or businesses.
Dragon Legal is a speech recognition software for legal professionals, available in three editions with a solid command of the language. Dragon Anywhere is a cloud-based speech-to-text solution. Compatible with mobile and computer devices. Easier to create, store, and edit documents.
The Nuance Dragon Software is compatible with Windows, Android, and iOS.
Features
- Support multiple versions for professionals and individuals in different fields.
- Full voice-to-text functionality.
- Executes commands using the user’s voice.
- Deep learning of individual accents and regional intonations
- Search and browse the internet by voice.
- Fast, accurate documentation.
- Provides comprehensive security.
- Gives the user flexibility on how to convert voice to text and communicate.
- Easier to surf the web through commands and can program multi-step tasks into one simple command that triggers a Google search while using another application.
Cons
Technical glitches for updates in version 15.
No microphone in version 15.
Payments on updates.
Limited choices of languages.
Pricing
Nuance Dragon is quite affordable as the Nuance Dragon Professional is worth $500, and Nuance Dragon Home is $200 for digital downloadDownload with a 30-day money-back guarantee. Later, one can add a USB or Bluetooth headset at a cheap cost.
- Notevibes
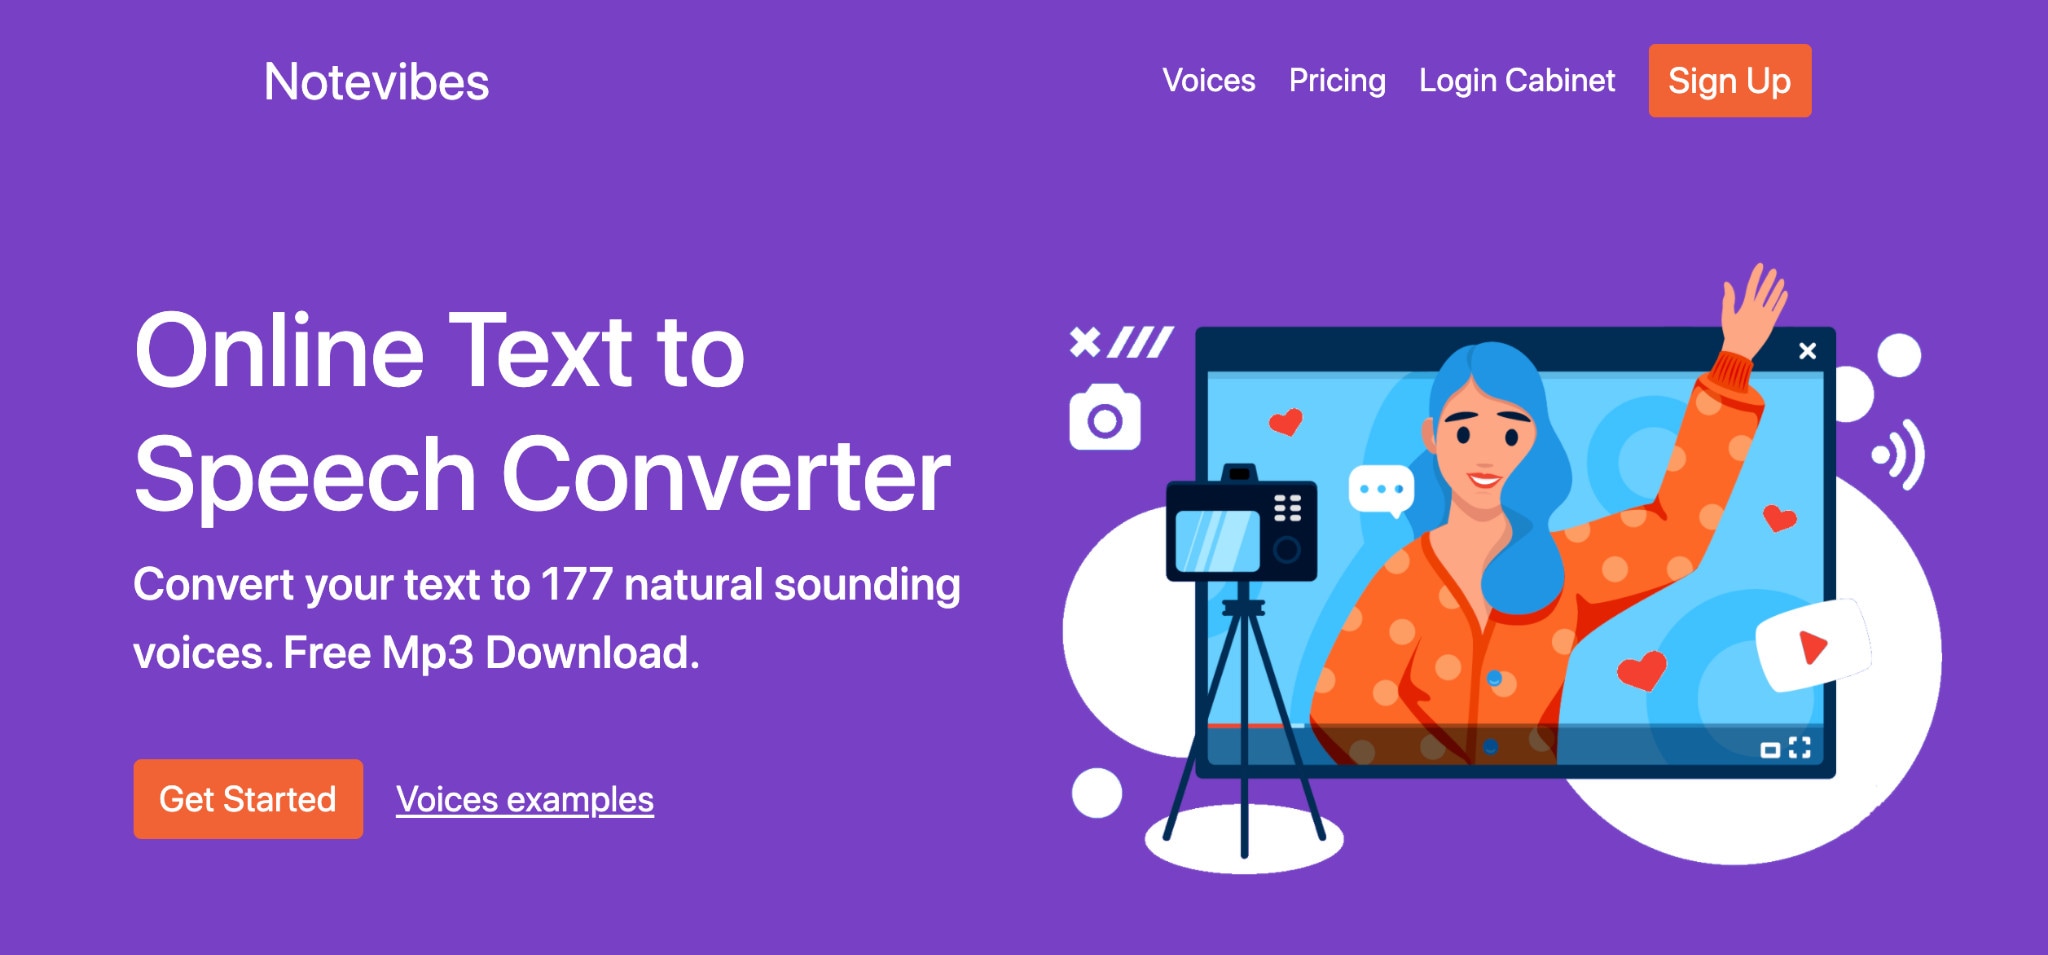
Notevibes text-to-speech software exists as a free version and a feature-rich paid version. This ensures users have all tools they need to understand a new language. Notevibes is the best text-to-speech tool in the market with e-learning and essay reading. The tools help one break down a difficult-to-read text into understandable text.
Features
- Use the text-to-voice converter to make videos with natural-sounding
- Notevibes integrates the most realistic voice generator for teams to make their work easier.
- The advanced editor is designed with simplicity and a flexible interface.
- Easy solution for multi-language teams for converting documents into natural-sounding speech.
- Available with 201 high-quality voices and 22 Languages
- Uses premium voices only for text-to-speech
- Saves Audio as MP3
- It has 47 natural voices with 200- 1000000 characters.
Cons
The voice-over and Editor page are different; switching between both pages would consume time.
It has no project-based structure, and keeping multiple files can create a mess.
It has no preview of a script. You must generate the voice-over to listen.
Cannot merge multiple audio files.
Pricing
Limited free online access
The personal pack goes for $9 per month, but when one makes an annual subscription, he or she gets a $2 discount each month.
The commercial pack goes for $90 per month and $840 annually. Supports SSML tags, MP3, Wav Download, and File Storage.
- Natural Reader
Natural Reader suits personal use and learning, especially for dyslexic readers and foreign language learners. Its design is simple to use, and it can load documents directly into its library.
The tool allows the user to manage multiple files across several formats. The inbuilt OCR enables the user to upload photos or scan texts. The Natural Reader software is compatible with both mobile and desktop versions (PC and MAC). The subscription package allows users to create and save a sound file of text and embed the tool within an application’s toolbar.
The hovering menu offers a gesture to the user that they can use assistive technology. The drag-and-drop feature makes it easier to use and intuitive. The learning curve for using Natural Reader is simplified with adjusting settings like voice and speed in comparison to a Mac inbuilt tool. The Natural Reader website has tutorial videos to guide the user on how to execute tasks.
Natural Reader can effectively help improve spelling and reduce eye strain from reading. The user can save a text and proofread it later.
Features
- It has an inbuilt OCR and browser hence compatible with files generated by scanning software.
- Incorporates the latest and most intelligent AI voices.
- Generates audio for eLearning material.
- Used in IVR systems, broadcasting, and public.
- Creates narration for YouTube videos.
- Provides a wide choice of interfaces to the users.
- It has a dyslexic-friendly font.
- Offers a good natural sounding with voice tuning.
- Supports SSML tags and MP3 downloadDownload.
- Incorporates 61 voices and 18 languages.
- It has a floating bar with one click to read.
- Flexible speeds help in memorizing tasks awaiting execution.
Cons
Require internet connectivity to access the voices.
Do not have the option to skip any text in the document.
Technical glitches for prolonged usage.
The subscription package is overpriced compared to other Software.
Pricing
Consists of a 7-day free trial, a single plan for $49, and a Team plan of 4 users going for $79.
- Linguatec Voice Reader

Suits individuals are planning to learn foreign languages. Linguatec Voice Reader creates a friendly environment to conveniently convert texts into high-quality voice recordings automatically. The design of the tool supports the needs of private users with a rich collection of improvised and natural-sounding voices. Converts texts such as Emails, Word documents, Epubs, or PDFs into audio and listen to them directly on a PC or mobile device.
Linguatec Voice Reader software is primarily for private use and not commercial. The tool helps to identify spelling mistakes by reading it out as people stumble over awkward phrasing. The visually impaired clients get accurate and effective information in the audio format. It works with great sounds within an identified niche.
Features
- Convenient and fast conversion of text to audio
- Voice customization through control of pitch, volume, and speaking speed.
- Dynamic change between male and female voices.
- Prompt and responsive systems optimized for personal use.
- Supports converting many text formats.
- Easier pronunciation correction through user dictionaries.
- High data throughput for fast, responsive time.
Cons
Provide only one language and one voice in Voice Reader Home per license.
No free personal version is available, unlike Natural Reader.
Paying for MP3 capabilities is inconvenient.
Quite expensive if needed for multiple voices or the option to use the output commercially.
No pronunciation adjustments.
Technical glitches ruin the flow and highlight the synthetic nature of the voice.
- Capti Voice
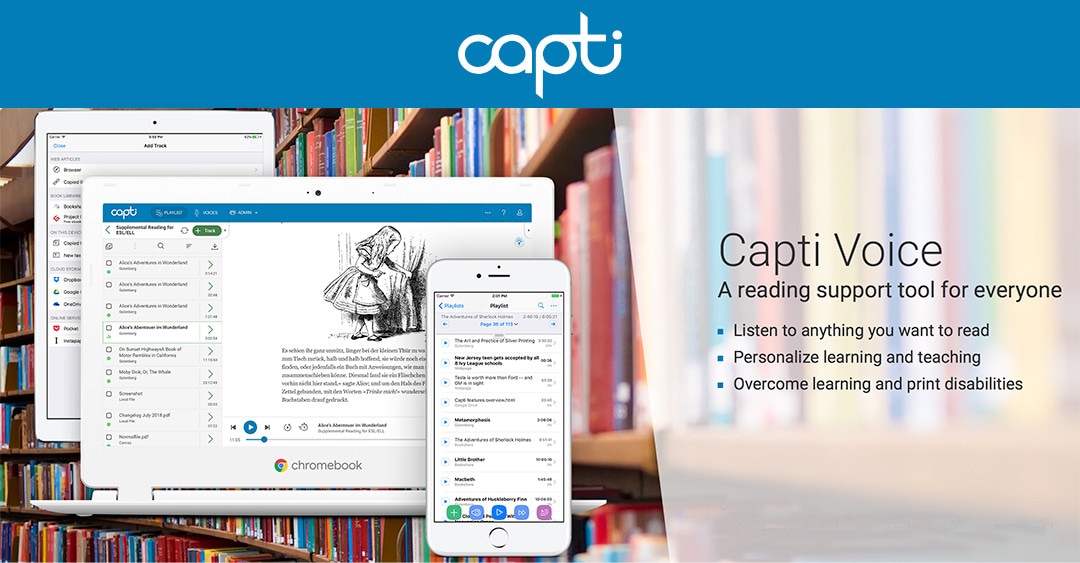
Capti is a convenient text-to-speech software which works both online and offline. It has a natural sounding with over 20 languages and integrates cloud platforms such as Google Drive, text-to-speech Dropbox, and One Drive.
Capti Voice suits learners with help provision for students to overcome language barriers. The Capti Voice narrates a large variety of text documents such as articles, eBooks, and web pages. Capti improves the productivity of learners either at school or work. Capti Voice is compatible with Windows, iOS, macOS, and Chrome OS.
Features
- Advanced text navigation
- Tracks speech word by word.
- Enables cross-device Sync.
- Available for offline use.
- Offers Screen-reader accessibility
- Features article extraction from web pages while skipping all clutter.
- Supports numerous text formats such as Pdf, Docx, Google Docs, Sheets, Slides, and many more.
Cons
The free account is limited
Offers features for people suffering from dyslexia and other print disabilities.
Its design is compatible for use for people with different age gaps.
Pricing
A week’s trial is free.
For a monthly subscription, it will cost close to $2
For six months subscription package it costs $10
For an annual subscription, it costs $20
- Voice Dream Reader
The Voice Dream Reader is compatible with mobile apps for iOS users. It integrates a premium Acapela Heather voice for its users. This Software suits Apple users as it incorporates the best features. Apart from text-to-speech conversion, the users can benefit from features like full-screen reading mode, text highlighting, dictionary lookups, and creating & pinning notes. This gives the user a listening experience with high-quality reading. It is the best text-to-speech mobile app for iOS users in comparison to other tools.
Features
- The Voice Dream Reader supports many file formats, including DAISY 3.0 text-only, DAISY 2.02 audio, DRM-free EPUB, pdf, Microsoft Word, Microsoft PowerPoint, HTML, and zipped MP3 files.
- It integrates with Bookshare and Gutenberg by loading files from Google Drive, Dropbox, or iTunes via USB or Wi-Fi.
- The Voice Dream Reader works with voices available on the device and offers in-app purchases of voices for more than 20 languages.
- Its interface is designed with simplicity and advanced features, which allocates a user premium mobile text-to-speech solution.
- It has a library management system with both audio and visual controls.
- This Software provides navigation and reading options.
- Provides iCloud Sync, which synchronizes and backs up documents in signed devices.
- Safari Extension saves online articles and files directly from Safari.
- Sets bookmark, highlights text and adds notes.
- Scan documents with QR codes require the Voice Dream Scanner.
Cons
It has a limited free version but supports buying premium voices.
No support for desktop OSs like Windows and macOS, unlike other text-to-speech Software.
Technical glitches often interfere with the user’s experience.
Pricing
There is a free version of the Software.
The iOS app software goes for $14.99, while the Android version costs $9.99.
Final Thoughts
Text-to-Speech software is not only a game-changer when it comes to the business space but also in the entertainment scene. The Software mentioned above is some of the best meme text to speech in the global Software.
Although they don’t all come at a low price, it is way better than sourcing for voice-over freelancers who charge hourly. This Software is also very convenient as it can convert any text to speech within seconds with just a click of a button.
TIP: Don’t just settle for a particular software because it’s cheap. Analyze its features, pros, and cons. Only then can you get one that gives you value for your money.
Technology is changing really fast. To keep up, we must be able to adapt to the current trends.
Various technological advancements have played a big role in the improvement of our daily lives. Nowadays, you no longer have to pay voice-over artists thousands of dollars each month, thanks to the invention of text-to-speech technology.
Text-to-speech helps improve accessibility as many people don’t like reading long bodies of text. Furthermore, it eliminates the language barrier and helps you reach a global audience.
In this guide, we’ll focus more on the best meme text to speech, fro their compatibility, features, pricing, and cons.
What is the best meme text to speech?
| Software | Do prices start from? | Free plan/trial | Support |
|---|---|---|---|
| Ispring Suite | $770 (per year) | ✔ | Windows |
| Murf | $13 | ✔ | Windows & IOS |
| Speechelo | $37 | ✘ | Windows & IOS |
| Synthesys | $29 | ✘ | Windows & IOS |
| Nuance Dragon | $200 | ✔ | Windows & IOS |
| Note Vibes | $99 | ✔ | Windows & IOS |
| Natural Reader | $49 | ✔ | Windows & IOS |
| Linguatec Voice Reader | $49 | ✘ | Windows & IOS |
| Capti Voice | $2 | ✔ | Windows & IOS |
| Voice Drea Reader | $9.99 | ✔ | Windows & IOS |
1. iSpring Suite
The ispring Suite is a user-friendly eLearning authoring tool whose system incorporates PowerPoint. The navigation tabs are designed with simplicity making it easier for user interaction. The system is only compatible with Windows. The technical staff is prompt and responsive to any matters arising.
Features
- The ispring Suite allows quick conversion of PowerPoint training materials to eLearning.
- Supports multiple users to attend the training and get the same information.
- Creates eLearning content with synched voice narrations and exams for certification.
- Tools such as the Quiz Maker aid a user in creating content with ease.
- Taking training slide decks and working with the ispring Suite creates magical interactivity for the user.
- The ispring Suite provides access to create SCROM content with ease.
Cons
One cannot use a shared drive and auto-sync for content creation.
It is incompatible with Mac users.
Limited options were added for accessibility.
Cost
Ispring Suite costs $770 per year
Ispring Suite Max costs $970 annually
- Murf
Murf is a versatile AI voice generator that converts text to natural-sounding speech. Cuts down the cost of hiring a voice-over artist, renting out a studio, and investing inexpensive resources. Its simplicity and flexibility generate a studio quality and professional sounding voice-over.
Murf studio creates and edits voice-overs from a range of 120+ natural-sounding voices in 20+ languages and accents. The Murf studio aids one in doing product reviews, promotional videos, and eLearning course modules for audiobooks. Murf’s library incorporates a list of natural-sounding voice covers across several languages.
The Murf provides powerful features to create voice-over videos by adding pause and editing. The clients rate the Murf as the best text-to-speech editor in comparison to other Software since it is cost-effective and efficient. The ability to sync high-quality voice-overs to video creates a slick video quickly.
Features
- The ability to sync voice-overs with images, videos and background music takes away the need to integrate into a third-party tool.
- Incorporates voice cloning as a service.
- Customization of voice that suits the brand position by signing for a custom voice demo.
- Features adding pauses and changing the speed of narration and emphasis help build a more realistic and natural output.
- Murf integrates advanced team collaboration features, access control, pronunciation library, and SLA.
- The text-based voice-over maker allows one to typescript and uploads voice recordings as the tool converts them into hyper-realistic AI voices. The voice converters are editable, just like a word document.
- It has the capability of syncing the time of your voice-over with the visuals.
- The interface is easy to use and super-friendly for beginners to effectively navigate.
- It runs through the system to identify multiple parameters.
- Murf provides voices trained by professional voice-over artists.
- Makes studio-quality voice-overs with no training and little time coverage.
- Supports both audio and text-based inputs.
- Allows the user to enhance e-learning content by providing an audio element to enrich content.
Cons
The soundtrack has a glitch as one cannot upload music under the voice waveform.
Using the tool to its full potential is a learning curve, but it is not that difficult.
Expensive for Individuals; the premium plans are ideal for businesses that regularly create voice-over content but may prove pricey for individuals. The free plan comes in handy in such a case.
Price
Murf pricing exists in four plans: Free, Basic ($13/month), Pro ($26/month), and Enterprise ($69/ month). The free plan package offers all 120+ voices with a share link for audio/video output. It is for a single user with 10 mins of voice generation and transcription.
The basic plan has unlimited downloads with 24 hours of voice generation with access to 60 voices which sums to 10 languages. It is a single user with commercial usage rights.
The Pro plan has 96 hours of voice generation and 48 hours of transcription per year. Supports up to 3 users with recorded voice editing.
The enterprise package has custom voice generation time and transcription time. Works with a specific number of users and collaboration features. Prompts a user to centralized invoicing and account manager.
- Speechelo
Suites Cloud-based solution to create a voice-over. Provides original voice sound with all expressions increasing the interactivity with the users. It is essential for sales videos, training videos, and educational videos. Speechelo incorporates breathing & pauses and voice tones, changing speed & pitch, and support for 23 languages.
It is a cloud-based solution to create voice-over. Speechelo remains the best text-to-speech Software on the market to help several content creators around the world create videos and podcasts that effectively engage the audience.
Features
- Add inflections in the voice with the aid of an AI engine that increases the naturalness of the audio production and allows a user to choose between tones.
- Transforms any text into speech within 5 seconds.
- Reads text in three ways, normal tone, joyful tone, and Serious tone.
- Incorporates over 30 human-sounding voices.
- Works in English and 23 other languages.
- Compatible with most video creation software such as Adobe, iMovie, Premiere, Camtasia, and Audacity.
- Has both male and female voices.
- The ability to include breathes and pauses increases the human-like quality of voice production.
- Provides an online text editor who checks through a script to identify errors (Punctuation errors).
- Offers its users over fifty voices to choose from.
- The easiest text-to-speech converter in the market comes with three clicks; you must paste the text, then choose the voice, and then download the generated audio.
Cons
Quite expensive when in need of an upgrade to the Pro version or to download an add-on.
Pricing
Speechelo has three main package plans for users: the Starter pack, Speechelo pro, and speechelo tube add-on. The starter pack offers a special discount for a first-time user. For this plan, it is a one-time payment fee of $47. It gives the user access to all features of speechelo; however, it limits the words you can convert to 700 words.
For Speechelo pro, a user pays $47 every three months of the year. This subscription limits the number of words one can convert.
The Speechelo tube add-on allows the user to link directly to YouTube. It costs $37 and gives access to YouTube templates.
- Synthesys
This tool is a large professional AI voice library, 3-click text-to-speech recognition, cloud-based, unlimited speech generation.
They generate natural-sounding voices from texts with a wide variety of tones, languages, male and female voices, and reading speeds to choose from. Takes a few steps to generate natural-sounding artificial speech to fit a wide range of commercial purposes.
First, choose the gender, accent, and tone you would like to transform into. The next step is to write the text to convert to speech into Synthesys’s AI voice-generating interface. Finally, click ‘create’ to generate the artificial speech.
With Human Synthesys , you can create sales videos, ads, demo videos, commercials, training videos, and animation videos. This opens business production to a hike as clients keep flocking. It is as easy as pie, open a YouTube channel and upload videos about your niche, sell voice-overs, ads, explainer videos, or help other businesses get more clients.
Features
- Full customization on cloud-based applications.
- Interactive user interface for editing and rendering.
- High-resolution output
- Suits explainer videos, eLearning, social media, product descriptions, and more.
- Creates room for unlimited voices with over 35 female and 30 male voices.
- It has over 66 languages to choose from, and a total voice bank of 254 unique styles.
- Offers endless possibilities in marketing
- A more compelling alternative to animations and avatars.
- Lip-syncing done by Artificial Intelligence gives it a more realistic appearance.
- Human Synthesys studio’s breakthrough technology solves all the problems, giving high quality at an affordable price.
- Supports multi-slide Videos and MP4 downloads.
- Contains a wide range of high-quality and realistic synthetic voices.
Cons
Require a user to purchase further credits after the license purchase.
Requires an active and stable internet connection.
Pricing
Audio Synthesys costs $29 per month, Human Studio Synthesys $39 per month, and both Audio and Human Studio Synthesys cost $59 per month.
- Nuance Dragon
AI-powered speech recognition solution for both home and professional use. Creates cloud solutions and runs on geographically dispersed data centres. The AES 256-bit encryption sync data across devices 99% accuracy with typing. It guarantees a user superior speed and accuracy. The deep learning technology used in Dragon Nuance design ensures the Software adapts to the user’s voice and environmental variables.
Nuance Dragon software is a better pick for ambiguous projects and applications. They are reliable and offer accurate output. There are four versions of Nuance Dragon Software: Dragon Home, Professional, Legal, and Anywhere.
The Dragon Home Software suits personal use and is easy to use with deep learning technology and high accuracy. The Professional suits freelancers or businesses.
Dragon Legal is a speech recognition software for legal professionals, available in three editions with a solid command of the language. Dragon Anywhere is a cloud-based speech-to-text solution. Compatible with mobile and computer devices. Easier to create, store, and edit documents.
The Nuance Dragon Software is compatible with Windows, Android, and iOS.
Features
- Support multiple versions for professionals and individuals in different fields.
- Full voice-to-text functionality.
- Executes commands using the user’s voice.
- Deep learning of individual accents and regional intonations
- Search and browse the internet by voice.
- Fast, accurate documentation.
- Provides comprehensive security.
- Gives the user flexibility on how to convert voice to text and communicate.
- Easier to surf the web through commands and can program multi-step tasks into one simple command that triggers a Google search while using another application.
Cons
Technical glitches for updates in version 15.
No microphone in version 15.
Payments on updates.
Limited choices of languages.
Pricing
Nuance Dragon is quite affordable as the Nuance Dragon Professional is worth $500, and Nuance Dragon Home is $200 for digital downloadDownload with a 30-day money-back guarantee. Later, one can add a USB or Bluetooth headset at a cheap cost.
- Notevibes
Notevibes text-to-speech software exists as a free version and a feature-rich paid version. This ensures users have all tools they need to understand a new language. Notevibes is the best text-to-speech tool in the market with e-learning and essay reading. The tools help one break down a difficult-to-read text into understandable text.
Features
- Use the text-to-voice converter to make videos with natural-sounding
- Notevibes integrates the most realistic voice generator for teams to make their work easier.
- The advanced editor is designed with simplicity and a flexible interface.
- Easy solution for multi-language teams for converting documents into natural-sounding speech.
- Available with 201 high-quality voices and 22 Languages
- Uses premium voices only for text-to-speech
- Saves Audio as MP3
- It has 47 natural voices with 200- 1000000 characters.
Cons
The voice-over and Editor page are different; switching between both pages would consume time.
It has no project-based structure, and keeping multiple files can create a mess.
It has no preview of a script. You must generate the voice-over to listen.
Cannot merge multiple audio files.
Pricing
Limited free online access
The personal pack goes for $9 per month, but when one makes an annual subscription, he or she gets a $2 discount each month.
The commercial pack goes for $90 per month and $840 annually. Supports SSML tags, MP3, Wav Download, and File Storage.
- Natural Reader
Natural Reader suits personal use and learning, especially for dyslexic readers and foreign language learners. Its design is simple to use, and it can load documents directly into its library.
The tool allows the user to manage multiple files across several formats. The inbuilt OCR enables the user to upload photos or scan texts. The Natural Reader software is compatible with both mobile and desktop versions (PC and MAC). The subscription package allows users to create and save a sound file of text and embed the tool within an application’s toolbar.
The hovering menu offers a gesture to the user that they can use assistive technology. The drag-and-drop feature makes it easier to use and intuitive. The learning curve for using Natural Reader is simplified with adjusting settings like voice and speed in comparison to a Mac inbuilt tool. The Natural Reader website has tutorial videos to guide the user on how to execute tasks.
Natural Reader can effectively help improve spelling and reduce eye strain from reading. The user can save a text and proofread it later.
Features
- It has an inbuilt OCR and browser hence compatible with files generated by scanning software.
- Incorporates the latest and most intelligent AI voices.
- Generates audio for eLearning material.
- Used in IVR systems, broadcasting, and public.
- Creates narration for YouTube videos.
- Provides a wide choice of interfaces to the users.
- It has a dyslexic-friendly font.
- Offers a good natural sounding with voice tuning.
- Supports SSML tags and MP3 downloadDownload.
- Incorporates 61 voices and 18 languages.
- It has a floating bar with one click to read.
- Flexible speeds help in memorizing tasks awaiting execution.
Cons
Require internet connectivity to access the voices.
Do not have the option to skip any text in the document.
Technical glitches for prolonged usage.
The subscription package is overpriced compared to other Software.
Pricing
Consists of a 7-day free trial, a single plan for $49, and a Team plan of 4 users going for $79.
- Linguatec Voice Reader
Suits individuals are planning to learn foreign languages. Linguatec Voice Reader creates a friendly environment to conveniently convert texts into high-quality voice recordings automatically. The design of the tool supports the needs of private users with a rich collection of improvised and natural-sounding voices. Converts texts such as Emails, Word documents, Epubs, or PDFs into audio and listen to them directly on a PC or mobile device.
Linguatec Voice Reader software is primarily for private use and not commercial. The tool helps to identify spelling mistakes by reading it out as people stumble over awkward phrasing. The visually impaired clients get accurate and effective information in the audio format. It works with great sounds within an identified niche.
Features
- Convenient and fast conversion of text to audio
- Voice customization through control of pitch, volume, and speaking speed.
- Dynamic change between male and female voices.
- Prompt and responsive systems optimized for personal use.
- Supports converting many text formats.
- Easier pronunciation correction through user dictionaries.
- High data throughput for fast, responsive time.
Cons
Provide only one language and one voice in Voice Reader Home per license.
No free personal version is available, unlike Natural Reader.
Paying for MP3 capabilities is inconvenient.
Quite expensive if needed for multiple voices or the option to use the output commercially.
No pronunciation adjustments.
Technical glitches ruin the flow and highlight the synthetic nature of the voice.
- Capti Voice
Capti is a convenient text-to-speech software which works both online and offline. It has a natural sounding with over 20 languages and integrates cloud platforms such as Google Drive, text-to-speech Dropbox, and One Drive.
Capti Voice suits learners with help provision for students to overcome language barriers. The Capti Voice narrates a large variety of text documents such as articles, eBooks, and web pages. Capti improves the productivity of learners either at school or work. Capti Voice is compatible with Windows, iOS, macOS, and Chrome OS.
Features
- Advanced text navigation
- Tracks speech word by word.
- Enables cross-device Sync.
- Available for offline use.
- Offers Screen-reader accessibility
- Features article extraction from web pages while skipping all clutter.
- Supports numerous text formats such as Pdf, Docx, Google Docs, Sheets, Slides, and many more.
Cons
The free account is limited
Offers features for people suffering from dyslexia and other print disabilities.
Its design is compatible for use for people with different age gaps.
Pricing
A week’s trial is free.
For a monthly subscription, it will cost close to $2
For six months subscription package it costs $10
For an annual subscription, it costs $20
- Voice Dream Reader
The Voice Dream Reader is compatible with mobile apps for iOS users. It integrates a premium Acapela Heather voice for its users. This Software suits Apple users as it incorporates the best features. Apart from text-to-speech conversion, the users can benefit from features like full-screen reading mode, text highlighting, dictionary lookups, and creating & pinning notes. This gives the user a listening experience with high-quality reading. It is the best text-to-speech mobile app for iOS users in comparison to other tools.
Features
- The Voice Dream Reader supports many file formats, including DAISY 3.0 text-only, DAISY 2.02 audio, DRM-free EPUB, pdf, Microsoft Word, Microsoft PowerPoint, HTML, and zipped MP3 files.
- It integrates with Bookshare and Gutenberg by loading files from Google Drive, Dropbox, or iTunes via USB or Wi-Fi.
- The Voice Dream Reader works with voices available on the device and offers in-app purchases of voices for more than 20 languages.
- Its interface is designed with simplicity and advanced features, which allocates a user premium mobile text-to-speech solution.
- It has a library management system with both audio and visual controls.
- This Software provides navigation and reading options.
- Provides iCloud Sync, which synchronizes and backs up documents in signed devices.
- Safari Extension saves online articles and files directly from Safari.
- Sets bookmark, highlights text and adds notes.
- Scan documents with QR codes require the Voice Dream Scanner.
Cons
It has a limited free version but supports buying premium voices.
No support for desktop OSs like Windows and macOS, unlike other text-to-speech Software.
Technical glitches often interfere with the user’s experience.
Pricing
There is a free version of the Software.
The iOS app software goes for $14.99, while the Android version costs $9.99.
Final Thoughts
Text-to-Speech software is not only a game-changer when it comes to the business space but also in the entertainment scene. The Software mentioned above is some of the best meme text to speech in the global Software.
Although they don’t all come at a low price, it is way better than sourcing for voice-over freelancers who charge hourly. This Software is also very convenient as it can convert any text to speech within seconds with just a click of a button.
TIP: Don’t just settle for a particular software because it’s cheap. Analyze its features, pros, and cons. Only then can you get one that gives you value for your money.
Convert Slow Motion Videos to Regular Videos in Your iOS Device |A How
Thanks to the eccentric and offbeat elements, slow-motion videos have become the super-fun, state-of-the-art trend. Whether you’re in the bar trying to click the aesthetic, cinematic video or capture cool, unique, and enticing birthday moments, you can always rely on the slow-mo feature.

But do you ever feel like converting the slow-motion video in your iOS device to a normal video? Perhaps you thought the slow-mo video would be more attractive, but it’s not, or maybe you want to determine how to remove slow-motion from a video iPhone.
No matter the reason, there are numerous ways to remove slow motion from iPhone video. In this article, you’ll learn the various methods to convert slow-motion video into a regular video on your iPhone or iPad. Also, learn the steps involved in achieving it.
So, let’s start.
How To Convert Slow Motion Video to Normal on iPhone and iPad
Due to the slow-motion and Time-lapse modes that are built into the iPhone, people may quickly record slo-mo and time-lapse clips using their iOS smartphone cameras.
Access the iPhone camera, select Slo-mo, press the Record icon once to begin filming, and then press it once more to stop. This will create a slo-mo video.
Do you ever wish to get your video’s slow motion removed? How to convert slow-motion video to normal on an iPhone? Well, here’s your answer.
Method 1. Using the Photos App
The Photos app is an in-built app for iPhone and iPad that features editing capabilities like rotation, resizing, and auto-enhancement, in addition to helping you manage videos and images.

You may quickly and effortlessly turn a slow-mo video into a regular-speed one with the Photos app’s tucked-away slow-motion converter feature. Additionally, there won’t be any quality loss in your video.
And here are the steps on how to remove slow-mo from iPhone video using the Photos app on an iPad or iPhone to turn it to normal speed.
Step1: Take your iPad or iPhone, navigate to the Photos app, open it, and then go to the bottom to hit the Albums tab.
Step2: Choose the Slo-mo option, and subsequently select the video you wish to turn into a regular speed video. Go to the top right corner of the screen and hit the Edit button.

Step3: If you look under the timeline, you’ll find vertical lines. Here, the area with apart spaces signifies slow motion.

Step4: To learn how to remove slow mo from iPhone video is to learn how to turn it into regular speed. To do so, select the slow-motion bar and drag it towards the other one to position the lines at a close distance.
Step5: When finished, hit the Done button and save this video. However, if you think this change was unnecessary or incorrect, you can discard it by clicking on Edit → Revert → Revert To Original.

Editing Tip
- The Photos app on iPhone doesn’t allow you to convert any video shot at 24fps or 30fps to slow motion.
- You cannot reduce or decrease the overall size of the video after conversion.
Pros & Cons
Pros
- It is a built-in app on every iOS device.
- Saves the hassle of downloading any third-party app.
- No charges are applicable for using this app.
- Excellent slow-mo video convertor.
Cons
- Limited speed adjustment for the conversion of slow-mo videos into regular videos.
Method 2: Using Other Converter Apps
You may think that converting slow-mo video to a regular speed video on your iPad or iPhone is convenient, but there’s a drawback too. The method mentioned above can only help you with minimalistic speed changes, which may not give you the desired result.
However, other converter apps also help you change slow-mo video to regular iPhone video. These apps work seamlessly on your PC or Mac to turn your slow-mo videos on the iPhone or Mac to normal-speed video using customized and high-resolution settings.
Overview of The Apps
| Particulars | iMovie | Slow-Fast Motion Video Editor |
|---|---|---|
| Type (versatile or specialized) | Versatile | Specialized |
| Supported OS | iOS, Mac | iOS, Mac |
| Average Rating | 3.9/5 | 4.7/5 |
| Price | Free | Free |
| Best for | Video editing with cinematic effects | Slo-mo video conversion |
1) iMovie

iMovie is an excellent option if you’re looking for an application to modify a video with additional tools and convert the slow-mo to a regular pace. Among the top video converters for the iPhone is iMovie.
It offers a wide range of tools and capabilities that allow you to change the video transition, audio, and speed, add music, animated text, video overlay effects, normal video effects, and more. Additionally, it aids users in producing stunning films and commercials in a Cinematic manner.
iMovie could convert slow-mo footage to normal speed, in case you didn’t know. Did you ever attempt to change slow mot to regular speed in iMovie? With the use of iMovie, how can slow-motion video be made normally on an iPhone?
Here are the instructions.
Step1: Open the iMovie app, click on the ‘Create Project’ option, → tap on ‘Movie → Media → Video.

Step2: Tap on the slow-mo option, select the slow-motion video you want to convert and hit the ‘Create Movie’ option.

Step3: Get to know the editing options by clicking on the timeline. Then, click on the clock (speed) icon. At the beginning of the lines, you’ll find a turtle. It demonstrates slow motion. Plus, the number right behind the rabbit at the end signifies the speed.

Step4: To turn this slow-motion video into a regular speed video, drag and slide the speed control slider until the number turns 1x.
Step5: To save the changes, tap on the Done option. Subsequently, edit the video as per your preference.
2) Slow-Fast Motion Video Editor

This slow-mo video converter app helps you slow down or speed up any slow-motion video without any watermark and charges. This free app supports both landscape or portrait operation, unlimited video length, and corrected audio pitch.
The application is convenient to use and seamless to speed up or slow down any parts or clips of your videos. Without charging a penny, this app meets the users’ expectations. If you’re wondering how to use this converter app, here’s a step-by-step guide:
Method 3. Using Third-Party Online Tools
The smartphone sector’s most cutting-edge functionalities can be found on iPhones. Users may capture slow-motion videos, for instance. However, you may consider accelerating the slo-mo movie to regular video speed once it has been recorded.
Using your smartphone, how would you go about doing that? Well, we have seen that using the built-in Photos app and converter apps like iMovie can help, but can they really provide the level of customization and outcomes you need?
When things get professional and the expectations are too high, it’s best to use third-party online tools. So, here are a few practical choices:
Overview of the Online Tools
| Particulars | KAPWING | Clideo | EZGIF |
|---|---|---|---|
| Supported File Format | .AVI, .FLV, 3GP, and other edge file types. | MP4, MOV, WMV, AVI, WEBM, FLV, MKV, MPG, MPEG, MTS. | MNG files |
| Watermark | Not Available | Only in Free version | Not Available |
| Available Speed Option | As fast as 4x for an accelerated video | 0.25 times to 2 times | 0.25 times to 2 times |
| Time Consuming | No | Moderate | No |
1) KAPWING

Kapwing is a tool for group film editing that enables people to collaborate to produce original videos. For individuals to create the ideal video, Kapwing offers a collection of pre-built themes, stock footage, and materials.
Kapwing acts as a digital office solution that enables individuals to organize all of their resources in one location and work together on projects utilizing sharing features. Amid its vast range of features, its slow-mo converter is the most famous and widely used one.
- Rating: 4.1/5
- Price: Plan starts at $20 per month
Step-By-Step Guide To Convert Slow-Mo on Iphone Using Kapwing App
Step1: First, download and install the Kapwing app from the App Store.
Step2: Upload the slow-mo video that you want to speed up.
![]()
Note: Kapwing also lets you speed up any slow-mo video present on TikTok, Twitter, or YouTube.

Step3: Perform the video clip speed adjustment by utilizing the Kapwing sidebar. You can accelerate the video clip speed up to four times the original speed. If not, you can play in every level in between.

Step4: Finally, click on the Export option, and the final video clip with all speed adjustments will be generated within a few seconds.

2) Clideo

Among the finest free tools for rapid photo or video editing is Clideo. You can start upgrading your material by uploading files in a wide range of formats to their site.
Limitless customization is possible with the paid version for just $9 a month. The capabilities, though, aren’t as varied as those offered by rivals, and there aren’t any mobile apps for people who want to generate material while on the go.
- Ratings: 4.3/5
- Price: Starts at $9 per month
Step-By-Step Guide To Convert Slow-Mo on Iphone Using Clideo App:
Step1: From your computer (Mac) or mobile device (iPhone), upload a video. You can also add from a Dropbox or Google Drive account.

Step2: Select to speed up the video after it has been recorded. Then, if required, muffle its sound and alter the file type.


Step3: The video can be seen directly in your browser. Click “Download” after you are finished and delighted with your creation.

3) EZGIF

EZGIF is a free online editing tool that enables individuals to change the playback speed of any video. Not only does it effectively convert your slow-mo video on an iOS device to a normal speed video, but it also comes with many other features (later on that). The website has a simple, outdated interface, but except for that, it’s a fine app for beginners.
Step-By-Step Guide To Convert Slow-Mo on Iphone Using Clideo App:
Step1: Upload the video clip and choose a speed multiplier to start using this program.

Step2: A number less than one will slow down playback; a number greater than one will quicken it.
Step3: Thus, input 0.5 to run the program at 1/2 its normal speed, and so forth.

Step4: You can preserve the audio track’s original tempo, vary the speed along with the video, or silence the audio entirely.
Convert Your Slo-Mo Videos Into Regular Ones In a Few Simple Steps With Filmora
Filmora is a leading online video editing software that has become the preferred choice of all professionals and amateurs. From everyday needs to something formal, it helps you edit videos for every occasion.
You can change pace swiftly or consistently in Filmora and vary the pace of the audio or video recordings. Use the Speed Ramping tool in Filmora. If you want to remove slow-mo or add it, you can use Filmora’s speed ramping feature anytime.
Free Download For Win 7 or later(64-bit)
Free Download For macOS 10.14 or later
We will share some details on how to use this feature here, but for a comprehensive, detailed guide, read to the end.
Step-By-Step Guide to Speed Changing
Step1Launch the Video
Activate Wondershare Filmora on your computer. To increase the speed and runtime of the movie, explore the desired video and enter it into the software. You can drag and drop the movie onto the interface as well.
Step2Speed Adjustment

Press the left mouse button as soon as the video shows on the screen. And click the speed tab in the toolbar. There is then a contextual menu displayed. To double the rate, select 2x from the “Fast” menu. The participant may use any fundamental that has more than one.
Step3Save & Export
When finished, select “Save Project” from the list of available options in the “File” panel. Press “Save” after renaming the project.
Using Filmora’s “Export” feature, selecting “Export,” and then modifying the file name is the alternative way to export the video. A device, a system, or even YouTube can receive the exported video. Next, click “Export.”
Bonus Tips. 2 More Methods to Normalize Your Video Speed
Filmora offers you 2 more advanced methods to increase or decrease the speed of the video, one is uniform speed and the other, is speed ramping . Want to learn more about changing speed in Filmora, watch this video tutorial to get a quick start on using them.
Conclusion
That’s basically it! So that’s how you turn any slow-motion video into a regular one.
This article covers all major techniques to convert videos to slow motion on iOS and Mac. You can pick one of them to convert video to slow motion or to slow down slow motion.
So, are you now prepared to convert slow-motion videos on your iPad or iPhone device to ordinary speed? Try the Filmora video editor if you’re looking for something really professional.
It makes it much easier to convert slow-motion videos from your smartphone or tablet to regular speed. It has powerful video editing features and is more comfortable to use. So, get started today!
Method 2: Using Other Converter Apps
You may think that converting slow-mo video to a regular speed video on your iPad or iPhone is convenient, but there’s a drawback too. The method mentioned above can only help you with minimalistic speed changes, which may not give you the desired result.
However, other converter apps also help you change slow-mo video to regular iPhone video. These apps work seamlessly on your PC or Mac to turn your slow-mo videos on the iPhone or Mac to normal-speed video using customized and high-resolution settings.
Overview of The Apps
| Particulars | iMovie | Slow-Fast Motion Video Editor |
|---|---|---|
| Type (versatile or specialized) | Versatile | Specialized |
| Supported OS | iOS, Mac | iOS, Mac |
| Average Rating | 3.9/5 | 4.7/5 |
| Price | Free | Free |
| Best for | Video editing with cinematic effects | Slo-mo video conversion |
1) iMovie
iMovie is an excellent option if you’re looking for an application to modify a video with additional tools and convert the slow-mo to a regular pace. Among the top video converters for the iPhone is iMovie.
It offers a wide range of tools and capabilities that allow you to change the video transition, audio, and speed, add music, animated text, video overlay effects, normal video effects, and more. Additionally, it aids users in producing stunning films and commercials in a Cinematic manner.
iMovie could convert slow-mo footage to normal speed, in case you didn’t know. Did you ever attempt to change slow mot to regular speed in iMovie? With the use of iMovie, how can slow-motion video be made normally on an iPhone?
Here are the instructions.
Step1: Open the iMovie app, click on the ‘Create Project’ option, → tap on ‘Movie → Media → Video.
Step2: Tap on the slow-mo option, select the slow-motion video you want to convert and hit the ‘Create Movie’ option.
Step3: Get to know the editing options by clicking on the timeline. Then, click on the clock (speed) icon. At the beginning of the lines, you’ll find a turtle. It demonstrates slow motion. Plus, the number right behind the rabbit at the end signifies the speed.
Step4: To turn this slow-motion video into a regular speed video, drag and slide the speed control slider until the number turns 1x.
Step5: To save the changes, tap on the Done option. Subsequently, edit the video as per your preference.
2) Slow-Fast Motion Video Editor
This slow-mo video converter app helps you slow down or speed up any slow-motion video without any watermark and charges. This free app supports both landscape or portrait operation, unlimited video length, and corrected audio pitch.
The application is convenient to use and seamless to speed up or slow down any parts or clips of your videos. Without charging a penny, this app meets the users’ expectations. If you’re wondering how to use this converter app, here’s a step-by-step guide:
Method 3. Using Third-Party Online Tools
The smartphone sector’s most cutting-edge functionalities can be found on iPhones. Users may capture slow-motion videos, for instance. However, you may consider accelerating the slo-mo movie to regular video speed once it has been recorded.
Using your smartphone, how would you go about doing that? Well, we have seen that using the built-in Photos app and converter apps like iMovie can help, but can they really provide the level of customization and outcomes you need?
When things get professional and the expectations are too high, it’s best to use third-party online tools. So, here are a few practical choices:
Overview of the Online Tools
| Particulars | KAPWING | Clideo | EZGIF |
|---|---|---|---|
| Supported File Format | .AVI, .FLV, 3GP, and other edge file types. | MP4, MOV, WMV, AVI, WEBM, FLV, MKV, MPG, MPEG, MTS. | MNG files |
| Watermark | Not Available | Only in Free version | Not Available |
| Available Speed Option | As fast as 4x for an accelerated video | 0.25 times to 2 times | 0.25 times to 2 times |
| Time Consuming | No | Moderate | No |
1) KAPWING
Kapwing is a tool for group film editing that enables people to collaborate to produce original videos. For individuals to create the ideal video, Kapwing offers a collection of pre-built themes, stock footage, and materials.
Kapwing acts as a digital office solution that enables individuals to organize all of their resources in one location and work together on projects utilizing sharing features. Amid its vast range of features, its slow-mo converter is the most famous and widely used one.
- Rating: 4.1/5
- Price: Plan starts at $20 per month
Step-By-Step Guide To Convert Slow-Mo on Iphone Using Kapwing App
Step1: First, download and install the Kapwing app from the App Store.
Step2: Upload the slow-mo video that you want to speed up.
![]()
Note: Kapwing also lets you speed up any slow-mo video present on TikTok, Twitter, or YouTube.
Step3: Perform the video clip speed adjustment by utilizing the Kapwing sidebar. You can accelerate the video clip speed up to four times the original speed. If not, you can play in every level in between.
Step4: Finally, click on the Export option, and the final video clip with all speed adjustments will be generated within a few seconds.
2) Clideo
Among the finest free tools for rapid photo or video editing is Clideo. You can start upgrading your material by uploading files in a wide range of formats to their site.
Limitless customization is possible with the paid version for just $9 a month. The capabilities, though, aren’t as varied as those offered by rivals, and there aren’t any mobile apps for people who want to generate material while on the go.
- Ratings: 4.3/5
- Price: Starts at $9 per month
Step-By-Step Guide To Convert Slow-Mo on Iphone Using Clideo App:
Step1: From your computer (Mac) or mobile device (iPhone), upload a video. You can also add from a Dropbox or Google Drive account.
Step2: Select to speed up the video after it has been recorded. Then, if required, muffle its sound and alter the file type.
Step3: The video can be seen directly in your browser. Click “Download” after you are finished and delighted with your creation.
3) EZGIF
EZGIF is a free online editing tool that enables individuals to change the playback speed of any video. Not only does it effectively convert your slow-mo video on an iOS device to a normal speed video, but it also comes with many other features (later on that). The website has a simple, outdated interface, but except for that, it’s a fine app for beginners.
Step-By-Step Guide To Convert Slow-Mo on Iphone Using Clideo App:
Step1: Upload the video clip and choose a speed multiplier to start using this program.
Step2: A number less than one will slow down playback; a number greater than one will quicken it.
Step3: Thus, input 0.5 to run the program at 1/2 its normal speed, and so forth.
Step4: You can preserve the audio track’s original tempo, vary the speed along with the video, or silence the audio entirely.
Convert Your Slo-Mo Videos Into Regular Ones In a Few Simple Steps With Filmora
Filmora is a leading online video editing software that has become the preferred choice of all professionals and amateurs. From everyday needs to something formal, it helps you edit videos for every occasion.
You can change pace swiftly or consistently in Filmora and vary the pace of the audio or video recordings. Use the Speed Ramping tool in Filmora. If you want to remove slow-mo or add it, you can use Filmora’s speed ramping feature anytime.
Free Download For Win 7 or later(64-bit)
Free Download For macOS 10.14 or later
We will share some details on how to use this feature here, but for a comprehensive, detailed guide, read to the end.
Step-By-Step Guide to Speed Changing
Step1Launch the Video
Activate Wondershare Filmora on your computer. To increase the speed and runtime of the movie, explore the desired video and enter it into the software. You can drag and drop the movie onto the interface as well.
Step2Speed Adjustment
Press the left mouse button as soon as the video shows on the screen. And click the speed tab in the toolbar. There is then a contextual menu displayed. To double the rate, select 2x from the “Fast” menu. The participant may use any fundamental that has more than one.
Step3Save & Export
When finished, select “Save Project” from the list of available options in the “File” panel. Press “Save” after renaming the project.
Using Filmora’s “Export” feature, selecting “Export,” and then modifying the file name is the alternative way to export the video. A device, a system, or even YouTube can receive the exported video. Next, click “Export.”
Bonus Tips. 2 More Methods to Normalize Your Video Speed
Filmora offers you 2 more advanced methods to increase or decrease the speed of the video, one is uniform speed and the other, is speed ramping . Want to learn more about changing speed in Filmora, watch this video tutorial to get a quick start on using them.
Conclusion
That’s basically it! So that’s how you turn any slow-motion video into a regular one.
This article covers all major techniques to convert videos to slow motion on iOS and Mac. You can pick one of them to convert video to slow motion or to slow down slow motion.
So, are you now prepared to convert slow-motion videos on your iPad or iPhone device to ordinary speed? Try the Filmora video editor if you’re looking for something really professional.
It makes it much easier to convert slow-motion videos from your smartphone or tablet to regular speed. It has powerful video editing features and is more comfortable to use. So, get started today!
How to Make Hand Shake Effect with Final Cut Pro

Are you struggling to attract audiences to your videos? If so, you may consider adding effects to them during your editing process. Most video editing software includes preset video effects to create and publish attractive videos quickly. For example, Final Cut Pro is a video editing software for Apple devices and includes lots of editing tools and video effects. Here is a detailed guide on how to apply the Final Cut Pro camera shake effect to your videos.
- What are hand shake effects for
- What kind of shots are best for such an effect
- Is it better to hand shake when shooting or add the effects
Part1: When Do You Need a Hand Shake Effect?

Adding effects to your videos is a great way to make them more impactful. However, you need to apply them correctly for them to be effective. The following information explores different aspects of the Final Cut Pro camera shake effect, including its definition, why video creators use it, and how best to apply it.
What are hand shake effects for?
Hand shake effects are video adjustments you apply to specific scenes that make the shot vibrate. Depending on the software you use, there are multiple variations of the effect. In addition, developers refer to it by different names. For example, Final Cut Pro users know it as the earthquake effect, which is a preset video effect in most versions of the software.
Typically, video creators use the Final Cut Pro camera shake effect to add energy to their videos. As such, their scenes are more dramatic and encourage you to pay more attention to the video. For example, you can apply the effect to indicate the arrival of the villain in your video. In addition, the effect will be more impactful if the villain is a giant.
You can also use the camera shake video effect for the following purposes:
- Break the monotony in a scene. Applying this scene after a long dialogue scene will give your audience a brief respite, allowing them to regain their focus.
- The camera shake effect can also be an effective tool to build your brand identity. Instead of applying it during the screenplay, you can use it in the end credits to introduce your logo to audiences. Furthermore, you can include a creative sound track for additional emphasis.
What kind of shots are best for such an effect?
The best shot to apply the camera shake effect are still shots. This is because they give you extra creative room with the scene since the subjects are facing the camera directly from a level angle. As such, you can customize unique motion patterns for each subject when applying the camera shake effect.
Is it better to hand shake when shooting or add the effects?
Although it may seem tempting to physically shake the camera when shooting, most filmmakers prefer to add the effect during editing. This is because shaking the camera during shooting may result in unusable shots in post-production. For example, shooting a car scene from a hand-held camera in the passenger seat often results in shaky footage. As such, video creators mount the camera on a tripod to capture still shots and then add the camera shake during post-production.
Part2: How to Add a hand shake effect with FCPX?
The following is a step-to-step guide on how to add a hand shake effect on Final Cut Pro X. However, you need to meet the following requirements for the process to work.
A licensed copy of Final Cut Pro X

The camera shake effect is only available with the full version of Final Cut Pro X. In addition, you will access all variations of the effect with the full version.
A compatible video file
Apple’s Final Cut Pro X is compatible with the following video file formats:
- QuickTime formats.
- Apple ProRes
- Apple Animation Codec
- XF-AVC
- Container files, such as3GP, AVI, and MP4.
Camera shake effect plugins
The video editing software comes with preset camera shake effects, which you can find in the Effects Browser. However, you can also download compatible plugins from established sources, such as the Camera Shake Effects pack from Motion Array.
Once you have everything in place, follow the below steps.
- Import your desired video clip to the Final Cut Pro X workspace. Your video will appear in the timeline section at the bottom of your workspace.

- Select the section where you want to add the camera shake effect. In addition, you need to set the in and out points from the timeline. For example, Mac users can set these points by pressing the Iand O keys, respectively.
- Then, select the Shakefrom the Effects browser and search for Hand Held.

- Drag the effect over your selection to apply the effect.
- You can also make additional adjustments to your hand-held shake effect from the inspector panel.

For example, you can prevent black borders from appearing with the effect by increasing the Scale attribute to 105%. Scroll to the bottom right section of your workspace to the Inspector Panel, and click on Scale to make the adjustment.
Part3: How to add hand shake effect in the simplest way?
If the above guide is too complicated for you, Wondershare Filmora offers you the simplest way to add the hand shake effect to your videos.

The program is a stand-alone video editor for Windows and macOS users. It comes with a variety of preset camera shaking effects, including
- Up-down shaking
- Extreme shaking
- Chaos shaking
- Sideways shaking
Free Download For Win 7 or later(64-bit)
Free Download For macOS 10.14 or later
The above effects offer various shaking intensities and patterns to help you achieve your desired effect. In addition, you will need to purchase a license to access the different versions of the hand shake video effect. Once you have Wondershare Filmora running on your device, follow the below steps to add the hand shake effect to your videos.
1. Import your video
Click on the Import tab on your user interface and select Import Media Files. Then, drag and drop the files you want to edit to your timeline from the resulting window.
2. Applying Wondershare Filmora’s hand shake effect
Click on the Effects tab from the user interface and then select Filters. Next, proceed to the Shake subcategory to view all available presets. Currently, the program has eight camera shake presets, which you can preview using the pop-up thumbnail on your workspace.
Once you identify your desired effect, drag and drop it over the video selection, you want to apply it. You can make further adjustments using the sliders on the effect’s sub menu. For example, you can vary the duration of the effect by adjusting the frequency and intensity sliders.
Finally, click on Ok to apply the hand shake effect to your video and save the changes.
3. Exporting your final project
Wondershare Filmora allows you to export your completed projects to external locations, such as external hard drives and cloud storage. In addition, you can directly upload your videos to YouTube and Vimeo from the workspace.
Here is how to export videos from Filmora:
- Click on the Exporttab from the program’s main menu.
- Identify your file destination from the options on the Export The latest version of Filmora allows file exports to your local storage, YouTube, Vimeo, and DVD.
- Select your file format from the left menu and click Exporton the bottom right corner to finalize the process. Some of the available file formats include MP4, WMV, and FLV.
Kindly note that the above guide is for the latest version of Wondershare Filmora. As such, confirm that you have the latest edition before using it. Alternatively, you can download the latest version for free from the Filmora website.
FAQs
1. What are the minimum system requirements to run Film Cut Pro X?
According to Apple, your device needs to have the below minimum system requirements.
- 4 gigabytes of RAM. However, running the program on a device with 8 GB RAM allows you to work with 4K videos and perform 360-degree video editing seamlessly.
- A dedicated graphics processing unit with at least 1 GB of VRAM.
- About 4.5 GB of storage space for Final Cut Pro’s system files.
- An active internet connection to enable access to online customer support and additional features.
- You will also need a Blu-ray recorder to export videos directly to DVDs.
- Finally, your device should be running macOS 11.5.1 or later.
2. Can you import custom hand shake effects to Final Cut Pro?
Yes, you can import custom hand shake effects to your licensed version of Final Cut Pro. However, always install custom plugins from verifiable sites to prevent the installation of malicious software such as spyware. Some of the sites to consider consist of Motion Array, Studio Binder, and FCPX Free. For example, you can check out these 10 free plugins for Final Cut Pro from Filmora .
- A licensed copy of Final Cut Pro X
- A compatible video file
- Camera shake effect plugins
- How to add hand shake effect in the simplest way
Part1: When Do You Need a Hand Shake Effect?
Adding effects to your videos is a great way to make them more impactful. However, you need to apply them correctly for them to be effective. The following information explores different aspects of the Final Cut Pro camera shake effect, including its definition, why video creators use it, and how best to apply it.
What are hand shake effects for?
Hand shake effects are video adjustments you apply to specific scenes that make the shot vibrate. Depending on the software you use, there are multiple variations of the effect. In addition, developers refer to it by different names. For example, Final Cut Pro users know it as the earthquake effect, which is a preset video effect in most versions of the software.
Typically, video creators use the Final Cut Pro camera shake effect to add energy to their videos. As such, their scenes are more dramatic and encourage you to pay more attention to the video. For example, you can apply the effect to indicate the arrival of the villain in your video. In addition, the effect will be more impactful if the villain is a giant.
You can also use the camera shake video effect for the following purposes:
- Break the monotony in a scene. Applying this scene after a long dialogue scene will give your audience a brief respite, allowing them to regain their focus.
- The camera shake effect can also be an effective tool to build your brand identity. Instead of applying it during the screenplay, you can use it in the end credits to introduce your logo to audiences. Furthermore, you can include a creative sound track for additional emphasis.
What kind of shots are best for such an effect?
The best shot to apply the camera shake effect are still shots. This is because they give you extra creative room with the scene since the subjects are facing the camera directly from a level angle. As such, you can customize unique motion patterns for each subject when applying the camera shake effect.
Is it better to hand shake when shooting or add the effects?
Although it may seem tempting to physically shake the camera when shooting, most filmmakers prefer to add the effect during editing. This is because shaking the camera during shooting may result in unusable shots in post-production. For example, shooting a car scene from a hand-held camera in the passenger seat often results in shaky footage. As such, video creators mount the camera on a tripod to capture still shots and then add the camera shake during post-production.
Part2: How to Add a hand shake effect with FCPX?
The following is a step-to-step guide on how to add a hand shake effect on Final Cut Pro X. However, you need to meet the following requirements for the process to work.
A licensed copy of Final Cut Pro X
The camera shake effect is only available with the full version of Final Cut Pro X. In addition, you will access all variations of the effect with the full version.
A compatible video file
Apple’s Final Cut Pro X is compatible with the following video file formats:
- QuickTime formats.
- Apple ProRes
- Apple Animation Codec
- XF-AVC
- Container files, such as3GP, AVI, and MP4.
Camera shake effect plugins
The video editing software comes with preset camera shake effects, which you can find in the Effects Browser. However, you can also download compatible plugins from established sources, such as the Camera Shake Effects pack from Motion Array.
Once you have everything in place, follow the below steps.
- Import your desired video clip to the Final Cut Pro X workspace. Your video will appear in the timeline section at the bottom of your workspace.
- Select the section where you want to add the camera shake effect. In addition, you need to set the in and out points from the timeline. For example, Mac users can set these points by pressing the Iand O keys, respectively.
- Then, select the Shakefrom the Effects browser and search for Hand Held.
- Drag the effect over your selection to apply the effect.
- You can also make additional adjustments to your hand-held shake effect from the inspector panel.
For example, you can prevent black borders from appearing with the effect by increasing the Scale attribute to 105%. Scroll to the bottom right section of your workspace to the Inspector Panel, and click on Scale to make the adjustment.
Part3: How to add hand shake effect in the simplest way?
If the above guide is too complicated for you, Wondershare Filmora offers you the simplest way to add the hand shake effect to your videos.
The program is a stand-alone video editor for Windows and macOS users. It comes with a variety of preset camera shaking effects, including
- Up-down shaking
- Extreme shaking
- Chaos shaking
- Sideways shaking
Free Download For Win 7 or later(64-bit)
Free Download For macOS 10.14 or later
The above effects offer various shaking intensities and patterns to help you achieve your desired effect. In addition, you will need to purchase a license to access the different versions of the hand shake video effect. Once you have Wondershare Filmora running on your device, follow the below steps to add the hand shake effect to your videos.
1. Import your video
Click on the Import tab on your user interface and select Import Media Files. Then, drag and drop the files you want to edit to your timeline from the resulting window.
2. Applying Wondershare Filmora’s hand shake effect
Click on the Effects tab from the user interface and then select Filters. Next, proceed to the Shake subcategory to view all available presets. Currently, the program has eight camera shake presets, which you can preview using the pop-up thumbnail on your workspace.
Once you identify your desired effect, drag and drop it over the video selection, you want to apply it. You can make further adjustments using the sliders on the effect’s sub menu. For example, you can vary the duration of the effect by adjusting the frequency and intensity sliders.
Finally, click on Ok to apply the hand shake effect to your video and save the changes.
3. Exporting your final project
Wondershare Filmora allows you to export your completed projects to external locations, such as external hard drives and cloud storage. In addition, you can directly upload your videos to YouTube and Vimeo from the workspace.
Here is how to export videos from Filmora:
- Click on the Exporttab from the program’s main menu.
- Identify your file destination from the options on the Export The latest version of Filmora allows file exports to your local storage, YouTube, Vimeo, and DVD.
- Select your file format from the left menu and click Exporton the bottom right corner to finalize the process. Some of the available file formats include MP4, WMV, and FLV.
Kindly note that the above guide is for the latest version of Wondershare Filmora. As such, confirm that you have the latest edition before using it. Alternatively, you can download the latest version for free from the Filmora website.
FAQs
1. What are the minimum system requirements to run Film Cut Pro X?
According to Apple, your device needs to have the below minimum system requirements.
- 4 gigabytes of RAM. However, running the program on a device with 8 GB RAM allows you to work with 4K videos and perform 360-degree video editing seamlessly.
- A dedicated graphics processing unit with at least 1 GB of VRAM.
- About 4.5 GB of storage space for Final Cut Pro’s system files.
- An active internet connection to enable access to online customer support and additional features.
- You will also need a Blu-ray recorder to export videos directly to DVDs.
- Finally, your device should be running macOS 11.5.1 or later.
2. Can you import custom hand shake effects to Final Cut Pro?
Yes, you can import custom hand shake effects to your licensed version of Final Cut Pro. However, always install custom plugins from verifiable sites to prevent the installation of malicious software such as spyware. Some of the sites to consider consist of Motion Array, Studio Binder, and FCPX Free. For example, you can check out these 10 free plugins for Final Cut Pro from Filmora .
Detailed Steps to Rotate Videos Using Kdenlive
Kdenlive is a free, open-source video editing software application. Kdenlive is a powerful video editor that can be used to create professional-quality videos. It supports all of the major video formats and has a wide range of features. Kdenlive is available for Linux, Mac OS X, and Windows. Kdenlive is a great choice for anyone looking for a powerful, yet easy-to-use video editor. It is perfect for creating professional-quality videos, and its wide range of features makes it suitable for a variety of different tasks. It is perfect for anyone who wants a versatile video editor that works on all major platforms.
Kdenlive’s user interface is divided into three main areas: the timeline, the clip monitor, and the effects stack. The timeline is where you add and arrange your clips. The clip monitor shows your video as it will appear in your final project. The effects stack allows you to apply a range of video effects to your clips.
Step-by-step on how to rotate videos using Kdenlive
There are two ways to rotate videos using Kdenlive: by using the rotate filter or by changing the project settings. The rotate filter is a video effect that allows you to rotate your video clip around its vertical and horizontal axes. To apply the rotate filter…
Step 1: Import your video clip to the timeline.

Step 2: Open the Effects tab and expand the Transform, Distort Perspective tab.

Step 3: Drag the Rotate filter onto your clip.

Step 4: The Rotate filter will open in the Effects Editor.

Step 5: Use the sliders to rotate your video clip.
Step 6: Click the ‘Save’ Icon to apply the filter.

The rotate filter is a great way to quickly rotate your video clip. However, it does have some limitations. For example, you can’t…
- use the rotate filter on clips that are already rotated
- use the rotate filter to create a 360-degree rotation
- change the rotation orientation of your clip.
If you need to rotate your video clip in a different direction, or if you want to create a 360-degree rotation, you can change the project settings. The rotate filter can be used to rotate your video clip in 90-degree increments. If you need to rotate your video clip by a different amount, you can change the project settings. To change the project settings…
Step 1: Import your video clip to the timeline.

Step 2: Right-click on the clip and select Apply an Effect > Transform from the menu.

Step 3: The Properties window will open. Select the Rotate tab.

Step 4: Use the slider to set the amount of rotation you need.

Step 5: Click the ‘Save’ Icon to apply the changes.

The project settings allow you to rotate your video clip in any direction you need.
How to rotate videos using Filmora?
Meanwhile, you can also use Filmora Video Editor to rotate your video. Filmora is a powerful video editor that can be used to create professional-quality videos. It supports all of the major video formats and has a wide range of features. Filmora is available for Windows and Mac OS X. Filmora’s user interface is divided into three main areas: the timeline, the preview window and the effects panel. The timeline is where you add and arrange your clips. The preview window shows your video as it will appear in your final project. The effects panel allows you to apply a range of video effects to your clips.
For Win 7 or later (64-bit)
For macOS 10.14 or later
Step-by-step on how to rotate videos using Filmora
Two ways to rotate your videos using Filmora: by using the rotate option when you right click it or changing the project settings. The rotate filter is a video effect that allows you to rotate your video clip around its vertical and horizontal axes.
To apply the rotate filter…
Step 1: Import your video clip into Filmora.

Step 2: Right-click on the video.
Step 3: Select ‘Rotate 90 CW’ or click Ctrl + Alt + Right to rotate the video 90 degrees clockwise.

Step 4: Select ‘Rotate 90 CCW’ or click Ctrl + Alt + Left to rotate the video 90 degrees counterclockwise.
Step 5: Repeat the steps until you are satisfied. Note: It can only rotate the video in the degrees of multiples of 90.
Step 6: The video is now rotated.
Filmora’s rotate filter is very similar to Kdenlive’s. However, there are a few differences. For example…
- you can use the rotate filter on clips that are already rotated
- you can change the rotation orientation of your clip.
If you need to rotate your video clip in a different direction, or if you want to create a 360-degree rotation, follow the below steps:
Click on the ‘Edit’ option in the tool above the timeline.

Select the ‘Transform’ option, then go to ‘Rotate’

Use the slider to set the amount of rotation you need.

Click OK to apply the changes.

The project settings allow you to rotate your video clip in any direction you need.
Both Filmora and Kdenlive offer a rotate filter that allows you to rotate your video clip by a certain amount. However, only Filmora offers the ability to rotate your video clip in any direction you need. Additionally, Filmora offers a wide range of features that can be used to create professional-quality videos. If you need to rotate your video clip in a different direction, or if you want to create a 360-degree rotation, Filmora is the best option.
Step 2: Open the Effects tab and expand the Transform, Distort Perspective tab.
Step 3: Drag the Rotate filter onto your clip.
Step 4: The Rotate filter will open in the Effects Editor.
Step 5: Use the sliders to rotate your video clip.
Step 6: Click the ‘Save’ Icon to apply the filter.
The rotate filter is a great way to quickly rotate your video clip. However, it does have some limitations. For example, you can’t…
- use the rotate filter on clips that are already rotated
- use the rotate filter to create a 360-degree rotation
- change the rotation orientation of your clip.
If you need to rotate your video clip in a different direction, or if you want to create a 360-degree rotation, you can change the project settings. The rotate filter can be used to rotate your video clip in 90-degree increments. If you need to rotate your video clip by a different amount, you can change the project settings. To change the project settings…
Step 1: Import your video clip to the timeline.
Step 2: Right-click on the clip and select Apply an Effect > Transform from the menu.
Step 3: The Properties window will open. Select the Rotate tab.
Step 4: Use the slider to set the amount of rotation you need.
Step 5: Click the ‘Save’ Icon to apply the changes.
The project settings allow you to rotate your video clip in any direction you need.
How to rotate videos using Filmora?
Meanwhile, you can also use Filmora Video Editor to rotate your video. Filmora is a powerful video editor that can be used to create professional-quality videos. It supports all of the major video formats and has a wide range of features. Filmora is available for Windows and Mac OS X. Filmora’s user interface is divided into three main areas: the timeline, the preview window and the effects panel. The timeline is where you add and arrange your clips. The preview window shows your video as it will appear in your final project. The effects panel allows you to apply a range of video effects to your clips.
For Win 7 or later (64-bit)
For macOS 10.14 or later
Step-by-step on how to rotate videos using Filmora
Two ways to rotate your videos using Filmora: by using the rotate option when you right click it or changing the project settings. The rotate filter is a video effect that allows you to rotate your video clip around its vertical and horizontal axes.
To apply the rotate filter…
Step 1: Import your video clip into Filmora.
Step 2: Right-click on the video.
Step 3: Select ‘Rotate 90 CW’ or click Ctrl + Alt + Right to rotate the video 90 degrees clockwise.
Step 4: Select ‘Rotate 90 CCW’ or click Ctrl + Alt + Left to rotate the video 90 degrees counterclockwise.
Step 5: Repeat the steps until you are satisfied. Note: It can only rotate the video in the degrees of multiples of 90.
Step 6: The video is now rotated.
Filmora’s rotate filter is very similar to Kdenlive’s. However, there are a few differences. For example…
- you can use the rotate filter on clips that are already rotated
- you can change the rotation orientation of your clip.
If you need to rotate your video clip in a different direction, or if you want to create a 360-degree rotation, follow the below steps:
Click on the ‘Edit’ option in the tool above the timeline.
Select the ‘Transform’ option, then go to ‘Rotate’
Use the slider to set the amount of rotation you need.
Click OK to apply the changes.
The project settings allow you to rotate your video clip in any direction you need.
Both Filmora and Kdenlive offer a rotate filter that allows you to rotate your video clip by a certain amount. However, only Filmora offers the ability to rotate your video clip in any direction you need. Additionally, Filmora offers a wide range of features that can be used to create professional-quality videos. If you need to rotate your video clip in a different direction, or if you want to create a 360-degree rotation, Filmora is the best option.
Also read:
- New 2024 Approved Text Animation Intro Tutorial in Filmora
- Motion Tracking Is the Process of Tracking the Movements of a Project in a Video. This Article Will Show You How to Apply Motion Tracking Effect Into Videos for 2024
- In 2024, Do You Want to Show Your Mood in Your Digital Media Content but Dont Know How To? There Are Many Moody LUTs Available that Highlight Your Mood in Your Content
- Updated In 2024, Best Online MPEG to GIF Converters
- New How to Create Intro with Renderforest
- Top Tools To Create Blend Image Collage for 2024
- Updated The Complete Guide to Zoho Slides with Ease
- Updated 2024 Approved 10 Best Voice Over Generators Windows, Mac, Android, iPhone, and Online
- Updated In 2024, How to Speed up a Video on Splice
- New 2024 Approved HOW to Add Fade to Black on Premiere Pro
- 2024 Approved Guide Create The Perfect VHS Effect Look in Premiere Pro
- Updated Create Kinetice Typography Text Effect in Filmora for 2024
- Updated How to Zoom in on PowerPoint Easy Ways
- New How to Add Miniature Effect in Video with Filmora for 2024
- Updated | How to Livestream Zoom on Facebook for 2024
- In 2024, 2 Effective Ways to Easily Convert VTT to SRT
- New In 2024, How to Change Video Thumbnail in Google Drive
- New In 2024, How to Create a Slideshow GIF?
- Wondering How to Replace Sky in After Effects? Learn How for 2024
- 2024 Approved Wondering How to Edit a Video to Slow Motion on iPhone and Android Devices? Find Out How to Use Wondershare Filmora to Create and Edit Slo Mo Videos in a Few Clicks
- Wondering if You Can Make DIY Green Screen Video for Streaming? Learn the Easy Steps to Setup DIY Green Screen, Shoot the Video and Edit It Out to Add Green Screen Effects
- New Add Green Screen Video on TikTok
- Slow Motion Videos Are Taking over Social Media and Becoming a New Trend. Read This Article if You Want to Learn How to Slow Down Video in After Effects for 2024
- New How to Apply Video Filters
- 2024 Approved Change Background Color in After Effects
- New An Introduction to LUTs | Their Overview and Benefits
- The Availability of the Slow-Motion Feature on the iPhone Is Often Debated. This Article Will Guide You on How to Slow Down a Video on iPhone for 2024
- New Boost Your Spirit Creating Motivational Status Videos for 2024
- Updated How to Upload Videos to Twitch? Heres a Guide for Beginner
- Updated 2024 Approved Find The Best Free Canon LUTs
- A Guide Realme 12 Pro+ 5G Wireless and Wired Screen Mirroring | Dr.fone
- How to Recover iPhone SE (2020) Data From iOS iTunes Backup? | Dr.fone
- How to Track Vivo Y100i Location without Installing Software? | Dr.fone
- In 2024, Getting the Pokemon Go GPS Signal Not Found 11 Error in Lava Agni 2 5G | Dr.fone
- Hassle-Free Ways to Remove FRP Lock from Oppo Reno 10 5G Phones with/without a PC
- How To Open Your Apple iPhone 11 Pro Max Without a Home Button
- 3 Ways to Erase Apple iPhone 13 Pro When Its Locked Within Seconds
- Unlock iPhone 15 Pro Max Without Passcode Easily | Dr.fone
- How to get the dragon scale and evolution-enabled pokemon On Poco X6? | Dr.fone
- In 2024, How to Track OnePlus 12 by Phone Number | Dr.fone
- How to Fix Error 495 While Download/Updating Android Apps On Oppo Find X7 Ultra | Dr.fone
- Full Guide on Mirroring Your Motorola Moto G Stylus 5G (2023) to Your PC/Mac | Dr.fone
- In 2024, Does Vivo T2 Pro 5G Have Find My Friends? | Dr.fone
- In 2024, How to Mirror Your Realme Narzo N55 Screen to PC with Chromecast | Dr.fone
- In 2024, 9 Mind-Blowing Tricks to Hatch Eggs in Pokemon Go Without Walking On Vivo V30 Pro | Dr.fone
- Can I Remove the Apple Watch Activation Lock By Apple iPhone 14 without the Previous Owner?
- Apple ID Locked for Security Reasons On iPhone 8 Plus? Find the Best Solution Here
- In 2024, How to Reset a Locked Xiaomi Redmi K70 Pro Phone
- In 2024, Top 6 Apps/Services to Trace Any Xiaomi 13 Ultra Location By Mobile Number | Dr.fone
- Fix the Error of Unfortunately the Process.com.android.phone Has Stopped on Samsung Galaxy XCover 7 | Dr.fone
- In 2024, How to Hide/Fake Snapchat Location on Your Realme 10T 5G | Dr.fone
- How to Perform Hard Reset on Vivo V29 Pro? | Dr.fone
- Updated Uncensored Top 10 + Free Streaming Sites for 2024
- Title: New 2024 Approved 10 Best Meme Text to Speech Tools Windows, Mac, Android, iPhone
- Author: Chloe
- Created at : 2024-04-24 07:08:25
- Updated at : 2024-04-25 07:08:25
- Link: https://ai-editing-video.techidaily.com/new-2024-approved-10-best-meme-text-to-speech-tools-windows-mac-android-iphone/
- License: This work is licensed under CC BY-NC-SA 4.0.
