
:max_bytes(150000):strip_icc():format(webp)/6-things-to-consider-before-buying-a-gaming-pc-5221042-8a79710a1e4549edbc357125123fb04e.jpg)
New 2024 Approved 15 Best Travel Vloggers That You Should Follow
15 Best Travel Vloggers That You Should Follow
Do you wish to travel to the best parts of the world? Have you found it difficult to travel to your dream places? There are multiple techniques of understanding the dynamics of traveling around the globe. One effective way is to follow vloggers who provide unique information about places they travel.
Since you are looking for information to travel, this article presents you with some of the best vloggers that you can see before traveling to your favorite places.
Part 1: 15 Most Popular Vloggers That You Should Follow for Travel
This part will introduce you to some of the top vloggers that can be followed for travel tips and videos. This list will surely help you prepare for your traveling perfectly.
1. Drew Binsky
Subscriber Count: 3.12M+
Are you fascinated by new cultures and traditions? Drew Binsky is the perfect vlogger that you can follow for deciding your next trip. This American travel vlogger designs the perfect documentary for enthusiasts like you, with a focus on discovering cultures across the world. As he makes his video perfect with assisted storylines, he can be the perfect option for you to get started with traveling.

2. Mark Wiens
Subscriber Count: 8.6M+
A fan of both food and traveling? Migrationology is the perfect combination of YouTube vlogging that you can find across the Internet. Mark, the person behind this idea and venture, comes up with the best spots to travel and enjoy food. He accompanies his best visits with proper guides so that you can go through a perfect travel trip to the place you decide.

3. Sorelle Amore
Subscriber Count: 1.03M+
There are very few phenomenal female travel vloggers focused on providing exclusive content to their viewers. Being one powerhouse of excruciating content, Sorelle inspires her viewers with her experiences in traveling. With a greater motive to run her vlog channel, Sorelle Amore encourages her viewers to visit and endure the beauty of the world as it is. Her travel videos are always a step ahead.

4. Jonna Jinton
Subscriber Count: 4.04M+
Jonna is a Swedish local that lives across the woods. While being an artist, musician, and filmmaker, Jonna has a very different perspective on life. Her idea of getting inspired by nature and finding the ‘right’ essence of nature are induced across her everyday travel videos. She accompanies her videos with music, painting, nature, ice baths, and much more, making her a different deal than the rest.

5. Hey Nadine
Subscriber Count: 496K+
This travel vlogger is probably among the first who started filming travel vlogs. While being the best in the market, Hey Nadine has been known for inspiring many people worldwide. Isn’t it great? Her videos are inclusive of the viewer’s desire, making people visit the places after looking at the videos. An authentic personality, combined with nature’s beauty, is what you’ll witness across her travel vlogs.

6. The Budgeteers
Subscriber Count: 119K+
The name says a lot about these travel vloggers. The Budgeteers work with wholesome travel vlogs across their channel, which represents a major keyword of ‘budget’ trips. As their objective is to cover trips on a low budget, it has been observed that most of their videos are based in the Southeast Asian region. A group of three people with great visuals and extensive presentation is everything you’ll find across this YouTube channel.

7. FunForLouis
Subscriber Count: 1.98M+
Do you seek diversity in selecting the best travel spot for your summer vacation? FunForLouis is a casual traveler and vlogger who builds up the idea of traveling with the desire to enjoy life. You will find extensive quality in his videos, making the viewers addicted to his videos. Louis Cole surely knows how to brand his travels and bring the best out for his viewers.

8. Kold
Subscriber Count: 1.25M+
Inspired by filmmakers and storytellers? Do you wish to hit the feeling of traveling to the best places worldwide? Kold is recognized among the best vloggers who essentially work in providing the best view of the location under effective transitions. Although he is not a regular vlogger, he surely brings the best content you can find across the Internet.

9. Vagabrothers
Subscriber Count: 1.13M+
Do you wish to find a fun side of traveling to the best sites in the world? Vagabrothers taps into a different aspect of traveling and helps viewers understand the beauty of being different. Their vlogging is inspired by fun shooting styles and a different perspective to showing the culture and traditions of the place they visit.

10. Fearless and Far
Subscriber Count: 969K+
Just as the name suggests, Mike Corey brings you some of the extreme travel vlogs. If you are a fan of going on extreme adventures, Mike will provide you with some of the best ideas to try. He will let you know the unheard parts of the world that you would want to visit after going through his videos. His sense of perfection in adventure makes him one of the top vloggers.

11. Jennelle Eliana
Subscriber Count: 2.44M+
Young blood is always inspiring. If you are curious how a person living in a van survives, this vlogger is the best choice to watch. Jennelle Eliana has not been an old player, yet her followers have been truly inspired by her motive and content. If you wish to be as inclusive to traveling as Jennelle, you should try out her ideology and style of traveling.

12. Kara and Nate
Subscriber Count: 2.96M+
Do you wish to spend traveling with your life partner, just like Kara and Nate present across their vlogging channel? This couple has been putting up content that is extremely exceptional in terms of vlogging; however, it puts them at the top amongst other best vloggers. Kara and Nate have tried to bring the better side to everything they face across their travel diaries, which can be clearly witnessed in their content.

13. Casey Neistat
Subscriber Count: 12.4M+
A pioneer in YouTube vlogging, Casey Neistat brings up a different vibe to traveling. His videos are created with intent and desire, which drives a sensation across the viewers and builds an urge to travel. Casey has been inspiring people with his content, and by producing some masterpieces in travel vlogs, he has also put up his name in the top vloggers for travel.

14. Lost LeBlanc
Subscriber Count: 1.94M+
There is a whole different story to Christian LeBlanc when it comes across his traveling vlog channel. This vlogger has worked across his desire to get out of the corporate culture and work on his desire to explore the world. As he sold everything he owned, he has now been working as a travel vlogger, with the aim of inspiring people all along.

15. Sailing La Vagabonde
Subscriber Count: 1.69M+
If you wish to have a whole new traveling experience, you should see Elayna and Riley traveling the world across a boat. As they took a new lifestyle in their lives, they have presented a different perspective of traveling through water. Their idea of the environment is enticing, making them referred to among the best vloggers.

Closing Words
Have you gone through this extensive list of travel vloggers? Find out the best among them? We wish that you will be inspired by our list and would come across this industry with a new idea to travel vlogging. However, within this journey of video making, you should never forget the video editor that would help you. Wondershare Filmora is the perfect option that you may find in the market for putting up a nice travel vlog for your channel.
For Win 7 or later (64-bit)
For macOS 10.12 or later
For macOS 10.12 or later
For macOS 10.12 or later
For macOS 10.12 or later
Recording Video in Slow Motion: Some Considerable Points
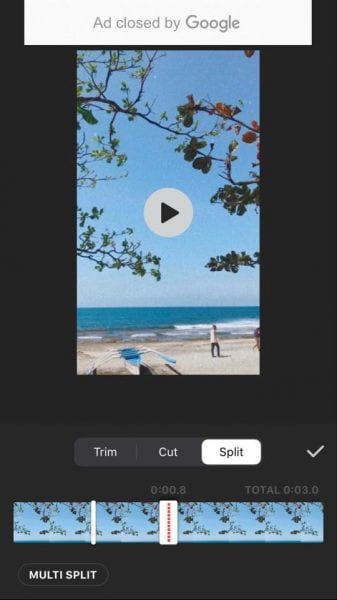
Slow motion helps filmmakers to achieve several goals in their projects. Slo-mo can dramatize emotions, set the right mood for watching action films, and so on. Recording slow-motion videos with high-end cameras was a matter of the past. In this tech-based era, capturing moments in slow motion is a built-in feature in your smartphone.
Amplify your message in slow-motion videos by understanding how to record slow-motion video. You will learn how to record a slow-motion video using any model of Android and iPhones. Besides, there are some aspects that you should know before start recording scenes. As a plus point, here you can find a top-notch editing app with a guide on how to record slow-motion video.
Slow Motion Video Maker Slow your video’s speed with better control of your keyframes to create unique cinematic effects!
Make A Slow Motion Video Make A Slow Motion Video More Features

Part 1: Some Important Deliverables to Ensure While Recording Videos in Slow Motion
Capture fleeting moments in the slow-motion mode of the camera to emphasize details. It’s the only way to highlight important aspects of sports and action scenes. Recording in slow motion is not difficult when you will learn how to record slow-motion video. Before learning, let’s understand important aspects you should look at while recording.
- Frame Rate: For slow-motion video, choosing the right frame rate is crucial. A higher framerate, such as 120fps and 240fps, allows smoother playback. So, before recording, ensure that your camera supports a good framerate.
- Resolution: Maintaining high-resolution videos is important to get good quality. Usually, slow-motion footage uses 4K and HD (High Definition) resolution. Having a high video resolution means providing clarity in details in videos.
- Shutter Speed: It refers to the speed at which the camera closes and controls exposure. Adjust the shutter speed to faster mode to capture every crisp in slow motion. It will prevent motion blur and help in freezing fast-moving objects.
- Audio Consideration: You should know that recording slow motion will affect the original audio. Meanwhile, some cameras preserve the original sound. So, be prepared and test your camera’s audio speed to ease the editing process.
- Focus and Stability: Minimize your camera shake and enable a stabilizer or tripod. Stable footage is essential to enhance the video quality. Moreover, try to keep your main subject in camera focus. In this regard, you can use manual focus control if necessary.
- Editing Software Compatibility: Another thing that you must consider is tool compatibility. It’s better to check it before recording so you will not regret it later. Check your editing tools are supporting the file format of the recorded slow-motion video.
- Storage Space: The “No More Storage” sign is a nightmare when you have recorded a perfect shot. Slow-motion videos consume large storage because of high resolution and frame rate. Thus, consider this aspect before recording to avoid inconvenience and arrange storage media.
Part 2: How to Record a Slow-Motion Video on Android/iPhone?
No matter your smartphone, recording slow-mo is just one click away. Luckily, you don’t need any separate app and technical equipment for this task. If you want to record slow motion now, keep reading this section for detailed steps. Here, you will find how to record a slow-motion video using an iPhone and Android.
Record Slow Motion Using an iPhone
Apple has offered a slow-motion feature since 2013 with the release of the iPhone 5s. Subsequent iPhone models also support this feature. Following are the steps that you can follow to record a slow-motion video on an iPhone:
Step 1
Before recording, set frame rate and resolution. To do so, go to “Settings” and scroll until you find “Camera.” After choosing the camera, touch the “Record Slo-mo.” From the given two choices, select one frame rate and resolution option.

Step 2
Now, tap on the “Camera” app on the home screen of your iPhone. Click on the “Slo-Mo” option next to the “Video.” Then, touch the red “Record” button and capture moments till you want. Finally, stop recording by hitting the same red button. Your footage will automatically be saved in your gallery.

Record Slow Motion Using Android
Who needs a third-party app when Android also supports a slow-motion recording feature? Currently, almost all Android phones are offering slow-motion. The location and access to slow-motion options might differ per Android phone model. To start recording, look at the given steps:
Step 1
Unlock your phone and click on the “Camera” from the main screen. Click on the “More” option next to the “Portrait.” From the next menu, look for the “Slow Motion” circle icon.

Step 2
After selecting slow motion, adjust the focus manually. Head to the top-right corner and click on the small menu icon. Choose a frame rate and resolution from the displayed options. To start recording, touch the red “Record” button. When you capture the desired shots, press the red button again and get the video on your phone.

Part 3: Making Recorded Video in Slow Motion Using the Right Tools
Now, you are pretty much familiar with how to record slow-motion video using smartphones. A phenomenon that arises here is, can we slow down the normally recorded video? The simple answer is yes. There are many editing apps designed for this purpose. Adobe Premiere Pro is one such editing app to slow down the pre-recorded videos.
Step 1
Access your Adobe Premiere Pro application and import a video in the timeline. Identify the frame rate of your video clip for a non-choppy playback.

Step 2
The frame rate will tell you how much you need to slow down the video. To do so, use this “(Timeline Frame Rate ÷ Footage Frame Rate) x 100” formula. Before moving, analyze the slow motion you can add in your clip as per their frame rate.

Step 3
After making calculations, right-click on your footage in the timeline. Select the “Speed/Duration” option from the list and get a small pop-up screen. There, type any number; suppose you type 40% in the box given next to the “Speed.” Finally, click on the “OK” and press the Space bar to get a preview.

Bonus Part: Making Video Editing Simpler! Use Wondershare Filmora to Slow Down Your Video
Apart from Adobe Premiere Pro, there are many other software to do the same task. From multiple options, it’s quite difficult to pick the best option. Let us ease your selection by introducing Wondershare Filmora . It’s a video editing app that is much easier to operate than any other option. With AI integration, many time-consuming editing tasks are now a matter of seconds.
Free Download For Win 7 or later(64-bit)
Free Download For macOS 10.14 or later
How to Turn a Video into Slow-Motion with Optical Flow
As discussed earlier, Filmora can slow down your videos with customization options. Users can set their video to optical flow to automatically get slow speed with high quality.
Step 1Import a Project in Timeline after Launching Filmora
Launch the latest version of Filmora on your device. Access the main interface and choose the “New Project” option to start editing. From the editing screen, look for the “Import” option and bring your media to the timeline. Now, right-click on your video in the timeline to get an extended list. Select the “Uniform Speed” option to get a panel on the right side.

Step 2Explore the Uniform Speed option to Slow Down Videos
Move to that panel, hold, and drag the “Speed” slider towards the left. Drop the slider at your desired speed for slow-motion video. Go downward and click on the downward icon of “AI Interpolation.” From the extended menu, pick the “Optical Flow” option.

Step 3Head to Export Button Once You Finish Editing
Get a preview of the slow-motion video and decide whether to continue editing or quit. If you are done with editing, move to the top right corner and click on the “Export” button. Assign parameters of your choice and again press the “Export” option to get the file on your PC.

In slow-motion video editing, you can slow down videos to the extent you want. In addition, users can try the AI features of Filmora to explore its powerful functionalities. Keep reading to know some of the key features that Filmora offers to ensure your workflow.
1. AI Copilot Editing
Have you ever imagined AI as your assistant in video editing? Filmora offers an AI copilot editor to assist you in complex editing tasks. To optimize your workflow, it provides valuable insights and guidance with navigations. It ensures that your projects maintain high quality, so it detects conflicting parameters. Afterward, it sends error messages to prevent any issues.
2. AI Text-Based Editing
Getting editable text out of videos is no more challenging with this feature of Filmora. It offers transformative leap technology that converts audio into video and text. After getting transcribed text from the video, users can edit it as per their preferences. You can save work hours because AI can add subtitles to your movies. Also, it allows you to export, translate, and rewrite the subtitles.
3. AI Image
If you are searching for an image that matches your content needs, look no forward. You can generate your own image after giving instructions to AI. This creative concept of Filmora aims to bring your imagination into visual content. In this regard, you just have to describe your image in simple words. Later, users can pick one resolution and image style from endless options.
4. AI Thumbnail Creator
As a content creator, you might know that thumbnail creates a first impression on viewers. A stunning and informative thumbnail attracts viewers to watch the video. For this purpose, Filmora automatically detects the best shots out of your video as a thumbnail. Despite that, you can choose any thumbnail from the professional thumbnail templates library.
5. AI Music Generator
Finding a musical video according to the video content is a hectic job. What if AI generates a soundtrack tailored to your needs? Filmora can generate a musical video by assigning musical choices and sound duration. In addition, you can prompt the number of musical tracks you want. The generated music will be royalty-free and further editable.
Conclusion
Overall, slow-motion videos are becoming a necessity for digital media. That’s why smartphones are offering built-in slow-motion recording features. In this guide, you have learned how to record a slow-motion video and edit it using Premiere Pro. Still, there lies a need to get a better and easier option. For this, you can rely on Filmora, which offers powerful AI features to boost productivity.
Make A Slow Motion Video Make A Slow Motion Video More Features
Part 1: Some Important Deliverables to Ensure While Recording Videos in Slow Motion
Capture fleeting moments in the slow-motion mode of the camera to emphasize details. It’s the only way to highlight important aspects of sports and action scenes. Recording in slow motion is not difficult when you will learn how to record slow-motion video. Before learning, let’s understand important aspects you should look at while recording.
- Frame Rate: For slow-motion video, choosing the right frame rate is crucial. A higher framerate, such as 120fps and 240fps, allows smoother playback. So, before recording, ensure that your camera supports a good framerate.
- Resolution: Maintaining high-resolution videos is important to get good quality. Usually, slow-motion footage uses 4K and HD (High Definition) resolution. Having a high video resolution means providing clarity in details in videos.
- Shutter Speed: It refers to the speed at which the camera closes and controls exposure. Adjust the shutter speed to faster mode to capture every crisp in slow motion. It will prevent motion blur and help in freezing fast-moving objects.
- Audio Consideration: You should know that recording slow motion will affect the original audio. Meanwhile, some cameras preserve the original sound. So, be prepared and test your camera’s audio speed to ease the editing process.
- Focus and Stability: Minimize your camera shake and enable a stabilizer or tripod. Stable footage is essential to enhance the video quality. Moreover, try to keep your main subject in camera focus. In this regard, you can use manual focus control if necessary.
- Editing Software Compatibility: Another thing that you must consider is tool compatibility. It’s better to check it before recording so you will not regret it later. Check your editing tools are supporting the file format of the recorded slow-motion video.
- Storage Space: The “No More Storage” sign is a nightmare when you have recorded a perfect shot. Slow-motion videos consume large storage because of high resolution and frame rate. Thus, consider this aspect before recording to avoid inconvenience and arrange storage media.
Part 2: How to Record a Slow-Motion Video on Android/iPhone?
No matter your smartphone, recording slow-mo is just one click away. Luckily, you don’t need any separate app and technical equipment for this task. If you want to record slow motion now, keep reading this section for detailed steps. Here, you will find how to record a slow-motion video using an iPhone and Android.
Record Slow Motion Using an iPhone
Apple has offered a slow-motion feature since 2013 with the release of the iPhone 5s. Subsequent iPhone models also support this feature. Following are the steps that you can follow to record a slow-motion video on an iPhone:
Step 1
Before recording, set frame rate and resolution. To do so, go to “Settings” and scroll until you find “Camera.” After choosing the camera, touch the “Record Slo-mo.” From the given two choices, select one frame rate and resolution option.
Step 2
Now, tap on the “Camera” app on the home screen of your iPhone. Click on the “Slo-Mo” option next to the “Video.” Then, touch the red “Record” button and capture moments till you want. Finally, stop recording by hitting the same red button. Your footage will automatically be saved in your gallery.
Record Slow Motion Using Android
Who needs a third-party app when Android also supports a slow-motion recording feature? Currently, almost all Android phones are offering slow-motion. The location and access to slow-motion options might differ per Android phone model. To start recording, look at the given steps:
Step 1
Unlock your phone and click on the “Camera” from the main screen. Click on the “More” option next to the “Portrait.” From the next menu, look for the “Slow Motion” circle icon.
Step 2
After selecting slow motion, adjust the focus manually. Head to the top-right corner and click on the small menu icon. Choose a frame rate and resolution from the displayed options. To start recording, touch the red “Record” button. When you capture the desired shots, press the red button again and get the video on your phone.
Part 3: Making Recorded Video in Slow Motion Using the Right Tools
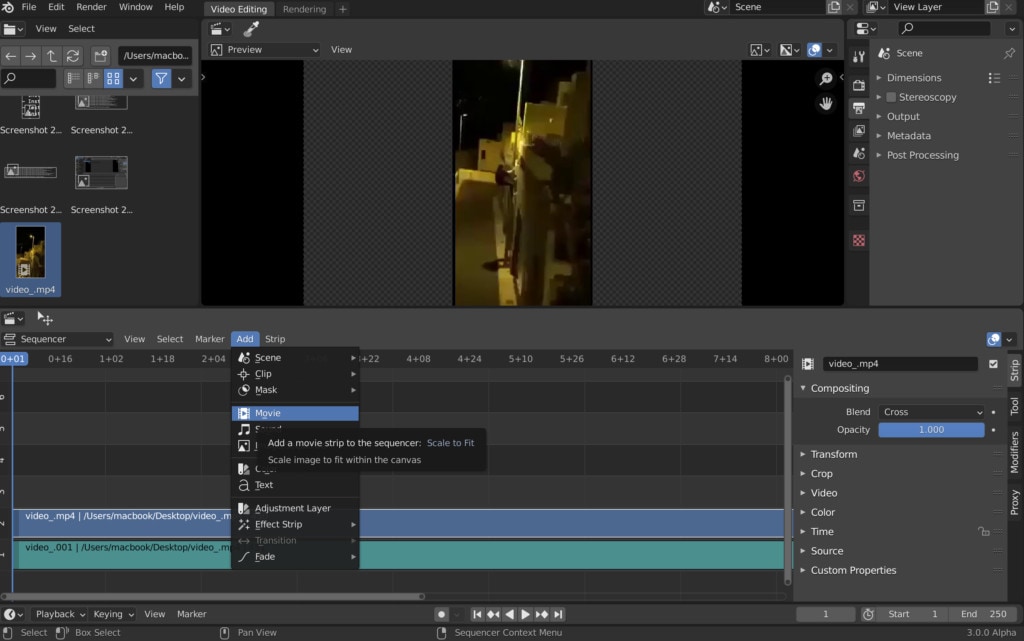
Now, you are pretty much familiar with how to record slow-motion video using smartphones. A phenomenon that arises here is, can we slow down the normally recorded video? The simple answer is yes. There are many editing apps designed for this purpose. Adobe Premiere Pro is one such editing app to slow down the pre-recorded videos.
Step 1
Access your Adobe Premiere Pro application and import a video in the timeline. Identify the frame rate of your video clip for a non-choppy playback.
Step 2
The frame rate will tell you how much you need to slow down the video. To do so, use this “(Timeline Frame Rate ÷ Footage Frame Rate) x 100” formula. Before moving, analyze the slow motion you can add in your clip as per their frame rate.
Step 3
After making calculations, right-click on your footage in the timeline. Select the “Speed/Duration” option from the list and get a small pop-up screen. There, type any number; suppose you type 40% in the box given next to the “Speed.” Finally, click on the “OK” and press the Space bar to get a preview.
Bonus Part: Making Video Editing Simpler! Use Wondershare Filmora to Slow Down Your Video
Apart from Adobe Premiere Pro, there are many other software to do the same task. From multiple options, it’s quite difficult to pick the best option. Let us ease your selection by introducing Wondershare Filmora . It’s a video editing app that is much easier to operate than any other option. With AI integration, many time-consuming editing tasks are now a matter of seconds.
Free Download For Win 7 or later(64-bit)
Free Download For macOS 10.14 or later
How to Turn a Video into Slow-Motion with Optical Flow
As discussed earlier, Filmora can slow down your videos with customization options. Users can set their video to optical flow to automatically get slow speed with high quality.
Step 1Import a Project in Timeline after Launching Filmora
Launch the latest version of Filmora on your device. Access the main interface and choose the “New Project” option to start editing. From the editing screen, look for the “Import” option and bring your media to the timeline. Now, right-click on your video in the timeline to get an extended list. Select the “Uniform Speed” option to get a panel on the right side.
Step 2Explore the Uniform Speed option to Slow Down Videos
Move to that panel, hold, and drag the “Speed” slider towards the left. Drop the slider at your desired speed for slow-motion video. Go downward and click on the downward icon of “AI Interpolation.” From the extended menu, pick the “Optical Flow” option.
Step 3Head to Export Button Once You Finish Editing
Get a preview of the slow-motion video and decide whether to continue editing or quit. If you are done with editing, move to the top right corner and click on the “Export” button. Assign parameters of your choice and again press the “Export” option to get the file on your PC.
In slow-motion video editing, you can slow down videos to the extent you want. In addition, users can try the AI features of Filmora to explore its powerful functionalities. Keep reading to know some of the key features that Filmora offers to ensure your workflow.
1. AI Copilot Editing
Have you ever imagined AI as your assistant in video editing? Filmora offers an AI copilot editor to assist you in complex editing tasks. To optimize your workflow, it provides valuable insights and guidance with navigations. It ensures that your projects maintain high quality, so it detects conflicting parameters. Afterward, it sends error messages to prevent any issues.
2. AI Text-Based Editing
Getting editable text out of videos is no more challenging with this feature of Filmora. It offers transformative leap technology that converts audio into video and text. After getting transcribed text from the video, users can edit it as per their preferences. You can save work hours because AI can add subtitles to your movies. Also, it allows you to export, translate, and rewrite the subtitles.
3. AI Image
If you are searching for an image that matches your content needs, look no forward. You can generate your own image after giving instructions to AI. This creative concept of Filmora aims to bring your imagination into visual content. In this regard, you just have to describe your image in simple words. Later, users can pick one resolution and image style from endless options.
4. AI Thumbnail Creator
As a content creator, you might know that thumbnail creates a first impression on viewers. A stunning and informative thumbnail attracts viewers to watch the video. For this purpose, Filmora automatically detects the best shots out of your video as a thumbnail. Despite that, you can choose any thumbnail from the professional thumbnail templates library.
5. AI Music Generator
Finding a musical video according to the video content is a hectic job. What if AI generates a soundtrack tailored to your needs? Filmora can generate a musical video by assigning musical choices and sound duration. In addition, you can prompt the number of musical tracks you want. The generated music will be royalty-free and further editable.
Conclusion
Overall, slow-motion videos are becoming a necessity for digital media. That’s why smartphones are offering built-in slow-motion recording features. In this guide, you have learned how to record a slow-motion video and edit it using Premiere Pro. Still, there lies a need to get a better and easier option. For this, you can rely on Filmora, which offers powerful AI features to boost productivity.
2 Actionable Ways to Extract Subtitles From MKV Videos without Quality Loss
The subtitles are a great way of watching movies in a foreign language, but in several situations, you would need to extract or remove these subtitles from your MKV videos. For instance, if you are fond of watching movies with a clear screen, getting a clean video at times can be a task, and here the need to remove the subtitle SRT files arises. Some of the other possible reasons for removing the subtitles are synchronization issues, changing the subtitle language, using the extracted subtitles in other high-quality videos, incompatible codec issues, and more.
MKV is a popularly used multimedia format that is capable of containing multiple metadata including videos, audio, chapters, subtitles, and more. So, if you too have downloaded an MKV video having subtitles online or ripped it from a DVD. This article will help you to know the 2 actionable ways for extracting the subtitles. So, keep reading to learn about srt extractor tools.

Part 1: Not All Subtitles for MKV files Can Be Extracted (Hardsub Vs. Softsub)
As we have mentioned that there are tools and programs available that can help you remove the subtitle srt files, but here one thing needs to be remembered not all types of subtitle files can be extracted from the MKV videos. The reason for this lies in the type of subtitles used in the videos. So, first, let’s learn about subtitle types and their differences.
There are two major types of forms of subtitles- hardsubs (also known as hardcoded subtitles or open subtitles) or softsubs (also known as closed subtitles or softcoded subtitles).
Hardsubs are the subtitles that are burned in the image of the videos and thus cannot be extracted, removed, hidden, or disabled when the video files are played.
Softsubs are the subtitles that are added as external files to the video container as an independent stream and thus can be turned off, removed, or extracted.
So, what we guide here is for ripping softsubs from videos in MKV videos. Now, let’s dive into the details.
Part 2. 2 Actionable ways for extracting subtitles from MKV videos
There are two different ways by which subtitles can be extracted from MKV files.
Solution 1: Extract Subtitles from MKV Videos Online Extractors
If you are looking for a quick and simple solution for subtitle removal, online tools work as an apt choice. There are several browser-based programs available that works directly from your browser, are simple to use, and need no software download or installation. Below listed are popularly used 3 tools in the category.
This is a widely used online tool that allows extracting subtitle srt files from an array of video files including MKV, MP4, FLV, MOV, and others.
Key Feature
- Free to use online tool for srt extract.
- Support to a wide range of video formats including MKV, MP$, 3GP, FLV, and others.
- Support to a wide range of video languages.
- Allows extracting subtitles from a local video or using a video link.
Pros
- Simple and free tool.
- Support for multiple video formats
- Allows getting audio transcription.
- Support to Text Detection (OCR).
- Subtitles can be downloaded in SRT and VTT format.
- Option to preview the video.
- Offers 24X7 support.
Cons
- Internet dependency.
- Need to provide a valid email id for processing the files.
- The free version allows uploading videos of only up to 25MB.
- The free version has a slow subtitle extraction speed.
Best for: This online tool is best when you wish to extract subtitles not only from your local files but also from videos on video sites like YouTube and others. Using the tool, you can also add captions to YouTube, Facebook, and other sites.

This is a multitasking online tool that allows you to convert, edit, download, as well as extract subtitles.
Key features
- Allows downloading subtitles from local as well as online sites like YouTube, Facebook, DailyMotion, and more.
- Simple and user-friendly interface.
- Free to use browser-based program.
Pros
- No need for any software download or registration.
- Simple and quick file processing.
- Add URL or local files.
- Option to share with friends.
Cons
- Works only when the internet is available.
- Limited format supported for local files.
- Limited additional features.
Best for- When you want to extract and download subtitles from YouTube, Facebook, and other online sites in a simple manner, Savesubs works as the best tool.

Relied by all, Veed is a feature-packed tool for performing an array of video-related tasks including subtitle extraction.
Key features
- Free to use online tools for a variety of video tasks.
- Allows extracting and downloading subtitles from videos in an array of formats.
- Online videos from popular sites can be added.
- Allows to work manually or through auto-generated subtitles.
- Option to edit the subtitles if needed.
Pros
- Easy to use tool without any training required.
- Support to local, and online files.
- Subtitles support multiple formats including SRT, ASS, VTT, SSA, and TXT.
- Allows editing the subtitles and also choosing their font.
Cons
- Dependency on internet connectivity.
- The free version has a watermark on the processed files.
- With too many features and options, the interface may appear confusing to many.
Best for: Veed is an apt tool for users who want subtitles in an array of formats.

Steps for extracting subtitles
Above we have listed 3 online tools and the steps for extracting subtitles using them are more or less the same. To run you through the general process and steps, below we have listed the steps using Savesubs.
Steps to extract subtitles using Savesubs
Step1On your system browser and vist Savesubs .
Step2Next, add the video URL or enter any keyword related to the video for which you wish to extract the subtitles. Alternatively, you can also add local files by clicking on the
Select Files button. Click on the Download button.
Step3Tap on the Click here to extract button for the tool to start extracting the subtitles.
Solution 2: Rip Subtitles from MKV Video with Extractor Software
Though online tools are simple to use, they are dependent on internet connectivity and have limited additional features. So, if you want to extract SRT subtitles even when there is no network and with added functions, desktop software works as the best choice.
With a wide range of these extractor software available, selecting one can be a daunting task and to help you with this, we have shortlisted a few popular and reliable programs as below.
Popular among users across the globe, this free desktop software is known as “de-factor open source for closed captions”.
Key features of the software
- Allows extracting subtitles from a wide range of media files.
- Support to multiple formats including MKV, MP4, MPEG, and more.
- Free to use software with a user-friendly interface.
- Compatible with Windows, Linux, and OSX platforms.
Pros
- Simple to use free tool for subtitle extraction.
- Multi-platform support.
- A small and portable program that is fast in functioning.
Cons
- Software needs to be downloaded and installed on your system.
- Too many settings and features on the interface make it look crammed.
Best for: If you are looking for a free and open-source tool that can work on multiple platforms, CCExtractor is an apt choice.

For Windows and Mac users, VideoProc works as a great tool to extract subtitles from videos in MKV, MP4, VOB, AVI, and other formats.
Key features of the software
- Multi-tasking desktop software supporting subtitle extraction as well.
- Allows extracting subtitles from videos in an array of formats including MKV, AVI, MP4, and more.
- Multiple video editing options are supported like cutting, cropping, rotating, merging, and more.
- Also allows searching and adding subtitles files.
Pros
- Subtitles can be extracted from multiple video file formats. So, you can extract SRT from MP4 as well as other video formats.
- Subtitles can be downloaded and added in srt, ss, and ssa format in one go.
- Support for downloading subtitles for movies and TV shows in multiple languages.
- Multiple video editing options are supported.
Cons
- Lack tutorials which might take time for first-time users to understand the tool.
- A lot of users complain of lagging issues.
- Paid software.
Best for: If you are looking for a tool that not only lets you extract the subtitles but also performs other video editing functions, VideoProc will work great.

This is a free and open-source tool known for editing text-based subtitles. The most popular subtitle formats can be used. Preview of the subtitles in real-time or in design time, spell checking, translation mode and styles editing are some of the main features.
Key Features of the software
- Free and open-source tool under GNU public license.
- Allows editing text-based subtitles by converting, correcting, transforming, and converting.
- New subtitles can also be added using the software.
- Support to preview the subtitles in the design-time or real-time.
- Support additional features like style editing, spell-check, translation mode, and more.
Pros
- Free and open-source tool.
- Allows adding new subtitles as well as editing the existing ones.
- Allows using the popular subtitle formats.
- Feature to preview the subtitles in design-time or real-time.
Cons
- Software download is needed.
- Limited format support.
Best for: The tool is apt for users who need a free tool that can work on Windows as well as Mac systems.

How to extract subtitles using extractor software?
The main key steps for extracting the subtitles using desktop software may differ from tool to tool. Below listed are the steps using CCExtractor for your reference.
Steps to extract subtitles using CCExtractor
Step1Download and install the software on your system.
Step2Next, run CCExtractorGUI.exe and drag the video file to the program under the Input file tab.
Step3Next at the Output (1) tab choose output type as .srt and at the Output (2) tab select UTF-8 Encoding.
Step4Tap on the Execution tab bar and then click on the Start button. The program will start processing and the subtitle SRT file will be generated and will appear with the source video in the same folder.
Pro Tips: How do I Edit embedded SRT subtitles in MKV?
Above we have talked about the ways by which subtitles can be extracted from MKV files. But if you need to edit the embedded SRT subtitles in your MKV videos, professional software would be needed and here we recommend Wondershare Filmora as the best choice.
Wondershare Filmora is a versatile Windows and Mac-based video editing tool that supports a wide range of editing functions like visual effects, transitions, PIP, green screen, split screen, AI portrait, auto reframe, and screen recorder, masking, and many more.
The software supports multiple subtitles-related functions like editing embedded SRT files, speech-to-text, and text to speech.
Free Download For Win 7 or later(64-bit)
Free Download For macOS 10.14 or later
Steps to edit embedded SRT subtitles in MKV files using Wondershare Filmora
Step1Download, install, and launch the software on your system. In the Media Resources area import the SRT subtitles files.
Step2Next, right-click on the timeline and then choose Advanced Edit or double-click on the selected SRT file to clip.

Step3In the next step, multiple subtitle editing tasks can be done like – editing time code, changing the subtitles, add/remove/merge subtitle strips, and changing subtitle styles.

Step4Finally, choose the SRT file at the timeline and then right-click and choose Export Subtitle File.

Above are the brief steps for editing the subtitles. You can check the detailed steps at this link here.
Hot FAQs on Extracting SRT from MKV
Below listed are some commonly asked questions and their answers.
1. Except for SRT, what types of subtitle formats does MKV support?
The subtitle formats supported by the MKV file include SRT, PGS/SUP, VobSub, and SSA.
2. Can VLC extract subtitles?
Though VLC is a media player, it supports an array of additional features as well including subtitle extraction. Using the software, you can also add subtitles to the video.
3. How can I extract hardcoded subtitles from a video?
The only solution for extracting hardcoded subtitles from a video is by using the Optical Character Recognition (OTR) technology.
Final Words
We hope, we have answered all your queries and doubts related to subtitle extraction in the article above. The choice of choosing an online tool or a desktop software depends on your requirements and the subtitle file. For editing the subtitles, you can rely on Wondershare Filmora which is an excellent all-in-one video editing tool.
Free Download For Win 7 or later(64-bit)
Free Download For macOS 10.14 or later
Best for: This online tool is best when you wish to extract subtitles not only from your local files but also from videos on video sites like YouTube and others. Using the tool, you can also add captions to YouTube, Facebook, and other sites.
This is a multitasking online tool that allows you to convert, edit, download, as well as extract subtitles.
Key features
- Allows downloading subtitles from local as well as online sites like YouTube, Facebook, DailyMotion, and more.
- Simple and user-friendly interface.
- Free to use browser-based program.
Pros
- No need for any software download or registration.
- Simple and quick file processing.
- Add URL or local files.
- Option to share with friends.
Cons
- Works only when the internet is available.
- Limited format supported for local files.
- Limited additional features.
Best for- When you want to extract and download subtitles from YouTube, Facebook, and other online sites in a simple manner, Savesubs works as the best tool.
Relied by all, Veed is a feature-packed tool for performing an array of video-related tasks including subtitle extraction.
Key features
- Free to use online tools for a variety of video tasks.
- Allows extracting and downloading subtitles from videos in an array of formats.
- Online videos from popular sites can be added.
- Allows to work manually or through auto-generated subtitles.
- Option to edit the subtitles if needed.
Pros
- Easy to use tool without any training required.
- Support to local, and online files.
- Subtitles support multiple formats including SRT, ASS, VTT, SSA, and TXT.
- Allows editing the subtitles and also choosing their font.
Cons
- Dependency on internet connectivity.
- The free version has a watermark on the processed files.
- With too many features and options, the interface may appear confusing to many.
Best for: Veed is an apt tool for users who want subtitles in an array of formats.
Steps for extracting subtitles
Above we have listed 3 online tools and the steps for extracting subtitles using them are more or less the same. To run you through the general process and steps, below we have listed the steps using Savesubs.
Steps to extract subtitles using Savesubs
Step1On your system browser and vist Savesubs .
Step2Next, add the video URL or enter any keyword related to the video for which you wish to extract the subtitles. Alternatively, you can also add local files by clicking on the
Select Files button. Click on the Download button.
Step3Tap on the Click here to extract button for the tool to start extracting the subtitles.
Solution 2: Rip Subtitles from MKV Video with Extractor Software
Though online tools are simple to use, they are dependent on internet connectivity and have limited additional features. So, if you want to extract SRT subtitles even when there is no network and with added functions, desktop software works as the best choice.
With a wide range of these extractor software available, selecting one can be a daunting task and to help you with this, we have shortlisted a few popular and reliable programs as below.
Popular among users across the globe, this free desktop software is known as “de-factor open source for closed captions”.
Key features of the software
- Allows extracting subtitles from a wide range of media files.
- Support to multiple formats including MKV, MP4, MPEG, and more.
- Free to use software with a user-friendly interface.
- Compatible with Windows, Linux, and OSX platforms.
Pros
- Simple to use free tool for subtitle extraction.
- Multi-platform support.
- A small and portable program that is fast in functioning.
Cons
- Software needs to be downloaded and installed on your system.
- Too many settings and features on the interface make it look crammed.
Best for: If you are looking for a free and open-source tool that can work on multiple platforms, CCExtractor is an apt choice.
For Windows and Mac users, VideoProc works as a great tool to extract subtitles from videos in MKV, MP4, VOB, AVI, and other formats.
Key features of the software
- Multi-tasking desktop software supporting subtitle extraction as well.
- Allows extracting subtitles from videos in an array of formats including MKV, AVI, MP4, and more.
- Multiple video editing options are supported like cutting, cropping, rotating, merging, and more.
- Also allows searching and adding subtitles files.
Pros
- Subtitles can be extracted from multiple video file formats. So, you can extract SRT from MP4 as well as other video formats.
- Subtitles can be downloaded and added in srt, ss, and ssa format in one go.
- Support for downloading subtitles for movies and TV shows in multiple languages.
- Multiple video editing options are supported.
Cons
- Lack tutorials which might take time for first-time users to understand the tool.
- A lot of users complain of lagging issues.
- Paid software.
Best for: If you are looking for a tool that not only lets you extract the subtitles but also performs other video editing functions, VideoProc will work great.
This is a free and open-source tool known for editing text-based subtitles. The most popular subtitle formats can be used. Preview of the subtitles in real-time or in design time, spell checking, translation mode and styles editing are some of the main features.
Key Features of the software
- Free and open-source tool under GNU public license.
- Allows editing text-based subtitles by converting, correcting, transforming, and converting.
- New subtitles can also be added using the software.
- Support to preview the subtitles in the design-time or real-time.
- Support additional features like style editing, spell-check, translation mode, and more.
Pros
- Free and open-source tool.
- Allows adding new subtitles as well as editing the existing ones.
- Allows using the popular subtitle formats.
- Feature to preview the subtitles in design-time or real-time.
Cons
- Software download is needed.
- Limited format support.
Best for: The tool is apt for users who need a free tool that can work on Windows as well as Mac systems.
How to extract subtitles using extractor software?
The main key steps for extracting the subtitles using desktop software may differ from tool to tool. Below listed are the steps using CCExtractor for your reference.
Steps to extract subtitles using CCExtractor
Step1Download and install the software on your system.
Step2Next, run CCExtractorGUI.exe and drag the video file to the program under the Input file tab.
Step3Next at the Output (1) tab choose output type as .srt and at the Output (2) tab select UTF-8 Encoding.
Step4Tap on the Execution tab bar and then click on the Start button. The program will start processing and the subtitle SRT file will be generated and will appear with the source video in the same folder.
Pro Tips: How do I Edit embedded SRT subtitles in MKV?
Above we have talked about the ways by which subtitles can be extracted from MKV files. But if you need to edit the embedded SRT subtitles in your MKV videos, professional software would be needed and here we recommend Wondershare Filmora as the best choice.
Wondershare Filmora is a versatile Windows and Mac-based video editing tool that supports a wide range of editing functions like visual effects, transitions, PIP, green screen, split screen, AI portrait, auto reframe, and screen recorder, masking, and many more.
The software supports multiple subtitles-related functions like editing embedded SRT files, speech-to-text, and text to speech.
Free Download For Win 7 or later(64-bit)
Free Download For macOS 10.14 or later
Steps to edit embedded SRT subtitles in MKV files using Wondershare Filmora
Step1Download, install, and launch the software on your system. In the Media Resources area import the SRT subtitles files.
Step2Next, right-click on the timeline and then choose Advanced Edit or double-click on the selected SRT file to clip.
Step3In the next step, multiple subtitle editing tasks can be done like – editing time code, changing the subtitles, add/remove/merge subtitle strips, and changing subtitle styles.
Step4Finally, choose the SRT file at the timeline and then right-click and choose Export Subtitle File.
Above are the brief steps for editing the subtitles. You can check the detailed steps at this link here.
Hot FAQs on Extracting SRT from MKV
Below listed are some commonly asked questions and their answers.
1. Except for SRT, what types of subtitle formats does MKV support?
The subtitle formats supported by the MKV file include SRT, PGS/SUP, VobSub, and SSA.
2. Can VLC extract subtitles?
Though VLC is a media player, it supports an array of additional features as well including subtitle extraction. Using the software, you can also add subtitles to the video.
3. How can I extract hardcoded subtitles from a video?
The only solution for extracting hardcoded subtitles from a video is by using the Optical Character Recognition (OTR) technology.
Final Words
We hope, we have answered all your queries and doubts related to subtitle extraction in the article above. The choice of choosing an online tool or a desktop software depends on your requirements and the subtitle file. For editing the subtitles, you can rely on Wondershare Filmora which is an excellent all-in-one video editing tool.
Free Download For Win 7 or later(64-bit)
Free Download For macOS 10.14 or later
If You Wish to Edit FLV Videos without Any Problems, You Should Utilize a Multipurpose Video Editor that Supports the FLV File Format
FLV is a common container format for transferring digital video and audio information over the Internet. A.flv file is a flash video that may be seen on your computer with Adobe Flash Player, Adobe Air, or some third-party Adobe Flash plugins.
FLV has become the standard video format for web-based streaming video service providers such as Hulu and VEVO due to its superior functionality and tiny size. It’s also the default format for Quicktime on Mac systems.
If you wish to edit FLV videos without any problems, you should utilize a multipurpose video editor that supports the FLV file format.
Best FLV Editor to Edit FlV Video on Windows and Mac - Filmroa Video Editor
Filmora Video Editor is a professional FLV video editing application. This software allows you to edit 4K video files, share completed films directly on social media platforms, and add subtitles and audio files.
You may mix multiple films and enhance your footage with numerous transitions and other effects using this FLV video editing software. Furthermore, the free Filmora application is ideal for adding audio files or video clips from the wide library and uploading your soundtrack.
For Win 7 or later (64-bit)
For macOS 10.14 or later
Therefore, you can use the following steps to edit FLV video on Windows and Mac:
Step 1: Import file:

Step 2: Edit the FLV file:
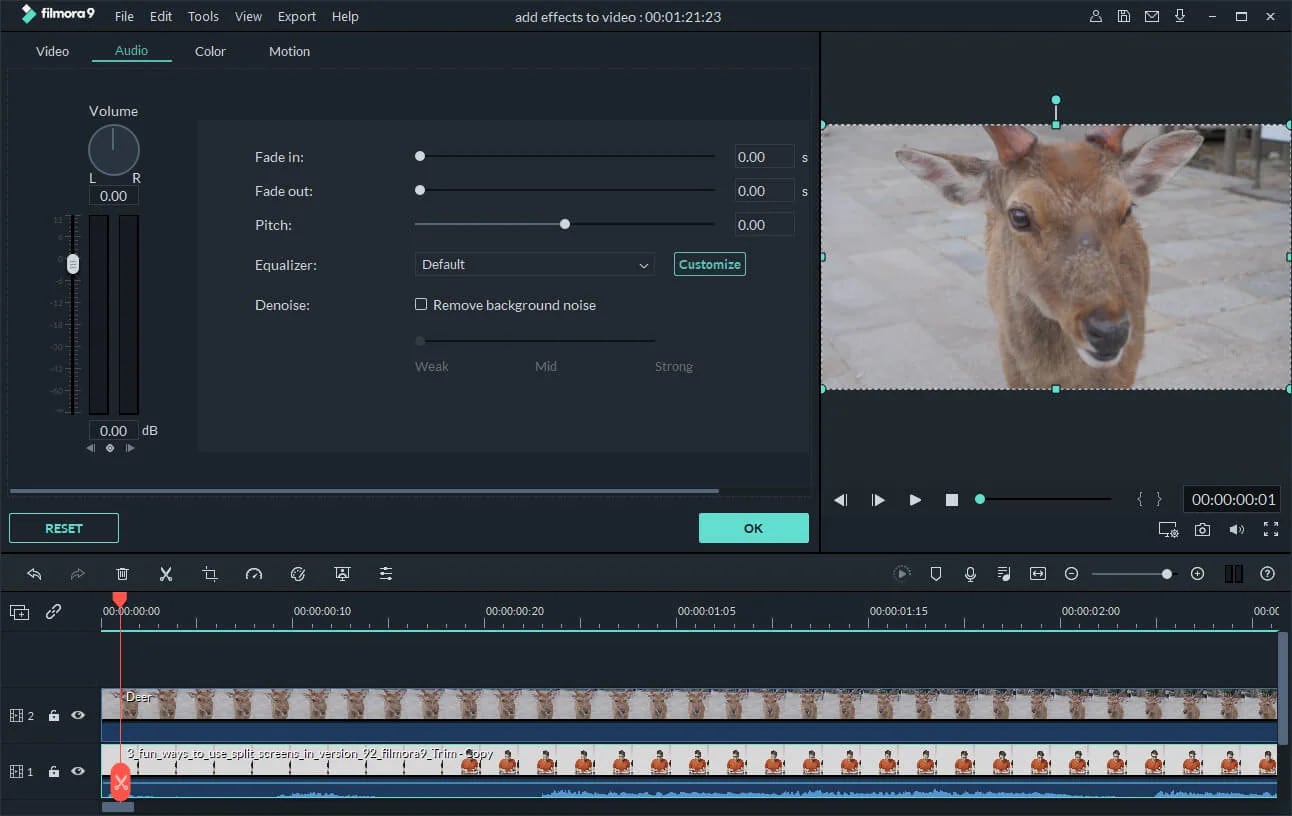
Acquire the perfect tool in your palm for anything you want to do, such as clipping, cropping, rotating, and more.
Furthermore, all editing capabilities in the toolbar allow drag-and-drop, making it even easier to touch up your films quickly. Consider the following scenario:
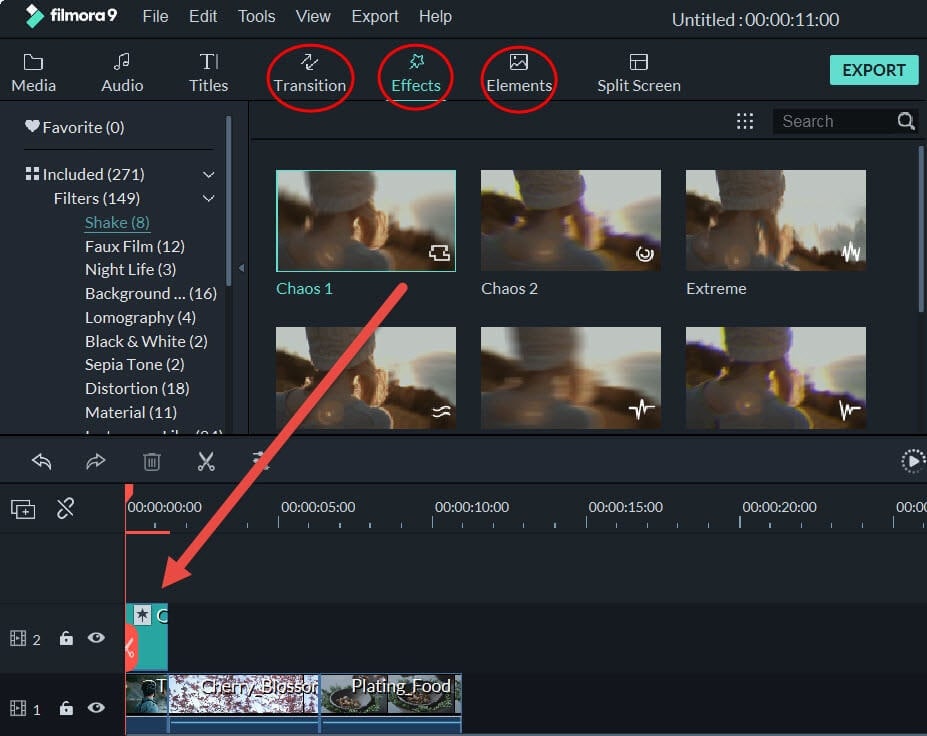
- Drag and drop a transition into the video/photo, or right-click it and select “Apply to All.”
- Please drag & drop a title template to the position where you want it to appear, then adjust it.
- To use the effects, select one from the 50+ available video effects, select it, and apply it to your photos/videos instantaneously.
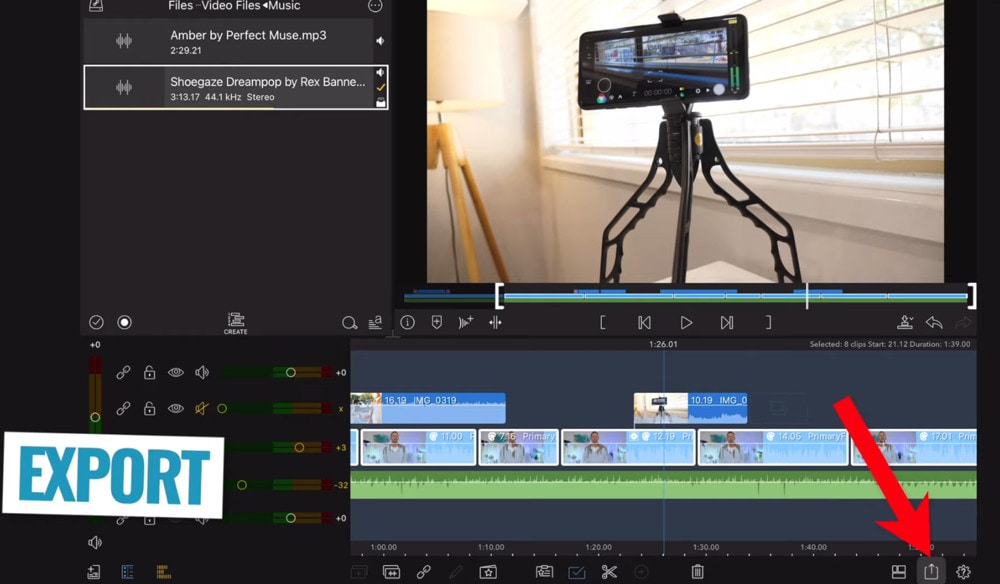
Step 3: Save or Export the file:

When you’re done, export your modified MP4 files to Windows/Mac and quickly share them on YouTube, with the option of sending a message to Facebook and Twitter. When you click Create in the program window’s middle right corner, you’ll be taken to the Output window below.
Alternative Way to Edit FlV Video on Windows
1. VSDC
VSDC is a free video editor along with a lot of advanced features. Cut, combine, trim, crop, and other editing capabilities are available to help you polish your FLV films.
Although it may not look logical, learning the editing capabilities hidden within modular boxes is simple. One noteworthy aspect of VSDC is its ability to produce good visual effects using many trendy video effects, transitions, and filters.
Furthermore, strong chroma keys, color correction, object modification, and other editing tools can be utilized to edit FLV videos. It not only creates excellent FLV videos, but it also supports a wide range of media conversion, allowing you to convert FLV files to various formats and export them without a watermark.
Therefore, follow the below mentioned steps to edit FLV video using VSDC:
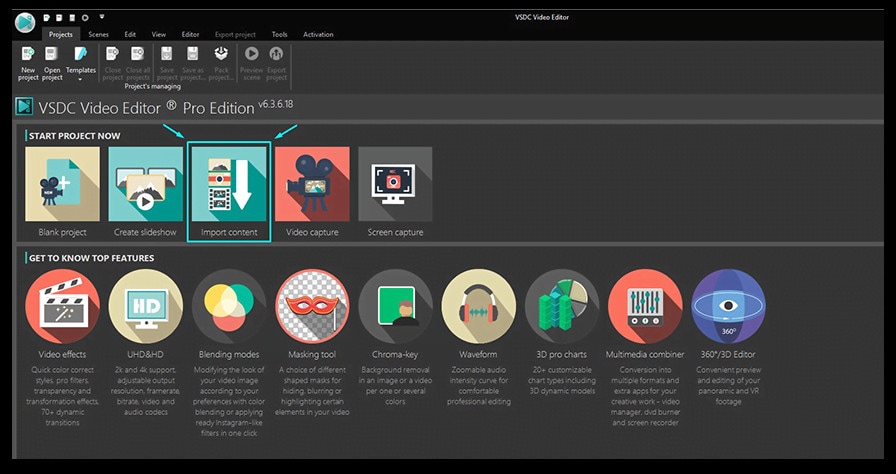
Step 1: Install the software on the Windows. Open the application and import the video.
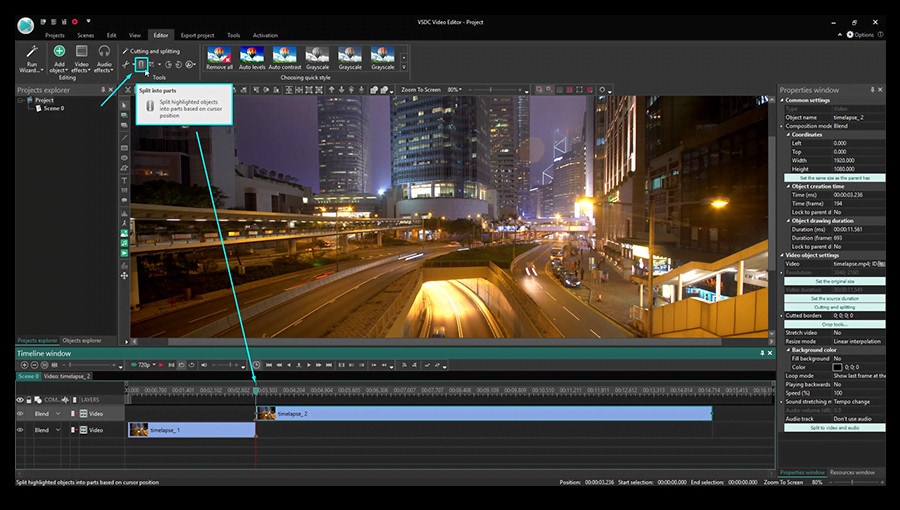
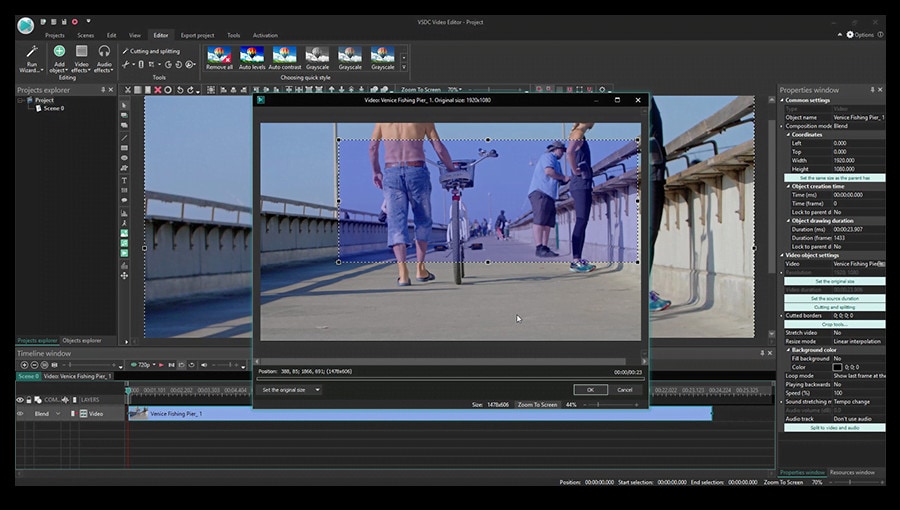
Step 2: Use cutting and splitting tools to edit the video.
The first icon is a picture of a pair of scissors, which is a cutting tool. It’s very useful when you need to cut the beginning or end of a film. Place the cursor exactly where you want to cut, then select “Trim start” or “Trim finish” from the dropdown cutting menu (the small triangle next to the scissors icon).
Cropping is also simple. If you have too much additional space around the scene object recorded, just choose the file you want to trim and select the cropping icon from the “Cutting and Splitting” option. A new window will appear, allowing you to select the region of the scene that should stay.
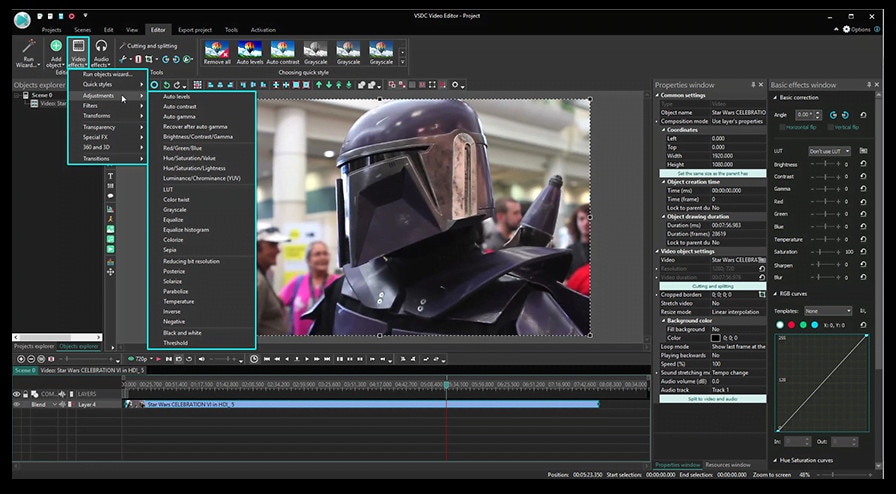
Step 3: Apply effects and transitions.
To use one, first select the video file you wish to edit, then go to the Video effects tab and select the effect you want to use. On the timeline, a new tab will appear, containing all of the effects done to the selected object. You can alter the effect’s duration and position in time by dragging it with the mouse there. The properties pane on the right-hand side can be used to change other parameters.
Transitions follow the same rule. Place your cursor where you want the transition to begin, then choose a transition from the Video effects dropdown menu and manually adjust the duration.
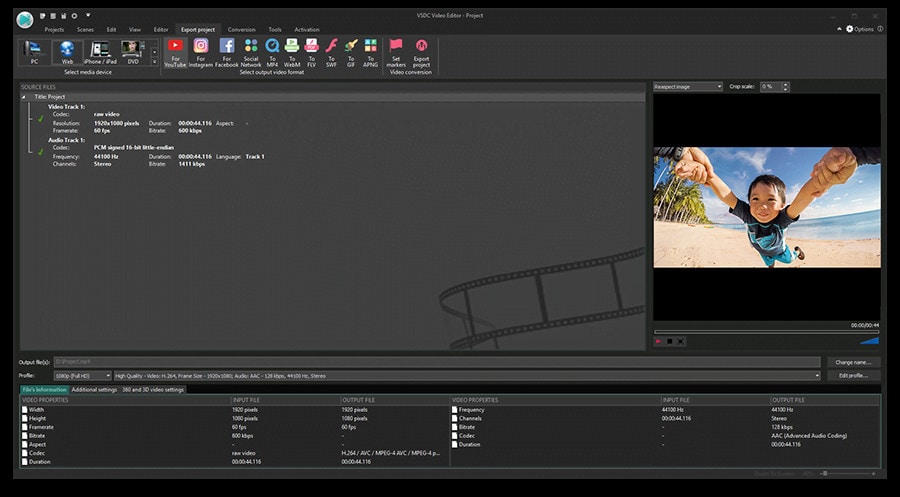
Step 4: Save changes and export video.
Make sure your movie appears exactly how you want it to before exporting it. If the video appears choppy, use the red preview button and lower the preview quality. When the PC’s resources are insufficient to process the video in real time, lagging can occur. Keep in mind that it has no bearing on the outcome. When you’re finished, navigate to the Export project tab and select an export format.
2. Adobe Premiere Pro:
Professional video editors use Premiere Pro to make everything from YouTube videos to Hollywood films like Mank, a 2021 Oscar candidate. It’s also widely utilized in the workflows of designers, animators, and VFX artists, and we can see why after lengthy testing.
We found the software’s UI to be simple to use, and it increased our productivity by separating things into various workspaces, such as editing, effects, and audio. When we tested it on both Mac and PC, we discovered that each workspace helps handle a specific activity while minimizing distraction.
Edit the FLV video with Adobe Premiere Pro using the following steps:
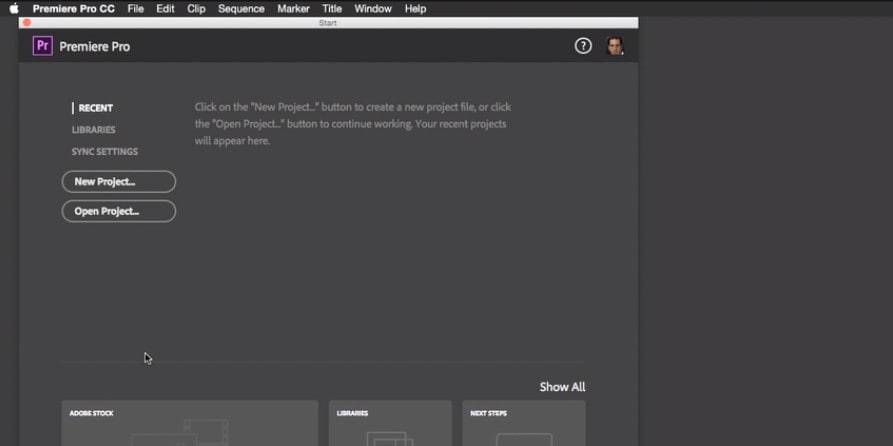
Step 1: Import the video and create initial sequence.
Step 2: In the Timeline, trim and rearrange clips, add audio, and transitions.
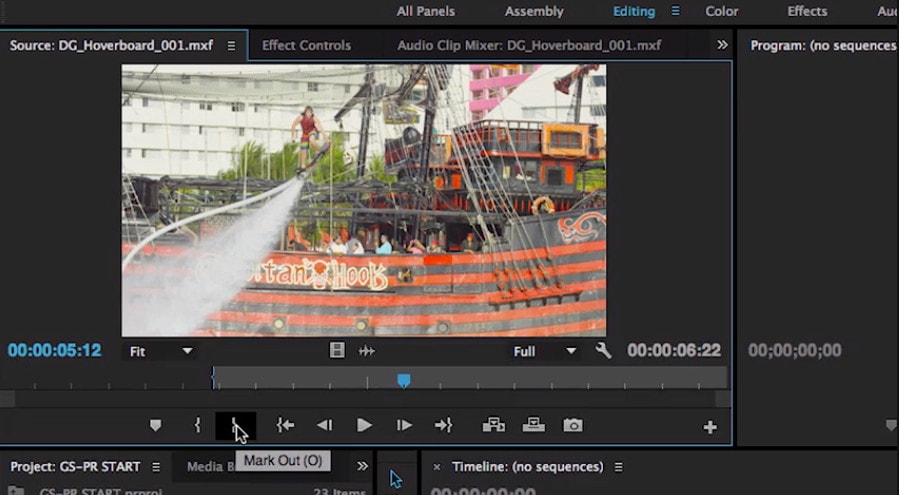
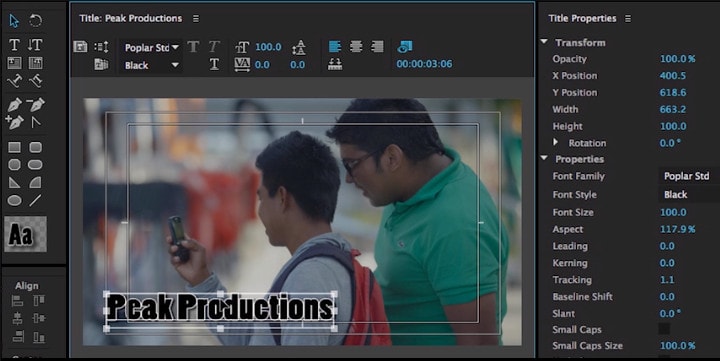
Step 3: Add title and graphics.
In Premiere Pro, you may make onscreen titles, as well as stylize and animate your images.
Step 4: Export your video.

Alternative Way to Edit FlV Video on Mac
1. Blender:
Under the GNU General Public License, Blender is a free, open-source 3D content production program that runs on all major operating systems. Blender is one of the greatest video editors for both Windows and Mac, with advanced features such as modifier-based modeling tools, powerful character animation capabilities, a node-based material, etc.
Because it is developed for professionals, it is tough to use as a beginner. However, it is unrestricted in its use and distribution. In addition, color options are changeable and versatile in the UI.
In contrast, this free video editor is perfect for semi-pros or those who want to enhance their video editing skills. However, you’ll need a lot of time and effort to learn it.
Step 1: Open the application.
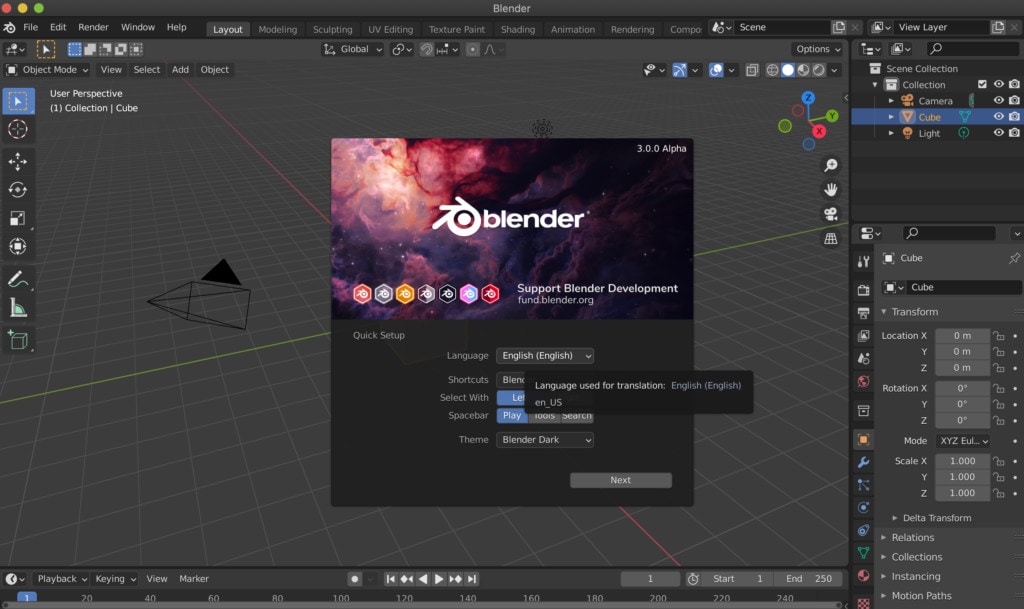
Step 2: Then, go into File->New->Video Editing to open the video editor.
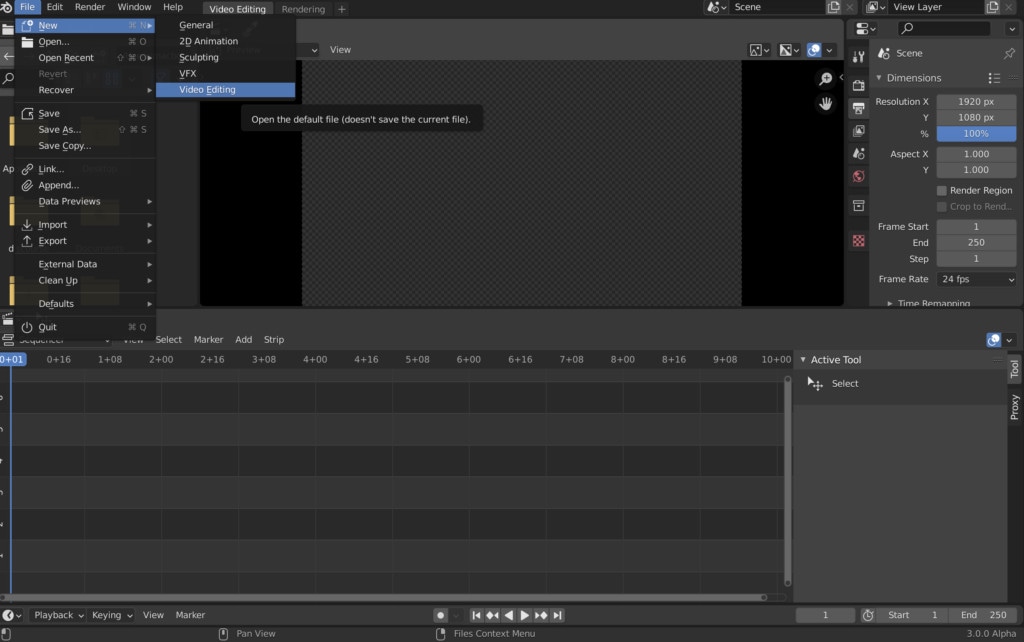
Step 3: Import the video and start editing using the editing tools.
Step 4: Save and export the video.

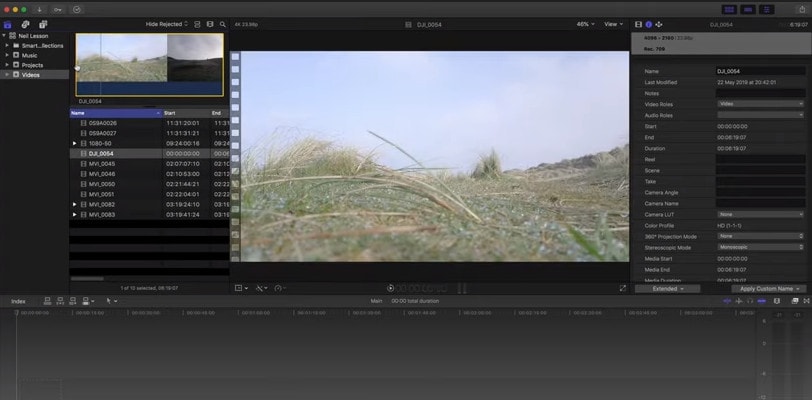
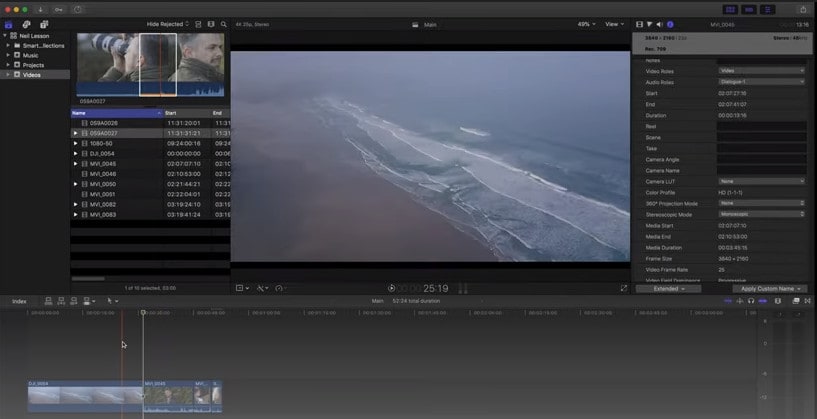
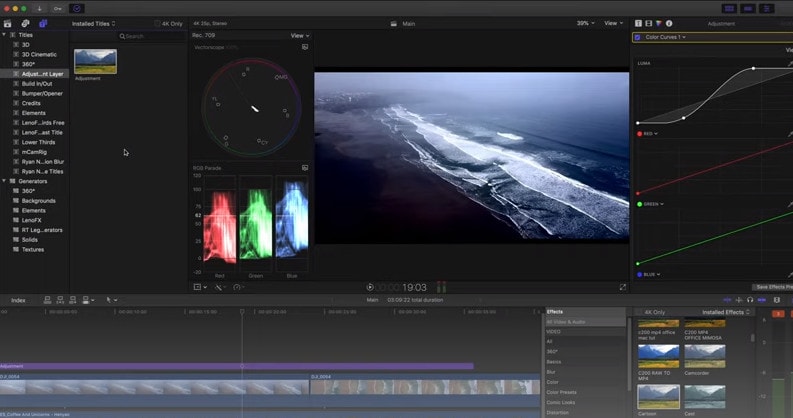
2. Final Cut Pro:
When it comes to video editing software, Apple’s Final Cut Pro is one of the industry standards. As a result, it’s widely utilized in the television and film industries - at least among Mac users. However, one of the truly convincing reasons to choose it over Premiere Pro is because it is subscription-free: you only pay once.
The software’s Magnetic Timeline, grouping tools, a vast selection of effects, solid organizational capabilities, and simple ways to add and edit audio make it a favorite among professional video editors. 360° video, HDR, and powerful color correcting tools are among the other capabilities. It’s a strong software with a lot of features.
Follow the steps to edit FLV video using Final Cut Pro:
Step 1: Create Project.
To make a movie in Final Cut Pro, you must first establish a project, which keeps track of your editing selections and the media you utilize.
Step 2: Select and add clips to the timeline:
The second stage in making a movie with Final Cut Pro is to add and arrange clips in your project. In the timeline, you can move and reorder clips.
Step 3: Cut and trim video:
Final Cut Pro has a number of features for altering the start and stop points of clips in the timeline, as well as regulating the pacing of shots from one to the next.
Step 4: Edit the video by adding effects and transitions:
Final Cut Pro includes a number of advanced editing features that make it simple to create a professional film. Visual enhancements and colour correction are among the finishing touches.

Step 5: Save and export video:
2 Ways to Edit FlV Video on Android:
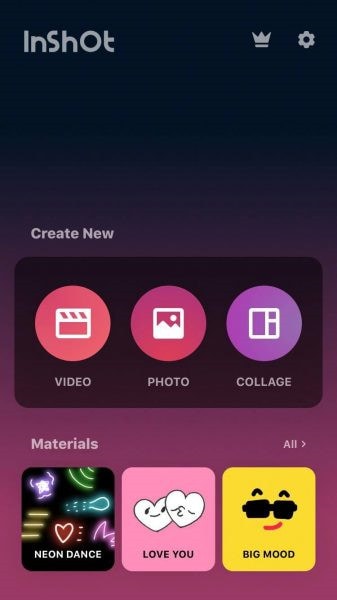
1. Inshot:
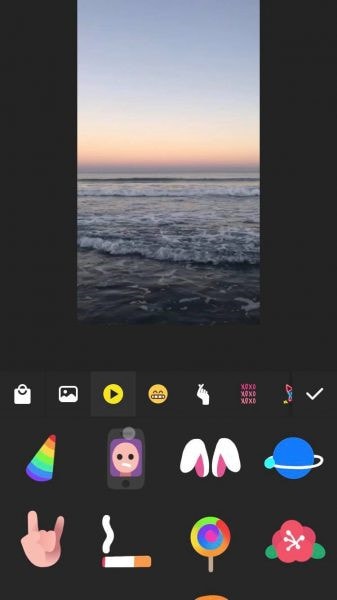
For Android users, Inshot is a fantastic image and video editor. This Android video editor allows you to add popular stickers and emoticons to your films, making them more fashionable and unique.
The program supports HD video output, allowing you more control over your footage. Moreover, the additional sound and video can be synchronized with the available video chronology.
You can quickly blend more than two movies into one with rich effects and sound with this Android editor app. In addition, you can generate a watermark using unique text provided in the app, and subtitles support allow you to produce one with a variety of fonts.
Following are the steps that you can follow to edit FLV video using Inshot:
Step 1: Open the app and import the video.
Tap “Video” to open your phone’s gallery folder and begin editing a video in the InShot app. Select a video to work with. Adjust the canvass after your video has been loaded into the InShot App. For your other social media accounts, there are aspect ratios and sizes that work well with the video. It also has the option of being in portrait or landscape mode.
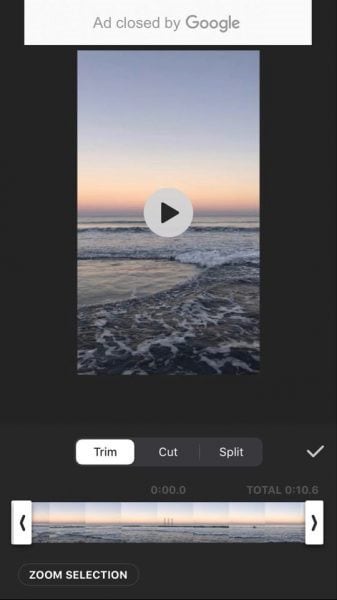
Step 2: Trim and split videos.
Step 3: Merge videos (optional):
By combining clips, you can combine them into a single film or project. Simply choose the videos you want to import from the drop-down menu. By tapping the “+” button on the lower left of the screen, you can insert and merge more videos. Your project will then be updated using the selected video.
Step 4: Apply filters, add music, text and stickers.
Step 5: Once you are done with the editing process, save the file.
2. Videoshow:
VideoShow has a lot of video editing options. It is a simple and practical video editing program and movie scene maker for art directors and beginners. Using this video cutter, you may reverse, blur, duplicate, edit, merge and split collage clips or films.
You can also use VideoShow to adjust the audio or add subtitles to any video. It also allows you to use different filters on any video on your device. Over 50 intricate themes are included in the program, allowing you to create gorgeous music videos, slide shows, and vlogs in no time.
The annual subscription package is for $135.19, or you can also make a one-time purchase for $225.78.
However, to edit the video, you can use the following steps:
Step 1: Download and install the videoshow application and open it. Upload the video that you want to edit.
Step 2: Edit the video by applying filters or cutting and trimming the part of the video that you want to remove.
Step 3: Save changes and export the video to your preferred location.
2 Ways to Edit FlV Video on iPhone:
1. LumaFusion:
No other software program on the iPhone comes close to the feature set that LumaFusion offers for video editing. It is the only premium app on this list, and it is well worth every penny.
But, of course, YouTubers aren’t the only ones who use the program; mobile journalists and professional video producers who don’t want to lug along their bulky camera equipment and editing apparatus also use it.
LumaFusion deals with up to six video and audio tracks for photographs, movies, audio, titles, and graphics, and six audio tracks for narration, music, and sound effects. You also receive a magnetic timeline; importing clips is a breeze once they’ve been imported.
There are many transitions and effects to choose from, all of which can be layered. Finally, it includes much royalty-free music, sound effects, and other assets. So if you need a professional video editing tool for your iPhone, LumaFusion ($29.99) is the way to go.
Follow these steps to edit FLV video using LumaFusion:
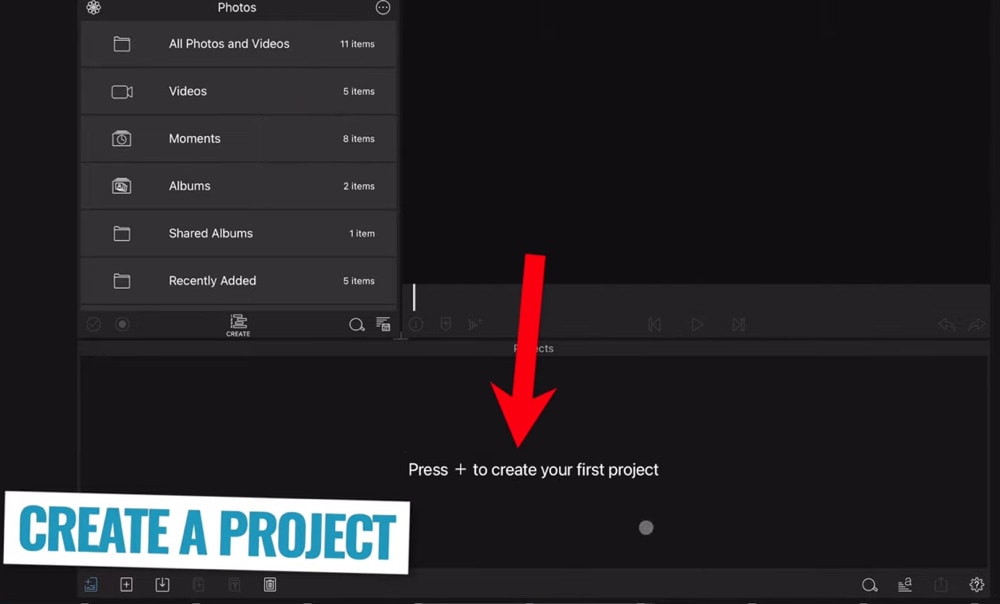
Step 1: To create your first project, press + at the bottom of the screen. You can create a new project by tapping that area or by tapping the Plus button.
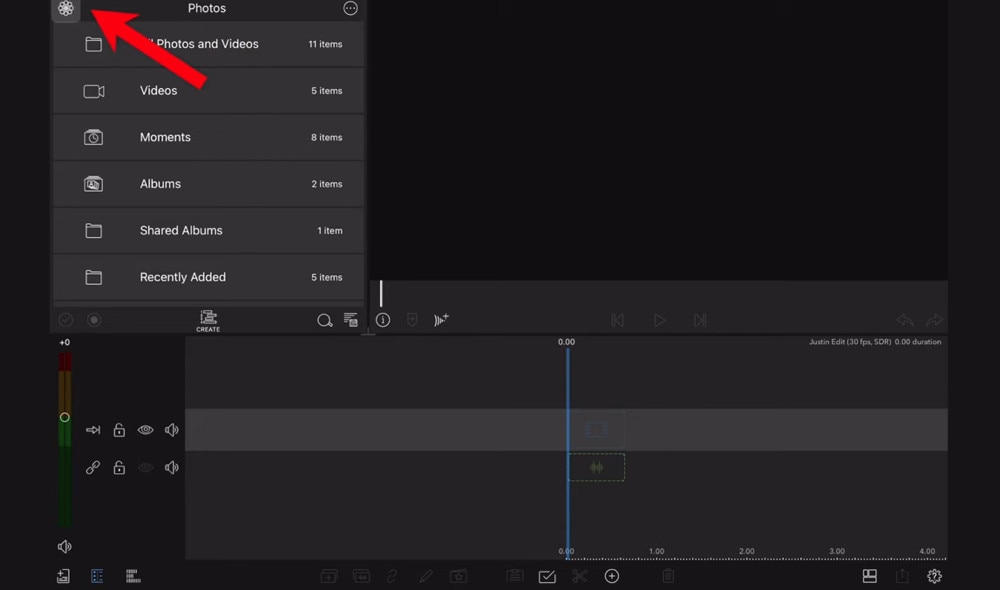
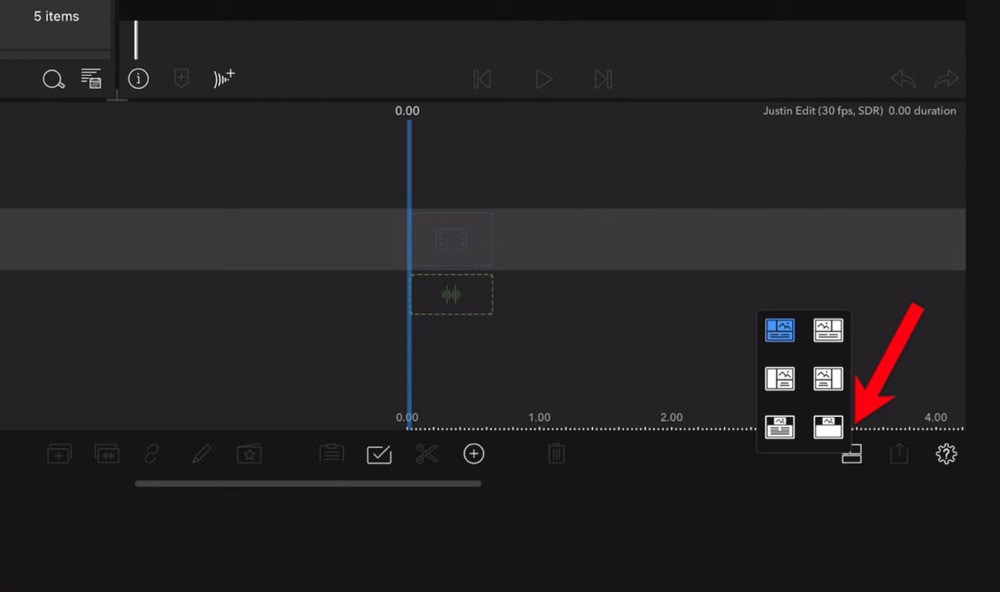
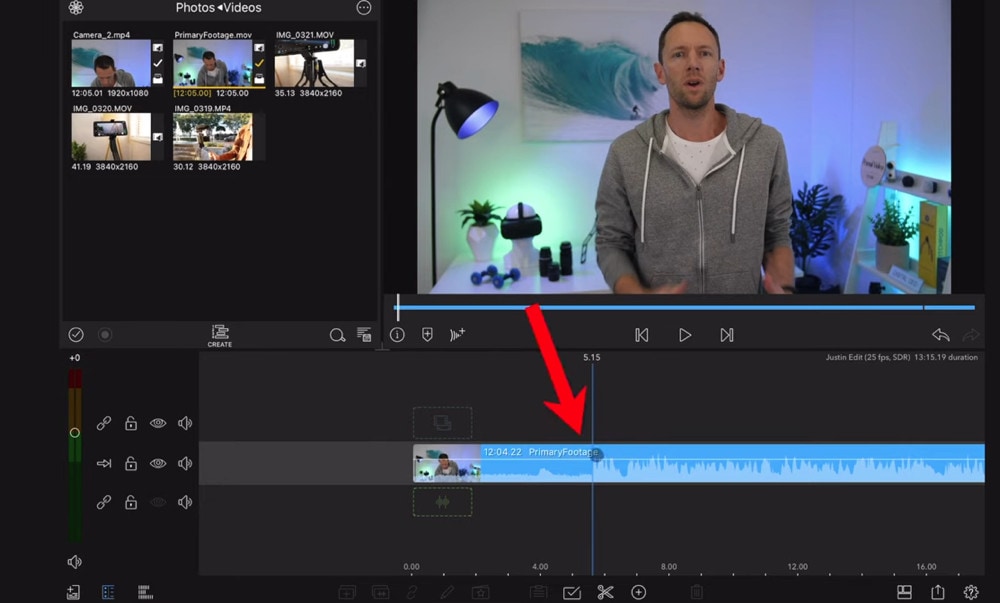
Step 2: Import video:
The Import section is located in the top left corner of the screen. This defaults to the Photos tab when you initially launch a new project. All of the photographs and videos can be seen here.
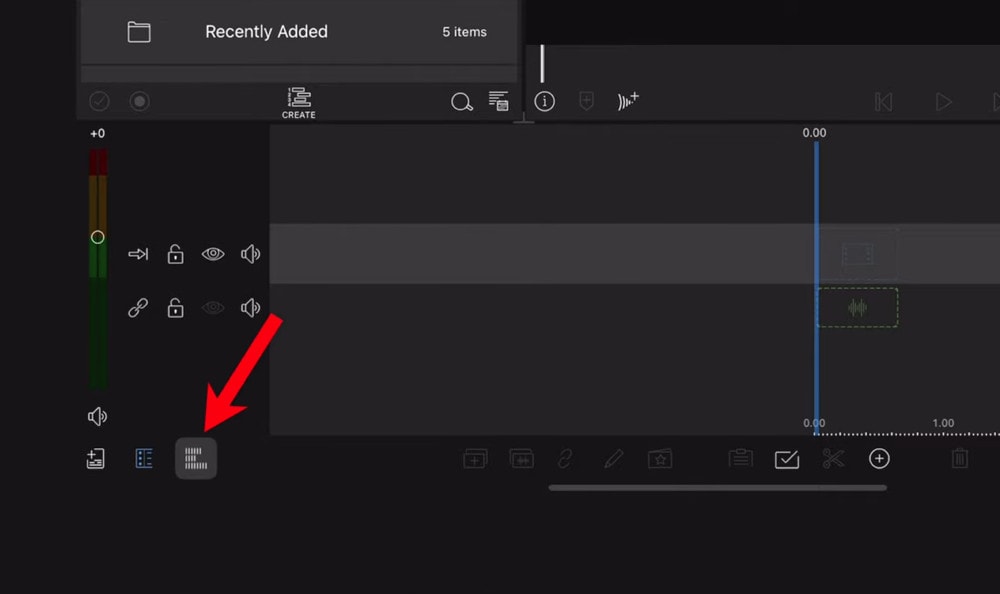
Step 3: Check layout and adjust volume levels
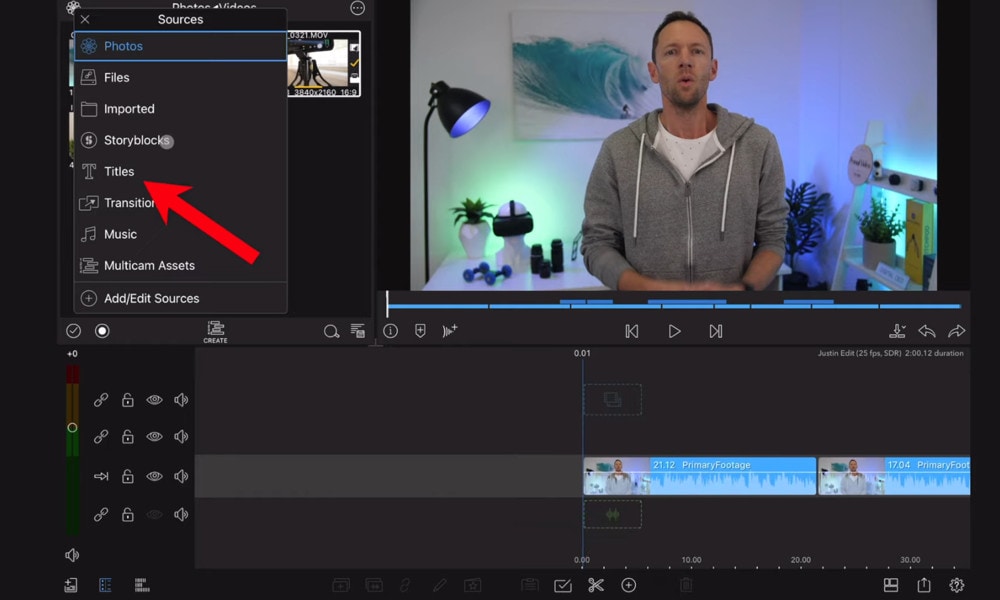
Step 4: Edit the video and add titles.
Step 5: Export the video.
2. Filmora Go:
Without a doubt, Filmora is one of the greatest free video editors for iPhone that does not contain any watermarks. In addition, it’s compatible with both iPhones and Android devices and has a simple user interface.
Filmora is the greatest iPhone video editor for beginners, with themed filters and effects that add flair to your videos without any work.
Filmora has many unique features, including themes for your videos and ‘Materials,’ which are visual effects created by the program. Unfortunately, materials are only available with Filmora Pro, so keep that in mind.
Aside from that, you’ll find all of the typical features here. You can also add titles to videos, utilize stickers and effects, and add music to the background of your movie. You may also add another clip in picture-in-picture mode, which is beneficial.
Below are the following steps to edit FLV video:
Step 1: Open the application and select ‘Create new video’. Now, import the video by choosing the video icon.
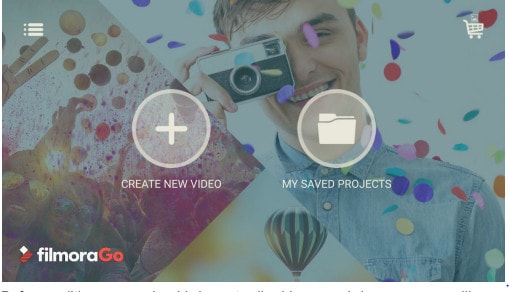
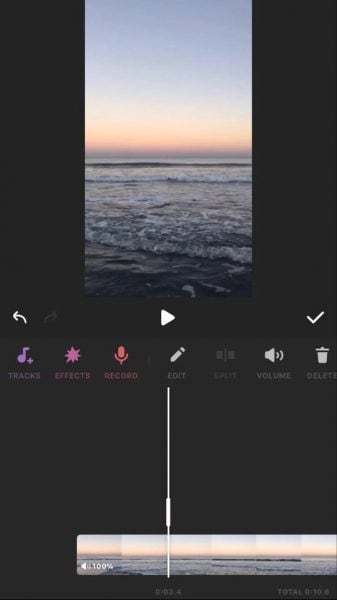
Step 2: Edit the video. Within the edit tool, you can trim and split the video. You can also improve the video quality by adding titles, transitions, and music, and voiceovers.


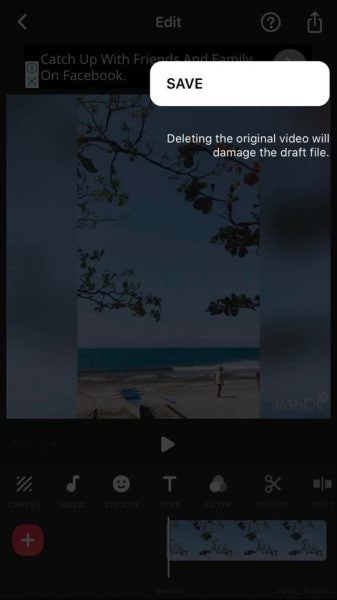
Step 3: After editing the video, select ‘SAVE’ and export the video or download it.
2 Ways to Edit FlV Video Online:
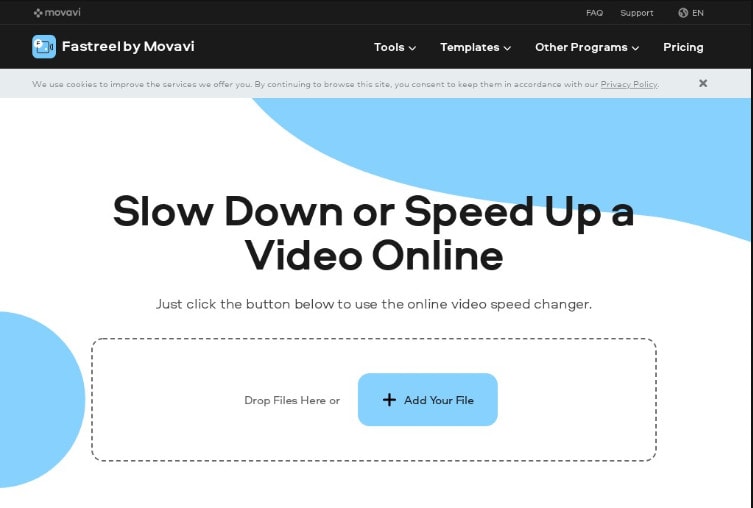
1. Fastreel:
If you’re seeking the finest free online video editor, Fastreel is a terrific tool to start with. This online video editing software provides a wide range of editing options. It can merge, edit, crop, and compress videos to make sharing easier.
It also includes many pre-made templates that you can change to create titles and transitions and other editing features like reverse, looping, and rotating. It’s also quite simple to use, and you can have polished videos in minutes.
There are also numerous pricing options to suit different customers, ranging from a completely free plan with watermarks to paid subscriptions with no limitations.
Use the following steps to edit FLV video:
Step 1: Open Fastreel web and import the video.
Step 2: Use templates to make it look attractive.
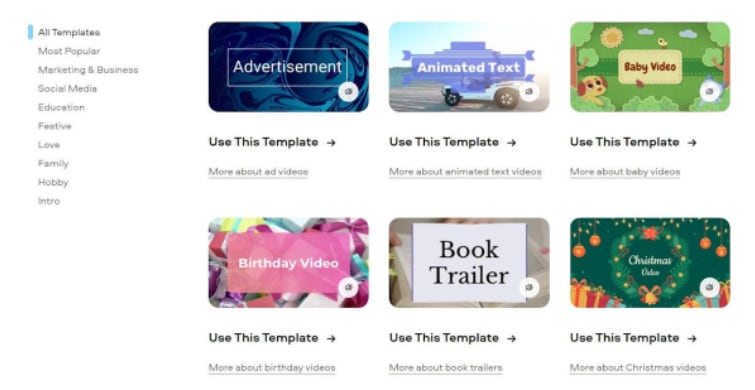
Step 3: Edit the video using the template.
Templates are unfinished videos with all of the effects already applied, such as backdrops, transitions, animated stickers, and titles. There are blank spots for your photos or videos, and you can arrange them in any sequence you like. You can also add music from the Fastreel library or upload your own track after entering your text.
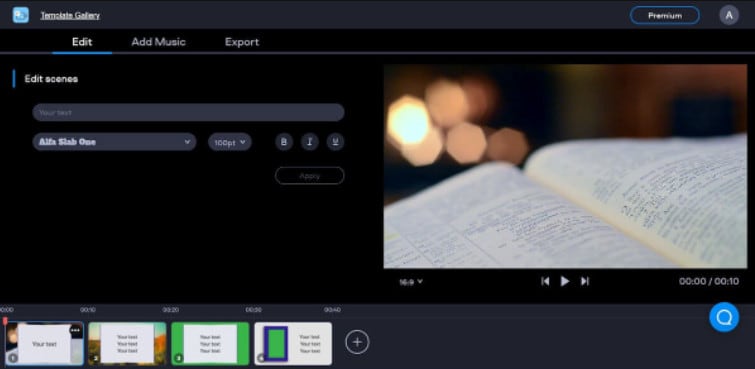
Step 4: Once you are done with edits, save the video and export it.
2. WeVideo:
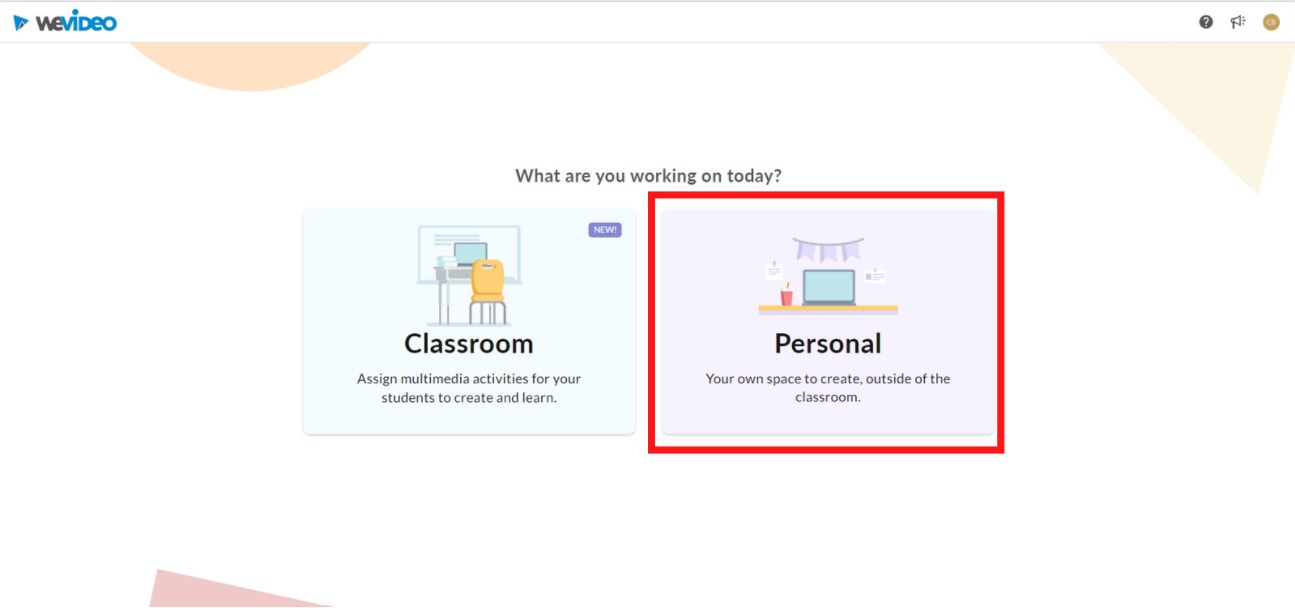
When you’re seeking the greatest video producer online, another wonderful choice to explore is WeVideo.
Google, Dropbox, Rover, and Roche are just a few of the huge names that trust our online editor. Its fast, versatile editing engine and vast stock content collection for adding stock movies, photos, and audio tracks to your productions are ideal for business users.
WeVideo also stands out since it provides unlimited cloud storage for all of your videos, which you can download and watch on any device. The only drawback is that all of this comes at a price, with WeVideo offering a variety of payment plans ranging from $4.99 to $36.99 a month.
Follow the steps to edit videos using WeVideo:
Step 1: Open WeVideo and import the video file.
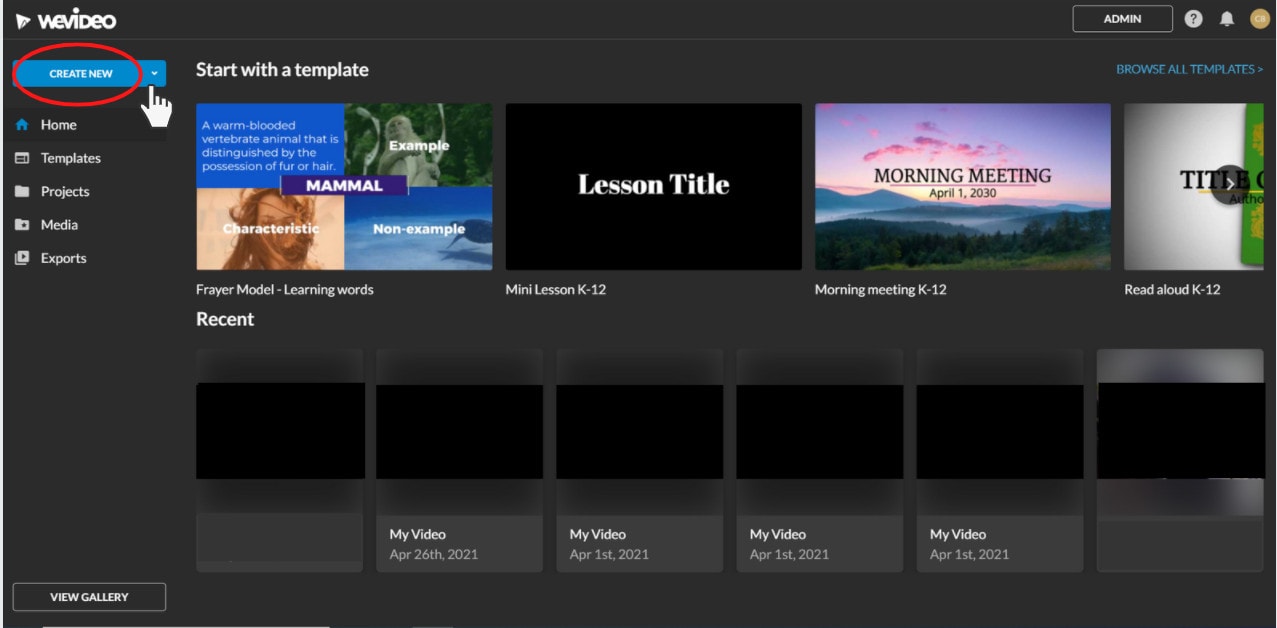
Step 2: Click on create new video in the left-hand corner of the screen.
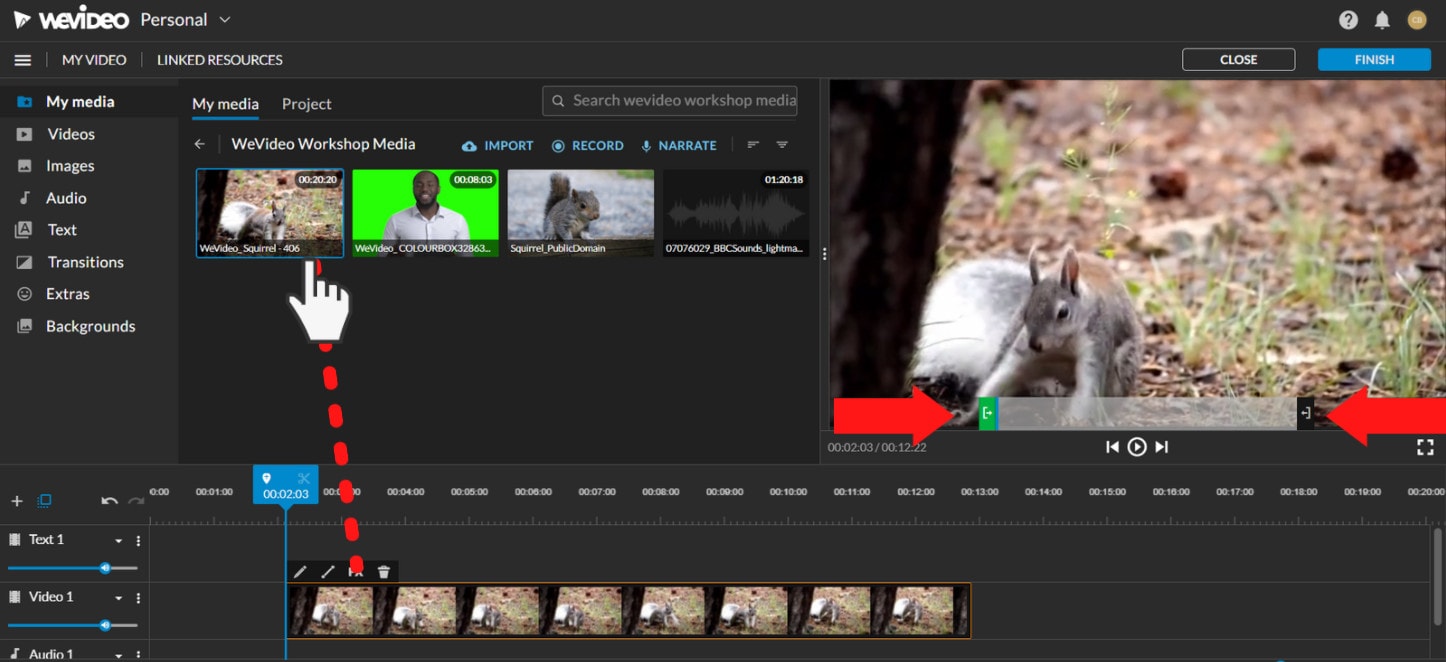
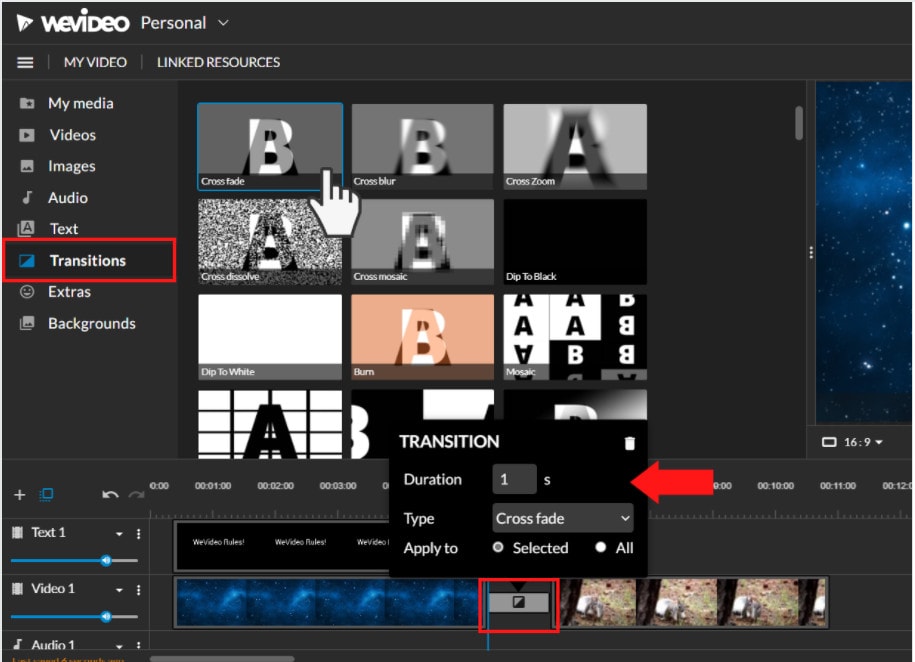
Step 3: Edit the video.
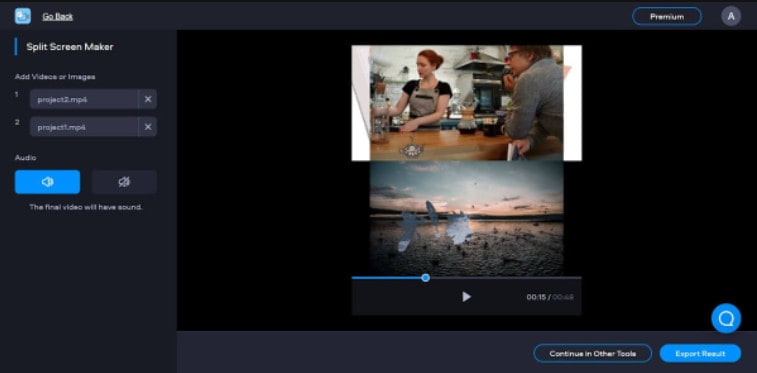
The video clip you imported will appear in the viewing window to the right once you click on it. By moving the arrows and either end, you can edit out the beginning or end of your footage.
- Drag the clip into your timeline from your media pool.
- Place the clip on your timeline by dragging and dropping it.
- Click the scissor symbol after moving the blue marker to the spot where you want to cut your clip.
- Once the material has been chopped, you can erase bits of it by selecting it with your mouse and then pressing delete on your keyboard or rearrange the clips in the timeline by dragging and dropping them to other positions.
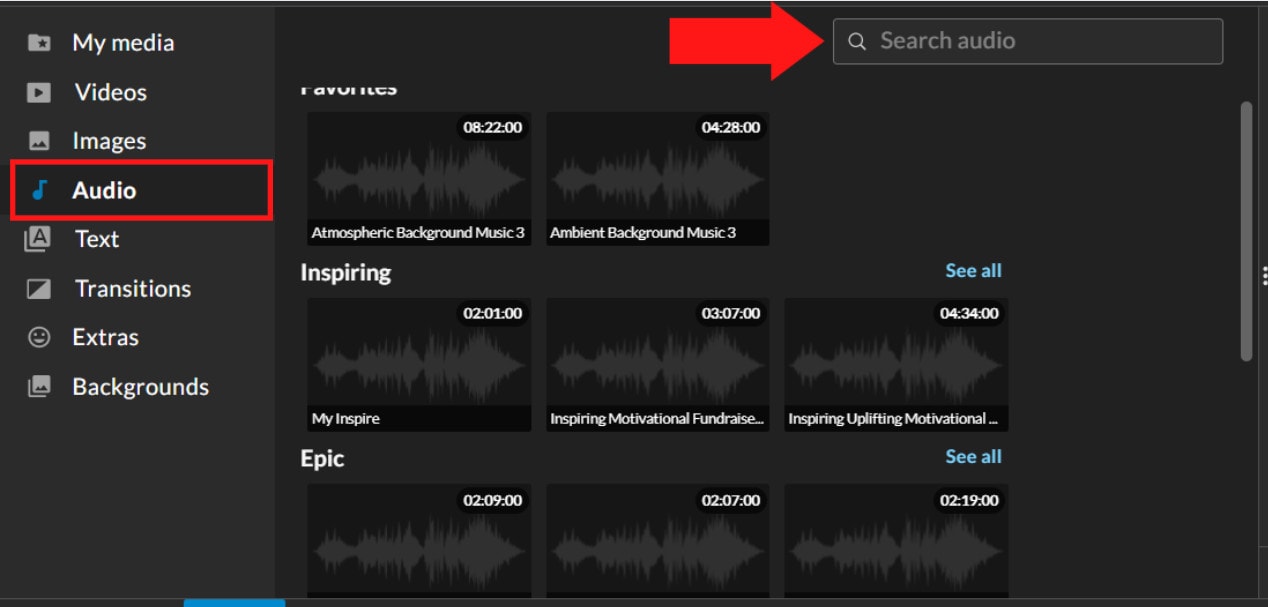
Step 4: Add effects, transitions, and music to the video.
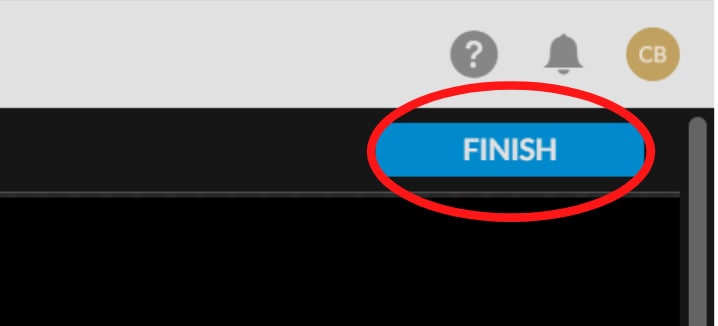
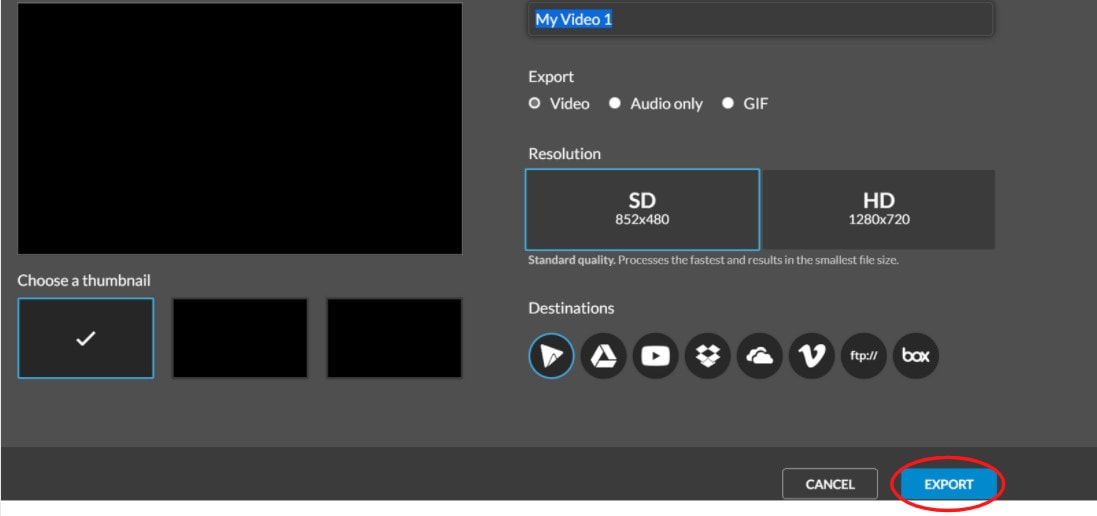
Step 5: Save and export the video by clicking on the Finish tab.
FAQs about editing FLV video
- How to open FLV files?
Any FLV player is required to view FLV files. Various players are available, including VLC, FLV Player, Sothink FLV Player for Mac, Tonec Free FLV Player, Any FLV Player, and others.
- Is Filmora compatible with Mac?
Filmora requires macOS Sierra (version 10.12) or later and the Big Sur (version 11) and Apple M1 chips. Touch Bar compatibility for MacBook Pro users and custom shortcuts to speed up editing.
- What is the best online FLV editor?
There are numerous free online editors to choose from. Fastreel, WeVideo, and FlexClip Video Maker are a few of the most popular.
- Is FLV better than MP4?
Because FLV and MP4 are the two most popular video file formats, it’s crucial to know which one is preferable. Adobe’s proprietary format is FLV. Both formats employ video and audio codecs and have equal performance levels. In their unprocessed state, MP4 files are more adaptable. You can, however, use an FLV file at the same time if you have the correct player.
- How do I choose a video editor?
When comparing video editing software, there are six crucial elements to consider.
- Budget and cost
- Ease of use/learning curve
- Multi-GPGPU acceleration and video format support
- Tools for advanced editing
- Music, special effects, and other goodies
- Customer service is second to none.
For macOS 10.14 or later
Therefore, you can use the following steps to edit FLV video on Windows and Mac:
Step 1: Import file:
Step 2: Edit the FLV file:
Acquire the perfect tool in your palm for anything you want to do, such as clipping, cropping, rotating, and more.
Furthermore, all editing capabilities in the toolbar allow drag-and-drop, making it even easier to touch up your films quickly. Consider the following scenario:
- Drag and drop a transition into the video/photo, or right-click it and select “Apply to All.”
- Please drag & drop a title template to the position where you want it to appear, then adjust it.
- To use the effects, select one from the 50+ available video effects, select it, and apply it to your photos/videos instantaneously.
Step 3: Save or Export the file:
When you’re done, export your modified MP4 files to Windows/Mac and quickly share them on YouTube, with the option of sending a message to Facebook and Twitter. When you click Create in the program window’s middle right corner, you’ll be taken to the Output window below.
Alternative Way to Edit FlV Video on Windows
1. VSDC
VSDC is a free video editor along with a lot of advanced features. Cut, combine, trim, crop, and other editing capabilities are available to help you polish your FLV films.
Although it may not look logical, learning the editing capabilities hidden within modular boxes is simple. One noteworthy aspect of VSDC is its ability to produce good visual effects using many trendy video effects, transitions, and filters.
Furthermore, strong chroma keys, color correction, object modification, and other editing tools can be utilized to edit FLV videos. It not only creates excellent FLV videos, but it also supports a wide range of media conversion, allowing you to convert FLV files to various formats and export them without a watermark.
Therefore, follow the below mentioned steps to edit FLV video using VSDC:
Step 1: Install the software on the Windows. Open the application and import the video.
Step 2: Use cutting and splitting tools to edit the video.
The first icon is a picture of a pair of scissors, which is a cutting tool. It’s very useful when you need to cut the beginning or end of a film. Place the cursor exactly where you want to cut, then select “Trim start” or “Trim finish” from the dropdown cutting menu (the small triangle next to the scissors icon).
Cropping is also simple. If you have too much additional space around the scene object recorded, just choose the file you want to trim and select the cropping icon from the “Cutting and Splitting” option. A new window will appear, allowing you to select the region of the scene that should stay.
Step 3: Apply effects and transitions.
To use one, first select the video file you wish to edit, then go to the Video effects tab and select the effect you want to use. On the timeline, a new tab will appear, containing all of the effects done to the selected object. You can alter the effect’s duration and position in time by dragging it with the mouse there. The properties pane on the right-hand side can be used to change other parameters.
Transitions follow the same rule. Place your cursor where you want the transition to begin, then choose a transition from the Video effects dropdown menu and manually adjust the duration.
Step 4: Save changes and export video.
Make sure your movie appears exactly how you want it to before exporting it. If the video appears choppy, use the red preview button and lower the preview quality. When the PC’s resources are insufficient to process the video in real time, lagging can occur. Keep in mind that it has no bearing on the outcome. When you’re finished, navigate to the Export project tab and select an export format.
2. Adobe Premiere Pro:
Professional video editors use Premiere Pro to make everything from YouTube videos to Hollywood films like Mank, a 2021 Oscar candidate. It’s also widely utilized in the workflows of designers, animators, and VFX artists, and we can see why after lengthy testing.
We found the software’s UI to be simple to use, and it increased our productivity by separating things into various workspaces, such as editing, effects, and audio. When we tested it on both Mac and PC, we discovered that each workspace helps handle a specific activity while minimizing distraction.
Edit the FLV video with Adobe Premiere Pro using the following steps:
Step 1: Import the video and create initial sequence.
Step 2: In the Timeline, trim and rearrange clips, add audio, and transitions.
Step 3: Add title and graphics.
In Premiere Pro, you may make onscreen titles, as well as stylize and animate your images.
Step 4: Export your video.
Alternative Way to Edit FlV Video on Mac
1. Blender:
Under the GNU General Public License, Blender is a free, open-source 3D content production program that runs on all major operating systems. Blender is one of the greatest video editors for both Windows and Mac, with advanced features such as modifier-based modeling tools, powerful character animation capabilities, a node-based material, etc.
Because it is developed for professionals, it is tough to use as a beginner. However, it is unrestricted in its use and distribution. In addition, color options are changeable and versatile in the UI.
In contrast, this free video editor is perfect for semi-pros or those who want to enhance their video editing skills. However, you’ll need a lot of time and effort to learn it.
Step 1: Open the application.
Step 2: Then, go into File->New->Video Editing to open the video editor.
Step 3: Import the video and start editing using the editing tools.
Step 4: Save and export the video.
2. Final Cut Pro:
When it comes to video editing software, Apple’s Final Cut Pro is one of the industry standards. As a result, it’s widely utilized in the television and film industries - at least among Mac users. However, one of the truly convincing reasons to choose it over Premiere Pro is because it is subscription-free: you only pay once.
The software’s Magnetic Timeline, grouping tools, a vast selection of effects, solid organizational capabilities, and simple ways to add and edit audio make it a favorite among professional video editors. 360° video, HDR, and powerful color correcting tools are among the other capabilities. It’s a strong software with a lot of features.
Follow the steps to edit FLV video using Final Cut Pro:
Step 1: Create Project.
To make a movie in Final Cut Pro, you must first establish a project, which keeps track of your editing selections and the media you utilize.
Step 2: Select and add clips to the timeline:
The second stage in making a movie with Final Cut Pro is to add and arrange clips in your project. In the timeline, you can move and reorder clips.
Step 3: Cut and trim video:
Final Cut Pro has a number of features for altering the start and stop points of clips in the timeline, as well as regulating the pacing of shots from one to the next.
Step 4: Edit the video by adding effects and transitions:
Final Cut Pro includes a number of advanced editing features that make it simple to create a professional film. Visual enhancements and colour correction are among the finishing touches.
Step 5: Save and export video:
2 Ways to Edit FlV Video on Android:
1. Inshot:
For Android users, Inshot is a fantastic image and video editor. This Android video editor allows you to add popular stickers and emoticons to your films, making them more fashionable and unique.
The program supports HD video output, allowing you more control over your footage. Moreover, the additional sound and video can be synchronized with the available video chronology.
You can quickly blend more than two movies into one with rich effects and sound with this Android editor app. In addition, you can generate a watermark using unique text provided in the app, and subtitles support allow you to produce one with a variety of fonts.
Following are the steps that you can follow to edit FLV video using Inshot:
Step 1: Open the app and import the video.
Tap “Video” to open your phone’s gallery folder and begin editing a video in the InShot app. Select a video to work with. Adjust the canvass after your video has been loaded into the InShot App. For your other social media accounts, there are aspect ratios and sizes that work well with the video. It also has the option of being in portrait or landscape mode.
Step 2: Trim and split videos.
Step 3: Merge videos (optional):
By combining clips, you can combine them into a single film or project. Simply choose the videos you want to import from the drop-down menu. By tapping the “+” button on the lower left of the screen, you can insert and merge more videos. Your project will then be updated using the selected video.
Step 4: Apply filters, add music, text and stickers.
Step 5: Once you are done with the editing process, save the file.
2. Videoshow:
VideoShow has a lot of video editing options. It is a simple and practical video editing program and movie scene maker for art directors and beginners. Using this video cutter, you may reverse, blur, duplicate, edit, merge and split collage clips or films.
You can also use VideoShow to adjust the audio or add subtitles to any video. It also allows you to use different filters on any video on your device. Over 50 intricate themes are included in the program, allowing you to create gorgeous music videos, slide shows, and vlogs in no time.
The annual subscription package is for $135.19, or you can also make a one-time purchase for $225.78.
However, to edit the video, you can use the following steps:
Step 1: Download and install the videoshow application and open it. Upload the video that you want to edit.
Step 2: Edit the video by applying filters or cutting and trimming the part of the video that you want to remove.
Step 3: Save changes and export the video to your preferred location.
2 Ways to Edit FlV Video on iPhone:
1. LumaFusion:
No other software program on the iPhone comes close to the feature set that LumaFusion offers for video editing. It is the only premium app on this list, and it is well worth every penny.
But, of course, YouTubers aren’t the only ones who use the program; mobile journalists and professional video producers who don’t want to lug along their bulky camera equipment and editing apparatus also use it.
LumaFusion deals with up to six video and audio tracks for photographs, movies, audio, titles, and graphics, and six audio tracks for narration, music, and sound effects. You also receive a magnetic timeline; importing clips is a breeze once they’ve been imported.
There are many transitions and effects to choose from, all of which can be layered. Finally, it includes much royalty-free music, sound effects, and other assets. So if you need a professional video editing tool for your iPhone, LumaFusion ($29.99) is the way to go.
Follow these steps to edit FLV video using LumaFusion:
Step 1: To create your first project, press + at the bottom of the screen. You can create a new project by tapping that area or by tapping the Plus button.
Step 2: Import video:
The Import section is located in the top left corner of the screen. This defaults to the Photos tab when you initially launch a new project. All of the photographs and videos can be seen here.
Step 3: Check layout and adjust volume levels
Step 4: Edit the video and add titles.
Step 5: Export the video.
2. Filmora Go:
Without a doubt, Filmora is one of the greatest free video editors for iPhone that does not contain any watermarks. In addition, it’s compatible with both iPhones and Android devices and has a simple user interface.
Filmora is the greatest iPhone video editor for beginners, with themed filters and effects that add flair to your videos without any work.
Filmora has many unique features, including themes for your videos and ‘Materials,’ which are visual effects created by the program. Unfortunately, materials are only available with Filmora Pro, so keep that in mind.
Aside from that, you’ll find all of the typical features here. You can also add titles to videos, utilize stickers and effects, and add music to the background of your movie. You may also add another clip in picture-in-picture mode, which is beneficial.
Below are the following steps to edit FLV video:
Step 1: Open the application and select ‘Create new video’. Now, import the video by choosing the video icon.
Step 2: Edit the video. Within the edit tool, you can trim and split the video. You can also improve the video quality by adding titles, transitions, and music, and voiceovers.
Step 3: After editing the video, select ‘SAVE’ and export the video or download it.
2 Ways to Edit FlV Video Online:
1. Fastreel:
If you’re seeking the finest free online video editor, Fastreel is a terrific tool to start with. This online video editing software provides a wide range of editing options. It can merge, edit, crop, and compress videos to make sharing easier.
It also includes many pre-made templates that you can change to create titles and transitions and other editing features like reverse, looping, and rotating. It’s also quite simple to use, and you can have polished videos in minutes.
There are also numerous pricing options to suit different customers, ranging from a completely free plan with watermarks to paid subscriptions with no limitations.
Use the following steps to edit FLV video:
Step 1: Open Fastreel web and import the video.
Step 2: Use templates to make it look attractive.
Step 3: Edit the video using the template.
Templates are unfinished videos with all of the effects already applied, such as backdrops, transitions, animated stickers, and titles. There are blank spots for your photos or videos, and you can arrange them in any sequence you like. You can also add music from the Fastreel library or upload your own track after entering your text.
Step 4: Once you are done with edits, save the video and export it.
2. WeVideo:
When you’re seeking the greatest video producer online, another wonderful choice to explore is WeVideo.
Google, Dropbox, Rover, and Roche are just a few of the huge names that trust our online editor. Its fast, versatile editing engine and vast stock content collection for adding stock movies, photos, and audio tracks to your productions are ideal for business users.
WeVideo also stands out since it provides unlimited cloud storage for all of your videos, which you can download and watch on any device. The only drawback is that all of this comes at a price, with WeVideo offering a variety of payment plans ranging from $4.99 to $36.99 a month.
Follow the steps to edit videos using WeVideo:
Step 1: Open WeVideo and import the video file.
Step 2: Click on create new video in the left-hand corner of the screen.
Step 3: Edit the video.
The video clip you imported will appear in the viewing window to the right once you click on it. By moving the arrows and either end, you can edit out the beginning or end of your footage.
- Drag the clip into your timeline from your media pool.
- Place the clip on your timeline by dragging and dropping it.
- Click the scissor symbol after moving the blue marker to the spot where you want to cut your clip.
- Once the material has been chopped, you can erase bits of it by selecting it with your mouse and then pressing delete on your keyboard or rearrange the clips in the timeline by dragging and dropping them to other positions.
Step 4: Add effects, transitions, and music to the video.
Step 5: Save and export the video by clicking on the Finish tab.
FAQs about editing FLV video
- How to open FLV files?
Any FLV player is required to view FLV files. Various players are available, including VLC, FLV Player, Sothink FLV Player for Mac, Tonec Free FLV Player, Any FLV Player, and others.
- Is Filmora compatible with Mac?
Filmora requires macOS Sierra (version 10.12) or later and the Big Sur (version 11) and Apple M1 chips. Touch Bar compatibility for MacBook Pro users and custom shortcuts to speed up editing.
- What is the best online FLV editor?
There are numerous free online editors to choose from. Fastreel, WeVideo, and FlexClip Video Maker are a few of the most popular.
- Is FLV better than MP4?
Because FLV and MP4 are the two most popular video file formats, it’s crucial to know which one is preferable. Adobe’s proprietary format is FLV. Both formats employ video and audio codecs and have equal performance levels. In their unprocessed state, MP4 files are more adaptable. You can, however, use an FLV file at the same time if you have the correct player.
- How do I choose a video editor?
When comparing video editing software, there are six crucial elements to consider.
- Budget and cost
- Ease of use/learning curve
- Multi-GPGPU acceleration and video format support
- Tools for advanced editing
- Music, special effects, and other goodies
- Customer service is second to none.
Also read:
- Powerpoint Slideshow Icon, Slide Sorter View Icon, Slideshow Icon Powerpoint, Slide Show View Icon
- Best 10 Mind-Blowing Video Collage Maker for PC
- Updated MAGIX Vegas Pro Review A Professional Video Editing Software
- In 2024, Do You Have an Idea on How to Zoom in on Snapchat? Using This Article, You Will Find the Easiest Way to Zoom in and Out on Snapchat Videos for Different Purposes
- In 2024, The Craziest 10 AI Editors Youve Seen
- Updated 2024 Approved How to Animate Your Designs With Canva GIF
- How to Add Text Effects in Adobe Premiere Pro, In 2024
- Do You Want to Download Slow-Motion Apps that Can Edit Video Professionally? This Article Will Discuss some Slomo Makers for Both iOS and Android for 2024
- Splice App for Android - How to Download & Use
- Updated How to Zoom in on PowerPoint Easy Ways
- How to Add Font Effects to Videos
- New 10 Best Free Text to Speech Software Windows, Mac,Android, iPhone & Online for 2024
- Updated 2024 Approved HOW to Add Fade to Black on Premiere Pro
- New How to Create the Stranger Things Upside Down Effect for 2024
- In 2024, What Is the Best Frame Rate for 4K Videos?
- 2024 Approved Learn About How You Can Create a Smooth Speed Ramp with Premiere Pro. Also, Find Alternative Software “WonderShare Filmora” For the Same Purpose with a Much Easier User Interface
- How to Create Glowing Edge Effect in TikTok Dancing Video for 2024
- Updated 2024 Approved How to Use OBS Chroma Key With/Without Green Screen
- What To Do When Itel A60 Has Black Screen of Death? | Dr.fone
- How to Track Apple iPhone 11 Location by Number | Dr.fone
- Android Screen Stuck General Oppo Reno 8T 5G Partly Screen Unresponsive | Dr.fone
- How to Change Netflix Location to Get More Country Version On Infinix Note 30 | Dr.fone
- Solved Mac Doesnt Recognize my iPhone 14 Plus | Stellar
- How to Mirror Nubia Z50S Pro to Mac? | Dr.fone
- Updated 10 Popular Cartoon Characters That Should Top Your List
- 2024 Approved 10 Must-Use MP4 to GIF Converters to Get Perfect-Made GIF
- Fixing Foneazy MockGo Not Working On Nokia C12 Plus | Dr.fone
- How to Lock Apps on Itel P55+ to Protect Your Individual Information
- Refurbished Apple iPhone XS Max Everything You Need to Know | Dr.fone
- Does Life360 Notify When You Log Out On Apple iPhone 14? | Dr.fone
- Title: New 2024 Approved 15 Best Travel Vloggers That You Should Follow
- Author: Chloe
- Created at : 2024-04-24 07:08:26
- Updated at : 2024-04-25 07:08:26
- Link: https://ai-editing-video.techidaily.com/new-2024-approved-15-best-travel-vloggers-that-you-should-follow/
- License: This work is licensed under CC BY-NC-SA 4.0.
