
:max_bytes(150000):strip_icc():format(webp)/GettyImages-1443716794-411cf2c5404b4f35b2a1153826e5a280.jpg)
New 2024 Approved Comprehensive Guide to Add LUTs in Premiere Pro with Ease
Comprehensive Guide to Add LUTs in Premiere Pro with Ease
LUTs, fully known as look-up tables, are essential video editing elements. By using LUTs, you can enhance your video quality with improved color grading. Talking about its configuration, LUTs are made of different effects and styles for providing unique visualization.
There is a buzz around adding LUTs to Premiere Pro. Many people often fail to use LUTs due to their complexities. This article comprises detailed information and steps to add LUTs with ease.
Part 1: Why are LUTs Important in Video Editing?
Video editing becomes easier and smarter with LUTs. This specific utility can ensure upscaling video content with improved quality. But why are LUTs important? Here is why:
1. Creative Color Grading
LUTs are known to provide consistent color grading within a video. There are color palettes that are applied to every visual part. Thus, an appropriate visual style is applied to your content, making it more impressive. Moreover, with several creative options, LUTs are adjusted and enhanced to perfection. Color grading becomes special with them.
2. Flexibility and Accuracy
You can change LUTs within desired intensity, blur, sharpness, and lightning. There are also color adjustments with the most flexibility. You can transform your video color gradients as required. The important thing is colors are applied with accuracy and proper details. This way, your video will be more consistent in colors.
3. Advanced AI Functionality
With technological advancement, LUTs are also upgrading with time. The implementation of AI functionality into LUTs makes them more special. The color grading process is fully automated. Thus, videos are analyzed, and LUTs are applied based on the required color criteria. LUTs are also integrated with AI augmented reality to provide realistic experiences.
4. Saves Time
Applying LUT doesn’t take time, and it instantly improves color grading. This way, you don’t need to spend hours on video editing. After all, with LUTs, you can effortlessly upscale video colors and quality. The pre-designed color presets are effective and efficient.
Empower your videos with a new mood using different LUTs. Filmora now offers 100+ top-quality 3D LUTs cover a broad range of scenarios. Transform your videos with Filmora’s powerful 3D LUTs.
Apply LUT on Videos Apply LUT on Videos Learn More


Part 2: How to Add LUTs in Premiere Pro?
LUTs are great video editing tools with extended color grading and schemas. Premiere Pro is a commonly consumed video editing tool with extensive features. Being a new user, you might not be aware of the functionality of LUTs in the platform. To add LUTs to Premiere Pro, you need to follow simple steps:
Step 1: Launch and open Adobe Premiere Pro on your device. Proceed to add the video clip that needs to be edited on the timeline. Navigate to the “Color” workspace from the screen’s top.

Step 2: From the project window on the bottom left, press the “New Item” tab and choose “Adjustment Layer.” Adjust video settings from the available panel, including the “Width,” “Height,” “Timebase,” and “Pixel Aspect Ratio,” and click “OK.”

Step 3: Drag and drop the created adjustment layer from the project window into the timeline and set the length adjacent to the video. Select the adjustment layer, and press “Lumetri Color” from the top in the right-hand panel. From the “Basic Correction” category, set “Input LUT” and proceed to click the “Browse” option from the drop-down menu. Navigate your LUT from the folder and click “Open” to apply desired LUT to the video.

Part 3: What are the Future Prospects of LUTs in Video Editing?
LUTs are already transforming video editing functionalities with automated color grading. This means users don’t have to edit colors, styles, and other elements manually. In the future, LUTs will have amazing prospects. Let’s discuss some of them:
- Cloud Infrastructure: Sharing and collaboration on customized LUTs will be easier in the future. This will be possible due to cloud infrastructure. Hence, video editors worldwide can collaborate and share color insights on projects.
- User-Friendly Interface: LUTs will become more user-friendly in the future. This will make them easy to use and implement in projects. Even beginners will minimal editing knowledge will be able to use them. In contrast, professional editors will streamline their workflows with fast processing.
- Real-time Preview: Using LUTs, users would be able to preview color grading. This way, they will know what their video after LUT would look like. Hence, they can preview different LUT presets and proceed with the desired one.
- Wide Compatibility: The platform compatibility of LUTs will also enhance. After all, you will access them on mobile, web, and desktop devices without problems. You can use LUTs in everyday life by applying them to visual content.
Bonus Part: Wondershare Filmora – An Alternative Haven for Adding LUTs
LUTs are great utility when it comes to video editing environments. Apart from Premiere Pro, several other tools are working to improve the industry. Wondershare Filmora is a video editing software where you can upgrade your videos. You can add different elements, effects, and transitions in Filmora. You can also use and apply LUT presets within Filmora.
Add LUTs on Video For Win 7 or later(64-bit)
Add LUTs on Video For macOS 10.14 or later
There are approximately 100+ LUTs presets in the current version of Filmora. Users can use them to enlighten the colors of videos. Meanwhile, in the new version, there would be additional 100 LUTs. So, in total, you will be getting 200+ LUTs in the new updates provided by Wondershare Filmora. Each LUT is unique in its kind and style.

Key Features of Wondershare Filmora
- Intensity Setting: You can also modify the intensity of your applied colors. This way, you can adjust color saturation on a 0 – 100% scale range. With intensity, there is an option to customize color grading.
- Color Wheel: Within Wondershare Filmora, there is a color wheel for adjusting video colors. Thus, users can set color pallets within their required style. The color grading is then enhanced with the desired customization.
- Optimized Export: The video export facility is optimized with fast processing. You can also set the video format, select resolution, and adjust other settings. The video is exported in the highest of qualities.
- Preview Render: After editing your videos with LUT presets, check color styles using render preview. Render preview allows previewing your final project before exporting it to the device.
Conclusion
Videos are close to all of us, as they store our important visual data. This is why video editing is essential to enhance color grading and schemas. Meanwhile, installing LUTs in Premiere Pro can help improve video quality with minimal effort. A good tool for using LUTs is Wondershare Filmora. After all, Filmora offers 100+ LUT presets, with 100 more to follow soon.
Add LUTs on Video For Win 7 or later(64-bit)
Add LUTs on Video For macOS 10.14 or later
Apply LUT on Videos Apply LUT on Videos Learn More
Part 2: How to Add LUTs in Premiere Pro?
LUTs are great video editing tools with extended color grading and schemas. Premiere Pro is a commonly consumed video editing tool with extensive features. Being a new user, you might not be aware of the functionality of LUTs in the platform. To add LUTs to Premiere Pro, you need to follow simple steps:
Step 1: Launch and open Adobe Premiere Pro on your device. Proceed to add the video clip that needs to be edited on the timeline. Navigate to the “Color” workspace from the screen’s top.
Step 2: From the project window on the bottom left, press the “New Item” tab and choose “Adjustment Layer.” Adjust video settings from the available panel, including the “Width,” “Height,” “Timebase,” and “Pixel Aspect Ratio,” and click “OK.”
Step 3: Drag and drop the created adjustment layer from the project window into the timeline and set the length adjacent to the video. Select the adjustment layer, and press “Lumetri Color” from the top in the right-hand panel. From the “Basic Correction” category, set “Input LUT” and proceed to click the “Browse” option from the drop-down menu. Navigate your LUT from the folder and click “Open” to apply desired LUT to the video.
Part 3: What are the Future Prospects of LUTs in Video Editing?
LUTs are already transforming video editing functionalities with automated color grading. This means users don’t have to edit colors, styles, and other elements manually. In the future, LUTs will have amazing prospects. Let’s discuss some of them:
- Cloud Infrastructure: Sharing and collaboration on customized LUTs will be easier in the future. This will be possible due to cloud infrastructure. Hence, video editors worldwide can collaborate and share color insights on projects.
- User-Friendly Interface: LUTs will become more user-friendly in the future. This will make them easy to use and implement in projects. Even beginners will minimal editing knowledge will be able to use them. In contrast, professional editors will streamline their workflows with fast processing.
- Real-time Preview: Using LUTs, users would be able to preview color grading. This way, they will know what their video after LUT would look like. Hence, they can preview different LUT presets and proceed with the desired one.
- Wide Compatibility: The platform compatibility of LUTs will also enhance. After all, you will access them on mobile, web, and desktop devices without problems. You can use LUTs in everyday life by applying them to visual content.
Bonus Part: Wondershare Filmora – An Alternative Haven for Adding LUTs
LUTs are great utility when it comes to video editing environments. Apart from Premiere Pro, several other tools are working to improve the industry. Wondershare Filmora is a video editing software where you can upgrade your videos. You can add different elements, effects, and transitions in Filmora. You can also use and apply LUT presets within Filmora.
Add LUTs on Video For Win 7 or later(64-bit)
Add LUTs on Video For macOS 10.14 or later
There are approximately 100+ LUTs presets in the current version of Filmora. Users can use them to enlighten the colors of videos. Meanwhile, in the new version, there would be additional 100 LUTs. So, in total, you will be getting 200+ LUTs in the new updates provided by Wondershare Filmora. Each LUT is unique in its kind and style.
Key Features of Wondershare Filmora
- Intensity Setting: You can also modify the intensity of your applied colors. This way, you can adjust color saturation on a 0 – 100% scale range. With intensity, there is an option to customize color grading.
- Color Wheel: Within Wondershare Filmora, there is a color wheel for adjusting video colors. Thus, users can set color pallets within their required style. The color grading is then enhanced with the desired customization.
- Optimized Export: The video export facility is optimized with fast processing. You can also set the video format, select resolution, and adjust other settings. The video is exported in the highest of qualities.
- Preview Render: After editing your videos with LUT presets, check color styles using render preview. Render preview allows previewing your final project before exporting it to the device.
Conclusion
Videos are close to all of us, as they store our important visual data. This is why video editing is essential to enhance color grading and schemas. Meanwhile, installing LUTs in Premiere Pro can help improve video quality with minimal effort. A good tool for using LUTs is Wondershare Filmora. After all, Filmora offers 100+ LUT presets, with 100 more to follow soon.
Add LUTs on Video For Win 7 or later(64-bit)
Add LUTs on Video For macOS 10.14 or later
Quick Answer: What Is a Transparent Logo and Why Do You Need It
Quick Answer: What is a Transparent Logo and Why Do You Need It
An easy yet powerful editor
Numerous effects to choose from
Detailed tutorials provided by the official channel
A logo is a brand image of a company, it’s the face of a company and it represents the company out there in the market. In today’s world, the most famous companies are recognized worldwide via their brand image. Be it the “big M” of McDonald’s or the “horses” of Ferrari, we very well know these brands by their respective logos. A company’s logo is hence one of the most essential parts of branding and marketing. Moreover, a logo is one of the first steps towards brand building. Only after deciding on a specific logo can a company begin its commercial operations. Therefore, an attractive transparent logo is highly essential. Wondering what a transparent logo PNG is? Well, today we shall tell you everything about a transparent logo, for instance, the transparent WhatsApp logo!
In this article
01 [What Is a Transparent Format and Where to Use a Transparent Logo](#Part 1)
02 [When Should You Use the PNG or Vector Format?](#Part 2)
03 [7 Popular Transparent Logo Examples You Might Want to Learn](#Part 3)
04 [How to Create One transparent Logo](#Part 4)
05 [How to Insert Transparent Logo in Video](#Part 5)
Part 1 What Is a Transparent Format and Where to Use a Transparent Logo
A transparent logo is just a format of logos. It is generally in PNG format or vector format. So what differentiates a normal logo from a transparent logo? Well, the key differentiator between a regular logo and a transparent logo is that in a transparent logo, the background of the image file is transparent i.e. you cannot see a white or any other background in a transparent logo. This makes the logo more prominent and attractive. Since a logo is a key part of branding, an attractive transparent becomes all the more important for your brand’s success and prosperity!
Part 2 When Should You Use the PNG or Vector Format?
What’s the difference between a white background and a transparent background? Well, a white background tends to outshine the logo and reduces the fanciness of the logo. On the other hand, a transparent background logo goes well with any background. For instance, if the page behind the logo is black, if you were to place a white background logo on a black page, it’d look absurd. On the other hand, if your logo’s background is transparent, the color of the page wouldn’t matter. Your logo would look good irrespective of the background’s color. Since you will use your logo on not just one but multiple platforms, it becomes highly important to have a transparent background for your logo. For instance, if you use your logo on a website with an off white background, a transparent logo would suit much better than a generic white background logo. Using a white background logo would make it look clumsy and would leave a disregarding first impression.
Using PNG files helps you in multiple ways. Firstly, because PNG format files are generally compressed. They occupy very little space on your website. Moreover, a PNG format file supports lossless compression unlike other counterparts such as JPG and JPEG file formats. PNG files facilitate very high quality and occupy minimum space on your disk. PNG files also describe the features of an image very well. This means that it represents intricate details such as gradient, transparency, and other well-defined features very neatly.
Part 3 7 Popular Transparent Logo Examples You Might Want to Learn
01Instagram Logo Transparent
Instagram’s logo is synonymous with its brand image. The logo is one of the most popular logos and the social media platform is recognized by its logo worldwide. The Instagram transparent logo is simple yet conveys the sole purpose of the application. The popular social media application logo is one of the highest regarded logos. If you’re into logo making and looking waiting for an idea to click, you might want to take inspiration from the Instagram logo!
![]()
02Nike logo PNG
Nike is a highly popular sports equipment and sportswear brand. The multinational Brand is highly popular for its logo and tagline, “Just Do It”. The logo is represented by a simple tick mark followed by a full stop. It draws parallels with its tagline. The tagline and the logo are the most famous ones and are the driving force behind the success of the brand!
![]()
03Facebook Logo Transparent
Facebook is another popular social media platform. Currently, in the process of rebranding from Facebook to Meta, the company is parent to several other social media apps such as WhatsApp and Instagram. Facebook is one of the first players in the social media market. Since its inception, the logo has not been changed and that shows the prominence of the logo!
![]()
04YouTube Logo Transparent
YouTube is the most popular video streaming platform. With a collection of more than a billion videos, YouTube has done an excellent job in establishing a monopoly in the video streaming market! The YouTube logo is indeed one of the smartest logos, it resembles the “play button” and hence explains the functionality of YouTube!
![]()
05Twitter Logo Transparent
Twitter is another social media platform that stands alongside its counterparts. Since its inception, Twitter has gained widespread popularity. Today, Twitter has an estimate of 290.5 million users making it one of the most trendy social media platforms. The concept of tweeting was introduced by Twitter. Tweeting means expressing your thoughts in one or two lines. The Twitter logo is a bird that resembles the action of tweeting!
![]()
06Snapchat Logo PNG
Snapchat is a social media platform that is highly popular among the younger generation. Snap means picture and chat means texting. Snapchat is an app wherein you can send pictures and text. Snapchat logo PNG is goofy and interesting.
![]()
07Transparent Whatsapp Logo
WhatsApp is indeed one of the most important chatting apps. Most of our conversations happen via WhatsApp, such as the market cap of WhatsApp. The logo is simple yet effective, it represents a telephone within a chat bubble. The transparent WhatsApp logo conveys the entire purpose of the app within one image.
![]()
Part 4 How To Create One Transparent Logo
Now that you know so much about transparent logos, their usage, and their importance, you must be wondering how to create transparent logos. Well, creating a transparent logo is pretty simple. Here’s how you can make your logo transparent and make it outshine all the other logos.
● Firstly, you need to create a regular logo for your brand.
● Once you have your regular logo, check whether the file format is PNG or not. If the file format is not PNG, then convert the file format to PNG via an online converter.
● Once done, you need to head to a background removal website such as “Removebg.
● Now all you need to do is upload your regular logo and click on “Remove Background”.
● The background will soon be removed and you’ll have a transparent logo with you!
Part 5 How to Insert Transparent Logo in Video
Now you know everything about transparent logos and how you can make your very own transparent logo. Now you must be thinking about how you can add this transparent logo to a video. Videos are a key part of a marketing campaign, they help creating an impact on the target audience. Well, Wondershare has got you covered. With Wondershare Filmora Video Editor , you can create beautiful explainer videos and marketing videos. Through Wondershare, you can easily add your logo onto your videos and put your brand out there in the market with ease! Apart from this, Wondershare has also got several super cool video editing and making features. It helps you make videos all the more attractive and attention-grabbing! Think marketing video? Think Wondershare.
For Win 7 or later (64-bit)
For macOS 10.12 or later
● Ending Thoughts →
● Today, we understood the importance of a transparent logo for a brand. We understood how transparent logos can play a key role in putting your brand out there.
● Further, we took a look at 7 of the most popular transparent logos. We also understood the process of making a transparent logo!
● To top it off with a cherry, we also took a look at a cool video editing software that can help you create a ton of marketing videos. Using Filmora, you can insert your logo onto a video and make it stand out from all your competitors!
4 Ways to Merge MP4 and MP3
The rising trends in audio and visual effects have introduced the media industry to new dimensions of technology. The screens around us are flickering 24/7 with videos on several topics. But, without the perfect background audios, their underlying message remains unheard. Hence, a balance of sound and picture is necessary to entice the audience and break the monotony. You can also create personalized videos by merging various video clips and adding the background sound afterwards. For this purpose, all you need is a tool that can add audio to your videos.
Let’s look at four different ways of merging audios and videos. The tools will help you craft high-end videos without involving any complex steps. You can make your videos beautiful by using the following easy to use tools.
- Filmora Wondershare
- VLC
- Photos App on Windows 10
- Using the Online Converter
Merge MP4 and MP3 Using Filmora Wondershare
Filmora Video Editor is an editing tool that brings your creativity and productivity to a whole new level. It comes with several editing options for both audio and video. All you need is to let your imagination run wild to give a personalized touch to your videos.
If you want to record podcasts, narration or voiceovers with lowered background music under speech, itsaudio ducking feature comes in handy. Filmora’sauto-synchronization feature is the cherry on top. It facilitates matching your audio with your video in a crispy way. Thus, making the whole experience of customizing video more professional.
Adding more to it, the Filmora Montage maker edits your video automatically to make it smooth with the music of your choice. Thisauto-beat sync feature is user friendly and convenient. Hence, you cannot deny that from beginners to intermediate, Filmora is empowering creators over the globe.
Filmora comes with an in-built audio library that serves the purpose of adding different sounds in the background. Its drag and drop feature make its interface more user friendly.It allows you to add audio files (.MP3, or .WMA) to videos (.Avi, .MP4, .MKV).It supports different audio and video formats that help you create awesome videos.
For Win 7 or later (64-bit)
For macOS 10.14 or later
Here is a step-by-step guide for adding sound to your videos.
Step 1: Importing the Media files (Both Audio and Video)
After you finish installing Wondershare Filmora from the official website on your computer, launch it.
You can import the MP4 and MP3 files by going to the File menu and then selecting import media files.

Tip: The software comes with a huge built-in library. You can also use it to add sound to your project.
Step 2: Adding media files to Timeline
- Now, hover the mouse over the media files that you have imported.
- Use the drag and drop feature to add the mp4 and mp3 files to the timeline.

If you want to modify the audio, the audio panel can be seen by double-tapping the audio from the timeline. This panel will appear at the top of the screen.

You can explore different options ranging from ducking to denoising.
Step 3: Exporting the File
Now that the audio has been added to the video, select the ‘Export’ tab so that you can export your video.

The exported file can be saved in different formats. (MP4, WMV, etc)
Tip: You can rename and define the resolution for better output.
Merge MP4 and MP3 Using VLC Media Player
VLC is an open-source media player that works for different platforms (Windows, Mac and Linux). The media player comes with features ranging from compression to conversion. This multimedia framework supports audio formats like AC-3, DV Audio, FLAC, MP3, Speex, Vorbis. It also supports different video formats.
If your video has no background sound, you can add it to your videos by following simple steps. Not only that, but you can also change the original audio track to make your video an exquisite piece of art.
The majority of people consider VLC as only a media player. But, it works as a video editor as well. Therefore, it allows you to add background sound to your videos. This handy tool supports various streaming protocols along with almost all multimedia files.
Here is a demonstration for adding audio to your video.
Step 1: Installation
The first step would be installing the VLC media player on your computer and launching it afterward.
Click on Media and then select Convert/Save.

A pop-up window will appear in which you have to select the Add option. This will help you load the targeted video.

Step 2: Playing both audio and video in a synchronous manner
- After loading the video, at the bottom of the dialogue box, tick the Show more options.
- Select the option named ‘Play another media synchronously.

Click Browse to import your desired audio. It will open another window.

Step 3: Adding audio
Click + Add on the second Open Media window. It will load the audio files for the video.
- Now, you’ll have your video and audio files in the formats of mp4 and mp3 respectively.

- Click on Convert/Save
- A pop-up window will appear asking about the format you wish to have for your video.

- Also, by selecting Browse, select the destination where you want to save your video.

- Click on Start so that the video and audio can be merged.

Merge MP4 and MP3 Using Windows Photo App
Windows Photo App is home to all audio and video files on your PC. You can view, edit and store your audio and video files in it. It also allows you to share those among your family and friends. The tool comes with an AI-powered assistant to manage your media efficiently. Hence, you can find your required media files faster.
With its editing features, you can bring dull moments to life. It lets you integrate photos and videos into third-party apps so that you may transform your mundane videos into extraordinary ones.
The App also comes with a backup feature that makes it a safe home for your life’s memories.
If you want to merge recordings of small video clips in no time, then Windows Photo App will assist you in doing it in a jiff. It is a built-in app for Windows 10 and comes with the easiest ways of adding sound to your videos.
Have a look at the following steps.
You can find the Windows Photo app on your desktop or press the Windows + S to open the Start menu search and type Photos in the search box.

- Click on the video editor tab.
- Select the New Video project to start a blank project.

A dialogue box will appear asking to add the desired project name. Enter the name.

You’ll see an add button on the left side. By selecting it, a drop-down menu will appear. It will show you different options for adding video to your project.

Select the desired option and add the video clips.

Adjust the order of your videos by dragging the videos in the storyboard.

- You can trim, split and rotate your videos here.
- It also allows you to use various filters, texts and 3D effects.
- After completing the editing, select the finish video button on the menu bar.
- Select your preferred video quality.
You can add audio by selecting the Custom Audio option.

You will see a window-pane on the right side with different options for adding the sound. You can add it by the drag and drop feature or by clicking on the add file option.


- Select Done to complete the process.
- You have successfully added mp3 to your video file**.**
- Tap on Finish video in the upper right corner to complete the process.

- You can also select the quality of your video.

Click on Export to save your file to your desired destination.
Merge MP4 and MP3 Using Using Online Converter
Different online resources on the internet will help combine videos. You do not have to go through the hassle of downloading and installing third-party apps. Online Converter supports different formats like MP4, AVI, FLV, MOV, 3GP, MKV, etc. With it, you can combine multiple video files into a single file in no time. The most popular output format is MP4.
The procedure is simple. You have to upload your video clips on Online Converter in the order that you want in the final output.

You’ll navigate to a page with options for adding the media files by clicking on the choose file.

After uploading the media files. You will also see options for the audio in a drop-down menu.

Select the Add option to merge mp3 to mp4.

After the mp3 is merged to the mp4, you can download the converted file or share it via social media as well.

Disadvantages
- If your internet connectivity is poor, the videos may take longer to upload.
- If the response time is slow, you need to cancel the process and re-submit the data.
- Encrypted or protected video files are not supported for the merger of the videos.
Conclusion
Each tool comes with its pros and cons. With the wide range of video editing options, you can explore these different platforms and add life to your moments. Whether you are a beginner or an intermediate, editing multimedia files has been made easy by these different tools.
For macOS 10.14 or later
Here is a step-by-step guide for adding sound to your videos.
Step 1: Importing the Media files (Both Audio and Video)
After you finish installing Wondershare Filmora from the official website on your computer, launch it.
You can import the MP4 and MP3 files by going to the File menu and then selecting import media files.
Tip: The software comes with a huge built-in library. You can also use it to add sound to your project.
Step 2: Adding media files to Timeline
- Now, hover the mouse over the media files that you have imported.
- Use the drag and drop feature to add the mp4 and mp3 files to the timeline.
If you want to modify the audio, the audio panel can be seen by double-tapping the audio from the timeline. This panel will appear at the top of the screen.
You can explore different options ranging from ducking to denoising.
Step 3: Exporting the File
Now that the audio has been added to the video, select the ‘Export’ tab so that you can export your video.
The exported file can be saved in different formats. (MP4, WMV, etc)
Tip: You can rename and define the resolution for better output.
Merge MP4 and MP3 Using VLC Media Player
VLC is an open-source media player that works for different platforms (Windows, Mac and Linux). The media player comes with features ranging from compression to conversion. This multimedia framework supports audio formats like AC-3, DV Audio, FLAC, MP3, Speex, Vorbis. It also supports different video formats.
If your video has no background sound, you can add it to your videos by following simple steps. Not only that, but you can also change the original audio track to make your video an exquisite piece of art.
The majority of people consider VLC as only a media player. But, it works as a video editor as well. Therefore, it allows you to add background sound to your videos. This handy tool supports various streaming protocols along with almost all multimedia files.
Here is a demonstration for adding audio to your video.
Step 1: Installation
The first step would be installing the VLC media player on your computer and launching it afterward.
Click on Media and then select Convert/Save.
A pop-up window will appear in which you have to select the Add option. This will help you load the targeted video.
Step 2: Playing both audio and video in a synchronous manner
- After loading the video, at the bottom of the dialogue box, tick the Show more options.
- Select the option named ‘Play another media synchronously.
Click Browse to import your desired audio. It will open another window.
Step 3: Adding audio
Click + Add on the second Open Media window. It will load the audio files for the video.
- Now, you’ll have your video and audio files in the formats of mp4 and mp3 respectively.
- Click on Convert/Save
- A pop-up window will appear asking about the format you wish to have for your video.
- Also, by selecting Browse, select the destination where you want to save your video.
- Click on Start so that the video and audio can be merged.
Merge MP4 and MP3 Using Windows Photo App
Windows Photo App is home to all audio and video files on your PC. You can view, edit and store your audio and video files in it. It also allows you to share those among your family and friends. The tool comes with an AI-powered assistant to manage your media efficiently. Hence, you can find your required media files faster.
With its editing features, you can bring dull moments to life. It lets you integrate photos and videos into third-party apps so that you may transform your mundane videos into extraordinary ones.
The App also comes with a backup feature that makes it a safe home for your life’s memories.
If you want to merge recordings of small video clips in no time, then Windows Photo App will assist you in doing it in a jiff. It is a built-in app for Windows 10 and comes with the easiest ways of adding sound to your videos.
Have a look at the following steps.
You can find the Windows Photo app on your desktop or press the Windows + S to open the Start menu search and type Photos in the search box.
- Click on the video editor tab.
- Select the New Video project to start a blank project.
A dialogue box will appear asking to add the desired project name. Enter the name.
You’ll see an add button on the left side. By selecting it, a drop-down menu will appear. It will show you different options for adding video to your project.
Select the desired option and add the video clips.
Adjust the order of your videos by dragging the videos in the storyboard.
- You can trim, split and rotate your videos here.
- It also allows you to use various filters, texts and 3D effects.
- After completing the editing, select the finish video button on the menu bar.
- Select your preferred video quality.
You can add audio by selecting the Custom Audio option.
You will see a window-pane on the right side with different options for adding the sound. You can add it by the drag and drop feature or by clicking on the add file option.
- Select Done to complete the process.
- You have successfully added mp3 to your video file**.**
- Tap on Finish video in the upper right corner to complete the process.
- You can also select the quality of your video.
Click on Export to save your file to your desired destination.
Merge MP4 and MP3 Using Using Online Converter
Different online resources on the internet will help combine videos. You do not have to go through the hassle of downloading and installing third-party apps. Online Converter supports different formats like MP4, AVI, FLV, MOV, 3GP, MKV, etc. With it, you can combine multiple video files into a single file in no time. The most popular output format is MP4.
The procedure is simple. You have to upload your video clips on Online Converter in the order that you want in the final output.
You’ll navigate to a page with options for adding the media files by clicking on the choose file.
After uploading the media files. You will also see options for the audio in a drop-down menu.
Select the Add option to merge mp3 to mp4.
After the mp3 is merged to the mp4, you can download the converted file or share it via social media as well.
Disadvantages
- If your internet connectivity is poor, the videos may take longer to upload.
- If the response time is slow, you need to cancel the process and re-submit the data.
- Encrypted or protected video files are not supported for the merger of the videos.
Conclusion
Each tool comes with its pros and cons. With the wide range of video editing options, you can explore these different platforms and add life to your moments. Whether you are a beginner or an intermediate, editing multimedia files has been made easy by these different tools.
Adobe After Effects Review
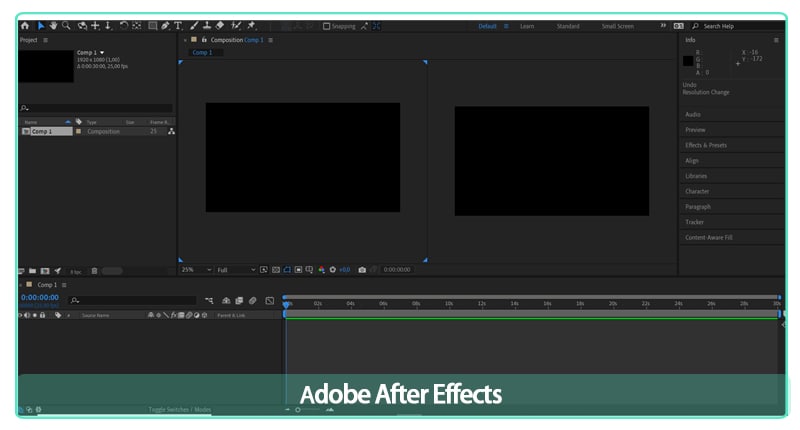
Make cinematic films, movies, intros, and transitions. Delete people from clips. Start fires or create a foggy weather. With Adobe After Effects, the industry-standard motion graphics and visual effects software, you are able to take any idea and make it come to life. Animate titles, credits, and lower thirds. Begin editing from scratch or with presets available. Combine photos and video footage to create anything you can think of.
Choose amazing effects from hundreds of options, remove unwanted parts from the frame, people or objects, and make VR videos to push your audience into the action. This software lets professionals configure keyframes, allow them to create compositing operations. Features of Adobe After Effects include a content library, digital asset management, video rendering, data import/export, and much more. In this article we will give you a brief overview of what After Effects is, what it’s used for and by who and the overall experience!
With that said, let’s get started!
1. Speed and Stability
When talking about speed and stability, After Effects has the latest release packed with improvements. All the developers have focused themselves on speed and also performance. The team at Adobe have worked very hard to make this application more responsive and when we go along in this article, that can be seen in many ways
The main improvement which is immediately clear to all users, is the renewed preview playback optimization. What we noticed is that After Effects is creating the ram preview for your projects a lot faster. However, while working with the software for this article, we did find the user interface to be more responsive, the playback is way smoother, so is it a lot more stable overall.
While using shape layers, there was a significant improvement. A few expressions are a lot faster. This alone is worth upgrading to the latest version of After Effects.

2. User Interface
The After Effects interface is constructed up of four main parts. The Timeline panel, the Project panel, the Composition panel and the Effects panel.
The Timeline Panel
In the Timeline panel, you edit all the footage and clips to create your rough cut. You can find the Timeline panel on the bottom of the workspace.
The Project Panel
It’s pretty straightforward that in the Project panel you import your footage and create your project. This is located on the top left of the standard After Effects workspace.
The Composition Panel
The Composition panel is where you will see the final product. This is located in the middle of your workspace.
The Effects Panel
In order to make creative changes to your video, use the preview, audio, effects, and Preset Panels. These panels are located on the upper right area of your workspace, each one also has its dropdown.
3. Learning Curve
The learning curve for After Effects depends on your background, the best way to find out if you like it is starting a free trial. Go through some tutorials online or paid courses. You’ll also want to spend time with the User Guide. The Search Help field in the top right corner provides you an easier search for answers to most questions that you have. Speaking of YouTube and online learning, most of the video tutorials you will find have been created by people that are experienced in After Effects and know their way around it.
4. VFX
There’s a time-period when video editors require strengthening their skills, calling it imperative software for improving editing skills is nowhere near an exaggeration. it really helps prospective professionals improve their learning experience through visual effects, camera tracking, text animation, motion tracking, color grading, etc. All of these methodologies do help in improving the VFX learning process in the long run.
Video editing happens to be a crucial part of film production. Making videos in a fantastic process can indulge in building professional videos via motion graphics animation. This is where Adobe After Effects become an excellent learning tool.
5. Motion Graphics
Motion graphics can sound quite scary. It’s a new term for a specific genre of animation. Motion graphics is the intersection between animation and graphic design. These are purpose-driven visual aspects with the goal of showing information to the viewer through the use of animated graphics or text. Sometimes they include voice-overs narrating what the text or graphics are showing. Where it gets a little complex is that the more popular the term motion graphics becomes, the more people are misaligning animations to it. They need to represent information and illustrate the idea to the viewer clearly, so they do that using animation and motion graphics.
6. Titles and Outros
Adobe released a new combination of features for you. For Adobe Stock: Graphics templates. Those pre-made templates give you a super smooth way to discover new motion graphics within Premiere Pro, without needing to spend time creating titles, overlays, or animations from scratch. The world has digitalized, and videos often need visual aspects such as titles, lower thirds, to present information. The templates not only assist video editors increase the quality of the content by showing certain information, but they also give a strong visual touch to keep the viewer engaged throughout the video. The audience nowadays is a lot more sophisticated, meaning that motion graphics are a necessity in a driven media world.
Motion Graphics templates are valuable for video editors of all levels. For the beginning content creators, the templates offer great quality, ready-made footage to help their creative goal. They can explore and work on their skills. Motion graphics that are pre-made are an excellent way to express the vision and express inspiration to new opportunities.
So now that you are aware of what After Effects templates are, we can move on to the actual workflow, why it is important, and how to use it as efficient as possible.
7. Workflow
Whether you are using Adobe After Effects to create motion graphics, or composite realistic visuals, you usually follow the same workflow, you may repeat the process of adjusting layer properties, editing, and compositing until everything looks good. You can change any property of any element, such as position, opacity and size. Make use of motion tracking to stabilize footage so that it follows the motion from another clip, and so much more!
8. Rendering Speed
When it comes to exporting your project in After Effects, you don’t need to buy an expensive workstation. You can speed up your rendering process from your own laptop without investing too much and by using the following tips we have for you below!
Tip #1: Enable Multiprocessing
What exactly is multiprocessing? That is when After Effects uses multiple cores from your CPU to export multiple frames at once. If your processor has one or more cores, you can enable this feature to reduce your rendering time. We want to mention that you need to check whether or not this option is turned on. Once enabled, you’ll see a great decrease in export time.
To enable Multiprocessing, navigate to Preferences > Memory & Multiprocessing. Then you click the check box next to ‘Render Multiple Frames Simultaneously’ and remember also to adjust the settings that you need.
Tip #2: Optimize Your RAM Usage
The RAM memory inside your workstation can be used to write and read data at a lot higher speeds than regular hard drives and portable drives. Configuring your RAM in a system is one of the easiest upgrades for better performance. Giving you affordable solutions for both desktop and laptop systems, the RAM memory upgrade does not require a lot of knowledge. The more RAM you allow applications to use, the higher the performance you will get out of it.
It also shows a noticeable increase in rendering speed. When the export time in your work is longer than needed, look at your RAM memory and see if you can make the necessary changes or upgrades.
Tip #3: Use the Media Encoder
Let’s talk about the Media Encoder. It’s the software that comes up with Adobe Creative Cloud products such as After Effects and Premiere Pro to simplify the export process. You can easily render your project from After Effects to Adobe Media Encoder and begin the project render process from that point on. The Media Encoder will increase your rendering performance and will significantly decrease rendering time.
Tip #4: Disable Ray-Traced 3D
The included After Effects Ray-Traced 3D feature enables you to produce 3D models within After Effects without any struggle. Calculating all the motions and visual graphics is such a heavy process for your workstation. When you disable raytracing, you will get a faster export time. By looking that ‘Classic 3D’ is checked instead of ‘Ray-Traced 3D’ from your composition preferences, you can speed your rendering speed up to 50%. Isn’t that incredible?
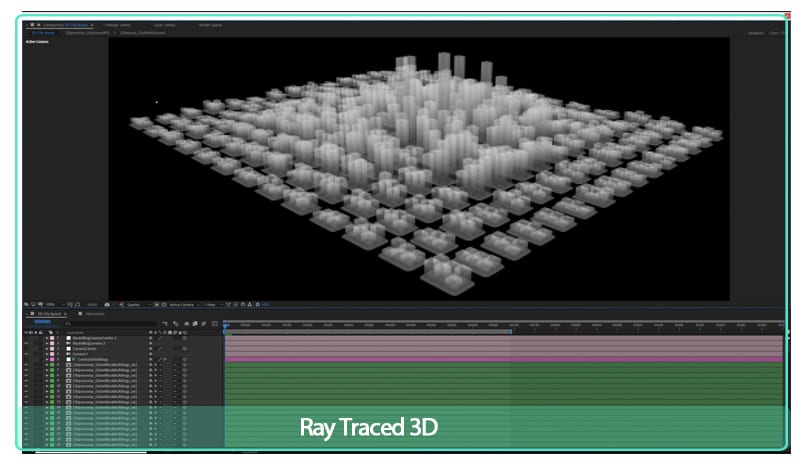
Tip #5: Activate GPU Exporting with Cuda Acceleration
Exporting your videos with GPU rather than CPU will increase the efficiency of your render process. The export length will decrease a whole lot when you activate Mercury GPU Acceleration, also known as ‘CUDA’ from the ‘Project Settings’.
After Effects doesn’t really require CUDA features from a special kind of Nvidia GPU. Only the GPU accelerated 3D renderer, that is based on the raytracing algorithm, requires that. The other GPU features are running on any GPU that meets the basic minimums, including Intel and AMD GPUs.
9. System Requirements for Windows
These are the minimum specifications needed to use After Effects on PC:
OS: Windows 10 (64-bit) versions 1909 and later, or Windows 11
CPU: Intel or AMD Quad-Core Processor (Intel i5 and i7 will do the job)
RAM: 16 GB
Monitor resolution: 1280 x 1080
An internet connection
Free storage: 15 GB
GPU: Minimum 2 GB of VRAM
10. System Requirements for macOS
OS: macOS 10.13 or later
RAM: 16 GB
CPU: Intel and Apple Silicon (Rosetta2 Supported) Quad-Core Processor
GPU: 2GB of VRAM
Monitor resolution: 1440×900
Free storage: 15 GB
An internet connection
11. Keyboard Shortcuts
You can work visually when you configure your keyboard shortcuts with the visual keyboard shortcut editor within After Effects. You can use the keyboard user interface to show the keys that have been assigned to shortcuts, the available keys for assignment, and edit assigned shortcuts to make your workflow even easier.
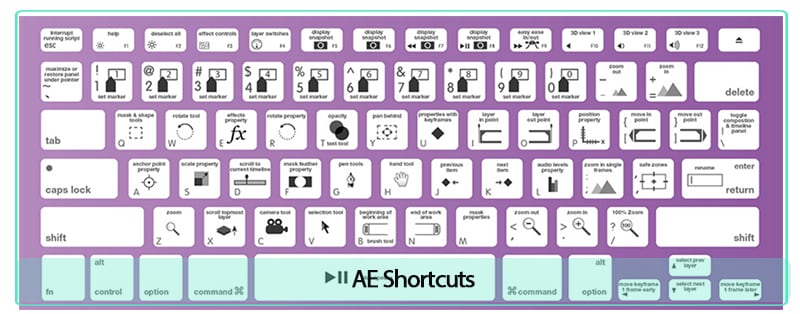
The keyboard layout:
This is a representation of your physical keyboard where you can see which keys have been assigned a shortcut, and which are available.
Command list:
The list displays all the commands that can be assigned shortcuts.
Key modifier list:
This list shows you all the modifier combinations and assigned shortcuts associated with the key you select on your physical keyboard.
After Effects does not allow you to reassign the following keys:
- A
- AA
- E
- EE
- F
- FF
- L
- LL
- M
- MM
- P
- PP
- R
- RR
- S
- SS
- T
- TT
- U
- UU
12. Should You Buy It?
Well first, you cannot buy After Effects, Premiere Pro or other software from Adobe. You have to rent them by paying monthly. After Effects is primarily a compositing and graphics software. Premiere is primarily a video editing program. In the case of After Effects and Premiere Pro, it’s not really an either/or. They’re both software with different purposes. After Effects is a lot more powerful and essentially showcases most of Premiere’s functionality, but according to our experience, the Premiere Pro interface and workflow is way more superior for video editing.
Premiere Pro is essentially built around its timeline, the region where you cut your video clips and drag and place them into your appropriate sequence. Hollywood filmmakers and professional YouTube content creators are using Premiere Pro to edit high-performing content and award-winning films. The software is very intuitive and easy for beginners to start with.
Are going to work with After Effects to create an income? Or are just going to use it for a hobby? It’s crucial to mention that question because Adobe After Effects is not something that is cheaply available. You will be investing much money on the program, and if you are working to use the software, paying a good amount, and earning nothing in return, then you might want to shift to another alternative which would cost you less. For instance, let’s assume you are using the application to earn an income, and have a few low-paying clients. In such a situation, you will have to rethink your options of software and analyze whether what you are paying in comparison to what you are getting is enough for you or not. We all are different individuals and have different preferences. Once we can see what is more important to us, or what is our need at this moment, then we will be able to judge the worth of purchasing Adobe After Effects better.
Are you going to use After Effects to earn an income? Or are just using it as a hobby? It is very important to address this question because Adobe After Effects is not something cheaply accessible. You will be investing a lot of money into this software, if you are using the software while paying a good amount and earning nothing in return yet, then you could shift to a different alternative which will cost you a lot less. Let’s say you are using After Effects to earn an income and have some low-paying work. In that case, you will have to reconsider your options of video editing software and look at whether what you are paying in comparison to what you are getting is possible for you. When we can see what is more important to us, we will be able to see the worth of buying After Effects.
Did you previously use After Effects or are you new to the program? The return that you will get using Adobe After Effects, depends on how good you know how to work with the options, functions and features in the software.
The Bottom Line
So summing it all together, Adobe After Effects takes care of all your assets and creates a final product, considering that After Effects is usually an asset-generation tool. Most video editors complete their projects in After Effects non-stop. It’s excellent for making visual videos come to life.
AE version 22.3 is very impressive. Giving you a wealth of new features created to make VFX editing a lot faster and easier. Offering new features on a regular basis, improving their subscription model making it more attractive. Especially if you’re a professional editor and designer.
Once you get comfortable with Adobe After Effects, you learn how to dynamically combine After Effects compositions to your Premiere projects. You are able to access both assets at the same time if needed!
Free Download For Win 7 or later(64-bit)
Free Download For macOS 10.14 or later
Also read:
- Updated 2024 Approved Learn to Use Montage with These Movies
- New In 2024, A Complete Guide to Use Distortion Effect in Premiere Pro
- New Complete Guide to Make a Super Easy Rotating Video Effect
- In 2024, Reviewing Efectum App and The Best Alternatives for Smartphone Users
- Step by Step to Crop Videos Using Lightworks
- New Doable Ways to Make Transparent Background in Procreate
- In 2024, 4 Methods to Merge MP4 and MP3
- New In 2024, How to Create a Clideo Slideshow
- In 2024, How to Make Stunning Glitch Effect in Photoshop?
- Having Trouble with Black Backgrounds in After Effects? Land in Here to Know How You Can Quickly Escape This Glitch in the Simplest Ever Way Possible for 2024
- New 2024 Approved Best Ways to Blur Zoom Background for Free
- New Top 18 Video Editors for PC and Mac
- New Do You Want to Use a Video Editor for Your iOS Device? This Article Introduces LumaFusion, a Perfect Multi-Track Video Editor Designed to Cater to Your Needs
- Updated Perfect Moody LUTs for VN Editor An Overview
- New How to Make Eye Zoom Transition Effect with Filmora
- Updated A Complete Guideline To Better Use QuickTime Player
- Finding Best GIF Websites Is Easy as Pie for 2024
- Updated 2024 Approved Easily Sync Audio With Video With Filmora
- In 2024, How to Create a Dynamic Text Animation in Filmora — Step-By-Step
- Updated 2024 Approved Learning How to Create LUTs with LUTs Generator
- 2024 Approved Easy Guide to Overlay Videos in Premiere Pro
- In 2024, Adobe Premiere Pro Download and Use Guide In Depth
- Ultimate Guidelines to Help You Use VLC Media Player Better for 2024
- How to Clone Yourself in Videos with Filmora for 2024
- Best 5 PDF to GIF Converters You Should Know for 2024
- 2024 Approved Different Ways To Trim Video In Premiere Pro
- New Confused About Deciding the Next Destination for Your Trip? This Article Features some of the Best Vloggers You Can Find for Gaining Inspiration for Traveling
- Updated Learn Topaz Video Enhance AI Review
- New Updated 8 Ways to Merge SRT with MP4 for 2024
- New In 2024, Whatre the Best Alternatives to Pexels?
- A Guide to Color Grade Your Picture in LightRoom for 2024
- New Are You in Search for a Step-by-Step Guide to How to Add Effects in TikTok? Here It Is. To Add some Flavor to Your TikTok Videos. Use These How to Add Effect to TikTok Recommendations
- New Ideas That Will Help You Out in Making Transparent Image
- New 2024 Approved Customize PowerPoint Slideshow Icon in 8 Simple Ways
- 2024 Approved Top 10 Free WhatsApp Video Converter
- 2024 Approved 4 Ways for Rotating Your GoPro Videos Professionally
- New Add Zoom Blur Effect In Photoshop Step by Step
- Updated How To Create a Polaroid Collage, In 2024
- Updated 6 Top Online MP4 Croppers for 2024
- Wondering How to Replace Sky in After Effects? Learn How for 2024
- New In 2024, 3D Ray Traced Settings In After Effects A Comprehensive Guide
- 9 Solutions to Fix Samsung Galaxy S24 Ultra System Crash Issue | Dr.fone
- How To Bypass iCloud By Checkra1n Even On iPhone 6 Plus If Youve Tried Everything
- How To Deal With the Xiaomi Redmi Note 12R Screen Black But Still Works? | Dr.fone
- Top 7 Skype Hacker to Hack Any Skype Account On your Oppo Find X6 | Dr.fone
- Does Life360 Notify When You Log Out On Oppo A18? | Dr.fone
- In 2024, How To Pause Life360 Location Sharing For Samsung Galaxy A54 5G | Dr.fone
- Bypass iCloud Activation Lock with IMEI Code On iPhone 14
- In 2024, How to Fake Snapchat Location without Jailbreak On Oppo A56s 5G | Dr.fone
- How to use Pokemon Go Joystick on Tecno Spark 20C? | Dr.fone
- 5 Quick Methods to Bypass Oppo Find X7 Ultra FRP
- How to Fix corrupt video files of Poco C51 using Video Repair Utility on Windows?
- Detailed Review of doctorSIM Unlock Service For Apple iPhone 6 Plus
- Honor Bypass Tools to Bypass Lock Screen(Honor Magic 6 Lite)
- In 2024, 10 Fake GPS Location Apps on Android Of your Nubia Red Magic 8S Pro | Dr.fone
- In 2024, How to Lock Apps on Realme C53 to Protect Your Individual Information
- How to Reset Gmail Password on Realme 11 Pro+ Devices
- App Wont Open on Your Honor Play 40C? Here Are All Fixes | Dr.fone
- In 2024, Latest Guide How To Bypass Tecno Spark 20 Pro+ FRP Without Computer
- Top 5 Car Locator Apps for Xiaomi Redmi 13C 5G | Dr.fone
- In 2024, Top 4 Ways to Trace Samsung Galaxy A25 5G Location | Dr.fone
- Complete Review & Guide to Techeligible FRP Bypass and More For Oppo Find X6
- Updated In 2024, Real-Time AI Voice Changer Revolutionizing Communication
- In 2024, Guide on How To Change Your Apple ID Email Address On iPhone 7 | Dr.fone
- In 2024, Full Guide to Bypass Vivo Y77t FRP
- Will iSpoofer update On Honor Magic 6 Pro | Dr.fone
- How to fix iCloud lock from your Apple iPhone 13 Pro Max and iPad
- In 2024, How to Track Lava Blaze 2 Location by Number | Dr.fone
- How to Retrieve Deleted Calendar Events iPhone 6s? | Stellar
- Updated In 2024, 12+ Stunning Instagram GIF Stickers and How to Make & Find
- How to Fix Excel 2010 Run Time Error 1004 | Stellar
- In 2024, 9 Best Free Android Monitoring Apps to Monitor Phone Remotely For your Tecno Spark Go (2023) | Dr.fone
- Best Anti Tracker Software For Infinix Smart 7 | Dr.fone
- Why Is My OnePlus Ace 2 Offline? Troubleshooting Guide | Dr.fone
- A Working Guide For Pachirisu Pokemon Go Map On ZTE Nubia Flip 5G | Dr.fone
- Methods to Change GPS Location On Motorola Moto G34 5G | Dr.fone
- How To Reset the Security Questions of Your Apple ID From Your Apple iPhone 7
- In 2024, How Do You Remove Restricted Mode on iPhone 14 Pro Max
- In 2024, How To Do Realme GT 5 Pro Screen Sharing | Dr.fone
- 5 Easy Ways to Change Location on YouTube TV On Honor 90 GT | Dr.fone
- Title: New 2024 Approved Comprehensive Guide to Add LUTs in Premiere Pro with Ease
- Author: Chloe
- Created at : 2024-04-24 07:08:32
- Updated at : 2024-04-25 07:08:32
- Link: https://ai-editing-video.techidaily.com/new-2024-approved-comprehensive-guide-to-add-luts-in-premiere-pro-with-ease/
- License: This work is licensed under CC BY-NC-SA 4.0.
