
:max_bytes(150000):strip_icc():format(webp)/the-best-instagram-filters-for-2018-4177148-1-5bc5e4b6c9e77c00517f198d.jpg)
New 2024 Approved Convert Time-Lapse to Normal Video
How to Convert Time-Lapse to Normal Video
Ever since video cameras were invented, there have been various technological advancements in filming. And today people generally use smartphones or portable cameras to record videos. But one of the interesting ways in which smart devices can capture moments is using the timelapse feature. Timelapse files are a way of videography in which the camera or smart device captures frames in intervals of a few seconds or minutes.
In this way, you get a stop motion-like video at the end. This format of the video is both interesting and can be used to capture long hours of activities. But often we are needed to convert time-lapse to normal video to export or share them over a platform. For these requirements, there are different applications available across multiple operating systems.
Free Download For Win 7 or later(64-bit)
Free Download For macOS 10.14 or later


Part 1. Convert Time-lapse Video to Normal on Computer
Computer users aiming to conserve the value of their time-lapses as videos can resort to Filmora . The Filmora program is a fee-based software that furnishes very productive video editing capacities. As an alternative, one can choose its trial edition for free. Here is how to turn your time lapses into videos by means of Filmora:
First, go to the official website of Filmora and then click on “Try Filmora for free”. This will start the download of the Filmora trial version. For converting time-lapses into normal videos, the premium version is not necessary. After the application is downloaded and installed on your PC, open it by clicking its icon.
Wondershare Filmora Easily convert time-lapse video to normal speed on PC and Mac.
Free Download Free Download Learn More

![]()
When the Filmora interface opens, you will need to go to “project” and then select “New project”. This will create a new project for you. Alternatively, you can click on the “+” icon available on the screen to do the same. After a new project is opened, you need to click on “Import” to add the timelapse file you want to convert.

Then from the tools menu, select the “Tools” option on the top of your screen. Here you will be able to access different features of Filmora. Click on the option that says “Speed” to go to speed settings. Change the speed from 1X to a lower speed by toggling across the drag bar.

After setting a preferred speed for your timelapse, you will notice that the timelapse will seem like a normal video. When you are satisfied with the preview video, go to “Export” and click on it. This will save your converted video to your device in the highest resolution. Then you will be able to share it instantly on any platform.
Part 2. Change Timelapse Video to Normal on iPhone
If you are an iPhone user then you must have discovered the timelapse feature which is present in the camera app. Using the camera app, Apple users have the choice to make stunning time lapses with customized duration and settings.
And if you have a timelapse that you want to convert to a normal video format, then you can follow these steps on how to convert time-lapse to normal video:

- There are multiple ways and applications to convert timelapse videos to normal ones on iPhone. But the safest and most effective way to do that is by using iMovie. This application is mostly preinstalled on all iPhones and is free to use. If somehow you are missing this app, then visit the Apple store and install it on your device.
- When iMovie is successfully installed on your iPhone, open the application and allow all the permissions that it asks for. Then click on the “+” icon in the middle of your screen to create a new project. If you want you can name your project when its created.
- After opening your new project, you can tap on the “Import” option to add media files to the interface. Here it will open your files from which you will need to select the timelapse video that you want to edit. Click on it and it will be automatically added to iMovie.
- You can also add multiple timelapse videos if you want to convert them all and merge them into one file. Then on the iMovie interface, there will be a timeline available at the bottom of your screen. You can adjust it to trim, replace or rearrange the clips.
- Then on the bottom left corner of your screen, you will see a “speed” icon which is generally the second tool on the interface. Click on it and it will open the playback speed controls for you. Adjusting and dragging on the speed control, you will be able to change the playback speed of the timelapse.
- You will need to slow down the playback speed by toggling the speed controls. Set it to a speed lower than 1X which can make it look like a normal video. When you are done, click on the tick mark to save the changes.
- Now preview the video and make sure you are satisfied with the conversion. Then go to settings, and customize the video output settings as well as quality. When you are done with these changes, click on the “Export” option to save the video to your device or share it on any platform.
Part 3. Time-lapse to Normal Video Online
There are situations where users don’t want to go installing extra applications when it comes to executing a task. And if you happen to be such a user who wants to convert your timelapse into a beautiful video, then you can do it online for free. Veed.io is an online platform that allows users to upload and convert time-lapse to normal video online easily.
First, open your browser and enter “veed.io” i.e. “time-lapse to normal video converter online” in your search box. Then the first result that will be shown will be from its official website. Click on that and you will be directed to the veed.io online interface.

The interface will have different options like “Sign Up, “Try Sample” etc. From the available options, click on “Upload Your Video”. This will allow you to edit your videos without even creating an account.
Then the interface will direct you to the video creation page. Here you will see a bunch of predefined templates to make videos. Click on the “Create Template” option and the interface will have a “Upload Your Media” box on the screen. Here you can click on it and select your timelapse file or drag and drop it from any source.

After the video is added to the veed.io page, it will take some time to upload it to the project menu. You can add multiple files by clicking on the “Add” option available on the screen. After a short while, you will see the video preview on the screen along with a timeline of the video.

Click on the timeline feature and there will be different tools from veed.io available at the bottom of the interface. Select the speedometer type icon on the screen and this will give you access to control the playback speed of timelapse.
You can drag the cursor from 1X to any desired speed here. Just click on the drag button and lower the speed below 1X to a desirable speed of your choice. In the preview window, check how the video is being rendered.
When you are satisfied with the changes and the video speed seems normal to you, go to the top right corner of the screen and click on the “Export” option. This will ask you to set your preferences for different video settings. Change them according to your requirement and then the video will be downloaded to your device.
Wondershare Filmora Easily convert time-lapse video to normal speed on PC and Mac.
Free Download Free Download Learn More
![]()
Conclusion
Time lapses are an amazing way to capture moments from any device. But there are situations where we need to convert them into video format for our requirements. Luckily there are some built-in features in different smartphone devices as well as applications available on others that can help you to do so. We have discussed some of these methods following which you will easily be able to convert your timelapse into videos on any device.
Free Download For Win 7 or later(64-bit)
Free Download For macOS 10.14 or later
Part 1. Convert Time-lapse Video to Normal on Computer
Computer users aiming to conserve the value of their time-lapses as videos can resort to Filmora . The Filmora program is a fee-based software that furnishes very productive video editing capacities. As an alternative, one can choose its trial edition for free. Here is how to turn your time lapses into videos by means of Filmora:
First, go to the official website of Filmora and then click on “Try Filmora for free”. This will start the download of the Filmora trial version. For converting time-lapses into normal videos, the premium version is not necessary. After the application is downloaded and installed on your PC, open it by clicking its icon.
Wondershare Filmora Easily convert time-lapse video to normal speed on PC and Mac.
Free Download Free Download Learn More
![]()
When the Filmora interface opens, you will need to go to “project” and then select “New project”. This will create a new project for you. Alternatively, you can click on the “+” icon available on the screen to do the same. After a new project is opened, you need to click on “Import” to add the timelapse file you want to convert.
Then from the tools menu, select the “Tools” option on the top of your screen. Here you will be able to access different features of Filmora. Click on the option that says “Speed” to go to speed settings. Change the speed from 1X to a lower speed by toggling across the drag bar.
After setting a preferred speed for your timelapse, you will notice that the timelapse will seem like a normal video. When you are satisfied with the preview video, go to “Export” and click on it. This will save your converted video to your device in the highest resolution. Then you will be able to share it instantly on any platform.
Part 2. Change Timelapse Video to Normal on iPhone
If you are an iPhone user then you must have discovered the timelapse feature which is present in the camera app. Using the camera app, Apple users have the choice to make stunning time lapses with customized duration and settings.
And if you have a timelapse that you want to convert to a normal video format, then you can follow these steps on how to convert time-lapse to normal video:
- There are multiple ways and applications to convert timelapse videos to normal ones on iPhone. But the safest and most effective way to do that is by using iMovie. This application is mostly preinstalled on all iPhones and is free to use. If somehow you are missing this app, then visit the Apple store and install it on your device.
- When iMovie is successfully installed on your iPhone, open the application and allow all the permissions that it asks for. Then click on the “+” icon in the middle of your screen to create a new project. If you want you can name your project when its created.
- After opening your new project, you can tap on the “Import” option to add media files to the interface. Here it will open your files from which you will need to select the timelapse video that you want to edit. Click on it and it will be automatically added to iMovie.
- You can also add multiple timelapse videos if you want to convert them all and merge them into one file. Then on the iMovie interface, there will be a timeline available at the bottom of your screen. You can adjust it to trim, replace or rearrange the clips.
- Then on the bottom left corner of your screen, you will see a “speed” icon which is generally the second tool on the interface. Click on it and it will open the playback speed controls for you. Adjusting and dragging on the speed control, you will be able to change the playback speed of the timelapse.
- You will need to slow down the playback speed by toggling the speed controls. Set it to a speed lower than 1X which can make it look like a normal video. When you are done, click on the tick mark to save the changes.
- Now preview the video and make sure you are satisfied with the conversion. Then go to settings, and customize the video output settings as well as quality. When you are done with these changes, click on the “Export” option to save the video to your device or share it on any platform.
Part 3. Time-lapse to Normal Video Online
There are situations where users don’t want to go installing extra applications when it comes to executing a task. And if you happen to be such a user who wants to convert your timelapse into a beautiful video, then you can do it online for free. Veed.io is an online platform that allows users to upload and convert time-lapse to normal video online easily.
First, open your browser and enter “veed.io” i.e. “time-lapse to normal video converter online” in your search box. Then the first result that will be shown will be from its official website. Click on that and you will be directed to the veed.io online interface.
The interface will have different options like “Sign Up, “Try Sample” etc. From the available options, click on “Upload Your Video”. This will allow you to edit your videos without even creating an account.
Then the interface will direct you to the video creation page. Here you will see a bunch of predefined templates to make videos. Click on the “Create Template” option and the interface will have a “Upload Your Media” box on the screen. Here you can click on it and select your timelapse file or drag and drop it from any source.
After the video is added to the veed.io page, it will take some time to upload it to the project menu. You can add multiple files by clicking on the “Add” option available on the screen. After a short while, you will see the video preview on the screen along with a timeline of the video.
Click on the timeline feature and there will be different tools from veed.io available at the bottom of the interface. Select the speedometer type icon on the screen and this will give you access to control the playback speed of timelapse.
You can drag the cursor from 1X to any desired speed here. Just click on the drag button and lower the speed below 1X to a desirable speed of your choice. In the preview window, check how the video is being rendered.
When you are satisfied with the changes and the video speed seems normal to you, go to the top right corner of the screen and click on the “Export” option. This will ask you to set your preferences for different video settings. Change them according to your requirement and then the video will be downloaded to your device.
Wondershare Filmora Easily convert time-lapse video to normal speed on PC and Mac.
Free Download Free Download Learn More
![]()
Conclusion
Time lapses are an amazing way to capture moments from any device. But there are situations where we need to convert them into video format for our requirements. Luckily there are some built-in features in different smartphone devices as well as applications available on others that can help you to do so. We have discussed some of these methods following which you will easily be able to convert your timelapse into videos on any device.
VN Video Editor Templates: A Game-Changer for Your Videos
Creating engaging and professional-looking videos can be difficult, especially if you need to familiarize yourself with video editing software. However, with the right tools, it can be a breeze. The VN Video Editor is a powerful and user-friendly software that allows you to create stunning videos easily.
One of the best things about VN Video Editor is that this app comes with a wide variety of templates that you can use to make your videos look even better. This article will share amazing templates for VN Video Editor that you can download for free.
These templates have been carefully crafted to help you create professional-looking videos in no time. Whether you’re creating videos for your business or YouTube channel or just for fun, these templates will take your videos to the next level. So, without further ado, let’s dive in and explore the best templates for VN Video Editor that you can use to make your videos stand out.

- Travel Vlog Template in VN Video Editor
- Production Introduction Video Template in VN Video Editor
- VN Cooking Vlog Template
- VN Fashion Video Template
- Beauty Video Template of VN Video Editor
Overview of VN Video Editor and Its Templates
VN Video Editor is a popular video editing software on desktop and mobile devices. The mobile version of VN Video Editor is available on both Google Play Store and App Store. The app’s mobile version is particularly useful for those who want to create and edit videos on the go. The app is user-friendly and intuitive, making it easy for anyone to create professional-looking videos.

One of the best features of VN Video Editor is its wide variety of templates, which makes it easy for users to create videos that look great in just a few minutes. In addition, the templates are very customizable; users can change the color and text and add their media files.
The templates are also useful for those who need to become more familiar with video editing and want to create professional-looking videos without spending much time on the editing process.
The templates include various styles and themes, such as modern, classic, and vintage. They also come with various layouts, such as split-screen and collage. Moreover, these templates can create a wide range of videos, from promotional and product demonstrations to travel vlogs and personal videos.
How To Use & Download VN Video Templates
Using templates in VN Video Editor is a great way to create professional-looking videos quickly and easily. The process is straightforward and can be done in just a few steps. Here’s a quick guide on how to use and download templates in VN Video Editor.
Step1 Download VN Video Editor and launch it on your mobile phone. Tap the “Template“ button.

Step2 Choose the free available templates you want to use.

Step3 Click the “Download“ button to download your template.

Step4 Click the “Use Template“ button to start the editing process.

Step5 Select the images or clips you want and click “Next.”

Step6 Make desired adjustments to your template.

Step7 Click the “Export“ button and adjust the “Export Settings.”

Step8 Click “Save“ and wait for your exported clip.

5 Amazing Templates in VN Video Editor
VN Video Editor is a powerful and user-friendly app with various templates. These templates can create a wide range of videos, from promotional and product demonstrations to travel vlogs and personal videos. This section will introduce you to 5 amazing templates you can use in VN Video Editor to create professional-looking videos.
1. Travel Vlog Template in VN Video Editor

This template is perfect for capturing the essence of your travels. It features a split-screen layout that lets you showcase multiple footage and locations at once, giving your audience a glimpse of all the exciting places you’ve visited. The template also includes customizable text and map animations to help you create a professional and engaging travel vlog.
2. Production Introduction Video Template in VN Video Editor

This template is designed to help you introduce your products or services professionally and engagingly. It features a clean and modern design highlighting your products and services and includes customizable text, product demonstrations, and animations to help create a video that stands out.
3. VN Cooking Vlog Template

This template is perfect for creating cooking videos that are both informative and engaging. It features a split-screen layout that lets you showcase multiple recipes and cooking techniques and includes customizable text and animations to help you create a professional cooking vlog.
4. VN Fashion Video Template

This template is perfect for creating fashion videos that are both stylish and engaging. It features a clean and modern design highlighting the latest fashion trends and includes customizable text and animations to help create a video that stands out in the fashion industry.
5. Beauty Video Template of VN Video Editor

This template is designed to help you create videos that showcase your beauty and skincare products professionally and engagingly. It features a clean and modern design highlighting your products and services and includes customizable text and animations to help create a video that stands out in the beauty industry.
Each template has its unique style and design and can be easily customized to match your brand or style. With the help of these templates, you can create professional-looking videos in no time.
20+ VN Code Video Templates
In addition to the templates that come with VN Video Editor, a wide variety of templates are available from other vloggers and creators. These templates are created by app users who have shared their designs for others to use. These templates are often more specialized and niche-focused than the templates that come with the app, making them ideal for creating videos on specific topics.
1. 10 VN Video Templates for Instagram Reel
This provides access to 10 VN Video Templates for Instagram Reel made by YouTuber Bagus Muhamad. These templates are designed to help you create engaging and professional-looking Instagram Reel videos quickly and easily.
These templates come in various styles and themes, such as modern, classic, and vintage. They also come with various layouts, such as split-screen and collage. All templates are fully customizable with the VN Video Editor. You can change the color and text and add your media files.
These templates are perfect for creating Instagram Reel videos that attract attention. With the help of these templates, you can create professional-looking videos in no time.
2. 10 VN Cinematic Video Templates
This provides access to 10 VN Cinematic Video Templates by YouTuber Dhemusz Official. These templates are designed to help you create cinematic and professional-looking videos quickly and easily.
They come in various styles and themes, such as modern, classic, and vintage. They also come with various layouts, such as split-screen and collage. All templates are fully customizable with the VN Video Editor, and you can change the color and text and add your media files to them.
These templates are perfect for creating videos with a cinematic feel and look, making them great for movie trailers, short films, and more. With the help of these templates, you can create professional-looking videos in no time.
3. 8 VN Video Templates
This provides access to a collection of 8 VN Video Templates created by YouTuber desiwithcamera. These templates offer a unique blend of style and functionality, making it easy for users to create professional-looking videos.
Each template boasts a different aesthetic, including modern, classic, and vintage themes and diverse layout options such as split-screen and collage. The templates are fully customizable with the VN Video Editor, enabling users to incorporate their media files, adjust colors and add texts, thus making it stand out from the crowd.
These templates suit various videos, such as product reviews, personal vlogs, and event videos. With these templates, you can elevate your video editing skills and create visually stunning videos in minutes.
[Bonus] VN’s Best Alternative - Filmora Mobile Video Editor
Filmora Mobile Video Editor is a great alternative to VN Video Editor. It is a powerful and user-friendly video editing app that allows you to create stunning videos on your mobile device. It comes with various templates and features similar to VN Video Editor.
Free Download For Win 7 or later(64-bit)
Free Download For macOS 10.14 or later

Here are some of the key template features of Filmora Mobile Video Editor:
- Variety of Templates: Filmora Mobile Video Editor offers a wide range of templates for various types of videos, such as travel vlogs, product reviews, and personal vlogs.
- Customizable Templates: Filmora Mobile Video Editor’s templates are fully customizable, allowing you to add your media files and text and adjust the colors to match your brand or style.
- Unique Templates: Filmora Mobile Video Editor provides unique templates with different themes and styles that are not commonly found in other video editing apps.
- Animated Templates: Filmora Mobile Video Editor has a variety of animated templates that add dynamic movement to your videos and give them a professional look.
- Split-screen templates: Filmora Mobile Video Editor also has a variety of split-screen templates that allow you to showcase multiple footages at once, giving your videos a unique and interesting look.
Using these templates, you can easily create professional-looking videos that stand out. The templates in Filmora Mobile Video Editor are perfect for those who need to become more familiar with video editing and want to create professional-looking videos without spending much time on the editing process.
Conclusion
VN Video Editor is a powerful and user-friendly video editing app with various templates to choose from. These templates are perfect for creating professional-looking videos quickly and easily.
However, Filmora Mobile Video Editor is also a great alternative for VN. It offers similar features, such as customizable templates and various templates for various types of videos. It also has unique preset templates not commonly found in other video editing apps, and its animated templates add dynamic movement to your videos, giving them a professional look.
Overview of VN Video Editor and Its Templates
VN Video Editor is a popular video editing software on desktop and mobile devices. The mobile version of VN Video Editor is available on both Google Play Store and App Store. The app’s mobile version is particularly useful for those who want to create and edit videos on the go. The app is user-friendly and intuitive, making it easy for anyone to create professional-looking videos.
One of the best features of VN Video Editor is its wide variety of templates, which makes it easy for users to create videos that look great in just a few minutes. In addition, the templates are very customizable; users can change the color and text and add their media files.
The templates are also useful for those who need to become more familiar with video editing and want to create professional-looking videos without spending much time on the editing process.
The templates include various styles and themes, such as modern, classic, and vintage. They also come with various layouts, such as split-screen and collage. Moreover, these templates can create a wide range of videos, from promotional and product demonstrations to travel vlogs and personal videos.
How To Use & Download VN Video Templates
Using templates in VN Video Editor is a great way to create professional-looking videos quickly and easily. The process is straightforward and can be done in just a few steps. Here’s a quick guide on how to use and download templates in VN Video Editor.
Step1 Download VN Video Editor and launch it on your mobile phone. Tap the “Template“ button.
Step2 Choose the free available templates you want to use.
Step3 Click the “Download“ button to download your template.
Step4 Click the “Use Template“ button to start the editing process.
Step5 Select the images or clips you want and click “Next.”
Step6 Make desired adjustments to your template.
Step7 Click the “Export“ button and adjust the “Export Settings.”
Step8 Click “Save“ and wait for your exported clip.
5 Amazing Templates in VN Video Editor
VN Video Editor is a powerful and user-friendly app with various templates. These templates can create a wide range of videos, from promotional and product demonstrations to travel vlogs and personal videos. This section will introduce you to 5 amazing templates you can use in VN Video Editor to create professional-looking videos.
1. Travel Vlog Template in VN Video Editor
This template is perfect for capturing the essence of your travels. It features a split-screen layout that lets you showcase multiple footage and locations at once, giving your audience a glimpse of all the exciting places you’ve visited. The template also includes customizable text and map animations to help you create a professional and engaging travel vlog.
2. Production Introduction Video Template in VN Video Editor
This template is designed to help you introduce your products or services professionally and engagingly. It features a clean and modern design highlighting your products and services and includes customizable text, product demonstrations, and animations to help create a video that stands out.
3. VN Cooking Vlog Template
This template is perfect for creating cooking videos that are both informative and engaging. It features a split-screen layout that lets you showcase multiple recipes and cooking techniques and includes customizable text and animations to help you create a professional cooking vlog.
4. VN Fashion Video Template
This template is perfect for creating fashion videos that are both stylish and engaging. It features a clean and modern design highlighting the latest fashion trends and includes customizable text and animations to help create a video that stands out in the fashion industry.
5. Beauty Video Template of VN Video Editor
This template is designed to help you create videos that showcase your beauty and skincare products professionally and engagingly. It features a clean and modern design highlighting your products and services and includes customizable text and animations to help create a video that stands out in the beauty industry.
Each template has its unique style and design and can be easily customized to match your brand or style. With the help of these templates, you can create professional-looking videos in no time.
20+ VN Code Video Templates
In addition to the templates that come with VN Video Editor, a wide variety of templates are available from other vloggers and creators. These templates are created by app users who have shared their designs for others to use. These templates are often more specialized and niche-focused than the templates that come with the app, making them ideal for creating videos on specific topics.
1. 10 VN Video Templates for Instagram Reel
This provides access to 10 VN Video Templates for Instagram Reel made by YouTuber Bagus Muhamad. These templates are designed to help you create engaging and professional-looking Instagram Reel videos quickly and easily.
These templates come in various styles and themes, such as modern, classic, and vintage. They also come with various layouts, such as split-screen and collage. All templates are fully customizable with the VN Video Editor. You can change the color and text and add your media files.
These templates are perfect for creating Instagram Reel videos that attract attention. With the help of these templates, you can create professional-looking videos in no time.
2. 10 VN Cinematic Video Templates
This provides access to 10 VN Cinematic Video Templates by YouTuber Dhemusz Official. These templates are designed to help you create cinematic and professional-looking videos quickly and easily.
They come in various styles and themes, such as modern, classic, and vintage. They also come with various layouts, such as split-screen and collage. All templates are fully customizable with the VN Video Editor, and you can change the color and text and add your media files to them.
These templates are perfect for creating videos with a cinematic feel and look, making them great for movie trailers, short films, and more. With the help of these templates, you can create professional-looking videos in no time.
3. 8 VN Video Templates
This provides access to a collection of 8 VN Video Templates created by YouTuber desiwithcamera. These templates offer a unique blend of style and functionality, making it easy for users to create professional-looking videos.
Each template boasts a different aesthetic, including modern, classic, and vintage themes and diverse layout options such as split-screen and collage. The templates are fully customizable with the VN Video Editor, enabling users to incorporate their media files, adjust colors and add texts, thus making it stand out from the crowd.
These templates suit various videos, such as product reviews, personal vlogs, and event videos. With these templates, you can elevate your video editing skills and create visually stunning videos in minutes.
[Bonus] VN’s Best Alternative - Filmora Mobile Video Editor
Filmora Mobile Video Editor is a great alternative to VN Video Editor. It is a powerful and user-friendly video editing app that allows you to create stunning videos on your mobile device. It comes with various templates and features similar to VN Video Editor.
Free Download For Win 7 or later(64-bit)
Free Download For macOS 10.14 or later
Here are some of the key template features of Filmora Mobile Video Editor:
- Variety of Templates: Filmora Mobile Video Editor offers a wide range of templates for various types of videos, such as travel vlogs, product reviews, and personal vlogs.
- Customizable Templates: Filmora Mobile Video Editor’s templates are fully customizable, allowing you to add your media files and text and adjust the colors to match your brand or style.
- Unique Templates: Filmora Mobile Video Editor provides unique templates with different themes and styles that are not commonly found in other video editing apps.
- Animated Templates: Filmora Mobile Video Editor has a variety of animated templates that add dynamic movement to your videos and give them a professional look.
- Split-screen templates: Filmora Mobile Video Editor also has a variety of split-screen templates that allow you to showcase multiple footages at once, giving your videos a unique and interesting look.
Using these templates, you can easily create professional-looking videos that stand out. The templates in Filmora Mobile Video Editor are perfect for those who need to become more familiar with video editing and want to create professional-looking videos without spending much time on the editing process.
Conclusion
VN Video Editor is a powerful and user-friendly video editing app with various templates to choose from. These templates are perfect for creating professional-looking videos quickly and easily.
However, Filmora Mobile Video Editor is also a great alternative for VN. It offers similar features, such as customizable templates and various templates for various types of videos. It also has unique preset templates not commonly found in other video editing apps, and its animated templates add dynamic movement to your videos, giving them a professional look.
How to Make a Smooth Speed Ramping in Premiere Pro?
Versatile Video Editor - Wondershare Filmora
An easy and powerful editor
Numerous effects to choose from
Detailed tutorials are provided by the official channel
Speed ramping is a popular Premiere Pro effect for good reason: it looks fantastic! When utilized simultaneously to spice up a video clip, slow motion and quick motion may both be great aesthetic choices. This practice may save you time by enabling you to show more about what you want to see in your edit without using harsh jump cuts.

This effect may be used for a number of reasons, including clip transitions, speeding up a clip to make it shorter, and slowing down a clip to make it longer. Speed ramping may be used with a number of various effects.
According to the business, Adobe Premiere Pro is one of the most widely used video editing products on the market today. The ability to alter the speed of individual clips is one of Premiere Pro’s most important capabilities. While speed ramping is often used in sports highlights, changing the speed of video may be useful for a number of other types of material.
You’ll learn how to construct a spectacular speed ramp in Adobe Premiere Pro, beginning with capturing the proper kind of video and moving to advanced tips and methods. Following that, we’ll go through some ideas and inspiration for when to use a speed ramp in your circumstance.
What is Speed Ramping?
A speed ramp is used to gradually increase the speed of a video clip as it accelerates or decelerates. It is guaranteed that a smooth transition between two separate speeds will take place. The method is crucial in changing the tempo of the film and, as a consequence, creating a dramatic impression. The film’s required velocity is achieved by the employment of super-fast visual effects.
A speed ramp, as opposed to a rapid shift in speed, provides for a more smooth transition between two drastically differing speeds. This method is used to focus attention on certain parts of your video, which has a huge impact on your editing. It provides just the right amount of zing to keep your audience interested and excited about your presentation.
Examples of Speed Ramping
It works especially well when utilized to focus the viewer’s attention on a certain moment or action in your videos, such as a tough jump or an impending bullet. Another name for this approach speeds ramping (sometimes known as time remapping). It may also be used to create a visually pleasing transition between two clips or pictures inside a single movie.
You may also use Speed Ramping to alter the runtime of your video to fit the time limits of other social media sites, such as Instagram and Vine. If you just have 30 seconds to deliver your video, the following are the two most common places where people apply speed ramping techniques:
Assume you are shooting a person walking and want the clip to play in slow motion so that viewers can clearly see the person’s face. In this scenario, speed ramping is precisely what you need since it enables you to do precisely that.
Do you remember the famous movie “The Matrix” scene, when Neo dodges the bullets? It’s not some typical scene; it’s a pretty good example of speed ramping.
How to Create Speed Ramping/Time Remapping in Premiere Pro?
Speed Ramping premiere pro is an excellent tool for speeding up video clips. ‘ In order to speed up or slow down the speed of a video clip, this effect may be employed. In this article, you’ll learn how to make the most of this fantastic tool in Adobe Premiere Pro.

While using Premiere Pro, the ability to change a clip’s speed without altering its pitch is a very useful feature. An example of how this feature comes in helpful is when you have a clip that shows someone or something moving from left to right or vice versa.
Advanced Premiere Pro Time Remapping
The fact that this effect is so simple to use is its main benefit. By moving handles around on the clip, you may quickly choose different regions of the clip to be influenced by the adjustment when you apply it. This makes achieving the required result extremely quick and easy.

If you want to go deep into the game, Speed Ramp offers some more advanced options that give you even more control over your speed modifications. The properties section allows you to designate which portions of the timeline are affected by the ramp, as well as change factors like the curve type and bias.
Steps To Use Speed Ramping In Premiere Pro
Follow the below-mentioned steps to learn how to use speed ramping in premiere pro:
- Download and install Adobe Premiere Pro. Once installed, launch the application.
- Create a new project in Premiere by clicking the New Project button. After that, import the film that you want to speed ramp. It is the simplest and most straightforward method of importing film into Premiere to just click and drag the clip into the project window.
- Before commencing any work with speed, click and drag the video track in the timeline to make it taller by increasing the height of the track. This will guarantee that you can see the speed ramp as you go to the next stages.
- To create a sequence if you don’t already have one, drag a clip into the timeline and drop it where you want it to appear. Using the clip’s parameters, Premiere will automatically generate a sequence with the necessary settings.
- Decide when you want to apply the speed ramp and mark the spot on the screen where you will do so. The key to a pleasant speed ramp is movement, so choose a time when the environment is very active. You can specify in and out points, cut the clip with “Command+K,” or divide the clip into parts using the razor blade tool (which is accessible through the “Command+K” shortcut).
- Keyframes will be created at this point. It’s first and foremost important that the keyframes be clearly visible. Access the proper view by selecting “Show Clip Keyframes” from the context menu when you right-click on your clip.
- Another drop-down option will appear, from which you’ll choose “Time Remapping” and then press the “Enter” key.
- Select “Speed” from the drop-down menu.
- To create a keyframe, choose the pen from the toolbar (or just use the “P” key on your keyboard) and click on the white line running across the video track. If you wish to make a speed ramp, you’ll need at least two keyframes: one to indicate where the speed ramp should begin and another to indicate where it should terminate.
- If you wish to create more sophisticated speed ramps, you may do so by including more keyframes in your animation.
- Switch back to the selection tool when you’ve finished placing your keyframes. “V” is the shortcut key for this.
- Now comes the critical moment: it’s time to change the speed. This is a task that Premiere Pro makes rather simple. The only thing you have to do now is click on the white line between the keyframes you have created and drag it either up or down, depending on your preference for speed or slowness.
- It’s not finished yet; we still need to smooth it out a little more. With the selection tool selected, click and drag one of the keyframe markers to the other side of the screen. The number of frames across which the speed shift will occur will be stretched out as a result of this. The longer and more gradual the speed ramp will be, the greater the distance between the two sides of the keyframe indication is separated.
- Complete the process with the other keyframe, and your speed ramp will be complete!
Techniques to Make Speed Ramping Smooth
In this section, we will be viewing some advanced time remapping features of Adobe Premiere Pro, which are as follows.
Keyframe Interpolation
When creating a speed ramp, keyframes are used to indicate the beginning and finishing points of the speed shift. However, there are a number of methods in which Premiere may transport the clip from point A to point B.
In the video industry, filling in the data between the two locations is known as keyframe interpolation.
- Simply dragging to divide a keyframe, like in the previous example, results in an equitable speed increase between the keyframes in the animation. Linear interpolation is the term used to describe this process.
- Instead of using Bezier Interpolation, you may utilize it to produce a smoother, more natural speed ramp. With Bezier Interpolation, the pace at which the speed increases will likewise accelerate, giving the effect of a more pronounced ramp.
- To build an S-curve shape, choose a keyframe and drag the Bezier handles to the desired position. Make adjustments until you are satisfied with the outcome.
Speed Ramp Transition
Speed ramp transitions are easy to make and may be utilized to add visual interest to a wide range of video genres. This effect is achieved by boosting the clip speed at the end of a clip before transitioning into a cut.
- In the second clip, the tempo is abruptly boosted and subsequently decreased to provide a smooth transition between situations. It may symbolize the passage of time, a character’s perplexity, or simply add flair to a commercial film.
- Using Premiere Pro, create a ramp-up at the end of your first clip and a ramp-down at the start of your second clip. The speed rubber band will be curved like a bell curve across the two clips when finished.
Adding speed ramps to films in Premiere Pro may improve the usefulness and looks of a variety of movies, from narrative features to social media posts. In Premiere, you may easily create and adjust speed duration directly in the timeline to meet any needs.
Speed Ramping In Wondershare Filmora
We understood how to do speed ramping in Premiere Pro. You can also get the same results using a much easier software that is “Wondershare Filmora”.
What is Wondershare Filmora?
Filmora is a video editor that is best suited for social video editors, vloggers, home movies, and other video projects. In addition, it may be used on both Macs and PCs. To begin using Filmora, you just need to pay a one-time registration fee of $0! You’ll notice a watermark when you export from the free version. For $59.99, Filmora’s latest version is a one-time purchase that doesn’t need a subscription!
Amazing Features
Filmora is an award-winning video editing program, that allows users to create visually stunning videos without the need for complex editing techniques.
Video playback in Filmora’s latest version may be accelerated by the graphics card (GPU). It’s accelerating at an alarming rate right now. It’s also possible to lower the resolution of a 4K or higher video for quicker playing. Cuts and splits are a snap using Filmora. Make a cut by dragging your play head to the location where you want to split the footage. Then, to remove the additional clip from the clip, use the delete key.
Even those with the most basic PC hardware may use this video editing software to create high-quality movies. Moreover, the most anticipated features that Filmora’s latest version offers are as follows:
- Motion Tracking
- Keyframing Animations
- Audio Ducking
- Split Screen
- Video Transitions
- Speed Control
- Color Grading
- Filmstock Effects
- Multiple Formats Exporting
Users may utilize the color tuning option to change the white balance and dynamic range of their video clip, among other things. You may alter the audio levels of each track using the audio mixer tool. The advanced Text Editor function allows you to adjust the color, size, font, and even the motion of text. The screen recording tool enables you to capture your computer’s screen as well as your webcam in excellent quality. The video stabilization feature lowers or eliminates the effect of camera shake on video.
Speed Ramping In Filmora
The method is crucial in changing the tempo of the film and, as a consequence, creating a dramatic impression. The film’s required speed is achieved by the employment of super-fast visual effects.
When using a camera with a much higher frame rate, the speed ramping approach may provide excellent effects. It aids in the production of the most dramatic impression.
Speed ramping effects are available in six presets, which include Montage, Hero Moment, Bullet Time, Jumper, and Flash In, all of which will add a theatrical element to your movie that will leave your viewers in awe.

Creative pros can swiftly and effectively speed up a movie with Wondershare Filmora. However, in order to get the intended results, it is essential to completely understand and adhere to the approach.
Wondershare Filmora 11 has a variety of tools and features to help you create a visually stunning film in a short period of time. Its Instant Mode allows you to produce a video creation from start to finish in less than 5 minutes.
Steps
- Download and Install Filmora. Launch the application on your system.

- Navigate to the chosen video and open it in the program to speed up and lengthen it. You may also add the movie to the interface by dragging and dropping it there.

- When the video appears in the timeline, right-click it to begin playback. As a consequence, a context menu is displayed.

- Select Speed from the pop-up editing window, and then select Speed Ramping from the drop-down menu.

- Alternatively, right-click on the video or audio clip, choose Speed from the drop-down menu, and select Speed Ramping.

- In the Speed Ramping panel, you may adjust the speed or choose from a number of presets, including Montage, Hero Moment, Bullet Time, Jumper, Flash in, and Flash out, to use as templates. You have the option of using the Preset speed ramps. Alternatively, you may personalize your own innovative ones.

- Move the play head to the point where you wish to increase or decrease the speed of the video or audio. Then, to add speed keyframes, choose the Add icon from the toolbar. The video or audio clips will be marked as Speed Ramping when the speed ramp has been added by Filmora.

- If you want to delete a keyframe, you can do so by selecting that particular keyframe and selecting the delete button like in the image:

- As we go on to the video keyframe speed adjustment, just slide the keyframe dot upward or downward to alter the point speed of the movie. Aside from that, you can keep the audio pitch constant regardless of how fast or slow the video is moving.

- The settings will be saved if you are pleased with them after you make the necessary modifications. In any other case, you may use the Reset button to return to the original configuration.
- When you’ve finished your work, go to the “File” panel and choose “Save Project” from the list of options that display. Change the name of the project and then click “Save.”
- Additionally, the movie may be exported using Filmora’s “Export” feature; just choose “Export” and then specify a new name for the file. The video may be exported to a device, a system, or even YouTube. After that, choose “Export.”

Speed Ramping Tips
- High Frame Rate: The frame rate is an important consideration when it comes to speed ramping. If you wish to slow down the video after it’s been recorded, shoot it at a frame rate higher than 60 frames per second. When a video is slowed down, there should be enough frames to guarantee that the video passes the 24 frames per second threshold frame rate.
- Choose The Appropriate Frame Resolution: Another possibility is to modify your video’s frame resolution. The tip has the ability to edit the clip’s properties from the Slowing down the video is achieved by changing the frame rate in the clip’s parameters from 120 to 24 frames per second. As a consequence, the frames will be expanded to the proper frame rate. As a consequence, the video is slowed down but not jerked.
- Purposeful Time Remapping: Instead of keeping the same pace throughout the film, a deliberate speed ramp should be implemented. A video has emotional, mysterious, exciting, and slow-motion Why is this the case? The usage of the same video speed throughout the film may have a negative influence on the watching experience. As a result, it is critical that videos be separated into genres and that the tempo of the videos is modified accordingly.
Conclusion
The use of the ideal cinematic effect at the right time boosts the audience and engagement with the material. This respective article explored speed ramping in-depth and oughts to teach creative pros how to slow down a video and speed up a movie. It covers speed raming in premiere pro and then moves toward Wondershare Filmora which seems a bit easier. Wondershare Filmora is a good choice for completing the task as quickly as possible. You will have access to all of the effects and tools mentioned, as well as the ability to keep the audio pitch consistent throughout the effect, which is critical while altering the video speed.
Speed ramping is a popular Premiere Pro effect for good reason: it looks fantastic! When utilized simultaneously to spice up a video clip, slow motion and quick motion may both be great aesthetic choices. This practice may save you time by enabling you to show more about what you want to see in your edit without using harsh jump cuts.
This effect may be used for a number of reasons, including clip transitions, speeding up a clip to make it shorter, and slowing down a clip to make it longer. Speed ramping may be used with a number of various effects.
According to the business, Adobe Premiere Pro is one of the most widely used video editing products on the market today. The ability to alter the speed of individual clips is one of Premiere Pro’s most important capabilities. While speed ramping is often used in sports highlights, changing the speed of video may be useful for a number of other types of material.
You’ll learn how to construct a spectacular speed ramp in Adobe Premiere Pro, beginning with capturing the proper kind of video and moving to advanced tips and methods. Following that, we’ll go through some ideas and inspiration for when to use a speed ramp in your circumstance.
What is Speed Ramping?
A speed ramp is used to gradually increase the speed of a video clip as it accelerates or decelerates. It is guaranteed that a smooth transition between two separate speeds will take place. The method is crucial in changing the tempo of the film and, as a consequence, creating a dramatic impression. The film’s required velocity is achieved by the employment of super-fast visual effects.
A speed ramp, as opposed to a rapid shift in speed, provides for a more smooth transition between two drastically differing speeds. This method is used to focus attention on certain parts of your video, which has a huge impact on your editing. It provides just the right amount of zing to keep your audience interested and excited about your presentation.
Examples of Speed Ramping
It works especially well when utilized to focus the viewer’s attention on a certain moment or action in your videos, such as a tough jump or an impending bullet. Another name for this approach speeds ramping (sometimes known as time remapping). It may also be used to create a visually pleasing transition between two clips or pictures inside a single movie.
You may also use Speed Ramping to alter the runtime of your video to fit the time limits of other social media sites, such as Instagram and Vine. If you just have 30 seconds to deliver your video, the following are the two most common places where people apply speed ramping techniques:
Assume you are shooting a person walking and want the clip to play in slow motion so that viewers can clearly see the person’s face. In this scenario, speed ramping is precisely what you need since it enables you to do precisely that.
Do you remember the famous movie “The Matrix” scene, when Neo dodges the bullets? It’s not some typical scene; it’s a pretty good example of speed ramping.
How to Create Speed Ramping/Time Remapping in Premiere Pro?
Speed Ramping premiere pro is an excellent tool for speeding up video clips. ‘ In order to speed up or slow down the speed of a video clip, this effect may be employed. In this article, you’ll learn how to make the most of this fantastic tool in Adobe Premiere Pro.
While using Premiere Pro, the ability to change a clip’s speed without altering its pitch is a very useful feature. An example of how this feature comes in helpful is when you have a clip that shows someone or something moving from left to right or vice versa.
Advanced Premiere Pro Time Remapping
The fact that this effect is so simple to use is its main benefit. By moving handles around on the clip, you may quickly choose different regions of the clip to be influenced by the adjustment when you apply it. This makes achieving the required result extremely quick and easy.
If you want to go deep into the game, Speed Ramp offers some more advanced options that give you even more control over your speed modifications. The properties section allows you to designate which portions of the timeline are affected by the ramp, as well as change factors like the curve type and bias.
Steps To Use Speed Ramping In Premiere Pro
Follow the below-mentioned steps to learn how to use speed ramping in premiere pro:
- Download and install Adobe Premiere Pro. Once installed, launch the application.
- Create a new project in Premiere by clicking the New Project button. After that, import the film that you want to speed ramp. It is the simplest and most straightforward method of importing film into Premiere to just click and drag the clip into the project window.
- Before commencing any work with speed, click and drag the video track in the timeline to make it taller by increasing the height of the track. This will guarantee that you can see the speed ramp as you go to the next stages.
- To create a sequence if you don’t already have one, drag a clip into the timeline and drop it where you want it to appear. Using the clip’s parameters, Premiere will automatically generate a sequence with the necessary settings.
- Decide when you want to apply the speed ramp and mark the spot on the screen where you will do so. The key to a pleasant speed ramp is movement, so choose a time when the environment is very active. You can specify in and out points, cut the clip with “Command+K,” or divide the clip into parts using the razor blade tool (which is accessible through the “Command+K” shortcut).
- Keyframes will be created at this point. It’s first and foremost important that the keyframes be clearly visible. Access the proper view by selecting “Show Clip Keyframes” from the context menu when you right-click on your clip.
- Another drop-down option will appear, from which you’ll choose “Time Remapping” and then press the “Enter” key.
- Select “Speed” from the drop-down menu.
- To create a keyframe, choose the pen from the toolbar (or just use the “P” key on your keyboard) and click on the white line running across the video track. If you wish to make a speed ramp, you’ll need at least two keyframes: one to indicate where the speed ramp should begin and another to indicate where it should terminate.
- If you wish to create more sophisticated speed ramps, you may do so by including more keyframes in your animation.
- Switch back to the selection tool when you’ve finished placing your keyframes. “V” is the shortcut key for this.
- Now comes the critical moment: it’s time to change the speed. This is a task that Premiere Pro makes rather simple. The only thing you have to do now is click on the white line between the keyframes you have created and drag it either up or down, depending on your preference for speed or slowness.
- It’s not finished yet; we still need to smooth it out a little more. With the selection tool selected, click and drag one of the keyframe markers to the other side of the screen. The number of frames across which the speed shift will occur will be stretched out as a result of this. The longer and more gradual the speed ramp will be, the greater the distance between the two sides of the keyframe indication is separated.
- Complete the process with the other keyframe, and your speed ramp will be complete!
Techniques to Make Speed Ramping Smooth
In this section, we will be viewing some advanced time remapping features of Adobe Premiere Pro, which are as follows.
Keyframe Interpolation
When creating a speed ramp, keyframes are used to indicate the beginning and finishing points of the speed shift. However, there are a number of methods in which Premiere may transport the clip from point A to point B.
In the video industry, filling in the data between the two locations is known as keyframe interpolation.
- Simply dragging to divide a keyframe, like in the previous example, results in an equitable speed increase between the keyframes in the animation. Linear interpolation is the term used to describe this process.
- Instead of using Bezier Interpolation, you may utilize it to produce a smoother, more natural speed ramp. With Bezier Interpolation, the pace at which the speed increases will likewise accelerate, giving the effect of a more pronounced ramp.
- To build an S-curve shape, choose a keyframe and drag the Bezier handles to the desired position. Make adjustments until you are satisfied with the outcome.
Speed Ramp Transition
Speed ramp transitions are easy to make and may be utilized to add visual interest to a wide range of video genres. This effect is achieved by boosting the clip speed at the end of a clip before transitioning into a cut.
- In the second clip, the tempo is abruptly boosted and subsequently decreased to provide a smooth transition between situations. It may symbolize the passage of time, a character’s perplexity, or simply add flair to a commercial film.
- Using Premiere Pro, create a ramp-up at the end of your first clip and a ramp-down at the start of your second clip. The speed rubber band will be curved like a bell curve across the two clips when finished.
Adding speed ramps to films in Premiere Pro may improve the usefulness and looks of a variety of movies, from narrative features to social media posts. In Premiere, you may easily create and adjust speed duration directly in the timeline to meet any needs.
Speed Ramping In Wondershare Filmora
We understood how to do speed ramping in Premiere Pro. You can also get the same results using a much easier software that is “Wondershare Filmora”.
What is Wondershare Filmora?
Filmora is a video editor that is best suited for social video editors, vloggers, home movies, and other video projects. In addition, it may be used on both Macs and PCs. To begin using Filmora, you just need to pay a one-time registration fee of $0! You’ll notice a watermark when you export from the free version. For $59.99, Filmora’s latest version is a one-time purchase that doesn’t need a subscription!
Amazing Features
Filmora is an award-winning video editing program, that allows users to create visually stunning videos without the need for complex editing techniques.
Video playback in Filmora’s latest version may be accelerated by the graphics card (GPU). It’s accelerating at an alarming rate right now. It’s also possible to lower the resolution of a 4K or higher video for quicker playing. Cuts and splits are a snap using Filmora. Make a cut by dragging your play head to the location where you want to split the footage. Then, to remove the additional clip from the clip, use the delete key.
Even those with the most basic PC hardware may use this video editing software to create high-quality movies. Moreover, the most anticipated features that Filmora’s latest version offers are as follows:
- Motion Tracking
- Keyframing Animations
- Audio Ducking
- Split Screen
- Video Transitions
- Speed Control
- Color Grading
- Filmstock Effects
- Multiple Formats Exporting
Users may utilize the color tuning option to change the white balance and dynamic range of their video clip, among other things. You may alter the audio levels of each track using the audio mixer tool. The advanced Text Editor function allows you to adjust the color, size, font, and even the motion of text. The screen recording tool enables you to capture your computer’s screen as well as your webcam in excellent quality. The video stabilization feature lowers or eliminates the effect of camera shake on video.
Speed Ramping In Filmora
The method is crucial in changing the tempo of the film and, as a consequence, creating a dramatic impression. The film’s required speed is achieved by the employment of super-fast visual effects.
When using a camera with a much higher frame rate, the speed ramping approach may provide excellent effects. It aids in the production of the most dramatic impression.
Speed ramping effects are available in six presets, which include Montage, Hero Moment, Bullet Time, Jumper, and Flash In, all of which will add a theatrical element to your movie that will leave your viewers in awe.
Creative pros can swiftly and effectively speed up a movie with Wondershare Filmora. However, in order to get the intended results, it is essential to completely understand and adhere to the approach.
Wondershare Filmora 11 has a variety of tools and features to help you create a visually stunning film in a short period of time. Its Instant Mode allows you to produce a video creation from start to finish in less than 5 minutes.
Steps
- Download and Install Filmora. Launch the application on your system.
- Navigate to the chosen video and open it in the program to speed up and lengthen it. You may also add the movie to the interface by dragging and dropping it there.
- When the video appears in the timeline, right-click it to begin playback. As a consequence, a context menu is displayed.
- Select Speed from the pop-up editing window, and then select Speed Ramping from the drop-down menu.
- Alternatively, right-click on the video or audio clip, choose Speed from the drop-down menu, and select Speed Ramping.
- In the Speed Ramping panel, you may adjust the speed or choose from a number of presets, including Montage, Hero Moment, Bullet Time, Jumper, Flash in, and Flash out, to use as templates. You have the option of using the Preset speed ramps. Alternatively, you may personalize your own innovative ones.
- Move the play head to the point where you wish to increase or decrease the speed of the video or audio. Then, to add speed keyframes, choose the Add icon from the toolbar. The video or audio clips will be marked as Speed Ramping when the speed ramp has been added by Filmora.
- If you want to delete a keyframe, you can do so by selecting that particular keyframe and selecting the delete button like in the image:
- As we go on to the video keyframe speed adjustment, just slide the keyframe dot upward or downward to alter the point speed of the movie. Aside from that, you can keep the audio pitch constant regardless of how fast or slow the video is moving.
- The settings will be saved if you are pleased with them after you make the necessary modifications. In any other case, you may use the Reset button to return to the original configuration.
- When you’ve finished your work, go to the “File” panel and choose “Save Project” from the list of options that display. Change the name of the project and then click “Save.”
- Additionally, the movie may be exported using Filmora’s “Export” feature; just choose “Export” and then specify a new name for the file. The video may be exported to a device, a system, or even YouTube. After that, choose “Export.”
Speed Ramping Tips
- High Frame Rate: The frame rate is an important consideration when it comes to speed ramping. If you wish to slow down the video after it’s been recorded, shoot it at a frame rate higher than 60 frames per second. When a video is slowed down, there should be enough frames to guarantee that the video passes the 24 frames per second threshold frame rate.
- Choose The Appropriate Frame Resolution: Another possibility is to modify your video’s frame resolution. The tip has the ability to edit the clip’s properties from the Slowing down the video is achieved by changing the frame rate in the clip’s parameters from 120 to 24 frames per second. As a consequence, the frames will be expanded to the proper frame rate. As a consequence, the video is slowed down but not jerked.
- Purposeful Time Remapping: Instead of keeping the same pace throughout the film, a deliberate speed ramp should be implemented. A video has emotional, mysterious, exciting, and slow-motion Why is this the case? The usage of the same video speed throughout the film may have a negative influence on the watching experience. As a result, it is critical that videos be separated into genres and that the tempo of the videos is modified accordingly.
Conclusion
The use of the ideal cinematic effect at the right time boosts the audience and engagement with the material. This respective article explored speed ramping in-depth and oughts to teach creative pros how to slow down a video and speed up a movie. It covers speed raming in premiere pro and then moves toward Wondershare Filmora which seems a bit easier. Wondershare Filmora is a good choice for completing the task as quickly as possible. You will have access to all of the effects and tools mentioned, as well as the ability to keep the audio pitch consistent throughout the effect, which is critical while altering the video speed.
10 Best Voice Over Generators [Windows, Mac, Android, iPhone, and Online]
Best Voice Generator and Video Editor
Filmora’s Text to Speech (TTS) function allows you to convert your text files to voiceover and bring more elements to enrich your video.
Free Download Free Download Free Download Learn More >

Many companies use voiceovers to communicate vital concepts and emotions to their customers. Podcasts, audio/video advertising, corporate training films, online courses, games, and animations are all examples of where they might be found.
Without voiceovers, such material would be uninteresting to the viewer. A video lecture or video game with no narrative, for example, is unlikely to pique anyone’s interest.
Good voiceovers, on the other hand, are not inexpensive to make.
Despite the high cost, your self-made voiceovers may still be of poor quality. Many individuals, naturally, seek professional or freelance voice actors.
Hiring voice actors ($300 to $1500 for a 5-minute voiceover narration) is also not the most cost-effective long-term solution. Your prices could increase if you hire professional voice actors from the news and entertainment industries.
There are resources available. Voice over generators is available online. Most software products come in both free and premium versions, which you can pick from depending on your needs. These programs will swiftly help you reach your text to audio transformation goals, whether you’re a YouTube content maker in need of an informative voiceover or a disabled person looking for a user-friendly text-to-speech converter.
Yes! That’s correct. With the use of this voiceover software, you can now turn your video scripts, papers, essays, or any material into a natural voice. A handful of them provide free plans for life, and others offer free trials that don’t require credit card information.
Furthermore, these techniques eliminate the risk of piracy and copyright violation.
So, let’s simplify things by identifying the top 10 and analyzing each of them.
- ai (Supports Web)
Resemble.ai operates in a variety of ways. It can not only help you make a speech out of the text, but it can also generate text for adverts with a single click. The platform can also produce a personalized voice that you can use as a voice assistant for Alexa, Google, and other services. The technique can also be used by call centres to clone their agents’ voices and customize them.
Resemble gives you four alternative ways to create synthetic voices. You can use the API to generate voices, record up to 50 samples immediately on the online platform, choose from a large number of voice actors, or submit raw audio without a script.
Features
- The software allows you to Customize your brand’s tone.
- It creates responsive IVR agents.
- Possible to do Advertisement text generation with AI with one click.
- Allows Instant language translation.
Cons
- The user interface could be enhanced.
- - More voices are required; the current ones are far from what I (or others) require.
Price
The cheapest package is $30 per month.
For a personalized plan, contact a Resemble representative.
- ai ( Supports Web, Mobile
Lovo.ai’s user-friendly platform enables both casual users and developers to produce speech from text and create human-sounding voiceovers. Over 180 voice styles in 33 languages are available on the platform. The site is also regularly updated with new voices every day, giving consumers a wide range of options.
In just 15 minutes, the tool can generate personalized voices. On this platform, converting text to speech requires only three simple steps. Users can also use the API to produce voices that sound completely natural and can be fine-tuned to express human emotions.
Features
- Listening, conversion and sharing are all unlimited.
- A large voice library is available.
- Up to 15000 characters can be converted at once.
- Collection of unique voices. Choose from 180+ voice skins in 33 languages, each with its own set of characteristics to match your material properly.
- Genuine voices. Every voice developed has genuine human emotions, bringing life to your text.
Cons
- While the UI/UX is simple to use, it feels a little bland and dull.”
- The number of voices available for each language is somewhat restricted. More voice samples are available.”
- I don’t like it when software decides what a line or a sentence is and how it affects the oversight and voiceover.”
Pricing
Lovo.ai now offers two pricing options: (all pricing is for annual plans).
$34.99 per month for personal
$99.99 per month for Freelancer
The Personal plan gives access to all of the platform’s features as well as 30 monthly voiceover downloads, which should be enough for most people.
Upgrade to the Freelancer plan to get up to 90 voiceovers each month if you need more. Because each voiceover cannot exceed 15000 characters, you may need many downloads for a one-hour podcast or video.
You will have to pay an additional $69.99 per month per voice for voice cloning. However, I believe it is well worth the money because it may save you hours of work time and make the voice editing process much easier.
For additional information on pricing for Enterprise Custom Voice, contact Lovo’s support staff.
- Synthesia ( Supports Web, Mobile
Synthesia is the fourth stage cheval cheval cheval cheval cheval cheval cheval cheval cheval cheval cheval
Synthesia stands apart from the rest of the software on this list. It’s a video maker that also has an AI presenter.
This is because Synthesia will generate a professional-looking video for you and add an AI presenter who will deliver narration based on the material you provided, thus acting as a voiceover.
Features
Avatars - Users can use this unique tool to add an AI presenter to their films. There are many pre-built avatars to pick from.
Video with AI Presenter — Once you’ve chosen your avatar, all you have to do now is fill in your script. Synthesia allows you to make videos up to 2.5 hours long.
From text to video For the first time, turn plain words into a professional-looking video.
There are more than 60 languages available. We now support over 60 distinct languages.
There are over 45 AI avatars. Synthesia comes with 40+ avatars right out of the box.
These are Avatars that are unique to you.
Uploads of audio are possible using synthesis.
There is Music available for the background.
Ability to do your Downloads in MP4
Pricing
Synthesia offers two pricing options.
$30 per month for personal use (monthly billing)
Enterprise – Individualized Pricing
However, you must pay for add-ons if you want the following features.
Synthesia API – beginning at $49 per month. Custom Avatar – $1000 one-time.
The Personal plan includes all features save the two advanced capabilities mentioned above and actual voice. As a result, you can make up to 10 minutes of video per month.
Assume you’ve exhausted your video credits. More credits can be purchased for $30 for ten credits. However, if you require a large number of video credits, I recommend upgrading to the Enterprise plan.
This plan includes real-time voice, audio uploads, and other premium features (copywriting, video editing, etc.)
Cons
- Only video producers can use it. If you’re a podcaster, you’ll be disappointed with the tool.
- Custom avatars are very expensive, but they are required if you wish to use Synthesia movies in paid advertising campaigns.
4.Murf.ai ( Supports Web, Mobile)
Murf.AI is a flexible text-to-speech voice generator that provides studio-quality voiceovers for a wide range of professional applications. The tool has a large voice library with over 115 distinct voices in 15 languages. Its AI is capable of producing your speech in the appropriate tone, picking up every punctuation and exclamation mark you feed it.
It also has a grammatical assistant, so you can create proofread scripts that will only improve your voiceover work. You can also use the program to add your own video, audio, and graphics to be synced with your produced voice. With its enterprise plan, the tool also has a powerful collaboration capability.
Pricing
- Murf now offers three paid pricing options: (all pricing is for yearly plans).
- Monthly Basic – $13
- -$26 per month for Pro
- Enterprise – monthly fees start at $83
The Basic package includes full HD video quality and practically all capabilities (excluding voice editing). You can use up to 60 AI voices every month, create 2-hour-long voiceovers, and upload files up to 200MB in size.
For most users, I believe this plan is adequate. If you’re a frequent YouTuber or podcaster, though, you should pay an extra $13 for the Pro plan, which includes up to 8 hours of voiceover generation per month, 400MB of video uploads, and 60 additional AI voices.
Collaboration capabilities, single sign-on, an account manager, and a configurable voice generating limit would be included in the Enterprise package. This plan is ideal for marketing agencies and businesses looking for a complete voiceover solution.
Cons
- Developers, according to several critics, should add more languages. Murf has many fewer AI voices in the library than his competitors.
5.Play.ht
Play. Ht is a web-based voice generator that allows you to generate high-quality text-to-speech. Because of its basic user interface, the platform is exceptionally simple to use. It has a text box on the home page where you may input your text, choose the language, gender, and voice style, and choose the conversion speed.
Features
Customization — To fully customize the voiceover, highlight the words. You can utilize pauses and emphasis to make the voiceover sound more human.
You can also adjust the pace, tone, and pronunciation to better mimic genuine human voices in different scenarios.
Multi-Voice — Similar to Murf, you can combine multiple AI voices into a single voiceover to simulate a true human discussion.
Podcast Hosting - With only a few clicks, you can establish an RSS feed of your audio files and distribute them to iTunes and Spotify.
Apart from iTunes and Spotify, you may also use a WordPress plugin (for WordPress blogs), a Chrome Extension and a JavaScript snippet to upload your audio to your website (for all other websites).
Sounds Analytics - Play. It will gather information on all audio. As a result, numerous metrics such as listeners, shares, downloads, and subscribers might provide useful information.
Pricing
Play. ht has four pricing tiers as of August 2021. (all pricing below is for yearly plans).
$14.25 per month for personal use
$29.25 per month for professionals
$74.25 per month in Growth
$149.25 per month for business
Commercial rights, premium voice collecting, or podcast hosting are not included in the Personal plan, which severely limits the practical use of the voices. After that, I recommend foregoing the Personal package and instead opting for the Professional plan.
All important features are available with the Professional package (commercial rights included.) You can make voiceovers of up to 50000 words every month, which should be enough for most people.
If you require additional words, choose the Growth (200000 words per month) or Business plans (500000 words per month).
Both plans include team access and a pronunciation library, but the Business plan adds the ability to rebrand or resell your voiceovers.
Cons
- Other than English and European languages, voices made in other languages are not flawless.
- There isn’t a built-in video editor for adding voiceovers to videos.
- Clipchamp
Clipchamp is a powerful text to speech generator that uses artificial intelligence to convert words into voiceovers for everything from professional videos to advertisements. In a matter of seconds, it can convert an imported script into speech.
Because of its simplicity, Clipchamp is another excellent choice for beginners. To generate a preview, simply select your voice, language, and speed before uploading a script. The AI technology in the tool analyzes the script to identify areas that need to be changed.
Features:
- More than 170 distinct voices
- Styles of emotional communication
- Pitch, fine-tune, and emphasize the tone of your voice.
- Simple to operate
Pricing
Clipchamp is available for a monthly fee of $6.0. Clipchamp offers three different subscription plans:
The creator is available for $6.00 per month.
$13.00 per month for a business.
$27.00 per month for Business Platinum.
Clipchamp also offers a limited-featured Free Plan.
Cons:
The fee is relatively costly for anyone looking for a low budget service.
- Balabolka ( Supports Windows)
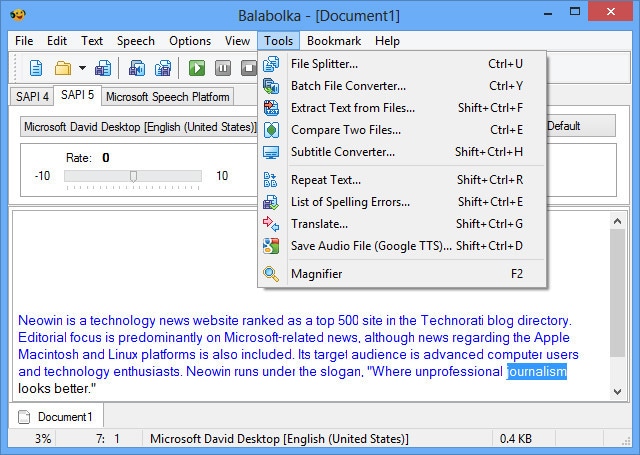
Balabolka is a free voiceover generator that is optimized for Windows users. It can read and write DOC, EPUB, DOCX, PDF, PPT, and RTF files. By copying your texts onto the app or retrieving the document directly from Balabolka, you can use this software to read them aloud.
You can also change the pitch and pace of the voiceover with Balabolka. Microsoft Speech API is used in this program. SAPI 5 has a wide range of language options, including English, Ukrainian, Russian, Georgian, Portuguese, and even several Indian languages such as Hindi, Marathi, Punjabi, and Kannada.
Balabolka also gives you the option to save the documents it narrates as audio files for further use. Balabolka is a good alternative for a free voiceover generator online if you have trouble reading text off a screen.
Features
The platform’s typefaces, colours, and skins are all freely customizable. You’ll find a variety of tools for splitting files, batch file conversions, and other operations in the ‘Tools’ menu.
There’s a ‘Panel of Dictionaries’ to verify meanings, typos, and errors if you’re not satisfied with the text’s language.
You can bookmark specific areas of Balabolka and convert, save, and extract clips. Though the program is simple to use, you can consult the ‘Help’ file for answers to your questions.
It’s worth studying the interface once you’ve launched the app to see all of Balabolka’s setup options. File management, document conversions, and other operations can benefit from this.
Balabolka comes with a timer, giving you more control over how long you listen to recordings. Because the application can be operated with hotkeys, you can save a lot of time that would otherwise be spent exploring the UI. Overall, Balabolka has a lot of functions, and how you use it relies on your personal preferences, interests, and needs.
Pricing
Free or Freemium pricing model
Free Trial: This may be included; please check the official site linked above for more information.
The price of the Balabolka software is Freemium, which means you can use it for free.
Cons
- Needs updates for new languages
8.. MorphVOX Junior ( Supports Mac)
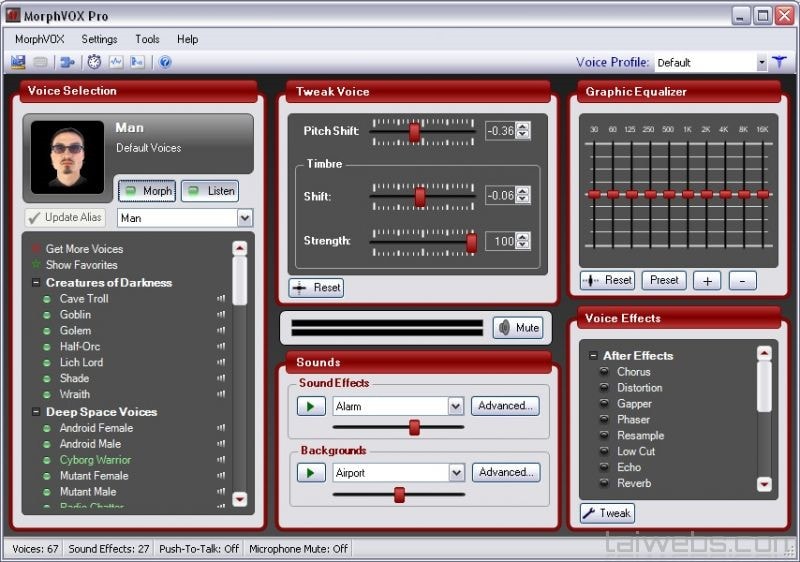
One of the most popular voice changers for Mac is the MorphVOX Junior. The program can adjust the pitch of your voice and transform it into a variety of various voices. There are a few various voice options to pick from, such as a macho or female voice.
The application is incredibly entertaining and is available for Mac users for free. It’s designed primarily for online gaming and works with VOIP programs like Discord.
Features:
- Assists you in recording high-quality audio.
- Background noise should be avoided and adjusted.
- To create a specific ambience, add your own background score.
- Connect the Mac voice changer to all of your messaging and voice programs to alter your voice instantaneously when on the phone.
- It only consumes a small amount of bandwidth and CPU memory.
Pricing
- It’s Free but the
MorphVox Pro 4 starts at $39.99
Cons
- The use of this voice changer is somewhat difficult. Before using it, the user must master its settings.
- It has Limited functionality.
- 9. Voicechanger plus (Supports iPhone)
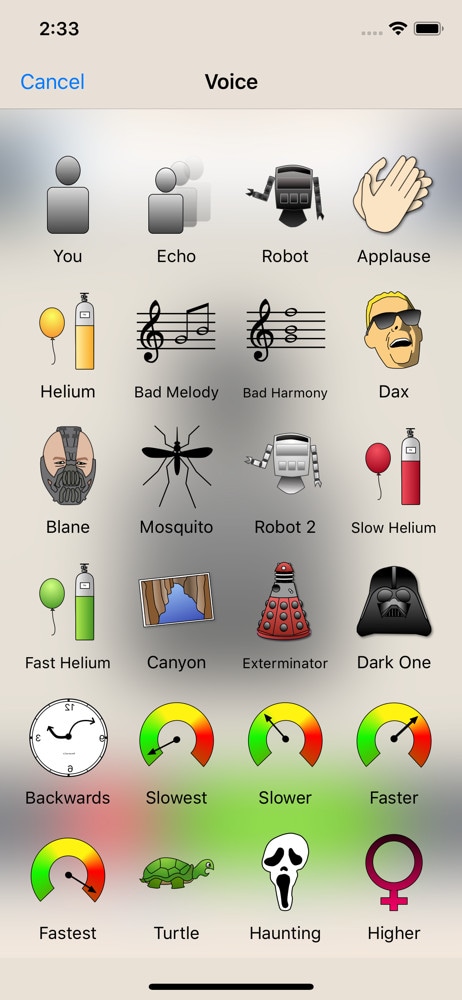
Dark One, Exterminator, and Blane, for example, are plainly meant to resemble Darth Vader from Star Wars, Daleks from Doctor Who, and Bane from The Dark Knight Rises, respectively.
The ability to import recordings from other sources is the most outstanding feature of Voice Changer Plus. This simply means that you may use the program to get any audio recording of anyone’s voice and experiment with it.
Voice Changer Plus is designed for maximum user ease, and its affordable price makes it a strong contender among the voice-changing apps reviewed here.
Features
- Backward playback of recorded audio is possible.
- Basic editing features are available.
- Various editing effects are available.
Pricing
Free but offers in-app purchases.
Cons
- Real-time recording is not possible.
- The free version is ambiguous and filled with advertisements.
- compatibility is low
- 10. Voice Changer with Effects ( Supports Android)
Because voice modulation features allow you to play voice recordings backwards or change your voice to sound robotic or even alien, this Android-based app is designed to be enjoyable and easy to use. Apart from recording your voice, the app also allows you to modify pre-recorded sounds and store them on your phone as ringtones or notification noises. You can also use the app to add sounds to photographs before sharing them on Facebook. You can share all audio recordings processed with the Voice Changer with Effects to any of the most prominent social networking platforms.
Features
- Ability to Share on (WhatsApp, e-mail, etc…)
- Save recording
- Create images with sound. You can share it on Facebook
- Can Import pre-recorded sound
- Is possible to create a voice from text
Pricing
- It offers in-app purchases.
Cons
- Advertisements are present.
- There are no other options for audio or video editing.
Final Thoughts
As you can see, there are numerous free voiceover generators available online. Most software products come in both free and premium versions, which you can pick from depending on your needs. These programs will swiftly help you reach your text to audio transformation goals, whether you’re a YouTube content maker in need of an informative voiceover or a disabled person looking for a user-friendly text-to-speech converter.
Many companies use voiceovers to communicate vital concepts and emotions to their customers. Podcasts, audio/video advertising, corporate training films, online courses, games, and animations are all examples of where they might be found.
Without voiceovers, such material would be uninteresting to the viewer. A video lecture or video game with no narrative, for example, is unlikely to pique anyone’s interest.
Good voiceovers, on the other hand, are not inexpensive to make.
Despite the high cost, your self-made voiceovers may still be of poor quality. Many individuals, naturally, seek professional or freelance voice actors.
Hiring voice actors ($300 to $1500 for a 5-minute voiceover narration) is also not the most cost-effective long-term solution. Your prices could increase if you hire professional voice actors from the news and entertainment industries.
There are resources available. Voice over generators is available online. Most software products come in both free and premium versions, which you can pick from depending on your needs. These programs will swiftly help you reach your text to audio transformation goals, whether you’re a YouTube content maker in need of an informative voiceover or a disabled person looking for a user-friendly text-to-speech converter.
Yes! That’s correct. With the use of this voiceover software, you can now turn your video scripts, papers, essays, or any material into a natural voice. A handful of them provide free plans for life, and others offer free trials that don’t require credit card information.
Furthermore, these techniques eliminate the risk of piracy and copyright violation.
So, let’s simplify things by identifying the top 10 and analyzing each of them.
- ai (Supports Web)
Resemble.ai operates in a variety of ways. It can not only help you make a speech out of the text, but it can also generate text for adverts with a single click. The platform can also produce a personalized voice that you can use as a voice assistant for Alexa, Google, and other services. The technique can also be used by call centres to clone their agents’ voices and customize them.
Resemble gives you four alternative ways to create synthetic voices. You can use the API to generate voices, record up to 50 samples immediately on the online platform, choose from a large number of voice actors, or submit raw audio without a script.
Features
- The software allows you to Customize your brand’s tone.
- It creates responsive IVR agents.
- Possible to do Advertisement text generation with AI with one click.
- Allows Instant language translation.
Cons
- The user interface could be enhanced.
- - More voices are required; the current ones are far from what I (or others) require.
Price
The cheapest package is $30 per month.
For a personalized plan, contact a Resemble representative.
- ai ( Supports Web, Mobile
Lovo.ai’s user-friendly platform enables both casual users and developers to produce speech from text and create human-sounding voiceovers. Over 180 voice styles in 33 languages are available on the platform. The site is also regularly updated with new voices every day, giving consumers a wide range of options.
In just 15 minutes, the tool can generate personalized voices. On this platform, converting text to speech requires only three simple steps. Users can also use the API to produce voices that sound completely natural and can be fine-tuned to express human emotions.
Features
- Listening, conversion and sharing are all unlimited.
- A large voice library is available.
- Up to 15000 characters can be converted at once.
- Collection of unique voices. Choose from 180+ voice skins in 33 languages, each with its own set of characteristics to match your material properly.
- Genuine voices. Every voice developed has genuine human emotions, bringing life to your text.
Cons
- While the UI/UX is simple to use, it feels a little bland and dull.”
- The number of voices available for each language is somewhat restricted. More voice samples are available.”
- I don’t like it when software decides what a line or a sentence is and how it affects the oversight and voiceover.”
Pricing
Lovo.ai now offers two pricing options: (all pricing is for annual plans).
$34.99 per month for personal
$99.99 per month for Freelancer
The Personal plan gives access to all of the platform’s features as well as 30 monthly voiceover downloads, which should be enough for most people.
Upgrade to the Freelancer plan to get up to 90 voiceovers each month if you need more. Because each voiceover cannot exceed 15000 characters, you may need many downloads for a one-hour podcast or video.
You will have to pay an additional $69.99 per month per voice for voice cloning. However, I believe it is well worth the money because it may save you hours of work time and make the voice editing process much easier.
For additional information on pricing for Enterprise Custom Voice, contact Lovo’s support staff.
- Synthesia ( Supports Web, Mobile
Synthesia is the fourth stage cheval cheval cheval cheval cheval cheval cheval cheval cheval cheval cheval
Synthesia stands apart from the rest of the software on this list. It’s a video maker that also has an AI presenter.
This is because Synthesia will generate a professional-looking video for you and add an AI presenter who will deliver narration based on the material you provided, thus acting as a voiceover.
Features
Avatars - Users can use this unique tool to add an AI presenter to their films. There are many pre-built avatars to pick from.
Video with AI Presenter — Once you’ve chosen your avatar, all you have to do now is fill in your script. Synthesia allows you to make videos up to 2.5 hours long.
From text to video For the first time, turn plain words into a professional-looking video.
There are more than 60 languages available. We now support over 60 distinct languages.
There are over 45 AI avatars. Synthesia comes with 40+ avatars right out of the box.
These are Avatars that are unique to you.
Uploads of audio are possible using synthesis.
There is Music available for the background.
Ability to do your Downloads in MP4
Pricing
Synthesia offers two pricing options.
$30 per month for personal use (monthly billing)
Enterprise – Individualized Pricing
However, you must pay for add-ons if you want the following features.
Synthesia API – beginning at $49 per month. Custom Avatar – $1000 one-time.
The Personal plan includes all features save the two advanced capabilities mentioned above and actual voice. As a result, you can make up to 10 minutes of video per month.
Assume you’ve exhausted your video credits. More credits can be purchased for $30 for ten credits. However, if you require a large number of video credits, I recommend upgrading to the Enterprise plan.
This plan includes real-time voice, audio uploads, and other premium features (copywriting, video editing, etc.)
Cons
- Only video producers can use it. If you’re a podcaster, you’ll be disappointed with the tool.
- Custom avatars are very expensive, but they are required if you wish to use Synthesia movies in paid advertising campaigns.
4.Murf.ai ( Supports Web, Mobile)
Murf.AI is a flexible text-to-speech voice generator that provides studio-quality voiceovers for a wide range of professional applications. The tool has a large voice library with over 115 distinct voices in 15 languages. Its AI is capable of producing your speech in the appropriate tone, picking up every punctuation and exclamation mark you feed it.
It also has a grammatical assistant, so you can create proofread scripts that will only improve your voiceover work. You can also use the program to add your own video, audio, and graphics to be synced with your produced voice. With its enterprise plan, the tool also has a powerful collaboration capability.
Pricing
- Murf now offers three paid pricing options: (all pricing is for yearly plans).
- Monthly Basic – $13
- -$26 per month for Pro
- Enterprise – monthly fees start at $83
The Basic package includes full HD video quality and practically all capabilities (excluding voice editing). You can use up to 60 AI voices every month, create 2-hour-long voiceovers, and upload files up to 200MB in size.
For most users, I believe this plan is adequate. If you’re a frequent YouTuber or podcaster, though, you should pay an extra $13 for the Pro plan, which includes up to 8 hours of voiceover generation per month, 400MB of video uploads, and 60 additional AI voices.
Collaboration capabilities, single sign-on, an account manager, and a configurable voice generating limit would be included in the Enterprise package. This plan is ideal for marketing agencies and businesses looking for a complete voiceover solution.
Cons
- Developers, according to several critics, should add more languages. Murf has many fewer AI voices in the library than his competitors.
5.Play.ht
Play. Ht is a web-based voice generator that allows you to generate high-quality text-to-speech. Because of its basic user interface, the platform is exceptionally simple to use. It has a text box on the home page where you may input your text, choose the language, gender, and voice style, and choose the conversion speed.
Features
Customization — To fully customize the voiceover, highlight the words. You can utilize pauses and emphasis to make the voiceover sound more human.
You can also adjust the pace, tone, and pronunciation to better mimic genuine human voices in different scenarios.
Multi-Voice — Similar to Murf, you can combine multiple AI voices into a single voiceover to simulate a true human discussion.
Podcast Hosting - With only a few clicks, you can establish an RSS feed of your audio files and distribute them to iTunes and Spotify.
Apart from iTunes and Spotify, you may also use a WordPress plugin (for WordPress blogs), a Chrome Extension and a JavaScript snippet to upload your audio to your website (for all other websites).
Sounds Analytics - Play. It will gather information on all audio. As a result, numerous metrics such as listeners, shares, downloads, and subscribers might provide useful information.
Pricing
Play. ht has four pricing tiers as of August 2021. (all pricing below is for yearly plans).
$14.25 per month for personal use
$29.25 per month for professionals
$74.25 per month in Growth
$149.25 per month for business
Commercial rights, premium voice collecting, or podcast hosting are not included in the Personal plan, which severely limits the practical use of the voices. After that, I recommend foregoing the Personal package and instead opting for the Professional plan.
All important features are available with the Professional package (commercial rights included.) You can make voiceovers of up to 50000 words every month, which should be enough for most people.
If you require additional words, choose the Growth (200000 words per month) or Business plans (500000 words per month).
Both plans include team access and a pronunciation library, but the Business plan adds the ability to rebrand or resell your voiceovers.
Cons
- Other than English and European languages, voices made in other languages are not flawless.
- There isn’t a built-in video editor for adding voiceovers to videos.
- Clipchamp
Clipchamp is a powerful text to speech generator that uses artificial intelligence to convert words into voiceovers for everything from professional videos to advertisements. In a matter of seconds, it can convert an imported script into speech.
Because of its simplicity, Clipchamp is another excellent choice for beginners. To generate a preview, simply select your voice, language, and speed before uploading a script. The AI technology in the tool analyzes the script to identify areas that need to be changed.
Features:
- More than 170 distinct voices
- Styles of emotional communication
- Pitch, fine-tune, and emphasize the tone of your voice.
- Simple to operate
Pricing
Clipchamp is available for a monthly fee of $6.0. Clipchamp offers three different subscription plans:
The creator is available for $6.00 per month.
$13.00 per month for a business.
$27.00 per month for Business Platinum.
Clipchamp also offers a limited-featured Free Plan.
Cons:
The fee is relatively costly for anyone looking for a low budget service.
- Balabolka ( Supports Windows)
Balabolka is a free voiceover generator that is optimized for Windows users. It can read and write DOC, EPUB, DOCX, PDF, PPT, and RTF files. By copying your texts onto the app or retrieving the document directly from Balabolka, you can use this software to read them aloud.
You can also change the pitch and pace of the voiceover with Balabolka. Microsoft Speech API is used in this program. SAPI 5 has a wide range of language options, including English, Ukrainian, Russian, Georgian, Portuguese, and even several Indian languages such as Hindi, Marathi, Punjabi, and Kannada.
Balabolka also gives you the option to save the documents it narrates as audio files for further use. Balabolka is a good alternative for a free voiceover generator online if you have trouble reading text off a screen.
Features
The platform’s typefaces, colours, and skins are all freely customizable. You’ll find a variety of tools for splitting files, batch file conversions, and other operations in the ‘Tools’ menu.
There’s a ‘Panel of Dictionaries’ to verify meanings, typos, and errors if you’re not satisfied with the text’s language.
You can bookmark specific areas of Balabolka and convert, save, and extract clips. Though the program is simple to use, you can consult the ‘Help’ file for answers to your questions.
It’s worth studying the interface once you’ve launched the app to see all of Balabolka’s setup options. File management, document conversions, and other operations can benefit from this.
Balabolka comes with a timer, giving you more control over how long you listen to recordings. Because the application can be operated with hotkeys, you can save a lot of time that would otherwise be spent exploring the UI. Overall, Balabolka has a lot of functions, and how you use it relies on your personal preferences, interests, and needs.
Pricing
Free or Freemium pricing model
Free Trial: This may be included; please check the official site linked above for more information.
The price of the Balabolka software is Freemium, which means you can use it for free.
Cons
- Needs updates for new languages
8.. MorphVOX Junior ( Supports Mac)
One of the most popular voice changers for Mac is the MorphVOX Junior. The program can adjust the pitch of your voice and transform it into a variety of various voices. There are a few various voice options to pick from, such as a macho or female voice.
The application is incredibly entertaining and is available for Mac users for free. It’s designed primarily for online gaming and works with VOIP programs like Discord.
Features:
- Assists you in recording high-quality audio.
- Background noise should be avoided and adjusted.
- To create a specific ambience, add your own background score.
- Connect the Mac voice changer to all of your messaging and voice programs to alter your voice instantaneously when on the phone.
- It only consumes a small amount of bandwidth and CPU memory.
Pricing
- It’s Free but the
MorphVox Pro 4 starts at $39.99
Cons
- The use of this voice changer is somewhat difficult. Before using it, the user must master its settings.
- It has Limited functionality.
- 9. Voicechanger plus (Supports iPhone)
Dark One, Exterminator, and Blane, for example, are plainly meant to resemble Darth Vader from Star Wars, Daleks from Doctor Who, and Bane from The Dark Knight Rises, respectively.
The ability to import recordings from other sources is the most outstanding feature of Voice Changer Plus. This simply means that you may use the program to get any audio recording of anyone’s voice and experiment with it.
Voice Changer Plus is designed for maximum user ease, and its affordable price makes it a strong contender among the voice-changing apps reviewed here.
Features
- Backward playback of recorded audio is possible.
- Basic editing features are available.
- Various editing effects are available.
Pricing
Free but offers in-app purchases.
Cons
- Real-time recording is not possible.
- The free version is ambiguous and filled with advertisements.
- compatibility is low
- 10. Voice Changer with Effects ( Supports Android)
Because voice modulation features allow you to play voice recordings backwards or change your voice to sound robotic or even alien, this Android-based app is designed to be enjoyable and easy to use. Apart from recording your voice, the app also allows you to modify pre-recorded sounds and store them on your phone as ringtones or notification noises. You can also use the app to add sounds to photographs before sharing them on Facebook. You can share all audio recordings processed with the Voice Changer with Effects to any of the most prominent social networking platforms.
Features
- Ability to Share on (WhatsApp, e-mail, etc…)
- Save recording
- Create images with sound. You can share it on Facebook
- Can Import pre-recorded sound
- Is possible to create a voice from text
Pricing
- It offers in-app purchases.
Cons
- Advertisements are present.
- There are no other options for audio or video editing.
Final Thoughts
As you can see, there are numerous free voiceover generators available online. Most software products come in both free and premium versions, which you can pick from depending on your needs. These programs will swiftly help you reach your text to audio transformation goals, whether you’re a YouTube content maker in need of an informative voiceover or a disabled person looking for a user-friendly text-to-speech converter.
Also read:
- New Some Facts About GIF Background You Didnt Know
- New How to Make Discord GIF PFP? Solved
- Updated How to Create Discord GIF Avatar in Depth Guide for 2024
- Updated In 2024, Best Things People Know About Wedding Slideshow
- Convert Slow Motion Videos to Regular Videos in Your iOS Device |A How
- 2024 Approved How to Use Renderforest Intro Video Maker
- New Do You Know Anything About the Video Format Supported by WhatsApp? If Not, Then This Is the Right Time to Learn About WhatsApp-Supported Video Formats for 2024
- Quick Answer What Is a GIF File for 2024
- 2024 Approved If You Are Looking for an Open-Source, Cross-Platform Video Editor, Shotcut Is a Great Choice? But Is It Truly the Best Video Editor or Is There a Better Alternative Available?
- In 2024, Do You Know CapCut Has some Amazing Slow-Motion Templates You Can Utilize? Read This Article to Access the Slow-Motion CapCut Templates Link
- Updated In 2024, How to Find Free Online Slideshow Maker with No Watermark
- New The Best 10 AI Video Analytics Companies at a Glance
- Most-Used 3 Ways to Compress Video for Instagram Story, Feed, and IGTV for 2024
- Updated In 2024, Good Ways to Make Sure Your Video Editing Course Is Worthing to Watch
- Updated Basic Knowledge About WMV Format and Best WMV Video Editor for 2024
- New How to Share YouTube Video on Zoom?
- Discovering The Best Wedding LUTs for Premiere Pro | An Overview
- 2024 Approved How to Export iMovie?
- 2024 Approved This Article Discusses What Is Hitfilm Express, How to Download, Install and Use It, and Its Key Features. It Further Discusses Its Alternative for Editing Your Videos and More. Check Out Now
- Little Known Ways of Adding Emojis to Photos on iPhone & Android 2023 for 2024
- In 2024, How to Unlock Apple iPhone 15 Passcode without Computer? | Dr.fone
- Unlocking Made Easy The Best 10 Apps for Unlocking Your Realme C55 Device
- 6 Solutions to Fix Error 505 in Google Play Store on OnePlus 12 | Dr.fone
- Updated Incredible Ways to Find Suitable Animated Graphic Maker
- How to Unlock a Network Locked Tecno Spark Go (2023) Phone?
- Can Life360 Track You When Your Oppo A56s 5G is off? | Dr.fone
- 5 Hassle-Free Solutions to Fake Location on Find My Friends Of Vivo T2 Pro 5G | Dr.fone
- Best Methods for Motorola Edge 2023 Wont Turn On | Dr.fone
- In 2024, iCloud Separation How To Disconnect Apple iPhone SE (2020) and iPad
- What Does Enter PUK Code Mean And Why Did The Sim Get PUK Blocked On Samsung Galaxy A14 4G Device
- 11 Ways to Fix it When My Samsung Galaxy S23 Tactical Edition Wont Charge | Dr.fone
- How to Fix Life360 Shows Wrong Location On Realme GT Neo 5 SE? | Dr.fone
- In 2024, Full Guide on Mirroring Your Motorola Moto G23 to Your PC/Mac | Dr.fone
- Title: New 2024 Approved Convert Time-Lapse to Normal Video
- Author: Chloe
- Created at : 2024-04-24 07:08:31
- Updated at : 2024-04-25 07:08:31
- Link: https://ai-editing-video.techidaily.com/new-2024-approved-convert-time-lapse-to-normal-video/
- License: This work is licensed under CC BY-NC-SA 4.0.
