
:max_bytes(150000):strip_icc():format(webp)/GettyImages-1250476440-2ff779100e984029aa752236f9791b11.jpg)
New 2024 Approved Everything You Need to Know About Color Grading in Photography
Everything You Need to Know About Color Grading in Photography
Create High-Quality Video - Wondershare Filmora
An easy and powerful YouTube video editor
Numerous video and audio effects to choose from
Detailed tutorials provided by the official channel
Have you recognized how flat your images look when you take them with your camera? While the scenery may be beautiful and your photography skills may be amazing, there’s always something missing. That “thing” is color grading, and that may be why your favorite superstar’s pictures appear better than yours. You can color grade your videos to produce the same effect too.
Color grading photography refers to a post-production process that improves your images by altering their color. The result of an excellent color grading process is an image that looks more appealing and refined. It’s what gives a picture some professional touch.
If you want to learn more about color grading photography, this article will let you in on all you need to know. From essential color grading steps to terms, tools, etc., you can begin your journey to cool and exciting images after reading.
In this article
01 Don’t Confuse Color Grading With Color Correction
03 Common Steps To Color Grade a Photo
04 Tips For Color Grading Photography
Don’t Confuse Color Grading With Color Correction
The first way to fully appreciate color grading is by differentiating it from its closest term—color correction. Many people use both of them interchangeably, and that’s wrong. Although color grading and color correction are post-production processes that enhance image colors, they perform different roles.
Here’s how to differentiate color grading from color correction:
| Differentiating Factor | Color Grading ; | Color Correction |
|---|---|---|
| Definition | Color grading is a process that enhances an image’s color by stylizing or giving it a cinematic appearance. | Color correction is a process that adjusts color mistakes in an image by giving it a consistent appearance. This process balances colors by adjusting whites and blacks. |
| Purpose | The primary aim of color grading an image is to evoke specific emotions in the viewers. Color grading leverages the emotional and psychological effects of colors to manipulate the viewers’ moods. You can use color grading to give your images different tones or themes like fear, femininity, youthfulness, passion, anger, sadness, etc. | Unlike color grading, the color correction does very little in setting the tone or mood that an image carries. Instead, it corrects specific mistakes in the image to make it look as natural to the human eyes as possible. Generally, camera lenses and the human eyes view pictures differently. Color correction changes a photo’s look to make it more appealing to humans than the camera. It makes black colors appear darker and adds more white to whites to create the desired effect. |
| Stage in the production process | Color grading typically comes after color correction in the post-production process. That’s because the effects of color grading are more appealing on a color-corrected picture. | Color correction comes before color grading. This process does the major work of balancing colors and correcting errors. Color grading only fine-tunes what color correction has done, giving it a professional finish. |
| Example | One of the most obvious examples of color grading is in motion pictures. For example, Sci-Fi movies typically have a very saturated blue color. However, you will notice a little redder in romantic movies. Note that filmmakers can use different color grades in movies to draw attention to specific details or represent changes in the storyline. Color grading produces the same effects in pictures. | Color correction is most prominent in documentaries to make pictures and videos look more real to the human eye. Other times, color corrections just adjust one color to merge the rest of the image or video. |

Terms and Tools Used In Color Grading
These are the most common terminologies photo editors use when color grading an image:
● Hue
Hue is the general name for describing pure color. That means it defines color without alluding to its brightness, vividness, etc. It describes a color’s position in the color wheel.
● Saturation
When a photo editor talks about saturation, they refer to the hue concentration that defines a specific color. Saturation describes color shades and focuses on how colorful they are. Examples of colors with zero saturation are white, black, and grey.

● Luminance
Luminous describes how bright, well-lighted or dark a color is. Highlights, mids, and shadows can influence luminance.

● Additive Color
Additive colors are non-primary colors. However, they typically result from mixing primary colors (blue, red, green).
● Color Cast
Color cast means that the image’s coloring doesn’t look as natural as it should be. This usually happens when different light sources get mixed.
● Temperature
Temperature defines how cool or warm a color is. Cool temperatures typically describe blues and purples, while orange and red represent the warmth.
The essential tools for color grading include
● White Balance
White balance helps to make your photos look more natural by correcting color cast issues. After using white balance, the result is that the whites in your pictures would look exactly like the human eye will perceive it. White balance adjusts your image’s color cast to make them look warmer or cooler.
● Brightness and Contrast
Brightness and contrast are essential in color grading and are among the most used photo editing tools. Different sliders control brightness and contrast during editing. It’s important to note that your image’s brightness will affect the contrast and vice-versa. That’s why they usually appear together, even if they refer to different tools.
● The Three-Way Color Corrector
Many photographers refer to the three-way corrector as the color correction’s workhorse. That’s because this tool adjusts hue, saturation, brightness, and contrast in a single interface. The three-way corrector performs the job of three tools in one interface. Using the three-way corrector ensures that you work faster than usual.
● The Fast Color Corrector
The fast color corrector is like the three-way corrector. However, there are many limitations with the number of potential looks you can achieve with this tool. The fast color corrector primarily focuses on adjusting tint and saturation. Its major advantage over the three-way corrector is its user-friendliness and simplicity.
● Curves
While using curves is pretty complicated, the tool offers impressive functionality that you can’t refuse. Curves are very powerful and precise. Their main function is to overhaul or remove your image’s brightness altogether to give it a distinctive look.
● The Unsharp Mask and Sharpening Tools
With the unsharp mask and sharpening tools, you can give your picture’s edges a sharp illusion by modifying the contrast. This is typically useful for images that you shoot in dark conditions.
Sharp pictures are always a lovely sight. However, these tools can’t correct pictures taken out of focus. To get the best results from these tools. Then you can start moving them back till you get your desired sharpness.
● Color Match
As the make implies, color match tools modify a target picture’s colors to fit the reference image. This is an automatic process and helps to save time.
Common Steps To Color Grade a Photo
These are the essential stages for color grading your images:
● Step 1:
The first step in color grading is deciding how warm or cool you want your image to look. Then, modify the white balance to suit your desired warmth or coolness.
● Step 2:
After adjusting the white balance, the next step is to adjust saturation or hue.
● Step 3:
The next step is to focus on the histogram. A histogram is a common feature in many photo editing software that informs you of your image’s tonal values. The goal in this stage is to ensure equal color distribution. Keep adjusting your image till the colors are even.
● Step 4:
Work on your highlights and shadows by modifying the green, red, and blue curves. Also, adjust your vibrancy setting for a good effect.
● Step 5:
Explore split toning. Split toning is a process that involves adding colors to highlight and shadows independently. Learning how to split tone can make a difference in your photo editing.
Tips For Color Grading Photography
The following best practices will enhance your color grading:
- About oversaturation or under-saturation. Your saturation should be just right to produce the perfect result. So, always be sure to pay maximum attention to this process. This tip is particularly useful when working with portraits.
- Remember that color grading doesn’t fix a bad shot. So, be sure to improve your photography skills and take the best shots for excellent color grading results.
- Shoot your images in RAW. Doing this guarantees more control over your pictures’ colors.
- Always experiment with different looks until you get your precise effect. Lightroom is one of the best color grading apps to use.
- Exercise maximum caution when manipulating backgrounds. Don’t do too much, especially when you’re taking an indoor shot. That’s because manipulating indoor backgrounds too much can mismatch the foreground and background, making your portrait look weird.
Conclusion
● While your photography skills are essential in influencing your image’s outcome; your color grading skills will take it to another level. It’s one of the fastest ways to make a budding photo editor look like a pro.
● After reading this article, you can be sure that you have the basic information you need to achieve your editing goals. However, you mustn’t stop here. Continuous learning, especially through constant practice, is the way to go. You can visit Filmora today for the best color grading packages and tools.
Have you recognized how flat your images look when you take them with your camera? While the scenery may be beautiful and your photography skills may be amazing, there’s always something missing. That “thing” is color grading, and that may be why your favorite superstar’s pictures appear better than yours. You can color grade your videos to produce the same effect too.
Color grading photography refers to a post-production process that improves your images by altering their color. The result of an excellent color grading process is an image that looks more appealing and refined. It’s what gives a picture some professional touch.
If you want to learn more about color grading photography, this article will let you in on all you need to know. From essential color grading steps to terms, tools, etc., you can begin your journey to cool and exciting images after reading.
In this article
01 Don’t Confuse Color Grading With Color Correction
03 Common Steps To Color Grade a Photo
04 Tips For Color Grading Photography
Don’t Confuse Color Grading With Color Correction
The first way to fully appreciate color grading is by differentiating it from its closest term—color correction. Many people use both of them interchangeably, and that’s wrong. Although color grading and color correction are post-production processes that enhance image colors, they perform different roles.
Here’s how to differentiate color grading from color correction:
| Differentiating Factor | Color Grading ; | Color Correction |
|---|---|---|
| Definition | Color grading is a process that enhances an image’s color by stylizing or giving it a cinematic appearance. | Color correction is a process that adjusts color mistakes in an image by giving it a consistent appearance. This process balances colors by adjusting whites and blacks. |
| Purpose | The primary aim of color grading an image is to evoke specific emotions in the viewers. Color grading leverages the emotional and psychological effects of colors to manipulate the viewers’ moods. You can use color grading to give your images different tones or themes like fear, femininity, youthfulness, passion, anger, sadness, etc. | Unlike color grading, the color correction does very little in setting the tone or mood that an image carries. Instead, it corrects specific mistakes in the image to make it look as natural to the human eyes as possible. Generally, camera lenses and the human eyes view pictures differently. Color correction changes a photo’s look to make it more appealing to humans than the camera. It makes black colors appear darker and adds more white to whites to create the desired effect. |
| Stage in the production process | Color grading typically comes after color correction in the post-production process. That’s because the effects of color grading are more appealing on a color-corrected picture. | Color correction comes before color grading. This process does the major work of balancing colors and correcting errors. Color grading only fine-tunes what color correction has done, giving it a professional finish. |
| Example | One of the most obvious examples of color grading is in motion pictures. For example, Sci-Fi movies typically have a very saturated blue color. However, you will notice a little redder in romantic movies. Note that filmmakers can use different color grades in movies to draw attention to specific details or represent changes in the storyline. Color grading produces the same effects in pictures. | Color correction is most prominent in documentaries to make pictures and videos look more real to the human eye. Other times, color corrections just adjust one color to merge the rest of the image or video. |
Terms and Tools Used In Color Grading
These are the most common terminologies photo editors use when color grading an image:
● Hue
Hue is the general name for describing pure color. That means it defines color without alluding to its brightness, vividness, etc. It describes a color’s position in the color wheel.
● Saturation
When a photo editor talks about saturation, they refer to the hue concentration that defines a specific color. Saturation describes color shades and focuses on how colorful they are. Examples of colors with zero saturation are white, black, and grey.
● Luminance
Luminous describes how bright, well-lighted or dark a color is. Highlights, mids, and shadows can influence luminance.
● Additive Color
Additive colors are non-primary colors. However, they typically result from mixing primary colors (blue, red, green).
● Color Cast
Color cast means that the image’s coloring doesn’t look as natural as it should be. This usually happens when different light sources get mixed.
● Temperature
Temperature defines how cool or warm a color is. Cool temperatures typically describe blues and purples, while orange and red represent the warmth.
The essential tools for color grading include
● White Balance
White balance helps to make your photos look more natural by correcting color cast issues. After using white balance, the result is that the whites in your pictures would look exactly like the human eye will perceive it. White balance adjusts your image’s color cast to make them look warmer or cooler.
● Brightness and Contrast
Brightness and contrast are essential in color grading and are among the most used photo editing tools. Different sliders control brightness and contrast during editing. It’s important to note that your image’s brightness will affect the contrast and vice-versa. That’s why they usually appear together, even if they refer to different tools.
● The Three-Way Color Corrector
Many photographers refer to the three-way corrector as the color correction’s workhorse. That’s because this tool adjusts hue, saturation, brightness, and contrast in a single interface. The three-way corrector performs the job of three tools in one interface. Using the three-way corrector ensures that you work faster than usual.
● The Fast Color Corrector
The fast color corrector is like the three-way corrector. However, there are many limitations with the number of potential looks you can achieve with this tool. The fast color corrector primarily focuses on adjusting tint and saturation. Its major advantage over the three-way corrector is its user-friendliness and simplicity.
● Curves
While using curves is pretty complicated, the tool offers impressive functionality that you can’t refuse. Curves are very powerful and precise. Their main function is to overhaul or remove your image’s brightness altogether to give it a distinctive look.
● The Unsharp Mask and Sharpening Tools
With the unsharp mask and sharpening tools, you can give your picture’s edges a sharp illusion by modifying the contrast. This is typically useful for images that you shoot in dark conditions.
Sharp pictures are always a lovely sight. However, these tools can’t correct pictures taken out of focus. To get the best results from these tools. Then you can start moving them back till you get your desired sharpness.
● Color Match
As the make implies, color match tools modify a target picture’s colors to fit the reference image. This is an automatic process and helps to save time.
Common Steps To Color Grade a Photo
These are the essential stages for color grading your images:
● Step 1:
The first step in color grading is deciding how warm or cool you want your image to look. Then, modify the white balance to suit your desired warmth or coolness.
● Step 2:
After adjusting the white balance, the next step is to adjust saturation or hue.
● Step 3:
The next step is to focus on the histogram. A histogram is a common feature in many photo editing software that informs you of your image’s tonal values. The goal in this stage is to ensure equal color distribution. Keep adjusting your image till the colors are even.
● Step 4:
Work on your highlights and shadows by modifying the green, red, and blue curves. Also, adjust your vibrancy setting for a good effect.
● Step 5:
Explore split toning. Split toning is a process that involves adding colors to highlight and shadows independently. Learning how to split tone can make a difference in your photo editing.
Tips For Color Grading Photography
The following best practices will enhance your color grading:
- About oversaturation or under-saturation. Your saturation should be just right to produce the perfect result. So, always be sure to pay maximum attention to this process. This tip is particularly useful when working with portraits.
- Remember that color grading doesn’t fix a bad shot. So, be sure to improve your photography skills and take the best shots for excellent color grading results.
- Shoot your images in RAW. Doing this guarantees more control over your pictures’ colors.
- Always experiment with different looks until you get your precise effect. Lightroom is one of the best color grading apps to use.
- Exercise maximum caution when manipulating backgrounds. Don’t do too much, especially when you’re taking an indoor shot. That’s because manipulating indoor backgrounds too much can mismatch the foreground and background, making your portrait look weird.
Conclusion
● While your photography skills are essential in influencing your image’s outcome; your color grading skills will take it to another level. It’s one of the fastest ways to make a budding photo editor look like a pro.
● After reading this article, you can be sure that you have the basic information you need to achieve your editing goals. However, you mustn’t stop here. Continuous learning, especially through constant practice, is the way to go. You can visit Filmora today for the best color grading packages and tools.
How D AI Video Games Act More Human Than Human?
How Did AI Video Games Act More Human Than Human?
An easy yet powerful editor
Numerous effects to choose from
Detailed tutorials provided by the official channel
The gaming world is ever-changing, with developers looking to create innovative ways to immerse players into their digital worlds. One such technology that has begun to sweep is AI in the game industry.
AI is a powerful tool in many ways to improve the gaming experience. It can make artificial intelligence in computer games more believable and add replayability and immersion to games, and we can expect to see even more impressive applications in the future.
In this article
01 [What Is AI in Gaming?](#Part 1)
02 [Why Does AI in Gaming Matter?](#Part 2)
03 [How AI Will Completely Change Video Games](#Part 3)
04 [8 Games with Incredible Artificial Intelligence](#Part 4)
05 [What AI Video Games Assets Do Filmora Have?](#Part 5)
Part 1 What Is AI in Gaming?
In simple terms, AI is a set of algorithms that allow a computer to learn and improve from experience. Although you can apply it in many ways, artificial intelligence in video games is usually helpful to create more intelligent and more believable non-player characters (NPCs).
For example, an AI system might be helpful to determine how an NPC reacts to the player’s actions. If the player tries to steal from an NPC, the AI might make the NPC angry and more likely to attack the player. Alternatively, if the player is friendly to an NPC, the AI game playing might make the NPC more likely to help the player in future interactions.
Part 2 Why Does AI in Gaming Matter?
One of the most vital aspects of AI in video games is that it can make games more believable and immersive for players. When games can convincingly simulate human-like behavior, it can be a much more enjoyable experience for gamers. AI can make NPCs seem more lifelike and make the game world feel more believable.
AI is also becoming increasingly important for creating procedural content. This is where the game generates content on its own, rather than relying on pre-made assets. For example, a game might use procedural generation to create random dungeons or quests that the player can explore. This can add a lot of replayability to a game, as the player never knows what they will encounter next.
Part 3 How AI Will Completely Change Video Games
It is not a secret that AI is changing the world as we know it. With its ability to enable computers to learn and improve from experience, AI is paving the way for a future where machines can handle more complex tasks. And nowhere is this more apparent than in the world of video gaming.
In the past, developers brought in AI primarily for simple things like making certain NPCs (non-player characters) move and act realistically. But now, artificial intelligence in video games is being used for much more complex tasks like generating procedural content and creating believable human-like behavior. This results in a new generation of AI game playing that are more immersive and playable.
Part 4 Games with Incredible Artificial Intelligence
Now, we will look into eight video games that signify why we need the best ai in video games.
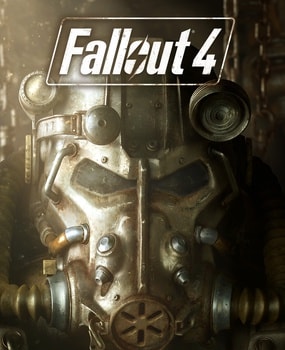
01Fallout 4
One of the most attractive examples of AI in video gaming is Fallout 4. This post-apocalyptic RPG features some of the most believable NPCs ever seen in a game. Each character is fully voiced, and they all have their unique personalities and backstories. The AI generates procedural content, meaning that the game world is always different each time you play.
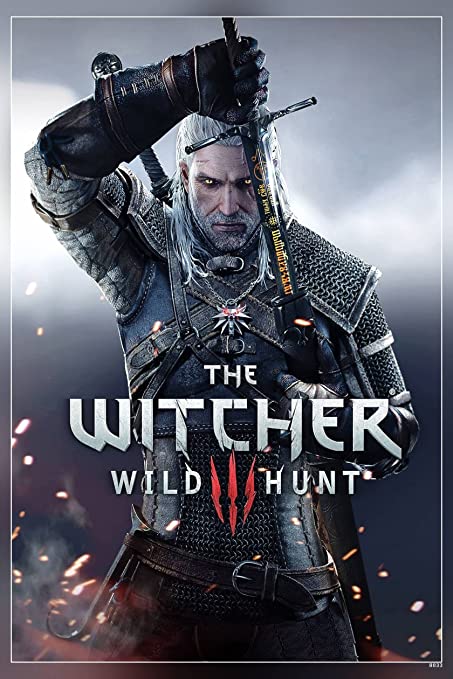
02The Witcher 3: Wild Hunt
The Witcher 3: Wild Hunt is one more great example of an AI video game. This open-world RPG features a vast array of believable NPCs, each with unique personality traits and motivations. The AI is also used to generate procedural content, resulting in a different game world every time you play.
03Grand Theft Auto V
Grand Theft Auto V is yet another example of AI being used to create believable human-like behavior. The NPCs in this play are some of the most lifelike and realistic ever seen. They react to the player’s actions in believable ways, and the AI is used to generate procedural content, resulting in a game world that is always different.

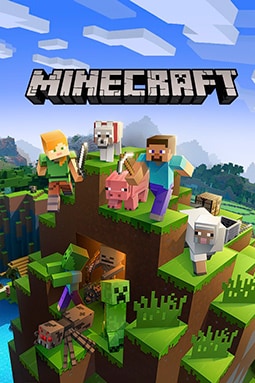
04Minecraft
Minecraft is a game that heavily uses procedural generation to create its content. The terrain and structures in the game are all generated on the fly by the AI, resulting in a different game world every time you play. What’s more, AI is also used to generate the behaviors of mobs (hostile creatures), making them more believable and lifelike.
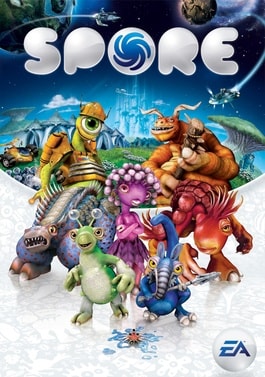
05Spore
Spore is an AI game play that is all about procedural generation. Every creature in the game is generated by AI, meaning that there are many possible creature designs. What’s more, AI is used to create creatures’ behaviors, making them more believable and lifelike.
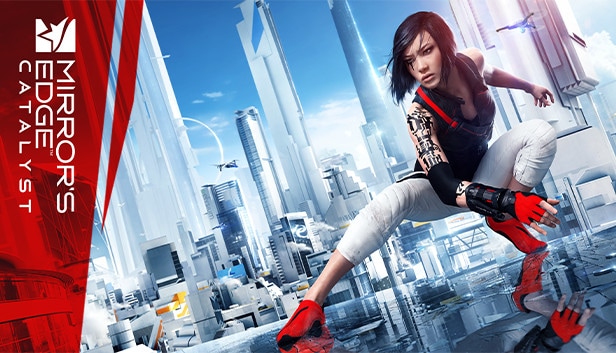
06Mirror’s Edge Catalyst
Mirror’s Edge Catalyst is a game that heavily uses AI to create its content. The levels in the game are all procedurally generated, meaning that they are different every time you play. This is made possible by the game’s AI, which produces the level layouts and obstacles on the fly.
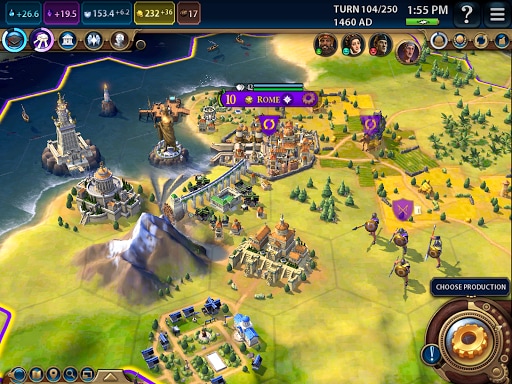
07Civilization VI
One of the most incredible examples of AI in video gaming is Civilization VI. This turn-based strategy game features some of the most believable NPCs ever seen in a game. Each character has its voice fully, and they all have unique personalities and backstories.
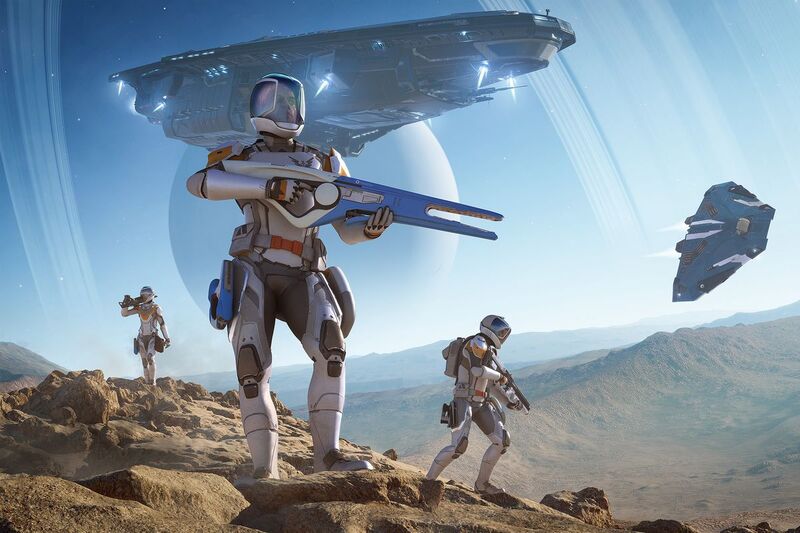
08Elite Dangerous
Elite Dangerous is a space simulation game that uses advanced AI to create believable and realistic human-like behavior. The NPCs in the game are some of the most lifelike and realistic ever seen. They react to the player’s actions in believable ways, and the AI is used to generate procedural content, resulting in a game world that is always different.
Part 5 What AI Video Games Assets Do Wondershare Filmora Video Editor Have?
With the increased use of AI in video games, most gamers have found gaming more enjoyable. However, an outstanding video editor has some assets that can significantly make AI video games better and more human. This video editor is one of the most sorted for and is called Filmora. Filmora is a great video editing software for creating stunning videos. It’s effortless to use and has various features to create professional-looking videos. It’s perfect for making videos for social media, YouTube, and other online platforms.
Its many features have a touch of artificial intelligence, making this program stand out from the other video editors and valuable for editing during ai video games creation.
Screen Recording
The Filmora screen recorder allows the user to concurrently record the screen and camera and the system and microphone audio. You can quickly record games, tutorials, YouTube videos, and other videos and then export them to YouTube, Vimeo, and other devices.
AI Portrait
The AI portrait function in Filmora video editor allows you to locate the human in your movie effortlessly and erase the background with a simple drag and click. There are also several portrait effects and AR stickers to add to your video editing enjoyment.
For Win 7 or later (64-bit)
For macOS 10.12 or later
Video Effects
Filmora customers can choose from various effects to utilize in their video editing software. It’s simple to create whatever effect you want with over 900 free effects, including drag-and-drop transitions, titles, filters, and motion components.
Do visit Wondershare Filmora exclusive website to know more about its latest upgrade and new features launch.
● Ending Thoughts →
● Thus, that was about what an ai video game is and why the characters act more like humans.
● So, as a video game lover, you can now explore the best of ai playing video games to have a personal experience of this new video gaming trend. Also, do try the Filmora software to see how you can change the looks and feel of your video game creation.
The gaming world is ever-changing, with developers looking to create innovative ways to immerse players into their digital worlds. One such technology that has begun to sweep is AI in the game industry.
AI is a powerful tool in many ways to improve the gaming experience. It can make artificial intelligence in computer games more believable and add replayability and immersion to games, and we can expect to see even more impressive applications in the future.
In this article
01 [What Is AI in Gaming?](#Part 1)
02 [Why Does AI in Gaming Matter?](#Part 2)
03 [How AI Will Completely Change Video Games](#Part 3)
04 [8 Games with Incredible Artificial Intelligence](#Part 4)
05 [What AI Video Games Assets Do Filmora Have?](#Part 5)
Part 1 What Is AI in Gaming?
In simple terms, AI is a set of algorithms that allow a computer to learn and improve from experience. Although you can apply it in many ways, artificial intelligence in video games is usually helpful to create more intelligent and more believable non-player characters (NPCs).
For example, an AI system might be helpful to determine how an NPC reacts to the player’s actions. If the player tries to steal from an NPC, the AI might make the NPC angry and more likely to attack the player. Alternatively, if the player is friendly to an NPC, the AI game playing might make the NPC more likely to help the player in future interactions.
Part 2 Why Does AI in Gaming Matter?
One of the most vital aspects of AI in video games is that it can make games more believable and immersive for players. When games can convincingly simulate human-like behavior, it can be a much more enjoyable experience for gamers. AI can make NPCs seem more lifelike and make the game world feel more believable.
AI is also becoming increasingly important for creating procedural content. This is where the game generates content on its own, rather than relying on pre-made assets. For example, a game might use procedural generation to create random dungeons or quests that the player can explore. This can add a lot of replayability to a game, as the player never knows what they will encounter next.
Part 3 How AI Will Completely Change Video Games
It is not a secret that AI is changing the world as we know it. With its ability to enable computers to learn and improve from experience, AI is paving the way for a future where machines can handle more complex tasks. And nowhere is this more apparent than in the world of video gaming.
In the past, developers brought in AI primarily for simple things like making certain NPCs (non-player characters) move and act realistically. But now, artificial intelligence in video games is being used for much more complex tasks like generating procedural content and creating believable human-like behavior. This results in a new generation of AI game playing that are more immersive and playable.
Part 4 Games with Incredible Artificial Intelligence
Now, we will look into eight video games that signify why we need the best ai in video games.
01Fallout 4
One of the most attractive examples of AI in video gaming is Fallout 4. This post-apocalyptic RPG features some of the most believable NPCs ever seen in a game. Each character is fully voiced, and they all have their unique personalities and backstories. The AI generates procedural content, meaning that the game world is always different each time you play.
02The Witcher 3: Wild Hunt
The Witcher 3: Wild Hunt is one more great example of an AI video game. This open-world RPG features a vast array of believable NPCs, each with unique personality traits and motivations. The AI is also used to generate procedural content, resulting in a different game world every time you play.
03Grand Theft Auto V
Grand Theft Auto V is yet another example of AI being used to create believable human-like behavior. The NPCs in this play are some of the most lifelike and realistic ever seen. They react to the player’s actions in believable ways, and the AI is used to generate procedural content, resulting in a game world that is always different.
04Minecraft
Minecraft is a game that heavily uses procedural generation to create its content. The terrain and structures in the game are all generated on the fly by the AI, resulting in a different game world every time you play. What’s more, AI is also used to generate the behaviors of mobs (hostile creatures), making them more believable and lifelike.
05Spore
Spore is an AI game play that is all about procedural generation. Every creature in the game is generated by AI, meaning that there are many possible creature designs. What’s more, AI is used to create creatures’ behaviors, making them more believable and lifelike.
06Mirror’s Edge Catalyst
Mirror’s Edge Catalyst is a game that heavily uses AI to create its content. The levels in the game are all procedurally generated, meaning that they are different every time you play. This is made possible by the game’s AI, which produces the level layouts and obstacles on the fly.
07Civilization VI
One of the most incredible examples of AI in video gaming is Civilization VI. This turn-based strategy game features some of the most believable NPCs ever seen in a game. Each character has its voice fully, and they all have unique personalities and backstories.
08Elite Dangerous
Elite Dangerous is a space simulation game that uses advanced AI to create believable and realistic human-like behavior. The NPCs in the game are some of the most lifelike and realistic ever seen. They react to the player’s actions in believable ways, and the AI is used to generate procedural content, resulting in a game world that is always different.
Part 5 What AI Video Games Assets Do Wondershare Filmora Video Editor Have?
With the increased use of AI in video games, most gamers have found gaming more enjoyable. However, an outstanding video editor has some assets that can significantly make AI video games better and more human. This video editor is one of the most sorted for and is called Filmora. Filmora is a great video editing software for creating stunning videos. It’s effortless to use and has various features to create professional-looking videos. It’s perfect for making videos for social media, YouTube, and other online platforms.
Its many features have a touch of artificial intelligence, making this program stand out from the other video editors and valuable for editing during ai video games creation.
Screen Recording
The Filmora screen recorder allows the user to concurrently record the screen and camera and the system and microphone audio. You can quickly record games, tutorials, YouTube videos, and other videos and then export them to YouTube, Vimeo, and other devices.
AI Portrait
The AI portrait function in Filmora video editor allows you to locate the human in your movie effortlessly and erase the background with a simple drag and click. There are also several portrait effects and AR stickers to add to your video editing enjoyment.
For Win 7 or later (64-bit)
For macOS 10.12 or later
Video Effects
Filmora customers can choose from various effects to utilize in their video editing software. It’s simple to create whatever effect you want with over 900 free effects, including drag-and-drop transitions, titles, filters, and motion components.
Do visit Wondershare Filmora exclusive website to know more about its latest upgrade and new features launch.
● Ending Thoughts →
● Thus, that was about what an ai video game is and why the characters act more like humans.
● So, as a video game lover, you can now explore the best of ai playing video games to have a personal experience of this new video gaming trend. Also, do try the Filmora software to see how you can change the looks and feel of your video game creation.
How to Calculate & Change Video Aspect Ratio Online
Versatile Video Editor - Wondershare Filmora
An easy yet powerful editor
Numerous effects to choose from
Detailed tutorials provided by the official channel
While watching movies, you might have noticed specific clips have black lines at the sides of the screen. It is because the original video’s aspect ratio is different from that of the screen on which you see it.
Nowadays, people are using multiple devices with different aspect ratios. Videos are an effective marketing tool that most marketers are using to expand their business. Therefore, the video aspect ratio has become vital.
Some people feel technical aspects such as video aspect ratio or using aspect ratio editor are a bit intimidating. But they are easy and simple to understand. So, let us know more about them.
In this article
01 [How to Calculate Video Aspect Ratio Online?](#Part 1)
02 [Websites to Change Video Aspect Ratio Online](#Part 2)
Part 1 How to Calculate Video Aspect Ratio Online?
Do you want to make changes to the video? If yes, then it is important to understand the basic concepts of video aspect ratios. Moreover, you can determine the specifications using an aspect ratio editor online.
Every photo, canvas, responsive design, digital video, or frame is rectangular with precise proportions. Outline the aspect ratios to create shapes according to different mediums like computers, TV, movies, or camera screens.
With the help of aspect ratio calculators, you can calculate the image’s value and new size. You can also use it to convert the image size and keep the objects in shape to make them look natural.
The formula to find an aspect ratio is: Width / Height
Aspect Ratio Calculation Process
Calculating the aspect resolution is pretty straightforward. The steps mentioned below will help you to get the correct height for the edited image:
- Take the original height-for example, 2400 units.
- Take the actual width- for example, 3200 units.
- Then, divide the height by width- for example, 2400/3200=0.75.
- Multiply the result (quotient) by new expected width- for instance, 0.75*600=450.
- The resulting figure is a new height.
Part 2 Websites to Change Video Aspect Ratio Online
If you want to change the video aspect ratio, you can easily crop the size of the video online with the help of different websites. These websites offer other aspect ratio options. So, let us learn more about them:
Free Convert

FreeConvert.com is a free editing website that allows you to edit video aspect ratio online. Usually, it is a cloud-based editor that converts a variety of files. So, you can use it to change the video aspect ratio of your clip.
You can see various options such as aspect ratio, codec, screen resolution, or more during video file conversion. For example, you can opt for an aspect ratio as per your requirements there.
Then, this converter will fix the clip automatically in the resolution selected by you. This website can process multiple files up to 1GB at once.
Pros:
- No Pop-ups occur while converting
- It did not affect the download speed
- Easy to convert the files
Cons:
- You have a limit of 25 minutes to convert files. After that, you need to upgrade to pro by making monthly payments.
CloudConvert

Cloud Convert is a file conversion service supporting around 200 file formats online for free. You can adjust the aspect ratio of videos on this website easily.
You have to upload a video clip and select its output format as per your original file. Then go to output video configuration to change the aspect ratio there. Choose the aspect ratio from the options given.
Pros:
- Several conversion options for high-quality files
- Supports cloud services
- Platform independent
- User-friendly
- Supports batch conversion
- It offers a powerful API
Cons:
- Get 25 minutes a day to convert the files
Kapwing

It is a free online aspect ratio editor to create content online. This tool has several features and a collection of online material. For example, through this aspect ratio editor, you can crop the size of video online.
You can select or resize video aspect ratio according to different social media platforms. But you can export only 720 p quality through this website for free after that; you have to create an account.
Pros:
- Merge multiple videos or images collectively in any order and add audio.
- Reduce the video size of any format with a single click.
- Add video subtitles
- Resize or crop videos for all social media posts.
- Cut out multiple sections of a video.
Cons:
- 250MB file upload limit
- Export only in 720p quality
- Export video clips for 7 minutes
- Edit or store content till two days
IMOVIE

Try the iMovie iPhone aspect ratio editor if you want to drag or drop the interface for editing videos simply. It has primitive tools to edit videos or images, and you can also import content from local drives or cloud storage with it.
It offers various visual effects like picture-in-picture, split-screen, or green screen effects. You can also enable viewers to zoom in or pass the scenes. Imovie set aspect ratio gives videos a cinematic feel using its 13 different video filters.
Pros:
- It has a simple interface.
- Its 4K resolution support allows you to give a cinematic feel to videos.
- iMovie has great speed controls that enable you for optimal pace-setting of scenes.
Cons:
- It does not have many output controls options.
- It only works on Mac systems.
Wondershare Filmora
If you permanently want to change the aspect ratio online, you must opt for a video converter or editor. Wondershare Filmora is the most remarkable aspect ratio editor that allows you to easily create videos of 4:3, 9:16, 16:9, and 1:1 aspect ratios.
Moreover, it is a convenient tool to edit videos on YouTube, Apple TV, Vimeo, or mobile devices. So, many YouTubers or bloggers are using it.
It is a reliable and cost-effective tool that offers drop and drag effects, audio, templates, soundtracks, filters, and other options. In addition, you can access features like split-screen, green screen, motion tracking, etc.
Its keyframing feature allows you to include custom animations, while motion tracking helps you track objects. Then, the color matching feature enables you to copy the color settings of one video and apply them to another clip.
You can even assign hotkeys shortcuts for various tools to save your time. Moreover, you can use different transitions, motion elements, filters, clips, titles, audios, and many other things with a simple drag and drop option.
Wondershare Filmora
Get started easily with Filmora’s powerful performance, intuitive interface, and countless effects!
Try It Free Try It Free Try It Free Learn More >

With its green screen feature, you can remove or change the video background. Then, you have an audio ducking feature to lower down the background volume or fade the audio track to another.
Here are various methods to change the aspect ratio in Wondershare Filmora:
Method 1: Change Aspect Ratio at the Starting Interface
Wondershare Filmora allows you to resize video aspect ratio when you launch the editor program. First, go to the drop-down menu button. Then, click on it to see various aspect ratios such as 16:9, 1:1, 4:3, 9:16, or 21:9.
Choose the aspect ratio that you want by simply clicking on it.

Method 2: Change Aspect Ratio under Project Settings
You can change the aspect ratio by clicking on the “Project Settings.” You can decide the target aspect ratio based on the aspect ratio of the media source.
For instance, if the aspect ratio of media source files is 4:3, select the standard aspect ratio of 4:3. Then, media files with other aspect ratios will show black bars.
In case of any discordance or if you want to change the aspect ratio, choose the proper ratio from project settings.

Method 3: Change Aspect Ratio during Editing
Even after importing the videos or images into Filmora’s timeline, you can easily change the ratio from the Crop and Zoom tool.
- Go to timeline and right-click on the video clip. Then, select “Crop and Zoom.” You will see the pop-up window.
- Click on 16:9, 4:3, 1:1, or 9:16 manually at the bottom if you like to change the video aspect ratio.
- You can also manually enter the video aspect ratio. Next, click on the “Ok” button.

After changing the aspect ratio, add background blur effects if you notice a black bar. It will enhance the video. You can also intensify your video by using filters, visual effects, overlays, or titles.

Method 4: Change the Aspect Ratio with Auto-Reframe
If you use Filmora’s latest versions, you will notice Auto Reframe helps to change the aspect ratio. Other than cropping, it will find the object in clips and crop it automatically if needed.
The following are steps to change the aspect ratio using the Auto-Reframe option:
Step1 Once you upload the video clips to the media library, right-click on it and choose the Auto-Reframe option

Step2 You will see the Auto Reframe window appear on the screen. Replace the existing video with a new clip. Then, change the video aspect ratio and video motion speed. Make sure to change the aspect ratio that fits most with different social media platforms

Step3 Once you choose the aspect ratio, click on the “Analyze” button. Filmora will Auto-Reframe the video itself. Once the process completes, you can see results in the preview window
Drag box to adjust the frame or to keep the object in it. It will automatically remove the content outside the box.

Step4 After completing adjustment or reframing, click on the “Export” button to save your video
Change the name of the video and select the location where you want to save the video. Now, click on the “Export” again to save.

Method 5: Change Aspect Ratio at Exporting
You can save the clip to your system or smartphones, depending on your requirements. Then, upload them directly to Youtube or burn them into DVD by clicking on the “Export button.” In this way, you can watch on widescreen or standard TV whenever you want.

● Change Aspect Ratio for the Local Computer
First, you will see the “Local” tab. There you can save the clip in a particular aspect ratio to your system.
You can see all resolutions with various aspect ratios after selecting the format. The output video depends on the media click resolution.
● Change Aspect Ratio for a Device
Change the “Device” tab to save the video in formats compatible with popular devices, including iPod, iPhone, PSP, iPad, etc. Once you choose the device, you will see all resolutions. Choose your favorite or the best resolution.
The video quality will continue improving with higher resolutions. But it will also increase the size of the file.
● Change Aspect Ratio for YouTube
Go to the “YouTube” tab and fill in the information. Then, click the “Export” button. Selecting the aspect ratio again is not necessary. It will directly upload your videos to YouTube.
● Change Aspect Ratio for DVD TV
When you go to the “DVD” tab, you will notice various aspect ratio options. Switching the aspect ratio for TV from 4:3 to 16:9 is pretty straightforward. To do so, select what you think is right.
Conclusion
From the article above, you have learned about different online converters. Now you know how to change the video aspect ratio online and use the video aspect ratio editor. Also, understand how to calculate aspect ratios.
So, you can decide for yourself that Wondershare Filmora video editor is one of the best tools. Using its different methods you can change the aspect ratio easily.
Furthermore, you can use it to make changes on both social media platforms and your devices because it is an effective and reliable tool.
For Win 7 or later (64-bit)
For macOS 10.12 or later
While watching movies, you might have noticed specific clips have black lines at the sides of the screen. It is because the original video’s aspect ratio is different from that of the screen on which you see it.
Nowadays, people are using multiple devices with different aspect ratios. Videos are an effective marketing tool that most marketers are using to expand their business. Therefore, the video aspect ratio has become vital.
Some people feel technical aspects such as video aspect ratio or using aspect ratio editor are a bit intimidating. But they are easy and simple to understand. So, let us know more about them.
In this article
01 [How to Calculate Video Aspect Ratio Online?](#Part 1)
02 [Websites to Change Video Aspect Ratio Online](#Part 2)
Part 1 How to Calculate Video Aspect Ratio Online?
Do you want to make changes to the video? If yes, then it is important to understand the basic concepts of video aspect ratios. Moreover, you can determine the specifications using an aspect ratio editor online.
Every photo, canvas, responsive design, digital video, or frame is rectangular with precise proportions. Outline the aspect ratios to create shapes according to different mediums like computers, TV, movies, or camera screens.
With the help of aspect ratio calculators, you can calculate the image’s value and new size. You can also use it to convert the image size and keep the objects in shape to make them look natural.
The formula to find an aspect ratio is: Width / Height
Aspect Ratio Calculation Process
Calculating the aspect resolution is pretty straightforward. The steps mentioned below will help you to get the correct height for the edited image:
- Take the original height-for example, 2400 units.
- Take the actual width- for example, 3200 units.
- Then, divide the height by width- for example, 2400/3200=0.75.
- Multiply the result (quotient) by new expected width- for instance, 0.75*600=450.
- The resulting figure is a new height.
Part 2 Websites to Change Video Aspect Ratio Online
If you want to change the video aspect ratio, you can easily crop the size of the video online with the help of different websites. These websites offer other aspect ratio options. So, let us learn more about them:
Free Convert
FreeConvert.com is a free editing website that allows you to edit video aspect ratio online. Usually, it is a cloud-based editor that converts a variety of files. So, you can use it to change the video aspect ratio of your clip.
You can see various options such as aspect ratio, codec, screen resolution, or more during video file conversion. For example, you can opt for an aspect ratio as per your requirements there.
Then, this converter will fix the clip automatically in the resolution selected by you. This website can process multiple files up to 1GB at once.
Pros:
- No Pop-ups occur while converting
- It did not affect the download speed
- Easy to convert the files
Cons:
- You have a limit of 25 minutes to convert files. After that, you need to upgrade to pro by making monthly payments.
CloudConvert
Cloud Convert is a file conversion service supporting around 200 file formats online for free. You can adjust the aspect ratio of videos on this website easily.
You have to upload a video clip and select its output format as per your original file. Then go to output video configuration to change the aspect ratio there. Choose the aspect ratio from the options given.
Pros:
- Several conversion options for high-quality files
- Supports cloud services
- Platform independent
- User-friendly
- Supports batch conversion
- It offers a powerful API
Cons:
- Get 25 minutes a day to convert the files
Kapwing
It is a free online aspect ratio editor to create content online. This tool has several features and a collection of online material. For example, through this aspect ratio editor, you can crop the size of video online.
You can select or resize video aspect ratio according to different social media platforms. But you can export only 720 p quality through this website for free after that; you have to create an account.
Pros:
- Merge multiple videos or images collectively in any order and add audio.
- Reduce the video size of any format with a single click.
- Add video subtitles
- Resize or crop videos for all social media posts.
- Cut out multiple sections of a video.
Cons:
- 250MB file upload limit
- Export only in 720p quality
- Export video clips for 7 minutes
- Edit or store content till two days
IMOVIE
Try the iMovie iPhone aspect ratio editor if you want to drag or drop the interface for editing videos simply. It has primitive tools to edit videos or images, and you can also import content from local drives or cloud storage with it.
It offers various visual effects like picture-in-picture, split-screen, or green screen effects. You can also enable viewers to zoom in or pass the scenes. Imovie set aspect ratio gives videos a cinematic feel using its 13 different video filters.
Pros:
- It has a simple interface.
- Its 4K resolution support allows you to give a cinematic feel to videos.
- iMovie has great speed controls that enable you for optimal pace-setting of scenes.
Cons:
- It does not have many output controls options.
- It only works on Mac systems.
Wondershare Filmora
If you permanently want to change the aspect ratio online, you must opt for a video converter or editor. Wondershare Filmora is the most remarkable aspect ratio editor that allows you to easily create videos of 4:3, 9:16, 16:9, and 1:1 aspect ratios.
Moreover, it is a convenient tool to edit videos on YouTube, Apple TV, Vimeo, or mobile devices. So, many YouTubers or bloggers are using it.
It is a reliable and cost-effective tool that offers drop and drag effects, audio, templates, soundtracks, filters, and other options. In addition, you can access features like split-screen, green screen, motion tracking, etc.
Its keyframing feature allows you to include custom animations, while motion tracking helps you track objects. Then, the color matching feature enables you to copy the color settings of one video and apply them to another clip.
You can even assign hotkeys shortcuts for various tools to save your time. Moreover, you can use different transitions, motion elements, filters, clips, titles, audios, and many other things with a simple drag and drop option.
Wondershare Filmora
Get started easily with Filmora’s powerful performance, intuitive interface, and countless effects!
Try It Free Try It Free Try It Free Learn More >
With its green screen feature, you can remove or change the video background. Then, you have an audio ducking feature to lower down the background volume or fade the audio track to another.
Here are various methods to change the aspect ratio in Wondershare Filmora:
Method 1: Change Aspect Ratio at the Starting Interface
Wondershare Filmora allows you to resize video aspect ratio when you launch the editor program. First, go to the drop-down menu button. Then, click on it to see various aspect ratios such as 16:9, 1:1, 4:3, 9:16, or 21:9.
Choose the aspect ratio that you want by simply clicking on it.
Method 2: Change Aspect Ratio under Project Settings
You can change the aspect ratio by clicking on the “Project Settings.” You can decide the target aspect ratio based on the aspect ratio of the media source.
For instance, if the aspect ratio of media source files is 4:3, select the standard aspect ratio of 4:3. Then, media files with other aspect ratios will show black bars.
In case of any discordance or if you want to change the aspect ratio, choose the proper ratio from project settings.
Method 3: Change Aspect Ratio during Editing
Even after importing the videos or images into Filmora’s timeline, you can easily change the ratio from the Crop and Zoom tool.
- Go to timeline and right-click on the video clip. Then, select “Crop and Zoom.” You will see the pop-up window.
- Click on 16:9, 4:3, 1:1, or 9:16 manually at the bottom if you like to change the video aspect ratio.
- You can also manually enter the video aspect ratio. Next, click on the “Ok” button.
After changing the aspect ratio, add background blur effects if you notice a black bar. It will enhance the video. You can also intensify your video by using filters, visual effects, overlays, or titles.
Method 4: Change the Aspect Ratio with Auto-Reframe
If you use Filmora’s latest versions, you will notice Auto Reframe helps to change the aspect ratio. Other than cropping, it will find the object in clips and crop it automatically if needed.
The following are steps to change the aspect ratio using the Auto-Reframe option:
Step1 Once you upload the video clips to the media library, right-click on it and choose the Auto-Reframe option
Step2 You will see the Auto Reframe window appear on the screen. Replace the existing video with a new clip. Then, change the video aspect ratio and video motion speed. Make sure to change the aspect ratio that fits most with different social media platforms
Step3 Once you choose the aspect ratio, click on the “Analyze” button. Filmora will Auto-Reframe the video itself. Once the process completes, you can see results in the preview window
Drag box to adjust the frame or to keep the object in it. It will automatically remove the content outside the box.
Step4 After completing adjustment or reframing, click on the “Export” button to save your video
Change the name of the video and select the location where you want to save the video. Now, click on the “Export” again to save.
Method 5: Change Aspect Ratio at Exporting
You can save the clip to your system or smartphones, depending on your requirements. Then, upload them directly to Youtube or burn them into DVD by clicking on the “Export button.” In this way, you can watch on widescreen or standard TV whenever you want.
● Change Aspect Ratio for the Local Computer
First, you will see the “Local” tab. There you can save the clip in a particular aspect ratio to your system.
You can see all resolutions with various aspect ratios after selecting the format. The output video depends on the media click resolution.
● Change Aspect Ratio for a Device
Change the “Device” tab to save the video in formats compatible with popular devices, including iPod, iPhone, PSP, iPad, etc. Once you choose the device, you will see all resolutions. Choose your favorite or the best resolution.
The video quality will continue improving with higher resolutions. But it will also increase the size of the file.
● Change Aspect Ratio for YouTube
Go to the “YouTube” tab and fill in the information. Then, click the “Export” button. Selecting the aspect ratio again is not necessary. It will directly upload your videos to YouTube.
● Change Aspect Ratio for DVD TV
When you go to the “DVD” tab, you will notice various aspect ratio options. Switching the aspect ratio for TV from 4:3 to 16:9 is pretty straightforward. To do so, select what you think is right.
Conclusion
From the article above, you have learned about different online converters. Now you know how to change the video aspect ratio online and use the video aspect ratio editor. Also, understand how to calculate aspect ratios.
So, you can decide for yourself that Wondershare Filmora video editor is one of the best tools. Using its different methods you can change the aspect ratio easily.
Furthermore, you can use it to make changes on both social media platforms and your devices because it is an effective and reliable tool.
For Win 7 or later (64-bit)
For macOS 10.12 or later
The Frames per Second Can Enhance or Hamper Your Ability to Enjoy Watching a Video on YouTube. This Article Will Define Frame Rates and Help You Choose the Best FPS
YouTube has become one of the to go to social media platforms for internet use because it provides entertainment for people who want to get entertained, learn or catch up with their favorite personalities. This platform has also given content creators a space to showcase their talents, educate the masses or simply have a good time when playing their games.
However, being a content creator on YouTube entails more than just posting a video weekly. You ought to ensure you get the frame rate in the video right. Failure to choose the correct frame rate will affect how your audience enjoys the video, increasing the chances that you lose subscribers.
Without further ado, let’s discuss the best fps for YouTube.

How Does FPS Affect Viewing YouTube Videos?
Before we dive into how FPS affects your viewing experience on YouTube and determine the best frame rate for YouTube, let’s define what it is. FPS is short for frames per second and is the number of still images appearing on display in one second. The more frames per second you have in your video, the clearer your video will become. The vice versa is also true.
To further simplify this definition, we will use the example of a flipbook. An animator usually draws an image on each page of the book. When they flip the pages in rapid succession, the images appear to be in motion. Suppose the animator used fewer pages to make their flipbook.

The animation would not be as smooth and crisp as if they had used more pages, each with a different still image contributing to the final motion.
The human brain can easily differentiate between 12 distinct images. However, when the photos exceed 18 and move rapidly, the brain is tricked into believing that the pictures are in motion. A frame rate lower than 24FPS will make your YouTube video look choppy and unnatural, as if it lags in real time.
Ideally, 24fps is the best fps for YouTube videos featuring mundane activities that we see in daily life. However, if you want to pack more information into your video and make the motion a bit smoother, then 30fps is the best video frame rate for YouTube.
Perhaps you post fast-paced content about gaming and other live-action videos. You are better off choosing 60FPS, which makes high-speed scenes look more fluid and helps you capture double the information.
What Is the Recommended & Highest Frame Rate for YouTube Videos?
Unfortunately, there is no correct answer when it comes to the best video frame rate for YouTube videos. The controversy still continues, and everyone seems to have their own opinion.
According to Thomas Edison , anything less than 46FPS for motion pictures will strain the eyes and give an unpleasant viewing experience. At the time, filmmakers and videographers were adamant about sticking to between 22-26PFS for their videos, provided the audio adaptability remained at 35mm.
Different frame rates are used for various displays, genres, and mediums. For instance, 1-16FPS was common in silent-era movies and stop-motion movies. However, this frame rate is neither universally accepted nor widespread in the world today.

An excellent example of a frame rate that produces larger-than-life videos with exceptional detail is 24fps. However, the NTSC confirms that it is, in fact, 23.97 frames per second when you consider issues to do with color and hue.
Another universally acceptable frame rate is 30fps, which is widespread in television. Videographers also use it to make slow-motion segments in sports videos or other fast-paced content. The sweet 60fps makes any motion look smooth as butter and significantly reduces any blur in your videos. This frame rate is also characterized by super fine details you can easily miss with 24 and 30fps. It is also the highest fps video on YouTube.
120fps is synonymous with grandeur, with its monumental footage suitable for slow-motion scenes. Lastly, anything above 120fps works great with ultra-slow-motion videos. Of course, we are talking 240fps, which is rare but not uncommon. However, you would need a high-speed capture camera, which we believe doesn’t come cheap.
To sum it all up, 24fps is the recommended frame rate for YouTube. You can go higher than the baseline and use 30fps or higher if you make videos with lots of motion, like gaming videos. Most of the time, a higher frame rate is a personal choice rather than a necessity. However, we understand you want to give your viewers a pleasant experience while watching your content.
What Is the Best Frame Rate for YouTube Videos?
If you want to record a video for your YouTube channel, you might wonder what is the best fps for YouTube videos. You are better off sticking between 24fps and 60fps. The platform has only recently added 8K support for videos, which is a plus for many content creators. Below is a list of frame rates for the most popular genres on YouTube.

- Podcasts and talk shows - 30 FPS
- Gaming videos - 60 FPS
- Makeup tutorials - 60 FPS
- Educational videos - 24- 30 FPS
- Health and fitness - 24-30 FPS
- Sports - 40-60 FPS
Remember that the list above is not exhaustive and doesn’t cover all types of content on the platform. We can’t also guarantee that there is a “best” frame rate for your YouTube video. We suggest you heed our suggestion and practice to determine the best frame rate for YouTube videos.
We couldn’t fail to mention that your frame rate should match the content uploading and decoding. Since the interlaced content may experience performance issues on YouTube, it would help if you deinterlaced it.
How To Check FPS on YouTube Video?
Below is a simple guide on how to check fps on YouTube videos.
Step1 Open any video on YouTube and right-click on it. A pop-up window will appear. Select “Stats for nerds.”

Step2 Narrow down on the “Current/Optimal Res” tab. The first set of figures before the forward slash represents the current resolution, while the figures after the forward slash represent the optimal resolution for the video. For instance, the figure in the picture below indicates that the resolution is 1280*720, and the frame rate is 30FPS. The figures repeat themselves, meaning that the video is at the optimal resolution.

How To Adjust FPS When Editing a YouTube Video?
An efficient video editing tool is all you need to adjust the frame rate for a video you want to upload to YouTube. Since there are so many options in the market, it is easy to get swept away by the prospects and wonder which one to choose.
Based on our research, Wondershare Filmora is one of the most efficient editing tools to change the FPS in your video and make it more enjoyable to watch.
Free Download For Win 7 or later(64-bit)
Free Download For macOS 10.14 or later
Wondershare Filmora is highly feature-rich, making it an editor’s dream. We guarantee you don’t need to be a pro to use this platform. The user-friendly interface is the ideal choice for even the most clueless novice.
However, a little knowledge goes a long way in ensuring you don’t get stuck using it. In addition, customer support is impeccable, meaning you will always find someone to help you whenever you encounter a problem using the platform.
The split-screen icon allows you to play and edit different clips simultaneously without clicking out of the app or finishing one task before starting the next. You can also select the number of split screens you want, depending on the videos you want to edit in one go. The newer version, Filomra 12, has everything you need to edit your video and make anyone who watches it glued to the screen because of how crisp it is.

Below are some examples of key features you might find interesting.
- GIF support
- Audio equalizer
- 4K editing
- Advanced text editing
- Noise removal
- Scene detection
- Audio mixer
- Colour tuning
Here is a detailed guide on how to use Wondershare Filmora to adjust the frame rate for YouTube videos.
Step1 Launch the platform on your PC or laptop and click on the “File” tab at the top of the page. A drop-down menu will appear. Select “Project Settings.”

Step2 After a dialogue box appears, click “Frame Rate” and choose the best option.

Step3 Continue customizing your video using the other editing tools in the platform, and click “Export” to save a copy to your device.
Conclusion
Making crisp, polished-looking YouTube videos takes a lot of time and dedication. Fortunately, you knew that by the time you decided to start creating content for the platform. With all the knowledge at your fingertips, you have no reason not to broaden your knowledge base and gather enough information to help you create the best videos.
There are plenty of video editing tools to get your video to the correct resolution, so your content is above par. If you don’t know how to use a specific app or platform, you must search for a tutorial and start practicing. You could also consult other creators in your niche and ask them how they make their videos look so good.
Free Download For macOS 10.14 or later
Wondershare Filmora is highly feature-rich, making it an editor’s dream. We guarantee you don’t need to be a pro to use this platform. The user-friendly interface is the ideal choice for even the most clueless novice.
However, a little knowledge goes a long way in ensuring you don’t get stuck using it. In addition, customer support is impeccable, meaning you will always find someone to help you whenever you encounter a problem using the platform.
The split-screen icon allows you to play and edit different clips simultaneously without clicking out of the app or finishing one task before starting the next. You can also select the number of split screens you want, depending on the videos you want to edit in one go. The newer version, Filomra 12, has everything you need to edit your video and make anyone who watches it glued to the screen because of how crisp it is.
Below are some examples of key features you might find interesting.
- GIF support
- Audio equalizer
- 4K editing
- Advanced text editing
- Noise removal
- Scene detection
- Audio mixer
- Colour tuning
Here is a detailed guide on how to use Wondershare Filmora to adjust the frame rate for YouTube videos.
Step1 Launch the platform on your PC or laptop and click on the “File” tab at the top of the page. A drop-down menu will appear. Select “Project Settings.”
Step2 After a dialogue box appears, click “Frame Rate” and choose the best option.
Step3 Continue customizing your video using the other editing tools in the platform, and click “Export” to save a copy to your device.
Conclusion
Making crisp, polished-looking YouTube videos takes a lot of time and dedication. Fortunately, you knew that by the time you decided to start creating content for the platform. With all the knowledge at your fingertips, you have no reason not to broaden your knowledge base and gather enough information to help you create the best videos.
There are plenty of video editing tools to get your video to the correct resolution, so your content is above par. If you don’t know how to use a specific app or platform, you must search for a tutorial and start practicing. You could also consult other creators in your niche and ask them how they make their videos look so good.
Also read:
- Updated In 2024, Finding Best GIF Websites Is Easy as Pie
- New 2024 Approved Best 8 AI Video Denoise Software
- Unlink Audio and Video in DaVinci Resolve Detailed Steps
- New Are You Looking for an Ideal Halloween Countdown Video Clip for Your Video? This Article Will Walk You Through the Best Ones You Can Use to Get the Job Done Perfectly
- 2024 Approved Best Free Video Editing Software for Reddit
- 2024 Approved Want to Buy a Drone for Better Videography Creating? This Article Will Review 6 of the Best Drones on the Market for You to Consider
- 2024 Approved Shoot Video with Virtual Green Screen
- Color Correction Basics (S-LOG Footage) for 2024
- Updated How Does the YouTube AI Algorithm Work
- Updated Create A Freeze Frame Sequence In Your Videos for 2024
- Updated How Did AI Video Games Act More Human Than Human, In 2024
- Updated How To Brighten Video In Premiere Pro | Step By Step Guide
- 2024 Approved Do You Know How to Create Video Loops on PowerPoint? If Not Then Read This Article to Learn More Details
- Updated In 2024, Top 10 Sony LUT for Different Purposes
- New In 2024, Best Frame Rate for 4K Video
- 2024 Approved Does the Customary Speed of Your TikTok Slideshow Appear to Be Slow Enough of Late? If Yes, Drop Your Worries Here with the Know-How of Increasing the TikTok Slideshow Speed
- 2024 Approved Progressive Solutions to Add VHS Effects to Video with Ease
- 2024 Approved Live Stream on YouTube Using Zoom
- 2024 Approved How to Add Text Animation Online
- 2024 Approved Intro Videos Have the Potential to Make a First Impression on Viewers, and You Know How They Say that the First Impression Is the Last Impression
- In 2024, 9 Best Sparkle Effects Photo and Video Editors You Should Know
- Updated Do You Know You Can Add LUTs for Cinematic Color Grading on Your Smartphones? With VN Editor You Can, You Can Add LUTs. Choose the Option VN LUTs Free Download
- In 2024, Learn How to Create Your Own Unique Video in Cinematic Text Intro in Filmora. Its a Simple Process that Will Offer Professional-Level Intros of Your Own
- Spooky Halloween Best 15+ Halloween Countdown Video Clips for 2024
- New Top 5 Free Online Video Filter Editors Improve Your Videos with Filters
- Fixed Microsoft Excel 2016 Cannot Access the File Error
- In 2024, Overview of the Best Honor V Purse Screen Mirroring App | Dr.fone
- Ultimate Guide on Samsung Galaxy S21 FE 5G (2023) FRP Bypass
- Fix Cant Take Screenshot Due to Security Policy on OnePlus Nord N30 5G | Dr.fone
- Where Is the Best Place to Catch Dratini On Samsung Galaxy M34 5G | Dr.fone
- How To Bypass FRP on Lava Agni 2 5G
- 3 Ways to Change Location on Facebook Marketplace for Vivo T2 Pro 5G | Dr.fone
- In 2024, Here Are Some Reliable Ways to Get Pokemon Go Friend Codes For Nokia C32 | Dr.fone
- In 2024, How to Screen Mirroring Samsung Galaxy S23 FE? | Dr.fone
- How To Change Your Apple ID Password On your Apple iPhone XS
- Ways to trade pokemon go from far away On Asus ROG Phone 7? | Dr.fone
- How to Change Itel P55 Location on Skout | Dr.fone
- Recover your contacts after Itel P55 5G has been deleted.
- Things You Dont Know About Samsung Galaxy XCover 6 Pro Tactical Edition Reset Code | Dr.fone
- In 2024, How to Transfer Contacts from Honor Magic 6 to iPhone XS/11 | Dr.fone
- How PGSharp Save You from Ban While Spoofing Pokemon Go On Vivo Y17s? | Dr.fone
- Title: New 2024 Approved Everything You Need to Know About Color Grading in Photography
- Author: Chloe
- Created at : 2024-04-24 07:08:33
- Updated at : 2024-04-25 07:08:33
- Link: https://ai-editing-video.techidaily.com/new-2024-approved-everything-you-need-to-know-about-color-grading-in-photography/
- License: This work is licensed under CC BY-NC-SA 4.0.
