
:max_bytes(150000):strip_icc():format(webp)/is-kindle-unlimited-worth-it-fda01dceb923406a8524c64d2b72693e.jpg)
New 2024 Approved Finding the Best Voice Changers for WhatsApp Free and Paid
Finding the Best Voice Changers for WhatsApp: Free and Paid
Ever thought of the best way to prank your friends via WhatsApp voice calls? WhatsApp voice changing app is what you need. Not any voice changer, but one that offers quality services to end-users. Many software programs claim to render such services. However, not all are the perfect fit since the majority are substandard.
Are you looking for an efficient WhatsApp voice changer with a comprehensive user interface that you can use on your Windows, Mac, or mobile devices? You are at the right spot. Our team has browsed the internet and handpicked the best 7 WhatsApp voice-changing apps available in the global market today. We will share them with you here.
Try AI Voice Changer For Win 7 or later(64-bit)
Try AI Voice Changer For macOS 10.14 or later
Part 1. 7 Best Voice Changers for WhatsApp
Here are the seven (7) most powerful software or apps that offer quality voice-changing services on WhatsApp:
1. Magic Call[iOS] [Free with Limited Features]
Magic Call [iOS] is one of the best voice-changing apps available on the internet. The app lets you switch your voice into a fun and lovely one with complete ease. It’s a simple app available for download to Android and iOS devices.
Users of this WhatsApp voice changer find it simple to operate because of the comprehensive user interface and rich features it holds. Magic Call [iOS] is a freemium app and highly secured. The app provides you with several voice-changing options that you can choose from to prank your callers. Some of them are male, female, and robotic sounds. Additionally, it supports sounds like clap, laughter, gasp, and several others.

How to Use Magic Call [iOS] with WhatsApp
Open Google PlayStore or App Store on your Android device, and search Magic Call. Click on the corresponding key to download and install the app on your device, then follow the procedure below to change your WhatsApp voice:
Step1 Launch Magic Call [iOS], and grant it access to the necessary features such as contact, audio recording, etc.
Step2 Next, choose a contact from the list appearing on your display screen to speak to
Step3 Tap on the contact’s name, and then click on the Female Voice filter from the options that pop up.
Step4 Apply the WhatsApp voice-changer to spice up your conversation with friends and relatives on your contact.
2. Voicemod
Here is another fun-oriented software that permits you to change your voice during WhatsApp calls easily and quickly. Voicemod is a highly efficient WhatsApp voice changer popular among gamers, content creators, and more.
The app is well-customized with epic sound effects that you can select from to pimp your voice during calls. You can choose to sound like a robot, woman, man, or demon. Voicemod integrates with apps like TikTok, Elgato Stream, Audacity, Discord, Skype, and many more.
Also, Voicemod comes with voice filters. The app allows you to switch between scary, loud, or funny voices. Additionally, you have the chance to customize your vice via the Voicelab feature tucked into it. It’s a simple tool compatible with Windows, Mac, and Chromebook.

How to Use Voicemod with WhatsApp
Step1 Open your desired web browser on your PC, and navigate to the official website for Voicemod. A page as below will appear on your screen:
Click on the corresponding button to download and install a suitable version. Wait until the download is complete, and follow the on-screen instructions to configure the app. Ensure you grant permission to the necessary devices such as Microphone, etc.
Step2 Next, confirm the Voice Changer toggle at the bottom of the Window page is activated. Once that’s set, scroll through the library of voice filters, and sound effects to select your desired prank voice.
Step3 Now connect the selected Microphone to WhatsApp, host a call, and start enjoying the lovely prank voices from Voicemod.
3. Call Voice Changer [iOS]
Call Voice Changer is a simple yet powerful voice-changing app built with countless sound effects that you can use to fool your contacts during calls. The app helps you spice up your conversation with friends and families. It lets you select between funny, creepy, and loud voices.
Also, Call Voice Changer supports sound effects like birthday songs, cartoon characters, and lots more. All end-users of this app find it simple to operate. The reason is because of the clean user interface. Call Voice Changer provides you with real-time voice-changing effects- this means you have the privilege to change your voice at any time during calls.

How to Use Call Voice Changer- IntCall
Step1 On your iOS device, open the App Store, and click on the Search tab at the extreme lower right corner of your screen. Enter Call Voice Changer in the empty field provided and tap on the Enter key on your keypad.
Step2 A new screen showing the Call Voice Changer app will pop up. Here is what the app looks like:

Click on the GET button next to the app name. Validate your action when required. Launch the app after the successful download, accept the necessary conditions, and grant access if prompted.
Step3 When Call Voice Changer opens, add your cellphone number, and grant access to Microphone.
Next, select your preferred voice pitch on the next interface that pops up.

Step4 Choose your preferred sound effect from the available options, and make calls via WhatsApp.
4. Funcalls- Voice Changer & Call Recording
With over 100 voice effects, Funcalls is another wonderful WhatsApp voice-changer you can use to alter your voice during audio or video calls. The app makes it to our top list because of the quality features it holds. Funcalls is well-designed with a clean interface that lets you navigate around easily and quickly without involving a third party.
Besides voice changing, Funcalls lets you record your conversations during calls. This WhatsApp voice-changer works perfectly with mobile operating systems like Android and iOS devices. It’s a highly flexible app that permits you to change your voice using different pitches and speeds.
How to Use Funcalls- Voice Changer & Call Recorder
Step1 Depending on the mobile operating system you are using, launch the App Store, or Google PlayStore, click on the Search button and enter Funcalls in the appropriate field.
Tap on the appropriate button to install the app on your device.
Step2 Wait patiently for the installation to complete, and follow the on-screen prompts to set up the app with your Android or iOS device. Once the configuration is complete, click on the Dialer button at the bottom of the app screen. Enter a cellphone number by selecting the appropriate keys. Ensure you input the country code while dialing the number.
Step3 Now select your preferred voice effect from the options appearing on your screen.

Host the call, and download the audio recording. After the call, share the recording with friends and families for fun.
5. Prank Dial
Designed for novices and experts in the tech space, Prank Dial is another voice changer that integrates with WhatsApp. This lightweight app lets you change your voice during calls to spice up conversations with families and friends.
It’s a fun app customized with several background sound effects. From funny sounds to annoying, celebrations, scams, money, politics, and lots more. Prank Dial WhatsApp voice-changer offers quality services in free and paid subscription packages. Like the Funcalls-Voice Changer & Call Recording, Prank Dial also supports call recording.

How to Use Prank Dial with WhatsApp
Step1 Click the appropriate button on your Android or iOS device to open Google PlayStore or App Store. Enter Prank Dial in the field given to search the WhatsApp voice-changer.
Tap the corresponding button to download and install the app on your device. After the installation is over, open the app for operation.
Step2 Next, kindly grant Prank Dial access to calls, contact, and local storage. Pick a sound effect to prank your friend, and head to connect with a friend via WhatsApp.
Step3 Once the step above is complete, settle down and prank your friends. Export and share audio recordings with people on your contact list for fun.
6. Voice Changer with Effects
Here is another good WhatsApp voice-changer with top-notch sound effects that you can select from to prank your contacts. It is a high utility voice-changing app well-known for delivering all it promises. End-users have the freedom to switch a boring phone call into an interesting one by selecting a background effect.
How to Use Voice Changer with Effects with WhatsApp
Step1 Download and install Voice Changer with Effects on your smartphone. Launch the app, and grant necessary permission as required.
Step2 Next, locate the Microphone icon, and click on it. Speak to the mic, and add your desired background voice effect.
Step3 Once the step above is complete, edit the recording, and hit the Share button to send it to your contact.

You can share it via WhatsApp. To do that, select the WhatsApp icon

7. Narrator’s Voice
Lastly, Narrator’s voice is a top-rated WhatsApp voice-changing app designed with extraordinary background sound effects you can use to create a wonderful phone call experience. The app supports the text-to-speech feature. Thus, you can type, and Narrator’s Voice will convert into speech.

How to Use Narrator’s Voice with WhatsApp
Step1 Run Narrator’s Voice by clicking on the appropriate icon on your Android device.
Step2 Grant the app access to all the necessary apps and features, including the microphone. Speak to the microphone to proceed.
Step3 Edit your speech with sound effects, and click on Apply. When the editing is complete, click on Share to send to friends.
Part 2: FAQs
Q1. Can I change my voice during calls?
Yes, of course, you can!
However, you need a voice-changing app that supports real-time voice changing. You can select one from the list shared above. We mentioned seven (7) quality voice-changing apps that you can use to prank your contact during calls.
Q2. How to edit voice recordings before sharing them with friends?
Editing voice recording before sharing it with friends is straightforward if you have a voice editing tool like Wondershare Filmora. Wondershare Filmora is a world-leading video editing software with robust features that you need to edit your media files. It supports audio editing without distorting the file format.
Filmora allows you to detach audio from videos, delete, and adjust audio speeds with quality. Additionally, you can use the software to edit your videos, add transitions, effects, and more. This software works with popular computer systems like Windows and Mac. The software is simple to operate and offers quality results at a remarkably high speed. When compared with other video editing tools, Filmora stands out.

Conclusion
Now we’ve successfully explored the best 7 WhatsApp voice changers. Which do you wish to invest your funds in? While making a selection, we advise that you consider the subscription price, ease of use, and compatibility. If you want to edit your voice recordings before sharing them with friends and relatives, Filmora is the perfect tool to apply.
Free Download For Win 7 or later(64-bit)
Free Download For macOS 10.14 or later
Try AI Voice Changer For Win 7 or later(64-bit)
Try AI Voice Changer For macOS 10.14 or later
Part 1. 7 Best Voice Changers for WhatsApp
Here are the seven (7) most powerful software or apps that offer quality voice-changing services on WhatsApp:
1. Magic Call[iOS] [Free with Limited Features]
Magic Call [iOS] is one of the best voice-changing apps available on the internet. The app lets you switch your voice into a fun and lovely one with complete ease. It’s a simple app available for download to Android and iOS devices.
Users of this WhatsApp voice changer find it simple to operate because of the comprehensive user interface and rich features it holds. Magic Call [iOS] is a freemium app and highly secured. The app provides you with several voice-changing options that you can choose from to prank your callers. Some of them are male, female, and robotic sounds. Additionally, it supports sounds like clap, laughter, gasp, and several others.
How to Use Magic Call [iOS] with WhatsApp
Open Google PlayStore or App Store on your Android device, and search Magic Call. Click on the corresponding key to download and install the app on your device, then follow the procedure below to change your WhatsApp voice:
Step1 Launch Magic Call [iOS], and grant it access to the necessary features such as contact, audio recording, etc.
Step2 Next, choose a contact from the list appearing on your display screen to speak to
Step3 Tap on the contact’s name, and then click on the Female Voice filter from the options that pop up.
Step4 Apply the WhatsApp voice-changer to spice up your conversation with friends and relatives on your contact.
2. Voicemod
Here is another fun-oriented software that permits you to change your voice during WhatsApp calls easily and quickly. Voicemod is a highly efficient WhatsApp voice changer popular among gamers, content creators, and more.
The app is well-customized with epic sound effects that you can select from to pimp your voice during calls. You can choose to sound like a robot, woman, man, or demon. Voicemod integrates with apps like TikTok, Elgato Stream, Audacity, Discord, Skype, and many more.
Also, Voicemod comes with voice filters. The app allows you to switch between scary, loud, or funny voices. Additionally, you have the chance to customize your vice via the Voicelab feature tucked into it. It’s a simple tool compatible with Windows, Mac, and Chromebook.
How to Use Voicemod with WhatsApp
Step1 Open your desired web browser on your PC, and navigate to the official website for Voicemod. A page as below will appear on your screen:
Click on the corresponding button to download and install a suitable version. Wait until the download is complete, and follow the on-screen instructions to configure the app. Ensure you grant permission to the necessary devices such as Microphone, etc.
Step2 Next, confirm the Voice Changer toggle at the bottom of the Window page is activated. Once that’s set, scroll through the library of voice filters, and sound effects to select your desired prank voice.
Step3 Now connect the selected Microphone to WhatsApp, host a call, and start enjoying the lovely prank voices from Voicemod.
3. Call Voice Changer [iOS]
Call Voice Changer is a simple yet powerful voice-changing app built with countless sound effects that you can use to fool your contacts during calls. The app helps you spice up your conversation with friends and families. It lets you select between funny, creepy, and loud voices.
Also, Call Voice Changer supports sound effects like birthday songs, cartoon characters, and lots more. All end-users of this app find it simple to operate. The reason is because of the clean user interface. Call Voice Changer provides you with real-time voice-changing effects- this means you have the privilege to change your voice at any time during calls.
How to Use Call Voice Changer- IntCall
Step1 On your iOS device, open the App Store, and click on the Search tab at the extreme lower right corner of your screen. Enter Call Voice Changer in the empty field provided and tap on the Enter key on your keypad.
Step2 A new screen showing the Call Voice Changer app will pop up. Here is what the app looks like:
Click on the GET button next to the app name. Validate your action when required. Launch the app after the successful download, accept the necessary conditions, and grant access if prompted.
Step3 When Call Voice Changer opens, add your cellphone number, and grant access to Microphone.
Next, select your preferred voice pitch on the next interface that pops up.
Step4 Choose your preferred sound effect from the available options, and make calls via WhatsApp.
4. Funcalls- Voice Changer & Call Recording
With over 100 voice effects, Funcalls is another wonderful WhatsApp voice-changer you can use to alter your voice during audio or video calls. The app makes it to our top list because of the quality features it holds. Funcalls is well-designed with a clean interface that lets you navigate around easily and quickly without involving a third party.
Besides voice changing, Funcalls lets you record your conversations during calls. This WhatsApp voice-changer works perfectly with mobile operating systems like Android and iOS devices. It’s a highly flexible app that permits you to change your voice using different pitches and speeds.
How to Use Funcalls- Voice Changer & Call Recorder
Step1 Depending on the mobile operating system you are using, launch the App Store, or Google PlayStore, click on the Search button and enter Funcalls in the appropriate field.
Tap on the appropriate button to install the app on your device.
Step2 Wait patiently for the installation to complete, and follow the on-screen prompts to set up the app with your Android or iOS device. Once the configuration is complete, click on the Dialer button at the bottom of the app screen. Enter a cellphone number by selecting the appropriate keys. Ensure you input the country code while dialing the number.
Step3 Now select your preferred voice effect from the options appearing on your screen.
Host the call, and download the audio recording. After the call, share the recording with friends and families for fun.
5. Prank Dial
Designed for novices and experts in the tech space, Prank Dial is another voice changer that integrates with WhatsApp. This lightweight app lets you change your voice during calls to spice up conversations with families and friends.
It’s a fun app customized with several background sound effects. From funny sounds to annoying, celebrations, scams, money, politics, and lots more. Prank Dial WhatsApp voice-changer offers quality services in free and paid subscription packages. Like the Funcalls-Voice Changer & Call Recording, Prank Dial also supports call recording.
How to Use Prank Dial with WhatsApp
Step1 Click the appropriate button on your Android or iOS device to open Google PlayStore or App Store. Enter Prank Dial in the field given to search the WhatsApp voice-changer.
Tap the corresponding button to download and install the app on your device. After the installation is over, open the app for operation.
Step2 Next, kindly grant Prank Dial access to calls, contact, and local storage. Pick a sound effect to prank your friend, and head to connect with a friend via WhatsApp.
Step3 Once the step above is complete, settle down and prank your friends. Export and share audio recordings with people on your contact list for fun.
6. Voice Changer with Effects
Here is another good WhatsApp voice-changer with top-notch sound effects that you can select from to prank your contacts. It is a high utility voice-changing app well-known for delivering all it promises. End-users have the freedom to switch a boring phone call into an interesting one by selecting a background effect.
How to Use Voice Changer with Effects with WhatsApp
Step1 Download and install Voice Changer with Effects on your smartphone. Launch the app, and grant necessary permission as required.
Step2 Next, locate the Microphone icon, and click on it. Speak to the mic, and add your desired background voice effect.
Step3 Once the step above is complete, edit the recording, and hit the Share button to send it to your contact.
You can share it via WhatsApp. To do that, select the WhatsApp icon
7. Narrator’s Voice
Lastly, Narrator’s voice is a top-rated WhatsApp voice-changing app designed with extraordinary background sound effects you can use to create a wonderful phone call experience. The app supports the text-to-speech feature. Thus, you can type, and Narrator’s Voice will convert into speech.
How to Use Narrator’s Voice with WhatsApp
Step1 Run Narrator’s Voice by clicking on the appropriate icon on your Android device.
Step2 Grant the app access to all the necessary apps and features, including the microphone. Speak to the microphone to proceed.
Step3 Edit your speech with sound effects, and click on Apply. When the editing is complete, click on Share to send to friends.
Part 2: FAQs
Q1. Can I change my voice during calls?
Yes, of course, you can!
However, you need a voice-changing app that supports real-time voice changing. You can select one from the list shared above. We mentioned seven (7) quality voice-changing apps that you can use to prank your contact during calls.
Q2. How to edit voice recordings before sharing them with friends?
Editing voice recording before sharing it with friends is straightforward if you have a voice editing tool like Wondershare Filmora. Wondershare Filmora is a world-leading video editing software with robust features that you need to edit your media files. It supports audio editing without distorting the file format.
Filmora allows you to detach audio from videos, delete, and adjust audio speeds with quality. Additionally, you can use the software to edit your videos, add transitions, effects, and more. This software works with popular computer systems like Windows and Mac. The software is simple to operate and offers quality results at a remarkably high speed. When compared with other video editing tools, Filmora stands out.
Conclusion
Now we’ve successfully explored the best 7 WhatsApp voice changers. Which do you wish to invest your funds in? While making a selection, we advise that you consider the subscription price, ease of use, and compatibility. If you want to edit your voice recordings before sharing them with friends and relatives, Filmora is the perfect tool to apply.
Free Download For Win 7 or later(64-bit)
Free Download For macOS 10.14 or later
Tips & Tricks To Perfectly Use the Audio Mixer in Filmora
Have you seen those classic and outstanding videos of professional YouTubers? Yeah, they feel different from the videos we usually make. The reason mainly lies within the outclass audio quality of those videos.
And now, you might think it’s impossible to mess with the audio control without the support of a professional. But believe me; it’s much simpler than you think. In this brief guide, we’ll show you how to use the audio mixer of Filmora to fine-tune all of your videos skillfully.
But let’s first see what an audio mixer is.
Part 1: What is an audio mixer?
An audio mixer is a tool that gives you control over the audio quality of your videos. Using the audio mixer, you can easily give your video a cinematic feel by controlling different modes and levels.
And that’s not where it ends!!! This mixing console also allows you to mix, combine and balance audio from different sources. So control your audio and give your video that extra bit of depth.
To your surprise, you can access this excellent tool without cost using the world’s leading video editor, Filmora . Let’s see a brief intro of Wondershare Filmora, and then we’ll show you how to use the audio mixer of Filmora in a stepwise manner.
Free Download For Win 7 or later(64-bit)
Free Download For macOS 10.14 or later
Part 2: An easy-to-use audio mixer - Wondershare Filmora
![]()
Wondershare Filmora is one of the world’s leading video-editor and is no less than a blessing for all creators. Its stunning editing features like split screen, motion tracking, speed ramping, and many others allow you to take your video to the next level. Moreover, the massive arsenal of video effects and AI portraits gives you various choices.
What’s more, you can tweak the audio using auto synchronization, audio duckling, an audio visualizer, and even an audio mixer. Isn’t it fantastic? Now let’s move forward and see how we can sharpen our video with the audio mixer of Filmora in detail steps.
Part 3: Steps to effectively use the audio mixer in Filmora
Here are the steps you need to follow to use the audio mixer of Filmora effectively.
Step1Download & install
First, you must have a suitable version of Filmora installed on your device. Here are the steps to install the free version.
- Go to the official website of Filmora and hit the “Free Download” button. Filmora is available for Windows 11 and all the previous versions, as well as for macOS 10.14 to macOS 13
Free Download For Win 7 or later(64-bit)
Free Download For macOS 10.14 or later
- When the download finishes, follow the guidelines of the installation wizard to install Filmora on your computer.
Now let’s see how to prepare our video.
Step2Prepare your video
After you have installed the latest version of Filmora, you need to prepare your video for editing.
For this,
- Launch the Filmora on your computer and click the “New Project” button from the starting interface.

- Now let’s import our video. Click on the “Import Media” section or drag and drop your video/audio file here to import it.

- Once the media file has been imported, add it to the editing panel below with the drag-and-drop method. This is important to create a workspace for your video.

- Now it’s time to edit the video. Make all the editing you want with graphics and visuals to finalize your video before using the audio mixer. And once it’s done, we can move to the first-class audio mixer of Filmora.
Bonus Tip: Before using the audio mixer, ensure you have a headphone to see the changes you are making instead of relying on your desktop speaker.
Step3Start the audio mixer
To open up the audio mixer, click on the “audio mixer” icon on the toolbar below the preview window.

This is what your audio mixer will look like at the start.

Now we can start adjusting the audio settings. Let’s go with the audio levels first.
Step4Adjust the audio levels
To adjust the audio levels, look at the left side of the audio mixer. Here you’ll see two vertical bars, which are;
- The audio levels for the video clip.
- The audio levels for the sound and music in the music track.
You can adjust the icon up or down to make these channels louder or softer.

After the audio levels, let’s see how we can change the audio channels.
Free Download For Win 7 or later(64-bit)
Free Download For macOS 10.14 or later
Step5Adjust the audio channels
See those circles above the audio levels? These are for adjusting the audio channels.
- Rotate the knob-like icon in these circles to adjust the Audio channels’ pan/bounce control. This switches the sound between the left and right channels.
- On top of that, you can see these changes on the channel control panel.

To check the effect, let’s rotate the knob to the left. And to see the result hit the “Play” button on the bottom left corner of the audio mixer interface. Here’s how it looks.

Now it’s time to select the audio mode.
Step6Select the audio mode
The audio mixer of Filmora provides you with two audio mode options. These are;
● Stereo Mode
In the Stereo mode, you can pan from left to right and control your audio just like the knob of the audio channel.
● Surround Mode
You can pan from left to right and front to back in this mode by rotating the video or music icons. This provides you with complete control over the audio positions. But remember that this mode works best if your video is played with the surround sound system.

Once you have changed the audio mode, let’s look at the master levels.
Step7Adjust the master levels
On the very left of the window, you’ll find the Master levels.
This is where you can adjust the master section or all your audio files on your timeline.
- Just drag the master level slider upward and downwards, and you’ll notice the changes right away.

So done with the changes? Let’s preview them.
Free Download For Win 7 or later(64-bit)
Free Download For macOS 10.14 or later
Step8Preview your changes
After carefully making all the changes to your audio, preview it for the last time before going with them. The “Play” button is still there in the bottom left corner.
Perfect!!! No? Make the changes again until you are satisfied and then hit the “Apply” button on the bottom right corner to adjust these changes.

And here we are, done!!! Now you can easily surprise your friends with your master-like audio handling. Before we wind up our guide, we’ll answer some of the frequently asked questions about the audio mixer of Filmora. So let’s dive right into it.
Part 4: Hot FAQs about the audio mixer of Filmora
1.How important is an audio mixer in video editing?
An audio mixer is necessary if you want to create impressive videos. This master volume control allows you to deepen the audio effect and merge two audio sources to get the maximum out of them. This is why most content creators give grave importance to audio mixers during video editing.
2.Where can we find the audio mixer in Filmora?
Like other highly advanced editing tools, you can also find the audio mixer in Filmora. After you’ve placed your media file on the editing panel, the “audio mixer” icon appears on the toolbar under the preview channel.
3.Is the audio mixer of Filmora available for free?
Yes, you can freely use the audio mixer of Filmora as much as you want without any cost. And unlike many other free sound control tools, you get all the latest and advanced features like the preview tool with the audio mixer of Filmora.
Conclusion
Every top-ranked video contains the best-suited audio tracks with it. And the audio mixer of Filmora comes in handy whenever you want to tweak the audio settings of a video.
In this article, we’ve covered everything you need to know about using the audio mixer in Filmora.
Free Download For Win 7 or later(64-bit)
Free Download For macOS 10.14 or later
Free Download For macOS 10.14 or later
Part 2: An easy-to-use audio mixer - Wondershare Filmora
![]()
Wondershare Filmora is one of the world’s leading video-editor and is no less than a blessing for all creators. Its stunning editing features like split screen, motion tracking, speed ramping, and many others allow you to take your video to the next level. Moreover, the massive arsenal of video effects and AI portraits gives you various choices.
What’s more, you can tweak the audio using auto synchronization, audio duckling, an audio visualizer, and even an audio mixer. Isn’t it fantastic? Now let’s move forward and see how we can sharpen our video with the audio mixer of Filmora in detail steps.
Part 3: Steps to effectively use the audio mixer in Filmora
Here are the steps you need to follow to use the audio mixer of Filmora effectively.
Step1Download & install
First, you must have a suitable version of Filmora installed on your device. Here are the steps to install the free version.
- Go to the official website of Filmora and hit the “Free Download” button. Filmora is available for Windows 11 and all the previous versions, as well as for macOS 10.14 to macOS 13
Free Download For Win 7 or later(64-bit)
Free Download For macOS 10.14 or later
- When the download finishes, follow the guidelines of the installation wizard to install Filmora on your computer.
Now let’s see how to prepare our video.
Step2Prepare your video
After you have installed the latest version of Filmora, you need to prepare your video for editing.
For this,
- Launch the Filmora on your computer and click the “New Project” button from the starting interface.
- Now let’s import our video. Click on the “Import Media” section or drag and drop your video/audio file here to import it.
- Once the media file has been imported, add it to the editing panel below with the drag-and-drop method. This is important to create a workspace for your video.
- Now it’s time to edit the video. Make all the editing you want with graphics and visuals to finalize your video before using the audio mixer. And once it’s done, we can move to the first-class audio mixer of Filmora.
Bonus Tip: Before using the audio mixer, ensure you have a headphone to see the changes you are making instead of relying on your desktop speaker.
Step3Start the audio mixer
To open up the audio mixer, click on the “audio mixer” icon on the toolbar below the preview window.
This is what your audio mixer will look like at the start.
Now we can start adjusting the audio settings. Let’s go with the audio levels first.
Step4Adjust the audio levels
To adjust the audio levels, look at the left side of the audio mixer. Here you’ll see two vertical bars, which are;
- The audio levels for the video clip.
- The audio levels for the sound and music in the music track.
You can adjust the icon up or down to make these channels louder or softer.
After the audio levels, let’s see how we can change the audio channels.
Free Download For Win 7 or later(64-bit)
Free Download For macOS 10.14 or later
Step5Adjust the audio channels
See those circles above the audio levels? These are for adjusting the audio channels.
- Rotate the knob-like icon in these circles to adjust the Audio channels’ pan/bounce control. This switches the sound between the left and right channels.
- On top of that, you can see these changes on the channel control panel.
To check the effect, let’s rotate the knob to the left. And to see the result hit the “Play” button on the bottom left corner of the audio mixer interface. Here’s how it looks.
Now it’s time to select the audio mode.
Step6Select the audio mode
The audio mixer of Filmora provides you with two audio mode options. These are;
● Stereo Mode
In the Stereo mode, you can pan from left to right and control your audio just like the knob of the audio channel.
● Surround Mode
You can pan from left to right and front to back in this mode by rotating the video or music icons. This provides you with complete control over the audio positions. But remember that this mode works best if your video is played with the surround sound system.
Once you have changed the audio mode, let’s look at the master levels.
Step7Adjust the master levels
On the very left of the window, you’ll find the Master levels.
This is where you can adjust the master section or all your audio files on your timeline.
- Just drag the master level slider upward and downwards, and you’ll notice the changes right away.
So done with the changes? Let’s preview them.
Free Download For Win 7 or later(64-bit)
Free Download For macOS 10.14 or later
Step8Preview your changes
After carefully making all the changes to your audio, preview it for the last time before going with them. The “Play” button is still there in the bottom left corner.
Perfect!!! No? Make the changes again until you are satisfied and then hit the “Apply” button on the bottom right corner to adjust these changes.
And here we are, done!!! Now you can easily surprise your friends with your master-like audio handling. Before we wind up our guide, we’ll answer some of the frequently asked questions about the audio mixer of Filmora. So let’s dive right into it.
Part 4: Hot FAQs about the audio mixer of Filmora
1.How important is an audio mixer in video editing?
An audio mixer is necessary if you want to create impressive videos. This master volume control allows you to deepen the audio effect and merge two audio sources to get the maximum out of them. This is why most content creators give grave importance to audio mixers during video editing.
2.Where can we find the audio mixer in Filmora?
Like other highly advanced editing tools, you can also find the audio mixer in Filmora. After you’ve placed your media file on the editing panel, the “audio mixer” icon appears on the toolbar under the preview channel.
3.Is the audio mixer of Filmora available for free?
Yes, you can freely use the audio mixer of Filmora as much as you want without any cost. And unlike many other free sound control tools, you get all the latest and advanced features like the preview tool with the audio mixer of Filmora.
Conclusion
Every top-ranked video contains the best-suited audio tracks with it. And the audio mixer of Filmora comes in handy whenever you want to tweak the audio settings of a video.
In this article, we’ve covered everything you need to know about using the audio mixer in Filmora.
Free Download For Win 7 or later(64-bit)
Free Download For macOS 10.14 or later
Step by Step Guide of Make Gimp Transparent Background PNG
Step by Step Guide on Make Gimp Transparent Background PNG
An easy yet powerful editor
Numerous effects to choose from
Detailed tutorials provided by the official channel
Removing background of images and making them transparent is a really very tough task for the newbies. Sometimes you may need to learn lots of software to get the work done and most of the programs are paid over the internet. There are many reasons why you need to remove the background of images such as you don’t like the background and replace with the new one. Here, in this article we will share the information about the GIMP which is a free and open source programs and can help you to remove background from the images and make the transparent.
In this article
01 [What’s Gimp?](#Part 1)
02 [How to Create a Transparent Background in GIMP](#Part 2)
03 [How to Turn the Complex Image Background Transparent](#Part 3)
04 [How to Turn a One-Color Background Transparent](#Part 4)
Part 1 What’s Gimp?
GIMP is open source software which allows you to do image manipulations. The program is distributed over the internet for free of cost the beginners to learn the photography skills. GIMP software can be used for photo retouching, image authoring and image compositions. GIMP supports all features of photo editing even it can be used for GIMP remove background to transparent. You can also use it as a paint program, online batch processing system, image format converter and as an image renderer.
Part 2 How to Create a Transparent Background in GIMP
With the help of GIMP software you can easily remove background from image and make it transparent. Here, we are going to tell you that how you can remove background with the help of GIMP. Let’s learn it step by step.
Step 1:
Install and launch GIMP program on your system. Now click the “File > Open” or you can also use “File > Open as Layers” option.

Step 2:
Now, you have to use the Fuzzy tool. The Fuzzy tool is mainly designed to select the current layer area and the image on the basis of color. Using this tool you can easily select the background which you want to remove with just one click.

Step 3:
On your image, now you will see a channel dialog when you add a second layer on it. This layer will tell the transparency of the image you have added to remove background. So, click the “Layer > Transparency > Add Alpha Channel option.

Step 4:
On your keyboard now you need to hit the “Delete” button to remove background. You may need to repeat the steps 2 to 4 if the background is not completely removed else there is no problem. We have removed blue background here for example.

Step 5:
Finally, you can click the “File > Export As” and then select the PNG format and save it on your computer in the PNG format. This is the way about GIMP remove background to transparent.

Part 3 How to Turn the Complex Image Background Transparent
The above part was about removing the simple and easy background from the image. Here we will share about GIMP transparent background PNG when you have the complex background. For, GIMP create transparent background in the complex images you need to add a transparent layer on the image.
Step 1:
Open the image in GIMP and then right click on the layer of image. Now, click the “Add Alpha Chanel” option.

Step 2:
After making a layer for background now you have to select the foreground of the image which you want to keep using the select tool of GIMP. To start, first you need to make sure the in the settings you have selected “Draw foreground option” is selected.
After doing all adjustments of the settings you need to draw outline of the object and finally press the enter button on keyboard.

Step 3:
After doing all the settings you have to adjust the stroke width from settings panel of GIMP. Use your mouse now and start dragging and drawing the image just like you are painting with a brush. Once your drawing is finished and you leave your mouse the image will look like the below screenshot.

Step 4:
You can also fine tune your selection now with the help of draw background option in the GIMP. This will help you to adjust the rough outline you created previously. Once you are happy then simply press the enter button.

Step 5:
Still, if you want to refine your results more than you can refine your outlines by using the path nodes option. You can view the path nodes by following the below steps.
● Keep your mouse cursor at paths dialog.
● Now, hit selection.
● To view the path you can click the CTRL+Shift+A button.
● Now, select the paths tool.
● Finally click the “Path”.

Step 6:
Now, it’s a time to adjust the outlines according to the output of your foreground image. You can zoom the image and add or adjust the previous nodes. To adjust node you can click the CTRL button on keyboard and drag the node using your mouse. If you need to remove a node then you can use CTRL+Shift button and then click on the node.

Step 7:
Once the path is refined according to your need hit the “Selection from Path” option at the left side.

Step 8:
You will have to add the layer mask on the image now to which will reveal the transparency. Right click the Current layer > Add Layer Mask > Selection and finally click “Add” button.

Step 9:
Now, if you have followed all the previous steps perfectly then your background will be removed now and you can also add a new background to the image. This is way about GIMP delete background to transparent for the complex images.

Part 4 How to Turn a One-Color Background Transparent
While using the GIMP you can also run the one color images background in the transparent. This method helps you to make the transparent background in case if you have the single color in the background of your image. In this method you just need to select the background by the color and it will be removed in the seconds. For GIMP create transparent background image in the single color background image you can follow the below steps.
Steps to Follow:
● Open the image using “File > Open” in the GIMP program.
● Once image is opened you have to select the image layer at the right side corner of the screen. Now right click and select the Add Alpha Channel option.
● Now, you have to choose the select by color tool.

Step 2:
After selecting the color tool you can select the area of the background image which you need to make transparent by clicking on the image. You can also select it manually by clicking and dragging using your mouse pointer. To increase the selection press Shift button on keyboard and then select the different area which you want to select.

Step 3:
Finally, when you have selected the complete area which you want to make transparent then simply select the delete button. This is the way about GIMP set transparent background for one color background images.

Learn New Ways to Make Transparent Background
GIMP software is a free program for newbie users to expand their skills. With the help of GIMP software you can easily remove background from mostly any kind of images. If you like to go for pro software to make the video from the images you have created then you can try the Wondershare Filmora Video Editor which allows you to make the beautiful videos and edit them quickly.
For Win 7 or later (64-bit)
For macOS 10.12 or later
Wondershare Filmora program is video editor software which also offers you some of the photo editing options as well. It is compatible with the windows as well as the Mac operating system devices. The program comes with a very easy to use interface and allows you to edit the videos and design them from scratch. It comes with the premade templates in it so you can directly use them for your videos to make the process faster. You can do keyframing, speed ramping, splitting screen, motion tracking etc for editing your videos.
Filmora offers you an inbuilt screen recorder which is the best for recording the gaming videos. it also offers you the effects to apply on the videos, color correction, color matching and many more others features which can be used for making the best quality videos.

● Ending Thoughts →
● Well, this is all about making transparent background in the GIMP. GIMP is really a very helpful program that comes with most all features what you need to edit the images and change the background of your images.
● If you need to edit the videos as well or you want to make videos with the images edited using GIMP then you can simply use Wondershare Filmora which the best in the video editing Era.
Removing background of images and making them transparent is a really very tough task for the newbies. Sometimes you may need to learn lots of software to get the work done and most of the programs are paid over the internet. There are many reasons why you need to remove the background of images such as you don’t like the background and replace with the new one. Here, in this article we will share the information about the GIMP which is a free and open source programs and can help you to remove background from the images and make the transparent.
In this article
01 [What’s Gimp?](#Part 1)
02 [How to Create a Transparent Background in GIMP](#Part 2)
03 [How to Turn the Complex Image Background Transparent](#Part 3)
04 [How to Turn a One-Color Background Transparent](#Part 4)
Part 1 What’s Gimp?
GIMP is open source software which allows you to do image manipulations. The program is distributed over the internet for free of cost the beginners to learn the photography skills. GIMP software can be used for photo retouching, image authoring and image compositions. GIMP supports all features of photo editing even it can be used for GIMP remove background to transparent. You can also use it as a paint program, online batch processing system, image format converter and as an image renderer.
Part 2 How to Create a Transparent Background in GIMP
With the help of GIMP software you can easily remove background from image and make it transparent. Here, we are going to tell you that how you can remove background with the help of GIMP. Let’s learn it step by step.
Step 1:
Install and launch GIMP program on your system. Now click the “File > Open” or you can also use “File > Open as Layers” option.
Step 2:
Now, you have to use the Fuzzy tool. The Fuzzy tool is mainly designed to select the current layer area and the image on the basis of color. Using this tool you can easily select the background which you want to remove with just one click.
Step 3:
On your image, now you will see a channel dialog when you add a second layer on it. This layer will tell the transparency of the image you have added to remove background. So, click the “Layer > Transparency > Add Alpha Channel option.
Step 4:
On your keyboard now you need to hit the “Delete” button to remove background. You may need to repeat the steps 2 to 4 if the background is not completely removed else there is no problem. We have removed blue background here for example.
Step 5:
Finally, you can click the “File > Export As” and then select the PNG format and save it on your computer in the PNG format. This is the way about GIMP remove background to transparent.
Part 3 How to Turn the Complex Image Background Transparent
The above part was about removing the simple and easy background from the image. Here we will share about GIMP transparent background PNG when you have the complex background. For, GIMP create transparent background in the complex images you need to add a transparent layer on the image.
Step 1:
Open the image in GIMP and then right click on the layer of image. Now, click the “Add Alpha Chanel” option.
Step 2:
After making a layer for background now you have to select the foreground of the image which you want to keep using the select tool of GIMP. To start, first you need to make sure the in the settings you have selected “Draw foreground option” is selected.
After doing all adjustments of the settings you need to draw outline of the object and finally press the enter button on keyboard.
Step 3:
After doing all the settings you have to adjust the stroke width from settings panel of GIMP. Use your mouse now and start dragging and drawing the image just like you are painting with a brush. Once your drawing is finished and you leave your mouse the image will look like the below screenshot.
Step 4:
You can also fine tune your selection now with the help of draw background option in the GIMP. This will help you to adjust the rough outline you created previously. Once you are happy then simply press the enter button.
Step 5:
Still, if you want to refine your results more than you can refine your outlines by using the path nodes option. You can view the path nodes by following the below steps.
● Keep your mouse cursor at paths dialog.
● Now, hit selection.
● To view the path you can click the CTRL+Shift+A button.
● Now, select the paths tool.
● Finally click the “Path”.
Step 6:
Now, it’s a time to adjust the outlines according to the output of your foreground image. You can zoom the image and add or adjust the previous nodes. To adjust node you can click the CTRL button on keyboard and drag the node using your mouse. If you need to remove a node then you can use CTRL+Shift button and then click on the node.
Step 7:
Once the path is refined according to your need hit the “Selection from Path” option at the left side.
Step 8:
You will have to add the layer mask on the image now to which will reveal the transparency. Right click the Current layer > Add Layer Mask > Selection and finally click “Add” button.
Step 9:
Now, if you have followed all the previous steps perfectly then your background will be removed now and you can also add a new background to the image. This is way about GIMP delete background to transparent for the complex images.
Part 4 How to Turn a One-Color Background Transparent
While using the GIMP you can also run the one color images background in the transparent. This method helps you to make the transparent background in case if you have the single color in the background of your image. In this method you just need to select the background by the color and it will be removed in the seconds. For GIMP create transparent background image in the single color background image you can follow the below steps.
Steps to Follow:
● Open the image using “File > Open” in the GIMP program.
● Once image is opened you have to select the image layer at the right side corner of the screen. Now right click and select the Add Alpha Channel option.
● Now, you have to choose the select by color tool.
Step 2:
After selecting the color tool you can select the area of the background image which you need to make transparent by clicking on the image. You can also select it manually by clicking and dragging using your mouse pointer. To increase the selection press Shift button on keyboard and then select the different area which you want to select.
Step 3:
Finally, when you have selected the complete area which you want to make transparent then simply select the delete button. This is the way about GIMP set transparent background for one color background images.
Learn New Ways to Make Transparent Background
GIMP software is a free program for newbie users to expand their skills. With the help of GIMP software you can easily remove background from mostly any kind of images. If you like to go for pro software to make the video from the images you have created then you can try the Wondershare Filmora Video Editor which allows you to make the beautiful videos and edit them quickly.
For Win 7 or later (64-bit)
For macOS 10.12 or later
Wondershare Filmora program is video editor software which also offers you some of the photo editing options as well. It is compatible with the windows as well as the Mac operating system devices. The program comes with a very easy to use interface and allows you to edit the videos and design them from scratch. It comes with the premade templates in it so you can directly use them for your videos to make the process faster. You can do keyframing, speed ramping, splitting screen, motion tracking etc for editing your videos.
Filmora offers you an inbuilt screen recorder which is the best for recording the gaming videos. it also offers you the effects to apply on the videos, color correction, color matching and many more others features which can be used for making the best quality videos.
● Ending Thoughts →
● Well, this is all about making transparent background in the GIMP. GIMP is really a very helpful program that comes with most all features what you need to edit the images and change the background of your images.
● If you need to edit the videos as well or you want to make videos with the images edited using GIMP then you can simply use Wondershare Filmora which the best in the video editing Era.
Top 12 AI Video Generators to Pick
Top 12 AI Video Generators to Pick
An easy yet powerful editor
Numerous effects to choose from
Detailed tutorials provided by the official channel
It is a fact that video editing can sometimes be laborious and time-consuming. Even when using the best video editing software, it still requires human effort to get an impressive result. But luckily for us, the invention of the AI video generator has now made a lot of things easier. The AI video generators are the next level as they allow users to automate video creation and editing without compromising quality.
This article will discuss the best AI text to video generators for free that will help make your life easier. Thus, this will soon help you create engaging videos for your personal or business use in just a few clicks.
In this article
01 [What Is an AI Video Generator](#Part 1)
02 [How Does the AI Video Maker Work](#Part 2)
03 [The 12 Best AI Video Generator](#Part 3)
Part 1 What Is an AI Video Generator
AI video generator is the process of using artificial intelligence (AI) to create professional videos. With an AI video generator for free, you do not need any equipment, an editing studio, or a premium video editing application to be able to create a video.
All that is required is that you feed input to the AI tool, and it will automatically help you generate a video. You can edit a blog post into a video within a few minutes with any of these tools listed. In addition, it won’t incur any high costs for video productions because the AI tool will help you carry out most of the tasks.
Part 2 How Does the AI Video Maker Work
Professional AI video editors, are trained by showing them various examples and then providing them feedback by telling them what is wrong and good. The machine then takes note of it and remembers it. However, as the machine continues to learn, it picks the results and then improves itself based on the feedback. Ultimately the device becomes very good or even better than the human that creates it. Here are some breakdowns of the ways video editors work:
● The AI video maker tool, can augment your videos with AR effects, including AR masks, face and color filters, face touch-ups, etc. The tool uses neural networks and computer vision to interrupt, extract, and understand the video content.
● This AI subtitle generator can allow interviews to be delivered and analyzed to the editor fully transcribed, searchable by word or even sentences. Video editors can use AI for keyword extraction, speech-to-text conversion, facial recognition, sentiment analysis, image recognition, and emotion detection.
● AI-video editors can pull sections of a video clip from any source automatically. These AI systems can also detect emotions that allow the creation of warm, appealing videos.
Part 3 The 12 Best AI Video Generator
There are top AI video generators for free that you can choose from for your video editing. These video editors complete work quickly and easily. In addition, if you need video editing software to help you edit your generated videos after generating them, we recommend that you try out Filmora from Wondershare. Wondershare Filmora Video Editor is a perfect video editing software with tons of new features, like keyframing, split video, and adding animations and effects to help you carry out your video editing seamlessly.
For Win 7 or later (64-bit)
For macOS 10.12 or later
01Sora
Sora is an artificial intelligence model that generates videos with textual descriptions, developed by OpenAI. It is a US-based artificial intelligence research organization. Sora stands out as a game-changing platform. It can seamlessly convert text into captivating videos, blending convenience with creativity.
Features
● With Sora, transforming written content into engaging videos is swift and efficient.
● Unlike traditional video editing tools, Sora is designed for users of all levels, eliminating the need for prior video production experience.
● Sora offers a plethora of customization options.
● Generates videos up to 60 seconds long
● Generates complex scenes with multiple characters, motions, and accurate details of the subject
● Creates multiple shots within a single generated video
● Generating videos from text instructions by utilizing the recaptioning technique from DALL·E 3
Pros
● Highly realistic video generation with impressive visual quality
● Text-based control over the content of the video, allowing for precise video generation
● A highly versatile tool that handles a wide range of prompts and styles
Cons
● Lacks implicit understanding of the rules of physics
This software is best realistic and imaginative scenes.
02Wondershare Filmora
Wondershare Filmora is a highly efficient video editing software that comes with AI text to video generation. The software is friendly to both beginner and intermediate creations, offering you a wide range of intuitive features.
Pricing
● Subscription Plan: US$19.99 per month
● Cross-Platform Plan: US$69.99 per year
● Perpetual Plan: US$19.99 Onetime Payment
Features
● User-friendly interface that is easy to learn and use
● Wide range of features for creating and editing videos, including transitions, effects, and text overlays.
● Large stock library of royalty-free music and stock footage
● Readily available templates and presets to quickly generate videos
● Easily export videos directly to popular platforms like YouTube and TikTok
Pros
● User-friendly interface with a learning curve suitable for all kinds of creators
● Extensive library of free and paid assets to enhance your videos
● Wide range of features for video editing
Cons
● Lacks advanced features for AI video prompt generation
This software is best for video creation and editing for freelancers, SMBs, markters.
For Win 7 or later (64-bit)
For macOS 10.12 or later
How to Use Filmora’s AI to Video Feature : AI Video Prompt Sample
Here is a brief step-by-step guide on how to use Filmora to generate AI videos. The process is as simple as writing a text prompt and getting the video ready:
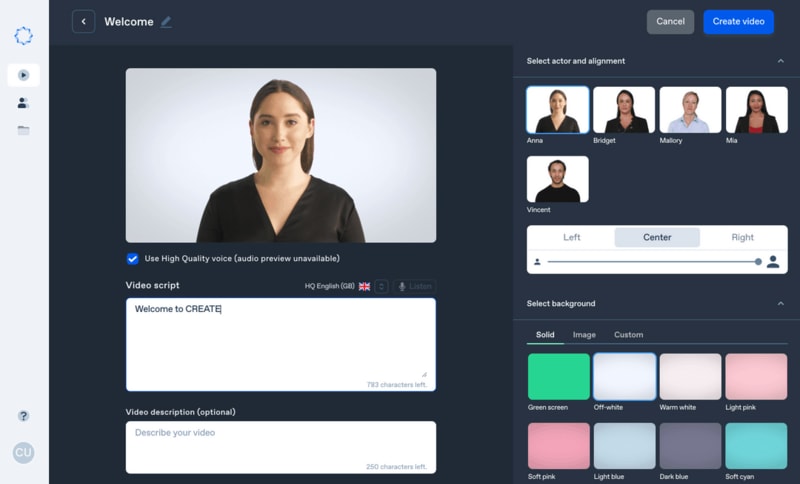
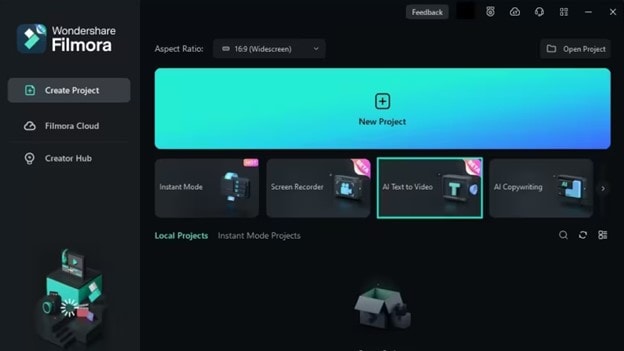
Step 1: Lauch Filmora AI Text-to-Video Features
Once you launch on your PC Filmora, click the AI Text-to-Video option to start the video generation process.
Step 2: Add a Text Prompt or Video Script
On the AI Text-to-Video video, add your text prompt. You can also modify other settings such as text language and video voice. Then click the Text to Video button at the bottom to prompt Filmora to generate the video.
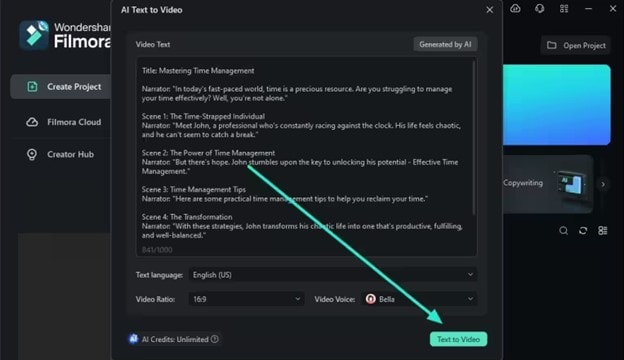
Step 3: Preview the Generated Video
Filmora generates the video based on your prompt and a new editing window. You can now a preview video and make any further editing needed.
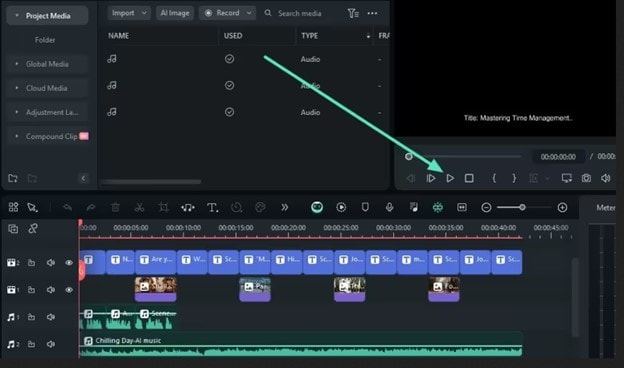
AI Video Prompt Sample Using Filmora
Prompt: A young man at his 20s is sitting on a piece of cloud in the sky, reading a book.
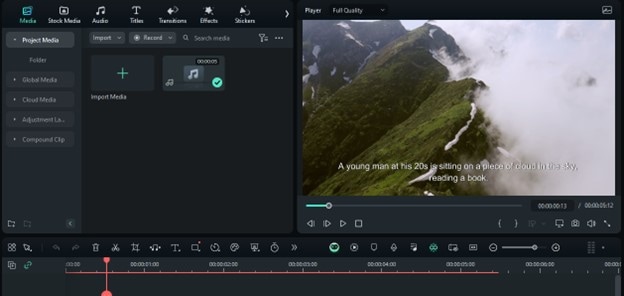
When prompted to generate a video of a young man in his 20s sitting on a piece of cloud in the sky, reading a book, Filmora generated a narration video from the point of view of the young man as shown above.
03Synthesia
This is a web-app video generator AI from a text supporting AI-driven video creation used by experts and beginners. Rather than filming content utilizing a microphone and camera, this software AI technology helps to simulate human presenters and real-life videos. Thus, it saves video creators hours of work.
Pricing
● Personal Plan: $30 monthly
● Corporate Plan: custom pricing
Features
● Over 40 supported languages
● Allows template customizations
● Allows users to make their avatars
● It has 50 built-in presenters
● Allows you to create realistic AI videos
● Offers live chat support
● Allows download in Mp4
● Enables users to create videos automatically using integrations with APIs
● Allows the addition of backgrounds
● Users can share their videos on other social media platforms
● Allows the addition of images, shapes, and texts to videos
Pros
● Great for beginners are you do not need prior knowledge
Cons
● It supports only front-facing poses
This software is best for freelancers, agencies, marketers, and content creators looking to create high-quality video content.
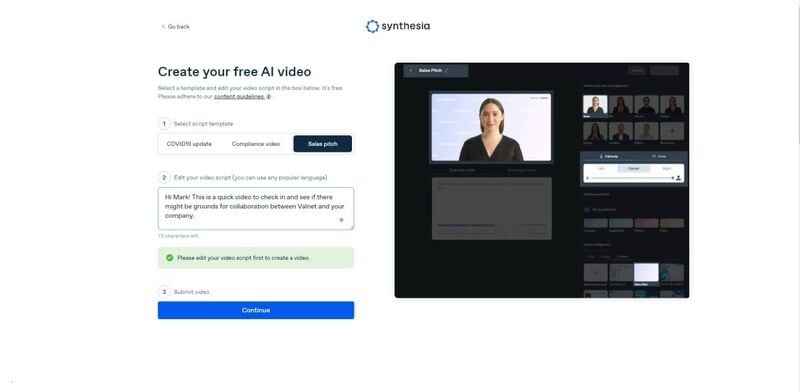
04Synths Video
This is an AI video-generating tool primarily concerned with helping users drive leads and traffic from YouTube. It is an AI YouTube title generator that allows users to create professional-looking videos from blog posts on YouTube.
Pricing
● YouTube Start: $399 monthly.
● Premium Custom Package: Custom Pricing.
Features
● Video generation from URLs
● It has built-in integration with YouTube
● 20+ avatars are available
● Allows video upload in HD quality
● Over 40+ languages supported
Cons
● No free plan is available
Best for the owners of YouTube channels.
05Rephrase.ai
Rephrase.ai is a video editing software that uses a sophisticated deep learning engine to create professional videos.
Pricing
● Starter plan: $25 monthly
● Enterprise plan: Custom Pricing
Features
● Produces high-resolution videos
● Supports functionality for presenter customization
● Multiple-use cases supported
● Allows users to select their preferred AI voice
● Support varieties of video editing tools
Cons
● It has a complex pricing plan
It is best for agencies seeking to create customizable and personalized professional videos for marketing and advertising.
06Lumen5
Lumen5 is one of the top AI video-creating tools available for beginners and uses Natural Language Processing algorithms to convert text into high-quality videos.
Pricing
● Free Plan
● Creator plan: $15 monthly.
● Premium plan: $79 monthly.
● Business plan: $199 monthly.
● Enterprise plan: Custom Pricing.
Features
● Transforms text to video within minutes
● Numerous templates are available
● Allows customization of videos resolution, color, and font
Cons
● Limited features in the free plan
Best for beginners who are looking to generate short-duration of videos for social media platforms.
07Designs.ai
This is an AI-powered video maker that is useful for users that do not have any experience in design.
Pricing
● Basic plan: $29 monthly
● Pro plan: $69 monthly
● Enterprise plan: Custom Pricing
Features
● It has an attractive and modern user interface
● Allows the creation of videos from pre-designed templates
● Helps video creation from your custom video files
● Over 20 languages supported
● Coverts texts to video
Cons
● Only allows video download in a paid plan.
This tool is best for creators and designers who are willing to create quick AI videos.
08InVideo
This is a perfect AI generator used for creating explainers or marketing videos easily and quickly. The platform helps produce high-quality videos with varieties of style options to make the ideal video according to your requirements.
Pricing
● Free: Free with watermarks on your videos.
● Business: $15 monthly with no watermarks.
● Unlimited: $30 monthly with unlimited video exports.
Features
● Very affordable
● Comprises an online drag-and-drop video editor
● Over 50 AI-powered themes that help to convert text to video in 3 minutes
● Full iStock media library available in all plans
Cons
● Requires internet connection to use
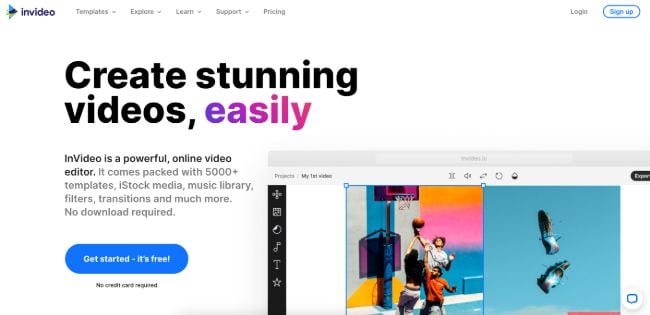
09Pictory.ai
This AI subtitle generator converts your text and turns it into an AI-generated video. This program is simple and easy to get started, requiring no software download. Paste your text into the editor and get started.
Pricing
● Free trial: Only use 3 videos.
● Standard Plan: $29 per month.
● Premium Plan: $59 per month.
Features
● It has a simple user interface.
● Over 6M licensed Shutterstock available
● Unlimited and affordable videos in the premium plan
Cons
● It is quite expensive compared to other tools
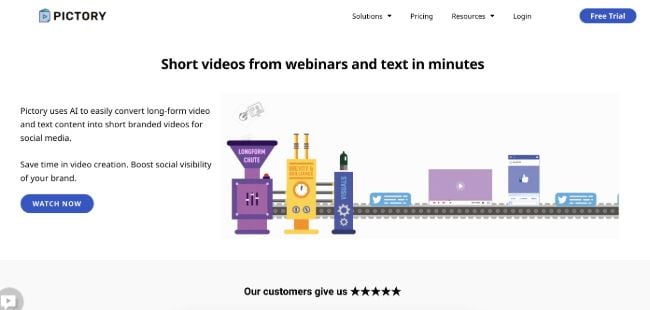
10Veed.io
Veed.io is not specifically an AI video generator but a video editing tool that utilizes AI to simplify the entire process and allows users to create high-quality videos within seconds.
Pricing
● Free: Free with watermarks!
● Basic: $18 monthly.
● Pro: $30 monthly
Features
● It has lots of video templates and a music library to choose
● Easy to learn, user-friendly interface
● Video rendering times are quite fast
● The basic plan has a high-quality resolution
Cons
● Not a typical AI video generator
● Not for beginners
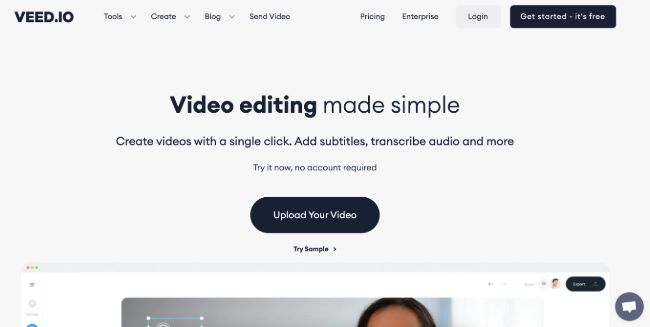
11Wisecut
This free AI video generator platform allows you to turn your text into video. Type in your text and choose a voice actor, and then Wisecut will take care of the rest. It offers excellent editing tools for users to tweak your video until it’s just right.
Pricing
● Basic: Free.
● Professional: $57 per month.
Features
● This platform is easy to use
● It has a simple drag and drops user-interface
● Allows auto subtitles and auto cut silences
● Allows integration with YouTube
● Subtitles auto-translation
● Excellent video quality
Cons
● Has limited effects

12Flexclip
FlexClip makes video creation and editing easy with-it millions of royalty-free stock media and thousands of templates for you to choose from.
Pricing
● Free
● Basic: $5.99 per month.
● Plus: $9.99 per month
● Business: $19.99 per month.
Features
● Thousands of available templates
● Simple tool for creating and editing videos
● Use for creating engaging videos
● Provides millions of royalty stock media
● Versatile and Flexible
Cons
● Not for beginners
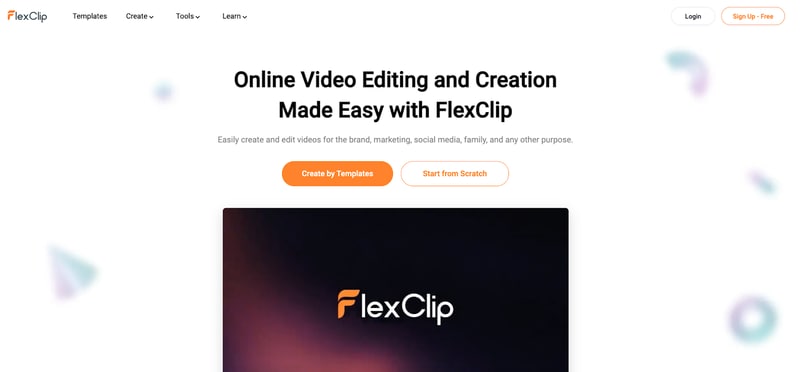
● Ending Thoughts →
● In this post, we have listed the top text to video generators that you can choose from to help you perform tasks within minutes.
● The report also explains all you need to know about video AI generators and recommends Filmora as a perfect tool for editing your videos.
It is a fact that video editing can sometimes be laborious and time-consuming. Even when using the best video editing software, it still requires human effort to get an impressive result. But luckily for us, the invention of the AI video generator has now made a lot of things easier. The AI video generators are the next level as they allow users to automate video creation and editing without compromising quality.
This article will discuss the best AI text to video generators for free that will help make your life easier. Thus, this will soon help you create engaging videos for your personal or business use in just a few clicks.
In this article
01 [What Is an AI Video Generator](#Part 1)
02 [How Does the AI Video Maker Work](#Part 2)
03 [The 12 Best AI Video Generator](#Part 3)
Part 1 What Is an AI Video Generator
AI video generator is the process of using artificial intelligence (AI) to create professional videos. With an AI video generator for free, you do not need any equipment, an editing studio, or a premium video editing application to be able to create a video.
All that is required is that you feed input to the AI tool, and it will automatically help you generate a video. You can edit a blog post into a video within a few minutes with any of these tools listed. In addition, it won’t incur any high costs for video productions because the AI tool will help you carry out most of the tasks.
Part 2 How Does the AI Video Maker Work
Professional AI video editors, are trained by showing them various examples and then providing them feedback by telling them what is wrong and good. The machine then takes note of it and remembers it. However, as the machine continues to learn, it picks the results and then improves itself based on the feedback. Ultimately the device becomes very good or even better than the human that creates it. Here are some breakdowns of the ways video editors work:
● The AI video maker tool, can augment your videos with AR effects, including AR masks, face and color filters, face touch-ups, etc. The tool uses neural networks and computer vision to interrupt, extract, and understand the video content.
● This AI subtitle generator can allow interviews to be delivered and analyzed to the editor fully transcribed, searchable by word or even sentences. Video editors can use AI for keyword extraction, speech-to-text conversion, facial recognition, sentiment analysis, image recognition, and emotion detection.
● AI-video editors can pull sections of a video clip from any source automatically. These AI systems can also detect emotions that allow the creation of warm, appealing videos.
Part 3 The 12 Best AI Video Generator
There are top AI video generators for free that you can choose from for your video editing. These video editors complete work quickly and easily. In addition, if you need video editing software to help you edit your generated videos after generating them, we recommend that you try out Filmora from Wondershare. Wondershare Filmora Video Editor is a perfect video editing software with tons of new features, like keyframing, split video, and adding animations and effects to help you carry out your video editing seamlessly.
For Win 7 or later (64-bit)
For macOS 10.12 or later
01Sora
Sora is an artificial intelligence model that generates videos with textual descriptions, developed by OpenAI. It is a US-based artificial intelligence research organization. Sora stands out as a game-changing platform. It can seamlessly convert text into captivating videos, blending convenience with creativity.
Features
● With Sora, transforming written content into engaging videos is swift and efficient.
● Unlike traditional video editing tools, Sora is designed for users of all levels, eliminating the need for prior video production experience.
● Sora offers a plethora of customization options.
● Generates videos up to 60 seconds long
● Generates complex scenes with multiple characters, motions, and accurate details of the subject
● Creates multiple shots within a single generated video
● Generating videos from text instructions by utilizing the recaptioning technique from DALL·E 3
Pros
● Highly realistic video generation with impressive visual quality
● Text-based control over the content of the video, allowing for precise video generation
● A highly versatile tool that handles a wide range of prompts and styles
Cons
● Lacks implicit understanding of the rules of physics
This software is best realistic and imaginative scenes.
02Wondershare Filmora
Wondershare Filmora is a highly efficient video editing software that comes with AI text to video generation. The software is friendly to both beginner and intermediate creations, offering you a wide range of intuitive features.
Pricing
● Subscription Plan: US$19.99 per month
● Cross-Platform Plan: US$69.99 per year
● Perpetual Plan: US$19.99 Onetime Payment
Features
● User-friendly interface that is easy to learn and use
● Wide range of features for creating and editing videos, including transitions, effects, and text overlays.
● Large stock library of royalty-free music and stock footage
● Readily available templates and presets to quickly generate videos
● Easily export videos directly to popular platforms like YouTube and TikTok
Pros
● User-friendly interface with a learning curve suitable for all kinds of creators
● Extensive library of free and paid assets to enhance your videos
● Wide range of features for video editing
Cons
● Lacks advanced features for AI video prompt generation
This software is best for video creation and editing for freelancers, SMBs, markters.
For Win 7 or later (64-bit)
For macOS 10.12 or later
How to Use Filmora’s AI to Video Feature : AI Video Prompt Sample
Here is a brief step-by-step guide on how to use Filmora to generate AI videos. The process is as simple as writing a text prompt and getting the video ready:
Step 1: Lauch Filmora AI Text-to-Video Features
Once you launch on your PC Filmora, click the AI Text-to-Video option to start the video generation process.
Step 2: Add a Text Prompt or Video Script
On the AI Text-to-Video video, add your text prompt. You can also modify other settings such as text language and video voice. Then click the Text to Video button at the bottom to prompt Filmora to generate the video.
Step 3: Preview the Generated Video
Filmora generates the video based on your prompt and a new editing window. You can now a preview video and make any further editing needed.
AI Video Prompt Sample Using Filmora
Prompt: A young man at his 20s is sitting on a piece of cloud in the sky, reading a book.
When prompted to generate a video of a young man in his 20s sitting on a piece of cloud in the sky, reading a book, Filmora generated a narration video from the point of view of the young man as shown above.
03Synthesia
This is a web-app video generator AI from a text supporting AI-driven video creation used by experts and beginners. Rather than filming content utilizing a microphone and camera, this software AI technology helps to simulate human presenters and real-life videos. Thus, it saves video creators hours of work.
Pricing
● Personal Plan: $30 monthly
● Corporate Plan: custom pricing
Features
● Over 40 supported languages
● Allows template customizations
● Allows users to make their avatars
● It has 50 built-in presenters
● Allows you to create realistic AI videos
● Offers live chat support
● Allows download in Mp4
● Enables users to create videos automatically using integrations with APIs
● Allows the addition of backgrounds
● Users can share their videos on other social media platforms
● Allows the addition of images, shapes, and texts to videos
Pros
● Great for beginners are you do not need prior knowledge
Cons
● It supports only front-facing poses
This software is best for freelancers, agencies, marketers, and content creators looking to create high-quality video content.
04Synths Video
This is an AI video-generating tool primarily concerned with helping users drive leads and traffic from YouTube. It is an AI YouTube title generator that allows users to create professional-looking videos from blog posts on YouTube.
Pricing
● YouTube Start: $399 monthly.
● Premium Custom Package: Custom Pricing.
Features
● Video generation from URLs
● It has built-in integration with YouTube
● 20+ avatars are available
● Allows video upload in HD quality
● Over 40+ languages supported
Cons
● No free plan is available
Best for the owners of YouTube channels.
05Rephrase.ai
Rephrase.ai is a video editing software that uses a sophisticated deep learning engine to create professional videos.
Pricing
● Starter plan: $25 monthly
● Enterprise plan: Custom Pricing
Features
● Produces high-resolution videos
● Supports functionality for presenter customization
● Multiple-use cases supported
● Allows users to select their preferred AI voice
● Support varieties of video editing tools
Cons
● It has a complex pricing plan
It is best for agencies seeking to create customizable and personalized professional videos for marketing and advertising.
06Lumen5
Lumen5 is one of the top AI video-creating tools available for beginners and uses Natural Language Processing algorithms to convert text into high-quality videos.
Pricing
● Free Plan
● Creator plan: $15 monthly.
● Premium plan: $79 monthly.
● Business plan: $199 monthly.
● Enterprise plan: Custom Pricing.
Features
● Transforms text to video within minutes
● Numerous templates are available
● Allows customization of videos resolution, color, and font
Cons
● Limited features in the free plan
Best for beginners who are looking to generate short-duration of videos for social media platforms.
07Designs.ai
This is an AI-powered video maker that is useful for users that do not have any experience in design.
Pricing
● Basic plan: $29 monthly
● Pro plan: $69 monthly
● Enterprise plan: Custom Pricing
Features
● It has an attractive and modern user interface
● Allows the creation of videos from pre-designed templates
● Helps video creation from your custom video files
● Over 20 languages supported
● Coverts texts to video
Cons
● Only allows video download in a paid plan.
This tool is best for creators and designers who are willing to create quick AI videos.
08InVideo
This is a perfect AI generator used for creating explainers or marketing videos easily and quickly. The platform helps produce high-quality videos with varieties of style options to make the ideal video according to your requirements.
Pricing
● Free: Free with watermarks on your videos.
● Business: $15 monthly with no watermarks.
● Unlimited: $30 monthly with unlimited video exports.
Features
● Very affordable
● Comprises an online drag-and-drop video editor
● Over 50 AI-powered themes that help to convert text to video in 3 minutes
● Full iStock media library available in all plans
Cons
● Requires internet connection to use
09Pictory.ai
This AI subtitle generator converts your text and turns it into an AI-generated video. This program is simple and easy to get started, requiring no software download. Paste your text into the editor and get started.
Pricing
● Free trial: Only use 3 videos.
● Standard Plan: $29 per month.
● Premium Plan: $59 per month.
Features
● It has a simple user interface.
● Over 6M licensed Shutterstock available
● Unlimited and affordable videos in the premium plan
Cons
● It is quite expensive compared to other tools
10Veed.io
Veed.io is not specifically an AI video generator but a video editing tool that utilizes AI to simplify the entire process and allows users to create high-quality videos within seconds.
Pricing
● Free: Free with watermarks!
● Basic: $18 monthly.
● Pro: $30 monthly
Features
● It has lots of video templates and a music library to choose
● Easy to learn, user-friendly interface
● Video rendering times are quite fast
● The basic plan has a high-quality resolution
Cons
● Not a typical AI video generator
● Not for beginners
11Wisecut
This free AI video generator platform allows you to turn your text into video. Type in your text and choose a voice actor, and then Wisecut will take care of the rest. It offers excellent editing tools for users to tweak your video until it’s just right.
Pricing
● Basic: Free.
● Professional: $57 per month.
Features
● This platform is easy to use
● It has a simple drag and drops user-interface
● Allows auto subtitles and auto cut silences
● Allows integration with YouTube
● Subtitles auto-translation
● Excellent video quality
Cons
● Has limited effects
12Flexclip
FlexClip makes video creation and editing easy with-it millions of royalty-free stock media and thousands of templates for you to choose from.
Pricing
● Free
● Basic: $5.99 per month.
● Plus: $9.99 per month
● Business: $19.99 per month.
Features
● Thousands of available templates
● Simple tool for creating and editing videos
● Use for creating engaging videos
● Provides millions of royalty stock media
● Versatile and Flexible
Cons
● Not for beginners
● Ending Thoughts →
● In this post, we have listed the top text to video generators that you can choose from to help you perform tasks within minutes.
● The report also explains all you need to know about video AI generators and recommends Filmora as a perfect tool for editing your videos.
Also read:
- New Top 11 Best Video Editing Apps for iPhone for 2024
- New Do You Want a LUT that You Can Use for Your High-Definition Content? You Can Use Rec 709 LUT Premiere Pro for Your HD Digital Media to Give the Perfect Result
- Add Neon Effects to Your Dance Videos with the Help of Wondershare Filmora After Reading This Article. It Will Give a More Thrilling and Exciting Appearance for 2024
- New In 2024, How to Add Filters on iMovie
- In 2024, 4 Solutions to Resize a WebM File
- How to Make a Slideshow on iPhone
- In 2024, How to Zoom Video in VLC Media Player
- Updated Do You Know CapCut Has some Amazing Slow-Motion Templates You Can Utilize? Read This Article to Access the Slow-Motion CapCut Templates Link
- Updated Have You Ever Watched YouTube Live Streams? In Fact, You Can Also Start a Live Streaming on YouTube if You Want. Here Well Share some Tips to Live Stream on YouTube
- Updated Are You Finding It Challenging to Convert GIFs Into JPG or PNG Images? Do Not Worry! The Best Free Online Tool and Software to Change Your GIF Into PNG or JPG Images Are Below
- How to Correct Lens Distortion With Filmora for 2024
- Are You Ready to Learn About Something Free yet Amazing? We Are Talking About All Format Video Players for PC that You Should Know , Lets Begin
- Troubleshoot Snapchat Camera Zoomed in Issue
- Updated Add Some Shake to Videos with Alight Motion for 2024
- 2024 Approved How to Edit Facebook Video Ads for E-Commerce Business
- New How to Make Boring Videos Look Cool By B Rolls
- Best Image (JPG/PNG) to GIF Converters for 2024
- New 2024 Approved Adobe Photoshop Is the Best Photo Editor to Add Green Screen Effect to Your Photo While Wondershare Filmora Is the Best Video Editor to Add Green Screen Effect to Your Video
- Updated Some Facts That Few People Know on How to Make Transparent Background in Canva for 2024
- In 2024, Want to Take Your Editing Creativity to the Next Level by Designing Top-Class, Professional-Quality Slideshows in Aquasoft? Rest Assured, You Have Landed at the Right Place
- Learning How to Create LUTs with LUTs Generator for 2024
- New Mastering Video Marketing An Expert Playbook
- How to Stabilize Videos with Google Photos App for Free for 2024
- 2024 Approved 5 Simple Tools to Merge Video and Audio Online
- New 2024 Approved How To Fix Slow Playback Issues in DaVinci Resolve Finding the Best Solutions
- Updated How to Make Video Fade to Black in Movie Maker Easily for 2024
- Deep Learning of AI Video Recognition - Guide for 2024
- Unleash the Power of Video Scopes in Your Video Editing Projects. Find the Most Common Video Scopes and How to Use Them on Video Editing Software
- Updated 2024 Approved 10 Best Audio Visualizers Windows, Mac, Android, iPhone & Online
- Updated In 2024, How to Create Video in Text Intro?
- Updated How to Make A Jaw-Dropping Time Lapse Video for 2024
- Updated Video Editing Tips to Know Before Editing First Draft for 2024
- Best Tricks for Learning Photo Slideshow for 2024
- 2024 Approved So, in This Short Tutorial, Well Learn How to Create a Vintage 1980-Style Video with a Retro Effect that Will Leave Your Audience Yearning for More
- New In 2024, Best 6 WebM to GIF Converters
- Learn How to Slow Down Time-Lapse Videos on iPhone to Make Detailed and Captivating Slow-Motion Effects in Your Time-Lapse Captures for 2024
- In 2024, Edit FLV Video Files with FLV Editor Windows, Mac,Android, iPhone
- Updated 10 Best Mp3 Visualizers Windows, Mac, Android, iPhone & Online for 2024
- Do You Also Use Android to Create and Edit Videos? Read About the Efectum Video Effects Editor, Which Is Available in Your App Stores for Seamless Editing
- How to Use LUTs Perfectly in Final Cut Pro for 2024
- New Facts About GIF Background You Didnt Know
- In 2024, Learn How to Convert MP4 Videos to 60 FPS GIFs with This Easy-to-Follow Tutorial. Get Smooth and Crisp Motion in Your GIFs in Just a Few Simple Steps
- 2024 Approved Repeated Text Animation Tutorial
- Top 9 Lava Blaze 2 Monitoring Apps for Parental Controls | Dr.fone
- Forgotten The Voicemail Password Of Poco X6? Try These Fixes
- How to Fix It Asus ROG Phone 8 Wont Turn On | Dr.fone
- In 2024, How To Use Special Features - Virtual Location On Motorola Moto G73 5G? | Dr.fone
- In 2024, How to Change Oppo A38 Location on Skout | Dr.fone
- How to Fix Android App Not Installed Error on Oppo K11x Quickly? | Dr.fone
- In 2024, How To Unlock Cricket iPhone 8 Plus for Free
- How to Unlock Vivo Y78 5G PIN Code/Pattern Lock/Password
- In 2024, 15 Best Strongest Pokémon To Use in Pokémon GO PvP Leagues For Motorola Moto G24 | Dr.fone
- Calls on Oppo Reno 8T 5G Go Straight to Voicemail? 12 Fixes | Dr.fone
- How to Track WhatsApp Messages on Asus ROG Phone 7 Without Them Knowing? | Dr.fone
- How to Screen Mirroring Honor Magic 5 Lite? | Dr.fone
- New 2024 Approved Secrets for TikTok Live Studio Success
- What is Fake GPS Location Pro and Is It Good On Realme Narzo 60x 5G? | Dr.fone
- New How To Use CapCut Translate to Transform Video Content
- In 2024, How to Transfer Contacts from Infinix Note 30i To Phone | Dr.fone
- How to use iSpoofer on Poco M6 5G? | Dr.fone
- Title: New 2024 Approved Finding the Best Voice Changers for WhatsApp Free and Paid
- Author: Chloe
- Created at : 2024-04-24 07:08:33
- Updated at : 2024-04-25 07:08:33
- Link: https://ai-editing-video.techidaily.com/new-2024-approved-finding-the-best-voice-changers-for-whatsapp-free-and-paid/
- License: This work is licensed under CC BY-NC-SA 4.0.
