
New 2024 Approved How to Add Subtitles in Canva?
How to Add Subtitles in Canva?
Have you ever used Canva before? It is a famous online tool that is also available on Windows, Mac, Android, and iOS platforms. It contains various basic editing features that you can use to crop, trim, resize, and rotate your video clips and images. Apart from these basic tools, you can also navigate to the built-in library of Canva to explore its vibrant templates.
As more than 100 million individuals use Canva every month, it’s a well-trusted tool. If you are a frequent user of Canva, this article can help you how to add subtitles in Canva. Keep reading this article to find out the quickest way to add subtitles to videos using Canva.

Part 1: What is Canva?
To create and edit videos flawlessly, Canva offers great options. It contains pre-sized video formats for YouTube, Facebook, and other social media platforms. If you are a beginner and struggling with ideas, Canva offers various templates of different categories, such as fitness, education, fashion, and real estate. Apart from using the built-in media library, you have complete freedom to upload your media files to add further modifications.

Furthermore, using Canva, you can also add exciting animations and transitions to your videos to generate a smooth look. You can also add multiple overlays to add more dimensions to your video clips. Also, you can use the Canvas captions feature to generate customized subtitles for your video files. To learn more about Canva, let’s shed light on its key features, advantages, and pricing plans:
Key Features of Canva
- Multiple Export Options: Canva offers various export formats such as MP3, PNG, GIF, MP4, PPTX, etc. You can also check the video quality before exporting it to your device.
- Add Audio Tracks: To make your videos more engaging, you can add audio tracks and sound effects using this professional tool.
- Background Remover: To remove a dull background from your video without a green screen or professional software, you can use the background remover of Canva. Through this advanced feature, you can remove the background from your videos with a single click.
- Magic Resize: It offers a Magic Resize option that enables you to resize videos in different formats for multiple platforms.
- Brand Tools: Canva’s branding tools allow users to create and save branded templates, colors, and fonts. This makes it easy to maintain consistency across all design materials and ensures that all designs align with the brand’s visual identity.
- Collaboration Features: Canva’s collaboration features make it easy for teams to work together on a design project. Users can share designs with team members and assign roles and permissions, allowing for seamless collaboration and feedback.
Advantages of Using Canva
- If you want to share your videos on social media platforms instantly, Canva is the best option. Using this software, you can share your videos on Instagram or other social media platforms with a single tap.
- Canva can also add voice-overs and narrations to your videos in high audio quality.
- This tool provides various elements such as lines, shapes, stickers, and frames that you can add to your videos.
Pricing Plans
If you want to learn more about Canva’s detailed plan, you can visit its official website .
| Plan Name | Price |
|---|---|
| Canva Pro | $54.99/Year for 1 Person |
| Canva for Teams | $84.90/Year for 5 Person |
Part 2: How to Add Captions to Videos in Canva?
Do you want to know how to add subtitles in Canva? Adding subtitles in Canva is extremely simple and quick. In this section, we have jotted down accurate and simple instructions to add subtitles using the Canva tool:
Step1 Begin by visiting the video editor tool page of Canva through any web browser. After accessing the tool page, click on “Edit a Video.” This will open a new window on your screen.

Step2 Now, hit the “Upload Files” button from the left panel and import the video file on this tool. Once done, navigate to the “Text” tab and tap “Add a little bit of body text.” Now adjust the position of the text box according to your desire. You can write your Canva captions by choosing your preferred font, color, size, and style.

Step3 You can also add effects and animation to your added subtitles for more enhancements. Once done with customizations, click on the “Share” button. Here select MP4 as the video file format and save the video on your system.

Part 3: Is There a Good Alternative to Add Subtitles to Videos?
Canva provides a very basic user interface to create subtitles. If you want to enhance your added subtitles with more possibilities, Wondershare Filmora is the best alternative. You can add subtitles through this tool in multiple ways. You can either add subtitles manually or use its “Speech-to-Text” feature. Through this feature, you can transcribe your voice to generate subtitles automatically.
Free Download For Win 7 or later(64-bit)
Free Download For macOS 10.14 or later
Filmora also offers great styles and font options to customize the subtitles. You can easily check the results from the preview window of this efficient video editor. Hence, Filmora acts as a complete and well-trusted platform to generate subtitles in different ways.
Instructions to Create Subtitles Using Filmora
Are you tired of writing subtitles manually in Canva? Read the precise instructions guided below to create the subtitles automatically in more than 16 languages:
Step1 Upload the Video File
Download and launch Filmora on your desktop to initiate the process. On its main interface, tap “Create New Project,” which will open a new window. Afterward, upload your desired video on the Project Media to proceed.

Step2 Select Speech-to-Text Feature
Once done with uploading the file, drag the video file to the timeline. Click on the “Speech-to-Text” icon displayed on the timeline and hit the “OK” button after selecting the required language and file. After some seconds, subtitles would be automatically added to the timeline.

Step3 Add Modifications to Subtitles
On your timeline, double-click on the auto-generated subtitles to open the edit settings. By going to the Presets section, you can select the subtitle styles. To add more modifications, you can head to the Custom tab as displayed on your screen. From here, you can change the font, style, color, and size of the subtitles. To confirm the subtitles edits, press the “OK” button.

Step4 Export the Video File
Once you are done with all the subtitle edits, click on the “Export” button. Filmora provides you with various export resolution options and file formats that you can choose. Moreover, you can also share the video file to your desired social media platform, such as YouTube, Vimeo, or TikTok.

Conclusion
Being a non-technical individual, adding subtitles may sound tricky. To provide you with complete assistance, this article has shed light on how to add subtitles in Canva. But, Canva has some limitations in generating subtitles. Hence, we recommend you try and explore Wondershare Filmora to craft subtitles. This tool comprises a Speech-to-Text feature through which you can produce subtitles automatically without hassle.
Part 2: How to Add Captions to Videos in Canva?
Do you want to know how to add subtitles in Canva? Adding subtitles in Canva is extremely simple and quick. In this section, we have jotted down accurate and simple instructions to add subtitles using the Canva tool:
Step1 Begin by visiting the video editor tool page of Canva through any web browser. After accessing the tool page, click on “Edit a Video.” This will open a new window on your screen.
Step2 Now, hit the “Upload Files” button from the left panel and import the video file on this tool. Once done, navigate to the “Text” tab and tap “Add a little bit of body text.” Now adjust the position of the text box according to your desire. You can write your Canva captions by choosing your preferred font, color, size, and style.
Step3 You can also add effects and animation to your added subtitles for more enhancements. Once done with customizations, click on the “Share” button. Here select MP4 as the video file format and save the video on your system.
Part 3: Is There a Good Alternative to Add Subtitles to Videos?
Canva provides a very basic user interface to create subtitles. If you want to enhance your added subtitles with more possibilities, Wondershare Filmora is the best alternative. You can add subtitles through this tool in multiple ways. You can either add subtitles manually or use its “Speech-to-Text” feature. Through this feature, you can transcribe your voice to generate subtitles automatically.
Free Download For Win 7 or later(64-bit)
Free Download For macOS 10.14 or later
Filmora also offers great styles and font options to customize the subtitles. You can easily check the results from the preview window of this efficient video editor. Hence, Filmora acts as a complete and well-trusted platform to generate subtitles in different ways.
Instructions to Create Subtitles Using Filmora
Are you tired of writing subtitles manually in Canva? Read the precise instructions guided below to create the subtitles automatically in more than 16 languages:
Step1 Upload the Video File
Download and launch Filmora on your desktop to initiate the process. On its main interface, tap “Create New Project,” which will open a new window. Afterward, upload your desired video on the Project Media to proceed.
Step2 Select Speech-to-Text Feature
Once done with uploading the file, drag the video file to the timeline. Click on the “Speech-to-Text” icon displayed on the timeline and hit the “OK” button after selecting the required language and file. After some seconds, subtitles would be automatically added to the timeline.
Step3 Add Modifications to Subtitles
On your timeline, double-click on the auto-generated subtitles to open the edit settings. By going to the Presets section, you can select the subtitle styles. To add more modifications, you can head to the Custom tab as displayed on your screen. From here, you can change the font, style, color, and size of the subtitles. To confirm the subtitles edits, press the “OK” button.
Step4 Export the Video File
Once you are done with all the subtitle edits, click on the “Export” button. Filmora provides you with various export resolution options and file formats that you can choose. Moreover, you can also share the video file to your desired social media platform, such as YouTube, Vimeo, or TikTok.
Conclusion
Being a non-technical individual, adding subtitles may sound tricky. To provide you with complete assistance, this article has shed light on how to add subtitles in Canva. But, Canva has some limitations in generating subtitles. Hence, we recommend you try and explore Wondershare Filmora to craft subtitles. This tool comprises a Speech-to-Text feature through which you can produce subtitles automatically without hassle.
How to Add Motion Blur in After Effects
Everyone has seen those transition or animation video cuts when something doesn’t quite seem right; the movement appears forced or the playback is choppy. Typically, this occurs because a motion blur effect was not used while editing. Learning the ins, outs, rights, and wrongs of Motion Blur in After Effects is one of the most thrilling early steps in the motion graphics adventure. Learning how and when to utilize it successfully is a true “level up” moment for most designers.
Making everything you add to a motion graphic or animation project appear like it belongs there organically and hasn’t been “artificially” inserted is a crucial component. Adding motion blur After Effects Is a fantastic tool for making items mix more naturally in your compositions. Let’s quickly examine Motion Blur with all of this in mind. To help you better grasp motion blur and how to add motion blur to flawlessly merge objects in your video projects or even create styled effects, we’ve put up a detailed guide here.
Part 1. What is Motion Blur Effects
Let’s start with a little introduction before learning how to apply motion blur. The visual result of an item moving while being photographed in conjunction with the shutter speed of the camera is called motion blur. When we swiftly move our heads from side to side, this effect also naturally occurs with our eyes, but we aren’t aware of it since our brains “edit” it for us. It may be startling and awkward to watch when items are moving on the screen, particularly rapid motion, without any kind of blurring effect.
Motion blur was introduced into animation to aid in the blending of frames and replicate the blurring that was seen in earlier cameras as a result of fast-moving objects. When a moving item keeps moving while light is still reaching our eyes, motion blur results. The goal of Motion Blur in After Effects is to replicate this phenomenon. After Effects will duplicate your layer several times when it changes in size or location. Then, it will offset it in various ways. This is closely related to the direction and pace of your layer’s animation.
These days, we have cameras with fast shutter speeds, which allows us to almost completely remove motion blur. Without motion blurring, each frame of your animation is like a flawless still image, making the action seem a little disorienting. Each picture captures the exact moment in time, despite the fluid motion. However, the absence of motion blur is what viewers do notice. Because of this, visual effects creators often use artificial motion blur in their effects to replicate what the viewer would experience if the element were really there in the picture.
Part 2. How to Add Motion Blur in After Effects
In videos, slow-motion may be used in a variety of ways, such as to convey the emotional context of a story or make beautiful slideshow backdrops. It doesn’t matter why you want to make a slow-motion sequence; After Effects’ slow-motion effect will work well. Click the Motion Blur layer switch to turn Motion Blur on or off. Make sure you can render out Motion Blur by turning on the Enable Motion Blur composition option at the top of the Timeline panel.
Using the motion blur option in your layer settings is the first and easiest approach to apply motion blur in After Effects. You’ll see many choices on the left and right sides of the screen after choosing a certain video. There are several techniques to motion blur a video, which we wish to accomplish. But because this guide is for novices, we will choose the simpler option. Follow the steps below to learn how to add motion blur to a video in AE:
Steps to Add Motion Blur to After Effects:
So, it goes without saying that After Effects makes it simple to access Motion Blur’s magic. You should shoot the movie at a frame rate that is faster than the average if you want the greatest slow-motion effects. How many photos are being captured each second is indicated by the frame rate.
Step1 Download and install Adobe After Effects if it isn’t already on your PC. Since Adobe After Effects is a commercial program, it is not available for free. Open the program after installation. After installation, launch it and choose “New Project” to begin editing a brand-new file. Look through the video you wish to alter.

Step2 You have a variety of settings in Adobe After Effects on the right side. Then, choose “Effects & Presets.” A search bar will appear as a result. Enter “CC Force Motion Blur” in the search field if you wish to add motion blur to the video. You may apply this effect to whatever layer you choose since your movie is made up of layers.

Step3 Next, drag the “CC Force Motion Blur” to the layers that represent your imported video at the bottom left of the screen. On the left side of the screen, under “CC Force Motion Blur,” you will find settings for motion blur. Here, you may change the motion blur to suit your needs. You may type in the values and watch the video as appropriate. There are several choices available for you to modify.

![]()
Note: Before applying any speed effects, first trim your film to the proper length. Once the speed effects have been included, you need also make sure that your composition is lengthy enough for your clip. Once you’re satisfied with the footage you want to slow down, choose one of the ways—Time warp or Time Stretch.
Step4 Customize “Shutter Angle” and “Motion Blur Samples.” Always be careful to preview the video after any modifications. Adjust to your needs and specifications. Additionally, if you wish, you may add any additional effect to the video. When finished, save the video by selecting “File” in the upper left corner.

Step5 Finally, hit the OK button and afterwards, export the project with the Motion Blur embedded inside the main video. Adobe AE also gives you flexibility to export to the desired format with the preset project settings.
Part 3. Other Video Editor to Add Effects to Videos
Due to its cost and adaptability, Adobe After Effects is quite expensive; especially for the beginners. So, we’ve a handy option, Filmora by Wondershare, that is a fantastic option since most high-end video editors are, to put it mildly, expensive. It may seem natural to just add motion blur to everything before rendering while working on a conventional 2D project in After Effects, but there are occasions when having no motion blur at all is preferable. When used properly, After Effects’ slow-motion features are extensive and reliable.
Wondershare: A video-making and editing program has its flagship product called Filmora . You may use the tools to create a wide variety of styles and appearances. Less complicated and user-friendly for beginners, the program. With the help of this program, you may edit your video at home like an expert. With this user-friendly tool and stylish effects, making excellent films doesn’t have to be difficult. When you open the app and choose Editor mode as it will walk you through each stage of the procedure.
Free Download For Win 7 or later(64-bit)
Free Download For macOS 10.14 or later
Import Files
Media files may be easily added to the timeline in Filmora from the device’s library. .mpg,.mpeg, and many more file types are supported for this video file format’s input.

Utilize Filmstock
On Wondershare Filmora , there is a full-service shop called Filmstock that offers a ton of exciting media and after-effects for download. You may get free sound effects and short video clips to add to your videos on this website.
Edit Effect
Download films from the effect store or import them from your device and add them to your timeline in Filmora to modify your videos. Utilize the software’s drag-and-drop feature to modify the video.

Apply filters
Overlays and video filters are effects used to enhance the appeal of the video. Open the effects tab and select your desired filter to apply overlays and filters. To apply it, drag and drop it into the timeline’s video. Additionally, filters may be adjusted to change the time scale and transparency.
Export
Exporting a video to a variety of platforms comes after editing it. Filmora allows users to export video in a number of different file types, including mp4, Wmv, Mkv, ts, 3gp, f4v, Mkv, MOV, mpg, 3gp, GIF 4K, and mp3.
Conclusion
Motion blur is crucial when animating characters to move. Your videos require some blur to seem realistic when there is motion, particularly when there is quick movement. You have learnt how to include motion blur into your animation project from this guide. To add motion blur effects to your movie or animation, After Effects offers a wide variety of options. To inform you about this wonderful gesture, we utilized Filmora and Adobe After Effects and recommend Filmora for easiness and handy outputs.
Let’s start with a little introduction before learning how to apply motion blur. The visual result of an item moving while being photographed in conjunction with the shutter speed of the camera is called motion blur. When we swiftly move our heads from side to side, this effect also naturally occurs with our eyes, but we aren’t aware of it since our brains “edit” it for us. It may be startling and awkward to watch when items are moving on the screen, particularly rapid motion, without any kind of blurring effect.Motion blur was introduced into animation to aid in the blending of frames and replicate the blurring that was seen in earlier cameras as a result of fast-moving objects. When a moving item keeps moving while light is still reaching our eyes, motion blur results. The goal of Motion Blur in After Effects is to replicate this phenomenon. After Effects will duplicate your layer several times when it changes in size or location. Then, it will offset it in various ways. This is closely related to the direction and pace of your layer’s animation.
These days, we have cameras with fast shutter speeds, which allows us to almost completely remove motion blur. Without motion blurring, each frame of your animation is like a flawless still image, making the action seem a little disorienting. Each picture captures the exact moment in time, despite the fluid motion. However, the absence of motion blur is what viewers do notice. Because of this, visual effects creators often use artificial motion blur in their effects to replicate what the viewer would experience if the element were really there in the picture.
Part 2. How to Add Motion Blur in After Effects
In videos, slow-motion may be used in a variety of ways, such as to convey the emotional context of a story or make beautiful slideshow backdrops. It doesn’t matter why you want to make a slow-motion sequence; After Effects’ slow-motion effect will work well. Click the Motion Blur layer switch to turn Motion Blur on or off. Make sure you can render out Motion Blur by turning on the Enable Motion Blur composition option at the top of the Timeline panel.
Using the motion blur option in your layer settings is the first and easiest approach to apply motion blur in After Effects. You’ll see many choices on the left and right sides of the screen after choosing a certain video. There are several techniques to motion blur a video, which we wish to accomplish. But because this guide is for novices, we will choose the simpler option. Follow the steps below to learn how to add motion blur to a video in AE:
Steps to Add Motion Blur to After Effects:
So, it goes without saying that After Effects makes it simple to access Motion Blur’s magic. You should shoot the movie at a frame rate that is faster than the average if you want the greatest slow-motion effects. How many photos are being captured each second is indicated by the frame rate.
Step1 Download and install Adobe After Effects if it isn’t already on your PC. Since Adobe After Effects is a commercial program, it is not available for free. Open the program after installation. After installation, launch it and choose “New Project” to begin editing a brand-new file. Look through the video you wish to alter.
Step2 You have a variety of settings in Adobe After Effects on the right side. Then, choose “Effects & Presets.” A search bar will appear as a result. Enter “CC Force Motion Blur” in the search field if you wish to add motion blur to the video. You may apply this effect to whatever layer you choose since your movie is made up of layers.
Step3 Next, drag the “CC Force Motion Blur” to the layers that represent your imported video at the bottom left of the screen. On the left side of the screen, under “CC Force Motion Blur,” you will find settings for motion blur. Here, you may change the motion blur to suit your needs. You may type in the values and watch the video as appropriate. There are several choices available for you to modify.
![]()
Note: Before applying any speed effects, first trim your film to the proper length. Once the speed effects have been included, you need also make sure that your composition is lengthy enough for your clip. Once you’re satisfied with the footage you want to slow down, choose one of the ways—Time warp or Time Stretch.
Step4 Customize “Shutter Angle” and “Motion Blur Samples.” Always be careful to preview the video after any modifications. Adjust to your needs and specifications. Additionally, if you wish, you may add any additional effect to the video. When finished, save the video by selecting “File” in the upper left corner.
Step5 Finally, hit the OK button and afterwards, export the project with the Motion Blur embedded inside the main video. Adobe AE also gives you flexibility to export to the desired format with the preset project settings.
Part 3. Other Video Editor to Add Effects to Videos
Due to its cost and adaptability, Adobe After Effects is quite expensive; especially for the beginners. So, we’ve a handy option, Filmora by Wondershare, that is a fantastic option since most high-end video editors are, to put it mildly, expensive. It may seem natural to just add motion blur to everything before rendering while working on a conventional 2D project in After Effects, but there are occasions when having no motion blur at all is preferable. When used properly, After Effects’ slow-motion features are extensive and reliable.
Wondershare: A video-making and editing program has its flagship product called Filmora . You may use the tools to create a wide variety of styles and appearances. Less complicated and user-friendly for beginners, the program. With the help of this program, you may edit your video at home like an expert. With this user-friendly tool and stylish effects, making excellent films doesn’t have to be difficult. When you open the app and choose Editor mode as it will walk you through each stage of the procedure.
Free Download For Win 7 or later(64-bit)
Free Download For macOS 10.14 or later
Import Files
Media files may be easily added to the timeline in Filmora from the device’s library. .mpg,.mpeg, and many more file types are supported for this video file format’s input.
Utilize Filmstock
On Wondershare Filmora , there is a full-service shop called Filmstock that offers a ton of exciting media and after-effects for download. You may get free sound effects and short video clips to add to your videos on this website.
Edit Effect
Download films from the effect store or import them from your device and add them to your timeline in Filmora to modify your videos. Utilize the software’s drag-and-drop feature to modify the video.
Apply filters
Overlays and video filters are effects used to enhance the appeal of the video. Open the effects tab and select your desired filter to apply overlays and filters. To apply it, drag and drop it into the timeline’s video. Additionally, filters may be adjusted to change the time scale and transparency.
Export
Exporting a video to a variety of platforms comes after editing it. Filmora allows users to export video in a number of different file types, including mp4, Wmv, Mkv, ts, 3gp, f4v, Mkv, MOV, mpg, 3gp, GIF 4K, and mp3.
Conclusion
Motion blur is crucial when animating characters to move. Your videos require some blur to seem realistic when there is motion, particularly when there is quick movement. You have learnt how to include motion blur into your animation project from this guide. To add motion blur effects to your movie or animation, After Effects offers a wide variety of options. To inform you about this wonderful gesture, we utilized Filmora and Adobe After Effects and recommend Filmora for easiness and handy outputs.
Best Video Editors to Add Text to a Video
While it can be very easy to add text to an image, the same cannot be said when it comes to adding even the simplest text to a video. You will need video editing software that is designed with the necessary features to help you add text to your video.
There are very many programs in the market that can technically be used to add text to a video. But the ones we will look at are video editors that make the process easy, but also give you a wide range of options to customize your text in numerous ways.
Filmora
Filmora by Wondershare is one of the best video editors in the market. Its user interface is so easy to use that adding text to the video is a simple 3-step process. Aside from adding text to the video, Filmora also allows you to edit other aspects of the video including adding transitions, overlays, and animations to any section of the video.

Key Features:
- You can use Filmora to add text to any section of the video
- It gives you the freedom to move the text to any section of the video
- Customizing the text, you add to the video can be done in numerous ways including changing the color, and font and adding animations to the text.
- It offers numerous templates to choose from and different font styles that you can use
- It has a simple user interface that makes the video editing process very easy
- It has numerous other video editing capabilities that allow you to create and edit videos in different ways including splitting videos, trimming videos, and even merging videos clips into one
- You can upload the videos directly to YouTube after editing.
After Effects
Adobe After Effects is a motion picture editing program that you can also use to add text and other animations to your video. While you can use it to add simple text to the video, it is an ideal solution when your goal is to add advanced text animations. It is however by no means a simple solution, especially for beginners who may find it hard to get going with After Effects.

Key Features:
- You can add simple lines of text to any section of the video
- Text is easily customizable by changing the color, font, and size of the text
- You can also choose to change the entire text layer and add advanced animations and effects
- There are a lot of text, animations, and effects templates to choose from
- You can easily copy text from other Adobe applications to use in After Effects
Movavi Editor
Movavi video editor is another great video editor that you can use to add and edit text on a video. Like most similar tools it is designed to simplify the process, allowing you to add text to any section of the document, move the text to any location on the video and even add text effects to customize the text. It has a very simple user interface that allows you to do that quickly and easily.

Key Features:
- You can add text to any section of the video
- Customizing the text by changing the font, color and size is also very easy
- The user interface is very easy to use, allowing you to add even blocks of text very quickly
- You also have additional options to edit the video including splitting and merging the video or adjusting the brightness, saturation, and color.
iMovie
This is a built-in video editor that you will find on macOS and iOS devices. Even though it is free, iMovie has a lot of features that come in handy when you want to add and edit text on a video. The fact that it can be used on iOS devices is an added advantage when you want to edit videos on the go.

Key Features:
- It allows users to add transitions and effects to the text you add to the video
- It comes with a lot of title templates to choose from
- Adding animated text is also very simple including Sideways Drift, Lens Flare, and more
- You can customize the text in very many ways including adding fonts, drop shadows, changing the color, and even resizing or repositioning the text.
Camtasia
TechSmith Camtasia is one of the most popular tools to create and edit videos. Of the numerous features that you get when you choose to use Camtasia is adding and editing text to the video. It has numerous templates that can be used to customize the text you add in various ways.

Key Features:
- It gives you numerous options to add text to the images including text boxes, templates, and effects
- It has a speech-to-text feature that is perfect for adding captions and subtitles to the video
- You can easily customize the text by adding transitions and effects or even by simply changing the font, color, and size of the text
- The text can be moved to any section of the video
Typito
Typito is an online video editor with simple tools that can help you make changes to any video. designed to help YouTube content creators and video editors, Typito can be used to add all kinds of text and text effects to any video. It is accessible on all browsers and it is also very easy to use.
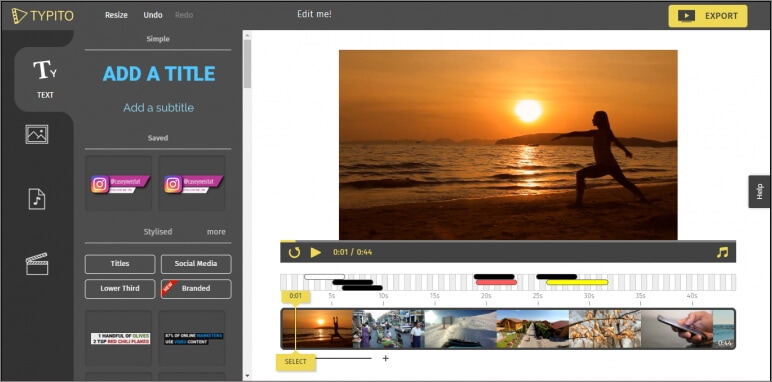
Key Features:
- It is very easy to use, allowing you to add text to any video in a few simple steps
- It has numerous templates to choose from
- Changing the font size, color, and style of the text is very easy
- You can publish videos directly to numerous video-sharing sites after editing
- It allows users to add animations, transitions, and effects to the text
Splice
Splice is an iOS app designed to help you add text to videos on iOS devices. Adding text to any video using Splice can be easily done using the overlay feature. It also has numerous other video editing features including allowing you to easily synchronize your videos and music, adding filters and transitions, and more.

Key Features:
- it has a simple user interface that makes adding text very easy
- You can customize the text in various ways including changing the font size, color and style or even adding various text effects
- Videos can be saved on the device or shared directly on social media apps like Facebook, Instagram, and YouTube
- It has numerous other video editing features including filters and animations
Clipomatic
If the text you want to add to the video is in the form of captions or subtitles, then Clipomatic is perhaps the best choice. It supports various languages including German, French, Portuguese, and even Chinese. You can also use it to add regular text to any video, reposition the text on any section of the video and customize the text in various ways.

Key Features:
- It is available for both Android and iOS
- Adding text to the video is very easy
- You can easily customize the text by changing the font color, and size and adding transitions and text effects
- It supports various languages, making it ideal for captions and subtitles
MySubtitle
MySubtitle is a simple but highly effective app that you can use to add text to your video. As the name suggests, this tool is ideal for adding subtitles and you can do that very easily by simply typing in the text and syncing the text to the video’s content.

Key Features:
- It is available for both iOS and Android devices
- You can type in your subtitles directly on the video
- Subtitles can then be paced to suit the video’s playback speed
- It is completely free to use
- You can share the videos you edit directly on various social media platforms
Free Download For Win 7 or later(64-bit)
Free Download For macOS 10.14 or later
Free Download For macOS 10.14 or later
What Is Color Finale
The question of which is superior between Color Finale and DaVinci Resolve may have crossed your mind if you’re considering upgrading your color grading software. That’s very natural, too! These two programs for color grading and color correction are among the best options for intermediate to advanced video editors. And with good cause. But what distinguishes each piece of software? Keep reading to find out.
1. What is color finale?
One of the best color grading and correction programs is Color Finale from Color Trix. It can only be used with Final Cut Pro X at the moment and is downloaded as a plug-in. Therefore, Color Finale is something you should definitely think about employing if you’re currently using FCPX to edit your video. Color Finale 2, the most recent edition, is incredibly potent. Compared to the default Final Cut Pro coloring tools, it offers a significantly more detailed coloring experience. It’s also shockingly simple to use. After installing it, Color Finale 2 will be accessible under “Video Effects.” Simply drag and drop it onto the desired clips to use it. Alternately, make an adjustment layer and apply it to your entire video.
The use of curves, vectors, color wheels, and HSL curves will be available to editors. These can all be utilized in layers. Additionally, rearranging and modifying the layers is simple. The masking and an enhanced LUTs browser are two of Color Finale 2’s finest additions. Masks are easy to handle and apply to video clips, and they have a great tracking capability. This makes it simpler for editors to isolate particular colors or sections inside film for intricate coloring.
Additionally, with Color Finale 1, the LUTs browser has been improved. LUTs are now much simpler to go through and preview. Additionally, Color Finale can be shown the location of your computer’s favorite LUTs for rapid application. Alternately, you might make your own LUTs and store them for use in later projects. These resources offer a wide range of color options.
The nicest part about it all, though, is how easy Color Finale is to use. Numerous excellent Color Finale instructions may also be found on their YouTube channel. The base version of Color Finale 2 software costs $99 to buy. Alternately, spend $149 once to get the full feature set of Color Finale 2 Pro.
2. Ease of use color finale 2.0
In this division, Color Finale 2 is the undisputed champion. All you have to do to use FCPX editors is download the software. It will be accessible when you launch FCPX the following time. Additionally, editors more experienced with Premiere Pro will still find Color Finale to be simpler to use than DaVinci Resolve. This is due to the fact that DaVinci Resolve uses an entirely unique method than other tools for editing videos. With Resolve, there is a very high learning curve. But with Color Finale 2, you can get started after watching a few tutorials.
3. Features
On the timeline of your Final Cut Pro project, a comprehensive range of professional color grading tools.
Image quality: Avoid problems with color management or image compression that could cause degradation between the editing and grading systems.
Speed: When compared to the conventional color tools found in Final Cut Pro, the color toolset in this extension has been fine-tuned and their user interface has been optimized for a speedier grading workflow.
Efficiency: Keep your project in Final Cut Pro for all of your high-end color grading needs, and there will be no need for round-tripping.
Transcoder: Color Finale Transcoder is an FCPX addon that lets you preview, alter, and transcode RAW files. BRAW, ARRIRAW, and CinemaDNG are supported. As Final Cut Pro X natively supports R3D/ProRes RAW files, there’s no necessity to support them. Inside the extension, you can change the transcoding codec, color space, output file resolution, delayering mode, and highlight recovery. Color Finale Transcoder lets you change RAW files’ color temperature/tint, ISO, and sharpness/detail. Import a preview LUT to see how your film will look.
Value: Included are brand new tools for image processing as well as picture analysis - there is no requirement to buy any other plugins.
4. Color Finale 2
The color correction tool known as Color Finale 2 is a plug-in that can only be used with Apple’s Final Cut Pro software. It is superior to the color correcting capabilities that are incorporated into Final Cut Pro and transform the software into a professional grading solution. There is a Standard version and a Pro version of Color Finale 2 available for purchase.
This article may refer to some features that are only available in the Pro edition; thus, please visit our website for a comparison of the features included in each of the two versions. Color Finale 2 Pro will interact with Tangent hardware control surfaces, in addition to the differences in features that are already there. Both Final Cut Pro and Motion have an option to install Color Finale 2 as a video effect filter, known as a plug-in. It also installs a separate Color Finale application, which is necessary for the program to function properly within the framework of macOS. This application is only used to check for and apply updates to Color Finale 2, therefore the user will not ordinarily need to access it. The Color Finale 2 effect can be applied to any video clip, compound clip, title, generator, or adjustment layer (title effect) on the timeline by dragging and dropping the Color Finale 2 or Color Finale 2 Pro** effect from the effects panel in Final Cut Pro.
The interface of Color Finale 2 is split into two sections: a control panel that can be found in the Final Cut Pro inspector and a layer editing panel that can be moved around and resized. These panels make use of a design language for the interface that is similar to that of Final Cut Pro. Both have contextual pulldown pickers and contextual menus, in addition to return arrows that are located next to the majority of the parameters in order to reset their values to the default (identified by three vertical dots).
5. Minimum system requirements?
Apple Mac 2012 or newer OS X 10.13 and later Requires graphics card sold by Apple supporting Graphics card with Metal support Final Cut Pro X 10.4 or later 4 GB of RAM.
6. Availability and price
The ability to produce high-quality results within Color Finale without the need to round-trip to another program is the primary advantage of utilizing this software. Doing all of your editing, grading, and finishing work right within FCPX may save you a ton of time and effort, which is especially helpful when you’re working under strict time constraints. The price of Color Finale is only $99, which is very affordable.
Conclusion
Color Finale includes several high-end color suite capabilities. Color Finale includes standard color tools including 3-way color wheels and RGB curves, plus a basic LUT option and a six-channel vector grading feature. Using this vector tool, it’s easy to brighten skies, adjust building colors, or enhance skin tones.
Free Download For Win 7 or later(64-bit)
Free Download For macOS 10.14 or later
Free Download For macOS 10.14 or later
Also read:
- [New] 2024 Approved Mastering View Counts by Upholding YouTube's CC License
- [New] In 2024, Mastering the Art of Uploading and Sharing Videos on Instagram
- [Updated] 2024 Approved The Editing Game Changer FCP's Best 10 Plugins
- 2024 Approved Beyond the Basics Advanced Techniques for Improved Recordings
- Beyond ThinkPads & MacBooks: Unveiling a Highly Effective Workhorse Laptop for Peak Efficiency – Now at a Sweet Deal of 30% Off on Prime Day | Expert Review From ZDNET
- BitRaser Pro: Comprehensive Tutorial on Secure Data Destruction via Video
- Counter-Strike Microphone Not Working? Here's How You Can Get It Fixed Today
- Enhanced Artificial Intelligence Performance with Intel's Ultra PC: The New Era of Optimized Model Integration
- Is Windows Movie Maker Still Available, In 2024
- Mastering Claude 2: Understanding Its Functions & Applications
- New Are You in Search for a Step-by-Step Guide to How to Add Effects in TikTok? Here It Is. To Add some Flavor to Your TikTok Videos. Use These How to Add Effect to TikTok Recommendations
- Official HP Deskjet 2700 All-in-One Printer Drivers: Updated Guide [Free]
- The New Frontier of Personal Health: The Amazon Halo's Revolutionary Design and Functionality
- Updated Do You Want a LUT that You Can Use for Your High-Definition Content? You Can Use Rec 709 LUT Premiere Pro for Your HD Digital Media to Give the Perfect Result
- Updated How To Make Ninja Jump Effect with Filmora
- Title: New 2024 Approved How to Add Subtitles in Canva?
- Author: Chloe
- Created at : 2025-02-26 08:36:44
- Updated at : 2025-03-03 22:12:18
- Link: https://ai-editing-video.techidaily.com/new-2024-approved-how-to-add-subtitles-in-canva/
- License: This work is licensed under CC BY-NC-SA 4.0.