:max_bytes(150000):strip_icc():format(webp)/sofya-NomETWcv2Fo-unsplash-be3fc2855a7e477db0273993fd22e822.jpg)
New 2024 Approved How to Concatenate Videos Using FFmpeg

How to Concatenate Videos Using FFmpeg
Video editing is a crucial aspect of creating content for many people. Whether you’re a YouTuber, a marketer, or just someone who wants to share videos with friends and family, being able to edit and manipulate your videos is key. One of the most basic video editing tasks is concatenating videos, which combines multiple files to create one cohesive video.
FFmpeg is a powerful tool that allows you to do just that, and in this guide, we’ll walk you through the process of FFmpeg concatenate videos. Whether a beginner or an experienced video editor, this guide will provide you with all the information you need to seamlessly merge your videos. From installation to execution, we’ll cover it all so you can streamline your video editing process.
Overview and Installation of FFmpeg
FFmpeg is free, open-source project that allows you to record, convert, and stream digital audio and video. It is a command-line tool widely used in video editing and transcoding. FFmpeg can be used to concatenate videos and other tasks, such as adding subtitles, changing video resolution, and more. It is available for Windows, Mac, and Linux, making it a versatile and accessible tool for anyone to use.
Here’s how to install FFmpeg:
Step1 Log in to your Ubuntu server via SSH and update the package index.
$ sudo apt update
Step2 Install FFmpeg and all the required dependencies
$ sudo apt install ffmpeg
Step3 Verify the version of FFmpeg that you’ve installed.
$ ffmpeg -version
Prerequisite
Before we merge videos using FFmpeg, we must understand the various methods available to us. FFmpeg offers three ways to concatenate videos: a demuxer, a filter, or a protocol. However, each method has its own set of considerations, and the best method for you will depend on the properties of the videos you’re working with.
It’s crucial to ensure that all encoding-related properties align with your chosen method. This includes the timebase, height and width, codecs, and pixel format. Some methods require the videos you’re merging to have the same encoding, while others allow for different encodings. It’s essential to keep this in mind to ensure that the final video is seamless without any breaks. Remember that these prerequisites will help you have a smooth process.
Concatenate Videos With Same Codecs Using FFmpeg
If the videos you want to concatenate have the same codec, you can use the FFmpeg “concat” demuxer or protocol to join them together. This simple and efficient method doesn’t require re-encoding the videos, saving time and preserving the original quality. This section will review the steps to concatenate videos using the “concat” demuxer and “concat” protocols in FFmpeg.
Merge Videos With the “Concat” Demuxer
The concat demuxer in FFmpeg allows you to join together multiple video files with the same codecs by reading a list of file paths from a text file and demuxing them in sequence. Each video starts where the previous one finishes without needing to re-encode the videos. Here’s how to do it:
Step1 Create a .txt file and list the paths of the video files you want to merge.
Join_video.txt
file /Users/Video/input1.mp4
file /Users/Video/input2.mp4
![]()
Note: You can add more than two video files.
Step2 Run the FFmpeg command:
ffmpeg -f concat -safe 0 -i join_video.txt -c copy output_demuxer.mp4
![]()
Note: -safe 0 is added to accept any file name.
-c copy will copy all the streams.
As this method allows you to “stream copy” the files instead of re-encoding them, the concatenation is very fast. This can be a good option if you have videos with the same codecs and want to join them quickly without losing quality.
Join Videos With the “Concat” Protocol
The concat protocol in FFmpeg allows you to join together multiple video files in a specific format that supports file-level concatenation, such as MPEG-2 TS. However, it cannot be used for other video formats like MP4 and WEBM.
Here’s how to use the “concat protocol:
Step1 Run the FFmpeg command:
ffmpeg -i “concat:input1.ts|input2.ts” -c copy output_protocol.ts
![]()
Note: The concat protocol allows you to “stream copy” the files by adding the option -c copy.
Step2 Input the file name of the video using this code:
ffmpeg -i “concat:input1.mp4|input2.mp4” -c copy output_protocol.mp4
![]()
Note: If you try to use this method on video formats that are not supported, only the first input video will be saved in the output video. And the video ends after the first video.
Although this method is limited in terms of supported video formats, it’s very easy to use if you merge videos in the supported formats. It’s a single command in the terminal without needing a text file. Additionally, using the -c copy option makes it efficient as it doesn’t require re-encoding, saving time.
Concatenate MP4 Video Files of Different Codecs & Resolutions Using FFmpeg
If the videos you want to concatenate have different codecs or resolutions, you can still use FFmpeg to join them together. However, this method requires re-encoding the videos, which can take longer and may result in a loss of quality. This section will cover the steps to concatenate videos with different codecs or resolutions using FFmpeg.
Here’s how to do it:
Step1 Provide the names of the input files to FFmpeg.
ffmpeg -i file1.mp4 -i file2.mp4 -i file3.mp4 \
Step2 Use the filter_complex filtergraph parameter to instruct FFmpeg from where to take the audio and video.
-filter_complex “[0:v] [0:a] [1:v] [1:a] [2:v] [2:a]
![]()
Note: [0:v][0:a] means FFmpeg needs to take the video and audio from the 0th video (file1.mp4).
Step3 Tell FFmpeg to concatenate three files (n=3).
concat=n=3:v=1:a=1 [vv] [aa]“ \
![]()
Note: The v=1:a=1 implies one stream for the audio and one stream for the video.
Step4 Map these audio and video outputs to the final video container. This is done as follows:
-map “[vv]“ -map “[aa]“ mergedVideo.mp4
It is important to note that this method requires re-encoding the videos, which can take more time and may result in a loss of quality. However, it offers the flexibility of filtering the videos before concatenating them. The filter_complex method in FFmpeg allows you to concatenate videos of different codecs and resolutions. The final step is to map the audio and video outputs to the final video container. This can be done using the -map command.
Concatenate Videos With Multiple Audio Streams Using FFmpeg
Concatenating videos with multiple audio streams can be more complex than concatenating videos with a single audio stream. This section will cover the steps to concatenate videos with multiple audio streams using FFmpeg. We’ll be using the filter_complex method in FFmpeg, which allows you to manipulate and concatenate multiple audio and video streams in a single command. This method is more advanced but allows you to join videos with different audio streams and create a final video with multiple audio tracks.
Step1 Specify the input files and opening.mkv, episode.mkv, and ending.mkv:
$ ffmpeg -i opening.mkv -i episode.mkv -i ending.mkv -filter_complex
Step2 Use the filter_complex parameter in FFmpeg to specify the input streams for the video and audio.
[0:0] [0:1] [0:2] [1:0] [1:1] [1:2] [2:0] [2:1] [2:2]
![]()
Note: Single video stream ([0:0], [1:0], [2:0])
Dual audio streams ([0:1][0:2], [1:1][1:2], [2:1][2:2])
Step3 Use the concat filter to specify that you want to concatenate 3 files (n=3) with 1 video stream (v=1) and 2 audio streams (a=2). Specify the output streams as [v], [a1], [a2]:
concat=n=3:v=1:a=2 [v] [a1] [a2]
Step4 Use the -map option to map the output streams to the final video container:
-map ‘[v]‘ -map ‘[a1]‘ -map ‘[a2]‘ output.mkv
[Bonus] Join Videos Together With Filmora
While FFmpeg offers a wide range of options for joining videos together, it can have a steep learning curve for some users. An alternative method for joining videos is using Filmora. Wondershare Filmora is a user-friendly video editing software that allows you to easily join multiple videos. It’s a great option for users new to video editing or needing experience with command-line tools like FFmpeg.
Free Download For Win 7 or later(64-bit)
Free Download For macOS 10.14 or later
Filmora has a simple drag-and-drop interface, making adding, arranging, and editing videos and audio tracks easy. Additionally, it offers various features like split, trim, crop, merge, and more. It also has various effects, transitions, and animations to enhance the overall look of your video. With Filmora, you can create professional-looking videos with minimal effort.
How-to Steps
Here’s how to merge videos using Filmora:
Step1 Open Filmora and click “New Project.”

Step2 Go to “File“ > “Import Media“ > “Import Media Files“ to add your video files to the media library.

Step3 Drag and drop the files you want to merge from the media library to the timeline, and then you’ll get the merged video seamlessly.

Step4 Edit your video.

Step5 After editing, click the “Export“ tab to save your videos.

Conclusion
FFmpeg is a powerful tool that allows you to concatenate videos in various ways. Whether you’re working with videos of the same codecs and resolutions or videos with multiple audio streams, FFmpeg can handle it. However, for users new to video editing or needing experience with command-line tools, using Filmora can be a more user-friendly option. It offers a simple drag-and-drop interface and a variety of features and effects to enhance the overall look of your video.
Step2 Run the FFmpeg command:
ffmpeg -f concat -safe 0 -i join_video.txt -c copy output_demuxer.mp4
![]()
Note: -safe 0 is added to accept any file name.
-c copy will copy all the streams.
As this method allows you to “stream copy” the files instead of re-encoding them, the concatenation is very fast. This can be a good option if you have videos with the same codecs and want to join them quickly without losing quality.
Join Videos With the “Concat” Protocol
The concat protocol in FFmpeg allows you to join together multiple video files in a specific format that supports file-level concatenation, such as MPEG-2 TS. However, it cannot be used for other video formats like MP4 and WEBM.
Here’s how to use the “concat protocol:
Step1 Run the FFmpeg command:
ffmpeg -i “concat:input1.ts|input2.ts” -c copy output_protocol.ts
![]()
Note: The concat protocol allows you to “stream copy” the files by adding the option -c copy.
Step2 Input the file name of the video using this code:
ffmpeg -i “concat:input1.mp4|input2.mp4” -c copy output_protocol.mp4
![]()
Note: If you try to use this method on video formats that are not supported, only the first input video will be saved in the output video. And the video ends after the first video.
Although this method is limited in terms of supported video formats, it’s very easy to use if you merge videos in the supported formats. It’s a single command in the terminal without needing a text file. Additionally, using the -c copy option makes it efficient as it doesn’t require re-encoding, saving time.
Concatenate MP4 Video Files of Different Codecs & Resolutions Using FFmpeg
If the videos you want to concatenate have different codecs or resolutions, you can still use FFmpeg to join them together. However, this method requires re-encoding the videos, which can take longer and may result in a loss of quality. This section will cover the steps to concatenate videos with different codecs or resolutions using FFmpeg.
Here’s how to do it:
Step1 Provide the names of the input files to FFmpeg.
ffmpeg -i file1.mp4 -i file2.mp4 -i file3.mp4 \
Step2 Use the filter_complex filtergraph parameter to instruct FFmpeg from where to take the audio and video.
-filter_complex “[0:v] [0:a] [1:v] [1:a] [2:v] [2:a]
![]()
Note: [0:v][0:a] means FFmpeg needs to take the video and audio from the 0th video (file1.mp4).
Step3 Tell FFmpeg to concatenate three files (n=3).
concat=n=3:v=1:a=1 [vv] [aa]“ \
![]()
Note: The v=1:a=1 implies one stream for the audio and one stream for the video.
Step4 Map these audio and video outputs to the final video container. This is done as follows:
-map “[vv]“ -map “[aa]“ mergedVideo.mp4
It is important to note that this method requires re-encoding the videos, which can take more time and may result in a loss of quality. However, it offers the flexibility of filtering the videos before concatenating them. The filter_complex method in FFmpeg allows you to concatenate videos of different codecs and resolutions. The final step is to map the audio and video outputs to the final video container. This can be done using the -map command.
Concatenate Videos With Multiple Audio Streams Using FFmpeg
Concatenating videos with multiple audio streams can be more complex than concatenating videos with a single audio stream. This section will cover the steps to concatenate videos with multiple audio streams using FFmpeg. We’ll be using the filter_complex method in FFmpeg, which allows you to manipulate and concatenate multiple audio and video streams in a single command. This method is more advanced but allows you to join videos with different audio streams and create a final video with multiple audio tracks.
Step1 Specify the input files and opening.mkv, episode.mkv, and ending.mkv:
$ ffmpeg -i opening.mkv -i episode.mkv -i ending.mkv -filter_complex
Step2 Use the filter_complex parameter in FFmpeg to specify the input streams for the video and audio.
[0:0] [0:1] [0:2] [1:0] [1:1] [1:2] [2:0] [2:1] [2:2]
![]()
Note: Single video stream ([0:0], [1:0], [2:0])
Dual audio streams ([0:1][0:2], [1:1][1:2], [2:1][2:2])
Step3 Use the concat filter to specify that you want to concatenate 3 files (n=3) with 1 video stream (v=1) and 2 audio streams (a=2). Specify the output streams as [v], [a1], [a2]:
concat=n=3:v=1:a=2 [v] [a1] [a2]
Step4 Use the -map option to map the output streams to the final video container:
-map ‘[v]‘ -map ‘[a1]‘ -map ‘[a2]‘ output.mkv
[Bonus] Join Videos Together With Filmora
While FFmpeg offers a wide range of options for joining videos together, it can have a steep learning curve for some users. An alternative method for joining videos is using Filmora. Wondershare Filmora is a user-friendly video editing software that allows you to easily join multiple videos. It’s a great option for users new to video editing or needing experience with command-line tools like FFmpeg.
Free Download For Win 7 or later(64-bit)
Free Download For macOS 10.14 or later
Filmora has a simple drag-and-drop interface, making adding, arranging, and editing videos and audio tracks easy. Additionally, it offers various features like split, trim, crop, merge, and more. It also has various effects, transitions, and animations to enhance the overall look of your video. With Filmora, you can create professional-looking videos with minimal effort.
How-to Steps
Here’s how to merge videos using Filmora:
Step1 Open Filmora and click “New Project.”

Step2 Go to “File“ > “Import Media“ > “Import Media Files“ to add your video files to the media library.

Step3 Drag and drop the files you want to merge from the media library to the timeline, and then you’ll get the merged video seamlessly.

Step4 Edit your video.

Step5 After editing, click the “Export“ tab to save your videos.

Conclusion
FFmpeg is a powerful tool that allows you to concatenate videos in various ways. Whether you’re working with videos of the same codecs and resolutions or videos with multiple audio streams, FFmpeg can handle it. However, for users new to video editing or needing experience with command-line tools, using Filmora can be a more user-friendly option. It offers a simple drag-and-drop interface and a variety of features and effects to enhance the overall look of your video.
Best GIF to AVI Converters
Great Video Converter - Wondershare Filmora
Provide abundant video effects - A creative video editor
Powerful color correction and grading
Detailed tutorials provided by the official channel
Introduction
It will be much fun if you get to assort most of your GIF files and turn them into full-length streaming videos. However, many conversion websites and software on the internet offer you the facility to convert GIF to AVI file format with ease of use. With these online tools, you also get the opportunity to upload the converted file on various social media channels. Unlike real video, these files have less memory and are easy to save on your device or hard disk.
Although both AVI and GIF are two commonly used file formats, they are different. First of all, GIF stands for Graphical Interchange Format, and it is an image format that can store several consequent or dis-consequent pictures into an animated file. In contrast, AVI is a lossless video file format. This guide focuses on turning GIF animated images into AVI videos and gives a list of the best GIF to AVI converters you can choose from.
In this article
Part 1: Best 4 Online GIFs to AVI Converters
Part 2: Best 4 GIFs to AVI Software
Part 3: How to Convert GIF to AVI?
Part 1: Best 4 Online GIFs to AVI Converters
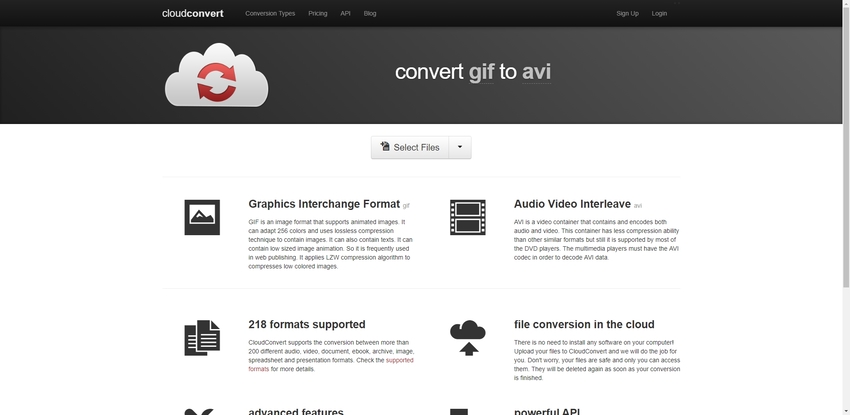
· Cloudconvert
One prominent feature of this tool is the interface of this GIF to AVI converter is straightforward to follow. However, you don’t have to download any plug-ins or software during the file conversion process with this online tool. This online website is SSL protected; thus, you will not need to deal with worms or viruses when downloading your converted file. In addition, you can also choose from more than 200 different file formats. Moreso, you get a chance to contact webmasters through email channels.
Main Features:
- There is an API function that you can use the site on several of your laptops, mobile devices, etc.
- It offers users various platforms to upload files for conversion through URL, PC, DropBox, Google Drive, etc.
· Video.online-convert
Using this GIF to AVI online converter, you do not have to deal with many advertisements; furthermore, the conversion speed is very high. Thus, with this converter, you can work on lengthy projects efficiently. In addition, the website also offers a lot of options that you can choose from while converting a file. This software also allows you to crop, change the bitrate of the video, change the rate of the frame, etc. The uploaded files will be secure and safe as the website follows strict confidentiality norms.
Main Features:
- This converter website offers a drag-drop feature that allows users to upload a file quickly.
- The facility to solve your queries is available through various frequently asked questions.

· Convertio
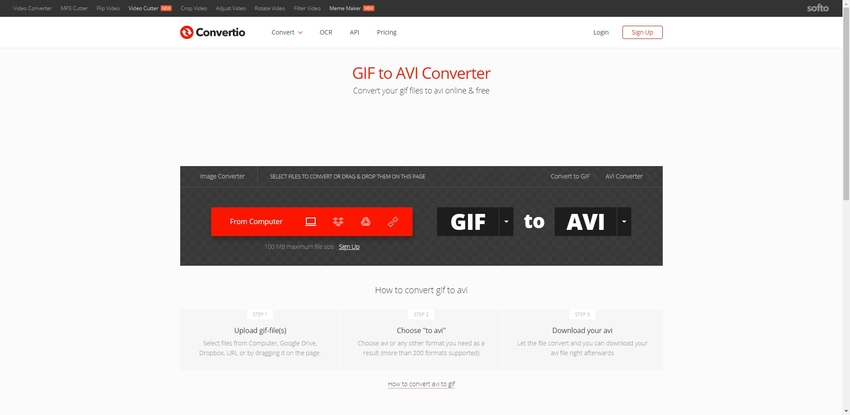
Using Convertio will have to follow a few initial steps to change GIF to AVI file extension. However, to convert GIF files to AVI online, you are not required to download any external software, saving your computer memory and time. It is effortless to download converted files on your system, as the website also provides API services. The website also gives an effective option to store and save data over cloud services through DropBox, Google Drive, etc.
Main Features:
- The site provides excellent options for video cutting, rotating, clipping, filtering, etc.
- Choose from different languages; thus, converting a file would be more comfortable and practical.
· File-conversion
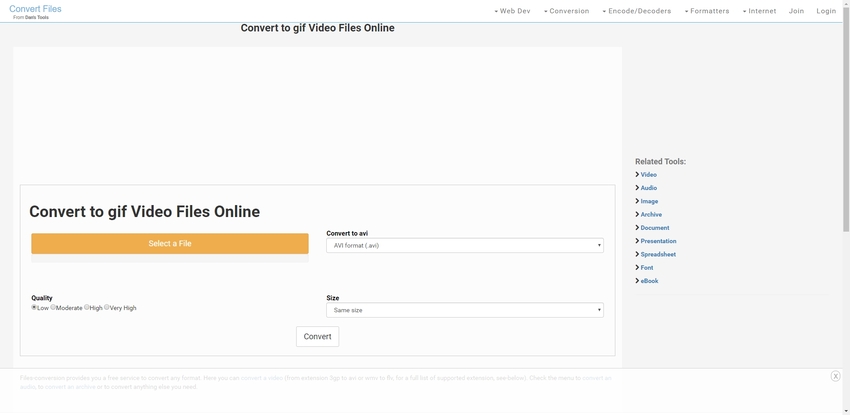
The website has excellent UI and UX features. Allows users to convert GIF to AVI file format within a short time. Once you can convert GIF to AVI with this software, you will be able to download the file straight into your PC. The website also grants the opportunity to delete the data once it gets converted, and you can then download the file.
Main Features:
- This converter web portal gives you the chance to make several changes to the file you plan to convert.
- There are no unnecessary advertisements, which speeds up the conversion process.
Part 2: Best 4 GIFs to AVI Software
· Filmora.
Wondershare Filmora is editing and creating software specially designed for Windows and Mac PCs that is also an excellent GIF to AVI converter. In addition, it is highly compatible with a variety of media formats and gives you access to a variety of editing options. It also provides you with high-quality output files and uses various effects, transitions, overlays, graphics, and titles to create videos.
This software also supports numerous formats: MPEG, MP4, AVI, WebM, etc. It extracts the audio or converts them into MP3 format. In addition, it outputs high-quality videos, which include ones in 4K resolution.
Pros
It is compatible with various media formats
It comes with a built-in video editing tool
Receive high-quality output files
Grant users with access to multiple video editing options
Cons
Sometimes it takes extra time to generate the output files
Some of the sample files require a download

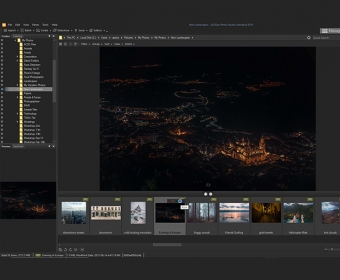
· ACDSee
This GIF to AVI converter software can share, manage, and edit photographs. In addition, its interface is, however, similar to those of other similar products, so if you have previous experience in using any editing software, this is no different. This software is also highly improbable. Thus, you will not have any difficulty using ACDSee. Its working area is usually divided into three sections:
- a left panel where you can browse folders
- a right panel with the properties
- the prominent viewing area in the middle.
Pros
It is elementary to use
It has a very lovely user-interface
An extensive collection of tools
Quick browsing through photos is allowed
Uploading photographs to the cloud through photos is supported
Cons
There are not as many features as other video editing tools
Its corrections are not always effective
· Free Video Editor
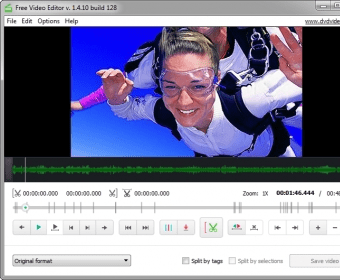
If you need a GIF to AVI converter that works free of charge, you need to try this software. This software program allows you to slice your video files and convert them into popular video formats. It also enables users to perform some basic edits and supports AVI, GIF, MKV, and MP4 for the output. It also gives users the possibility of extracting the audio stream of your video files and saving it as an MP3 file. In addition, users can load any MPG, MKV, AVI, WEBM, MP$, or WMV files split easily into as many clips as possible.
Pros
Has an accurate cutting point
It has useful features that can help to maximize the cutting process
Capabilities for rotation
Tag editor
Allows the conversion to some of the most well-known video formats
Cons
Some complex editing features are lacking
Unable to customize output profiles
· Easy GIF Animator
The main intention of this software is to create animations for your web pages. In addition, this software has a modern interface, in the style of Microsoft Office’s latest versions. However, some wizards can help to guide users of this software.
Pros
Helpful in creating graphical banners for advertising
Perfect for animation frame by frame
Convert video to GIF animations
Ideal for converting GIF to AVI
Add effects to your animations
Cons
Key-framing animation unsupported
Layers are not supported

Part 3: How to Convert GIF to AVI?
Convert GIF to AVI Using Online Converters
Convertio is an online file format converting tool compatible with a wide range of input and output formats, including GIF to AVI.
Here is a step-by-step guide of this GIF to AVI converter:
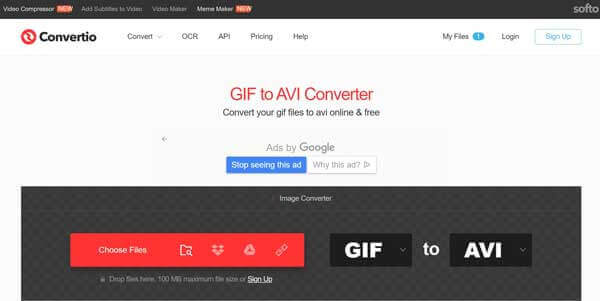
Step 1: Visit Convertio in your browser and select and upload a GIF file from your channel, like URL, computer, Dropbox, and Google Drive.
Step 2: Select AVI from the dropdown format option and click the Convert button to begin converting GIF to AVI.
Step 3: When completed, download the AVI files to your computer or send them to the cloud service
Save GIF as AVI through GIF to AVI Software
One of the primary reasons we recommend Wondershare Filmora is that online GIF converters can be unreliable. This implies that there must be a stable internet connection and power supply. In addition, Filmora software is safe and secure, which is a common concern with online tools.
Follow the steps below to turn GIF into AVI:
Step 1: Install Filmora on Mac or Windows
Download and Install Filmora software on your PC. Double click the .dmg file and follow all the instructions to install this software.
Step 2: Begin New Project
Click on the Filmora icon to start a new project and when it is open, click “New Project,” and make sure you select the “Project Settings” from the dropdown options (desired video aspect ratio, resolution and frame rate based on the sharing platform)
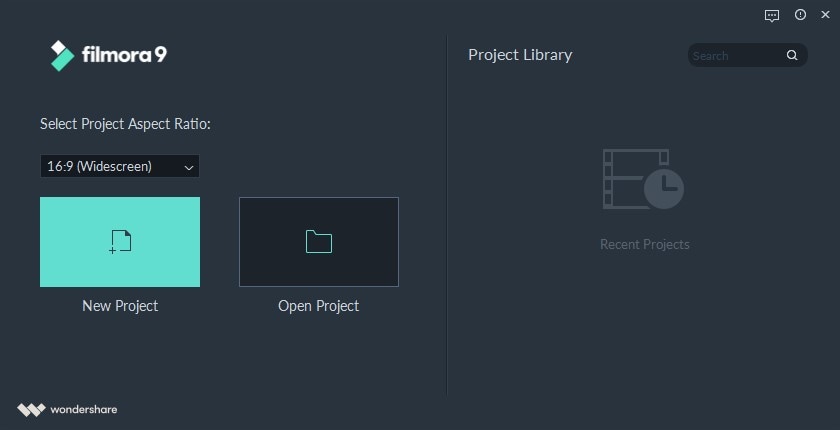
Step 3: Import Files to Convert
Start a new project by importing the GIF you want to convert to the timeline. A prompt project setting will pop up if the media aspect ratio and resolution do not match. Make sure you click on “DON’T CHANGE” to maintain your earlier setting

Step 4: Finish the Process and Export
Click on export to convert the video and select the AVI file format to save your file

Finally, save your GIF to AVI video on your preferred location
Conclusion
Thus, we learned:
- The process of converting GIF files to AVI using online tools
- How to use downloaded software to turn GIF to AVI
- It also provided a list of the top best software and online tool you can choose from to convert your GIF to AVIvery quickly.
- Lastly, it recommended Filmora as the top-most GIF to AVI converterdue to its reliability and safety commitment.
Introduction
It will be much fun if you get to assort most of your GIF files and turn them into full-length streaming videos. However, many conversion websites and software on the internet offer you the facility to convert GIF to AVI file format with ease of use. With these online tools, you also get the opportunity to upload the converted file on various social media channels. Unlike real video, these files have less memory and are easy to save on your device or hard disk.
Although both AVI and GIF are two commonly used file formats, they are different. First of all, GIF stands for Graphical Interchange Format, and it is an image format that can store several consequent or dis-consequent pictures into an animated file. In contrast, AVI is a lossless video file format. This guide focuses on turning GIF animated images into AVI videos and gives a list of the best GIF to AVI converters you can choose from.
In this article
Part 1: Best 4 Online GIFs to AVI Converters
Part 2: Best 4 GIFs to AVI Software
Part 3: How to Convert GIF to AVI?

Part 1: Best 4 Online GIFs to AVI Converters
· Cloudconvert
One prominent feature of this tool is the interface of this GIF to AVI converter is straightforward to follow. However, you don’t have to download any plug-ins or software during the file conversion process with this online tool. This online website is SSL protected; thus, you will not need to deal with worms or viruses when downloading your converted file. In addition, you can also choose from more than 200 different file formats. Moreso, you get a chance to contact webmasters through email channels.
Main Features:
- There is an API function that you can use the site on several of your laptops, mobile devices, etc.
- It offers users various platforms to upload files for conversion through URL, PC, DropBox, Google Drive, etc.

· Video.online-convert
Using this GIF to AVI online converter, you do not have to deal with many advertisements; furthermore, the conversion speed is very high. Thus, with this converter, you can work on lengthy projects efficiently. In addition, the website also offers a lot of options that you can choose from while converting a file. This software also allows you to crop, change the bitrate of the video, change the rate of the frame, etc. The uploaded files will be secure and safe as the website follows strict confidentiality norms.
Main Features:
- This converter website offers a drag-drop feature that allows users to upload a file quickly.
- The facility to solve your queries is available through various frequently asked questions.

· Convertio
Using Convertio will have to follow a few initial steps to change GIF to AVI file extension. However, to convert GIF files to AVI online, you are not required to download any external software, saving your computer memory and time. It is effortless to download converted files on your system, as the website also provides API services. The website also gives an effective option to store and save data over cloud services through DropBox, Google Drive, etc.
Main Features:
- The site provides excellent options for video cutting, rotating, clipping, filtering, etc.
- Choose from different languages; thus, converting a file would be more comfortable and practical.

· File-conversion
The website has excellent UI and UX features. Allows users to convert GIF to AVI file format within a short time. Once you can convert GIF to AVI with this software, you will be able to download the file straight into your PC. The website also grants the opportunity to delete the data once it gets converted, and you can then download the file.
Main Features:
- This converter web portal gives you the chance to make several changes to the file you plan to convert.
- There are no unnecessary advertisements, which speeds up the conversion process.

Part 2: Best 4 GIFs to AVI Software
· Filmora.
Wondershare Filmora is editing and creating software specially designed for Windows and Mac PCs that is also an excellent GIF to AVI converter. In addition, it is highly compatible with a variety of media formats and gives you access to a variety of editing options. It also provides you with high-quality output files and uses various effects, transitions, overlays, graphics, and titles to create videos.
This software also supports numerous formats: MPEG, MP4, AVI, WebM, etc. It extracts the audio or converts them into MP3 format. In addition, it outputs high-quality videos, which include ones in 4K resolution.
Pros
It is compatible with various media formats
It comes with a built-in video editing tool
Receive high-quality output files
Grant users with access to multiple video editing options
Cons
Sometimes it takes extra time to generate the output files
Some of the sample files require a download

· ACDSee
This GIF to AVI converter software can share, manage, and edit photographs. In addition, its interface is, however, similar to those of other similar products, so if you have previous experience in using any editing software, this is no different. This software is also highly improbable. Thus, you will not have any difficulty using ACDSee. Its working area is usually divided into three sections:
- a left panel where you can browse folders
- a right panel with the properties
- the prominent viewing area in the middle.
Pros
It is elementary to use
It has a very lovely user-interface
An extensive collection of tools
Quick browsing through photos is allowed
Uploading photographs to the cloud through photos is supported
Cons
There are not as many features as other video editing tools
Its corrections are not always effective

· Free Video Editor
If you need a GIF to AVI converter that works free of charge, you need to try this software. This software program allows you to slice your video files and convert them into popular video formats. It also enables users to perform some basic edits and supports AVI, GIF, MKV, and MP4 for the output. It also gives users the possibility of extracting the audio stream of your video files and saving it as an MP3 file. In addition, users can load any MPG, MKV, AVI, WEBM, MP$, or WMV files split easily into as many clips as possible.
Pros
Has an accurate cutting point
It has useful features that can help to maximize the cutting process
Capabilities for rotation
Tag editor
Allows the conversion to some of the most well-known video formats
Cons
Some complex editing features are lacking
Unable to customize output profiles

· Easy GIF Animator
The main intention of this software is to create animations for your web pages. In addition, this software has a modern interface, in the style of Microsoft Office’s latest versions. However, some wizards can help to guide users of this software.
Pros
Helpful in creating graphical banners for advertising
Perfect for animation frame by frame
Convert video to GIF animations
Ideal for converting GIF to AVI
Add effects to your animations
Cons
Key-framing animation unsupported
Layers are not supported

Part 3: How to Convert GIF to AVI?
Convert GIF to AVI Using Online Converters
Convertio is an online file format converting tool compatible with a wide range of input and output formats, including GIF to AVI.
Here is a step-by-step guide of this GIF to AVI converter:

Step 1: Visit Convertio in your browser and select and upload a GIF file from your channel, like URL, computer, Dropbox, and Google Drive.
Step 2: Select AVI from the dropdown format option and click the Convert button to begin converting GIF to AVI.
Step 3: When completed, download the AVI files to your computer or send them to the cloud service
Save GIF as AVI through GIF to AVI Software
One of the primary reasons we recommend Wondershare Filmora is that online GIF converters can be unreliable. This implies that there must be a stable internet connection and power supply. In addition, Filmora software is safe and secure, which is a common concern with online tools.
Follow the steps below to turn GIF into AVI:
Step 1: Install Filmora on Mac or Windows
Download and Install Filmora software on your PC. Double click the .dmg file and follow all the instructions to install this software.
Step 2: Begin New Project
Click on the Filmora icon to start a new project and when it is open, click “New Project,” and make sure you select the “Project Settings” from the dropdown options (desired video aspect ratio, resolution and frame rate based on the sharing platform)

Step 3: Import Files to Convert
Start a new project by importing the GIF you want to convert to the timeline. A prompt project setting will pop up if the media aspect ratio and resolution do not match. Make sure you click on “DON’T CHANGE” to maintain your earlier setting

Step 4: Finish the Process and Export
Click on export to convert the video and select the AVI file format to save your file

Finally, save your GIF to AVI video on your preferred location
Conclusion
Thus, we learned:
- The process of converting GIF files to AVI using online tools
- How to use downloaded software to turn GIF to AVI
- It also provided a list of the top best software and online tool you can choose from to convert your GIF to AVIvery quickly.
- Lastly, it recommended Filmora as the top-most GIF to AVI converterdue to its reliability and safety commitment.
Introduction
It will be much fun if you get to assort most of your GIF files and turn them into full-length streaming videos. However, many conversion websites and software on the internet offer you the facility to convert GIF to AVI file format with ease of use. With these online tools, you also get the opportunity to upload the converted file on various social media channels. Unlike real video, these files have less memory and are easy to save on your device or hard disk.
Although both AVI and GIF are two commonly used file formats, they are different. First of all, GIF stands for Graphical Interchange Format, and it is an image format that can store several consequent or dis-consequent pictures into an animated file. In contrast, AVI is a lossless video file format. This guide focuses on turning GIF animated images into AVI videos and gives a list of the best GIF to AVI converters you can choose from.
In this article
Part 1: Best 4 Online GIFs to AVI Converters
Part 2: Best 4 GIFs to AVI Software
Part 3: How to Convert GIF to AVI?

Part 1: Best 4 Online GIFs to AVI Converters
· Cloudconvert
One prominent feature of this tool is the interface of this GIF to AVI converter is straightforward to follow. However, you don’t have to download any plug-ins or software during the file conversion process with this online tool. This online website is SSL protected; thus, you will not need to deal with worms or viruses when downloading your converted file. In addition, you can also choose from more than 200 different file formats. Moreso, you get a chance to contact webmasters through email channels.
Main Features:
- There is an API function that you can use the site on several of your laptops, mobile devices, etc.
- It offers users various platforms to upload files for conversion through URL, PC, DropBox, Google Drive, etc.

· Video.online-convert
Using this GIF to AVI online converter, you do not have to deal with many advertisements; furthermore, the conversion speed is very high. Thus, with this converter, you can work on lengthy projects efficiently. In addition, the website also offers a lot of options that you can choose from while converting a file. This software also allows you to crop, change the bitrate of the video, change the rate of the frame, etc. The uploaded files will be secure and safe as the website follows strict confidentiality norms.
Main Features:
- This converter website offers a drag-drop feature that allows users to upload a file quickly.
- The facility to solve your queries is available through various frequently asked questions.

· Convertio
Using Convertio will have to follow a few initial steps to change GIF to AVI file extension. However, to convert GIF files to AVI online, you are not required to download any external software, saving your computer memory and time. It is effortless to download converted files on your system, as the website also provides API services. The website also gives an effective option to store and save data over cloud services through DropBox, Google Drive, etc.
Main Features:
- The site provides excellent options for video cutting, rotating, clipping, filtering, etc.
- Choose from different languages; thus, converting a file would be more comfortable and practical.

· File-conversion
The website has excellent UI and UX features. Allows users to convert GIF to AVI file format within a short time. Once you can convert GIF to AVI with this software, you will be able to download the file straight into your PC. The website also grants the opportunity to delete the data once it gets converted, and you can then download the file.
Main Features:
- This converter web portal gives you the chance to make several changes to the file you plan to convert.
- There are no unnecessary advertisements, which speeds up the conversion process.

Part 2: Best 4 GIFs to AVI Software
· Filmora.
Wondershare Filmora is editing and creating software specially designed for Windows and Mac PCs that is also an excellent GIF to AVI converter. In addition, it is highly compatible with a variety of media formats and gives you access to a variety of editing options. It also provides you with high-quality output files and uses various effects, transitions, overlays, graphics, and titles to create videos.
This software also supports numerous formats: MPEG, MP4, AVI, WebM, etc. It extracts the audio or converts them into MP3 format. In addition, it outputs high-quality videos, which include ones in 4K resolution.
Pros
It is compatible with various media formats
It comes with a built-in video editing tool
Receive high-quality output files
Grant users with access to multiple video editing options
Cons
Sometimes it takes extra time to generate the output files
Some of the sample files require a download

· ACDSee
This GIF to AVI converter software can share, manage, and edit photographs. In addition, its interface is, however, similar to those of other similar products, so if you have previous experience in using any editing software, this is no different. This software is also highly improbable. Thus, you will not have any difficulty using ACDSee. Its working area is usually divided into three sections:
- a left panel where you can browse folders
- a right panel with the properties
- the prominent viewing area in the middle.
Pros
It is elementary to use
It has a very lovely user-interface
An extensive collection of tools
Quick browsing through photos is allowed
Uploading photographs to the cloud through photos is supported
Cons
There are not as many features as other video editing tools
Its corrections are not always effective

· Free Video Editor
If you need a GIF to AVI converter that works free of charge, you need to try this software. This software program allows you to slice your video files and convert them into popular video formats. It also enables users to perform some basic edits and supports AVI, GIF, MKV, and MP4 for the output. It also gives users the possibility of extracting the audio stream of your video files and saving it as an MP3 file. In addition, users can load any MPG, MKV, AVI, WEBM, MP$, or WMV files split easily into as many clips as possible.
Pros
Has an accurate cutting point
It has useful features that can help to maximize the cutting process
Capabilities for rotation
Tag editor
Allows the conversion to some of the most well-known video formats
Cons
Some complex editing features are lacking
Unable to customize output profiles

· Easy GIF Animator
The main intention of this software is to create animations for your web pages. In addition, this software has a modern interface, in the style of Microsoft Office’s latest versions. However, some wizards can help to guide users of this software.
Pros
Helpful in creating graphical banners for advertising
Perfect for animation frame by frame
Convert video to GIF animations
Ideal for converting GIF to AVI
Add effects to your animations
Cons
Key-framing animation unsupported
Layers are not supported

Part 3: How to Convert GIF to AVI?
Convert GIF to AVI Using Online Converters
Convertio is an online file format converting tool compatible with a wide range of input and output formats, including GIF to AVI.
Here is a step-by-step guide of this GIF to AVI converter:

Step 1: Visit Convertio in your browser and select and upload a GIF file from your channel, like URL, computer, Dropbox, and Google Drive.
Step 2: Select AVI from the dropdown format option and click the Convert button to begin converting GIF to AVI.
Step 3: When completed, download the AVI files to your computer or send them to the cloud service
Save GIF as AVI through GIF to AVI Software
One of the primary reasons we recommend Wondershare Filmora is that online GIF converters can be unreliable. This implies that there must be a stable internet connection and power supply. In addition, Filmora software is safe and secure, which is a common concern with online tools.
Follow the steps below to turn GIF into AVI:
Step 1: Install Filmora on Mac or Windows
Download and Install Filmora software on your PC. Double click the .dmg file and follow all the instructions to install this software.
Step 2: Begin New Project
Click on the Filmora icon to start a new project and when it is open, click “New Project,” and make sure you select the “Project Settings” from the dropdown options (desired video aspect ratio, resolution and frame rate based on the sharing platform)

Step 3: Import Files to Convert
Start a new project by importing the GIF you want to convert to the timeline. A prompt project setting will pop up if the media aspect ratio and resolution do not match. Make sure you click on “DON’T CHANGE” to maintain your earlier setting

Step 4: Finish the Process and Export
Click on export to convert the video and select the AVI file format to save your file

Finally, save your GIF to AVI video on your preferred location
Conclusion
Thus, we learned:
- The process of converting GIF files to AVI using online tools
- How to use downloaded software to turn GIF to AVI
- It also provided a list of the top best software and online tool you can choose from to convert your GIF to AVIvery quickly.
- Lastly, it recommended Filmora as the top-most GIF to AVI converterdue to its reliability and safety commitment.
Introduction
It will be much fun if you get to assort most of your GIF files and turn them into full-length streaming videos. However, many conversion websites and software on the internet offer you the facility to convert GIF to AVI file format with ease of use. With these online tools, you also get the opportunity to upload the converted file on various social media channels. Unlike real video, these files have less memory and are easy to save on your device or hard disk.
Although both AVI and GIF are two commonly used file formats, they are different. First of all, GIF stands for Graphical Interchange Format, and it is an image format that can store several consequent or dis-consequent pictures into an animated file. In contrast, AVI is a lossless video file format. This guide focuses on turning GIF animated images into AVI videos and gives a list of the best GIF to AVI converters you can choose from.
In this article
Part 1: Best 4 Online GIFs to AVI Converters
Part 2: Best 4 GIFs to AVI Software
Part 3: How to Convert GIF to AVI?

Part 1: Best 4 Online GIFs to AVI Converters
· Cloudconvert
One prominent feature of this tool is the interface of this GIF to AVI converter is straightforward to follow. However, you don’t have to download any plug-ins or software during the file conversion process with this online tool. This online website is SSL protected; thus, you will not need to deal with worms or viruses when downloading your converted file. In addition, you can also choose from more than 200 different file formats. Moreso, you get a chance to contact webmasters through email channels.
Main Features:
- There is an API function that you can use the site on several of your laptops, mobile devices, etc.
- It offers users various platforms to upload files for conversion through URL, PC, DropBox, Google Drive, etc.

· Video.online-convert
Using this GIF to AVI online converter, you do not have to deal with many advertisements; furthermore, the conversion speed is very high. Thus, with this converter, you can work on lengthy projects efficiently. In addition, the website also offers a lot of options that you can choose from while converting a file. This software also allows you to crop, change the bitrate of the video, change the rate of the frame, etc. The uploaded files will be secure and safe as the website follows strict confidentiality norms.
Main Features:
- This converter website offers a drag-drop feature that allows users to upload a file quickly.
- The facility to solve your queries is available through various frequently asked questions.

· Convertio
Using Convertio will have to follow a few initial steps to change GIF to AVI file extension. However, to convert GIF files to AVI online, you are not required to download any external software, saving your computer memory and time. It is effortless to download converted files on your system, as the website also provides API services. The website also gives an effective option to store and save data over cloud services through DropBox, Google Drive, etc.
Main Features:
- The site provides excellent options for video cutting, rotating, clipping, filtering, etc.
- Choose from different languages; thus, converting a file would be more comfortable and practical.

· File-conversion
The website has excellent UI and UX features. Allows users to convert GIF to AVI file format within a short time. Once you can convert GIF to AVI with this software, you will be able to download the file straight into your PC. The website also grants the opportunity to delete the data once it gets converted, and you can then download the file.
Main Features:
- This converter web portal gives you the chance to make several changes to the file you plan to convert.
- There are no unnecessary advertisements, which speeds up the conversion process.

Part 2: Best 4 GIFs to AVI Software
· Filmora.
Wondershare Filmora is editing and creating software specially designed for Windows and Mac PCs that is also an excellent GIF to AVI converter. In addition, it is highly compatible with a variety of media formats and gives you access to a variety of editing options. It also provides you with high-quality output files and uses various effects, transitions, overlays, graphics, and titles to create videos.
This software also supports numerous formats: MPEG, MP4, AVI, WebM, etc. It extracts the audio or converts them into MP3 format. In addition, it outputs high-quality videos, which include ones in 4K resolution.
Pros
It is compatible with various media formats
It comes with a built-in video editing tool
Receive high-quality output files
Grant users with access to multiple video editing options
Cons
Sometimes it takes extra time to generate the output files
Some of the sample files require a download

· ACDSee
This GIF to AVI converter software can share, manage, and edit photographs. In addition, its interface is, however, similar to those of other similar products, so if you have previous experience in using any editing software, this is no different. This software is also highly improbable. Thus, you will not have any difficulty using ACDSee. Its working area is usually divided into three sections:
- a left panel where you can browse folders
- a right panel with the properties
- the prominent viewing area in the middle.
Pros
It is elementary to use
It has a very lovely user-interface
An extensive collection of tools
Quick browsing through photos is allowed
Uploading photographs to the cloud through photos is supported
Cons
There are not as many features as other video editing tools
Its corrections are not always effective

· Free Video Editor
If you need a GIF to AVI converter that works free of charge, you need to try this software. This software program allows you to slice your video files and convert them into popular video formats. It also enables users to perform some basic edits and supports AVI, GIF, MKV, and MP4 for the output. It also gives users the possibility of extracting the audio stream of your video files and saving it as an MP3 file. In addition, users can load any MPG, MKV, AVI, WEBM, MP$, or WMV files split easily into as many clips as possible.
Pros
Has an accurate cutting point
It has useful features that can help to maximize the cutting process
Capabilities for rotation
Tag editor
Allows the conversion to some of the most well-known video formats
Cons
Some complex editing features are lacking
Unable to customize output profiles

· Easy GIF Animator
The main intention of this software is to create animations for your web pages. In addition, this software has a modern interface, in the style of Microsoft Office’s latest versions. However, some wizards can help to guide users of this software.
Pros
Helpful in creating graphical banners for advertising
Perfect for animation frame by frame
Convert video to GIF animations
Ideal for converting GIF to AVI
Add effects to your animations
Cons
Key-framing animation unsupported
Layers are not supported

Part 3: How to Convert GIF to AVI?
Convert GIF to AVI Using Online Converters
Convertio is an online file format converting tool compatible with a wide range of input and output formats, including GIF to AVI.
Here is a step-by-step guide of this GIF to AVI converter:

Step 1: Visit Convertio in your browser and select and upload a GIF file from your channel, like URL, computer, Dropbox, and Google Drive.
Step 2: Select AVI from the dropdown format option and click the Convert button to begin converting GIF to AVI.
Step 3: When completed, download the AVI files to your computer or send them to the cloud service
Save GIF as AVI through GIF to AVI Software
One of the primary reasons we recommend Wondershare Filmora is that online GIF converters can be unreliable. This implies that there must be a stable internet connection and power supply. In addition, Filmora software is safe and secure, which is a common concern with online tools.
Follow the steps below to turn GIF into AVI:
Step 1: Install Filmora on Mac or Windows
Download and Install Filmora software on your PC. Double click the .dmg file and follow all the instructions to install this software.
Step 2: Begin New Project
Click on the Filmora icon to start a new project and when it is open, click “New Project,” and make sure you select the “Project Settings” from the dropdown options (desired video aspect ratio, resolution and frame rate based on the sharing platform)

Step 3: Import Files to Convert
Start a new project by importing the GIF you want to convert to the timeline. A prompt project setting will pop up if the media aspect ratio and resolution do not match. Make sure you click on “DON’T CHANGE” to maintain your earlier setting

Step 4: Finish the Process and Export
Click on export to convert the video and select the AVI file format to save your file

Finally, save your GIF to AVI video on your preferred location
Conclusion
Thus, we learned:
- The process of converting GIF files to AVI using online tools
- How to use downloaded software to turn GIF to AVI
- It also provided a list of the top best software and online tool you can choose from to convert your GIF to AVIvery quickly.
- Lastly, it recommended Filmora as the top-most GIF to AVI converterdue to its reliability and safety commitment.
A Comprehensive Guide on Converting Slo-Mo Videos to Normal Speed Videos On iPhone
Thanks to the eccentric and offbeat elements, slow-motion videos have become the super-fun, state-of-the-art trend. Whether you’re in the bar trying to click the aesthetic, cinematic video or capture cool, unique, and enticing birthday moments, you can always rely on the slow-mo feature.

But do you ever feel like converting the slow-motion video in your iOS device to a normal video? Perhaps you thought the slow-mo video would be more attractive, but it’s not, or maybe you want to determine how to remove slow-motion from a video iPhone.
No matter the reason, there are numerous ways to remove slow motion from iPhone video. In this article, you’ll learn the various methods to convert slow-motion video into a regular video on your iPhone or iPad. Also, learn the steps involved in achieving it.
So, let’s start.
How To Convert Slow Motion Video to Normal on iPhone and iPad
Due to the slow-motion and Time-lapse modes that are built into the iPhone, people may quickly record slo-mo and time-lapse clips using their iOS smartphone cameras.
Access the iPhone camera, select Slo-mo, press the Record icon once to begin filming, and then press it once more to stop. This will create a slo-mo video.
Do you ever wish to get your video’s slow motion removed? How to convert slow-motion video to normal on an iPhone? Well, here’s your answer.
Method 1. Using the Photos App
The Photos app is an in-built app for iPhone and iPad that features editing capabilities like rotation, resizing, and auto-enhancement, in addition to helping you manage videos and images.

You may quickly and effortlessly turn a slow-mo video into a regular-speed one with the Photos app’s tucked-away slow-motion converter feature. Additionally, there won’t be any quality loss in your video.
And here are the steps on how to remove slow-mo from iPhone video using the Photos app on an iPad or iPhone to turn it to normal speed.
Step1: Take your iPad or iPhone, navigate to the Photos app, open it, and then go to the bottom to hit the Albums tab.
Step2: Choose the Slo-mo option, and subsequently select the video you wish to turn into a regular speed video. Go to the top right corner of the screen and hit the Edit button.
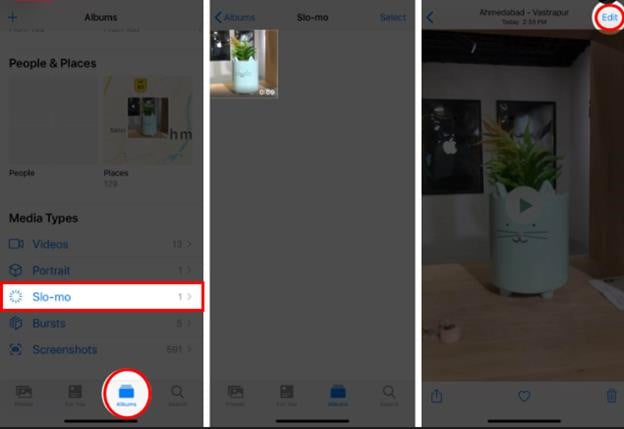
Step3: If you look under the timeline, you’ll find vertical lines. Here, the area with apart spaces signifies slow motion.
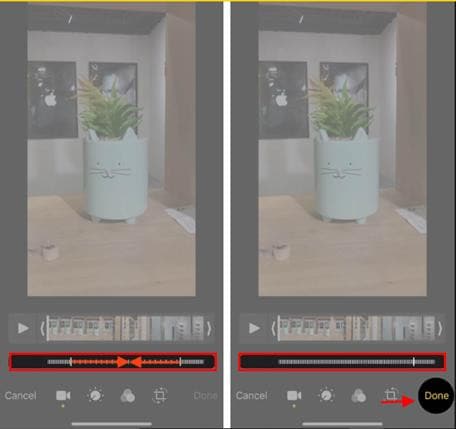
Step4: To learn how to remove slow mo from iPhone video is to learn how to turn it into regular speed. To do so, select the slow-motion bar and drag it towards the other one to position the lines at a close distance.
Step5: When finished, hit the Done button and save this video. However, if you think this change was unnecessary or incorrect, you can discard it by clicking on Edit → Revert → Revert To Original.

Editing Tip
- The Photos app on iPhone doesn’t allow you to convert any video shot at 24fps or 30fps to slow motion.
- You cannot reduce or decrease the overall size of the video after conversion.
Pros & Cons
Pros
- It is a built-in app on every iOS device.
- Saves the hassle of downloading any third-party app.
- No charges are applicable for using this app.
- Excellent slow-mo video convertor.
Cons
- Limited speed adjustment for the conversion of slow-mo videos into regular videos.
Method 2: Using Other Converter Apps
You may think that converting slow-mo video to a regular speed video on your iPad or iPhone is convenient, but there’s a drawback too. The method mentioned above can only help you with minimalistic speed changes, which may not give you the desired result.
However, other converter apps also help you change slow-mo video to regular iPhone video. These apps work seamlessly on your PC or Mac to turn your slow-mo videos on the iPhone or Mac to normal-speed video using customized and high-resolution settings.
Overview of The Apps
| Particulars | iMovie | Slow-Fast Motion Video Editor |
|---|---|---|
| Type (versatile or specialized) | Versatile | Specialized |
| Supported OS | iOS, Mac | iOS, Mac |
| Average Rating | 3.9/5 | 4.7/5 |
| Price | Free | Free |
| Best for | Video editing with cinematic effects | Slo-mo video conversion |
1) iMovie
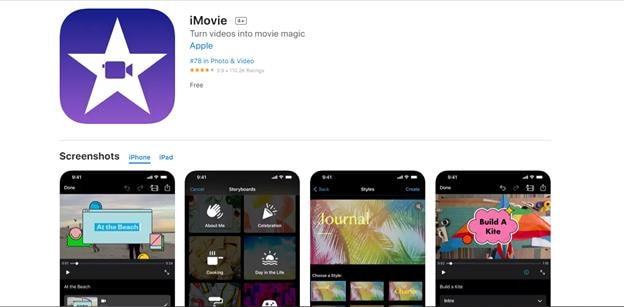
iMovie is an excellent option if you’re looking for an application to modify a video with additional tools and convert the slow-mo to a regular pace. Among the top video converters for the iPhone is iMovie.
It offers a wide range of tools and capabilities that allow you to change the video transition, audio, and speed, add music, animated text, video overlay effects, normal video effects, and more. Additionally, it aids users in producing stunning films and commercials in a Cinematic manner.
iMovie could convert slow-mo footage to normal speed, in case you didn’t know. Did you ever attempt to change slow mot to regular speed in iMovie? With the use of iMovie, how can slow-motion video be made normally on an iPhone?
Here are the instructions.
Step1: Open the iMovie app, click on the ‘Create Project’ option, → tap on ‘Movie → Media → Video.

Step2: Tap on the slow-mo option, select the slow-motion video you want to convert and hit the ‘Create Movie’ option.
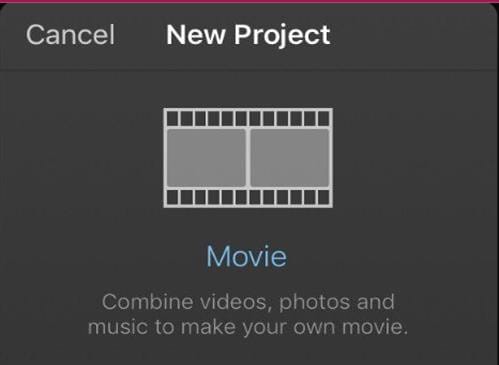
Step3: Get to know the editing options by clicking on the timeline. Then, click on the clock (speed) icon. At the beginning of the lines, you’ll find a turtle. It demonstrates slow motion. Plus, the number right behind the rabbit at the end signifies the speed.

Step4: To turn this slow-motion video into a regular speed video, drag and slide the speed control slider until the number turns 1x.
Step5: To save the changes, tap on the Done option. Subsequently, edit the video as per your preference.
2) Slow-Fast Motion Video Editor
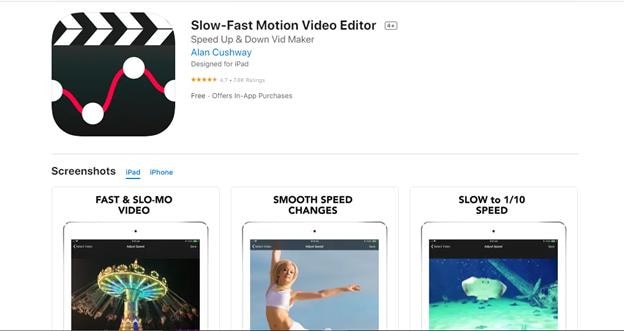
This slow-mo video converter app helps you slow down or speed up any slow-motion video without any watermark and charges. This free app supports both landscape or portrait operation, unlimited video length, and corrected audio pitch.
The application is convenient to use and seamless to speed up or slow down any parts or clips of your videos. Without charging a penny, this app meets the users’ expectations. If you’re wondering how to use this converter app, here’s a step-by-step guide:
Method 3. Using Third-Party Online Tools
The smartphone sector’s most cutting-edge functionalities can be found on iPhones. Users may capture slow-motion videos, for instance. However, you may consider accelerating the slo-mo movie to regular video speed once it has been recorded.
Using your smartphone, how would you go about doing that? Well, we have seen that using the built-in Photos app and converter apps like iMovie can help, but can they really provide the level of customization and outcomes you need?
When things get professional and the expectations are too high, it’s best to use third-party online tools. So, here are a few practical choices:
Overview of the Online Tools
| Particulars | KAPWING | Clideo | EZGIF |
|---|---|---|---|
| Supported File Format | .AVI, .FLV, 3GP, and other edge file types. | MP4, MOV, WMV, AVI, WEBM, FLV, MKV, MPG, MPEG, MTS. | MNG files |
| Watermark | Not Available | Only in Free version | Not Available |
| Available Speed Option | As fast as 4x for an accelerated video | 0.25 times to 2 times | 0.25 times to 2 times |
| Time Consuming | No | Moderate | No |
1) KAPWING
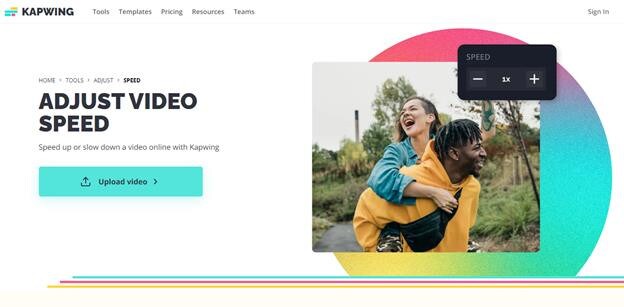
Kapwing is a tool for group film editing that enables people to collaborate to produce original videos. For individuals to create the ideal video, Kapwing offers a collection of pre-built themes, stock footage, and materials.
Kapwing acts as a digital office solution that enables individuals to organize all of their resources in one location and work together on projects utilizing sharing features. Amid its vast range of features, its slow-mo converter is the most famous and widely used one.
- Rating: 4.1/5
- Price: Plan starts at $20 per month
Step-By-Step Guide To Convert Slow-Mo on Iphone Using Kapwing App
Step1: First, download and install the Kapwing app from the App Store.
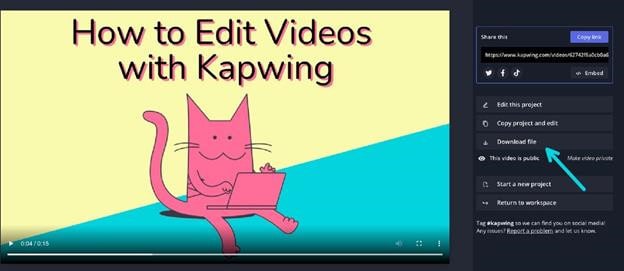
Step2: Upload the slow-mo video that you want to speed up.
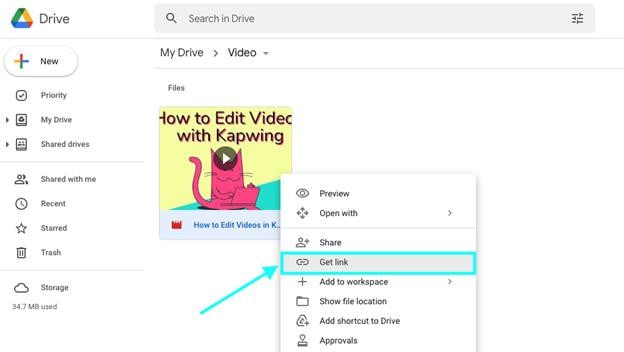
![]()
Note: Kapwing also lets you speed up any slow-mo video present on TikTok, Twitter, or YouTube.
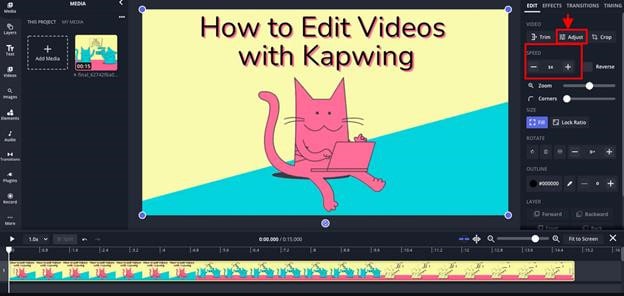
Step3: Perform the video clip speed adjustment by utilizing the Kapwing sidebar. You can accelerate the video clip speed up to four times the original speed. If not, you can play in every level in between.
Step4: Finally, click on the Export option, and the final video clip with all speed adjustments will be generated within a few seconds.
2) Clideo
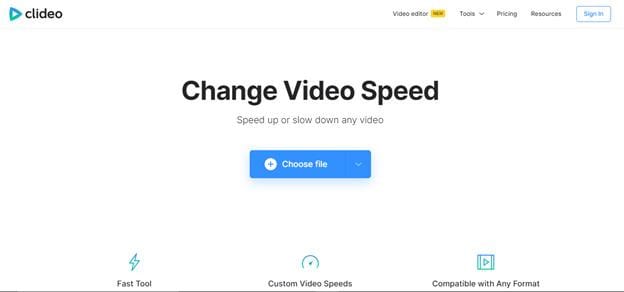
Among the finest free tools for rapid photo or video editing is Clideo. You can start upgrading your material by uploading files in a wide range of formats to their site.
Limitless customization is possible with the paid version for just $9 a month. The capabilities, though, aren’t as varied as those offered by rivals, and there aren’t any mobile apps for people who want to generate material while on the go.
- Ratings: 4.3/5
- Price: Starts at $9 per month
Step-By-Step Guide To Convert Slow-Mo on Iphone Using Clideo App:
Step1: From your computer (Mac) or mobile device (iPhone), upload a video. You can also add from a Dropbox or Google Drive account.
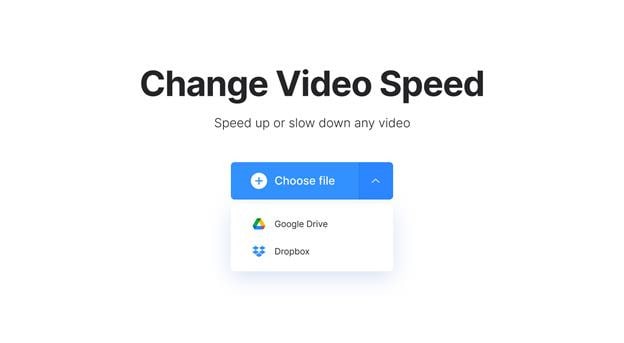
Step2: Select to speed up the video after it has been recorded. Then, if required, muffle its sound and alter the file type.
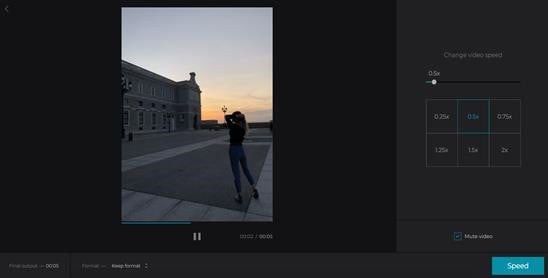
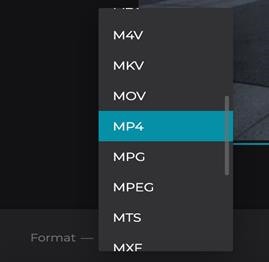
Step3: The video can be seen directly in your browser. Click “Download” after you are finished and delighted with your creation.

3) EZGIF
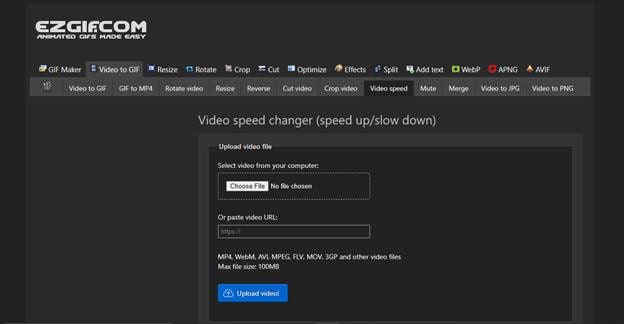
EZGIF is a free online editing tool that enables individuals to change the playback speed of any video. Not only does it effectively convert your slow-mo video on an iOS device to a normal speed video, but it also comes with many other features (later on that). The website has a simple, outdated interface, but except for that, it’s a fine app for beginners.
Step-By-Step Guide To Convert Slow-Mo on Iphone Using Clideo App:
Step1: Upload the video clip and choose a speed multiplier to start using this program.
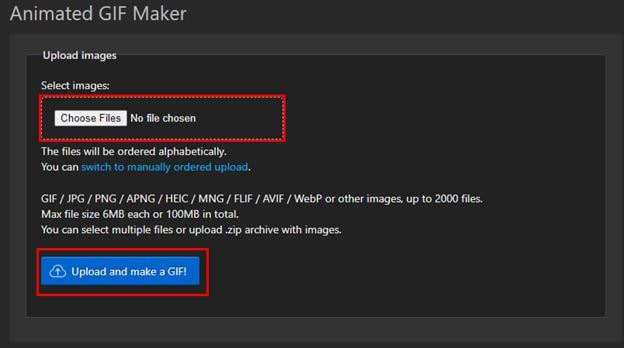
Step2: A number less than one will slow down playback; a number greater than one will quicken it.
Step3: Thus, input 0.5 to run the program at 1/2 its normal speed, and so forth.
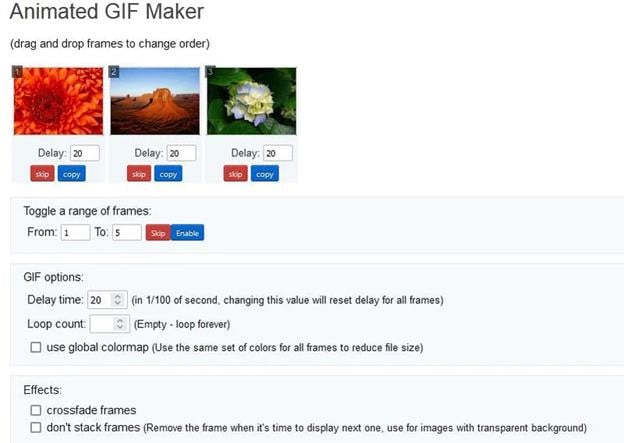
Step4: You can preserve the audio track’s original tempo, vary the speed along with the video, or silence the audio entirely.
Convert Your Slo-Mo Videos Into Regular Ones In a Few Simple Steps With Filmora
Filmora is a leading online video editing software that has become the preferred choice of all professionals and amateurs. From everyday needs to something formal, it helps you edit videos for every occasion.
You can change pace swiftly or consistently in Filmora and vary the pace of the audio or video recordings. Use the Speed Ramping tool in Filmora. If you want to remove slow-mo or add it, you can use Filmora’s speed ramping feature anytime.
Free Download For Win 7 or later(64-bit)
Free Download For macOS 10.14 or later
We will share some details on how to use this feature here, but for a comprehensive, detailed guide, read to the end.
Step-By-Step Guide to Speed Changing
Step1Launch the Video
Activate Wondershare Filmora on your computer. To increase the speed and runtime of the movie, explore the desired video and enter it into the software. You can drag and drop the movie onto the interface as well.
Step2Speed Adjustment

Press the left mouse button as soon as the video shows on the screen. And click the speed tab in the toolbar. There is then a contextual menu displayed. To double the rate, select 2x from the “Fast” menu. The participant may use any fundamental that has more than one.
Step3Save & Export
When finished, select “Save Project” from the list of available options in the “File” panel. Press “Save” after renaming the project.
Using Filmora’s “Export” feature, selecting “Export,” and then modifying the file name is the alternative way to export the video. A device, a system, or even YouTube can receive the exported video. Next, click “Export.”
Bonus Tips. 2 More Methods to Normalize Your Video Speed
Filmora offers you 2 more advanced methods to increase or decrease the speed of the video, one is uniform speed and the other, is speed ramping . Want to learn more about changing speed in Filmora, watch this video tutorial to get a quick start on using them.
Conclusion
That’s basically it! So that’s how you turn any slow-motion video into a regular one.
This article covers all major techniques to convert videos to slow motion on iOS and Mac. You can pick one of them to convert video to slow motion or to slow down slow motion.
So, are you now prepared to convert slow-motion videos on your iPad or iPhone device to ordinary speed? Try the Filmora video editor if you’re looking for something really professional.
It makes it much easier to convert slow-motion videos from your smartphone or tablet to regular speed. It has powerful video editing features and is more comfortable to use. So, get started today!
Method 2: Using Other Converter Apps
You may think that converting slow-mo video to a regular speed video on your iPad or iPhone is convenient, but there’s a drawback too. The method mentioned above can only help you with minimalistic speed changes, which may not give you the desired result.
However, other converter apps also help you change slow-mo video to regular iPhone video. These apps work seamlessly on your PC or Mac to turn your slow-mo videos on the iPhone or Mac to normal-speed video using customized and high-resolution settings.
Overview of The Apps
| Particulars | iMovie | Slow-Fast Motion Video Editor |
|---|---|---|
| Type (versatile or specialized) | Versatile | Specialized |
| Supported OS | iOS, Mac | iOS, Mac |
| Average Rating | 3.9/5 | 4.7/5 |
| Price | Free | Free |
| Best for | Video editing with cinematic effects | Slo-mo video conversion |
1) iMovie

iMovie is an excellent option if you’re looking for an application to modify a video with additional tools and convert the slow-mo to a regular pace. Among the top video converters for the iPhone is iMovie.
It offers a wide range of tools and capabilities that allow you to change the video transition, audio, and speed, add music, animated text, video overlay effects, normal video effects, and more. Additionally, it aids users in producing stunning films and commercials in a Cinematic manner.
iMovie could convert slow-mo footage to normal speed, in case you didn’t know. Did you ever attempt to change slow mot to regular speed in iMovie? With the use of iMovie, how can slow-motion video be made normally on an iPhone?
Here are the instructions.
Step1: Open the iMovie app, click on the ‘Create Project’ option, → tap on ‘Movie → Media → Video.

Step2: Tap on the slow-mo option, select the slow-motion video you want to convert and hit the ‘Create Movie’ option.

Step3: Get to know the editing options by clicking on the timeline. Then, click on the clock (speed) icon. At the beginning of the lines, you’ll find a turtle. It demonstrates slow motion. Plus, the number right behind the rabbit at the end signifies the speed.

Step4: To turn this slow-motion video into a regular speed video, drag and slide the speed control slider until the number turns 1x.
Step5: To save the changes, tap on the Done option. Subsequently, edit the video as per your preference.
2) Slow-Fast Motion Video Editor

This slow-mo video converter app helps you slow down or speed up any slow-motion video without any watermark and charges. This free app supports both landscape or portrait operation, unlimited video length, and corrected audio pitch.
The application is convenient to use and seamless to speed up or slow down any parts or clips of your videos. Without charging a penny, this app meets the users’ expectations. If you’re wondering how to use this converter app, here’s a step-by-step guide:
Method 3. Using Third-Party Online Tools
The smartphone sector’s most cutting-edge functionalities can be found on iPhones. Users may capture slow-motion videos, for instance. However, you may consider accelerating the slo-mo movie to regular video speed once it has been recorded.
Using your smartphone, how would you go about doing that? Well, we have seen that using the built-in Photos app and converter apps like iMovie can help, but can they really provide the level of customization and outcomes you need?
When things get professional and the expectations are too high, it’s best to use third-party online tools. So, here are a few practical choices:
Overview of the Online Tools
| Particulars | KAPWING | Clideo | EZGIF |
|---|---|---|---|
| Supported File Format | .AVI, .FLV, 3GP, and other edge file types. | MP4, MOV, WMV, AVI, WEBM, FLV, MKV, MPG, MPEG, MTS. | MNG files |
| Watermark | Not Available | Only in Free version | Not Available |
| Available Speed Option | As fast as 4x for an accelerated video | 0.25 times to 2 times | 0.25 times to 2 times |
| Time Consuming | No | Moderate | No |
1) KAPWING

Kapwing is a tool for group film editing that enables people to collaborate to produce original videos. For individuals to create the ideal video, Kapwing offers a collection of pre-built themes, stock footage, and materials.
Kapwing acts as a digital office solution that enables individuals to organize all of their resources in one location and work together on projects utilizing sharing features. Amid its vast range of features, its slow-mo converter is the most famous and widely used one.
- Rating: 4.1/5
- Price: Plan starts at $20 per month
Step-By-Step Guide To Convert Slow-Mo on Iphone Using Kapwing App
Step1: First, download and install the Kapwing app from the App Store.
Step2: Upload the slow-mo video that you want to speed up.
![]()
Note: Kapwing also lets you speed up any slow-mo video present on TikTok, Twitter, or YouTube.

Step3: Perform the video clip speed adjustment by utilizing the Kapwing sidebar. You can accelerate the video clip speed up to four times the original speed. If not, you can play in every level in between.

Step4: Finally, click on the Export option, and the final video clip with all speed adjustments will be generated within a few seconds.

2) Clideo

Among the finest free tools for rapid photo or video editing is Clideo. You can start upgrading your material by uploading files in a wide range of formats to their site.
Limitless customization is possible with the paid version for just $9 a month. The capabilities, though, aren’t as varied as those offered by rivals, and there aren’t any mobile apps for people who want to generate material while on the go.
- Ratings: 4.3/5
- Price: Starts at $9 per month
Step-By-Step Guide To Convert Slow-Mo on Iphone Using Clideo App:
Step1: From your computer (Mac) or mobile device (iPhone), upload a video. You can also add from a Dropbox or Google Drive account.

Step2: Select to speed up the video after it has been recorded. Then, if required, muffle its sound and alter the file type.


Step3: The video can be seen directly in your browser. Click “Download” after you are finished and delighted with your creation.

3) EZGIF

EZGIF is a free online editing tool that enables individuals to change the playback speed of any video. Not only does it effectively convert your slow-mo video on an iOS device to a normal speed video, but it also comes with many other features (later on that). The website has a simple, outdated interface, but except for that, it’s a fine app for beginners.
Step-By-Step Guide To Convert Slow-Mo on Iphone Using Clideo App:
Step1: Upload the video clip and choose a speed multiplier to start using this program.

Step2: A number less than one will slow down playback; a number greater than one will quicken it.
Step3: Thus, input 0.5 to run the program at 1/2 its normal speed, and so forth.

Step4: You can preserve the audio track’s original tempo, vary the speed along with the video, or silence the audio entirely.
Convert Your Slo-Mo Videos Into Regular Ones In a Few Simple Steps With Filmora
Filmora is a leading online video editing software that has become the preferred choice of all professionals and amateurs. From everyday needs to something formal, it helps you edit videos for every occasion.
You can change pace swiftly or consistently in Filmora and vary the pace of the audio or video recordings. Use the Speed Ramping tool in Filmora. If you want to remove slow-mo or add it, you can use Filmora’s speed ramping feature anytime.
Free Download For Win 7 or later(64-bit)
Free Download For macOS 10.14 or later
We will share some details on how to use this feature here, but for a comprehensive, detailed guide, read to the end.
Step-By-Step Guide to Speed Changing
Step1Launch the Video
Activate Wondershare Filmora on your computer. To increase the speed and runtime of the movie, explore the desired video and enter it into the software. You can drag and drop the movie onto the interface as well.
Step2Speed Adjustment

Press the left mouse button as soon as the video shows on the screen. And click the speed tab in the toolbar. There is then a contextual menu displayed. To double the rate, select 2x from the “Fast” menu. The participant may use any fundamental that has more than one.
Step3Save & Export
When finished, select “Save Project” from the list of available options in the “File” panel. Press “Save” after renaming the project.
Using Filmora’s “Export” feature, selecting “Export,” and then modifying the file name is the alternative way to export the video. A device, a system, or even YouTube can receive the exported video. Next, click “Export.”
Bonus Tips. 2 More Methods to Normalize Your Video Speed
Filmora offers you 2 more advanced methods to increase or decrease the speed of the video, one is uniform speed and the other, is speed ramping . Want to learn more about changing speed in Filmora, watch this video tutorial to get a quick start on using them.
Conclusion
That’s basically it! So that’s how you turn any slow-motion video into a regular one.
This article covers all major techniques to convert videos to slow motion on iOS and Mac. You can pick one of them to convert video to slow motion or to slow down slow motion.
So, are you now prepared to convert slow-motion videos on your iPad or iPhone device to ordinary speed? Try the Filmora video editor if you’re looking for something really professional.
It makes it much easier to convert slow-motion videos from your smartphone or tablet to regular speed. It has powerful video editing features and is more comfortable to use. So, get started today!
Do You Know You Can Use Mobile Apps to Apply Camera Effects to Your Videos? Many Smartphone Applications Allow You to Apply Camcorder Effects
Nowadays, tools available on the internet make it easy to apply effects and overlays. These effects can give your videos a whole new look and feel. It wasn’t easy to apply effects in the past, but it has become much simpler with the advancements. Each video effect offers a unique style and can completely transform the video.
Even if you want to create a vintage look or add glitches, these tools can do it for you. There are many popular video filters that you use today. One such popular filter is the camcorder effect that you can apply to your video. This effect creates an old VCR video look with noise and distortion. You can try many apps, which are mentioned in this article, to use such effects.
Part 1: How Can the VHS Effect Be Beneficial in the Current Film Industry?
VHS camcorder overlay is not just a filter to apply to your videos for fun. There are many advantages of VHS effects that are discussed in the portion below.
1. Retro Aesthetics
The VHS effect taps into nostalgia and retro aesthetics. This effect captures the interest of viewers who have a fondness for the past. It creates a sense of familiarity and nostalgia in your video. Such effects further add emotions by connecting with audiences on an emotional level.
2. Differentiation and Uniqueness
In a crowded media landscape, the VHS look helps films and videos stand out. Its distinct visual style catches the eye and makes content more memorable. Furthermore, it increases the likelihood of being noticed and shared by people on the internet.
3. Genre-Specific Atmosphere
These effects are closely associated with specific genres like horror and retro. By using these effects, you can enhance the atmosphere and mood of the video. Additionally, improving the overall storytelling and engagement in the intended genre experience.
4. Historical Context
When films are set in specific time periods, this effect mimics the visual aesthetics of that era. It helps establish and reinforce the historical context of your video. Moreover, it provides an authentic representation that enhances the audience’s engagement.
5. Budget-Friendly
The VHS camera effect offers a budget-friendly way to achieve a vintage look. Additionally, without requiring post-production resources, you can achieve the look. It is particularly valuable for independent filmmakers and artists with limited budgets. These effects allow them to create visually appealing content within their budget.
6. Experimental and Creative
VHS effects provide a unique canvas for artistic expression and creativity. Filmmakers and video artists can distort reality and challenge traditional aesthetics. Moreover, enthusiasts can go creative and experiment with these effects in a new way.
Part 2: Some Top Applications For Creating The Best VHS Camera Effect
You don’t have to worry, as there are many apps that can apply your favorite effects to your video. Moreover, if you are specifically looking to apply a camcorder vintage effect, try one of these.
- 1 - Camcorder - Record VHS Home Videos [iOS]
- 2 - True VHS - 90s Vintage Camera [iOS]
- 3 - Vaporgram Glitch Photo Editor [Android]
- 4 - Film Cam -Vintage Roll Camera [Android]
- 5 - Rarevision VHS Lite - 80s Cam [Android | iOS]
- 6 - Glitch Video Effect - Live VHS [iOS]
- 7 - VHS Video Editor, Vintage Cam [iOS]
1. Camcorder - Record VHS Home Videos [iOS ]
Camcorder – Record VHS Home Videos is a camcorder video maker app, as its name suggests. You can upload your video and give it the old 80s feel. It gives your videos the authentic camcorder feel by adding the date and other details in your video. The good part about this app is that it is free for a while, which means there are no annoying ads. You can apply your favorite VHS camera effects to your videos ad-free.
Compatibility: iOS 7.0 and newer

2. True VHS - 90s Vintage Camera [iOS ]
True VHS is an application to give your videos the early 90s look. It is a vintage camera app replicating the old footage and creating a similar ambiance. This app adds distortion and RGB effects to your videos. Moreover, it adds PLAY SP to give more authenticity to your video clips. True VHS also offers different effects and aspect ratios that you can choose for your edits.
Compatibility: iOS 11.0 and newer

3. Vaporgram Glitch Photo Editor [Android ]
Another amazing tool that gives you the original feel of VHS footage is Vaporgram. This Android app adds glitch effects and RGB to your media files. To create a more original VHS look of your video, this tool also adds scanlines and distorted 3D effects. It is a fun app with multiple textures and filters to add to your media. This app will surely take you back to the 20th century.
Compatibility: Android 5.0 and newer

4. Film Cam -Vintage Roll Camera [Android ]
Do you want to give your videos the old vintage camera film look? Film Cam gives your videos a retro Kodak or Fujifilm look, making it a unique feature of this application. Editing your videos using this app will give your clips the exact feel of an old film look. People will surely be surprised when they know edited videos are not captured using a Kodak camera.
Compatibility: Android 6.0 and newer

5. Rarevision VHS Lite - 80s Cam [Android | iOS ]
If you wish to hold a camcorder and record a video, thinking it’s the 80s, you’re in luck. This app is for you, as Rarevision offers you the same thing you want. It will let you imagine you are in the last quarter of the 20th century. Your videos look jittery, with glitches and lines in them. Furthermore, the colors of your videos will be distorted with decreased saturation.
Compatibility: Android 5.0 and newer, iOS 9.0 and newer

6. Glitch Video Effect - Live VHS [iOS ]
You are in the right place because this is an amazing VHS camera overlay editor. Glitch Video Effect is an app available on iOS that creates a perfect retro look. This app is loaded with over 100 VHS overlays and glitch effects that you can apply to your videos. It has everything from distortion, noise, and faded colors to create a perfect VHS look. Take back your videos to the old school and create a vintage feel.
Compatibility: iOS 12.0 and newer

7. VHS Video Editor, Vintage Cam [iOS ]
Don’t confuse yourself with retro, 90s, VHS, and vintage looks. All these looks are different from each other, and this iOS app has it all. From light leaks to the original VHS look, you can add any effect to your video. With over 100 effects and overlay options, VHS Video Editor has much to offer. Your videos will look dusty, with grains and increased noise, creating an old vintage look.
Compatibility: iOS 13.0 and newer

Part 3: Introducing Wondershare Filmora: An Explicit Solution To Easy VHS Camera Filters
Wondershare Filmora Video Editor , like always, brings newer and better features to the user. This powerful tool lets you edit, adjust, and correct your video. Nevertheless, this tool can do much more than you expect. You can create your overlays, effects, and filters using this tool. It is a solution for professionals and beginners both. You can apply the existing presets to your video using Wondershare Filmora.
Apply VHS Camera Effect For Win 7 or later(64-bit)
Apply VHS Camera Effect For macOS 10.14 or later
As discussed, Filmora lets you easily open the doors of creative expression. If you think creating an overlay is difficult, apply an effect from the library. You will find many effects and overlays in the built-in library, including a VHS camera filter. You can find these specific filters in good numbers, which exceed more than 100 effects. To apply this filter to your video, you can follow the guided instructions provided.
Step 1 Create a New Project
To begin, open Wondershare Filmora on your system and click on the “New Project” tab in the main interface. This will lead you to a new window where you can start your project.

Step 2 Import and Arrange Your Video
Import your file from the system using the import media option. Next, drag and drop your video into the timeline area to organize and prepare it for editing.

Step 3 Apply VHS Overlay
Now, it’s time to apply the VHS effects to your video. Locate the “Effects” option in the top bar of the software and click on it. In the Effects panel, search for “VHS” to find a range of VHS overlays to choose from. Select the effect that suits your style and drag it onto the timeline, placing it over your video.

Step 4 Adjust the Overlay
Change the intensity of the VHS overlay by adjusting its opacity. Go to the “Effects” tab on the right side of the screen and find the effect you applied. From there, modify its transparency to achieve the desired look. Once you’re satisfied, click on the “Export” button located at the top left of the screen to save your video with the applied VHS effects.

Conclusion
In conclusion, the internet offers many video effects that can enhance the look of your videos. With the help of such tools, you can easily apply these effects and overlays to your videos. However, if you want to apply a specific effect like the VHS camera effect, you can. Wondershare Filmora is a platform where you can edit and apply different effects to your video.
1. Camcorder - Record VHS Home Videos [iOS ]
Camcorder – Record VHS Home Videos is a camcorder video maker app, as its name suggests. You can upload your video and give it the old 80s feel. It gives your videos the authentic camcorder feel by adding the date and other details in your video. The good part about this app is that it is free for a while, which means there are no annoying ads. You can apply your favorite VHS camera effects to your videos ad-free.
Compatibility: iOS 7.0 and newer

2. True VHS - 90s Vintage Camera [iOS ]
True VHS is an application to give your videos the early 90s look. It is a vintage camera app replicating the old footage and creating a similar ambiance. This app adds distortion and RGB effects to your videos. Moreover, it adds PLAY SP to give more authenticity to your video clips. True VHS also offers different effects and aspect ratios that you can choose for your edits.
Compatibility: iOS 11.0 and newer

3. Vaporgram Glitch Photo Editor [Android ]
Another amazing tool that gives you the original feel of VHS footage is Vaporgram. This Android app adds glitch effects and RGB to your media files. To create a more original VHS look of your video, this tool also adds scanlines and distorted 3D effects. It is a fun app with multiple textures and filters to add to your media. This app will surely take you back to the 20th century.
Compatibility: Android 5.0 and newer

4. Film Cam -Vintage Roll Camera [Android ]
Do you want to give your videos the old vintage camera film look? Film Cam gives your videos a retro Kodak or Fujifilm look, making it a unique feature of this application. Editing your videos using this app will give your clips the exact feel of an old film look. People will surely be surprised when they know edited videos are not captured using a Kodak camera.
Compatibility: Android 6.0 and newer

5. Rarevision VHS Lite - 80s Cam [Android | iOS ]
If you wish to hold a camcorder and record a video, thinking it’s the 80s, you’re in luck. This app is for you, as Rarevision offers you the same thing you want. It will let you imagine you are in the last quarter of the 20th century. Your videos look jittery, with glitches and lines in them. Furthermore, the colors of your videos will be distorted with decreased saturation.
Compatibility: Android 5.0 and newer, iOS 9.0 and newer

6. Glitch Video Effect - Live VHS [iOS ]
You are in the right place because this is an amazing VHS camera overlay editor. Glitch Video Effect is an app available on iOS that creates a perfect retro look. This app is loaded with over 100 VHS overlays and glitch effects that you can apply to your videos. It has everything from distortion, noise, and faded colors to create a perfect VHS look. Take back your videos to the old school and create a vintage feel.
Compatibility: iOS 12.0 and newer

7. VHS Video Editor, Vintage Cam [iOS ]
Don’t confuse yourself with retro, 90s, VHS, and vintage looks. All these looks are different from each other, and this iOS app has it all. From light leaks to the original VHS look, you can add any effect to your video. With over 100 effects and overlay options, VHS Video Editor has much to offer. Your videos will look dusty, with grains and increased noise, creating an old vintage look.
Compatibility: iOS 13.0 and newer

Part 3: Introducing Wondershare Filmora: An Explicit Solution To Easy VHS Camera Filters
Wondershare Filmora Video Editor , like always, brings newer and better features to the user. This powerful tool lets you edit, adjust, and correct your video. Nevertheless, this tool can do much more than you expect. You can create your overlays, effects, and filters using this tool. It is a solution for professionals and beginners both. You can apply the existing presets to your video using Wondershare Filmora.
Apply VHS Camera Effect For Win 7 or later(64-bit)
Apply VHS Camera Effect For macOS 10.14 or later
As discussed, Filmora lets you easily open the doors of creative expression. If you think creating an overlay is difficult, apply an effect from the library. You will find many effects and overlays in the built-in library, including a VHS camera filter. You can find these specific filters in good numbers, which exceed more than 100 effects. To apply this filter to your video, you can follow the guided instructions provided.
Step 1 Create a New Project
To begin, open Wondershare Filmora on your system and click on the “New Project” tab in the main interface. This will lead you to a new window where you can start your project.

Step 2 Import and Arrange Your Video
Import your file from the system using the import media option. Next, drag and drop your video into the timeline area to organize and prepare it for editing.

Step 3 Apply VHS Overlay
Now, it’s time to apply the VHS effects to your video. Locate the “Effects” option in the top bar of the software and click on it. In the Effects panel, search for “VHS” to find a range of VHS overlays to choose from. Select the effect that suits your style and drag it onto the timeline, placing it over your video.

Step 4 Adjust the Overlay
Change the intensity of the VHS overlay by adjusting its opacity. Go to the “Effects” tab on the right side of the screen and find the effect you applied. From there, modify its transparency to achieve the desired look. Once you’re satisfied, click on the “Export” button located at the top left of the screen to save your video with the applied VHS effects.

Conclusion
In conclusion, the internet offers many video effects that can enhance the look of your videos. With the help of such tools, you can easily apply these effects and overlays to your videos. However, if you want to apply a specific effect like the VHS camera effect, you can. Wondershare Filmora is a platform where you can edit and apply different effects to your video.
Also read:
- This Article Describes Different Ways for Removing Gif Backgrounds, How We Can Use Them, and How This Way Differs From One Another
- Working Out All Important Details of Slowing Down Video in After Effects for 2024
- New EasyHDR Review Is This a Good Choice to Create HDR
- Updated 2024 Approved What Is Animated GIF | GIF Example & Advantages of GIF
- New Looking For the Best VHS Video Effect Makers? Get To Know the Top List for 2024
- Want to Learn How to Create the Random Letter Reveal Intro? Read Through the Stages of Preparing This Effect via Filmora in This Guide for 2024
- In 2024, How to Color-Correct an S-Log Footage
- Do You Wish to Know How FFmpeg Can Remove Audio From a Video? If Yes, Keep Scrolling This Guide to Remove Audio From Video with FFmpeg and Other Alternative Software
- Updated 2024 Approved Easy Ways to Add Text Overlay to Video
- In 2024, Why Vimeo Slideshow Maker Become More and More Popular
- In 2024, Shoot Video with Virtual Green Screen
- Have You Ever Wanted to Stop Your Video and Hold on to a Single Frame to Draw Attention to a Point or for Dramatic Flair? Good News! VEGAS Pro Makes It Easy to Do Just That. In This Tutorial, Well Look at How to Make Sony Vegas Freeze Frame
- New In 2024, Easy Steps to Export Video in Filmora
- New In 2024, Art of Time Manipulation A Guide to After Effects Slow Motion Mastery
- Do You Wish to Design the Perfect Slow-Motion Video on Your Smartphone? Learn some Top-Rated Free Slow-Mo Apps for Android and iOS Users in This Article
- New 2024 Approved Time Bending Brilliance The Ultimate Slow Motion Video Makers
- 2024 Approved 12 Top Picks of Video Enhancer Software
- 2024 Approved Top 10 Mp3 Visualizers Windows, Mac, Android, iPhone & Online
- Updated Top 5 Solutions on How to Add Emojis to iPhone for 2024
- New In 2024, How to Make a Smooth Speed Ramping in Premiere Pro?
- Updated 12 Best Picks of Video Enhancer Software
- What Is MOV Format and How to Edit MOV Video Better, In 2024
- Free Ways To Split Video For Whatsapp Status On All Platforms
- In 2024, Zoom In and Out on Discord (Desktop + App + Browser Solutions)
- New Want to Make Your Canva Slideshow More Attractive? Follow the Given Discussion to Know Everything About Making the Best Slideshows with Canva
- 2024 Approved Want to Apply a Filter on Your Video Using Your iPhone or Mac? Here Are the Simple Steps to Put Add Filters on iMovie. Find Out a Better iMovie Alternative with More Filters
- Updated How to Color Grade Your Picture in LightRoom
- New In 2024, Backup and Organize Your Footage in Minutes
- New How to Do Censor Effects with Filmora for 2024
- New 2024 Approved Top 7 Best GoPro Video Editors for Mac
- How to solve MKV lagging problem in Huawei Nova Y71?
- How to Delete iCloud Account From iPhone 15 without Password?
- In 2024, 6 Methods to Mirror Apple iPhone 15 to your Windows PC | Dr.fone
- Pokémon Go Cooldown Chart On Vivo Y78+ (T1) Edition | Dr.fone
- The Top 5 Android Apps That Use Fingerprint Sensor to Lock Your Apps On Realme GT 5 Pro
- Guide on How To Erase Apple iPhone 12 Devices Entirely | Dr.fone
- 4 Ways to Fix Android Blue Screen of Death On Itel A70 | Dr.fone
- 9 Mind-Blowing Tricks to Hatch Eggs in Pokemon Go Without Walking On Realme GT 5 | Dr.fone
- How to Change Xiaomi Redmi Note 13 Pro 5G Location on Skout | Dr.fone
- How to Lock Apps on Vivo Y77t to Protect Your Individual Information
- How to Remove an AirTag from Your Apple ID Account From iPhone 14 Plus?
- In 2024, Ways to trade pokemon go from far away On Sony Xperia 5 V? | Dr.fone
- Motorola Moto E13 ADB Format Tool for PC vs. Other Unlocking Tools Which One is the Best?
- 6 Proven Ways to Unlock Realme GT Neo 5 Phone When You Forget the Password
- In 2024, How To Get the Apple ID Verification Code On Apple iPhone 12 in the Best Ways
- The Top 10 Apple iPhone 13 mini Emualtors for Windows, Mac and Android | Dr.fone
- How To Fix iPhone 15 Unavailable Issue With Ease | Dr.fone
- Title: New 2024 Approved How to Concatenate Videos Using FFmpeg
- Author: Chloe
- Created at : 2024-04-24 07:08:34
- Updated at : 2024-04-25 07:08:34
- Link: https://ai-editing-video.techidaily.com/new-2024-approved-how-to-concatenate-videos-using-ffmpeg/
- License: This work is licensed under CC BY-NC-SA 4.0.


