
New 2024 Approved How To Film a Slow Motion Video
How To Film a Slow Motion Video
Scenes that might otherwise be monotonous can be made more interesting by the use of slow-motion photography in movies and television shows. For instance, a battle sequence between two characters can be portrayed in its entirety, but if it is later replayed in slow motion, the intensity of the action is amplified significantly.
Let’s dive in!
1. What is slow motion?
Filmmakers use the slow-motion effect to create the illusion that the passage of time has been slowed down on the screen. In the early 20th century, an Austrian priest named August Musger was the one who came up with the idea. Playing normally recorded material at a slower pace is another method for creating the illusion of slow motion.
When a film is recorded at 25 frames per second, but played back at 24 frames per second, it will seem as if it is being shown in slow motion because all of the movements will be slightly slower than when they were actually performed. This is because the film was recorded at 25 frames per second, but the playback was done at 24 frames per second.
Because there are not enough frames to show all of the details of each frame when a 24-frame animation is played at a 25-frame rate (or a 30-frame animation at a 32-frame rate), certain frames have to be repeated (every 5th one in this case). When there is a dramatic event taking place, this manipulation of the film speed makes the action on screen appear even more dramatic or “tensioned.”

2. Understanding frame rates
When filming video, there are a set number of frames per second that you can choose from. One picture is all you get when you take a still photograph. Click. That is only one example. A frame is the name of that picture. With video, however, you take 30 or 24 images per second, which you then combine. You now have footage.
The video is a combination of tens of thousands of frames or images that are flashing before your eyes. With a normal frame rate of 24 frames per second, you are essentially taking 24 pictures per second and stitching them together to create video. When you stretch it out in post for slow motion, you double or triple the frame rate, which results in more images per second and eliminates empty gaps and jarring actions.
This is how video that has been sped up for slow motion may still preserve its quality. But you can’t just choose a frame rate based on taste. Frame rates vary depending on the different types of emotions. 60 fps will do if the video is a slo-mo of a person’s emotion. However, if your shot contains a lot of movement and you want to show it, such as when automobiles collide or explode, you may require a higher frame rate, such as 120 fps.

3. Post processing
This is when it gets a bit complicated. Some cameras come equipped with a slow-motion feature. To capture the video in slow motion at a higher frame rate, go to your settings. You might not have this built-in slow-motion feature in other models.
Therefore, even though the footage was taken at a higher frame rate, the camera is playing the movie back at the same pace it was shot at, so when you shoot at a higher frame rate, you end up with footage of a normal speed. There is a solution to that. The footage’s speed can be adjusted during post-production.
The 24/30 fps editing timelines are pre-set. The majority of the video you capture at this frame rate plays back just nicely on this timeline. You must stretch out video that was shot at a higher frame rate to match this timeline, though. That effectively doubles or triples the length of a video, depending on the multiple of the timeline’s typical frame rate.

4. Lighting
While watching TV or movies, you might have observed anything. The majority of the extremely slow photos happen in broad daylight. Not after dark or in dimly lit areas. The reason for this is that sufficient lighting is required in order to capture motion. Lighting becomes crucial as your frame rate exceeds 300 frames per second. Therefore, if you must take these pictures, you must do so in a studio environment with lots of artificial lighting.
To create that cinematic magic, you can use high CRI lighting. On the screen, a flickering light may spell doom. Flickering lights have the potential to damage slow-motion film even though they would be OK for any other scene. Because there is no risk of voltage fluctuation, LED lights are a safe bet. The reason for this is that some models do not require an electrical outlet to function. Prior to departure, make sure you have checked each and every light.
If you are filming during the day and you point your camera toward the sun, you may end up with a significant amount of glare that cannot be hidden up in the post-production stage nor can it be ignored. This is not merely a problem that occurs throughout the daytime. Flares can also be obtained from moving vehicles and various other sources of light. If you use a flat lens when you’re out at night, you can eliminate the risk of something like that happening.

5. Why use slow motion?
When you first begin working with slow-motion video, you need to ask yourself, “What exactly is the purpose behind me choosing this effect?” Once you have an answer to that question, you may move on to the next step.
In most cases, there are often two primary causes for it.
1. It makes sense to present emotions on the screen for a longer period of time in order for the audience to be able to absorb and comprehend it in its whole if they are shown for a longer period of time since moments that are packed with emotions seem to endure longer than ordinary ones.
2. The second strategy is to draw attention to striking visuals that you might have overlooked in other circumstances and that contribute significantly to the aesthetic value of your setting. A flutter of the eyelid, a butterfly stretching its wings, rains falling on a flower petal, shards of fire breaking free, etc. are all examples of how quickly things may happen. You need to have a good reason for using slow motion, and you shouldn’t abuse the effect too much too. You should only do so at those moments where it makes logical sense to do so.

Subconscious slow-motion. Overusing or misusing a function ruins its appeal. Filming isn’t an exact science, but it does nothing unnecessary. For a cinematic effect, slow-motion should be introduced carefully.
Free Download For Win 7 or later(64-bit)
Free Download For macOS 10.14 or later
Free Download For macOS 10.14 or later
Leveraging the Vectorscope for Better Color Correction in Premiere Pro
Our eyes process colors differently. When two people look at the same picture, they may see different shades of colors. In post-production, Vectorscopes help to color grade and make sure you get your images exactly right. This means that you will process the exact color that you want across devices. Premiere Vectorscope is a great choice for anyone looking to correct and grade colors. Using Vectorscope Premiere allows you to get quantitative data about your image for a more accurate assessment of colors within the film. In this article, we explore what comprises Premiere Pro Vectorscope and how to use them in video editing.
Color Correction Editor An easy-to-use video editor helps you make color correction and color grading experience for videos!
Free Download Use Vectorscope in Filmora Try Color Correction

Part 1. Vectorscope: What is It and How to Read
Vectorscopes provide a great post-production way for color correction. It is video scope that provides greater data about the color properties of an image. Another way to look at it is that a Vectorscope is a circular graph, which monitors the following information of an image. By looking at it, you can measure saturation outward from the center while hue is measured in a circular pattern.
The Vectorscope contains markings indicating the degree of saturation and hue in an image. The distance of the markings from the center indicates how saturated the color is in your image. In simple terms, the further the markings, the more saturated the color. The two main options of Vectorscope are HLS and YUV. The HLS displays the hue, lightness, saturation, and signal information at a glance. On the other hand, the YUV mode contains several color boxes, giving accurate levels of hue and saturation.

Vectorscopes are useful to filmmakers and editors to ensure greater conformity in a film as they transition from one shot to the next. When the camera captures an image with too much saturation, using a Vectorscope helps to reduce the said saturation. This makes Vectorscope a useful feature for color correction and color grading. Color correction involves altering the colors of an image within a film to provide consistency and tone for the film. On the other hand, color grading is more like a supercharged version of color correction. It refers to altering a film so that it matches a tone or theme. Since the two, grading and correction are important, more video editing will use a combination of both.
How to Read a Vectorscope
Learning how to read a Vectorscope will make your video editing fun and easier. The best way is to view the Vectorscope in relation to the color wheel. When using Premiere Vectorscope, the colors are nicely labeled for anyone to understand. You only need to understand the primary colors of saturation and hue to accurately read a Vectorscope.

The hue color is the direction to which the marketer points. For instance, a marker pointing toward the boxes labeled “R” indicates that the hue is predominantly red. On the other hand, the saturation correlates to the length of the marker. The image is more saturated when the marker is furthest from the center of the wheel.
Keep note of the two boxes in each main color. The box that is close to the center indicates 75%, and you will normally avoid the marker extending beyond this first box. Any marketer that extends beyond this is known as non-broadcast safe or illegal colors. Although you may need to go beyond the first box in some projects for stylistic reasons, the general rule of thumb is to avoid that.
Without proper calibration, your images may end up looking too red or too blue. They will not look natural at all and will affect the overall quality of your video. Therefore, using the features within the vectorsope will help you color-grade your images to perfection.
Part 2. Vectorscope in Premiere Pro : A Brief Guide
Just like many other video editing software, Adobe Premiere Pro offers Vectorscope to help in post-production. The best way to look at Vectorscope in Premiere Pro is to use the Color Correction workspace. Once you have launched the software, Click Window, followed by Workspace, and then Color Correction. Access the reference monitor directly to deliver the program.
The reference monitor will first display composite video. Clicking on the setting icon allows you to access the panel and choose the video scope you want to use. Now, this is how you use the Vectorscope in Premiere Pro:
1. Reading a Vectorscope on Premiere Pro
A Vectorscope is similar to a color wheel. It displays colors in the same places as the wheel, with cyan to the bottom right and red to the top left. When you see a dot or line in the Vectorscope, you can tell it is giving you information about the color or chrominance of a shot. Essentially, this information is the hue (specific color) and the saturation (the strength of that hue).

As you examine the Vectorscope, you get to see how strong a particular color is by the length of the line from the center of the wheel. A longer line indicates that the color is more saturated. However, all Vectorscopes have small color targets. The Vectorscope points are lined with a drop-down used to read the scope. The default is set to 75%, which is a good limit for a typical broadcast system.

2. Adjusting Skin Tones
A commonly used feature of the Premier Pro Vectorscope is the Skin Tone Line. With this feature, you get the line on the scope between the Yellow and the Red sections at about 10.30 or 11 o’clock position.

The Vectorscope skin tone line represents the color of blood flowing through the skin. You can use this line to check the accuracy of skin tone color representation regardless of the ethnicity of the person you’re filming. In particular, video images are more accurate
The major problem is figuring out how to look at skin tones in a shot with many other colors. With the skin tons line in Premiere Pro, color correction becomes easy and quick. You only need to use a garbage matte, which is found under video effects then keying. Adjust the points so that they cover the skin of the person on the shot, then look at the Premiere Pro Vectorscope to see your end results.

Part 3. How to Use Vectorscope in Filmora : Step-by-Step Guide
The choice of video editing software can have an impact on how well you use your Vectorscopes. Wondershare Filmora is a great choice for anyone who wants to achieve great results with their videos. The versatile video editing software offers four types of video scopes, including the Vectorscope. This gives you more flexibility in video editing and achieving accurate results in color correction and grading. With the recent V13, you also get access to a range of AI features that make video editing quicker and easier.
Free Download For Win 7 or later(64-bit)
Free Download For macOS 10.14 or later
Access Vectorscope on Filmora
Accessing Vectorscope in Filmora is straightforward. As part of the four available video scopes, Filmora has made it easy to use Vectorscope during video editing. Here is a step-by-step guide to follow:
Step 1Create a New Project on Filmora
Once you have downloaded and installed the Filmora software on your desktop, launch it and click Create a New Project.

Step 2Access Video Scopes
After starting a new project, head to the top right corner of the main interface. Click on the Video Scope button to launch the video scope bar on the preview screen.

Step 3Customize Video Scopes Layout Bar
Customizing the layout of the video scope bar allows you to have more freedom in using the feature. You have the option to choose from four layouts or expand the button to display the video scope’s name. The purpose of this step is to modify the display option of the video scopes, allowing you to have a clear view of what you are editing.

Step 4Manage the Vectorscope as Desired
On the preview screen, choose the Vectorscope option. This video scope allows you to define the skin tone indication for better color grading and correction.

Step 5Change Other Video Scopes
To achieve more accurate and better results, explore the other video scopes in the same window. View the color changes in your image through parade, histogram, and waveform video scopes. You can also change the color channels to view specific color changes across the video.

Conclusion
Vectorscopes are great for post-production color correction. Although lesser-known features to many people, they are widely used in video production. They ensure that the colors in your video are consistent across all clips or shots of your film. Since filming will often involve different shots and settings, we recommend using Wondershare Filmora for your video editing. It comes with an easy-to-use Vectorscope and other video scopes that help you achieve great results with color correction and grading.
Free Download Use Vectorscope in Filmora Try Color Correction
Part 1. Vectorscope: What is It and How to Read
Vectorscopes provide a great post-production way for color correction. It is video scope that provides greater data about the color properties of an image. Another way to look at it is that a Vectorscope is a circular graph, which monitors the following information of an image. By looking at it, you can measure saturation outward from the center while hue is measured in a circular pattern.
The Vectorscope contains markings indicating the degree of saturation and hue in an image. The distance of the markings from the center indicates how saturated the color is in your image. In simple terms, the further the markings, the more saturated the color. The two main options of Vectorscope are HLS and YUV. The HLS displays the hue, lightness, saturation, and signal information at a glance. On the other hand, the YUV mode contains several color boxes, giving accurate levels of hue and saturation.
Vectorscopes are useful to filmmakers and editors to ensure greater conformity in a film as they transition from one shot to the next. When the camera captures an image with too much saturation, using a Vectorscope helps to reduce the said saturation. This makes Vectorscope a useful feature for color correction and color grading. Color correction involves altering the colors of an image within a film to provide consistency and tone for the film. On the other hand, color grading is more like a supercharged version of color correction. It refers to altering a film so that it matches a tone or theme. Since the two, grading and correction are important, more video editing will use a combination of both.
How to Read a Vectorscope
Learning how to read a Vectorscope will make your video editing fun and easier. The best way is to view the Vectorscope in relation to the color wheel. When using Premiere Vectorscope, the colors are nicely labeled for anyone to understand. You only need to understand the primary colors of saturation and hue to accurately read a Vectorscope.
The hue color is the direction to which the marketer points. For instance, a marker pointing toward the boxes labeled “R” indicates that the hue is predominantly red. On the other hand, the saturation correlates to the length of the marker. The image is more saturated when the marker is furthest from the center of the wheel.
Keep note of the two boxes in each main color. The box that is close to the center indicates 75%, and you will normally avoid the marker extending beyond this first box. Any marketer that extends beyond this is known as non-broadcast safe or illegal colors. Although you may need to go beyond the first box in some projects for stylistic reasons, the general rule of thumb is to avoid that.
Without proper calibration, your images may end up looking too red or too blue. They will not look natural at all and will affect the overall quality of your video. Therefore, using the features within the vectorsope will help you color-grade your images to perfection.
Part 2. Vectorscope in Premiere Pro : A Brief Guide
Just like many other video editing software, Adobe Premiere Pro offers Vectorscope to help in post-production. The best way to look at Vectorscope in Premiere Pro is to use the Color Correction workspace. Once you have launched the software, Click Window, followed by Workspace, and then Color Correction. Access the reference monitor directly to deliver the program.
The reference monitor will first display composite video. Clicking on the setting icon allows you to access the panel and choose the video scope you want to use. Now, this is how you use the Vectorscope in Premiere Pro:
1. Reading a Vectorscope on Premiere Pro
A Vectorscope is similar to a color wheel. It displays colors in the same places as the wheel, with cyan to the bottom right and red to the top left. When you see a dot or line in the Vectorscope, you can tell it is giving you information about the color or chrominance of a shot. Essentially, this information is the hue (specific color) and the saturation (the strength of that hue).
As you examine the Vectorscope, you get to see how strong a particular color is by the length of the line from the center of the wheel. A longer line indicates that the color is more saturated. However, all Vectorscopes have small color targets. The Vectorscope points are lined with a drop-down used to read the scope. The default is set to 75%, which is a good limit for a typical broadcast system.
2. Adjusting Skin Tones
A commonly used feature of the Premier Pro Vectorscope is the Skin Tone Line. With this feature, you get the line on the scope between the Yellow and the Red sections at about 10.30 or 11 o’clock position.
The Vectorscope skin tone line represents the color of blood flowing through the skin. You can use this line to check the accuracy of skin tone color representation regardless of the ethnicity of the person you’re filming. In particular, video images are more accurate
The major problem is figuring out how to look at skin tones in a shot with many other colors. With the skin tons line in Premiere Pro, color correction becomes easy and quick. You only need to use a garbage matte, which is found under video effects then keying. Adjust the points so that they cover the skin of the person on the shot, then look at the Premiere Pro Vectorscope to see your end results.
Part 3. How to Use Vectorscope in Filmora : Step-by-Step Guide
The choice of video editing software can have an impact on how well you use your Vectorscopes. Wondershare Filmora is a great choice for anyone who wants to achieve great results with their videos. The versatile video editing software offers four types of video scopes, including the Vectorscope. This gives you more flexibility in video editing and achieving accurate results in color correction and grading. With the recent V13, you also get access to a range of AI features that make video editing quicker and easier.
Free Download For Win 7 or later(64-bit)
Free Download For macOS 10.14 or later
Access Vectorscope on Filmora
Accessing Vectorscope in Filmora is straightforward. As part of the four available video scopes, Filmora has made it easy to use Vectorscope during video editing. Here is a step-by-step guide to follow:
Step 1Create a New Project on Filmora
Once you have downloaded and installed the Filmora software on your desktop, launch it and click Create a New Project.
Step 2Access Video Scopes
After starting a new project, head to the top right corner of the main interface. Click on the Video Scope button to launch the video scope bar on the preview screen.
Step 3Customize Video Scopes Layout Bar
Customizing the layout of the video scope bar allows you to have more freedom in using the feature. You have the option to choose from four layouts or expand the button to display the video scope’s name. The purpose of this step is to modify the display option of the video scopes, allowing you to have a clear view of what you are editing.
Step 4Manage the Vectorscope as Desired
On the preview screen, choose the Vectorscope option. This video scope allows you to define the skin tone indication for better color grading and correction.
Step 5Change Other Video Scopes
To achieve more accurate and better results, explore the other video scopes in the same window. View the color changes in your image through parade, histogram, and waveform video scopes. You can also change the color channels to view specific color changes across the video.
Conclusion
Vectorscopes are great for post-production color correction. Although lesser-known features to many people, they are widely used in video production. They ensure that the colors in your video are consistent across all clips or shots of your film. Since filming will often involve different shots and settings, we recommend using Wondershare Filmora for your video editing. It comes with an easy-to-use Vectorscope and other video scopes that help you achieve great results with color correction and grading.
How to Create Vintage Film Effect 1990S
In the 90s, movie production technology improved a lot. This decade saw horror movies become much more fun and immersive than in the 80s and 50s because they were more psychological. In fact, we can say that the horror movies of the 90s laid the foundation for current horror movies. So, without wasting time, let’s create a 1990s horror movie similar to The Blair Witch Project.
Preparation

The preparation for this horror film production is relatively self-explanatory if you’ve watched The Blair Witch Project. Simply shoot footage inside a dark room and apply some light to your face. It’s even better if you can shoot the video inside the woods. Just add some drama and a few screaming scenes to evoke emotions.
How to create a 1990s horror film with Filmora :
Free Download For Win 7 or later(64-bit)
Free Download For macOS 10.14 or later
Step1 Add the horror video to the timeline

Open Wondershare Filmora on your computer, then load the video you want to edit. After adding the video, drag it to the editing timeline, then move it a few keyframes to the right. The idea is to apply some black screen to add drama and fear before the film starts playing.
Step2 Apply color grading

Next, double-click the horror clip and go to the Color menu. Then, click the Tone arrow before lowering the Saturation to -50%. This will give us a less saturated look popularly used in horror films.

Now click the 3D LUT option and choose a LUT that works for your film. For this horror film project, we’ll select the Dark Film option.
Step3 Add creepiness to the video

Obviously, you’ll want your horror film to look as creepy as possible. To achieve that, click the Elements tab, then search for the Smokescreen 1 effect. Move the effect to the timeline above the video track before trimming the effect clip to fit with the original horror video.

We’ll now change the size and positioning of the smokescreen effect to match the feature video. To do that, double-click the effect track. You can also reduce the opacity to around 30% to make the smoke more visible.
Step4 Add a retro filming effect

Now we’ll make the film more believable by adding a retro overlay. Click the Effects tab, then search for Retro Film Overlay 15 before dragging and dropping the effect above all the tracks in the editing timeline.

Summary
That’s it! With these tips and tricks, you can effortlessly create a retro-style 1990s horror film. Follow this tutorial and play around with the movie effects to find what works best for you. Remember, Filmstock is the ultimate resource for video and movie effects. Give it a try!
Free Download For macOS 10.14 or later
Step1 Add the horror video to the timeline
Open Wondershare Filmora on your computer, then load the video you want to edit. After adding the video, drag it to the editing timeline, then move it a few keyframes to the right. The idea is to apply some black screen to add drama and fear before the film starts playing.
Step2 Apply color grading
Next, double-click the horror clip and go to the Color menu. Then, click the Tone arrow before lowering the Saturation to -50%. This will give us a less saturated look popularly used in horror films.
Now click the 3D LUT option and choose a LUT that works for your film. For this horror film project, we’ll select the Dark Film option.
Step3 Add creepiness to the video
Obviously, you’ll want your horror film to look as creepy as possible. To achieve that, click the Elements tab, then search for the Smokescreen 1 effect. Move the effect to the timeline above the video track before trimming the effect clip to fit with the original horror video.
We’ll now change the size and positioning of the smokescreen effect to match the feature video. To do that, double-click the effect track. You can also reduce the opacity to around 30% to make the smoke more visible.
Step4 Add a retro filming effect
Now we’ll make the film more believable by adding a retro overlay. Click the Effects tab, then search for Retro Film Overlay 15 before dragging and dropping the effect above all the tracks in the editing timeline.
Summary
That’s it! With these tips and tricks, you can effortlessly create a retro-style 1990s horror film. Follow this tutorial and play around with the movie effects to find what works best for you. Remember, Filmstock is the ultimate resource for video and movie effects. Give it a try!
Best Video Editors to Add Text to a Video
While it can be very easy to add text to an image, the same cannot be said when it comes to adding even the simplest text to a video. You will need video editing software that is designed with the necessary features to help you add text to your video.
There are very many programs in the market that can technically be used to add text to a video. But the ones we will look at are video editors that make the process easy, but also give you a wide range of options to customize your text in numerous ways.
Filmora
Filmora by Wondershare is one of the best video editors in the market. Its user interface is so easy to use that adding text to the video is a simple 3-step process. Aside from adding text to the video, Filmora also allows you to edit other aspects of the video including adding transitions, overlays, and animations to any section of the video.

Key Features:
- You can use Filmora to add text to any section of the video
- It gives you the freedom to move the text to any section of the video
- Customizing the text, you add to the video can be done in numerous ways including changing the color, and font and adding animations to the text.
- It offers numerous templates to choose from and different font styles that you can use
- It has a simple user interface that makes the video editing process very easy
- It has numerous other video editing capabilities that allow you to create and edit videos in different ways including splitting videos, trimming videos, and even merging videos clips into one
- You can upload the videos directly to YouTube after editing.
After Effects
Adobe After Effects is a motion picture editing program that you can also use to add text and other animations to your video. While you can use it to add simple text to the video, it is an ideal solution when your goal is to add advanced text animations. It is however by no means a simple solution, especially for beginners who may find it hard to get going with After Effects.

Key Features:
- You can add simple lines of text to any section of the video
- Text is easily customizable by changing the color, font, and size of the text
- You can also choose to change the entire text layer and add advanced animations and effects
- There are a lot of text, animations, and effects templates to choose from
- You can easily copy text from other Adobe applications to use in After Effects
Movavi Editor
Movavi video editor is another great video editor that you can use to add and edit text on a video. Like most similar tools it is designed to simplify the process, allowing you to add text to any section of the document, move the text to any location on the video and even add text effects to customize the text. It has a very simple user interface that allows you to do that quickly and easily.

Key Features:
- You can add text to any section of the video
- Customizing the text by changing the font, color and size is also very easy
- The user interface is very easy to use, allowing you to add even blocks of text very quickly
- You also have additional options to edit the video including splitting and merging the video or adjusting the brightness, saturation, and color.
iMovie
This is a built-in video editor that you will find on macOS and iOS devices. Even though it is free, iMovie has a lot of features that come in handy when you want to add and edit text on a video. The fact that it can be used on iOS devices is an added advantage when you want to edit videos on the go.

Key Features:
- It allows users to add transitions and effects to the text you add to the video
- It comes with a lot of title templates to choose from
- Adding animated text is also very simple including Sideways Drift, Lens Flare, and more
- You can customize the text in very many ways including adding fonts, drop shadows, changing the color, and even resizing or repositioning the text.
Camtasia
TechSmith Camtasia is one of the most popular tools to create and edit videos. Of the numerous features that you get when you choose to use Camtasia is adding and editing text to the video. It has numerous templates that can be used to customize the text you add in various ways.

Key Features:
- It gives you numerous options to add text to the images including text boxes, templates, and effects
- It has a speech-to-text feature that is perfect for adding captions and subtitles to the video
- You can easily customize the text by adding transitions and effects or even by simply changing the font, color, and size of the text
- The text can be moved to any section of the video
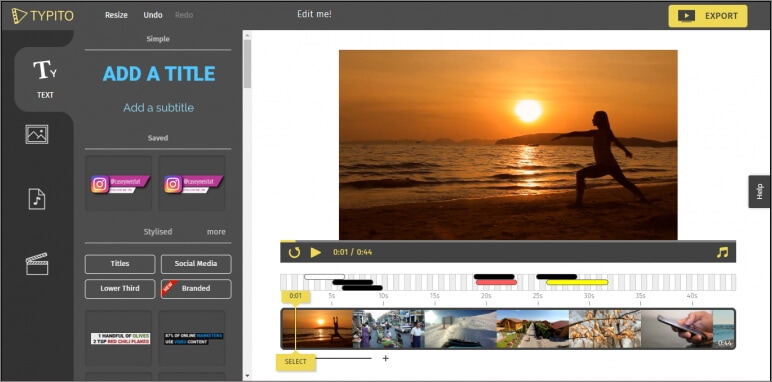
Typito
Typito is an online video editor with simple tools that can help you make changes to any video. designed to help YouTube content creators and video editors, Typito can be used to add all kinds of text and text effects to any video. It is accessible on all browsers and it is also very easy to use.
Key Features:
- It is very easy to use, allowing you to add text to any video in a few simple steps
- It has numerous templates to choose from
- Changing the font size, color, and style of the text is very easy
- You can publish videos directly to numerous video-sharing sites after editing
- It allows users to add animations, transitions, and effects to the text
Splice
Splice is an iOS app designed to help you add text to videos on iOS devices. Adding text to any video using Splice can be easily done using the overlay feature. It also has numerous other video editing features including allowing you to easily synchronize your videos and music, adding filters and transitions, and more.

Key Features:
- it has a simple user interface that makes adding text very easy
- You can customize the text in various ways including changing the font size, color and style or even adding various text effects
- Videos can be saved on the device or shared directly on social media apps like Facebook, Instagram, and YouTube
- It has numerous other video editing features including filters and animations
Clipomatic
If the text you want to add to the video is in the form of captions or subtitles, then Clipomatic is perhaps the best choice. It supports various languages including German, French, Portuguese, and even Chinese. You can also use it to add regular text to any video, reposition the text on any section of the video and customize the text in various ways.

Key Features:
- It is available for both Android and iOS
- Adding text to the video is very easy
- You can easily customize the text by changing the font color, and size and adding transitions and text effects
- It supports various languages, making it ideal for captions and subtitles
MySubtitle
MySubtitle is a simple but highly effective app that you can use to add text to your video. As the name suggests, this tool is ideal for adding subtitles and you can do that very easily by simply typing in the text and syncing the text to the video’s content.

Key Features:
- It is available for both iOS and Android devices
- You can type in your subtitles directly on the video
- Subtitles can then be paced to suit the video’s playback speed
- It is completely free to use
- You can share the videos you edit directly on various social media platforms
Free Download For Win 7 or later(64-bit)
Free Download For macOS 10.14 or later
Free Download For macOS 10.14 or later
Also read:
- [New] 2024 Approved Step-by-Step Tutorial on How to Use IGTV Effectively
- [Updated] Social Network Showdown 2 Written by a Computer Program, without Understanding Language or Culture
- 2024 Approved Learn How to Create a Kinetic Typography Text Effect in Filmora, One of the Best Video Editors for All Skill Levels. Check Out This Simple Step-by-Step Guide
- 2024 Approved Timeless Treasures Unlocked Free Public Works
- 3 Ways to Unlock iPhone 6s without Passcode or Face ID | Dr.fone
- AnimPros Full Review & Exploration 2024
- Choosing the Right Gimbal for Flawless YouTube Footage for 2024
- If You Want to Make an Intro Video, Then Adobe After Effects Will Be a Great Choice. This Article Will Show the Steps to Create an Intro Video with After Effects by Your Own
- In 2024, LG VR 360 Review A New Dimension of Gaming
- Maximizing Excel Potential via Three ChatGPT Techniques
- New How to Create Vintage Film Effect 1950S
- New The Premiere Pro Video Templates Help Make Original Content of Broadcast Quality. The Article Introduces 10 Free Premiere Pro Templates that Are Sure to Make Your Life Easy
- New Whatre the Best Alternatives to Pexels?
- Updated Add Camera Shake to Video in Adobe After Effects for 2024
- Updated Guide To Cropping and Combining Content in Wondershare Filmora Latest for 2024
- Updated Motion Tracking Is the Process of Tracking the Movements of a Project in a Video. This Article Will Show You How to Apply Motion Tracking Effect Into Videos
- Xbox Interface: Smoothly Integrating Into Windows
- Title: New 2024 Approved How To Film a Slow Motion Video
- Author: Chloe
- Created at : 2025-02-26 17:15:29
- Updated at : 2025-03-03 18:42:46
- Link: https://ai-editing-video.techidaily.com/new-2024-approved-how-to-film-a-slow-motion-video/
- License: This work is licensed under CC BY-NC-SA 4.0.