
:max_bytes(150000):strip_icc():format(webp)/netgear-default-password-list-2619154-b581fdcf136848d29e944638cd2ad444.png)
New 8 Frame Rate Video Converters for a Professional Finish
8 Frame Rate Video Converters for a Professional Finish
One important aspect to consider when creating high-quality videos is the frame rate. The frame rate, measured in frames per second (fps), determines the smoothness and fluidity of your video. If the frame rate is too low, your video may appear choppy or stutter. On the other hand, a higher frame rate can provide a more cinematic experience.
However, not all cameras or devices record videos at the same frame rate. That’s where frame rate video converters come in. These tools allow you to change the frame rate of your videos so they can be played back on different devices or platforms. With so many options available, it can be overwhelming to know which frame rate converters to use.
In this article, we’ll look at 8 of the best frame rate video converters you must try. These tools will help you achieve the perfect frame rate for your videos, from free online options to paid software.
Unknown Facts About Converting Frame Rates
When converting frame rates, there are a few things to keep in mind that you may need to be made aware of.

1. The Web Doesn’t Care About Frame Rates
First, it’s important to note that the web doesn’t care about frame rates. Most online platforms, such as YouTube and Vimeo, automatically adjust the frame rate of videos to match the viewer’s device or internet connection. This means that even if you have a video with a high frame rate, it may be automatically downgraded when it’s uploaded to the web.
2. Converting Frame Rates in Exact Multiples Is Easy
Another thing to remember is that converting frame rates in exact multiples is relatively easy.
For example, if you have a video recorded at 30 fps and want to convert it to 60 fps, it’s a simple process as it is a 2x multiple. However, if you want to convert your video to a frame rate that is not a multiple of the original, such as 29.97 fps, the process can be more complex and may result in some loss of quality.
3. Frame Rate Is Not “Cinematic”
Lastly, it’s important to note that frame rate is not “cinematic” because a higher frame rate does not automatically make your video look more cinematic. While a higher frame rate can provide a more smooth and more fluid video, it’s just one aspect of creating a cinematic experience. Other elements, such as lighting, composition, and sound design, also play a crucial role in creating a cinematic look.
5 Frame Rate Video Converters for Win/Mac
Many options are available for both Windows and Mac users when converting frame rates. Here are 5 of the best frame rate video converters for both platforms:
1. Wondershare Filmora Video Editor and Frame Rate Converter for Win/Mac
Free Download For Win 7 or later(64-bit)
Free Download For macOS 10.14 or later
Filmora Video Editor and Frame Rate Converter is a versatile tool for Windows and Mac users that allows you to edit and convert your videos easily. It has a user-friendly interface and provides a wide range of video editing functions, such as trimming, cropping, splitting, and merging.
It also allows you to change the frame rate of your videos with a few simple clicks. You can easily adjust the frame rate to match the output device or platform, such as 30fps for YouTube or 60fps for Vimeo. Moreover, it also provides various video effects, transitions, and text/title templates to enhance your video quality. With Filmora, you can easily turn your home videos into professional-looking films.
How To Convert Video Frame Rate With Filmora
Here’s the step-by-step process of converting video frame rate using Filmora:
Step1 Create a new project, then import the video. Right click the video, and click “Properties.”

Step2 Check the current frame rate of the video

Step3 Add the video to the timeline, then click the “Export“ button
Step4 Change the frame rate and then click “Export.”

2. VideoPad Video Editor and Frame Rate Converter for Win/Mac
VideoPad Video Editor, created by NCH Software, is a user-friendly video editing software suitable for professionals and beginners. It offers various editing tools, video transitions and effects, customizable templates, and audio editing options.
One of its key features is the ability to convert the frame rate of your videos during the exporting process, making it a versatile tool for adjusting video playback smoothness. It supports multiple video formats for input and output; a free version is available for non-commercial use only.
Here’s the step-by-step process of converting video frame rate using VideoPad:
Step1 Open VideoPad and import your video to the timeline
Step2 Edit the video as desired, then navigate to “Export Video“ > “Video File.”
Step3 In the “Export File Settings“ window, select the desired frame rate, edit the file name, and choose the output folder, format, and resolution. Click “Create“ to export the video.

3. Frame Rate Converter - MiniTool Video Converter (Windows)

MiniTool Video Converter is a free and versatile tool for converting the frame rate of your videos. It offers multiple FPS options, such as 12, 15, 20, 23.97, 30, 50, and 60, which vary depending on your chosen video format. Not only can it change the frame rate, but it can also convert the video format, allowing you to import a video and then simultaneously change the format and frame rate.
Additionally, MiniTool offers options for video resolution, quality, encoder, and more. Furthermore, this video FPS converter allows you to record your computer screen in various formats, such as MP4, WMV, MKV, AVI, MOV, FLV, and TS in 15, 20, 25, and 30 fps. It also enables you to download videos and audio from YouTube.
Here’s the step-by-step process of converting video frame rate using MiniTool Video Converter:
Step1 Open MiniTool Video Converter, and upload the video you wish to convert by clicking “Add“ or dragging the file into the conversion area.

Step2 Under the Video tab in the new pop-up, select a format and click “Create Custom“ to open the settings window. Choose the desired frame rate.
Step3 Click “Convert,” and once completed, locate the converted video in the “Converted“ tab by clicking “Show in Folder.”

4. VLC Converter Frame Rate Conversion Software

The VLC media player is a well-known free tool for converting frame rates. It’s a versatile player that supports various audio-visual formats, including AVI, MPEG, WMV, DVD, and CD.
VLC also includes additional features such as cropping and de-interlacing, allowing you to configure and edit your files. VLC media players can also remove DRM protection and convert multiple videos in batches. It’s a great option for a free frame rate converter.
Here’s how to change the frame rate of a video using VLC Media Player:
Step1 Open the VLC media player and click on “Media“ > “Capture Device.”
Step2 Select “Convert/Save“ and browse for the video you want to change the frame rate
Step3 Select the desired frame rate in the “Convert/Save“ dialog box and click “Start.”
Step4 Wait for the conversion to finish and click “Convert/Save“ to find the new video with the adjusted frame rate.

5. HandBrake: Open Source Frame Rate Converter

Handbrake is a versatile, open-source video converter that can change the frame rate of a video from nearly any format to MP4, WebM, or MKV. It offers a wide range of frame rate options, from 5 to 120 FPS, making it a great tool for video production needs.
In addition to frame rate conversion, Handbrake also features various filters to enhance video quality, such as reducing noise, sharpening, rotating, flipping videos, adding subtitles, and more. With Handbrake, you can easily change the frame rate of your videos to your desired settings.
Here’s how to change the frame rate of a video using HandBrake:
Step1 Open Handbrake and add your video.
Step2 Select a format, change the frame rate, and choose the output folder.
Step3 Click “Start Encode“ to convert the video frame rate.

3 Video FPS Converters Online
In addition to software-based video frame rate converters, a variety of online video FPS converters can be used for quick and easy frame rate conversions.
These online tools are often user-friendly and require no installation, making them accessible from any device with an internet connection. These tools allow for easy uploading of videos and the ability to select the desired frame rate for conversion. They also offer a variety of output formats and options for video quality, resolution, and more.
1. VEED.IO Video FPS Converter Online
VEED’s online frame rate converter is a simple tool to increase or decrease your video’s frame rate without leaving your browser. It supports popular frame rates such as 16fps, 24fps, 30fps, 60fps, and more.
Lower the frame rate to create a stop-motion video or GIF, or increase it to make the video appear smoother. The tool can upload videos in any format and render them in seconds without installing converter apps or software. It works on Windows 10, Mac, Linux, and mobile devices.
Here’s how to change the video frame rate using Veed.io:
Step1 Import your video, or you can drag and drop your video.

Step2 Click “Export,” then click “switch to advanced settings“ to access frame rate settings. Adjust the frame rate using the framerate limit tool.

Step3 Click “Export Video,” and your video will render in seconds.

2. Video2Edit Video Frame Rate Converter Online Free

Video2Edit is an all-in-one online video solution that offers a variety of editing options such as conversion, rotation, cutting, merging, and audio compression and normalization. Additionally, it is also a highly efficient online video frame rate converter. With Video2edit, you can easily change the frame rate of your videos to match your specific needs.
This tool makes it simple whether you want to increase or decrease the frame rate. It supports a wide range of frame rates, from 16 to 60 fps, and can convert your video to any format you need. With this powerful and versatile tool, you can ensure that your videos look smooth and professional and have the right frame rate for your desired output.
Here’s how to change the video frame rate using Video2Edit:
Step1 On Video2Edit’s website, select “Convert from video“ and upload your file.

Step2 Select an output format and enter a new frame rate (1-120) in the “Change frame rate“ box.

Step3 Click “START“ to begin the conversion process.

3. AConvert Free Video Frame Rate Converter

With AConvert, you can quickly change the frame rate of your video to fit your needs. This online tool offers various frame rates, including 20fps, 24fps, 30fps, 50fps, and more, giving you the flexibility to find the right setting for your video.
Additionally, AConvert offers a range of video editing options, including cutting, merging, rotating, and cropping, allowing you to enhance your video in multiple ways. The process of converting frame rate with AConvert is simple.
Here’s how to change the video frame rate using AConvert:
Step1 Visit the AConvert website, select Video, and upload your video.

Step2 Choose “Change size, bitrate, or frame rate“ and select “Frame Rate“ in the drop-down menu.

Step3 Select a frame rate and click “Convert Now!“ to start the conversion process.

Conclusion
Converting video frame rates can significantly impact your video’s quality and viewing experience. Whether you’re looking to increase or decrease the frame rate, the above options provide easy and efficient ways. Regardless of the tool or software, the process is straightforward, allowing you to change the frame rate with just a few clicks. So go ahead and try out one of these options to improve your video’s frame rate today!
Free Download For macOS 10.14 or later
Filmora Video Editor and Frame Rate Converter is a versatile tool for Windows and Mac users that allows you to edit and convert your videos easily. It has a user-friendly interface and provides a wide range of video editing functions, such as trimming, cropping, splitting, and merging.
It also allows you to change the frame rate of your videos with a few simple clicks. You can easily adjust the frame rate to match the output device or platform, such as 30fps for YouTube or 60fps for Vimeo. Moreover, it also provides various video effects, transitions, and text/title templates to enhance your video quality. With Filmora, you can easily turn your home videos into professional-looking films.
How To Convert Video Frame Rate With Filmora
Here’s the step-by-step process of converting video frame rate using Filmora:
Step1 Create a new project, then import the video. Right click the video, and click “Properties.”
Step2 Check the current frame rate of the video
Step3 Add the video to the timeline, then click the “Export“ button
Step4 Change the frame rate and then click “Export.”
2. VideoPad Video Editor and Frame Rate Converter for Win/Mac
VideoPad Video Editor, created by NCH Software, is a user-friendly video editing software suitable for professionals and beginners. It offers various editing tools, video transitions and effects, customizable templates, and audio editing options.
One of its key features is the ability to convert the frame rate of your videos during the exporting process, making it a versatile tool for adjusting video playback smoothness. It supports multiple video formats for input and output; a free version is available for non-commercial use only.
Here’s the step-by-step process of converting video frame rate using VideoPad:
Step1 Open VideoPad and import your video to the timeline
Step2 Edit the video as desired, then navigate to “Export Video“ > “Video File.”
Step3 In the “Export File Settings“ window, select the desired frame rate, edit the file name, and choose the output folder, format, and resolution. Click “Create“ to export the video.
3. Frame Rate Converter - MiniTool Video Converter (Windows)
MiniTool Video Converter is a free and versatile tool for converting the frame rate of your videos. It offers multiple FPS options, such as 12, 15, 20, 23.97, 30, 50, and 60, which vary depending on your chosen video format. Not only can it change the frame rate, but it can also convert the video format, allowing you to import a video and then simultaneously change the format and frame rate.
Additionally, MiniTool offers options for video resolution, quality, encoder, and more. Furthermore, this video FPS converter allows you to record your computer screen in various formats, such as MP4, WMV, MKV, AVI, MOV, FLV, and TS in 15, 20, 25, and 30 fps. It also enables you to download videos and audio from YouTube.
Here’s the step-by-step process of converting video frame rate using MiniTool Video Converter:
Step1 Open MiniTool Video Converter, and upload the video you wish to convert by clicking “Add“ or dragging the file into the conversion area.
Step2 Under the Video tab in the new pop-up, select a format and click “Create Custom“ to open the settings window. Choose the desired frame rate.
Step3 Click “Convert,” and once completed, locate the converted video in the “Converted“ tab by clicking “Show in Folder.”
4. VLC Converter Frame Rate Conversion Software
The VLC media player is a well-known free tool for converting frame rates. It’s a versatile player that supports various audio-visual formats, including AVI, MPEG, WMV, DVD, and CD.
VLC also includes additional features such as cropping and de-interlacing, allowing you to configure and edit your files. VLC media players can also remove DRM protection and convert multiple videos in batches. It’s a great option for a free frame rate converter.
Here’s how to change the frame rate of a video using VLC Media Player:
Step1 Open the VLC media player and click on “Media“ > “Capture Device.”
Step2 Select “Convert/Save“ and browse for the video you want to change the frame rate
Step3 Select the desired frame rate in the “Convert/Save“ dialog box and click “Start.”
Step4 Wait for the conversion to finish and click “Convert/Save“ to find the new video with the adjusted frame rate.
5. HandBrake: Open Source Frame Rate Converter
Handbrake is a versatile, open-source video converter that can change the frame rate of a video from nearly any format to MP4, WebM, or MKV. It offers a wide range of frame rate options, from 5 to 120 FPS, making it a great tool for video production needs.
In addition to frame rate conversion, Handbrake also features various filters to enhance video quality, such as reducing noise, sharpening, rotating, flipping videos, adding subtitles, and more. With Handbrake, you can easily change the frame rate of your videos to your desired settings.
Here’s how to change the frame rate of a video using HandBrake:
Step1 Open Handbrake and add your video.
Step2 Select a format, change the frame rate, and choose the output folder.
Step3 Click “Start Encode“ to convert the video frame rate.
3 Video FPS Converters Online
In addition to software-based video frame rate converters, a variety of online video FPS converters can be used for quick and easy frame rate conversions.
These online tools are often user-friendly and require no installation, making them accessible from any device with an internet connection. These tools allow for easy uploading of videos and the ability to select the desired frame rate for conversion. They also offer a variety of output formats and options for video quality, resolution, and more.
1. VEED.IO Video FPS Converter Online
VEED’s online frame rate converter is a simple tool to increase or decrease your video’s frame rate without leaving your browser. It supports popular frame rates such as 16fps, 24fps, 30fps, 60fps, and more.
Lower the frame rate to create a stop-motion video or GIF, or increase it to make the video appear smoother. The tool can upload videos in any format and render them in seconds without installing converter apps or software. It works on Windows 10, Mac, Linux, and mobile devices.
Here’s how to change the video frame rate using Veed.io:
Step1 Import your video, or you can drag and drop your video.
Step2 Click “Export,” then click “switch to advanced settings“ to access frame rate settings. Adjust the frame rate using the framerate limit tool.
Step3 Click “Export Video,” and your video will render in seconds.
2. Video2Edit Video Frame Rate Converter Online Free
Video2Edit is an all-in-one online video solution that offers a variety of editing options such as conversion, rotation, cutting, merging, and audio compression and normalization. Additionally, it is also a highly efficient online video frame rate converter. With Video2edit, you can easily change the frame rate of your videos to match your specific needs.
This tool makes it simple whether you want to increase or decrease the frame rate. It supports a wide range of frame rates, from 16 to 60 fps, and can convert your video to any format you need. With this powerful and versatile tool, you can ensure that your videos look smooth and professional and have the right frame rate for your desired output.
Here’s how to change the video frame rate using Video2Edit:
Step1 On Video2Edit’s website, select “Convert from video“ and upload your file.
Step2 Select an output format and enter a new frame rate (1-120) in the “Change frame rate“ box.
Step3 Click “START“ to begin the conversion process.
3. AConvert Free Video Frame Rate Converter
With AConvert, you can quickly change the frame rate of your video to fit your needs. This online tool offers various frame rates, including 20fps, 24fps, 30fps, 50fps, and more, giving you the flexibility to find the right setting for your video.
Additionally, AConvert offers a range of video editing options, including cutting, merging, rotating, and cropping, allowing you to enhance your video in multiple ways. The process of converting frame rate with AConvert is simple.
Here’s how to change the video frame rate using AConvert:
Step1 Visit the AConvert website, select Video, and upload your video.
Step2 Choose “Change size, bitrate, or frame rate“ and select “Frame Rate“ in the drop-down menu.
Step3 Select a frame rate and click “Convert Now!“ to start the conversion process.
Conclusion
Converting video frame rates can significantly impact your video’s quality and viewing experience. Whether you’re looking to increase or decrease the frame rate, the above options provide easy and efficient ways. Regardless of the tool or software, the process is straightforward, allowing you to change the frame rate with just a few clicks. So go ahead and try out one of these options to improve your video’s frame rate today!
Looking for a Legitimate Tutorial to Create and Add Text Effects in Adobe Premiere Pro? Here Are the Simple Steps for Premiere Pro Text Effects and Find an Alternative Way
If you want to edit your raw video footage and turn ordinary clips into eye-catching videos, you will need a professional video editor. Adobe Premiere Pro is the most commonly used premium video editor that most professionals prefer. When it comes to editing videos, text effects play a major role along with video effects and animations.
If you are new to Adobe Premiere Pro, you will experience a steep learning curve. This is because the user interface is specially designed for professional video editors. Therefore, you might not get Premiere Pro text effects readily available. In this article, we will illustrate how you can add Adobe Premiere Pro text effects to your video project. We will also state the best alternative to Premiere Pro to add stunning text effects easily.
Part 1. Steps to Add Text Effects to Adobe Premiere
Text effects are an essential part of videos to enhance the video content immensely. You can add opening titles and end credits with text effects and animations. You can display the dialogues on the screen as subtitles. Showing location information and shooting date through text effects is quite regular these days. Besides, the use of lower thirds for social media promotion in videos is common. Without further ado, let us look at the steps to add Premiere text effects.
Step1 Add Your Text
First of all, you need to import your video and add text to it and apply different text effects. Here we are starting from scratch for better illustration. Go to Window> Essential Graphics> Text Tool(T). Type your text as per your requirements. You will notice a new text layer appearing under Edit tab.

Select the text layer and you will see all the properties that you can tweak. For example, go to Align and Transform section to reposition and resize your text properly. Go to Text section to change the style of the text. Similarly, there is an Appearance section to adjust color, shadow, and much more.
Step2 Apply Pre-Animated Template
Go to Graphics> Essential Graphics and browser through the title templates available to match your requirements. Once you have selected one title template, drag and drop it into your timeline above your video clip.

Double-click on the text to edit the content and type your title. Go to Essential Graphics panel and customize the text effect as per your preference. You can also choose the available elements included in the template to enhance the text effects as you think fit.
Step3 Edit the Text Effect and Animation
Select the text layer on your timeline to check out the keyframes applied in the template. Go to Effects Control panel and open Keyframe box by dragging it to the right. Adjust the keyframe to speed up or slow down the animation.

Bring the keyframes closer or spread them apart respectively. You can also adjust Velocity Controls present under different text properties as per the speed requirements.
Part 2. Alternative Way to Make Text Effects
If you are new to Adobe Premiere Pro, you will find title effects Premiere Pro difficult to add and edit as per your requirements. It is very common for amateur video editors to look for an easy alternative to Premiere Pro. We recommend Wondershare Filmora as the best alternative to Adobe Premiere text effects.
Filmora has a super intuitive user interface that is suitable for everyone including those who do not have prior video editing experience. There are more text effects and animations available that you can customize to get the desired effect. Here are the steps to add text effects to your video on Filmora.
Free Download For Win 7 or later(64-bit)
Free Download For macOS 10.14 or later
Step1 Download and install Wondershare Filmora and it is available for both Windows and macOS. Launch the application and click on New Project on the welcome screen.

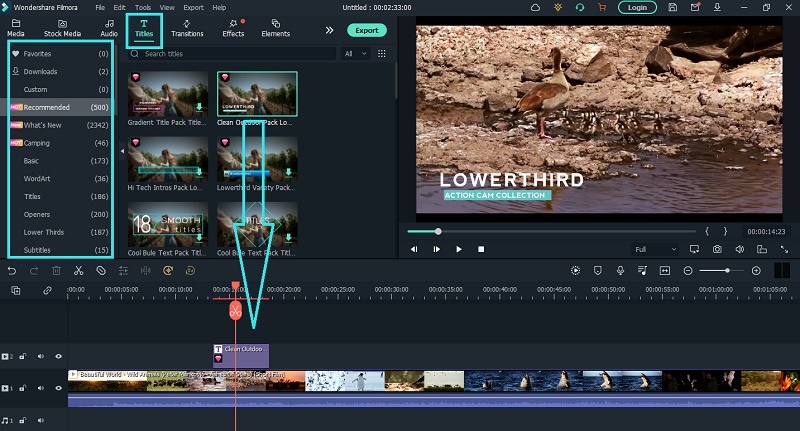
Step2 Drag and drop your video clips under Project Media folder and then onto the timeline. Go to Titles and you will see different categories of text effects and templates.

Step3 Select a template whichever you think is perfect for your project and drop it on the timeline. Adjust its position on the timeline as per where you want it to appear. Double-click on it to edit the title and type in your text. Similarly, you can reposition the text from Viewer as per your need.

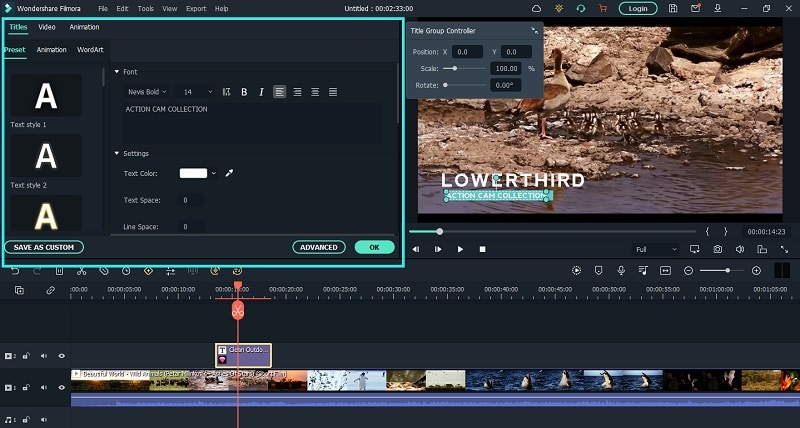
Select the text style as well as adjust fonts and settings to get different styles for your texts. There is also an Advanced section available for detailed editing and getting the desired text effect.
Step4 You can animate the texts in your video from Animation section. Choose from the animation presets to animate individual text in the video. Besides, you can also add keyframes and animate the text as per your preference.

Part 3. Related FAQs on Adobe Premiere Pro
1. How do you make text look good in Premiere Pro?
There are several steps you need to take to make text look good in Premiere Pro. First of all, the color of the text should be in contrast to the background. You can add a rectangle highlighter in the background. Experiment with font and text of the text. Apply a text effect from the different templates available. Customize the effect to get the desired result.
2. How do you add typing effects in Premiere?
Add your text to your video so that a text layer appears on the timeline. Animate the text Effects> Video Effects> Liner Wipe and double-click to get the typing effect. Tweak the parameters like transition completion, wipe angle, and others to smoothen out the animation. Draw a cursor icon using rectangle tool and animation it to move with the text using keyframes.
3. How do I open text effects controls in Premiere Pro?
Select the text layer from the timeline of the project. From the main menu, go to Windows> Effects Control option to open effect controls for text. Otherwise, you can directly go to Effects Control tab located below the menu bar after selecting your text layer.
The Bottom Line
Adding text effects in Premiere Pro can be slightly overwhelming for an amateur video editor who does not have enough experience with Premiere Pro. We have stated the simple steps to apply Premiere Pro text effects to your video project. However, we recommend Wondershare Filmora as the best and the easiest alternative to Premiere Pro where you get more text effects and add them instantly and effortlessly.
Free Download For macOS 10.14 or later
Step1 Download and install Wondershare Filmora and it is available for both Windows and macOS. Launch the application and click on New Project on the welcome screen.
Step2 Drag and drop your video clips under Project Media folder and then onto the timeline. Go to Titles and you will see different categories of text effects and templates.
Step3 Select a template whichever you think is perfect for your project and drop it on the timeline. Adjust its position on the timeline as per where you want it to appear. Double-click on it to edit the title and type in your text. Similarly, you can reposition the text from Viewer as per your need.
Select the text style as well as adjust fonts and settings to get different styles for your texts. There is also an Advanced section available for detailed editing and getting the desired text effect.
Step4 You can animate the texts in your video from Animation section. Choose from the animation presets to animate individual text in the video. Besides, you can also add keyframes and animate the text as per your preference.
Part 3. Related FAQs on Adobe Premiere Pro
1. How do you make text look good in Premiere Pro?
There are several steps you need to take to make text look good in Premiere Pro. First of all, the color of the text should be in contrast to the background. You can add a rectangle highlighter in the background. Experiment with font and text of the text. Apply a text effect from the different templates available. Customize the effect to get the desired result.
2. How do you add typing effects in Premiere?
Add your text to your video so that a text layer appears on the timeline. Animate the text Effects> Video Effects> Liner Wipe and double-click to get the typing effect. Tweak the parameters like transition completion, wipe angle, and others to smoothen out the animation. Draw a cursor icon using rectangle tool and animation it to move with the text using keyframes.
3. How do I open text effects controls in Premiere Pro?
Select the text layer from the timeline of the project. From the main menu, go to Windows> Effects Control option to open effect controls for text. Otherwise, you can directly go to Effects Control tab located below the menu bar after selecting your text layer.
The Bottom Line
Adding text effects in Premiere Pro can be slightly overwhelming for an amateur video editor who does not have enough experience with Premiere Pro. We have stated the simple steps to apply Premiere Pro text effects to your video project. However, we recommend Wondershare Filmora as the best and the easiest alternative to Premiere Pro where you get more text effects and add them instantly and effortlessly.
How to Set Up Twitch Green Screen
Green screens are a fun way for creators to bring their personality to their stream, allowing them to dynamically alter their stream background and make their content appear even more engaging and polished. With Twitch green screen background, you can easily configure Chroma key settings and detect your green screen with a single click.
The twitch green screen attaches directly to the back of your chair. You don’t have to worry about stands, or spacing behind your chair. Just attach it and go. This portable green screen can fit on the back of your chair a feature that makes it easy to assemble and use for start-up twitchers.
How to set up a Green Screen with Twitch Studio
**Set Up Your Camera
First things first, make sure that your camera is being detected on Twitch Studio. If you do not already have a layer with your webcam on your scene, click Edit Scene and add a webcam layer by clicking the + icon on the left next to Layers.
Once your webcam layer has been created, make sure that the desired device is selected, plugged in, and that you have not turned off every webcam (Camera icon on the bottom left of Twitch Studio).
**Set Up Your Green Screen
Once your green screen is set up in your background, select your webcam layers to display your webcam settings.
We recommend using the Auto-Detect Color feature as it will automatically detect the best color code for you and will be a great base to work from. If you prefer, you can manually pick the color code by either providing the color code in the Color to Remove field or clicking on the colored square to display a color spectrum that you can select from.
The Chroma Key section is located at the bottom of the webcam settings, and you will be able to toggle the chroma key on and off by clicking the eye icon.
To adjust the chroma key settings, you can click on Edit Chroma Key. You will be able to change the color code and change similarity, edge transparency and color correction for the perfect fit.
Other free ways to set up green screen for Twitch streams
OBS
OBS Studio is a free and open-source app for screen-casting and live streaming. Written in C/C++ and built with Qt, OBS Studio provides real-time capture, scene composition, recording, encoding, and broadcasting via the Real Time Messaging Protocol(RTMP).It can stream Videos to any RTMP supporting destination including YouTube, Twitch, Instagram and Facebook.
OBS Green Screen Set-up Steps
- Make sure you have the following equipment prepared: a solid green background, webcam or video camera, lighting, and OBS Studio.
- Download the latest stable version of OBS Studio from the official website and install the software. Open OBS and let the Auto-Configuration Wizard optimize the software’s settings based on your hardware.
- Now you can add a video source.
- Right-click on the video source you’ve created and select Filter.
- Click the +button under the Effects Filters section and select Chroma Key.
- Type in a name for this effect layer.
- After you add a chroma key, OBS will automatically create and adjust the baseline settings for the filter. You can experiment with the sliders and settle when you are satisfied with the result.
- Make sure you aren’t wearing any green or reflective material. You can double-checkthe performance on the preview screen.
- If things are working smoothly, you are all set to start streamingwith the green screen on.
Pro tip:
You can follow the instructions above and live stream to multiple platforms at once with Restream. Multistreaming to platforms like YouTube, Facebook, Twitter, Twitch, and LinkedIn allows you to drastically increase the audience reach and grow your followers.
XBOX
It is a video gaming brand created and owned by Microsoft. The brand consists of five video game consoles, as well as applications(games), streaming services, an online service by the name of Xbox network, and the development arm by the name of Xbox Game Studios. The brand was first introduced in the United States in November 2001, with the launch of the original Xbox console.
Steps on Using Xbox Green Screen
Make your Xbox console reflect your personal style by changing its look and feel. Choose a favourite colour, update your background with game art or a customised image, or select a different theme.
Choose your color
The color you choose will appear in tiles and accents on your Xbox. It also follows you to any console you sign in to.
- Press the Xboxbutton on your controller to open the guide, and then select Profile & system > Settings > General > Personalisation > My color & theme > My color.
- Select a color, and then select OK.
**Choose your background
Your background appears where you’d expect it to—in the background of Home. It can be a solid color or an image, such as game art, achievement art, a screenshot, or a customized image. Achievement art follows you to any Xbox, but screenshots and customized images stay on the console that they’re set to.
To choose your background, press the Xbox button on your controller to open the guide, and then select Profile & system > Settings > General > Personalization > My background.
From here, choose from the following options:
**Solid color and game art
Select a background color, and then select OK. To then add game art, choose the game most recently played and the game art will appear as the background.
**Achievement art
- Select Achievement art> Gaming.
- Select a game from your list of games with achievements.
- Select the achievement with the background art you want.
- Select Set as background.
**Custom image
Note Customized images must be smaller than 3 MB, and the best size for backgrounds is 1920 x 1080.
- Copy a JPG or PNG file that you want to use to a USB device, and then plug it into your Xbox.
- On your Xbox, select Customized image. A dialogue box appears that shows the contents of your console and attached USB device.
- Select the USB device, and then choose your image.
**Screenshot
- Select Screenshot, then choose the one you want.
- Select More actions> Set as background.
**Dynamic background
Note Dynamic backgrounds are only available on Xbox Series X|S.
- Select Dynamic background.
- Select the background art you want.
- Select Apply.
Note Some dynamic backgrounds are only available through promotions with special edition hardware (like the 20th Anniversary Special Edition controller). To see one of these special dynamic backgrounds in your list of options, make sure your special edition hardware is turned on and in use with your console when you set your background.
**Remove customized background
If you want to remove your background, select Remove customized background.
**Choose your theme
Themes can be set to dark or light and can also be scheduled. To set a theme:
- Press the Xboxbutton on your controller to open the guide, and then select Profile & system > Settings > General > Personalization.
- Select My color & theme.
- Under System theme, select Darkor Light. Select Scheduled to activate your theme according to specific times, or to start at sunrise and sunset.
Themes stay on the console they’re set to.
Solid Color
Achievement Art
Custom Image
Remove Custom Background
Filmora
Wondershare Filmora is the one of best video editing software with cool features that compares to other competing video editing Softwares. Many video editing programs claim to offer professional results; Filmora is one of a few consumer-level tools that actually delivers.
For Win 7 or later (64-bit)
For macOS 10.12 or later
Key Features
4k editing support
GIF support
Noise removal
Color tuning
Advanced tech editor
Audio mixer
Video stabilization
Scene detection
Conclusion
You probably already have an idea of how to use a green screen, at least in principle. You film something or someone in front of a colored background — the green screen — then you replace everything that’s in the color of the screen with other footage, images, charts, presentations, or whatever visuals you want. However, Chroma keying a live stream works almost the same way. The main difference is that you have to replace the green screen as you’re filming, rather than during editing.
How to Add Motion Titles
Do you want to make your videos eye-catching instantly? Looking for some cool title animations to make your texts stand out? You should definitely opt for motion title templates that are widely available in popular video editors. Motion title templates come preloaded with animated texts, engaging graphic elements, and even background effects.
You can add them directly to your video and customize them as per you requirements so that your video looks exactly the way you desire. Different video editors have different motion titles, and therefore, you should check them out one by one to find out the templates you are looking for. We will illustrate title motion graphics in all the leading video editors.
Part 1. Add Motion Title with Filmora
The easiest way to add motion title to your video on your computer is through Wondershare Filmora . Filmora is a professional video editor that is available for Windows and Mac users. Filmora has the best collection of motion title templates, and the user interface is super intuitive and anyone can use without any prior experience. Here are the steps to add motion title with Filmora.
Step1Install and launch Wondershare Filmora on your computer. Click on New Project option on the welcome screen or go to File menu and click on New Project option.

Step2Go to File menu and Import Media option to import your video file. Otherwise, you can simply drop the video file into Project Media folder.
Step3Drag the video file from Project Media folder and drop it into the Timeline.

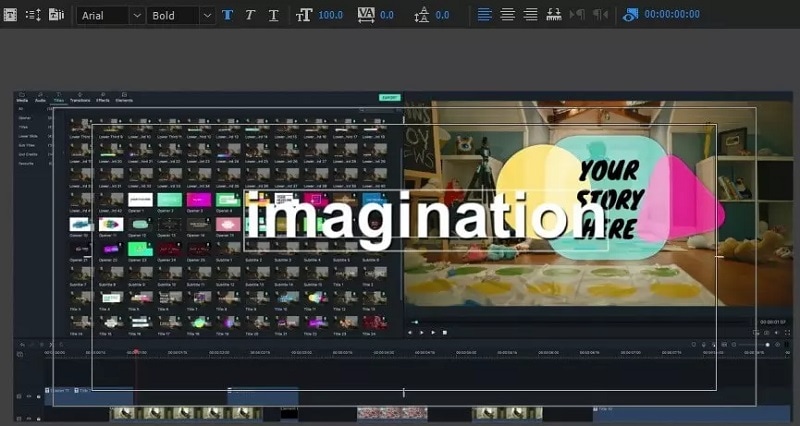
Step4Go to Titles at the top and go to the left panel. You can different categories of motion title templates. Select any desired text effect and drop into the Timeline above the video layer wherever you want.
Step5Double clicking on the text layer on Timeline to edit the text and change the styles. Under Preset tab, you can change font, size, and color. Finally, click on OK button to save the edits done.
Part 2. Add Motion Title with Premiere Pro
Adobe Premiere Pro is a renowned video editor that is mostly used by professionals to edit videos and add effects and animations. Even though Premiere Pro has a steep learning curve, you can create motion title in simple steps. You can write any text on the video and select from different effects and animations to create motion title graphics. Here are the steps to add title motion graphics Premiere Pro free.
Step1Launch Premiere Pro and go to New> Project option. Import the video file and drop it into Timeline.
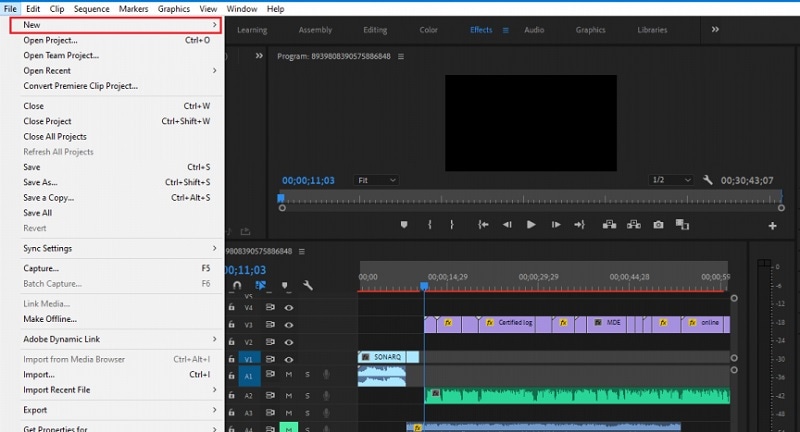
Step2Go to Title> New Title> Default Still option and follow the on-screen instructions.

Step3You will see different types of title styles and designs to choose from as you feel.

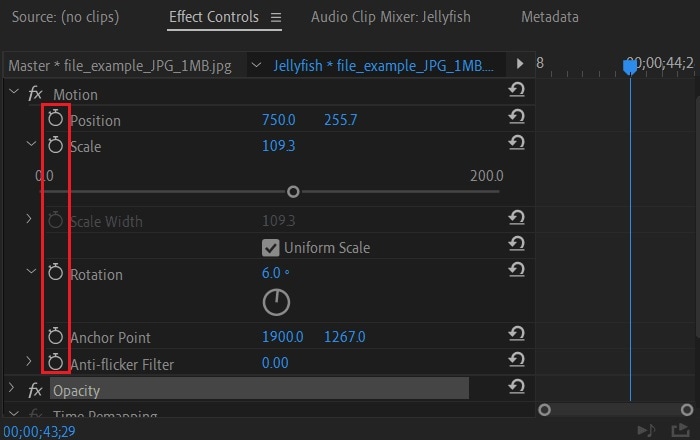
Step4Click on Type Tool option and click on the area on the video where you want the text to appear. You can customize them from the right panel from Title Styles, Title Properties, Tools and Title Actions.
Step5To add motion to the title, click on Effects Control window. Click on any desired animation and turn to Stopwatch icon to apply the effect to the text. There is a dedicated Motion option available.
Part 3. Make motion title with Studio
Studio is a popular video editing software where you can not only apply motion title presets but also create motion title presets from scratch. The reason why video editors choose Studio is because it allows users to customize everything and create different templates and animations for personalization. Here are the steps to create title motion graphics in Studio as per your requirements.
Step1Launch Studio. Import your video file, and you can import single frames such as images from a live video for stop motion titles. Once you have imported, go to the header bar above the Timeline. Click on Create Title option to open Title Editor to create title motion.
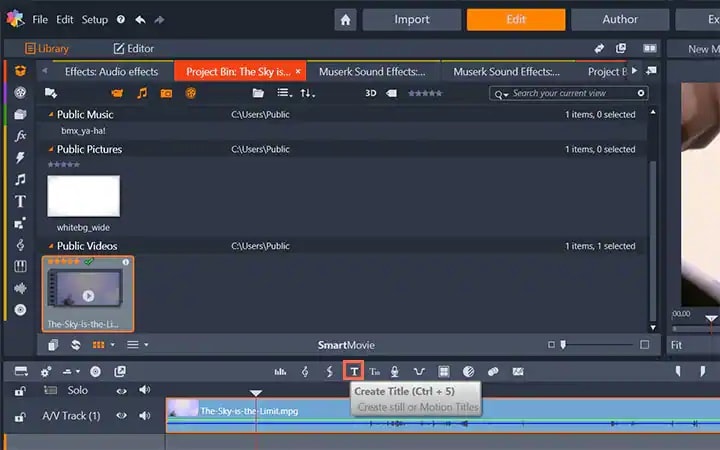
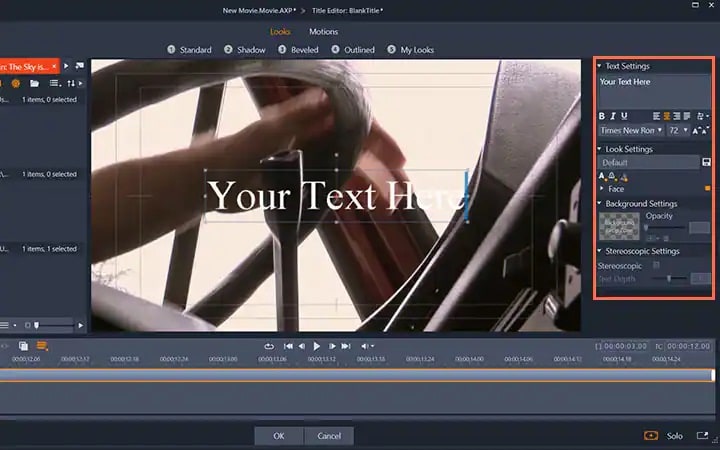
Step2Add your preferred text under Title Editor and adjust font, size, and style as you feel. Go to the right side to make changes to Look, Background, and Stereoscopic Settings to get the perfect text style from the wide range of choices available.
Step3Click on Motion option at the top to add motion to the text. Choose from the different motion title templates as per your preference.
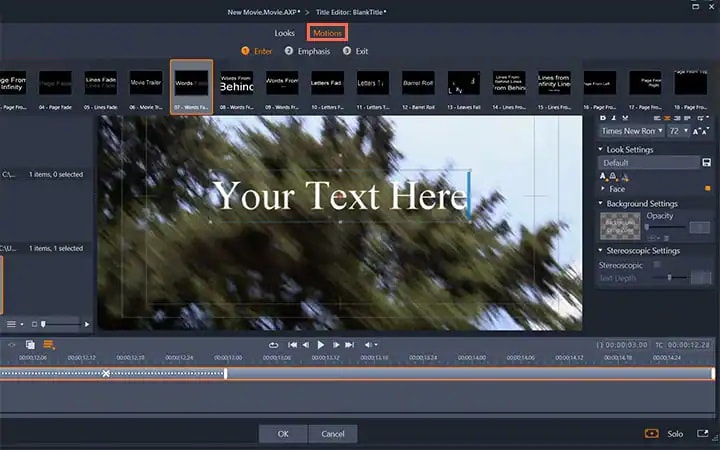
Step4You can adjust the duration of the motion effect from the right panel and click on Ok button.

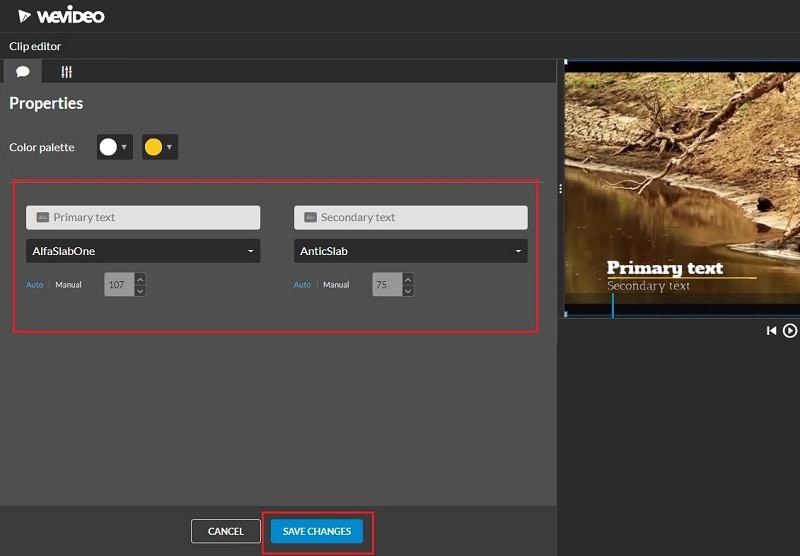
Part 4. Add Motion Title with WeVideo
WeVideo is a popular online video editor that you can use to add title motion graphics Premiere Pro free. You can find many motion titles on WeVideo for free like you get in Premiere Pro and there are many exclusive motion text templates available. You need to create a free account with WeVideo to get started. You can create your video from scratch by selecting from the available video templates. You can even import your recorded video and add motion texts and animations as per your preference. Here are the steps to add motion title with WeVideo.
Step1Open your web browser and visit “wevideo.com”. Click on Try For Free button. Sign up for free and go to WeVideo video editor.
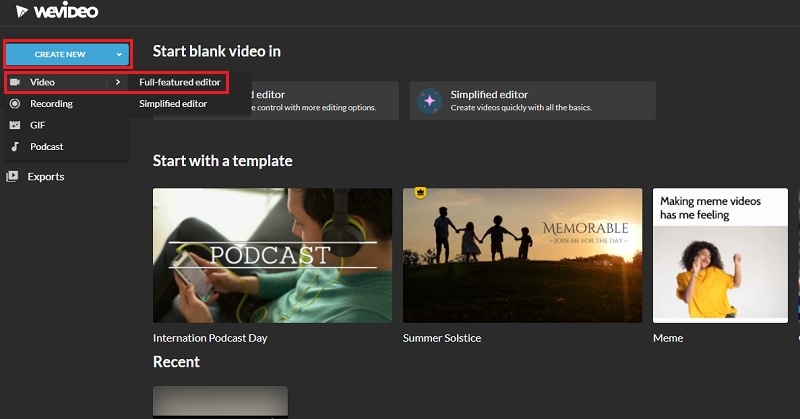
Step2Click on Create New button and select Video option. Click on Full-featured editor option.
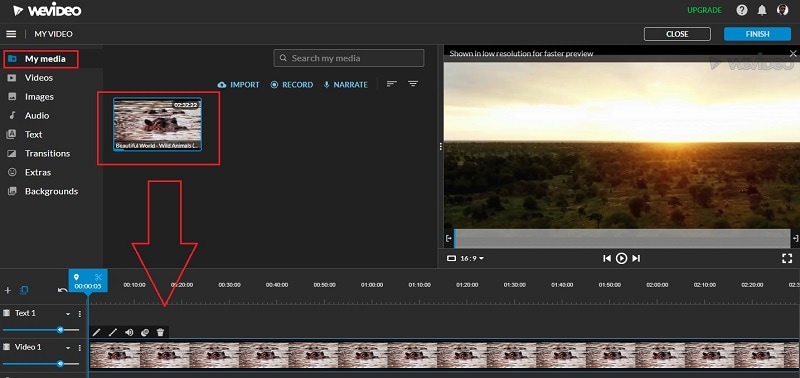
Step3Drag and drop your video file into My Media folder and bring it to Timeline.
Step4Go to Text tab and you will see all the motion animated titles under Titles section. Click on them to check out their previews in Viewer. If you have selected anyone, drag and drop it into Timeline.
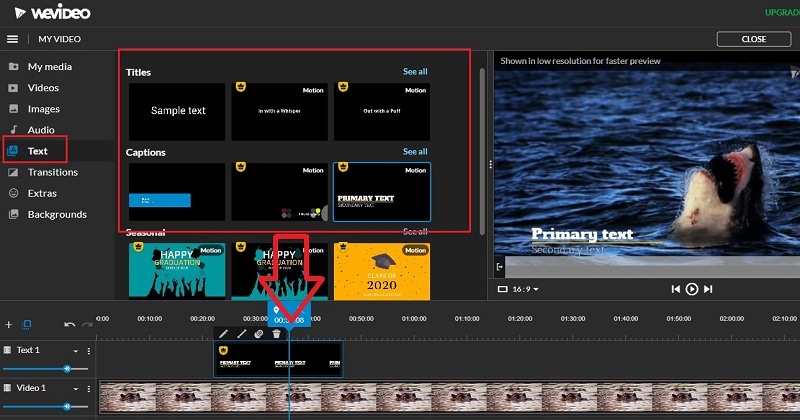
Step5Adjust the position where you want the title to appear on the video and stretch the duration as required. Double-click on the title to edit and customize it as per your preference. Finally, click on Save Changes button.
The Bottom Line
Motion titles are extremely important for any video because they bring in a variety to your video. They make the video eye-catching and help in getting the message across by grabbing the attention of the viewers. We have illustrated how to add motion titles Premiere Pro and Studio. You can also use WeVideo online video editor. We recommend Wondershare Filmora for its extensive collection of motion title templates to choose from and apply to your text.
Free Download For Win 7 or later(64-bit)
Free Download For macOS 10.14 or later
Also read:
- In 2024, Editing Videos Was Never so Easy as It Is Now. With Video Enhancer Ai, This Task Is Very Simple to Do and No Trouble Will Be There in Getting the Things Done as Needed. Choose the Right AI Video Enhancer for Task Completion
- Updated Looking Forward to Making up Your Career in Video Editing? Land in Here to Learn About the Credibility of some Popular Video Editing Courses
- In 2024, Experience Time Differently with The Top Slow-Motion Applications
- Updated Best 6 WMV to GIF Converters
- Updated 2024 Approved Top List 20 Best LUTs for Music Videos
- Updated How To Combine Videos On TikTok
- Want to Imbibe Your Graphic Expertise with Designing Classic iMovie Presentations? Be Here to Work Through the Process Within the Quickest Possible Time Span
- Updated In 2024, 10 Top Suggestions for AI Video Interviews
- Updated In 2024, An Overview of the Best Free LUTs to Use
- In 2024, Learn About Open Broadcaster Software and How to Perform Obs Color Correction. Also, Explore the Various Aspects of Color Correction Like Contrast, Brightness, Saturation, Among Others
- Updated How Can You Create Outstanding Educational Teaching Videos for 2024
- New How to Create Video Contents That Convert Sales
- Updated 10 Best Websites to Discover Free Premiere Pro Video Templates for 2024
- Updated 10 Best Sony LUT for Different Purposes for 2024
- Updated In 2024, 4 Ways to Add White Border to Video on Mobile and Desktop
- New In 2024, 7 Ways Add Subtitles to MKV Videos on All Platforms
- New In 2024, 10 Best Websites to Discover Free Premiere Pro Video Templates
- New Working Out All Important Details of Slowing Down Video in After Effects for 2024
- New 2024 Approved The Ultimate Guide to Make a Text Collage
- How to Reset a Poco C51 Phone That Is Locked | Dr.fone
- Recover Apple iPhone 12 Pro Max Data From iTunes | Dr.fone
- Top 4 Android System Repair Software for Oppo A59 5G Bricked Devices | Dr.fone
- Updated In 2024, Top 4 Morgan Freeman Voice Generator Tools for Voice Cloning
- Proven Ways in How To Hide Location on Life360 For Meizu 21 | Dr.fone
- Fake Android Location without Rooting For Your Tecno Pova 5 Pro | Dr.fone
- How To Repair System of Apple iPhone 7? | Dr.fone
- Complete guide for recovering music files on Huawei P60
- How to get the dragon scale and evolution-enabled pokemon On Tecno Spark 10C? | Dr.fone
- How to Check Distance and Radius on Google Maps For your Oppo A78 5G | Dr.fone
- Title: New 8 Frame Rate Video Converters for a Professional Finish
- Author: Chloe
- Created at : 2024-05-20 03:37:44
- Updated at : 2024-05-21 03:37:44
- Link: https://ai-editing-video.techidaily.com/new-8-frame-rate-video-converters-for-a-professional-finish/
- License: This work is licensed under CC BY-NC-SA 4.0.
