
:max_bytes(150000):strip_icc():format(webp)/samsungappstore-c0194a478ba54e90a798b3bb5ff4f6d5.jpg)
New 8 Tips to Apply Cinematic Color Grading to Your Video
8 Tips to Apply Cinematic Color Grading to Your Video
Create High-Quality Video - Wondershare Filmora
An easy and powerful YouTube video editor
Numerous video and audio effects to choose from
Detailed tutorials are provided by the official channel
After a successful video shoot, video editing tends to wrap up the video production process. However, a video cannot be enlivened by using simple video editing tools, i.e., cut, crop, and trim, but rather tools such as cinematic color grading. Usually, directors want their video to evoke their intended ambiance and appear more realistic – This can only be achieved through cinematic color grading.
Color grading is the alteration and enhancement of color in a video, motion picture, or still image. Color grading is an essential tool for videographers since it enables them to enhance the mood or tone. Stick to this article and learn about the eight tips to apply cinematic color grading to your video.
In this article
02 8 Tips to Apply Cinematic Color Grading to Your Video
Don’t Make These Mistakes
Even though to err is human, there are some mistakes that colorists and video editors need to avoid at all costs. It is not only because they will make them look amateurish but also undermines the message and impact of the video.
Some people assume color grading is as simple as adding filters to their Instagram photos which they are absolutely wrong. Color grading is a long and frustrating process, and it only requires “persons with a thick skin.”
Some mistakes are not only committed by amateurs alone but also professional colorists who are in a rush to complete their projects on due time. Usually, these mistakes degrade the quality output. Some of the mistakes that one needs not make include:
1. Using a Poorly Calibrated Monitor
Almost every videographer and colorist’s goal is to design footages that distinctively display their primary colors and decipher the intended message. And this can only be achieved using a properly calibrated monitor.
Before working on a project, you ought to crosscheck your monitor calibration. Most people assume that the calibration is accurate since they possess a new, out-of-the-box monitor. It is utterly wrong since retailer shops usually adjust the monitor settings to overblown saturation and contrast to attract customers.
Furthermore, if you opt to edit your videos without adjusting your monitor calibration, you will have a poor footage.
2. Poor Prepping of the Video Footage
One major mistake that videographers often make is not prepping their video correctly. A poorly prepped footage is one that has a bad color space conversion. Usually, the outcome result of poorly prepped footage is an imbalanced image.
Prepping footage is not as easy as an apple pie. Besides, most videographers tend to follow a shortcut by starting messing with the gains and individual nodes, forgetting that a shortcut is often a wrong cut.
The best way of prepping a video is to start by making separate nodes and labeling them differently.
3. Imbalancing the Shadow
Have you ever seen video footage with partially opaque shadows? And when you look keenly, you see tinted greens and reds. Usually, this is a result of an imbalanced shadow.
This mistake is not only carried out by beginner videographers but also professionals who are always in a hurry to complete a project. When you look at your scope, you see the shadows are lifted or down in other scenarios – This is also a result of shadow imbalance.
4. Overusing LUTs
A mistake that beginner editors often make is overusing LUTs. Footages with overly used LUTs often appear to be dull. A thing that videographers need to observe when using LUTs is consistency.
When using LUTs, you need to ensure that your project has similar saturation, colors, and contrast throughout your video project. Moreover, it would be best to choose your LUTs based on the film color palette and your story.
5. Having Limited break
Having enough break enables one’s eyes to recalibrate. As a colorist, your eyes are often considered the main asset. Sitting for long periods in your workstation and staring for long hours at your monitor may cause one to add more saturation and contrast, thus making the video dull. Therefore the best remedy is to take a break from your monitor.
Besides, coming from a break enables one to have another different perspective about the color grading of the project.
8 Tips to Apply Cinematic Color Grading to Your Video
When it comes to creating cinematic looks in video footage, the camera type is usually non-essential. What matters is that you capture quality videos with the right angles then leave the rest to color grading.
For a video clip to look more cinematic, a couple of elements are put together. Here, we will look at those elements and create stunning videos.
1. Use Lumetri Color to adjust brightness, contrast, and saturation
The Lumeri color is an essential color grading functionality in most premiere software, including Wondershare Filmora, Adobe After Effects, and Davinci Resolve 17. With this functionality tool, you can carry out a wide range of customizable settings such as hue, saturation, contrasts, brightness, and tone.
The lumetri panel contains a histogram, vectorscope, parade scope, and waveform monitor. In your lumetri panel, you can measure the brightness and tonal values using a histogram, the light intensity with a waveform monitor, saturation and hue using vectorscope, and color channel using parade scope.
Adjusting the brightness, contrast, hue, saturation, and tone to moderate levels will give your video clip that cinematic look.

2. Use Cosmo functionality to adjust skin tones
Due to the light effect, shots taken during the day will have inconsistent color matches, especially skin tone. In the post-production process, one needs to make uniformity in skin tone and the clip. To rectify this, you need to involve a professional color grading functionality, Cosmo.
With cosmo, you can adjust the skin color, squeeze the skin, and soften the skin. Generally, Cosmo makes people in video clips look their best.

3. Use Highlights and Shadows adjustment
A clip will look more cinematic when the shadows and highlights are brought out as separate entities. The shadows become more vivid when adjusted to either teal, purple or blue. You can go a mile and adjust the highlights to become crystal clear by making the footage become yellow, red, or orange.
When carrying out color grading, you need to know the various video demands, such as the horror clips demand more of the dark shadow.

4. Use Vectorscope to get the accurate adjustment
Naked eyes cannot effectively see all the errors in a video project, which is the essence of having a vectorscope. A vectorscope provides all the quantitative information about a video image – This lessens work for video editors.
Vectorscope provides extensive details, such as how intense a given color is – This will help you make necessary adjustments to your footage.

5. Use the black and white functionality to change the opacity
Even though you can change your footage to black and white using the hue and saturation functionality, the black and white tool gives you more control.
This functionality feature can make your footage blend with the soft light part. Besides, it is best to first lower the contrast of your image or video to black and white to be able to highlight the unclear parts.

6. Use levels to unveil the whites, blacks, and mids of an image
Levels is a functionality feature that displays the blacks, whites, and mids of footage. With this functionality, you can make the highlight parts lighter and the shadows appear darker, which is essential in making cinematic videos.
In the levels histogram, the left slider defines the darkest part, the right defines the brightest part, and the top defines distributions.
In software such as Adobe After Effects, you can set this functionality to automatic or customize it based on your preference.

7. Use Vibrance to control other levels of saturation
The saturation of video footage or a clip can be regulated using vibrance functionality. With vibrance, you can alter the saturation levels of your clip while simultaneously minimizing clippings for the colors to approach complete saturation.
When you want to use this functionality in After Effects, you drag and drop it right on top of your footage – The exact part you want to apply it.

8. Use a Vignette to fade edges
To increase the point of focus, you need to fade your edges. In color grading, you can only fade your edges with a vignette.
This functionality allows you to center images or certain video parts and make the edges unclear. Your emphasis will be more on the central region.

Bottom line
● Color grading is not a piece of cake. Besides, you should not use it as an excuse for making simple mistakes such as the ones highlighted above. You need to pay close attention when color grading your films, and you will have your video project mapping out its intended meaning.
● Moreover, you need not be a pro to carry out cinematic color grading. You need to follow the above eight tips altogether to apply color grading to your video. You will create stunning video files that leave your viewers’ eyes gorged out.
After a successful video shoot, video editing tends to wrap up the video production process. However, a video cannot be enlivened by using simple video editing tools, i.e., cut, crop, and trim, but rather tools such as cinematic color grading. Usually, directors want their video to evoke their intended ambiance and appear more realistic – This can only be achieved through cinematic color grading.
Color grading is the alteration and enhancement of color in a video, motion picture, or still image. Color grading is an essential tool for videographers since it enables them to enhance the mood or tone. Stick to this article and learn about the eight tips to apply cinematic color grading to your video.
In this article
02 8 Tips to Apply Cinematic Color Grading to Your Video
Don’t Make These Mistakes
Even though to err is human, there are some mistakes that colorists and video editors need to avoid at all costs. It is not only because they will make them look amateurish but also undermines the message and impact of the video.
Some people assume color grading is as simple as adding filters to their Instagram photos which they are absolutely wrong. Color grading is a long and frustrating process, and it only requires “persons with a thick skin.”
Some mistakes are not only committed by amateurs alone but also professional colorists who are in a rush to complete their projects on due time. Usually, these mistakes degrade the quality output. Some of the mistakes that one needs not make include:
1. Using a Poorly Calibrated Monitor
Almost every videographer and colorist’s goal is to design footages that distinctively display their primary colors and decipher the intended message. And this can only be achieved using a properly calibrated monitor.
Before working on a project, you ought to crosscheck your monitor calibration. Most people assume that the calibration is accurate since they possess a new, out-of-the-box monitor. It is utterly wrong since retailer shops usually adjust the monitor settings to overblown saturation and contrast to attract customers.
Furthermore, if you opt to edit your videos without adjusting your monitor calibration, you will have a poor footage.
2. Poor Prepping of the Video Footage
One major mistake that videographers often make is not prepping their video correctly. A poorly prepped footage is one that has a bad color space conversion. Usually, the outcome result of poorly prepped footage is an imbalanced image.
Prepping footage is not as easy as an apple pie. Besides, most videographers tend to follow a shortcut by starting messing with the gains and individual nodes, forgetting that a shortcut is often a wrong cut.
The best way of prepping a video is to start by making separate nodes and labeling them differently.
3. Imbalancing the Shadow
Have you ever seen video footage with partially opaque shadows? And when you look keenly, you see tinted greens and reds. Usually, this is a result of an imbalanced shadow.
This mistake is not only carried out by beginner videographers but also professionals who are always in a hurry to complete a project. When you look at your scope, you see the shadows are lifted or down in other scenarios – This is also a result of shadow imbalance.
4. Overusing LUTs
A mistake that beginner editors often make is overusing LUTs. Footages with overly used LUTs often appear to be dull. A thing that videographers need to observe when using LUTs is consistency.
When using LUTs, you need to ensure that your project has similar saturation, colors, and contrast throughout your video project. Moreover, it would be best to choose your LUTs based on the film color palette and your story.
5. Having Limited break
Having enough break enables one’s eyes to recalibrate. As a colorist, your eyes are often considered the main asset. Sitting for long periods in your workstation and staring for long hours at your monitor may cause one to add more saturation and contrast, thus making the video dull. Therefore the best remedy is to take a break from your monitor.
Besides, coming from a break enables one to have another different perspective about the color grading of the project.
8 Tips to Apply Cinematic Color Grading to Your Video
When it comes to creating cinematic looks in video footage, the camera type is usually non-essential. What matters is that you capture quality videos with the right angles then leave the rest to color grading.
For a video clip to look more cinematic, a couple of elements are put together. Here, we will look at those elements and create stunning videos.
1. Use Lumetri Color to adjust brightness, contrast, and saturation
The Lumeri color is an essential color grading functionality in most premiere software, including Wondershare Filmora, Adobe After Effects, and Davinci Resolve 17. With this functionality tool, you can carry out a wide range of customizable settings such as hue, saturation, contrasts, brightness, and tone.
The lumetri panel contains a histogram, vectorscope, parade scope, and waveform monitor. In your lumetri panel, you can measure the brightness and tonal values using a histogram, the light intensity with a waveform monitor, saturation and hue using vectorscope, and color channel using parade scope.
Adjusting the brightness, contrast, hue, saturation, and tone to moderate levels will give your video clip that cinematic look.
2. Use Cosmo functionality to adjust skin tones
Due to the light effect, shots taken during the day will have inconsistent color matches, especially skin tone. In the post-production process, one needs to make uniformity in skin tone and the clip. To rectify this, you need to involve a professional color grading functionality, Cosmo.
With cosmo, you can adjust the skin color, squeeze the skin, and soften the skin. Generally, Cosmo makes people in video clips look their best.
3. Use Highlights and Shadows adjustment
A clip will look more cinematic when the shadows and highlights are brought out as separate entities. The shadows become more vivid when adjusted to either teal, purple or blue. You can go a mile and adjust the highlights to become crystal clear by making the footage become yellow, red, or orange.
When carrying out color grading, you need to know the various video demands, such as the horror clips demand more of the dark shadow.
4. Use Vectorscope to get the accurate adjustment
Naked eyes cannot effectively see all the errors in a video project, which is the essence of having a vectorscope. A vectorscope provides all the quantitative information about a video image – This lessens work for video editors.
Vectorscope provides extensive details, such as how intense a given color is – This will help you make necessary adjustments to your footage.
5. Use the black and white functionality to change the opacity
Even though you can change your footage to black and white using the hue and saturation functionality, the black and white tool gives you more control.
This functionality feature can make your footage blend with the soft light part. Besides, it is best to first lower the contrast of your image or video to black and white to be able to highlight the unclear parts.
6. Use levels to unveil the whites, blacks, and mids of an image
Levels is a functionality feature that displays the blacks, whites, and mids of footage. With this functionality, you can make the highlight parts lighter and the shadows appear darker, which is essential in making cinematic videos.
In the levels histogram, the left slider defines the darkest part, the right defines the brightest part, and the top defines distributions.
In software such as Adobe After Effects, you can set this functionality to automatic or customize it based on your preference.
7. Use Vibrance to control other levels of saturation
The saturation of video footage or a clip can be regulated using vibrance functionality. With vibrance, you can alter the saturation levels of your clip while simultaneously minimizing clippings for the colors to approach complete saturation.
When you want to use this functionality in After Effects, you drag and drop it right on top of your footage – The exact part you want to apply it.
8. Use a Vignette to fade edges
To increase the point of focus, you need to fade your edges. In color grading, you can only fade your edges with a vignette.
This functionality allows you to center images or certain video parts and make the edges unclear. Your emphasis will be more on the central region.
Bottom line
● Color grading is not a piece of cake. Besides, you should not use it as an excuse for making simple mistakes such as the ones highlighted above. You need to pay close attention when color grading your films, and you will have your video project mapping out its intended meaning.
● Moreover, you need not be a pro to carry out cinematic color grading. You need to follow the above eight tips altogether to apply color grading to your video. You will create stunning video files that leave your viewers’ eyes gorged out.
Adobe Photoshop Is the Best Photo Editor to Add Green Screen Effect to Your Photo While Wondershare Filmora Is the Best Video Editor to Add Green Screen Effect to Your Video
Removing green screen backgrounds and replacing them with stunning videos is a common practice in video and movie making. The same process is applicable to still photos as well. You can take a photo with a green screen background and replace the screen with any photo as per your preference and requirement. You will need a high-quality photo editor to add green screen effects to your photo. There is no better photo editor in the world than Adobe Photoshop.
First, you have to opt for remove green screen Photoshop and then add anything you want in place of the green screen. The difference between Chroma key Photoshop and any other photo editor is that you can pay attention to details and remove the entire green screen halo effect around the main subject or object on the photo. Therefore, there will be no jittery green edges and green patches to disturb the overall photo quality. Here are the steps to use green screen effect in Adobe Photoshop.
1. How To Use Green Screen in Photoshop?
There are various ways available to remove greenscreen Photoshop. The beginners prefer using the Magic Wand tool but there will always be green patches around the main object on the photo. These green patches will get highlighted when you insert any image in the background. Therefore, we are using the best method to Chroma key Photoshop and that is through Color Range option. Here are the detailed steps to use color keying in Photoshop to use green screen effect.
Step 1: Launch Adobe Photoshop and open your photo with green screen background.
Step 2: Go to Select menu and click on Color Range.

Step 3: Pick the Eyedropper tool. Hold Shift key to select the green background. You can also hold Alt key to remove any selection that you might have done by mistake. When you are perfectly ok with the selection of the green screen background, you should click on OK button.

Step 3: Go to Select menu and click on Inverse. Now, the selection will be on the main subject instead of the background.

Step 4: If you want to see a preview of the selection in your photo, you should select Image radio button and from Selection Preview, select any option other than None.

Step 5: Go to Select menu again and click on Refine Edge. Use the sliders to fine-tune the selection so that the selection is smooth on the edges of the main subject of the photo. Once done, click on OK button.

Step 6: Go to Select menu and click on Inverse again.
Step 7: Press Delete key to delete the green screen background selection.
Step 8: Open the replacement image which you want to put in the place of the green screen background that you have just deleted.
Step 9: Select the entire replacement image and copy the replacement. Come back to your photo and paste the replacement image. Make sure that the layer of the replacement image must be placed below the layer of your photo.

Step 10: You can adjust the size of the images as per your requirement so that everything fits perfectly in the frame. Similarly, you should adjust the color scheme so that the superimposition does not look awkward.
2. Best Way To Add Green Screen Effect To Video
In the previous section, we have stated how to remove the green screen background in any image and replace that with a stunning background photo. In this section, we will state how to add green screen effects in a video. There are many who think that adding green screen effects in a video takes a lot of expertise, but it is not the case.
If you select the suitable video editor, it is a matter of a few steps only. We recommend Wondershare Filmora to add green screen effects to your video where you have shot the scenes with green screen backgrounds. Here are the steps to follow to remove green screen backgrounds and replace with any photo or video as per your preference.
For Win 7 or later (64-bit)
For macOS 10.12 or later
Step 1: Download and install Wondershare Filmora.
Step 2: Launch Filmora and go for Create New Project option to get started.
Step 3: Import your video with green screen background and move it to the Timeline.
Step 4: Import the replacement photo or video and put it directly on the Timeline.
On the Timeline, your recorded video should be below the replacement photo or video.

Step 5: Double-click on your video, and you will come across a panel on the upper-left side. From that panel, you have to turn on Chroma Key option. This will enable the green screen effect due to which you will see the replacement photo or video superimposed on your recorded video in the green screen background.

Step 6: Finally, adjust the parameters available to fine-tune the overall green screen effect. Lastly, click on Ok button.
Conclusion
If you are looking to add green screen effects to your photo, you can opt for Chroma key Photoshop. Adobe Photoshop is the best photo editor to remove the green screen backgrounds on your photo and replace them with any image you want. Color keying in Photoshop enables you to change any solid color background to anything you want. Similarly, you can use Wondershare Filmora to add green screen effects to your video in simple steps.
For macOS 10.12 or later
Step 1: Download and install Wondershare Filmora.
Step 2: Launch Filmora and go for Create New Project option to get started.
Step 3: Import your video with green screen background and move it to the Timeline.
Step 4: Import the replacement photo or video and put it directly on the Timeline.
On the Timeline, your recorded video should be below the replacement photo or video.
Step 5: Double-click on your video, and you will come across a panel on the upper-left side. From that panel, you have to turn on Chroma Key option. This will enable the green screen effect due to which you will see the replacement photo or video superimposed on your recorded video in the green screen background.
Step 6: Finally, adjust the parameters available to fine-tune the overall green screen effect. Lastly, click on Ok button.
Conclusion
If you are looking to add green screen effects to your photo, you can opt for Chroma key Photoshop. Adobe Photoshop is the best photo editor to remove the green screen backgrounds on your photo and replace them with any image you want. Color keying in Photoshop enables you to change any solid color background to anything you want. Similarly, you can use Wondershare Filmora to add green screen effects to your video in simple steps.
Best Video Editing Courses Online with Certificate
The best way to learn video editing is from people who are experts in the field. Plus, getting a certification is a nice bonus that can more easily land you a great job when you’re done. With that said, we’re offering a comprehensive list of the best video editing courses with certification — ones you’ll be glad to complete.
Read below to find out all about these courses. What they teach, who they are from, and how they will benefit you.
List of the Best Online Video Editing Courses With Certification
You’re about to see a list of video editing courses categorized into four groups. Each caters to specific needs that will help you make a better decision.
Courses With Certification for Popular Video Editor Platforms
| Course Name | Vendor |
|---|---|
| Premiere Pro CC for Beginners: Video Editing in Premiere | Udemy |
| Video Editing in DaVinci Resolve 18/17 | Udemy |
| DaVinci Resolve Fundamentals | LinkedIn Learning |
| PowerDirector 15 – Video Editing for PC Users | Udemy |
| Mastering Final Cut Pro | Coursera |
| Learning Final Cut Pro X – Video Editing Mastery | Udemy |
Video Editing Tutorials - Mastering The Basics
| Course Name | Vendor |
|---|---|
| Video Production Essentials | Fiverr Learn |
| Free Video Editing Courses and Tutorials | Udemy |
| Introduction to Video Editing | |
| Video editing fundamentals | |
| Online Video Editing Classes | Skillshare |
| The Complete Video Production Bootcamp | Udemy |
Video Editing Courses With Certification For Mobile Users
| Course Name | Vendor |
|---|---|
| Smartphone Video For Beginners – iPhone Video Editing Course | Udemy |
Cinematic Level Video Editing Courses
| Course Name | Vendor |
|---|---|
| VIDEO EDITING. Techniques loved by pro broadcast filmmakers | Udemy |
| The History of Film and Video Editing |
What You Will Learn From Each Course
Each video editing course online with certification offers something unique. Below, you can see a detailed comparison between all of them. As a result, you’ll know exactly which course to choose and which video editing tool to start with.
1. Courses With Certification for Popular Video Editor Platforms
First, let’s break down all the courses in this group. You’ll learn about its ratings, duration, contents, and more.
Premiere Pro CC for Beginners: Video Editing in Premiere

Initially, this course dives into the basics of video editing. Then, you get into more advanced topics that will help you distinguish yourself from the complete beginners.
- Vendor: Udemy
- Cost: $19.99
- Duration: 24.5 hours
- Rating: 4.7 / 5
- Level: Beginner-Advanced
Key topics inside this course:
- How to export your videos for High-Definition Playback and 4K
- Video color correction
- How to apply visual effects
- Design clean and modern titles for any video
- The editing process of a video from beginning to end
- Load the perfect settings at the start of each project
- Color grading
- Edit green screen footage
- How to add motion to titles, photos, and videos
At the end of the course, you’ll have the skills necessary to edit an entire video from start to finish. Additionally, you’ll know your way around Adobe Premiere Pro. Most of the topics taught inside will be enough to help you land a video editing job or edit your videos professionally.
Video Editing in DaVinci Resolve 18/17

With this video editing course, you will master editing in DaVinci Resolve. It includes beginner lessons, as well as a few advanced editing techniques. Over 30.000 students have currently completed it.
- Vendor: Udemy
- Cost: $84.99
- Duration: 11.5 hours
- Rating: 4.6 / 5
- Level: Beginner-Advanced
Key topics inside this course:
- How to add effects to videos in DaVinci Resolve
- Color Grading with multiple tools
- Master different types of Nodes
- Complete tests doing various projects
- Cut page quick and easy video editing
- Adding motion graphics
- Effective color-correcting methods
- Using Color Wheels, Power windows, Scopes, Curves, Qualifiers, and more
This course aims to teach you how to use DaVinci Resolve. After you’ve mastered the platform, the mentor shows you various tips and tricks to edit videos more professionally using this tool.
PowerDirector 15 - Video Editing for PC Users

Power Director 15 is a great app to learn video editing if you’re a Windows user. This course covers everything necessary for you to know your way around this program quickly.
- Vendor: Udemy
- Cost: $13.99
- Duration: 4h
- Rating: 4.5 / 5
- Level: Beginner
Key topics inside this course:
- How to export high-quality videos for any device or platform
- How to use every feature in Power Director, including the newest ones
- Add professional titles and animated graphics to any video
- Master using blend modes, masks, and the action camera center
The knowledge in this video editing course online with certification will allow you to edit videos the way you envision. You will have the ability to create anything you want, and deliver exceptional results.

Mastering Final Cut Pro is an online video editing course with certification that grants you the knowledge to use this tool. In addition, you and over 30.000 other students get to learn from Apple Certified trainers.
- Vendor: Coursera
- Cost: $49
- Duration: 40h
- Rating: 4.5 / 5
- Level: Beginner
Key topics inside this course:
- The best ways to import and export project files with Final Cut Pro
- How to apply effects and modern transitions
- Creating a project and editing a video from start to finish
- Change the timing of clips
This is the perfect course if you’ve never used Final Cut Pro. It’s beginner-friendly and takes you through every step of using the platform, from creating a project to editing it and finally exporting a high-quality video.
Learning Final Cut Pro X – Video Editing Mastery

This is a video editing course for anyone using Mavericks OS. It’s designed to take full advantage of this Operating System alongside the Final Cut Pro X platform.
- Vendor: Udemy
- Cost: $14.99
- Duration: 6h 30min
- Rating: 4.7 / 5
- Level: Beginner
Key topics inside this course:
- Mastering the user interface and choosing your preferences
- Learning helpful shortcuts to speed up your workflow
- Best and quickest methods to import media
- How to organize your clips
- Using the timeline
- Working with effects, keyframes, compounds clips, and audio clips
- How to use generators and white screens
- The best export settings and other tips
If you’ve ever wanted to master Final Cut Pro X, there’s no better place to go. This course is designed to start on a beginner-friendly level. But, it moves to more advanced lessons later down the line.
2. Video Editing Tutorials - Mastering The Basics
The following video editing courses include lessons mainly on the basics of video editing. They won’t focus on any specific platform or tool. Instead, you’ll be learning the most important principles of creating a high-quality and modern video.

A fairly simple course designed to teach you the process of creating and editing a video from scratch. This is one of the best video editing courses online, featuring several professional mentors.
- Vendor: Fiverr Learn
- Cost: $24
- Duration: 6h 38min
- Rating: 4.8 / 5
- Level: Beginner to Intermediate
Key topics inside this course:
- What equipment to use for professional video editing
- How to shoot high-quality video with your smartphone
- Professional video and audio recording techniques
- Exporting settings for high-quality online viewing
- Fundamentals of using a DSLR or Mirrorless camera
- Create high-converting CTAs for your videos
The course will help you understand crucial facts about many different types of videos that are in demand today. You’ll learn how to use and navigate video editing tools to create anything you can imagine. The mentors even offer a few tips for growing your own Youtube channel.
Free Video Editing Courses and Tutorials

This pick is slightly different. Here, you can see a list of a few of the best video editing courses that are completely free. They are still taught by experts and offer plenty of useful knowledge, especially for beginners.
- Vendor: Udemy
- Cost: Free
- Duration: Unknown
- Rating: Varies
- Level: Beginner to Intermediate
Key topics inside this course:
- Beginner lessons on editing all types of videos
- How to record professional video content
- Beginner lessons for many different video editing platforms
- 3D Video Composition
- Understand how to use Premiere Pro
- Video editing on your smartphone
- Camtasia 9 Mastery Course
- How to create social media marketing videos
This is a list of many different video editing courses that are free on Udemy. Millions of members have enrolled and are learning for free. Best of all, it’s a great way to dive into video editing for free. Then, you can choose some of the paid ones for more advanced lessons.

This course gives you a LinkedIn Learning Certificate and the knowledge to edit your first-ever video. There are 6 different lesson categories that you will enjoy going through. Each one focuses on another skill or principle.
- Vendor: LinkedIn Learning
- Cost: $34.99
- Duration: 2h 53min
- Rating: 4.7 / 5
- Level: Beginner
Key topics inside this course:
- The importance of storytelling in video editing
- Structures and transitions
- Timing and pacing
- Shot composition
- Comparing different editing applications
- Track-based editing vs. storyline-based editing
- Organizing your files
- How to edit a short documentary
- Audio editing lessons
- Post-production processes
This course offers a video editing certification that proves you’re well accustomed to the basic principles of this skill. You will know your way around different editing platforms. You will learn how to edit modern videos. And you will know exactly where to focus your efforts for improving yourself and your skills next.

This course features essential video editing foundations in one exciting program. It’s a short course designed to introduce you to video editing. To be more precise, you will mainly learn about the post-production process of video editing.
- Vendor: LinkedIn Learning
- Cost: LinkedIn Learning Membership Only ($39.99)
- Duration: 37min
- Rating: 4.7 / 5
- Level: Beginner
Key topics inside this course:
- Trimming or fine-tuning the product
- Audio editing process
- How to add images to your videos
- Video effects tutorials
- Color correction
- How to use text to your advantage
- Export and delivery settings
This certificate will prove that you know what it takes to edit a video professionally. It tells us that you are familiar with all the different parts that come together to create a video worth watching.

This is a list of video editing courses by some of the most popular video editors on the planet. You’ll learn from huge names such as Marques Brownies, Nathaniel Drew, Jordy Vandeput, and many more. So, pick your favorite, and start learning.
- Vendor: Skillshare
- Cost: Depends
- Duration: 37min
- Rating: Varies
- Level: From Beginner to Pro
Key topics inside this course:
- How to create mind-blowing Youtube videos
- Adobe Premiere Pro for Beginners
- How to document your life
- Final Cut Pro X - Beginner to Youtuber
- Introduction to Filmmaking
- Mastering TikTok videos
- iPhone Filmmaking
- Advanced training for all video editing apps
There are courses for all skill levels here. You can start as a complete beginner and finish as a master who knows how to create a worthwhile video. Or, you can choose one that improves your current skills.
The Complete Video Production Bootcamp

A nine-hour course on everything video editing related. To be more precise, you will dive into video production tutorials, cinematography, editing & distribution, and more. Companies like Nasdaq, Box, NetApp, and more offer this course to their employees.
- Vendor: Udemy
- Cost: $19.99
- Duration: 9h
- Rating: 4.5 / 5
- Level: Beginner
Key topics inside this course:
- Video storytelling
- How to record better audio
- Tips for posting videos online
- Discover the best equipment to use
- How to set up the perfect lighting
- How to get more engagement on your videos
- Create professional videos with any equipment
Over 160.000 students have benefited from the contents of this course. It dives into both beginner and advanced video editing lessons. So even if you don’t have any experience in this, you will still easily understand everything taught inside.
3. Video Editing Courses With Certification For Mobile Users
The courses you will see in this list are exclusively for mobile users. You can still make great videos on your mobile device if you don’t have a computer. All of the knowledge you need for this is below.
Smartphone Video For Beginners – iPhone Video Editing Course

Dive into five hours of content teaching you how to create unbelievable videos on your phone. You’ll be surprised by how it’s possible to create such professional videos on a smartphone.
- Vendor: Udemy
- Cost: $99.99
- Duration: 5h
- Rating: 4.3 / 5
- Level: Beginner
Key topics inside this course:
- Must-have gear for editing on a smartphone (Affordable options)
- How to set up your phone’s camera for optimal results
- Must-have free apps for professional smartphone video editing
- Using gimbals, action cams, and drones with your phone
- Video storytelling on a smartphone
- Phone resolutions, frame rates, ProRes, color space, and more
- How to make Cinematic shots, hit the right angles, and similar
This outstanding course will give you a certification proving you’re one of the rare video editors who can create wonders from their phones. From now on, you can’t use the excuse that you don’t have an excellent PC to create amazing videos.
4. Cinematic Level Video Editing Courses
The final category will introduce you to video editing courses online with certification for cinematic-level skills. Completing these courses will prove you are a master video editor who knows no bounds.
VIDEO EDITING. Techniques loved by pro broadcast filmmakers

Your teacher for this course will be Andrew St.Pierre White, an award-winning video editing veteran. He will teach you tips and tricks used by professionals to this day. Timeless advice that will take your career to the next level.
- Vendor: Udemy
- Cost: $84.99
- Duration: 3h 30min
- Rating: 4.5 / 5
- Level: Advanced to Pro
Key topics inside this course:
- How to entertain and inspire any audience
- Understand the balance between good editing and good content
- Amazing techniques used in TV production
- Turn great editing into great results
- Turn amateur videos into professional productions
- Most common mistakes filmmakers make
Once you know the basics of video editing, this course will take your skills to the next level. You will learn how the big players make professional videos that capture massive audiences. Plus, your mentor will show you how to work with big names in this industry.
The History of Film and Video Editing

Never underestimate how much history can teach you. Completing this course will teach you more about video editing than many pro filmmakers. Find out how video editing has progressed through the last century.
- Vendor: LinkedIn Learning
- Cost: $34.99
- Duration: 2h 10min
- Rating: 4.8 / 5
- Level: Everyone
Key topics inside this course:
- Early days of photography and film
- Continuity editing and montage theory
- When sound was born
- Establishing the standards for editing
- Evolution of editing techniques
- Technology
- The rise of the digital era
By learning the history of video editing, you will be more aware. You will realize what people love to see and detect patterns. These patterns will guide you toward becoming a professional video editor.
Make Your Video Editing Journey Easier
Now that we’re done with learning, it’s time to start doing. You already have enough fantastic courses to learn everything necessary to edit videos professionally. But now, how do you use your skills and achieve the easiest and quickest results?
Your best option is to use the Filmora video editor.
What Is Filmora and Filmora?
It’s as powerful as Adobe Premiere Pro but more straightforward to navigate. In addition, Filmora lets you command an arsenal of unique tools necessary for creating modern videos.
Free Download For Win 7 or later(64-bit)
Free Download For macOS 10.14 or later
Anyone on both Windows and Mac can use Filmora. In addition, if you’re a mobile user, you can download Filmora and enjoy the same benefits.
Aside from its easy-to-use interface, Filmora is packed with editing resources that will never leave you wondering how or what to do next. Of course, you can watch the free Youtube tutorials to master the platform entirely.
For example, we have prepared you with a video tutorial below to start your video editing journey with no delay!
Lastly, you can easily export in any format necessary for your project. It doesn’t get easier than this.
Conclusion
The video editing certification online courses you see here are more than enough to prepare you. You will learn everything it takes to edit any video. Use this information wisely and take advantage of this beautiful opportunity to become one of the best video editors.
Video Editing Tutorials - Mastering The Basics
| Course Name | Vendor |
|---|---|
| Video Production Essentials | Fiverr Learn |
| Free Video Editing Courses and Tutorials | Udemy |
| Introduction to Video Editing | |
| Video editing fundamentals | |
| Online Video Editing Classes | Skillshare |
| The Complete Video Production Bootcamp | Udemy |
Video Editing Courses With Certification For Mobile Users
| Course Name | Vendor |
|---|---|
| Smartphone Video For Beginners – iPhone Video Editing Course | Udemy |
Cinematic Level Video Editing Courses
| Course Name | Vendor |
|---|---|
| VIDEO EDITING. Techniques loved by pro broadcast filmmakers | Udemy |
| The History of Film and Video Editing |
What You Will Learn From Each Course
Each video editing course online with certification offers something unique. Below, you can see a detailed comparison between all of them. As a result, you’ll know exactly which course to choose and which video editing tool to start with.
1. Courses With Certification for Popular Video Editor Platforms
First, let’s break down all the courses in this group. You’ll learn about its ratings, duration, contents, and more.
Premiere Pro CC for Beginners: Video Editing in Premiere
Initially, this course dives into the basics of video editing. Then, you get into more advanced topics that will help you distinguish yourself from the complete beginners.
- Vendor: Udemy
- Cost: $19.99
- Duration: 24.5 hours
- Rating: 4.7 / 5
- Level: Beginner-Advanced
Key topics inside this course:
- How to export your videos for High-Definition Playback and 4K
- Video color correction
- How to apply visual effects
- Design clean and modern titles for any video
- The editing process of a video from beginning to end
- Load the perfect settings at the start of each project
- Color grading
- Edit green screen footage
- How to add motion to titles, photos, and videos
At the end of the course, you’ll have the skills necessary to edit an entire video from start to finish. Additionally, you’ll know your way around Adobe Premiere Pro. Most of the topics taught inside will be enough to help you land a video editing job or edit your videos professionally.
Video Editing in DaVinci Resolve 18/17
With this video editing course, you will master editing in DaVinci Resolve. It includes beginner lessons, as well as a few advanced editing techniques. Over 30.000 students have currently completed it.
- Vendor: Udemy
- Cost: $84.99
- Duration: 11.5 hours
- Rating: 4.6 / 5
- Level: Beginner-Advanced
Key topics inside this course:
- How to add effects to videos in DaVinci Resolve
- Color Grading with multiple tools
- Master different types of Nodes
- Complete tests doing various projects
- Cut page quick and easy video editing
- Adding motion graphics
- Effective color-correcting methods
- Using Color Wheels, Power windows, Scopes, Curves, Qualifiers, and more
This course aims to teach you how to use DaVinci Resolve. After you’ve mastered the platform, the mentor shows you various tips and tricks to edit videos more professionally using this tool.
PowerDirector 15 - Video Editing for PC Users
Power Director 15 is a great app to learn video editing if you’re a Windows user. This course covers everything necessary for you to know your way around this program quickly.
- Vendor: Udemy
- Cost: $13.99
- Duration: 4h
- Rating: 4.5 / 5
- Level: Beginner
Key topics inside this course:
- How to export high-quality videos for any device or platform
- How to use every feature in Power Director, including the newest ones
- Add professional titles and animated graphics to any video
- Master using blend modes, masks, and the action camera center
The knowledge in this video editing course online with certification will allow you to edit videos the way you envision. You will have the ability to create anything you want, and deliver exceptional results.
Mastering Final Cut Pro is an online video editing course with certification that grants you the knowledge to use this tool. In addition, you and over 30.000 other students get to learn from Apple Certified trainers.
- Vendor: Coursera
- Cost: $49
- Duration: 40h
- Rating: 4.5 / 5
- Level: Beginner
Key topics inside this course:
- The best ways to import and export project files with Final Cut Pro
- How to apply effects and modern transitions
- Creating a project and editing a video from start to finish
- Change the timing of clips
This is the perfect course if you’ve never used Final Cut Pro. It’s beginner-friendly and takes you through every step of using the platform, from creating a project to editing it and finally exporting a high-quality video.
Learning Final Cut Pro X – Video Editing Mastery
This is a video editing course for anyone using Mavericks OS. It’s designed to take full advantage of this Operating System alongside the Final Cut Pro X platform.
- Vendor: Udemy
- Cost: $14.99
- Duration: 6h 30min
- Rating: 4.7 / 5
- Level: Beginner
Key topics inside this course:
- Mastering the user interface and choosing your preferences
- Learning helpful shortcuts to speed up your workflow
- Best and quickest methods to import media
- How to organize your clips
- Using the timeline
- Working with effects, keyframes, compounds clips, and audio clips
- How to use generators and white screens
- The best export settings and other tips
If you’ve ever wanted to master Final Cut Pro X, there’s no better place to go. This course is designed to start on a beginner-friendly level. But, it moves to more advanced lessons later down the line.
2. Video Editing Tutorials - Mastering The Basics
The following video editing courses include lessons mainly on the basics of video editing. They won’t focus on any specific platform or tool. Instead, you’ll be learning the most important principles of creating a high-quality and modern video.
A fairly simple course designed to teach you the process of creating and editing a video from scratch. This is one of the best video editing courses online, featuring several professional mentors.
- Vendor: Fiverr Learn
- Cost: $24
- Duration: 6h 38min
- Rating: 4.8 / 5
- Level: Beginner to Intermediate
Key topics inside this course:
- What equipment to use for professional video editing
- How to shoot high-quality video with your smartphone
- Professional video and audio recording techniques
- Exporting settings for high-quality online viewing
- Fundamentals of using a DSLR or Mirrorless camera
- Create high-converting CTAs for your videos
The course will help you understand crucial facts about many different types of videos that are in demand today. You’ll learn how to use and navigate video editing tools to create anything you can imagine. The mentors even offer a few tips for growing your own Youtube channel.
Free Video Editing Courses and Tutorials
This pick is slightly different. Here, you can see a list of a few of the best video editing courses that are completely free. They are still taught by experts and offer plenty of useful knowledge, especially for beginners.
- Vendor: Udemy
- Cost: Free
- Duration: Unknown
- Rating: Varies
- Level: Beginner to Intermediate
Key topics inside this course:
- Beginner lessons on editing all types of videos
- How to record professional video content
- Beginner lessons for many different video editing platforms
- 3D Video Composition
- Understand how to use Premiere Pro
- Video editing on your smartphone
- Camtasia 9 Mastery Course
- How to create social media marketing videos
This is a list of many different video editing courses that are free on Udemy. Millions of members have enrolled and are learning for free. Best of all, it’s a great way to dive into video editing for free. Then, you can choose some of the paid ones for more advanced lessons.
This course gives you a LinkedIn Learning Certificate and the knowledge to edit your first-ever video. There are 6 different lesson categories that you will enjoy going through. Each one focuses on another skill or principle.
- Vendor: LinkedIn Learning
- Cost: $34.99
- Duration: 2h 53min
- Rating: 4.7 / 5
- Level: Beginner
Key topics inside this course:
- The importance of storytelling in video editing
- Structures and transitions
- Timing and pacing
- Shot composition
- Comparing different editing applications
- Track-based editing vs. storyline-based editing
- Organizing your files
- How to edit a short documentary
- Audio editing lessons
- Post-production processes
This course offers a video editing certification that proves you’re well accustomed to the basic principles of this skill. You will know your way around different editing platforms. You will learn how to edit modern videos. And you will know exactly where to focus your efforts for improving yourself and your skills next.
This course features essential video editing foundations in one exciting program. It’s a short course designed to introduce you to video editing. To be more precise, you will mainly learn about the post-production process of video editing.
- Vendor: LinkedIn Learning
- Cost: LinkedIn Learning Membership Only ($39.99)
- Duration: 37min
- Rating: 4.7 / 5
- Level: Beginner
Key topics inside this course:
- Trimming or fine-tuning the product
- Audio editing process
- How to add images to your videos
- Video effects tutorials
- Color correction
- How to use text to your advantage
- Export and delivery settings
This certificate will prove that you know what it takes to edit a video professionally. It tells us that you are familiar with all the different parts that come together to create a video worth watching.
This is a list of video editing courses by some of the most popular video editors on the planet. You’ll learn from huge names such as Marques Brownies, Nathaniel Drew, Jordy Vandeput, and many more. So, pick your favorite, and start learning.
- Vendor: Skillshare
- Cost: Depends
- Duration: 37min
- Rating: Varies
- Level: From Beginner to Pro
Key topics inside this course:
- How to create mind-blowing Youtube videos
- Adobe Premiere Pro for Beginners
- How to document your life
- Final Cut Pro X - Beginner to Youtuber
- Introduction to Filmmaking
- Mastering TikTok videos
- iPhone Filmmaking
- Advanced training for all video editing apps
There are courses for all skill levels here. You can start as a complete beginner and finish as a master who knows how to create a worthwhile video. Or, you can choose one that improves your current skills.
The Complete Video Production Bootcamp
A nine-hour course on everything video editing related. To be more precise, you will dive into video production tutorials, cinematography, editing & distribution, and more. Companies like Nasdaq, Box, NetApp, and more offer this course to their employees.
- Vendor: Udemy
- Cost: $19.99
- Duration: 9h
- Rating: 4.5 / 5
- Level: Beginner
Key topics inside this course:
- Video storytelling
- How to record better audio
- Tips for posting videos online
- Discover the best equipment to use
- How to set up the perfect lighting
- How to get more engagement on your videos
- Create professional videos with any equipment
Over 160.000 students have benefited from the contents of this course. It dives into both beginner and advanced video editing lessons. So even if you don’t have any experience in this, you will still easily understand everything taught inside.
3. Video Editing Courses With Certification For Mobile Users
The courses you will see in this list are exclusively for mobile users. You can still make great videos on your mobile device if you don’t have a computer. All of the knowledge you need for this is below.
Smartphone Video For Beginners – iPhone Video Editing Course
Dive into five hours of content teaching you how to create unbelievable videos on your phone. You’ll be surprised by how it’s possible to create such professional videos on a smartphone.
- Vendor: Udemy
- Cost: $99.99
- Duration: 5h
- Rating: 4.3 / 5
- Level: Beginner
Key topics inside this course:
- Must-have gear for editing on a smartphone (Affordable options)
- How to set up your phone’s camera for optimal results
- Must-have free apps for professional smartphone video editing
- Using gimbals, action cams, and drones with your phone
- Video storytelling on a smartphone
- Phone resolutions, frame rates, ProRes, color space, and more
- How to make Cinematic shots, hit the right angles, and similar
This outstanding course will give you a certification proving you’re one of the rare video editors who can create wonders from their phones. From now on, you can’t use the excuse that you don’t have an excellent PC to create amazing videos.
4. Cinematic Level Video Editing Courses
The final category will introduce you to video editing courses online with certification for cinematic-level skills. Completing these courses will prove you are a master video editor who knows no bounds.
VIDEO EDITING. Techniques loved by pro broadcast filmmakers
Your teacher for this course will be Andrew St.Pierre White, an award-winning video editing veteran. He will teach you tips and tricks used by professionals to this day. Timeless advice that will take your career to the next level.
- Vendor: Udemy
- Cost: $84.99
- Duration: 3h 30min
- Rating: 4.5 / 5
- Level: Advanced to Pro
Key topics inside this course:
- How to entertain and inspire any audience
- Understand the balance between good editing and good content
- Amazing techniques used in TV production
- Turn great editing into great results
- Turn amateur videos into professional productions
- Most common mistakes filmmakers make
Once you know the basics of video editing, this course will take your skills to the next level. You will learn how the big players make professional videos that capture massive audiences. Plus, your mentor will show you how to work with big names in this industry.
The History of Film and Video Editing
Never underestimate how much history can teach you. Completing this course will teach you more about video editing than many pro filmmakers. Find out how video editing has progressed through the last century.
- Vendor: LinkedIn Learning
- Cost: $34.99
- Duration: 2h 10min
- Rating: 4.8 / 5
- Level: Everyone
Key topics inside this course:
- Early days of photography and film
- Continuity editing and montage theory
- When sound was born
- Establishing the standards for editing
- Evolution of editing techniques
- Technology
- The rise of the digital era
By learning the history of video editing, you will be more aware. You will realize what people love to see and detect patterns. These patterns will guide you toward becoming a professional video editor.
Make Your Video Editing Journey Easier
Now that we’re done with learning, it’s time to start doing. You already have enough fantastic courses to learn everything necessary to edit videos professionally. But now, how do you use your skills and achieve the easiest and quickest results?
Your best option is to use the Filmora video editor.
What Is Filmora and Filmora?
It’s as powerful as Adobe Premiere Pro but more straightforward to navigate. In addition, Filmora lets you command an arsenal of unique tools necessary for creating modern videos.
Free Download For Win 7 or later(64-bit)
Free Download For macOS 10.14 or later
Anyone on both Windows and Mac can use Filmora. In addition, if you’re a mobile user, you can download Filmora and enjoy the same benefits.
Aside from its easy-to-use interface, Filmora is packed with editing resources that will never leave you wondering how or what to do next. Of course, you can watch the free Youtube tutorials to master the platform entirely.
For example, we have prepared you with a video tutorial below to start your video editing journey with no delay!
Lastly, you can easily export in any format necessary for your project. It doesn’t get easier than this.
Conclusion
The video editing certification online courses you see here are more than enough to prepare you. You will learn everything it takes to edit any video. Use this information wisely and take advantage of this beautiful opportunity to become one of the best video editors.
How To Add Text In After Effects
In almost every video you come across, you will see text added to the video in different parts. There are various reasons why adding text to videos becomes a necessity. First of all, you can highlight the underlying message or key points in your video. Along with audio and video, the viewers will have another cue point in the form of text that they can retain in their memory for longer. You add animated texts to video to make the video interesting to watch and break the monotony of visual cues only.
Besides, you may have to want credits and add intro as well as outro to your video where adding text is almost a necessity. Text can help your viewer get the context of your video and make sense of the content. After Effects is a popular video editor thanks to its visual effects, text animation animations, and instant video enhancement tools. We will illustrate the different ways of adding text in After Effects in simple steps.
Part 1. Add Text in After Effects with Horizontal Type Tool
Once you have imported your video clip into the Timeline, there are several ways you can add text to your video. First of all, you can right-click on the Timeline and select New> Text to create an empty text layer and add any text you want. Similarly, you can go to Layer> New> Text option to do the same. But the easiest way of adding text in After Effects is by using Horizontal Type Tool. Here are the steps on how you can add text in AE with the type tool.
Step1Once you have imported your video into the Timeline, click on Horizontal Type Tool located in the top bar to add any text. You can press Ctrl+T(Windows) or Command+H(Mac) to get it instantly.
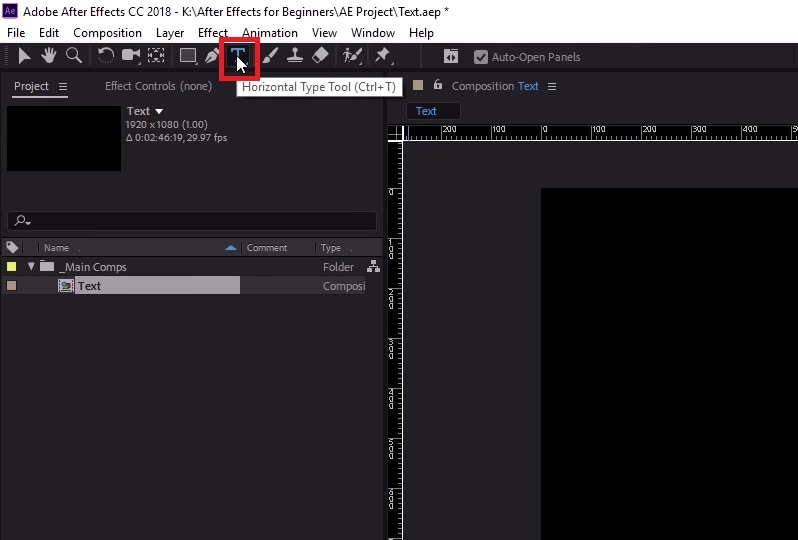
Step2Click on the video where you want to place the text and type your desired text there. After you are done adding your text, press Enter key in Num pad to exit out of the text field in the video.
Step3This will automatically create a text layer on Timeline. You can now move the text and place it anywhere you want. You can also modify the text style and add animation which we will illustrate in the next section.
Part 2. Use the Character Panel to Edit Text in AE
When you select Type tool and add your desired text, you get a default style for the text. It is most likely that you have to modify the text style such as changing color, font, and size to fit in your video seamlessly. That is when you have to visit the Character Panel. Character Panel is where you get to edit the font of the text you have typed, increase or decrease the font size, change the font color, and much more. Apart from that, you can increase the spacing between lines when your text is a paragraph instead of a few words. Here are the steps to use Character Panel to edit text in AE.
Step1Once you have typed your text using Horizontal Type tool on the video, click on the text.
Step2Go to Character panel located in the right side of the screen. If it is minimized, click on the panel to expand it.
Step3The first option in the panel is the font of the text. By the side of the font is the text color. You can use the color picker tool to choose any color as per your preference.
Step4Below the font, you can select the font style such as regular, bold, italics, and likewise. The subsequent part is to change the font size and adjust vertical spacing between lines and horizontal spacing between characters.
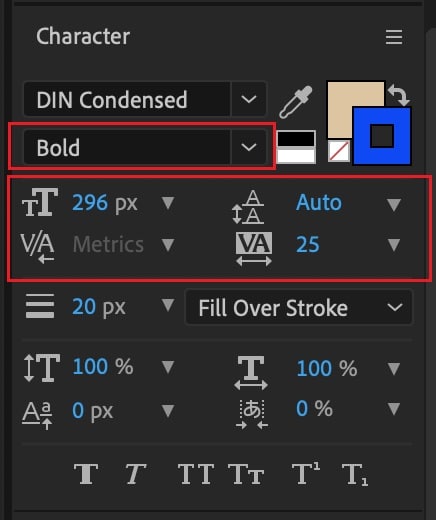
Step5The next section deals with Stroke option as well as fill the text option. You can fill the background of the text with any desired color.
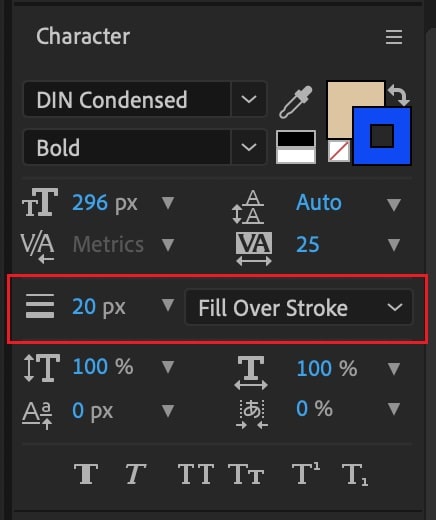
Part 3. Add Animated Text to Video with Animation Presets
Now that you have added a static text and set the text format as per your preference, it is time to animate the text. A static text in a video does not look appealing, and animated texts make the video eye-catching instantly. You can use text animation presets in After Effects to add animated text to video. Here are the steps to add animated text to video with animation presets and effects.
Step1Click on the text on your video that you want to animate. Go to Effects and Presets panel located on the right side.
Step2Under Effects and Presets panel, Click on Text option. This will open all the different categories of animation presets available that you can apply to the text on your video.
Step3Select any desired animation that you want to apply to the text and drag and drop the animation on the text in the composition window. Play the video and watch the applied animation on the text.
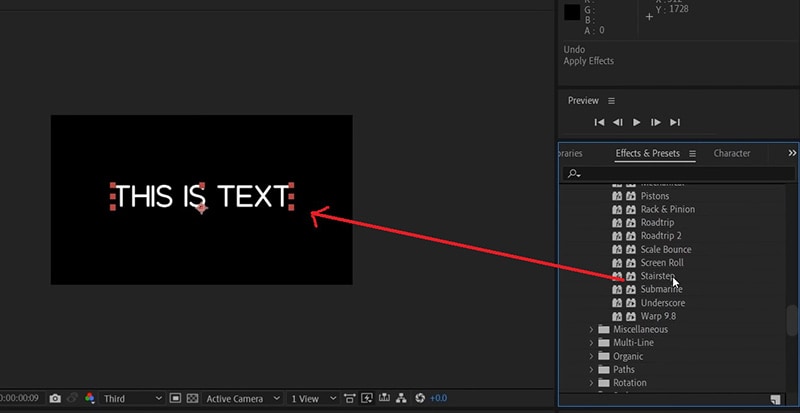
Part 4. Alternative Way to Add Text to Videos
If you are not comfortable with After Effects as a video editor, we recommend Wondershare as the best AE alternative. This is because the user interface of Filmora is super simple and there are loads of text effects and animations available to enhance your video content. Filmora is a professional video editor that is extremely popular among amateur and professional video editors. The application is available for both Windows and Mac users. Here are the steps for adding animated text to video using Filmora.
Step1Install Wondershare Filmora on your computer and launch the application. Click on New Project option on the welcome screen. Otherwise, you can go to File> New Project option.

Step2Go to File> Import Media> Import Media Files to import your video file. You can also drop the video file directly into Project Media folder.

Step3Drag and drop the video file from Project Media folder into the Timeline. If you have multiple video clips, you need to arrange them sequentially on the Timeline.
Step4To add text to your video, go to Titles located at the top bar. Check the left panel where you can see different categories of text effects. Select any desired text effect and drop into the Timeline. Make sure that the text layer is above the video layer on Timeline. You can shift the text layer on Timeline to place it where you want it to appear. You can also stretch the duration of the text effect as per your requirements.
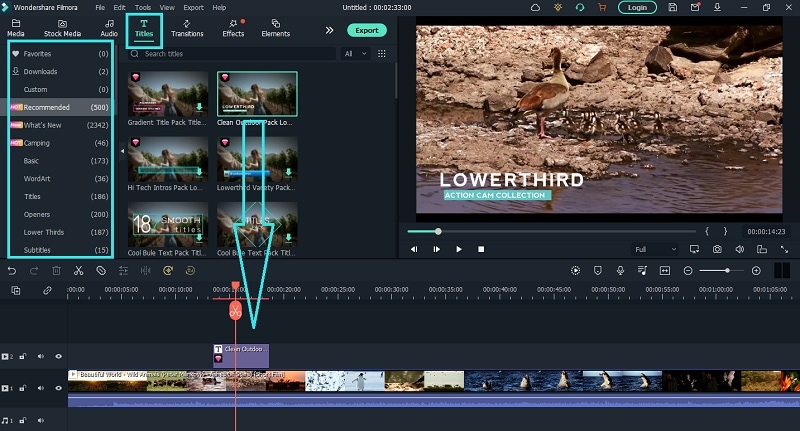
Step5You can edit the text effect by double clicking on the text layer on Timeline. Under Preset tab, you can change the text, font type and size, text color and much more. For further customization, you can click on Advanced button. At last, click on OK button to save the edits done.
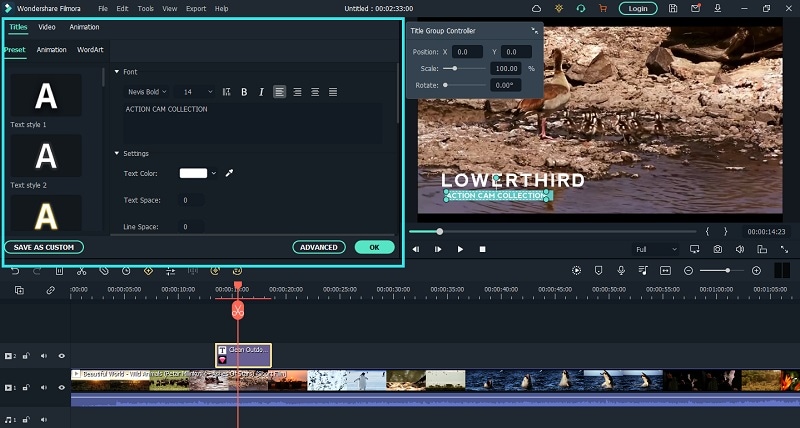
The Bottom Line
If you want to add animated text to photo and video, After Effects is a great editor you can use. We have illustrated how you can add text and customize the text and finally, animate it as per your preference. However, if you are looking for AE alternative, we recommend Wondershare Filmora where you can add text to video instantly and choose from a wide range of text effects and animations.
Free Download For Win 7 or later(64-bit)
Free Download For macOS 10.14 or later
Also read:
- 4 Simple Methods for Making a High-Quality Recap Video for 2024
- How to Make a Vacation Slideshow in 5 Minutes
- With an SRT Editor Online, You Can Synchronize the Subtitles with the Video, Change the Font, and Make Them More Readable. Read on to Know Your Options
- Fast Method to Match Color in Photoshop for 2024
- An Introduction to LUTs | Their Overview and Benefits for 2024
- How to Create Photoshop GIF The 100 Easy Way for 2024
- Updated Top 10 Audio Visualizers Windows, Mac, Android, iPhone & Online
- 2024 Approved Check Out All Details About Kinemaster Here and Understand How to Add Effects in Kinemaster. You Can Use the Chroma Key for the Green Screen as Well
- Updated 2024 Approved Mastering OpenCV Object Tracking A Comprehensive Guide for Beginners and Experts
- New The Complete Guide to Make a Text Collage
- This Easy Hack Using Wondershare Filmora New Masking Feature Will Be a Great Addition to Your Next Horror Video Content
- In 2024, How to Add Font Effect
- Updated How to Make A Jaw-Dropping Time Lapse Video, In 2024
- Updated Guaranteed 10 Storyboard Creators To Make Animation Easier For You for 2024
- Camtasia Vs. Final Cut Pro
- New 2024 Approved How to Add Effects in Premiere Pro
- Updated Discover the Various Techniques of Video Framing, Which Involve Capturing the Essence of a Subject While Eliminating Distractions in the Background, Andlearn How to Apply Them Skillfully to Achieve Desired Results
- Updated How To Import and Adjust the Video Clips on Wondershare Filmora?
- In 2024, How to Make Text Reveal Effect Easily
- Looking Forward to Making up Your Career in Video Editing? Land in Here to Learn About the Credibility of some Popular Video Editing Courses for 2024
- 2024 Approved How to Add a Custom Transition to OBS
- New How to Make a Slideshow with Icecream Slideshow Maker
- Two Ways to Track My Boyfriends Xiaomi Redmi Note 12 Pro+ 5G without Him Knowing | Dr.fone
- 8 Best Apps for Screen Mirroring Poco X6 Pro PC | Dr.fone
- In 2024, Top 12 Prominent Samsung Galaxy F15 5G Fingerprint Not Working Solutions
- How To Unlock The iPhone 11 SIM Lock 4 Easy Methods
- How to Remove a Previously Synced Google Account from Your Vivo Y55s 5G (2023)
- In 2024, How to Send and Fake Live Location on Facebook Messenger Of your Vivo S17 Pro | Dr.fone
- In 2024, Best Anti Tracker Software For Meizu 21 Pro | Dr.fone
- How to Fix Android App Not Installed Error on Vivo Y28 5G Quickly? | Dr.fone
- Ultimate Guide from Samsung Galaxy A34 5G FRP Bypass
- Updated In 2024, What Is an AI Voice Generator? | Wondershare Virbo Glossary
- In 2024, The Ultimate Guide to Xiaomi Redmi Note 13 Pro+ 5G Pattern Lock Screen Everything You Need to Know
- In 2024, Unlock Your Boost Mobile iPhone 7 Plus Before the Plan Expires
- How to use Snapchat Location Spoofer to Protect Your Privacy On Tecno Pova 6 Pro 5G? | Dr.fone
- How to Change your Vivo Y78 5G Location on Twitter | Dr.fone
- Easy Guide How To Bypass Vivo X Flip FRP Android 10/11/12/13
- Simple and Effective Ways to Change Your Country on YouTube App Of your Samsung Galaxy A05 | Dr.fone
- How to Unlock Itel A05s Phone without Google Account?
- Lock Your Poco M6 Pro 5G Phone in Style The Top 5 Gesture Lock Screen Apps
- Title: New 8 Tips to Apply Cinematic Color Grading to Your Video
- Author: Chloe
- Created at : 2024-05-20 03:37:44
- Updated at : 2024-05-21 03:37:44
- Link: https://ai-editing-video.techidaily.com/new-8-tips-to-apply-cinematic-color-grading-to-your-video/
- License: This work is licensed under CC BY-NC-SA 4.0.
